Embed Size (px)
Citation preview
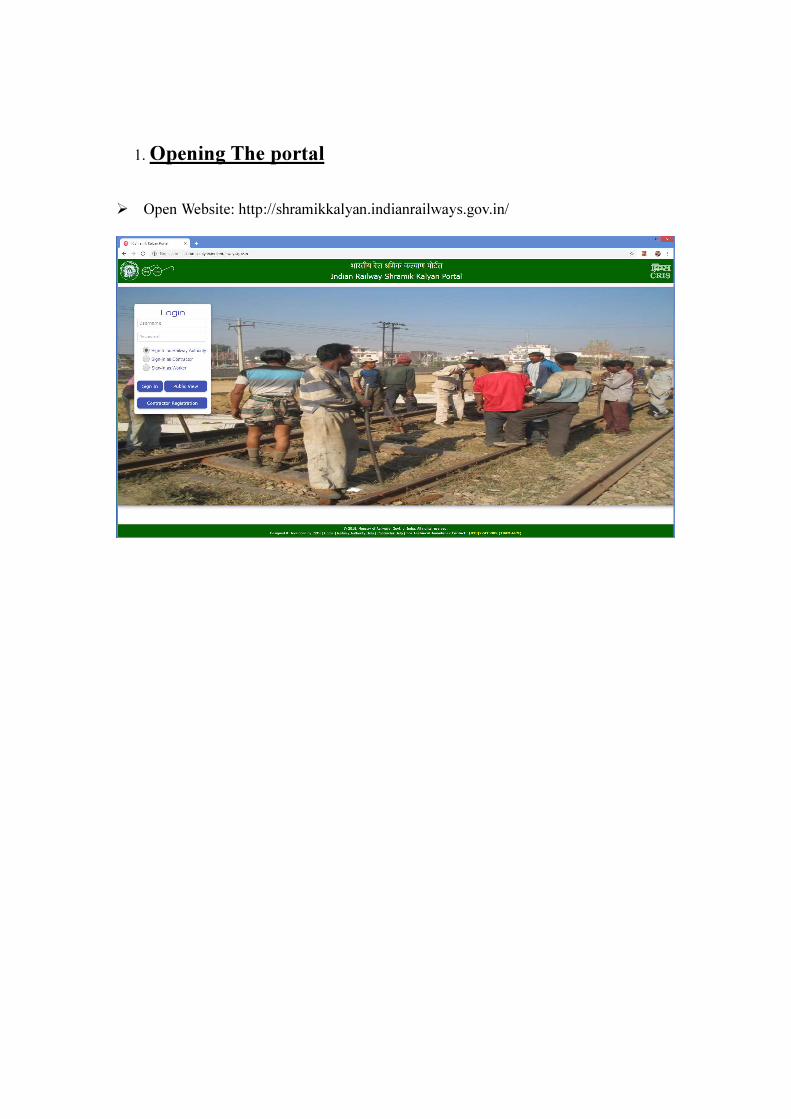
1. Opening The portal
� Open Website: http://shramikkalyan.indianrailways.gov.in/

2. Contractor Registration
� Click on the Contractor Registration
� Fill the required details in the form and create password. Entered PAN number will
be the username for the login
� Select Zone/Division/Department and enter a existing LOA for the selected
Zone/Division/Department/LOA Issuing Authority. Login to the system will be
possible only after verification by the concerned administrator.

3. Contractor Login
� For contractor Login, enter username (PAN Number used during registration process)
and password. Select Sign-in as contractor and click Sign-in
� the Home Screen will appear and it will show the list of all workman

4. LOA Registration
� Click on LOA , which will list all the LOA registered by you. This list can can be
exported in Excel/CSV/PDF .
� Then click on the Create New LOA
� A sub window will open as shown below. Enter the details of the LOA as listed in the
form. Add all LOA Locations. Then select Loa Issuing Authority and submit.
� Registered LOA will be verified by the selected Loa Issuing Authority before
workman can be assigned against the LOA

4.A Edit Unverified LOA � Click on LOA, then click Edit LOA, the select status Unverified and select the LOA
which need to be edited.
� Edit all the required fields. LOA location can also be add/removed but clicking “Add
More” or “Remove” button. Then click update.
� To delete the LOA click the Delete button.
4.B Edit Verified LOA � Click on LOA, then click Edit LOA, the select status Verified and select the LOA
which need to be edited.
� Then click “Add More” to add LOA more Location and then click Update button.
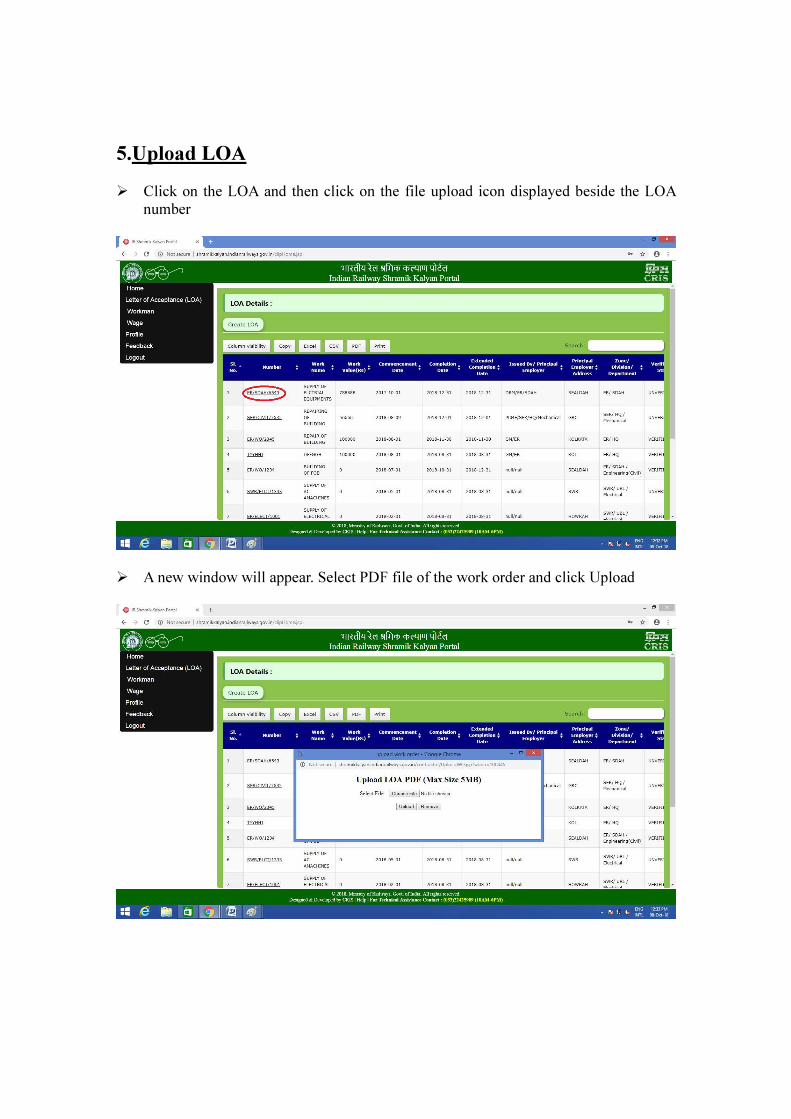
5.Upload LOA
� Click on the LOA and then click on the file upload icon displayed beside the LOA
number
� A new window will appear. Select PDF file of the work order and click Upload
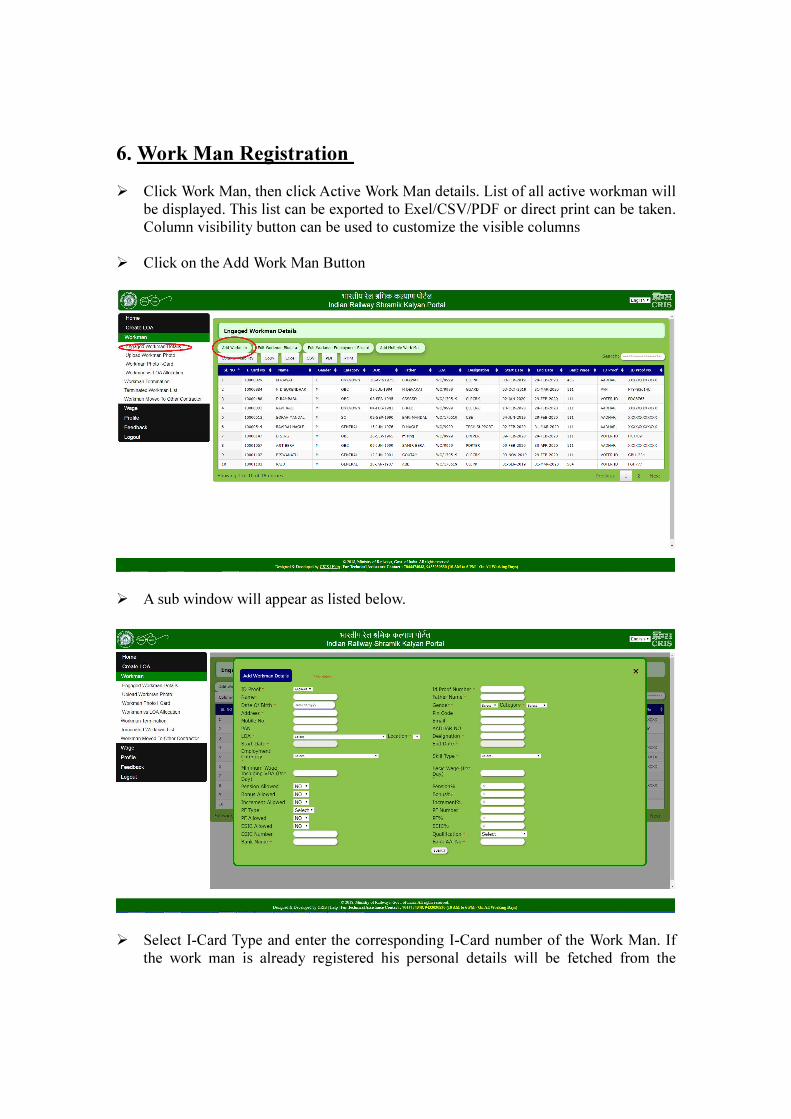
6. Work Man Registration � Click Work Man, then click Active Work Man details. List of all active workman will
be displayed. This list can be exported to Exel/CSV/PDF or direct print can be taken.
Column visibility button can be used to customize the visible columns
� Click on the Add Work Man Button
� A sub window will appear as listed below.
� Select I-Card Type and enter the corresponding I-Card number of the Work Man. If
the work man is already registered his personal details will be fetched from the

system
� Select LOA, Location, Start Date, Employment Category and Skill Type, based on
which the minimum wage is calculated and displayed. Enter work man basic wage
which should be greater than or equal to minimum wage displayed.
� Enter rest of the required details and submit.
7. Edit Workman Biodata
� Select Engaged Workman Details and then click Edit Workman Biodata
� A sub-window will appear as displayed below

� Enter the workman Shramik Kalian Portal I-Card Number, details of workman
will be fetched. Modify the details as required and Submit
8. Edit Workman Employment Record
� Select Engaged Workman Details and then click Edit Workman Employment
record
� A sub-window will appear. Enter Shramik Kalian Portal I-Card Number, LOA and
Start Date then Click Go.

� Workman Employment Record will be fetched. Modify the details as required and
submit

9. Add Multiple Workman � Select Engaged Workman Details and then click Add Multiple Workman
� Select LOA and Location then fill the required details in the form and submit.
Maximum 20 workman details can be submitted in single operation � Alternatively, to upload data through excel file, click the Download Excel(For
Uploading) button. One excel will be downloaded. Fill this excel file (Maximum
20 workman details) then upload the excel file from choose file option. The excel
data will be imported to the form if entered details are in correct format. Then
click Submit to enter data.
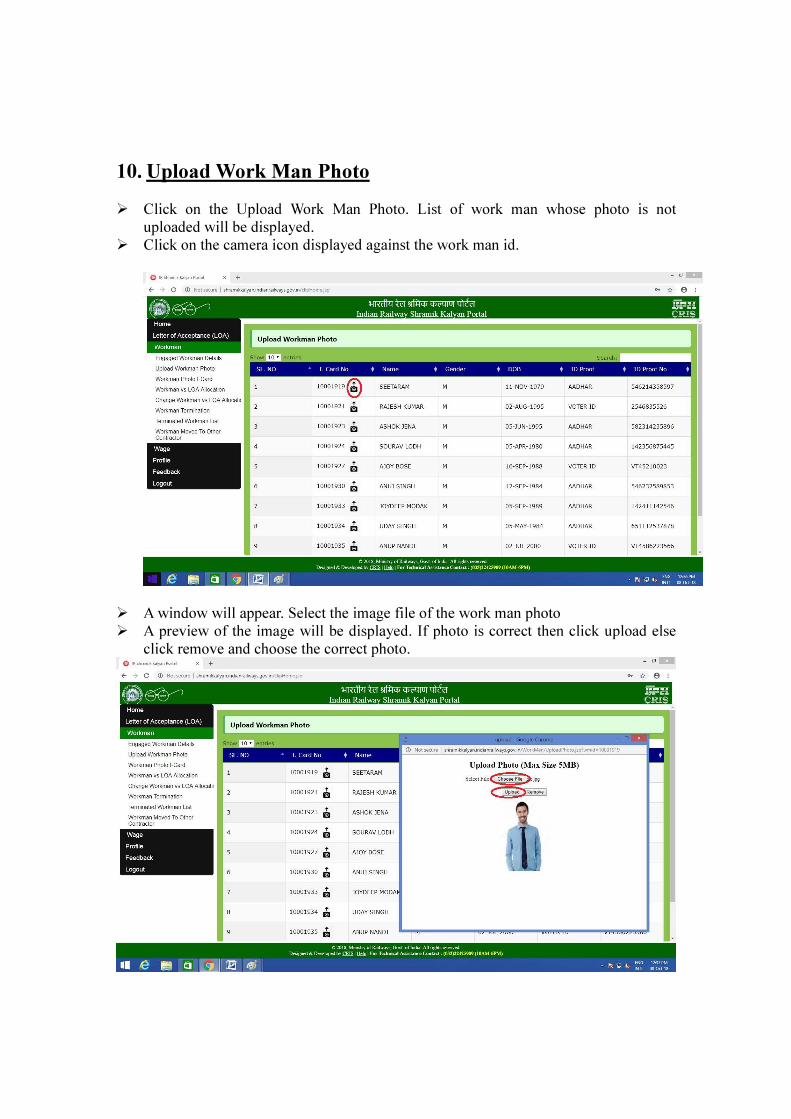
10. Upload Work Man Photo
� Click on the Upload Work Man Photo. List of work man whose photo is not
uploaded will be displayed.
� Click on the camera icon displayed against the work man id.
� A window will appear. Select the image file of the work man photo
� A preview of the image will be displayed. If photo is correct then click upload else
click remove and choose the correct photo.
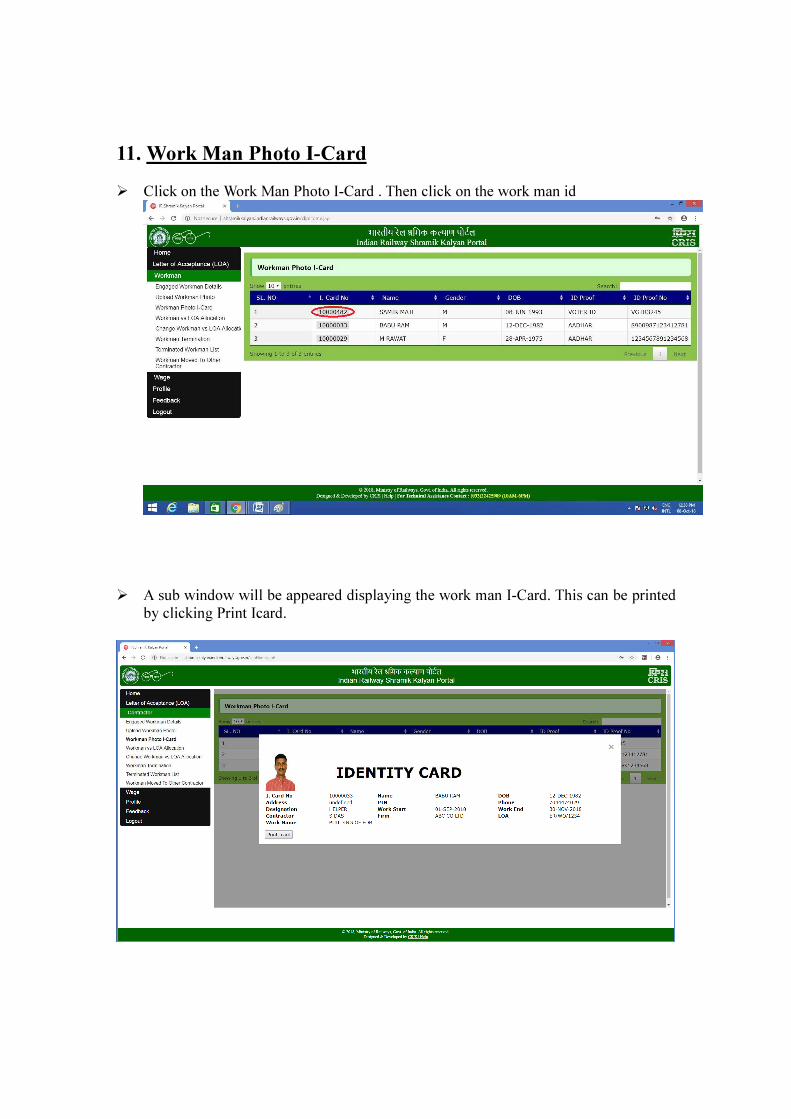
11. Work Man Photo I-Card � Click on the Work Man Photo I-Card . Then click on the work man id
� A sub window will be appeared displaying the work man I-Card. This can be printed
by clicking Print Icard.

12. Work Man Vs. LOA Allocation
� Click Work Man Vs. LOA Allocation.
� Then Select Current/Previous LOA and New LOA, then click Go
� A list of Engaged/terminated Workman in the Current/Previous LOA is displayed.
� Select the Work Man which are to be allocated to New LOA , fill the required details
and submit.

13. Work Man Termination
� Click on the Workman Termination. Then select the LOA from which workman is to
be terminated and then click search
� List of all active work man in the selected LOA is displayed.
� Select the work man which are to be terminated , choose a termination date and
termination reason(optional) and click Terminate Workman

14. Terminated Workman List
� Click on the Terminated Work Man. List of Terminated workman including those
having engagement expired is displayed.
15. Work Man Moved to Other Contractor
� Click on the Workman Move to Other Contractor. List of work man who once
worked for you but currently added by another contractor is displayed.

16. Work Man Wage Entry
� Click Wage and then click Add New Wages.
� Select Year, Month, LOA and then click GO
� List of work man in the selected year, month and LOA along with their basic wage is
displayed. Modify basic wage(If required) as per prevailing minimum wage rate for
the period. � Enter the required details and click Add Wage. System will calculate the net wage
amount based on the data entered.

17. Work Man Wage Upload By Excel � Click Wage and then click Add New Wages.
� Select Year, Month, LOA and then click GO
� List of work man in the selected year, month and LOA along with their basic wage is
displayed.
� Click on the ‘Export above table to XLS!’ button and the above table will be downloaded in a xls file.

� The xls file will be prefilled with basic data i.e workman Id, Name, Engagement
Start date, Basic wage. Fill the rest of the wage related details in the excel file. � Click ‘choose file’ and select the filled xls file.
� Data from xls file will be loaded in to the table. Click Add Wage. System will
calculate the net wage amount based on the data entered.

18. Edit Wage
� Select Edit Wage then select LOA. Last three wage–entry month will be loaded in
Year-Month field. Select the desired Year-Month and click GO.
� Wage details entered for the selected Year-Month for the LOA is displayed.
� Selected the entries need to be edited , modify the desired details and click Edit Wage to submit.

19. Wage Report
� Click on the Wage Report
� Select Year, From Month, To Month, LOA and Employment Category and click
Show Report.
� Wage details list for the selected Year/Month range/LOA/Employment Category is
displayed. This list can be exported to excel/csv/PDF.
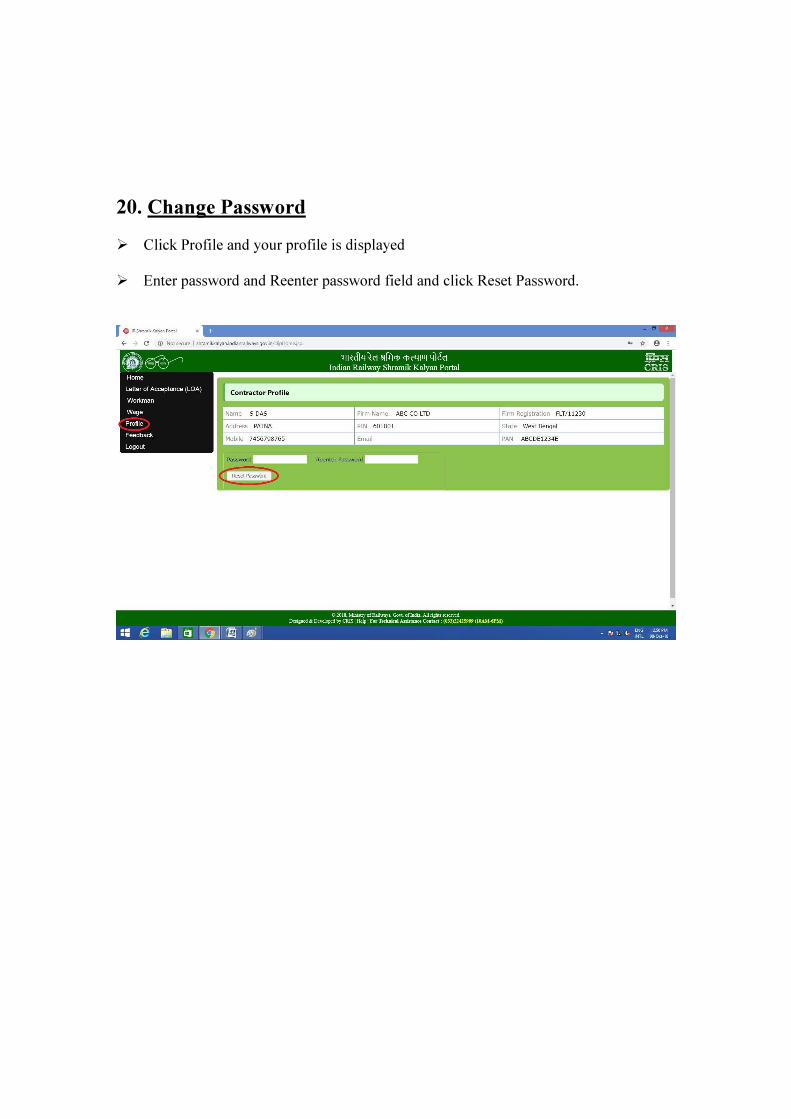
20. Change Password
� Click Profile and your profile is displayed
� Enter password and Reenter password field and click Reset Password.