Embed Size (px)
DESCRIPTION
this is a perfect science lesson plan!
Citation preview
Sometimes Snow Falls in the Summer: A Thematic Unit for Use in Grades K-3
The following activities were created to accompany Sometimes Snow Falls in the Summer, by Deb Troehler. For questions, suggestions, or comments, please contact me at [email protected].
Table of Contents1. Lesson 1--Where did the snow go?2. Lesson 2--How can you create a summer snowflake?3. Lesson 3--"Can you sort the seasons?" asked the silly snowman.4. Lesson 4--How can you make your own rainbow?5. Lesson 5--Rainbow colors are as easy to remember as your name.6. Lesson 6--Can you help Ella Louise put her cat together?
Lesson 1: Where did the snow go?Grade range: K-2Time to complete: 45-60 minutesSubjects/skills addressed: science, math
Objective: Students will change the density of powdered sugar by adding a liquid. They will use the changed sugar to decorate a snowflake cookie.
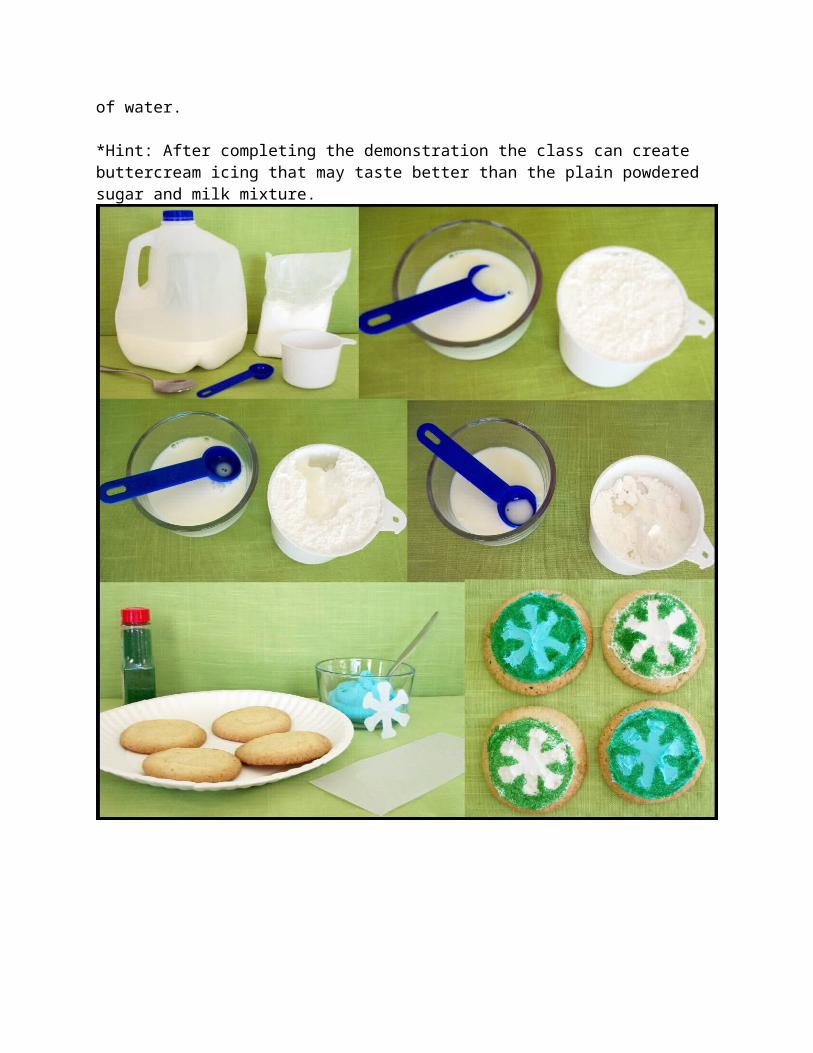
Materials needed:2 pounds powdered sugarMilk (2 TBSP per demonstration)Prebaked sugar cookiesColored granulated sugarVanilla and butter (optional)Set of measuring cups and spoonsSpoon and spreading knifeParchment paper
Words to know: measure, density, more, less
Instructions:1. Ask: How do you think snow melts? What happens when it melts?Explain that when snow melts, the density (how much space it fills) changes. The students will see how this is done by dissolving powdered sugar.2. Direct a student to fill a measuring cup with powered sugar, making sure that the sugar is not packed into the cup. Level the top with the handle of
the spoon.Ask: Is the cup full of sugar? Let's see if we can change that.3. Direct a student to pour 1 teaspoon of milk into the center of the cup of sugar.Ask: What is happening to the powdered sugar?3. Direct another student to add a second spoon of milk. A third, etc. Observe what happens to the sugar. Use no more than a total of 6 teaspoons.Ask: Why does it look like there is less sugar in the cup? Where did it go?4. Repeat steps 2 and 3.5. Stir the contents of the cup into a bowl, adding 2 teaspoons of vanilla to flavor.* 6. Use the steps in lesson 2 to create snowflakes that are 1.75" in diameter from the parchment paper.7. Cover the cookies with the powdered sugar icing.8. Place the parchment snowflake on top of the cookie and sprinkle generously with colored sugar, tapping off the extra before removing the snowflake pattern. A clean pin helps remove the parchment snowflakes from the icing.
Conclusion:When liquid is added to powdered sugar, the sugar dissolves into the liquid, increasing the density of the sugar. The amount of air between the particles of sugar is reduced, causing the sugar to take up less room in the cup. This is similar to how the density of snow is changed when it melts. The air between the snowflakes is reduced as the snow becomes a liquid.
Snowy fact: If a snowstorm produces a light fluffy snow, then it is possible for 10 inches of snow to melt into merely 1 inch of water.
*Hint: After completing the demonstration the class can create buttercream icing that may taste better than the plain powdered sugar and milk mixture.
Lesson 2: How can you create a summer snowflake?Grade range: K-3Time to complete: 45-60 minutesSubjects/skills addressed: art, math
This activity is very messy. Cattail seeds may adhere to clothing and carpeting. This activity is not intended for students with allergies.
Objective: Students will create a six-sided snowflake using fractions as a guide.
Materials needed:White paper (24 lb. works best)Construction paper for backgroundEnlarged images of real snowflakesMagnifying glassArt supplies: scissors, white glue, pencil, and paintbrushCattail seeds that have been removed from the stalk
Words to know: fraction, half, third, sixth, circle
Instructions:1. Ask: How many sides does a snowflake have? (6) Show images of real snowflakes to students and count the number of sides in each.Create the paper snowflake.a. Trace and cut a circle that is 6 inches in diameter out of white paper.b. Fold the paper in half, as shown.c. Fold the half circle into thirds, creating 6 sections.d. Draw and cut a V shape at the curved edge, as shown.e. Open and flatten the paper snowflake.2. Spread a layer of glue on one side of the snowflake with a paintbrush.3. Sprinkle the glued side of the paper with cattail seeds and allow to dry.4. When the snowflakes are dry, glue the snowflake onto a piece of construction paper.
Take a closer look: Use a magnifying glass to look at a single cattail seed. Discuss the shape of the seed and the reasons for that shape.

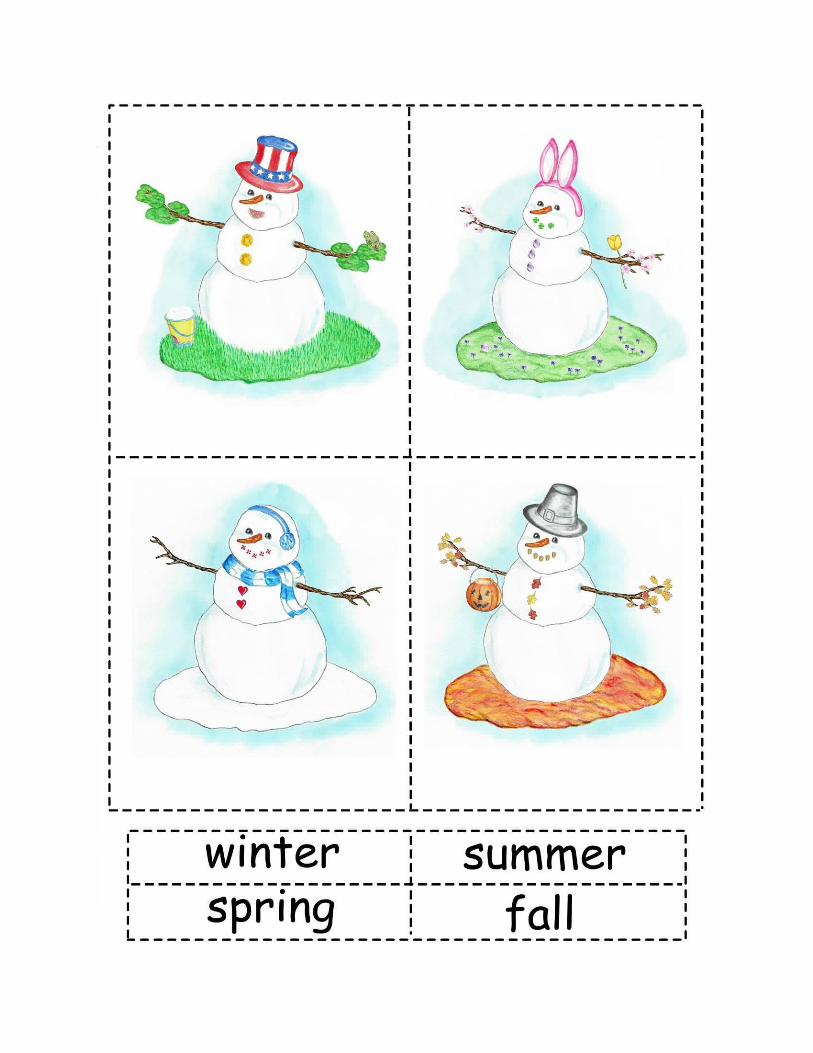
Lesson 3: "Can you sort the seasons?" asked the silly snowman.Grade range: K-1Time to complete: 20-30 minutes per activitySubjects/skills addressed: math, language arts, sorting, cutting
Objective: Students will identify the seasons of the year.
Materials needed:Printouts provided with this lessonScissors and glue
Words to know: seasons, spring, summer, fall (autumn), winter
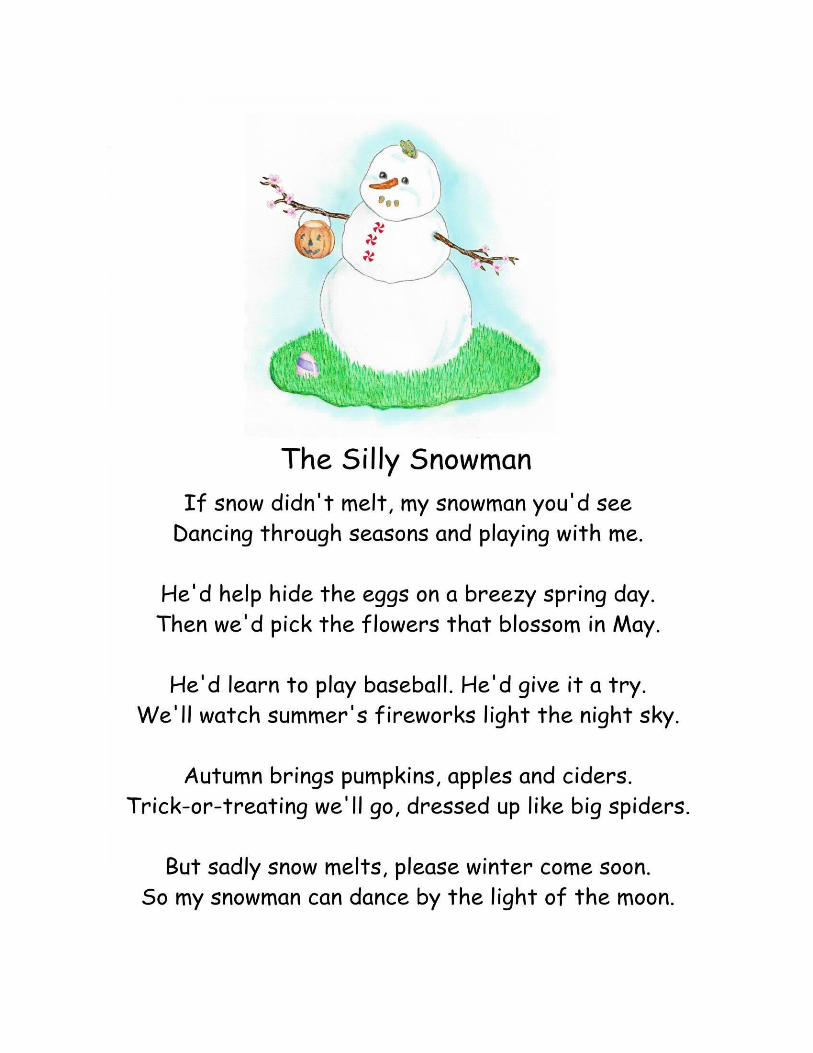
Instructions:1. Ask: Do you know what season it is right now? Do you think you would be able to build a snowman in this season? Why or why not? 2. Read the poem, The Silly Snowman, to the students.Ask: What seasons did you hear in the poem?3. Ask the students to find the season words in the poem. (Modification: Provide the season words on a flash card for visual cueing.)4. Show the images of the seasonal snowmen to the students. Discuss how they represent each season.5. Give the students the sheet with the seasonal snowmen. Match the name of the season with the way the snowman is decorated.
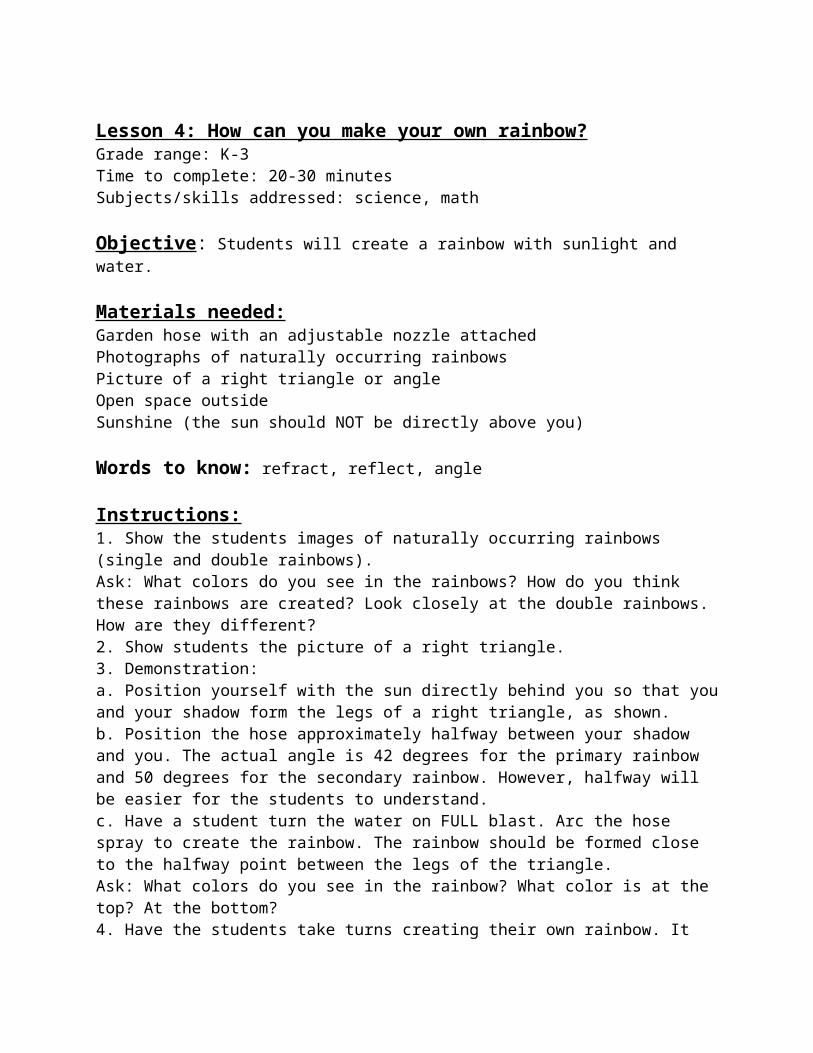
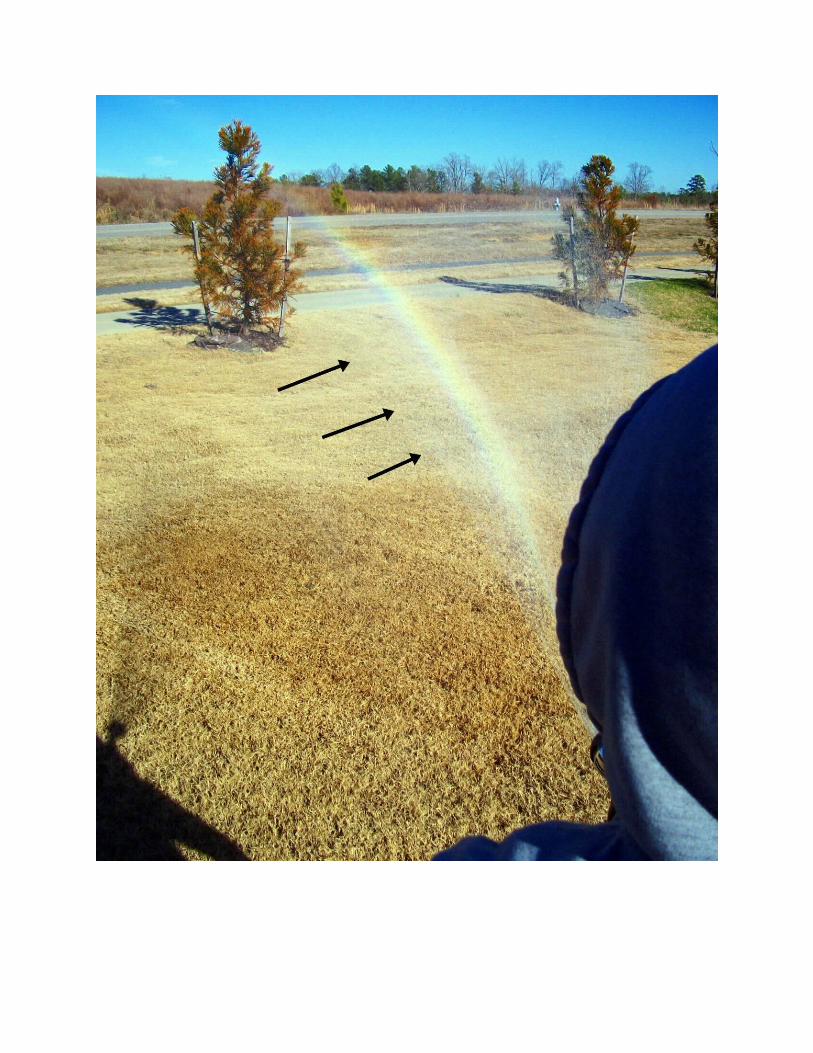
Lesson 4: How can you make your own rainbow?Grade range: K-3Time to complete: 20-30 minutesSubjects/skills addressed: science, math
Objective: Students will create a rainbow with sunlight and water.
Materials needed:Garden hose with an adjustable nozzle attachedPhotographs of naturally occurring rainbowsPicture of a right triangle or angleOpen space outsideSunshine (the sun should NOT be directly above you)
Words to know: refract, reflect, angle
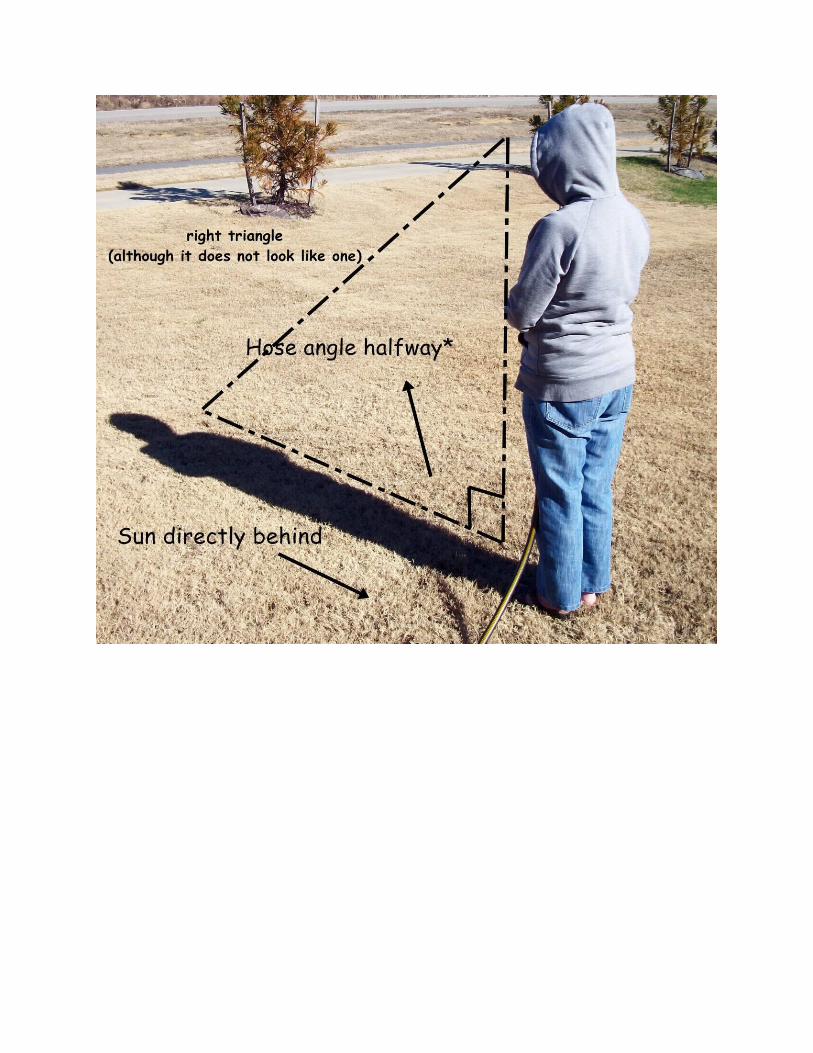
Instructions:1. Show the students images of naturally occurring rainbows (single and double rainbows).Ask: What colors do you see in the rainbows? How do you think these rainbows are created? Look closely at the double rainbows. How are they different?2. Show students the picture of a right triangle.3. Demonstration:a. Position yourself with the sun directly behind you so that you and your shadow form the legs of a right triangle, as shown.b. Position the hose approximately halfway between your shadow and you. The actual angle is 42 degrees for the primary rainbow and 50 degrees for the secondary rainbow. However, halfway will be easier for the students to understand.c. Have a student turn the water on FULL blast. Arc the hose spray to create the rainbow. The rainbow should be formed close to the halfway point between the legs of the triangle.Ask: What colors do you see in the rainbow? What color is at the top? At the bottom?4. Have the students take turns creating their own rainbow. It may be possible to create a double rainbow in this manner, but the secondary rainbow will be faint.
Conclusion:To create a rainbow you need a source of light and something that will refract and reflect the light. The light from the sun is refracted (bent) and reflected (bounced) inside the droplets of water from the hose. As each color of the rainbow has a different-sized wavelength, the way they are refracted
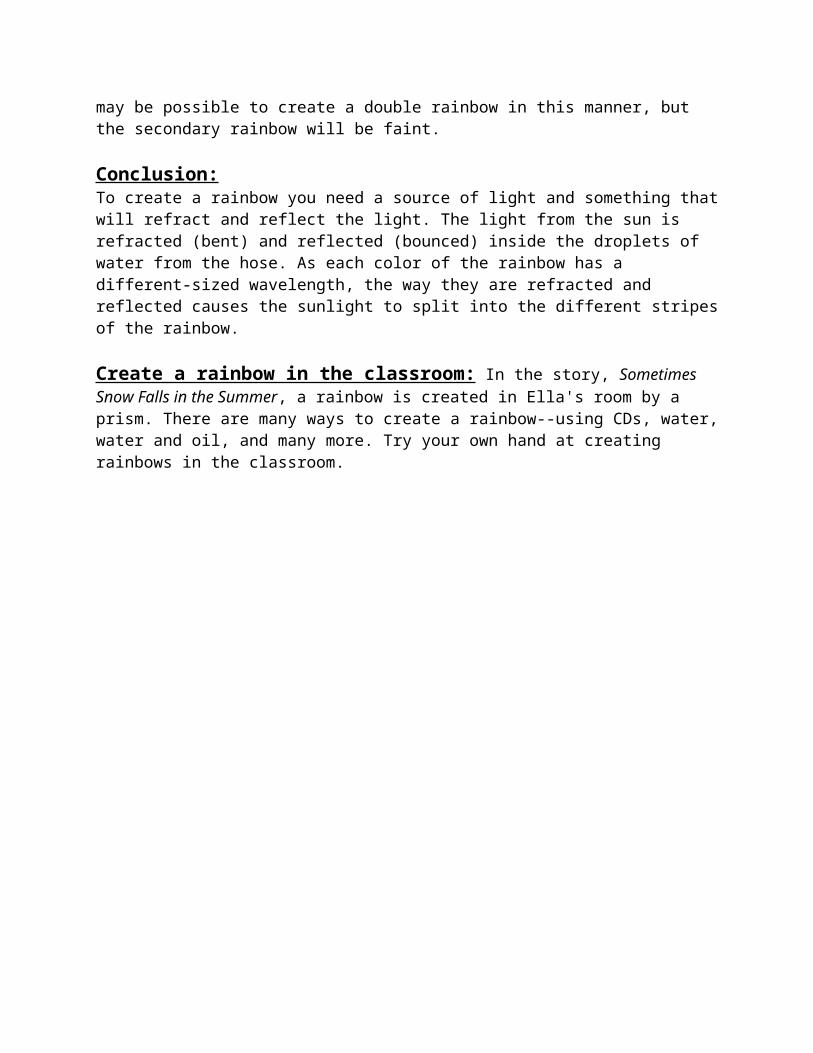
and reflected causes the sunlight to split into the different stripes of the rainbow.
Create a rainbow in the classroom: In the story, Sometimes Snow Falls in the Summer, a rainbow is created in Ella's room by a prism. There are many ways to create a rainbow--using CDs, water, water and oil, and many more. Try your own hand at creating rainbows in the classroom.
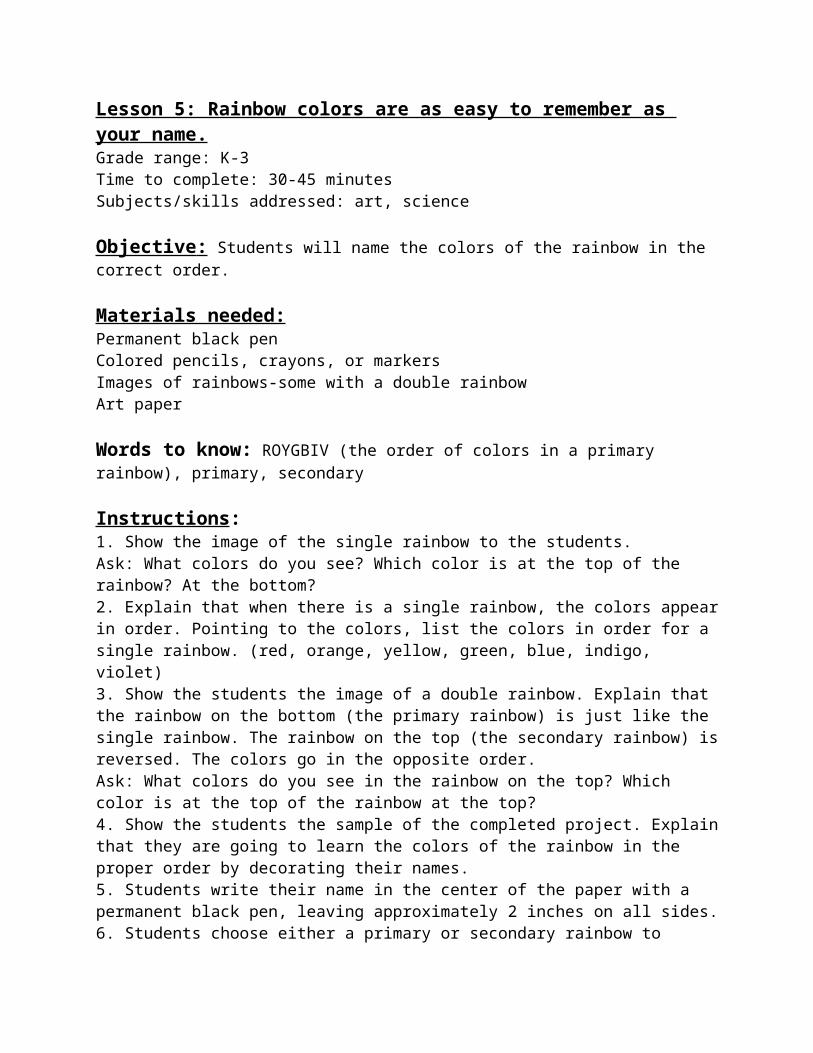
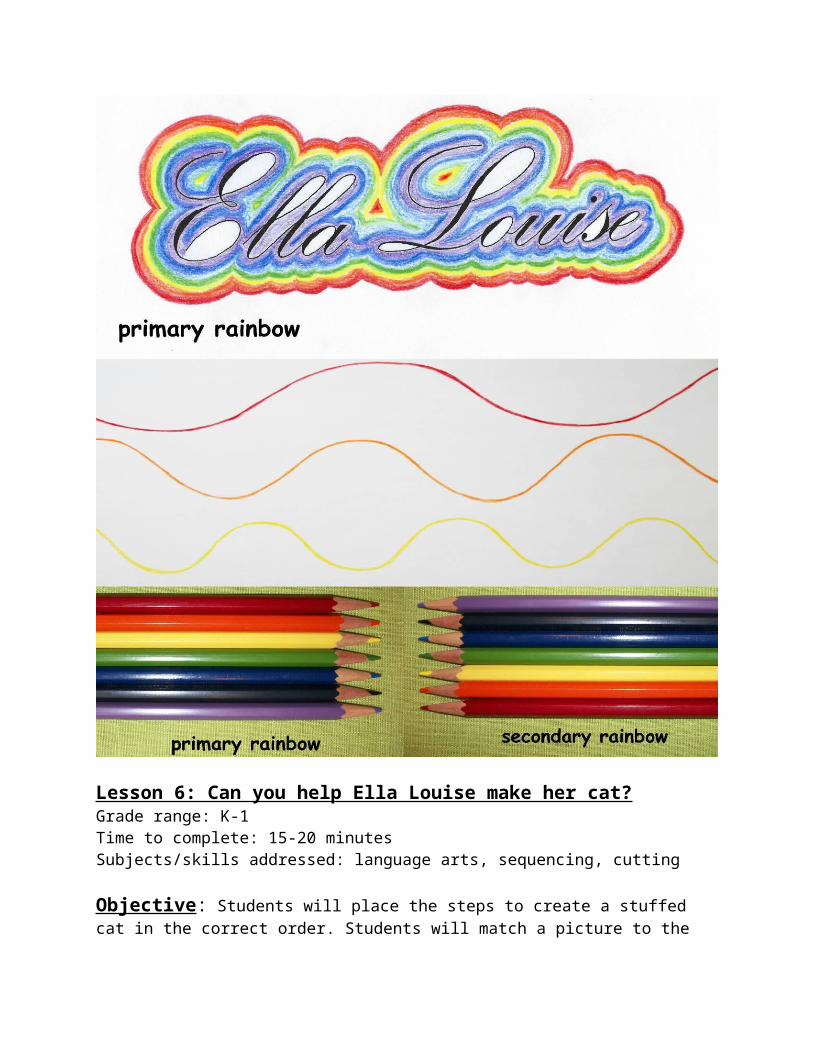
Lesson 5: Rainbow colors are as easy to remember as your name.Grade range: K-3Time to complete: 30-45 minutesSubjects/skills addressed: art, science
Objective : Students will name the colors of the rainbow in the correct order.
Materials needed:Permanent black penColored pencils, crayons, or markersImages of rainbows-some with a double rainbowArt paper
Words to know: ROYGBIV (the order of colors in a primary rainbow), primary, secondary
Instructions:1. Show the image of the single rainbow to the students.Ask: What colors do you see? Which color is at the top of the rainbow? At the bottom? 2. Explain that when there is a single rainbow, the colors appear in order. Pointing to the colors, list the colors in order for a single rainbow. (red, orange, yellow, green, blue, indigo, violet)3. Show the students the image of a double rainbow. Explain that the rainbow on the bottom (the primary rainbow) is just like the single rainbow. The rainbow on the top (the secondary rainbow) is reversed. The colors go in the opposite order. Ask: What colors do you see in the rainbow on the top? Which color is at the top of the rainbow at the top? 4. Show the students the sample of the completed project. Explain that they are going to learn the colors of the rainbow in the proper order by decorating their names.5. Students write their name in the center of the paper with a permanent black pen, leaving approximately 2 inches on all sides.6. Students choose either a primary or secondary rainbow to decorate their name and place their colored pencils in the correct order from top to bottom (primary: ROYGBIV; secondary: BIVGYOR).7. Write their rainbow choice on the back of their paper.8. Explain that they will create their rainbow from the inside out. Students draw a line around their names following the curves and lines that form their name with the pencil on the bottom. Fill in the empty space between the black line and the first colored line with the same color. Repeat for each color of the rainbow, as shown.
9. When students complete their artwork, have them hold up their designs and ask the other students if their rainbow is a primary or secondary rainbow.
Lesson 6: Can you help Ella Louise make her cat?Grade range: K-1Time to complete: 15-20 minutesSubjects/skills addressed: language arts, sequencing, cutting
Objective: Students will place the steps to create a stuffed cat in the
correct order. Students will match a picture to the corresponding sentence.
Materials needed : Printouts of activity sheets providedCopy of the book, Sometimes Snow Falls in the Summer (optional)Scissors and glue
Words to know: first, second, third, fourth, fifth, sixth
Instructions:1. Read and discuss the story, Sometimes Snow Falls in the Summer.Ask: What did Ella use to make her cat? How did she make the cat? If she didn't have any cattail seeds to fill her cat, what else could she have used?2. Show the students the pictures on the first worksheet. Discuss the order of the steps.Ask: What sentence could you say for the first picture? The second? etc. 3. Read the sentences on the second sheet to the students, identifying which picture goes with each sentence.4. Students will then cut and paste the pictures in the proper order on the sheet.
Follow-up Fun: Students can either make their own stuffed creations with felt and stuffing or use lacing cards to practice up and down stitches.


![arXiv:1703.01120v1 [cs.CV] 3 Mar 2017 Total word count ... · arXiv:1703.01120v1 [cs.CV] 3 Mar 2017 Total word count : approximately 5000 words. Abstract Purpose: Compressed sensing](https://img.pdfslide.us/doc/110x75/5fd77d3ce6322f34a9269038/arxiv170301120v1-cscv-3-mar-2017-total-word-count-arxiv170301120v1-cscv.jpg)