Embed Size (px)
Citation preview

One Sheet Wonder TechniqueSubmitted by Tracey Adams (StampinMagic)
The One Sheet Wonder Technique allows you to create 8-10 different cards in a short period of time by designing one sheet of cardstock and cutting it into different sized shapes to use on your solid base cards.
This is a popular layout that I’ve used many times and many others use on SplitcoastStampers. Because so many people have used it, I could not find the original designer to give credit. The most important thing is that you be creative once the pieces are cut in using them on your cards and creating unique designs with your own favorite elements! Have fun!!
First, begin with an 8 ½” x 11” piece of cardstock. Generally, white, cream or very light colored.
Then select several coordinating colors of ink (keeping in mind the base color(s) you will use for your cards). Select several different stamps and stamp on the cardstock starting with the largest stamp and darkest ink first. Fill in the entire sheet. Remember to twist and turn your designs as you stamp as the pieces will be used in different directions once they’re cut out.
(In this design, I used StampinUp! Snowflakes set and stamped in Navy, Vintage Violet, Buckaroo Blue, Cool Caribbean and Platinum Planet {silver})

Cut your stamped cardstock into quarters (4 ¼” x 5 ½” each).
With the first quarter sheet, cut or tear diagonally. (See Template #1 below)
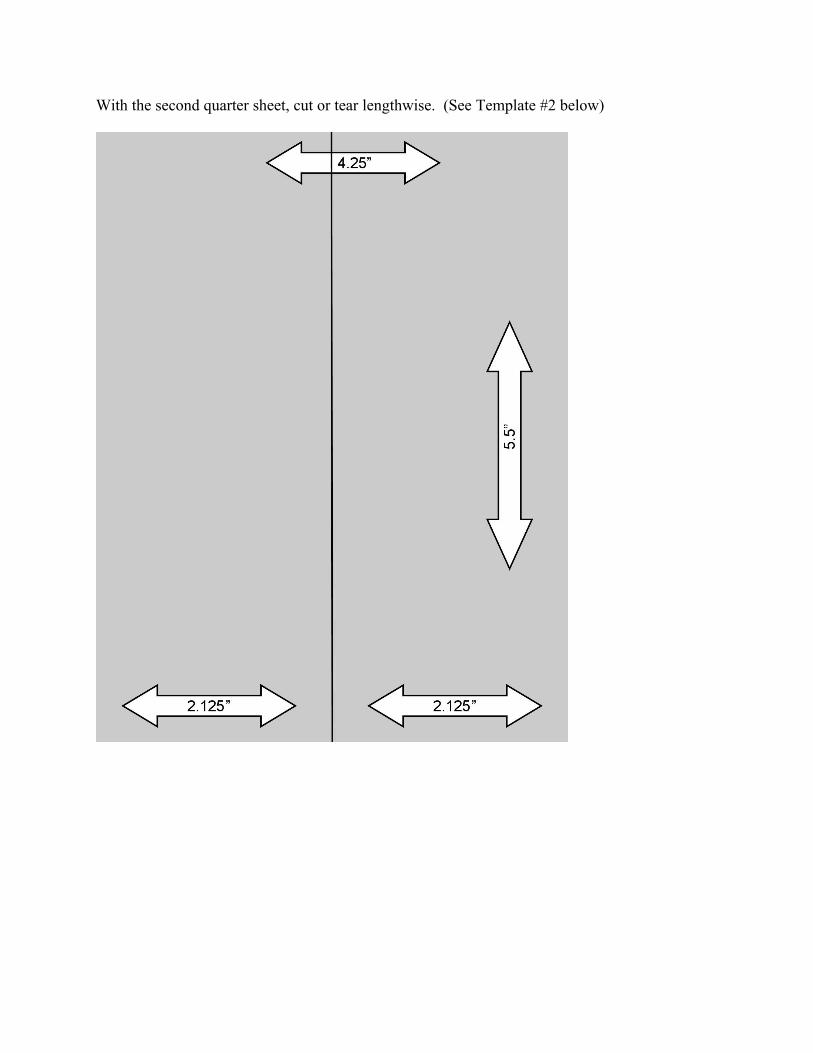
With the second quarter sheet, cut or tear lengthwise. (See Template #2 below)

With the third quarter sheet, cut one piece lengthwise at 1 ¼”, and another 1” wide. Cut the remaining piece into 3 – 1 ½” x 2” pieces. You will have a remaining 2” x 1” piece to use as you wish. (See Template #3 below)
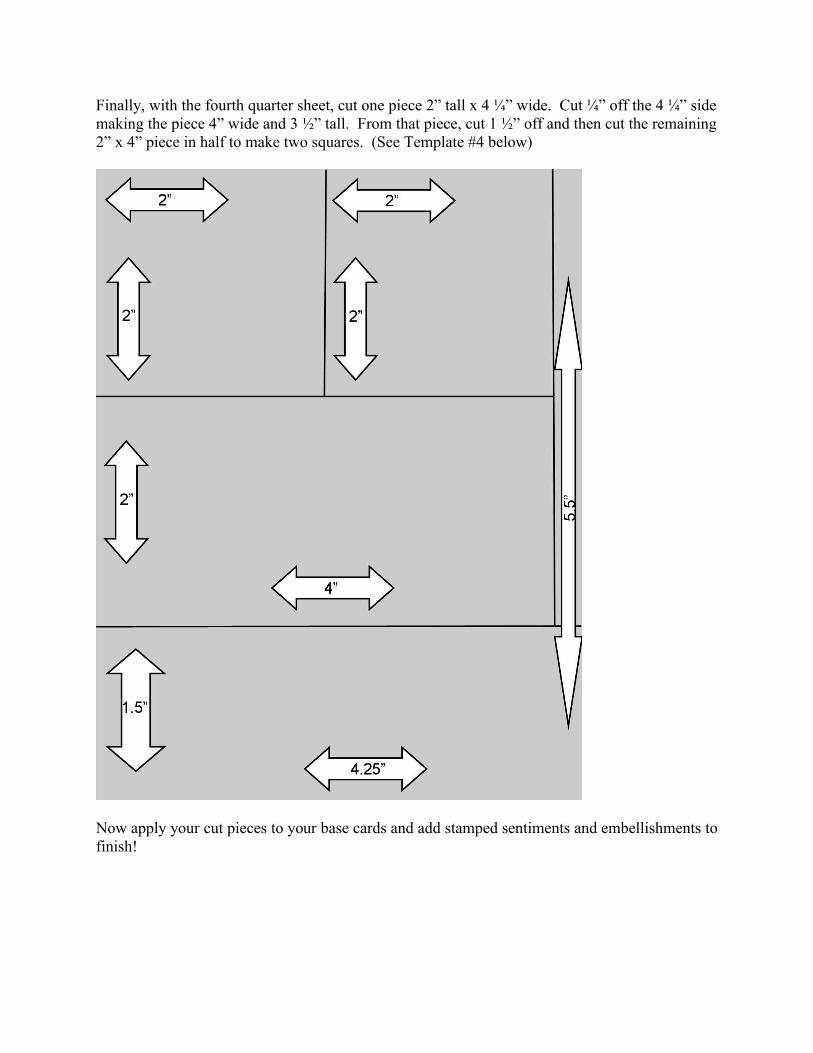
Finally, with the fourth quarter sheet, cut one piece 2” tall x 4 ¼” wide. Cut ¼” off the 4 ¼” side making the piece 4” wide and 3 ½” tall. From that piece, cut 1 ½” off and then cut the remaining 2” x 4” piece in half to make two squares. (See Template #4 below)
Now apply your cut pieces to your base cards and add stamped sentiments and embellishments to finish!

StampinMagicCopyright StampinUp!