Embed Size (px)
Citation preview

OfficeConnect®
ADSL Wireless 54 Mbps11g Firewall Router
3CRWDR101A-75
www.3com.com
Part No. 10015036Model Number: WL-552Published March 2006
Installation GuideGuía de instalaciónGuide d’installationManuale di installazioneInstallationsanleitungInstallations GuideGuia de Instalação
Jerry2_QIG 17/3/06 10:01 am Page 1
Downloaded from www.Manualslib.com manuals search engine

Jerry2_QIG 17/3/06 10:01 am Page 2
Downloaded from www.Manualslib.com manuals search engine

1Introducing the Router
INTRODUCING THE ROUTER
This Guide takes you through the basic steps necessary to install and configureyour OfficeConnect ADSL Wireless 54 Mbps 11g Firewall Router, and establisha connection from your computers to the Internet. Throughout this Guide, theOfficeConnect ADSL Wireless 54 Mbps 11g Firewall Router is simply referredto as the Router.
Note: 3Com recommends that you use wired (Ethernet) connection to performthe initial setup.
• One OfficeConnect ADSL Wireless 54 Mbps 11g Firewall Router
• One 12V power adapter for use with the Router
• Four rubber feet
• One RJ11 cable
• One CD-ROM containing the User Guide
• This Installation Guide
• One Support and Safety Information Sheet
• One Warranty Flyer
Before starting, ensure that:
• You already have an ADSL broadband account.
• You have a computer that has an Ethernet connection available and isalready correctly configured for communication with the Internet. Yourcomputer must be able to connect to the Internet via the modem, andmust have a Web browser installed.
• There are no other DHCP server devices on your local network that areresponsible for allocating IP addresses to your computers and other networkconnected devices. Your Router will perform this function by default.
• If you require wireless access, you have a computer that has a wireless802.11b or 802.11g adapter card installed.
If one or more of these conditions are not met, refer to the OfficeConnectADSL Wireless 54Mbps 11g Firewall Router User Guide provided on theaccompanying CD-ROM for further guidance.
Your Package Contains:
System Requirements
GB
Jerry2_QIG 17/3/06 10:01 am Page 1
Downloaded from www.Manualslib.com manuals search engine

Front Panel2
FRONT PANEL
1. Alert LED amberThis LED has a number of functions:
• It will flash rapidly during the power up self test. If it then remains on the unit self test has failed(refer to the User Guide).
• It will flash rapidly during software upgrade.
• It will flash rapidly during the reset to Factory defaults. If the reset button on the rear panel has beenused to reset the unit to Factory defaults the Alert LED will then slow flash until power is removed.
• It will flash on for 2 seconds when the firewall detects a hacker attack.
2. Power LED greenIf the LED is on, it indicates that the Router is powered on.
3. SYNC LED greenIf the LED is on, it indicates that the DSL connection is present. This LED flashes during configuration atpower up.
4. Online LED greenIf the LED is on, it indicates that your Username/Password has been authenticated successfully with your ISP.
5. Wireless LAN (WLAN) Status LED greenIf the LED is on, it indicates that wireless networking is enabled. If the LED is flashing, the link is OK anddata is being transmitted or received. If the LED is off, the wireless LAN has been disabled on the Router,or there is a problem (refer to the User Guide).
6. LAN Status LED greenIf the LED is on, the link between the port and the next piece of network equipment is OK. If the LED isflashing, the link is OK and data is being transmitted or received. If the LED is off, nothing is connected,or the connected device is switched off, or there is a problem with the connection (refer to the UserGuide). The port will automatically adjust to the correct speed and duplex.
OfficeConnect ADSL Wireless 54 Mbps 11g Firewall Router
3CRWDR101A-75 LAN StatusAlert Power SYNC Online WLAN 1 2 3 4
Green = Link, Flash = Activity
1 65
2 4
3
Jerry2_QIG 17/3/06 10:01 am Page 2
Downloaded from www.Manualslib.com manuals search engine

3Rear Panel
REAR PANEL
7. Wireless AntennaeFor optimum wireless coverage, place the antennae in a ‘V’ position.
8. Ethernet PortsUsing suitable RJ45 cables, you can connect your Router to a computer, or to any other piece of equip-ment that has an Ethernet connection (for example, a hub or a switch). These ports have an automaticMDI/MDIX feature, which means you can use either a straight-through or a crossover cable.
9. Reset ButtonTo reboot the Router, press the reset button for 1 second. If you want to reset the Router to factorydefaults or if you cannot access the Web management interface (for example, due to a lost password),press the reset button for 5 seconds.
10. Power Adapter SocketOnly use the 12V power adapter that is supplied with the Router. Do not use any other adapter.
11. ADSLThe ADSL port is used to connect the Router to the ADSL wall socket connection. Use an RJ11 cable toconnect from the ADSL port to the ADSL wall connection.
GB
RESETLAN
ADSL4 3 2 1
12 VDC1A MAX
8 109 117
Jerry2_QIG 17/3/06 10:01 am Page 3
Downloaded from www.Manualslib.com manuals search engine

Positioning and Installing Your Router4
1. POSITIONING AND INSTALLING YOUR ROUTER
WARNING: Please read the ‘Important Safety Information’ section inthe Support and Safety Information sheet before you start.
VORSICHT: Bitte lesen Sie den Abschnitt „WichtigeSicherheitsinformationen” sorgfältig durch, bevor Sie das Gerät inBetrieb nehmen.
AVERTISSEMENT: Lisez attentivement le paragraphe “Remarques relatives à la sécurité” avant de mettre votre routeur sous tension.
When positioning your Router, ensure that:
• The Router is centrally located to the wireless computers that will connectto it. A suitable location might be on top of a high shelf or similar furni-ture to optimize wireless connections to computers in both horizontal andvertical directions, allowing coverage throughout.
• It is out of direct sunlight and away from sources of heat.
• Cabling is away from power lines, fluorescent lighting fixtures, andsources of electrical noise such as radios, transmitters and broadbandamplifiers.
• To meet FCC radiation exposure regulations, the Router should be locatedin a position that maintains a minimum distance of 20 cm (8 inches) fromany personnel (refer to the User Guide for details).
• Water or moisture cannot enter the case of the unit.
• Air flow around the unit and through the vents on the side of the case isnot restricted. 3Com recommends that you provide a minimum of 25 mm(1 in.) clearance.
Use the four self-adhesive rubber feet to prevent your Router from movingaround on your desk or when stacking with other flat top units. Only stickthe feet to the marked areas at each corner of the underside of your Router.
Using the Rubber Feet
Safety Information
Jerry2_QIG 17/3/06 10:01 am Page 4
Downloaded from www.Manualslib.com manuals search engine

5Positioning and Installing Your Router
1. Connect the power adapter to the Router and wait for the WLAN LED toilluminate.
2. Ensure that your computer is switched on.
3. Connect your computer to one of the 10/100 LAN ports on the Router.The LAN Port Status LED should turn green.
4. Connect the RJ11 cable from the ADSL port on the Router to your ADSLsocket on the wall.
To share your Router with more than four users, you will need an additionalhub or switch. Connect a LAN port on your Router to the hub or switch (forexample, OfficeConnect Dual Speed Switch 8).
GB
InternetPower Supply Unit
Your PC
Wireless Users
TelephoneSocket
Splitter/Microfilter Block
3Com OfficeConnect ADSL Wireless 11g Firewall Router
Example Network with OfficeConnect ADSL Wireless 11g Firewall Router
Connecting to a Hub orSwitch
Connecting Your Router
Jerry2_QIG 17/3/06 10:01 am Page 5
Downloaded from www.Manualslib.com manuals search engine

Installing a Splitter and Micro-filter6
2. INSTALLING A SPLITTER AND MICRO-FILTER
A splitter and micro-filter allow you to use your Router and telephone at thesame time. The splitter connects to the ADSL wall connection, and then pro-vides two connectors:
• An RJ11 connector which connects to the Router with the RJ11 cable
• A telephone jack connector which can be connected to your telephone
There must also be a micro-filter between the splitter and the telephone. Themicro-filter ensures that DSL data signal does not interfere with the telephonevoice signal. A micro-filter must be installed inline with each telephone toprevent signal interference. Splitters are now available with built in microfil-ters, which simplifies the setup as shown in the diagram below. Splitters andmicro-filters can be obtained from your ISP or a computer store.
OfficeConnect® ADSL Wireless11g Firewall Router
Phone
Combind Splitterand Micro-filterWall
socket
Micro-filter
For Telephone Extensions
Wallsocket
Phone
Jerry2_QIG 17/3/06 10:01 am Page 6
Downloaded from www.Manualslib.com manuals search engine

7Connecting to Your ISP
GB
3. CONNECTING TO YOUR ISP
Before you can configure the Router, you need to know the IP allocationmethod used by your ISP. There are four different methods that the Routercan use to connect to the Internet, as described below. For all methods, youneed to know the VPI (Virtual Path Identifier), VCI (Virtual Channel Identifier)and the Encapsulation (LLC or VC Mux). The Router defaults for the VPI andVCI should cater for most ISPs. Your ISP can provide you with the requiredinformation.
1. PPPoETo configure the gateway, you will need to know the user name and passwordto log in to your ISP account. If you have been using a PPPoE client onyour computer, you can disable it as it is no longer needed. If your ISPprovides you with a static IP address, enter this IP address in the InternetSettings section of the Router Web interface. Otherwise, your ISP willautomatically assign your Router an IP address.
2. PPPoAThis is similar to PPPoE but is used mainly in the UK. To configure thegateway, you will need to know the user name and password to log in toyour ISP account. If your ISP provides you with a static IP address, enterthis IP address in the Internet Settings section of the Router Web interface.Otherwise, your ISP will automatically assign your Router an IP address.
3. Bridge Mode for a Single Computer (RFC 1483 Bridging Mode)In this mode, the Router is set into a bridging mode to connect the LANand WAN networks. Traffic is limited between the two networks based onhardware addresses and so limits the LAN side to a single computer.
4. Routing Mode over ATM (RFC 1483 Bridging Mode)Routing mode over ATM means that the Router has a fixed IP address toconnect to the Internet. Your ISP will provide the Router with a fixed IPaddress, the subnet mask and the ISP’s gateway address. You need toenter this information in the Internet Settings section of the Router Webinterface.
Jerry2_QIG 17/3/06 10:01 am Page 7
Downloaded from www.Manualslib.com manuals search engine

Running the Setup Wizard8
4. RUNNING THE SETUP WIZARD
1. If you have not already done so, restart your computer.
2. Launch your Web browser and try to connect to the Router by typing thefollowing URL in the address or location bar: http://192.168.1.1. If youcan access the login page, then your computer has correctly received an IPaddress from the Router.
3. Log in using the default password <admin>. The Wizard will attempt tolaunch automaticallyIf it fails, select Wizard from the menu.
Where possible, the Wizard will recommend settings for most parameters.However, there are some settings that you must provide. Most of these willhave been provided to you by your ISP when you set your account up.
When the Wizard has completed, attempt to browse to an Internet Web site,such as www.3com.com. If you can successfully access this site, then youcomputer and Router have been configured correctly.
Connecting to the Internet
Jerry2_QIG 17/3/06 10:01 am Page 8
Downloaded from www.Manualslib.com manuals search engine

9Connecting to the Wireless LAN
GB
5. CONNECTING TO THE WIRELESS LAN
1. Now that you have configured the Router via the wired computer, you canconnect to the Router via a wireless computer.
The Router and wireless clients must have both the same SSID and thesame encryption settings. All wireless clients must use Infrastructure mode.
The default wireless settings for the Router are:
2. If you do not have a wireless LAN, you can use the Router’s default settings.Ensure that your wireless clients have the default SSID, channel andencryption settings as detailed above.
If you have an existing wireless LAN, configure the Router to use the sameSSID and encryption settings to be compatible with your existing wirelessnetwork.
3. If your computer has both a wired and wireless NIC installed, you mustensure that only one NIC is used to communicate with the LAN. To use thewireless NIC, unplug the Ethernet cable, and then reboot your computer.
4. Launch your Web browser and attempt to browse to an Internet Web sitesuch as www.3com.com. If you can successfully access this site, thenyour wireless computer and Router have been configured successfully.
To improve the security of your wireless network, 3Com strongly recommendsthat you enable WPA2 or WPA encryption and that you change the SSID tosomething other than the default. Consult the online help or the User Guidefor details.
SSID is 3Com Channel 11 Encryption is off.
SSID ______________________________
Channel Number ______________________________
Jerry2_QIG 17/3/06 10:01 am Page 9
Downloaded from www.Manualslib.com manuals search engine

Problem Solving10
PROBLEM SOLVING
If you are experiencing difficulties with your installation, try the following.
• Ensure all networking equipment is switched on.The Router should be showing a green Power LED. If it is not, check thepower adapter connection. Do not use any power adapter with yourRouter other than the one supplied.
• Ensure that the computer is connected to the Router.The Router should be displaying a green LAN Status LED. If it is not, verifythat the computer is connected to one of the Router’s LAN ports with anEthernet cable.
• Ensure that you do not have a Web proxy enabled on your computer.Go to the Control Panel and click on Internet Options. Click theConnections tab, and then click the LAN Settings button at the bottom.Make sure that the Use Proxy Server option is unchecked.
• If you are unable to access the Router’s Web interface.Launch a Web browser, and then enter http://192.168.1.1. If you chose adifferent IP address, use that instead. Ensure that you include the http://prefix.
• Ensure your computer is configured correctly.Make sure that the computer obtains an IP address automatically from theRouter’s DHCP server.
• If you have an existing DSL line and have PPPoE client software installedon your computer, you need to disable it.
• It is important that you set up the correct VPI/VCI parameters andEncapsulation (LLC or VC Mux) method to match up with your DSL line.These parameters can be obtained from your ISP.
• Check that the PPPoE/PPPoA settings are correct (for example, user name,password and IP address configuration).
• You must use a splitter to separate the Router from your telephone. Amicro-filter can then be used in line with the telephone to ensure that theRouter and telephone do not interere with each other. Ensure that amicrofilter is not fitted directly inline with the Router.
DSL InternetConnections
Jerry2_QIG 17/3/06 10:01 am Page 10
Downloaded from www.Manualslib.com manuals search engine

11Problem Solving
• Ensure that the wireless client is set to infrastructure mode.
• If you have both wired and wireless NICs on the same computer, ensurethat the wired NIC is disabled.
• Ensure that the SSID is the same for the wireless client and the Router.
• Ensure that the Router WLAN LED is on. If not, go to the Wireless Settingsmenu, and then enable Wireless Networking.
• Ensure that wireless encryption is the same for the wireless client and theRouter. If there are problems, turn encryption off on the client and theRouter until you have established a wireless connection.
GB
Wireless Configuration.If you are unable to
access the wireless LAN.
Jerry2_QIG 17/3/06 10:01 am Page 11
Downloaded from www.Manualslib.com manuals search engine

12
Jerry2_QIG 17/3/06 10:01 am Page 12
Downloaded from www.Manualslib.com manuals search engine

13Introducción
INTRODUCCIÓN
Este manual le guiará a lo largo de los pasos básicos para instalar y configurarsu OfficeConnect ADSL Wireless 54 Mbps 11g Firewall Router, y estableceruna conexión a Internet desde sus PCs. A lo largo de esta guía, nos referire-mos al OfficeConnect ADSL Wireless 54 Mbps 11g Firewall Router simple-mente como el router.
Nota: 3Com le recomienda que utilice una conexión cableada (Ethernet) pararealizar la configuración inicial.
• Un OfficeConnect ADSL Wireless 11g Firewall Router
• Un adaptador de alimentación de 12V para usar con el router
• Cuatro pies de goma
• Un cable RJ11
• Un CD-ROM con la Guía de usuario
• Esta Guía de instalación
• Una hoja de información de soporte y seguridad
• Un folleto de garantía
Antes de empezar, debe asegurarse de lo siguiente:
• Ya dispone de una cuenta ADSL de banda ancha.
• Tiene un PC con una conexión Ethernet disponible y adecuadamente configurado para su comunicación con Internet. Su PC debe poder conec-tarse a Internet mediante el módem, y ha de disponer de un navegadorweb instalado.
• No hay ningún otro dispositivo de servidor DHCP en su red local responsablede la asignación de direcciones IP a sus PCs y a otros dispositivos conectadosa la red. Su router se encargará en adelante de realizar esta función pordefecto.
• Si necesita un acceso inalámbrico, deberá disponer de un PC con una tarjetaadaptadora inalámbrica 802.11b o 802.11g instalada.
Si una o varias de estas condiciones no se cumple, consulte la guía de usuariodel OfficeConnect ADSL Wireless 54 Mbps 11g Firewall Router facilitada en elCD-ROM que se adjunta y que incluye una información completa alrespecto.MENSIONES Y ESTÁNDARES
Contenido de la caja
Requisitos del sistema
E
Jerry2_QIG 17/3/06 10:01 am Page 13
Downloaded from www.Manualslib.com manuals search engine
Panel frontal14
PANEL FRONTAL
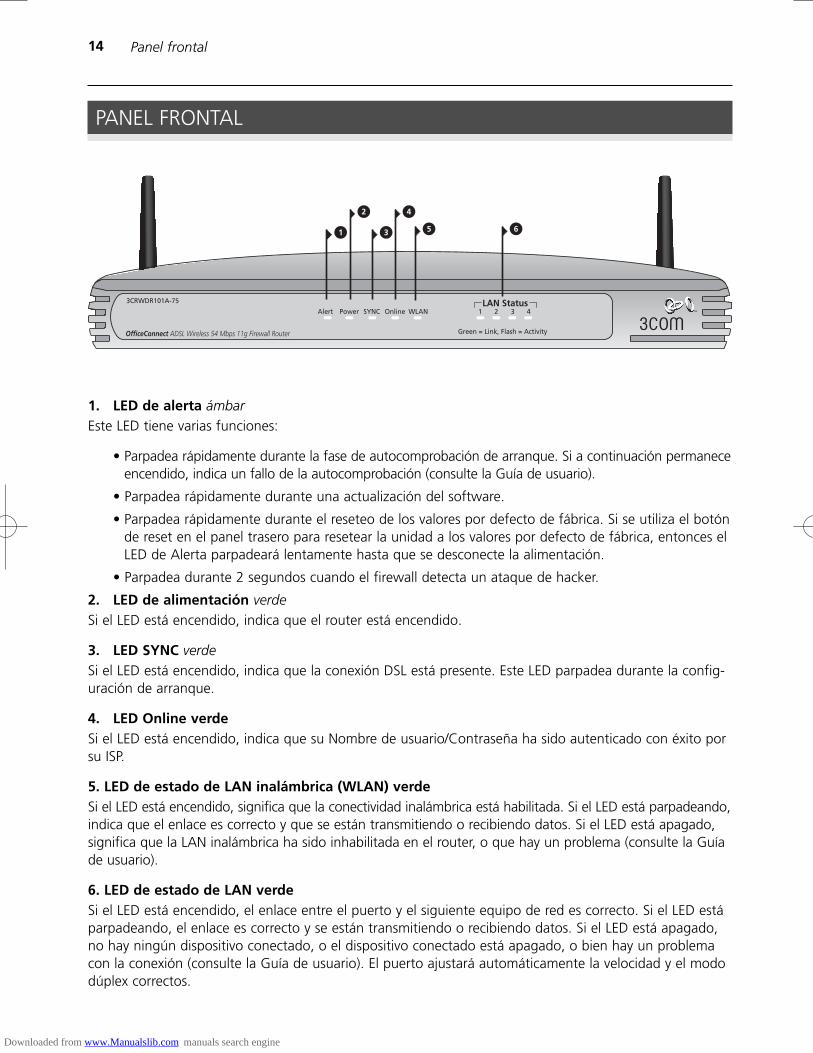
1. LED de alerta ámbarEste LED tiene varias funciones:
• Parpadea rápidamente durante la fase de autocomprobación de arranque. Si a continuación permaneceencendido, indica un fallo de la autocomprobación (consulte la Guía de usuario).
• Parpadea rápidamente durante una actualización del software.
• Parpadea rápidamente durante el reseteo de los valores por defecto de fábrica. Si se utiliza el botónde reset en el panel trasero para resetear la unidad a los valores por defecto de fábrica, entonces elLED de Alerta parpadeará lentamente hasta que se desconecte la alimentación.
• Parpadea durante 2 segundos cuando el firewall detecta un ataque de hacker.
2. LED de alimentación verdeSi el LED está encendido, indica que el router está encendido.
3. LED SYNC verdeSi el LED está encendido, indica que la conexión DSL está presente. Este LED parpadea durante la config-uración de arranque.
4. LED Online verdeSi el LED está encendido, indica que su Nombre de usuario/Contraseña ha sido autenticado con éxito porsu ISP.
5. LED de estado de LAN inalámbrica (WLAN) verdeSi el LED está encendido, significa que la conectividad inalámbrica está habilitada. Si el LED está parpadeando,indica que el enlace es correcto y que se están transmitiendo o recibiendo datos. Si el LED está apagado,significa que la LAN inalámbrica ha sido inhabilitada en el router, o que hay un problema (consulte la Guíade usuario).
6. LED de estado de LAN verdeSi el LED está encendido, el enlace entre el puerto y el siguiente equipo de red es correcto. Si el LED estáparpadeando, el enlace es correcto y se están transmitiendo o recibiendo datos. Si el LED está apagado,no hay ningún dispositivo conectado, o el dispositivo conectado está apagado, o bien hay un problemacon la conexión (consulte la Guía de usuario). El puerto ajustará automáticamente la velocidad y el mododúplex correctos.
OfficeConnect ADSL Wireless 54 Mbps 11g Firewall Router
3CRWDR101A-75 LAN StatusAlert Power SYNC Online WLAN 1 2 3 4
Green = Link, Flash = Activity
1 65
2 4
3
Jerry2_QIG 17/3/06 10:01 am Page 14
Downloaded from www.Manualslib.com manuals search engine

15Panel trasera
PANEL TRASERA
7. Antena inalámbricaPara una optima cobertura inalámbrica, la antena debe colocarse en forma de ‘V’.
8. Puertos EthernetSi utiliza cables RJ-45 adecuados, podrá conectar su router a un PC o a cualquier otro equipo que dispongade una conexión Ethernet (por ejemplo, un hub o un switch). Estos puertos se auto-configuraránautomáticamente como MDI o MDIX, lo que significa que puede usar cables tanto directos como cruzados.
9. Botón de resetPara reiniciar el router, pulse el botón de reset durante 1 segundo. Si desea reiniciar el router a sus valorespor defecto de fábrica, o si no puede acceder a la interfaz de administración web (por ejemplo, por pérdidade contraseña), pulse el botón de reset durante 5 segundos.
10. Toma de adaptador de alimentaciónUtilice únicamente el adaptador de alimentación de 12V suministrado con este router. No use ningún otroadaptador.
11. ADSLEl Puerto ADSL se usa para conectar el router con la toma de pared ADSL. Use un cable RJ11 para laconexión entre el puerto ADSL y la toma de pared ADSL.
E
RESETLAN
ADSL4 3 2 1
12 VDC1A MAX
8 109 117
Jerry2_QIG 17/3/06 10:01 am Page 15
Downloaded from www.Manualslib.com manuals search engine

Ubicación e instalación de su router16
1. UBICACIÓN E INSTALACIÓN DE SU ROUTER
ADVERTENCIA: Antes de empezar, por favor lea atentamente la sec-ción ‘Información importante de seguridad’ en la hoja de informaciónde soporte y seguridad.
WARNING: Please read the ‘Important Safety Information’ section inthe Support and Safety Information sheet before you start.
VORSICHT: Bitte lesen Sie den Abschnitt „WichtigeSicherheitsinformationen” sorgfältig durch, bevor Sie das Gerät inBetrieb nehmen.
AVERTISSEMENT: Lisez attentivement le paragraphe “Remarques relatives à la sécurité” avant de mettre votre routeur sous tension.
Cuando vaya a ubicar su router, asegúrese de que:
• La unidad se sitúa en una posición central respecto de los PCs inalámbri-cos que se conectarán al router. Una ubicación adecuada podría ser enci-ma de una estantería alta o de un mueble similar, para optimizar lasconexiones inalámbricas de los PCs, tanto en el plano horizontal comovertical, permitiendo así una cobertura total.
• El router no está expuesto directamente a la luz del sol y está alejado decualquier fuente de calor.
• El cableado está alejado de cables eléctricos, lámparas fluorescentes yfuentes de ruido eléctrico tales como radios, transmisores y amplificadoresde banda ancha.
• Para poder cumplir con las normativas de exposición a radiaciones delFCC, el router debe estar situado a una distancia mínima de 20 cm (8 pul-gadas) de cualquier persona (para una información detallada, consulte laGuía de usuario).
• El agua o la humedad no puede penetrar en la carcasa de la unidad.
• El flujo de aire alrededor de la unidad, y a través de las pequeñas aber-turas en el panel lateral de la unidad, no está restringido. Le recomen-damos que deje un espacio libre mínimo de 25 mm (1 pulgada).
Use los cuatro pies de goma auto-adhesivos para impedir que su router res-bale por la superficie de su mesa o cuando vaya a apilarlo con otras unidadesde superficie plana. Sólo tiene que pegar los pies de goma en las zonas mar-cadas en cada esquina en la parte inferior de su router.
Uso de los pies de goma
Información de seguridad
Jerry2_QIG 17/3/06 10:01 am Page 16
Downloaded from www.Manualslib.com manuals search engine

17Ubicación e instalación de su router
E
1. Conecte el adaptador de alimentación al router y espere a que el LED deWLAN esté encendido.
2. Compruebe que su PC está encendido.
3. Conecte su PC a uno de los puertos de LAN 10/100 en el router. Al hacer-lo, el LED de estado de puerto de LAN debería encenderse en color verde.
4. Conecte el cable RJ11 entre el puerto ADSL en el router y su toma ADSLen la pared.
Para poder compartir su router entre más de cuatro usuarios, necesitará unhub o un switch adicional. Conecte un puerto de LAN de su router al hub oswitch, como por ejemplo el OfficeConnect Dual Speed Switch 8.
InternetUnidad de fuente de alimentación
Su PC
Usuarios inalámbricos
Toma de teléfono
Bloque de splitter/microfiltro
3Com OfficeConnect ADSL Wireless 54Mbps 11g Firewall Router
Ejemplo de red con el OfficeConnect ADSL Wireless 54 Mbps 11g Firewall Router
Conexión a un hub o a un switch
Conexión de su router
Jerry2_QIG 17/3/06 10:01 am Page 17
Downloaded from www.Manualslib.com manuals search engine

Instalación de un splitter y de un microfiltro18
2. INSTALACIÓN DE UN SPLITTER Y DE UN MICROFILTRO
Un splitter y un microfiltro le permiten usar su router y un teléfono al mismotiempo. El splitter se conecta a la conexión ADSL de pared, y proporciona acontinuación dos conectores:
• Un conector RJ11 que se conecta al router con el cable RJ11
• Un conector de teléfono que puede conectarse a su teléfono
También tiene que haber un microfiltro entre el splitter y el teléfono. El micro-filtro garantiza que la señal de datos DSL no interfiere con la señal de voz delteléfono. Hay que instalar un microfiltro en línea con cada teléfono para pre-venir interferencias de señal. Los splitters están ahora disponibles con microfil-tros integrados, lo que permite simplificar la configuración, tal como se mues-tra en el diagrama que aparece a continuación. Podrá conseguir los splitters ymicrofiltros a través de su ISP, o bien en una tienda informática.
OfficeConnect® ADSL Wireless 54Mbps 11g Firewall Router
Teléfono
Splitter y microfiltro combinadosToma
de pared
Microfiltro
Para teléfonos adicionales
Toma de pared
Teléfono
Jerry2_QIG 17/3/06 10:01 am Page 18
Downloaded from www.Manualslib.com manuals search engine

19Conexión a su ISP
E
3. CONEXIÓN A SU ISP
Antes de poder configurar el router, necesita conocer el método de asi-gnación de la información IP usado por su ISP. Existen cuatro formas difer-entes con las que el router puede conectarse a Internet, tal como se describea continuación. Para todos los métodos, necesita conocer el VPI (identificadorde camino virtual), el VCI (identificador de canal virtual), y la encapsulación(LLC o VC Mux). Los valores por defecto de VPI y VCI que lleva el routerdeben ser válidos para la mayoría de ISPs. Pida a su ISP que le facilite la infor-mación requerida.
1. PPPoEPara configurar el gateway, es necesario que conozca el nombre deusuario y la contraseña para conectarse a su cuenta de ISP. Si ha estadousando un cliente PPPoE en su PC, puede desactivarlo puesto que ya noserá necesario. Si su ISP le proporciona una dirección IP estática, introduz-ca esta dirección IP en la sección de Configuración de Internet, en la inter-faz web del router. Si no es así, su ISP asignará automáticamente unadirección IP a su router.
2. PPPoAEste caso es similar al de PPPoE, pero se usa principalmente en el ReinoUnido. Para configurar el gateway, es necesario que conozca el nombre deusuario y la contraseña para conectarse a su cuenta de ISP. Si su ISP le pro-porciona una dirección IP estática, introduzca esta dirección IP en la sec-ción de Configuración de Internet, en la interfaz web del router. Si no esasí, su ISP asignará automáticamente una dirección IP a su router.
3. Bridge Mode for a Single Computer (RFC 1483 Bridging Mode)En este modo, el router se configura en un modo bridging para conectar laLAN con redes WAN. El tráfico está limitado entre las dos redes en base adirecciones de hardware, y por tanto limita el lado de la LAN a un único PC.
4. Routing Mode over ATM (RFC 1483 Bridging Mode)El modo routing sobre ATM significa que el router tiene una dirección IPfija para conectarse a Internet. Su ISP proporcionará al router una direcciónIP fija, la mascara de subred, y la dirección del gateway de ISP. Necesitaintroducir esta información en la sección de Configuración de Internet, enla interfaz web del router.
Jerry2_QIG 17/3/06 10:01 am Page 19
Downloaded from www.Manualslib.com manuals search engine
Cómo usar el asistente de configuración20
4. CÓMO USAR EL ASISTENTE DE CONFIGURACIÓN
1. Si todavía no lo ha hecho, reinicie su PC.
2. Abra su navegador web e intente conectar con el router escribiendo lasiguiente URL en la barra de direcciones: http://192.168.1.1.
3. Si puede acceder a la página de Login, significa que su PC ha recibido cor-rectamente una dirección IP del router.
4. Conéctese usando la contraseña por defecto <admin>. El asistente inten-tará lanzarse automáticamente. si no lo consigue, seleccione Asistente enel menú.
Cuando sea posible, el asistente recomendará ajustes para la mayoría de losparámetros. Sin embargo, hay algunos ajustes que deberá establecer ustedmismo. En la mayoría de los casos, su ISP se los habrá facilitado cuando sucuenta fue dada de alta.
Una vez completado el asistente de configuración, intente acceder a unapágina web de Internet, como por ejemplo www.3com.com. Si consigueacceder con éxito a esta página, esto significa que tanto su PC como surouter han sido configurados correctamente.
Conexión a Internet
Jerry2_QIG 17/3/06 10:01 am Page 20
Downloaded from www.Manualslib.com manuals search engine

21Conexión a la LAN inalámbrica
E
5. CONEXIÓN A LA LAN INALÁMBRICA
1. Después de haber configurado el router a través del PC cableado, puedeconectarse al router desde un PC inalámbrico.
Tanto el router como los clientes inalámbricos deben tener el mismo SSIDy los mismos ajustes de encriptación. Todos los clientes inalámbricosdeben usar el modo Infraestructura.
Los ajustes inalámbricos por defecto del router son:
2. Si no dispone de una LAN inalámbrica, puede usar la configuración pordefecto del router. Asegúrese que sus clientes inalámbricos usan el SSID,el canal y la encriptación por defecto, conforme a los datos indicadosanteriormente.
Si dispone de una LAN inalámbrica existente, configure el router para usarel mismo SSID y la misma configuración de encriptación, de forma que seacompatible con su red inalámbrica existente.
3. Si tiene instalado en su PC una NIC de cable y otra inalámbrica, debe ase-gurarse que sólo se usa una NIC para comunicar con la LAN. Para usar laNIC inalámbrica, desconecte el cable Ethernet y reinicie su PC.
4. Abra su navegador web e intente acceder a una página web, como porejemplo www.3com.com. Si consigue acceder con éxito a esta página,esto significa que tanto su PC inalámbrico como su router han sido con-figurados correctamente.
3Com le recomienda encarecidamente que active la encriptación WPA2 oWAP para mejorar la seguridad de su red inalámbrica, y que cambie el SSID aun valor distinto del valor por defecto. Para una información detallada, consultela ayuda on-line o la Guía de usuario.
El SSID es 3Com Canal 11 La encriptación está desactivada
SSID ______________________________
Número de canal ______________________________
Jerry2_QIG 17/3/06 10:01 am Page 21
Downloaded from www.Manualslib.com manuals search engine

Resolución de problemas22
RESOLUCIÓN DE PROBLEMAS
Si experimenta dificultades con su instalación, compruebe lo siguiente:
• Compruebe que todos los equipos de red están encendidos.El LED de alimentación del router debería estar encendido y de colorverde. Si no fuera el caso, verifique la conexión del adaptador de ali-mentación. Use sólo el adaptador de alimentación suministrado con elrouter.
• Compruebe que el PC está conectado al router.El LED de estado de LAN del router debería estar encendido y de colorverde. Si no fuera el caso, verifique que el PC está conectado a uno de lospuertos de LAN del router con un cable Ethernet.
• Compruebe que no está activado ningún servidor proxy en su PC.Vaya al Panel de control y haga clic en Opciones de Internet. Seleccione lapestaña Conexiones y haga clic en el botón Configuración de LAN en laparte inferior. Compruebe que la casilla Usar servidor proxy no esté selec-cionada.
• Si no puede acceder a la interfaz web del router.Abra un navegador web y escriba http://192.168.1.1 en la barra de direc-ciones. Si ha elegido una dirección IP distinta, use ésta en su lugar.Asegúrese de incluir el prefijo http://.
• Compruebe que su PC está correctamente configurado.Asegúrese de que el PC obtiene automáticamente una dirección IP delservidor DHCP del router.
• Si dispone de una línea DSL existente y tiene instalado en su PC un soft-ware de cliente PPPoE, deberá desactivarlo.
• Es importante que fije los parámetros VPI/VCI y el método de encapsu-lación (LLC o VC Mux) correctos que coincidan con su línea DSL. Podráobtener estos parámetros de su ISP.
• Compruebe que las configuraciones de PPPoE/PPPoA son correctas (porejemplo, configuración de nombre de usuario, contraseña, y dirección IP).
• Debe utilizar un splitter para separar el router de su teléfono. Además, sepuede usar un microfiltro en línea con el teléfono para garantizar que elrouter y el teléfono no interfieren entre sí. Asegúrese de que no hayningún microfiltro colocado directamente en línea con el router.
Conexiones a Internet DSL
Jerry2_QIG 17/3/06 10:01 am Page 22
Downloaded from www.Manualslib.com manuals search engine
23Resolución de problemas
E
• Compruebe que el cliente inalámbrico está configurado en modoinfraestructura.
• Si su PC dispone de una NIC de cable y una inalámbrica, asegúrese de quela NIC de cable está desactivada.
• Compruebe que el SSID es el mismo para el cliente inalámbrico y el router.
• Compruebe que el LED de WLAN del router está encendido. Si no fuera elcaso, vaya al menú Configuración inalámbrica y habilite el NetworkingInalámbrico.
• Compruebe que la encriptación inalámbrica es la misma para el clienteinalámbrico y el router. Si hay algún problema, desactive la encriptación enel cliente y en el router hasta que haya establecido una conexión inalámbrica.
Configuración inalámbrica. Si no
consigue acceder a laLAN inalámbrica.
Jerry2_QIG 17/3/06 10:01 am Page 23
Downloaded from www.Manualslib.com manuals search engine

24
Jerry2_QIG 17/3/06 10:01 am Page 24
Downloaded from www.Manualslib.com manuals search engine
25Présentation de votre routeur
PRÉSENTATION DE VOTRE ROUTEUR
Ce guide décrit la procédure d’installation et de configuration de votre routeurOfficeConnect ADSL Wireless 54 Mbps 11g Firewall Router jusqu’à l’établisse-ment de la connexion aux ordinateurs et à Internet. Dans l’ensemble du docu-ment, le routeur OfficeConnect ADSL Wireless 54 Mbps 11g Firewall Routersera simplement dénommé routeur.
Note : Pour l’installation initiale, 3Com vous recommande de configurer votrerouteur par l’intermédiaire d’une connexion Ethernet filaire (câblée).
• Un routeur OfficeConnect ADSL Wireless 11g Firewall Router
• Un adaptateur secteur 12V spécifique
• Quatre pieds caoutchouc
• Un câble RJ-11
• Un CD-ROM contenant le Guide de l’utilisateur
• Le présent Guide d’installation
• La fiche d’information Support et sécurité
• La carte de Garantie
Avant de commencer, vérifiez que :
• Vous disposez d’une connexion ADSL haut débit.
• Vous disposez d’un ordinateur doté d’une connexion Ethernet et configurépour Internet. Cet ordinateur doit pouvoir se connecter à Internet par l’intermédiaire du modem et être muni d’un navigateur.
• Il n’existe sur le réseau local aucun autre serveur DHCP chargé d’affecterdes adresses IP à vos ordinateurs et aux périphériques connectés auréseau. Par défaut, votre routeur prend en charge cette fonction.
• Pour l’accès sans fil, vous devez disposer d’un ordinateur équipé d’unecarte réseau sans fil au standard 802.11b ou 802.11g.
Si l’une de ces conditions n’est pas remplie, reportez-vous au Guide de l’utilisateurfourni sur CD-ROM pour plus d’informations.
Composition du produit :
Configuration minimum
F
Jerry2_QIG 17/3/06 10:01 am Page 25
Downloaded from www.Manualslib.com manuals search engine

Face avant26
FACE AVANT
1. LED Alert ambreCette LED remplit diverses fonctions :
• Elle clignote rapidement au cours du test automatique effectué à la mise sous tension de l’appareil.Si elle reste allumée ensuite, le test a échoué (reportez-vous au Guide de l’utilisateur).
• Elle clignote rapidement pendant la mise à niveau du logiciel.
• Elle clignote rapidement lors d’une réinitialisation de l’unité en configuration d’usine. Après unetelle réinitialisation (par le bouton reset situé en face arrière, elle clignote lentement jusqu’à la misehors tension de l’unité.
• Elle clignote pendant 2 secondes lorsque le firewall détecte une attaque.
2. LED Power verteAllumée, indique que le routeur est sous tension.
3. LED SYNC verteAllumée, indique que la connexion DSL est établie. Clignote pendant la configuration à la mise sous ten-sion.
4. LED Online verteAllumée, indique que votre nom d’utilisateur et votre mot de passe ont été authentifiés par votre four-nisseur d’accès.
5. LED WLAN (état du réseau sans fil) verteAllumée, indique que le réseau sans fil est actif. Clignotante, indique que la liaison est activée et que desdonnées sont en cours de transmission. Eteinte, indique que le LAN sans fil a été désactivé au niveau durouteur ou que la connexion pose problème (reportez-vous au Guide de l’utilisateur).
6. LED LAN Status (état du LAN) verteAllumée, indique que la liaison entre le port et l’équipement qui lui est associé est activée. Clignotante,indique que la liaison est active et que des données sont en cours de transmission. Eteinte, indique qu’au-cun équipement n’est connecté, que l’équipement connecté est hors tension ou que la liaison pose prob-lème (reportez-vous au Guide de l’utilisateur). Le port s’adapte automatiquement à la vitesse et au modeduplex appropriés.
OfficeConnect ADSL Wireless 54 Mbps 11g Firewall Router
3CRWDR101A-75 LAN StatusAlert Power SYNC Online WLAN 1 2 3 4
Green = Link, Flash = Activity
1 65
2 4
3
Jerry2_QIG 17/3/06 10:01 am Page 26
Downloaded from www.Manualslib.com manuals search engine

27Face arrière
F
FACE ARRIÈRE
7. Antennes sans filPour une couverture optimale, les antennes doivent être orientées de manière à former un ‘V’.
8. Ports EthernetA l’aide de câbles Ethernet munis de connecteurs RJ-45, vous pouvez connecter votre routeur à un ordi-nateur où d’autres équipements munis de connecteurs Ethernet (concentrateurs ou commutateurs, parexemple). Ces ports sont dotés de la fonction Auto MDI/MDIX, ce qui signifie que vous pouvez utiliserindifféremment des câbles droits ou croisés.
9. Bouton ResetPour relancer simplement le routeur, appuyez pendant une seconde sur le bouton Reset. Si vous souhaitezrestaurer ses paramètres par défaut et ne pouvez pas utiliser l’interface d’administration par navigateur(si, par exemple, vous avez oublié votre mot de passe), maintenez le bouton Reset enfoncé pendant cinqsecondes.
10. Fiche d’alimentationUtilisez exclusivement l’adaptateur secteur 12 V fourni avec votre routeur.
11. ADSLLe port ADSL sert à connecter votre routeur à la prise murale ADSL. Utilisez un câble RJ-11
RESETLAN
ADSL4 3 2 1
12 VDC1A MAX
8 109 117
Jerry2_QIG 17/3/06 10:01 am Page 27
Downloaded from www.Manualslib.com manuals search engine

Installation du routeur28
1. INSTALLATION DU ROUTEUR
AVERTISSEMENT: Lisez attentivement le paragraphe “Remarques relatives à la sécurité” avant de mettre votre routeur sous tension.
WARNING: Please read the ‘Important Safety Information’ section inthe Support and Safety Information sheet before you start.
VORSICHT: Bitte lesen Sie den Abschnitt „WichtigeSicherheitsinformationen” sorgfältig durch, bevor Sie das Gerät inBetrieb nehmen.
Lors de l’installation, assurez-vous que :
• Le routeur est placé autant que possible au centre des ordinateurs sans filqui lui seront connectés. Pour une couverture idéale, choisissez depréférence le haut d’une étagère ou d’un meuble, c’est-à-dire l’endroitd’où les connexions seront les plus directes possibles, tant horizontale-ment que verticalement.
• Le routeur n’est pas exposé directement aux rayons du soleil ou à unesource de chaleur.
• Le câblage est éloigné des lignes électriques, des éclairages fluorescents etautres sources d’interférences électriques (postes de radio, émetteurs etamplificateurs à large bande, par exemple).
• Pour satisfaire aux réglementations portant sur l’exposition aux ondesradio, le routeur est placé à au moins 20 cm des utilisateurs (reportez-vousau Guide de l’utilisateur pour plus d’informations).
• L’eau ou l’humidité ne peuvent en aucun cas pénétrer à l’intérieur de l’appareil.
• L’air peut circuler librement autour de l’appareil et par les aérations situéessur ses côtés. Nous recommandons un dégagement minimum de 25 mmautour de l’appareil.
Les quatre pieds autocollants empêchent le routeur de glisser sur les surfacesplanes. Collez ces pieds exclusivement aux endroits indiqués, à chaque angle,sous l’appareil.
Utilisation des piedscaoutchouc
Remarques relatives à lasécurité
Jerry2_QIG 17/3/06 10:01 am Page 28
Downloaded from www.Manualslib.com manuals search engine

29Présentation de votre routeur
F
1. Branchez l’alimentation et attendez que le voyant WLAN soit allumé.
2. Vérifiez que votre ordinateur est allumé.
3. Connectez votre ordinateur à l’un des ports LAN 10/100 du routeur.Vérifiez que le voyant LAN Status correspondant s’allume (vert).
4. Branchez le câble RJ-11 au port ADSL du routeur et à la prise ADSLmurale.
Le partage du routeur entre plus de quatre utilisateurs suppose que vousdisposiez d’un concentrateur ou d’un commutateur supplémentaire.Connectez l’un des ports LAN du routeur à votre équipement(OfficeConnect Dual Speed Switch 8, par exemple).
InternetAdaptateur secteur
Votre PC
Utilisateurs sans fil
Prise téléphonique
Bloc prise gigogne/microfiltre
3Com OfficeConnect ADSL Wireless 54Mbps 11g Firewall Router
Exemple de réseau avec routeur OfficeConnect ADSL Wireless 54 Mbps 11g Firewall Router
Connexion d’un concentrateur ou d’un
commutateur
Connexion du router
Jerry2_QIG 17/3/06 10:01 am Page 29
Downloaded from www.Manualslib.com manuals search engine

Installation d’une prise gigogne et d’un microfiltre30
2. INSTALLATION D’UNE PRISE GIGOGNE ET D’UN MICROFILTRE
Prise gigogne et microfiltre vous permettent d’utiliser en même temps votrerouteur et votre téléphone. La prise gigogne se branche sur la prise muraleADSL et fournit deux connecteurs :
• Un connecteur RJ-11 qui sera relié au routeur par le câble RJ-11 fourni
• Un connecteur téléphonique qui sera relié à votre combiné
Vous devez également insérer un microfiltre entre la prise gigogne et le télé-phone. Ce microfiltre, nécessaire pour chaque prise téléphonique de la ligne,évite les interférences entre le signal DSL et le signal téléphonique. Pourfaciliter l’installation, certaines prises gigognes intègrent à présent un microfil-tre (voir le diagramme ci-dessous). Achetez votre prise gigogne et vos micro-filtres auprès de votre FAI ou de votre revendeur informatique.
OfficeConnect® ADSL Wireless 54Mbps 11g Firewall Router
Téléphone
Prise gigogne avec microfiltre
Prise murale
Microfiltre
Postes téléphoniques annexes
Prise murale
Téléphone
Jerry2_QIG 17/3/06 10:01 am Page 30
Downloaded from www.Manualslib.com manuals search engine

31Connexion au FAI (fournisseur d’accès Internet)
F
3. CONNEXION AU FAI (FOURNISSEUR D’ACCÈS INTERNET)
Pour configurer votre routeur, vous devez savoir quelle méthode d’affectationdes adresses IP votre FAI utilise. Le routeur peut se connecter à Internet parles quatre méthodes décrites ci-dessous. Chacune suppose que vous connais-sez les paramètres VPI (Virtual Path Identifier, identifiant de chemins d’accèsvirtuels) et VCI (Virtual Channel Identifier, identifiant de circuit virtuel), ainsique la méthode d’encapsulation (LLC ou VC Mux) utilisés. Les valeurs pardéfaut des VPI et VCI devraient convenir à la plupart des FAI. Dans le cas con-traire, contactez votre fournisseur d’accès pour connaître les valeurs exactes.
1. PPPoEPour configurer votre routeur, vous devez connaître le nom d’utilisateur etle mot de passe que votre FAI a attribué à votre connexion. Si vous utilisiezdéjà un client PPPoE sur votre PC, désactivez-le : il ne sert plus à rien. Sivotre FAI vous fournit une adresse IP fixe, celle-ci peut être saisie surl’écran Paramètres Internet de l’interface d’administration du routeur.Dans le cas contraire, votre FAI affectera automatiquement une adresse IPà votre routeur.
2. PPPoASimilaire au client PPPoE, cette méthode est essentiellement utilisée auRoyaume-Uni. Pour configurer votre routeur, vous devez connaître le nomd’utilisateur et le mot de passe que votre FAI a attribué à votre connexion.Si votre FAI vous fournit une adresse IP fixe, celle-ci peut être saisie surl’écran Paramètres Internet de l’interface d’administration du routeur.Dans le cas contraire, votre FAI affectera automatiquement une adresse IPà votre routeur.
3. Mode Pont pour un seul PC (RFC 1483)Dans ce mode, le routeur sert de pont entre le réseau local et le réseauétendu. Le trafic entre les 2 réseaux est limité par des adresses physiques,d’où la restriction à un seul PC du côté LAN.
4. Mode Routage sur ATM (RFC 1483)Dans ce mode, le routeur possède une adresse IP fixe pour se connecter àInternet. Votre FAI affecte au routeur une adresse IP fixe, un masque desous-réseau et l’adresse de sa passerelle. Ces informations doivent êtresaisies sur l’écran Paramètres Internet de l’interface d’administration durouteur.
Jerry2_QIG 17/3/06 10:01 am Page 31
Downloaded from www.Manualslib.com manuals search engine

Lancement de l’assistant de configuration32
4. LANCEMENT DE L’ASSISTANT DE CONFIGURATION
1. Si ce n’est pas déjà fait, redémarrez votre ordinateur.
2. Ouvrez votre navigateur web et essayez de contacter le routeur en tapanthttp://192.168.1.1 dans la barre d’adresses.
3. Si vous accédez à la page de connexion, votre ordinateur a correctementreçu une adresse IP en provenance du routeur.
4. Connectez-vous avec le mot de passe par défaut <admin>. L’assistantessaie de se lancer automatiquement. S’il n’y parvient pas, sélectionnezAssistant dans le menu.
Lorsque c’est possible, l’assistant recommande des valeurs pour chaqueparamètre. Il vous revient cependant de définir certains d’entre eux. La plu-part vous ont été fournis par votre fournisseur d’accès lorsque vous avezouvert votre compte.
Une fois l’exécution de l’assistant achevée, essayez de consulter un site web,par exemple www.3com.com. Si vous pouvez accéder à ce site, votre ordi-nateur et votre routeur sont correctement configurés.
Connecting to the Internet
Jerry2_QIG 17/3/06 10:01 am Page 32
Downloaded from www.Manualslib.com manuals search engine

33Connexion au LAN sans fil
F
5. CONNEXION AU LAN SANS FIL
1. Une fois la configuration par l’ordinateur câblé terminée, connectez-vousau routeur par un ordinateur sans fil.
Le routeur et les clients sans fil doivent posséder le même SSID et lesmêmes paramètres de chiffrement. Tous les clients sans fil doivent employ-er le mode Infrastructure.
Les paramètres sans fil du routeur sont :
2. Si vous n’avez pas encore de réseau sans fil, ces paramètres par défaut sontacceptables. Vérifiez que vos clients sans fil sont paramétrés avec les valeursde SSID, canal et WEP ci-dessus.
Si vous disposez déjà d’un réseau sans fil, configurez le routeur en fonctiondes valeurs de SSID et de chiffrement utilisées sur le réseau existant.
3. Si votre ordinateur est équipé d’une carte réseau filaire et d’une carteréseau sans fil, vérifiez qu’une seule carte est utilisée pour communiqueravec le LAN. Pour utiliser la carte sans fil, débranchez le câble Ethernet etredémarrez votre ordinateur.
4. Lancez votre navigateur et essayez de consulter un site web, par exemplewww.3com.com. Si vous pouvez accéder à ce site, votre ordinateur etvotre routeur sont correctement configurés.
Pour sécuriser vos transmissions sans fil, 3Com vous conseille fortement d’ac-tiver le chiffrement WPA2 ou WPA et de ne pas conserver le SSID par défaut.Consultez l’aide en ligne ou le Guide de l’utilisateur pour plus d’informations.
SSID : 3Com Canal : 11 Chiffrement : Désactivé
SSID ______________________________
Numéro de canal ______________________________
Jerry2_QIG 17/3/06 10:01 am Page 33
Downloaded from www.Manualslib.com manuals search engine

Résolution des problèmes34
RÉSOLUTION DES PROBLÈMES
En cas de problème lors de l’installation, les procédures suivantes peuventvous aider :
• Vérifiez que tous vos équipements réseaux sont sous tension.Le voyant Power du routeur doit être allumé (vert). S’il ne l’est pas, vérifiezle branchement de l’alimentation. Utilisez exclusivement l’adaptateursecteur fourni avec votre routeur.
• Vérifiez que l’ordinateur est connecté au routeur.L’un au moins des voyants LAN Status du routeur doit être allumé (vert). Sice n’est pas le cas, vérifiez que l’ordinateur est connecté à l’un des portsLAN du routeur par un câble Ethernet.
• Vérifiez que vous n’avez pas activé de proxy sur votre ordinateur.Ouvrez le Panneau de configuration et cliquez sur Options Internet.Sélectionnez l’onglet Connexions et cliquez sur le bouton Paramètres LAN,en bas de la fenêtre. Assurez-vous que la case Utiliser un serveur proxyn’est pas cochée.
• Si vous ne parvenez pas à accéder à l’interface web du routeur.Lancez votre navigateur et tapez http://192.168.1.1 ou l’adresse IP quevous avez vous-même définie. N’oubliez pas le préfixe http://.
• Vérifiez que votre ordinateur est correctement configuré.Assurez-vous que le serveur DHCP du routeur lui affecte automatiquementune adresse IP.
• Si vous avez déjà une ligne DSL et un client PPPoE installés sur votre ordi-nateur, vous devez les désactiver.
• Les paramètres VPI/VCI et la méthode d’encapsulation (LLC ou VC Mux)doivent correspondre à votre ligne DSL. Seul votre fournisseur d’accès esten mesure de vous les communiquer.
• Vérifiez que les paramètres de votre client PPPoE ou PPPoA sont corrects(nom d’utilisateur, mot de passe et adresse IP, par exemple).
• Utilisez une prise gigogne pour isoler le routeur du téléphone. Installez unmicrofiltre entre la prise gigogne et le téléphone pour éviter les inter-férences entre le signal DSL et le signal téléphonique. Le microfiltre ne doitpas être installé en amont du routeur.
Connexion Internet par DSL
Jerry2_QIG 17/3/06 10:01 am Page 34
Downloaded from www.Manualslib.com manuals search engine

35Résolution des problèmes
F
• Vérifiez que le client sans fil est paramétré en mode Infrastructure.
• Si l’ordinateur est équipé d’une carte réseau filaire et d’une carte réseausans fil, vérifiez que la carte filaire est désactivée.
• Vérifiez que le client sans fil et le routeur ont le même SSID.
• Vérifiez que le voyant WLAN du routeur est allumé. Dans le cas contraire,activez l’option Réseau sans fil du menu Paramètres sans fil.
• Vérifiez que le client sans fil et le routeur ont la même configuration dechiffrement. En cas de problème, désactivez le chiffrement sur le client etsur le routeur jusqu’à ce que la connexion sans fil ait pu être établie.
Configuration sans fil.Si vous ne parvenez pas
à accéder au réseausans fil
Jerry2_QIG 17/3/06 10:01 am Page 35
Downloaded from www.Manualslib.com manuals search engine

36
Jerry2_QIG 17/3/06 10:01 am Page 36
Downloaded from www.Manualslib.com manuals search engine

37Presentazione del router
PRESENTAZIONE DEL ROUTER
Nel presente manuale sono illustrati i passaggi fondamentali per installare econfigurare il prodotto OfficeConnect ADSL Wireless 54 Mbps 11g FirewallRouter e per stabilire una connessione a Internet con il proprio computer. Nelseguito del manuale, il prodotto OfficeConnect ADSL Wireless 54 Mbps 11gFirewall Router verrà chiamato semplicemente il router.
Nota: 3Com consiglia di utilizzare una connessione cablata (Ethernet) pereseguire la configurazione iniziale.
• Un’unità OfficeConnect ADSL Wireless 11g Firewall Router
• Un adattatore di corrente da 12 V da utilizzare con il router
• Quattro piedini di gomma
• Un cavo RJ11
• Un CD-ROM contenente la Guida dell’utente
• La presente Guida all’installazione
• La scheda Supporto e informazioni di sicurezza
• La scheda di garanzia
Prima di iniziare, assicurarsi che siano soddisfatte le condizioni seguenti:
• Si deve già disporre di un account per un servizio ADSL a banda larga.
• Il computer deve disporre di una connessione Ethernet ed essere corretta-mente configurato per le comunicazioni su Internet. Sul computer, chedeve essere in grado di connettersi a Internet, è necessario che sia installa-to un browser Web.
• Sulla rete locale non devono essere presenti altri server DHCP per l’asseg-nazione degli indirizzi IP a computer e altre periferiche collegate alla rete.Per impostazione predefinita, è il router a svolgere questa funzione.
• Se è necessario l’accesso wireless, il computer in uso deve avere installatauna scheda di rete wireless compatibile con gli standard 802.11b o802.11g.
Se anche una sola di queste condizioni non è soddisfatta, consultare la Guidadell’utente di OfficeConnect ADSL Wireless 54 Mbps 11g Firewall Router,disponibile sul CD-ROM, per maggiori informazioni.
Contenuto della confezione
Requisiti di sistema
I
Jerry2_QIG 17/3/06 10:01 am Page 37
Downloaded from www.Manualslib.com manuals search engine

Pannello frontale38
PANNELLO FRONTALE
1. Spia Alert, ambraLe condizioni segnalate da questa spia sono molteplici:
• Quando è in corso il test di autodiagnostica all’avvio dell’unità, la spia lampeggia rapidamente. Sedopo il test la spia rimane accesa, il test ha avuto esito negativo (consultare la Guida dell’utente).
• Durante l’aggiornamento del software, la spia lampeggia rapidamente.
• Durante il reset delle impostazioni di fabbrica, la spia lampeggia rapidamente. Successivamente, seper ripristinare le impostazioni di fabbrica è stato usato il pulsante di reset sul pannello posteriore,la spia Alert lampeggia lentamente fino a quando non viene staccata l’alimentazione.
• Quando il firewall rileva l’attacco di un hacker, la spia lampeggia per 2 secondi.
2. Spia Power VerdeSe è accesa, la spia indica che il router riceve alimentazione.
3. Spia SYNC VerdeSe è accesa, la spia indica che è attiva una connessione DSL. La spia lampeggia durante la configurazioneall’accensione dell’unità.
4. Spia Online VerdeSe è accesa, la spia indica che il nome utente e la password sono stati autenticati presso il provider ISP.
5. Spia di stato WLAN (rete wireless) VerdeSe la spia è accesa, la rete wireless è attiva. Se lampeggia, la connessione è funzionante ed è in corso latrasmissione o la ricezione dei dati. Se è spenta, la rete wireless è disattivata nel router o si è verificato unproblema (vedere la Guida dell’utente).
6. Spia LAN Status VerdeSe la spia è accesa, la connessione tra la porta e il dispositivo di rete successivo è funzionante. Se lampeg-gia, la connessione è funzionante ed è in corso la trasmissione o la ricezione dei dati. Se è spenta, non visono dispositivi collegati, il dispositivo collegato è spento oppure si è verificato un problema di connes-sione (consultare la Guida dell’utente). La velocità e la modalità duplex della porta si regolano automati-camente sul valore più corretto.
OfficeConnect ADSL Wireless 54 Mbps 11g Firewall Router
3CRWDR101A-75 LAN StatusAlert Power SYNC Online WLAN 1 2 3 4
Green = Link, Flash = Activity
1 65
2 4
3
Jerry2_QIG 17/3/06 10:01 am Page 38
Downloaded from www.Manualslib.com manuals search engine

39Pannello posteriore
I
PANNELLO POSTERIORE
7. Antenne wirelessPer garantire la massima copertura wireless, le antenne del prodotto devono essere orientate a “V”.
8. Porte EthernetUtilizzando cavi RJ45 idonei, è possibile collegare il router a un computer o ad altri dispositivi che dispon-gono di connessione Ethernet (ad esempio, un hub o uno switch). Le porte hanno una funzionalitàMDI/MDIX automatica: è quindi possibile utilizzare un cavo di rete diretto oppure incrociato.
9. Pulsante ResetPer riavviare il router, premere il pulsante di reset per 1 secondo. Per ripristinare i valori di fabbrica delrouter o se non è possibile accedere all’interfaccia Web di gestione (ad esempio, perché si è dimenticatala password), premere il pulsante di reset per 5 secondi.
10. Presa dell’adattatore di correnteUtilizzare solo l’adattatore di corrente a 12 V fornito con il router. Non utilizzare adattatori di altro tipo.
11. ADSLLa porta ADSL è utilizzata per connettere il router alla presa a muro di connessione ADSL. Utilizzare uncavo RJ11 per collegare la porta ADSL alla presa ADSL a muro.
RESETLAN
ADSL4 3 2 1
12 VDC1A MAX
8 109 117
Jerry2_QIG 17/3/06 10:01 am Page 39
Downloaded from www.Manualslib.com manuals search engine

Posizionamento e installazione del router40
1. POSIZIONAMENTO E INSTALLAZIONE DEL ROUTER
ATTENZIONE: Prima di iniziare, leggere la sezione ‘Importanti informazionidi sicurezza’ contenuta nella scheda Supporto e informazioni di sicurezza.
WARNING: Please read the ‘Important Safety Information’ section inthe Support and Safety Information sheet before you start.
VORSICHT: Bitte lesen Sie den Abschnitt „WichtigeSicherheitsinformationen” sorgfältig durch, bevor Sie das Gerät inBetrieb nehmen.
AVERTISSEMENT: Lisez attentivement le paragraphe “Remarques relatives à la sécurité” avant de mettre votre routeur sous tension.
Quando si sceglie una posizione per il router, assicurarsi che vengano soddisfatte le condizioni seguenti.
• Collocare il router al centro rispetto ai sistemi wireless che verranno connessial router. Una collocazione ideale per ottimizzare le comunicazioni wirelesssia in senso orizzontale che verticale e garantire la massima copertura,potrebbe essere il ripiano alto di una scaffalatura (o mobile simile).
• Evitare l’esposizione alla luce diretta del sole e tenerlo lontano da fonti dicalore.
• Tenere i cavi a debita distanza da fili elettrici, apparecchi a luce fluorescente efonti di rumore elettrico quali radio, trasmettitori e amplificatori a banda larga.
• In conformità alle normative sull’esposizione alle radiazioni FCC, il routerdeve essere collocato ad una distanza minima di 20 cm dal personale (permaggiori informazioni, consultare la Guida dell’utente).
• Evitare che acqua e umidità penetrino all’interno dell’unità.
• Non ostruire la circolazione dell’aria attorno all’unità e attraverso le fessuredi ventilazione poste ai lati dell’unità. Si consiglia di lasciare uno spazio dialmeno 25 mm.
Utilizzare i quattro piedini di gomma autoadesivi per impedire che il router sisposti quando è appoggiato sul piano di lavoro o quando viene impilatoinsieme ad altre unità. Applicare i piedini alle zone contrassegnate, poste aiquattro angoli del fondo del router.
Uso dei piedini digomma
Informazioni sullasicurezza
Jerry2_QIG 17/3/06 10:01 am Page 40
Downloaded from www.Manualslib.com manuals search engine

41Posizionamento e installazione del router
I
1. Collegare l’adattatore di corrente al router e attendere che la spia WLANsi accenda.
2. Controllare che il computer sia acceso.
3. Collegare il computer a una delle porte LAN 10/100 disponibili sul router.La spia di stato LAN Port deve diventare verde.
4. Collegare il cavo RJ11 dalla porta ADSL del Router alla presa ADSL a muro.
Affinché il router possa essere condiviso tra più di quattro utenti, è necessarioutilizzare un ulteriore hub o switch. Collegare una porta LAN del routerall’hub o allo switch, ad esempio a un’unità OfficeConnect Dual SpeedSwitch 8.
InternetAlimentatore
Computer
Utenti wireless
Presa telefonica
Blocco splitter/microfiltro
3Com OfficeConnect ADSL Wireless 54Mbps 11g Firewall Router
Esempio di rete con 3Com OfficeConnect ADSL Wireless 54 Mbps 11g Firewall Router
Connessione a un hub ouno switch
Connessione del router
Jerry2_QIG 17/3/06 10:01 am Page 41
Downloaded from www.Manualslib.com manuals search engine

Installazione di uno splitter e di un microfiltro42
2. INSTALLAZIONE DI UNO SPLITTER E DI UN MICROFILTRO
Il ricorso a uno splitter e a un microfiltro consente l’impiego contemporaneodel router e di un apparecchio telefonico. Lo splitter si collega alla presa ADSLa muro ed è dotato di due connettori:
• Un connettore RJ11 per collegare il router al cavo RJ11
• Un jack telefonico che può essere collegato al telefono
Tra lo splitter e il telefono deve inoltre essere inserito un microfiltro per garan-tire che il segnale dati DSL non interferisca con il segnale voce del telefono. Ènecessario installare un microfiltro per ciascun apparecchio telefonico per pre-venire l’interferenza dei segnali. Esistono anche splitter dotati di microfiltriincorporati, che semplificano le operazioni di installazione come mostrato neldiagramma riportato sotto. È possibile procurarsi splitter e microfiltri presso ilproprio provider ISP o in un negozio di informatica.
OfficeConnect® ADSL Wireless 54Mbps 11g Firewall Router
Telefono
Splitter e microfiltro combinati
Presa a muro
Microfiltro
Per derivazioni telefoniche
Presa a muro
Telefono
Jerry2_QIG 17/3/06 10:01 am Page 42
Downloaded from www.Manualslib.com manuals search engine

43Connessione con l’ISP
I
3. CONNESSIONE CON L’ISP
Prima di poter configurare il router, occorre conoscere il metodo di asseg-nazione degli indirizzi IP utilizzato dal proprio ISP. Per connettersi a Internet, ilrouter può utilizzare i quattro metodi descritti qui di seguito. Per tutti i meto-di è necessario conoscere l’identificativo VPI (Virtual Path Identifier), l’identi-ficativo VCI (Virtual Channel Identifier) e il metodo di incapsulamento (LLC oVC Mux). I valori predefiniti del router per gli identificativi VPI e VCI in generesono compatibili con gran parte degli ISP. Il proprio provider ISP puòcomunque fornire tutte le informazioni necessarie.
1. PPPoEPer configurare il gateway, è necessario conoscere nome utente e passwordper accedere al proprio account. Se sul computer si utilizzavano clientPPPoE, è possibile disattivarli in quanto non sono più necessari. Se ilprovider ISP fornisce un indirizzo IP statico, immetterlo nella sezioneInternet Settings dell’interfaccia Web del router. In caso contrario, l’ISPassegnerà automaticamente al Router un indirizzo IP.
2. PPPoAÈ analogo al protocollo PPPoE, ma è utilizzato prevalentemente in GranBretagna. Per configurare il gateway, è necessario conoscere nome utentee password per l’accesso al proprio account. Se il provider ISP fornisce unindirizzo IP statico, immetterlo nella sezione Internet Settings dell’interfac-cia Web del router. In caso contrario, l’ISP assegnerà automaticamente alRouter un indirizzo IP.
3. Modalità Bridge per un solo computer (modalità Bridge RFC 1483)Con questo metodo, il router viene impostato in modalità di bridging percollegarsi alle reti LAN e WAN. Il traffico tra le due reti viene limitato sullabase degli indirizzi di rete, in questo modo la parte LAN può essere limitataa un solo computer.
4. Modalità Routing over ATM (modalità Bridge RFC 1483)Nella modalità Routing over ATM al router viene assegnato un indirizzo IPfisso per collegarsi a Internet. L’ISP fornisce al router un indirizzo IP fisso,un indirizzo di subnet mask e l’indirizzo del proprio gateway. Queste infor-mazioni devono essere immesse nella sezione Internet Settings dell’inter-faccia Web del router.
Jerry2_QIG 17/3/06 10:01 am Page 43
Downloaded from www.Manualslib.com manuals search engine

Procedura di installazione guidata (Setup Wizard)44
4. PROCEDURA DI INSTALLAZIONE GUIDATA (SETUP WIZARD)
1. Se non è già stato fatto, riavviare il computer.
2. Avviare il browser Web e provare a contattare il router digitando l’URLseguente nella barra degli indirizzi: http://192.168.1.1.
3. Se viene visualizzata la pagina Login, il computer ha ricevuto corretta-mente l’indirizzo IP dal router.
4. Eseguire l’accesso utilizzando la password predefinita, <admin>. La proce-dura guidata proverà ad avviarsi automaticamente. Se ciò non avviene,selezionare Wizard dal menu.
Se possibile, la procedura guidata suggerisce le impostazioni per gran partedei parametri. Tuttavia alcune opzioni devono essere impostate dall’utente. Ingenere queste opzioni sono fornite dal provider ISP quando si imposta il pro-prio account.
Al termine della procedura guidata, provare ad aprire un sito Web su Internet,ad esempio www.3com.com. Se si riesce ad accedere al sito, significa che ilcomputer e il router sono stati configurati correttamente.
Connessione a Internet
Jerry2_QIG 17/3/06 10:01 am Page 44
Downloaded from www.Manualslib.com manuals search engine

45Connessione alla rete locale wireless
I
5. CONNESSIONE ALLA RETE LOCALE WIRELESS
1. Dopo aver configurato il router tramite il computer cablato, è possibileeffettuare la connessione al router attraverso un computer wireless.
Il router e i client wireless devono condividere lo stesso SSID e le stesseimpostazioni per quanto riguarda la cifratura. Tutti i client wireless devonoutilizzare la stessa modalità Infrastructure.
Le impostazioni wireless predefinite per il Router sono le seguenti:
2. Se non si utilizza una rete locale wireless, è possibile utilizzare leimpostazioni predefinite del router. Verificare che i valori di SSID, Channel edEncryption siano impostati come indicato in precedenza.
Per rendere compatibile il router con un’eventuale rete locale wirelesspreesistente, impostare i medesimi valori per SSID ed Encryption.
3. Se sul computer sono installate schede di rete sia cablate che wireless, ènecessario fare in modo che solo una scheda venga utilizzata per comunicarecon la rete locale. Per utilizzare una scheda di rete wireless, disconnettere ilcavo Ethernet e riavviare il computer.
4. Avviare il browser Web e provare ad aprire un sito Web su Internet, adesempio www.3com.com. Se si riesce ad accedere al sito, significa che ilcomputer wireless e il router sono stati configurati correttamente.
Per potenziare la sicurezza della rete wireless, 3Com consiglia vivamente diabilitare la cifratura WPA2 o WPA e di cambiare l’SSID utilizzando un valorediverso da quello predefinito. Consultare la Guida in linea o la Guida dell’utenteper ulteriori informazioni.
SSID: 3Com Channel: 11 Encryption: Off
SSID ______________________________
Channel Number ______________________________
Jerry2_QIG 17/3/06 10:01 am Page 45
Downloaded from www.Manualslib.com manuals search engine

46 Risoluzione dei problemi
RISOLUZIONE DEI PROBLEMI
In caso di difficoltà durante l’installazione, provare le seguenti soluzioni:
• Controllare che tutti i dispositivi collegati alla rete siano accesi.La spia Power del router deve essere illuminata (colore verde). In caso con-trario, controllare la connessione dell’adattatore di corrente. Non utilizzareun adattatore di corrente diverso da quello fornito con il router.
• Controllare che il computer sia connesso al router.La spia di stato LAN del router deve presentare una luce verde. In casocontrario, verificare che il computer sia connesso a una delle porte LANdel router tramite un cavo Ethernet.
• Controllare di non avere un proxy Web attivo sul proprio computer.Andare al Pannello di controllo e fare clic su Opzioni Internet. Selezionarela scheda Connessioni e fare clic sul pulsante Impostazioni LAN in fondoalla schermata. Controllare che l’opzione Usa server proxy sia deseleziona-ta.
• Se non si riesce ad accedere all’interfaccia Web del router.Avviare il browser Web e digitare http://192.168.1.1. Se si è scelto unindirizzo IP diverso, utilizzare quello nuovo. Assicurarsi di includere http://come prefisso.
• Controllare che il computer sia configurato correttamente.Controllare che il computer ottenga l’indirizzo IP automaticamente dalserver DHCP del router.
• Se si dispone di una linea DSL esistente e si ha un client PPPoE installatosul computer, potrebbe essere necessario disattivarlo.
• È importante configurare correttamente i parametri VPI/VCI e il metodo diincapsulamento (LLC o VC Mux) in modo che corrispondano a quelli dellalinea DSL. Questi parametri vengono in genere forniti dall’ISP.
• Controllare che le impostazioni PPPoE/PPPoA siano corrette (ad esempio,nome utente, password e indirizzo IP).
• È necessario utilizzare uno splitter per separare il router dal telefono. Èpossibile utilizzare anche un microfiltro sulla linea telefonica per evitareinterferenze tra il router e il telefono. Controllare che il microfiltro non siainstallato direttamente sulla linea del router.
Connessioni DSL aInternet
Jerry2_QIG 17/3/06 10:01 am Page 46
Downloaded from www.Manualslib.com manuals search engine

47Risoluzione dei problemi
I
• Controllare che il client wireless sia in modalità Infrastructure.
• Se si hanno schede di rete cablate e wireless installate sullo stesso computer,assicurarsi che la scheda cablata sia disattivata.
• Controllare che l’SSID del cliente wireless sia identico a quello del router.
• Controllare che la spia WLAN del router sia accesa. In caso contrario,andare al menu Wireless Settings e selezionare l’opzione WirelessNetworking.
• Controllare che la cifratura wireless sia identica per il client wireless e ilrouter. In caso di problemi, disattivare la cifratura del client e del routerfino a quando non si è stabilita una connessione wireless.
Configurazione wireless. Se non si
riesce ad accedere allarete wireless:
Jerry2_QIG 17/3/06 10:01 am Page 47
Downloaded from www.Manualslib.com manuals search engine

48
Jerry2_QIG 17/3/06 10:01 am Page 48
Downloaded from www.Manualslib.com manuals search engine

49Inbetriebnahme des Routers
INBETRIEBNAHME DES ROUTERS
Diese Anleitung führt Sie durch die grundlegenden Schritte bei derInstallation und Konfiguration des OfficeConnect ADSL Wireless 54 Mbps 11gFirewall Routers. Außerdem wird hier beschrieben, wie Sie eine Verbindungvom Computer zum Internet herstellen. In dieser Anleitung wird derOfficeConnect ADSL Wireless 54 Mbps 11g Firewall Router der Einfachheithalber nur als Router bezeichnet.
Hinweis: 3Com empfiehlt, die Inbetriebnahme über die drahtbasierte(Ethernet) Verbindung durchzuführen.
• OfficeConnect ADSL Wireless 54 Mbps 11g Firewall Router
• 12 Volt-Netzteil für den Router
• Vier Gummifüße
• RJ11-Kabel
• CD-ROM mit dem Benutzerhandbuch
• Installationsanleitung
• Informationsblatt zu Support und Sicherheit
• Garantiekarte
Vor der Inbetriebnahme muss folgendes gewährleistet sein:
• Sie müssen bereits ein ADSL-Breitbandkonto eingerichtet haben.
• Ihr Computer verfügt über eine Ethernet-Verbindung und ist bereits richtigfür die Kommunikation mit dem Internet konfiguriert. Der Computer mussüber das Modem eine Verbindung zum Internet herstellen können. Siemüssen einen Webbrowser installiert haben.
• In Ihrem lokalen Netzwerk gibt es keine weiteren DHCP-Serverkomponenten, die Ihren Computern und anderen NetzwerkgerätenIP-Adressen zuweisen. Der Router führt diese Funktion standardmäßig aus.
• Wenn Sie drahtlose Verbindungen benötigen, muss in Ihrem Computereine 802.11b- oder 802.11g-konforme Wireless-Karte installiert sein.
Wenn eine oder mehr dieser Bedingungen nicht erfüllt ist, finden Sie imBenutzerhandbuch des OfficeConnect ADSL Wireless 54 Mbps 11g FirewallRouters (auf der mitgelieferten CD-ROM) weitere Anweisungen.
Lieferumfang:
Systemanforderungen
D
Jerry2_QIG 17/3/06 10:01 am Page 49
Downloaded from www.Manualslib.com manuals search engine

Vorderseite50
VORDERSEITE
1. Alert-LED orangeDiese LED hat verschiedene Funktionen:
• Blinkt schnell während des Selbsttests. Bleibt sie anschließend an, ist während des Selbsttests einFehler aufgetreten (siehe Benutzerhandbuch).
• Blinkt schnell während Software Upgrades.
• Blinkt schnell während des Zurücksetzens auf die Standardeinstellungen. Falls die Reset-Taste aufder Geräterückseite zum Zurücksetzen auf die Standardeinstellungen gedrückt wurde, blinkt dieAlert-LED langsam bis das Gerät stromlos gemacht wird.
• Leuchtet zwei Sekunden lang, wenn die Firewall einen Hackerangriff erkannt hat.
2. Power-LED grünWenn die LED leuchtet, ist der Router eingeschaltet.
3. SYNC-LED grünWenn die LED leuchtet, besteht eine DSL-Verbindung. Während der Einschaltkonfiguration blinkt dieseLED.
4. Online-LED grünWenn die LED leuchtet, wurden Benutzername/Kennwort erfolgreich bei Ihrem ISP authentifiziert.
5. Wireless LAN (WLAN) Status-LED grünWenn die LED leuchtet, wurde der drahtlose Netzwerkbetrieb aktiviert. Wenn die LED blinkt, ist dieVerbindung hergestellt, und es werden Daten gesendet oder empfangen. Wenn die LED aus ist, wurdedas drahtlose LAN im Router deaktiviert, oder es ist ein Problem aufgetreten (siehe Benutzerhandbuch).
6. LAN Status-LED grünWenn die LED leuchtet, besteht eine Verbindung zwischen dem Port und dem damit verbundenenNetzwerkgerät. Wenn die LED blinkt, ist die Verbindung hergestellt, und es werden Daten gesendet oderempfangen. Wenn die LED aus ist, ist entweder kein Gerät angeschlossen oder das angeschlossene Gerätausgeschaltet. Es kann auch ein Verbindungsproblem aufgetreten sein (siehe Benutzerhandbuch). DerPort stellt sich automatisch auf die richtige Geschwindigkeit und den entsprechenden Duplexbetrieb ein.
OfficeConnect ADSL Wireless 54 Mbps 11g Firewall Router
3CRWDR101A-75 LAN StatusAlert Power SYNC Online WLAN 1 2 3 4
Green = Link, Flash = Activity
1 65
2 4
3
Jerry2_QIG 17/3/06 10:01 am Page 50
Downloaded from www.Manualslib.com manuals search engine

51Rückseite
D
RÜCKSEITE
7. FunkantenneFür eine optimale Funkabdeckung sollte die Antenne senkrecht nach oben stehen.
8. Ethernet-PortsMit Hilfe geeigneter RJ45-Kabel können Sie den Router an einen Computer oder ein anderes Gerätanschließen, das über eine Ethernet-Verbindung verfügt (beispielsweise ein Hub oder ein Switch). DiesePorts verfügen über eine automatische MDI/MDIX-Funktion. Das bedeutet, dass Sie sowohl Kabel mit geradeverdrahteten als auch mit gekreuzten Leitungen verwenden können.
9. Reset-TasteUm den Router neu zu starten, drücken Sie die Reset-Taste 1 Sekunde lang. Wenn Sie den Router auf dieStandardeinstellungen zurücksetzen möchten, oder wenn Sie keinen Zugriff auf die Web-Oberfläche mehrhaben (beispielsweise, weil Sie Ihr Kennwort vergessen haben), drücken Sie die Reset-Taste 5 Sekunden lang.
10. NetzteilbuchseVerwenden Sie nur das mit dem Router gelieferten 12 V-Netzteil. Andere Netzteile dürfen nicht verwendetwerden.
11. ADSLÜber den ADSL-Port wird der Router an die ADSL-Wanddose angeschlossen. Verwenden Sie ein RJ11-Kabelfür die Verbindung ADSL-Port zu ADSL-Wanddose.
RESETLAN
ADSL4 3 2 1
12 VDC1A MAX
8 109 117
Jerry2_QIG 17/3/06 10:01 am Page 51
Downloaded from www.Manualslib.com manuals search engine
Aufstellen und Installieren des Routers52
1. AUFSTELLEN UND INSTALLIEREN DES ROUTERS
VORSICHT: Bitte lesen Sie den Abschnitt „WichtigeSicherheitsinformationen” sorgfältig durch, bevor Sie das Gerät inBetrieb nehmen.
WARNING: Please read the ‘Important Safety Information’ section inthe Support and Safety Information sheet before you start.
AVERTISSEMENT: Lisez attentivement le paragraphe “Remarques relatives à la sécurité” avant de mettre votre routeur sous tension.
Beachten Sie beim Aufstellen des Routers folgende Hinweise:
• Der Router sollte zentral zwischen den drahtlosen Computern aufgestelltwerden, die mit ihm verbunden werden sollen. Ein geeigneter Aufstellortwäre auf einem hohen Regal oder einem ähnlichen Möbelstück. Dadurchlässt sich eine optimale drahtlose Verbindung zwischen den Computern inhorizontaler und vertikaler Richtung erreichen, die eine vollständigeAbdeckung ermöglicht.
• Setzen Sie den Router keiner direkten Sonnenstrahlung aus, und stellenSie ihn nicht in die Nähe von Wärmequellen.
• Die Verkabelung darf nicht entlang von Stromleitungen, Leuchtstoff-Lampen und elektrischen Störquellen wie Radiogeräten, Sendern undBreitbandverstärkern verlaufen.
• Zur Einhaltung der FCC-Richtlinien zur Strahlungsemission sollte beimAufstellort des Routers mindestens 20 cm Abstand zu Personen eingehaltenwerden. (Einzelheiten dazu können Sie dem Benutzerhandbuch entnehmen.)
• Es dürfen weder Wasser noch Feuchtigkeit in das Gerätegehäuse gelangen.
• Die Luftzirkulation rund um das Gerät und durch die Belüftungsöffnungenseitlich am Gerät darf nicht behindert werden. Rund um das Gerät mussein Freiraum von mindestens 25 mm eingehalten werden.
Verwenden Sie die vier selbstklebenden Gummifüße, um zu verhindern, dassder Router auf dem Schreibtisch verrutscht oder wenn er auf andere flacheGeräte gestellt wird. Kleben Sie die Füße nur auf die markierten Stellen anden vier Ecken auf der Unterseite des Routers.
Verwendung derGummifüße
Sicherheitsinformationen
Jerry2_QIG 17/3/06 10:01 am Page 52
Downloaded from www.Manualslib.com manuals search engine

53Aufstellen und Installieren des Routers
D
1. Schließen Sie das Netzteil an den Router an, und warten Sie, bis dieWLAN-LED aufleuchtet.
2. Vergewissern Sie sich, dass der Computer eingeschaltet ist.
3. Schließen Sie den Computer an einen der 10/100 LAN-Ports am Routeran. Die LAN Port Status-LED muss daraufhin grün leuchten.
4. Schließen Sie das RJ11-Kabel am ADSL-Port des Routers und an der ADSL-Wanddose an.
Damit der Router von mehr als vier Anwendern genutzt werden kann,benötigen Sie einen zusätzlichen Hub oder Switch. Verbinden Sie einen LAN-Port des Routers mit dem Hub oder Switch (z. B. mit dem OfficeConnectDual Speed Switch 8).
InternetNetzteil
PC
Drahtlose Anwender
Telefondose
Splitter/Mikrofilterblock
3Com OfficeConnect ADSL Wireless 54Mbps 11g Firewall Router
Beispielnetzwerk mit OfficeConnect ADSL Wireless 54 Mbps 11g Firewall Router
Anschließen an einenHub oder Switch
Anschließen des Routers
Jerry2_QIG 17/3/06 10:01 am Page 53
Downloaded from www.Manualslib.com manuals search engine

Installieren eines Splitters und Mikrofilters54
2. INSTALLIEREN EINES SPLITTERS UND MIKROFILTERS
Mit Hilfe eines Splitters und Mikrofilters können Sie den Router und dasTelefon gleichzeitig betreiben. Der Splitter wird an die ADSL-Wanddoseangeschlossen. Er verfügt über zwei Anschlüsse:
• Einen RJ11-Anschluss, an den das RJ11-Kabel zum Router angeschlossenwird
• Einen Telefonbuchsenanschluss, an dem das Telefon angeschlossen werden kann
Zwischen dem Splitter und dem Telefon muss ein Mikrofilter zwischengeschal-tet werden. Der Mikrofilter verhindert, dass das Telefonsprachsignal durch dasDSL-Datensignal gestört wird. Vor jedem Telefon muss ein Mikrofilter in dieLeitung geschaltet werden, um Signalstörungen zu verhindern. Splitter sindauch mit integrierten Mikrofiltern erhältlich. Dadurch vereinfacht sich dieInstallation (siehe Abbildung unten). Splitter und Mikrofilter sind bei Ihrem ISPoder im Computerfachhandel erhältlich.
OfficeConnect® ADSL Wireless 54Mbps 11g Firewall Router
Telefon
Kombinierter Splitter und Mikrofilter
Wanddose
Mikrofilter
Für Telefonnebenstellen
Wanddose
Telefon
Jerry2_QIG 17/3/06 10:01 am Page 54
Downloaded from www.Manualslib.com manuals search engine

55Verbindung zum ISP
D
3. VERBINDUNG ZUM ISP
Bevor Sie den Router konfigurieren können, müssen Sie wissen, welche IP-Zuweisungsmethode Ihr ISP verwendet. Die Internetverbindung wird vomRouter mittels einer der vier unten beschriebenen Methoden hergestellt. Siemüssen dabei immer den VPI (Virtual Path Identifier), VCI (Virtual ChannelIdentifier) und die Encapsulation-Methode (LLC oder VC Mux) kennen. DieStandardeinstellungen des Routers für VPI und VCI sollten für die meisten ISPsgeeignet sein. Ihr ISP liefert Ihnen auf Anfrage die erforderlichenInformationen.
1. PPPoEFür die Konfiguration des Gateways müssen Sie den Benutzernamen unddas Kennwort für den Zugriff auf Ihr ISP-Konto kennen. Falls Sie auf IhremComputer einen PPPoE-Client genutzt haben, können Sie diesen deak-tivieren. Sie brauchen ihn nicht mehr. Wenn Ihnen Ihr ISP eine statische IP-Adresse zur Verfügung stellt, kann diese im Bereich„Interneteinstellungen” der Web-Oberfläche des Routers eingegeben wer-den. Andernfalls weist Ihr ISP Ihrem Router automatisch eine IP-Adresse zu.
2. PPPoAÄhnlich PPPoE, wird jedoch hauptsächlich in England genutzt. Für dieKonfiguration des Gateways müssen Sie den Benutzernamen und dasKennwort für den Zugriff auf Ihr ISP-Konto kennen. Wenn Ihnen Ihr ISP einestatische IP-Adresse zur Verfügung stellt, kann diese im Bereich„Interneteinstellungen” der Web-Oberfläche des Routers eingegeben werden.Andernfalls weist Ihr ISP Ihrem Router automatisch eine IP-Adresse zu.
3. Bridge-Modus für einen einzelnen Computer (RFC 1483 Bridging-Modus)In diesem Modus wird der Router in einen Bridging-Modus geschaltet, umdas LAN- und WAN-Netzwerk miteinander zu verbinden. Der Verkehrzwischen den beiden Netzwerken wird auf die Hardwareadressen beschränkt.Deshalb besteht LAN-seitig die Beschränkung auf einen einzigen Computer.
4. Routing-Modus über ATM (RFC 1483 Bridging-Modus)Im Routing-Modus über ATM stellt der Router über eine feste IP-Adresseeine Verbindung zum Internet her. Ihr ISP weist dem Router eine feste IP-Adresse, die Subnetzmaske und die Gateway-Adresse des ISP zu. DieseDaten müssen im Bereich „Interneteinstellungen” der Web-Oberfläche desRouters eingegeben werden.
Jerry2_QIG 17/3/06 10:01 am Page 55
Downloaded from www.Manualslib.com manuals search engine

Ausführen des Setup-Assistenten56
4. AUSFÜHREN DES SETUP-ASSISTENTEN
1. Falls noch nicht geschehen, müssen Sie den Computer jetzt neu starten.
2. Starten Sie den Webbrowser und versuchen Sie sich mit dem Router zuverbinden. Geben Sie dazu folgende URL in der Adresszeile ein:http://192.168.1.1.
3. Wenn Sie auf die Anmeldeseite zugreifen können, hat der Computer dierichtige IP-Adresse vom Router empfangen.
4. Melden Sie sich mit dem Standardkennwort <admin> an. Der Assistentwird nun automatisch gestartet. Falls dies fehlschlägt, rufen Sie denAssistenten über das Menü auf.
Soweit möglich, empfiehlt der Assistent die geeigneten Einstellungen für diemeisten Parameter. Einige Einstellungen müssen jedoch von Ihnen angegebenwerden. Die meisten dieser Einstellungen erhalten Sie beim Einrichten IhresKontos von Ihrem ISP.
Wenn der Assistent beendet wurde, versuchen Sie, eine Internet-Websiteaufzurufen, beispielsweise www.3com.de. Wenn Sie auf diese Site zugreifenkönnen, sind der Computer und der Router richtig konfiguriert.
Internetverbindung
Jerry2_QIG 17/3/06 10:01 am Page 56
Downloaded from www.Manualslib.com manuals search engine

57Verbindung zum drahtlosen LAN
D
5. VERBINDUNG ZUM DRAHTLOSEN LAN
1. Sie haben den Router jetzt über den drahtgebundenen Computer konfig-uriert und können über einen drahtlosen Computer eine Verbindung zumRouter herstellen.
Der Router und die drahtlosen Clients müssen über die gleiche SSID unddie gleichen Verschlüsselungs-Einstellungen verfügen. Alle drahtlosenClients müssen im Infrastrukturmodus ausgeführt werden.
Standardmäßige Einstellungen für drahtlosen Routerbetrieb:
2. Wenn Sie kein drahtloses LAN haben, können Sie die Standardeinstellungendes Routers verwenden. Achten Sie darauf, dass die drahtlosen Clients diestandardmäßigen Einstellungen für SSID, Kanal und Verschlüsselung (sieheoben) haben.
Wenn Sie über ein drahtloses LAN verfügen, konfigurieren Sie den Routerso, dass er die gleichen SSID- und Verschlüsselungs-Einstellungen verwen-det, damit er zum bestehenden drahtlosen Netzwerk konform ist.
3. Wenn in Ihrem Computer eine drahtgebundene und eine drahtloseNetzwerkkarte installiert sind, müssen Sie sicherstellen, dass dieKommunikation mit dem LAN lediglich über eine dieser Netzwerkkartenerfolgt. Zur Verwendung der drahtlosen Netzwerkkarte stecken Sie dasEthernet-Kabel ab und starten anschließend den Computer neu.
4. Starten Sie den Webbrowser, und versuchen Sie, eine Internet-Websiteaufzurufen, beispielsweise www.3com.de. Wenn Sie auf diese Sitezugreifen können, sind der drahtlose Computer und der Router richtigkonfiguriert.
Zur Erhöhung der Sicherheit Ihres drahtlosen Netzwerks empfiehlt Ihnen3Com dringend, die WPA2- bzw. WPA-Verschlüsselung zu aktivieren und diestandardmäßige SSID zu ändern. Einzelheiten hierzu finden Sie in der Online-Hilfe oder im Benutzerhandbuch.
SSID: 3Com Kanal 11 Verschlüsselung deaktiviert
SSID ______________________________
Kanalnummer ______________________________
Jerry2_QIG 17/3/06 10:01 am Page 57
Downloaded from www.Manualslib.com manuals search engine

Problemlösung58
PROBLEMLÖSUNG
Sollten Sie Probleme mit Ihrer Installation haben, versuchen Sie Folgendes.
• Vergewissern Sie sich, dass alle Netzwerkgeräte eingeschaltet sind.Am Router sollte die grüne Power-LED leuchten. Falls nicht, prüfen Sie, obdas Netzteil richtig angeschlossen ist. Verwenden Sie beim Router nur dasmitgelieferte Netzteil.
• Vergewissern Sie sich, dass der Computer an den Routerangeschlossen ist.Am Router sollte die grüne LAN Status-LED leuchten. Falls nicht, vergewis-sern Sie sich, ob der Computer mit Hilfe eines Ethernet-Kabels an einender LAN-Ports des Routers angeschlossen ist.
• Vergewissern Sie sich, dass auf Ihrem Computer kein Web-Proxyaktiviert ist.Öffnen Sie die Systemsteuerung, und klicken Sie auf Internetoptionen.Klicken Sie auf die Registerkarte Verbindungen und anschließend auf dieSchaltfläche LAN-Einstellungen. Vergewissern Sie sich, dass die OptionProxyserver für LAN verwenden deaktiviert ist.
• Sie können nicht auf die Web-Oberfläche des Routers zugreifen.Starten Sie den Webbrowser und geben Sie http://192.168.1.1 ein. WennSie eine andere IP-Adresse eingestellt haben, verwenden Sie diesestattdessen. Vergessen Sie dabei nicht das Präfix http://
• Vergewissern Sie sich, dass der Computer richtig konfiguriert ist.Vergewissern Sie sich, dass dem Computer vom DHCP-Server des Routersautomatisch eine IP-Adresse zugewiesen wird.
• Wenn Sie bereits einen DSL-Anschluss besitzen und auf Ihrem ComputerPPPoE Client-Software installiert haben, müssen Sie diese deaktivieren.
• Sie müssen unbedingt die richtigen VPI/VCI-Parameter und Encapsulation-Methode (LLC oder VC Mux) einstellen, die zu Ihrem DSL-Anschlusspassen. Diese Parameter können Sie von Ihrem ISP erfragen.
• Prüfen Sie, ob die PPPoE/PPPoA-Einstellungen stimmen (z. B.Benutzername, Kennwort und IP-Adresskonfiguration).
• Sie müssen einen Splitter verwenden, um den Router vom Telefon zuseparieren. Vor dem Telefon kann ein Mikrofilter in die Leitung geschaltetwerden, damit gegenseitige Störungen von Router und Telefon aus-geschlossen werden. Achten Sie darauf, dass der Mikrofilter nicht direktvor dem Router in die Leitung geschaltet wird.
DSL-Internetverbindungen.
Jerry2_QIG 17/3/06 10:01 am Page 58
Downloaded from www.Manualslib.com manuals search engine

59Problemlösung
D
• Vergewissern Sie sich, dass der drahtlose Client in den Infrastrukturmodusgeschaltet wurde.
• Wenn in einem Computer drahtgebundene und drahtlose Netzwerkkarteninstalliert sind, muss die drahtgebundene Netzwerkkarte deaktiviert werden.
• Vergewissern Sie sich, dass die SSIDs vom drahtlosen Client und Routerübereinstimmen.
• Vergewissern Sie sich, dass die WLAN-LED am Router leuchtet. Falls nicht,aktivieren Sie im Menü für die drahtlosen Einstellungen den drahtlosenNetzwerkbetrieb.
• Vergewissern Sie sich, dass die Wireless-Verschlüsselung des drahtlosenClients und dem Router übereinstimmen. Bei Problemen deaktivieren Siedie Verschlüsselung im Client und Router, bis Sie eine drahtloseVerbindung hergestellt haben.
DrahtloseKonfiguration. Sie kön-
nen nicht auf das draht-lose LAN zugreifen.
Jerry2_QIG 17/3/06 10:01 am Page 59
Downloaded from www.Manualslib.com manuals search engine

60
Jerry2_QIG 17/3/06 10:01 am Page 60
Downloaded from www.Manualslib.com manuals search engine

61Introduktion till routern
INTRODUKTION TILL ROUTERN
Denna guide tar dig igenom de grundsteg som krävs för att installera ochkonfigurera din OfficeConnect ADSL Wireless 54 Mbps 11g Firewall Routeroch sätta upp en anslutning från dina datorer till Internet. Genomgående iguiden kallas OfficeConnect ADSL Wireless 54 Mbps 11g Firewall Router heltenkelt “routern”.
Notera: 3Com rekommenderar att du använder en fast Ethernet-anslutningför att göra inledande inställningar.
• En OfficeConnect ADSL Wireless 54 Mbps 11g Firewall Router
• En 12 volts nätadapter för användning med routern
• Fyra gummifötter
• En RJ11-kabel
• En CD-ROM som innehåller bruksanvisningen
• Den här installationsguiden
• Ett blad kring support och säkerhet
• En garantibroschyr
Innan du startar måste du vara säker på följande:
• Att du har ett ADSL bredbandskonto.
• Att du har en dator med en ledig Ethernet-anslutning som är korrekt kon-figurerad för kommunikation med Internet. Din dator måste kunna anslu-ta till Internet via modemet och måste ha en webbrowser installerad.
• Att det inte finns andra DHCP-serverenheter på det lokala nätverket somansvarar för att dela ut IP-adresser till datorer och andra nätverksanslutnaenheter. Routern kommer att hantera detta från start.
• Att du, om du vill ha trådlös anslutning, har en dator med trådlöst802.11b eller 802.11g adapterkort installerat.
Om ett eller flera av dessa krav inte är uppfyllda, går till bruksanvisningen förOfficeConnect ADSL Wireless 54 Mbps 11g Firewall Router som finns på bifogadCD-skiva.
Paketets innehåll
Systemkrav
S
Jerry2_QIG 17/3/06 10:01 am Page 61
Downloaded from www.Manualslib.com manuals search engine

Framsida62
FRAMSIDA
1. Varningslysdiod orangeDenna lysdiod har ett antal funktioner:
• Snabbt blinkande under självtestet vid start. Om den fortsätter att lysa har självtestet misslyckats (sebruksanvisningen).
• Snabbt blinkande under uppdatering av programvara.
• Snabbt blinkande vid återställning till förinställda värden. Om återställningsknappen på baksidananvänts för att återställa enheten till förinställda värden kommer lysdioden blinka långsamt till dessströmmen slås av.
• Blinkande i 2 sekunder då brandväggen detekterar en hacker-attack.
2. Strömlysdiod grönOm lysdioden är tänd har routern strömanslutning.
3. Synklysdiod grönOm lysdioden lyser visar den att DSL-anslutningen fungerar. Lysdioden blinkar vid konfigurering då ström-men slås på.
4. Onlinelysdiod grönOm lysdioden lyser visar den att ditt användarnamn/lösenord har godkänts korrekt hos dinInternetoperatör.
5. Statuslysdiod för trådlöst LAN (WLAN) grönOm lysdioden lyser visar den att trådlöst nätverk är inkopplat. Om lysdioden blinkar är länken ok och dataskickas eller tas emot. Om lysdioden är släckt har det trådlösa LAN kopplats ur i routern eller ett problemuppstått (gå till bruksanvisningen).
6. Lysdiod för LAN-status grönOm lysdioden lyser är länken mellan porten och nästa nätverksenhet korrekt. Om lysdioden blinkar ärlänken korrekt och data skickas eller tas emot. Om lysdioden är släckt är inget anslutet, den anslutnaenheten är frånslagen eller det är ett problem med anslutningen (se bruksanvisning). Porten anpassar sigautomatiskt till rätt hastighet och duplex.
OfficeConnect ADSL Wireless 54 Mbps 11g Firewall Router
3CRWDR101A-75 LAN StatusAlert Power SYNC Online WLAN 1 2 3 4
Green = Link, Flash = Activity
1 65
2 4
3
Jerry2_QIG 17/3/06 10:01 am Page 62
Downloaded from www.Manualslib.com manuals search engine

63Baksida
S
BAKSIDA
7. Trådlös antennFör bästa trådlösa täckning, ställ antennen i “V”-position.
8. Ethernet-portarMed lämplig RJ-45-kabel kan du ansluta din router till en dator eller till vilken annan typ av utrustningsom helst som har en Ethernet-anslutning (till exempel en hubb eller en switch). Portarna har automatiskMDI/MDIX-funktion vilket gör att du kan använda antingen en ‘straight-through’- eller en ‘crossover-kabel’.
9. ÅterställningsknappFör att starta om routern håll in knappen i 1 sekund. Om du vill återställa routern till förinställda värdeneller om du inte kan nå webbgränssnittet för övervakning (till exempel beroende på ett borttappatlösenord), håll in knappen i 5 sekunder.
10. Anslutning för nätadapter Använd endast den 12 volts nätadapter som levereras med routern. Använd inte någon annan adapter.
11. ADSLADSL-porten används för att ansluta routern till ADSL-anslutningen i väggen. Använd en RJ11-kabel föratt ansluta mellan ADSL-porten och vägganslutningen.
RESETLAN
ADSL4 3 2 1
12 VDC1A MAX
8 109 117
Jerry2_QIG 17/3/06 10:01 am Page 63
Downloaded from www.Manualslib.com manuals search engine

Att placera och installera routern64
1. ATT PLACERA OCH INSTALLERA ROUTERN
VARNING: Läs avsnittet “Viktig säkerhetsinformation” i support- ochsäkerhetsinformationen innan du startar.
WARNING: Please read the ‘Important Safety Information’ section inthe Support and Safety Information sheet before you start.
VORSICHT: Bitte lesen Sie den Abschnitt „WichtigeSicherheitsinformationen” sorgfältig durch, bevor Sie das Gerät inBetrieb nehmen.
AVERTISSEMENT: Lisez attentivement le paragraphe “Remarques relatives à la sécurité” avant de mettre votre routeur sous tension.
När du placerar routern, var säker på att:
• Enheten är centralt placerad i förhållande till de trådlösa datorer somkommer att ansluta till routern. En lämplig plats kan vara ovanpå en höghylla eller liknande möbel för att optimera trådlös anslutning till datorer ibåde horisontell och vertikal riktning, för att ge total täckning.
• Den inte står i direkt solljus och inte vid värmekällor.
• Kablar inte ligger nära nätsladdar, lysrörsarmaturer eller elektriska störn-ingskällor som radioapparater, sändare eller bredbandsförstärkare.
• Routern placeras på en plats med minst 20 cm avstånd till all personal föratt möta regler för strålningsexponering från FCC (se bruksanvisningen fördetaljer).
• Vatten eller fukt inte kan komma in i lådan.
• Luftcirkulationen runt enheten och genom ventilationshålen på sidan inteär tilltäppt. Vi rekommenderar minst 25 mm fritt utrymme.
Använd de självhäftande gummifötterna för att hindra att routern rör sig påskrivbordet eller då den ställs på andra enheter med plan översida. Sättgummifötterna på markerade platser i varje hörn på routern.
Användning av gummifötterna
Säkerhetsinformation
Jerry2_QIG 17/3/06 10:01 am Page 64
Downloaded from www.Manualslib.com manuals search engine

65Att placera och installera routern
S
1. Anslut nätadaptern till routern och vänta till dess lysdioden för WLANlyser.
2. Kontrollera att datorn är påslagen.
3. Anslut datorn till en av 10/100 LAN-portarna på routern. Lysdiod för LAN-status ska då lysa grönt.
4. Anslut RJ11-kabeln från ADSL-porten på routern till ADSL-anslutningen iväggen.
För att dela router med fler än fyra användare behövs en hubb eller switch.Anslut en LAN-port på routern till hubben eller switchen (till exempelOfficeConnect Dual Speed Switch 8).
InternetNätaggregat
Din PC
Trådlösa användare
Telefonanslutning
Splitter/Mikrofilter
3Com OfficeConnect ADSL Wireless 54Mbps 11g Firewall Router
Exempel på nätverk med OfficeConnect ADSL Wireless 54 Mbps 11g Firewall Router
Anslutning till hubbeller switch
Anslutning av routern
Jerry2_QIG 17/3/06 10:01 am Page 65
Downloaded from www.Manualslib.com manuals search engine

Att installera splitter och mikrofilter 66
2. ATT INSTALLERA SPLITTER OCH MIKROFILTER
En splitter och ett mikrofilter låter dig använda din router och telefonlinjensamtidigt. Splittern ansluts till ADSL-anslutningen i väggen och ger då tvåanslutningar:
• En RJ11-anslutning som kopplas till routern med RJ11-kabeln.
• En anslutning för telefonjack som kan anslutas till din telefon.
Det måste också finnas ett mikrofilter mellan splittern och telefonen.Mikrofiltret säkerställer att DSL-datasignal inte stör röstsignalen för telefonen.Ett mikrofilter måste installeras in-line med varje telefon för att förhindra sig-nalstörningar. Splitters finns nu med inbyggda mikrofilter vilket förenklarinstallationen som visas i figuren nedan. Splitters och mikrofilter kan köpasfrån din Internetoperatör eller i en datorbutik.
OfficeConnect® ADSL Wireless 54Mbps 11g Firewall Router
Telefon
Kombinerad splitter och mikrofilter
Vägguttag
Mikrofilter
För ytterligare telefonanslutningar
Vägguttag
Telefon
Jerry2_QIG 17/3/06 10:01 am Page 66
Downloaded from www.Manualslib.com manuals search engine

67Anslutning till din Internetoperatör
S
3. ANSLUTNING TILL DIN INTERNETOPERATÖR
Innan du kan konfigurera din router måste du veta vilken metod somanvänds av din Internetoperatör för att tilldela IP-adresser. Det finns fyra olikasätt för en Internetoperatör att allokera IP-information som beskrivs nedan.
För alla metoder måste du veta VPI (Virtual Path Identifier), VCI (VirtualChannel Identifier) och Encapsulation (LLC eller VC Mux). De förinställda vär-dena för VPI och VCI ska fungera för de flesta Internetoperatörerna. DinInternetoperatör kan också ge dig den information du behöver.
1. PPPoEFör att konfigurera gateway måste du veta användarnamn och lösenordför att logga in på ditt konto hos Internetoperatören. Om du har använten PPPoe-klient på din dator kan du inaktivera den eftersom den intebehövs längre. Om din Internetoperatör ger en statisk IP-adress anger duden adressen i Internetinställningar i routerns webbgränssnitt. I annat fallkommer din Internetoperatör att ge din router en IP-adress automatiskt.
2. PPPoADetta liknar PPPoE men används i första hand i Storbritannien. För attkonfigurera gateway måste du veta användarnamn och lösenord för attlogga in på ditt konto hos Internetoperatören. Om din Internetoperatörger en statisk IP-adress anger du den adressen i Internetinställningar irouterns webbgränssnitt. I annat fall kommer din Internetoperatör att gedin router en IP-adress automatiskt.
3. Brygginställning för en dator (RFC 1483 Bridging Mode)Med den här inställningen sätts routern i en bryggningsinställning för attansluta till LAN och WAN. Trafiken begränsas mellan de två nätverkenbaserat på hårdvaruadresser och begränsar LAN-sidan till en enda dator.
4. Routing-inställning över ATM (RFC 1483 Bridging Mode)Routing-inställning över ATM innebär att routern har en fast IP-adress föranslutning till Internet. Din Internetoperatör ger routern fast IP-adress,subnet mask och Internetoperatörens gateway-adress. Denna informationmåste anges i Internetinställningar i routerns webbgränssnitt.
Jerry2_QIG 17/3/06 10:01 am Page 67
Downloaded from www.Manualslib.com manuals search engine

Att köra Setup Wizard68
4. ATT KÖRA SETUP WIZARD
1. Starta om din dator om du inte redan gjort det.
2. Öppna din webbrowser och försök att kontakta routern genom att skrivaföljande URL i adressfältet: http://192.168.1.1.
3. Om du når inloggningssidan har din dator fått en korrekt IP-adress frånroutern.
4. Logga in genom att använda det förbestämda lösenordet <admin>.Wizard kommer att försöka starta automatiskt, men om det inte lyckasväljer du Wizard i menyn.
Där det är möjligt kommer Wizard att rekommendera inställningar för de fles-ta parametrar. Men, det finns några inställningar du måste ange själv. De fles-ta av dessa har du fått från din Internetoperatör när kontot öppnades.
När Wizard är klar kan du prova att surfa till en webbplats på Internet, tillexempel www.3com.se. Om du kan nå webbplatsen är din dator och routerkorrekt konfigurerade.
Anslutning till Internet
Jerry2_QIG 17/3/06 10:01 am Page 68
Downloaded from www.Manualslib.com manuals search engine

69Anslutning till trådlöst LAN
S
5. ANSLUTNING TILL TRÅDLÖST LAN
1. När du nu har konfigurerat routern via en fast ansluten dator kan duansluta routern till en trådlös dator.
Routern och trådlösa klienter måste ha samma SSID och krypteringsinställ-ningar. Alla trådlösa klienter måste använda Infrastruktur-inställning.
De förinställda värdena för routern är:
2. Om du inte har ett trådlöst LAN kan du använda routerns förinställda vär-den. Var säker på att dina trådlösa klienter har de förinställda värdena påSSID, kanal och kryptering som anges ovan.
Om du redan har ett trådlöst LAN, konfigurera routern till att användasamma SSID och krypteringsinställningar för att bli kompatibel med dittbefintliga trådlösa nätverk.
3. Om din dator har nätverkskort för både fast och trådlös anslutninginstallerade måste du vara säker på att bara ett av nätverkskorten användsför kommunikationen med det lokala nätverket. För att använda dettrådlösa nätverkskortet, ta ur Ethernet-kabeln och starta om datorn.
4. Starta din webbrowser och försök att nå en webbplats på Internet, tillexempel www.3com.se. Om du kan nå webbplatsen är din trådlösadator och router korrekt konfigurerade.
3Com rekommenderar starkt att du aktiverar WPA2- eller WPA-kryptering föratt öka säkerheten i ditt trådlösa nätverk och att du ändrar SSID till någotannat än det förinställda värdet. Se on-line-hjälpen eller bruksanvisningen förmer information om detta.
SSID är 3Com Kanal 11 Kryptering är av
SSID ______________________________
Kanal nummer ______________________________
Jerry2_QIG 17/3/06 10:01 am Page 69
Downloaded from www.Manualslib.com manuals search engine

Problemlösning70
PROBLEMLÖSNING
Om du har problem med din installation, prova något av följande.
• Kontrollera att all nätverksutrustning är påslagen.Routern ska visa en grön lysdiod för strömförsörjningen. Om den inte gördet, kontrollera anslutningen för nätadaptern. Använd inte någon annannätadapter till din router än den som levereras med.
• Kontrollera att datorn är ansluten till routern.Routern ska visa en grön statuslysdiod för LAN. Om inte status-lysdiodenlyser, kontrollera att datorn är ansluten till en av routerns LAN-portar meden Ethernet-kabel.
• Kontrollera att du inte har en web proxy aktiverad på din dator. Gå till Kontrollpanelen och klicka på Internet-alternativ. Välj flikenAnslutningar och klicka på knappen LAN-inställningar nedtill. Var säker påatt alternativet Använd en proxyserver inte är valt.
• Om du inte kan nå routerns webbgränssnitt. Starta en webbrowser och ange http://192.168.1.1. Om du valt en annanIP-adress, ange den istället. Var säker på att du slår in prefixet http://
• Kontrollera att din dator är rätt konfigurerad. Var säker på att datorn får en IP-adress automatiskt från routerns DHCP-server.
• Om du har en befintlig DSL-linje och har PPPoE klientprogramvarainstallerad på din dator måste den inaktiveras.
• Det är viktigt att du anger VPI/VCI-parametrar och Encapsulation-metod(LLC eller VC Mux) som stämmer med din DSL-linje. Dessa parameterar fårdu från din Internetoperatör.
• Kontrollera att PPPoE/PPPoA-inställningar är korrekta (exempelvis använ-darnamn, lösenord och konfigurering av IP-adress).
• Du måste använda en splitter för att separera routern från telefonen. Ettmikrofilter kan användas in-line med telefonen för att säkerställa att interoutern och telefonen stör varandra. Var säker på att inte mikrofiltret inteinstalleras in-line direkt mot routern.
Anslutningar till DSL-Internet.
Jerry2_QIG 17/3/06 10:01 am Page 70
Downloaded from www.Manualslib.com manuals search engine

71Problemlösning
S
• Kontrollera att den trådlösa klienten är inställd på infrastruktur-läge.
• Om du har ett fast och trådlöst nätverkskort i samma dator, se till att dettrådlösa nätverkskortet inte är aktiverat.
• Kontrollera att SSID är samma för den trådlösa klienten som för routern.
• Kontrollera att routerns WLAN-lysdiod lyser. Om inte, gå till menyn förtrådlösa inställningar och aktivera trådlöst nätverk.
• Kontrollera att trådlös kryptering är samma för den trådlösa klienten somför routern. Om du har problem, slå av krypteringen i klient och router tilldess du har etablerat en trådlös anslutning.
Trådlös anslutning. Omdu inte kan nå dettrådlösa nätverket:
Jerry2_QIG 17/3/06 10:01 am Page 71
Downloaded from www.Manualslib.com manuals search engine

72
Jerry2_QIG 17/3/06 10:01 am Page 72
Downloaded from www.Manualslib.com manuals search engine

73Apresentação do roteador
APRESENTAÇÃO DO ROTEADOR
Este Guia irá conduzi-lo nas etapas básicas necessárias para instalar e config-urar o Roteador Firewall OfficeConnect ADSL Wireless 54 Mbps 11g e criaruma conexão entre os seus computadores e a Internet. Neste Guia, oRoteador Firewall OfficeConnect ADSL Wireless 54 Mbps 11g será chamadosimplesmente de roteador.
Nota: A 3Com recomenda que você utilize uma conexão wired (Ethernet)para realizar a configuração inicial.
• Um Roteador Firewall OfficeConnect ADSL Wireless 54 Mbps 11g
• Um adaptador de alimentação de 12V para ser utilizado com o roteador
• Quatro pés de borracha
• Um cabo RJ11
• Um CD-ROM com o Guia do Usuário
• Este Guia de Instalação
• Um folheto com informações sobre suporte e segurança
• Um folheto com informações sobre garantia
Antes de iniciar, certifique-se de que:
• Você já possui uma conta ADSL de banda larga.
• Você tem um computador com uma conexão Ethernet disponível, já con-figurado corretamente para comunicação com a Internet. É necessário queo seu computador possa conectar-se à Internet através do modem e nelehaja instalado um navegador de Internet.
• Na rede local não há outros dispositivos de servidor DHCP que sejamresponsáveis pela alocação de endereços de IP aos computadores e a out-ros dispositivos conectados à rede. Por padrão, o roteador desempenharáessa função.
• Se precisar de conexão wireless, você possui um computador que tenhainstalada uma placa adaptadora 802.11b ou 802.11g.
Caso não esteja sendo cumprida uma ou mais dessas condições, obtenhaorientação adicional no Guia do Usuário do Roteador Firewall OfficeConnectADSL Wireless 54 Mbps 11g, o qual é fornecido no CD-ROM que acompan-ha o produto.
Conteúdo do pacote
Requisitos do sistema
P
Jerry2_QIG 17/3/06 10:01 am Page 73
Downloaded from www.Manualslib.com manuals search engine

Painel dianteiro74
PAINEL DIANTEIRO
1. LED de alerta âmbarEsse LED tem várias funções:
• Ele pisca rapidamente durante o autoteste de ligação (“power up”). Se permanecer aceso depoisdisso é porque o autoteste não funcionou (consulte o Guia do Usuário).
• Pisca rapidamente durante a atualização de software.
• Pisca rapidamente durante a restauração dos padrões de fábrica. Se o botão Reset no painel traseirofoi utilizado para reinicializar a unidade nos padrões de fábrica, o LED de alerta irá piscar lentamenteaté que seja desligada a alimentação de energia.
• Pisca, permanecendo aceso durante dois segundos, quando o firewall detecta o ataque de um hacker.
2. LED de energia verdeO LED ligado indica que o roteador está ligado.
3. LED SYNC verdeO LED ligado indica que a conexão DSL está ativa. Esse LED pisca durante a configuração no momentoem que o roteador é ligado.
4. LED Online verdeO LED ligado indica que o seu nome de usuário/senha foi autenticado com sucesso pelo seu ISP.
5. LED do status da LAN wireless (WLAN) verdeO LED ligado indica que a rede wireless está ativada. Quando o LED pisca, a ligação está funcionandobem e está havendo transmissão ou recebimento de dados. Quando o LED está desligado, é porque aLAN wireless foi desativada no roteador ou está havendo algum problema (consulte o Guia do Usuário).
6. LED do status da LAN verdeQuando o LED está ligado, a ligação entre a porta e o próximo componente do equipamento de redeestá funcionando bem. Quando o LED pisca, a ligação está funcionando bem e está havendo transmissãoou recebimento de dados. Quando o LED está desligado, não está havendo nenhuma conexão, ou o dis-positivo conectado está desligado, ou está havendo algum problema na conexão (consulte o Guia doUsuário). A porta irá ajustar-se automaticamente à velocidade e ao duplex corretos.
OfficeConnect ADSL Wireless 54 Mbps 11g Firewall Router
3CRWDR101A-75 LAN StatusAlert Power SYNC Online WLAN 1 2 3 4
Green = Link, Flash = Activity
1 65
2 4
3
Jerry2_QIG 17/3/06 10:01 am Page 74
Downloaded from www.Manualslib.com manuals search engine

75Painel traseiro
P
PAINEL TRASEIRO
7. Antenas wirelessPara obter a melhor cobertura wireless, posicione as antenas de modo a formarem um ‘V’.
8. Portas EthernetCom a utilização dos cabos RJ45 corretos, você poderá conectar o roteador a um computador ou a qual-quer outro componente de equipamento que tenha uma conexão Ethernet (por exemplo, um hub ou umswitch). Essas portas possuem um recurso MDI/MDIX automático – isso significa que você poderá utilizarum cabo de conexão direta ou cruzada.
9. Botão ResetPara reiniciar o roteador, pressione o botão Reset durante um segundo. Se quiser restaurar o roteadorpara os padrões de fábrica ou se não estiver conseguindo acessar a interface de gerenciamento daInternet (por ter esquecido a senha, por exemplo), pressione o botão Reset durante cinco segundos.
10. Tomada do adaptador de alimentaçãoUtilize apenas o adaptador de alimentação que é fornecido com o roteador. Não utilize nenhum outroadaptador.
11. ADSLA porta ADSL é utilizada para conectar o roteador à conexão ADSL na tomada de parede. Utilize um caboRJ11 para fazer a conexão entre a porta ADSL e a conexão ADSL na parede.
RESETLAN
ADSL4 3 2 1
12 VDC1A MAX
8 109 117
Jerry2_QIG 17/3/06 10:01 am Page 75
Downloaded from www.Manualslib.com manuals search engine

Posicionamento e instalação do roteador76
1. POSICIONAMENTO E INSTALAÇÃO DO ROTEADOR
AVISO: Antes de iniciar, leia a seção “Informações Importantes sobreSegurança” no folheto com Informações sobre Suporte e Segurança.
WARNING: Please read the ‘Important Safety Information’ section inthe Support and Safety Information sheet before you start.
VORSICHT: Bitte lesen Sie den Abschnitt „WichtigeSicherheitsinformationen” sorgfältig durch, bevor Sie das Gerät inBetrieb nehmen.
AVERTISSEMENT: Lisez attentivement le paragraphe “Remarques relatives à la sécurité” avant de mettre votre routeur sous tension.
Ao definir a localização do roteador, certifique-se de que:
• O roteador está localizado num ponto central em relação aos computadoreswireless que ficarão conectados a ele. Seria adequado posicioná-lo sobreuma estante alta ou sobre um móvel semelhante, a fim de otimizar asconexões wireless entre o roteador e computadores que estejam nas direçõeshorizontal e vertical, permitindo que haja cobertura em toda a área.
• Ele não deve ficar diretamente sob a luz solar, nem próximo a fontes decalor.
• Os cabos devem ficar longe da rede elétrica, dos aparelhos de luz fluores-cente e de fontes de ruído produzido eletronicamente, tais como rádios,transmissores e amplificadores de banda larga.
• A fim de cumprir as normas da FCC (Comissão Federal de Comunicações– EUA) sobre exposição à radiação, o roteador deve ficar localizado numaposição na qual se mantenha uma distância mínima de 20 cm (8 pole-gadas) em relação a qualquer pessoa (mais detalhes no Guia do Usuário).
• Não permitir a entrada de água ou de umidade no gabinete da unidade.
• Não existam restrições ao fluxo de ar em torno da unidade e através dasaberturas laterais do gabinete. A 3Com recomenda que se permita umespaço livre mínimo de 25 mm (1 polegada).
Utilize os quatro pés de borracha auto-adesivos para impedir que o roteadorfique se mexendo quando estiver sobre a mesa ou colocado sobre outrasunidades com face superior plana. Basta fixar os pés nas áreas indicadas emcada um dos cantos da face inferior do roteador.
Como utilizar os pés de borracha
Informações sobre segurança
Jerry2_QIG 17/3/06 10:01 am Page 76
Downloaded from www.Manualslib.com manuals search engine

77Posicionamento e instalação do roteador
P
1. Conecte o adaptador de alimentação ao roteador e aguarde até que oLED de WLAN acenda.
2. Verifique se o computador está ligado.
3. Conecte o computador a uma das portas LAN 10/100 do roteador. O LEDdo status da porta LAN deverá ficar verde.
4. Faça a conexão do cabo RJ11 entre a porta ADSL do roteador e a tomadaADSL na parede.
Para compartilhar o roteador com mais de quatro usuários, será necessárioacrescentar um hub ou um switch. Conecte uma das portas LAN do roteadorao hub ou ao switch (por exemplo, o OfficeConnect Dual Speed Switch 8).
InternetFonte de alimentação
PC
Usuários wireless
Tomada do telefone
Bloqueio com divisor/microfiltro
Roteador Firewall OfficeConnect ADSL Wireless 54Mbps 11g
Exemplo de rede com o Roteador Firewall OfficeConnect ADSL Wireless 54 Mbps 11g
Conexão a um hub ou aum switch
Conexão do roteador
Jerry2_QIG 17/3/06 10:01 am Page 77
Downloaded from www.Manualslib.com manuals search engine

Instalação de divisor e microfiltro78
2. INSTALAÇÃO DE DIVISOR E MICROFILTRO
Divisores e microfiltros permitem utilizar o roteador e o telefone ao mesmotempo. O divisor se conecta à conexão ADSL na parede e fornece doisconectores:
• Um conector RJ11, que se conecta ao roteador pelo cabo RJ11
• Um conector de tomada de telefone, que poderá ser conectado ao telefone
Será necessário haver também um microfiltro entre o divisor e o telefone. Omicrofiltro garantirá que o sinal de dados DSL não irá interferir no sinal devoz do telefone. Será necessário instalar um microfiltro em linha com cadaum dos telefones, a fim de impedir a interferência no sinal. Agora os divisoressão fornecidos com microfiltros embutidos, o que simplifica a configuração,conforme se vê no diagrama abaixo. Divisores e microfiltros poderão seradquiridos junto ao seu ISP ou numa loja de informática.
Roteador Firewall OfficeConnect® Wireless ADSL 54Mbps 11g
Telefone
Divisor e microfiltro combinadosTomada
de parede
Microfiltro
Para extensões telefônicas
Tomada de parede
Telefone
Jerry2_QIG 17/3/06 10:01 am Page 78
Downloaded from www.Manualslib.com manuals search engine

79Conexão com o seu ISP
P
3. CONEXÃO COM O SEU ISP
Antes de configurar o roteador, é necessário conhecer o método de alocaçãode IP utilizado pelo seu ISP. Existem quatro métodos diferentes que podem serutilizados pelo roteador para se conectar à Internet, conforme a descrição aseguir. Para todos eles você precisará conhecer o VPI (Virtual Path Identifier –identificador do caminho virtual), o VCI (Virtual Channel Identifier – identifi-cador do canal virtual) e o encapsulamento (LLC ou VC Mux). Os padrões doroteador para o VPI e o VCI deverão aplicar-se à maioria dos ISP. O seu ISPpoderá fornecer-lhe as informações necessárias.
1. PPPoEPara configurar o gateway, você precisará conhecer o nome de usuário e asenha para fazer o login com a sua conta no ISP. Se estiver utilizando umcliente PPPoE no computador, você poderá desativá-lo, pois ele deixou deser necessário. Se o ISP lhe houver fornecido um endereço de IP estático,insira esse endereço de IP na seção de Configurações de Internet na inter-face de web do roteador. Caso contrário, o ISP indicará automaticamenteum endereço de IP ao roteador.
2. PPPoAÉ semelhante ao PPPoE, porém mais utilizado no Reino Unido. Para con-figurar o gateway, você precisará conhecer o nome de usuário e a senhapara fazer o login com a sua conta no ISP. Se o ISP lhe houver fornecidoum endereço de IP estático, insira esse endereço de IP na seção deConfigurações de Internet na interface de Internet do roteador. Caso con-trário, o ISP indicará automaticamente um endereço de IP ao roteador.
3. Modo bridge para um único computador (RFC 1483 Modo Bridge)Nesse modo, o roteador é configurado para modo bridge (ponte) parafazer a conexão entre as redes LAN e WLAN. O tráfego será limitado entreas duas redes com base nos endereços de hardware e assim limitará olado LAN a um único computador.
4. Modo de roteamento por ATM (RFC 1483 Modo Bridge)O modo de roteamento ATM significa que o roteador possui um endereçoIP fixo para conectar-se à Internet. O seu ISP fornecerá ao roteador umendereço IP fixo, a máscara de sub-rede e o endereço do gateway do ISP.Você precisará inserir essas informações na seção de Configurações deInternet na interface de Internet do roteador.
Jerry2_QIG 17/3/06 10:01 am Page 79
Downloaded from www.Manualslib.com manuals search engine

Execução do Assistente de configuração80
4. EXECUÇÃO DO ASSISTENTE DE CONFIGURAÇÃO
1. Caso ainda não o tenha feito, reinicie o computador.
2. Abra o navegador de Internet e tente conectar-se com o roteador digitan-do a seguinte URL na barra de endereços ou na barra de localização:http://192.168.1.1.
3. Se você consegue acessar a página de login, é porque o computador rece-beu corretamente um endereço de IP a partir do roteador.
4. Execute o login utilizando a senha padrão <admin>. O Assistente tentaráabrir automaticamente. Se ele não conseguir abrir, selecione Assistente nomenu.
Sempre que for possível, o Assistente irá recomendar configurações para amaioria dos parâmetros. Porém, será necessário que você forneça algumasconfigurações. A maioria delas já foi fornecida pelo seu ISP quando você con-figurou a conta.
Quando o Assistente houver terminado, tente navegar até um site daInternet, como por exemplo www.3com.com.br. Se você conseguiu acessaresse site, é porque o computador e o roteador foram configurados corretamente.
Conexão à Internet
Jerry2_QIG 17/3/06 10:01 am Page 80
Downloaded from www.Manualslib.com manuals search engine
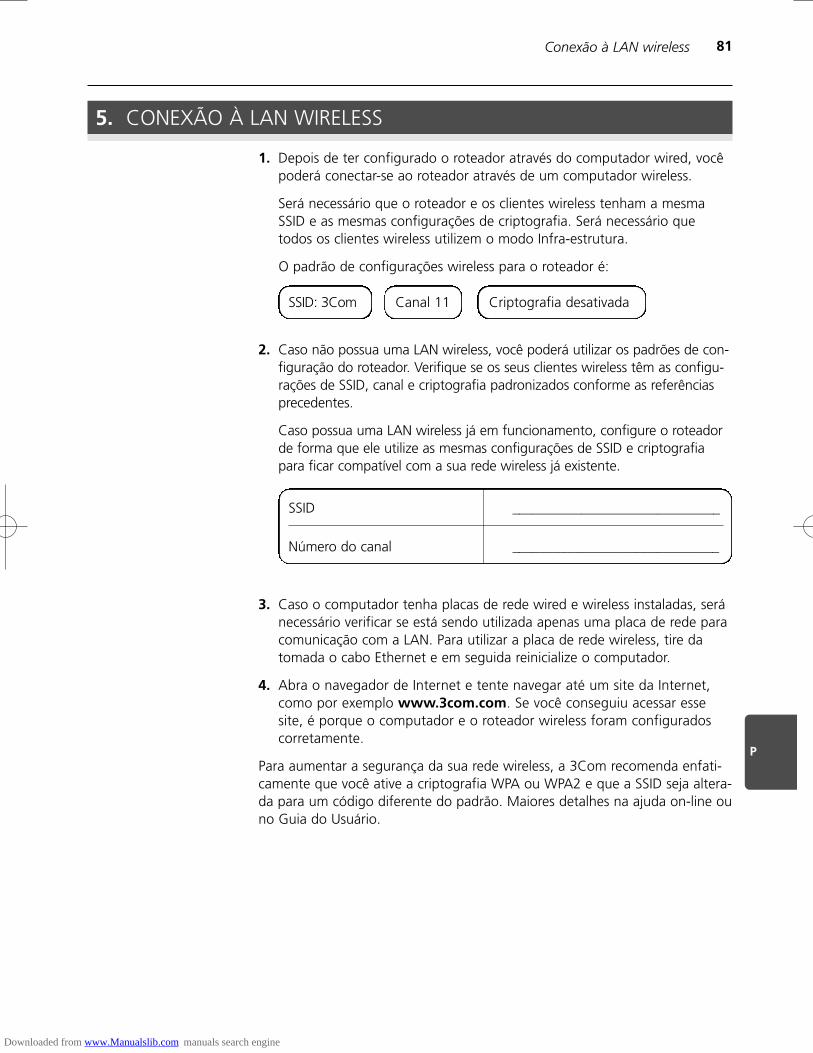
81Conexão à LAN wireless
P
5. CONEXÃO À LAN WIRELESS
1. Depois de ter configurado o roteador através do computador wired, vocêpoderá conectar-se ao roteador através de um computador wireless.
Será necessário que o roteador e os clientes wireless tenham a mesmaSSID e as mesmas configurações de criptografia. Será necessário quetodos os clientes wireless utilizem o modo Infra-estrutura.
O padrão de configurações wireless para o roteador é:
2. Caso não possua uma LAN wireless, você poderá utilizar os padrões de con-figuração do roteador. Verifique se os seus clientes wireless têm as configu-rações de SSID, canal e criptografia padronizados conforme as referênciasprecedentes.
Caso possua uma LAN wireless já em funcionamento, configure o roteadorde forma que ele utilize as mesmas configurações de SSID e criptografiapara ficar compatível com a sua rede wireless já existente.
3. Caso o computador tenha placas de rede wired e wireless instaladas, seránecessário verificar se está sendo utilizada apenas uma placa de rede paracomunicação com a LAN. Para utilizar a placa de rede wireless, tire datomada o cabo Ethernet e em seguida reinicialize o computador.
4. Abra o navegador de Internet e tente navegar até um site da Internet,como por exemplo www.3com.com. Se você conseguiu acessar essesite, é porque o computador e o roteador wireless foram configuradoscorretamente.
Para aumentar a segurança da sua rede wireless, a 3Com recomenda enfati-camente que você ative a criptografia WPA ou WPA2 e que a SSID seja altera-da para um código diferente do padrão. Maiores detalhes na ajuda on-line ouno Guia do Usuário.
SSID: 3Com Canal 11 Criptografia desativada
SSID ______________________________
Número do canal ______________________________
Jerry2_QIG 17/3/06 10:01 am Page 81
Downloaded from www.Manualslib.com manuals search engine

Resolução de problemas82
RESOLUÇÃO DE PROBLEMAS
Se tiver dificuldades na instalação, tente adotar os seguintes procedimentos.
• Certifique-se de que todos os equipamentos de rede estejam ligados.A luz verde do LED de energia do roteador deverá estar acesa. Caso nega-tivo, verifique a conexão do adaptador de alimentação. Não utilize noroteador nenhum outro adaptador de alimentação, e sim apenas o que foifornecido juntamente com o produto.
• Verifique se o computador está conectado ao roteador.A luz verde do LED de status da LAN do roteador deverá estar acesa. Casonegativo, verifique se o computador está conectado a uma das portasLAN do roteador através de um cabo Ethernet.
• Verifique se no computador não há um proxy de Internet habilitado.Abra o Painel de controle e clique em Opções da Internet. Selecione aguia Conexões e em seguida clique no botão Configurações da LAN, naparte inferior. Certifique-se de que a opção Usar um servidor proxy para arede local esteja desativada.
• Caso não consiga acessar a interface do roteador na Internet:Abra o navegador de Internet e digite http://192.168.1.1. Caso tenhapreferido um outro endereço de IP, utilize-o. Não deixe de incluir o prefixohttp://.
• Verifique se o computador está configurado corretamente.Certifique-se de que o computador obtém automaticamente um endereçode IP do servidor DHCP do roteador.
• Se houver uma linha DSL já existente e um software cliente PPPoE instala-do no computador, será necessário desativá-lo.
• É importante definir os parâmetros corretos de VPI/VCI e o método deencapsulamento (LLC ou VC Mux) para que correspondam à linha DSL.Esses parâmetros poderão ser obtidos junto ao ISP.
• Verifique se as definições de PPPoE/PPPoA estão corretas (por exemplo,nome de usuário, senha e configuração do endereço de IP).
• Será necessário utilizar um divisor para fazer a separação entre o roteadore o telefone. Depois poderá ser utilizado um microfiltro em linha com otelefone para garantir que o roteador e o telefone não irão provocar inter-ferência mútua. Certifique-se de que não há um microfiltro montado dire-tamente em linha com o roteador.
Conexões de Internet DSL.
Jerry2_QIG 17/3/06 10:01 am Page 82
Downloaded from www.Manualslib.com manuals search engine

83Resolução de problemas
P
• Verifique se o cliente wireless está configurado no modo Infra-estrutura.
• Caso tenha placas de rede wired e wireless no mesmo computador, certi-fique-se de que a placa de rede wired esteja desativada.
• Verifique se a SSID é a mesma para o cliente wireless e o roteador.
• Verifique se o LED da WLAN do roteador está aceso. Caso negativo, abrao menu Configurações wireless e ative a Rede wireless.
• Verifique se a criptografia wireless é a mesma para o cliente wireless e oroteador. Caso haja problemas, desligue a criptografia no cliente e noroteador até que tenha sido criada uma conexão wireless.
Configuração wireless.Caso não esteja
conseguindo acessar aLAN wireless:
Jerry2_QIG 17/3/06 10:01 am Page 83
Downloaded from www.Manualslib.com manuals search engine

84
Jerry2_QIG 17/3/06 10:01 am Page 84
Downloaded from www.Manualslib.com manuals search engine

Jerry2_QIG 17/3/06 10:01 am Page 85
Downloaded from www.Manualslib.com manuals search engine

3Com Corporation. 350 Campus Drive, Marlborough, MA. USA 01752-3064
Copyright © 2006 3Com Corporation. All rights reserved. 3Com, the 3Com logo, andOfficeConnect are registered trademarks of 3Com Corporation. Microsoft, MS-DOS andWindows are registered trademarks of Micorsoft Corporation.
All other company and product names may be trademarks of their respective companies.
Jerry2_QIG 17/3/06 10:01 am Page 86
Downloaded from www.Manualslib.com manuals search engine