Embed Size (px)
Citation preview
i1 iSis Optical Brightener Compensation (OBC) Module
User Guide

i1iSis Optical Brightener Compensation (OBC) Module - User Guide
2
Contents
1. Introduction 3
User Guide Overview 3 X-Rite Overview 3 OBC Module Overview 4 OBC Workflow Technical Notes 4
2. System Requirements 6
Windows 6 Macintosh 6 Additional Requirements 6
3. The Optical Brightener Compensation Module 6
Software Interface 6 Where to Find Profile Target Files 7 Optical Brightener Compensation Standards 7
4. Printing Test Charts 7
Printing an RGB Test Chart from Adobe Photoshop 7 Printing a CMYK Test Chart from RIP Software 9
5. Measuring Targets and Generating OBC Data 9
6. Building ICC Profiles with OBC Data 13
Using Optical Brightener Compensated Data in X-Rite ProfileMaker Software 13 Using OBC Data in MonacoPROFILER 14
7. Additional Information 15
Using Optical Brightener Compensation (OBC) for Profiling Printing Conditions on a Press 15 ProfileMaker Certification of Proofs based on OBC Profiles 15
i1iSis Optical Brightener Compensation (OBC) Module - User Guide
3
1. Introduction
User Guide Overview
This document provides overview information of functions and features for the X-Rite Optical Brightener Compensation Module, hereafter referred to as OBC. We appreciate your taking the time to read and understand the information presented.
X-Rite Overview
X-Rite is the global leader in color science and technology. The company, which now includes design industry color leader Pantone, Inc., develops, manufactures, markets and supports innovative color solutions through measurement systems, software, color standards and services. X-Rite’s expertise in inspiring, selecting, measuring, formulating, communicating and matching color helps users get color right the first time and every time, which translates to better quality and reduced costs. X-Rite serves a range of industries, including printing, packaging, photography, graphic design, video, automotive, paints, plastics, textiles, dental and medical. For further information, please visit www.xrite.com.
i1iSis Optical Brightener Compensation (OBC) Module - User Guide
4
OBC Module Overview
The X-Rite Optical Brightener Compensation (OBC) module is the industry’s first complete optical brightener correction solution. Designed for use in conjunction with X-Rite’s i1iSis family of automatic spectral chart readers, and ProfileMaker or MonacoPROFILER profiling software, X-Rite’s OBC module allows users in color-critical proofing and printing environments to effectively and precisely compen-sate for color shifts in custom ICC output profiles caused by Optical Brightening Agents (OBAs) in papers and other printing substrates.
OBAs are widely used by paper manufacturers to increase the apparent whiteness of substrates. OBAs absorb energy in the ultra violet spectrum and emit light (fluoresce) in the blue area of the vis-ible spectrum. In fact, OBAs are actually more bluing agents than whitening agents. As a result, the human eye perceives the effect as increased whiteness and brightness of the paper, whereas spectral measurement devices report a shift towards blue.
Color management applications tend to fix the problem by compensating with yellow, which results in an unwanted yellow-cast effect in images on the proof or print. Over the years, many attempts have been made to fix this problem by using UVcut filters in measurement instruments and viewing booths, or by avoiding or limiting OBAs in the proofing substrates and in papers used for standard-ized printing conditions (e.g. ISO 12647-2). The ability to avoid OBAs is becoming however, increas-ingly difficult due to the ever-increasing amount of OBAs in typical papers used for print production, and since UVcut environments do not necessarily match the consumer’s usual envornment for viewing.
Unlike previous attempts to correct for the OBAs in a substrate, X-Rite’s OBC solution corrects the spectral reflection measurement data of the complete test chart. Since every single patch of the test chart gets corrected, the OBC correction thus applies to the complete gamut of the printer. Individual UV absorption of the ink layer of the different patches is also considered as part of the correction.Given that the OBC module modifies the measurement data, it thus allows the user to take full advantage of his profiling application’s features for black generation and maximum ink coverage through seamless integration into the existing profiling software (MonacoPROFILER or ProfileMaker 5). The user can achieve these unparalled results only by replacing the measurement module (Color-Port or MeasureTool) of the profiling software with the OBC module, to be used in conjunction with the i1iSis automated chart reader.
All ICC rendering intents benefit from the i1iSis OBC module, especially soft- and hardcopy proofing where the media white point is simulated. Profiles corrected with OBC result in much better visual agreement with the print than with ICC profiles based on NoFilter or UVcut Filter measurements. As there are still variations regarding the ultra violet light in different viewing conditions, the i1iSis OBC module will not necessarily fix all existing problems as it can only compensate for one specific view-ing condition at a time. But even if other viewing conditions differ slightly from the profiled viewing condition, the results of an OBC ICC profile will be much better than ICC profiles based on NoFilter or UVcut Filter measurements alone.
OBC Workflow Technical Notes
The i1iSis Optical Brightener Compensation correction is based on a two-step process: profiling of test chart measurements, and a visual assessment of gray patches to adjust the measurement data to compensate for the amount of UV light present in the viewing condition.
In the first step a test chart is produced on your printer. Once the ink has dried, it is measured with the i1iSis in dual measurement mode. During the first measurement cycle the test chart is measured in the UVcut mode. The chart reader will automatically illuminate the test chart with a white light source containing no energy in the ultra violet part of the spectrum, and the optical brightening agents in the substrate won’t be stimulated.
In a second measurement cycle, the i1iSis measures the test chart in UVonly mode. The test chart is illuminated by a UV light source and only the effect of the optical brightening agents on the color of the different patches of the test chart is measured.
i1iSis Optical Brightener Compensation (OBC) Module - User Guide
5
The information from both measurements is used by the OBC Module to correct for the optical brightening agents in the substrate. As the level of correction must be adjusted to the intensity of the effect of the optical brightening agents in a real-world viewing situation, the amount of UV light in the viewing condition must be assessed as an additional step. Following the measurement process with the i1iSis, the OBC Module then creates an individual gray evaluation test chart suitable for your printing condition and your substrate using different corrective measures for the various amounts of UV light present. The Gray Evaluation Chart is then printed on the same printer using both the same substrate and same printer driver settings as used for the CMYK or RGB test chart printed earlier in the process. Once the ink has dried, the individual patches in the Gray Evaluation Chart need to be visually compared against the OBC Gray Standards in typical viewing condition used for hardcopy proof evaluation (e.g. a viewing booth or on the control panel of a printing press). The OBC Module comes with two sets of OBC Gray Standards - glossy and matte, each containing four different gray levels. Depending on the surface properties of the substrate, either the glossy or the matte set of Gray Standards is to be used.
The best match between the Gray Standard and the Gray Evaluation Chart will be achieved in the fields A-C (no or little UV in the viewing condition), D-M (medium UV level in the viewing condition) and N-S (high UV level in the viewing condition) contingent on the amount of UV light the is present under the viewing conditions. Please note that some viewing booths have a UVcut filter applied to the illuminants so results may always end up in fields A-C regardless the amount of optical brighten-ing agents in your substrate.
The visually-perceptible difference between the various fields on the Gray Evaluation Chart is depen-dent on the amount of OBAs in the substrate. Where low amounts of OBAs exist, the visual difference is marginal, making it perhaps difficult to find the right patch. In such a case the strength of the correction is also marginal so the accuracy of the match is of a lesser importance. In this situation, the evaluation of the darker gray patches may not be necessary; while they might improve the quality of the match, an assessment remains difficult for low amounts of OBAs in the substrates or ink films with a high UV absorption.
If the OBC Module detects no OBAs in a substrate you will be asked to skip the evaluation process as there won’t be any difference between a NoFilter and a UVcut filter measurement and the assess-ment of the UV amount of the viewing condition becomes unnecessary. After the visual evaluation of the UV effect of the viewing condition, a compensated measurement data file is generated and saved to be used with your profiling application (ProfileMaker 5 or MonacoPROFILER).
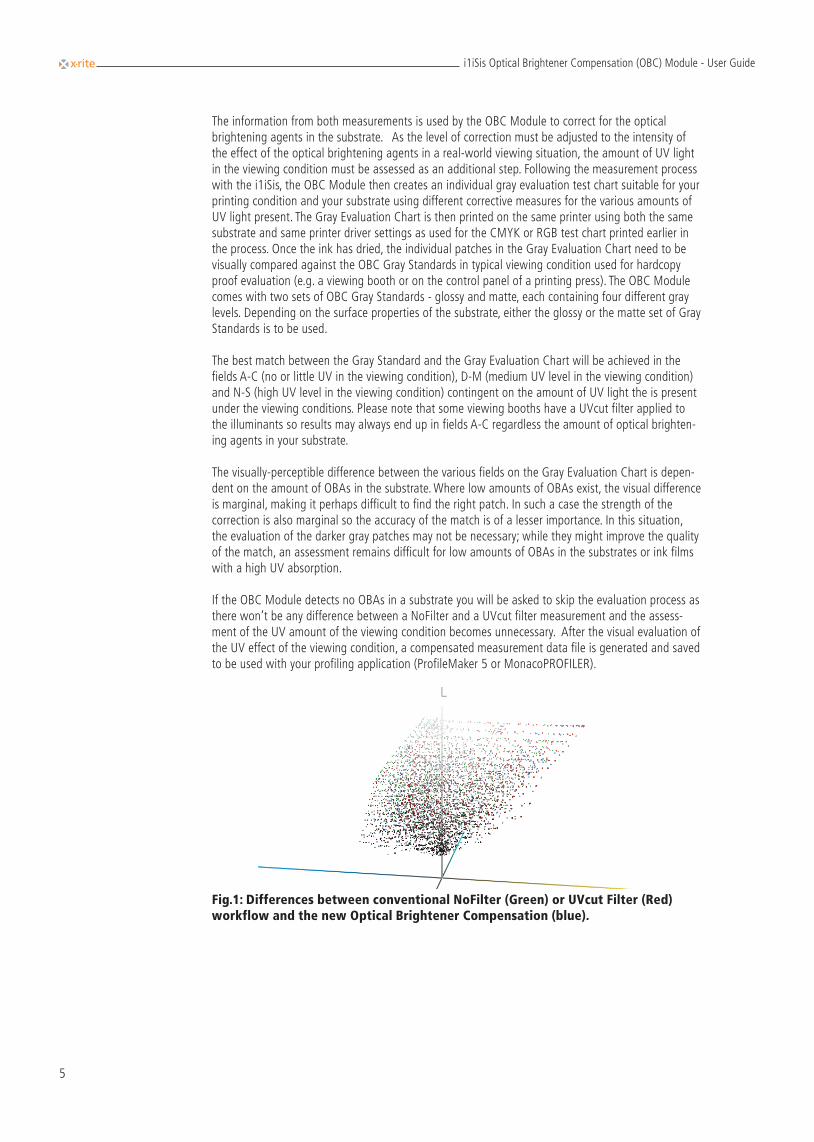
Fig.1: Differences between conventional NoFilter (Green) or UVcut Filter (Red) workflow and the new Optical Brightener Compensation (blue).
i1iSis Optical Brightener Compensation (OBC) Module - User Guide
6
2. System Requirements
Windows
Pentium PC or betterWindows XP or greater128MB application RAM, 100MB free disk space
Macintosh
Power Macintosh or betterMac OS X 10.4 or greater256MB System RAM, 100MB free disk space
Additional Requirements
Licensed dongle for ProfileMaker or MonacoPROFILER softwareProfileMaker 5 or MonacoPROFILER must be installed on the system prior to the installation of the OBC module.i1iSis or i1iSis XL automatic spectral chart reader
3. The Optical Brightener Compensation Module
Software Interface
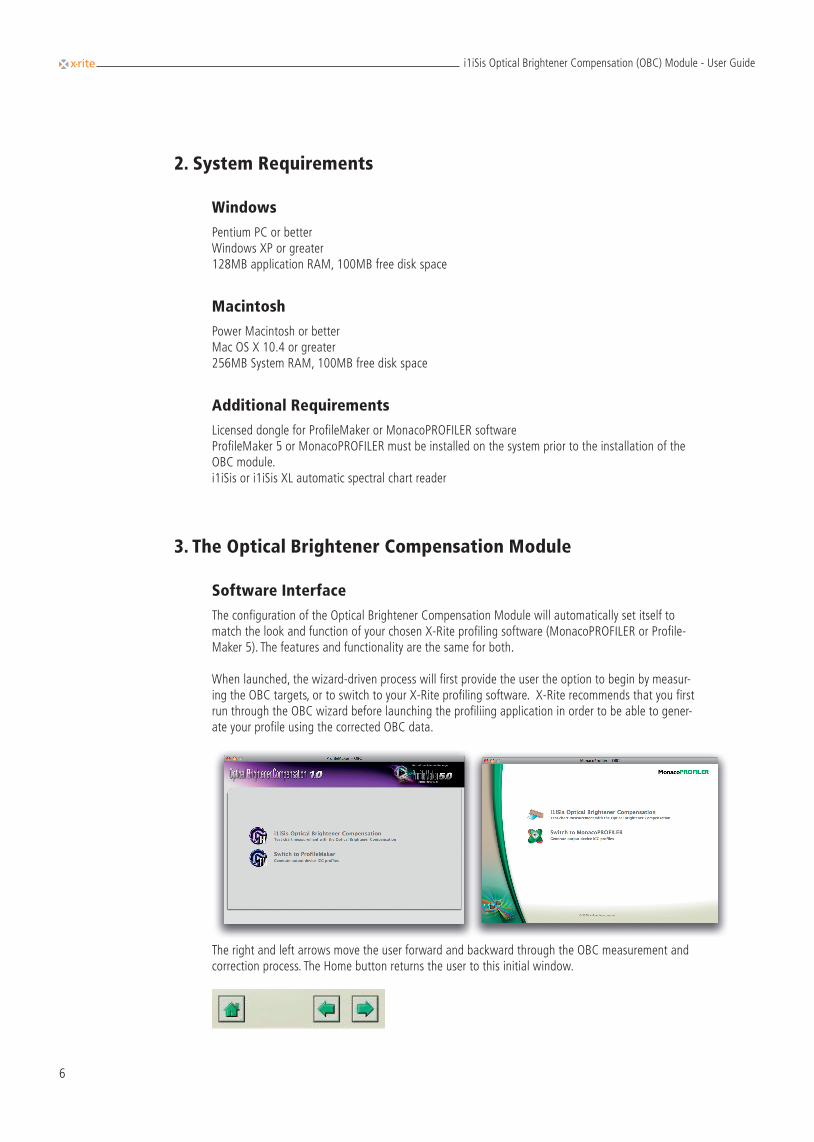
The configuration of the Optical Brightener Compensation Module will automatically set itself to match the look and function of your chosen X-Rite profiling software (MonacoPROFILER or Profile-Maker 5). The features and functionality are the same for both.
When launched, the wizard-driven process will first provide the user the option to begin by measur-ing the OBC targets, or to switch to your X-Rite profiling software. X-Rite recommends that you first run through the OBC wizard before launching the profiliing application in order to be able to gener-ate your profile using the corrected OBC data.
The right and left arrows move the user forward and backward through the OBC measurement and correction process. The Home button returns the user to this initial window.
i1iSis Optical Brightener Compensation (OBC) Module - User Guide
7
Where to Find Profile Target Files
Special profiling targets are provided in the OBC Module’s “OBC 1.0/OBC Profiling Targets” folder.
In the “CMYK Profiling Charts” folder are A3, A4, Letter and Tabloid size targets. The A4 and Letter sizes are laid out as multiple pages. You will need to print all of the pages for these sizes.
In the “RGB Profiling Charts” folder are A4 and letter size targets. During the profiling process, a unique “Gray Evaluation Chart” will be created. The Gray Evaluation Chart is intended to be use only once during the OBC correction process and then discarded.
Optical Brightener Compensation Standards
The OBC Module comes with two sets of OBC Gray Standards, each containing four different gray levels. Depending on the surface properties of the substrate, the glossy or the matt set of Gray Stan-dards should be used.
The user should first print the “Gray Evaluation Chart” on the same printer using the same substrate and same printer driver settings as were used for the printing of the profiling test charts earlier (either CMYK or RGB) in the process. Individual patches of the Gray Evaluation Chart are to be compared visually against the OBC Gray Standards in the typical viewing condition used for hardcopy proof evaluation (e.g. in a viewing booth or at the control panel of a printing press).
4. Printing Test Charts
Printing an RGB Test Chart from Adobe Photoshop
When profiling a printer through a print driver, you will need to select an RGB target. We recommend printing the target files through Adobe Photoshop.
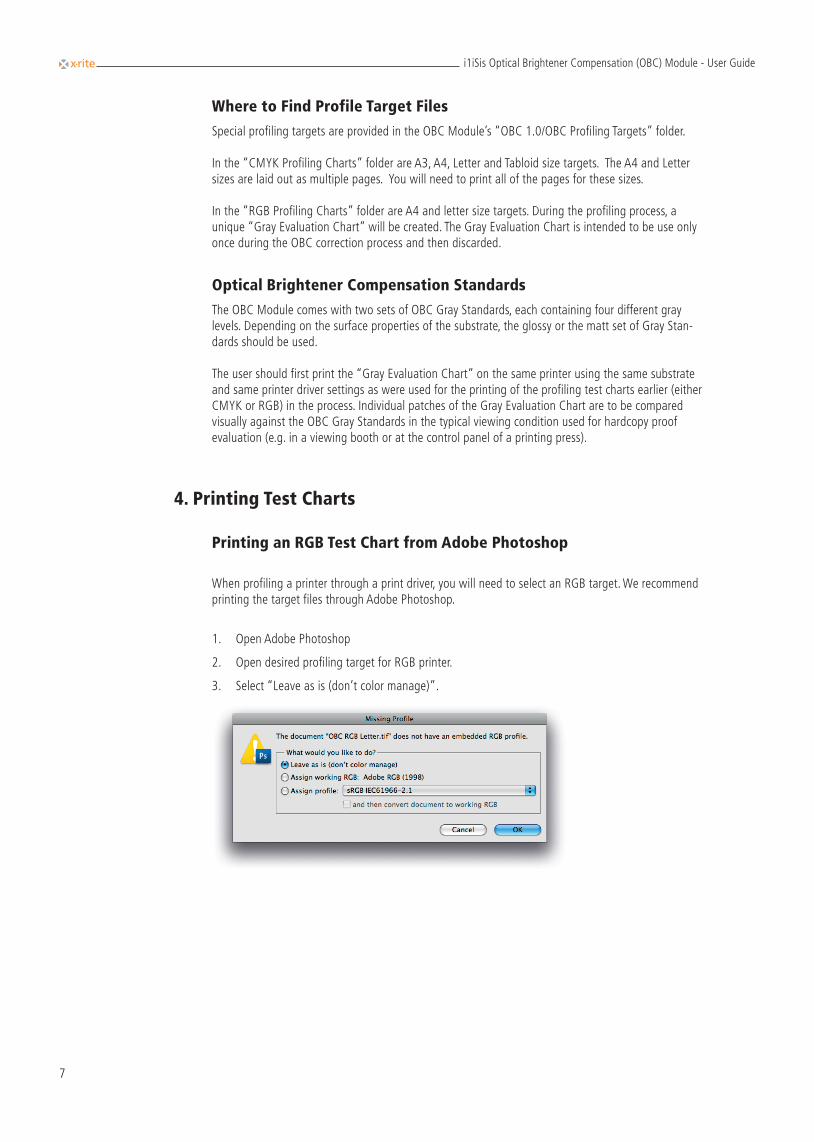
Open Adobe Photoshop1.
Open desired profiling target for RGB printer.2.
Select “Leave as is (don’t color manage)”.3.
i1iSis Optical Brightener Compensation (OBC) Module - User Guide
8
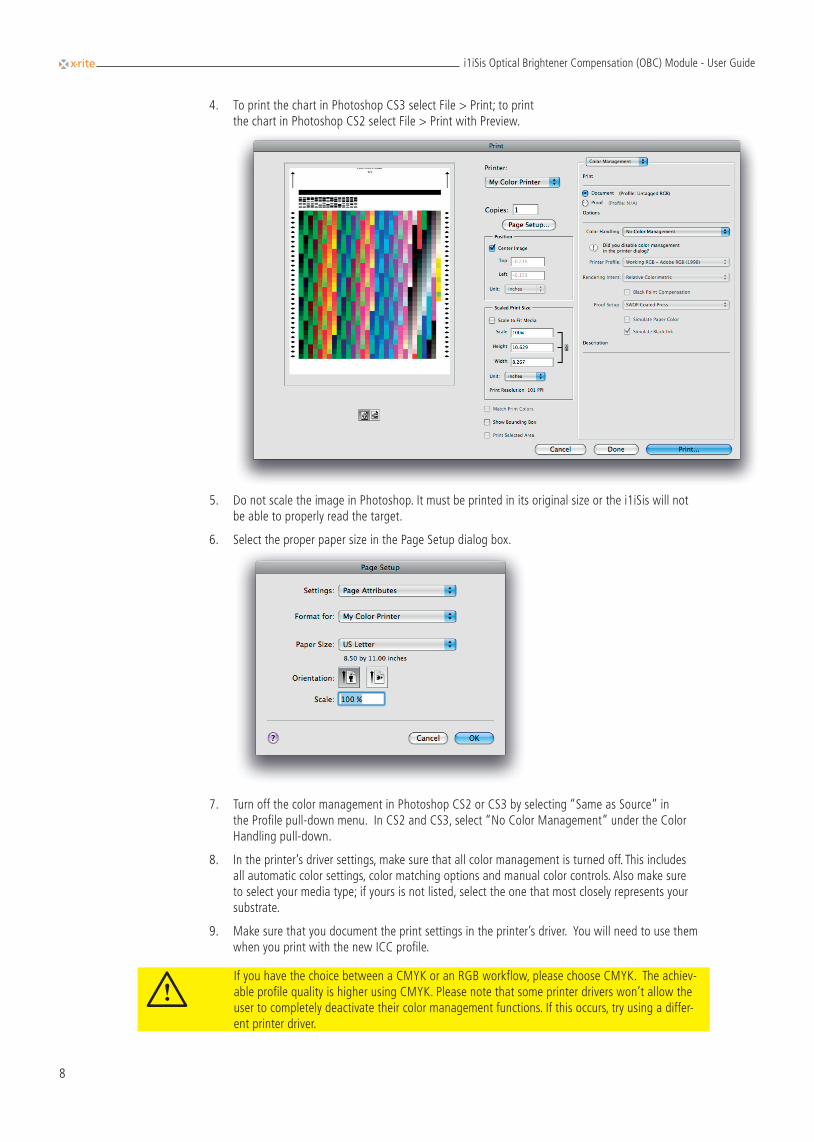
To print the chart in Photoshop CS3 select File > Print; to print 4. the chart in Photoshop CS2 select File > Print with Preview. the chart in Photoshop CS2 select File > Print with Preview.
Do not scale the image in Photoshop. It must be printed in its original size or the i1iSis will not 5. be able to properly read the target.
Select the proper paper size in the Page Setup dialog box.6. Select the proper paper size in the Page Setup dialog box.
Turn off the color management in Photoshop CS2 or CS3 by selecting “Same as Source” in 7. the Profile pull-down menu. In CS2 and CS3, select “No Color Management” under the Color Handling pull-down.
In the printer’s driver settings, make sure that all color management is turned off. This includes 8. all automatic color settings, color matching options and manual color controls. Also make sure to select your media type; if yours is not listed, select the one that most closely represents your substrate.
Make sure that you document the print settings in the printer’s driver. You will need to use them 9. when you print with the new ICC profile.
iIf you have the choice between a CMYK or an RGB workflow, please choose CMYK. The achiev-able profile quality is higher using CMYK. Please note that some printer drivers won’t allow the user to completely deactivate their color management functions. If this occurs, try using a differ-ent printer driver.
i1iSis Optical Brightener Compensation (OBC) Module - User Guide
9
Printing a CMYK Test Chart from RIP Software
When profiling a printer through a RIP, you will need to select a CMYK target. You will need to per-form any media calibration routines provided by the RIP software.
Calibrate the media for the print settings that you will use when printing in normal production. 1. These settings include screening, resolution, and any other settings that affect the way that ink or toner is placed on the substrate.
Print the target with all color management turned off. Make sure that the calibration in enabled.2.
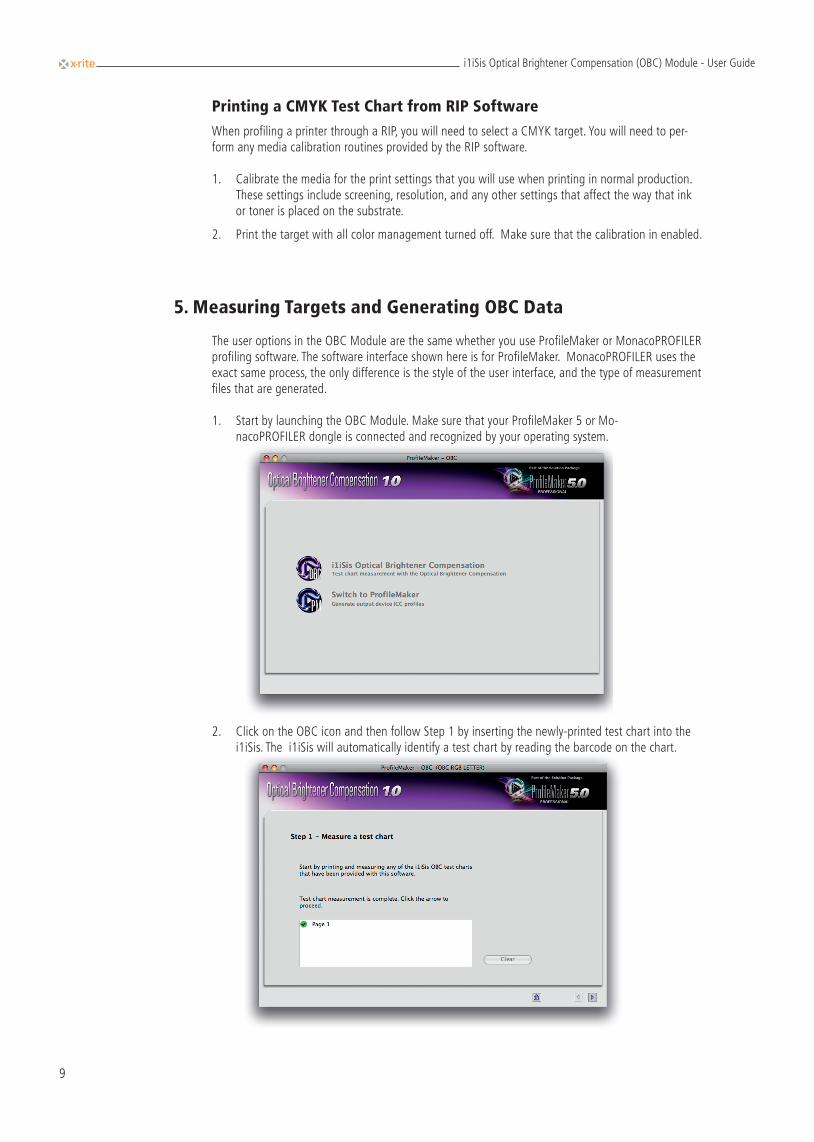
5. Measuring Targets and Generating OBC Data
The user options in the OBC Module are the same whether you use ProfileMaker or MonacoPROFILER profiling software. The software interface shown here is for ProfileMaker. MonacoPROFILER uses the exact same process, the only difference is the style of the user interface, and the type of measurement files that are generated.
Start by launching the OBC Module. Make sure that your ProfileMaker 5 or Mo-1. nacoPROFILER dongle is connected and recognized by your operating system. nacoPROFILER dongle is connected and recognized by your operating system.
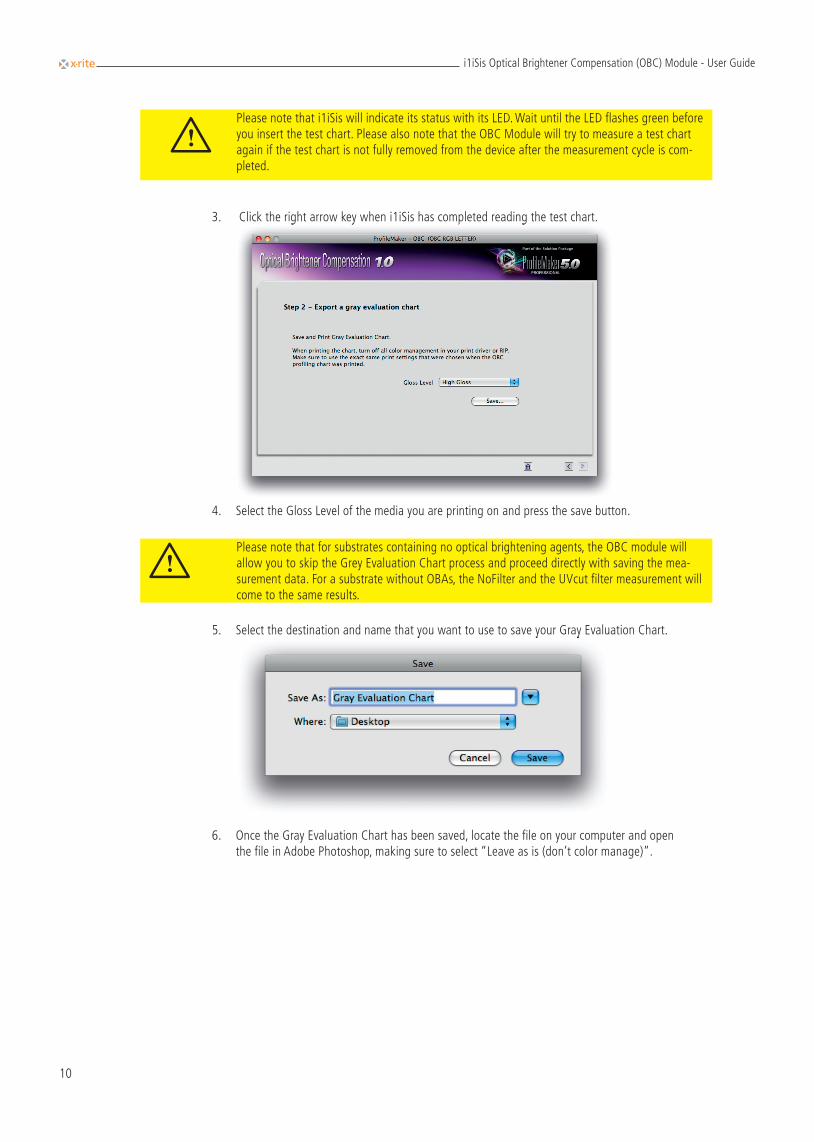
Click on the OBC icon and then follow Step 1 by inserting the newly-printed test chart into the 2. i1iSis. The i1iSis will automatically identify a test chart by reading the barcode on the chart. i1iSis. The i1iSis will automatically identify a test chart by reading the barcode on the chart.
i1iSis Optical Brightener Compensation (OBC) Module - User Guide
10
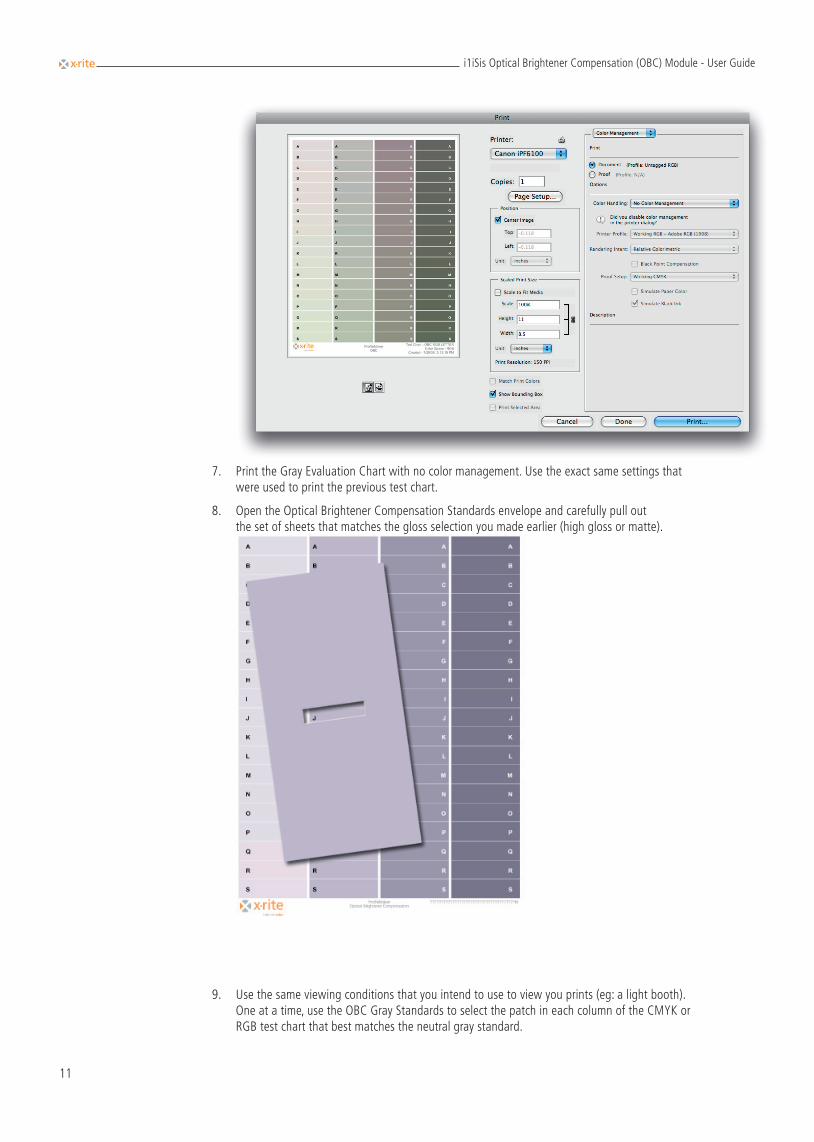
Click the right arrow key when i1iSis has completed reading the test chart. 3. Click the right arrow key when i1iSis has completed reading the test chart.
Select the Gloss Level of the media you are printing on and press the save button. 4.
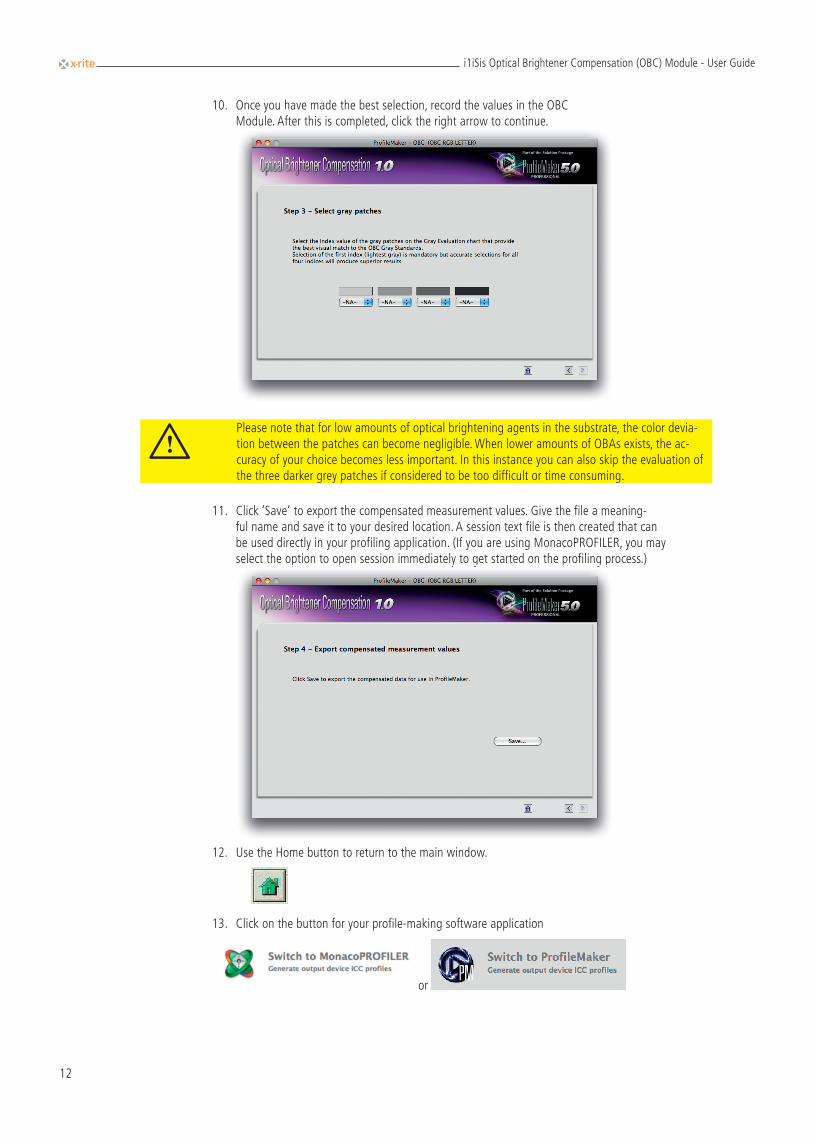
Select the destination and name that you want to use to save your Gray Evaluation Chart. 5. Select the destination and name that you want to use to save your Gray Evaluation Chart.
Once the Gray Evaluation Chart has been saved, locate the file on your computer and open 6. the file in Adobe Photoshop, making sure to select “Leave as is (don’t color manage)”.
iPlease note that i1iSis will indicate its status with its LED. Wait until the LED flashes green before you insert the test chart. Please also note that the OBC Module will try to measure a test chart again if the test chart is not fully removed from the device after the measurement cycle is com-pleted.
iPlease note that for substrates containing no optical brightening agents, the OBC module will allow you to skip the Grey Evaluation Chart process and proceed directly with saving the mea-surement data. For a substrate without OBAs, the NoFilter and the UVcut filter measurement will come to the same results.
i1iSis Optical Brightener Compensation (OBC) Module - User Guide
11
Print the Gray Evaluation Chart with no color management. Use the exact same settings that 7. were used to print the previous test chart.
Open the Optical Brightener Compensation Standards envelope and carefully pull out 8. the set of sheets that matches the gloss selection you made earlier (high gloss or matte).
Use the same viewing conditions that you intend to use to view you prints (eg: a light booth). 9. One at a time, use the OBC Gray Standards to select the patch in each column of the CMYK or RGB test chart that best matches the neutral gray standard.
i1iSis Optical Brightener Compensation (OBC) Module - User Guide
12
Once you have made the best selection, record the values in the OBC 10. Module. After this is completed, click the right arrow to continue. Module. After this is completed, click the right arrow to continue.
Click ‘Save’ to export the compensated measurement values. Give the file a meaning-11. ful name and save it to your desired location. A session text file is then created that can be used directly in your profiling application. (If you are using MonacoPROFILER, you may select the option to open session immediately to get started on the profiling process.) select the option to open session immediately to get started on the profiling process.)
Use the Home button to return to the main window.12.
Click on the button for your profile-making software application 13.
or
iPlease note that for low amounts of optical brightening agents in the substrate, the color devia-tion between the patches can become negligible. When lower amounts of OBAs exists, the ac-curacy of your choice becomes less important. In this instance you can also skip the evaluation of the three darker grey patches if considered to be too difficult or time consuming.
i1iSis Optical Brightener Compensation (OBC) Module - User Guide
13
6. Building ICC Profiles with OBC Data
Using Optical Brightener Compensated Data in X-Rite ProfileMaker Software
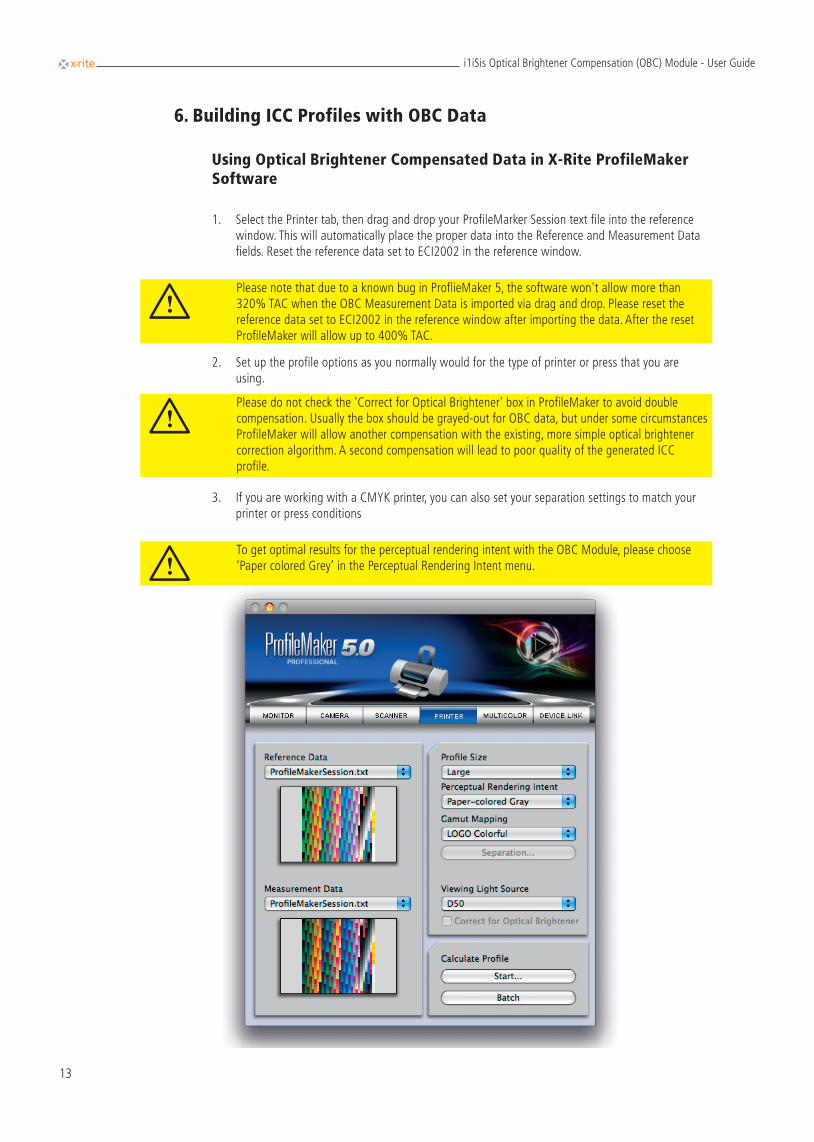
Select the Printer tab, then drag and drop your ProfileMarker Session text file into the reference 1. window. This will automatically place the proper data into the Reference and Measurement Data fields. Reset the reference data set to ECI2002 in the reference window.
Set up the profile options as you normally would for the type of printer or press that you are 2. using.
If you are working with a CMYK printer, you can also set your separation settings to match your 3. printer or press conditions
iPlease note that due to a known bug in ProflieMaker 5, the software won't allow more than 320% TAC when the OBC Measurement Data is imported via drag and drop. Please reset the reference data set to ECI2002 in the reference window after importing the data. After the reset ProfileMaker will allow up to 400% TAC.
iPlease do not check the 'Correct for Optical Brightener' box in ProfileMaker to avoid double compensation. Usually the box should be grayed-out for OBC data, but under some circumstances ProfileMaker will allow another compensation with the existing, more simple optical brightener correction algorithm. A second compensation will lead to poor quality of the generated ICC profile.
iTo get optimal results for the perceptual rendering intent with the OBC Module, please choose ‘Paper colored Grey’ in the Perceptual Rendering Intent menu.
i1iSis Optical Brightener Compensation (OBC) Module - User Guide
14
Select ‘Start’ to create your profile. Give your profile a meaningful name and save it in your 4. desired location.Your profile will be created and is then ready to use as you would any other printer profile.5.
Using OBC Data in MonacoPROFILER
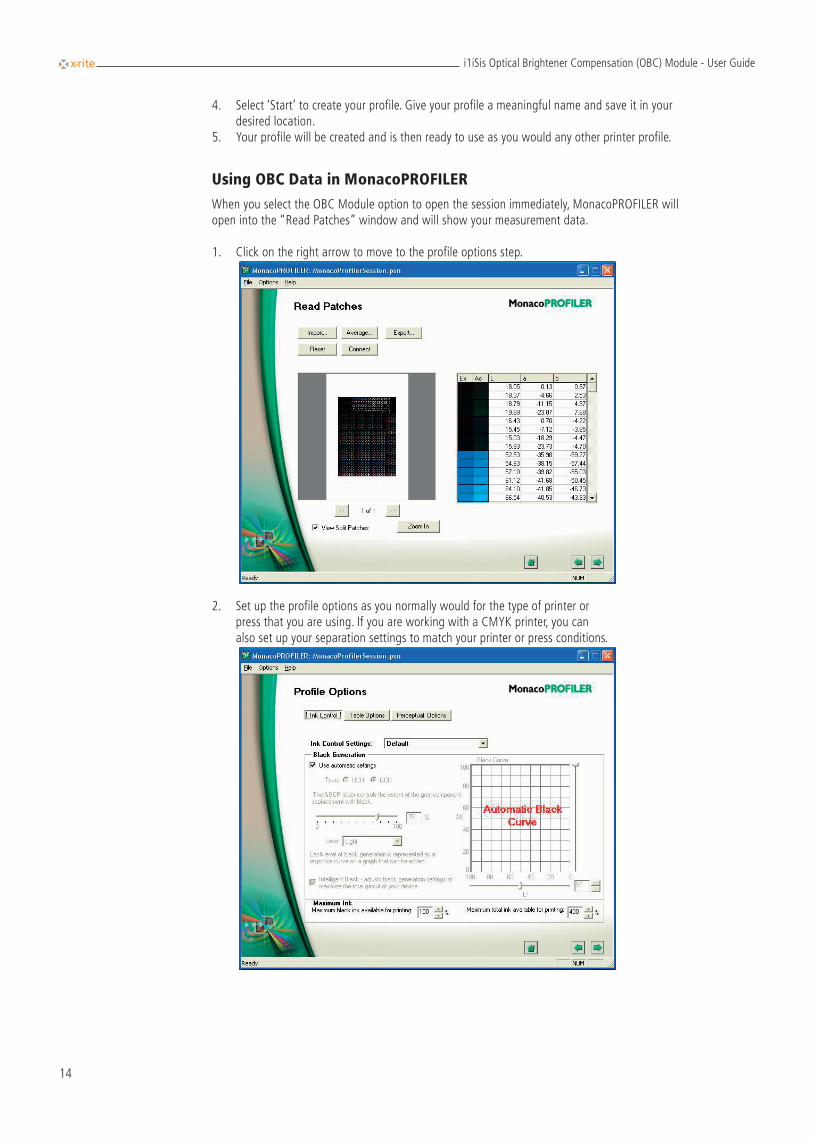
When you select the OBC Module option to open the session immediately, MonacoPROFILER will open into the “Read Patches” window and will show your measurement data.
Click on the right arrow to move to the profile options step. 1.
Set up the profile options as you normally would for the type of printer or 2. press that you are using. If you are working with a CMYK printer, you can also set up your separation settings to match your printer or press conditions.
i1iSis Optical Brightener Compensation (OBC) Module - User Guide
15
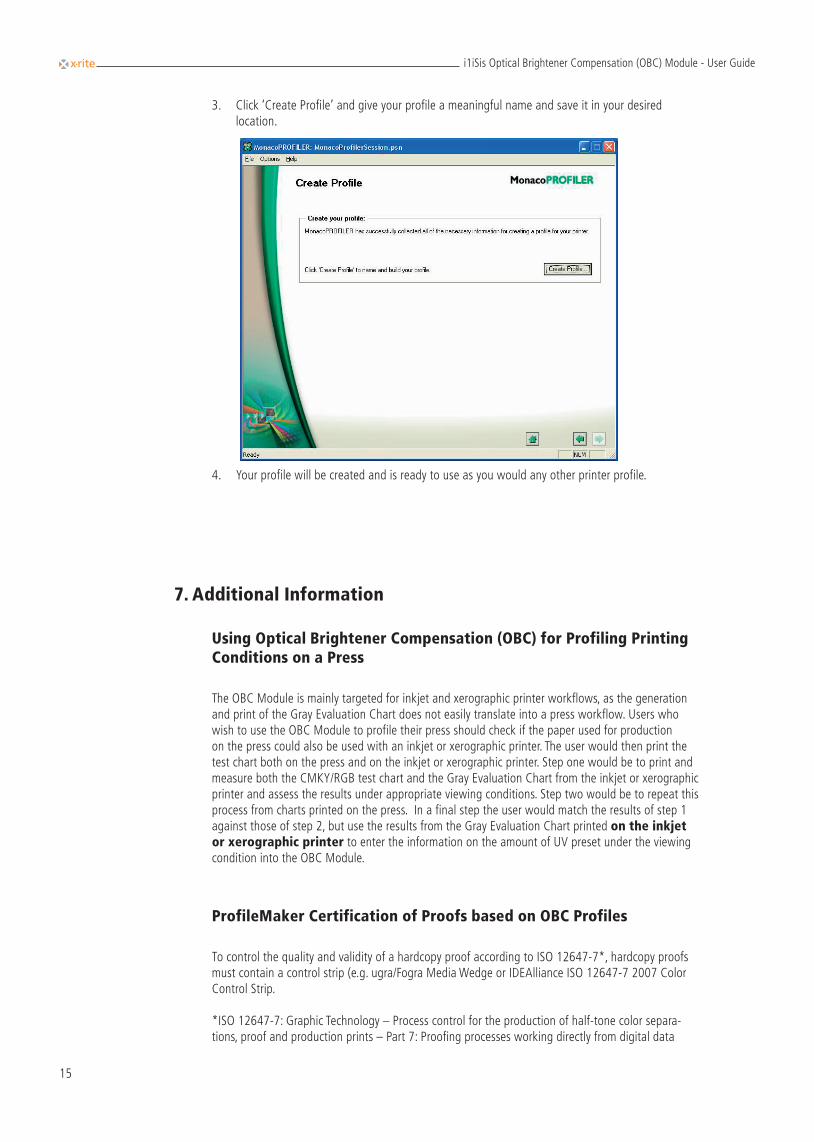
Click ‘Create Profile’ and give your profile a meaningful name and save it in your desired 3. location.
Your profile will be created and is ready to use as you would any other printer profile.4.
7. Additional Information
Using Optical Brightener Compensation (OBC) for Profiling Printing Conditions on a Press
The OBC Module is mainly targeted for inkjet and xerographic printer workflows, as the generation and print of the Gray Evaluation Chart does not easily translate into a press workflow. Users who wish to use the OBC Module to profile their press should check if the paper used for production on the press could also be used with an inkjet or xerographic printer. The user would then print the test chart both on the press and on the inkjet or xerographic printer. Step one would be to print and measure both the CMKY/RGB test chart and the Gray Evaluation Chart from the inkjet or xerographic printer and assess the results under appropriate viewing conditions. Step two would be to repeat this process from charts printed on the press. In a final step the user would match the results of step 1 against those of step 2, but use the results from the Gray Evaluation Chart printed on the inkjet or xerographic printer to enter the information on the amount of UV preset under the viewing condition into the OBC Module.
ProfileMaker Certification of Proofs based on OBC Profiles
To control the quality and validity of a hardcopy proof according to ISO 12647-7*, hardcopy proofs must contain a control strip (e.g. ugra/Fogra Media Wedge or IDEAlliance ISO 12647-7 2007 Color Control Strip.
*ISO 12647-7: Graphic Technology – Process control for the production of half-tone color separa-tions, proof and production prints – Part 7: Proofing processes working directly from digital data
i1iSis Optical Brightener Compensation (OBC) Module - User Guide
16
iPlease note that the validation of a proof based on an OBC-ICC profile might fail even though the quality of the hardcopy proof is good when measured with a NoFilter spectrophotometer like the i1Pro, as measurements from this type of device do not correct for the optical brightening agents in the paper. If applied correctly, OBC profiles will produce better visual agreement between hardcopy and softcopy proofs and prints. As the OBC Module creates a new group of measurement conditions taking the optical brightening agents and the amount of UV of the viewing condition into account, different OBC conditions such as NoFilter and UVcut Filter measurements should not compared against each other.
X-Rite WoRld HeadquaRteRs
Grand Rapids, Michigan USA • (800) 248-9748 • +1 616 803 2100© 2007, X-Rite, Incorporated. All rights reserved.