Embed Size (px)
Citation preview
November 2005.
Club Annual Competion Night! There are a number of categories for you to enter your models into this year’s Annual Competition. Each of these has its own trophy that will be awarded at the Xmas club meeting, and an overall winner will be voted on by club members and their families at that time and will be awarded the newly named “John Cox Memorial Trophy” (more about that later). Vic will set out the competition tables and will allocate an area for each category: if you happen to have half a dozen 1:72 B-52’s or Hercules’s (Phil), or possibly a full sized Bren Gun (Trevor), please can you let him know so he make room for them. So please, don’t be bashful, enter your models and join in the fun!
1 AIRCRAFT: 1/72 and below.
2 AIRCRAFT: Above 1/72
3 MILITARY VEHICLES: 1/72 and below.
4 MILITARY VEHICLES: Above 1/72.
5 SHIPS: any scale.
6 FIGURES: 80mm and below.
7 FIGURES: Above 80mm.
8 CIVILIAN VEHICLES: 1/20 and below.
9 CIVILIAN VEHICLES: Above 1/20.
10 DIORAMAS.
11 PHOTOGRAPHIC.
Competition Categories.
12 MISCELLANEOUS. You can enter any model that has not previously been placed 1st, 2nd or 3rd in this competition. If we are short of entries in any one category, we may merge it with another: this is more likely if the category has a scale split. Vic will place an entry slip with each model for you to complete. Please fill in the title of the model on the front of the slip and put your name on the reverse. Once all the entries are in place and labelled up, club members can then vote for their first, second and third choices in each category. Please make sure I am given the completed voting forms and I’ll need the entry slips as well, so please don’t take them away with you (Paul, Dan).
Military Modelcraft International. Paul A has kindly volunteered to take photos of models entered into the competition for sending to MMI. I’ll be asking you for a brief note to go with each which will include your name, kit used, other details or interesting aspects. The editor, Tony Little, will send some kits to the club to be used as prizes and we also believe there is a small financial contribution to club funds also to be had.
Events since we last met.
Autumn Model Show. Les, Vic and myself enjoyed the Autumn Model Show at the Fleet Air Arm Museum, Yeovilton. They have since written to me to say that they had an 80% increase in numbers over the previous year. It was good to meet up with Richard and Mick from IPMS Portsmouth as well.
Bugle Call 2005. Les tells me that the show and competition tables were fairly quiet this year, although there were a good number of traders there.
Forthcoming Events. We are coming towards the end of the show season now, so not a lot to report.
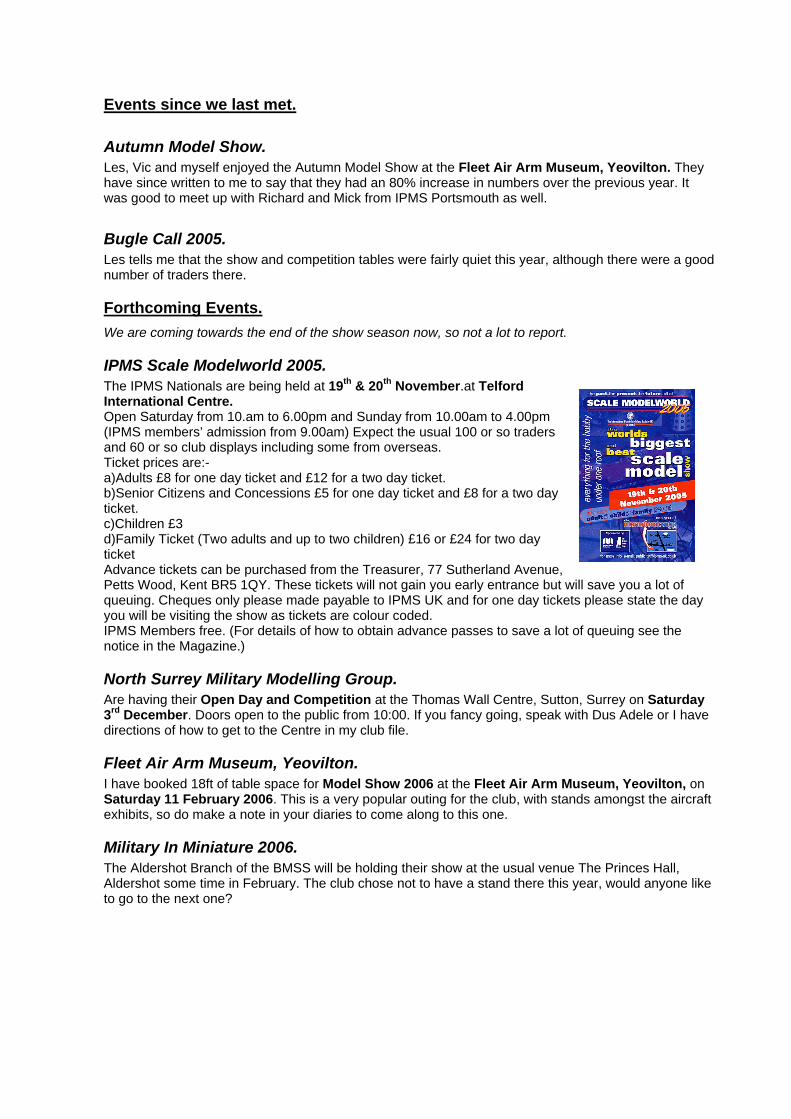
IPMS Scale Modelworld 2005. The IPMS Nationals are being held at 19th & 20th November.at Telford International Centre. Open Saturday from 10.am to 6.00pm and Sunday from 10.00am to 4.00pm (IPMS members’ admission from 9.00am) Expect the usual 100 or so traders and 60 or so club displays including some from overseas. Ticket prices are:- a)Adults £8 for one day ticket and £12 for a two day ticket. b)Senior Citizens and Concessions £5 for one day ticket and £8 for a two day ticket. c)Children £3 d)Family Ticket (Two adults and up to two children) £16 or £24 for two day ticket Advance tickets can be purchased from the Treasurer, 77 Sutherland Avenue, Petts Wood, Kent BR5 1QY. These tickets will not gain you early entrance but will save you a lot of queuing. Cheques only please made payable to IPMS UK and for one day tickets please state the day you will be visiting the show as tickets are colour coded. IPMS Members free. (For details of how to obtain advance passes to save a lot of queuing see the notice in the Magazine.)
North Surrey Military Modelling Group. Are having their Open Day and Competition at the Thomas Wall Centre, Sutton, Surrey on Saturday 3rd December. Doors open to the public from 10:00. If you fancy going, speak with Dus Adele or I have directions of how to get to the Centre in my club file.
Fleet Air Arm Museum, Yeovilton. I have booked 18ft of table space for Model Show 2006 at the Fleet Air Arm Museum, Yeovilton, on Saturday 11 February 2006. This is a very popular outing for the club, with stands amongst the aircraft exhibits, so do make a note in your diaries to come along to this one.
Military In Miniature 2006. The Aldershot Branch of the BMSS will be holding their show at the usual venue The Princes Hall, Aldershot some time in February. The club chose not to have a stand there this year, would anyone like to go to the next one?
What the papers say……
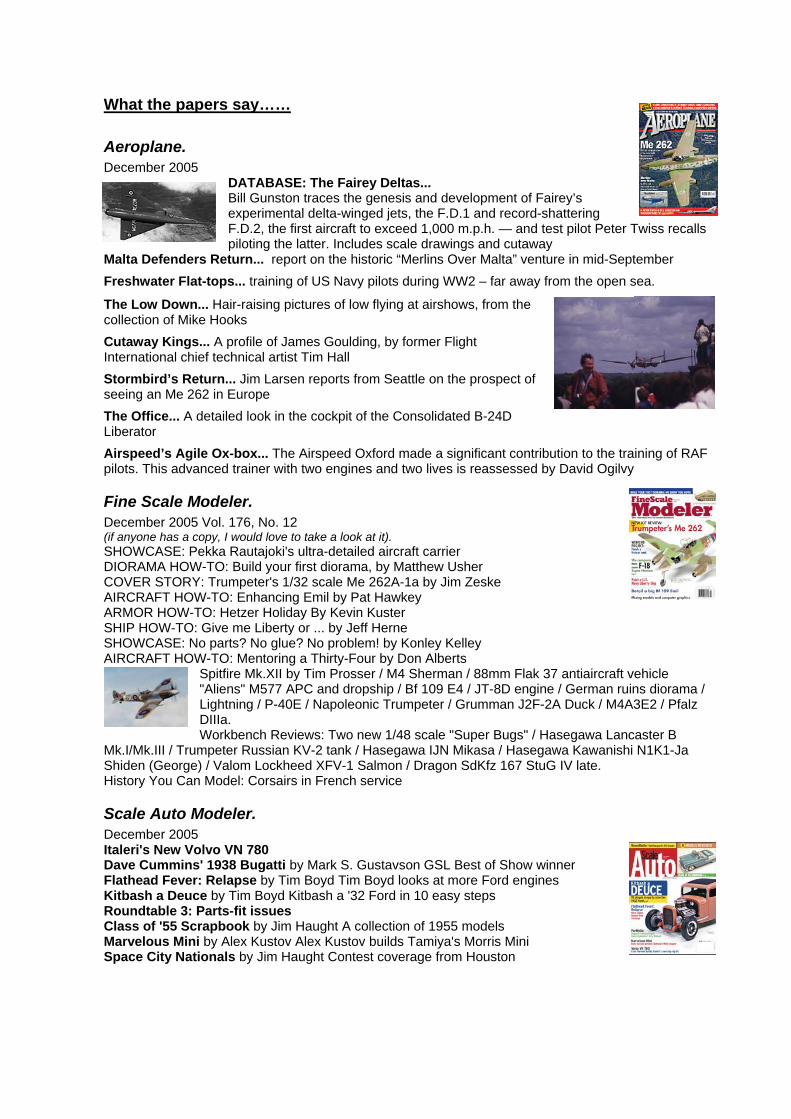
Aeroplane. December 2005
DATABASE: The Fairey Deltas... Bill Gunston traces the genesis and development of Fairey’s experimental delta-winged jets, the F.D.1 and record-shattering F.D.2, the first aircraft to exceed 1,000 m.p.h. — and test pilot Peter Twiss recalls piloting the latter. Includes scale drawings and cutaway
Malta Defenders Return... report on the historic “Merlins Over Malta” venture in mid-September Freshwater Flat-tops... training of US Navy pilots during WW2 – far away from the open sea.
The Low Down... Hair-raising pictures of low flying at airshows, from the collection of Mike Hooks Cutaway Kings... A profile of James Goulding, by former Flight International chief technical artist Tim Hall Stormbird’s Return... Jim Larsen reports from Seattle on the prospect of seeing an Me 262 in Europe The Office... A detailed look in the cockpit of the Consolidated B-24D Liberator Airspeed’s Agile Ox-box... The Airspeed Oxford made a significant contribution to the training of RAF pilots. This advanced trainer with two engines and two lives is reassessed by David Ogilvy
Fine Scale Modeler. December 2005 Vol. 176, No. 12 (if anyone has a copy, I would love to take a look at it). SHOWCASE: Pekka Rautajoki's ultra-detailed aircraft carrier DIORAMA HOW-TO: Build your first diorama, by Matthew Usher COVER STORY: Trumpeter's 1/32 scale Me 262A-1a by Jim Zeske AIRCRAFT HOW-TO: Enhancing Emil by Pat Hawkey ARMOR HOW-TO: Hetzer Holiday By Kevin Kuster SHIP HOW-TO: Give me Liberty or ... by Jeff Herne SHOWCASE: No parts? No glue? No problem! by Konley Kelley AIRCRAFT HOW-TO: Mentoring a Thirty-Four by Don Alberts
Spitfire Mk.XII by Tim Prosser / M4 Sherman / 88mm Flak 37 antiaircraft vehicle "Aliens" M577 APC and dropship / Bf 109 E4 / JT-8D engine / German ruins diorama / Lightning / P-40E / Napoleonic Trumpeter / Grumman J2F-2A Duck / M4A3E2 / Pfalz DIIIa. Workbench Reviews: Two new 1/48 scale "Super Bugs" / Hasegawa Lancaster B
Mk.I/Mk.III / Trumpeter Russian KV-2 tank / Hasegawa IJN Mikasa / Hasegawa Kawanishi N1K1-Ja Shiden (George) / Valom Lockheed XFV-1 Salmon / Dragon SdKfz 167 StuG IV late. History You Can Model: Corsairs in French service
Scale Auto Modeler. December 2005 Italeri's New Volvo VN 780 Dave Cummins' 1938 Bugatti by Mark S. Gustavson GSL Best of Show winner Flathead Fever: Relapse by Tim Boyd Tim Boyd looks at more Ford engines Kitbash a Deuce by Tim Boyd Kitbash a '32 Ford in 10 easy steps Roundtable 3: Parts-fit issues Class of '55 Scrapbook by Jim Haught A collection of 1955 models Marvelous Mini by Alex Kustov Alex Kustov builds Tamiya's Morris Mini Space City Nationals by Jim Haught Contest coverage from Houston
Military In Scale. December 2005, Issue No. 157. £3.25. Armour Kiwi Supporter Antonio Tello tells the story of his comprehensively converted 1/35 Sherman and how he created a vehicle serving with the New Zealand forces during WWII The Sky's The Limit When Skybow announced their new 1/48 Tigers we wondered how they would compare with Tamiya’s offering. In this specially extended feature, the Editor builds both early and later versions and is, to say the least, impressed... The Dawn Of A New Age Haris Ali our resident biplane fan, has taken to building some vehicles, Dragon’s 1/72 T-34 being his latest - or should that be first... - offering to you fine readers. The resulting model is, as you will see very good indeed... Hitchin A Ride Another 1/72 Dragon T-34 but a very different end result. Mike Thompson swaps wings for tracks, as he combines the kit with a set of Preiser Tank Riders. The resulting model is highly detailed and highly original... Aircraft Struck By Lightning! The Editor has always loved the P-38, but never built one - until now. Here, he gets to grips with the splendid Academy kit, Peter Green lending a hand along the way with some new artwork A Detailed Tutor'ial Vic Scheuerman completes his extended look at the Hobbycraft 1/48 Canadair Tutor. This time he paints the beast, detailed full sized shots providing modellers with enough detailed information to have a go themselves The Eagle That Became A White Dragon Julio Fuente Díaz tells the story of a very special F-15 Eagle, in a very special colour scheme - all courtesy of the Japanese Air Self Defence Force. Mark Rolfe adds to the party with some brand new artwork.
Model Aircraft Monthly Volume 4 Issue 11 November 2005 On Sale : 22 October Price : £3.25 Boeing E-3 Sentry
by David James The all seeing 'eye in the sky' The Boeing E-3 Sentry is arguably the most advanced airborne early warning platform in the world
Winds of Change Hurricane Camouflage Schemes and Markings November 1935 - August 1938
One Man’s War Part Two of the fascinating selection of Joe Currie's wartime photo album when he was an Airframe Fitter attached to No 51 Repair and Salvage Unit
Tigers Roar at RIAT 2005! Reports on this year's Royal International Air Tattoo at RAF Fairford
BPF Seafire Mk III Converts the recent Airfix 1/72 scale Spitfire Mk Vc into a BPF Seafire L Mk III using the latest MAM Resin Update Set
The First of the Many Build a selection of 1/48 scale Hurricane Mk Is - using the Classic Airframes fabric wing kit,
Heritage Aviation fabric wing conversion set and the Hasegawa kit - with accompanying colour artwork by Jon Freeman
Defecting Ju 88 by Andrew Armstrong Tells the story of the Ju 88R that is currently on display at the RAF Museum Hendon - and adds this rather special Ju 88 to his model collection

Scale Aviation Modeller. Volume 11 Issue 11 November 2005 On Sale: 22 October. Price : £3.80
Econo Lodge Emil Bf 109E-4/7 (late release) conversion by Lynn Ritger Holed up in a motel? Turn off that TV and get modelling, urges Lynn, with colour art and profiles by Jerry Boucher
Henschel'sTank Buster by Steve Evans Hasegawa's 1/48 Henschel Hs 129, with scale drawings by Arthur L Bentley
Jutland: a Short story by Neil Pinchbeck Aeroclub's new Short 184 seaplane and the story of one of its actions
Tsurugi: Nakajima's One-Shot Wonder by Randy Lutz Builds the last-ditch Japanese 'suicide fighter' that never saw action
Silent-winged Invader by Andrew Eaton Models Italeri's Waco CG-4A Hadrian assault glider The Captain and the Dirty Vicar by John Stokes Boeing 737 in the three different airline liveries in which his father flew it
Airkraft Guide Section Three Third in a 12-part series - sponsored by Airfix.
Tamiya Modelling Magazine International. Paul Adams writes…. In the December 2005 (Issue 122) TMMI provides another excellent selection of models from various disciplines. Some like it Hoth - A 6 page feaure on Master Replica's 19 inch high AT-AT Imperial Walker from Star Wars, The Empire Strikes Back. Chariot of Fire - John Murphy builds a 1/35th Merkava IID using the Legends resin set. Survival of the Fittest - Belgian master modeller Marijn van Gils descibes the conception, construction and painting of his latest WWI vignette. When Porsche comes to shove - Marcus Nichols gives Tamiya's reissued 1/24th 911 Turbo a few subtle tweaks. Landing Craft, Tank - The Editor undertakes his biggest project yet - Accurate Armour's 1.6m 1/35th LCT (4) landing craft... Comrade in Arms - Stephane Boirau takes Trumpeters 1/32 Mig 3 to task ans aplies a potentially controversial colour scheme... Yesterdays Hero - Sam Dwyer brings you an extensive updetailing of Italeri's ageing 1/35 Marder III ausf.H. The usual news and reviews and completed with a very nice Eduard ad on page 49..... Next months TMMI promises; Two Wheeled Ferrari - Tamiya's latest 1/12 Ducati MotoGP bike gets the TMMI treatment. When is a plane not a plane - Monograms A-10 in 1/48 is built by Wayne Hui. Dig the new breed - Dragons Superlative 1/35 Tiger I late, is reviewed.
Model Airplane International. Issue 5, December 2005 - published on 24th November 2005 Paul Adams writes….. • F/A-18D - John Wilkes builds Academy’s new two-seat Hornet in 1:32 • Me 262A-1a - Jay Laverty builds and details the new Trumpeter 1:32 kit • Historical feature on the Messerschmitt Me 262 by Richard J. Caruana • KV-107 - Steve A. Evans builds and updates Academy’s 1:48 kit with the Eduard etched sets • Plus all the latest news and kit, accessory, decal and book reviews. • Colour Profiles Richard J. Caruana provides colour profiles for all of our main features this month No news on next month.
Scale Models International. Volume 35 Issue 416 November 2005. On Sale: 29 October Price : £3.25
Black Bomber by David Francis David revisits the Korean war A-16 Invader from Revell-Monogram
Bentley Speed 8 Project Amalgam Making fine model cars
Focus of Attention by Ian T Grainger Hasegawa's 1/24 Ford Focus WRC 03 Rally Finland Winner
Bentley Blower by Trevor Pask Airfix 1/24(??) Le Mans Bentley: a classic build of a classic kit of a classic car
Factory Fighters by B G Adele Trumpeters KV2 in an atmospheric diorama setting. Well done Dus!!!
USS Essex by Don Robson Dragon's 1/700 kit with all the trimmings!
Omaha Beach by George Cootes 1/9 Normady Landing scenario from Mirage Hobby
South Hants Military Modelling Society. SHMMS are a BMSS & IPMS affiliated modelling club that meets on the first Wednesday of each month at The University of Southampton, 43 University Road, Southampton from 8:00 until 10:30pm. Simon is the club President, so if you have any questions he’s your man.
Caption Competition. Don’t forget, there will be a prize awarded for the most humorous caption for this photo of a Vigilante.
Link: http://members.tripod.com/rvah12_naskeywest/d85e
0870.jpg
Reference Photographs. Please can you let me have your reference material this meeting so that I can put it onto CD-ROMs for the Xmas club meeting.for putting on a CD-ROM over the coming month.
Website of the month. I have sent some photos of my aircraft carrier model for posting on www.steelnavy.com
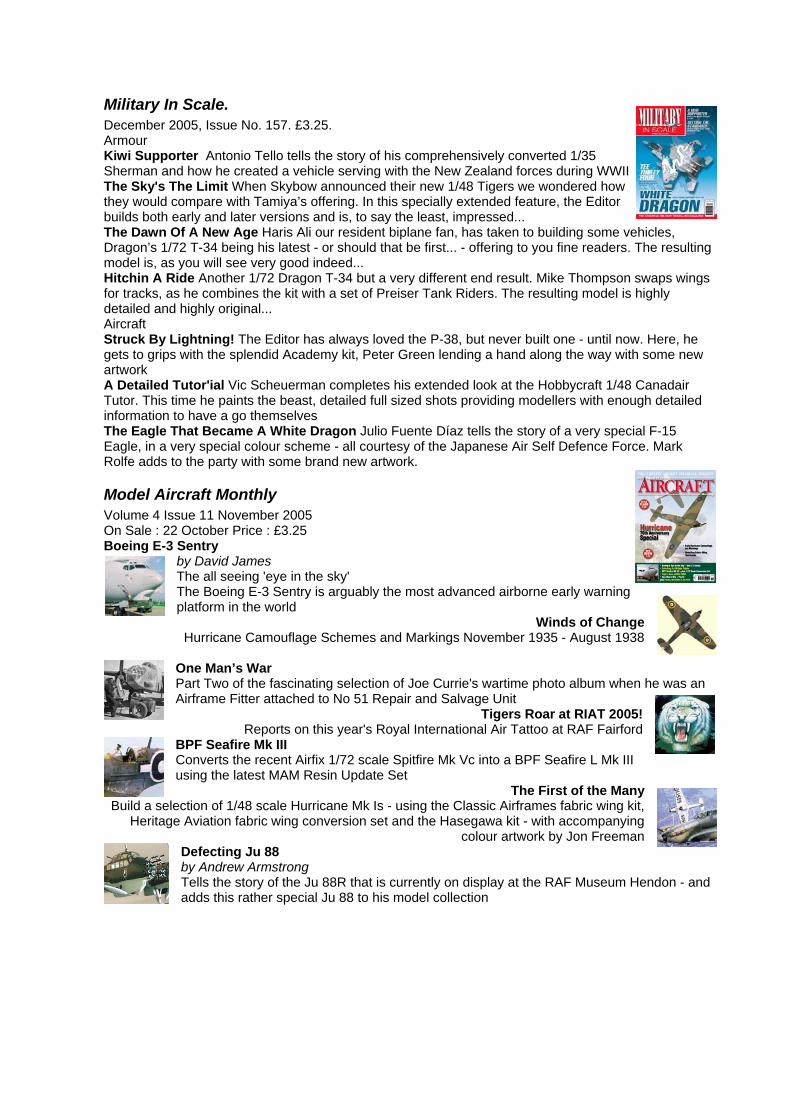
New Plastic. There are a few accessories that are about to be released by L’Arsenal that have caught my eye. The first two are gun mountings that you would find on aircraft carriers. The Bofors is most useful as these were sometime located at flight deck level (on CV-6 Enterprise these replaced the quad 1.1” “Chicago pianos” after her 1943 refit). Would look good alongside that Tamiya Corsair waiting in my “to-do” pile!
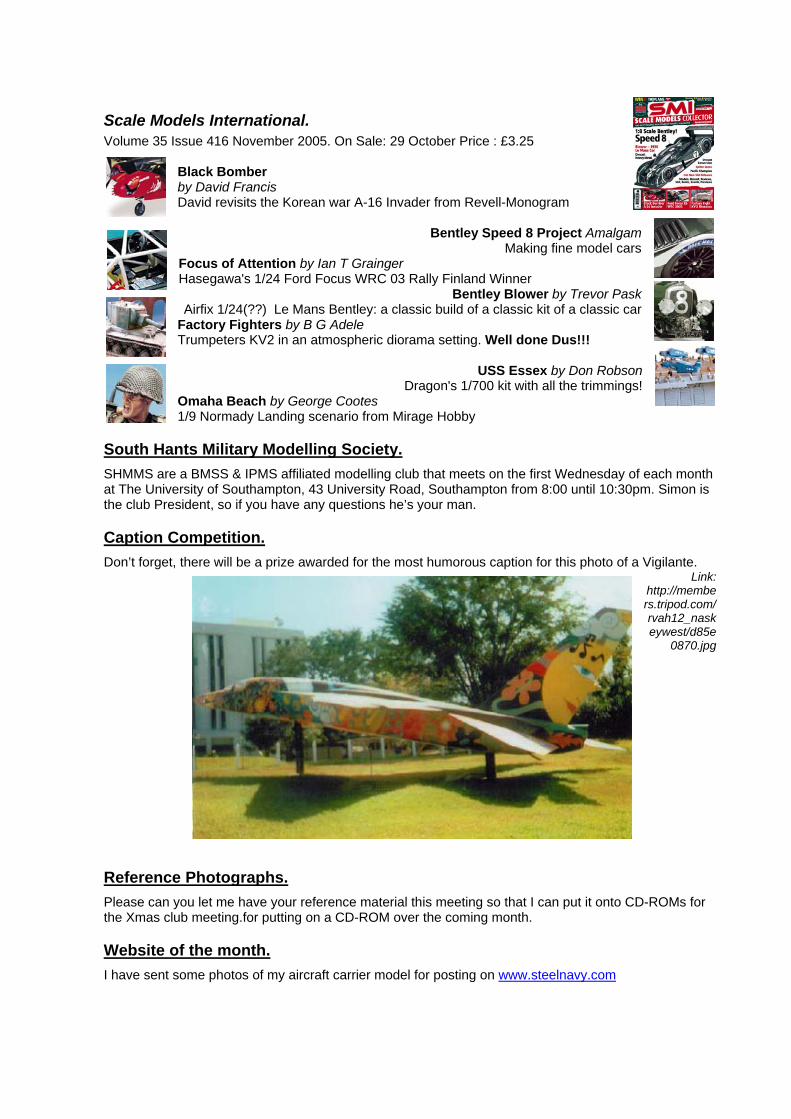
The 20mm Oerlikon would be found at catwalk level just below the flight deck. The third item is a 1/48 US Forces G-cart starting unit (no picture of this). Not sure what the prices are yet, but I intend to place an order so please let me know if you are interested.
Paul Adams has some rally car kit news.... “I have seen this kit on the Profil 24 website...a 1/24th resin Group B 1985/86 MG Metro 6R4 as rallied by the late great Tony Pond and Ford's current WRC team boss, Malcolm Wilson. Kits of the awesome fire-breathing Group B rally cars have been largly overlooked by manufactures apart from some expensive ones from Modellers which are now fetching silly money on Ebay - This kit was previously attempted by MRM International who charged about the same price for an aweful rendition of the car. This Profil kit should retail around £90.00, not cheap, but the kit looks like good value as you'll be able to build a number of different cars from the kit. The attached photo shows the kit to have the sweet sounding V6 as well as a white metal light pod and cast wheels. It looks as if they have depicted the car in tarmac spec, so it should look great with beefy wide tyres and low stance. My self imposed kit buying ban for 2006 is weakening already..!!!! Paul.
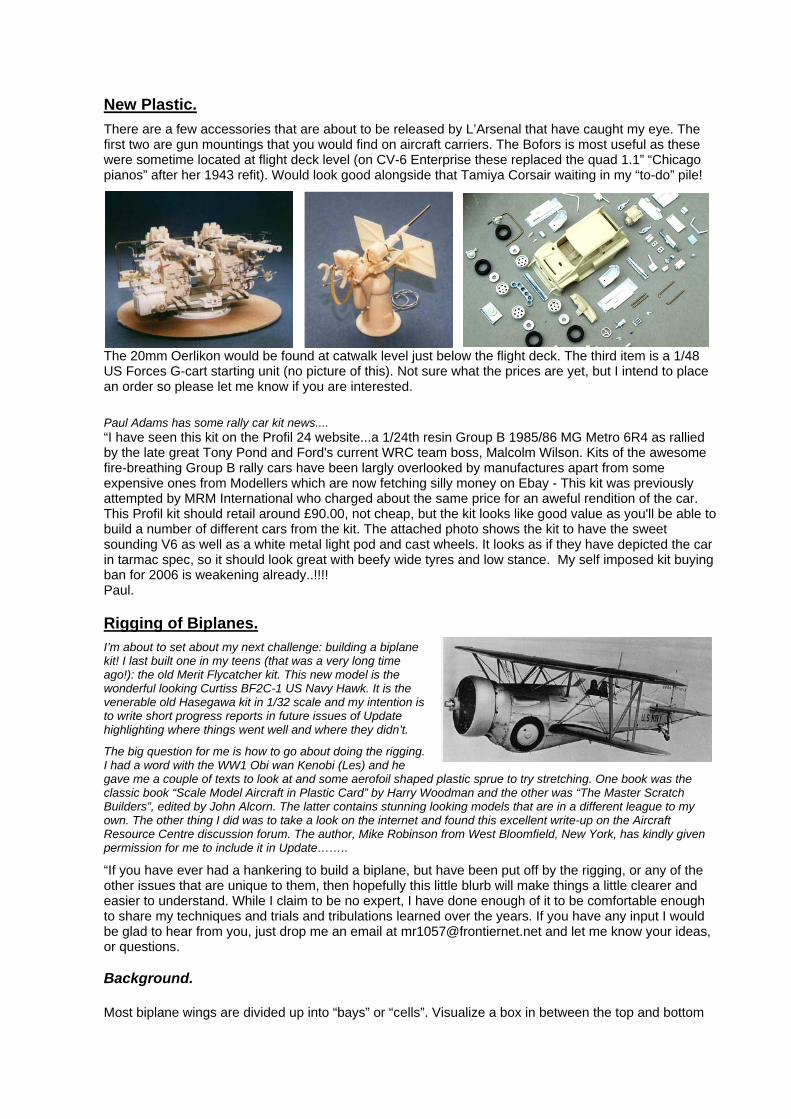
Rigging of Biplanes. I’m about to set about my next challenge: building a biplane kit! I last built one in my teens (that was a very long time ago!): the old Merit Flycatcher kit. This new model is the wonderful looking Curtiss BF2C-1 US Navy Hawk. It is the venerable old Hasegawa kit in 1/32 scale and my intention is to write short progress reports in future issues of Update highlighting where things went well and where they didn’t.
The big question for me is how to go about doing the rigging. I had a word with the WW1 Obi wan Kenobi (Les) and he gave me a couple of texts to look at and some aerofoil shaped plastic sprue to try stretching. One book was the classic book “Scale Model Aircraft in Plastic Card” by Harry Woodman and the other was “The Master Scratch Builders”, edited by John Alcorn. The latter contains stunning looking models that are in a different league to my own. The other thing I did was to take a look on the internet and found this excellent write-up on the Aircraft Resource Centre discussion forum. The author, Mike Robinson from West Bloomfield, New York, has kindly given permission for me to include it in Update……..
“If you have ever had a hankering to build a biplane, but have been put off by the rigging, or any of the other issues that are unique to them, then hopefully this little blurb will make things a little clearer and easier to understand. While I claim to be no expert, I have done enough of it to be comfortable enough to share my techniques and trials and tribulations learned over the years. If you have any input I would be glad to hear from you, just drop me an email at [email protected] and let me know your ideas, or questions. Background. Most biplane wings are divided up into “bays” or “cells”. Visualize a box in between the top and bottom
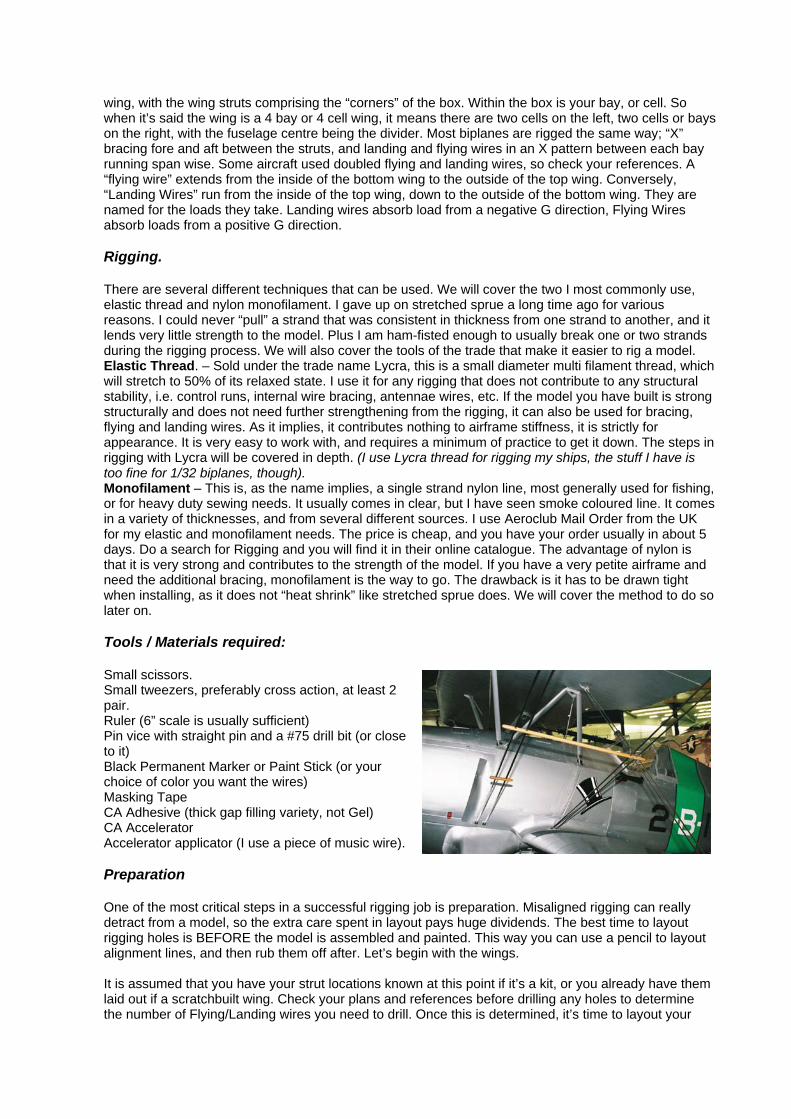
wing, with the wing struts comprising the “corners” of the box. Within the box is your bay, or cell. So when it’s said the wing is a 4 bay or 4 cell wing, it means there are two cells on the left, two cells or bays on the right, with the fuselage centre being the divider. Most biplanes are rigged the same way; “X” bracing fore and aft between the struts, and landing and flying wires in an X pattern between each bay running span wise. Some aircraft used doubled flying and landing wires, so check your references. A “flying wire” extends from the inside of the bottom wing to the outside of the top wing. Conversely, “Landing Wires” run from the inside of the top wing, down to the outside of the bottom wing. They are named for the loads they take. Landing wires absorb load from a negative G direction, Flying Wires absorb loads from a positive G direction. Rigging. There are several different techniques that can be used. We will cover the two I most commonly use, elastic thread and nylon monofilament. I gave up on stretched sprue a long time ago for various reasons. I could never “pull” a strand that was consistent in thickness from one strand to another, and it lends very little strength to the model. Plus I am ham-fisted enough to usually break one or two strands during the rigging process. We will also cover the tools of the trade that make it easier to rig a model. Elastic Thread. – Sold under the trade name Lycra, this is a small diameter multi filament thread, which will stretch to 50% of its relaxed state. I use it for any rigging that does not contribute to any structural stability, i.e. control runs, internal wire bracing, antennae wires, etc. If the model you have built is strong structurally and does not need further strengthening from the rigging, it can also be used for bracing, flying and landing wires. As it implies, it contributes nothing to airframe stiffness, it is strictly for appearance. It is very easy to work with, and requires a minimum of practice to get it down. The steps in rigging with Lycra will be covered in depth. (I use Lycra thread for rigging my ships, the stuff I have is too fine for 1/32 biplanes, though). Monofilament – This is, as the name implies, a single strand nylon line, most generally used for fishing, or for heavy duty sewing needs. It usually comes in clear, but I have seen smoke coloured line. It comes in a variety of thicknesses, and from several different sources. I use Aeroclub Mail Order from the UK for my elastic and monofilament needs. The price is cheap, and you have your order usually in about 5 days. Do a search for Rigging and you will find it in their online catalogue. The advantage of nylon is that it is very strong and contributes to the strength of the model. If you have a very petite airframe and need the additional bracing, monofilament is the way to go. The drawback is it has to be drawn tight when installing, as it does not “heat shrink” like stretched sprue does. We will cover the method to do so later on. Tools / Materials required: Small scissors. Small tweezers, preferably cross action, at least 2 pair. Ruler (6” scale is usually sufficient) Pin vice with straight pin and a #75 drill bit (or close to it) Black Permanent Marker or Paint Stick (or your choice of color you want the wires) Masking Tape CA Adhesive (thick gap filling variety, not Gel) CA Accelerator Accelerator applicator (I use a piece of music wire). Preparation One of the most critical steps in a successful rigging job is preparation. Misaligned rigging can really detract from a model, so the extra care spent in layout pays huge dividends. The best time to layout rigging holes is BEFORE the model is assembled and painted. This way you can use a pencil to layout alignment lines, and then rub them off after. Let’s begin with the wings. It is assumed that you have your strut locations known at this point if it’s a kit, or you already have them laid out if a scratchbuilt wing. Check your plans and references before drilling any holes to determine the number of Flying/Landing wires you need to drill. Once this is determined, it’s time to layout your

rigging holes and drill them. I generally space my landing/flying wires out from the strut hole about 1mm, but this is subject to accuracy. If you are not working from 3-views, then eyeballing it from a good clear photo should give you an idea how far away to make them. Begin by drawing a pencil line from tip to root, using the strut holes as a guide. Do this for front and rear struts if equipped. V strut wings may only require one line. Now using a small square, square off these lines and draw lines between the strut holes for your inter strut bracing. On both sides of this line, draw a parallel line the determined distance from your strut hole, for the flying and landing wires. Remember, on the outermost struts, there may not be flying wires, and rarely any landing wires, (check your references again) so odds are good you won’t need holes on the outside of those strut holes. Where these pencil lines intersect is where you will make the holes. Drilling holes. Depending on what technique you are using determines how deep you drill the holes. If you are using Lycra Thread, then you only need to drill to a depth of 1 mm or so. If you are using monofilament, then you will drill completely through the wing so that the hole goes all the way through on the bottom wing. On the underside of the top wing, drill ½ the thickness of the wing. We will cover why later. Using the pin vice with a sharp straight pin chucked in place, centre punch all the intersecting pencil lines to prevent the drill bit from walking when you drill. The method you use to drill is entirely up to you, but I have found a Dremel set to low speed makes short order of the holes, but a steady hand and a pin vice with a #75 or so drill bit works just as well, it just takes longer. Once all your holes are drilled, relax and have a beer or drink of your choice; you have earned it. The same methods work for fuselage rigging and tail plane rigging. Just remember the mantra, measure twice, mark once, drill once. Always double check your dimensions and never assume you have it right… always double check. Running the lines. Okay. Your jewel is assembled, all your rigging holes are drilled, and you are about to cut your first line. Stop. Look it over and determine an order of rigging. Generally speaking, working from the inside out makes the most sense, trying to run lines in between existing lines can be enough to make your little jewel become airborne into the nearest wall at a fatal velocity. Now we can cut lines and begin gluing them in place. If you are using mono, length is not a concern. The rule of thumb I use is to cut your line about 2 inches longer than what you need. This will allow for your tweezers to act as a weight to keep your line taught as you glue it in place. More on this later. For Elastic, use a ruler to measure the distance your line needs to be. It does not have to be accurate; remember this stuff stretches. Unroll a couple of feet off the spool, and using the permanent marker, draw it along the line several times to color it. Let it dry for a few minutes, then lay the line on your ruler at the determined length and cut it off. Make as many as you need, as you will find most of them will be roughly the same length. Now the fun begins. Remove the drill bit from your pin vice and install a common straight pin. This will be your CA applicator to get the glue into the hole. Put two strips of masking tape down on an area of your workbench that is out of the way, but easy to reach. You don’t want to rest your elbow in it and become one with your bench. Put a drop of CA on the tape, and stick your pin into it, so that a tiny drop forms on the point. Touch the tip of the pin onto the side of the hole and let capillary action pull the CA into the hole. A little practice on some scrap holes may be in order until you get the feel for it. You don’t want the CA to be above the surface of the wing, just enough to fill the hole. After 3 or 4 holes are filled, you may find it necessary to remove any excess CA built up on the tip of the pin. For the first end, no accelerator is needed, just poke the line into the hole and let it cure. Repeat this to as many lines as you feel comfortable with. (Hint: Install all the landing/flying wires and X bracing into the underside of the top wing before you install it onto the model. It is much easier than trying to install them later when it is assembled). Once these have cured, you can begin gluing them into the bottom holes. To accomplish this, I generally check the length by stretching the line to the hole and seeing how taught the line is. If it is loose, I cut just enough so that the end of the line is about 1/8th of an inch or so away from the hole in a relaxed state, then I can stretch it to the hole and it will be nice and taught. Now using your pin vice CA applicator, put a drop of CA into the receiving hole, and add a tiny dab of accelerator to the end of your line. It may curl a bit, but it does not hurt the line any. Now, quickly, use your tweezers and stretch the

line to the hole and poke it in. The accelerator will instantly cure the CA and you have one nicely installed rigging line. Repeat this procedure for as many lines as you have. Begin with the X bracing between the struts, then work your way from the centre of the model outboard, stretching and gluing as you go. Once you get the knack of this, you will be amazed at how quickly you can rig a model. For Monofilament the techniques are the same for the first end, just put a drop of CA into your anchor hole, poke it in and let it cure. The difference now will be the other end and how it is secured. Back in your preparation, you drilled the holes in the lower wing all the way through. Take the other end of your line and stuff it in the hole so that the end pokes through and out the bottom. Now using a pair of cross action tweezers, grasp the end and pull the line through the hole, and let the weight of the tweezers keep the line taught. Now using your CA applicator, add a drop of CA to the top of the hole to seize the line in place. When you get all your lines run, flip the model over upside down. There are two methods of seizing the line off, use whichever one you find easier. You can either use a sharp #11 blade and cut the excess off and add CA to the hole, or you can trim the line off, leaving about 1 or 2 mm extra, fold the line over on itself and poke it back into the hole before applying CA. The advantage of this is, the “hook” that is formed will become embedded in the CA in the hole and will be a very strong anchor. After all your lines are done, use a drop of CA to fill the hole off, and after it cures, a tiny brush with the same color paint the bottom has, or spray the color onto some decal film and punch out tiny circles to cover the holes, will make them invisible after flat coating. Hopefully this will give you some idea of how easy rigging really is. I find it one of the more satisfying parts of a biplane build, as the rigging is what gives them that “look” and a lot of character. I hope that as you practice the techniques here more, you will become more confident in your rigging abilities and you will find it’s not the endless dark tunnel that people perceive it as. As always, start with something simple with minimal rigging before you get carried away. A Fokker D-VII or a Nieuport is a good place to start, and then perhaps go to a Sopwith Camel or Albatross DV with a little more. The more you do, the more you will become comfortable”. The following comment was posted after Mike’s article…. “A much simpler option is to use smoke/black monofilament, rather than the clear stuff. Readily available in just about any sewing/craft store as 'invisible thread' - I just picked up a 300m spool last week for the princely sum of 60¢. While clear works fine to replicate white and silver lines, I'm really not fond of it for anything darker. I've found that paint can go on unevenly, both paint and marker have a tendency to come off with handling if you apply them BEFORE doing the rigging, and it's often difficult to touch in the lines after they're installed - touching the surface of the model with the marker/brush, leaving dots and smears that have to be touched up, hard to reach corners and inaccessible tight spots. Once you go black, you won't go back”. I hope you find the above helpful yourselves as I know that biplanes are a popular subject in the club.
The John Cox Memorial Trophy. A short time ago we decided that we should name our trophy for the annual competition overall winner the “John Cox memorial trophy” in tribute to one of the club founders. Without John, the club would probably have never got off the ground.
I spoke with Tony Chown, a long standing friend of John’s, and he sent me John’s obituary. I know many of you in the club never had the pleasure of meeting or knowing John, but as his name will be adorning the trophy that I hope each of you will come to win at some time, I thought you ought to know something about the man behind the name.
John Henry Cox, BEM.
“He will be greatly missed”. This formulaic tribute that so often appears in an obituary is certainly valid when applied to John Cox, who died peacefully in his sleep after a long and painful illness.
Best known to newer members of the British Model Soldier Society as Chief Judge, John’s name and address appeared on every issue of “The Bulletin” from No.6/1971 to No4/2004. A partial list of his

positions appeared in “Bulletin Extra” No2/2005, and he has served additionally as Area Rep and as Vice President during his 50+ years’ membership.
John was born into an army family and , in due course, joined as a boy soldier; on completion of his training he passed to the Royal Electrical and Mechanical Engineers. Too late to serve in World War II, he was in time to be sent to Korea where he was awarded the British Empire Medal for gallantry. Ever modest, he never spoke about this award, so that neither his wife nor his children have been able to provide details of the citation. It seems possible that he “took out” and enemy post, but how a REME technician was in a position to do that must remain a mystery.
The war over, John, as so many of the British Army at the time, then spent periods in the UK and BAOR. However, the posting that was to have the greatest effect on his life was when he was detailed to a small Royal Signals unit in Thailand.
All new arrivals to the unit were required to report to the Military Attaché in Bangkok. Something “clicked” between this soldier and the Attaché’s WRAC PA, with the result that John and Bobbi (John’s preferred spelling) were married, in January 1965, by the British Ambassador. At the subsequent service at the English Church in Bangkok, the Guard of Honour was formed of Gurkhas from the Embassy guard detail, complete with drawn kukris. Bobbi left the army but remained with John in Thailand, where their daughter Cheryl was born.
Further postings to the UK and Germany culminated in two years at the CIO in Southampton, where John’s BMSS involvement stepped up a notch. He joined the Southampton Branch (aka South Hants Military Modelling Society) with such as John Sanders, Terry Nappin and others.
It was here that Tony really came to know him. He turned up for his first Branch meeting and found himself part of the team for the inter-branch quiz the very next day – John’s golden tongue!
Southampton at that time was a good place to be a military “fan”. Apart from South Hants, there was a military dining group who met monthly in the Wardroom of HMS Wessex with a guest speaker, and a further group meeting for talks, films, quizzes, etc., at the Octagon Hotel, also monthly. In both of these very active groups none was more active than John, and it was largely due to his agency that Octagon speakers included Roy Dilley and Bill Carman, names well known to all BMSS members.
On leaving the Army, John joined British Gas in their Security Section which involved him in further foreign travel when British Gas were installing a gas line across the wastes of Russia. Apparently, the Russian Customs Officers were completely baffled by his hand luggage which contained a box containing flats (model figures), oil paints and brushes – occupational therapy for the long dark evenings.
Promotion within the British Gas hierarchy saw him reach retirement as Facilities Manager for Southern Gas, which provided him with still further travel, mostly within reasonable reach of home.
A frequent visitor to Tony’s home, John’s first words to his wife were “Is the kettle on?” We he had moved to Dorset, this question was followed by a diatribe against Dorset tractor drivers. He was adamant that they awaited him at the County boundary before coming onto the road. (“Townies” should note that “tractor” is the first word spoken by Dorset babies!)
Although already part of South Hants and Salisbury BMSS, John was instrumental in forming a further Branch based on Tony’s home, since he had no transport. He later helped with the merger that is now Salisbury and Mid Wessex MMC.
An important aspect of John’s enthusiasm for the hobby was his encouragement of youngsters, in support of which he donated a trophy and organized a Junior Championship. He was delighted when the champion in both 2001 and 2002 was his grandson, Carrick Masterman.
In addition to all of this involvement he was a founder member and great supporter of the Indian Army SIG “Chota Sepoy”, the SIG quarterly, frequently included the results of his research, sometimes under Tony’s name so that he didn’t appear to be doing so much! Over the years he had many articles published in The Bulletin, frequently supported by his own artwork; another talent as a competent artist, which he has passed on to at least two of his grandsons.
Before the advent of self-adhesive labels, “Bulletin day” would find the entire Cox family around the dining table, licking evil tasting labels for envelopes. We understand the children hated it!

He was a past master at persuading people to help out, and then ensuring that they, not he, received the plaudits for their combined efforts. Tony says he himself has been the recipient of undeserved paise by virtue of this foible of John’s.
John was a lecturer on Military History for the Open University as well as a stalwart of the Royal British Legion in Romsey, in which he held various posts including those of Branch Treasurer and Welfare Secretary. Those of us privelaged to attend his funeral heard a tribute from the RBL Branch Secretary in which he described the unstinting assistance he received from John on his first appointment. The Standards of RBL Romsey and REME OCA were both paraded at John’s funeral, an indication of his especially strong links with both organisations.
There were still more activities – small wonder he could claim that he had little time for modelling. His support for youth lead to his serving, for some time, as Cub master, and he was also treasurer for the local Red Cross Medical Loan Service (through which we at Romsey Modellers obtained our first club house).
His principal interest, besides the BMSS and military matters, was cricket. He was “not available” for most summer weekends due to this game where he participated, not as a player, but as an umpire. There was a period when he and his brother, Michael, were at opposite ends in the same matches. The Cox family hope to install a bench, in John’s memory, at the Ampfield Cricket Club from donations in lieu of flowers.
Overriding everything was John’s sense and love of family. Tom Ridout’s tribute to John referred to his “large and sorrowing family”, and they did indeed seem very close. Besides Cheryl, Bobbi presented him with twins, Kathryn and Ian, and there are now six grandsons, ranging from Carrick (aged 14) to Timothy (born 21st January 2005). Much to his delight, John was wheeled into the maternity ward to see and hold the new arrival.
In a particularly nice gesture, family members were able to arrange a surprise party at Christmas to which representatives of all John’s involvements were invited. It was to be the last large gathering he attended.
The funeral service and cremation were followed by internment in Aldershot Military Cemetery, where he joined his father and his brother.
There will be a Service of Remembrance on Saturday 28th January at 2:00pm in the United Reform Church in Romsey. If you would like to go along, either let me or Les know so that we can let Kathryn Masterman know for the catering.
Test Trout. The next Test Trout competition will be held in January’s club meeting. The theme is “x2”. Here is a reminder of ones to follow for those of us, like me, who take months to build anything…
White, Birds, Cats, “The Italian Job”, “The French Connection”, “Germany Calling”, “Made in Japan” (the subject, not just a Japanese kit), Thunder & Lightning, Twins, Any colour you like – so long as it is black!, Navy, Tamiya, strictly oob (out of the box).
Next Meeting: December 21, Christmas Meeting!
This is our Christmas evening and we welcome family members along as well. Please bring any food, drink, prizes for the raffle, items for bring and buy sale (whether for yourself or for donating to club funds).
Awards will be given for the Annual Competition and then every person present at the hall will vote on their overall favourite, so make sure you bring your model entries along and return any of last year’s trophies!
Happy modelling! Pat Camp Tel: 02380 266828, email [email protected] or [email protected]