Embed Size (px)
Citation preview

New York Hall of Science • 47-01 111th Street • Queens, NY 11368 www.nysci.org
The New York Hall of Science (NYSCI) offers a variety of programming, including Make Academy after-school and camp programs, where you can make things by learning how to use tools, manipulate materials, and creatively solve problems.
This booklet will show you activities used in Make Academy programs and some of the innovative objects created by kids. For even more ideas, check out our Maker Space blog at makerspace.nysci.org.
Before starting on your project, familiarize yourself with the tools listed in the Tools booklet. If you are unfamiliar with any of these tools, you should practice using them before you work on your final masterpiece. This will build your confidence with tools and help you learn how to use the tools properly.
It is very important to make sure that all your tools are the appropriate size and weight for the person using them. If there are different-sized people using your space (e.g. young siblings, adults), you should consider getting the same tool in different sizes to accommodate them. This is one way to help prevent injuries.
Contents
Introduction
Experimental Sound Machine
Wooden Acrobat Toy
Light Painting
Acoustic Speaker
Page
1 2 8 15
18
1
© 2014 by the New York Hall of Science
This publication is made possible with generous support from The Walt Disney Company.

32
Make Academy Camper: Samantha, Age 11
Experimental Sound Machine
Samantha started this activity by taking apart musical instruments and exploring what materials they are made of. Through this experience she gained an understanding of what each material does within the instrument to make it work. Then she explored everyday objects to discover what sounds they made.

4 5
Step 1 Use your pencil to plot out where you
would like your sound pegs to be on your Experimental Sound Machine. This is where you will put the machine screws.
Good to Know: Spacing your marks out across the piece of wood will provide more distance for the rubber band to stretch. The tighter the rubber band, the louder the sound it will make.
Step 2 Decorate your board! You can use markers, pencils, pens, paint, stickers and anything
else you want to use.
Step 3 Drill the holes for your sound pegs.
Use two quick-grip clamps or C-clamps to clamp your board between two surfaces. Samantha clamped her board between two tables.
Stuff You Will Need•PaperandPencil•Wood(Samantha used a 12 inch by 12 inch MDF board, but you can use any size or type of wood.)•MachineScrewsandNuts•RubberBands(Various Sizes)•Tape•PiezoElement•¼-inchAudioJack•Markers,Paint,Stickers,Printoutsand Magazines for Collage•DecorativeMaterials(Markers, Pens, Stickers, Paint, etc.)
Tools You Will Need (for reference see Tool Booklet)•Clamps(Tool Booklet, item 7)•DrillandDrillBits(Tool Booklet, item 17)•Sandpaper(Tool Booklet, item 3)•CombinationWrench(It will need to fit the nuts
for the machine bolts.) (Tool Booklet, item 10)•Screwdriver(Tool Booklet, item 9)•SolderingStation (Tool Booklet, item 20)
Protective Gear•Gloves (Tool Booklet, item 22)•Glasses(Tool Booklet, item 23)•DustMask(Tool Booklet, item 25)

6 7
Good to Know: You can reverse the order of steps 2 and 3 if you like. Why? There is a chance you may damage your artwork with the drill. Samantha didn’t mind because she designed the placement of the sound pegs around her artwork.
Step 4 Get some sandpaper and sand the areas around the drill
holes to smooth them out.
Step 5 Insert the machine screws through the bottom of the board,
place a nut on the other end, and tighten with your fingers. Repeatthisstepuntilalloftheholeshaveasoundpeg.
Step 6 Use the combination wrench and screwdriver to tighten the
bolts to the board. Place one end of the combination wrench around the nut to hold it in place, then insert the screwdriver into the other side of the screw and tighten.
Step 7 Lay your board on the table and stretch various rubber
bands over different sound pegs. You can stretch the rubber band around as many of the pegs as you want, but keep in mind that if two rubber bands overlap on top of each other, they will not vibrate as much.
Good to Know: At any point you can add more pegs or take some out. This is your project and you are in charge!
Step 8 Solder the black and red wires from the
piezo element to the two leads of the ¼-inch audio jack.
Good to Know: If you don’t have access to a soldering gun, you can cover the wire connection with hot glue. Either way, be careful because the connection is very fragile.
Place the contact mic to the back of your Experimental Sound Machine, using some tape to hold it in place. Then tape the audio jack securely on the back and plug it into an amplifier.
Now you’re ready to play! Experiment with the placement of the rubber bands, stretch them out as you pluck them, and see what happens to the sound.
+ =

8 9
Make Academy Camper: India, Age 10
Wooden Acrobat Toy
Kids at NYSCI’s Make Academy deconstructed, designed and made all kinds of different wooden toys. A favorite among the campers was the classic acrobat toy — squeeze the lever arms and the acrobat flips.
The acrobat toy seems to be a simple mechanism but as the camp kids found out things aren’t always as they seem. If you have one, pick it up, turn it upside down and backwards, and try to figure out exactly how it works.

1110
Stuff You Will Need•PaperandPencil•Various-SizedDowelRods•2PaperClips•String(Should be thin but strong.)•TapeMeasure•Ruler•Markers,Paint,Stickers,Printoutsand Magazines for Collage
Tools You Will Need (for reference, see Tool Booklet on page 22)•Hammer(Tool Booklet, item 1)•4VerySmallNails•PullSaw(Tool Booklet, item 2)•ViseClamporQuick-GripClamps(Tool Booklet, item 8)•Drill(Tool Booklet, item 17)•Needle-NosePlierswithWireCutter(Tool Booklet, item 11)•Sandpaper (Tool Booklet, item 3)
Protective Gear•Gloves (Tool Booklet, item 22)•EyeProtection (Tool Booklet, item 23)
Step 1 Measure and cut the dowels for the two lever arms, the fulcrum, the acrobat’s body,
the two arms, and two legs. Get creative with the measurements of all the pieces.
Here are the measurements used at NYSCI’s Make Academy:
Step 2 Drill the holes. There is room for
experimenting with where you drill the holes. If you have time, you might want to try a couple different places to see how it affects the movement of the acrobat.
Use a very thin drill bit and a vise clamp to hold your wood pieces so you can drill the holes accurately. If this is the first time you have used a drill, practice on another piece of wood first.
Acrobat: Body: 3 inches Arms: 2 ¾ inches Leg: 2 inches
Frame: Lever Arms – 10
inches each Fulcrum – 2 inches

12 13
Step 3 Now decorate! You can draw a face, paint
clothes, add stickers, or any combination of those. Another fun idea is to print out a picture of yourself and glue it onto the head of the acrobat.
Step 4 Straighten out both of the paper clips;
you will use them to attach the arms and legs to the body. Take needle-nose pliers and pinch them tightly on one end of the straightened paper clip. Slowly roll the paper clip around the end of the pliers, curling it into a small loop. Only do this
to one side of the paper clip, for now. Repeat this step with the other paper clip.
Step 5 Slide the paper clip through the single
hole of one of the arms, then through the armhole on the body and the second arm. Use the wire cutter on the pliers to snip theexcesspaperclipoff,leavingabout¼inch on the other side to curl, just as you didontheotherside.Repeatwiththelegs.
The measurements used at NYSCI’s Make Academy are as follows:
•Each arm has three holes: oneis¼inch from one end and there are two holes on the other end where the hands would be. Thefirstholeshouldbe¼inchfromtheotherendandthesecond¼inchfromthefirst one.
•Thelegsonlyneedonehole¼inchfromone end; this is where it will attach to the body.
•Thebodygetstwoholes,oneforthelegsand one for the arms. The hole for the legs should be centered ½ inch from the bottom of the body and the hole for the arms should also be centered and 1½ inch from the top of the body.
•Theleverarmsgettwoholeseach,whichshould mirror the ones on the arms. The firstholesshouldbe¼inchdownfrom thetopandthesecond,¼inchfromthat.
When you are done drilling, sand all the parts until they are smooth. Then wipe with a damp cloth to get all the dust off.

15
Light PaintingStuff You Will Need•LEDs•CoinCellBattery•BinderClip
Tools You Will Need•DigitalCamera(with
shutter control for long exposure)•Tripod
Good to Know: If you don’t have access to a digital camera, there are many apps for smart phones and tablets that simulate this procedure.
Step 6 Assemble the lever arms and fulcrum.
The fulcrum should be attached one-third of the length of the lever arms from the bottom. For example, with our 10-inch lever arms, the fulcrum would go 3 1/3 inches from the bottom. Measure and mark where the fulcrum will sit and use a hammer and two small nails to connect each lever arm to the fulcrum.
Step 7 Place all the pieces on a flat surface with
the acrobat in the middle of the two lever arms. Lift both arms up and align them with the holes in the lever arms. Weave the string criss-cross through the holes, the same way you lace your shoes. Once it is through, tie a knot and trim the excess.
Congratulations! You just made your very own acrobat toy. Now squeeze the bottom of the lever sticks and watch your new
acrobat flip.
14

16 17
Step 3 Light painting will work in a lit room if
the light source you are using is bright enough and the exposure is long enough. However, the darker the room the better. One person should be in charge of operating the camera. Of course the camera operator can join in the fun but he/she will also be responsible for opening and closing the shutter.
Once you are in a dark room, open the shutter on your camera by clicking the shutter button. When you hear the click, move the light around until you have completed your masterpiece. Then close the shutter, turn on the lights, and take a look. This process may take a little practice to get it just right, but it is quick and easy to do.
Step 1 Set up the camera on a tripod. Light
painting requires a long exposure so the camera must remain completely still. Try holding the camera instead of using a tripod to see what happens. Also, you could place the camera on a table or any other stable surface. Set your camera to manual mode and familiarize yourself with your camera’s settings, so when you press the shutter button the camera creates along exposure.
Step 2 Pick your light source; it can be anything
from a flashlight to a Fourth of July sparkler. The brighter and smaller the light source is, the more accurate and bright your creation will be. At NYSCI, makers used LEDs, small coin cell batteries and binder clips.
Slide the battery between the legs of severalLEDs.RememberthatLEDsareunidirectional, so if they don’t light up try switching the legs around. Place the binder clip over the legs of the LED, pinching them securely to the battery. You have light!

18 19
Make Academy Camper: Dylan, Age 10
Acoustic Speaker
In NYSCI’s Make Academy, Dylan prototyped several acoustic speakers for smartphones and found it worked best to use wood for the frame. Not only does wood provide a perfect stand to hold your smartphone, but also it looks and sounds great! Experiment with different materials and ways to make this project.
20 21
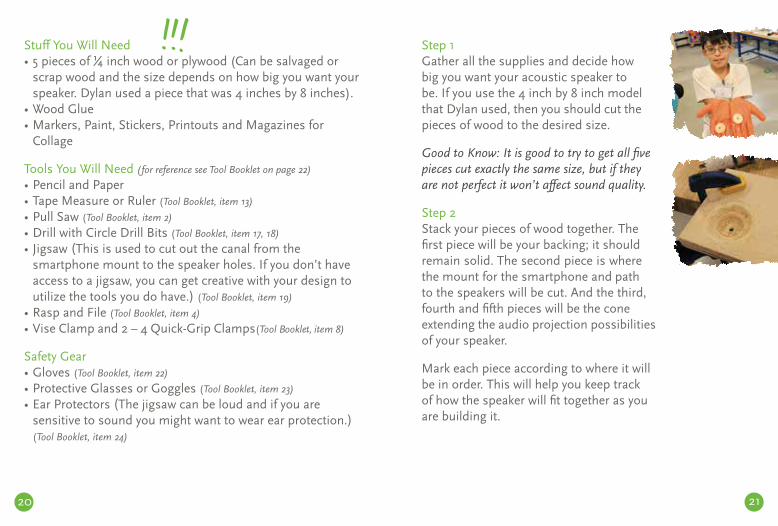
Stuff You Will Need •5piecesof¼inchwoodorplywood(Canbesalvagedor
scrap wood and the size depends on how big you want your speaker. Dylan used a piece that was 4 inches by 8 inches).
•WoodGlue•Markers,Paint,Stickers,PrintoutsandMagazinesfor
Collage
Tools You Will Need (for reference see Tool Booklet on page 22)•PencilandPaper•TapeMeasureorRuler(Tool Booklet, item 13)•PullSaw(Tool Booklet, item 2)•DrillwithCircleDrillBits(Tool Booklet, item 17, 18)•Jigsaw(This is used to cut out the canal from the
smartphone mount to the speaker holes. If you don’t have access to a jigsaw, you can get creative with your design to utilize the tools you do have.) (Tool Booklet, item 19)
•RaspandFile(Tool Booklet, item 4)•Vise Clamp and 2 – 4 Quick-Grip Clamps(Tool Booklet, item 8)
Safety Gear•Gloves(Tool Booklet, item 22)•ProtectiveGlassesorGoggles(Tool Booklet, item 23)•EarProtectors(The jigsaw can be loud and if you are
sensitive to sound you might want to wear ear protection.) (Tool Booklet, item 24)
Step 1 Gather all the supplies and decide how
big you want your acoustic speaker to be. If you use the 4 inch by 8 inch model that Dylan used, then you should cut the pieces of wood to the desired size.
Good to Know: It is good to try to get all five pieces cut exactly the same size, but if they are not perfect it won’t affect sound quality.
Step 2 Stack your pieces of wood together. The
first piece will be your backing; it should remain solid. The second piece is where the mount for the smartphone and path to the speakers will be cut. And the third, fourth and fifth pieces will be the cone extending the audio projection possibilities of your speaker.
Mark each piece according to where it will be in order. This will help you keep track of how the speaker will fit together as you are building it.

22 23
Step 5 Decide where the sound will come out
on your speaker and mark it with your pencil. Then draw a path from the notches you made to connect to where you want the sound to come out. If you decide to go with high fidelity stereo like Dylan, than
you will choose two speakers and two paths from the speaker.
Step 6 This is where the fun power tool
experience begins. First cut the speaker holes in the second layer with the drill and circle drill bit. Clamp the wood to a table with the quick-grip clamps. It is important to use two of them to provide maximum hold. The circle drill bits really bite into the wood so take it slow.
Step 7 You are ready to cut out the area that will
hold your phone as well as the canal leading to your speakers. It is time to use the jigsaw. A jigsaw is a powerful tool and it is very important to practice using it before you attempt this cut. Take a piece of scrap wood and draw a similar path as the one on your speaker. Try cutting it out and see how the jigsaw feels.
Step 3 Take the second layer, the one that will
hold the smartphone as well as provide the canal for the sound to travel through. Decide whether you want to have one or two speaker holes. NYSCI’s original design called for one hole, but Dylan decided to go stereo with his project and make two holes for the speaker.
Place your phone about ½ inch down from the top of piece two and trace the outline of the bottom of the phone. This is where your phone will stand in the speaker.
Step 4 Play a song on your phone and look to see where the sound is coming from.
Smartphones often have a speaker and a microphone near each other. Listen to hear where the sound is coming from and measure the size of the speaker. On the second layer mark a notch in the outline drawing of your phone that is the same size as your speaker.

24 25
Step 10 All layers are cut and ready to be sanded
and glued. Sand the circles of the speaker cone as well as the edges of all the pieces. Dylan figured out a way to use the vise clamp and sand all his pieces together.
Step 11 Put the first layer on the table and spread
some wood glue around the perimeter. Stack layer two on top and do the same. Repeatforeachlayerandusethequick- grip clamps to hold them all together, nice and tight. Some wood glue may drip out the sides; you can use a damp rag to wipe it clean. You should let it dry for at least four to six hours before removing the clamps.
Step 12 Now your speaker is assembled! Place
your phone in the cradle and see what your favorite song sounds like!
All that is left to do is to decorate it. Get your markers, paint, stickers, collage materials and anything else you want to use to design the perfect look.
Is it hard to use? Keep practicing — it only gets easier! Once you are ready, cut out the cradle for your phone and the canal to your speaker hole. Make sure that the phone fits in and lines up with the canal.
Step 8 For the time being, you are done with layer
two. Stack layer three on top of layer two and mark where the speaker hole is on layer three. Drill a hole with the circle drill bit; repeat for layer four and five.
Dylan used a big circle drill bit on the third layer, a bigger one on the fourth, and an even bigger one on the fifth. He did this to simulate the shape of a cone speaker.
Step 9 Dylan was very thoughtful with his design
and decided to file down layers two through five in order to make the speaker appear like a cone. Stack all your layers together (aside from layer one). Make sure to line up your layers as evenly as possible. Clamp them to the table and start filing. Hold the file at an angle to maximize your efforts and keep the cone even.