Embed Size (px)
Citation preview
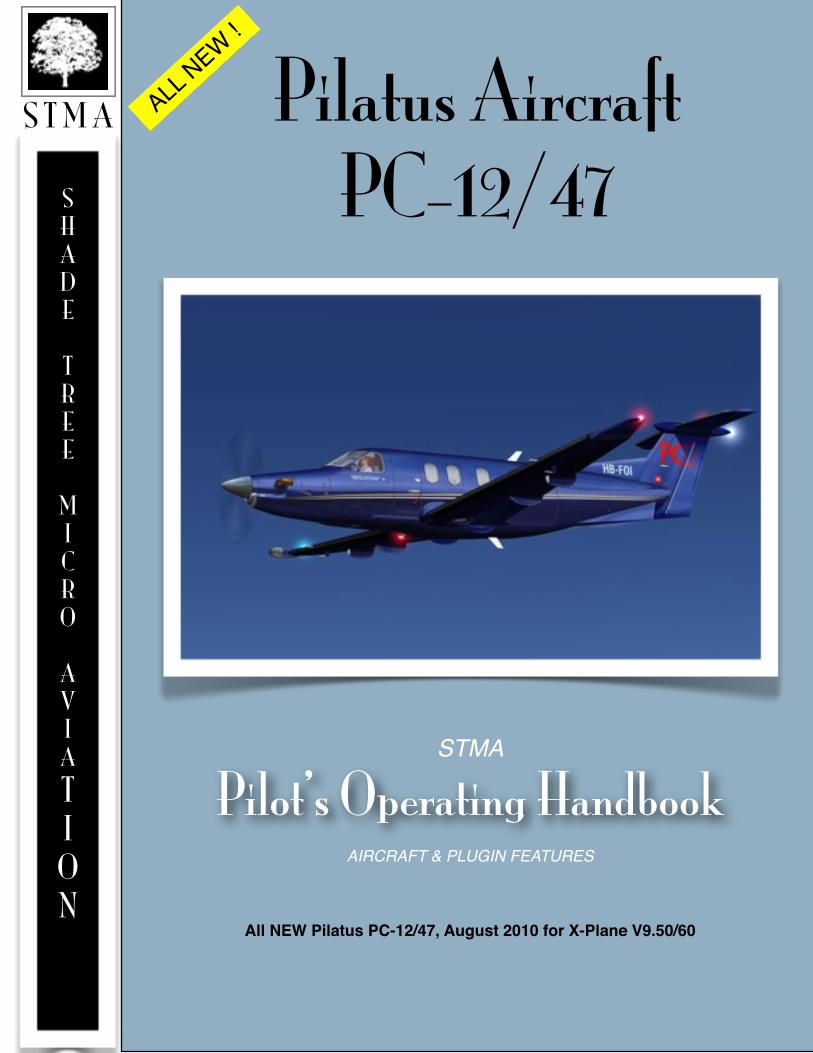
Pilatus AircraftPC-12/47S
HADE
TREE
MICRO
AVIATI
ON
S T M A
STMA
Pilot’s Operating HandbookAIRCRAFT & PLUGIN FEATURES
All NEW Pilatus PC-12/47, August 2010 for X-Plane V9.50/60
ALL NEW !
See more quality aircraft at www.shadetreemicro.com
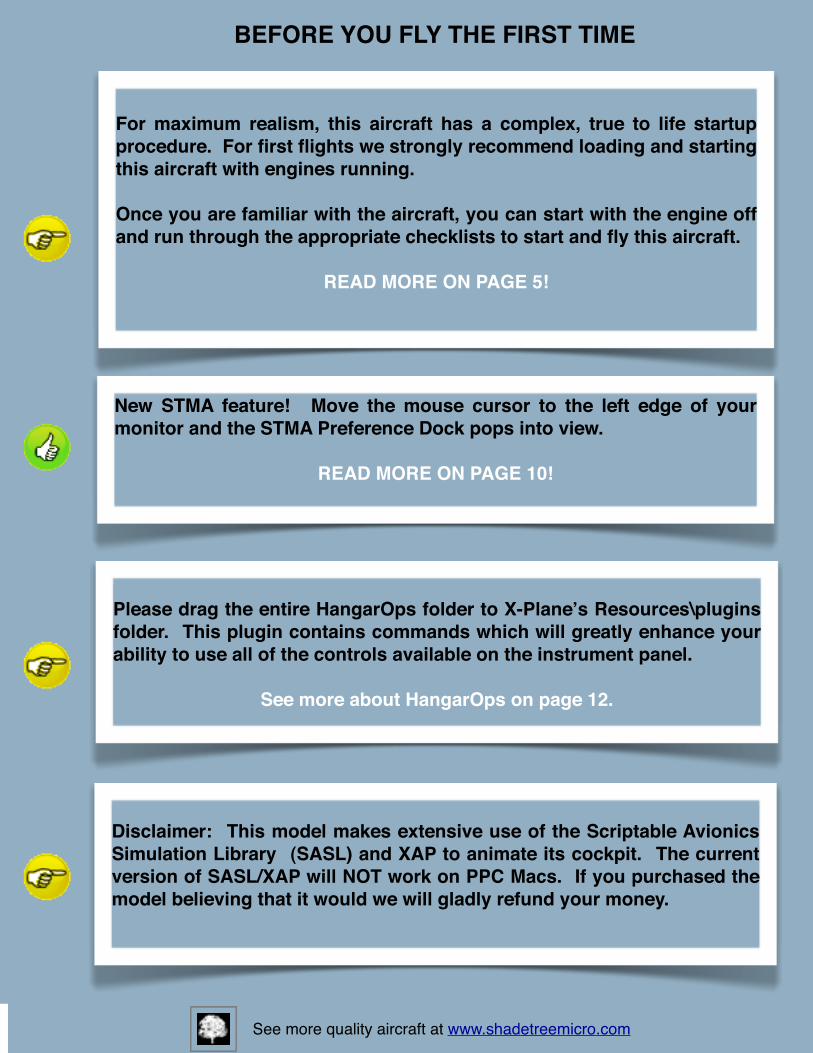
Disclaimer: This model makes extensive use of the Scriptable Avionics Simulation Library (SASL) and XAP to animate its cockpit. The current version of SASL/XAP will NOT work on PPC Macs. If you purchased the model believing that it would we will gladly refund your money.
For maximum realism, this aircraft has a complex, true to life startup procedure. For first flights we strongly recommend loading and starting this aircraft with engines running.
Once you are familiar with the aircraft, you can start with the engine off and run through the appropriate checklists to start and fly this aircraft.
READ MORE ON PAGE 5!
BEFORE YOU FLY THE FIRST TIME
Please drag the entire HangarOps folder to X-Planeʼs Resources\plugins folder. This plugin contains commands which will greatly enhance your ability to use all of the controls available on the instrument panel.
See more about HangarOps on page 12.
New STMA feature! Move the mouse cursor to the left edge of your monitor and the STMA Preference Dock pops into view.
READ MORE ON PAGE 10!

Pilatus Aircraft, Switzerland, PC-12/47
ABOUT THIS AIRCRAFT This is a replica of a Pilatus PC-12/47 turboprop airplane. It was created from the airplane's Type Certificate Data Sheet (TCDS), pilot information manual (PIM), maintenance manuals, and with the technical assistance of a skilled Swiss PC-12 pilot.
A simplified/modified version of this model is being used by Precision Flight Controls Inc. to train pilots on their simulators.
See more quality aircraft at www.shadetreemicro.com
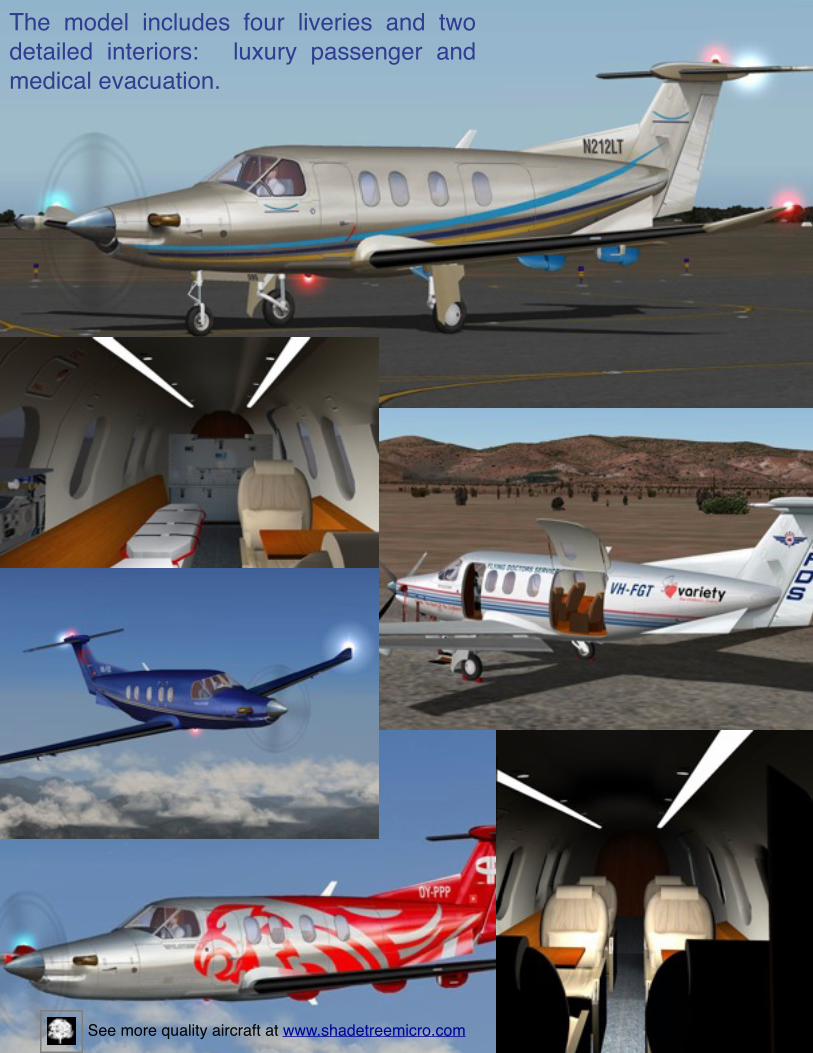
The model includes four liveries and two detailed interiors: luxury passenger and medical evacuation.
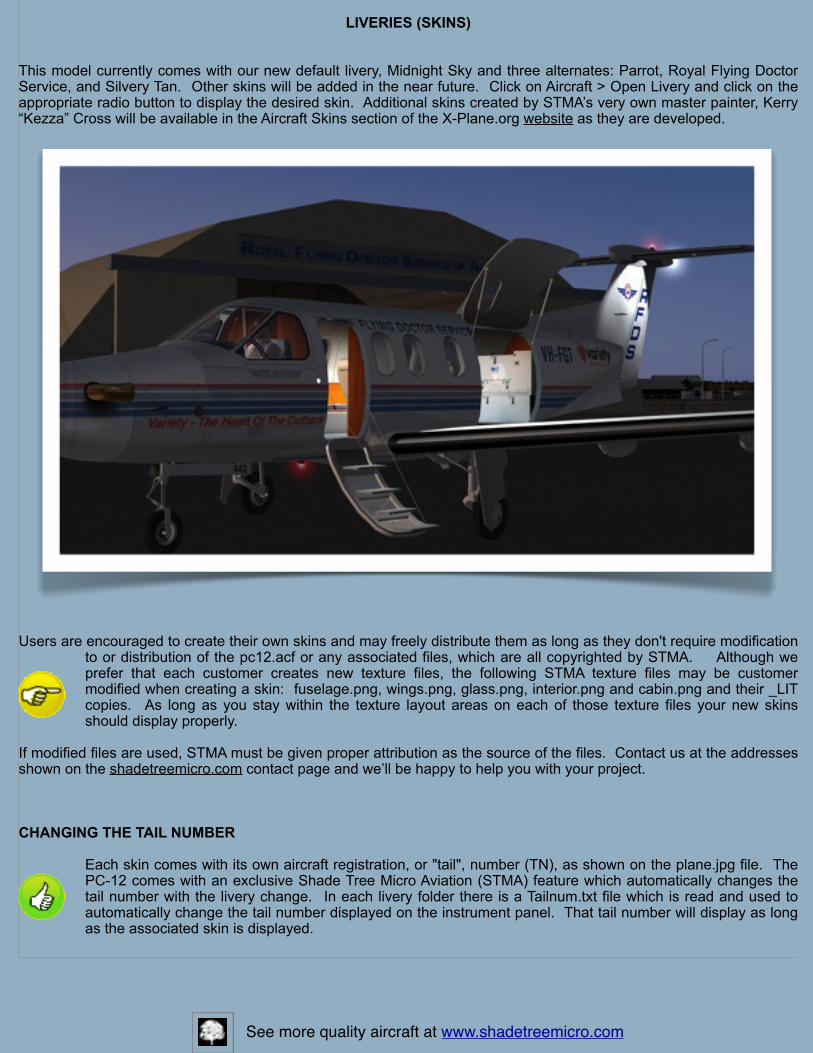
LIVERIES (SKINS)
This model currently comes with our new default livery, Midnight Sky and three alternates: Parrot, Royal Flying Doctor Service, and Silvery Tan. Other skins will be added in the near future. Click on Aircraft > Open Livery and click on the appropriate radio button to display the desired skin. Additional skins created by STMA’s very own master painter, Kerry “Kezza” Cross will be available in the Aircraft Skins section of the X-Plane.org website as they are developed.
Users are encouraged to create their own skins and may freely distribute them as long as they don't require modification to or distribution of the pc12.acf or any associated files, which are all copyrighted by STMA. Although we prefer that each customer creates new texture files, the following STMA texture files may be customer modified when creating a skin: fuselage.png, wings.png, glass.png, interior.png and cabin.png and their _LIT copies. As long as you stay within the texture layout areas on each of those texture files your new skins should display properly.
If modified files are used, STMA must be given proper attribution as the source of the files. Contact us at the addresses shown on the shadetreemicro.com contact page and we’ll be happy to help you with your project.
CHANGING THE TAIL NUMBER
Each skin comes with its own aircraft registration, or "tail", number (TN), as shown on the plane.jpg file. The PC-12 comes with an exclusive Shade Tree Micro Aviation (STMA) feature which automatically changes the tail number with the livery change. In each livery folder there is a Tailnum.txt file which is read and used to automatically change the tail number displayed on the instrument panel. That tail number will display as long as the associated skin is displayed.
See more quality aircraft at www.shadetreemicro.com
AIRCRAFT PREFLIGHT AND STARTUP
The engine startup procedure is complex, requiring multiple steps to perform so, for first flights we strongly recommend loading and starting this model with the engine running. (Settings → Operations & Warnings → Start Each Flight With Engines Running). Once you are comfortable finding your way around the cockpit you can start with engine OFF and then run through the appropriate checklists to start and fly the airplane.
The Pilatus Checklist is located in the PIM which is in the documents folder. Shade Tree Micro Aviation supports Snailpup's Checklister© plug-in and a Checklister checklist is included with the model. Checklister© is available for download at www.X-Plane.org. If you decide not to use Checklister, simply move clist.txt from the model’s root folder into the documents folder and Checklister will not display.
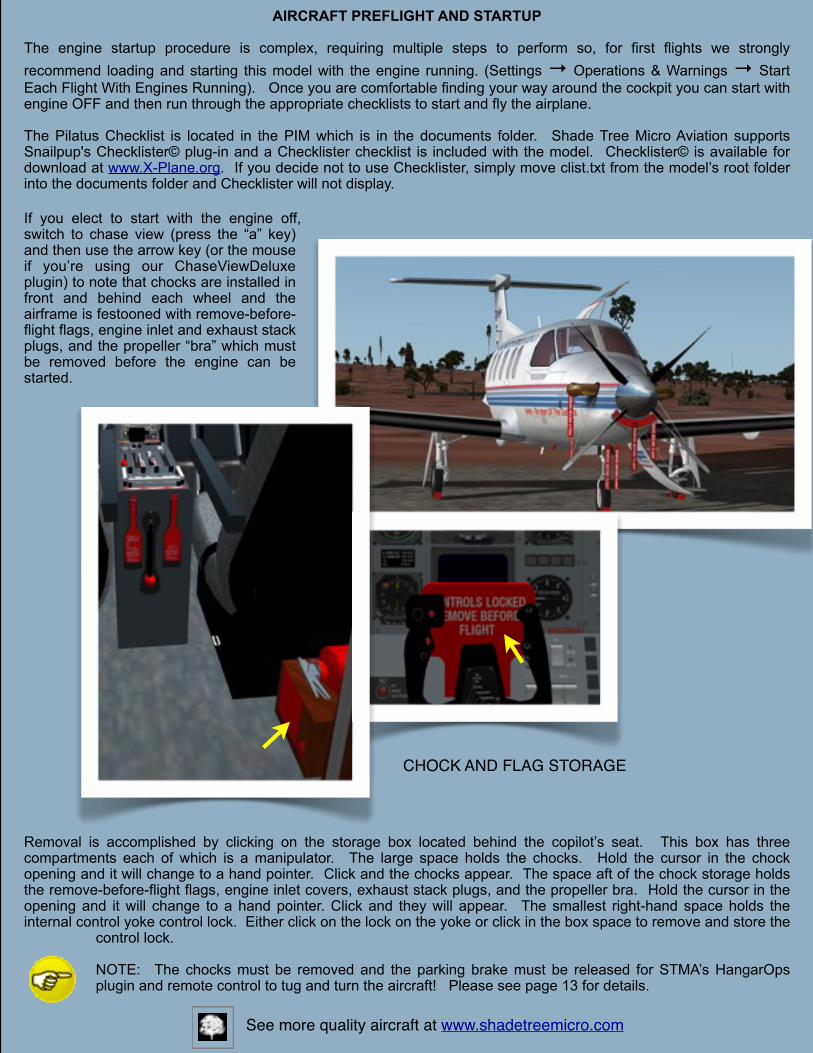
If you elect to start with the engine off, switch to chase view (press the “a” key) and then use the arrow key (or the mouse if you’re using our ChaseViewDeluxe plugin) to note that chocks are installed in front and behind each wheel and the airframe is festooned with remove-before-flight flags, engine inlet and exhaust stack plugs, and the propeller “bra” which must be removed before the engine can be started.
Removal is accomplished by clicking on the storage box located behind the copilot’s seat. This box has three compartments each of which is a manipulator. The large space holds the chocks. Hold the cursor in the chock opening and it will change to a hand pointer. Click and the chocks appear. The space aft of the chock storage holds the remove-before-flight flags, engine inlet covers, exhaust stack plugs, and the propeller bra. Hold the cursor in the opening and it will change to a hand pointer. Click and they will appear. The smallest right-hand space holds the internal control yoke control lock. Either click on the lock on the yoke or click in the box space to remove and store the
control lock.
NOTE: The chocks must be removed and the parking brake must be released for STMA’s HangarOps plugin and remote control to tug and turn the aircraft! Please see page 13 for details.
See more quality aircraft at www.shadetreemicro.com
CHOCK AND FLAG STORAGE
ENGINE STARTUP AND OPERATION
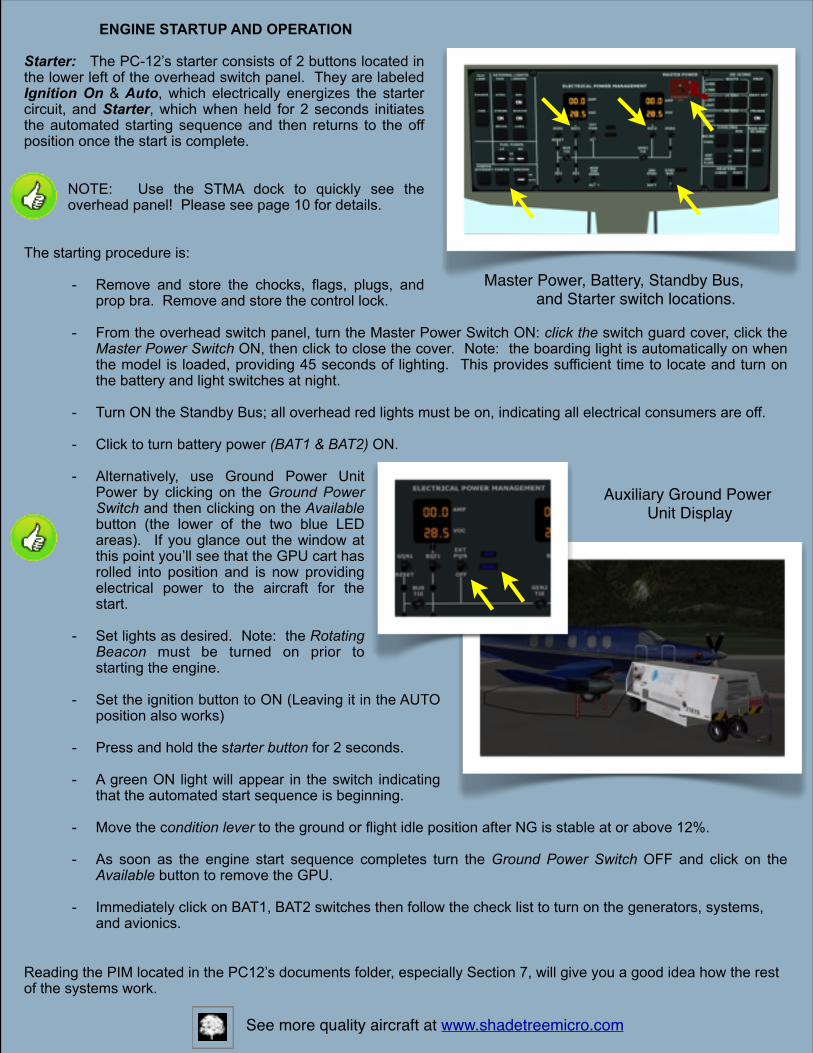
Starter: The PC-12’s starter consists of 2 buttons located in the lower left of the overhead switch panel. They are labeled Ignition On & Auto, which electrically energizes the starter circuit, and Starter, which when held for 2 seconds initiates the automated starting sequence and then returns to the off position once the start is complete.
NOTE: Use the STMA dock to quickly see the overhead panel! Please see page 10 for details.
The starting procedure is:
- Remove and store the chocks, flags, plugs, and prop bra. Remove and store the control lock.
- From the overhead switch panel, turn the Master Power Switch ON: click the switch guard cover, click the Master Power Switch ON, then click to close the cover. Note: the boarding light is automatically on when the model is loaded, providing 45 seconds of lighting. This provides sufficient time to locate and turn on the battery and light switches at night.
- Turn ON the Standby Bus; all overhead red lights must be on, indicating all electrical consumers are off.
- Click to turn battery power (BAT1 & BAT2) ON.
- Alternatively, use Ground Power Unit Power by clicking on the Ground Power Switch and then clicking on the Available button (the lower of the two blue LED areas). If you glance out the window at this point you’ll see that the GPU cart has rolled into position and is now providing electrical power to the aircraft for the start.
- Set lights as desired. Note: the Rotating Beacon must be turned on prior to starting the engine.
- Set the ignition button to ON (Leaving it in the AUTO position also works)
- Press and hold the starter button for 2 seconds.
- A green ON light will appear in the switch indicating that the automated start sequence is beginning.
- Move the condition lever to the ground or flight idle position after NG is stable at or above 12%.
- As soon as the engine start sequence completes turn the Ground Power Switch OFF and click on the Available button to remove the GPU.
- Immediately click on BAT1, BAT2 switches then follow the check list to turn on the generators, systems, and avionics.
Reading the PIM located in the PC12’s documents folder, especially Section 7, will give you a good idea how the rest of the systems work.
See more quality aircraft at www.shadetreemicro.com
Master Power, Battery, Standby Bus, and Starter switch locations.
Auxiliary Ground Power Unit Display
Power Management: Power Management: The PC-12 uses a single-power-lever system called a power management control system (PMCS). This system works much like that currently used by the Cirrus light airplane. The theory behind this system is that a computer controls fuel flow and prop RPM and modulates each to achieve the desired power so a single "go" lever sets the power for the engine. This system is accurately modeled whether you have a Joystick (and Throttle Quadrant, if available), use the mouse, or use keyboard commands.
Power Lever: If you have a joystick, map the power lever (throttle) to the joystick as you would for any airplane. If you have joystick controls available for propeller and condition (mixture) lever, set them also. Then when you fly the airplane, you can control power with the joystick throttle.
Note: For inflight, at altitude, the Interstage Turbine Temperature (ITT) is deliberately set so you will have to pull the power lever back slightly to keep the ITT out of the danger (red) range. More important, during the take off run keep the torque within limits. Maximum for takeoff is 44.3 and for climb is 36.9. Advance the PCL slowly forward in case the torque limiter is not working. Propeller Control: Do *NOT* attempt to adjust the propeller lever. The Power Management Control System (PMCS) will adjust the propeller pitch to match the amount of power you’ve set with the throttles. Automatic Propeller Feathering: On the real airplane, this is handled by the Negative Torque Sensing (NTS) system which is correctly modeled in our PC-12. The propeller feathers when an engine failure and certain other conditions are detected or the condition lever is moved into ICO.
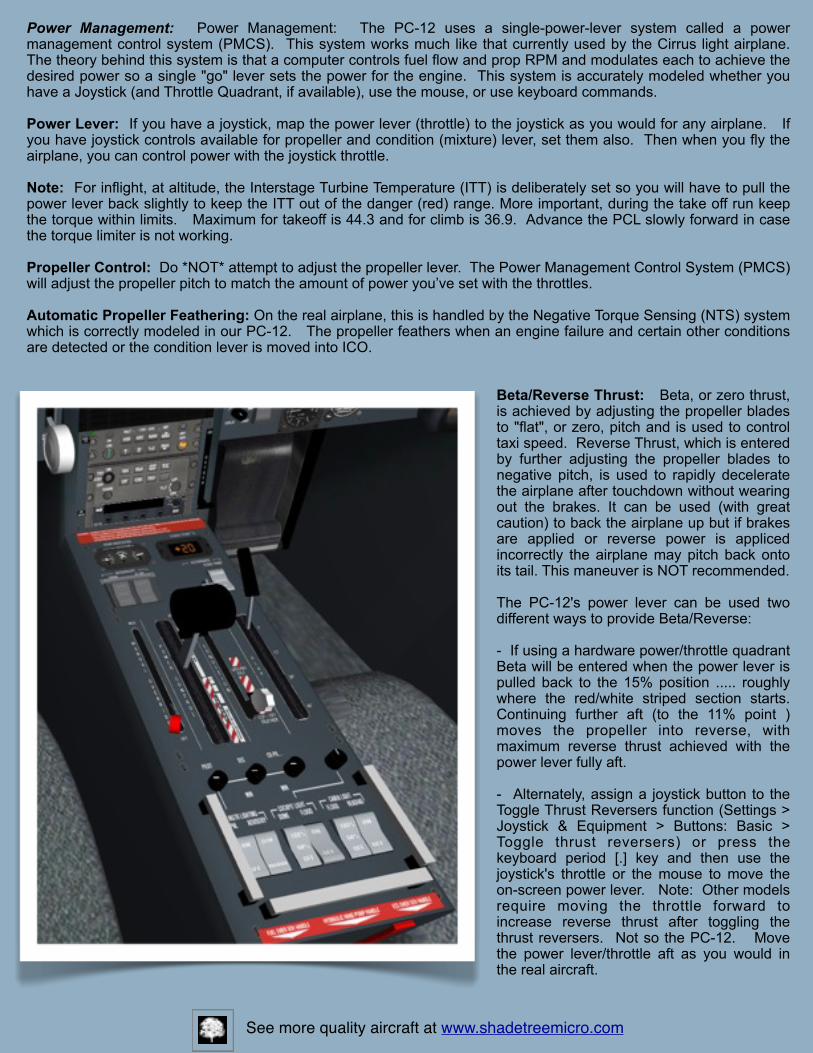
Beta/Reverse Thrust: Beta, or zero thrust, is achieved by adjusting the propeller blades to "flat", or zero, pitch and is used to control taxi speed. Reverse Thrust, which is entered by further adjusting the propeller blades to negative pitch, is used to rapidly decelerate the airplane after touchdown without wearing out the brakes. It can be used (with great caution) to back the airplane up but if brakes are applied or reverse power is appliced incorrectly the airplane may pitch back onto its tail. This maneuver is NOT recommended. The PC-12's power lever can be used two different ways to provide Beta/Reverse:
- If using a hardware power/throttle quadrant Beta will be entered when the power lever is pulled back to the 15% position ..... roughly where the red/white striped section starts. Continuing further aft (to the 11% point ) moves the propeller into reverse, with maximum reverse thrust achieved with the power lever fully aft. - Alternately, assign a joystick button to the Toggle Thrust Reversers function (Settings > Joystick & Equipment > Buttons: Basic > Toggle thrust reversers) or press the keyboard period [.] key and then use the joystick's throttle or the mouse to move the on-screen power lever. Note: Other models require moving the throttle forward to increase reverse thrust after toggling the thrust reversers. Not so the PC-12. Move the power lever/throttle aft as you would in the real aircraft.
See more quality aircraft at www.shadetreemicro.com
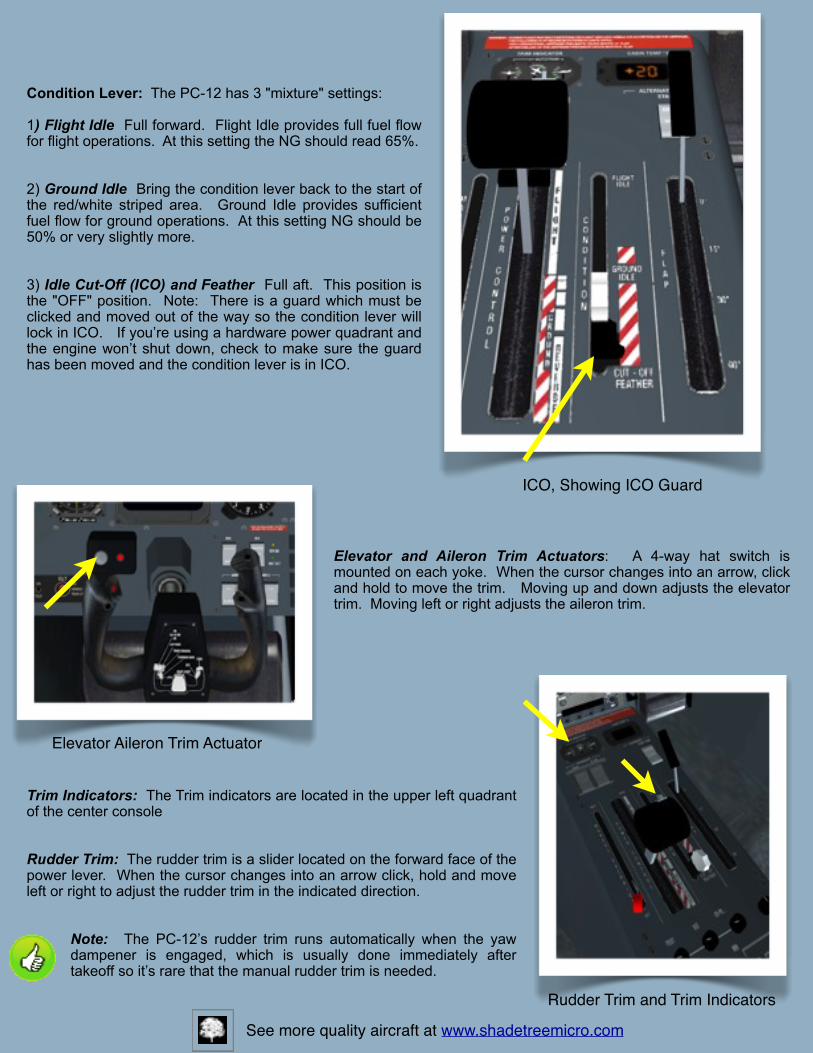
Condition Lever: The PC-12 has 3 "mixture" settings:
1) Flight Idle Full forward. Flight Idle provides full fuel flow for flight operations. At this setting the NG should read 65%.
2) Ground Idle Bring the condition lever back to the start of the red/white striped area. Ground Idle provides sufficient fuel flow for ground operations. At this setting NG should be 50% or very slightly more.
3) Idle Cut-Off (ICO) and Feather Full aft. This position is the "OFF" position. Note: There is a guard which must be clicked and moved out of the way so the condition lever will lock in ICO. If you’re using a hardware power quadrant and the engine won’t shut down, check to make sure the guard has been moved and the condition lever is in ICO.
Elevator and Aileron Trim Actuators: A 4-way hat switch is mounted on each yoke. When the cursor changes into an arrow, click and hold to move the trim. Moving up and down adjusts the elevator trim. Moving left or right adjusts the aileron trim.
Trim Indicators: The Trim indicators are located in the upper left quadrant of the center console
Rudder Trim: The rudder trim is a slider located on the forward face of the power lever. When the cursor changes into an arrow click, hold and move left or right to adjust the rudder trim in the indicated direction.
Note: The PC-12’s rudder trim runs automatically when the yaw dampener is engaged, which is usually done immediately after takeoff so it’s rare that the manual rudder trim is needed.
See more quality aircraft at www.shadetreemicro.com
Elevator Aileron Trim Actuator
ICO, Showing ICO Guard
Rudder Trim and Trim Indicators
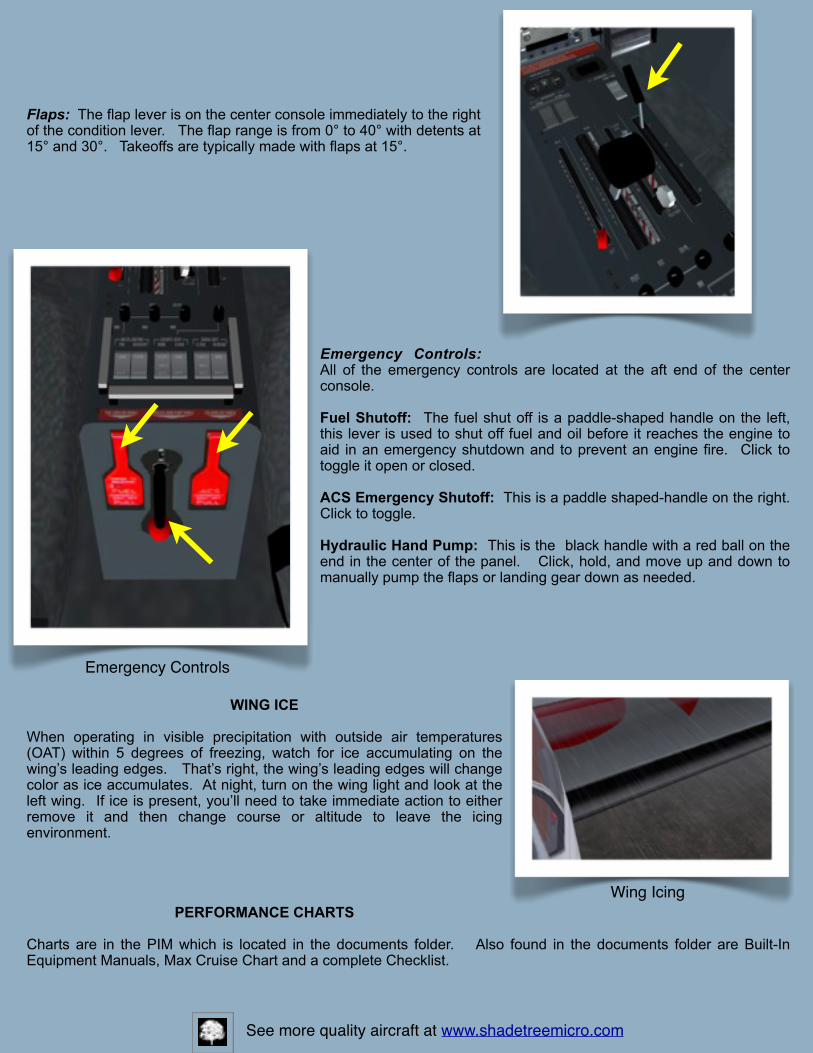
Flaps: The flap lever is on the center console immediately to the right of the condition lever. The flap range is from 0° to 40° with detents at 15° and 30°. Takeoffs are typically made with flaps at 15°.
Emergency Controls: All of the emergency controls are located at the aft end of the center console. Fuel Shutoff: The fuel shut off is a paddle-shaped handle on the left, this lever is used to shut off fuel and oil before it reaches the engine to aid in an emergency shutdown and to prevent an engine fire. Click to toggle it open or closed.
ACS Emergency Shutoff: This is a paddle shaped-handle on the right. Click to toggle.
Hydraulic Hand Pump: This is the black handle with a red ball on the end in the center of the panel. Click, hold, and move up and down to manually pump the flaps or landing gear down as needed.
WING ICE
When operating in visible precipitation with outside air temperatures (OAT) within 5 degrees of freezing, watch for ice accumulating on the wing’s leading edges. That’s right, the wing’s leading edges will change color as ice accumulates. At night, turn on the wing light and look at the left wing. If ice is present, you’ll need to take immediate action to either remove it and then change course or altitude to leave the icing environment.
PERFORMANCE CHARTS
Charts are in the PIM which is located in the documents folder. Also found in the documents folder are Built-In Equipment Manuals, Max Cruise Chart and a complete Checklist.
See more quality aircraft at www.shadetreemicro.com
Emergency Controls
Wing Icing

STMA’S HANGAROPS REMOTE
To conserve your PC-12’s battery power, STMA’s HangarOps Remote works a wee bit differently. Please see page 13 for HangarOps installation and other operating tips.
To Operate: - Press and hold any button for 2 seconds to turn the remote on. - Press the + or - buttons to select the number of the hangar door to open - Press the Shade Tree icon to toggle the door.
- Remove and store the chocks (see Preflight and Starting, page 7). - Release the parking brake by clicking, holding and moving it, or by pressing the “b” keyboard key. - Use the remote control’s directional arrow buttons to move the aircraft in the desired direction. - When done the remote will turn itself off after a brief delay to save the battery.
If you have four extra joystick buttons, or a spare joystick hat switch, program the buttons to STMA/Remote/PushForward, STMA/Remote /PushBack ,
STMA/Remote/TurnLeft, and STMA/Remote/TurnRight then switch to chase view (press the “a” keyboard key) and you can watch the PC-12‘s remote controlled tug move the airplane into the desired position at a touch of a button!
See the HangarOps ReadMe for detailed instructions.
See more quality aircraft at www.shadetreemicro.com

OPERATING TIPS AND CONTROL USAGE
Hidden Controls: Select parts of the cockpit and panel can be enlarged to enhance viewing. This model introduces STMA’s Preference Dock. Touch the mouse cursor anywhere on the left edge of your monitor and the STMA dock will appear. Click any of the instrument menu items and an enlarged instrument wi l l appear permitting easy manipulation of the controls. Click the Medical Service item and the PC-12‘s passenger compartment will become equipped for medical evacuation purposes.
Another alternative, you may notice that several of the instruments have green diagonals in their top left corners. Click the green diagonal and an enlarged instrument will appear. Close the instrument by clicking the red diagonal corner, or close the instrument from the STMA dock.
Door Controls: This model has the following animated doors:Cockpit Divider: The cockpit divider separates the pilot and passenger cabins. Move the mouse over the divider until the cursor changes to a hand. Click to toggle the divider open and closed.Cabin Door: Click the "D" button on the lower center console to toggle the passenger door. Clicking the inside surface of the door itself will also open it. If you desire to use a joystick button, click on the Settings → Joysticks & Equipment → Buttons: Adv tab and find and select the pc12/doors/passenger_door_toggle command to open and close the door.Cargo/Baggage Door: Click the “B” button on the lower center console to toggle the cargo door. If you desire to use a joystick button, click on the Settings → Joysticks & Equipment → Buttons: Adv tab to find and select the pc12/doors/cargo_door_toggle command to open and close the door. Engine Compartment Door: Click the “E” button on the lower
center console to toggle the engine compartment door. If you desire to use a joystick button, click on the Settings → Joysticks & Equipment → Buttons: Adv tab to find and select the pc12/doors/engine_door_toggle command to open and close the door.
Sun Visor Animation: Hover the mouse cursor over the sun visor until it changes shape, then click, hold and move the sun visor into the desired position.
Seat Animations: The seat and arm rest positions are moveable. Arm Rests: Click on the pilot’s right arm rest or the copilot’s left arm rest and they will toggle up or down.
Pilot Seat Position: Move the mouse cursor over the seat cushion as indicated until the cursor changes into a two-headed arrow and move forward or back to adjust the pilot’s seat horizontally or vertically. TIP: Changing the seat position changes the pilot’s point-of-view (POV). This setting is persistent (saved) until changed.
Rudder Pedals: The rudder pedals adjust fore and aft to accommodate a wide range of pilot heights. Place the mouse cursor on the rudder pedals, click, hold and drag to adjust pedal position.
Click and draghere to raise or lower the seat.
Click and draghere to move the seat fwd or back.
STMA Dock
Instrument Zoom
Door & Compartment Controls
Seat Adjustments
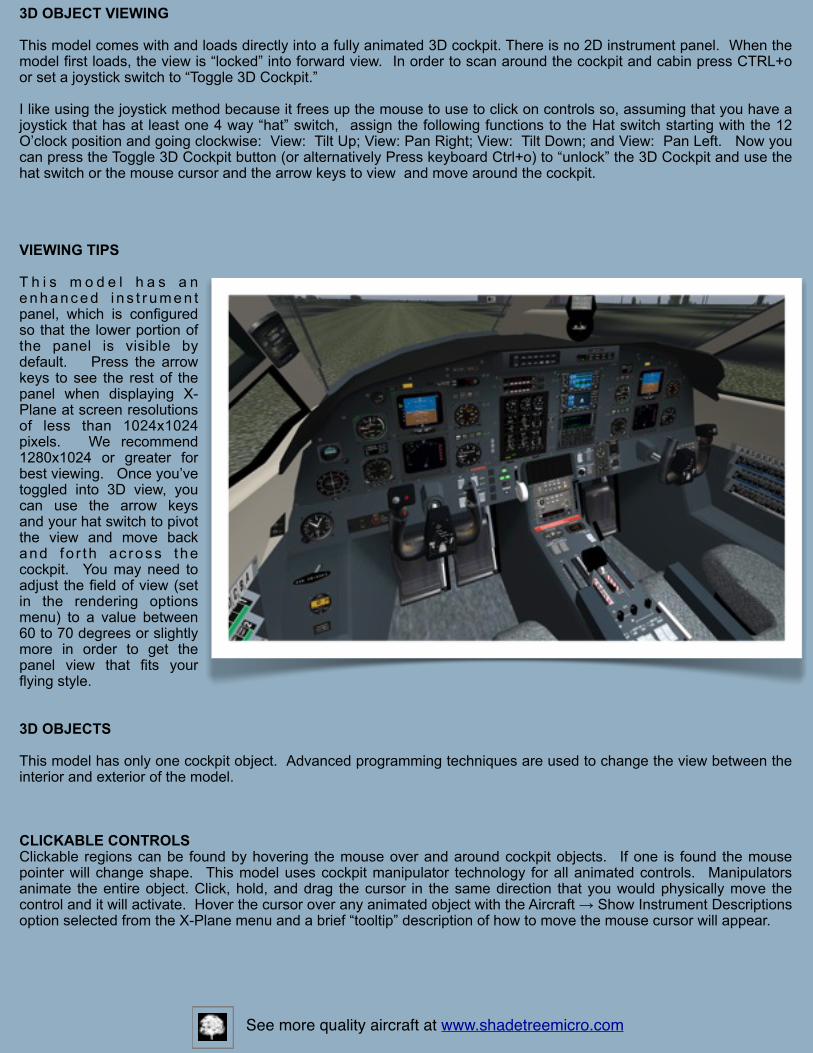
3D OBJECT VIEWING
This model comes with and loads directly into a fully animated 3D cockpit. There is no 2D instrument panel. When the model first loads, the view is “locked” into forward view. In order to scan around the cockpit and cabin press CTRL+o or set a joystick switch to “Toggle 3D Cockpit.”
I like using the joystick method because it frees up the mouse to use to click on controls so, assuming that you have a joystick that has at least one 4 way “hat” switch, assign the following functions to the Hat switch starting with the 12 O’clock position and going clockwise: View: Tilt Up; View: Pan Right; View: Tilt Down; and View: Pan Left. Now you can press the Toggle 3D Cockpit button (or alternatively Press keyboard Ctrl+o) to “unlock” the 3D Cockpit and use the hat switch or the mouse cursor and the arrow keys to view and move around the cockpit.
VIEWING TIPS
T h i s m o d e l h a s a n e n h a n c e d i n s t r u m e n t panel, which is configured so that the lower portion of the panel is visible by default. Press the arrow keys to see the rest of the panel when displaying X-Plane at screen resolutions of less than 1024x1024 pixels. We recommend 1280x1024 or greater for best viewing. Once you’ve toggled into 3D view, you can use the arrow keys and your hat switch to pivot the view and move back and fo r th ac ross the cockpit. You may need to adjust the field of view (set in the rendering options menu) to a value between 60 to 70 degrees or slightly more in order to get the panel view that fits your flying style.
3D OBJECTS
This model has only one cockpit object. Advanced programming techniques are used to change the view between the interior and exterior of the model.
CLICKABLE CONTROLSClickable regions can be found by hovering the mouse over and around cockpit objects. If one is found the mouse pointer will change shape. This model uses cockpit manipulator technology for all animated controls. Manipulators animate the entire object. Click, hold, and drag the cursor in the same direction that you would physically move the control and it will activate. Hover the cursor over any animated object with the Aircraft → Show Instrument Descriptions option selected from the X-Plane menu and a brief “tooltip” description of how to move the mouse cursor will appear.
See more quality aircraft at www.shadetreemicro.com
PLUGINS
The STMA and SASL/XAP plugins are correctly pre-installed into the PC12/plugins folders!
This and all STMA plugins are compatible with Mac, Win and Lin platforms. Do not to remove, rename or delete any of its component parts. The changing tail number with different liveries is known not work on some Linux distributions. This model makes extensive use of the Scriptable Avionics Simulation Library (SASL) and XAP to animate its cockpit. The current version of SASL/XAP will NOT work on PPC Macs. If you purchased this model believing that it would we will gladly refund your money.
STMA Plugin and SASL/XAP Plugins: These STMA plugins perform a variety of functions that greatly extend the capability of X-Plane to meet the specifications of the unique Pilatus PC-12 aircraft. This will greatly enhance your X-Plane experience.
The plugins enable many features that allow the user to show, hide, and display custom instruments sets, create the STMA preference dock, open and close doors and compartments, accurately display FMS waypoints, change the users POV and place instruments in convenient and visible locations. And much more.
These plugins create custom STMA datarefs and commands used to animate many of the controls and manipulators unique to the Pilatus PC-12 aircraft.
When you first open your PC-12 aircraft you will notice that the Hobbs time is set to zero. The plugin keeps accurate Hobbs time for every STMA aircraft version and model over the life of your aircraft. The Hobbs time is activated by engine oil pressure. You can reset the Hobbs time by removing the STMA_Husky_Settings.txt file and restarting your aircraft OR by editing the STMA_Settings.txt data to show zero seconds.
The plugin automatically matches the aircraft tail number panel plaque to the STMA livery tail number.
The plug-in creates a STMA_Settings.txt file in the models’ root folder which stores the current settings. To restore the default settings delete this file and restart X-Plane.
HangarOps Plugin: The models installation package includes a folder labeled “HangarOps”. Drag and drop this folder into your X-Plane\Resources\plug-ins folder in order to activate the HangarOps™ plug-in the next time you load X-Plane. Created by Bob Feaver, this remote control allows you to maneuver the aircraft on the ground as if it was being towed by a tug and to open/close 100 different hangar KeyCodes in our HangarOps™ series of hangars.
To Install: Drag the entire HangarOps folder to X-Plane’s/Resources/plugins folder. Do not separate, remove, or rename any of its component parts. For operating instructions specific to the Pilatus PC-12 please see page 10, STMA Remote.
HangarOps includes three customizable hangars that you can install at the airport of your choice. Complete instructions are included in the HangarOps ReadMe.
See our Scenery page at http://shadetreemicro.com for our unique Carson City (KCXP) scenery package which incorporates many of our HangarOps Hangars.
See more quality aircraft at www.shadetreemicro.com

LEGALITIES
© (copyright) August 2010 by Shade Tree Micro Aviation (STMA), an association of Jim McNeill's Papa Mac Enterprises, a subdivision of McAir LLC; Bob Feaver's RogerThat.ca, and Kerry Cross’s Image-FX.net.au.
STMA offers sincere thanks to our X-Plane friend, pik, for sharing his expert knowledge of the intricate details of the Pilatus PC-12/47. Many components of this aircraft and SASL/XAP code © (copyright) August 2010 by pik. This aircraft model and all associated files requires X-Plane flight simulation software by Laminar Research to be functional and is subject to X-Plane's user's agreement and licensing. This model is payware. Do not use it or its included plugins for any commercial purpose or distribute it or its included plugins by any means without permission of the authors. For commercial licensing, or if you desire to alter it for your personal use, send an e-mail to Shade Tree Micro Aviation at [email protected].
If modified files are used, STMA must be given proper attribution as the source of the files. This model is believed to be defect free and is offered without warranty, either express or implied.
See more quality aircraft at www.shadetreemicro.com
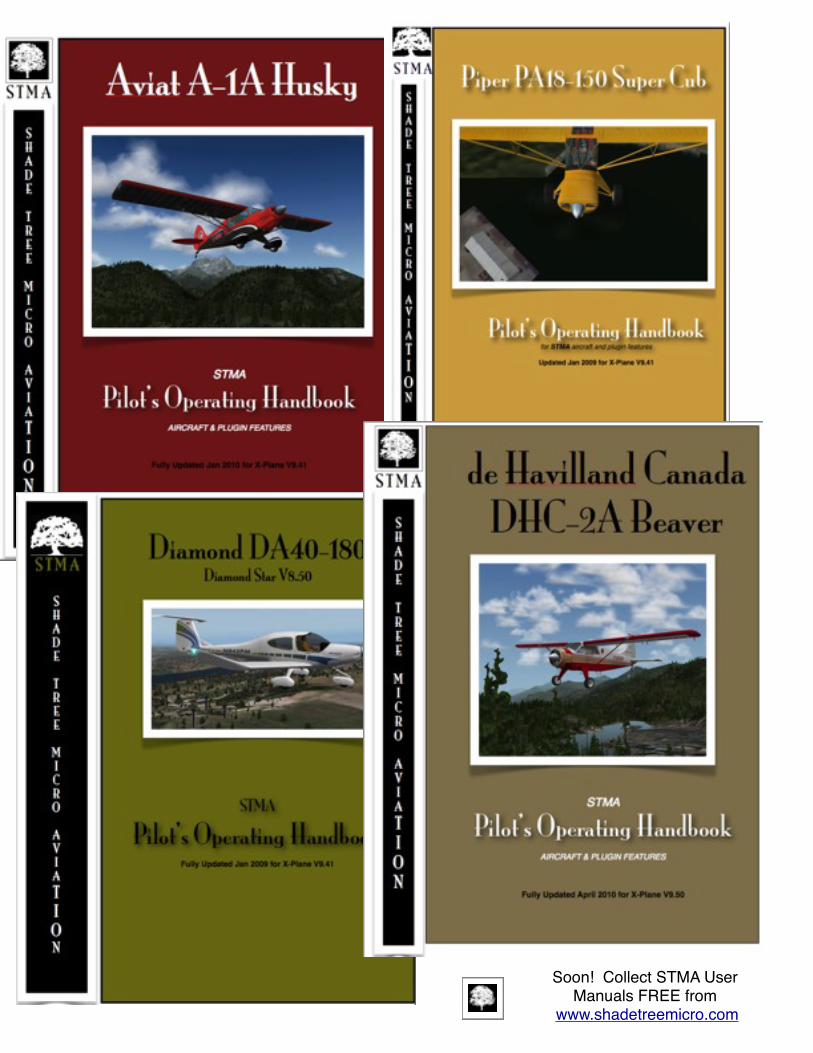
Soon! Collect STMA User Manuals FREE from
www.shadetreemicro.com
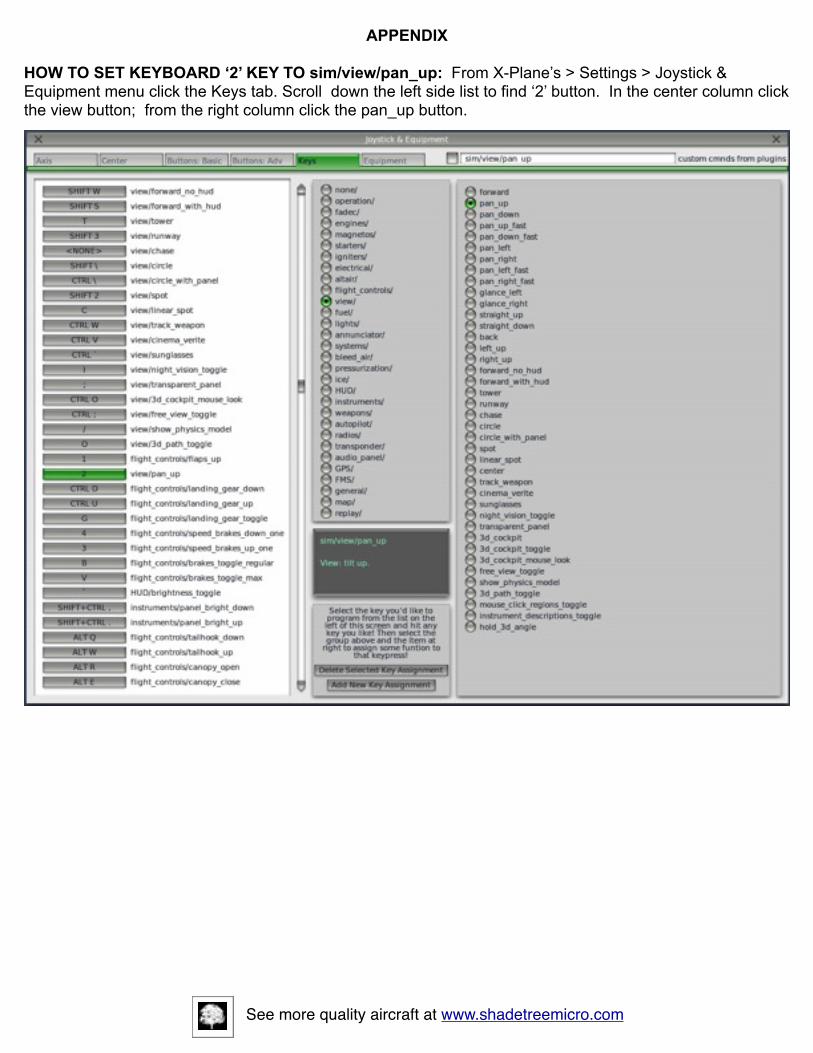
APPENDIX
HOW TO SET KEYBOARD ‘2’ KEY TO sim/view/pan_up: From X-Plane’s > Settings > Joystick & Equipment menu click the Keys tab. Scroll down the left side list to find ‘2’ button. In the center column click the view button; from the right column click the pan_up button.
See more quality aircraft at www.shadetreemicro.com