Embed Size (px)
Citation preview

NETWORK LICENSE
INSTALLATION &
ACTIVATION GUIDE

Network License SERVER
Installation Guide
1) Please choose the machine which is going to be network license SERVER. Please remember the name of this machine, because it will be used
to configure client workstations. It can be any PC in your company with following Windows versions: Windows Vista, Windows 7, Windows 8,
Windows Server 2003 and up.
Note: It is highly recommended to install NetworkLicenseServer on the same machine as Revit Server.
2) Install Network License Server NetworkLicenceServer*.msi to that machine.
3) Install Microsoft Internet Information Services (IIS):
http://www.iis.net/learn/install < The link shows how to install IIS.
4) You need to open TCP 8731 port on Your firewall software. Please ask Your administrator to do that.
5) Test NLM Server. Open web browser and enter URL:
http://localhost:2468/Web/
Note: If error page appears, please refer to the 5th page of this guide.
6) Open Activation tab in NLM Server.
7) Enter provided activation key in Activation key field
and press Submit button.
8) To view license details click on Product’s tab in NLM Server.
1

Revit User Network License Manager
Installation Guide
1) Install our Network License Manager to user machine:
For Revit 2015 – NetworkLicenceManager2015*.msi
For Revit 2014 – NetworkLicenceManager2014*.msi
2) Open Revit.
3) Click “T4R: Network License” tab.
4) Click “TOOLS 4 BIM” button.
5) Open “Set Network License Server” menu.
6) In opened window enter address of your Network License Server.
Note: This address is provided by your administrator, and refers to the computer
with Network License SERVER installed.
This address must be in one of the following formats:
http://networklicenseservername:8731 or http://ipaddressoflicenseserver:8731
7) Press Test connection button.
Note: If connection fails, please refer to the 9th page of this guide.
8) Download and install the software.
2
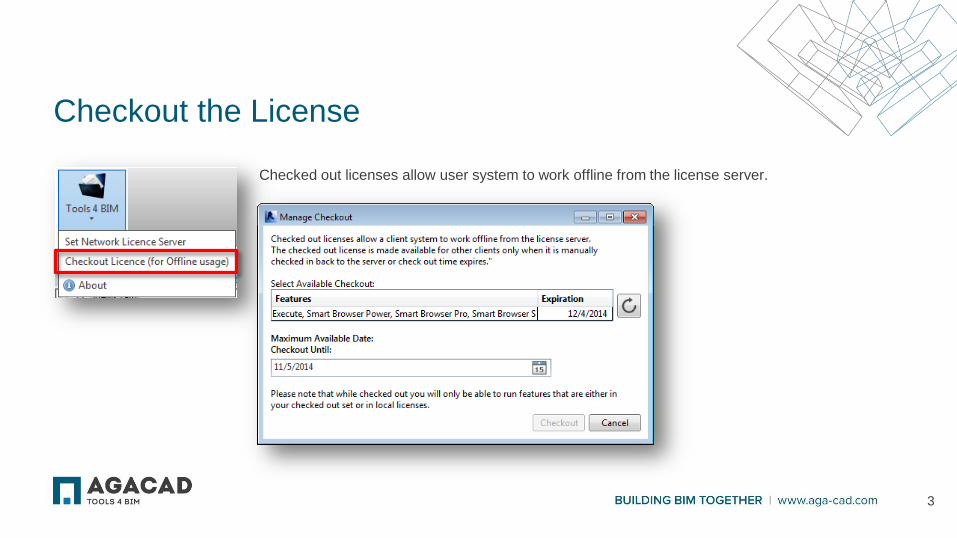
Checkout the License
Checked out licenses allow user system to work offline from the license server.
3
Network License SERVER
Troubleshooting
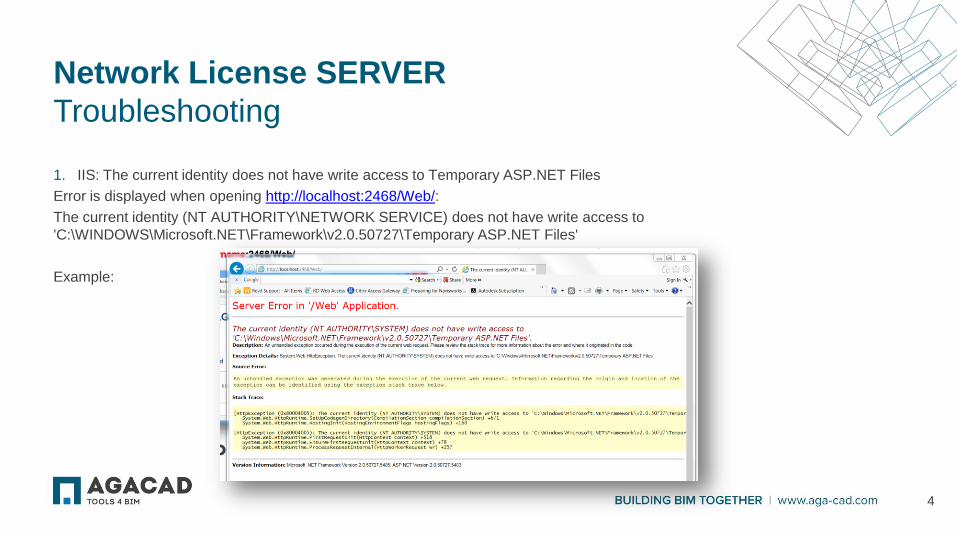
1. IIS: The current identity does not have write access to Temporary ASP.NET Files
Error is displayed when opening http://localhost:2468/Web/:
The current identity (NT AUTHORITY\NETWORK SERVICE) does not have write access to
'C:\WINDOWS\Microsoft.NET\Framework\v2.0.50727\Temporary ASP.NET Files'
Example:
4
Network License SERVER
Troubleshooting
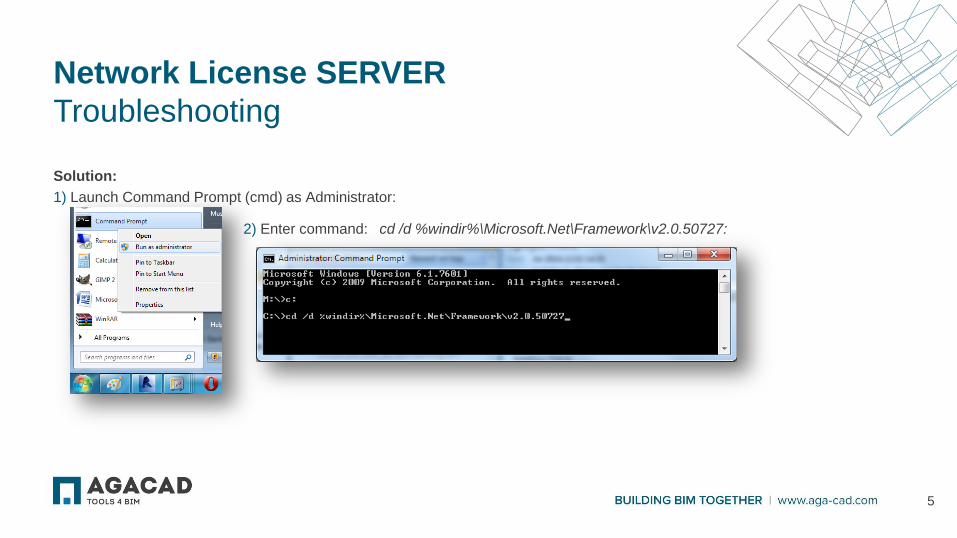
2) Enter command: cd /d %windir%\Microsoft.Net\Framework\v2.0.50727:
Solution:
1) Launch Command Prompt (cmd) as Administrator:
5

Network License SERVER
Troubleshooting
3) Enter command: aspnet_regiis -ga "NT Authority\Network Service":
4) Check if page is loading now.
5) If it’s not, enter command: aspnet_regiis -i
6

Network License SERVER
Troubleshooting
2. IIS: Configuration Error
Error is displayed when opening
http://localhost:2468/Web/:
Solution:
Download and install Microsoft .NET Framework 3.5:
http://www.microsoft.com/en-us/download/details.aspx?id=21
7

Network License MANAGER
Troubleshooting
Could not connect to http://<LicenseServer>:8731/
Example:
8

Network License MANAGER
Troubleshooting
Solution:
1. Ensure that License Server is reachable:
1.1. Open Command Prompt.
1.2. Enter command ping LicenseServer (where LicenseServer is address of your license server
without http:// and :8731).
Example:
1.3. If command returns error messages, contact your system administrator.
9
Network License MANAGER
Troubleshooting
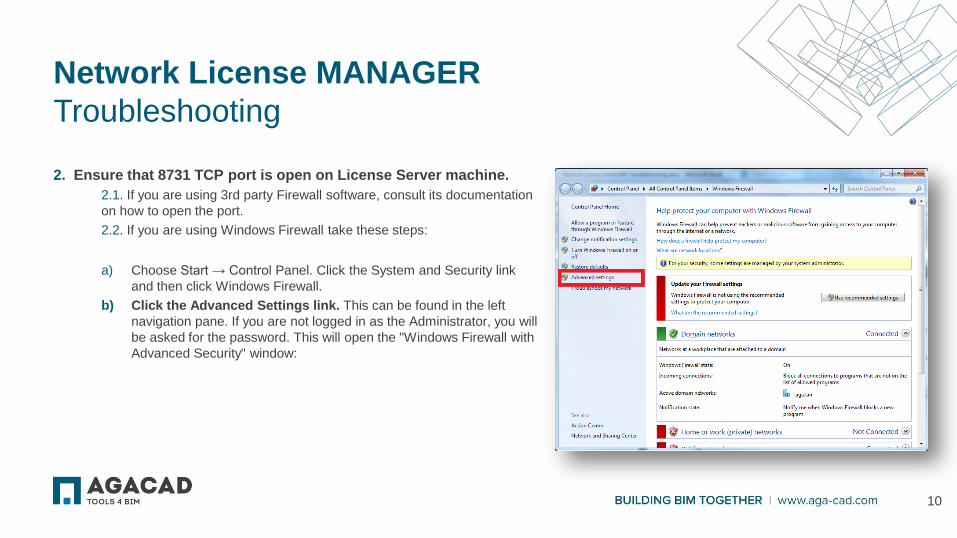
2. Ensure that 8731 TCP port is open on License Server machine.
2.1. If you are using 3rd party Firewall software, consult its documentation
on how to open the port.
2.2. If you are using Windows Firewall take these steps:
a) Choose Start → Control Panel. Click the System and Security link
and then click Windows Firewall.
b) Click the Advanced Settings link. This can be found in the left
navigation pane. If you are not logged in as the Administrator, you will
be asked for the password. This will open the "Windows Firewall with
Advanced Security" window:
10

Network License MANAGER
Troubleshooting
c) Select "Inbound Rules". This is located in the left
navigation panel. You will see a list of all your allowed
programs (if you have any). Click "New Rule" in the left
panel:
11

Network License MANAGER
Troubleshooting
d) Select "Port" from the first screen of the wizard. This will allow
you to open ports instead of trying to find a specific program. Click Next
> to continue:
12

Network License MANAGER
Troubleshooting
e) Choose TCP. Enter Specific local port: 8731:
13

Network License MANAGER
Troubleshooting
f) Select “Allow the connection":
Then tick "Domain", "Private" and "Public" checkboxes:
14
Network License MANAGER
Troubleshooting
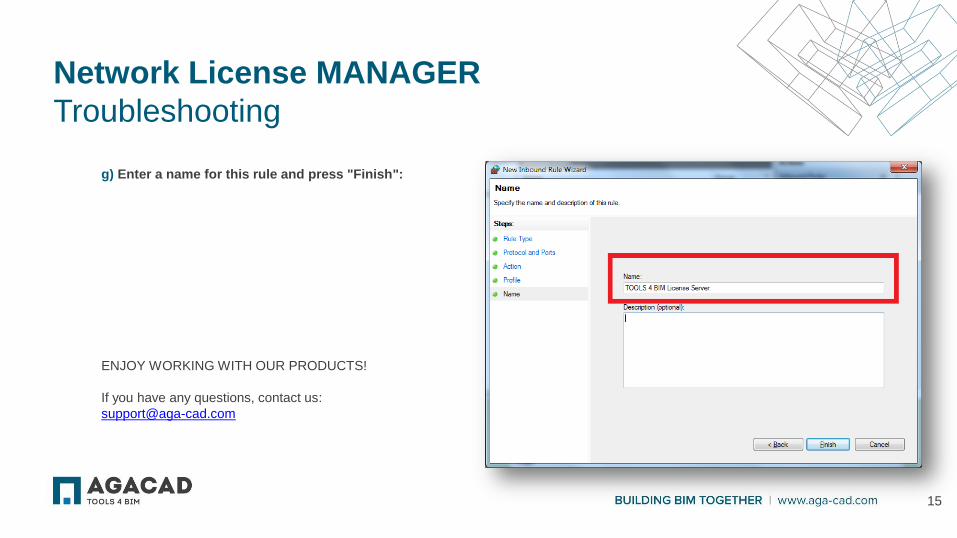
g) Enter a name for this rule and press "Finish":
ENJOY WORKING WITH OUR PRODUCTS!
If you have any questions, contact us:
15