Embed Size (px)
Citation preview
NetObjects Fusion Manual Book
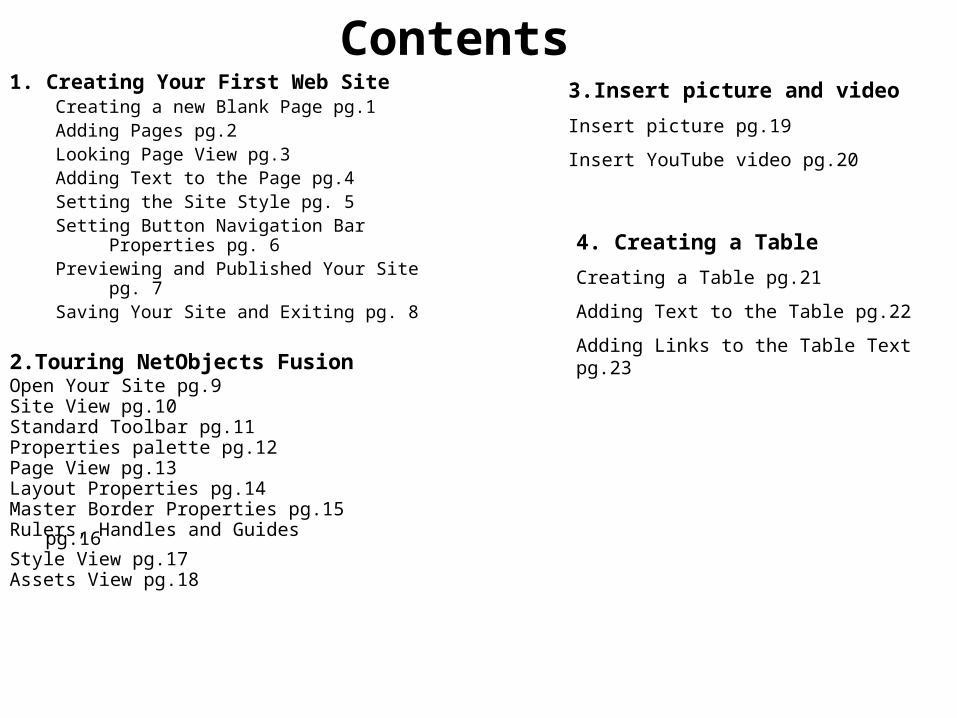
Contents1. Creating Your First Web Site
Creating a new Blank Page pg.1Adding Pages pg.2Looking Page View pg.3Adding Text to the Page pg.4Setting the Site Style pg. 5Setting Button Navigation Bar Properties pg. 6Previewing and Published Your Site pg. 7Saving Your Site and Exiting pg. 8
2.Touring NetObjects FusionOpen Your Site pg.9Site View pg.10Standard Toolbar pg.11Properties palette pg.12Page View pg.13Layout Properties pg.14Master Border Properties pg.15Rulers, Handles and Guides pg.16Style View pg.17Assets View pg.18
3.Insert picture and videoInsert picture pg.19
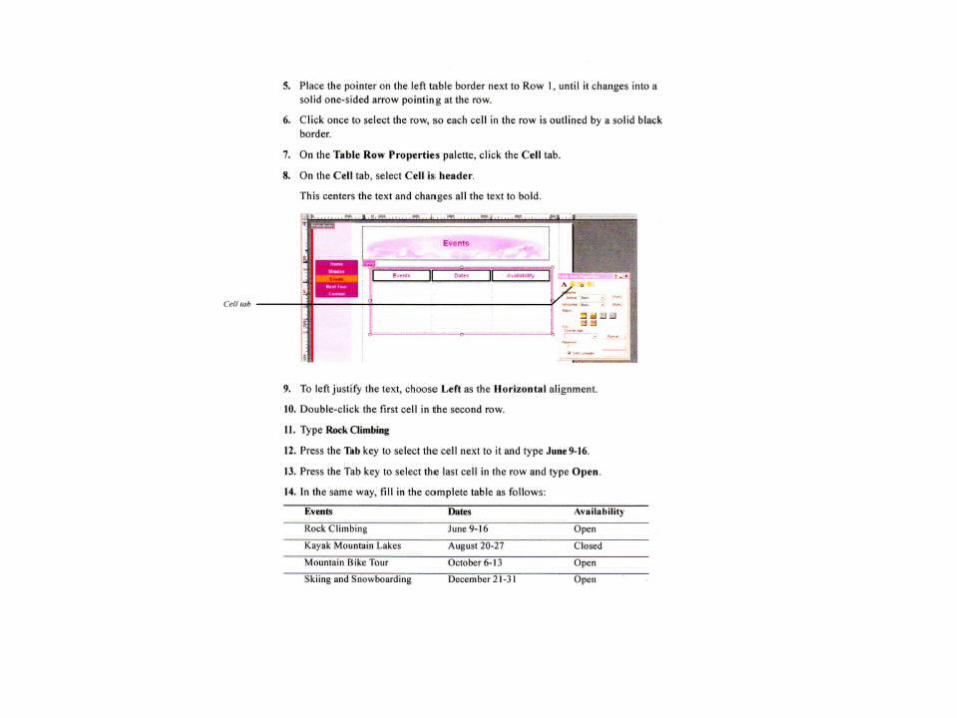
Insert YouTube video pg.20
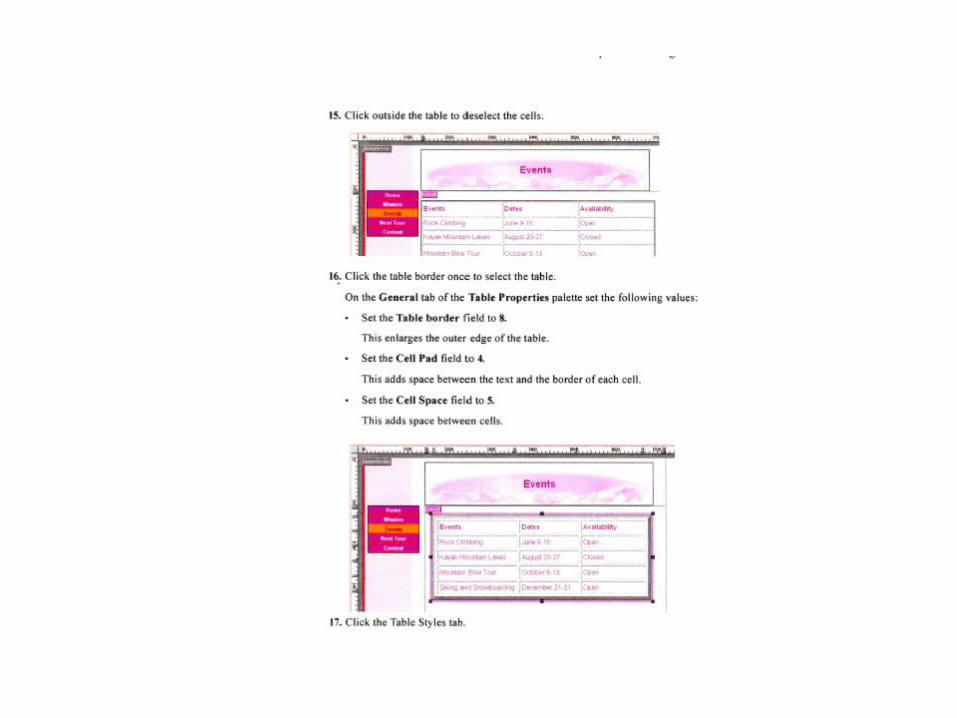
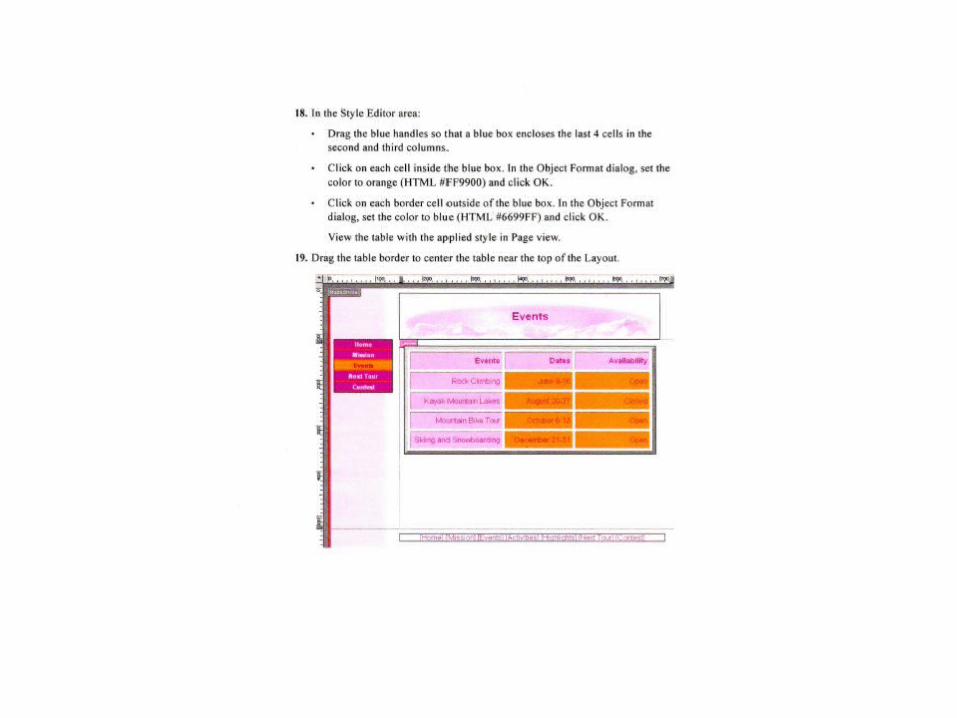
4. Creating a TableCreating a Table pg.21
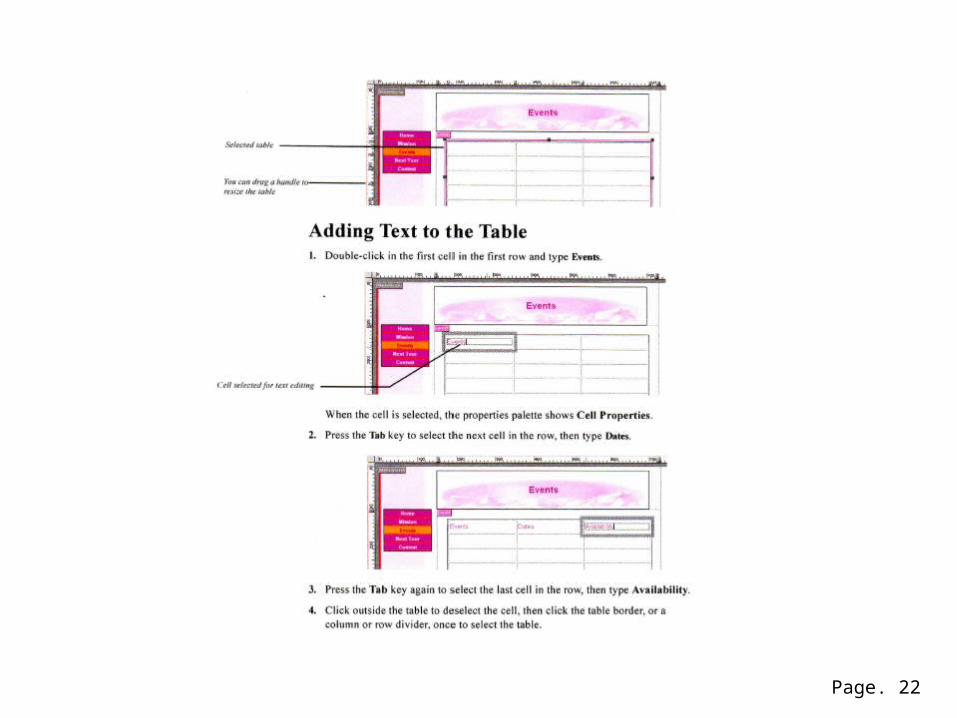
Adding Text to the Table pg.22
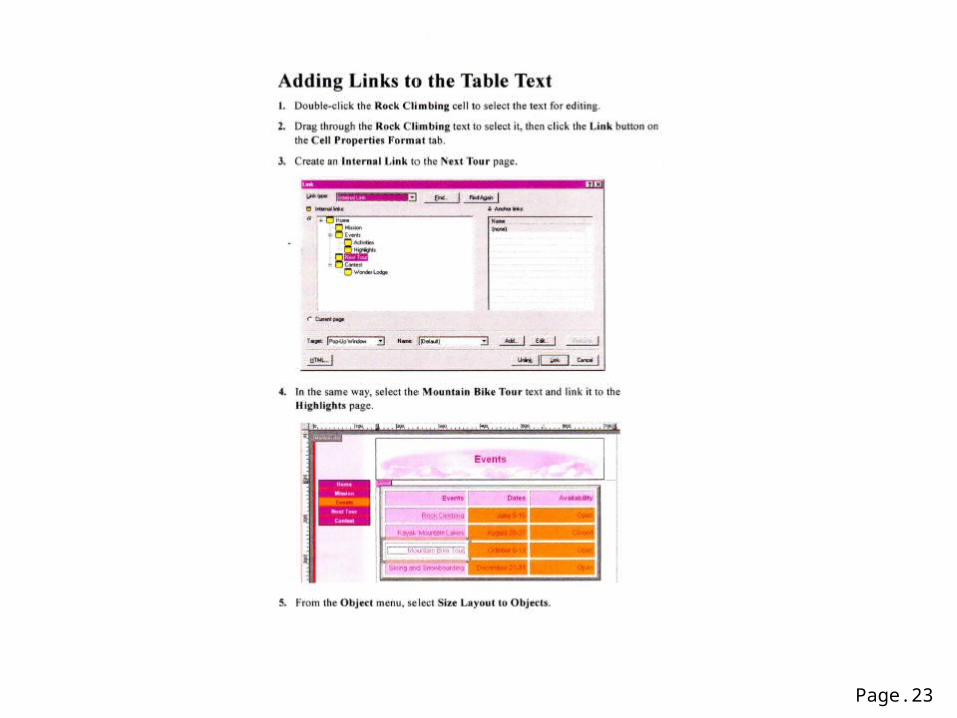
Adding Links to the Table Text pg.23
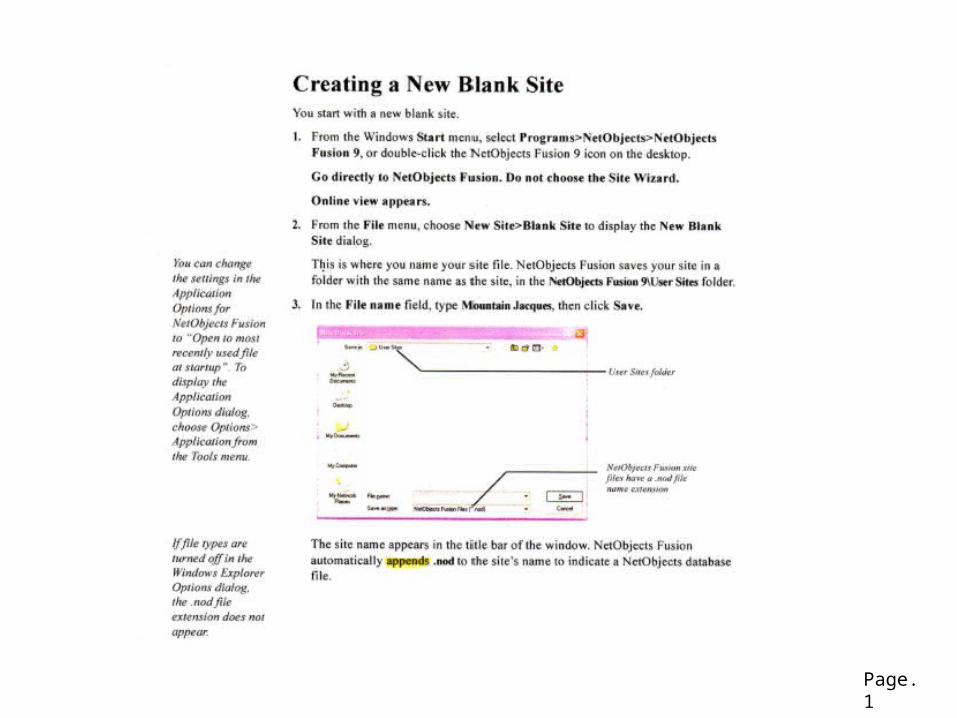
Page. 1
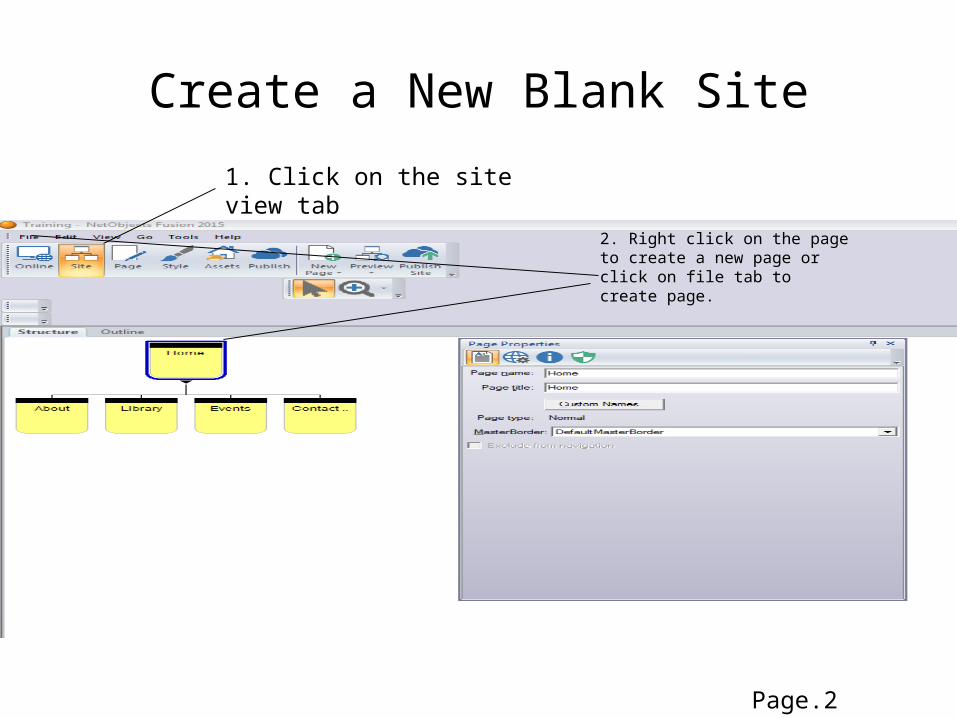
1. Click on the site view tab
2. Right click on the page to create a new page or click on file tab to create page.
Page.2 (Continue)
Create a New Blank Site
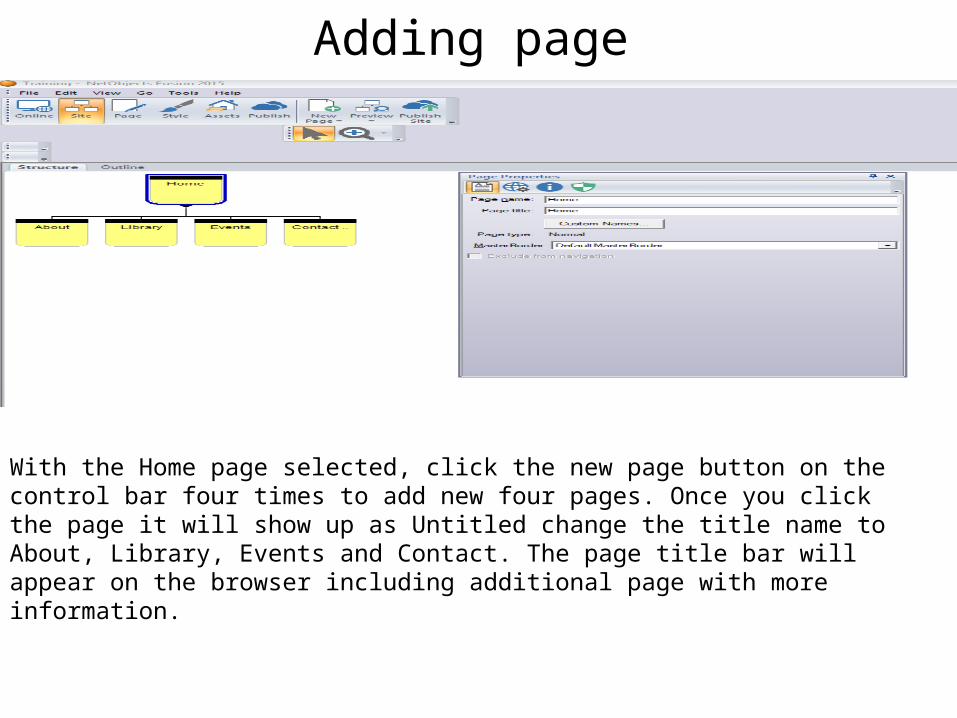
Adding page
With the Home page selected, click the new page button on the control bar four times to add new four pages. Once you click the page it will show up as Untitled change the title name to About, Library, Events and Contact. The page title bar will appear on the browser including additional page with more information.
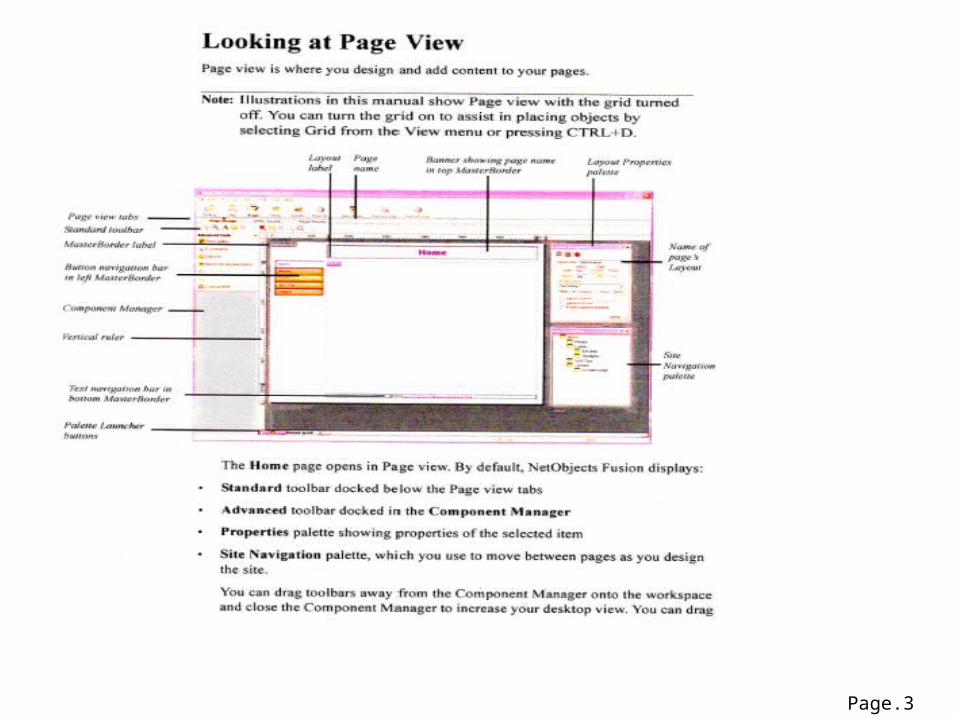
Page.3
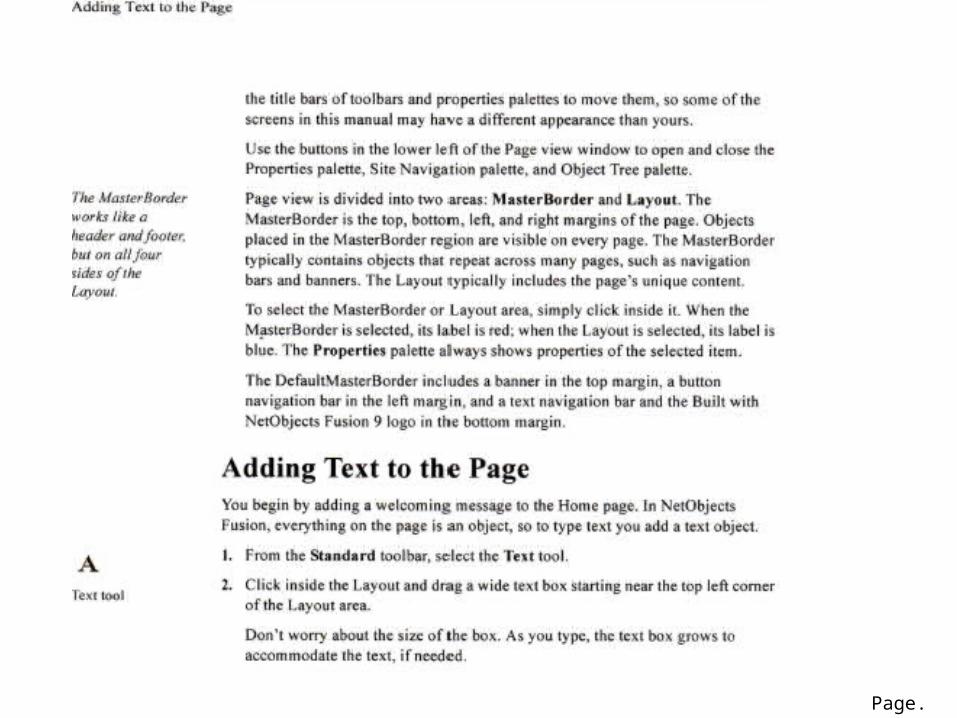
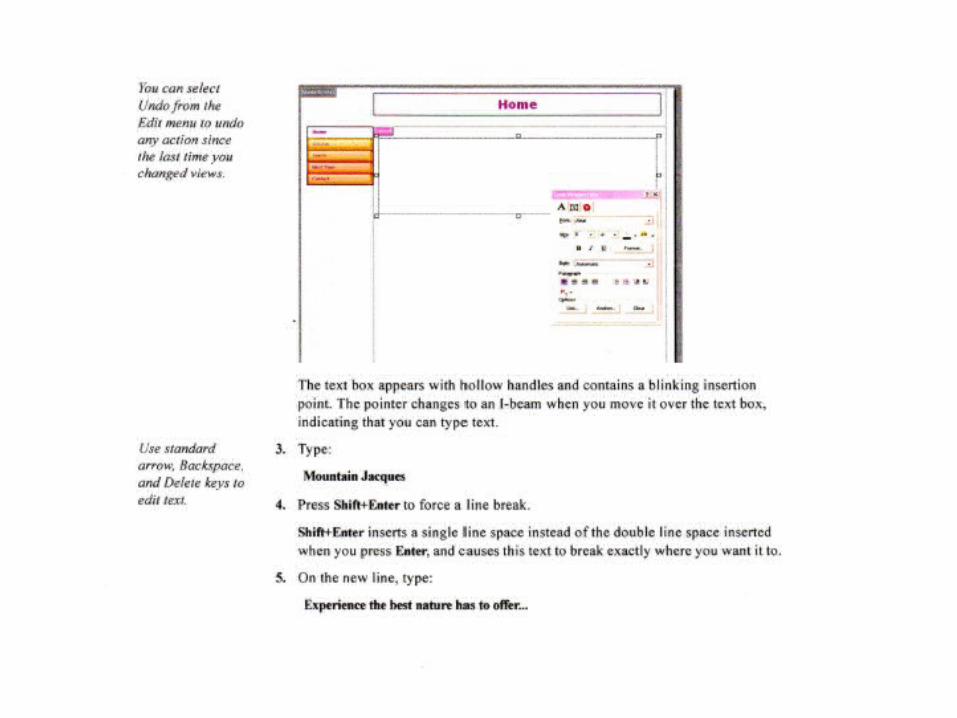
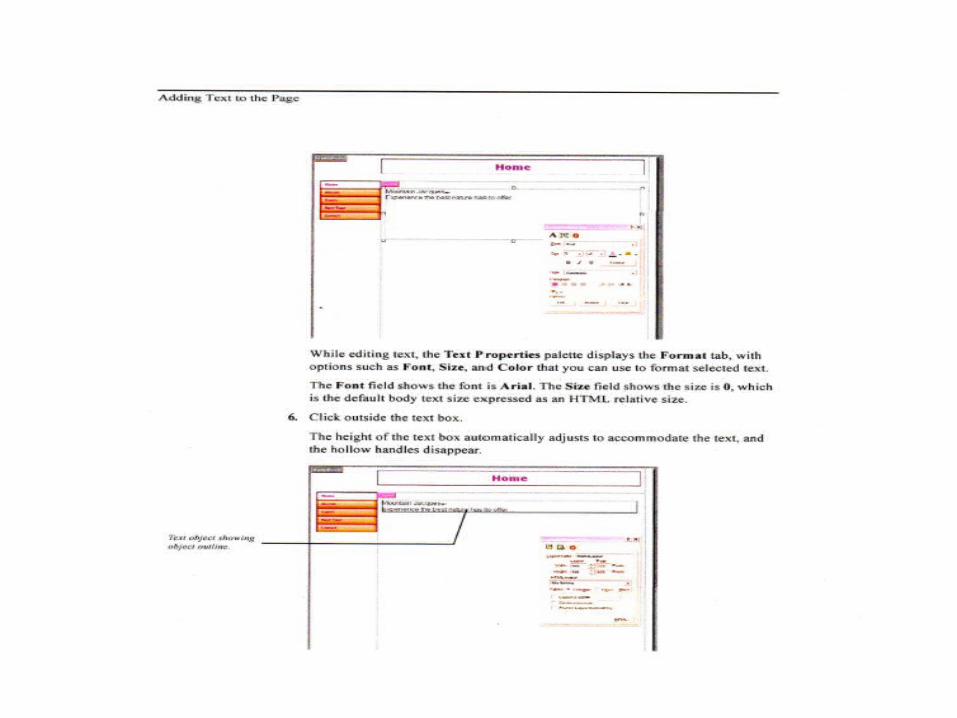
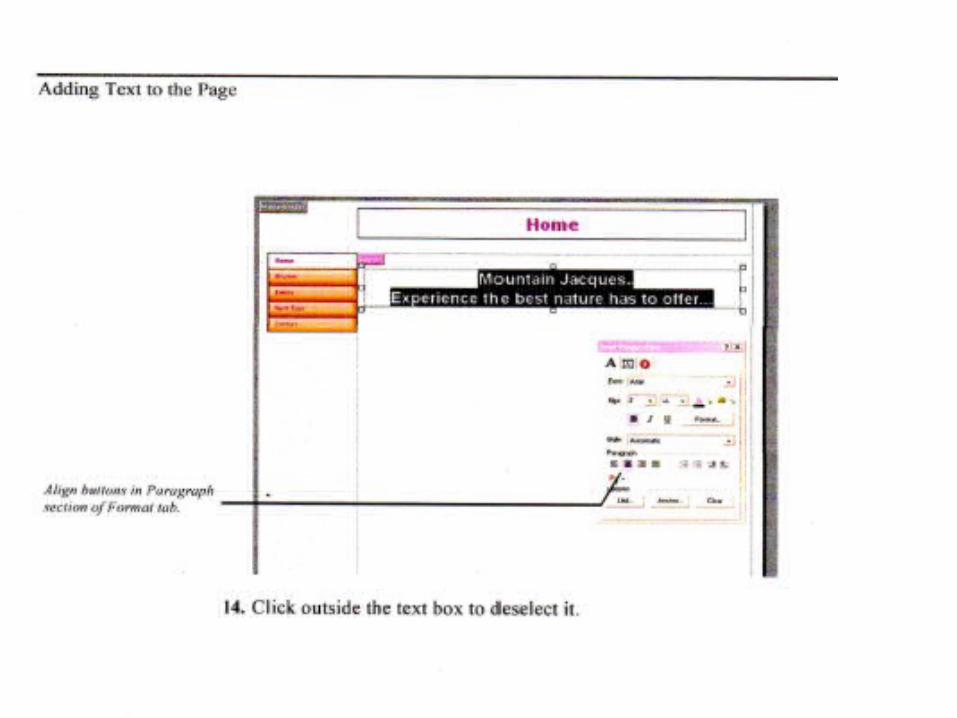
Page. 4
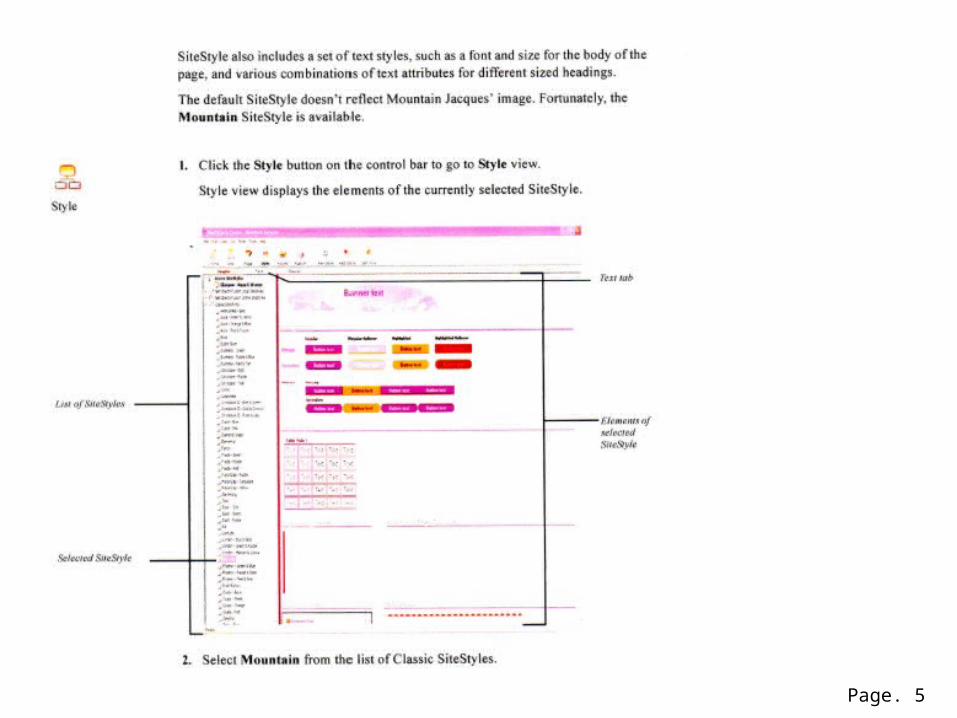
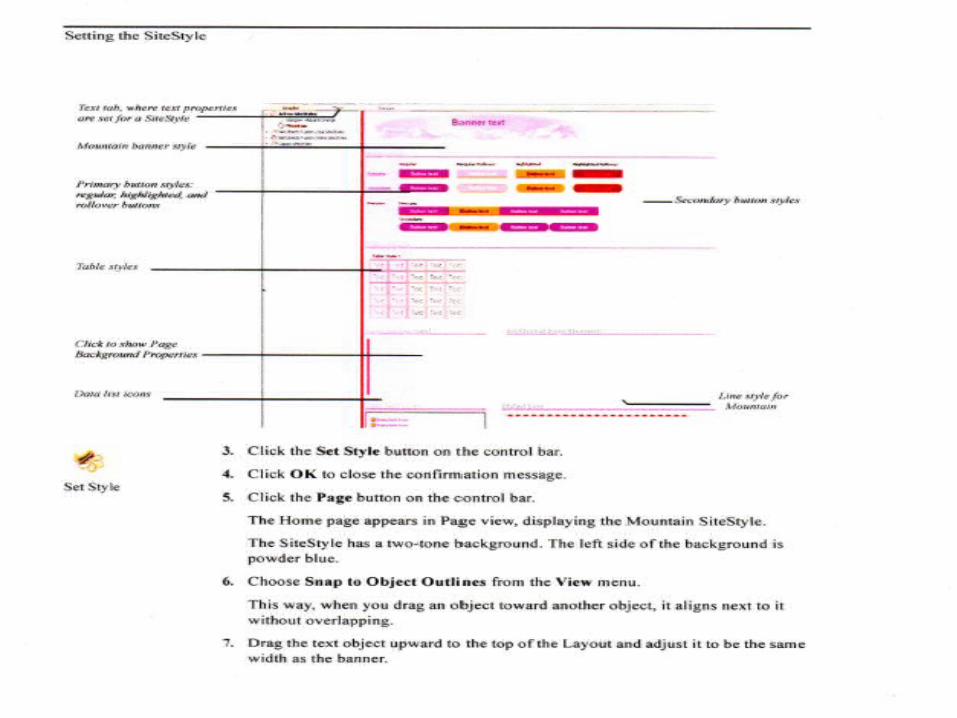
Page. 5
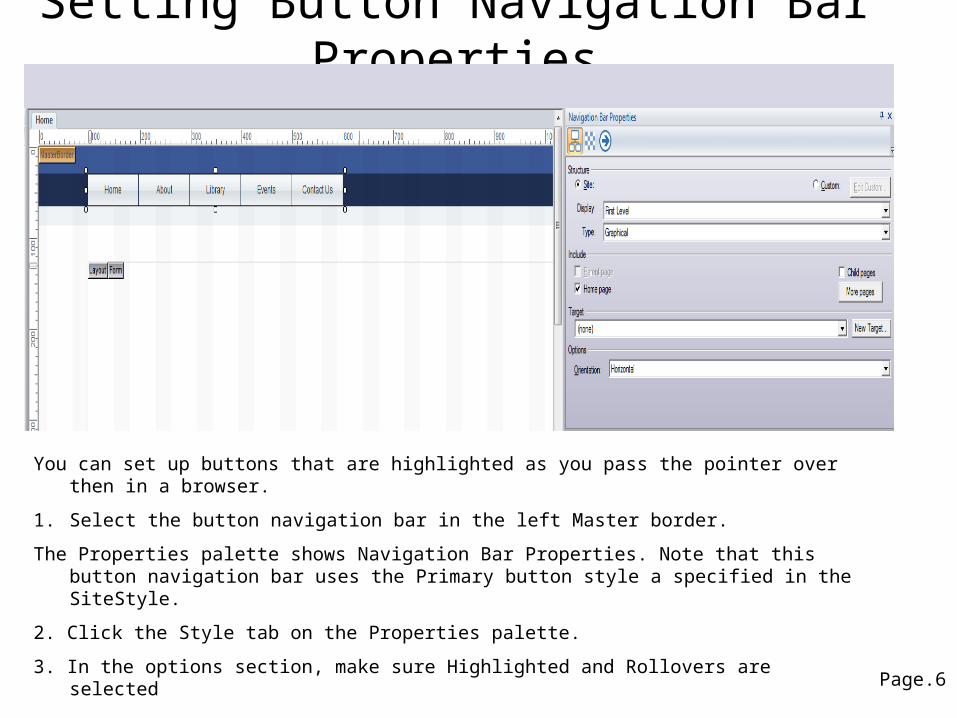
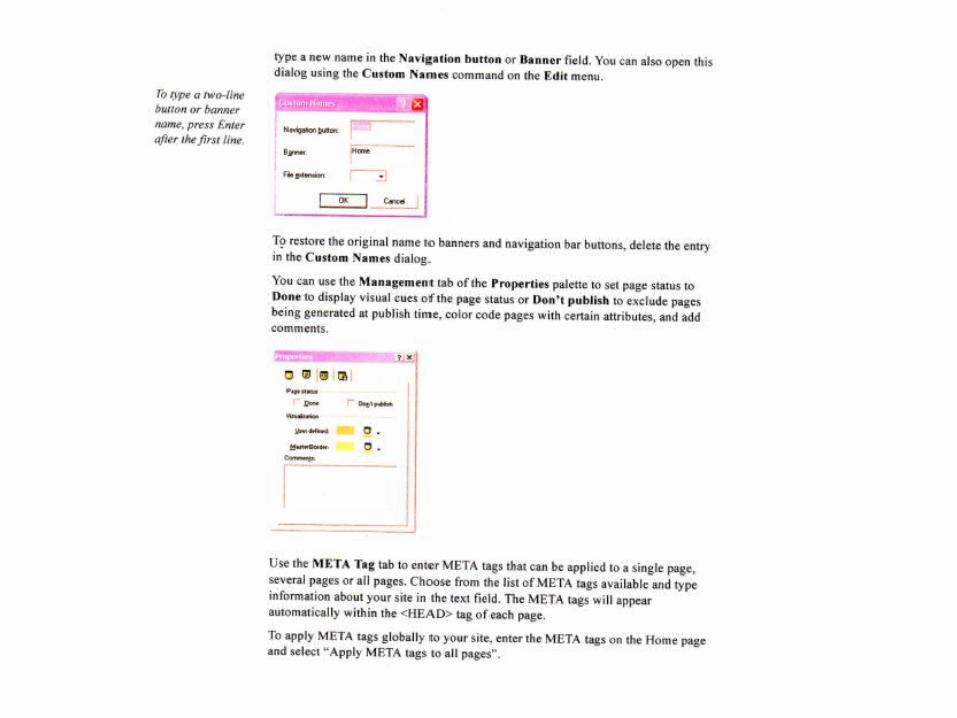
Setting Button Navigation Bar Properties
You can set up buttons that are highlighted as you pass the pointer over then in a browser.
1. Select the button navigation bar in the left Master border.
The Properties palette shows Navigation Bar Properties. Note that this button navigation bar uses the Primary button style a specified in the SiteStyle.
2. Click the Style tab on the Properties palette.
3. In the options section, make sure Highlighted and Rollovers are selected
Page.6
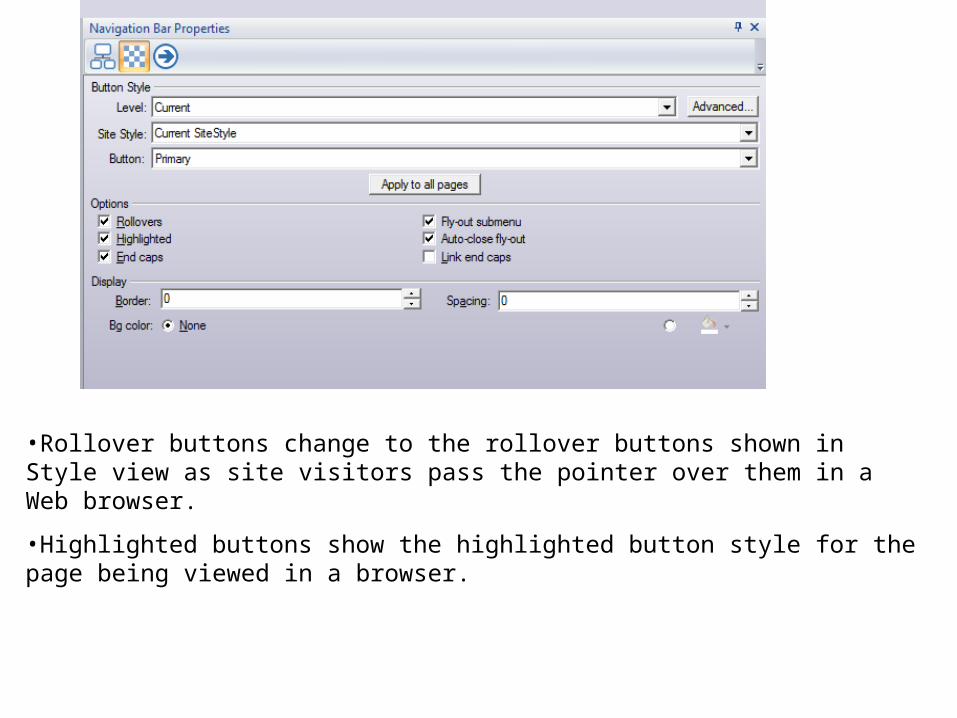
•Rollover buttons change to the rollover buttons shown in Style view as site visitors pass the pointer over them in a Web browser.
•Highlighted buttons show the highlighted button style for the page being viewed in a browser.
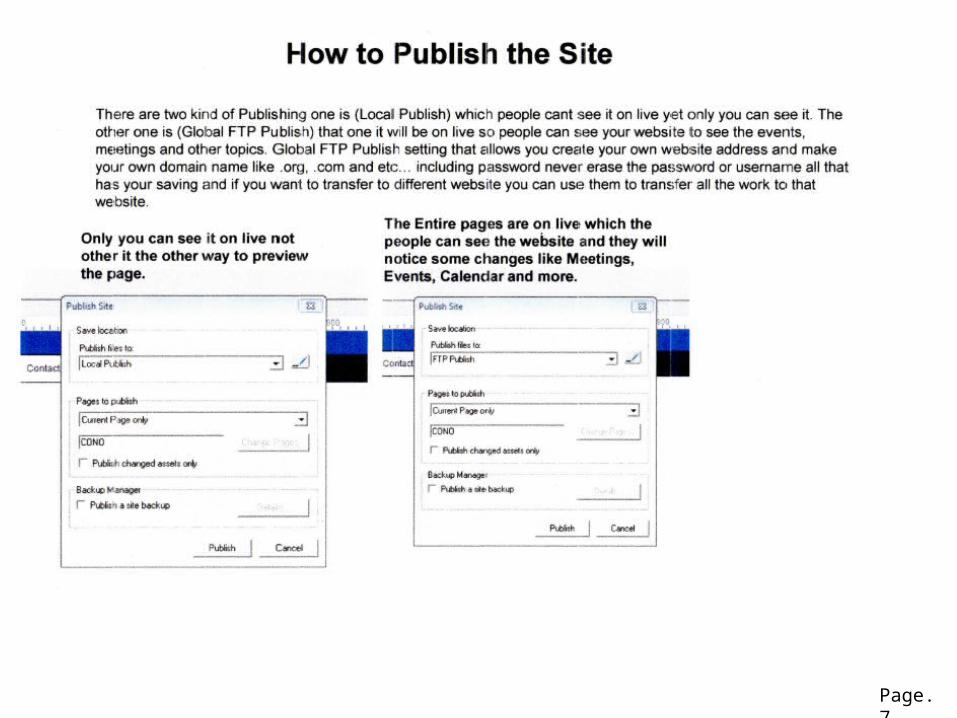
Page. 7
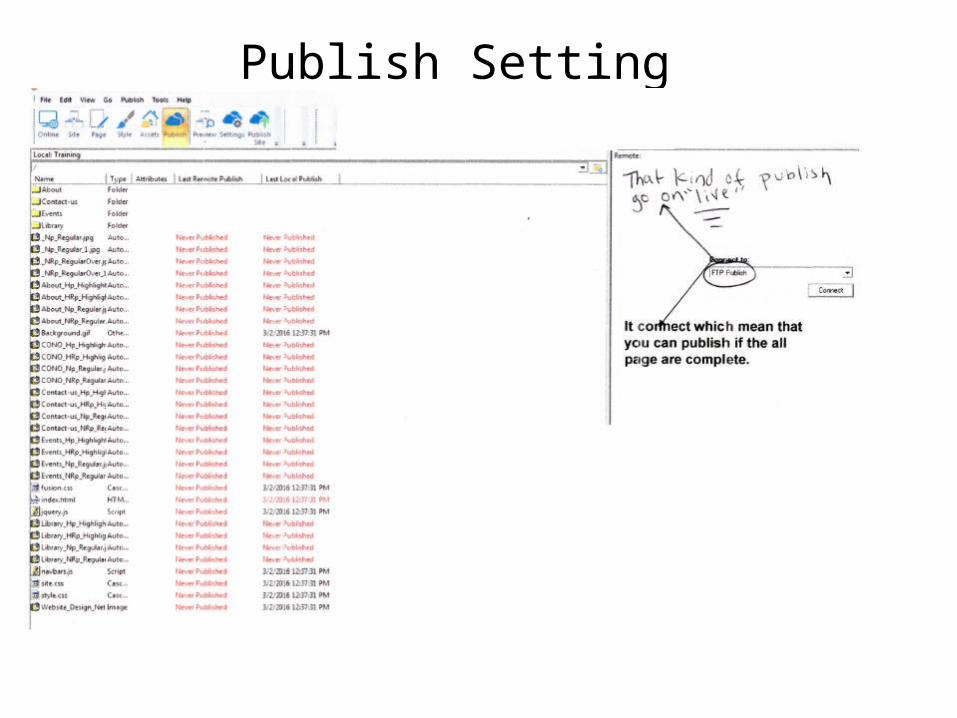
Publish Setting
Page. 8
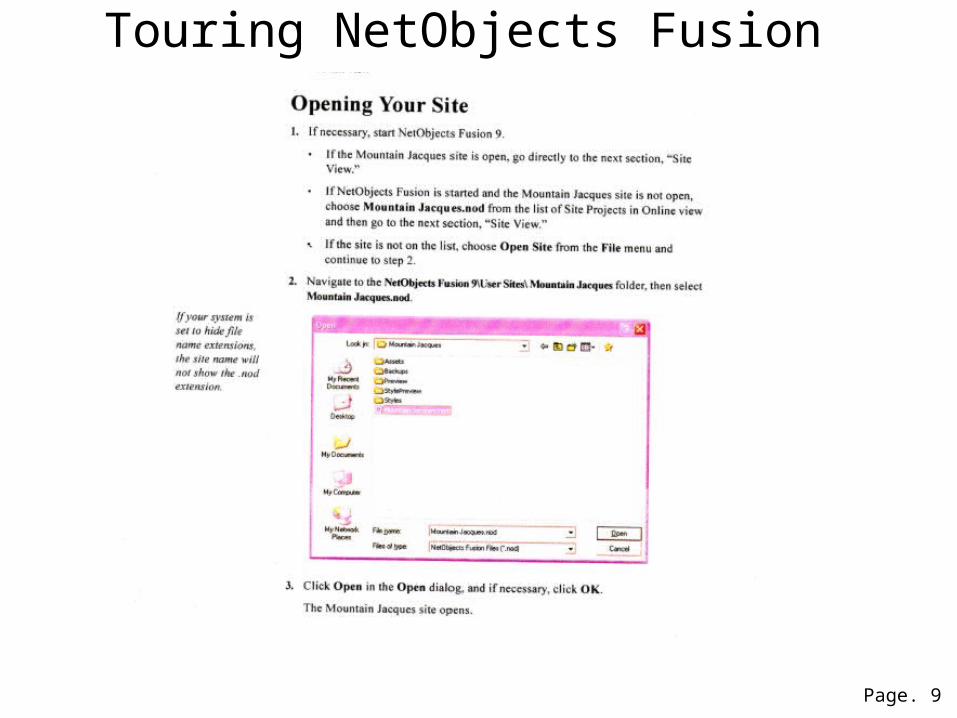
Touring NetObjects Fusion
Page. 9
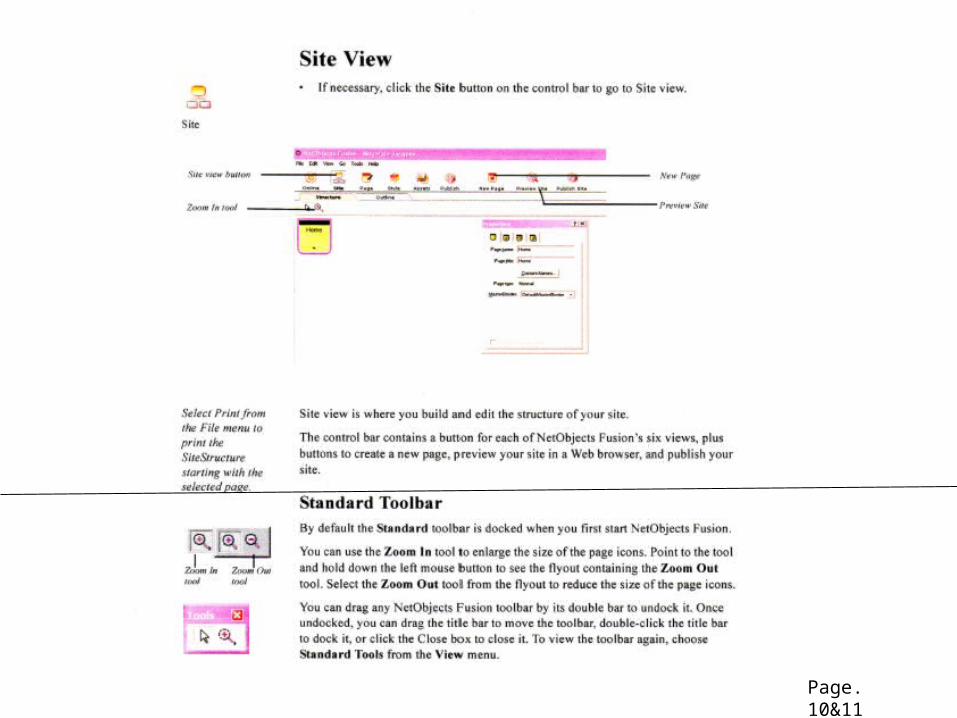
Page. 10&11
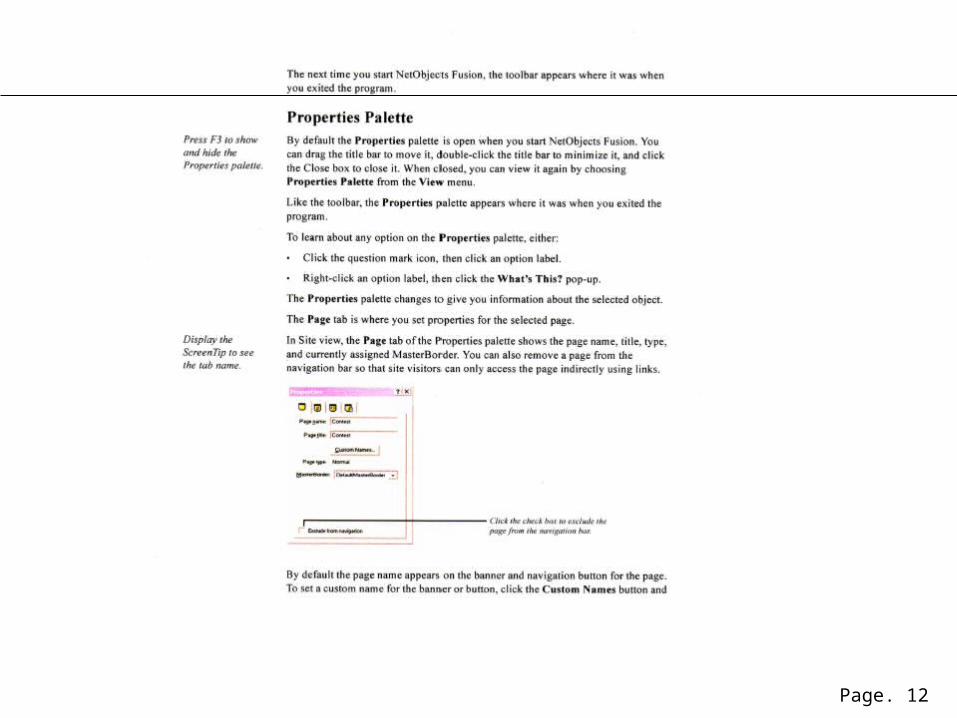
Page. 12
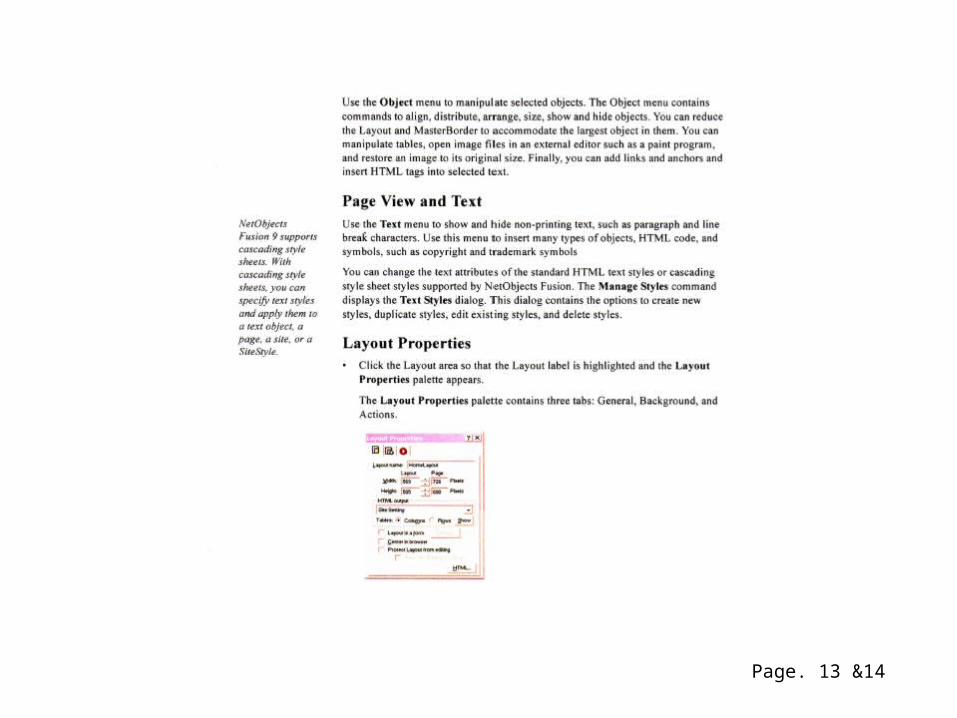
Page. 13 &14
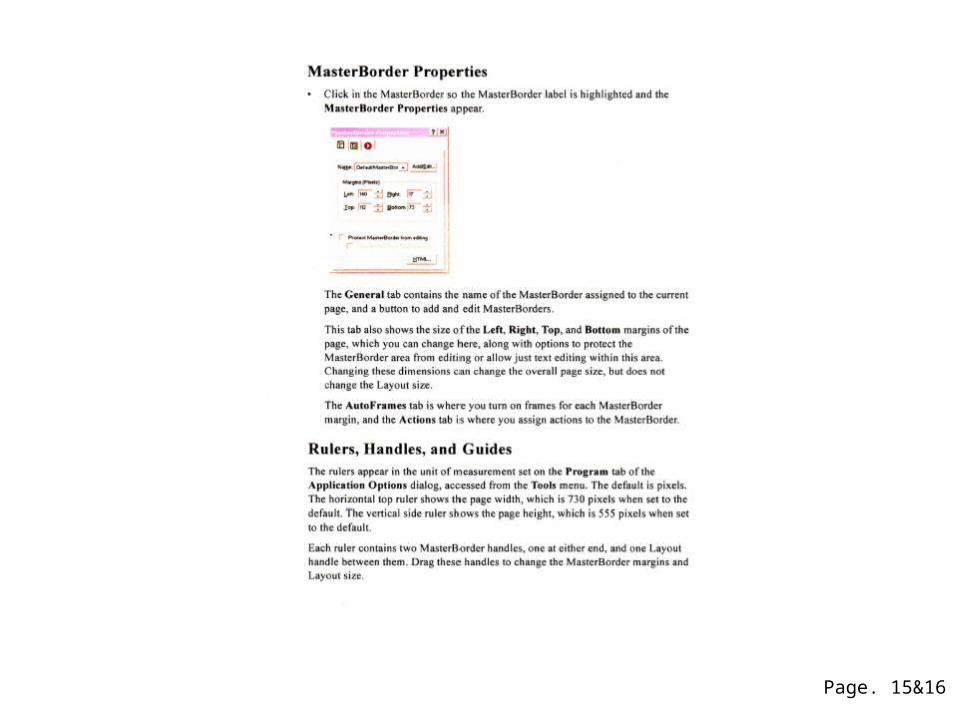
Page. 15&16
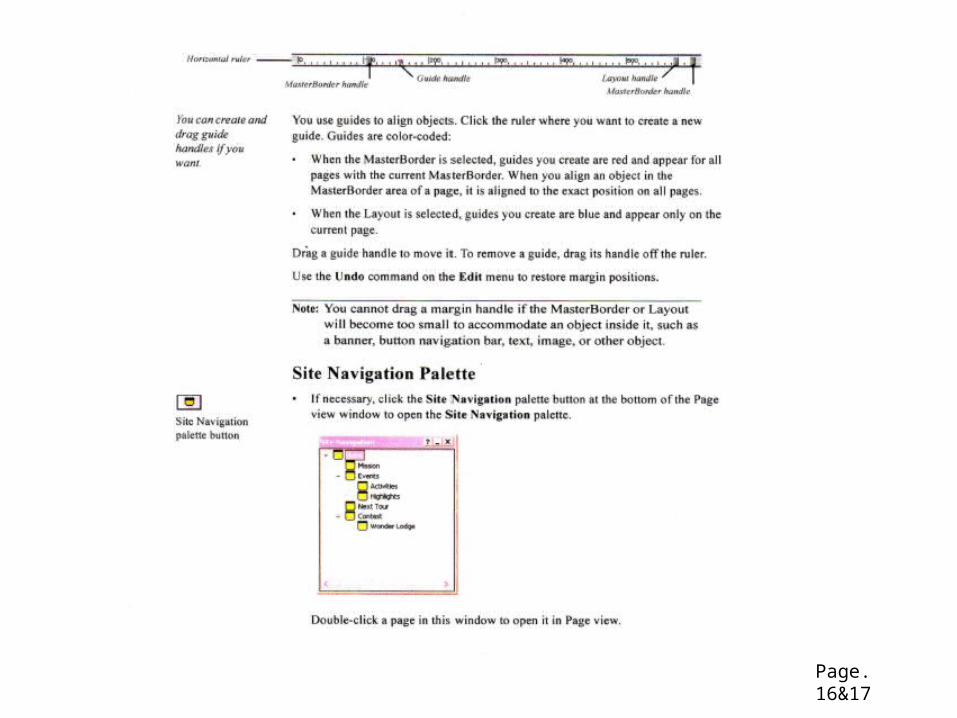
Page. 16&17
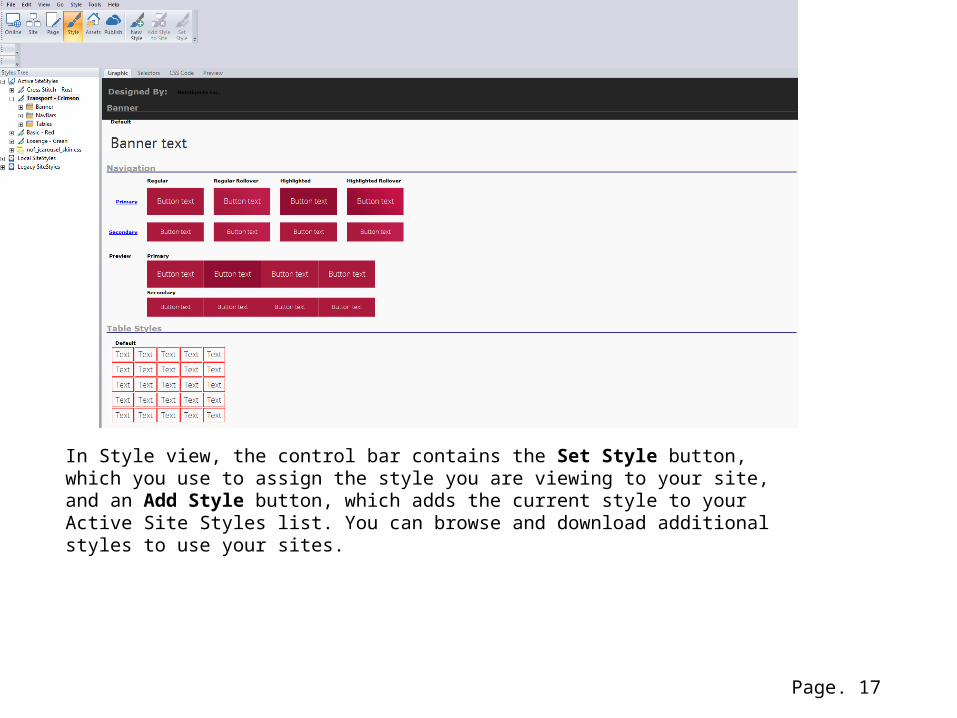
In Style view, the control bar contains the Set Style button, which you use to assign the style you are viewing to your site, and an Add Style button, which adds the current style to your Active Site Styles list. You can browse and download additional styles to use your sites.
Page. 17
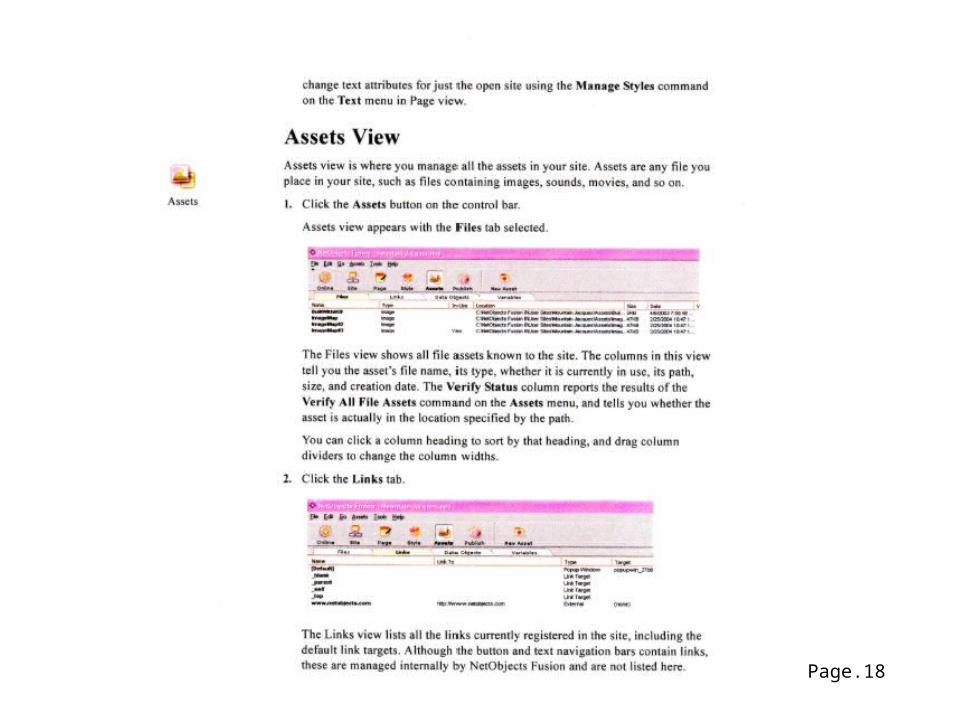
Page.18

Insert picture
First you click the picture tab then you drag it to the page and will pull up picture from the files and make sure you go to picture properties to change size and height. Also click on setting where it said application default on the picture properties where you can fix blurry pictures.
Page. 19
Insert YouTube Video
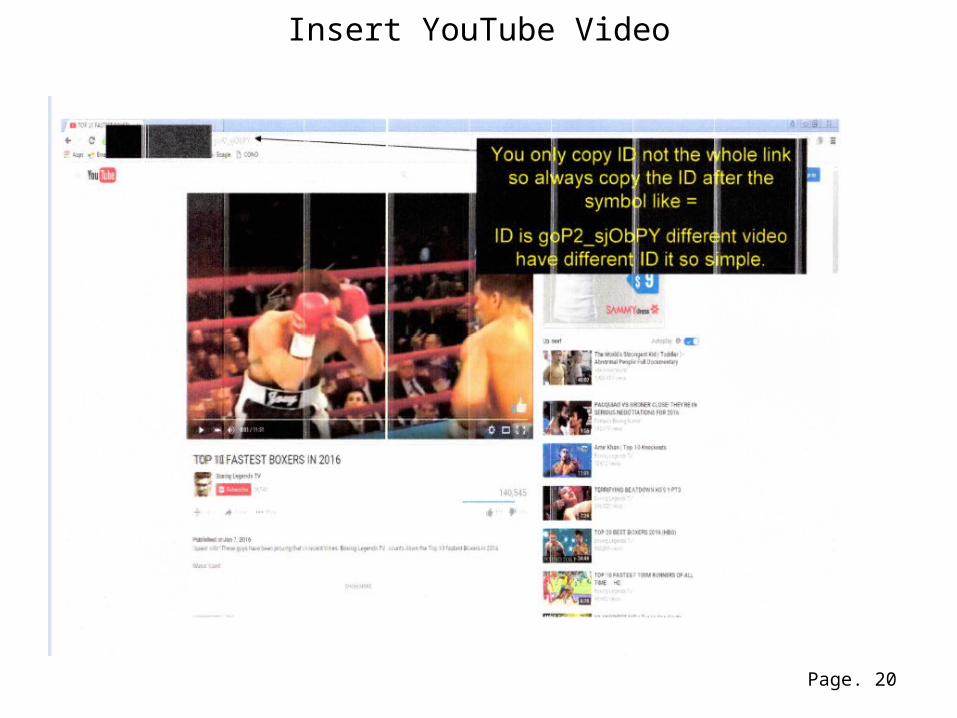
Page. 20
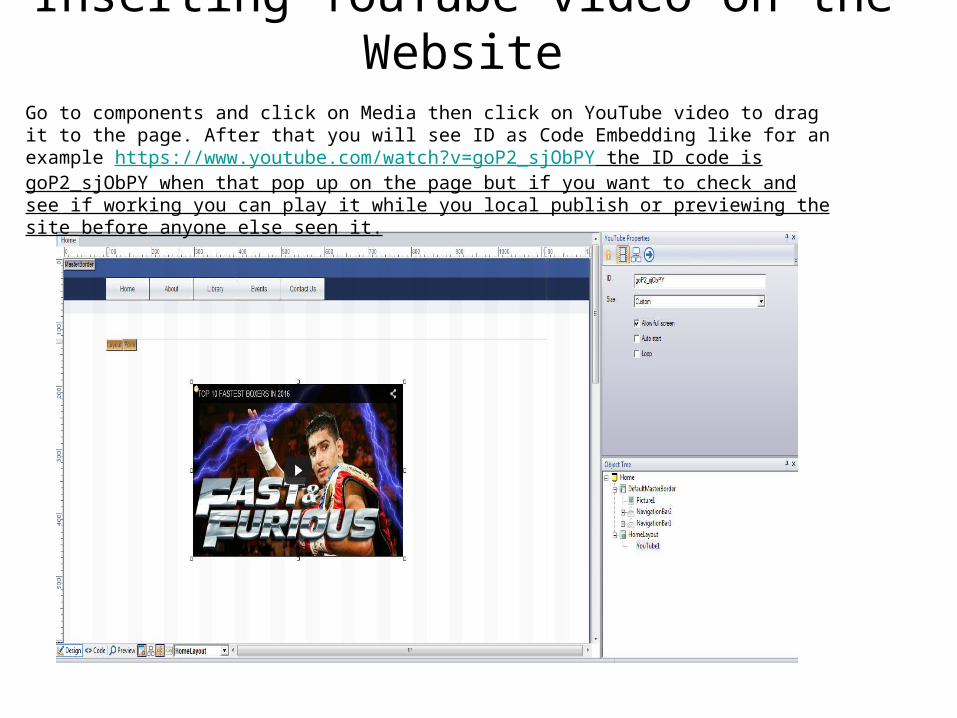
Inserting YouTube video on the Website
Go to components and click on Media then click on YouTube video to drag it to the page. After that you will see ID as Code Embedding like for an example https://www.youtube.com/watch?v=goP2_sjObPY the ID code is goP2_sjObPY when that pop up on the page but if you want to check and see if working you can play it while you local publish or previewing the site before anyone else seen it.

Creating A Table
Page.21
Page. 22
Page.23