Embed Size (px)
Citation preview
Document reference: IMP1958-06 January 2020
MyID Version 11.5
Mobile Identity Management Installation and Configuration Guide
Lutterworth Hall, St Mary's Road, Lutterworth, Leicestershire, LE17 4PS, UK
www.intercede.com | [email protected] | @intercedemyid | +44 (0)1455 558111
Mobile Identity Management Installation and Configuration Guide Page 2 of 35
Copyright
© 2001-2020 Intercede Limited. All rights reserved.
Information in this document is subject to change without notice. The software described in this document is furnished exclusively under a restricted license or non-disclosure agreement. Copies of software supplied by Intercede Limited may not be used resold or disclosed to third parties or used for any commercial purpose without written authorization from Intercede Limited and will perpetually remain the property of Intercede Limited. They may not be transferred to any computer without both a service contract for the use of the software on that computer being in existence and written authorization from Intercede Limited.
The software or web site referred to in this manual may utilize or contain material that is © 1994-2000 DUNDAS SOFTWARE LTD., all rights reserved.
No part of this publication may be reproduced, stored in a retrieval system or transmitted in any form or any means electronic or mechanical, including photocopying and recording for any purpose other than the purchaser's personal use without the written permission of Intercede Limited.
Whilst Intercede Limited has made every effort in the preparation of this manual to ensure the accuracy of the information, the information contained in this manual is delivered without warranty, either express or implied. Intercede Limited will not be held liable for any damages caused, or alleged to be caused, either directly or indirectly by this manual.
Bouncy castle
Copyright © 2000 – 2011 The Legion Of The Bouncy Castle (http://www.bouncycastle.org)
Permission is hereby granted, free of charge, to any person obtaining a copy of this software and associated documentation files (the "Software"), to deal in the Software without restriction, including without limitation the rights to use, copy, modify, merge, publish, distribute, sublicense, and/or sell copies of the Software, and to permit persons to whom the Software is furnished to do so, subject to the following conditions:
The above copyright notice and this permission notice shall be included in all copies or substantial portions of the Software.
THE SOFTWARE IS PROVIDED "AS IS", WITHOUT WARRANTY OF ANY KIND, EXPRESS OR IMPLIED, INCLUDING BUT NOT LIMITED TO THE WARRANTIES OF MERCHANTABILITY, FITNESS FOR A PARTICULAR PURPOSE AND NONINFRINGEMENT. IN NO EVENT SHALL THE AUTHORS OR COPYRIGHT HOLDERS BE LIABLE FOR ANY CLAIM, DAMAGES OR OTHER LIABILITY, WHETHER IN AN ACTION OF CONTRACT, TORT OR OTHERWISE, ARISING FROM, OUT OF OR IN CONNECTION WITH THE SOFTWARE OR THE USE OR OTHER DEALINGS IN THE SOFTWARE.
KSoap2
Copyright © 2003,2004 Stefan Haustein, Oberhausen, Rhld., Germany
Copyright © 2006, James Seigel, Calgary, AB., Canada
Permission is hereby granted, free of charge, to any person obtaining a copy of this software and associated documentation files (the "Software"), to deal in the Software without restriction, including without limitation the rights to use, copy, modify, merge, publish, distribute, sublicense, and/or sell copies of the Software, and to permit persons to whom the Software is furnished to do so, subject to the following conditions:
The above copyright notice and this permission notice shall be included in all copies or substantial portions of the Software.
Mobile Identity Management Installation and Configuration Guide Page 3 of 35
THE SOFTWARE IS PROVIDED "AS IS", WITHOUT WARRANTY OF ANY KIND, EXPRESS OR IMPLIED, INCLUDING BUT NOT LIMITED TO THE WARRANTIES OF MERCHANTABILITY, FITNESS FOR A PARTICULAR PURPOSE AND NONINFRINGEMENT. IN NO EVENT SHALL THE AUTHORS OR COPYRIGHT HOLDERS BE LIABLE FOR ANY CLAIM, DAMAGES OR OTHER LIABILITY, WHETHER IN AN ACTION OF CONTRACT, TORT OR OTHERWISE, ARISING FROM, OUT OF OR IN CONNECTION WITH THE SOFTWARE OR THE USE OR OTHER DEALINGS IN THE SOFTWARE.
Licenses and Trademarks
The Intercede® and MyID® word marks and the MyID® logo are registered trademarks of Intercede in the UK, US and other countries.
Microsoft and Windows are registered trademarks of Microsoft Corporation. Other brands and their products are trademarks or registered trademarks of their respective holders and should be noted as such. All other trademarks acknowledged.
a
Mobile Identity Management Installation and Configuration Guide Page 4 of 35
Conventions Used in this Document
▪ Lists:
Numbered lists are used to show the steps involved in completing a task when the order is important
Bulleted lists are used when the order is unimportant or to show alternatives
▪ Bold is used for menu items and for labels.
For example:
“Record a valid email address in 'From' email address”
Select Save from the File menu
▪ Italic is used for emphasis and to indicate references to other sections within the
current document:
For example:
“Copy the file before starting the installation”
“See Issuing a Card for further information”
▪ Bold and italic are used to identify the titles of other documents.
For example: “See the Release Notes for further information.”
Unless otherwise explicitly stated, all referenced documentation is available on the installation media.
▪ A fixed width font is used where the identification of spaces is important,
including filenames, example SQL queries and any entries made directly into configuration files or the database.
▪ Notes are used to provide further information, including any prerequisites or
configuration additional to the standard specifications.
For example:
Note: This issue only occurs if updating from a previous version.
▪ Warnings are used to indicate where failure to follow a particular instruction may
result in either loss of data or the need to manually configure elements of the system.
For example:
Warning: You must take a backup of your database before making any changes to it.
Mobile Identity Management Installation and Configuration Guide Page 5 of 35
Contents
1 Introduction ................................................................................................................................7
1.1 Supported devices ....................................................................................................................... 7
1.2 Supported key stores ................................................................................................................... 7
1.3 Supported Mobile Device Management integration ..................................................................... 7
1.4 Prerequisites and installation ....................................................................................................... 8 1.4.1 SMS gateway ............................................................................................................................... 8 1.4.2 Communication with the MyID mobile web services .................................................................... 8 1.4.3 SSL certificate .............................................................................................................................. 8 1.4.4 IIS and web service users ............................................................................................................ 8 1.4.5 Logon mechanisms for mobile identities ...................................................................................... 8
1.5 Overview ...................................................................................................................................... 9
1.6 Limitations of mobile badge layouts ............................................................................................. 9
1.7 Change history ............................................................................................................................. 9
2 Configuring the System ......................................................................................................... 10
2.1 Setting the content signing certificate ........................................................................................ 10
2.2 Setting the configuration options ................................................................................................ 11 2.2.1 Web service location .................................................................................................................. 11 2.2.2 Setting the certificate recovery password complexity ................................................................ 11 2.2.3 Biometric authentication............................................................................................................. 12 2.2.4 Configuring the image location .................................................................................................. 12 2.2.5 Maximum session count ............................................................................................................ 12 2.2.6 Setting up support for historic certificates .................................................................................. 13
2.3 Granting access to the workflows .............................................................................................. 14 2.3.1 Roles ......................................................................................................................................... 14 2.3.2 Scope ........................................................................................................................................ 14
2.4 Configuring SMS and email notifications ................................................................................... 15
2.5 Configuring the SMS gateway ................................................................................................... 15
2.6 Configuring SMS and email certificate renewal notifications...................................................... 16
2.7 Configuring the Certificate Authority .......................................................................................... 17
2.8 Registering mobile devices ........................................................................................................ 17
2.9 Setting up iOS OTA provisioning ............................................................................................... 18 2.9.1 Setting up the application pool for iOS OTA .............................................................................. 18 2.9.2 Setting up a signing certificate for iOS OTA............................................................................... 19 2.9.3 iOS OTA certificate requirements .............................................................................................. 19 2.9.4 Configuring MyID for OTA provisioning ..................................................................................... 20
2.10 Setting up the Identity Agent credential profiles ......................................................................... 21 2.10.1 Creating the Identity Agent credential profile ............................................................................. 21 2.10.2 Configuring authentication types for Identity Agent credential profiles ....................................... 24
2.11 Creating a custom mobile card format ....................................................................................... 25
3 Requesting and Approving Mobile IDs ................................................................................ 26
3.1 Recovering archived certificates ................................................................................................ 26
3.2 Requesting a mobile ID for another user ................................................................................... 27
3.3 Requesting a mobile ID for your own mobile device .................................................................. 28
4 Working with Mobile IDs ........................................................................................................ 29
4.1 Cancelling a mobile ID ............................................................................................................... 29 4.1.1 Important information about cancelling mobile IDs .................................................................... 29
4.2 Requesting replacement IDs ...................................................................................................... 29
4.3 Enabling and disabling IDs ........................................................................................................ 30
4.4 Unlocking IDs ............................................................................................................................. 30
5 Microsoft Intune and Derived Credentials ........................................................................... 31
5.1 What is Microsoft Intune? .......................................................................................................... 31
5.2 What does this help customers to achieve?............................................................................... 31
Mobile Identity Management Installation and Configuration Guide Page 6 of 35
5.3 How does MyID fit in? ................................................................................................................ 31
5.4 Compliance with NIST guidelines for derived PIV credentials ................................................... 31
5.5 How do you configure MyID to issue derived credentials? ........................................................ 32
5.6 How do you configure Intune to issue derived credentials? ....................................................... 32
5.7 How do you request a derived credential? ................................................................................. 32
5.8 How do you manage derived certificates? ................................................................................. 33
6 Troubleshooting ..................................................................................................................... 34
6.1 Setting up logging ...................................................................................................................... 34
6.2 Retry attempts ........................................................................................................................... 34
6.3 Configuration issues .................................................................................................................. 35
Mobile Identity Management Installation and Configuration Guide Page 7 of 35
1 Introduction
This document provides information on the support for MyID® Mobile Identity Management (MIM), including details on the following:
▪ Configuring the system to support the installation of mobile identities on your mobile devices.
▪ Requesting mobile identities through MyID.
▪ Managing mobile identities through MyID.
This release provides support for a range of Android and iOS mobile devices.
In this document, the words mobile device may refer either to a smartphone or a tablet. Some devices are unable to receive SMS messages but can receive email messages capable of starting the identity management process.
For information on using the mobile identities on your mobile device, see the information accompanying the individual client applications.
1.1 Supported devices
The following devices are supported:
▪ iOS 12.0, 11.0, 10.0
▪ Android 9.0, 8.0, 7.0, 6.0
If you would like to use a mobile operating system not listed here, contact Intercede customer support quoting reference SUP-49.
1.2 Supported key stores
MyID currently supports the following key stores:
▪ Intercede key store on iPhone and iPad.
▪ Intercede key store for Android devices running 6.0 (Marshmallow) or above.
▪ Citrix SecureVault on iPhone and iPad.
▪ MobileIron AppConnect on iPhone and iPad.
▪ iOS first party accessible key store on iPhone and iPad.
▪ Android system key store for devices running 6.0 (Marshmallow) or above.
Note: Issuing and recovering certificates with elliptic curve cryptography (ECC) keys to mobile devices is not currently supported.
1.3 Supported Mobile Device Management integration
MyID currently supports integration with the following Mobile Device Management (MDM) and associated systems:
▪ Microsoft Intune.
▪ Citrix XenMobile 10.6.
▪ MobileIron Core 9.2 Derived Credentials.
▪ VMWare AirWatch 9.1.
▪ Centrify Identity Service.
Note: Contact Centrify for details of supported versions.

Mobile Identity Management Installation and Configuration Guide Page 8 of 35
Contact the relevant vendor for full details of how to configure these MDM systems for integration with MyID.
1.4 Prerequisites and installation
1.4.1 SMS gateway
You can configure the system to use any SMS gateway. To set up the system to communicate with your SMS gateway and allow MyID to send text messages to the users' mobile devices, you must have some knowledge of ASP and JavaScript.
See section 2.5, Configuring the SMS gateway for details.
Alternatively, you can use email for notifications.
1.4.2 Communication with the MyID mobile web services
To allow your mobile device to obtain and work with mobile IDs, your device must be able to communicate with the URLs of the MyID mobile web services; for example:
https://myserver/MyIDProcessDriver/
https://myserver/MyIDDataSource/
Where myserver is the name of the server on which the MyID web services are
installed.
Note: If you attempt to browse to these URLs from the mobile device, you will see an error due to the security set up on the web service folders; this does not mean that the connection has failed.
Your PC-based MyID clients must also be able to communicate with these web services. For example, QR codes are generated on the web services server by the MyIDDataSource web service, and embedded in the workflow.
1.4.3 SSL certificate
Before you start provisioning mobile devices, you must issue an SSL certificate from a trusted root CA.
Issuance will fail if the SSL certificate used on the MyID web server is untrusted by the mobile device. Intercede recommends that either an SSL certificate is issued by a trusted public root CA, or that devices have a trusted root CA for the issuing CA added to their Trusted Root stores.
1.4.4 IIS and web service users
The MyID IIS and MyID web service users must be members of the IIS_IUSRS Windows group; this is necessary for .NET 4 to operate correctly.
1.4.5 Logon mechanisms for mobile identities
The server update installation program turns on the Password Logon logon mechanism, which is essential for the correct operation of this mobile identities. You must review your settings for logon mechanisms for the end user roles – you can switch off password logon for individual roles by using the Assign Logon Mechanisms feature in the Edit Roles workflow.
Mobile Identity Management Installation and Configuration Guide Page 9 of 35
1.5 Overview
This system allows you to request a mobile ID from your MyID system and store it on your mobile device; this allows you to use secure certificates with your email application for reading and writing encrypted and signed emails, display an identity badge, and so on.
The process is as follows:
1. You install the MyID Identity Agent app on your mobile device.
2. Using MyID, a MyID operator requests (and optionally approves) an ID for your mobile device.
3. MyID uses email or an SMS gateway to send a message to the user's email address or phone number that is stored as the Cell or Mobile (depending on the language setting) number in the MyID record.
4. When the message is received on your mobile device, you click the link or notification.
The type of notification depends on your mobile device type and whether the message is sent through SMS or email. Follow the instructions displayed on your mobile device.
5. You use the Identity Agent app to download the certificates and badge layouts to your mobile device from the MyID web service.
6. You can now use your mobile device as a MyID device.
1.6 Limitations of mobile badge layouts
The mobile badge layouts displayed on your mobile devices do not support the full range of layout options that you can specify in the MyID Card Layout Editor.
▪ Badges are displayed in portrait orientation only. The badge is scaled to fit the width of the screen.
▪ Only the Android or iOS system font is available.
▪ Only horizontal text is supported.
You are recommended to create specific card layouts for your mobile identities, and test them on your target devices before implementing your production system.
▪ IKB-290 – Cannot use .jpeg extension
Mobile layouts can use PNG or JPEG image files; however, you must ensure that the files have the extension .png or .jpg. If you attempt to issue a mobile identity
that contains a layout with an image that has a .jpeg extension, issuance will fail.
1.7 Change history
Version Description
IMP1958-01 Released with MyID 11.0.
IMP1958-02 Released with MyID 11.1.
IMP1958-03 Released with MyID 11.2.
IMP1958-04 Released with MyID 11.3.
IMP1958-05 Released with MyID 11.4.
IMP1958-06 Released with MyID 11.5.
Mobile Identity Management Installation and Configuration Guide Page 10 of 35
2 Configuring the System
You must configure your system to allow you to request mobile IDs and collect them on the mobile device.
2.1 Setting the content signing certificate
MyID must be able to sign the content for the mobile IDs before issuing them to mobile devices. Before MyID can use a certificate to sign the mobile IDs, the certificate must be available to the MyID COM user account.
1. On the MyID application server, log on using the account that you use to run the MyID components.
2. Request a certificate. You can issue a certificate from any certificate authority as long as it is available to CAPI or CNG.
Notes:
Do not enable strong private key protection on the certificate, as this will prevent processing of the request by the MyID account.
By default, MyID uses SHA256 as the hashing algorithm when signing using this certificate. The certificate that you use for signing must therefore have been produced using a KSP or CSP that supports SHA256.
3. Once the certificate has been generated, install and save it as a .cer file (in binary
format). You must save it in a location accessible to the MyID application, so save it to the Components folder within the MyID installation folder.
Note: You may need administrative privileges to save files to this area.
4. Enter the filename of the certificate in the system registry.
Note: You must log in as a user with sufficient privileges to edit the registry.
If the keys and values do not already exist, you must create them.
a) From the Start menu, click Run and type regedit in the dialog displayed.
Click OK.
b) Navigate to:
HKEY_LOCAL_MACHINE\SOFTWARE\wow6432Node\Intercede\Edefice\ ContentSigning
c) Check that the value of the following string is set:
Active – set to WebService
d) Set the value of the following string to the full path of the certificate on the application server:
WebService
For example:
C:\Program Files (x86)\Intercede\MyID\Components\mycert.cer
An example .reg file for setting the content signing certificate might be:
Windows Registry Editor Version 5.00 [HKEY_LOCAL_MACHINE\SOFTWARE\Wow6432Node\Intercede\Edefice\ContentSigning] "WebService"="C:\\Program Files (x86)\\Intercede\\MyID\\Components\\mycert.cer" "Active"="WebService"
Mobile Identity Management Installation and Configuration Guide Page 11 of 35
2.2 Setting the configuration options
2.2.1 Web service location
Within MyID, you must set the location of the MyID web service that allows a mobile device to collect a mobile ID.
To set the location of the web service:
1. From the Configuration category, select the Operation Settings workflow.
2. Click the Certificates tab.
3. Set the Mobile Certificate Recovery Service URL option to the location of the MyID Process Driver web service host.
For example:
https://myserver
Replace myserver with the name of the server on which the web service is
installed.
You are recommended to use SSL on this connection. Make sure you specify the correct protocol: http or https.
Note: The users' mobile devices must be able to access this URL. To be able to access the other MyID web services, all three MyID web services must be installed on the same server.
4. If you have installed MyID in a distributed network where the web server is in a separate domain, you may have to supply a separate URL for your MyID client workstations to retrieve a QR code for mobile issuance. In this case, set the Web Server External Address option to the URL of the MyID web services server that hosts the ProcessDriver web service. Make sure this URL is accessible to your MyID clients.
In the majority of network configurations, you can leave this option blank.
5. Click Save changes.
2.2.2 Setting the certificate recovery password complexity
To set up the single-use authentication code that is used to secure mobile IDs sent to the mobile device, you must use the Certificate Recovery Password Complexity configuration option to require numeric characters only.
To set the password complexity:
1. From the Configuration category, select the Operation Settings workflow.
2. Click the Certificates tab.
3. Set the Certificate Recovery Password Complexity option.
The format is xx-yyN, which is made up of:
xx = minimum length.
yy = maximum length.
The default is 04-08N which means a code of 4 to 8 numbers.
4. Click Save changes.

Mobile Identity Management Installation and Configuration Guide Page 12 of 35
2.2.3 Biometric authentication
MyID PIV systems support biometric authentication when updating and unlocking credentials. These features are not supported for mobile devices, therefore, on PIV systems, you must disable them before you can issue mobile identities successfully.
To set the biometric authentication options:
1. From the Configuration category, select the Operation Settings workflow.
2. Click the Biometrics tab.
3. Set the following options:
Set the Verify fingerprints during card update option in the Operation Settings workflow set to No.
If this option is set to Yes, provisioning a mobile identity will fail with an error
similar to:
Your mobile device is not compatible with biometric authentication
Set the Verify fingerprints during card unlock option in the Operation Settings workflow set to No.
If this option is set to Yes, unlocking a mobile identity will fail with an error
similar to:
Your mobile device is not compatible with biometric authentication
4. Click Save changes.
Note: When you set these options to No, you are removing the requirement to use
biometrics when unlocking or updating smart cards as well as mobile identities.
2.2.4 Configuring the image location
To allow MyID to send badge images to the mobile device, you must make sure that the Image Upload Server configuration option (on the Video page of the Operation Settings workflow) is set to a value that can be resolved (to the name or IP address of the MyID web server) from the MyID Web Services server. For more information, see the Configuring the image location section in the Administration Guide.
2.2.5 Maximum session count
If too many clients (whether mobile clients, or other clients such as MyID Desktop, the Self-Service App, or the Self-Service Kiosk) access the server at the same time for issuance or update processes, you may experience performance issues, and end users may experience errors.
If too many clients overload the server infrastructure, the errors may be generated from various points in the system (for example, from the database or the web server) and there may be a wide variety in the messages displayed; some error messages may be generic errors, with the details visible only in the MyID server logs.
If a user sees an "unexpected" error on the mobile device:
1. Review the MyID server logs for the time period involved. Check for timeout issues.
2. Review your infrastructure for high resource usage; for example, CPU, RAM, and so on.
3. Consider restricting the number of mobile sessions using the Maximum session count configuration option.
Mobile Identity Management Installation and Configuration Guide Page 13 of 35
To set the maximum number of mobile sessions allowed.
1. From the Configuration category, select the Operation Settings workflow.
2. Click the Identity Agent Policy tab.
3. Set the following option:
Maximum session count
This determines the number of concurrent sessions (whether from mobile clients or other clients such as MyID Desktop, the Self-Service App, or the Self-Service Kiosk) that are allowed by the server while still allowing mobile issuance and update operations.
Values:
0 – Do not allow mobile issuances or updates.
-1 – No limits.
Any other number determines the number of client sessions allowed. If this number is exceeded, the server returns HTTP 503 – service unavailable – to all mobile clients. This will also be recorded in the local event log.
Only mobile clients are prevented from connecting.
You are recommended to tailor this value to your hardware: too high a value, and your server may experience performance issues; too low and your server will be under-used.
As server deployments differ in computing capability, functionality usage, and data load, it is impossible to recommend precise values. You are recommended to try various values on a test system that mirrors the resources and data load of your production system.
4. Click Save changes.
2.2.6 Setting up support for historic certificates
Note: Currently, you cannot provision historic certificates to MobileIron AppConnect or Citrix SecureVault keystores.
You can set up MyID to provide historic encryption certificates for mobile identities. This feature allows users to decrypt their old email messages on their mobile device. The historic encryption certificates are delivered to the mobile device when the mobile identity is issued.
To configure MyID to provide historic certificates, you must use the certificate options in the credential profile. See the Administration Guide for details of the Issue new, Use existing, and Historic Only options.
Note: Due to a limitation of 50 characters on certificate names on Samsung Android devices, if you attempt to issue historic certificates with names longer than 45 characters, the additional characters added to the name to indicate that they are historic certificates cause the names to exceed this length and to overwrite the existing certificates. If you are issuing historic certificates to Samsung Android devices, you must ensure that the certificates you use have names with a maximum of 45 characters.
Mobile Identity Management Installation and Configuration Guide Page 14 of 35
2.3 Granting access to the workflows
The system makes use of the following workflows:
▪ Cancel Credential – used within MyID to cancel a mobile ID and revoke its certificates.
▪ Enable / Disable ID – used within MyID to enable or disable a mobile ID, and suspend or enable its certificates.
▪ Request ID – used within MyID for operator-guided requests for mobile IDs to be installed on a mobile device.
▪ Request My ID – used within MyID for self-service requests for mobile IDs to be installed on a mobile device.
▪ Request Replacement ID – used within MyID to request a replacement for a missing or damaged mobile ID.
▪ Unlock Credential – used within MyID to retrieve an unlock code for an issued mobile ID.
▪ Collect My Updates – used by the Identity Agent app to obtain a mobile ID.
▪ Issue Device – used by the Identity Agent app to obtain a mobile ID.
Note: The Collect My Updates and Issue Device workflows are not used within MyID; they are used to control access from a mobile device to the features of the web service.
Use the Edit Roles workflow to grant access for these workflows to the roles you want to be able to access them.
2.3.1 Roles
You must add the Collect My Updates workflow to the Server Credentials role if the user does not already have access to this workflow through one of their other roles.
Note: You can use the Server Credentials role to control access to the collection service; allocate this role to the users who you want to be able to collect mobile IDs.
Alternatively, you can add the Collect My Updates workflows to an existing role to allow users in that role to collect mobile IDs.
2.3.2 Scope
When a mobile device user, for example a guard, requests the details for another mobile device user, the guard must have the correct scope within MyID to view the details of the other user; for example, the user must be in the same group as the guard if the guard has Department scope.
Mobile Identity Management Installation and Configuration Guide Page 15 of 35
2.4 Configuring SMS and email notifications
You can choose whether to allow SMS, email, or both types of notification when sending provisioning messages to mobile devices.
You can also choose whether to display OTP codes on-screen or to send them to the mobile using SMS.
To allow provisioning messages:
1. From the Configuration category, select the Operation Settings workflow.
2. On the Devices tab, set the following options:
Mobile Provision Via Email – set this option to allow the notifications of mobile IDs to be sent to the user's email address.
Mobile Provision Via SMS – set this option to allow the notifications of mobile IDs to be sent to the user's mobile phone number.
Note: You can select one or both of these options. If you select both options, you can select which method to use when you request the mobile identity.
3. On the Notifications tab, set the following options:
Send Mobile OTP via SMS – set this option to allow the operator to send the OTP authentication code directly to the mobile device.
Note: If you set Send Mobile OTP via SMS to Yes, as a security feature, the OTP is sent as an SMS while the notification message must be sent using email and not SMS; make sure you select the Mobile Provision Via Email option on the Devices tab.
Mail Format – make sure this option is set to HTML.
4. Click Save changes.
2.5 Configuring the SMS gateway
You can configure the system to use any SMS gateway. You must customize the following file:
customSMS.asp
Versions of this file are installed to the MyID web server in the following locations:
▪ Web\<edition>\untranslated\res\custom\js\
▪ Web\<edition>\en\res\custom\js\
▪ Web\<edition>\us\res\custom\js\
Where <edition> is WebPIV for PIV, and WebENT for non-PIV editions of MyID.
You must make the same changes in each version of the file. If you have created any custom translations of the MyID web site, you must also make the same change in the custom versions.
The sample file installed with the system is set up to use the SMS gateway provided by www.2sms.com – if you are using this service, edit the username line to include your
2sms account, and the password line to include your 2sms password.
If you are using any other system, you must customize the ASP file to conform to the calling requirements of your own SMS gateway.
Mobile Identity Management Installation and Configuration Guide Page 16 of 35
This ASP file implements the following function:
customSendSMS(message, mobileNumber, userRS)
where:
▪ message – the body of the SMS text message to be sent to the mobile device.
▪ mobileNumber – the cell/mobile phone number from the user's MyID record.
▪ userRS – reserved for future use.
The function returns the response from the SMS gateway.
You can implement your system in any way. You are required only to send the body contained in message to the phone number in mobileNumber, and return the response
from the gateway.
Note: You must keep a backup of this file once you have customized it.
2.6 Configuring SMS and email certificate renewal notifications
You can decide whether to send renewal messages through email, through SMS, or through both email and SMS.
To allow MyID to send SMS messages, set the SMS email notifications on the General tab of the Operation Settings workflow to Yes.
By default, SMS messages are sent to an Email to SMS gateway, in the format <cellnumber>@<gateway>, where:
▪ <cellnumber> – the cell phone number from the user's record.
▪ <gateway> – the URL from the SMS gateway URL for notifications option on the
General tab of the Operation Settings workflow.
For example: [email protected]
If this is not suitable, you can customize the sp_CustomPrepareSMS stored procedure in
the MyID database.
You can use different content for email and SMS certificate renewal messages, and different content for different kinds of device – mobile or card, for example. Six additional renewal messages are provided – three messages for SMS to mobile devices, and three messages for email to mobile devices. Use the Email Templates workflow to edit the content of these messages.
Note: If you have upgraded your MyID system, MyID does not update your stored procedure to prevent the overwriting of your changes. The base stored procedure has been updated, and you must edit the sp_CustomPrepareSMS stored procedure to allow
it to work. If your stored procedure contains the following:
-- Output an XML string @xml NVARCHAR(MAX) OUT
change it to:
-- Output an XML string @xml NVARCHAR(4000) OUT
Mobile Identity Management Installation and Configuration Guide Page 17 of 35
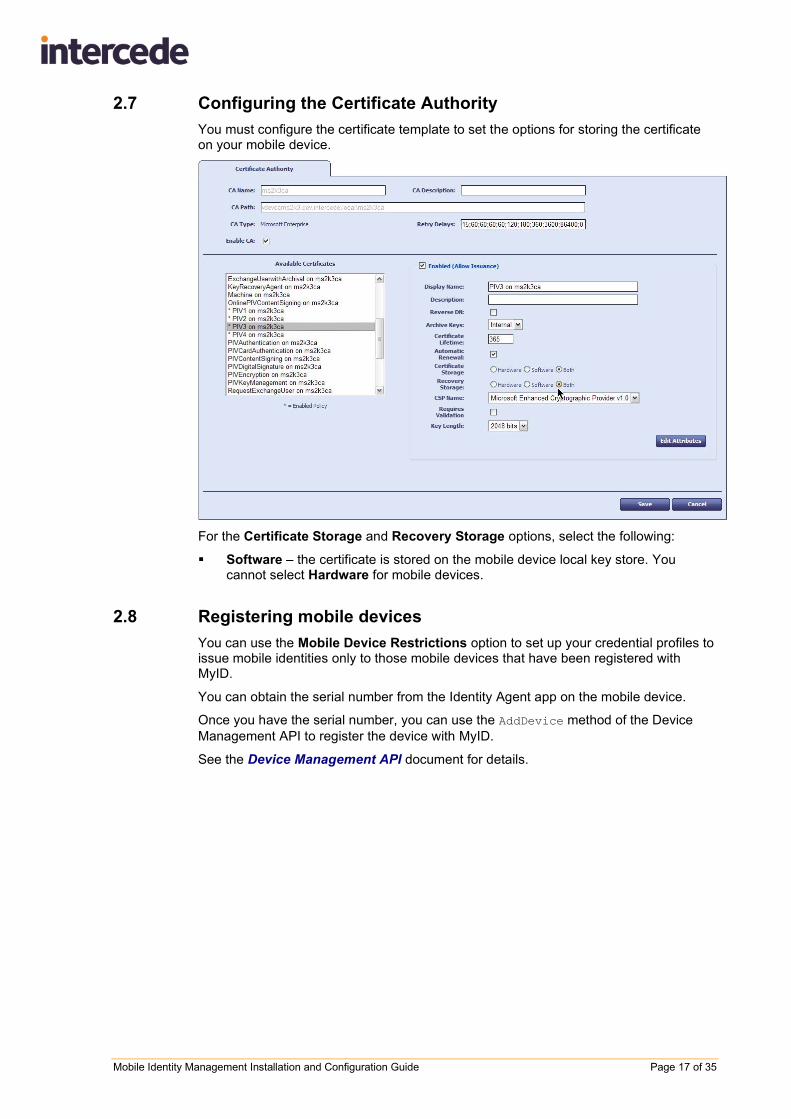
2.7 Configuring the Certificate Authority
You must configure the certificate template to set the options for storing the certificate on your mobile device.
For the Certificate Storage and Recovery Storage options, select the following:
▪ Software – the certificate is stored on the mobile device local key store. You cannot select Hardware for mobile devices.
2.8 Registering mobile devices
You can use the Mobile Device Restrictions option to set up your credential profiles to issue mobile identities only to those mobile devices that have been registered with MyID.
You can obtain the serial number from the Identity Agent app on the mobile device.
Once you have the serial number, you can use the AddDevice method of the Device
Management API to register the device with MyID.
See the Device Management API document for details.
Mobile Identity Management Installation and Configuration Guide Page 18 of 35
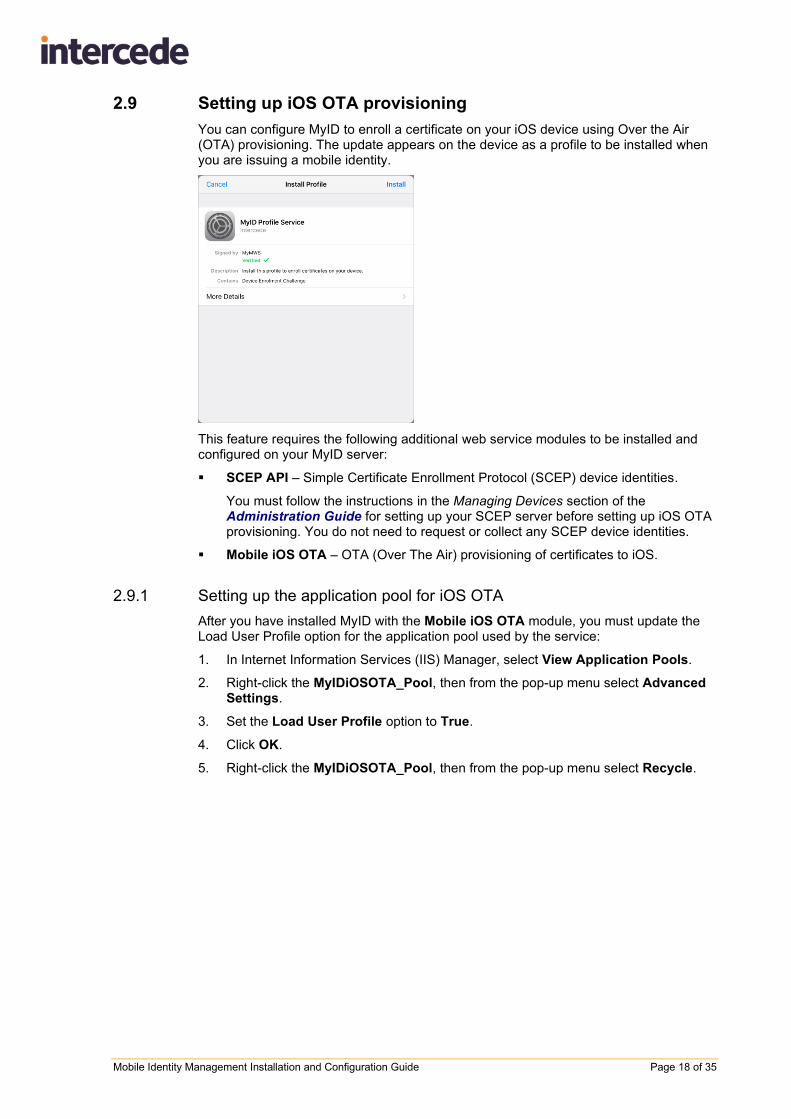
2.9 Setting up iOS OTA provisioning
You can configure MyID to enroll a certificate on your iOS device using Over the Air (OTA) provisioning. The update appears on the device as a profile to be installed when you are issuing a mobile identity.
This feature requires the following additional web service modules to be installed and configured on your MyID server:
▪ SCEP API – Simple Certificate Enrollment Protocol (SCEP) device identities.
You must follow the instructions in the Managing Devices section of the Administration Guide for setting up your SCEP server before setting up iOS OTA provisioning. You do not need to request or collect any SCEP device identities.
▪ Mobile iOS OTA – OTA (Over The Air) provisioning of certificates to iOS.
2.9.1 Setting up the application pool for iOS OTA
After you have installed MyID with the Mobile iOS OTA module, you must update the Load User Profile option for the application pool used by the service:
1. In Internet Information Services (IIS) Manager, select View Application Pools.
2. Right-click the MyIDiOSOTA_Pool, then from the pop-up menu select Advanced Settings.
3. Set the Load User Profile option to True.
4. Click OK.
5. Right-click the MyIDiOSOTA_Pool, then from the pop-up menu select Recycle.
Mobile Identity Management Installation and Configuration Guide Page 19 of 35
2.9.2 Setting up a signing certificate for iOS OTA
The web service has to be able to sign the information being sent to the phone and so requires a signing certificate to be issued. No specific attributes are required: any certificate that can be used for signing data is suitable.
1. On the MyID web server, log on using the MyID web service user.
2. Request a certificate that will be placed in the CAPI store. You can issue a certificate from any certificate authority as long as it is available to CAPI.
Note: Do not enable strong private key protection on the certificate, as this will prevent processing of the request by the MyID account.
3. Once the certificate has been generated, copy its thumbprint data into the SigningCertThumbprint value in the Web.config file.
By default, this is in the following folder:
C:\Program Files (x86)\Intercede\MyID\SSP\MyIDiOSOTA\
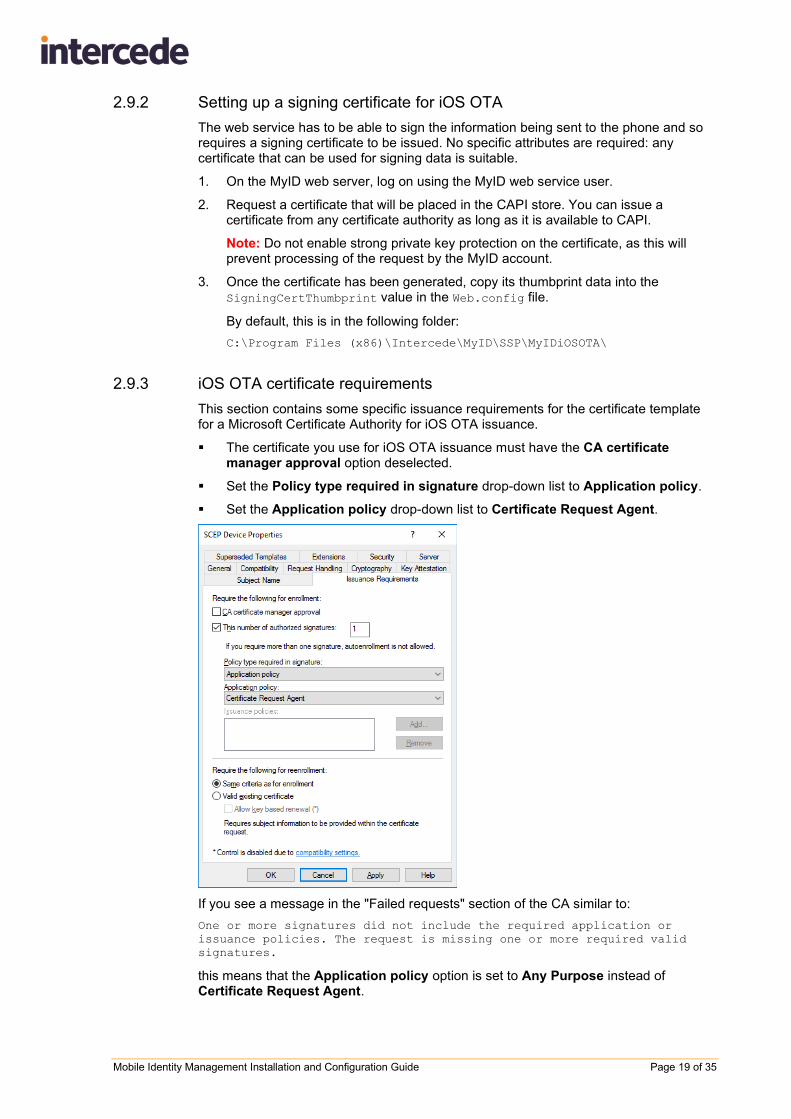
2.9.3 iOS OTA certificate requirements
This section contains some specific issuance requirements for the certificate template for a Microsoft Certificate Authority for iOS OTA issuance.
▪ The certificate you use for iOS OTA issuance must have the CA certificate manager approval option deselected.
▪ Set the Policy type required in signature drop-down list to Application policy.
▪ Set the Application policy drop-down list to Certificate Request Agent.
If you see a message in the "Failed requests" section of the CA similar to:
One or more signatures did not include the required application or issuance policies. The request is missing one or more required valid signatures.
this means that the Application policy option is set to Any Purpose instead of Certificate Request Agent.
Mobile Identity Management Installation and Configuration Guide Page 20 of 35
2.9.4 Configuring MyID for OTA provisioning
To configure MyID for OTA provisioning:
1. Create an Identity Agent credential profile that uses the following:
A Card Format of Mobile.
One or more certificates that uses the System Store container.
See section 2.10, Setting up the Identity Agent credential profiles for details.
2. Create a Device Identity (Only) credential profile that uses the following:
Require Challenge option selected.
See the Setting up a credential profile to use to issue device identities section in the Administration Guide for details of completing the credential profile.
See also section 2.9.3, iOS OTA certificate requirements for details of the requirements for the device certificate.
3. From the Configuration category, select Operation Settings.
4. Click the Certificates tab.
5. Set the following options:
iOS OTA Credential Profile – set this option to the name of the Device Identity credential profile.
iOS OTA Organization – set this option to the name of your organization. This appears on the OTA provisioning message on the mobile device.
iOS OTA Display Name – set this option to a name for the OTA update. This appears on the OTA provisioning message on the mobile device.
iOS OTA Description – set this option to the a description for the OTA update. This appears on the OTA provisioning message on the mobile device.
6. If required, you can customize the transform on the web services server that is used to display the intermediate web page that presents a link to the CA root certificate and the Enroll page used to provision the certificates.
See the Web Service Architecture Installation and Configuration guide for details.
7. Click Save changes.

Mobile Identity Management Installation and Configuration Guide Page 21 of 35
2.10 Setting up the Identity Agent credential profiles
You must create at least one new credential profile for issuing mobile IDs to mobile devices.
The credential profile contains the certificates that you want to issue to mobile users. You may create as many of these credential profiles as you need.
2.10.1 Creating the Identity Agent credential profile
To create a credential profile for issuing mobile identities:
1. From the Configuration category, select Credential profiles.
2. Click New.
3. Type a Name for the credential profile.
4. In Card Encoding, select Identity Agent.
5. In Issuance Settings, in the Mobile Device Restrictions drop-down list, select one of the following:
Any – The mobile identity can be loaded onto any mobile.
Known Mobiles – The mobile identity can be loaded onto any mobile that has already been registered with MyID. See section 2.8, Registering mobile devices for details.
My Mobiles Only – The mobile identity can be loaded only onto mobiles associated with the user's account.
6. Make sure that you do not require any biometrics:
Require Fingerprints at Issuance – set to Never required.
Require Facial Biometrics – set to Never required.
7. In Device Profiles, set the following from the Card Format drop-down list:
For Citrix enabled mobile devices, select Citrix SecureVault.
Select a different option for Citrix devices only if you have a customized data model that you must use for your system.
If you have upgraded from MyID 10.8 or earlier, you may have the option to select Legacy Citrix Vault. This is for a legacy version of Citrix; do not select this option unless Intercede advises you otherwise.
Mobile Identity Management Installation and Configuration Guide Page 22 of 35
To issue certificates to the iOS or Android System Store, select the generic Mobile card format with the System Store container. MyID will detect the type of mobile device when the mobile identity is issued and issue certificates to the appropriate system store, iOS or Android.
For MobileIron enabled mobile devices, select MobileIron AppConnect.
Select a different option for MobileIron devices only if you have a customized data model that you must use for your system.
For Microsoft Intune, VMware AirWatch, and Centrify Identity Service enabled mobile devices, make sure that None is selected.
For all other mobile devices, make sure that None is selected.
Note: If you attempt to issue a mobile device using a credential profile that includes support for certificates stored in the Citrix, MobileIron, or iOS System Store, but the mobile device does not support these certificate stores, the issuance will succeed; however, any certificates specified by the credential profile to be installed to containers that the mobile device does not support will be ignored.
For example, if your credential profile contains a Citrix Signing certificate, a Citrix Encryption certificate, and a certificate with no container specified, a Citrix-enabled mobile device will receive all three certificates, while a mobile device that is not Citrix-enabled will receive only the certificate with no container specified.
8. Click Next.
9. Select the certificates you want to make available.
If you are issuing multiple certificates to the iOS System Store, make sure that all of the certificates have the same expiry date; if the certificates do not have the same expiry date, you will not be able to renew them, as all of the certificates are added to the same iOS security profile in the system keystore.
For credential profiles that use a Citrix data model, select the Citrix containers for the certificates.
You can also select the System Store for one or more certificates. See section 2.9, Setting up iOS OTA provisioning for details of provisioning certificates to the iOS System Store.
For credential profiles that use the Mobile data model, you can select the System Store for one or more archive certificates.
For credential profiles that use a MobileIron data model, select the MobileIron containers for the certificates.
For Microsoft Intune, VMware AirWatch, and Centrify Identity Service enabled mobile devices, do not select any containers.
For all other types of credential profiles, do not select any containers.
All of the certificates you select here will be issued to your mobile device.
You can select the archived and historic certificate options on this screen. See the Administration Guide for details of the Issue new, Use existing, and Historic Only options.
If you want to distribute certificates that were not issued through MyID, you can import a PFX file then select the Unmanaged certificate option to specify it for distribution to the mobile device. See the Import and distribute certificates to devices section in the Administration Guide for details of setting up your credential profile and using the Upload PFX Certificates workflow.
10. Click Next and proceed to the Select Roles screen.
Mobile Identity Management Installation and Configuration Guide Page 23 of 35
11. Select the roles you want to be able to issue and receive this credential profile.
The Can Receive option determines which roles can receive credentials issued using this credential profile.
The Can Request option determines which roles can request credentials using this credential profile; for example, using Request ID for operator requests or Request My ID for self-service requests.
The Can Validate option determines which roles can validate requests for credentials using this credential profile using the Validate Request workflow.
The Can Collect option determines which roles can collect credentials using this credential profile; any user who is to receive a mobile identity must have both the Can Receive and the Can Collect options.
The Can Unlock option determines which roles can unlock mobile identities using the Unlock Credential workflow.
Note: Not all options may be available, depending on your system configuration. See the Administration Guide for details.
Note: Any role you want to receive mobile identities must have the Issue Device option selected in the Cards category within the Edit Roles workflow.
12. Click Next.
13. Select the card layouts you want to make available to the mobile device.
Badges based on these layouts will be transferred to the mobile device as part of the mobile ID. Note, however, that the reverse sides of the selected layouts (the _back layouts) will not be available on the mobile device.
Note: Card layouts are optional, and will be created only when using the Intercede key store and certificates are selected in the credential profile.
14. Select one of the layouts to be the default layout.
This layout will be displayed by default when using the Identity Agent app, and will be used for phone-to-phone identity verification.
15. Click Next.
16. Type your Comments and complete the workflow.
Mobile Identity Management Installation and Configuration Guide Page 24 of 35
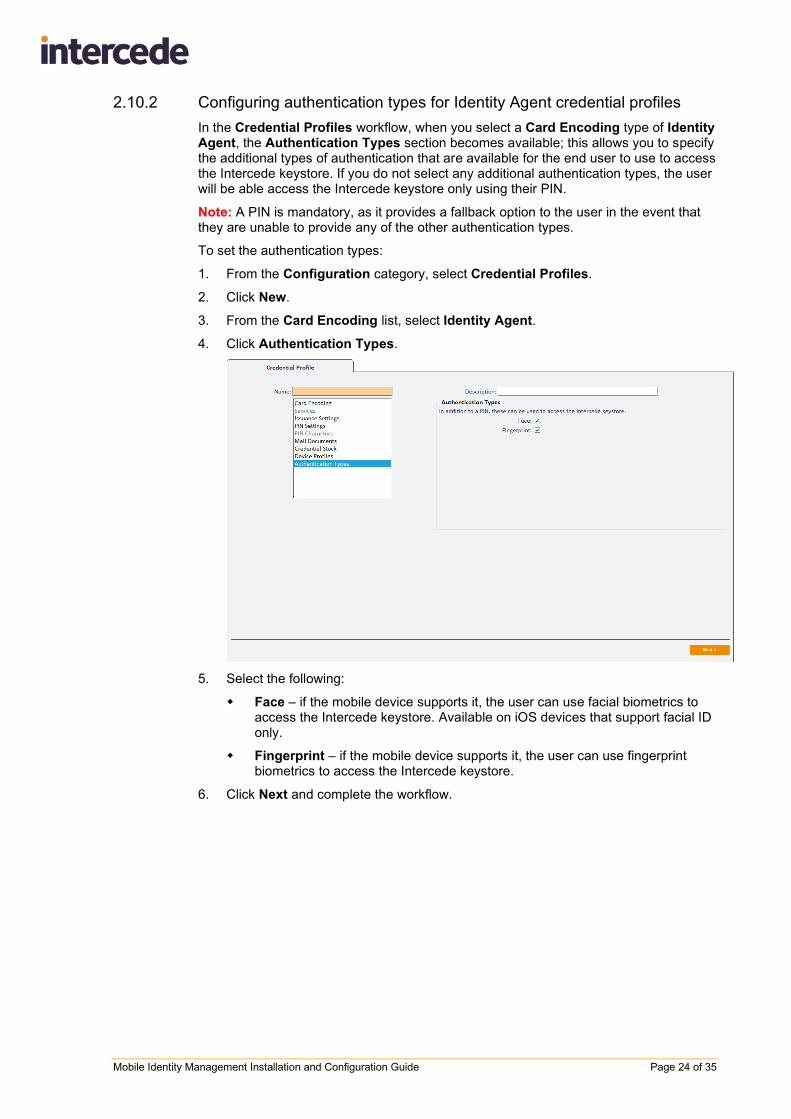
2.10.2 Configuring authentication types for Identity Agent credential profiles
In the Credential Profiles workflow, when you select a Card Encoding type of Identity Agent, the Authentication Types section becomes available; this allows you to specify the additional types of authentication that are available for the end user to use to access the Intercede keystore. If you do not select any additional authentication types, the user will be able access the Intercede keystore only using their PIN.
Note: A PIN is mandatory, as it provides a fallback option to the user in the event that they are unable to provide any of the other authentication types.
To set the authentication types:
1. From the Configuration category, select Credential Profiles.
2. Click New.
3. From the Card Encoding list, select Identity Agent.
4. Click Authentication Types.
5. Select the following:
Face – if the mobile device supports it, the user can use facial biometrics to access the Intercede keystore. Available on iOS devices that support facial ID only.
Fingerprint – if the mobile device supports it, the user can use fingerprint biometrics to access the Intercede keystore.
6. Click Next and complete the workflow.
Mobile Identity Management Installation and Configuration Guide Page 25 of 35
2.11 Creating a custom mobile card format
MyID provides a selection of standard card formats to be used with mobile identities. If you need to customize your card model to have multiple containers, for example, you can create a custom card format file on the MyID application server.
1. On the application server, create an XML file in the following folder:
C:\Program Files (x86)\Intercede\MyID\Components\ CardServer\CardFormats\
2. Copy the following into the XML file:
<CardDataModel> <identity> <name>Insert card data model name here</name> <description>Insert card data model description here</description> </identity> <Container> <Name>Insert container name here</Name> <ID>Insert container ID name here</ID> <Certificate/> <Explicit/> <Unique>1</Unique> <PreserveContainerForHistoric/> </Container> </CardDataModel>
3. Provide the appropriate values in the following nodes:
CardDataModel\identity\name
CardDataModel\identity\description
CardDataModel\Container\Name
CardDataModel\Container\ID
4. If necessary, add more CardDataModel\Container nodes for additional
containers.
5. Save the XML file.
Note: Save the file as ANSI. If you save the file as UTF-8, you will experience errors when MyID tries to access the file.
6. Restart your MyID clients.

Mobile Identity Management Installation and Configuration Guide Page 26 of 35
3 Requesting and Approving Mobile IDs
You can request a mobile ID for your own mobile device or for another user's mobile device.
The user for whom the mobile ID is requested must have the following:
▪ A cell/mobile phone number in their MyID record.
▪ An email address in their MyID record.
Note: The Request ID and Request My ID workflows are not assigned to any roles by default. You must use the Edit Roles workflow to ensure that these workflows are assigned to the roles you want to be able to request certificates for their mobile device.
In addition to the Request ID and Request My ID workflows within MyID, you can also request a mobile ID from an external system using the Credential Web Service API. For more information, see the Credential Web Service document.
Collecting the mobile ID may take several minutes, depending on the complexity of the certificates and the speed of your network connection. If the collection fails due to network problems, you are recommended to use the Cancel Credential workflow to cancel the mobile ID, then request another mobile ID for the user.
3.1 Recovering archived certificates
To recover a certificate from an existing card, the user must have a certificate that:
▪ is issued to a current device.
▪ has archived keys.
▪ is issuable and recoverable to software.
▪ has a policy that is available on at least one credential profile available to the user that has Identity Agent selected.
Mobile Identity Management Installation and Configuration Guide Page 27 of 35
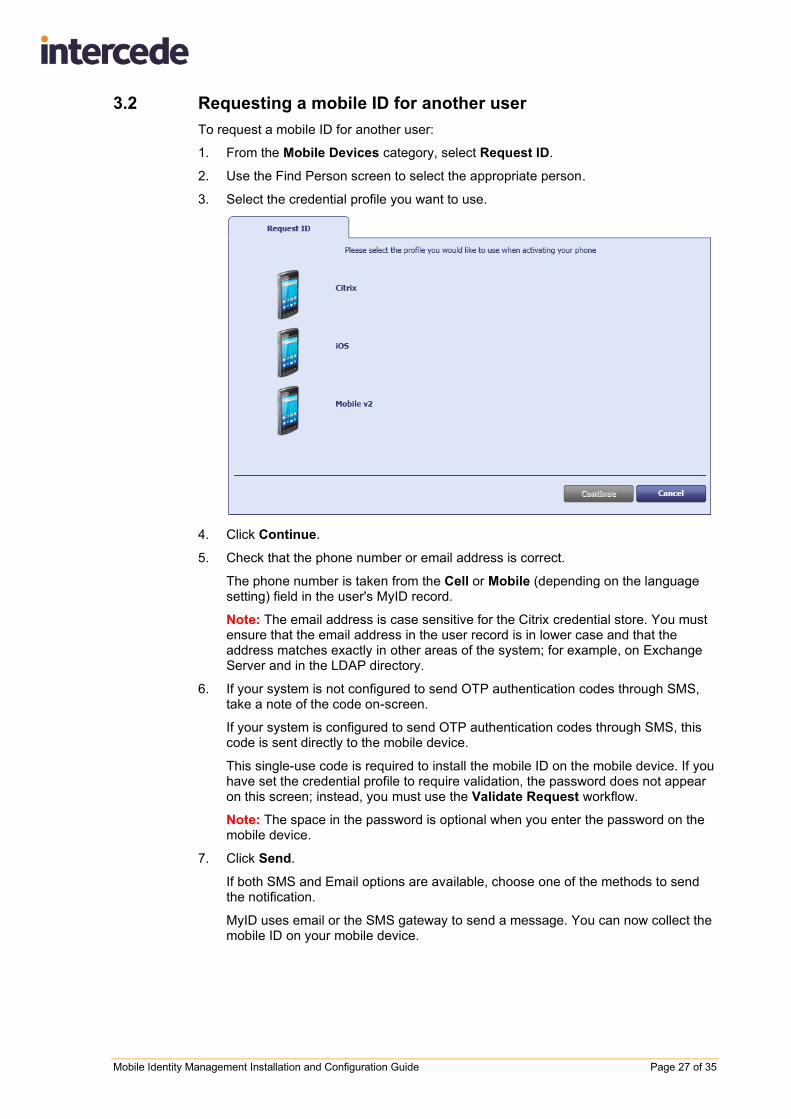
3.2 Requesting a mobile ID for another user
To request a mobile ID for another user:
1. From the Mobile Devices category, select Request ID.
2. Use the Find Person screen to select the appropriate person.
3. Select the credential profile you want to use.
4. Click Continue.
5. Check that the phone number or email address is correct.
The phone number is taken from the Cell or Mobile (depending on the language setting) field in the user's MyID record.
Note: The email address is case sensitive for the Citrix credential store. You must ensure that the email address in the user record is in lower case and that the address matches exactly in other areas of the system; for example, on Exchange Server and in the LDAP directory.
6. If your system is not configured to send OTP authentication codes through SMS, take a note of the code on-screen.
If your system is configured to send OTP authentication codes through SMS, this code is sent directly to the mobile device.
This single-use code is required to install the mobile ID on the mobile device. If you have set the credential profile to require validation, the password does not appear on this screen; instead, you must use the Validate Request workflow.
Note: The space in the password is optional when you enter the password on the mobile device.
7. Click Send.
If both SMS and Email options are available, choose one of the methods to send the notification.
MyID uses email or the SMS gateway to send a message. You can now collect the mobile ID on your mobile device.

Mobile Identity Management Installation and Configuration Guide Page 28 of 35
3.3 Requesting a mobile ID for your own mobile device
To request a mobile ID for your own mobile device:
1. From the Mobile Devices category, select Request My ID.
2. Select the credential profile you want to use.
3. Click Continue.
4. Take a note of the password.
This single-use code is required to install the mobile ID on the mobile device. If you have set the credential profile to require validation, the password does not appear on this screen; instead, you must use the Validate Request workflow.
Note: The space in the password is optional when you enter the password on the mobile device.
5. Check that the phone number or email address is correct, then click Send.
The phone number is taken from the Cell or Mobile (depending on the language setting) field your user's MyID record.
Note: The email address is case sensitive for the Citrix credential store. You must ensure that the email address in your user record is in lower case and that the address matches exactly in other areas of the system; for example, on Exchange Server and in the LDAP directory.
If you do not have a username or password set up on your account, MyID displays a QR code. Open the Identity Agent app on your phone and scan the QR code on screen, then click Done.
Note: If you have an email address or mobile number set up, but prefer to use a QR code, click the QR Code button at the bottom of the screen.
Mobile Identity Management Installation and Configuration Guide Page 29 of 35
4 Working with Mobile IDs
Once a user has been issued with a mobile ID, you can use MyID to manage the mobile IDs and their certificates.
4.1 Cancelling a mobile ID
The Cancel Credential workflow allows you to cancel an issued ID and revoke its certificates.
This does not affect the contents of the mobile device directly, but it revokes or suspends the certificates that were copied to the mobile device, and cancels the device in the MyID database. Any online check of the certificates or the mobile ID will fail, indicating that the mobile ID is no longer valid.
You can use this option if provisioning the mobile device fails, the mobile device is lost or stolen, or if the certificates expire and need to be replaced on the same device.
See the Operator's Guide for details of using the Cancel Credential workflow.
In addition to the Cancel Credential workflow within MyID, you can also cancel a mobile ID from an external system using the CancelDevice method of the Device
Management API. For more information, see the Device Management API document.
4.1.1 Important information about cancelling mobile IDs
Cancelling a mobile ID from the mobile device removes the identity from the mobile device, but does not revoke the certificates. The recommended method is to use Cancel Credential within MyID to cancel the mobile identity in the MyID database and revoke its certificates, then cancel the mobile identity on the mobile device itself to clean up the security objects on the device.
4.2 Requesting replacement IDs
The Request Replacement ID workflow allows you to replace a mobile ID that is missing or damaged.
1. From the Mobile Devices category, click Request Replacement ID.
2. Use the Find Person screen to select the person.
The devices assigned to the person are listed.
3. Select the device you want to replace.
4. Select a reason and provide Details for the card replacement, then click Next.
The old mobile ID is canceled, and a job for a replacement mobile ID is created.
Mobile Identity Management Installation and Configuration Guide Page 30 of 35
4.3 Enabling and disabling IDs
The Enable / Disable ID workflow allows you to change the status of an issued ID and its certificates; you can disable an ID so that the certificates are suspended, or enable an ID so that the user can use its certificates again.
To enable or disable a mobile ID:
1. From the Mobile Devices category, click Enable / Disable ID.
2. Click Search then use the Find Person screen to find the cardholder, then select the device you want to enable or disable.
3. To disable a mobile ID, select the reason and type the details for disabling the mobile ID, then click Disable.
To re-enable a mobile ID, click Enable.
4.4 Unlocking IDs
The Unlock Credential workflow allows you to retrieve an unlock code for an issued ID. The mobile device owner starts the unlock process on their mobile device, then contacts the helpdesk operator, who uses the Unlock Credential workflow to provide an unlocking code.
For information on using the Unlock Credential workflow, see the Operator's Guide.
In addition to the Unlock Credential workflow within MyID, you can also unlock a mobile ID from an external system using the RequestUnlockCodeForDevice method of
the Credential Web Service API. For more information, see the Credential Web Service document.
▪ IKB-179 – Cannot request an authentication code to unlock a mobile device
The Unlock Credential workflow can require an authentication code to confirm the user's identity before proceeding with the unlock process. For mobile credentials, it is not currently possible to request an authentication code for unlocking. Ensure that operators who perform unlock for mobile devices do not require authentication codes, or can bypass authentication where needed.
Mobile Identity Management Installation and Configuration Guide Page 31 of 35
5 Microsoft Intune and Derived Credentials
Microsoft have announced support for derived credentials using MyID® in combination with Microsoft's Intune mobile device management and mobile application management platform.
5.1 What is Microsoft Intune?
Microsoft Intune is a cloud-based service that focuses on mobile device management (MDM) and mobile application management (MAM). Intune is included in Microsoft's Enterprise Mobility + Security (EMS) suite, and enables users to be productive while keeping your organization data protected. It integrates with other services, including Microsoft 365 and Azure Active Directory to control who has access, and what they have access to, and Azure Information Protection for data protection. When you use it with Microsoft 365, you can enable your workforce to be productive on all their devices, while keeping your organization's information protected.
5.2 What does this help customers to achieve?
The objective is to use the trust placed in an issued certificate and use this to derive additional credentials to a mobile device managed by Microsoft Intune, to enable certificates to be used, depending on policy, for:
• App Authentication
• VPN
• S/MIME signing and encryption
• Wi-Fi authentication
Certificate issuance from MyID can be triggered by any process that displays a QR code to start a mobile provisioning process, for example Self Service Request Portal, PIV Derived Credential Kiosk or the Request My ID workflow in MyID Desktop.
5.3 How does MyID fit in?
Microsoft have built the Intercede mobile SDK components into their Intune Company Portal app to manage the provisioning process for certificates.
During the derived credential request process, MyID shows a QR code on screen. This is scanned by the mobile device which then triggers issuance of certificates from MyID to the mobile device. Microsoft Intune then takes control of these certificates to enable the certificate usage defined by Intune configuration.
5.4 Compliance with NIST guidelines for derived PIV credentials
If your organization is required to comply with the National Institute of Standards and Technology (NIST) guidelines for Derived Personal Identity Verification (PIV) credentials, you must use this feature with the PIV edition of MyID. You must also refer to the Derived Credentials SP800-157 Compliance Guidelines document supplied with MyID for further guidance on issuing Derived Credentials. A PIV card must be used to request the derived credentials.
Mobile Identity Management Installation and Configuration Guide Page 32 of 35
5.5 How do you configure MyID to issue derived credentials?
You must set up your MyID system to issue mobile identities, as described in section 2, Configuring the System.
When you set up your system, make sure you configure the credential profile to use the Intercede Key Store; that is, in the Card Format drop-down list, select None to ensure that MyID uses the default key store. The Intercede key store is used as a temporary intermediate store for the certificates issued by MyID before the Intune system takes control of the certificates.
When you select the certificates in the credential profile, select whatever certificates your system requires; for example, you may need both a signing certificate and an encryption certificate, or just a signing certificate.
5.6 How do you configure Intune to issue derived credentials?
For full details of how to use derived credentials in Microsoft Intune, see the Microsoft documentation:
https://docs.microsoft.com/en-us/intune/protect/derived-credentials
5.7 How do you request a derived credential?
To request a derived credential:
1. Register your mobile device with your Intune system.
Your organization's Intune Company Portal app will prompt you to request a mobile smart card.
2. Follow the instructions to use your existing smart card to request a derived credential.
Depending on your system configuration, carry out one of the following:
Take your PIV card and insert it into the MyID Self-Service Kiosk.
You must run the Kiosk with the /dc command-line parameter. See the
Self-Service Kiosk Installation and Configuration document for details.
For this method, the PIV card does not need to have been issued by the MyID system you are using to issue derived credentials.
This is the recommended method if you have an issued PIV card.
Take your PIV card and present it to the Self-Service Request Portal.
See the Derived Credentials Self-Service Request Portal guide for details.
Use your MyID credentials to log on to MyID Desktop and use the Request My ID workflow.
For this method, you must have credentials issued by the MyID system that is issuing the derived credentials.
See section 3.3, Requesting a mobile ID for your own mobile device for details.
At the end of either process, you are presented with a QR code.
3. Use your organization's app to scan the QR code.
MyID then issues certificates to your mobile device.
Mobile Identity Management Installation and Configuration Guide Page 33 of 35
5.8 How do you manage derived certificates?
You can use MyID to manage the issued derived certificates using the standard MyID lifecycle management features; for example, you can revoke the certificates using the Cancel Credential workflow.
For PIV installations, you can use the Derived Credentials Notification Listener to update MyID when the status of the original PIV card changes; for example, when the PIV card is canceled, you can use the API to inform the MyID system that the original card is no longer trusted, and MyID can revoke the derived credential. See the Derived Credentials Notification Listener guide for details.
Microsoft recommend that replacement, renewed, or updated derived credentials are issued by canceling the existing derived credentials and repeating the process used to issue the credentials. For the certificates that are issued to your derived credentials, do not select a certificate policy that has the Automatic Renewal option set in the Certificate Authorities workflow.
Mobile Identity Management Installation and Configuration Guide Page 34 of 35
6 Troubleshooting
6.1 Setting up logging
You can configure the Identity Agent app to create a log file for debugging purposes. Customer support may ask you to set the log level and send the resulting log file to Intercede for analysis.
Note: The Identity Agent app uses the system default email app to send the log file. For iOS devices, this means that you must have Apple Mail configured with at least one email account.
To enable logging, use the following configuration options on the Identity Agent Policy page of the Operation Settings workflow:
▪ Administrator email address – Set this to the email address to which Identity Agent will send logs for troubleshooting purposes.
▪ Log level – Set this to the level of debug logging you want Identity Agent to produce. Higher levels result in more detail, but larger files.
Set to one of the following:
0 – NONE 1 – FATAL 2 – ERROR 3 – WARNING 4 – INFO 5 – DEBUG 6 – VERBOSE By default, the log level is set to level 2, ERROR.
Note: This setting affects the level of debug logging only; the Identity Agent also logs all messages that occur between the client and the server. If you want to switch off logging altogether, set the Maximum number of log files to 0.
▪ Maximum log storage space – The maximum amount of space (in MB) that log files will take up on a device. Once this limit is reached, log files will be deleted automatically, oldest first, to clear room for new files.
▪ Maximum number of log files – The maximum number of log files to be stored on a device. Once this limit is reached, log files will be deleted automatically, oldest first, to clear room for new files.
To allow as many files as will fit in the maximum log storage space, set this value to -1. This is the default setting.
To switch off logging, set this value to 0.
6.2 Retry attempts
You can configure how Identity Agent handles attempts to reconnect to the server if the connection is lost during an operation.
Use the following configuration options on the Identity Agent Policy page of the Operation Settings workflow:
▪ Maximum retry attempts
The maximum number of times Identity Agent should attempt to reconnect to the server if connection is lost during an operation. The default is 5 times.
Mobile Identity Management Installation and Configuration Guide Page 35 of 35
▪ Minimum retry delay
The minimum delay, in seconds, between each attempt to contact the server after connection has been lost. The default is 10 seconds.
6.3 Configuration issues
▪ None of the selected user's certificates are configured to be allowed to be put on a mobile phone.
Make sure that you have setup the credential profiles correctly according to the instructions in this document. Make sure that the user has permission to receive the credential profile, and that the issuer can issue the credential profile.
Make sure that the certificate policy is the correct one.
Make sure that the certificate policy can be issued in software.
▪ The selected user has no certificates suitable for mobile devices and there are no credential profiles available for issuance.
Make sure that the user has permission to receive the credential profile, and that the issuer can issue the credential profile.
Make sure that the certificate policy is the correct one.
▪ The selected user has neither phone number nor email address registered and so is not suitable for mobile device activation.
Make sure that the user has an entry in the MyID database for Mobile or Cell phone number or for email address. If you are using LDAP integration, and you do not have this field populated in the directory, synchronizing MyID with the directory may clear this field from the MyID database.