Embed Size (px)
Citation preview
1
Professional Profiles1
Module 3 Module 3
2
In this module you will learn:Professional Profile basicsHow to create a Professional ProfileHow to add biosketchesHow to assign permissions to a Professional ProfileHow to avoid duplicate Professional Profiles
Objectives Objectives
3
Professional Profiles capture and store data about Principal Investigators, Key Personal, Other Significant Contributors, administrators, Signing Officials, etc.Before you create a grant application, you must create a Professional Profile for the Principal Investigator who is named in the grant
What is a Professional Profile? What is a Professional Profile?
4
Information stored in the Professional Profile is auto-filled into the grant proposal once that individual is named as a PI, Senior/Key Person or Authorized RepresentativeProfiles stored in the system can be shared with others and used multiple timesAfter you create a profile for the PI, you must then set up Professional Profiles for all Key Personnel and Other Significant Contributors named in the grant proposal if a profile has not already been created for them (this can be done after you create the proposal)
Utilizing Professional Profiles Utilizing Professional Profiles
5
1. Create Professional Profile2. Associate profile with Institution3. Complete profile fields4. Attach biosketches5. Add permissions6. Link User account to Professional Profile
View the Business Processes Document in the Resources tab of your training handbook or the S2S Grants project website for more information
Profile Development Steps Profile Development Steps
6
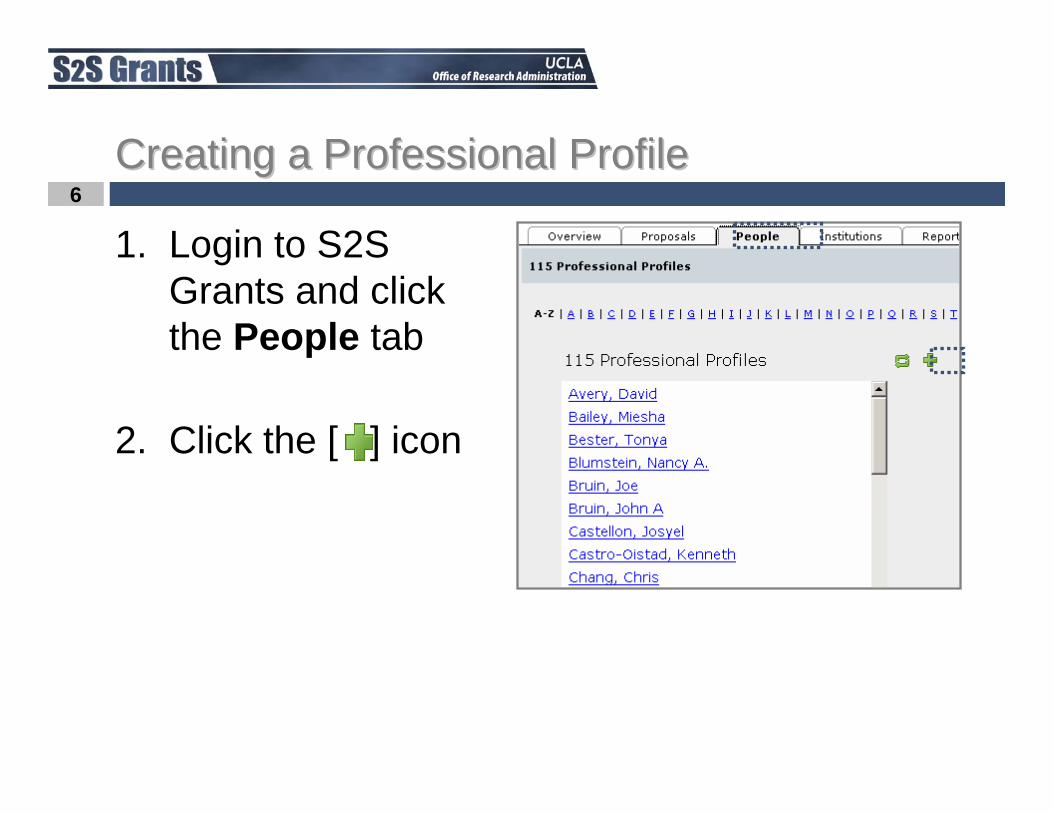
1. Login to S2S Grants and click the People tab
2. Click the [ ] icon
Creating a Professional Profile Creating a Professional Profile
7
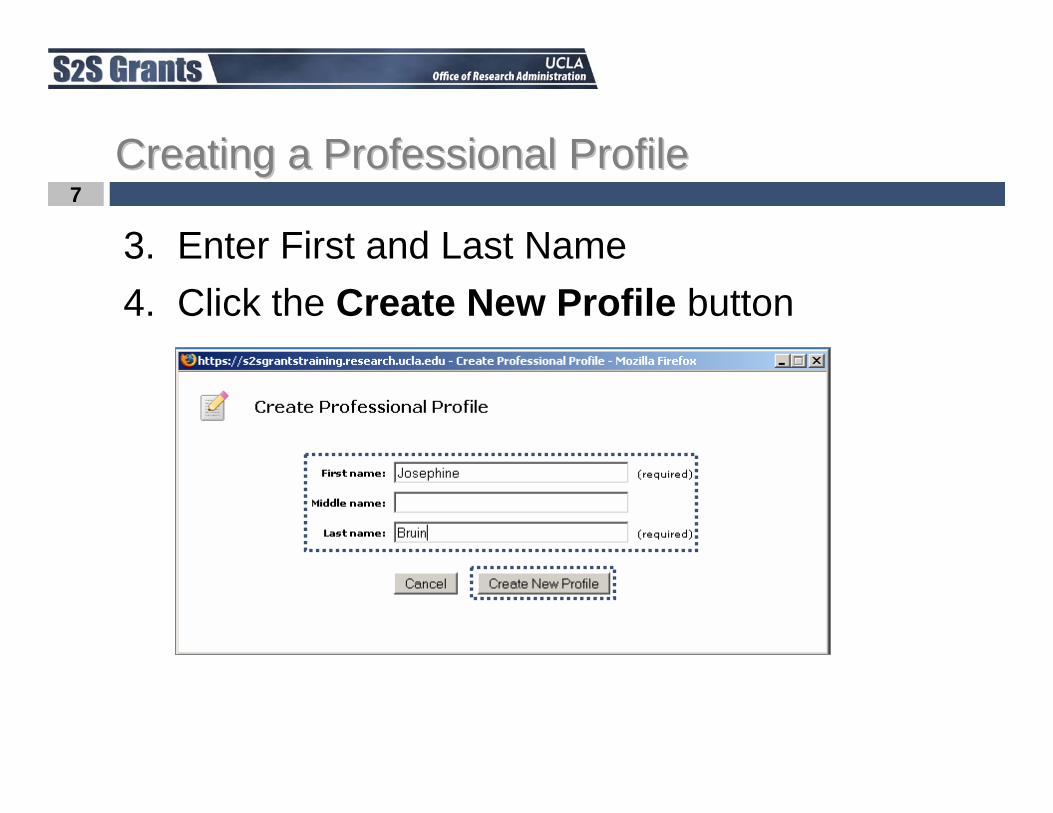
3. Enter First and Last Name4. Click the Create New Profile button
Creating a Professional Profile Creating a Professional Profile

8
Once the Professional Profile is created it must be affiliated with an institutionThis is achieved by linking the Professional Profile to an Institutional ProfileOnce an individual (Profile) is associated with an institution, basic institutional information (e.g., fringe rates) can be auto-filled into that individual’s Professional Profile.Professional Profiles should only be created for UCLA personnel. (For more information on adding senior/key personnel from outside UCLA, see Module 6.)
Institutional Association Institutional Association
9
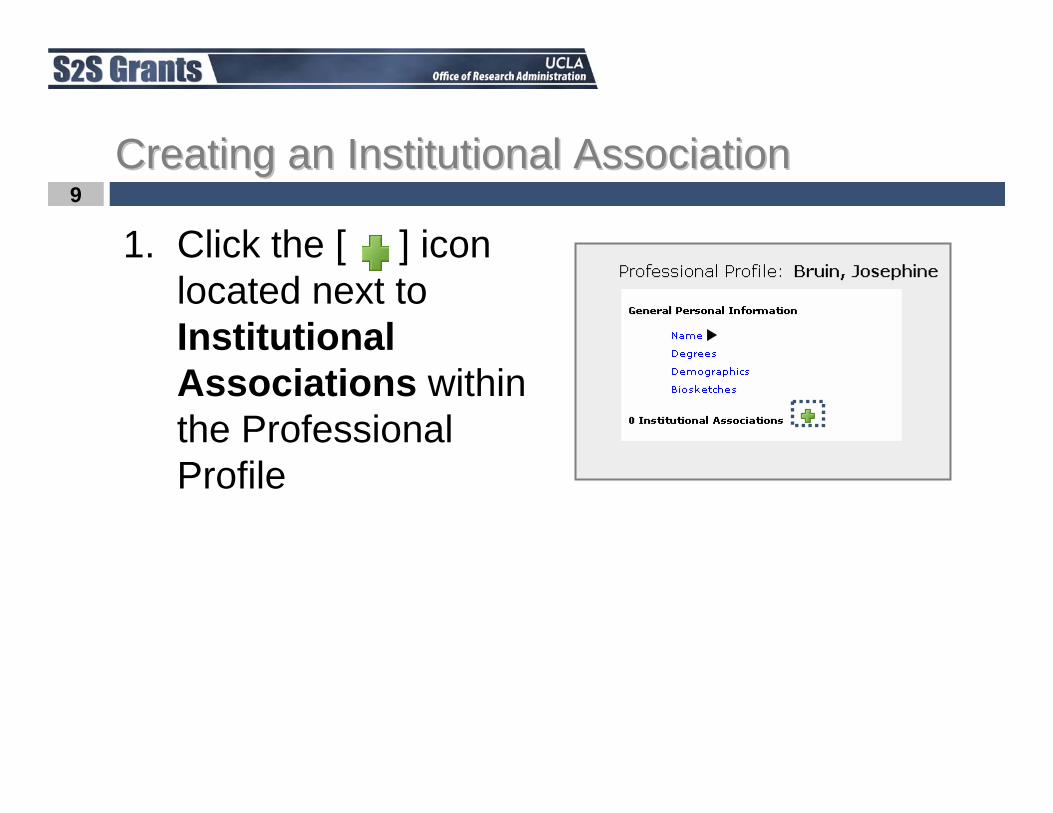
1. Click the [ ] icon located next to Institutional Associations within the Professional Profile
Creating an Institutional Association Creating an Institutional Association
10
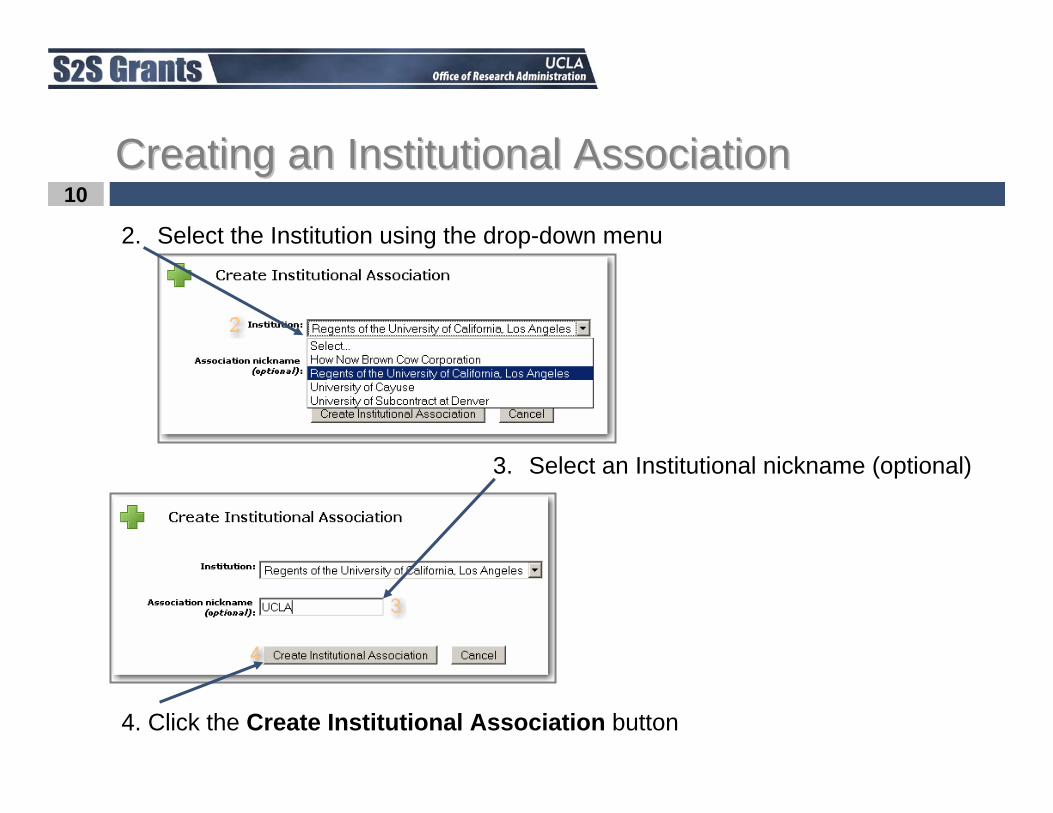
2. Select the Institution using the drop-down menu
3. Select an Institutional nickname (optional)
4. Click the Create Institutional Association button
Creating an Institutional Association Creating an Institutional Association
11
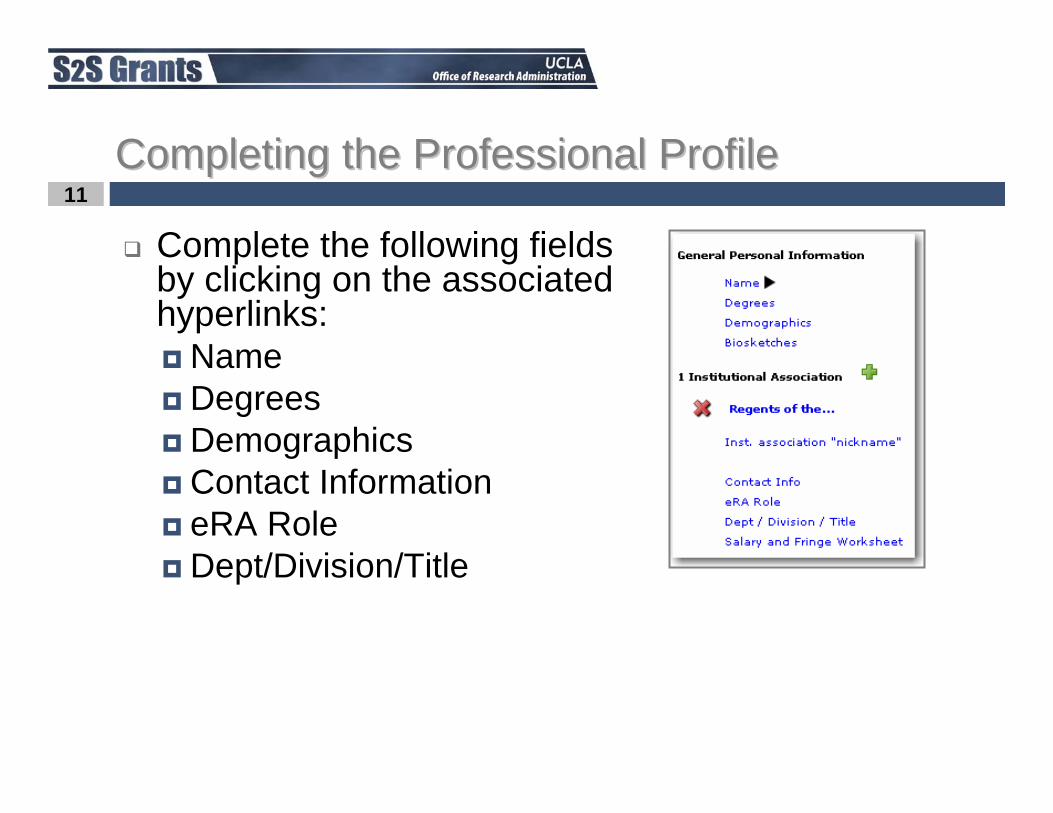
Complete the following fields by clicking on the associated hyperlinks:
Name DegreesDemographicsContact InformationeRA RoleDept/Division/Title
Completing the Professional Profile Completing the Professional Profile
12
Salary and Fringe WorksheetIf Appointment type is not entered into the Professional Profile, S2S Grants will not be able to auto-calculate salary on the budget pagesBase Fringe Rate and Fringe Rate Total can be imported from the Institutional Profile by clicking the Import Institutional Rates buttonTo add additional Fringe Rates click New Row and follow system promptsView the Business Processes Document in the Resources tab of your training handbook or the S2S Grants project website for more information
Completing the Professional Profile Completing the Professional Profile
13
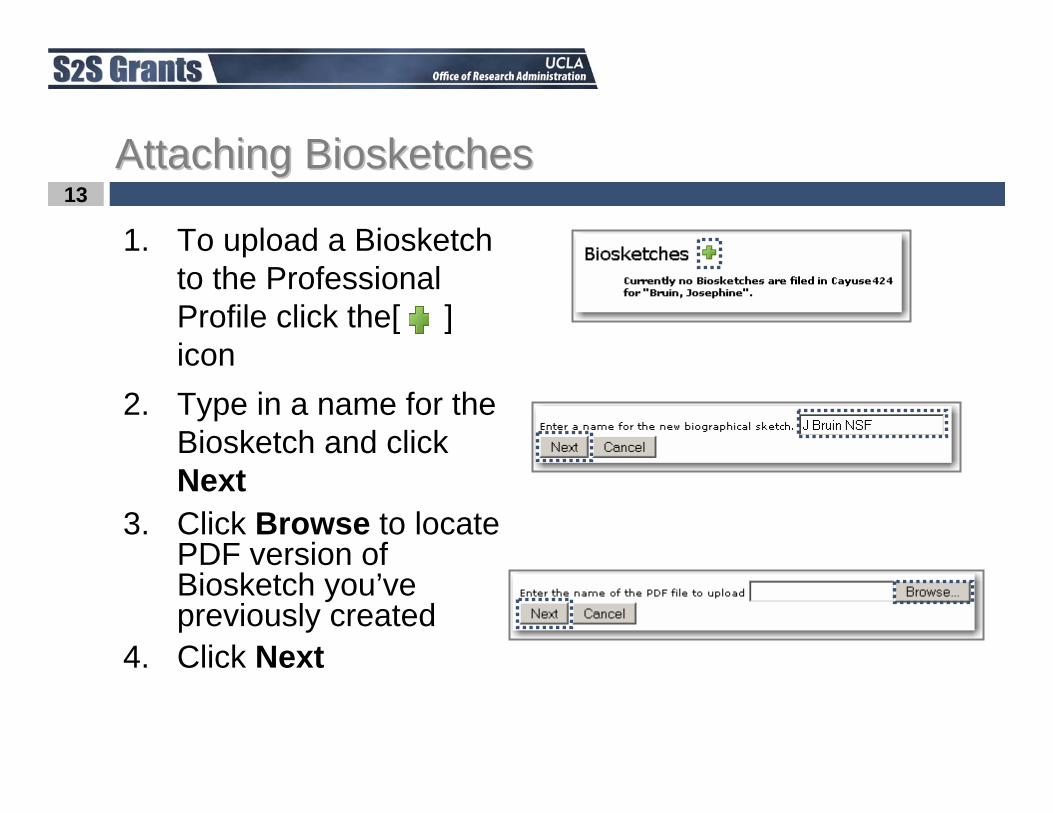
1. To upload a Biosketch to the Professional Profile click the[ ] icon
2. Type in a name for the Biosketch and click Next
3. Click Browse to locate PDF version of Biosketch you’ve previously created
4. Click Next
Attaching Biosketches Attaching Biosketches
14
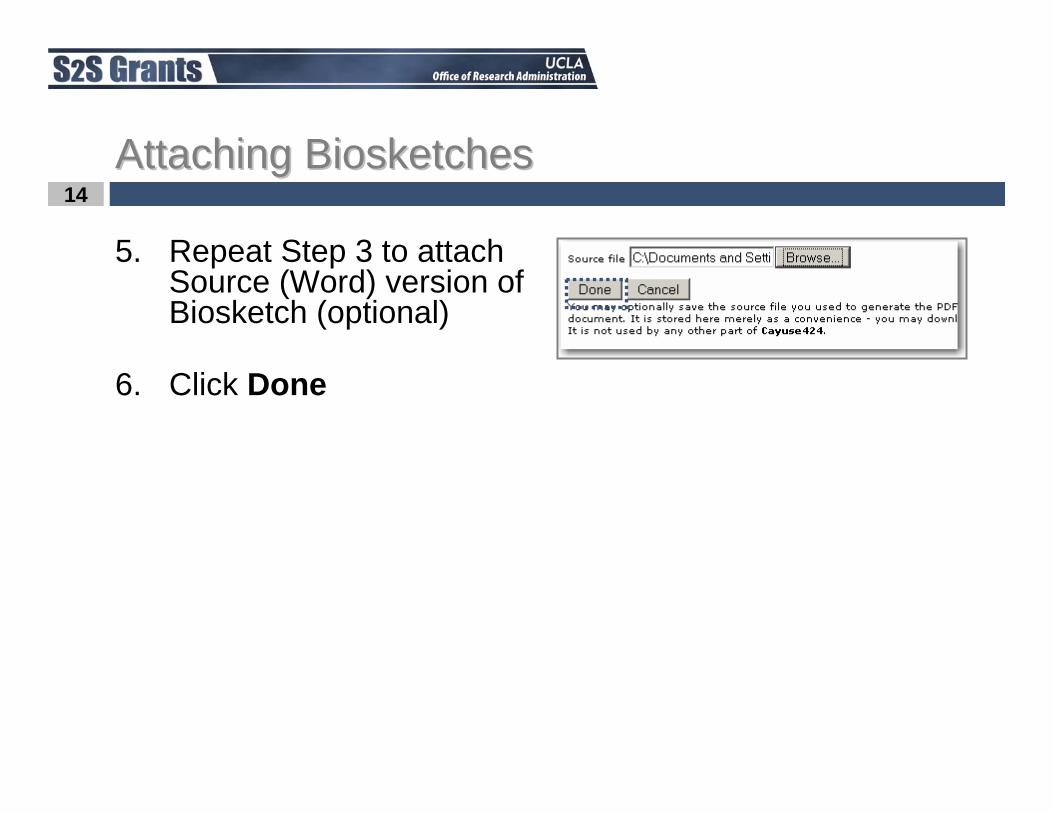
5. Repeat Step 3 to attach Source (Word) version of Biosketch (optional)
6. Click Done
Attaching Biosketches Attaching Biosketches
15
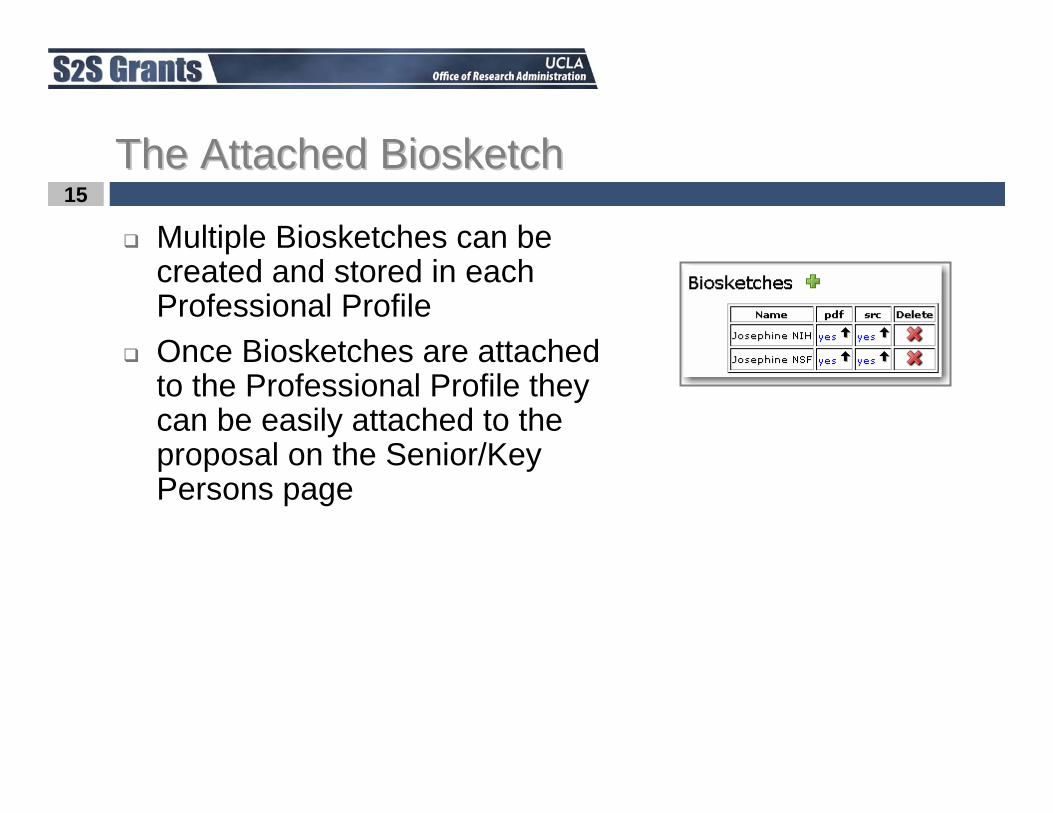
Multiple Biosketches can be created and stored in each Professional ProfileOnce Biosketches are attached to the Professional Profile they can be easily attached to the proposal on the Senior/Key Persons page
The Attached Biosketch The Attached Biosketch

16
Once a Professional Profile has been created permissions can be assignedThe creator of a Professional Profile is automatically granted all permissions associated with using that profileAll Users are granted default permissions as well(please do not modify these)
The profile creator can share the profile with other users by granting appropriate permissionsPermissions can be changed or removed
Managing Permissions Managing Permissions
17
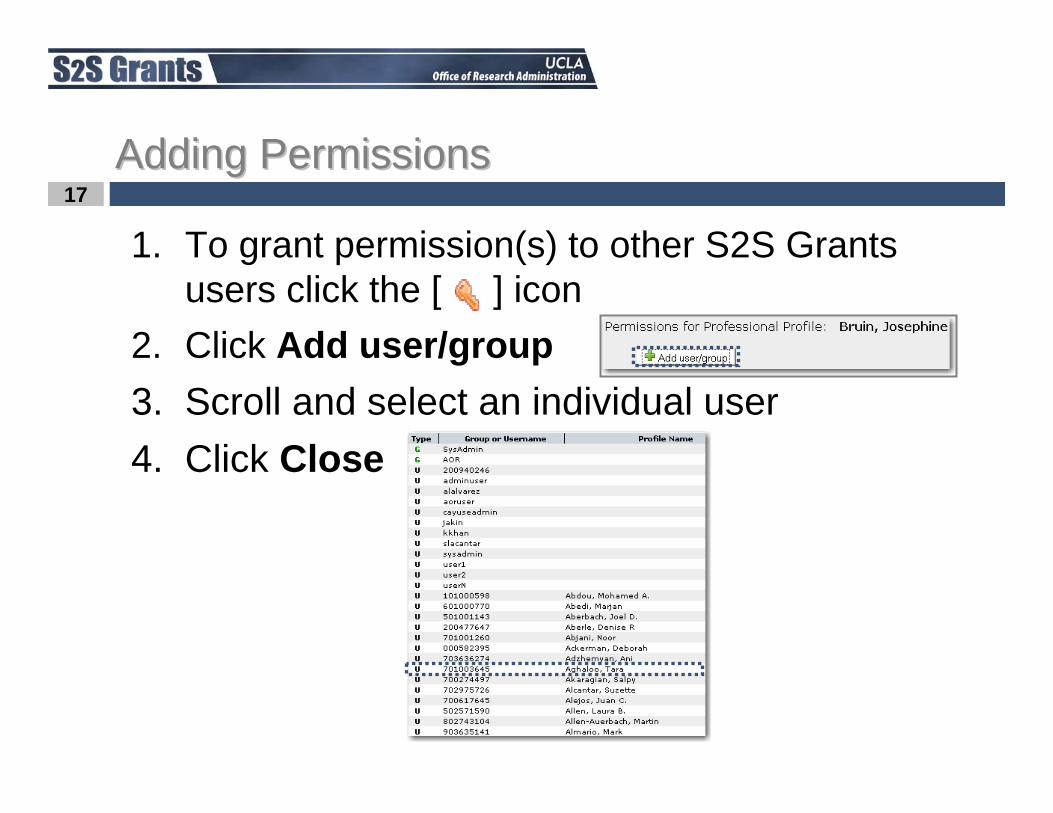
1. To grant permission(s) to other S2S Grants users click the [ ] icon
2. Click Add user/group3. Scroll and select an individual user4. Click Close
Adding Permissions Adding Permissions
18
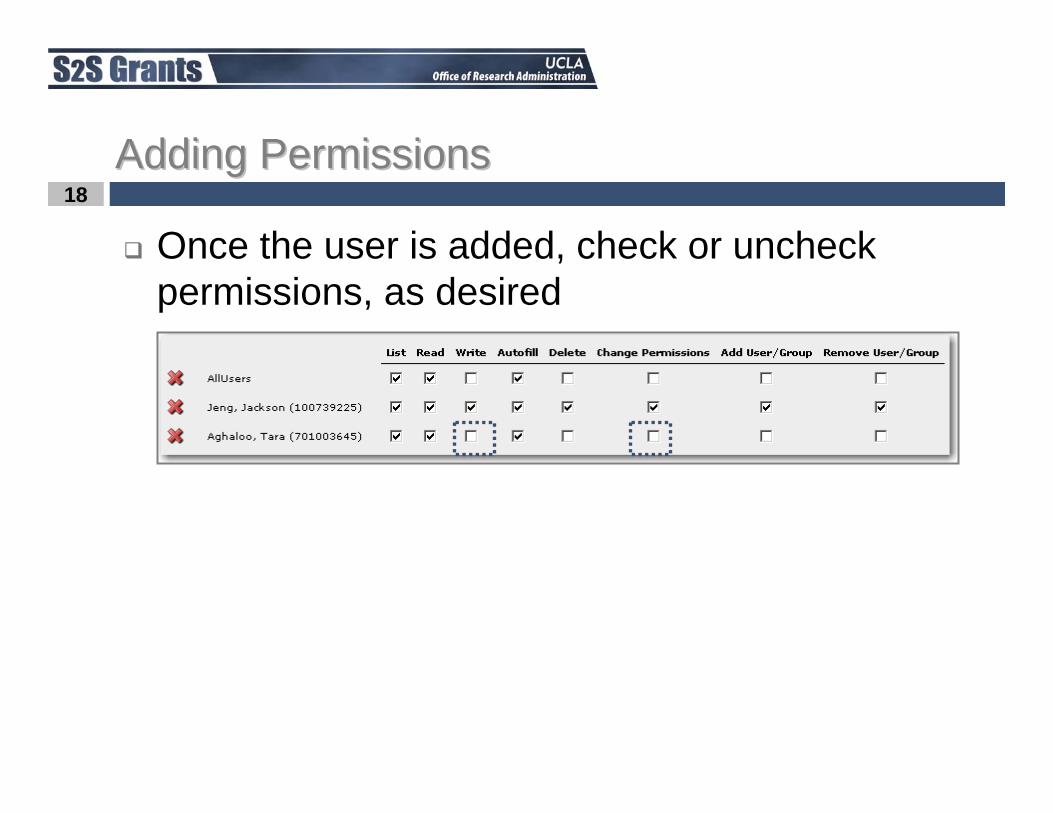
Once the user is added, check or uncheck permissions, as desired
Adding Permissions Adding Permissions
19
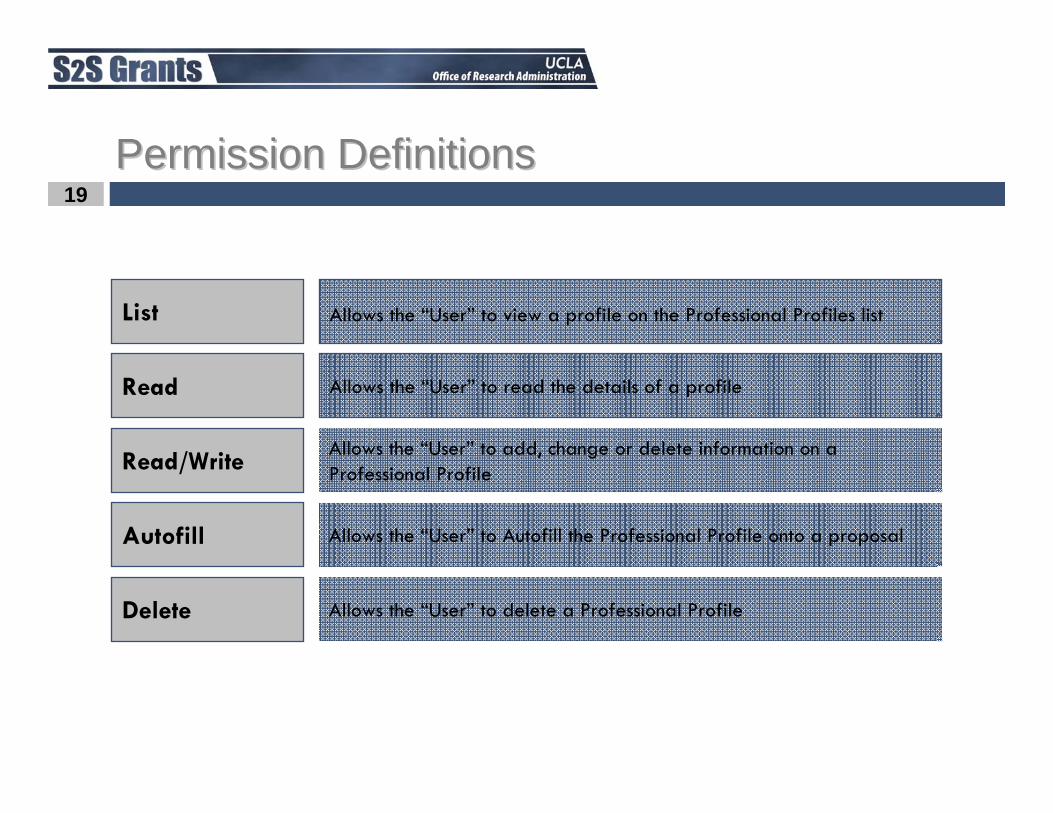
List
Read
Read/Write
Autofill
Delete
Allows the “User” to view a profile on the Professional Profiles list
Allows the “User” to read the details of a profile
Allows the “User” to add, change or delete information on a Professional Profile
Allows the “User” to Autofill the Professional Profile onto a proposal
Allows the “User” to delete a Professional Profile
Permission Definitions Permission Definitions

20
Change Permissions
Add User/Group
Remove/User Group
Allows the “User” to change security permissions associated with the Professional Profile
Allows the “User” to add other users to the Professional Profile
Allows the “User” to remove a user or group
Permission Definitions Permission Definitions

21
S2S Grants provides tools to reduce the proliferation of duplicate profiles. When you create a new profile, you see potential matching names and are asked to verify before creating a potential duplicate.More control over the permissions and visibility of new profiles to further reduce the chance of creating duplicates.
Duplicate profiles should not be created. If you need to add aninvestigator who has multiple appointments, you should autofill the current profile, and then make the necessary changes within yourproposal.
Duplicate Professional Profiles Duplicate Professional Profiles
22
In this module you learned:Professional Profile basicsHow to create a Professional ProfileHow to add biosketchesHow to assign permissions to a Professional ProfileHow to avoid duplicate Professional Profiles
Conclusion Conclusion