Embed Size (px)
Citation preview
IGNITE!An Integrated Design Thinking and STEM Curriculum
TEACHER GUIDE

The d.loft STEM Learning project
This curriculum is the collaboration of the Stanford University d.loft STEM Learning staff, Stanford University students in the Winter and Spring 2012 sections of the course, Mentoring Young STEM Thinkers, teachers and students from the East Palo Alto Phoenix Academy in East Palo Alto, CA, the Bayside S.T.E.M. Academy in San Mateo, CA, and the Stanford-Sunnyvale Summer School in Sunnyvale, CA.
d.Loft STEM Staff
Shelley Goldman, Professor and Principal Investigator
Maureen Carroll, Research Director
Eng Seng Ng, Curriculum Writer and Teaching Assistant
Molly Bullock and Stephanie Bachas-Daunert, Research Assistants
Sheri Sheppard and Bernard Roth, Professors and Co-Principal Investigators
2
Stanford Student Contributors
Tara Adiseshan
Stephanie Bachas-Daunert
Samantha Brunhaver
Molly Bullock
Cecilia Corral
Megan Elmore
Ben Hedrick
Timothy Huang
Jessica Jin
Camille Jones
Kara Kamikawa
Ann Lesnefsky
Diana Lin
Landon Medlock
Gretchen O’Henley
Mindy Phung
Shauntel Poulson
Tianay Pulphus
Joyce Rice
Taryn Sanks
Holly Sewell
Payal Shah
Christine Smith
Stefanie Tanenhaus
William Wagstaff, Jr.
---
Stephanie Bachas-Daunert
Achani Biaou
Jennifer Der Yuen
Rasha ElSayed
Tyler Fitzgerald
Wakuna Galega
Anna Gu
Maggie Hoffman
Jenny Hong
Tim Huang
Esther Illana
Niveen Ismail
Peter McDonough
Taryn Peacock
Robert Poole
Bryan Quintanilla
Hannah Rich
Sadaf Sobhani
Jennifer Telschow
Great Thavapatikom
Vy Van
Tanner Vea
Farah Weheba
d. Loft STEM Learning is a project of the ITEST program at the National Science Foundation (award No. DRL-1029929). Any opinions, findings, and conclusions or recommendations expressed in this material are those of the author(s) and do not necessarily reflect the
views of the National Science Foundation.
3
redlab.stanford.edu
Copyright
This work is licensed under the Creative Commons Attribution-NonCommercial 3.0 Unported License. To view a copy of this license, visit http://creativecommons.org/licenses/by-nc/3.0/ or send a letter to Creative Commons, 444 Castro Street, Suite 900, Mountain View, California, 94041, USA.
4
5
Preface
Ignite! An Integrated Design Thinking/STEM Curriculum Teacher Guide provides an overview of the project goals, background information on design thinking, teaching tips, descriptions of materials, lesson plans, and material lists and resources.
Project Overview:
President Obama has launched an “Educate to Innovate” campaign to improve the participation and performance of America’s students in science, technology, engineering, and mathematics (STEM). This campaign will include efforts not only from the Federal Government but also from leading companies, foundations, non-profits, and science and engineering societies to work with young people across America to excel in science and math. Design Thinking – an innovative, human-centered approach to defining and solving complex problems – is the foundation upon which the STEP Summer Program is built. The program goal is to introduce students to the design thinking process through hands-on, interactive learning activities that foster deep content knowledge in STEM fields and those engaged in STEM careers.
Ignite! An Integrated Design Thinking/STEM Curriculum provides an integrated approach to building science, technology, engineering and math knowledge and skills while engaging students in both identifying and solving problems in their communities and the larger world using a design thinking approach. The focus of this year’s curriculum is energy. In this four-week program, students will solve energy-based challenges with a wide range of activities.
As they conduct interviews and do observations, they will develop empathy. Data synthesis provides the opportunity to uncover deep user needs and insights. Highly generative brainstorming techniques will give student tools to create innovative solutions. They will build prototypes, test them, and incorporate user feedback. Students will leave the program with the creative confidence to become active problem solvers in innovative, human-centered ways that will help them confront the challenges and possibilities that surround us in the 21st century.
6
ContentsPreface......................................................................................................................................................................................................................... 5
Introduction............................................................................................................................................................................................................... 10
How to Use This Curriculum...................................................................................................................................................................................10
The Design Thinking Process..................................................................................................................................................................................12
...........................................................................................................................12
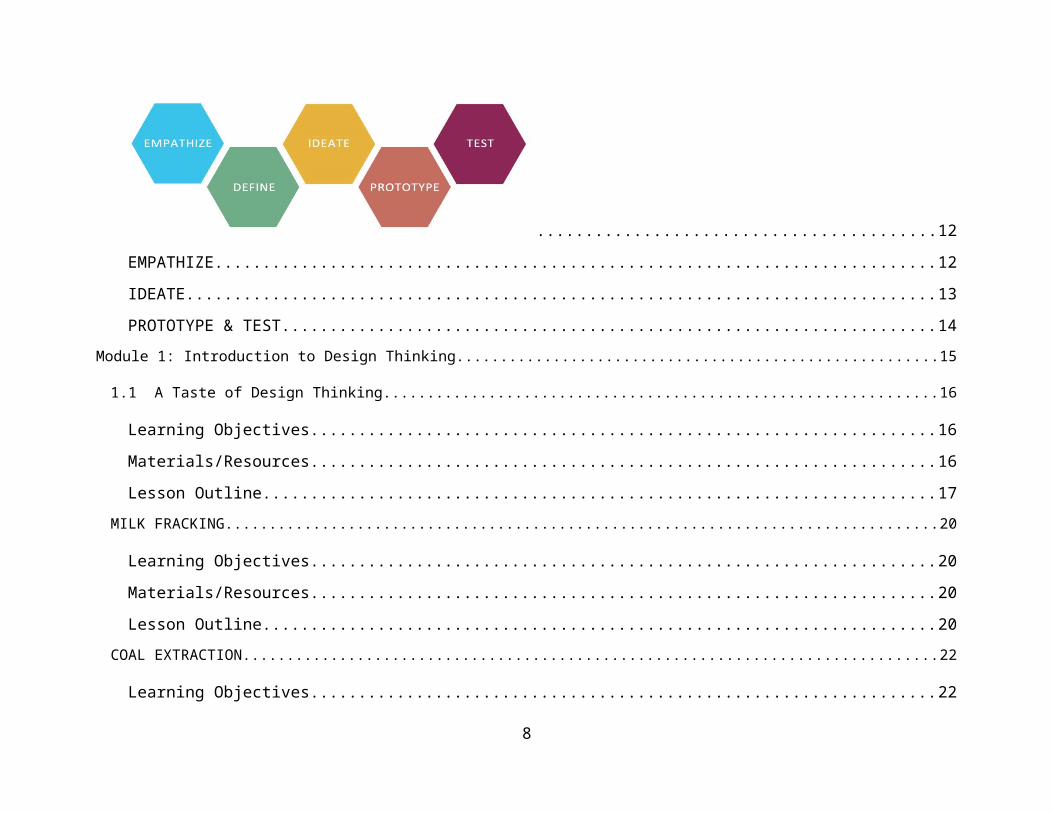
EMPATHIZE............................................................................................................................................................................................................................... 12
IDEATE........................................................................................................................................................................................................................................ 13
PROTOTYPE & TEST.............................................................................................................................................................................................................. 14
Module 1: Introduction to Design Thinking...............................................................................................................................................................15
1.1 A Taste of Design Thinking.........................................................................................................................................................................16
Learning Objectives............................................................................................................................................................................................................... 16
Materials/Resources............................................................................................................................................................................................................. 16
Lesson Outline.......................................................................................................................................................................................................................... 17
MILK FRACKING...................................................................................................................................................................................................... 20
7
Learning Objectives............................................................................................................................................................................................................... 20
Materials/Resources............................................................................................................................................................................................................. 20
Lesson Outline.......................................................................................................................................................................................................................... 20
COAL EXTRACTION................................................................................................................................................................................................. 22
Learning Objectives............................................................................................................................................................................................................... 22
Materials/Resources............................................................................................................................................................................................................. 22
Lesson Outline.......................................................................................................................................................................................................................... 23
FALLING WATER..................................................................................................................................................................................................... 25
Learning Objectives............................................................................................................................................................................................................... 25
Materials/Resources............................................................................................................................................................................................................. 25
Lesson Outline.......................................................................................................................................................................................................................... 26
WATER WHEELS..................................................................................................................................................................................................... 28
Learning Objectives............................................................................................................................................................................................................... 28
Materials/Resources............................................................................................................................................................................................................. 28
Lesson Outline.......................................................................................................................................................................................................................... 29
SOLAR OVEN.......................................................................................................................................................................................................... 30
Learning Objectives............................................................................................................................................................................................................... 30
Materials/Resources............................................................................................................................................................................................................. 30
Lesson Outline.......................................................................................................................................................................................................................... 31
WIND TURBINE...................................................................................................................................................................................................... 32
Learning Objectives............................................................................................................................................................................................................... 32
8
Materials/Resources............................................................................................................................................................................................................. 32
Lesson Outline.......................................................................................................................................................................................................................... 33
ENERGY EFFICIENT HOUSE.....................................................................................................................................................................................34
Learning Objectives............................................................................................................................................................................................................... 34
Materials/Resources............................................................................................................................................................................................................. 34
Lesson Outline.......................................................................................................................................................................................................................... 35
Engineering Communication..................................................................................................................................................................................40
Learning Objectives............................................................................................................................................................................................................... 40
Materials/Resources............................................................................................................................................................................................................. 40
Lesson Outline.......................................................................................................................................................................................................................... 41
Module 2: The International Design Challenge..........................................................................................................................................................42
PART 1: INTRODUCTION AND EMPATHY................................................................................................................................................................43
PART 2: POINT OF VIEW STATEMENT AND IDEATION............................................................................................................................................51
PART 3: PROTOTYPING AND TEST..........................................................................................................................................................................57
PART 4: INTRODUCTION TO INTERVIEWING AND ROLEPLAYING + PAPER PLANES AND PRECONCEPTIONS.........................................................60
PART 5: FUN DAY - EGG DROP + ICE CREAM MAKING...........................................................................................................................................67
Module 3: The Community Design Challenge............................................................................................................................................................70
SECOND DESIGN CHALLENGE – REDESIGNING ENERGY ACCESS IN YOUR COMMUNITY...............................................Error! Bookmark not defined.
PART 1: INTERVIEWING AND EMPATHY MAPPING....................................................................................................Error! Bookmark not defined.
PART 2: THE POINT-OF-VIEW STATEMENT.................................................................................................................Error! Bookmark not defined.
9
PART 3: IDEATION (BRAINSTORMING).......................................................................................................................Error! Bookmark not defined.
PART 5: IDEATION & PROTOTYPING..........................................................................................................................Error! Bookmark not defined.
THE MARSHMALLOW CHALLENGE.............................................................................................................................Error! Bookmark not defined.
...................................................................................................................................................................................Error! Bookmark not defined.
10
IntroductionHow to Use This Curriculum
This curriculum was designed for the Sunnyvale/Stanford summer school science teachers and pre-service teachers in the Stanford Teacher Education Program (STEP). The school includes middle school students from sixth to eighth grade. The curriculum is modular so it can be used in a variety of camp, after school, and school settings. It relies heavily on design thinking, a method of innovative problem solving taught at Stanford’s Hasso Plattner Institute for Design (the d.school).
We divided the curriculum into three modules, each expected to last roughly one week (five two-hour periods), along with additional standalone activities. If your time is shorter than the Sunnyvale summer school, you could eliminate the second or third module; if it’s longer, you could include some of the additional activities.
The first module, Introduction to Design Thinking, begins with a single start-to-finish Design Challenge on Day One. Next comes a series of activities designed to have the students experience the different stages of design thinking in hands-on ways.
****Due to discussions at our teacher workshop, we have included TWO beginning Design Thinking Touches in the Accompanying slides. You should use the one you feel most comfortable with. The Cafeteria Challenge is written in this document, but it is easy to substitute the Design the Future of Mobiles Touch instead.****
The second module, The International Design Challenge, has students empathize with schoolchildren in Africa of roughly their age, who do not have the benefits of energy infrastructure, ranging from lighting to efficient cooking. This challenge enables the students to integrate their first module learning in a coherent way. They will move through the stages of the design process, from empathy to prototyping, eventually creating a prototype to help the African schoolchildren.
The final module, The Local Design Challenge, brings the curriculum closer to home as students apply their skills to working on a project to benefit their own community. They’ll go through all the stages of the design process again, this time applying their skills in an even more open-ended way.
Reflection on learning is a critical component of the design thinking process. As students move through the different parts of
11
the curriculum, they should capture their thoughts, ideas, questions, and sketches in a Learning Journal. Each student will be given 1 Blue Book to start using as a design journal, and you can give another to students who need an extra. You can use the Learning Journal in a variety of ways. For example, you can direct students to respond to discussion questions at the end of activities, to write interview questions and take notes, to sketch prototypes, or to articulate definitions of different parts of the process. The Learning Journal is a way for students to reflect on their learning and for you to gain insights into how they are learning.
A deck of slides in PowerPoint accompanies this Teacher’s Guide and is arranged in order of the activities. If you notice that the indicated slide numbers do not match up exactly with the slide numbers indicated in this document, please adjust as needed. This is part of working with a draft document.
We’d appreciate it if you kept track of your suggestions and comments for the curriculum. We’d love to know what you think worked well, or where you would like to see additional activities. Please join our authorship team!!
12
The Design Thinking Process
EMPATHIZE
Design thinking is a process of human-centered innovation. Rather than looking at what we, the designers, think is the most important thing, our focus is our user and his or her needs. This needfinding is different than directly asking “What do you want from a backpack?” or “What do you want from a cafeteria?”
If you asked these sorts of questions, you might get too-specific answers like “I wish the backpack had wider straps”. That would limit your ability, later on, to design something new and interesting – after all, the only thing they wanted was wider straps.
You might also get too-general answers like “I wish the cafeteria had better food”. That gives you barely any help in figuring out what to design.
It’s up to you as a designer to dig a little deeper, and understand what problems the users are really having. As interviewers, we need to uncover what our subjects really need, and look beyond their words, body language and search for meaning as we dig deeper.
Before we can understand the specific problem, we need to be able to put ourselves “into the shoes” of the users. If you’re a seventh-grade student in the United States, with reliable access to electricity and fuel, you might not understand the problem of an African villager who lives without electricity.
13
IDEATE
Once you’ve gotten through the work of empathizing with the user, figuring out the problems they have, and writing a good, solid Point of View (P.O.V.) statement to sum up what they need from the design process, we can start the interesting task of coming up with ideas to solve those problems.
The design thinking brainstorming process is a bit more structured than the traditional brainstorm where everyone sits in a circle and comes up with ideas. There are a set of rules and a procedure for making sure that ideas get recorded, and for stimulating the process where people’s ideas can build on each other’s, with respect, and get to a really innovative place.
The brainstorming exercises for the challenges are found throughout. You’ll also find an overview of the rules and principles of the design thinking-style brainstorm.
After brainstorming, it’s time to do a bit of narrowing down and refinement of ideas before we move into the building and prototyping stage. In the classical design thinking process, we don’t spend very long on the narrowing-down process. We figure out the few ideas that we think are worth further pursuing, or that we need to pursue a bit before we decide if they’re good or bad. We don’t argue for a long time about which one to go and test, because that time could be used to do more tests.
14

PROTOTYPE & TEST
The final stage of the design thinking process is to create quick prototypes to make our ideas a bit more real. This is one of the main areas where design thinking differs from other engineering and design philosophies. In most other places, you plan for a long time, discuss the pros and cons of different ideas, and once you’ve decided on something, you build one very nice prototype to prove that it works. If it doesn’t work, though, or if there’s something you didn’t think of, you’re in trouble and you’ve wasted a lot of time.
Instead of using prototypes to prove that ideas work, design thinking uses prototypes to test and make sure they work. In that sense, prototypes that fail are just as useful as prototypes that succeed, because they all contribute to our understanding of how to make a good final product. We build by the saying “fail early and often” – by creating a lot of rough prototypes which are just barely good enough to get the essence of our idea across, we’re able to get valuable feedback from our users which we can use the next time we try another prototype. Going through a few rounds of the prototyping and testing process will give us an incredibly detailed and useful picture of what our final product needs to be.
We’ve provided you with examples of standalone prototyping-themed activities on … These activities are designed to get your students into the prototyping mindset of failing early and often. You’ll find that the teams that dive straight in and start building towers or boats might fail at the beginning, but they’ll have great products at the end after all the failures. The teams that spend too much time planning might make an interesting design, but if it doesn’t work, they’ll never have time to fix it.
After they’ve completed those challenges and gone through all the previous steps of the long design challenges, they’ll be ready to do prototyping and testing for their long challenges. This is a fun and rewarding step of the process, the part where they make things real, and then get to hand them to the users who’ll be able to give real feedback, and ultimately produce really great designs.
15
Module 1: Introduction to Design Thinking
16
1.1 A Taste of Design Thinking
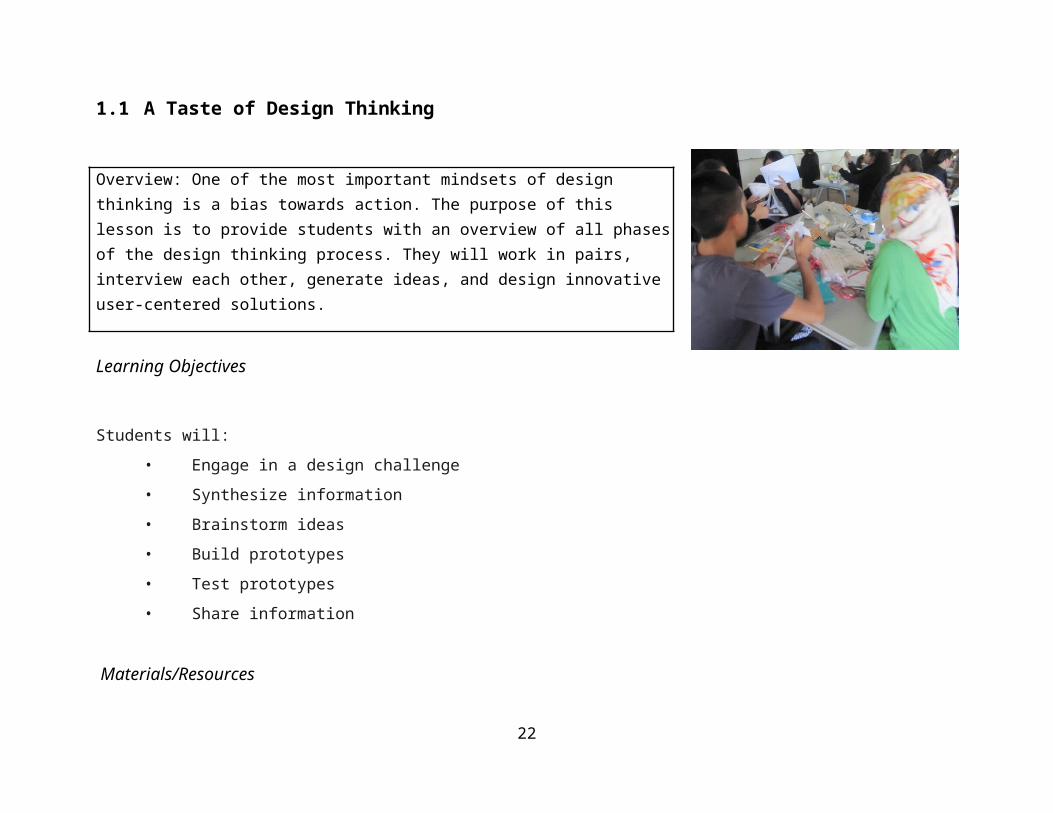
Overview: One of the most important mindsets of design thinking is a bias towards action. The purpose of this lesson is to provide students with an overview of all phases of the design thinking process. They will work in pairs, interview each other, generate ideas, and design innovative user-centered solutions.
Learning Objectives
Students will:
• Engage in a design challenge
• Synthesize information
• Brainstorm ideas
• Build prototypes
• Test prototypes
• Share information
Materials/Resources
• Slides and Blue Books for notes: A Taste of Design Thinking: Redesigning the School Cafeteria or Designing the Future of Mobiles
• Prototyping Materials: Creation Station Kit (1 per classroom)
17

Lesson Outline
Time Activity Description
5 min Activity Set Up/
Introduction
Show the first slide, and tell the class that they are going to learn the design thinking process, which is a new way to identify and solve problems.
Teachers have the liberty to choose a location, object or idea to be redesigned. For instance, rather than redesigning the school cafeteria or mobiles, students could also be asked to redesign their backpacks.
4 min Creating the story Tell the students to jot down ideas for solving the design challenge. Ask them to sketch their ideas in the indicated space. After 3 or 4 minutes, ask them to turn to the next page. Tell the students that what they just did was problem solving, and what they are going to do next is try a design thinking approach.
11 min Interviews Set students up with a partner. Show slide, “Imagine how you can improve…” . Explain that they are going to redesign the middle school cafeteria (or design the future of mobiles), not for themselves, but for their partner, and that they will begin by interviewing their partners.
Review the questions. Tell the students to begin with these questions first, and if they have time they can ask additional questions based on their partners’ responses.
Tell the class that they should choose who will be the first interviewer and interviewee, and that you will prompt them to switch roles after 5 minutes.
Tell the students to write brief notes and/or sketches as they conduct their interviews, and record this in their design notebook.
18
After both interviews are complete, ask each student to think about what his or her partner said, and capture some thoughts under the title “Insights.” Give the students 1 minute to capture insights.
8 min Defining needs Go to the next slide. Explain that the goal of this part of the design thinking process is to build empathy for their partners’ needs.
Have the students write the name of the person they interviewed in the journal. Ask the students to take 3 minutes to think about the interviews, and reflect on what was important to their partner.
Tell the class that their next task is to write a “Needs Statement.” Explain that a Needs Statement is a way to synthesize what they heard in their interviews, and that there are three main parts of a Needs Statement: user, need, and insight. Tell the students that the need must be a verb, and the insight is something that stood out to them as something that was important to their partners with respect to the cafeteria experience. Read the examples given aloud. (Note: This part of the process can be difficult. Encourage students to try to capture a need- it doesn’t have to be complex.)
5 min Ideation Turn to the brainstorming slide. Tell the class that they are going to brainstorm possible solutions to meet their partners’ needs. Explain that when you brainstorm you don’t judge any ideas and you try to think of as many ideas as you can to meet your partners’ needs. Tell the students that they have 4-5 minutes and should come up with 25 or more ideas! Ask the students to write or sketch their ideas in the space provided.
18 min Prototyping & Testing
View the next slide, Ideate – Brainstorm. Ask the students to choose one of their ideas that they are most excited about and explain that they are going to build prototypes for their partners. Show them the materials in the Creation Station, and tell them that will use these materials to build their prototypes.
Tell the class that a prototype is not a model, but is a way to make an experience tangible. Explain that if they were going to build a new seating arrangement, instead of drawing a
19
sketch, they might use the desks in the room. Remind them to think about creating something their partners can interact with. Give the students 8 minutes to build their prototypes.
After 8 minutes, tell the students that they are going to test their prototypes with their partners for 5 minutes each, and that you will tell them when it is time to switch. Review the right side of the handout so that the students are aware of how to capture feedback from their partners. Tell the students to fill in the four boxes provided to capture feedback.
6 min Reflection Show the TEST slide. Ask each student to answer the questions.
20

MILK FRACKING
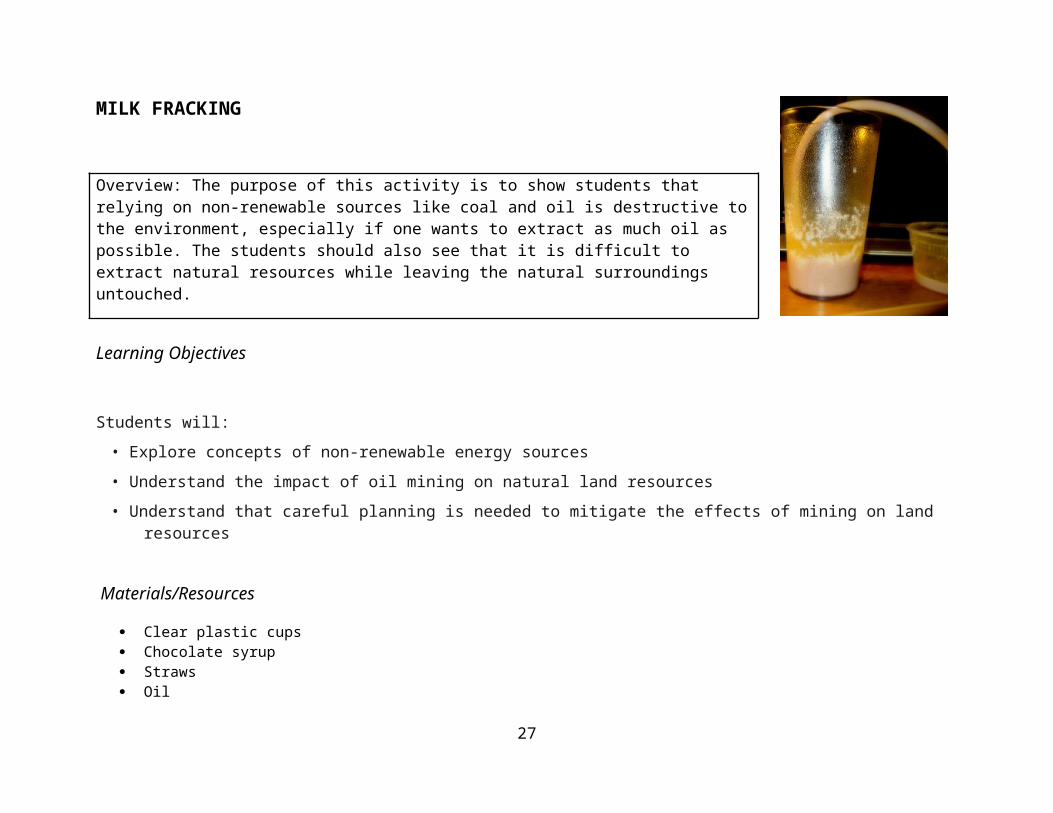
Overview: The purpose of this activity is to show students that relying on non-renewable sources like coal and oil is destructive to the environment, especially if one wants to extract as much oil as possible. The students should also see that it is difficult to extract natural resources while leaving the natural surroundings untouched.
Learning Objectives
Students will:
• Explore concepts of non-renewable energy sources
• Understand the impact of oil mining on natural land resources
• Understand that careful planning is needed to mitigate the effects of mining on land resources
Materials/Resources
Clear plastic cups Chocolate syrup Straws Oil Green food coloring Optional: access to fracking website dangersoffracking.com . Optional: syringes
Lesson Outline
21
Time Activity Description
4-6 min Introduction to oil mining and fracking
Talk about oil contained beneath bedrock
Discuss the utility of oil and the potential environmental consequences of extracting and burning natural gas
Go through fracking website and Slide 36, Milk Fracking
10 min Oil Drilling Pour chocolate milk in the bottom of each student’s cup
Carefully pour oil with food coloring on top of the chocolate milk. The goal is not to disturb the chocolate milk.
Give each student a straw (or syringe) and tell him or her that the goal is to transfer as much chocolate milk as possible from the layered cup to a clean cup. They should use the straw as a siphon. Tell the students that the chocolate milk represents precious natural gas and the green oil is the bedrock or ground water above. The goal is to leave the green oil as pristine as possible.
15 min Reporting and reflection
Evaluate to see how much chocolate milk was successfully extracted. Evaluate the quality of the green oil above. Explain that any mixing of the two mixtures represents the pollution of the ground water.
Debrief what was difficult about the activity and what lessons could be applied to fracking in the real world
22
COAL EXTRACTION
Overview: The purpose of this activity is to show students that relying on non-renewable sources like coal and oil is destructive to the environment, especially if one wants to extract as much coal/oil as possible. The activity uses chocolate chip cookies with the chips to represent coal. Students will be asked to mine coal without causing much damage to the cookie. The activity shows students how much care they have to make during the mining stage to avoid destroying the land.
Learning Objectives
Students will:
• Explore concepts of non-renewable energy sources
• Understand the impact of coal mining on natural land resources
• Understand that careful planning is needed to mitigate the effects of mining on land resources
Materials/Resources
• Chocolate chip cookies (1 per student)
• Paper towels
• Tooth picks
23
Lesson Outline
Time Activity Description
4-6 min Introduction and chocolate chip cookie extraction
Explain to students that the cookies here represent environments that contain a source of energy. The chocolate chips represent coal. They are tasked to extract as much coal as possible.
10 min Mining Have students begin mining using the toothpicks to remove the chocolate chips in the cookies. Have students place their coal deposits (chocolate chips) in one pile and the pieces of the earth’s crust that have been broken in another. Have students continue “mining” until most appear finished.
Instructors can make references to how the coal provides energy to people.
Let students break up the cookies to get to the coal/chocolate chips if needed - it will later be helpful for explaining the concept of mining destroying the earth.
24

15 min Reporting and reflection
Monitor group progress and count the number of chocolate chips collected. Groups can award themselves $10 for every piece of chip mined. They are then fined $5 for every piece of broken earth. They should tally up their totals and be prepared to report them.
Consider discussing the following points with the class:
o There are more coal deposits than could be seen on the surface
o “Mining” the deeper coal took more time and was more trouble than mining coal near the surface. (It takes energy to get energy.)
o The coal deposits were unevenly distributed. Some students had more coal deposits than others.
o Once the earth is disturbed by mining, if is very difficult to restore the earth to its original state.
o View Slide 37 and/or 38 video
Other Guiding Questions:
o What did you learn about mining?
o Why does mining occur even though it disturbs the earth? What are environmentally friendly alternatives to traditional mining method?
o What are some alternative energy resources that don’t cause damage to our planet?
25

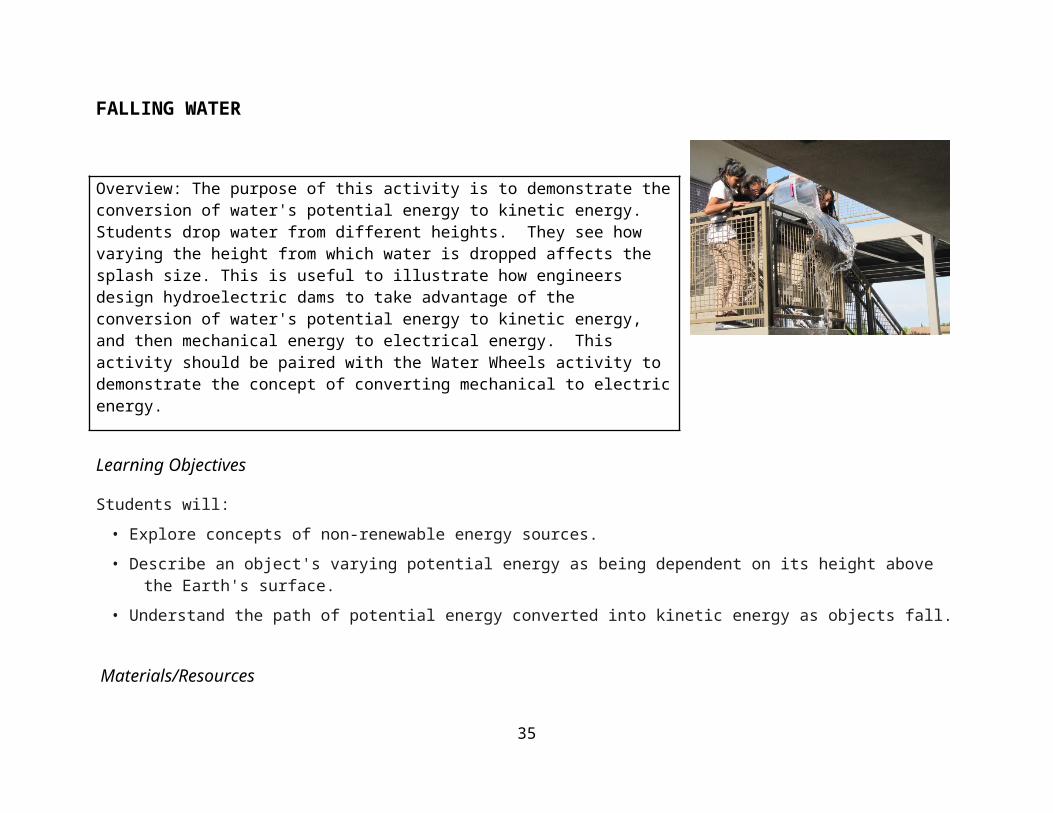
FALLING WATER
Overview: The purpose of this activity is to demonstrate the conversion of water's potential energy to kinetic energy. Students drop water from different heights. They see how varying the height from which water is dropped affects the splash size. This is useful to illustrate how engineers design hydroelectric dams to take advantage of the conversion of water's potential energy to kinetic energy, and then mechanical energy to electrical energy. This activity should be paired with the Water Wheels activity to demonstrate the concept of converting mechanical to electric energy.
Learning Objectives
Students will:
• Explore concepts of non-renewable energy sources.
• Describe an object's varying potential energy as being dependent on its height above the Earth's surface.
• Understand the path of potential energy converted into kinetic energy as objects fall.
Materials/Resources
Per team
• Water container for filling and throwing the water
• Trash bags to protect students from getting wet (per person)
• iPod or mobile phone to record the splash
26
Lesson Outline
Time Activity Description
10 min Introduction Briefly introduce students to the concepts of potential energy and kinetic energy. Potential energy is simply the "stored" energy of an object. An object's potential energy depends partly on its height and gravity. Kinetic energy is the energy of the object in motion. As an object falls, or moves down an incline, its potential energy is converted into kinetic energy. So, a falling object (or one rolling or sliding down a hill) loses its potential energy as it increases its kinetic energy. Look at video on Slide 39.
Ask the students about the different alternative sources of energy they know of that possibly uses potential and kinetic energy. Explain that engineers design hydroelectric dams to take advantage of the conversion of water's potential energy to kinetic energy, and then mechanical energy to electrical energy. In this activity we will focus on the first part.
27
20 min Water falling Fill the water container with water.
Drop water (make sure it’s the same amount) from different heights to demonstrate the conversion of water's potential energy to kinetic energy.
Have a student record the different splashes using the iPod Touch video camera. Tell them not to look at the videos until they are done.
Give students the option to design their own trash bag protection coat.
15 min Reporting and reflection
After they are done with the experiment and after watching the video (Slide 39, 40), ask them to see which height produced the biggest splash.
Tell them we are going to watch a video, but before we do that, we just wanted to explain and ask a few questions.
o Explain to them that water has potential energy and it is stored when the water is just still.
o When we dropped the water from a height, and as the water moved downwards, this potential energy converted to kinetic energy. Kinetic energy is all about movement ---> like when we see gushing water in a river.
o Civil engineers design and build dams and hydroelectric power plants that use the energy of falling water to turn the blades of turbines to generate electricity (thus, hydro-electric power) that we can use in our homes.
28

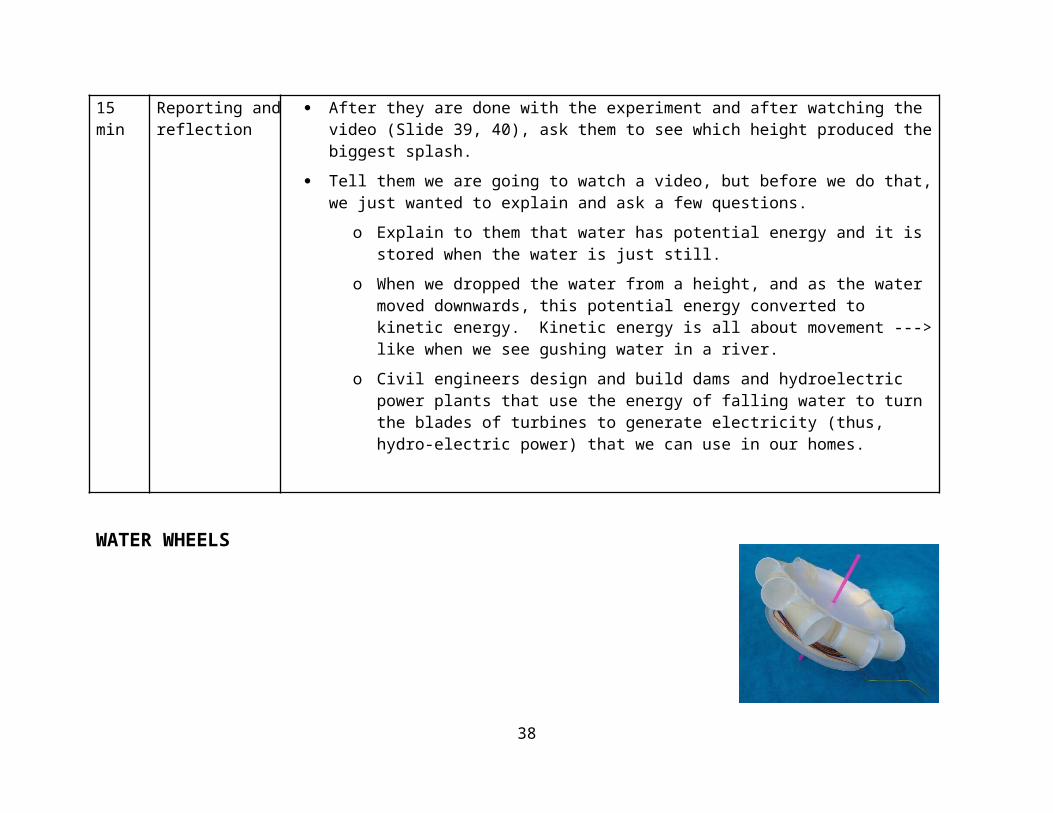
WATER WHEELS
Overview: The purpose of this activity is to demonstrate the concept of converting water’s mechanical energy to electric energy. The lesson comes as the next step after the Falling Water activity to demonstrate how engineers design hydroelectric dams to take advantage of the conversion of water's potential energy to kinetic energy, and then mechanical energy to electrical energy.
Learning Objectives
Students will:
• Explore concepts of non-renewable energy sources.
• Prototype a water wheel based on their understanding of the main scientific concepts.
Materials/Resources
Per team
• Water container to catch the falling
• Water that drops from the water wheel
• At least 20 plastic cups
• Cardboard (or plates)
• Scissors
• Stapler
• Chopstick
• Pencil or straw
29
Lesson Outline
Time Activity Description
10 min Introduction Briefly introduce students to the concepts of mechanical energy and electric energy. Remind students of how in the previous activity, water’s potential energy was converted to kinetic energy. Explain that now we will demonstrate how this kinetic energy is used in water wheels to generate electricity. View slide and video on Slide 40.
25 Water Wheels Cut the cardboard into two 12’ wide circles or use two Styrofoam plates.
Staple each plastic cup onto the cardboard circles such that each cup opening faces out with the side with the larger circumference near the edge of the cardboard.
Cup a hole through both faces of the cardboard circles and then stick a pencil, straw, or chopstick through
Pour water onto the edge of the water wheel or directly into one of the cups adjacent to the top cup to see the waterwheel spin.
See illustrations below.
15 min Testing and Prototyping
Students try their water wheels out and prototype adjustments.
5 min Reporting and Reflection
Students share out their water wheels.
Discuss how the water wheel catching the falling water is similar to generating electricity in the previous activity.
30
SOLAR OVEN
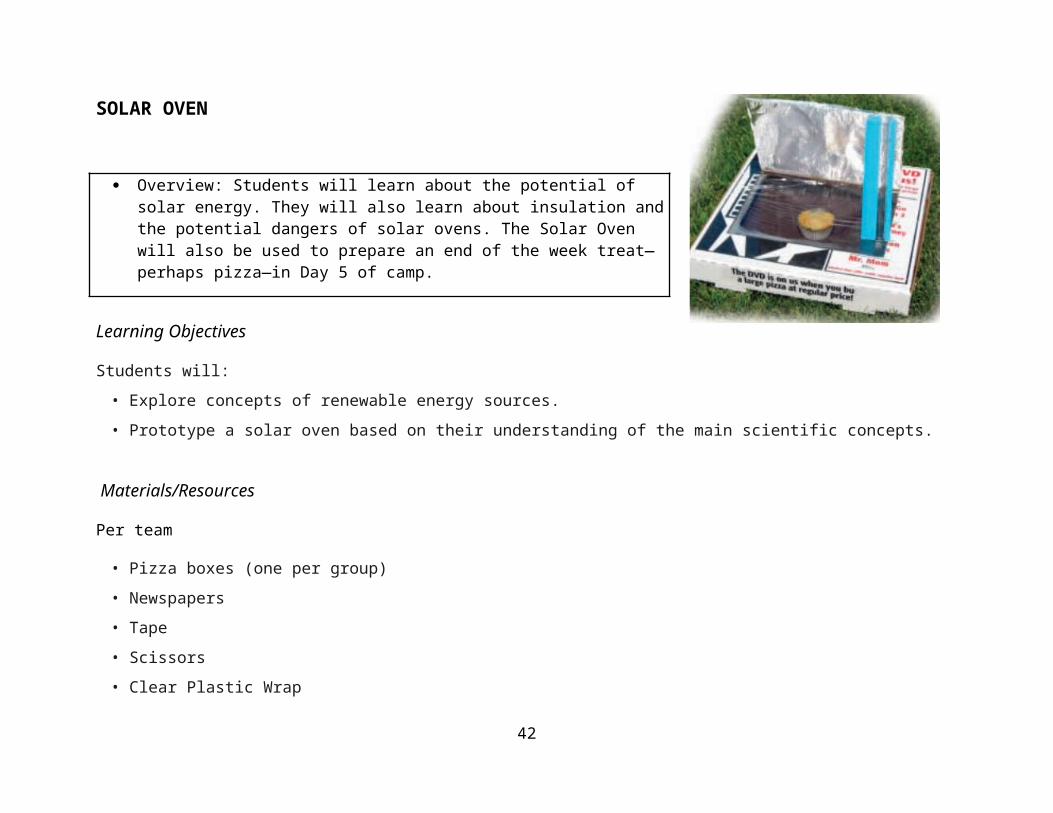
Overview: Students will learn about the potential of solar energy. They will also learn about insulation and the potential dangers of solar ovens. The Solar Oven will also be used to prepare an end of the week treat—perhaps pizza—in Day 5 of camp.
Learning Objectives
Students will:
• Explore concepts of renewable energy sources.
• Prototype a solar oven based on their understanding of the main scientific concepts.
Materials/Resources
Per team
• Pizza boxes (one per group)
• Newspapers
• Tape
• Scissors
• Clear Plastic Wrap
• Black Construction Paper
• Ruler
• Slides 41-45
31
• Movie clips ( http://www.youtube.com/watch?v=T1juKpbDS44, http://www.youtube.com/watch?v=4ZoIfh0DWdI, http://www.youtube.com/watch?v=MajofbAiJsI , http://www.youtube.com/watch?v=KMNnmv4zGnc , http://www.youtube.com/watch?v=dHVZ6jEf8To)
32
Lesson Outline
Time Activity Description
5 min Introduction Introduce the activity and the challenges of cooking without an electric or gas stove
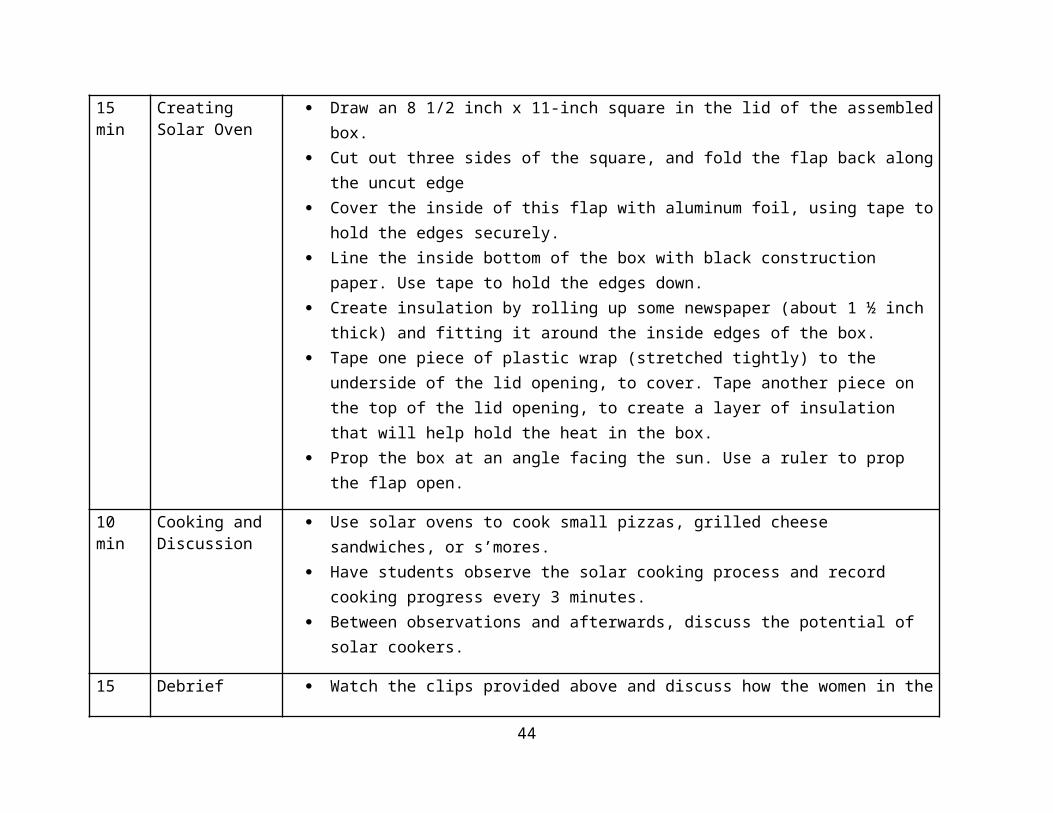
15 min Creating Solar Oven
Draw an 8 1/2 inch x 11-inch square in the lid of the assembled box. Cut out three sides of the square, and fold the flap back along the uncut edge Cover the inside of this flap with aluminum foil, using tape to hold the edges securely. Line the inside bottom of the box with black construction paper. Use tape to hold the
edges down. Create insulation by rolling up some newspaper (about 1 ½ inch thick) and fitting it
around the inside edges of the box. Tape one piece of plastic wrap (stretched tightly) to the underside of the lid opening, to
cover. Tape another piece on the top of the lid opening, to create a layer of insulation that will help hold the heat in the box.
Prop the box at an angle facing the sun. Use a ruler to prop the flap open.
10 min Cooking and Discussion
Use solar ovens to cook small pizzas, grilled cheese sandwiches, or s’mores. Have students observe the solar cooking process and record cooking progress every 3
minutes. Between observations and afterwards, discuss the potential of solar cookers.
15 min Debrief Watch the clips provided above and discuss how the women in the video feel,
WIND TURBINE
33

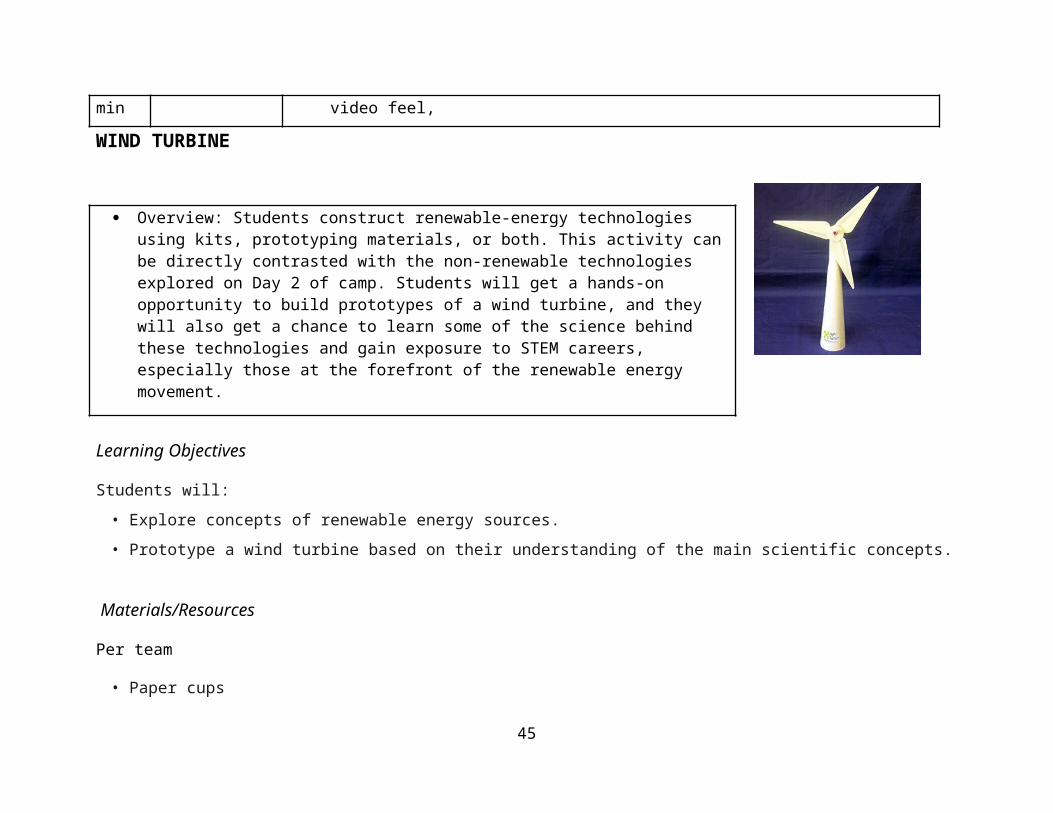
Overview: Students construct renewable-energy technologies using kits, prototyping materials, or both. This activity can be directly contrasted with the non-renewable technologies explored on Day 2 of camp. Students will get a hands-on opportunity to build prototypes of a wind turbine, and they will also get a chance to learn some of the science behind these technologies and gain exposure to STEM careers, especially those at the forefront of the renewable energy movement.
Learning Objectives
Students will:
• Explore concepts of renewable energy sources.
• Prototype a wind turbine based on their understanding of the main scientific concepts.
Materials/Resources
Per team
• Paper cups
• Straws
• Tape
• Paper
• String
• Chopsticks
• Slide 46 video
• Templates (http://www.csiro.au/helix/sciencemail/activities/images/WindTurbine.pdf or http://www.csiro.au/helix/sciencemail/activities/windturbine.html)
34
Lesson Outline
Time Activity Description
5 min Introduction Remind students of how water’s potential energy was converted to kinetic energy in the water wheel. Explain that moving air is also a fluid and the energy of the wind can be harnessed in a similar fashion.
15 Wind Turbine Tell the students they have 15 minutes to design, build and test their windmill. Show them an example picture of what a straw wind turbine might look like, but give them the freedom to design and build their own.
Remind students to test their prototypes as they build.
Tell students that the builder of the most functional wind turbine gets a prize.
5 min Testing the turbines
Everyone should go outside and test their wind turbines together.
10 min Iteration and re-test
Give students 5 more minutes to adapt or change their prototype.
Go outside to retest the improved prototypes.
10 min Debrief Discuss wind energy jobs- engineering, testing.
Questions to ask: What does it take the harness the wind? What worked and what didn’t? What did you learn? Did you have fun?
ENERGY EFFICIENT HOUSE
35
Overview: The purpose of this lesson is to introduce students to technologies used to construct “green” homes and the STEM professions that allow the real-world transformation from idea to finished product to be realized.
Learning Objectives
Students will:
• Learn various technologies that are used in energy efficient houses
• Understand the idea of trade-offs between energy conservation and affordability
• Work in teams to plan and prototype a house
Materials/Resources
Per team
• Prototyping Materials (tin foil, cardboard, straws, string, gummy bears, colored paper, egg cartons, etc.)
• Paper to draw initial house designs
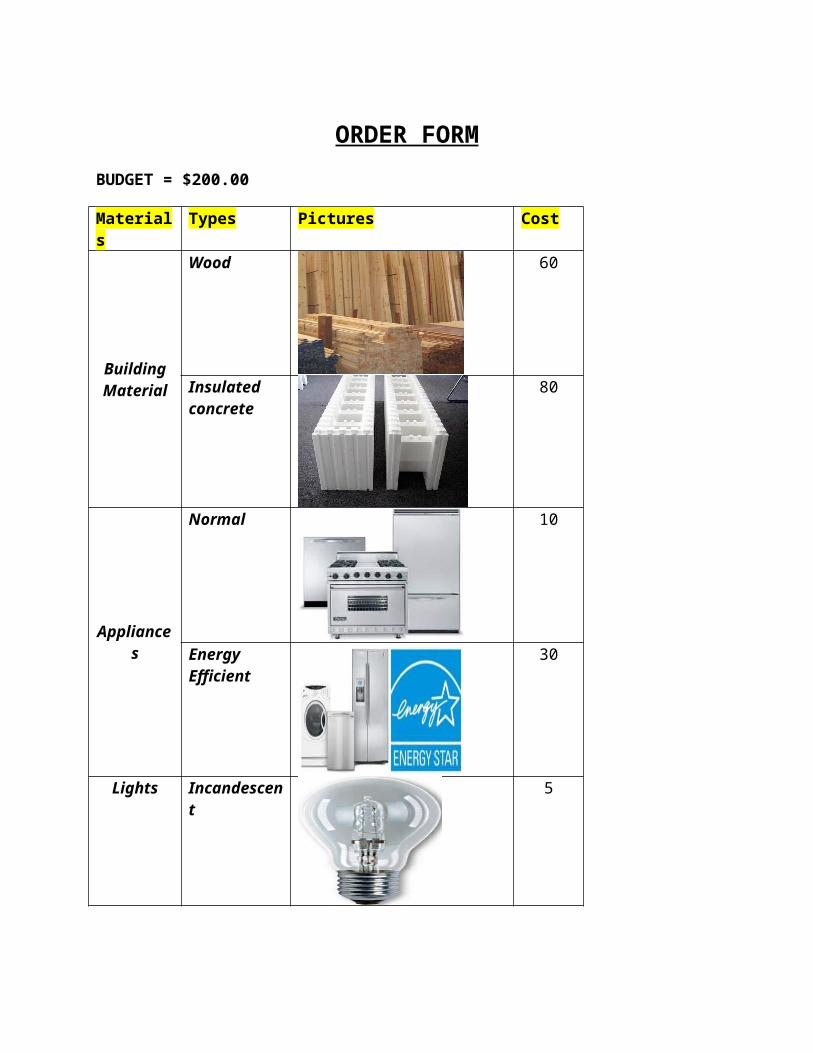
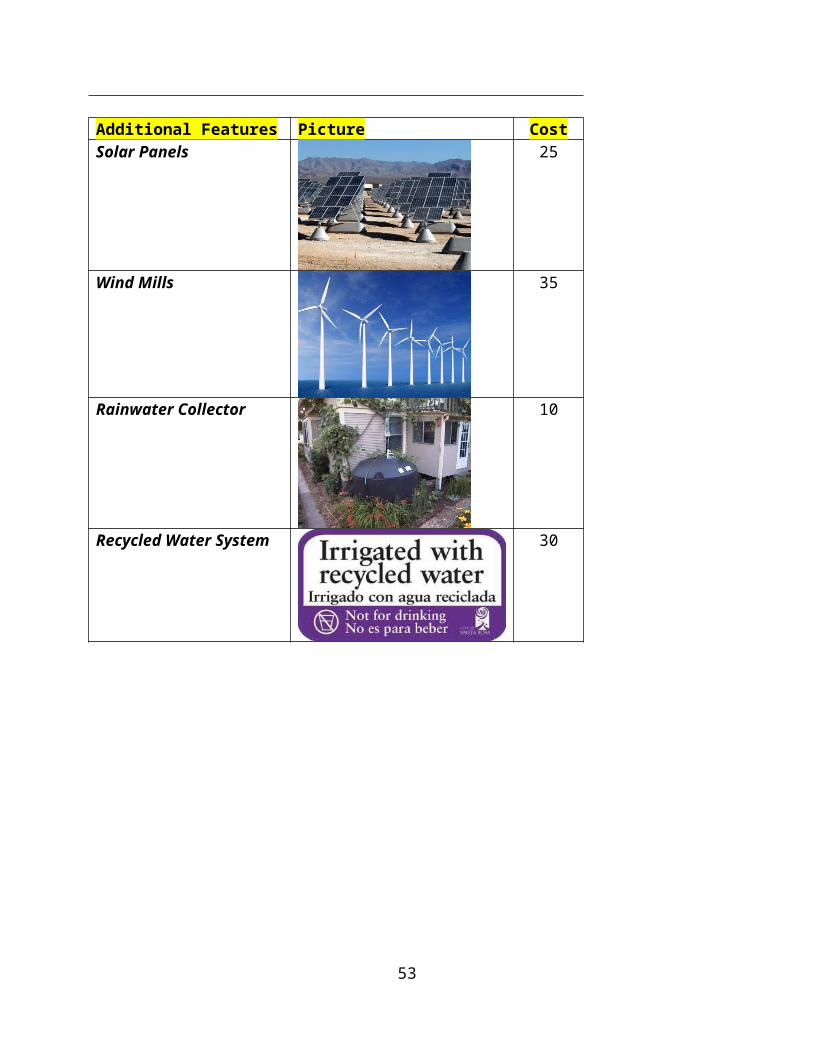
• Order Form (see final page of lesson plan). The Order Form has two components: Materials and Additional Features. In the materials section, each team will have to select one of the two options (for instance, selecting wood versus insulated concrete or incandescent versus CFL light bulbs). The energy-efficient option is always listed second. In the additional features section, teams can select options that they would like to add to their home until their budget runs out; the prices are arranged so that if teams buy the most expensive materials, they will still have money left over to buy one additional feature.
Lesson Outline
36
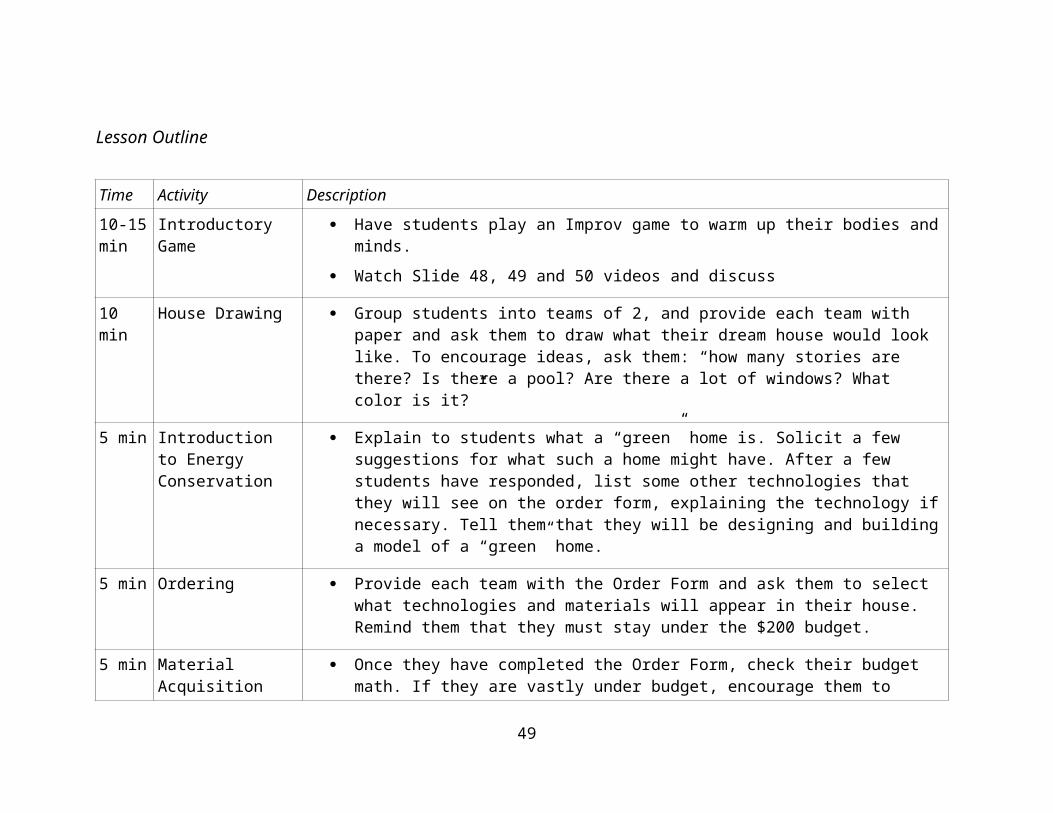
Time Activity Description
10-15 min
Introductory Game Have students play an Improv game to warm up their bodies and minds.
Watch Slide 48, 49 and 50 videos and discuss
10 min House Drawing Group students into teams of 2, and provide each team with paper and ask them to draw what their dream house would look like. To encourage ideas, ask them: “how many stories are there? Is there a pool? Are there a lot of windows? What color is it?”
5 min Introduction to Energy Conservation
Explain to students what a “green” home is. Solicit a few suggestions for what such a home might have. After a few students have responded, list some other technologies that they will see on the order form, explaining the technology if necessary. Tell them that they will be designing and building a model of a “green” home.
5 min Ordering Provide each team with the Order Form and ask them to select what technologies and materials will appear in their house. Remind them that they must stay under the $200 budget.
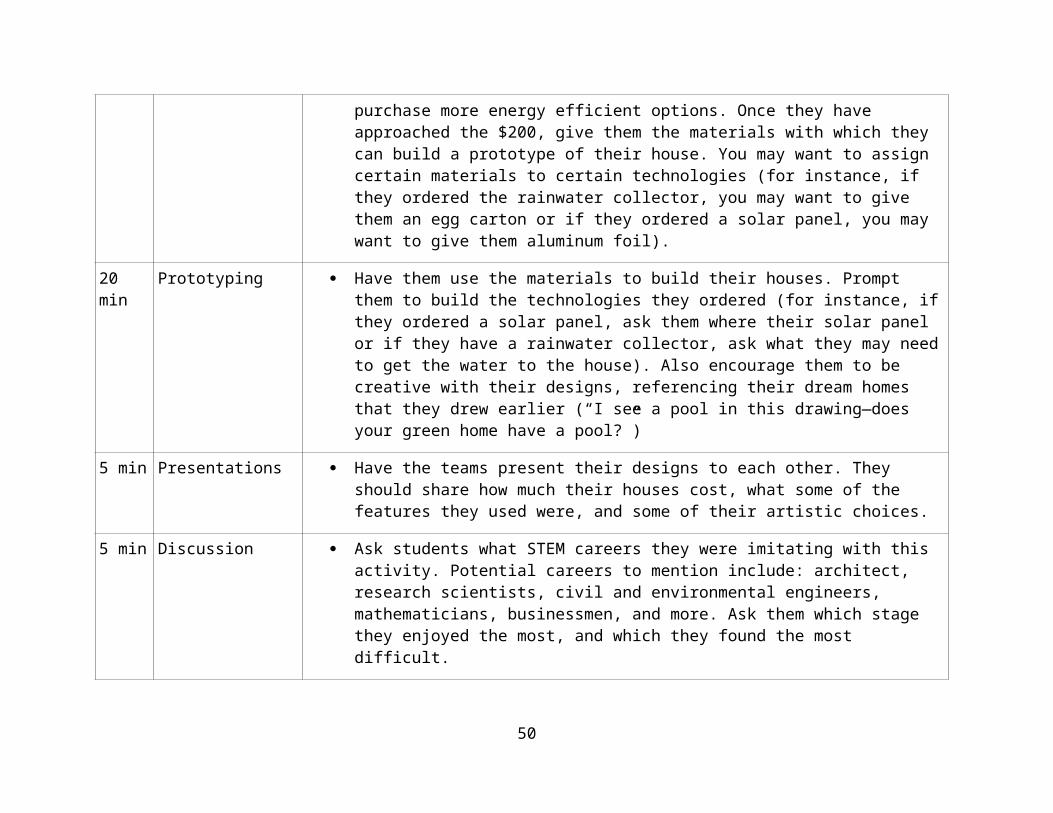
5 min Material Acquisition Once they have completed the Order Form, check their budget math. If they are vastly under budget, encourage them to purchase more energy efficient options. Once they have approached the $200, give them the materials with which they can build a prototype of their house. You may want to assign certain materials to certain technologies (for instance, if they ordered the rainwater collector, you may want to give them an egg carton or if they ordered a solar panel, you may want to give them aluminum foil).
20 min Prototyping Have them use the materials to build their houses. Prompt them to build the technologies they ordered (for instance, if they ordered a solar panel, ask them where their solar panel or if they have a rainwater collector, ask what they may need to get the water to the house). Also encourage them to be creative with their designs, referencing their dream homes that they drew earlier (“I see a pool in this drawing—does your green home have a pool?”)
5 min Presentations Have the teams present their designs to each other. They should share how much their
37
houses cost, what some of the features they used were, and some of their artistic choices.
5 min Discussion Ask students what STEM careers they were imitating with this activity. Potential careers to mention include: architect, research scientists, civil and environmental engineers, mathematicians, businessmen, and more. Ask them which stage they enjoyed the most, and which they found the most difficult.
38
ORDER FORM
BUDGET = $200.00
Materials Types Pictures Cost
Building Material
Wood 60
Insulated concrete
80
Appliances
Normal 10
Energy Efficient
30
Lights Incandescent 5
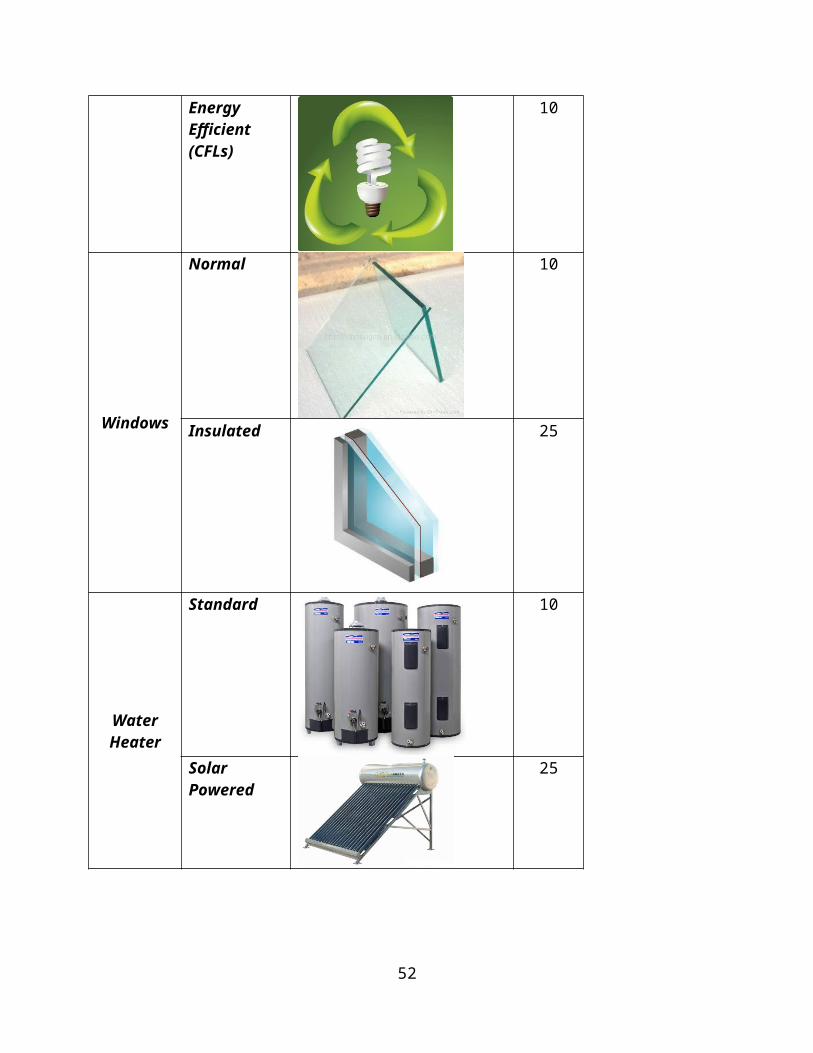
Energy Efficient (CFLs)
10
Windows
Normal 10
Insulated 25
Water Heater
Standard 10
Solar Powered
25
40
Additional Features Picture CostSolar Panels 25
Wind Mills 35
Rainwater Collector 10
Recycled Water System 30
41
Engineering Communication
Overview: This activity is an add-on to the energy efficient house. Students will communication the production steps to others. The main focus of this lesson is to communicate production steps to others with precision and accuracy.
Learning Objectives
Students will:
• Write clear instructions on how to build the prototype• Follow another team’s instructions and build their partner team’s energy-efficient home by following directions
Materials/Resources
Per team
• Duplicates of the same prototyping materials used in the previous activity
• Paper, pens
Lesson Outline
Time Activity Description
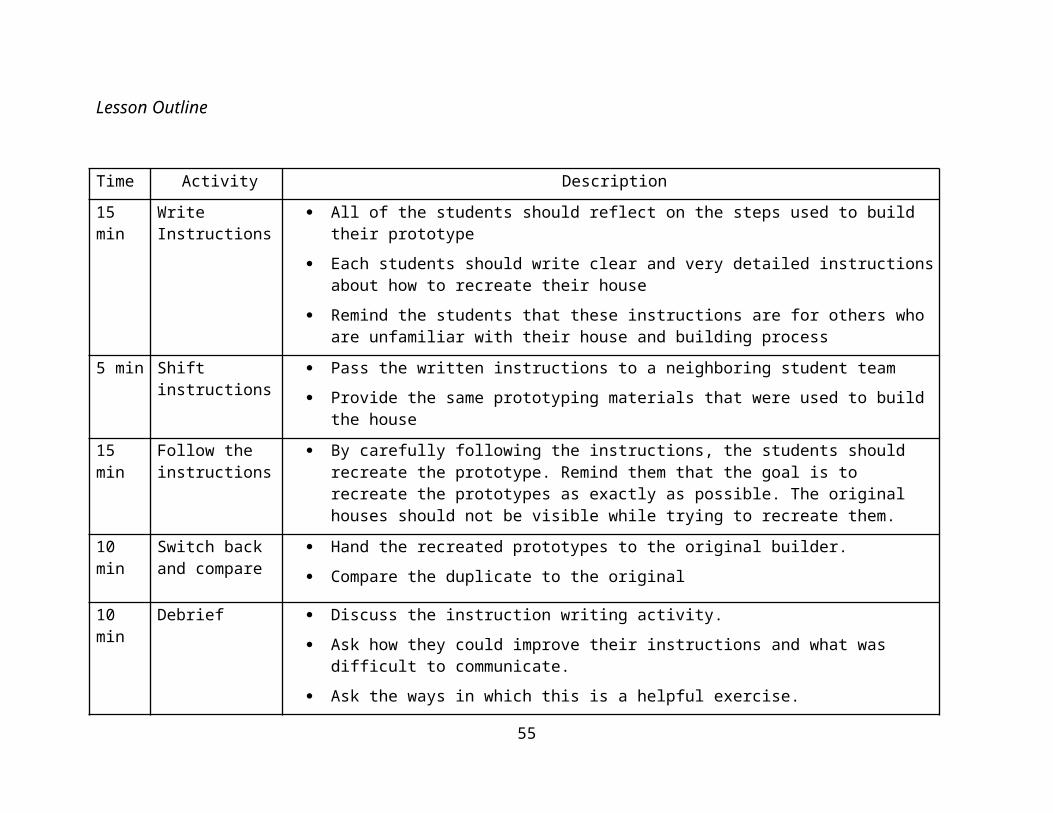
15 min Write Instructions All of the students should reflect on the steps used to build their prototype
Each students should write clear and very detailed instructions about how to recreate their house
Remind the students that these instructions are for others who are unfamiliar with their house and building process
5 min Shift instructions Pass the written instructions to a neighboring student team
Provide the same prototyping materials that were used to build the house
15 min Follow the instructions
By carefully following the instructions, the students should recreate the prototype. Remind them that the goal is to recreate the prototypes as exactly as possible. The original houses should not be visible while trying to recreate them.
10 min Switch back and compare
Hand the recreated prototypes to the original builder.
Compare the duplicate to the original
10 min Debrief Discuss the instruction writing activity.
Ask how they could improve their instructions and what was difficult to communicate.
Ask the ways in which this is a helpful exercise.
43
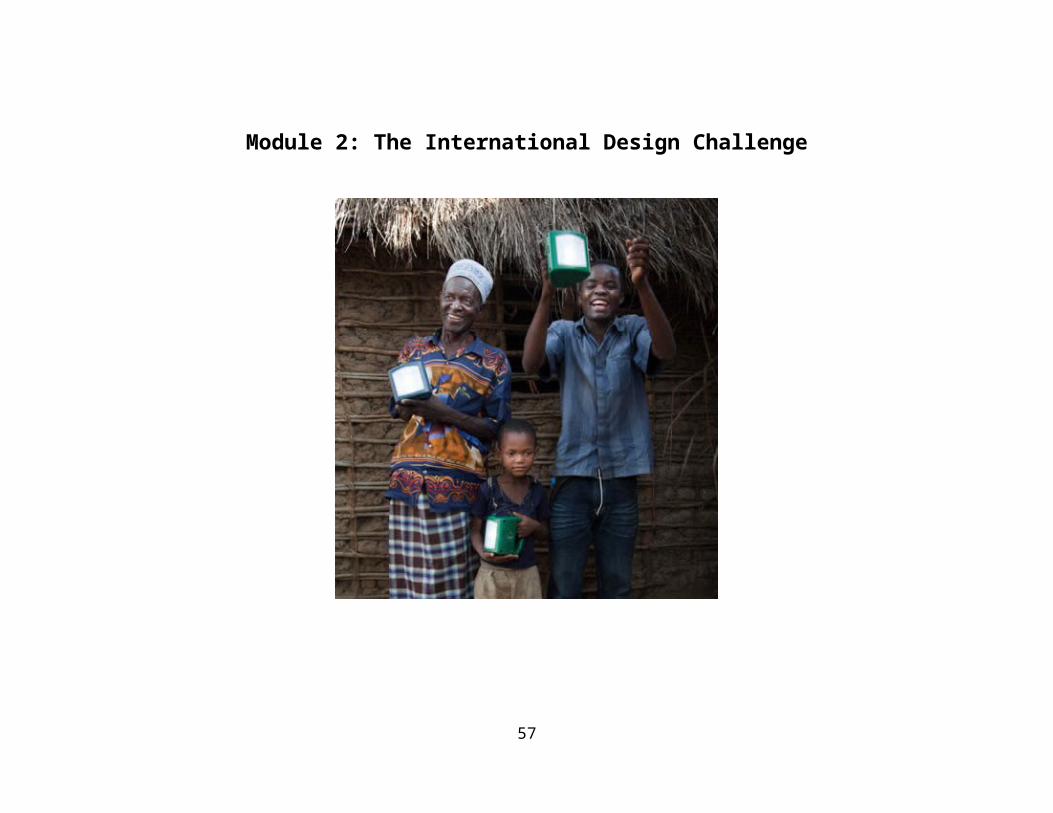
Module 2: The International Design Challenge
44
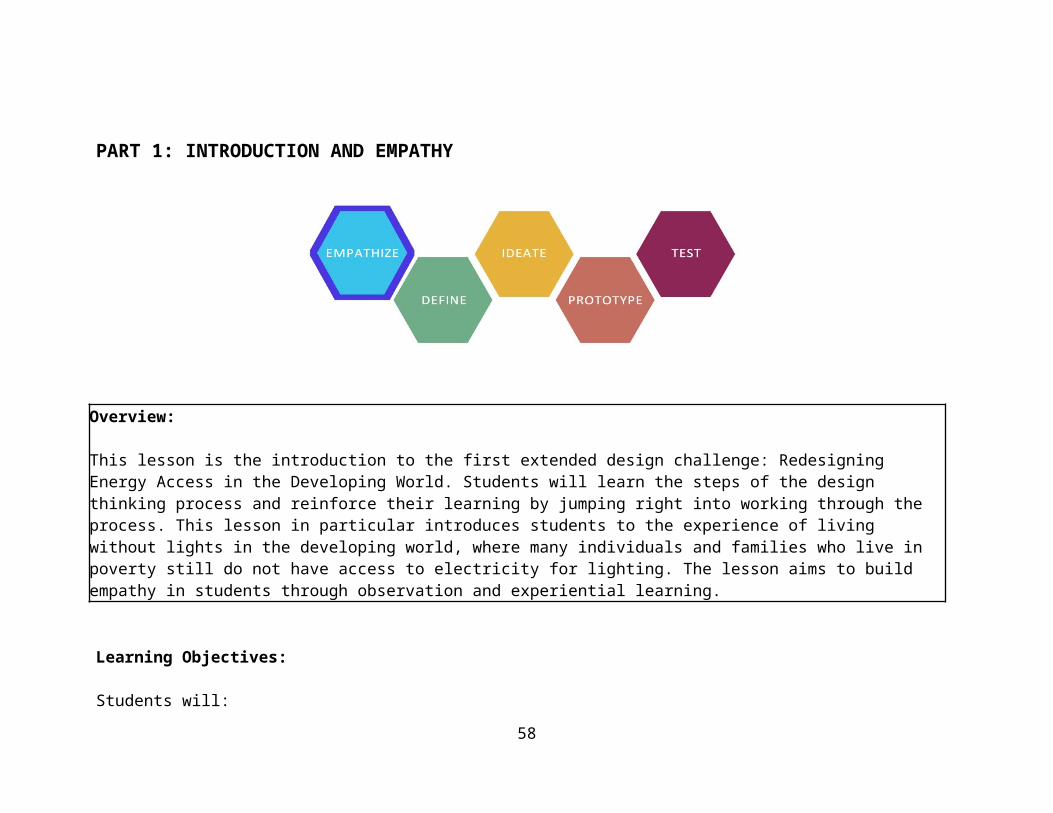
PART 1: INTRODUCTION AND EMPATHY
Overview:
This lesson is the introduction to the first extended design challenge: Redesigning Energy Access in the Developing World. Students will learn the steps of the design thinking process and reinforce their learning by jumping right into working through the process. This lesson in particular introduces students to the experience of living without lights in the developing world, where many individuals and families who live in poverty still do not have access to electricity for lighting. The lesson aims to build empathy in students through observation and experiential learning.
Learning Objectives:
Students will:
• Learn the design thinking process in more depth while emphasizing the empathy stage of the design process • Analyze and synthesize interview data• Create an Empathy Map• Develop empathy for the 1 out of 3 people in the world who still live without reliable electricity
45
• Search for insights about the way that socioeconomically disadvantaged individuals in developing regions live without electricity and the specific struggles these individuals face daily
• Complete an experiential activity in which they learn about what students in the developing world go through when they attempt to do school work in the dark
• Learn about environmental, health, economic, and social costs of using kerosene lamps for lighting
Materials/Resources:
• Set up the PPT/PDF/KEYNOTE International Energy Design Challenge so that students can view it. (Note: Begin at slide 54)
• Review Empathy Map in the Teacher Guide prior to beginning the lesson.
“Homework in the Dark” simulation:
• LED lights• A dark room with no windows• Pens or pencils• A word search worksheet (preferably an energy resources word search) – SEE APPENDIX I.
“Living without Lights” video observations:
• Video snippets of interviews from Ghana and India• Pens or pencils• Debrief worksheet (with empathy map on one side and the many costs of kerosene lamps on the other side) – SEE
APPENDIX II.
[OPTIONAL] Prototyping session:
• Aluminum foil• Pipe cleaners• Construction paper• Assortment of cloth• Chopsticks
46
• String• Tape• Scissors • Other school supplies, arts and crafts, and/or building materials
Per Team (Each team has 4-6 students)
• Printer paper (3 sheets per note taker)
• Markers or pens (One per person)
• One large piece of chart or butcher paper
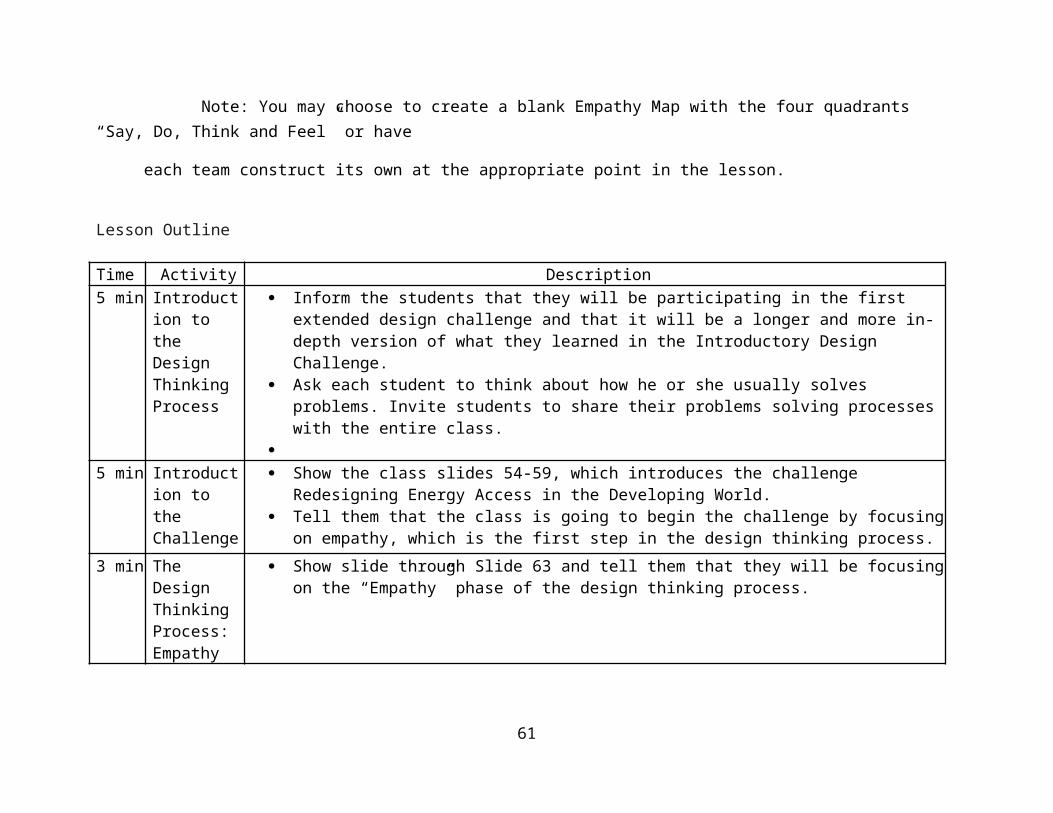
Note: You may choose to create a blank Empathy Map with the four quadrants “Say, Do, Think and Feel” or have
each team construct its own at the appropriate point in the lesson.
Lesson Outline
Time Activity Description5 min Introduction
to the Design Thinking Process
Inform the students that they will be participating in the first extended design challenge and that it will be a longer and more in-depth version of what they learned in the Introductory Design Challenge.
Ask each student to think about how he or she usually solves problems. Invite students to share their problems solving processes with the entire class.
5 min Introduction
to the Challenge
Show the class slides 54-59, which introduces the challenge Redesigning Energy Access in the Developing World.
Tell them that the class is going to begin the challenge by focusing on empathy, which is the first step in the design thinking process.
47
3 min The Design Thinking Process:Empathy
Show slide through Slide 63 and tell them that they will be focusing on the “Empathy” phase of the design thinking process.
2 min Design Thinking Definition Review
Review the definition of design thinking.
8 min Defining Empathy
Show the class slides 63-71. You can read them aloud, ask the students to read them silently, or ask the students to read them aloud. You can also choose any combination of these options. As you move through these slides, ask your students if they have any questions or need clarification of the ideas that are presented.
Ask students how they think that people might develop empathy (Slide 72) Show the students slide 73 and tell them that design thinkers have a toolbox that contains ways
to develop empathy for their users.8 min Observation Show the students slides 74-75 and emphasize the importance of observing with fresh eyes,
particularly when you are observing a place you are familiar with (e.g. your school or home). Slide 76 contains a brief (1:55 minutes) video that challenges students’ observation skills. After
viewing the video, ask students to discuss their reactions to it. Slides 77-82 provide slides for students to practice what they observe.
48
15 min “Living without Lights--Homework in the Dark” Simulation
Inform the students that they are starting the empathy stage of the international design challenge.
Have students sit down at the table in a room that you can make very dark. Hand out the energy resources word search sheets to the students. Start out by turning off all the lights in the room so the room is completely dark. Have the students attempt to complete the task (i.e. the word search) using just that individual
flameless candle, which represents a kerosene lamp. After about 2 minutes, turn on small LED lights for the student to use. After about another 3 minutes, turn off the LED lights and turn on the normal room lights and
allow students to complete the task. Debrief the experience for another 3-5 minutes:
What was it like to do a task in the dark? Was it hard? How did your eyes feel? Did the LED vs. normal lights make a difference in how quickly you completed the task? Did you know that students all around the world have to experience this every night? How do you think students in the developing world feel about doing homework without
lights?
49
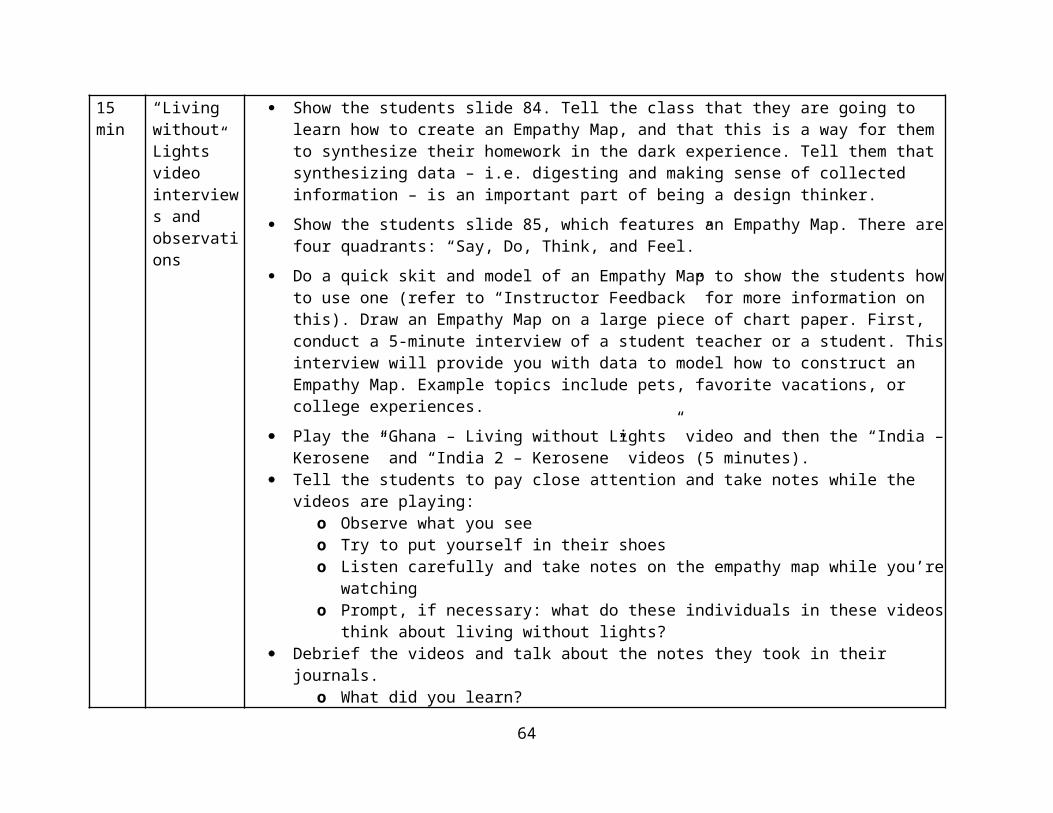
15 min “Living without Lights” video interviews and observations
Show the students slide 84. Tell the class that they are going to learn how to create an Empathy Map, and that this is a way for them to synthesize their homework in the dark experience. Tell them that synthesizing data – i.e. digesting and making sense of collected information – is an important part of being a design thinker.
Show the students slide 85, which features an Empathy Map. There are four quadrants: “Say, Do, Think, and Feel.”
Do a quick skit and model of an Empathy Map to show the students how to use one (refer to “Instructor Feedback” for more information on this). Draw an Empathy Map on a large piece of chart paper. First, conduct a 5-minute interview of a student teacher or a student. This interview will provide you with data to model how to construct an Empathy Map. Example topics include pets, favorite vacations, or college experiences.
Play the “Ghana – Living without Lights” video and then the “India – Kerosene” and “India 2 – Kerosene” videos (5 minutes).
Tell the students to pay close attention and take notes while the videos are playing:o Observe what you seeo Try to put yourself in their shoeso Listen carefully and take notes on the empathy map while you’re watchingo Prompt, if necessary: what do these individuals in these videos think about living
without lights? Debrief the videos and talk about the notes they took in their journals.
o What did you learn?o What surprised you?o Share out what you talked about.
Show Slide 89 and give the students time to fill out the “ Think” and “Feel” section of the empathy map for the persons in the videos. They can use their journals. Help students as needed.
50
25 min Creating Empathy Maps
Tell the class that the “Think” and “Feel” portion of the Empathy Map is their chance to make some inferences about what their interviewee thinks and feels based on what he or she said and did. Remind the student that there is no wrong answer. Record the students’ responses in the “Think” and “Feel” quadrants of the Empathy Map.
Give groups piece of chart paper and ask them to draw the four quadrants of the Empathy Map. (You may also wish to do this in advance for them.) Tell the students to combine their insights to complete an Empathy Map based on the videos. Visit each team to clarify any questions the students might have.
15 min Quick Prototyping Session (Optional)
Place prototyping materials in front of students
Give students the prompt: “Using what you learned from the videos, your own experience trying to do homework in the dark, and your empathy map, design a way for people in the videos in India and Ghana to have proper lighting in their homes.
o Think about how you might get the energy for your lighting.
o Think about the energy resources you have already learned about (sun, wind, water, etc.)
Share out your prototype and explain what it does for the group to understand.
3 min Revisiting Design Thinking Definition
Ask the students to describe design thinking in their own words. Show the graphic on Slide 83. As a class read the definition of design thinking aloud. Clarify any questions the students might have about what they have learned about the design thinking process.
Tell the class that they will continue the challenge as they participate in an activity to learn more about energy in the second part of the class.
51
52
PART 2: POINT OF VIEW STATEMENT AND IDEATION
Overview:This lesson continues the design challenge Redesigning Energy Access in the Developing World. Students will learn about the Define and Ideate phases of the design thinking process. Students will create Point of View statements based on the needs they uncovered during their user interviews. They will learn the rules of brainstorming, brainstorming techniques, and participate in a brainstorming session. Students will learn about the ideate phase of design thinking process. They will cluster the ideas they have generated in themes and learn how to make decisions on which ideas to move forward to prototype.
Learning Objectives:
Students will:
• Learn the Define phase of the design thinking process• Create Point of View statements based on user needs• Learn the Ideate phase of the design thinking process• Learn the rules of brainstorming• Learn brainstorming techniques• Participate in a brainstorming session• Learn the ideate phase of the design thinking process• Learn how to cluster ideas thematically
53
• Learn how to select ideas to prototype
Materials/Resources:
• Set up the PPT/PDF/KEYNOTE International Energy Design Challenge so that students can view the slides. (Note: Begin at Slide 92)
• Review Define and the Point of View Madlib in the Teacher Guide prior to beginning the lesson.
• Preview the video clip of First Time Teaching (Neema), Slide 93 at http://www.youtube.com/watch?v=ewlHN9SGuv0
Begin at 0:47 and stop at 1:18. You will use this clip to model the construction of a Point of View Statement.
• Preview the video clip of Teachers First Day (Shanda), Slide 95, at http://www.youtube.com/watch?v=kcfD0GDKYiA&feature=related. Begin at 0:21 and stop at 1:22. You will use this clip to model the construction of a Point of View Statement.
• Review Ideate Mode, Brainstorm Rules, and How to Facilitate a Brainstorm in the Teacher Guide prior to beginning the lesson.
●Review Ideate Mode, Brainstorm Rules, and How to Facilitate a Brainstorm in the Teacher Guide prior to beginning the lesson.
Per Team (Each team has 4-6 students.)
• Markers or pens (One per person)
• One large piece of chart or butcher paper
Note: You may choose to create a blank Point of View Statement for each team or have each team construct its
own at the appropriate point in the lesson.
Per Team/Person (Each team has 4-6 students)
54
• 1 Sharpie marker per person • A Copy of the team Point of View Statement • One large piece of chart or butcher paper for writing “How Might We Questions”• One pack of Post-it notes per person in team spaces
Lesson Outline
Time Activity Description2 min The Design
Thinking Process:Define
Tell the students that they will be continuing the design challenge Redesigning Energy Access in the Developing World.
Show the class slide 90 and tell them students that they are going to begin the “define” phase of the design thinking process.
10 min Understanding a POV Statement
Show the students Slide 91 and tell them that the next thing they are going to do using their interview data is to construct a Point of View Statement. Explain that a Point of View Statement is a way to synthesize their interview data, and that they will use this statement to help solve the design challenge for their users.
Show the students Slide 92, which highlights the structure of a Point of View Statement. Tell the students that Point of View Statement has three parts: a user description, a need, and a surprising insight, and that they will get the information to create a Point of View Statement from their interviews of their users.
55

3 min Modeling How to Create a Point of View Statements
Tell the students that they are going to view a video clip of Neema, Slide 93. http://www.youtube.com/watch?v=ewlHN9SGuv0, a new first year teacher as he talks about how he feels before he begins teaching. Begin at 0:47 and stop at 1:18.
As a class, construct two or three different needs statements for Neema. For example, you might write the following Point of View Statements:
o Neema, a nervous first year teacher, needs a way to feel less nervous, because he wants to do a good job as a new teacher.
o Neema needs a way to remember his lessons, because he gets confused when everyone is staring at him.
Tell the students that they are going to view a video clip of Shanda, Slide 95 http://www.youtube.com/watch?v=ewlHN9SGuv0, a new first year teacher as he talks about how she feels before she begins teaching. Show the class slide 79- click on the video and begin at 0:21 and stop at 1:22.
o Shanda, a new teacher, needs a way to make her students enjoy learning because she wants them to have as much fun as she did when she was a student.
Shanda needs a way to feel prepared for her first day of teaching because she is nervous about having her first class of students.
15 min Creating Point of View Statements
Have the students work in their challenge teams and tell them that they are going to create Point of View Statements for their users. Give each group a blank piece of chart paper and have them fill in the three parts of a Point of View Statement from slide 96.
Give the students 15 minutes and tell them to create 2-3 Point of View Statements. As the students work, go to each group and clarify any questions the students might have.
5 min Debrief Ask the students if they have any questions about the design thinking process.
Show the class slide 97, and reiterate the definition of a design thinker.
56
2 min The Design Thinking Process:Ideate
Tell the students that they will be continuing the design challenge Redesigning Energy Access in the Developing World.
Show the class Slide 98 and tell them students that they are going to begin the “ideate” phase of the design thinking process. Explain that ideation is a way for them to generate many possible potential solutions to meet the needs of their users.
5 min Brainstorming Mindsets
Show the students Slide 100 and explain to the class that brainstorming is built upon mindsets, and that mindsets are a “road map” for how things are done.
Show the students Slides 101-107, which feature the fundamental mindsets that underlie the ideation process in design thinking. Clarify any questions students might have as they view each slide.
15 min Creating “HowMight We?”Brainstorming Prompts
Have the students place their Point of View–Define Statements on a wall where everyone on the team can see them. Tell the students that they will be brainstorming solutions to meet their users‘ needs as they are expressed in the Point of View Statements.
Model how to generate a “How Might We?” question for the class. A “How Might We?” is a way to get from a Point of View Statement to a brainstorming prompt.
Use the examples on Slide 108 to show students how to do this. Below each Point of View Statement is a “How Might We?” question.
Review each group’s Point of View Statement, and, as a class, come up with a question in the form of “How Might We?” to use as a brainstorming prompt. Have each group write its “How Might We?” prompt on a piece of paper and place it in the team space where everyone can see it.
5 min Brainstorming Rules & Modeling
Show the students Slide 109, which contains a list describing “How to Brainstorm.”
Read each rule aloud.
Demonstrate, with 2 or 3 people, how to conduct a brainstorming session. Use one the following topics for your brainstorm: “Where to Go on a Summer Vacation”, “Desserts”, “Amusement Park Rides”, “Ways to Use a Pipe Cleaner”, “Ways to Use Paper Clips” or “Crazy Pet Names.”
57
15 min Brainstorming Tell the students that they are going to brainstorm solutions based on their “How Might We?” questions. Remind them that they are coming up with as many ideas as they can for user-centered solutions. Tell the students to come up with a minimum of 35 ideas and to set a goal of generating more than 50 ideas.
Give the class 15 minutes to brainstorm. Play upbeat music during the brainstorming session to keep the energy level high.
10 min Idea Clustering Show the class Slide 110 and 111 and tell the students that they are going to cluster their ideas into themes. Have them do this by rearranging their post-it notes. Some possible themes the students might generate include ways to remember to conserve, devices that conserve water, or sharing the message about water conservation.
10 min Idea Selection Show the class Slide 112. Tell the students that they are going select their favorite ideas that would like to build for their users. Tell the students that each person has 3 votes, and that he or she should choose their top
3 favorite ideas and indicate them by placing a check mark on the post-it containing that idea. Discuss the different possible ways to choose a favorite. These might include an idea that is easy to build, a crazy idea, or an idea that they are really excited about building.
Have each group tally its 3 favorite ideas.
5 min Idea Sharing Show the students Slide 113. Ask each group to share its top 3 ideas.
58
PART 3: PROTOTYPING AND TEST
Overview:This lesson continues the design challenge Redesigning Energy Access in the Developing World. Students will learn about the prototyping phase of design thinking process. They will create watch a video and create user-centered prototypes. Students will learn about the testing phase of the design thinking process and test the prototypes they build on their users.
Learning Objectives:
Students will:
• Learn the prototyping phase of the design thinking process• Build a prototype• Work collaboratively in teams• Participate in a whole class discussion• Learn about the testing phase of the design thinking process• Test their prototypes on users • Capture feedback from users
59
Materials/Resources:
• Set up the PPT/PDF/KEYNOTE International Energy Design Challenge so that students can view it. (Note: Begin at Slide 114)
Per Team
●Creation Station prototyping materials
Lesson Outline
Time Activity Description3 min The Design
Thinking Process:Prototype
Tell the students that they will be continuing the design challenge, and that they are in the prototyping phase of the design thinking process.
5 min About Prototyping
Ask each student to write a definition of a prototype
Explain to the class that design thinkers build prototypes that are unfinished products and that the purpose of a prototype is to put something in the hands of their user quickly to see if the person likes the idea.
Show the students Slide 115 which explains some of the features of a prototype. Review each point and clarify any questions that the students may have.
20 min
Prototype Building
Divide the group into sub teams of 2 or 3 students. Remind the students that they are going to build prototypes for their users.
Have them go back to their list of the top 3 ideas they selected and have each sub team choose 1 idea to for which to build a prototype. This means that each team will have 2 prototypes to test on their user. Tell the class to save their prototypes for user testing.
Show the students Slide 116 which instructs them to begin building.
60
20 min
User Testing Show the students Slide 117, and tell them that they are going to move into the “Testing/Feedback” phase of the design thinking process.
Show the students Slide 118, and explain that they are going to test their prototypes on their users and capture feedback. Ask each group to copy the questions on slide 118 and record the feedback from their users. Have each user divide the time so that he or she can test each of the group’s two prototypes. Each group should watch as the other group conducts user testing.
20 min
Prototype Building
Have the students improve and adjust their prototype based on user feedback and testing
Encourage students to really try to listen to their users’ needs.
15 min
Presentation Planning
Tell the students that they are going to create short presentations highlighting the story of their design process that will be featured in a Mini-Expo. They also need to share out their products, the specific user needs they attempted to address, and why their product is addressing the design challenge of redesigning energy access.
30 min
Presentations Have the different student groups present for 5 minutes each (or divide time equally between groups).
Allot one minute for debriefs and feedback after each presentation while the next group gets ready to present.
61

PART 4: INTRODUCTION TO INTERVIEWING AND ROLEPLAYING + PAPER PLANES AND PRECONCEPTIONS
Overview:This lesson will teach students about the empathy phase of design thinking process. Students will engage in role-playing, critique interviews, and learn about how to be open-minded in their interviewing. This additional lesson (if there is time) uses the making of paper airplanes to show that preconceptions can prevent you from getting the “best” answer.
Learning Objectives:
Students will:
• Learn the empathy design thinking process• Review information on interviewing• Generate good and bad interviewing techniques• Engage in role playing• Write critiques• Participate in small group and whole class discussion
Materials/Resources:
• Set up the PPT/PDF/KEYNOTE International Energy Design Challenge so that students can view it.
Per Person
• Printer paper (3 sheets per person) • Markers or pens (One per person)
62

Per Team (Each team has 4-6 students)
• One large piece of chart or butcher paper
Lesson Outline
Time Activity Description3 min The Design
Thinking Process: Empathy
Show the class Slide 119 and tell them that they will be focusing on the “Empathy” phase of the design thinking process. Show the class Slide 120, and tell them that you are going to show and teach them how to become a great interviewer.
25 Practice good and bad interviews
Begin with the skits below. Two teachers can start with the example bad interview skit and ask students to take note of “what went well” and “what could be improved”(See worksheet below). If only one teacher is present, then the teacher can be the interviewer and a volunteer student can be the interviewee.
Follow skit and helpful hints found below.
Discuss what went well and what could be improved.
Do the example good interview skit below and repeat the exercise. .
For 4 minutes, ask students to pair up and to start asking descriptive, straightforward questions to understand how their friends use the school cafeteria. For example, how long have you been coming to this cafeteria? What do you like or dislike about it?
The next 4 minutes, allow students to resume interview and make sure they ask 3 follow-up questions to the interview.
63
10 min Evaluating ideas Divide the class into groups of 4-6 students. Give each group a large piece of chart or butcher paper.
Show the students Slide 122, and ask each group to create a list entitled “How to Be a Great Interviewer.”
When they are finished, post each group’s work on the wall. Have the students participate in a “Gallery Walk” around the room and read each other’s lists.
Tell the class they have 3 stars to give out. Have them draw a star next to their three favorite ideas for how to be a great interviewer.
After the Gallery Walk is complete, have the students find the three ideas with the most stars. Share these ideas with the entire class.
15 min Understanding user needs (This activity is an add-on activity. It could be implemented in the case that there is extra time)
Ask the students to think about what they just heard in the interview and consider some of the needs of the interviewer through listing what the interview said. Ask questions such as “What did the interviewee say?”, “Why do you think they said that?”, and “How do you think they feel?”
Provide them with scrap paper and ask them to write down their ideas.
After 7 minutes, ask them to share out.
The interviewee stays in the role and tries to respond to the ideas shared out about the students to confirm or elaborate on how they feel.
5min Paper Airplane Task Introduction
Introduce the Paper Airplane building task and divide students into groups of 2 to 3.
64
25 min Build & Prototype
Give students many sheets of plain paper
Divide up leaders between groups of two
Ask students how planes fly and guide them through the forces acting on a plane and how to use this knowledge in the building process
Students should test and prototype as much as possible but from standing height
Midway checkpoint and test is optional
10 min Test Have students throw their plane of a high point (e.g. a balcony or staircase). See which of their planes travels furthest.
Have a leader throw a crumpled up paper ball, which will go farther than the rest of the planes.
10 min Debrief and Recap
Review with students what worked and what didn’t. Ask them why? What could they have done better and what would they do different next time
Show video: http://www.youtube.com/watch?v=vJG698U2Mvo
Explain that we often see what we are looking for and are often so focused on one thing that we ignore everything else that is going on.
65
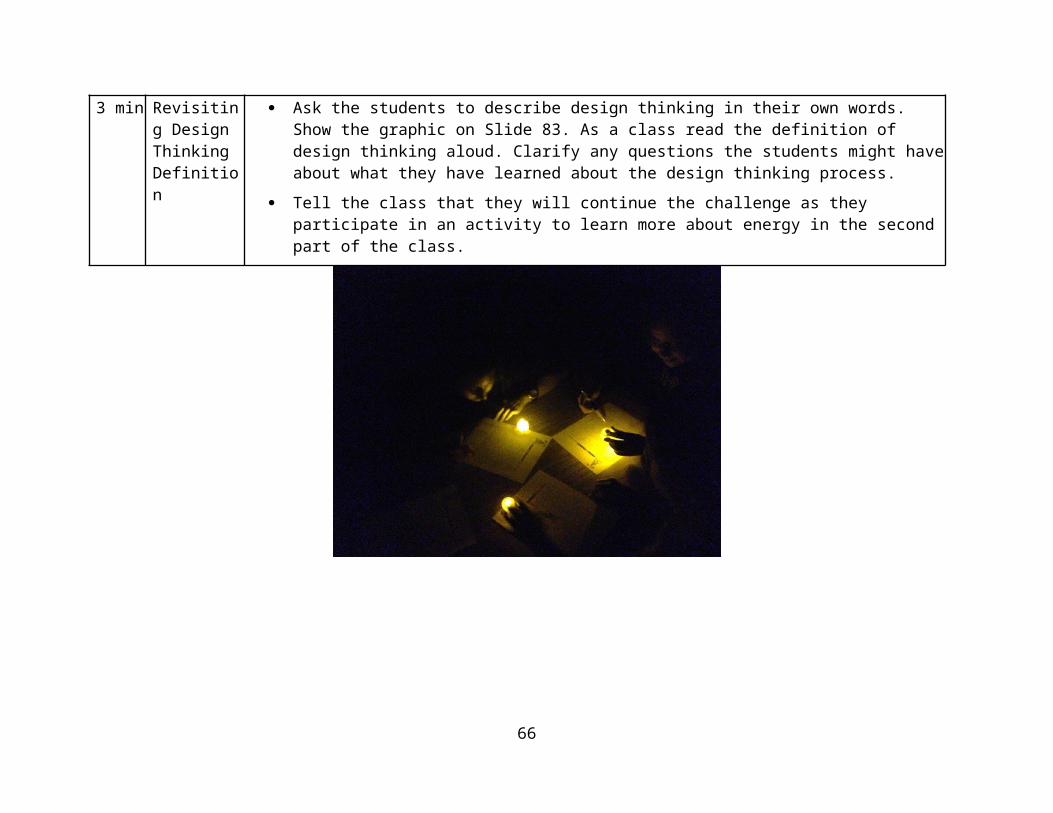
Good interview, bad interview skit and notes:
Bad interview:
Requiring two people (Two teachers can perform the skit. If only one teacher is present, then the teacher can be the interviewer and a volunteer student can be the interviewee)
Phone Notebook Pen
Interviewer: Good morning Sarah. I’m Joe, nice to meet you.
Interviewee: Oh, good morning, it’s actually Sally, my name is Sally.
Interviewer: Oh, pardon me, Sally. Sally, what do you do?
Interviewee: I’m a Spanish language tutor?
Interviewer: Oh, is that exciting or boring?
Interviewee: Well, I wouldn’t say it’s boring. I like to work with children.
Interviewer: Oh, good for you, I don’t how I would feel about being a tutor. It’s just so much work. It’s boring and I don’t have time because I have schoolwork
Interviewee: Oh, I ...
Interviewer: You see, I’m graduating from high school in two years and I’m worried how I’ll do in the track team next spring
Interviewee: Oh I see..and..
Interviewer: Well enough about me, unless you want to hear about my plans but I would like to know how you became a Spanish language tutor. Do you know how to speak Spanish well, then?
Interviewee: Um, yes, I guess. I do know how to speak Spanish, obviously, I tutor others.
66
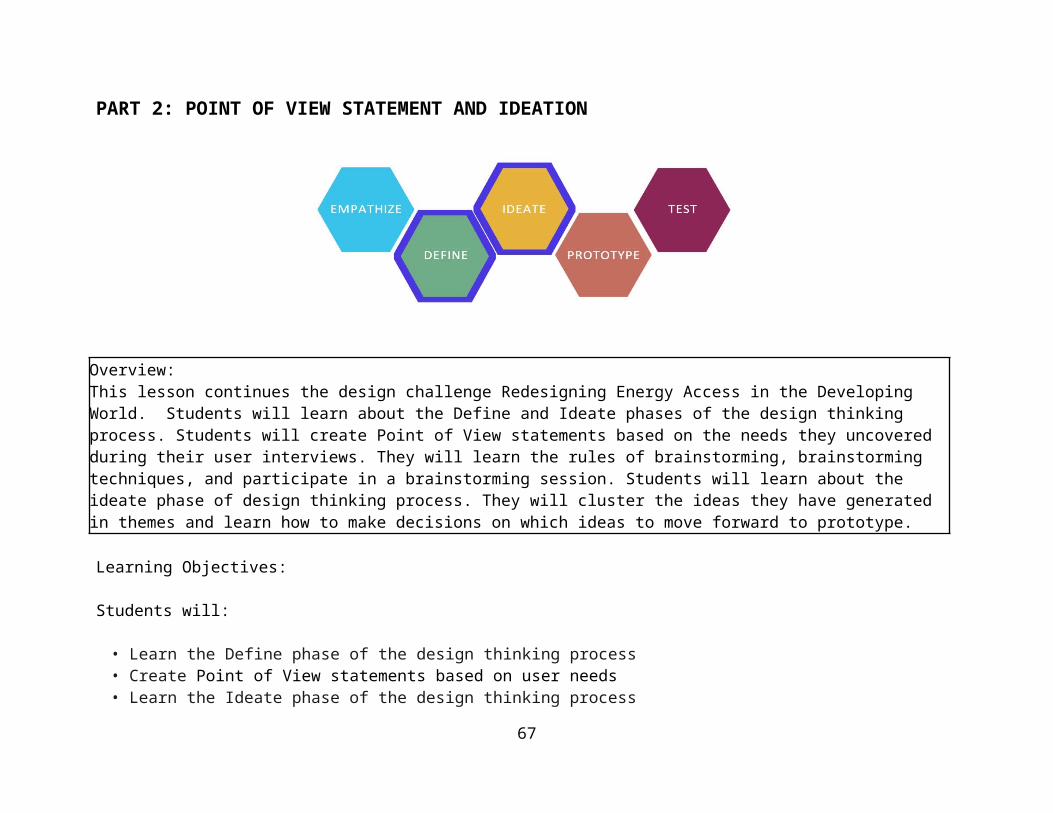
Interviewer: Of course, of course. Um, okay then, I think that we should wrap this interview up!
Interviewee: Oh..okay. Thank you?
Interviewer: Bye!
(Some things to do while conducting the interview: Take your phone and text message, don’t look at the interviewee and just keep your eye on the notebook and keep writing, give the interviewee strange faces when they answer the question (look confused, judgmental, disapproving).
Ask the students: What did they observe about this interview? What went wrong? Some points to consider:
● Interviewer was not well prepared. Did not know the name of the interviewee.● Interviewee was confused throughout the interview. The interviewer did not make any introductions or explanations about the
interview.● Interviewer spoke much more than the interviewee● Interviewer did not value the interviewee’s thoughts● Interviewer was judgmental and asking close-ended questions such “Do you know how to speak Spanish well, then?”● Poor eye contact
Better interview:
Interviewer: Good morning Sally. Thank you very much for coming in today.
Interviewee: Thank you very much, glad to be here.
Interviewer: I will be asking you a couple of questions. Please let me know if there is anything that you feel uncomfortable with during the interview.
Interviewee: Ok, thanks.
Interviewer: Tell me a little bit about yourself and what you do?
67
Interviewee: I’m a Spanish tutor and I have been doing this for the last five years. I learned Spanish over a course of five years. I tutor beginners four days a week.
Interviewer: Can you tell me more about how you learned it over this course of the five years?
Interviewee: Well I went to a language-learning center and I took a three-year structured course and for the next two years I tried to find people who would be willing to practice with me. It was hard at times but there are days where I had people speak to me in Spanish for the whole day.
Interviewer: wonderful, thank you. To pick up on that, tell me about your last week? How did tutoring go?
Interviewee: Oh, it went well. I currently have 25 students and they come to me at different times during the four days in which I tutor. It can get hectic and confusing at times because they don’t all come consistently at the same time every week. So last week, I had two days where twenty of my students signed up. And that was quite overwhelming. The rest of the days were much more relaxed.
Interviewer: Great, well, I realize we are out of time. Do you have any questions for me?
Interviewee: No, thank you very much.
Ask the students: what did they observe about this interview? What went well? Some points to consider:
● Eye contact● Interviewee spoke much more than the interviewer.● Open ended questions● Follow-up questions● Non-judgmental● Interviewee was comfortable.
68
PART 5: FUN DAY - EGG DROP + ICE CREAM MAKING
Overview:This lesson will give students a fun break from going through a longer design thinking challenge. The Egg Drop Challenge uses an iterative process of designing thinking, prototyping and testing to build a successful vestibule for an egg drop. It also reviews the concept of gravity and introduces the relationships between height and falling speed, and between height and impact force. The ice cream making is a fun opportunity for students to make food in a scientific setting.
Learning Objectives:
Students will:
Learn the importance of and enjoyment of the design-test cycle; Cultivate a sense of personal investment in learning by providing an opportunity for individual work and ownership. Observe the effects of height on a falling ball’s terminal speed and bounce height Relate height and speed to energy and force Design and test an egg capsule to be dropped Redesign the capsule for a final test Have fun and make some delicious ice cream!
Materials/Resources:
Prototyping materials: plastic bags, timer, cotton balls (1 pack), rubber bands, straws, yarn, Dixie cups, glue, popsicle sticks, pieces of felt, tarp, yarn, toilet paper rolls, scissors.
Basketball and other ball
69
2 Dozen Eggs (hard-boil or blow out the inside of the eggs beforehand).
Go to this website for pictures on how to make the ice cream: http://science.howstuffworks.com/innovation/edible-
innovations/ice-cream3.htm
1 tablespoon sugar
½ cup milk, cream, or half and half
¼ teaspoon vanilla extract (or other flavoring)
6 tablespoons salt
Enough ice to fill the gallon-sized bag halfway
1 gallon-sized Ziploc bag
1 pint-sized Ziploc bag
Lesson Outline
Time Activity Description5 min Brief overview of
falling objects Students are asked a series of questions, depending on their responses, about why objects
fall, what happens when various objects hit the ground, how height affects speed and impact, etc.
3 min Ball drop One person stands on a tall platform, another on a medium platform, and a third on a chair. A fourth is given a timer. Each of the first three students are given the ball in succession: they drop the ball and the person with the timer records how long it takes to fall.
5 min Egg squish Students are invited to try to break the egg by squeezing it length-wise with one hand. Someone willing to get dirty is invited to try squeezing the other way (easier to break). This is to give the students an idea of what orientation might provide the best protection for their eggs.
70
1 min Introduce the Design Challenge
Tell the students that they will be designing and building an egg drop that we will test.
Show which materials are available to use.
2 min First Prototype Give students 2 minutes to prototype the first egg support system (i.e. the egg holder/protector)
5 min Test First Prototype
Drop each student’s vestibule from the second floor balcony.
Inspect each egg after the drop.
In between the different drops ask students to predict what is going to happen and why.
15 min Second Prototype
Give students 15 minutes to refine or rebuild their prototype.
Give each student 2 eggs and allow them to test their prototype before the final test.
5 min Informal Discussion and Clean Up
While cleaning up, continue to informally discuss what students learned about building, what makes for better/ worse egg drops.
3min Introduction to Ice Cream activity
Introduce task and divide students along with the materials
25 min
Make the ice cream!
Fill the gallon-sized bag halfway with ice. Add the salt
Pour the milk, sugar, and vanilla extract into a bowl or other container and mix.
Carefully pour the mixture into the pint bag.
Close the bag, making sure it is completely sealed.
Put the pint bag into the gallon bag.
Remove the pint bag, open it up, and grab a spoon.
Enjoy!
71
Module 3: The Community Design Challenge
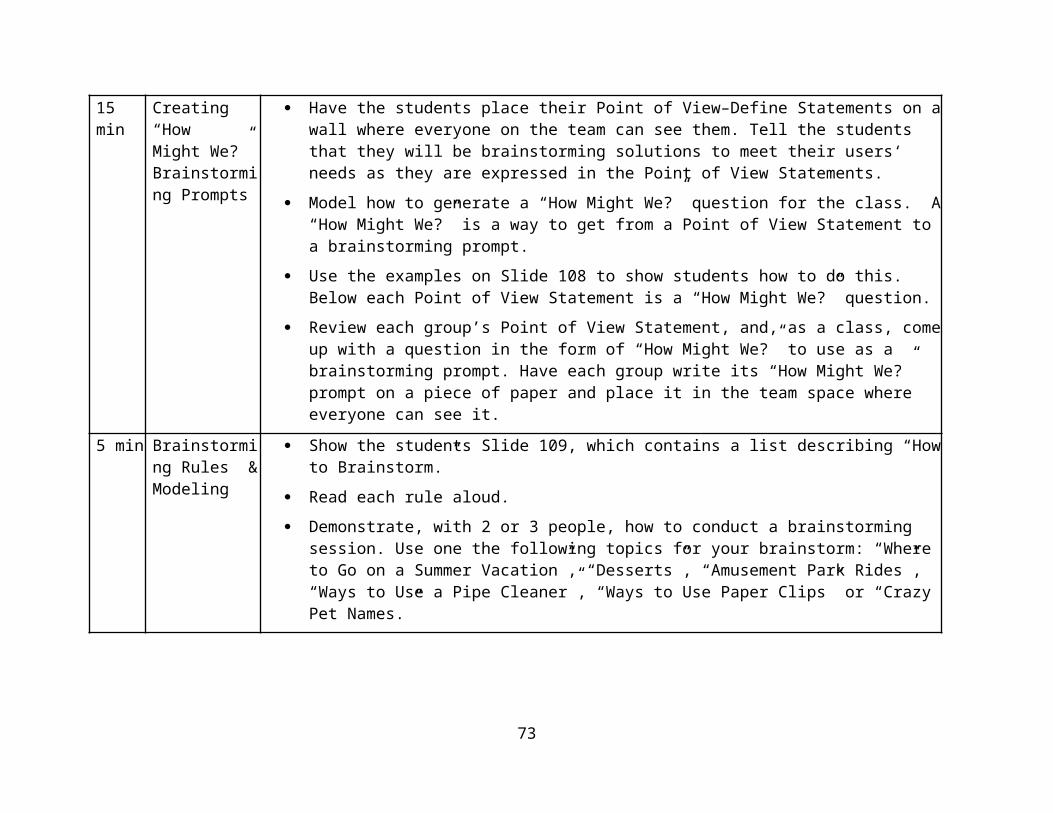
SECOND DESIGN CHALLENGE – REDESIGNING ENERGY ACCESS IN YOUR COMMUNITY
PART 1: INTERVIEWING AND EMPATHY MAPPING
Overview:This lesson is an introduction to the local design challenge: Redesigning Energy Access in Your Community, and it focuses on interviewing. Students will review and practice the interviewing skills they began developing in earlier lessons. First, students will play a game to get them warmed up for interviewing. Then they will review the objectives of critical interviewing. Next, they will practice interviewing in pairs. Then they will interview a teacher from a neighboring group to determine their energy needs. After the guest teacher leaves, the students will review what was learned and record their findings.
73
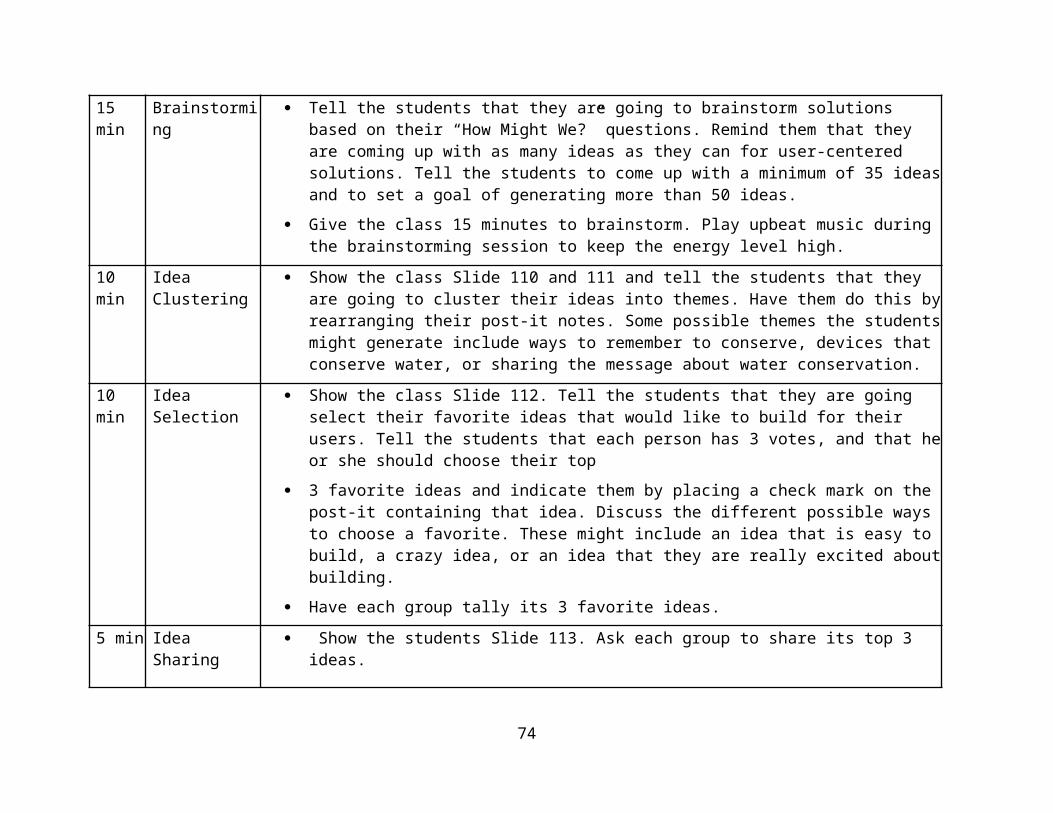
Learning Objectives:
Students will:
Become more confident in their ability to craft and deliver questions for interviewing Develop empathy for their user Practice interviewing skills Listen and respond to what they hear during the interview process Record what was said and what observed during the course of the interview
Materials/Resources:
Show Slides 127 to 131. Have students choose 3 interesting images from a magazine/ Internet – the images can depict anything. These should be mounted to a piece of cardboard so that they are not see-through. A fourth piece of cardboard without an image is also needed. When the 4 pieces of cardboard are held up the backsides should all look similar.
Forest Gump monologue movie clip or the Up! Movie clip Empathy map worksheet Volunteer interview worksheet
Lesson Outline
Time Activity Description15 min Questioning
game• Choose 4 students to be the interviewees.• Give the 4 students the 4 pieces of cardboard. 3 of them will have an image and the fourth will just
have a blank piece of cardboard. Tell the student without an image to imagine any image that they are going to pretend to be looking at. They need to be thinking of an image that they know well such that they can describe with enough detail to convince the interviewers that they actually have an image.
• Arrange the four interviewees at the front of the class. Tell the rest of the students that their goal is to discover which students have images and which one doesn't.
74

• Let the interviewees give a one-sentence description of their image.• Let the interviewers start asking questions (one at a time, and they have to direct their questions to just
one interviewee at a time).• After 5-7 minutes, take a vote to see if the students can guess who doesn't have an image.
3 min Interview Recap
Remind the students of the goals of a good interview: Listen to the speaker's words. Pay attention to the speaker's body language. Identify an energy-need that is specific to the interviewee.
10 min
Watch Forest Gump Monologue or Up! clip
Watch movie clip. Slide 131 http://www.youtube.com/watch?v=YwY9l38ouxE Have the students fill out the empathy map worksheet. Slide 132. Explain that students will complete this activity after their energy interview- this is a warm-up that will
help them remember what key points to listen for in the energy interview.
5 min Class Volunteer
Find a student who won't mind being at the front of the class. Ask a few questions- they can start out as scripted but follow up on any responses. For example:
o Tell me about how you used energy over the weekend.o Did you think about your energy usage yesterday?o What did you do over the weekend? (plus follow-up energy-related questions).
Ask the class to explain what the student said and then to interpret how they think he/she felt. Help the student make a connection between this and the previous empathy mapping activity.
10 min Pairs Practice
• Hand out one empathy map to each student.• Ask the students to get into pairs.• One student will be the interviewer and the other the interviewee, switch after 5 min.• Practice asking questions which allow the interviewer to tell their own story and get specific with
details. Encourage students to work hard to get their interviewees to share personal stories. Remind the students to find out energy needs that are specific to their partners.
5 minThe neighboring teacher arrives Pass out the volunteer interview worksheets to each student.
5 min New Teacher Introduction
Give the new teacher 3 minutes to introduce himself or herself. Tell how they like to enjoy their free time, what their biggest personal energy concern is, what their
75
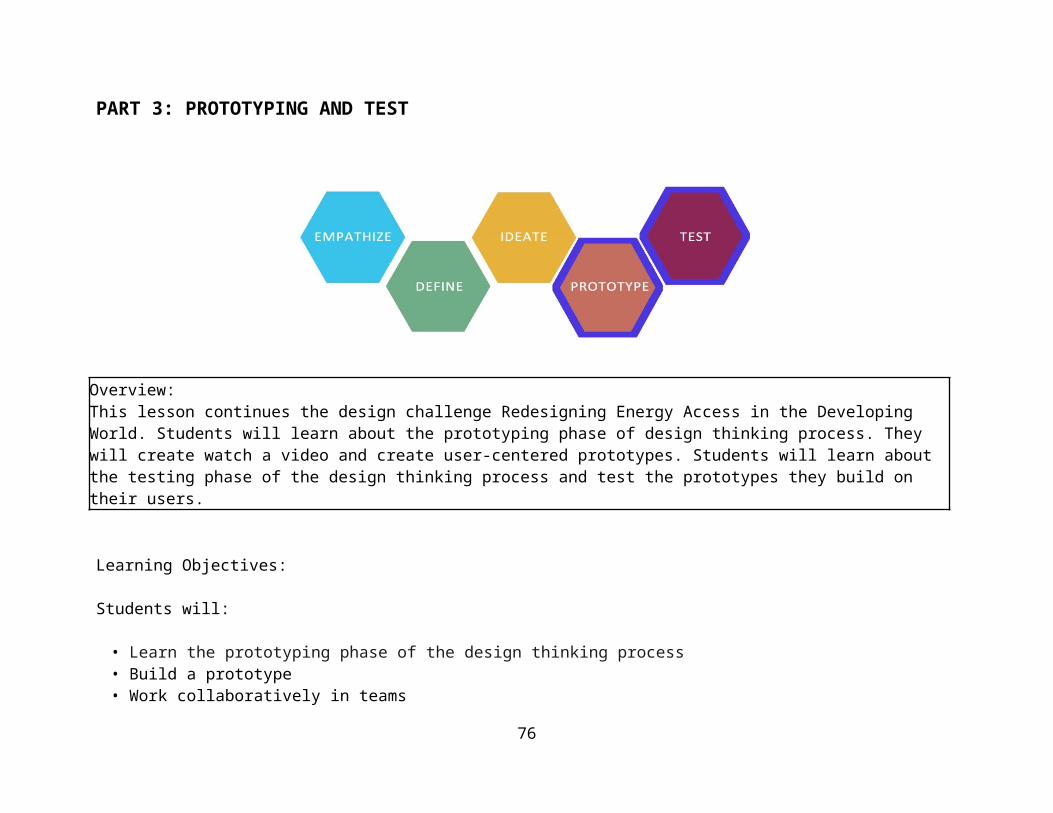
favorite part of summer school. Have the students take notes on the top part of the worksheet.
20 min Teacher Interview
Open the class up for questions. The students should be trying to get the teacher to tell detailed stories about their energy use that can be used to identify an energy need specific to the individual.
The goal is for each student should ask a question. The students should be taking notes, writing down quotes from the interview, and detailed observations
about the teacher’s body language.
2 min The teachers switch back Teachers return to their original class.
10 min Small Group Recording
In the same small groups, have the students summarize what was said. Fill in the think/feel side of the empathy map. Each group should come up with 5 or more bullet points that highlight the main points of the interview
or give some memorable quotes and observations about body language.
10 min Class Recap Briefly discuss the students' assessments. Have each student name one thing that they believed was a need for their interviewee.
76
PART 2: THE POINT-OF-VIEW STATEMENT
Overview:This lesson continues the design challenge Redesigning Energy Access in Your Community. Students will review the define phase of design thinking process. They will create Point of View statements based on the needs they uncovered during their user interviews.
Learning Objectives:
Students will:
• Practice the define phase of the design thinking process• Create a Point of View statement based on user needs
Materials/Resources:
• Review Define and the Point of View Madlib in the Teacher Guide prior to beginning the lesson.
Per Team (Each team has 4-6 students.)
77
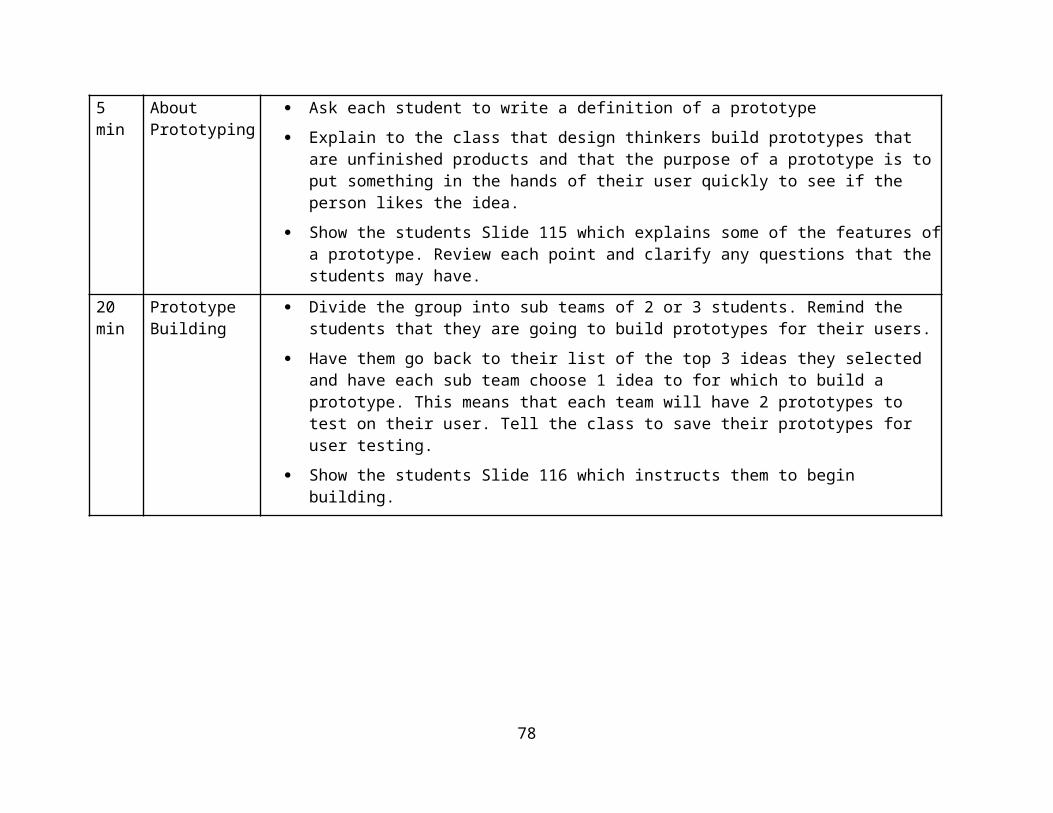
• Markers (One per person) • One large piece of chart or butcher paper
Note: You may choose to create a blank Point of View Statement for each team prior to the lesson or have each team construct their Own. Make this decision based on your students’ needs
Lesson Outline
Time Activity Description2 min The Design
Thinking Process:Define
Tell the students that they will be continuing the design challenge Redesigning Energy Access in Your Community. Prompt students to share out what has already been done on this challenge and make predictions about what they will be doing next.
8 min Point of View Statement Refresher
Show the students Slide 137 and tell them that the next thing they are going to do using their interview data is to construct a Point of View Statement. Remind the class that the purpose of a Point of View Statement is to synthesize their interview data, and that they will use this statement to help solve the design challenge for their users. Go around the class and ask each student to share 1 tip for creating an effective Point of View Statement.
Show the students Slide 138, which highlights the structure of a Point of View Statement. Review the three parts of a Point of View Statement: a user description, a need, and a surprising insight. Remind the students that they will get the information to create a Point of View Statement from their interviews with their users.
15 min Creating Point of View Statements
Have the students work in their design teams and tell them that they are going to create Point of View Statements for their users. Give each group a blank piece of chart paper and have them fill in the three parts of a Point of View Statement from Slide 139.
Give the students 15 minutes and tell them to create 2 Point of View Statements. As the students work, go to each group and clarify any questions the students might have.
78
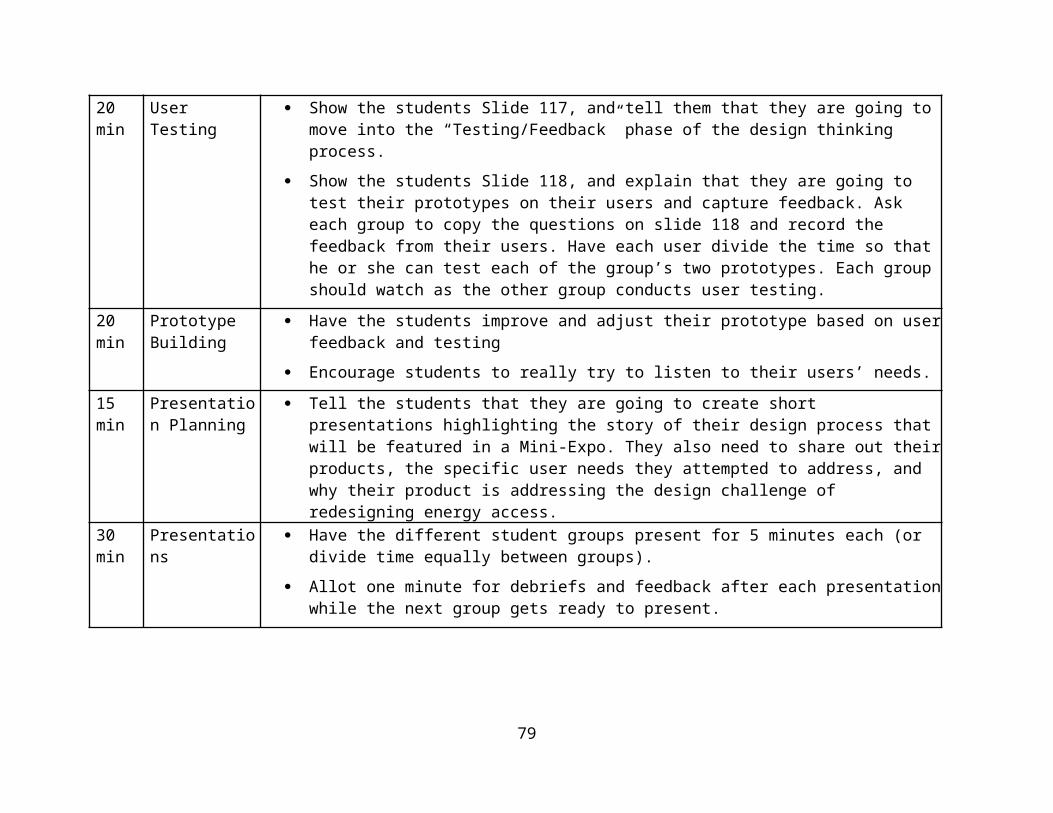
15 min Sharing & Critiquing Point of View Statements
Have each group share its Point of View Statements with the entire class. Discuss the statements using the following questions:
o Could we think of many solutions to meet the need that is described in the Point of View Statement?
o Is there a clear description of the user, the need and the insight? Ask each group to choose one Point of View Statement that they will use to create How Might
We Questions in the next phase of the challenge.5 min Class
Discussion Ask students to write or sketch a response in their journals to the following prompt:
o What does it mean to be a human-centered designer?
79
PART 3: IDEATION (BRAINSTORMING)
Overview:This lesson continues the design challenge Redesigning Energy Access in Your Community. Students will learn about the ideate phase of design thinking process. They will review the rules of brainstorming and brainstorming techniques, and participate in a brainstorming session.
Learning Objectives:
Students will:
• Learn the ideate phase of the design thinking process• Review the rules of brainstorming• Review brainstorming techniques and best practices• Participate in a brainstorming session
Materials/Resources:
●Review Ideation including the Brainstorm Rules, and How to Facilitate a Brainstorm in the Teacher Guide prior to beginning the lesson.
80
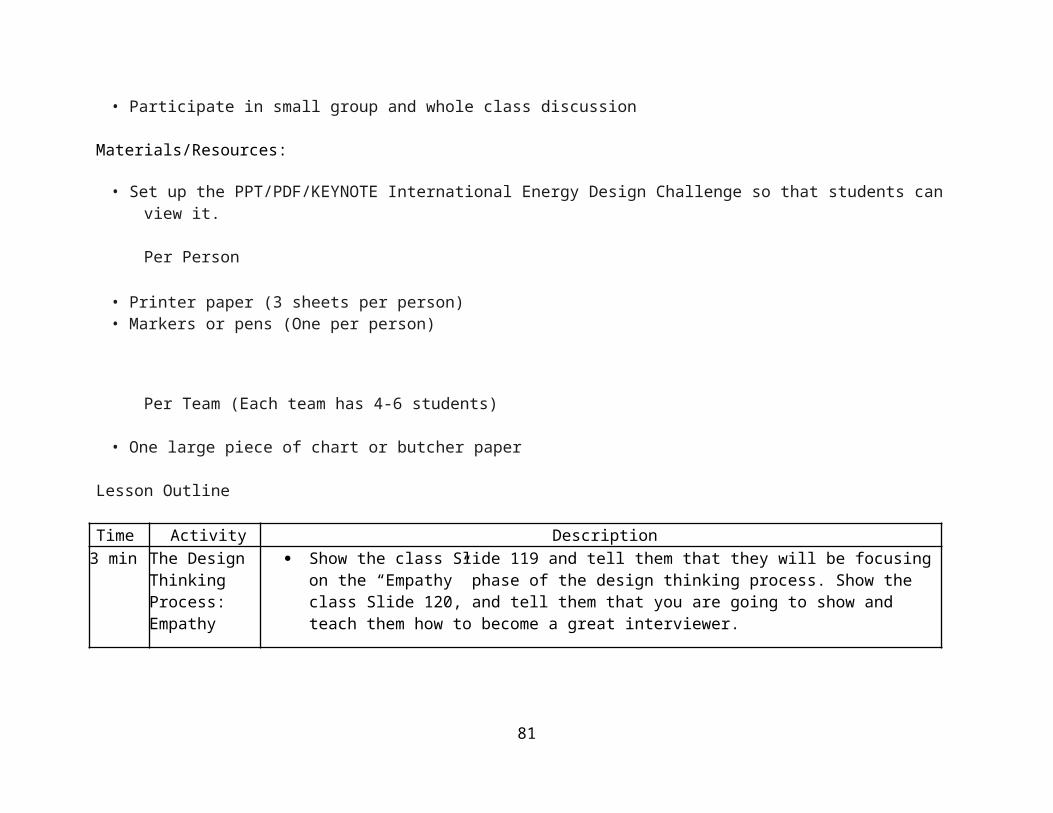
Per Team/Person (Each team has 4-6 students)
●1 marker per person ●A Copy of the team Point of View Statement ●One large piece of chart or butcher paper for writing “How Might We Questions”●One pack of Post-it notes per person in team spaces
Lesson Outline
Time Activity Description2 min The Design
Thinking Process:Ideate
Tell the students that they will be continuing the design challenge Redesigning Energy Access in Your Community.
Show the class Slide 140 and tell the students that they are going to begin the “ideate” phase of the design thinking process. Explain that ideation is a way for them to generate many possible potential solutions to meet the needs of their users.
5 min Brainstorming Mindsets
Show the students Slide 141 and explain to the class that brainstorming is built upon mindsets, and that mindsets are a “road map” for how things are done. Go around the class and ask each student to share 1 tip for an effective brainstorming session.
Show the students Slides 142-149, which feature the fundamental mindsets that underlie the ideation process in design thinking. Clarify any questions students might have as they view each slide.
81
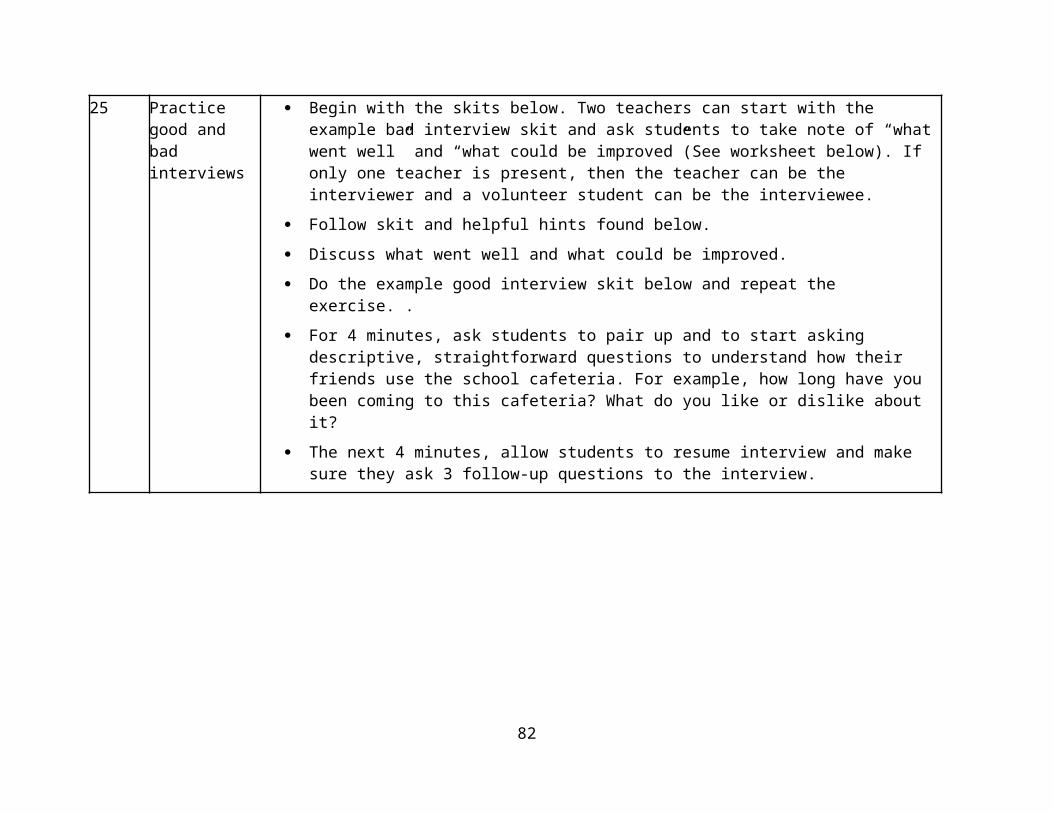
15 min Creating “HowMight We?”Brainstorming Prompts
Have the students place their Point of View Statements on a wall where everyone on the team can see them. Tell the students that they will be brainstorming solutions to meet their users‘ needs as they are expressed in the Point of View Statements.
Review how to generate a “How Might We?” question for the class. A “How Might We?” is a way to get from a Point of View Statement to a brainstorming prompt. Use the examples on slide 162 to practice. Read the Point of View Statement, and then ask the class to turn it into a “How Might We?” question.
Review each group’s Point of View Statement. As a class, come up with a question in the form of “How Might We?” to use as a brainstorming prompt. Have each group write its “How Might We?” prompt on a piece of paper and place it in the team space where everyone can see it.
5 min Brainstorming Rules & Modeling
Show the students Slide 149, which contains a list describing “How to Brainstorm.” Ask for 4 volunteers to demonstrate how to conduct a brainstorm. Use one the following
topics for your brainstorm: “How to Have a Great Birthday Party”, “How to Keep From Being Bored,” or “How to Be a Great Friend.” You can also ask students to choose a topic for the brainstorm.
15 min Brainstorming Tell the students that they are going to brainstorm solutions based on their “How Might We?” questions. Remind them that they are coming up with as many ideas as they can for user-centered solutions. Tell the students to come up with a minimum of 35 ideas and to set a goal of generating more than 50 ideas.
Give the class 15 minutes to brainstorm. Play upbeat music during the brainstorming session to keep the energy level high.
3 min Debrief Ask the students to share their brainstorming experiences with the entire group by responding to the phrase “I like_______________” or “I wish __________.”
82
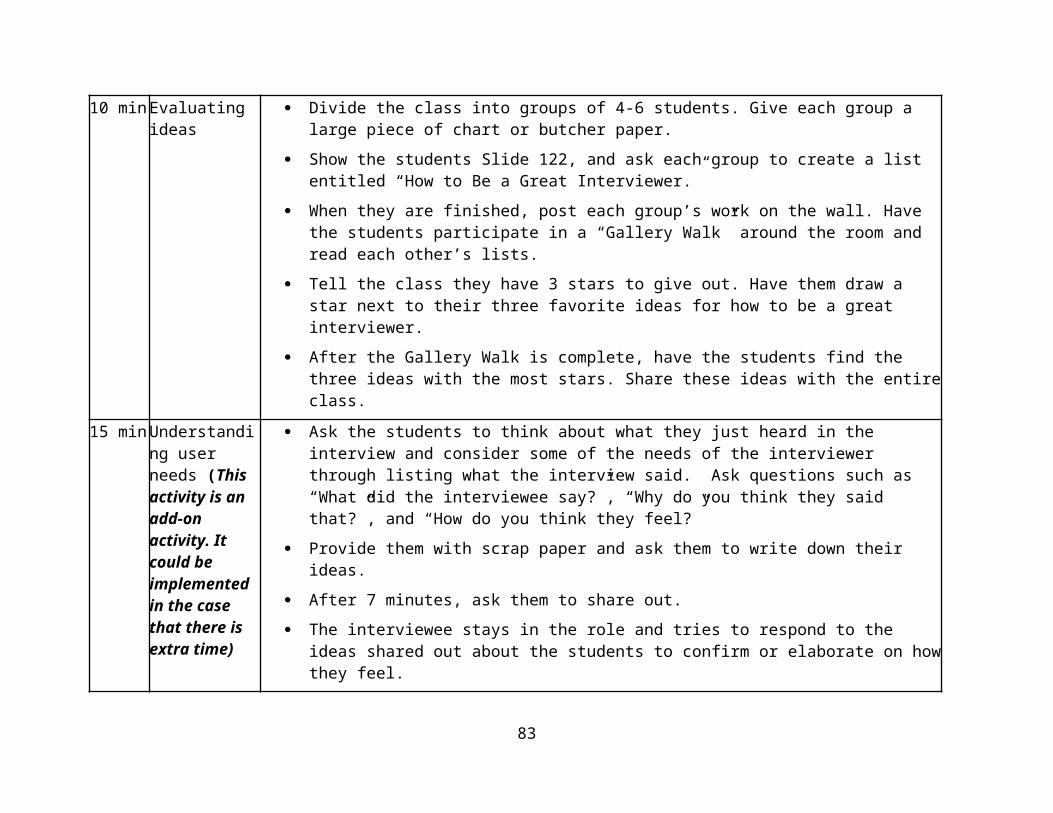
PART 5: IDEATION & PROTOTYPING
Overview:This lesson continues the design challenge Redesigning Energy Access in Your Community. Students will learn about the ideate phase of design thinking process. They will cluster the ideas they have generated in themes. After an idea is selected, they will build prototypes.
Learning Objectives:
Students will: • Cluster ideas thematically • Select ideas• Build prototypes
Materials/Resources:
Per Team/Person (Each team has 4-6 students)
• 1 Sharpie marker per person • Creation Station
83
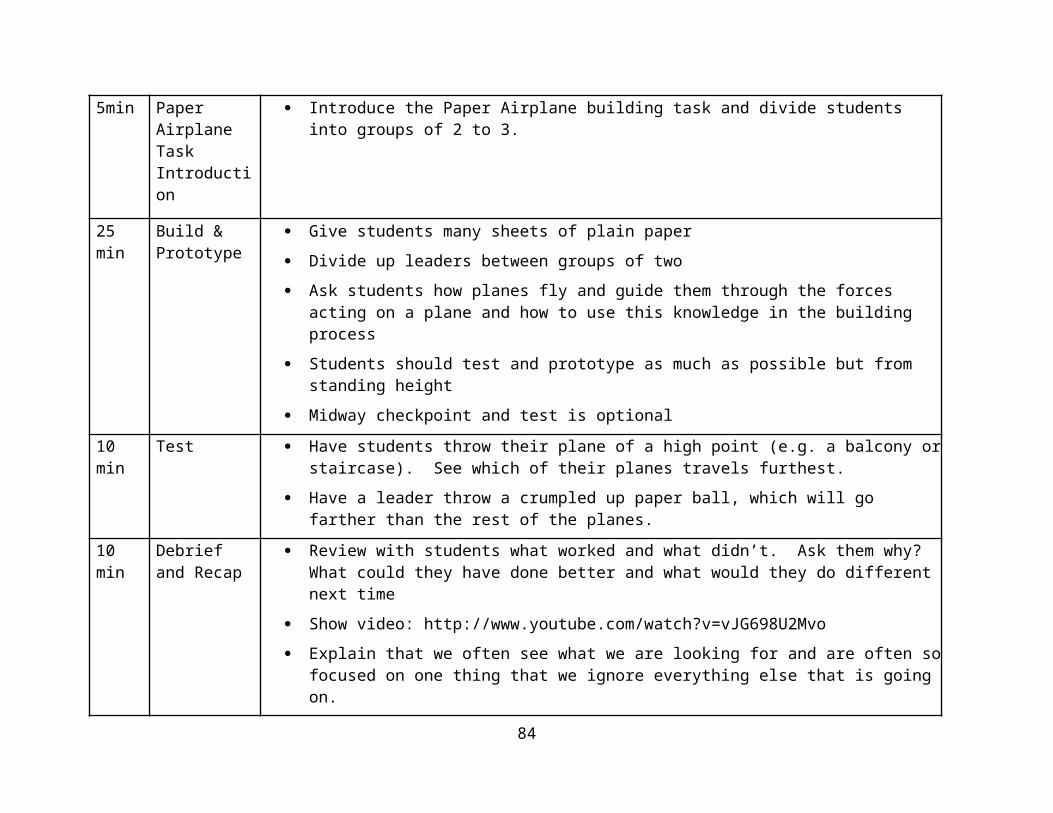
Lesson Outline
Time Activity Description2 min The Design
Thinking Process:Ideate
Tell the students that they will be continuing the design challenge Redesigning Energy Access in Your Community .
Show the class Slide 153 and tell them students that they continue working on the “ideate” phase of the design thinking process.
5 min Idea Clustering Tell students that they are going to cluster their ideas into themes. Have them do this by rearranging their post-it notes.
8 min Idea Selection Show the class Slide 154. Tell the students that they are going select their favorite ideas that would like to build for their users.
Tell the students that each person has 3 votes, and that he or she should choose their top three favorite ideas and indicate them by placing a check mark on the post-it containing that idea. Discuss the different possible ways to choose a favorite. These might include an idea that is easy to build, a crazy idea, or an idea that they are really excited about building.
Have each group tally its 3 favorite ideas.
3 min Prototyping Refresher
Show the students slide 169. Tell the students that they are working in the prototyping phase of the design thinking process. Ask each student to share 1 tip for building a good prototype.
12 min Prototype Building
Divide the group into sub-teams of 2 or 3 students so each sub-group can build a prototype. Remind the students that they are going to build prototypes for their users.
Have each sub-team build 2 different versions of the idea that was selected by the entire team. This means that each team will have 2 different prototypes of the same idea to test on their user.
84

15 User Testing Show the students Slide 155 and tell them that they are going to move into the “Testing/Feedback” phase of the design thinking process.
Show the students Slide 156 and explain that they are going to test their prototypes on their users and capture feedback. Ask each group to copy the questions on Slide 156 and record the feedback from their users. Have each user divide the time so that he or she can test each of the group’s two prototypes. Each sub-team should watch as the other conducts user testing.
85
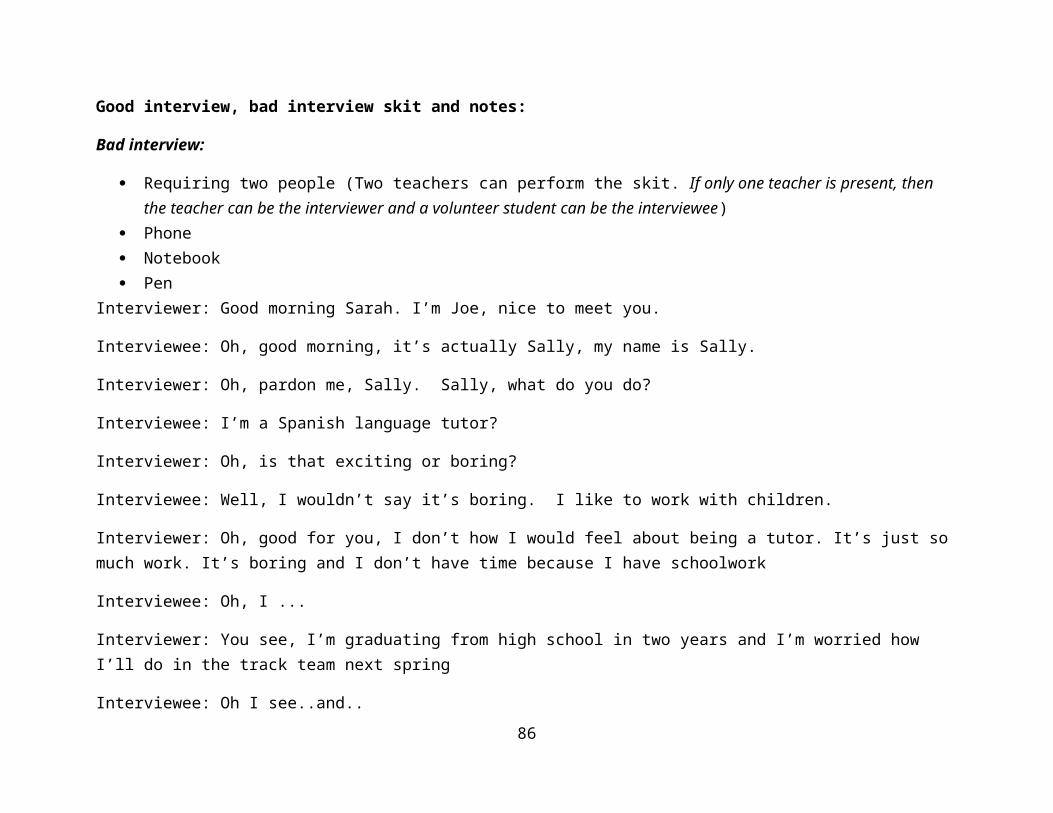
THE MARSHMALLOW CHALLENGE
Overview:Using popsicle sticks and marshmallows, groups must try to build a structure that extends off of a tabletop. The winning team is one with the furthest extending structure.
Learning Objectives:
Students will:
• Work in teams and cooperate• Problem solve • Reflect on good engineering methods
Materials/Resources:
• Popsicle sticks• Marshmallows• Tape
Lesson Outline
Time Activity Description
86
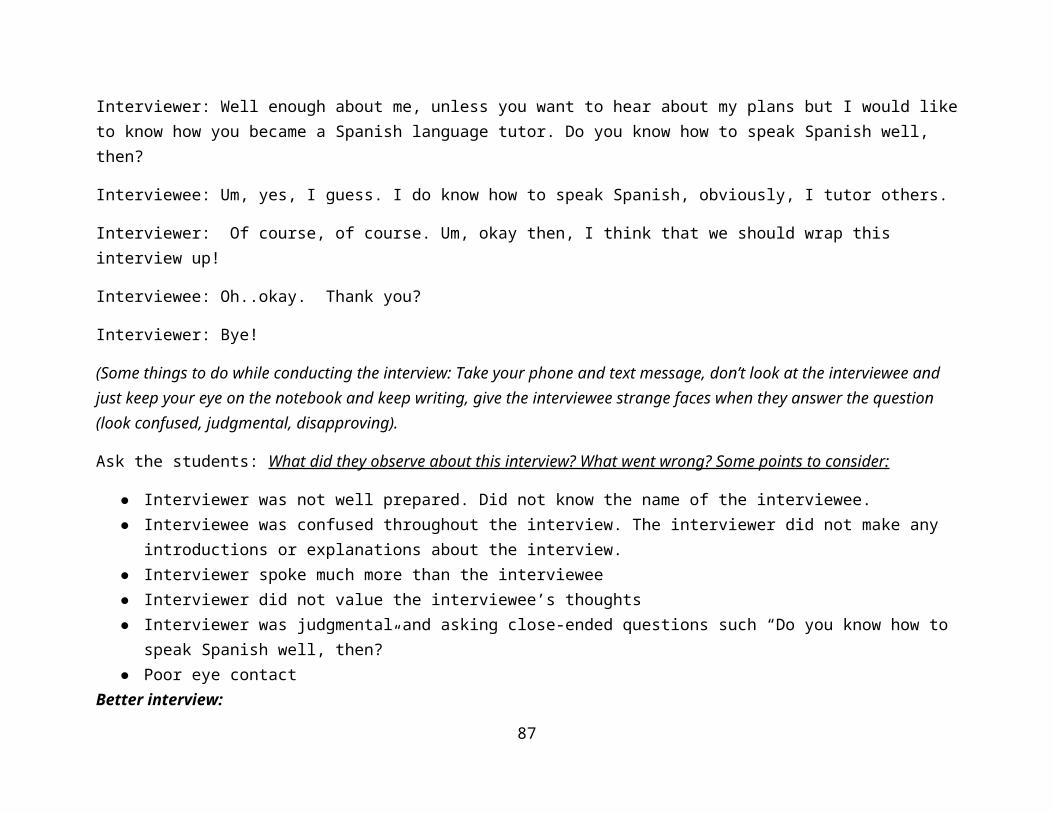
3 min Introduce the project
Show the students the materials and Slide 158 and explain the activity. Divide the students into groups of 3-4.
10 min 1st round of building
Before explaining too much, let the students explore the materials and try different designs. Encourage them to think critically about what they are designing.
5 min Debrief/ Discussion
Discuss about the approaches and methods that worked best in small groups.
5 min Pushing exercise
Have the students pair off amongst themselves. One partner should stand with their feet together while the other tries to push them off
balance. This should be easy. Next, the first partner should spread their feet out wide and have the second partner again
attempt to push them off balance. This should be harder to achieve.
2 min Wide base discussion
Explain the concept of a foundation in structures. Wider bases allow for more stability.
15 min Rebuild Now have the students restart their structures. This time, they should incorporate the effective approaches from the last trial and avoid the
ineffective ones. Encourage them to use the concept of wide bases that they just learned about.
5 min Measuring Measuring all the teams’ structures (measure from end of structure to tip of the table in the horizontal direction).
Declare the winner (and give them a prize!).10 min Discussion This time in a larger group, have the winning team talk about their strategies and how they
were able to accomplish building a successful structure. Ask if anyone else has anything to add about his or her learning.
5 min Clean-Up Clean up the structures and wipe countertops (sticky from the marshmallows).
87
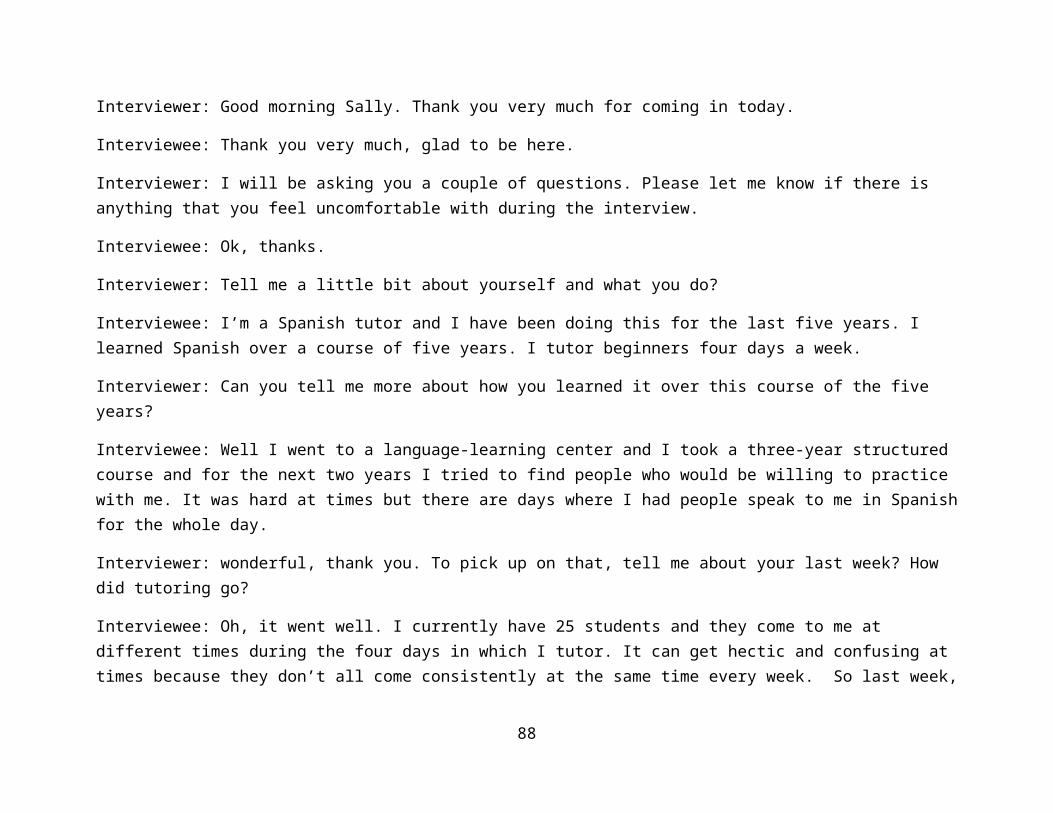
88