Embed Size (px)
Citation preview

ECE3829/574 Using MMCMs
Jim Duckworth, September 2015 1
This tutorial shows how to create a simple project with a MMCM (Mixed-Mode Clock Manager) using
Xilinx Vivado Design Suite. (Verilog Example)
In this example we instantiate an MMCM to generate a 10MHz clock from the 100MHz oscillator
connected to the FPGA.
Create a new project and verify the Tools => Project Settings => General => Target Language is set to
Verilog.
Create a simple module with the following ports and counter logic:
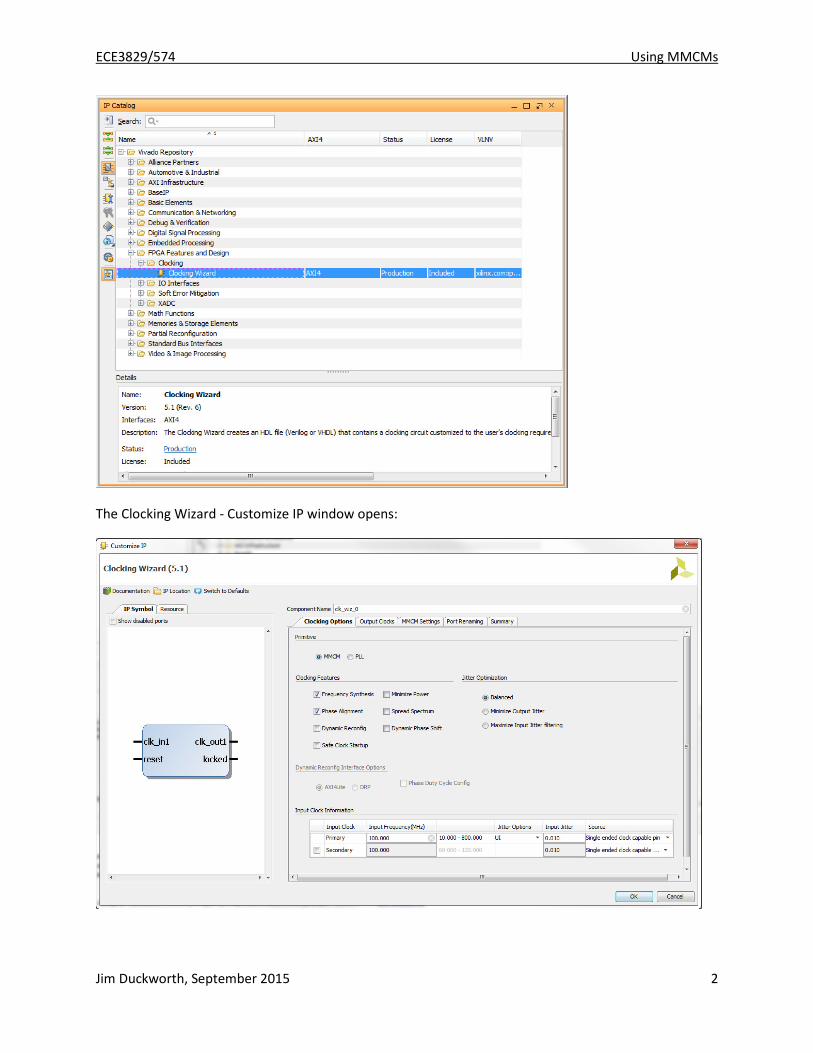
Select the IP Catalog in the Project Manager and select the clocking wizard:
ECE3829/574 Using MMCMs
Jim Duckworth, September 2015 2
The Clocking Wizard - Customize IP window opens:

ECE3829/574 Using MMCMs
Jim Duckworth, September 2015 3
In the Output Clocks tab select 10MHz for the clk_out1 frequency:
In the Port Renaming tab, change the port name to clk_10M:

ECE3829/574 Using MMCMs
Jim Duckworth, September 2015 4
Click OK
Click on Generate.
The MMCM is now added to the available design sources:
ECE3829/574 Using MMCMs
Jim Duckworth, September 2015 5
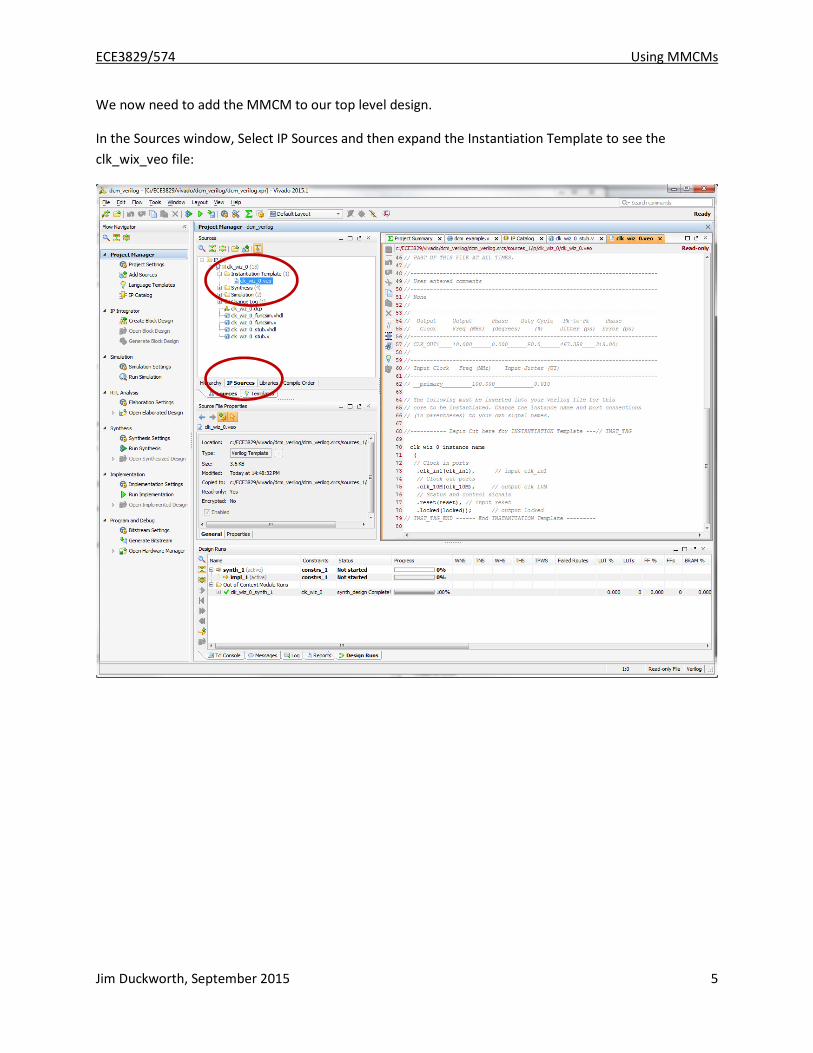
We now need to add the MMCM to our top level design.
In the Sources window, Select IP Sources and then expand the Instantiation Template to see the
clk_wix_veo file:

ECE3829/574 Using MMCMs
Jim Duckworth, September 2015 6
Select the lines at the bottom of the file for the instantiation template (select the lines and use ctrl C to
copy):
Back in your top level file, paste the instantiation template and modify the signal names to match your
connections:
You can now synthesize and implement this design.