Embed Size (px)
Citation preview

MIR TO DISK CONFIGURATION
OVERVIEW
In the past the only method available to transfer a MIR (Machineable Interface Record) accounting data record was to use a serial port and cable running from a workstation running GPM or a print server to a serial port on the workstation receiving the MIR record.
Globalware 3.2 and the latest versions of TRAMS and TRAVCOM now support a MIR transfer method named MIR to Disk. When a GPM MIR Link is setup for MIR to Disk the MIR records can be sent to a default folder named C:\MIR on the workstation running GPM or sent across the LAN cabling to a hard drive folder shared on another workstation. If the MIR data is to be sent to a shared folder on another workstation, that workstation must be on the same LAN as the workstation running GPM.
If you want the MIRs to be sent to a shared folder on another workstation on the LAN, go to page 6 for WINDOWS 95/98/Me or page 13 for WINDOWS 2000/XP instructions. .
MIR TO DISK CONFIGURATION (LOCAL C DRIVE)
Note: These steps are performed at the workstation running GPM.
1. If GPM is active close it. Click Start, Programs, Galileo Print Manager,
Configurations. Note: In the example shown the itinerary printer is a TI810. The itinerary printer may also be a Lexmark 2380 or customer owned printer.
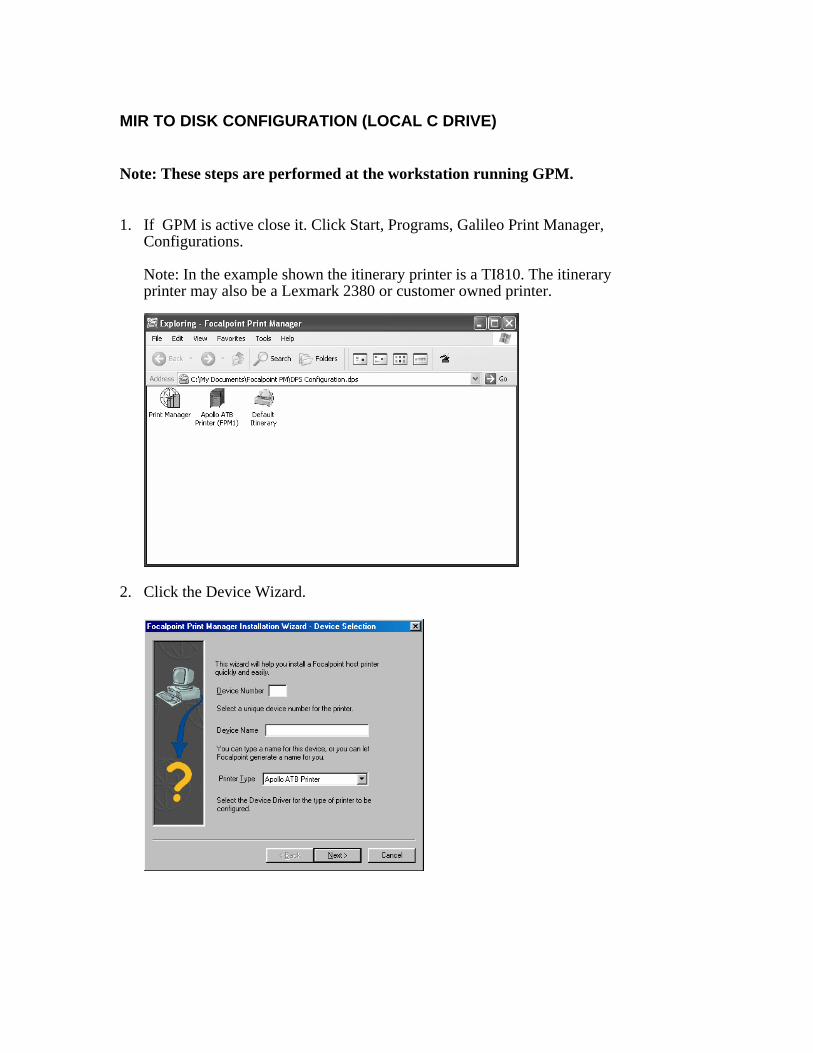
2. Click the Device Wizard.
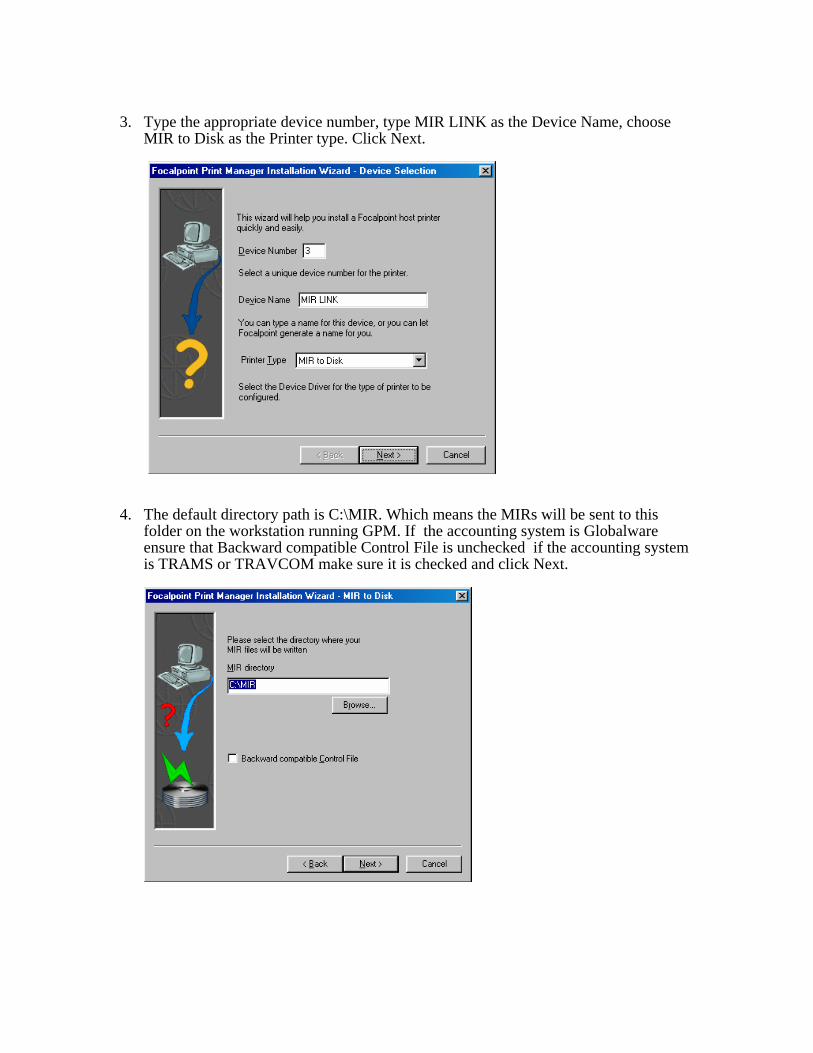
3. Type the appropriate device number, type MIR LINK as the Device Name, choose
MIR to Disk as the Printer type. Click Next.
4. The default directory path is C:\MIR. Which means the MIRs will be sent to this
folder on the workstation running GPM. If the accounting system is Globalware ensure that Backward compatible Control File is unchecked if the accounting system is TRAMS or TRAVCOM make sure it is checked and click Next.
5. Click Yes to create the C:\MIR directory.
6. Click Next when the Comments screen displays.
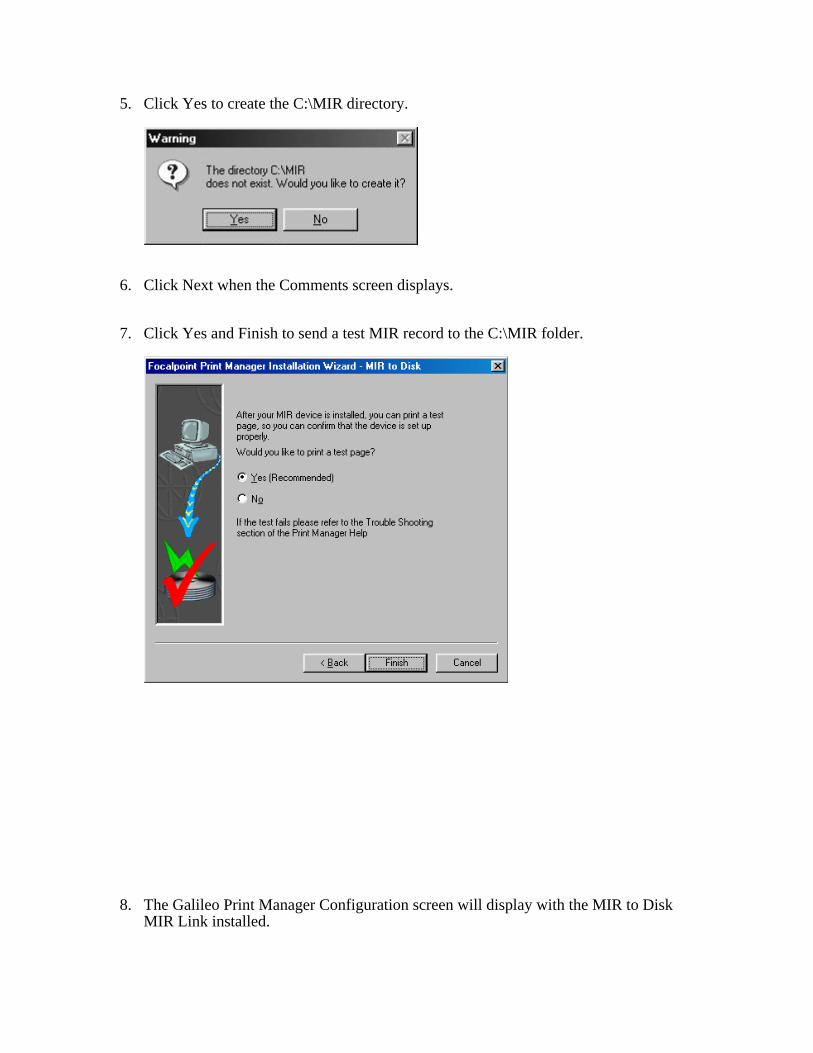
7. Click Yes and Finish to send a test MIR record to the C:\MIR folder.
8. The Galileo Print Manager Configuration screen will display with the MIR to Disk
MIR Link installed.
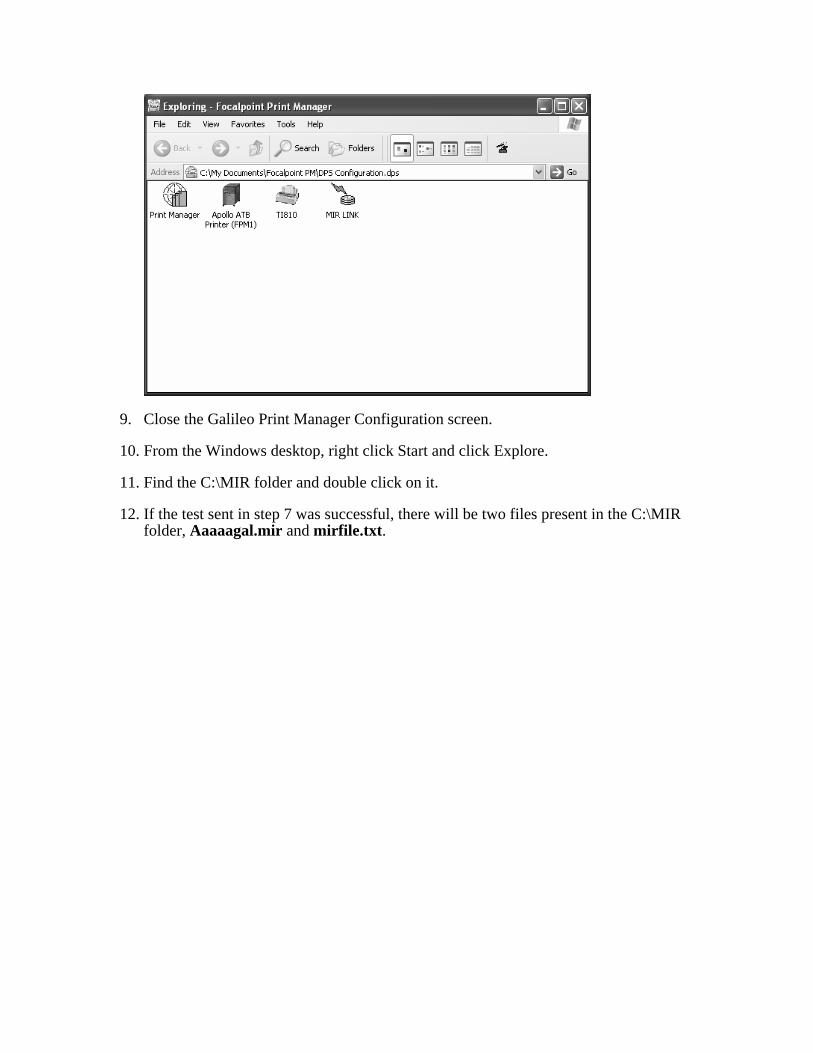
9. Close the Galileo Print Manager Configuration screen.
10. From the Windows desktop, right click Start and click Explore.
11. Find the C:\MIR folder and double click on it.
12. If the test sent in step 7 was successful, there will be two files present in the C:\MIR folder, Aaaaagal.mir and mirfile.txt.
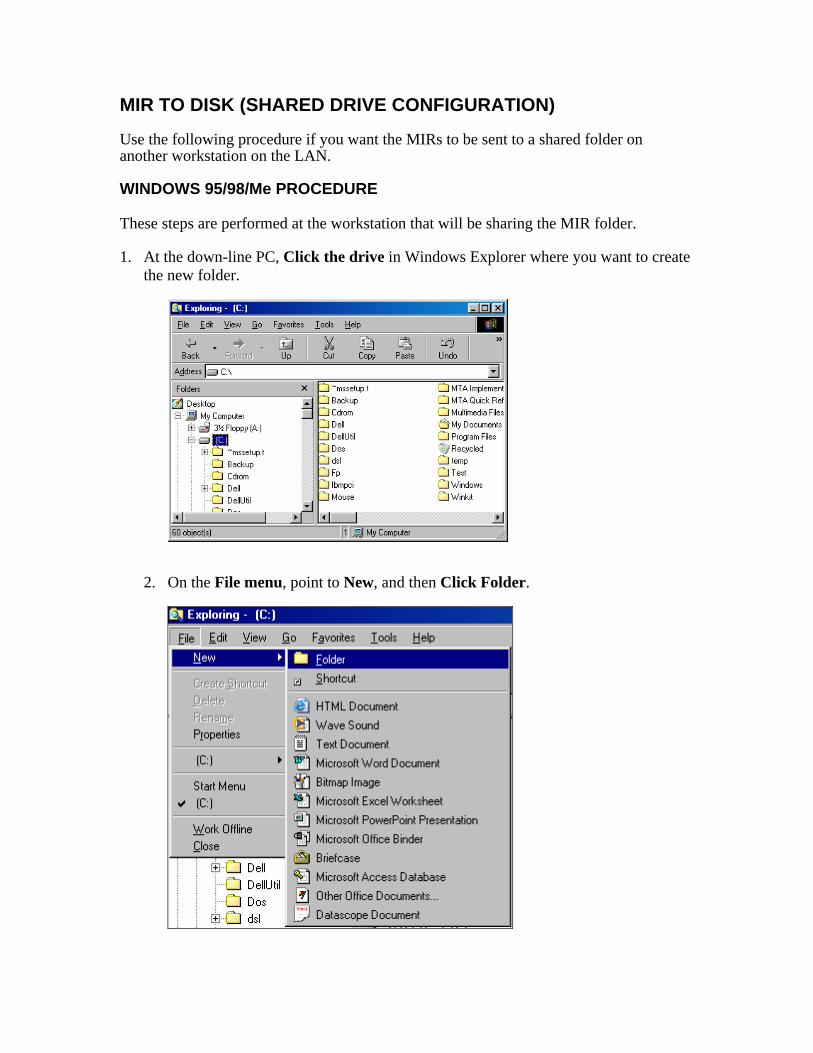
MIR TO DISK (SHARED DRIVE CONFIGURATION) Use the following procedure if you want the MIRs to be sent to a shared folder on another workstation on the LAN. WINDOWS 95/98/Me PROCEDURE These steps are performed at the workstation that will be sharing the MIR folder. 1. At the down-line PC, Click the drive in Windows Explorer where you want to create
the new folder.
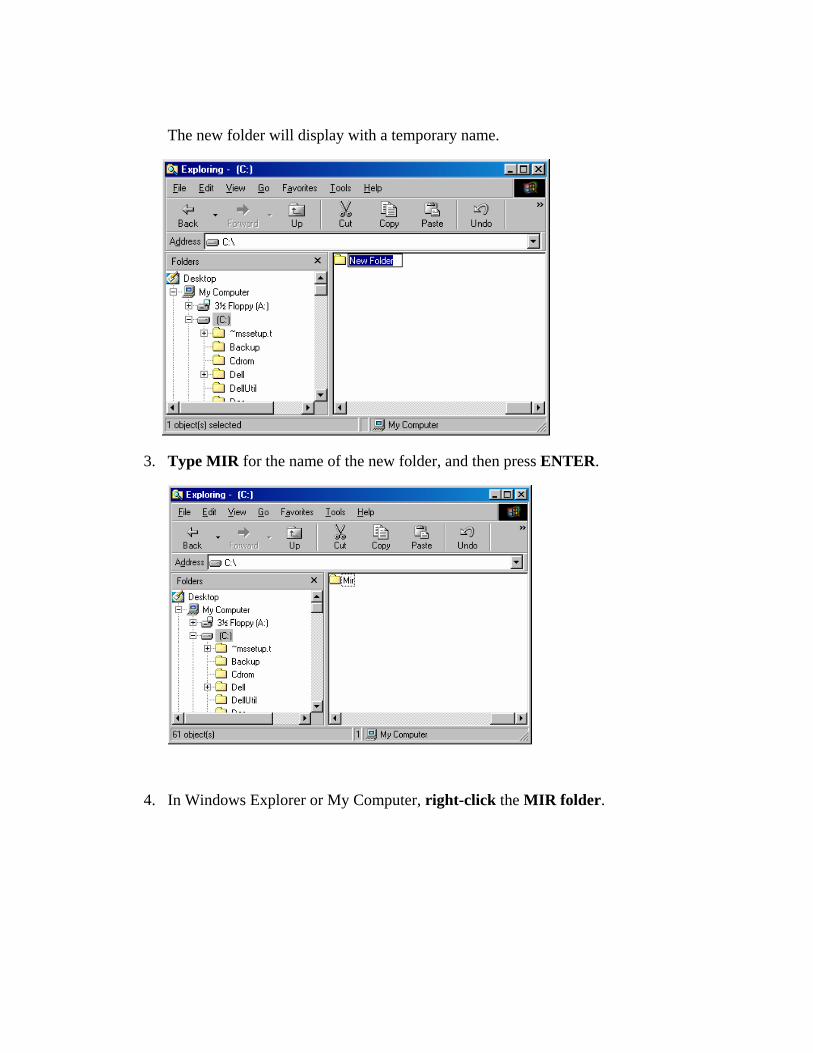
2. On the File menu, point to New, and then Click Folder.
The new folder will display with a temporary name.
3. Type MIR for the name of the new folder, and then press ENTER.
4. In Windows Explorer or My Computer, right-click the MIR folder.
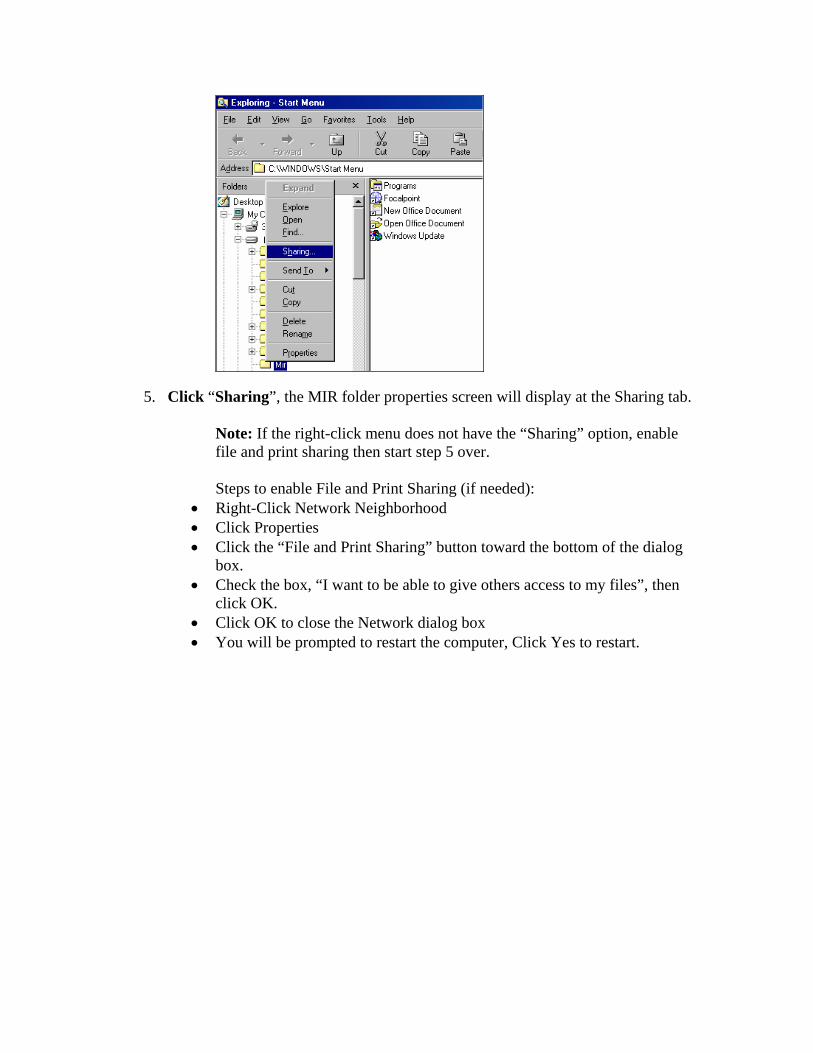
5. Click “Sharing”, the MIR folder properties screen will display at the Sharing tab.
Note: If the right-click menu does not have the “Sharing” option, enable file and print sharing then start step 5 over.
Steps to enable File and Print Sharing (if needed):
• Right-Click Network Neighborhood • Click Properties • Click the “File and Print Sharing” button toward the bottom of the dialog
box. • Check the box, “I want to be able to give others access to my files”, then
click OK. • Click OK to close the Network dialog box • You will be prompted to restart the computer, Click Yes to restart.
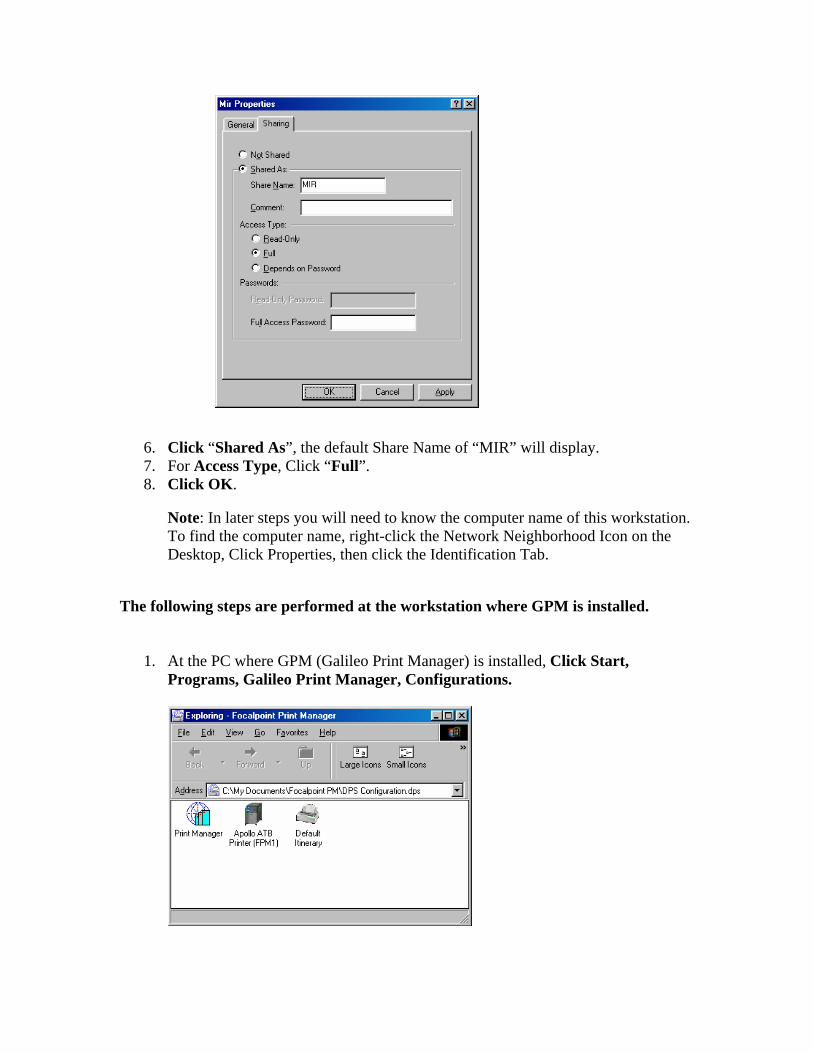
6. Click “Shared As”, the default Share Name of “MIR” will display. 7. For Access Type, Click “Full”. 8. Click OK.
Note: In later steps you will need to know the computer name of this workstation. To find the computer name, right-click the Network Neighborhood Icon on the Desktop, Click Properties, then click the Identification Tab.
The following steps are performed at the workstation where GPM is installed.
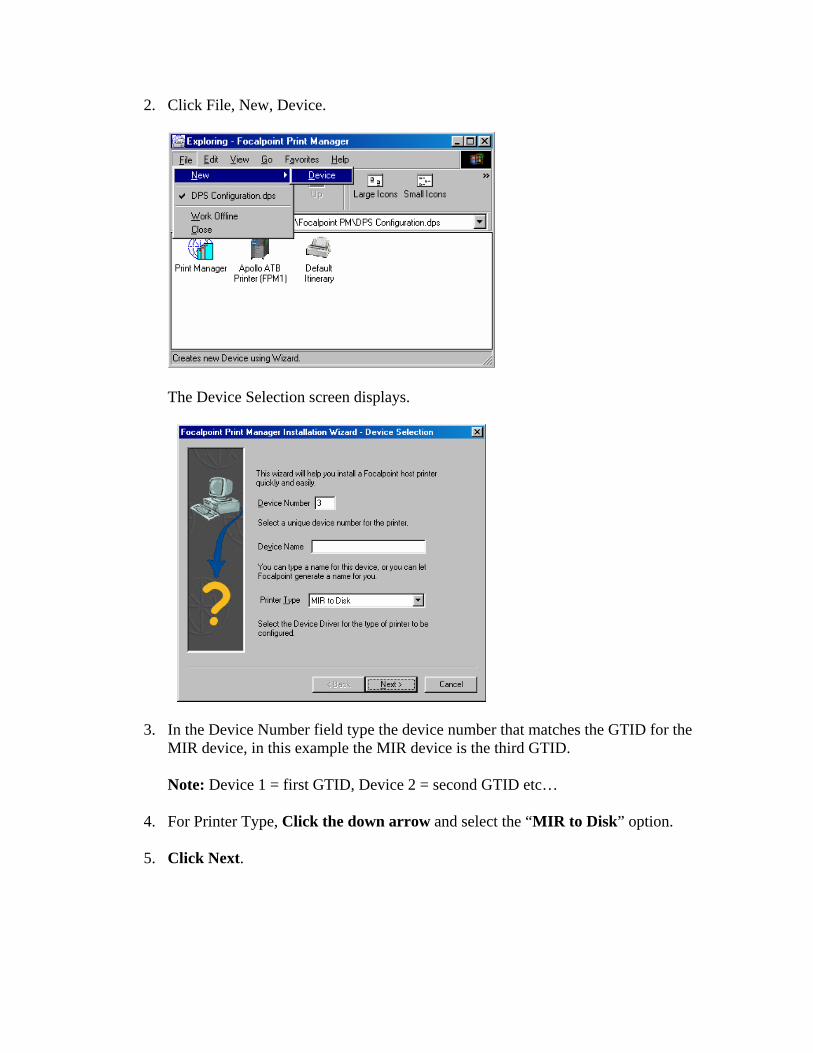
1. At the PC where GPM (Galileo Print Manager) is installed, Click Start, Programs, Galileo Print Manager, Configurations.
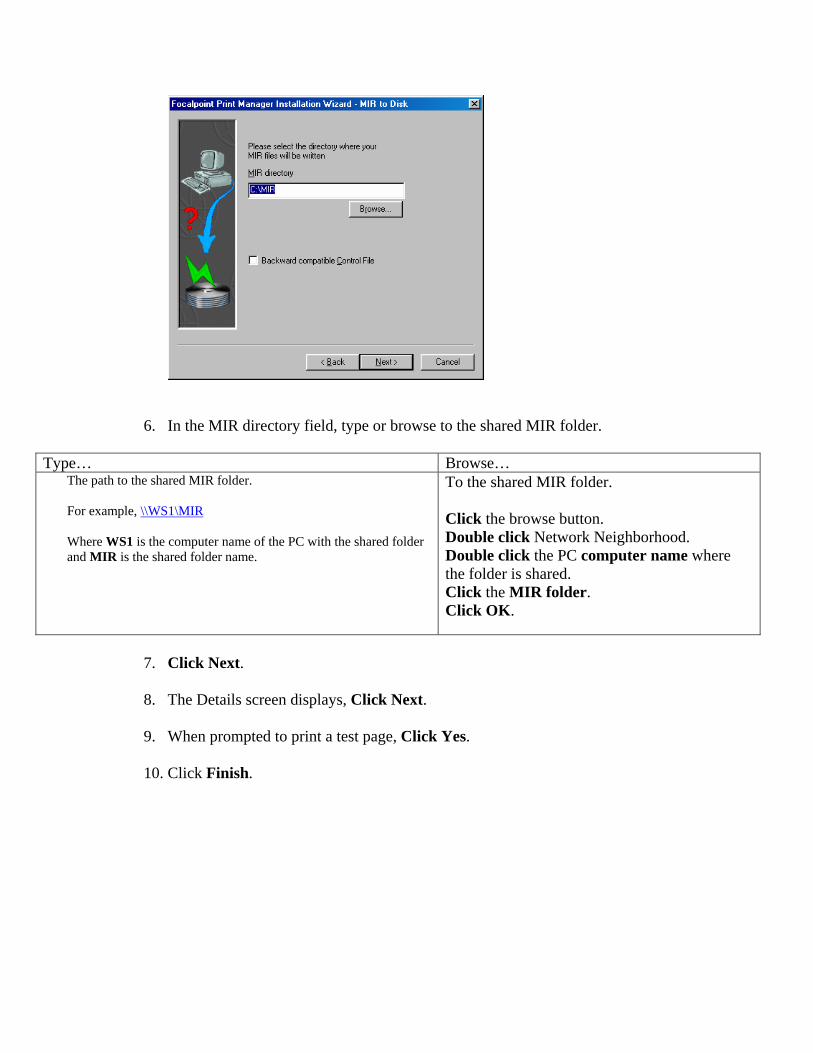
2. Click File, New, Device.
The Device Selection screen displays.
3. In the Device Number field type the device number that matches the GTID for the MIR device, in this example the MIR device is the third GTID.
Note: Device 1 = first GTID, Device 2 = second GTID etc…
4. For Printer Type, Click the down arrow and select the “MIR to Disk” option.
5. Click Next.
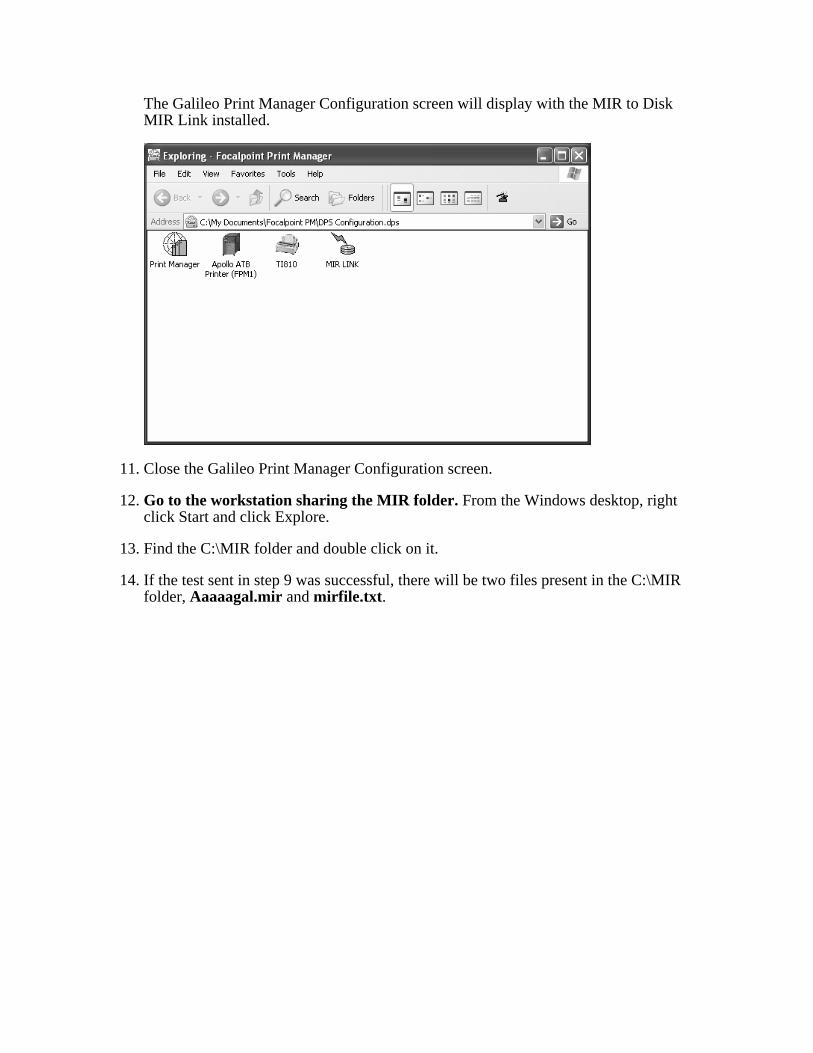
6. In the MIR directory field, type or browse to the shared MIR folder.
Type… Browse… The path to the shared MIR folder. For example, \\WS1\MIR Where WS1 is the computer name of the PC with the shared folder and MIR is the shared folder name.
To the shared MIR folder. Click the browse button. Double click Network Neighborhood. Double click the PC computer name where the folder is shared. Click the MIR folder. Click OK.
7. Click Next.
8. The Details screen displays, Click Next.
9. When prompted to print a test page, Click Yes.
10. Click Finish.
The Galileo Print Manager Configuration screen will display with the MIR to Disk MIR Link installed.
11. Close the Galileo Print Manager Configuration screen.
12. Go to the workstation sharing the MIR folder. From the Windows desktop, right click Start and click Explore.
13. Find the C:\MIR folder and double click on it.
14. If the test sent in step 9 was successful, there will be two files present in the C:\MIR folder, Aaaaagal.mir and mirfile.txt.
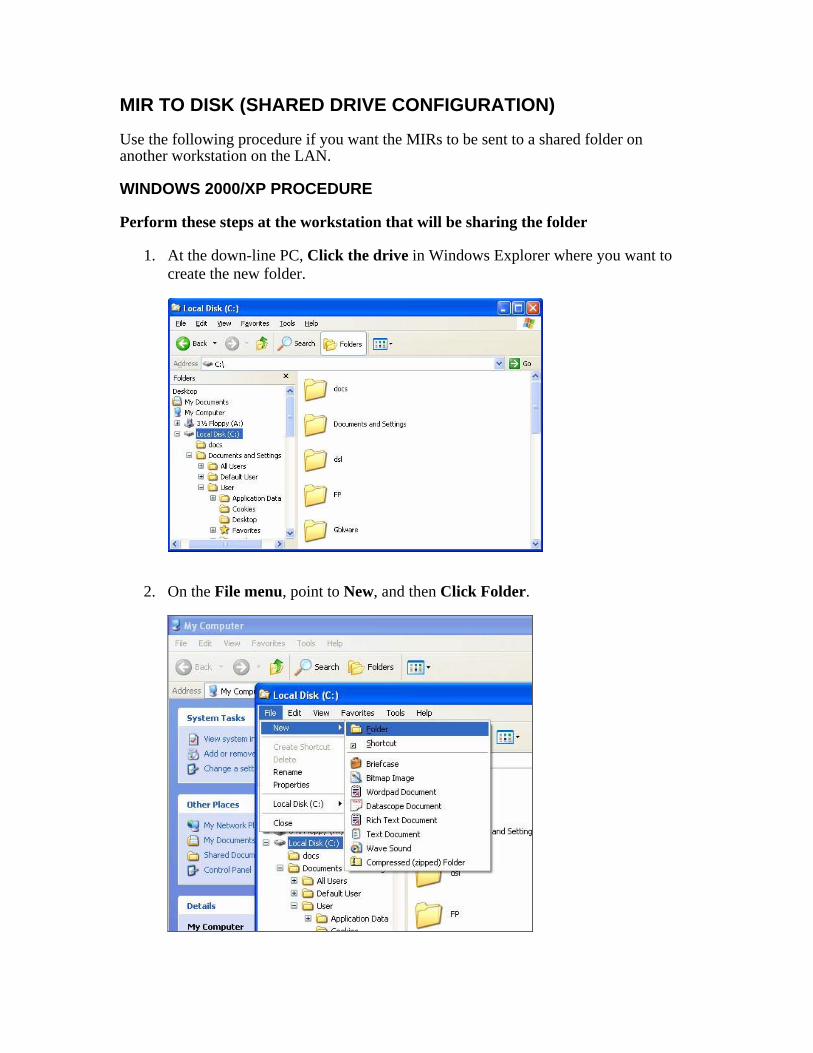
MIR TO DISK (SHARED DRIVE CONFIGURATION) Use the following procedure if you want the MIRs to be sent to a shared folder on another workstation on the LAN. WINDOWS 2000/XP PROCEDURE Perform these steps at the workstation that will be sharing the folder
1. At the down-line PC, Click the drive in Windows Explorer where you want to create the new folder.
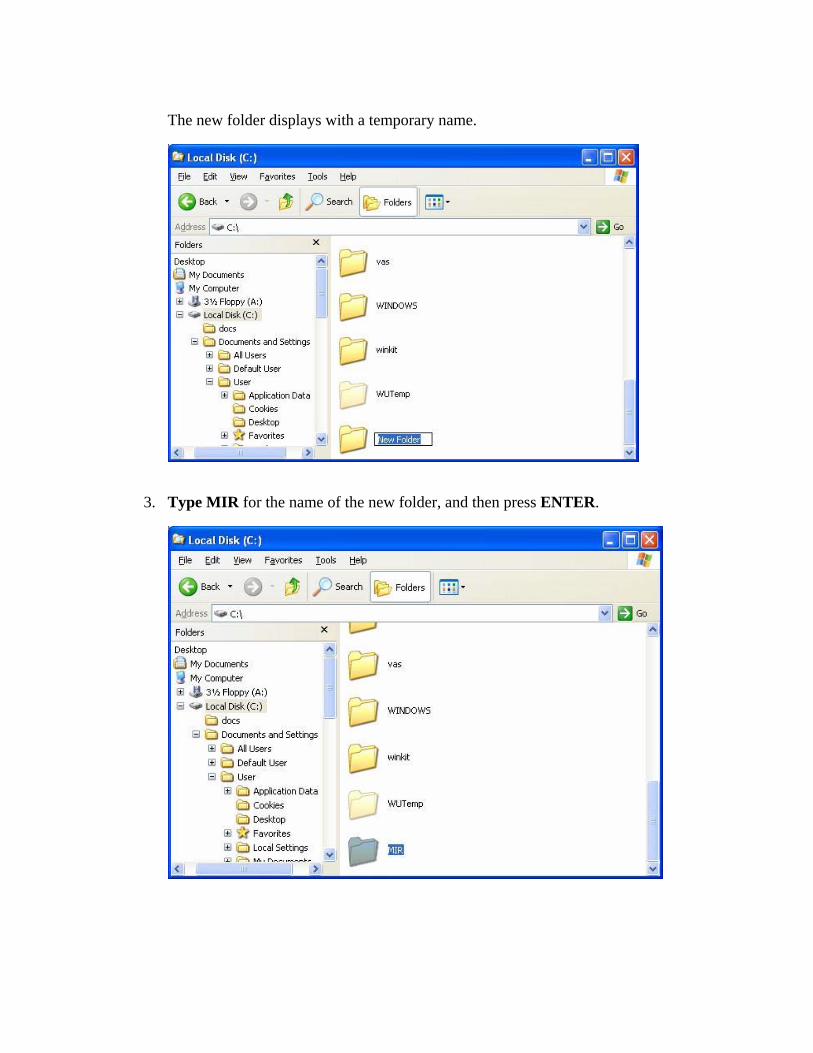
2. On the File menu, point to New, and then Click Folder.
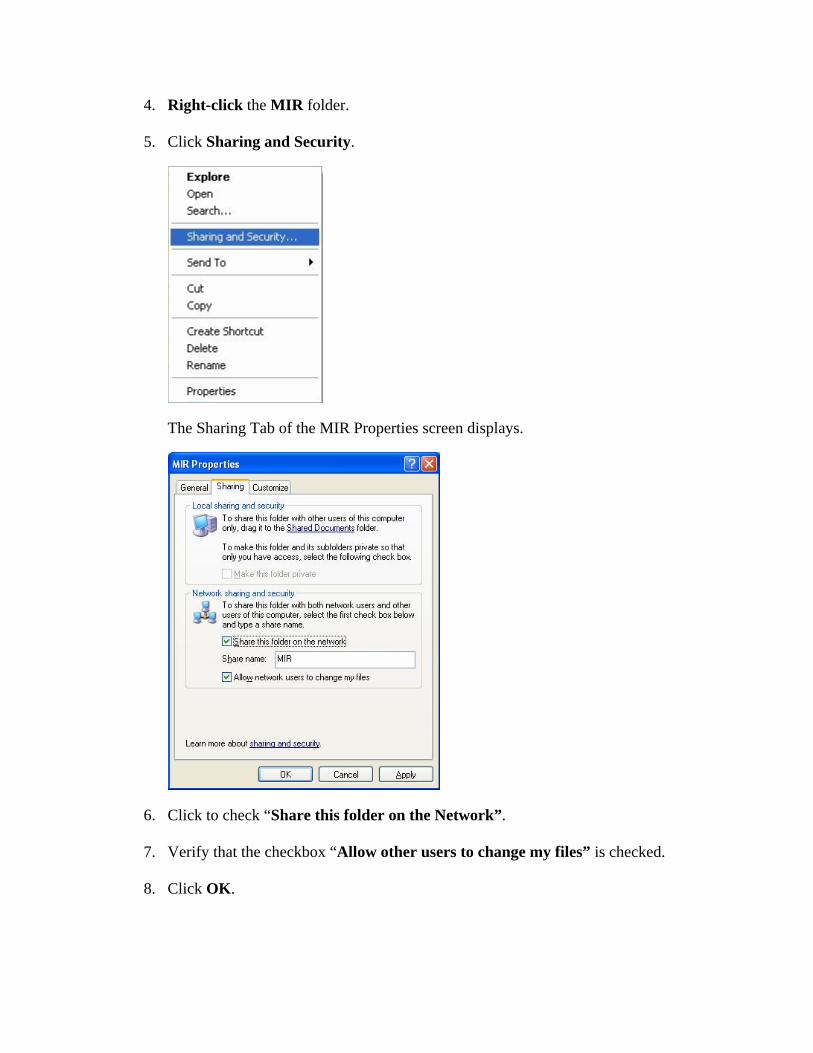
The new folder displays with a temporary name.
3. Type MIR for the name of the new folder, and then press ENTER.
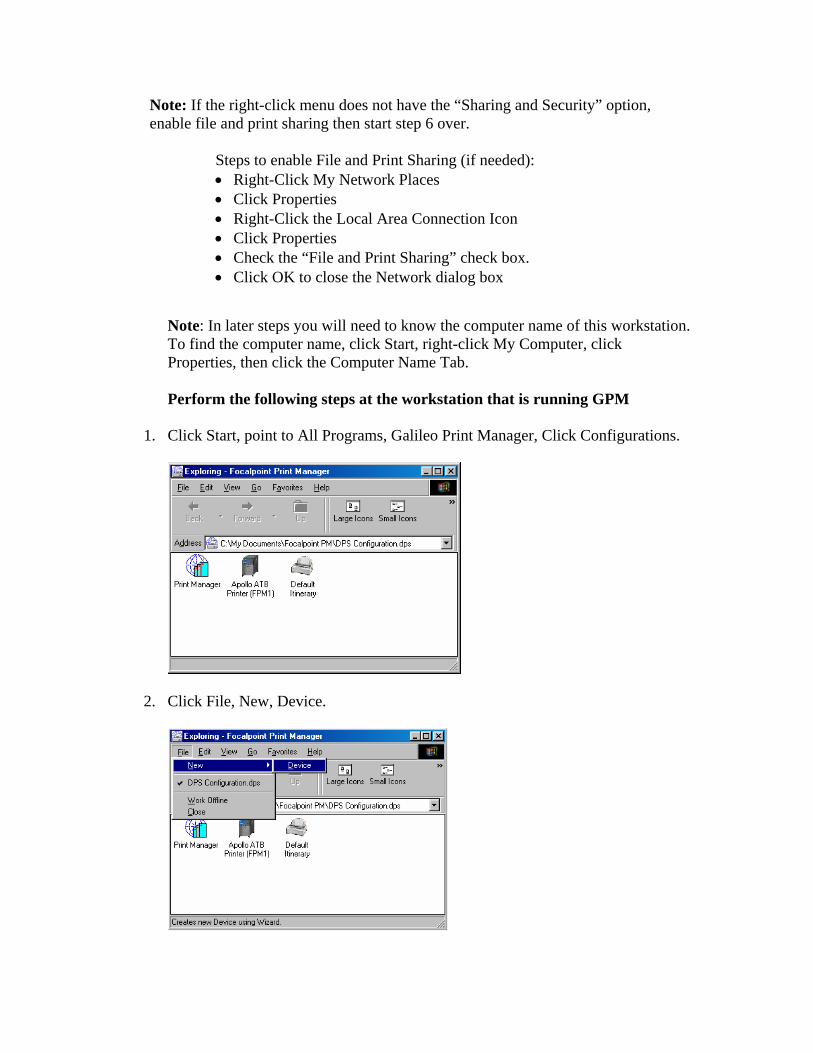
4. Right-click the MIR folder.
5. Click Sharing and Security.
The Sharing Tab of the MIR Properties screen displays.
6. Click to check “Share this folder on the Network”.
7. Verify that the checkbox “Allow other users to change my files” is checked.
8. Click OK.
Note: If the right-click menu does not have the “Sharing and Security” option, enable file and print sharing then start step 6 over. Steps to enable File and Print Sharing (if needed):
• Right-Click My Network Places • Click Properties • Right-Click the Local Area Connection Icon • Click Properties • Check the “File and Print Sharing” check box. • Click OK to close the Network dialog box
Note: In later steps you will need to know the computer name of this workstation. To find the computer name, click Start, right-click My Computer, click Properties, then click the Computer Name Tab. Perform the following steps at the workstation that is running GPM
1. Click Start, point to All Programs, Galileo Print Manager, Click Configurations.
2. Click File, New, Device.

The Device Selection screen displays.
3. In the Device Number field type the device number that matches the GTID for the MIR device, in this example the MIR device is the third GTID.
Note: Device 1 = first GTID, Device 2 = second GTID etc…
4. For Printer Type, Click the down arrow and select the “MIR to Disk” option.
5. Click Next.
6. In the MIR directory field, type or browse to the shared MIR folder.
Type… Browse…
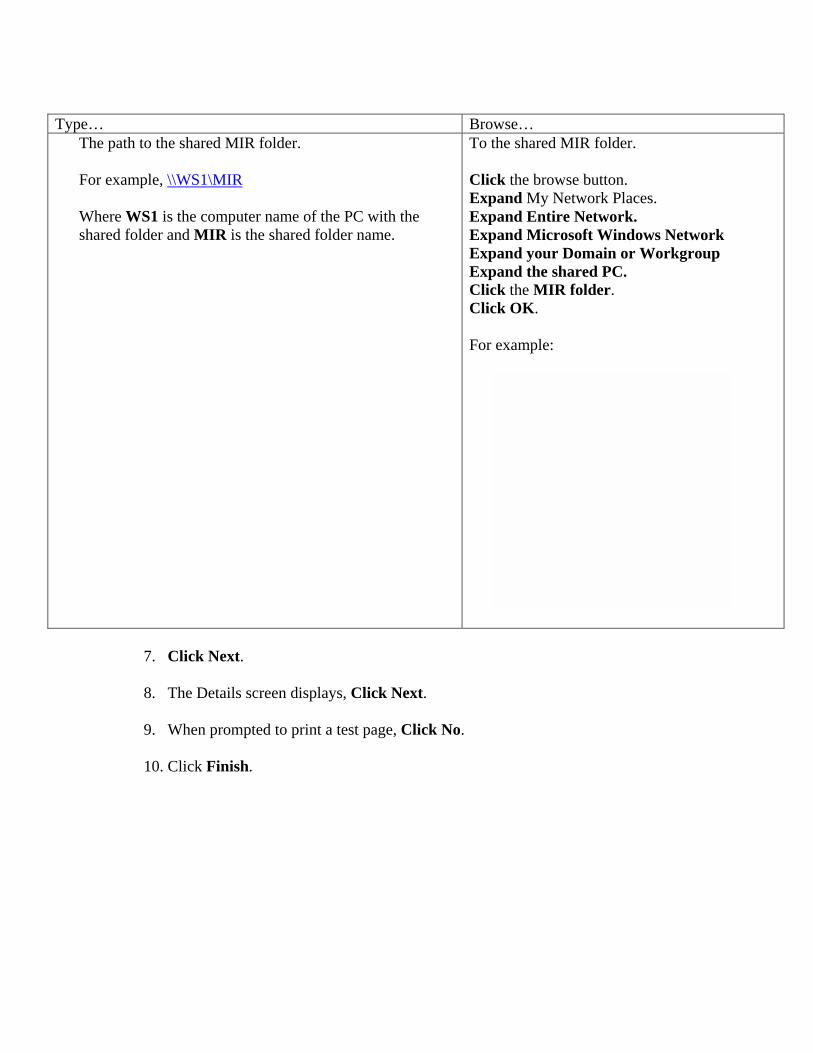
The path to the shared MIR folder. To the shared MIR folder. Click the browse button. Expand My Network Places. Expand Entire Network. Expand Microsoft Windows Network Expand your Domain or Workgroup Expand the shared PC. Click the MIR folder. Click OK. For example:
For example, \\WS1\MIR Where WS1 is the computer name of the PC with the shared folder and MIR is the shared folder name.
7. Click Next.
8. The Details screen displays, Click Next.
9. When prompted to print a test page, Click No.
10. Click Finish.

The Galileo Print Manager Configuration screen will display with the MIR to Disk MIR Link installed.
11. Close the Galileo Print Manager Configuration screen.
12. Go to the workstation sharing the MIR folder. From the Windows desktop,
right click Start and click Explore.
13. Find the C:\MIR folder and double click on it.
14. If the test sent in step 9 was successful, there will be two files present in the C:\MIR folder, Aaaaagal.mir and mirfile.txt.