Embed Size (px)
Citation preview
Mini 4–H4–H–911–7–W
PURDUE EXTENSION
2
Mini 4–H Before You Sew, Purdue University Cooperative Extension Service.
Written and Compiled by: Roylene Laswell
K–2 Program Coordinator
Youth Development and Agricultural Education
Purdue University
Faculty Advisor: Mary Pilat, Ph.D.
Youth Development and Agricultural Education
Purdue University
Cover Artwork:
Contact your local Extension office for a list of available project activity manuals.
Acknowledgements: We would like to thank the following people for their dedication to positive youth development:
Copyright (1999) by Purdue Research Foundation, West Lafayette, IN 47907. Unless permission is granted, this material may not be copied, reproduced or coded for
reproduction by any electrical, mechanical or chemical process or combination thereof, now known or later developed.
PRODUCTION TEAM
The Zaner–Bloser font used in this manual was chosen because it most closely resembles children’s current writing style.
Specialty Reviewers:Renee K. McKee, Ph.D.
State 4–H Program Leader
Purdue University
Trisha Hockemeyer
Extension Educator
Purdue University Cooperative Extension Service
LouAnn Menchhofer, B.S., M.S.
Extension Educator
Purdue University Cooperative Extension Service
Rae Ann O’Neill
Extension Educator
Purdue University Cooperative Extension Service
Editor:
Becky Goetz
Purdue University
Technical Graphics Support:
Durand Graves
Initial Development Team (1996–1997):A debt of gratitude is owed to the following people for their persistence and foresight in compiling the initial
project activity manuals:
David Caldwell, Rich Chalupa, John Crites, John Ferris, Jeanette Findley, Brian Gauck, Dan Kirtley,
Leanne McGiveron, Anita Krug, Carolyn Miner, Rae Ann O’Neill, Sue Provost, Scott Ripberger, Debra Searcy,
and Susan Trutner
Lisa Stein
Photographer/Graphic Designer
West Lafayette, IN
Layout: Mona Jackson
Purdue University
Cassi Halsema
Purdue University
3
Mini 4–H Before You Sew, Purdue University Cooperative Extension Service.
Mini 4–H Helper’s PageWelcome to the Mini 4–H Program! Mini 4–H is designed for children in grades K–2 to explore a variety of project activity areas and to interact with caring adults and other children.
Children receive this project activity manual when enrolling in Mini 4–H. This manual, and the manuals on various other topics, will provide fun, age–appropriate learning activities throughout their year(s) in Mini 4–H.
As a Mini 4–H adult helper, your job will be to guide and encourage each child through the activities. A wide range of activities are provided to allow you to choose the ones most appropriate for the children you are working with. It is strongly suggested that you do not complete the activities for them. Instead, help them, guide them, work with them, and let them do all that they possibly can. 4–H believes in allowing children to learn by doing. The Mini 4–H project activities are hands–on learning opportunities designed to provide a meaningful educational experience for youth.
Additionally, the Mini 4–H program is set up to allow children to display a project activity that is based upon information within this manual. Some children may want to exhibit at the 4–H Fair. The 4–H Fair is an exciting week that allows community youth to showcase their enthusiasm for learning. Children may choose to display a project activity they did by themselves or one they did with a group. Other children may choose to showcase their work in other ways such as displaying it in a special place in their own home.
Mini 4–H is fun! Children will certainly enjoy it. You can have fun, too, by guiding and helping as children participate in the program. Encourage and praise the children as they have fun learning and sharing with you. If you have any questions regarding Mini 4–H or other 4–H programs, please contact the local Extension Office in your county.
4
Mini 4–H Before You Sew, Purdue University Cooperative Extension Service.
Helper’s TipsThe Mini 4–H program can be used with individual children, but it works best when used in a group of two or more children. Children working cooperatively in groups develop positive images of themselves and their ideas. Other ways adult helpers can maximize the benefits of Mini 4–H are to:
• Work on a subject interesting to the child by encouraging children to choose the content area. Look through this manual and choose the project activities to work on based on the interests and skill levels of the children.
• Relax and have fun. Some children will want to finish their activities, others may not. There is no need to pressure children of this age to finish an activity because the real learning takes place while they participate in the activity and interact with others. The finished product should not be the main focus. The knowledge children gain while they explore new areas and experiment with new ideas should be the primary goal.
• Remain flexible and adapt to the changing needs of the children. Restlessness or boredom may indicate a need to stop the activity and come back to it later.
• Encourage children to talk and work with each other. Children learn best when they are encouraged to freely share their reactions and observations. You may want to ask the children about what they did during an activity, what happened, what was the most difficult, what was the easiest, and what they liked the most.
This manual contains activities for children that allow for a wide range of abilities and provide practice for developing a variety of skills. Many of the projects list additional things to do after the activity in the section. This section provides ideas to adapt the activity to better match children’s individual skill levels and also provides additional skill practice.
5
Mini 4–H Before You Sew, Purdue University Cooperative Extension Service.
Mini 4–H Member Page Mini 4–H members have lots of fun! There are many activities for you to explore. You can try new things. You can share them with your friends and family.
Here are some things to know about 4–H.
The 4–H symbol is a four–leaf clover with an “H” in each leaf. Clover is a plant that grows in fields, yards, and along roadsides. Most clovers have three leaves. Sometimes, if you look very carefully, you may get lucky and find a special clover with four leaves. A four–leaf clover is used as the symbol for 4–H to let everyone know 4–H is a special kind of group.
The 4–H colors are green and white. The four–leafclover is green and the “H” in each leaf is white.
A group motto is a saying that tells people what is important to the group. The 4–H motto is “To make the best better.” When something is better than all of the others, it is the best. Think about a time when you did your best. Maybe you threw a ball farther than you have ever thrown it before. Now, think about some ways you could do better. You may be able to throw farther by practicing for a while or by watching someone who can throw farther than you to see how they throw so far. Even if you throw the ball farther than you have ever thrown it before, there are still ways that you can do better the next time. 4–H encourages you to always try to do better, even if you are doing the best you have ever done.

6
Mini 4–H Before You Sew, Purdue University Cooperative Extension Service.
The 4–H PledgeA pledge is a promise you make to yourself and to the people around you. The 4–H pledge is in bold print below. Under each line of the pledge there are words telling what the pledge means.
I pledge my Head to clearer thinking,
I promise to use my head to make good choices,
my Heart to greater loyalty,
to use my heart to be a good friend,
my Hands to larger service, and
to use my hands to do helpful things for others,
my Health to better living,
to take care of my body and to show others how to live in a healthy way,
for my club, my community, my country, and my world.
to help my group, my community, my country, and my world be happy and safe for everyone.
7
Mini 4–H Before You Sew, Purdue University Cooperative Extension Service.
Important Information about This ManualThere were several challenges to creating this sewing related activity guide for children ages kindergarten through second grade. Because of these challenges, this activity guide may be a little different from many of the other “sewing guides” you have seen or used in the past.
Most sewing activities focus primarily on the end product. However, children of this age are process oriented, meaning that they are interested in participating in the activity far more than they are interested in what the final product is or how it looks. Art has a variety of materials that invite children to enjoy and explore the creation process. Did you know that sewing is a form of art? In fact, art and sewing have many things in common. Color, line, shape, and texture are just a few of the ideas that are important in both art and sewing. Before You Sew uses art activities to introduce sewing skills and concepts. Children are encouraged to explore the art activities. By doing so, the children practice sewing skills like following a pattern, cutting, lacing, measuring, stitching, stuffing, and weaving.
Sewing requires good eye–hand coordination and refined fine–motor skills in order to use the necessary sewing tools. There is a wide range of skills and abilities within any group of children ages kindergarten through second grade. Some children of this age are highly skilled in handling small objects, cutting along a given line, and/or manipulating several objects at one time. However, some children are far less skilled and may become frustrated if asked to perform at a level where they are not yet comfortable. This activity guide is designed so the activities that require the least skill and that allow the successful participation by most children of this age are toward the front. The activities toward the end of the guide generally require a higher skill level to accomplish.
Before You Sew can be used to encourage children to explore art activities, to share with children important sewing concepts, and to invite children to practice important sewing skills. A positive experience with this guide can help ensure that children are ready to participate in and enjoy future sewing–related activities.
Mini 4–H Before You Sew, Purdue University Cooperative Extension Service.
8
How Long? Where? How We Know
Note:Children of this age are generally not practiced in measuring techniques or in using measuring tools. For many of the activities in this guide there are two measurements given. The standard measurement (1/2”) is given as well as a non–standard measurement (such as 2 fingers). This allows the child to participate in measuring without all the skill required in using standard measuring tools and techniques. Hint: Remember, the finger widths given are for child–sized fingers.
h h
How much fabric will I need to make this project? Where do I place this button before I sew it on? Measuring to find out the size of something or where to place something is just one of the many skills you will need to practice to become good at sewing.
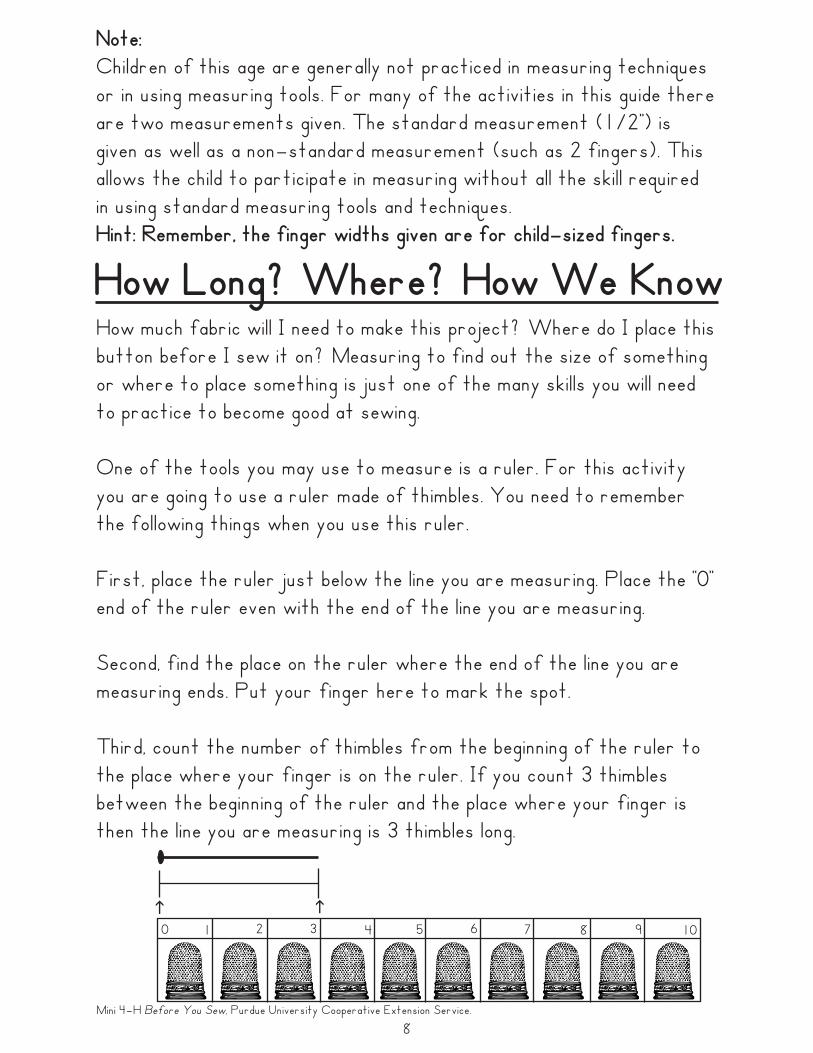
One of the tools you may use to measure is a ruler. For this activity you are going to use a ruler made of thimbles. You need to remember the following things when you use this ruler.
First, place the ruler just below the line you are measuring. Place the “0” end of the ruler even with the end of the line you are measuring.
Second, find the place on the ruler where the end of the line you are measuring ends. Put your finger here to mark the spot.
Third, count the number of thimbles from the beginning of the ruler to the place where your finger is on the ruler. If you count 3 thimbles between the beginning of the ruler and the place where your finger is then the line you are measuring is 3 thimbles long.
0 1 2 3 4 5 6 7 8 9 10
Mini 4–H Before You Sew, Purdue University Cooperative Extension Service.
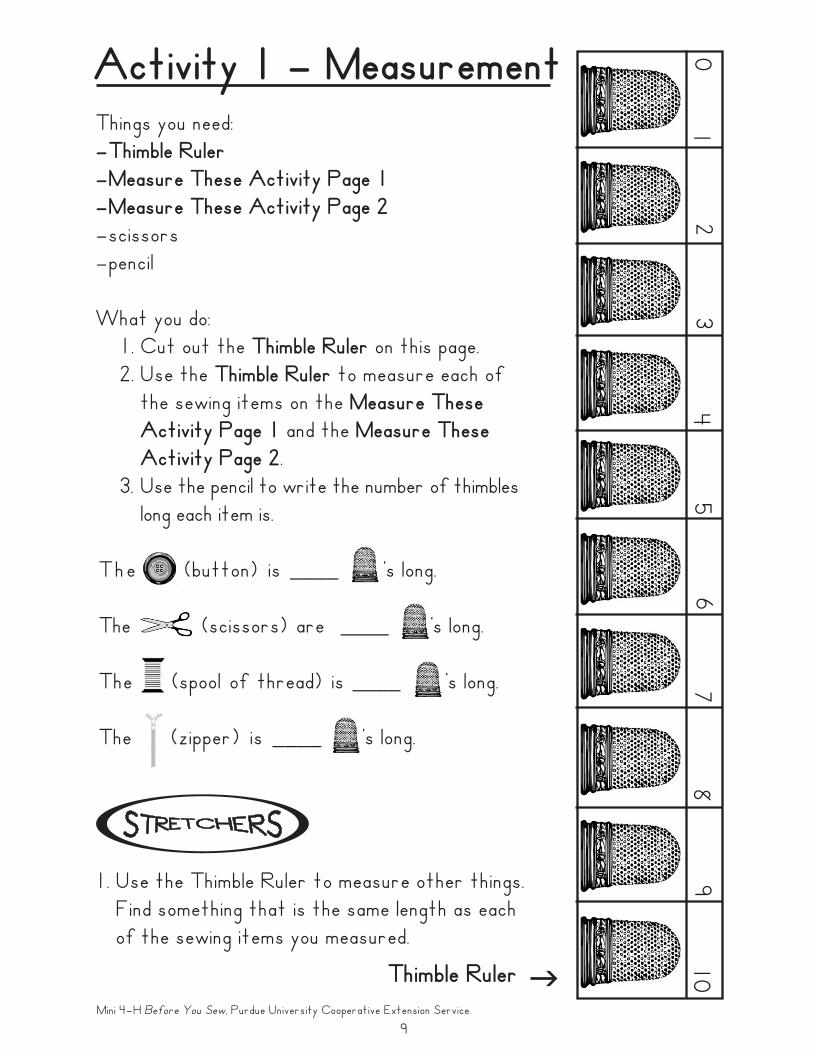
Things you need:–Thimble Ruler–Measure These Activity Page 1–Measure These Activity Page 2–scissors–pencil
What you do: 1. Cut out the Thimble Ruler on this page. 2. Use the Thimble Ruler to measure each of
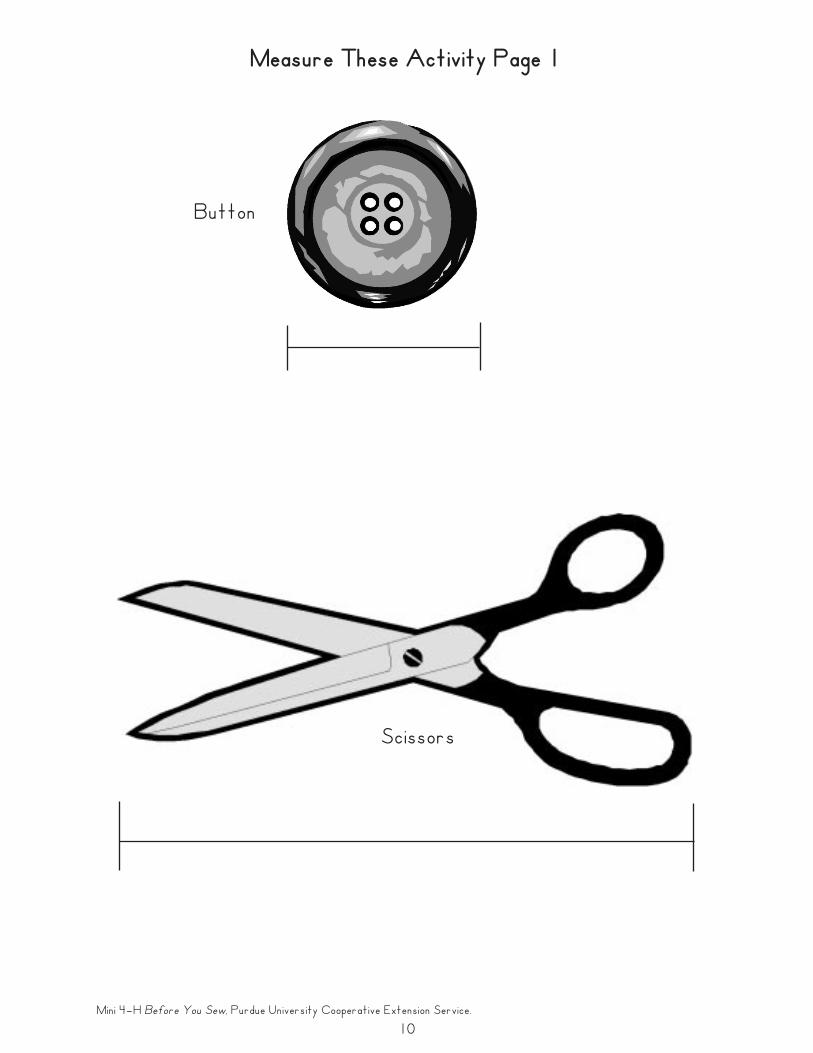
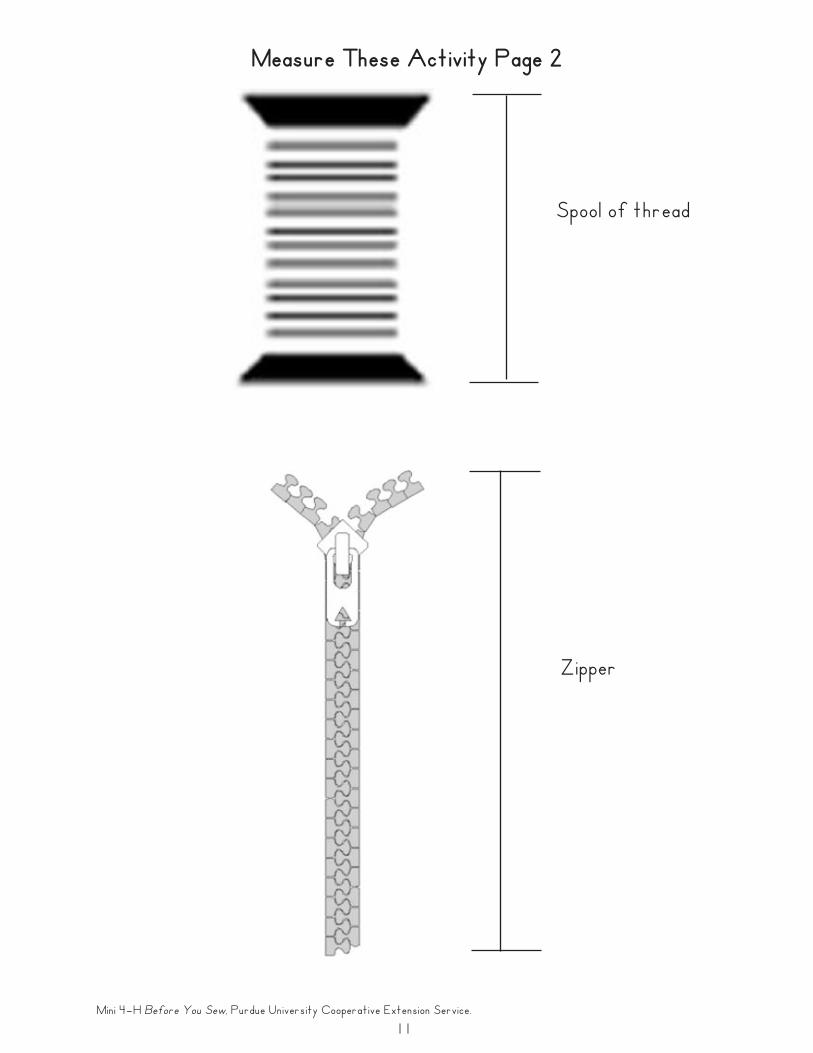
the sewing items on the Measure These Activity Page 1 and the Measure These Activity Page 2.
3. Use the pencil to write the number of thimbles long each item is.
The (button) is ____ ‘s long.
The (scissors) are ____ ‘s long.
The (spool of thread) is ____ ‘s long.
The (zipper) is ____ ‘s long.
Activity 1 – Measurement
1. Use the Thimble Ruler to measure other things. Find something that is the same length as each of the sewing items you measured.
Thimble Ruler g9
01
23
45
67
89
10
Mini 4–H Before You Sew, Purdue University Cooperative Extension Service.
Measure These Activity Page 1
10
Button
Scissors
Mini 4–H Before You Sew, Purdue University Cooperative Extension Service.
Measure These Activity Page 2
11
Spool of thread
Zipper
Mini 4–H Before You Sew, Purdue University Cooperative Extension Service.
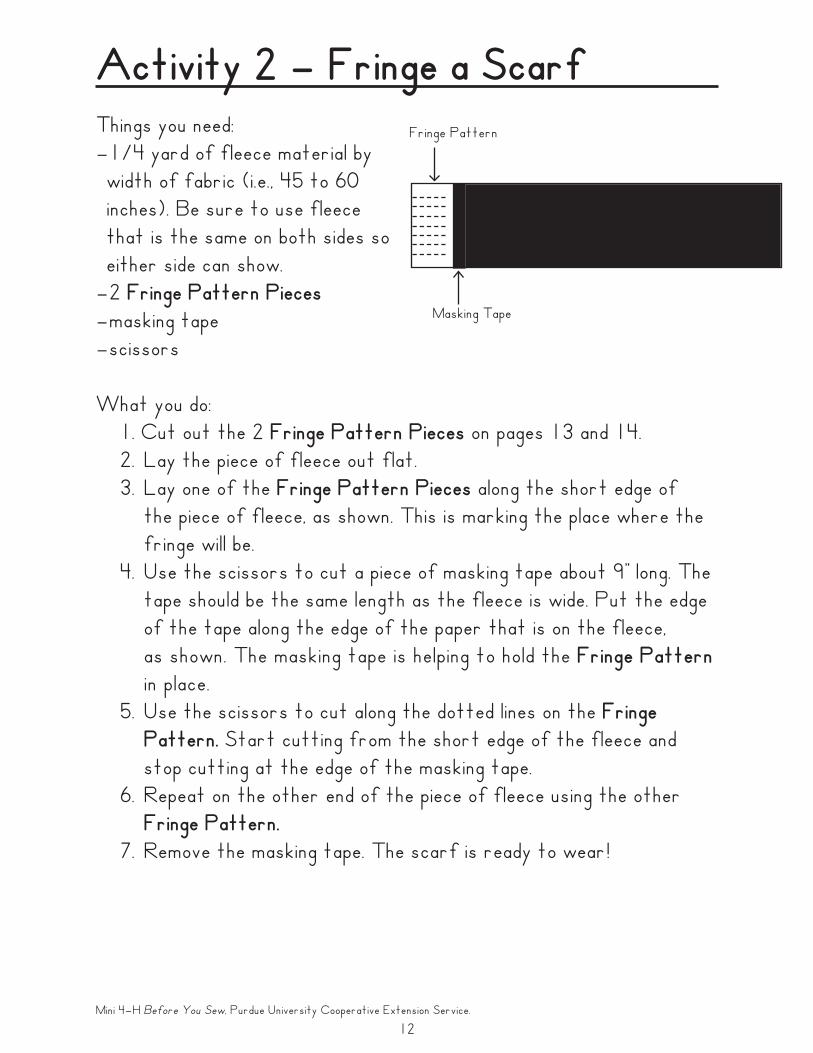
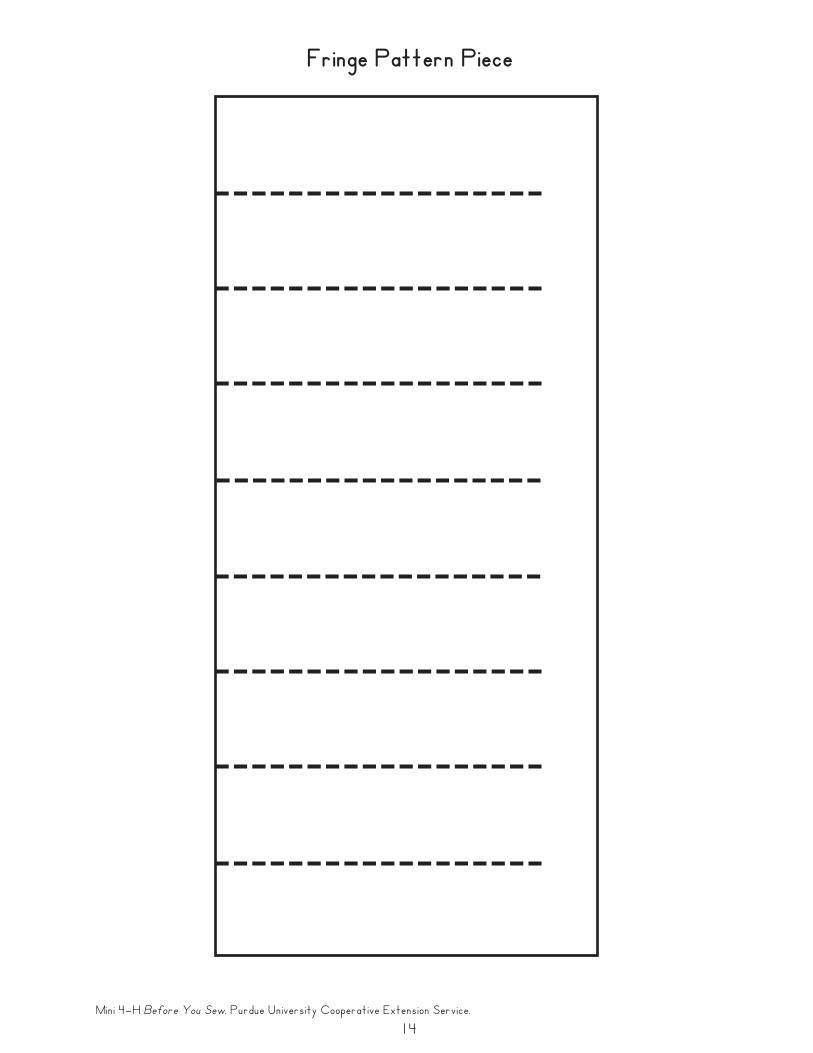
Things you need:–1/4 yard of fleece material by width of fabric (i.e., 45 to 60 inches). Be sure to use fleece that is the same on both sides so either side can show.–2 Fringe Pattern Pieces–masking tape–scissors
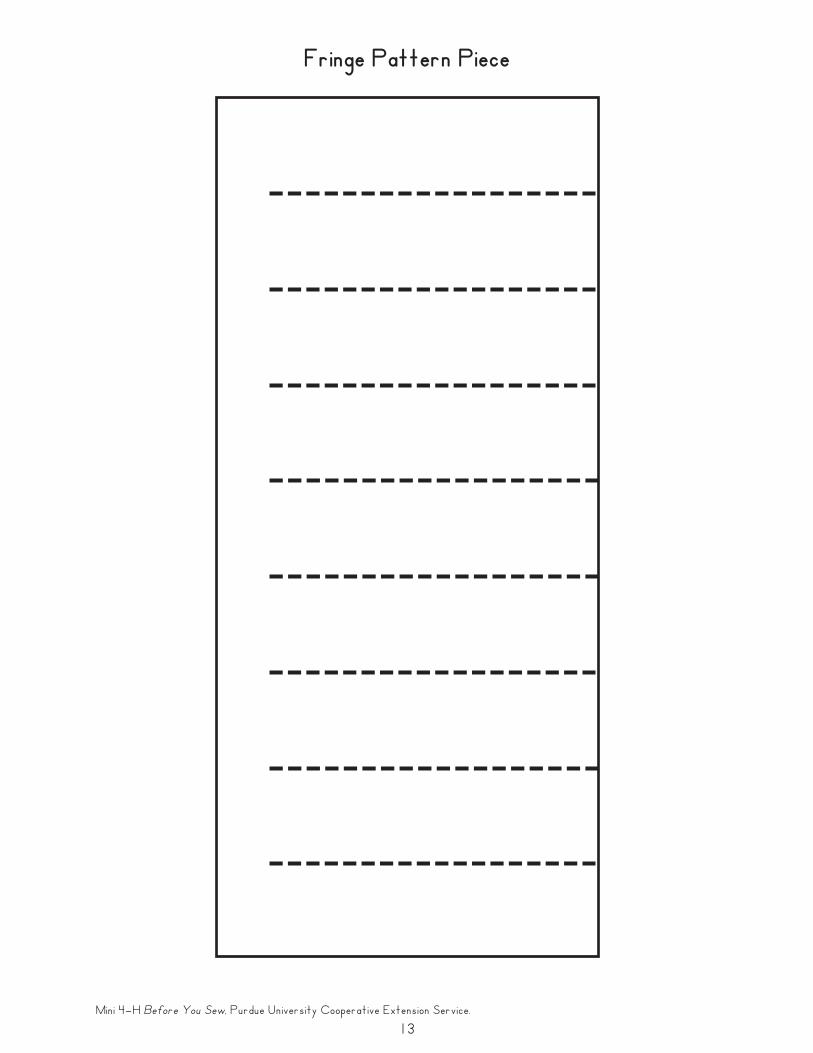
What you do: 1. Cut out the 2 Fringe Pattern Pieces on pages 13 and 14. 2. Lay the piece of fleece out flat. 3. Lay one of the Fringe Pattern Pieces along the short edge of
the piece of fleece, as shown. This is marking the place where the fringe will be.
4. Use the scissors to cut a piece of masking tape about 9” long. The tape should be the same length as the fleece is wide. Put the edge of the tape along the edge of the paper that is on the fleece,
as shown. The masking tape is helping to hold the Fringe Pattern in place.
5. Use the scissors to cut along the dotted lines on the Fringe Pattern. Start cutting from the short edge of the fleece and
stop cutting at the edge of the masking tape. 6. Repeat on the other end of the piece of fleece using the other
Fringe Pattern. 7. Remove the masking tape. The scarf is ready to wear!
Activity 2 – Fringe a Scarf
12
Fringe Pattern
Masking Tape
Mini 4–H Before You Sew, Purdue University Cooperative Extension Service.
13
Fringe Pattern Piece
Mini 4–H Before You Sew, Purdue University Cooperative Extension Service.
Fringe Pattern Piece
14
Mini 4–H Before You Sew, Purdue University Cooperative Extension Service.
15
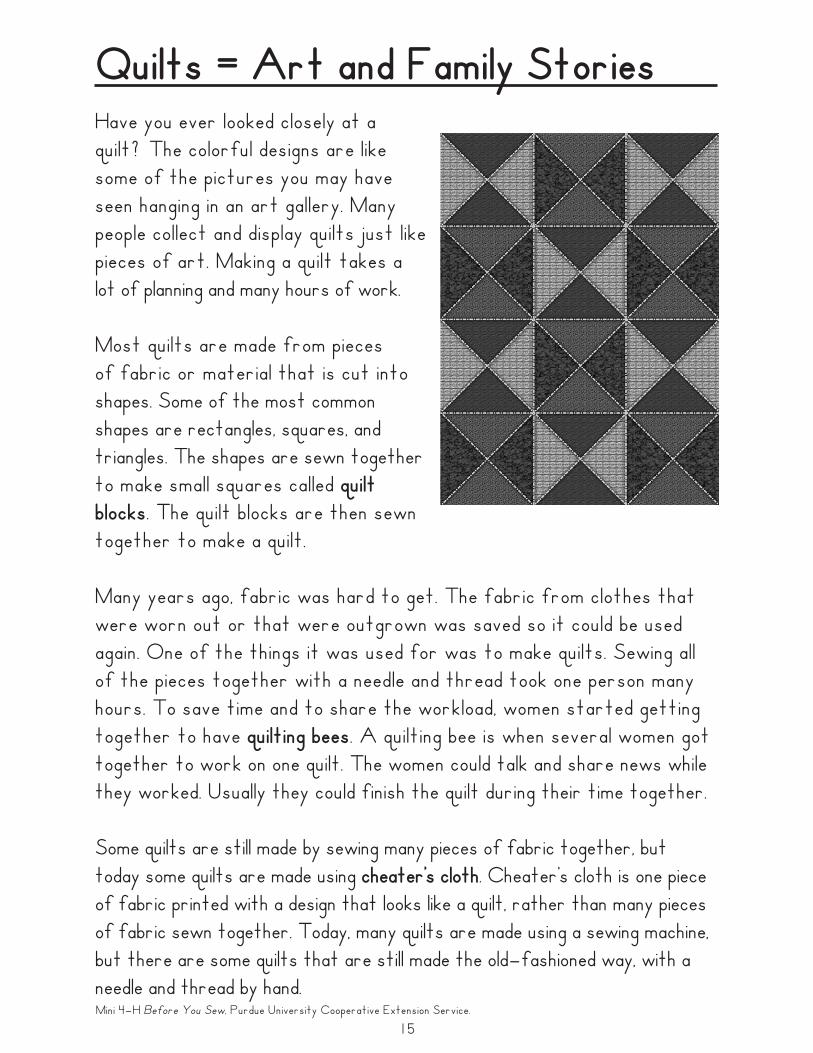
Quilts = Art and Family StoriesHave you ever looked closely at a quilt? The colorful designs are like some of the pictures you may have seen hanging in an art gallery. Many people collect and display quilts just like pieces of art. Making a quilt takes a lot of planning and many hours of work.
Most quilts are made from pieces of fabric or material that is cut into shapes. Some of the most common shapes are rectangles, squares, and triangles. The shapes are sewn together to make small squares called quilt blocks. The quilt blocks are then sewn together to make a quilt.
Many years ago, fabric was hard to get. The fabric from clothes that were worn out or that were outgrown was saved so it could be used again. One of the things it was used for was to make quilts. Sewing all of the pieces together with a needle and thread took one person many hours. To save time and to share the workload, women started getting together to have quilting bees. A quilting bee is when several women got together to work on one quilt. The women could talk and share news while they worked. Usually they could finish the quilt during their time together.
Some quilts are still made by sewing many pieces of fabric together, but today some quilts are made using cheater’s cloth. Cheater’s cloth is one piece of fabric printed with a design that looks like a quilt, rather than many pieces of fabric sewn together. Today, many quilts are made using a sewing machine, but there are some quilts that are still made the old–fashioned way, with a needle and thread by hand.
Mini 4–H Before You Sew, Purdue University Cooperative Extension Service.
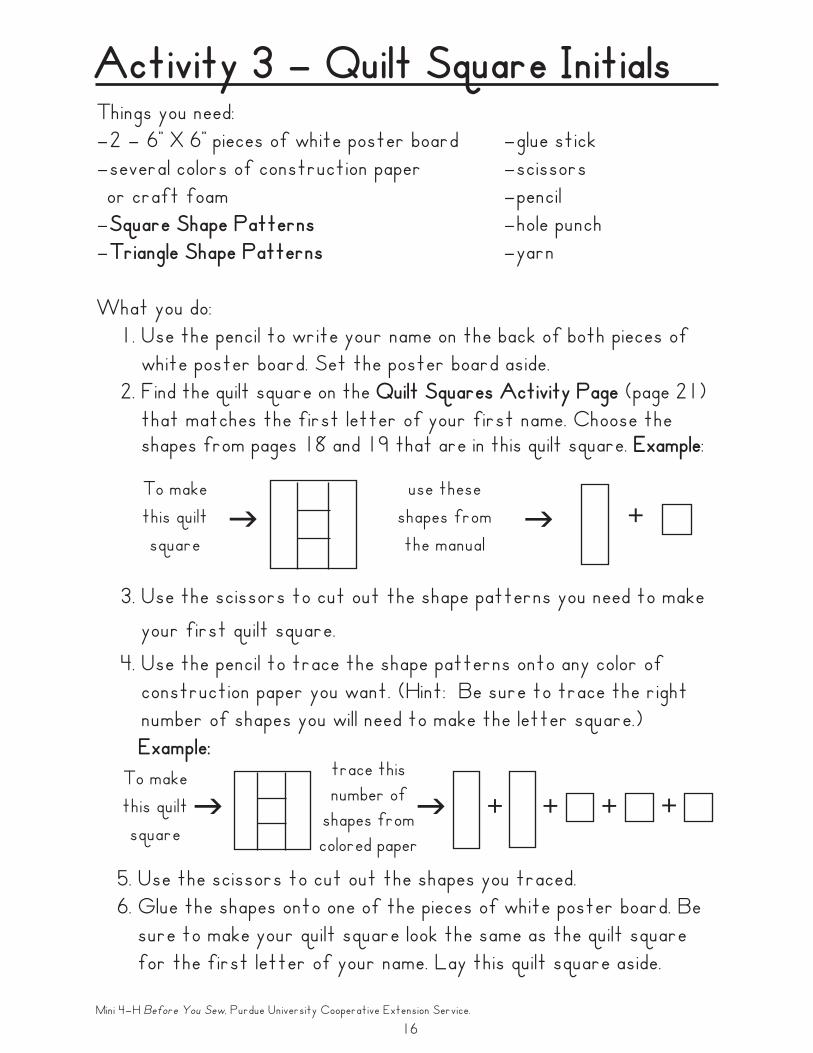
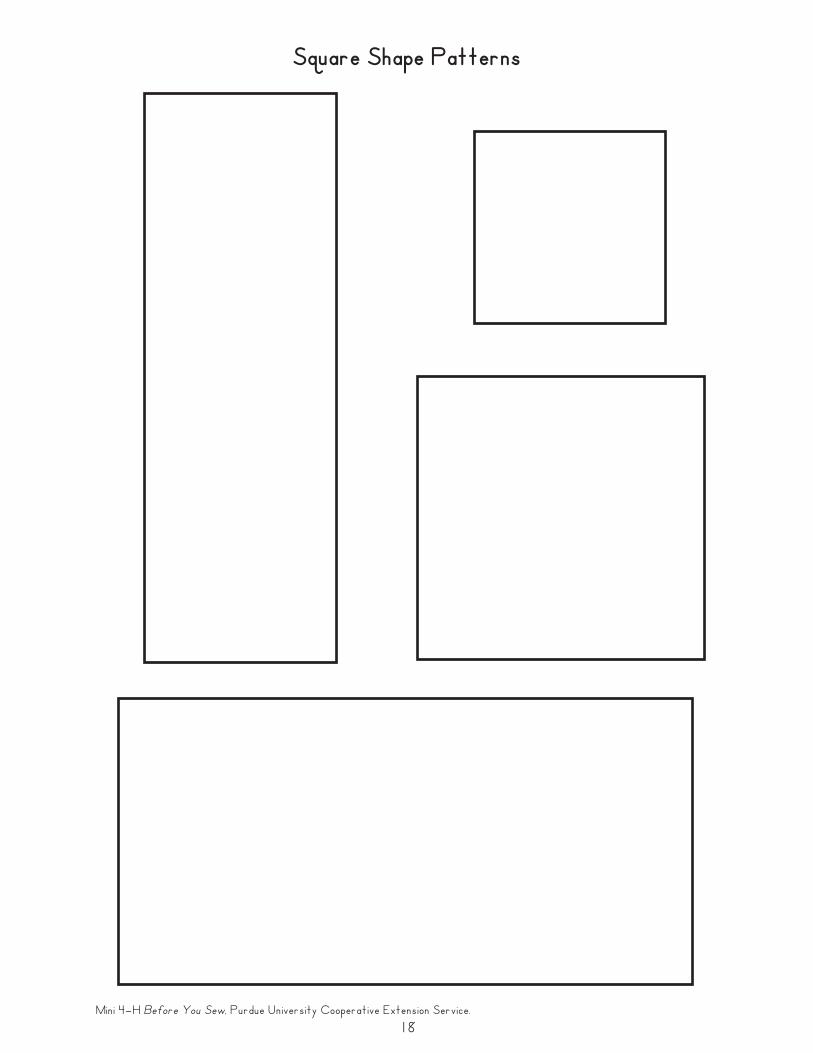
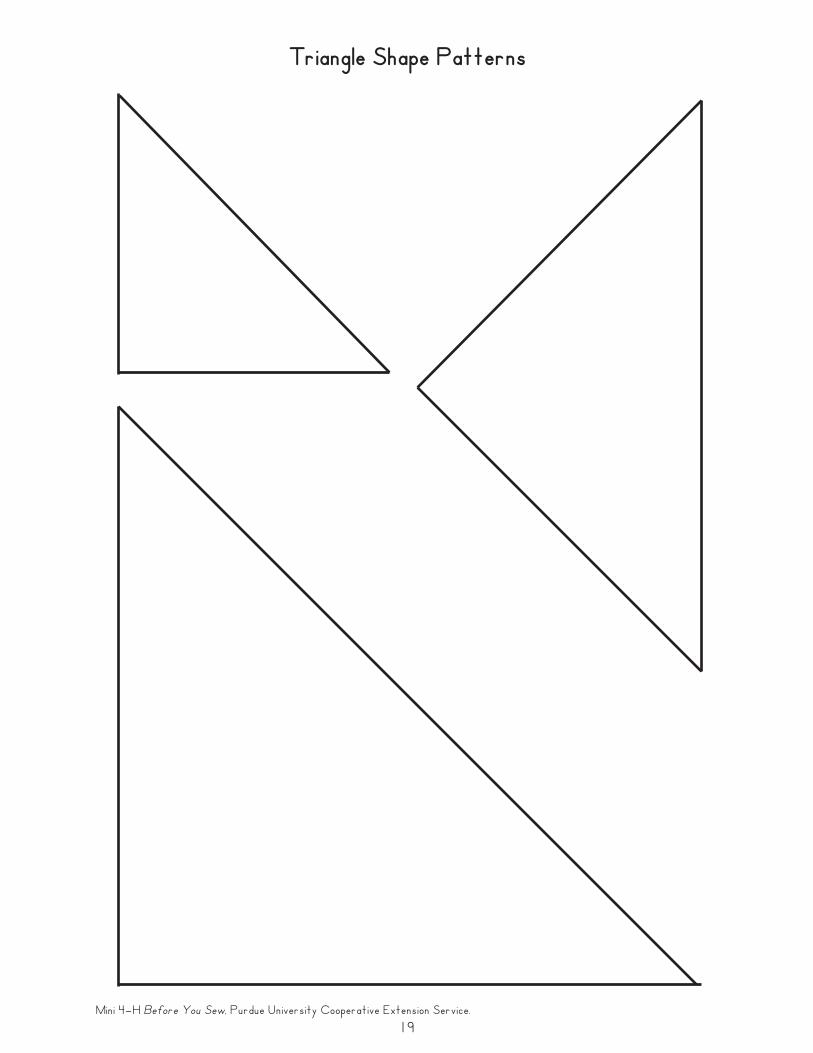
Things you need:–2 – 6” X 6” pieces of white poster board –glue stick–several colors of construction paper –scissors or craft foam –pencil –Square Shape Patterns –hole punch–Triangle Shape Patterns –yarn
What you do: 1. Use the pencil to write your name on the back of both pieces of
white poster board. Set the poster board aside. 2. Find the quilt square on the Quilt Squares Activity Page (page 21)
that matches the first letter of your first name. Choose the shapes from pages 18 and 19 that are in this quilt square. Example:
3. Use the scissors to cut out the shape patterns you need to make
your first quilt square.
4. Use the pencil to trace the shape patterns onto any color of construction paper you want. (Hint: Be sure to trace the right number of shapes you will need to make the letter square.) Example:
+
+ + +
Activity 3 – Quilt Square Initials
To make
this quilt
square
use these
shapes from
the manualg g
To make
this quilt
square
trace thisnumber of
shapes fromcolored paper
g g +
5. Use the scissors to cut out the shapes you traced. 6. Glue the shapes onto one of the pieces of white poster board. Be
sure to make your quilt square look the same as the quilt square for the first letter of your name. Lay this quilt square aside.
16

Mini 4–H Before You Sew, Purdue University Cooperative Extension Service.
7. Make another quilt square but this time make it look like the quilt square for the first letter of your last name.
8. Use the hole punch to punch 3 holes in the bottom of your first quilt square (the square that matches the first letter of your first name) and to punch 3 holes in the top of your second quilt square (the square that matches the first letter of your last name).
9. Use yarn to tie the two squares together by tying a loop through each set of holes.
Example:
10. Punch 2 holes in the top of your first quilt square. 11. Use yarn to make a hanger for your quilt square initials.
1. Use yarn to lace several sets of “Quilt Square Initials” together to make a group quilt.
2. Find someone who used one of the same quilt squares as you did. Compare the squares. How are they alike? How are they different?
Was there anyone who made a quilt square that looked exactly like one of your quilt squares?
3. Use the shapes to design your own quilt square.
gFirst letter of
your first name
gFirst letter of
your last name
17
Mini 4–H Before You Sew, Purdue University Cooperative Extension Service.
18
Square Shape Patterns
Mini 4–H Before You Sew, Purdue University Cooperative Extension Service.
19
Triangle Shape Patterns
Mini 4–H Before You Sew, Purdue University Cooperative Extension Service.
Activity 4 – If Quilts Could TalkIf quilts could talk, what would they say? This may sound funny, but did you know that quilts really can tell a story? Many families have quilts that were made by the people in their family a long time ago. Sometimes the pieces of fabric used to make the quilt are from clothes someone wore when they were a baby, or from an apron someone wore when they baked, or from an outfit someone wore at a very special occasion. The special pieces of fabric help people remember the stories about the people who used the fabric. Adults tell the stories to their children. The children remember the stories and tell them to their own children. In this way, stories about people and times of long ago are told by a quilt.
20
Things you need:–pencil–Quilt Squares Activity Page–Quilt Message Activity Page
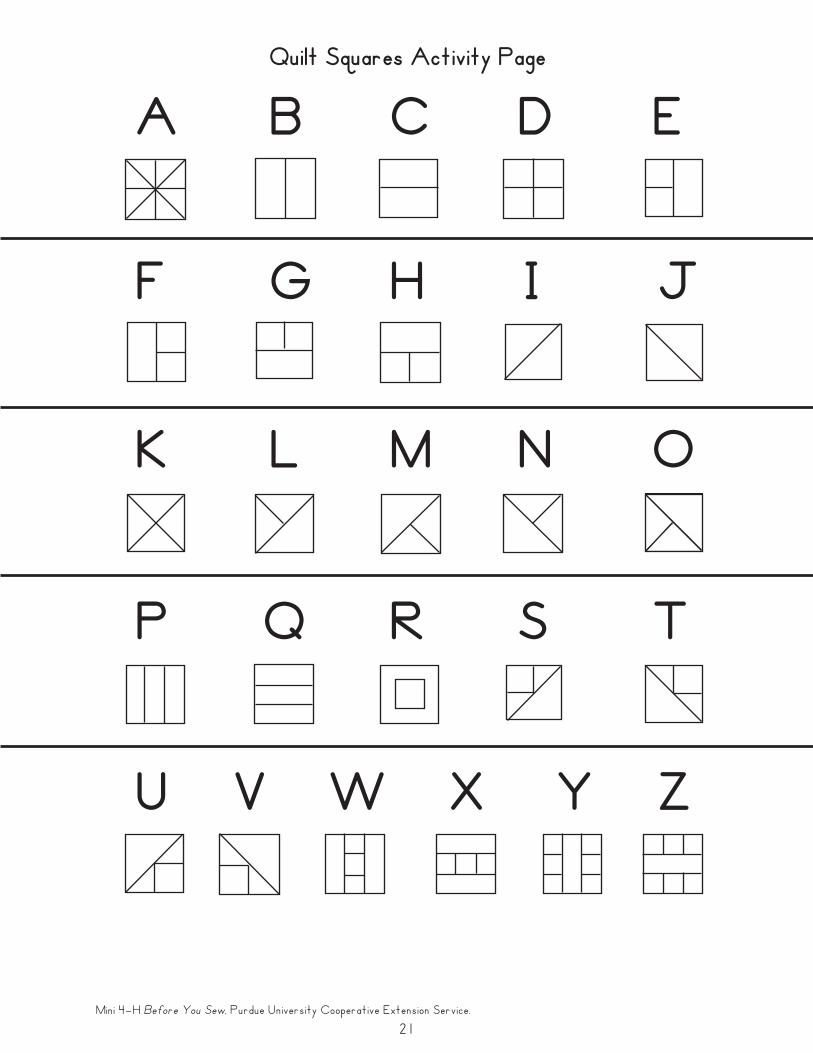
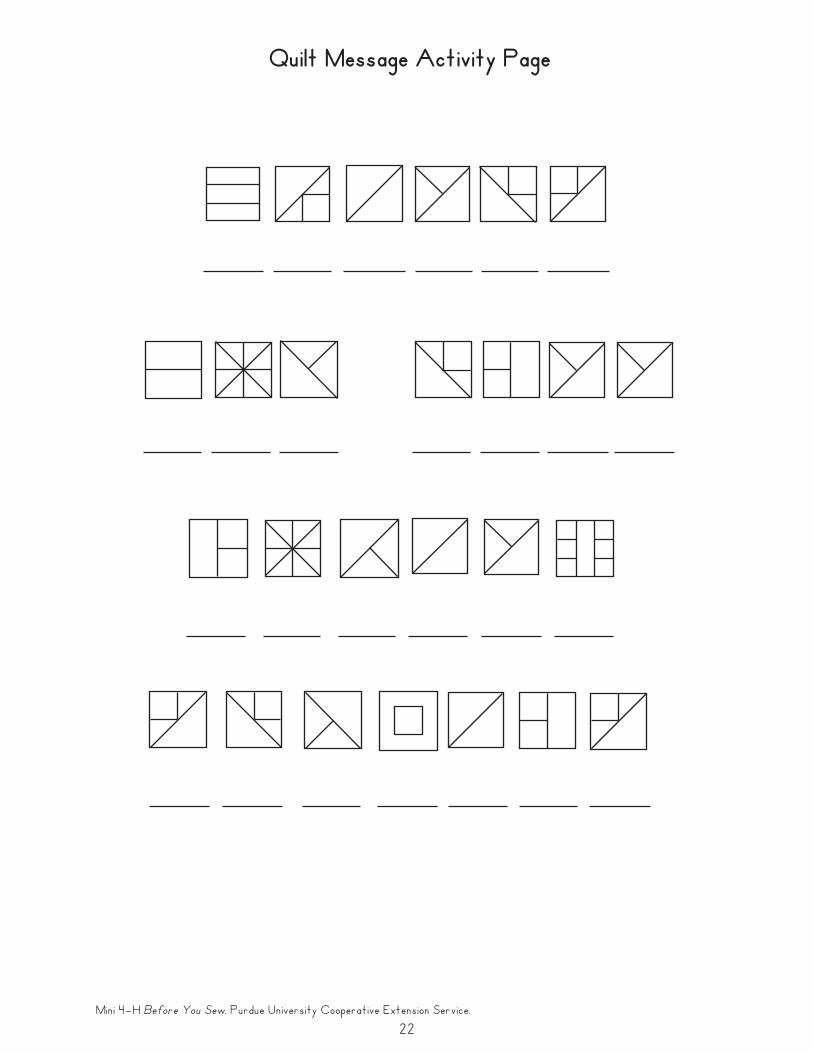
What you do: 1. Match and copy the letters from the Quilt Squares Activity Page
to the Quilt Message Activity Page to find out what the message says. (Answer on bottom of page 37.)
Mini 4–H Before You Sew, Purdue University Cooperative Extension Service.
21
Quilt Squares Activity Page
A B C D E
F G H I J
K L M N O
P Q R S T
U V W X Y Z
Mini 4–H Before You Sew, Purdue University Cooperative Extension Service.
Quilt Message Activity Page
22
Mini 4–H Before You Sew, Purdue University Cooperative Extension Service.
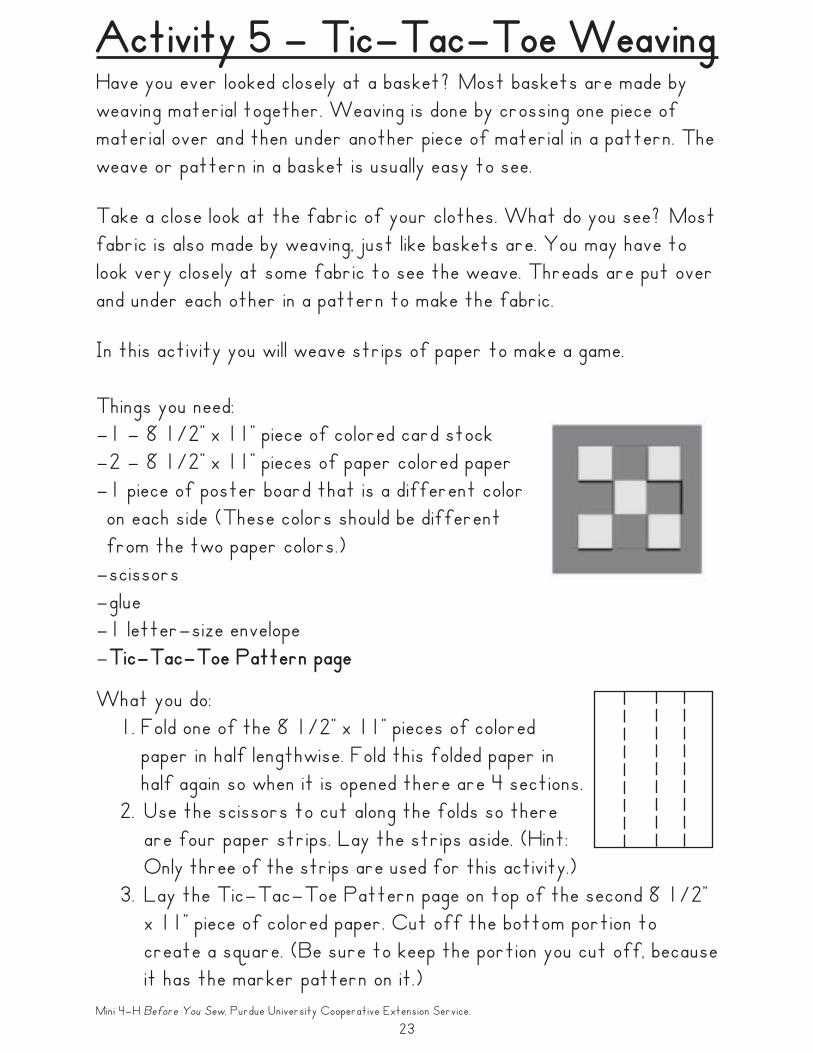
Things you need:–1 – 8 1/2” x 11” piece of colored card stock–2 – 8 1/2” x 11” pieces of paper colored paper–1 piece of poster board that is a different color on each side (These colors should be different from the two paper colors.)–scissors–glue–1 letter–size envelope–Tic–Tac–Toe Pattern page
Activity 5 – Tic–Tac–Toe WeavingHave you ever looked closely at a basket? Most baskets are made by weaving material together. Weaving is done by crossing one piece of material over and then under another piece of material in a pattern. The weave or pattern in a basket is usually easy to see.
Take a close look at the fabric of your clothes. What do you see? Most fabric is also made by weaving, just like baskets are. You may have to look very closely at some fabric to see the weave. Threads are put over and under each other in a pattern to make the fabric.
In this activity you will weave strips of paper to make a game.
23
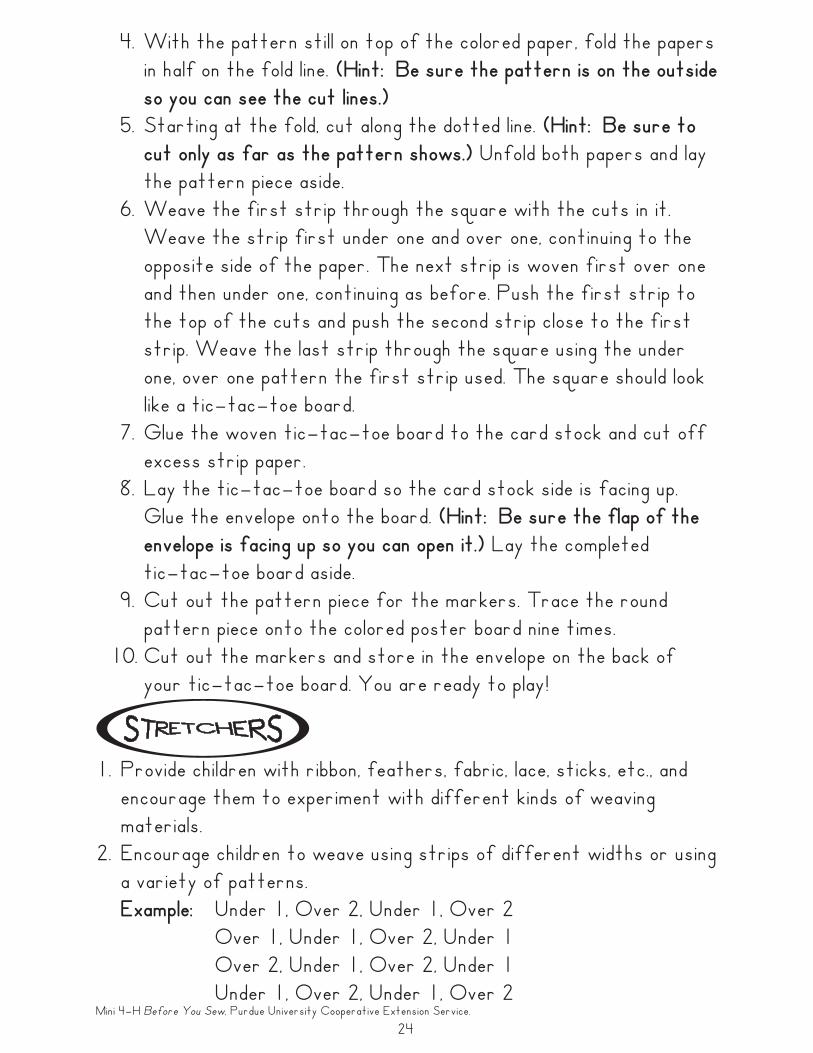
What you do: 1. Fold one of the 8 1/2” x 11” pieces of colored paper in half lengthwise. Fold this folded paper in
half again so when it is opened there are 4 sections.2. Use the scissors to cut along the folds so there
are four paper strips. Lay the strips aside. (Hint: Only three of the strips are used for this activity.)
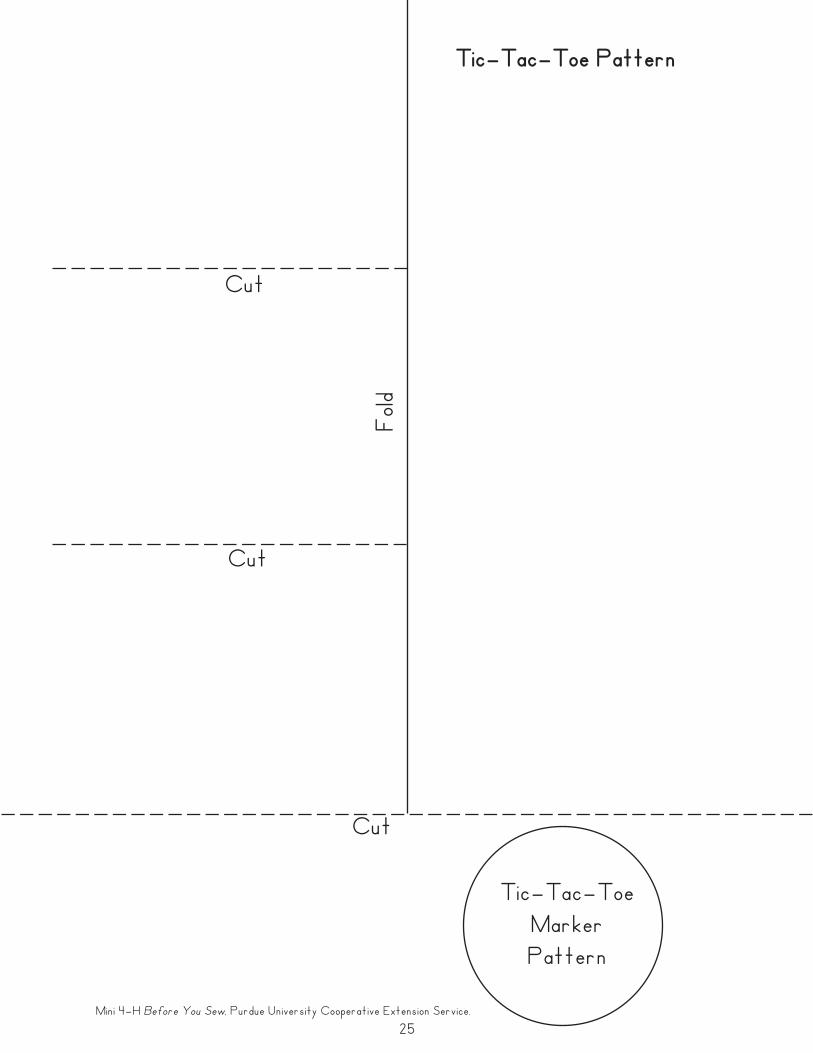
3. Lay the Tic–Tac–Toe Pattern page on top of the second 8 1/2” x 11” piece of colored paper. Cut off the bottom portion to create a square. (Be sure to keep the portion you cut off, because it has the marker pattern on it.)
Mini 4–H Before You Sew, Purdue University Cooperative Extension Service.
4. With the pattern still on top of the colored paper, fold the papers in half on the fold line. (Hint: Be sure the pattern is on the outside so you can see the cut lines.)
5. Starting at the fold, cut along the dotted line. (Hint: Be sure to cut only as far as the pattern shows.) Unfold both papers and lay the pattern piece aside.
6. Weave the first strip through the square with the cuts in it. Weave the strip first under one and over one, continuing to the
opposite side of the paper. The next strip is woven first over one and then under one, continuing as before. Push the first strip to the top of the cuts and push the second strip close to the first strip. Weave the last strip through the square using the under one, over one pattern the first strip used. The square should look like a tic–tac–toe board.
7. Glue the woven tic–tac–toe board to the card stock and cut off excess strip paper.
8. Lay the tic–tac–toe board so the card stock side is facing up. Glue the envelope onto the board. (Hint: Be sure the flap of the
envelope is facing up so you can open it.) Lay the completed tic–tac–toe board aside.9. Cut out the pattern piece for the markers. Trace the round pattern piece onto the colored poster board nine times.
10. Cut out the markers and store in the envelope on the back of your tic–tac–toe board. You are ready to play!
1. Provide children with ribbon, feathers, fabric, lace, sticks, etc., and encourage them to experiment with different kinds of weaving materials. 2. Encourage children to weave using strips of different widths or using
a variety of patterns. Example: Under 1, Over 2, Under 1, Over 2 Over 1, Under 1, Over 2, Under 1 Over 2, Under 1, Over 2, Under 1 Under 1, Over 2, Under 1, Over 2
24
Mini 4–H Before You Sew, Purdue University Cooperative Extension Service.
Tic–Tac–Toe Pattern
25
Tic–Tac–ToeMarkerPattern
Fol
d
Cut
Cut
Cut
Mini 4–H Before You Sew, Purdue University Cooperative Extension Service.
26
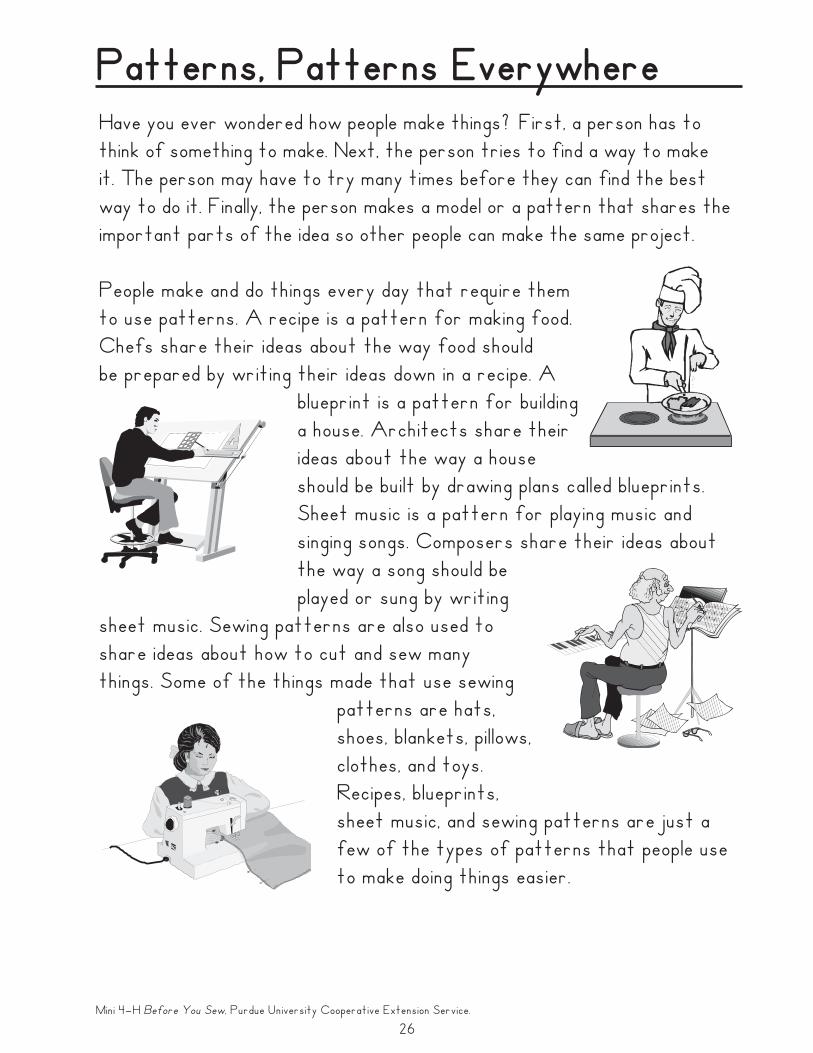
Patterns, Patterns EverywhereHave you ever wondered how people make things? First, a person has to think of something to make. Next, the person tries to find a way to make it. The person may have to try many times before they can find the best way to do it. Finally, the person makes a model or a pattern that shares the important parts of the idea so other people can make the same project.
People make and do things every day that require them to use patterns. A recipe is a pattern for making food. Chefs share their ideas about the way food should be prepared by writing their ideas down in a recipe. A
blueprint is a pattern for building a house. Architects share their ideas about the way a house should be built by drawing plans called blueprints. Sheet music is a pattern for playing music and singing songs. Composers share their ideas about the way a song should be played or sung by writing
sheet music. Sewing patterns are also used to share ideas about how to cut and sew many things. Some of the things made that use sewing
patterns are hats, shoes, blankets, pillows, clothes, and toys. Recipes, blueprints, sheet music, and sewing patterns are just a few of the types of patterns that people use to make doing things easier.
Mini 4–H Before You Sew, Purdue University Cooperative Extension Service.
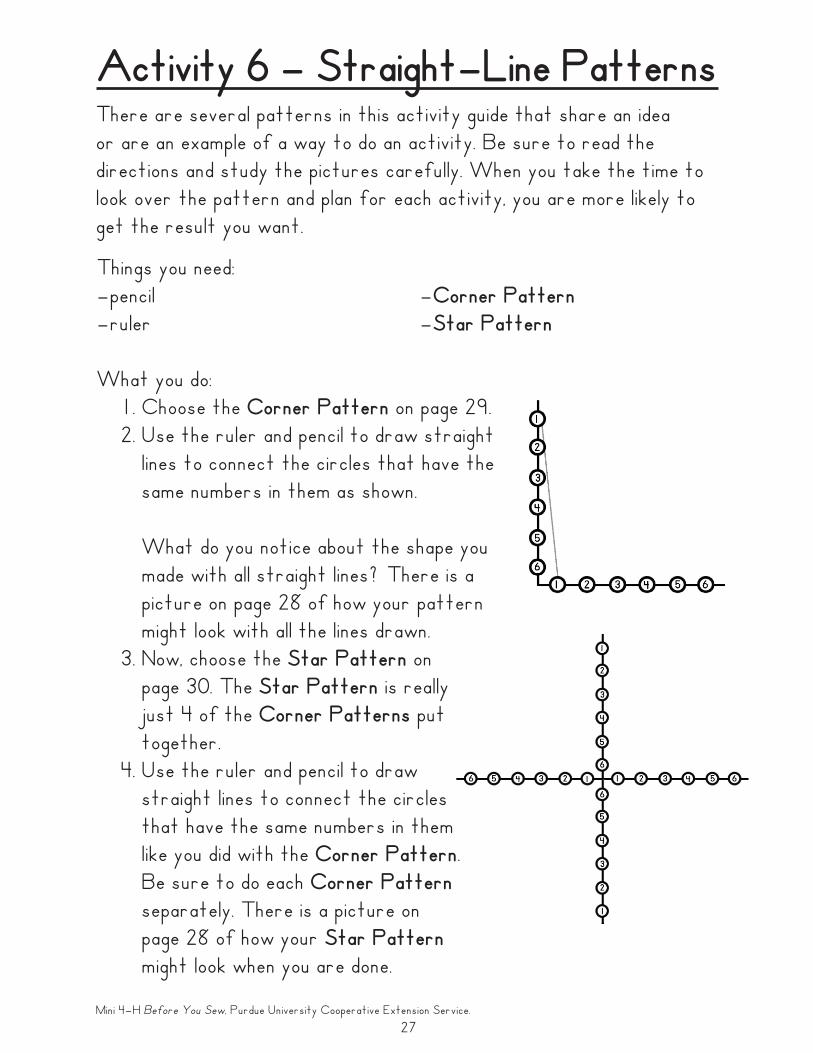
Things you need:–pencil –Corner Pattern–ruler –Star Pattern
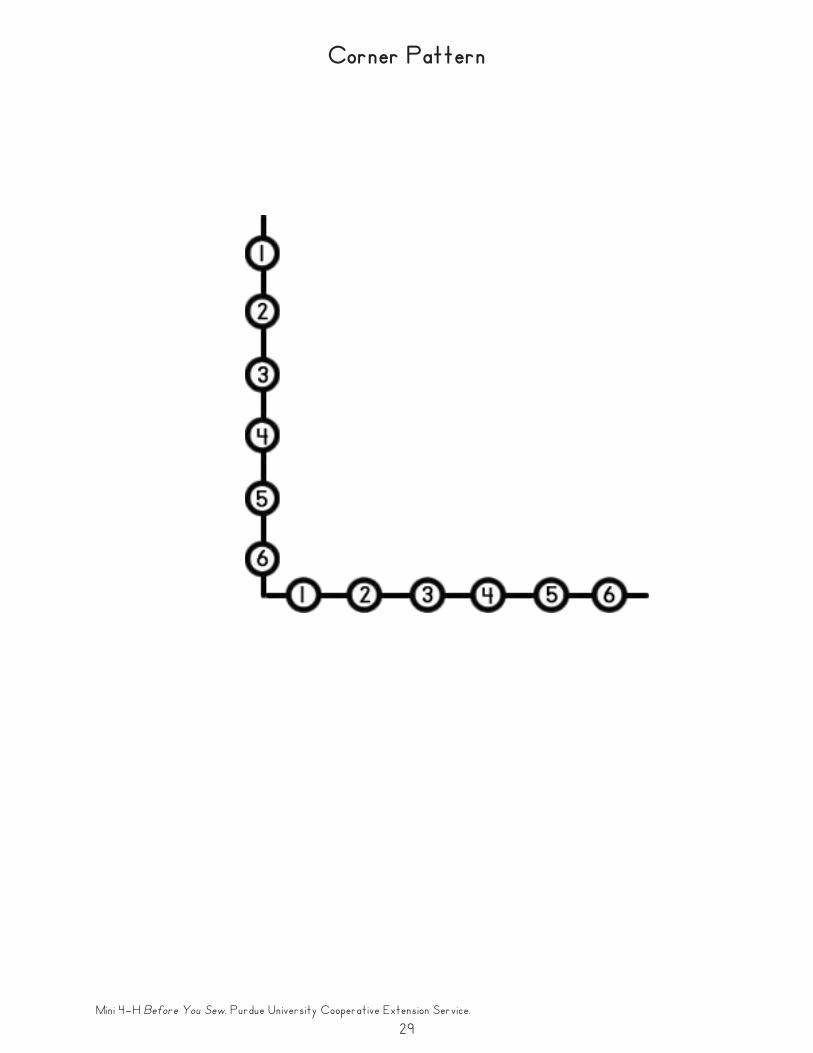
What you do: 1. Choose the Corner Pattern on page 29. 2. Use the ruler and pencil to draw straight
lines to connect the circles that have the same numbers in them as shown.
What do you notice about the shape you made with all straight lines? There is a picture on page 28 of how your pattern might look with all the lines drawn.
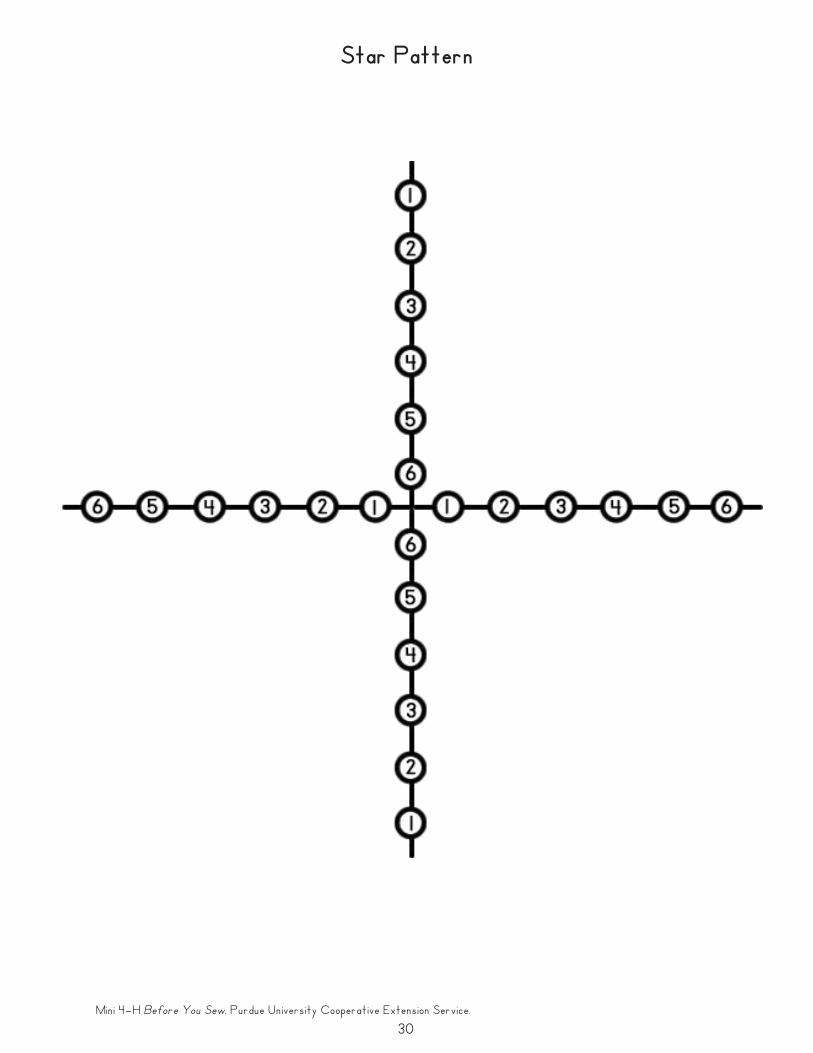
3. Now, choose the Star Pattern on page 30. The Star Pattern is really just 4 of the Corner Patterns put together. 4. Use the ruler and pencil to draw straight lines to connect the circles that have the same numbers in them like you did with the Corner Pattern. Be sure to do each Corner Pattern separately. There is a picture on page 28 of how your Star Pattern might look when you are done.
Activity 6 – Straight–Line PatternsThere are several patterns in this activity guide that share an idea or are an example of a way to do an activity. Be sure to read the directions and study the pictures carefully. When you take the time to look over the pattern and plan for each activity, you are more likely to get the result you want.
27
Mini 4–H Before You Sew, Purdue University Cooperative Extension Service.
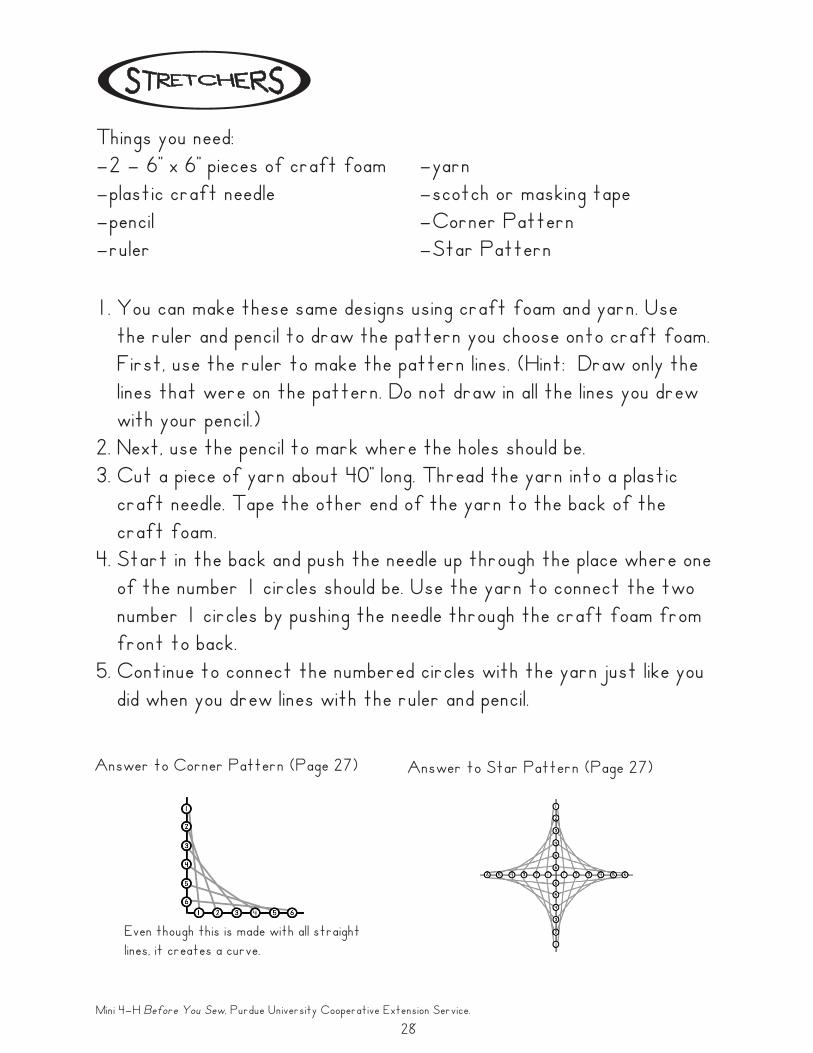
1. You can make these same designs using craft foam and yarn. Use the ruler and pencil to draw the pattern you choose onto craft foam. First, use the ruler to make the pattern lines. (Hint: Draw only the lines that were on the pattern. Do not draw in all the lines you drew with your pencil.)
2. Next, use the pencil to mark where the holes should be.3. Cut a piece of yarn about 40” long. Thread the yarn into a plastic
craft needle. Tape the other end of the yarn to the back of the craft foam.
4. Start in the back and push the needle up through the place where one of the number 1 circles should be. Use the yarn to connect the two number 1 circles by pushing the needle through the craft foam from front to back.
5. Continue to connect the numbered circles with the yarn just like you did when you drew lines with the ruler and pencil.
28
Things you need:–2 – 6” x 6” pieces of craft foam –yarn–plastic craft needle –scotch or masking tape–pencil –Corner Pattern–ruler –Star Pattern
Answer to Corner Pattern (Page 27) Answer to Star Pattern (Page 27)
Even though this is made with all straight lines, it creates a curve.
Mini 4–H Before You Sew, Purdue University Cooperative Extension Service.
Corner Pattern
29
Mini 4–H Before You Sew, Purdue University Cooperative Extension Service.
Star Pattern
30
Mini 4–H Before You Sew, Purdue University Cooperative Extension Service.
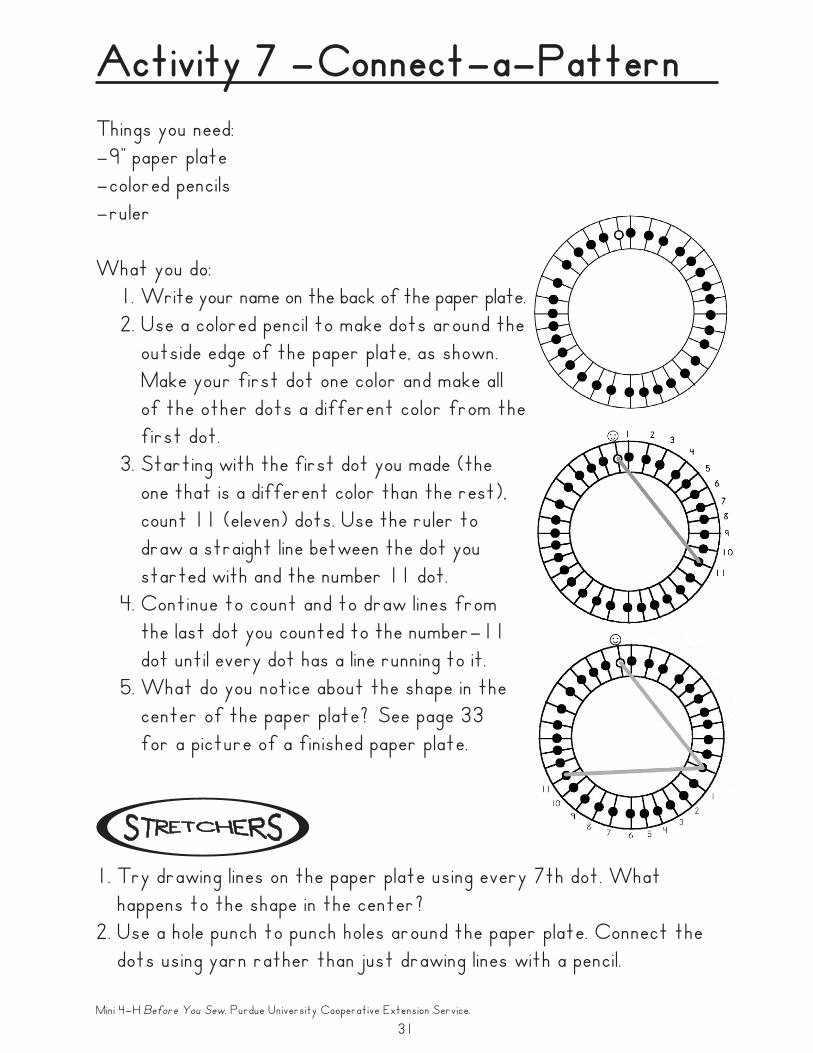
Things you need:–9” paper plate–colored pencils–ruler
What you do: 1. Write your name on the back of the paper plate. 2. Use a colored pencil to make dots around the
outside edge of the paper plate, as shown. Make your first dot one color and make all of the other dots a different color from the first dot.
3. Starting with the first dot you made (the one that is a different color than the rest), count 11 (eleven) dots. Use the ruler to draw a straight line between the dot you started with and the number 11 dot.
4. Continue to count and to draw lines from the last dot you counted to the number–11 dot until every dot has a line running to it.
5. What do you notice about the shape in the center of the paper plate? See page 33 for a picture of a finished paper plate.
Activity 7 – Connect–a–Pattern
1. Try drawing lines on the paper plate using every 7th dot. What happens to the shape in the center?2. Use a hole punch to punch holes around the paper plate. Connect the
dots using yarn rather than just drawing lines with a pencil.
31
Mini 4–H Before You Sew, Purdue University Cooperative Extension Service.
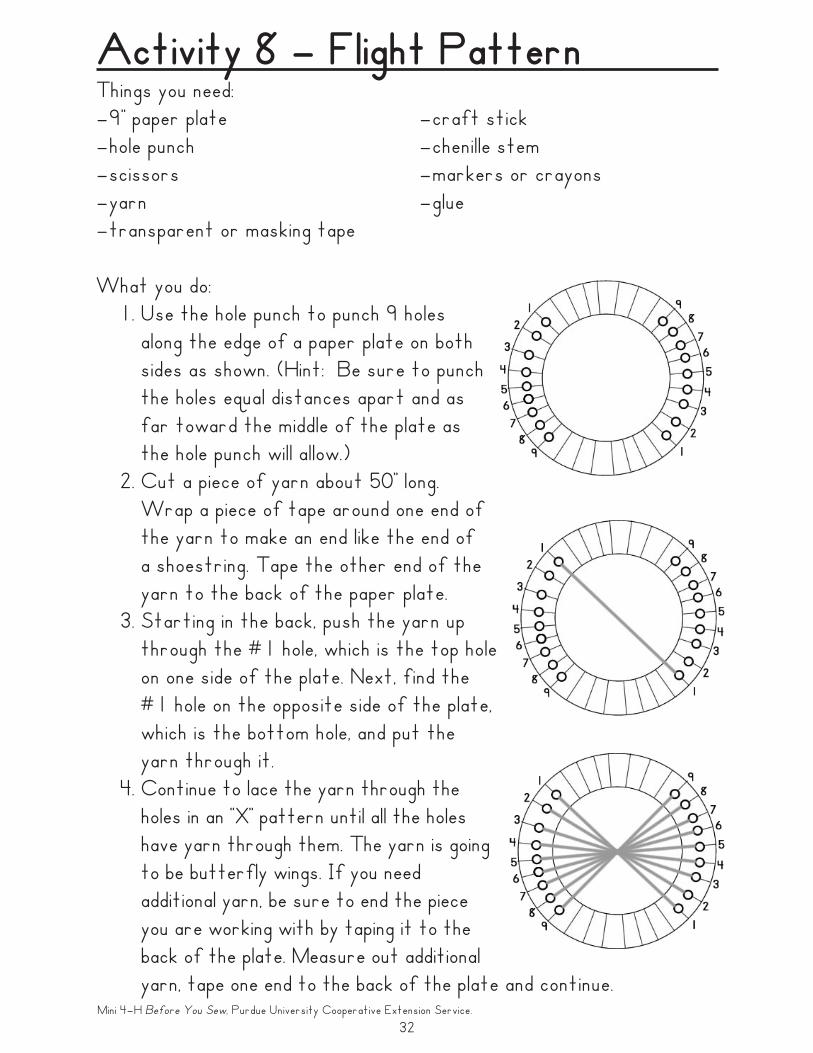
Things you need:–9” paper plate –craft stick–hole punch –chenille stem–scissors –markers or crayons–yarn –glue–transparent or masking tape
What you do: 1. Use the hole punch to punch 9 holes
along the edge of a paper plate on both sides as shown. (Hint: Be sure to punch the holes equal distances apart and as far toward the middle of the plate as the hole punch will allow.)
2. Cut a piece of yarn about 50” long. Wrap a piece of tape around one end of the yarn to make an end like the end of a shoestring. Tape the other end of the yarn to the back of the paper plate.
3. Starting in the back, push the yarn up through the #1 hole, which is the top hole on one side of the plate. Next, find the #1 hole on the opposite side of the plate, which is the bottom hole, and put the yarn through it.
4. Continue to lace the yarn through the holes in an “X” pattern until all the holes have yarn through them. The yarn is going to be butterfly wings. If you need
additional yarn, be sure to end the piece you are working with by taping it to the back of the plate. Measure out additional yarn, tape one end to the back of the plate and continue.
Activity 8 – Flight Pattern
32
Mini 4–H Before You Sew, Purdue University Cooperative Extension Service.
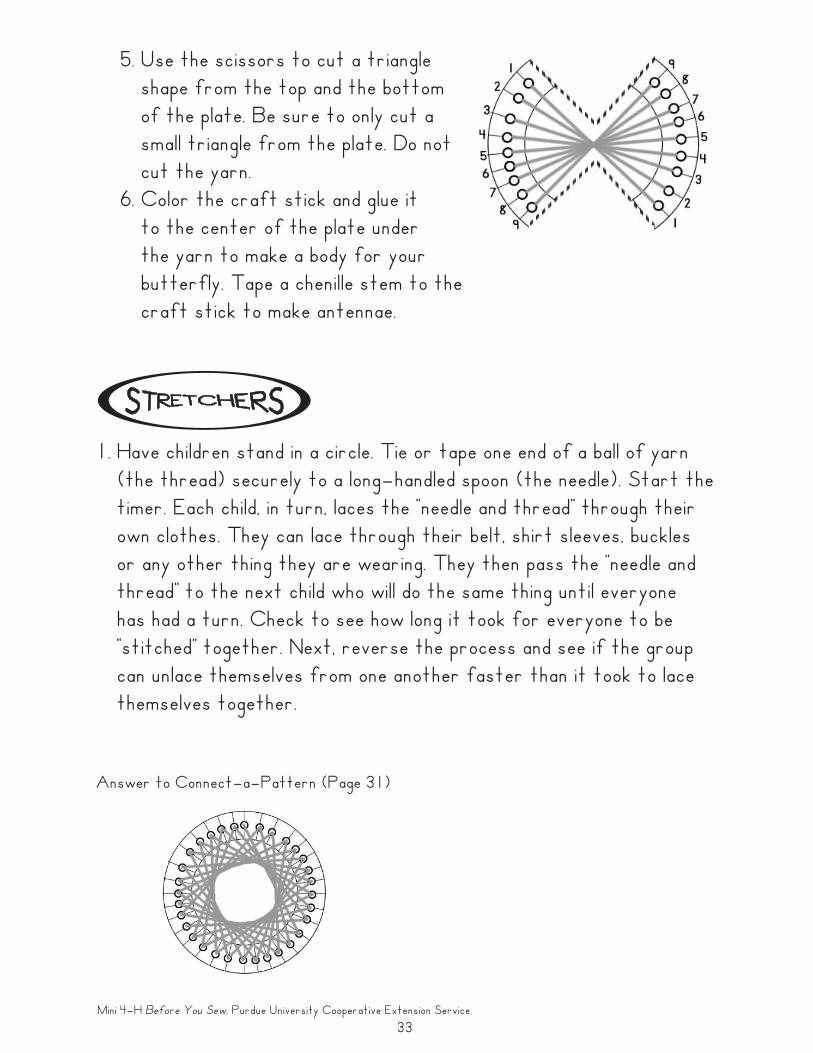
5. Use the scissors to cut a triangle shape from the top and the bottom of the plate. Be sure to only cut a small triangle from the plate. Do not cut the yarn.
6. Color the craft stick and glue it to the center of the plate under the yarn to make a body for your butterfly. Tape a chenille stem to the craft stick to make antennae.
1. Have children stand in a circle. Tie or tape one end of a ball of yarn (the thread) securely to a long–handled spoon (the needle). Start the timer. Each child, in turn, laces the “needle and thread” through their own clothes. They can lace through their belt, shirt sleeves, buckles or any other thing they are wearing. They then pass the “needle and thread” to the next child who will do the same thing until everyone has had a turn. Check to see how long it took for everyone to be “stitched” together. Next, reverse the process and see if the group can unlace themselves from one another faster than it took to lace themselves together.
33
Answer to Connect–a–Pattern (Page 31)
Mini 4–H Before You Sew, Purdue University Cooperative Extension Service.
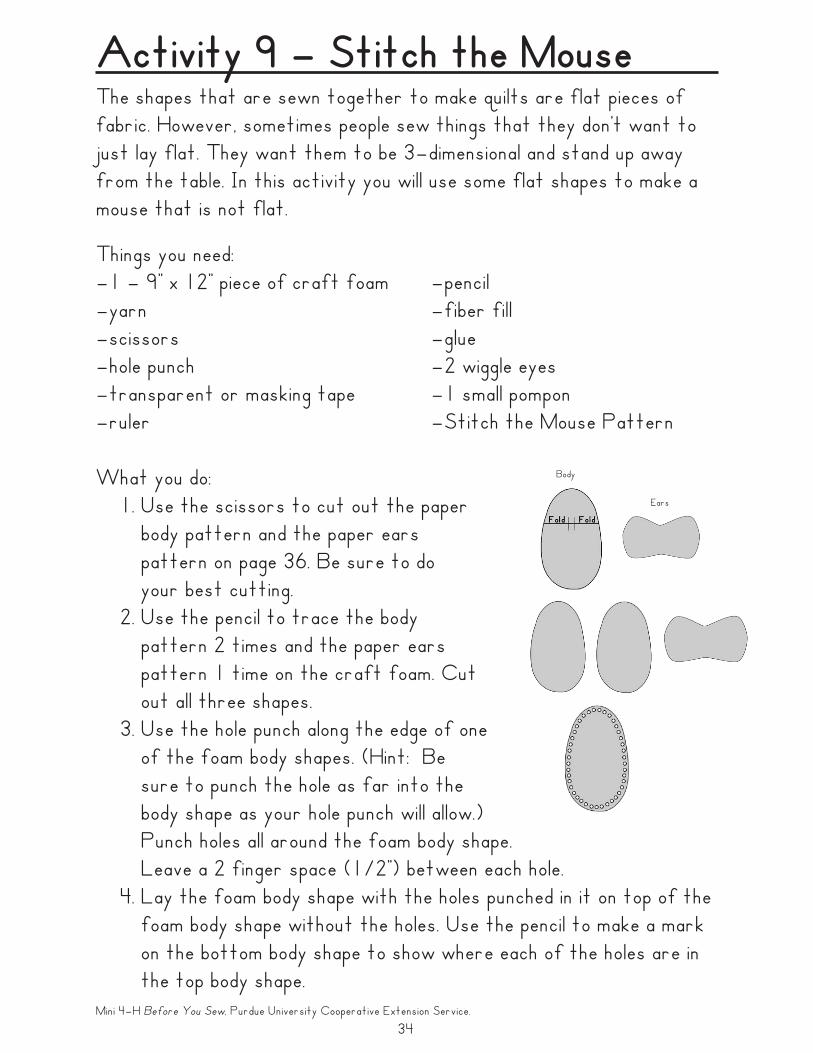
The shapes that are sewn together to make quilts are flat pieces of fabric. However, sometimes people sew things that they don’t want to just lay flat. They want them to be 3–dimensional and stand up away from the table. In this activity you will use some flat shapes to make a mouse that is not flat.
Activity 9 – Stitch the Mouse
Body
Ears
Things you need:–1 – 9” x 12” piece of craft foam –pencil–yarn –fiber fill–scissors –glue–hole punch –2 wiggle eyes–transparent or masking tape –1 small pompon–ruler –Stitch the Mouse Pattern
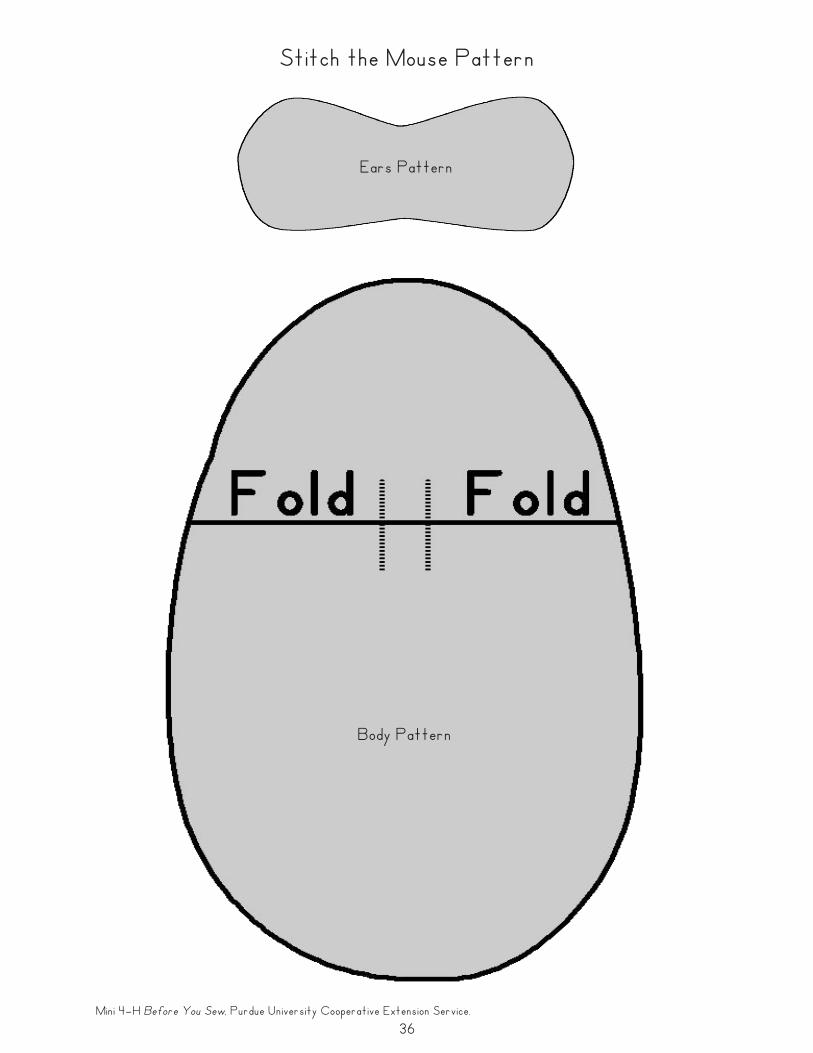
What you do: 1. Use the scissors to cut out the paper body pattern and the paper ears pattern on page 36. Be sure to do your best cutting. 2. Use the pencil to trace the body pattern 2 times and the paper ears pattern 1 time on the craft foam. Cut out all three shapes. 3. Use the hole punch along the edge of one of the foam body shapes. (Hint: Be sure to punch the hole as far into the body shape as your hole punch will allow.) Punch holes all around the foam body shape. Leave a 2 finger space (1/2”) between each hole. 4. Lay the foam body shape with the holes punched in it on top of the
foam body shape without the holes. Use the pencil to make a mark on the bottom body shape to show where each of the holes are in the top body shape.
34
Mini 4–H Before You Sew, Purdue University Cooperative Extension Service.
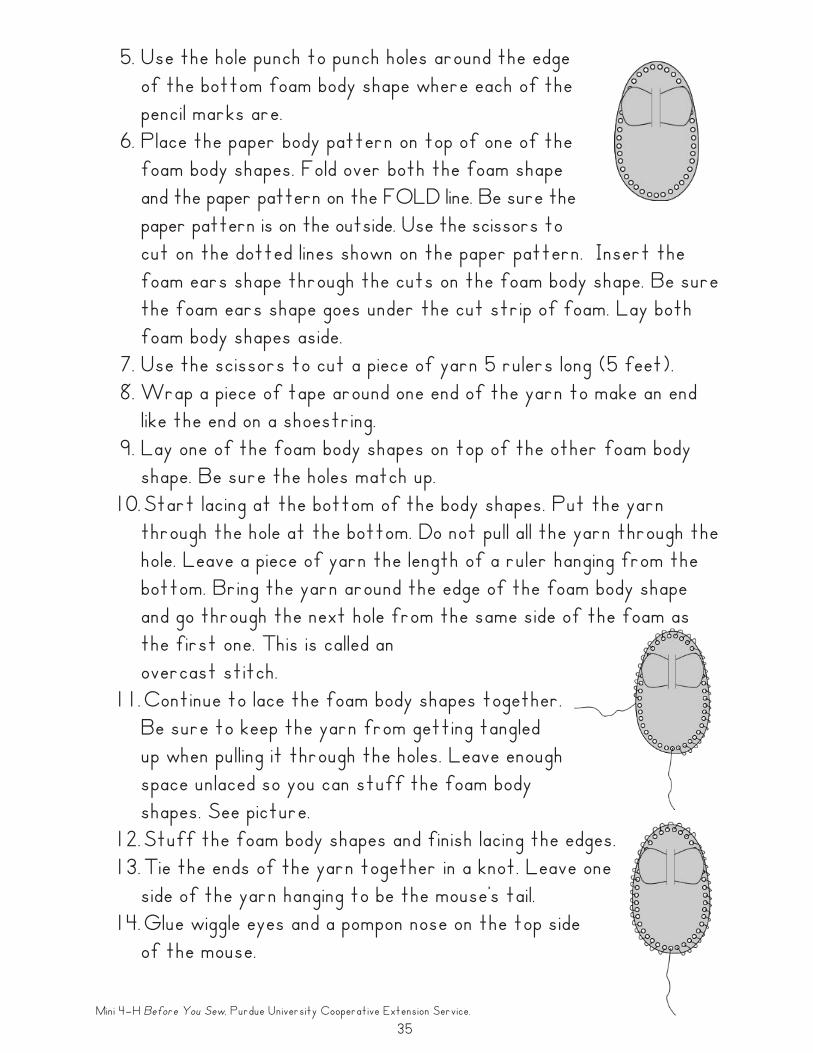
5. Use the hole punch to punch holes around the edge of the bottom foam body shape where each of the pencil marks are.
6. Place the paper body pattern on top of one of the foam body shapes. Fold over both the foam shape and the paper pattern on the FOLD line. Be sure the paper pattern is on the outside. Use the scissors to cut on the dotted lines shown on the paper pattern. Insert the foam ears shape through the cuts on the foam body shape. Be sure the foam ears shape goes under the cut strip of foam. Lay both foam body shapes aside.
7. Use the scissors to cut a piece of yarn 5 rulers long (5 feet). 8. Wrap a piece of tape around one end of the yarn to make an end
like the end on a shoestring. 9. Lay one of the foam body shapes on top of the other foam body
shape. Be sure the holes match up. 10. Start lacing at the bottom of the body shapes. Put the yarn
through the hole at the bottom. Do not pull all the yarn through the hole. Leave a piece of yarn the length of a ruler hanging from the bottom. Bring the yarn around the edge of the foam body shape and go through the next hole from the same side of the foam as the first one. This is called an
overcast stitch. 11. Continue to lace the foam body shapes together.
Be sure to keep the yarn from getting tangled up when pulling it through the holes. Leave enough space unlaced so you can stuff the foam body shapes. See picture.
12. Stuff the foam body shapes and finish lacing the edges. 13. Tie the ends of the yarn together in a knot. Leave one
side of the yarn hanging to be the mouse’s tail. 14. Glue wiggle eyes and a pompon nose on the top side of the mouse.
35
Mini 4–H Before You Sew, Purdue University Cooperative Extension Service.
Stitch the Mouse Pattern
Ears Pattern
Body Pattern
36
Mini 4–H Before You Sew, Purdue University Cooperative Extension Service.
37
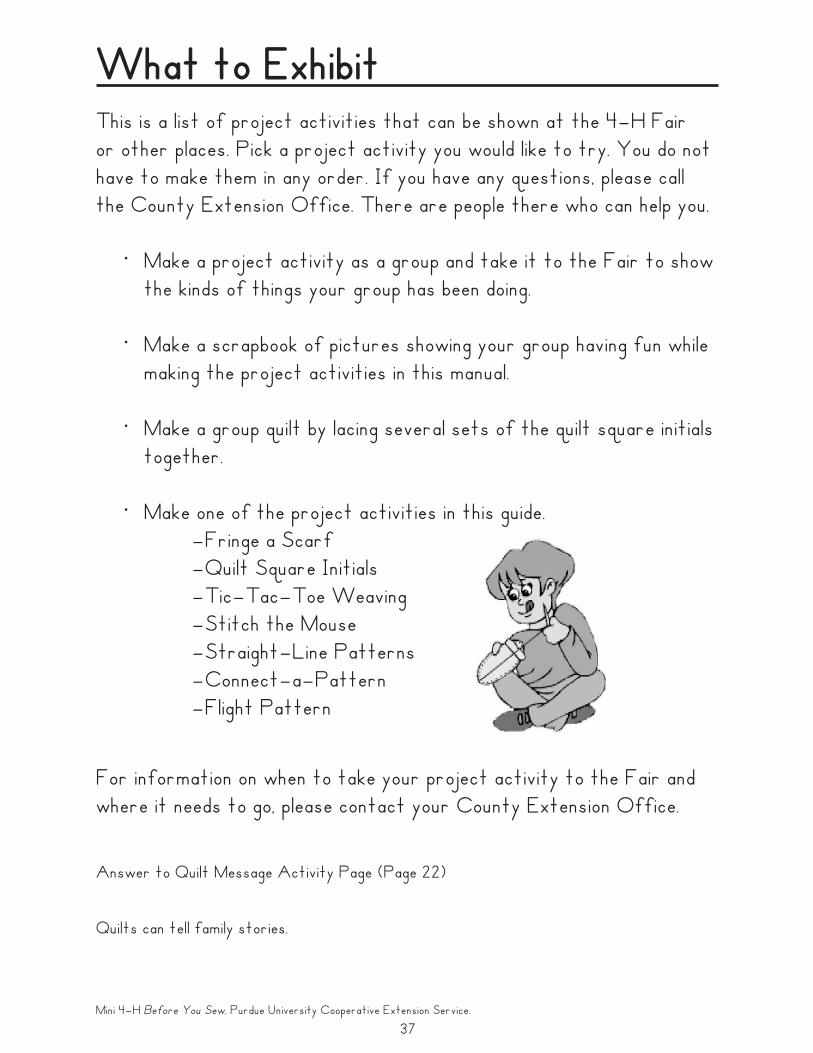
What to ExhibitThis is a list of project activities that can be shown at the 4–H Fair or other places. Pick a project activity you would like to try. You do not have to make them in any order. If you have any questions, please call the County Extension Office. There are people there who can help you.
· Make a project activity as a group and take it to the Fair to show the kinds of things your group has been doing.
· Make a scrapbook of pictures showing your group having fun while making the project activities in this manual.
· Make a group quilt by lacing several sets of the quilt square initials together.
· Make one of the project activities in this guide. –Fringe a Scarf –Quilt Square Initials –Tic–Tac–Toe Weaving –Stitch the Mouse –Straight–Line Patterns –Connect–a–Pattern –Flight Pattern
Answer to Quilt Message Activity Page (Page 22)
Quilts can tell family stories.
For information on when to take your project activity to the Fair and where it needs to go, please contact your County Extension Office.
Mini 4–H Before You Sew, Purdue University Cooperative Extension Service.
Abuela’s Weave (Lee and Low Books, 1993) by Omar S. Castaneda and Enrique O. Sanchez is a book about a grandmother and granddaughter, in Guatemala, who explore their talents in the creation of beautiful woven material while also sharing many loving experiences.
Charlie Needs a Cloak (Sagebrush Bound, 1999) by Tomie De Paola tells the entire story of how Charlie makes himself a cloak, starting with shearing the sheep and ending when the cloak is sewn together.
Eight Hands Round: A Patchwork Alphabet (Harper Trophy, 1996) by Ann Whitford Paul is an alphabet book where each letter represents a different quilting block pattern and the patterns possible origin.
Joseph Had a Little Overcoat (Scholastic Inc., 1999) by Simms Taback is a book relating the sequence of how a tattered overcoat is remade several times into something useful.
Quilting Now and Then (Now & Then Publications, 1994) by Karen B. Willing and Julie B. Dock is a rhyming book that tells the story of quilting from long ago to today.
The Goat in the Rug (Aladdin, Reprint Edition, 1990) by Charles L. Blood and Martin Link is a step by step story about cooperation between friends when a Navajo weaver named Glenmae decides to make a rug out of a goat named Geraldine.
The Memory Quilt (Aladdin, Reprint Edition, 2001) by Patricia Polacco tells the story of a family quilt that is passed from one generation to the next along with the unique stories and traditions that families share.
The Talking Cloth (Orchard Books, An Imprint of Scholastic Inc., 1997) by Rhonda Mitchell is the story of a young girl discovering a part of her heritage through an understanding of a piece of fabric.
More Places to Look
38
Before You Sew–Indiana Academic StandardsKindergartenEnglish/Language ArtsStandard 7LISTENING AND SPEAKING: Skills, Strategies, and Applications Students listen and respond to oral communication. They speak in clear and coherent sentences. Students deliver brief oral presentations about familiar experiences or interests.ComprehensionK.7.1 Understand and follow one– and two–step spoken directions.Oral Communication K.7.2 Share information and ideas, speaking in complete, coherent sentences.
MathStandard 1Number SenseStudents understand the relationship between numbers and quantities up to 10, and that a set of objects has the same number in all situations regardless of the position or arrangement of the objects.K.1.1 Match sets of objects one–to–one. Example: Take crayons from the box and give one to each student in the group. Explain what you are doing.K.1.5 Divide shapes into equal parts. Example: Divide a piece of paper into 4 equal pieces.
Standard 3Algebra and FunctionsStudents sort and classify objects.K.3.1 Identify, sort, and classify objects by size, number, and other attributes. Identify objects that do not belong to a particular group. Example: Find the squares in a collection of shapes. Sort these squares into large ones and small ones and explain how you decided which squares went in each pile.K.3.2 Identify, copy, and make simple patterns with numbers and shapes. Example: Make a pattern of squares and circles with one square, one circle, one square, one circle, etc.
Standard 5MeasurementStudents understand the concept of time and units to measure it. They understand that objects have length, capacity, weight, and temperature, and that they can compare objects using these qualities. K.5.1 Make direct comparisons of the length, capacity, weight, and temperature of objects and recognize which object is shorter, longer, taller, lighter, heavier, warmer, cooler or holds more. Example: Hold two books side by side to see which is shorter. Hold one in each hand to see which is heavier.
ScienceStandard 3The Physical SettingStudents investigate, describe, and discuss their natural surroundings. They begin to question why things move.Matter and EnergyK.3.1 Describe objects in terms of the materials they are made of, such as clay, cloth, paper, etc.
Standard 6Common ThemesStudents begin to understand how things are similar and how they are different. They look for ways to distinguish between different objects by observation.Models and ScaleK.6.1 Describe an object by saying how it is similar to or different from another object.
Social StudiesStandard 1HistoryStudents examine the connections of their own environment with the past, begin to distinguish between events and people of the past and the present, and use a sense of time in classroom planning and participation. Historical KnowledgeK.1.1 Compare people, objects, and events of today and long ago. Example: Compare objects of the past and present, such as a butter churn and a mixer; compare clothing, houses, and transportation of the past with the present.K.1.2 Identify celebrations and holidays as a way of remembering and honoring events and people in the past. Example: Identify Thanksgiving; the Reverend Martin Luther King, Jr. Day; Presidents’ Day; Memorial Day; Veterans’ Day. Chronological ThinkingK.1.4 Identify and order events that take place in a sequence. Example: Identify events in the school day as first, next, last; list the day’s classroom activities in order; place events, such as birthdays, in order; use a calendar to identify national holidays and historical events.
Standard 3GeographyStudents learn that maps and globes are different ways of representing Earth’s surface and begin to explore the geographic characteristics of their homes, school, and community.The World in Spatial TermsK.3.1 Use words related to location, direction, and distance, including here/there, over/under, left/right, and up/down.Places and RegionsK.3.3 Describe people and places in the school and community. Example: People in the school might include school workers; places might include the cafeteria, office, and gym. People in the community might include firefighters; places might include the fire station.
Standard 4EconomicsStudents explain how people do different jobs and work to meet basic economic wants. K.4.2 Identify different kinds of jobs that people do. Example: Picture books and stories illustrate and identify different types of jobs, as well as tools and clothing used in different jobs.
Grade OneEnglish/Language ArtsStandard 7LISTENING AND SPEAKING: Skills, Strategies, and ApplicationsStudents listen critically and respond appropriately to oral communication. They speak in a manner that guides the listener to understand important ideas by using proper phrasing, pitch, and modulation (raising and lowering voice). Students deliver brief oral presentations about familiar experiences or interests that are organized around a coherent thesis statement (a statement of topic). Students use the same Standard English conventions for oral speech that they use in their writing.Comprehension 1.7.1 Listen attentively.1.7.2 Ask questions for clarification and understanding.1.7.3 Give, restate, and follow simple two–step directions.
MathStandard 1Number SenseStudents understand symbols, objects, and pictures used to represent numbers up to 100 and show an understanding of fractions.1.1.1 Count, read, and write whole numbers up to 100. Example: Read “seventy–two” for the number 72. 1.1.7 Recognize when a shape is divided into congruent (matching) parts.
Example: Given a rectangle with lines dividing it into parts, decide whether the parts are the same size.
1.2.5 Understand the meaning of the symbols +, –, and =. Example: Use symbols to write the number sentence “one added to three equals four.”
Standard 4GeometryStudents identify common geometric shapes, classify them by common attributes, and describe their relative position or their location in space.1.4.1 Identify, describe, compare, sort, and draw triangles, rectangles, squares, and circles. Example: Draw a square and a circle and write their names next to them.
Standard 5MeasurementStudents learn how to measure length, as well as how to compare, order, and describe other kinds of measurement.1.5.1 Measure the length of objects by repeating a nonstandard unit or a standard unit. Example: Measure the length of your desk in pencil–lengths.
ScienceStandard 1The Nature of Science and TechnologyStudents are actively engaged in exploring how the world works. They explore, observe, count, collect, measure, compare, and ask questions. They discuss observations and use tools to seek answers and solve problems. They share their findings.Technology and Science1.1.4 Use tools, such as rulers and magnifiers, to investigate the world and make observations.
Standard 2Scientific ThinkingStudents begin to find answers to their questions about the world by using measurements, estimation, and observation as well as working with materials. They communicate with others through numbers, words, and drawings.Computation and Estimation 1.2.1 Use whole numbers, up to 100, in counting, identifying, measuring, and describing objects and experiences.Manipulation and Observation 1.2.4 Measure the length of objects having straight edges in inches, centimeters, or non–standard units.
Social StudiesStandard 1HistoryStudents will identify continuity and change in the different environments around them, including school and neighborhood communities, and identify individuals, events, and symbols that are important to our country.Historical Knowledge1.1.1 Identify examples of things that have changed and things that have remained the same as students compare their lives with the lives of family members, such as parents and grandparents. Example: People today use different kinds of technology, such as computers, in comparison to the types of technology people used in the past.
Grade TwoEnglish/Language ArtsStandard 2READING: Comprehension Students read and understand grade–level–appropriate material. They use a variety of comprehension strategies, such as asking and responding to essential questions, making predictions, and comparing information from several sources to understand what they read. The selections in the Indiana Reading List (available online at www.doe.state.in.us/standards/readinglist.html) illustrate the quality and complexity of the materials to be read by students. In addition to their regular school reading, at Grade 2, students read a variety of grade–level–appropriate narrative (story) and expository (informational) texts (such as grade–level–appropriate classic and contemporary literature, poetry, children’s magazines and newspapers, dictionaries and other reference materials, and online information).
Structural Features of Informational and Technical Materials 2.2.1 Use titles, tables of contents, and chapter headings to locate information in text.2.2.7 Interpret information from diagrams, charts, and graphs. Example: Use a five–day weather chart or a weather chart on the Internet to determine the weather for the coming weekend.
Standard 7LISTENING AND SPEAKING: Skills, Strategies, and ApplicationsStudents listen critically and respond appropriately to oral communication. They speak in a manner that guides the listener to understand important ideas by using proper phrasing, pitch, and modulation (raising and lowering voice). Students deliver brief oral presentations about familiar experiences or interests that are organized around a coherent thesis statement (a statement of topic). Students use the same Standard English conventions for oral speech that they use in their writing.Comprehension 2.7.4 Give and follow three– and four–step oral directions.
ScienceStandard 1The Nature of Science and TechnologyStudents are actively engaged in exploring how the world works. They explore, observe, count, collect, measure, compare, and ask questions. They discuss observations* and use tools to seek answers and solve problems. They share their findings.Scientific Inquiry 2.1.2 Use tools — such as thermometers, magnifiers, rulers, or balances — to gain more information about objects.
It is the policy of the Purdue University Cooperative Extension Service, David C. Petritz, Director, that all persons shall have equal opportunity and access to the programs and facilities without regard to race, color, sex, religion, national origin, age, marital status, parental status, sexual orientation, or disability. Purdue University is an Affirmative Action employer.
This material may be available in alternative formats.
New 7/05
You can order or download materials on this and other topics at the Purdue Extension Education Store.
www.ces.purdue.edu/new