Embed Size (px)
Citation preview
Microsoft FrontPage 2003 – The Basics
This tutorial attempts to explain how to access your website and create the basic elements which will enable you to have a lovely working website in no time. Opening a Website You have probably already signed up for a web space on college’s server; if not, please click the following link to do so: website request. Allow 48 hours for the account to be created. Note: For additional information about publishing your website, please see our tutorial titled “How to publish your website with Microsoft FrontPage 2003” 1. Launch Microsoft FrontPage. 2. Click “Open an existing site…” from the toolbar on the right hand side of the screen.

3. In the Open Site dialog box, enter the location of your site in the Folder Name textbox. Please note that the location of your website is either http://iws.ccccd.edu/ or http://iws2.ccccd.edu/. Following the website, enter your first initial and last name with no spaces in-between. For example, my first name is Brandon and last name is Wolf; thus my user name is bwolf.
4. When prompted for the user name and password, enter your first initial and last name with no spaces in-between
(the same as your Novell login) as the user name, and the month and year of your birthday in mmyyyy format as the password.
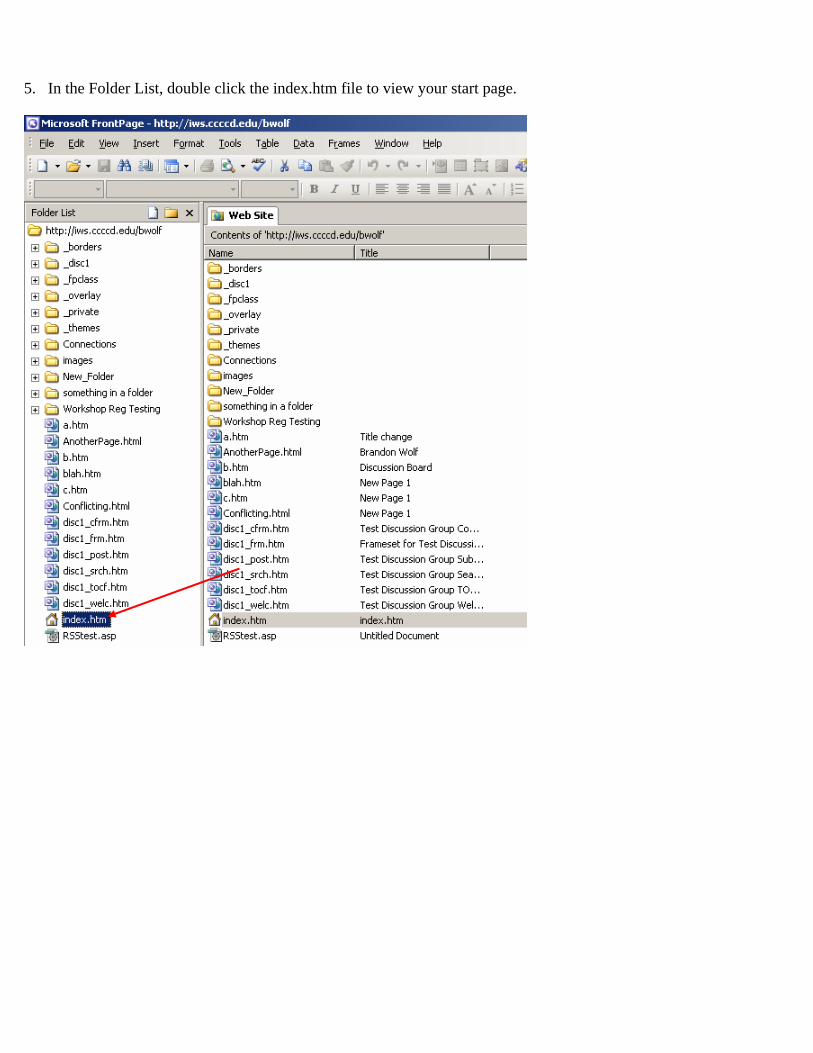
5. In the Folder List, double click the index.htm file to view your start page.
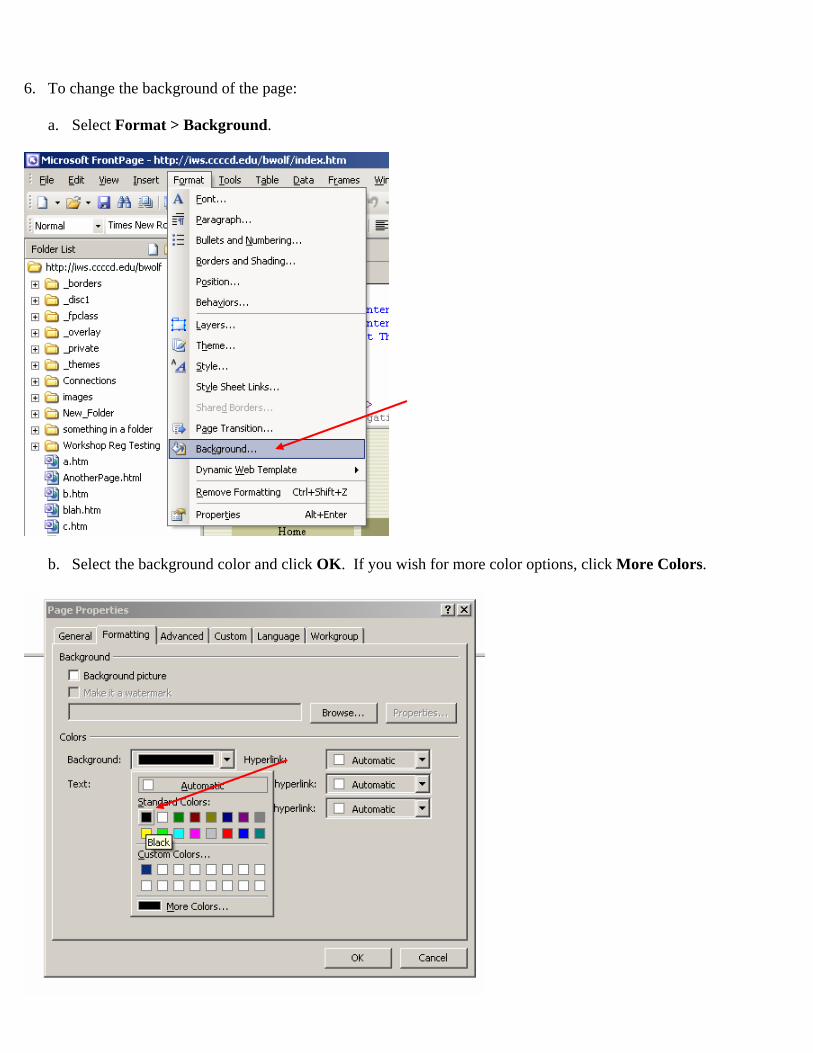
6. To change the background of the page:
a. Select Format > Background.
b. Select the background color and click OK. If you wish for more color options, click More Colors.
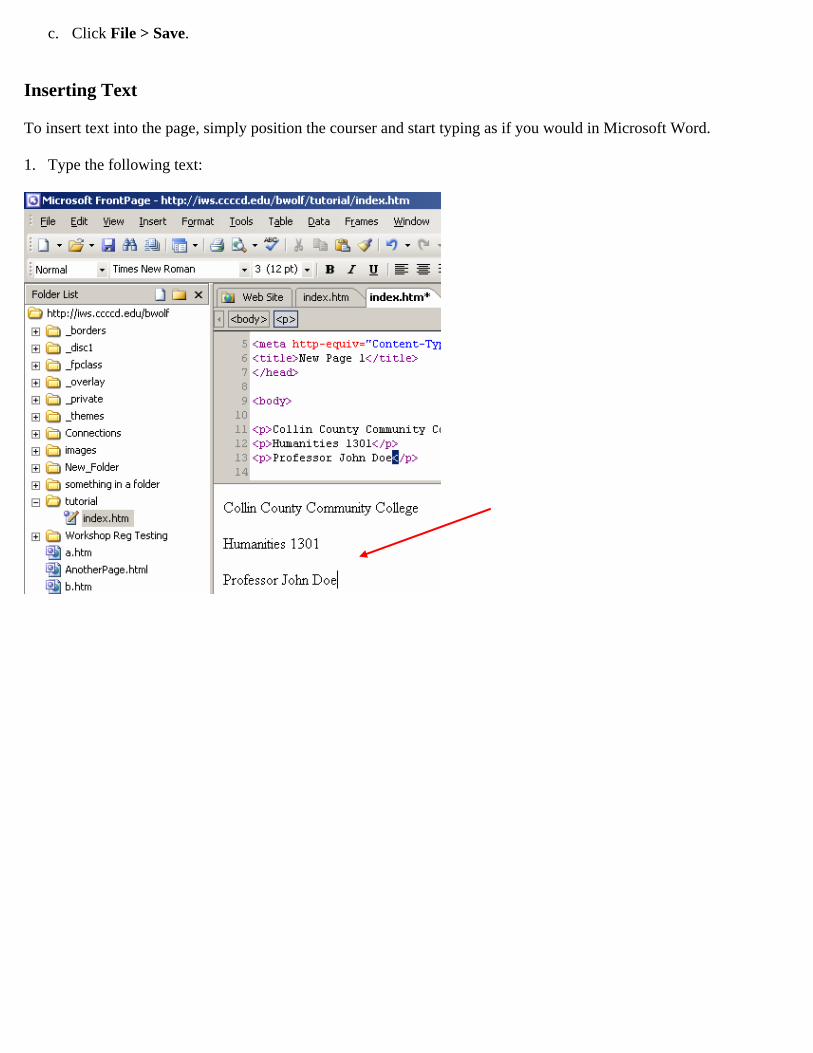
c. Click File > Save. Inserting Text To insert text into the page, simply position the courser and start typing as if you would in Microsoft Word. 1. Type the following text:
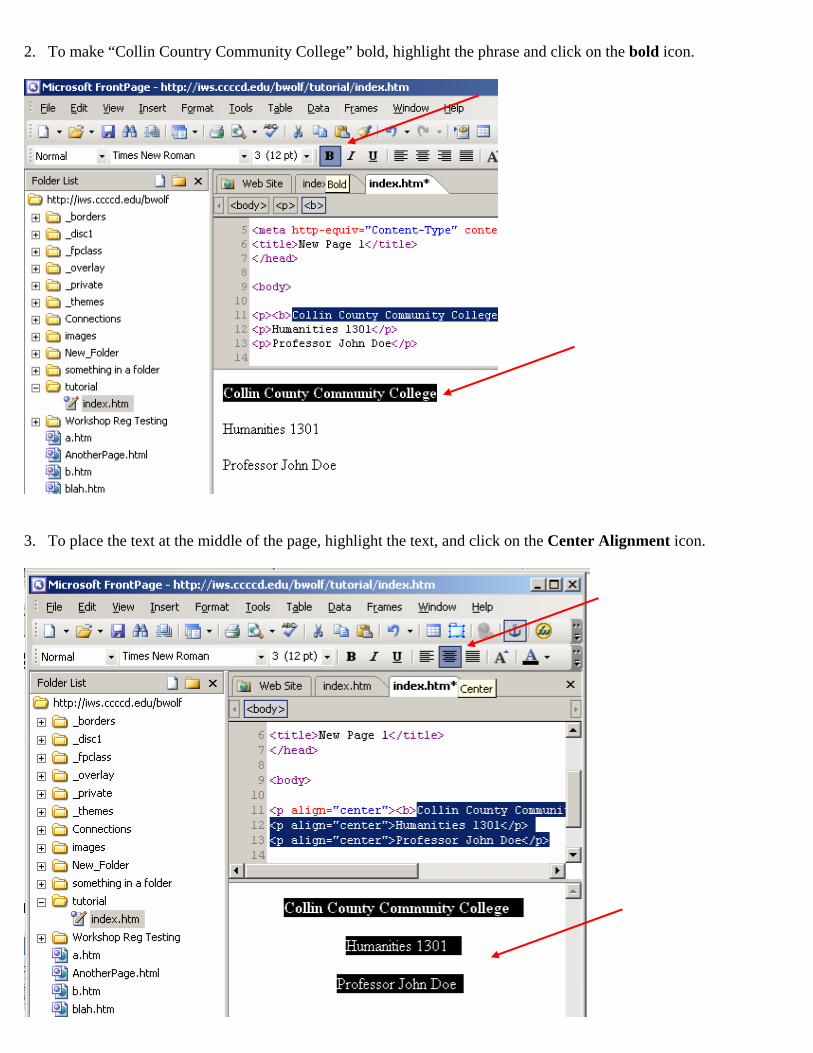
2. To make “Collin Country Community College” bold, highlight the phrase and click on the bold icon.
3. To place the text at the middle of the page, highlight the text, and click on the Center Alignment icon.

Inserting an Image To use an image in the web site, please make certain that the image is saved on the Desktop of your computer. Please note, that the image can be any a scanned or downloaded picture. Here, we’ll demonstrate how to download an image from the Internet, and insert it into the website. How do I edit pictures? Downloading the Image: 1. Click File > Save to save your current web and exit FrontPage. Launch Internet Explorer and navigate
http://iws2.ccccd.edu/tlc. Right click on the CCCC logo picture and select Save Picture As…
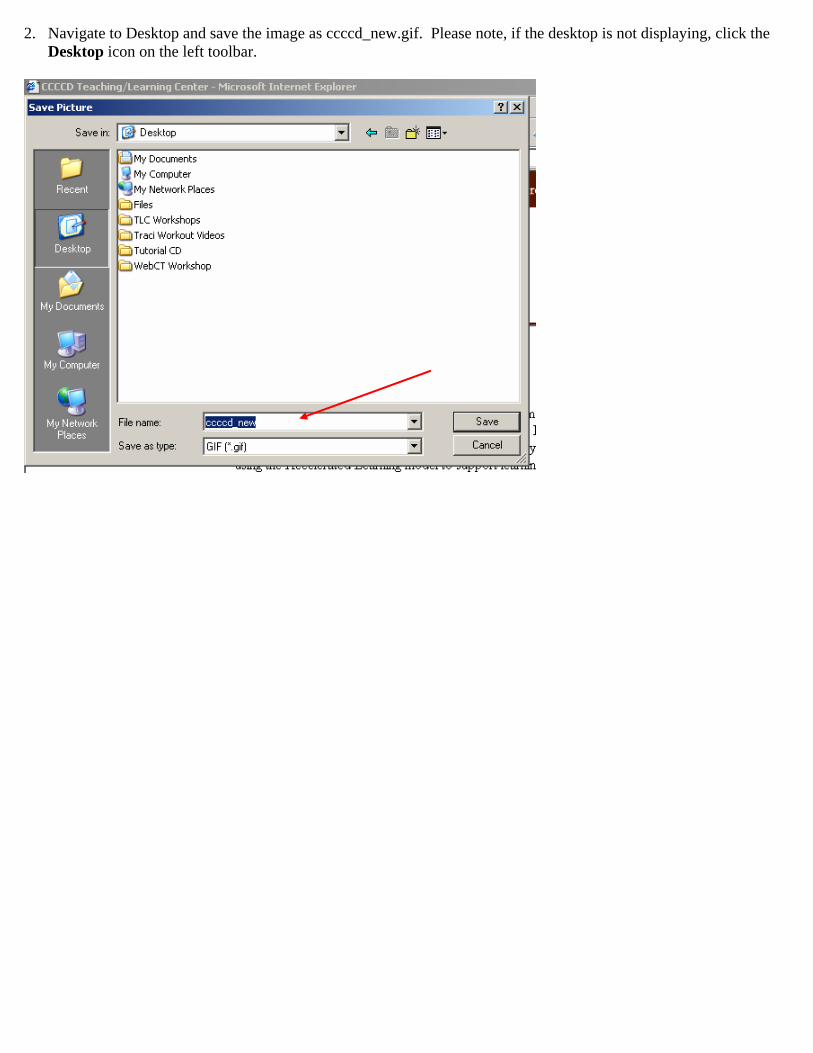
2. Navigate to Desktop and save the image as ccccd_new.gif. Please note, if the desktop is not displaying, click the Desktop icon on the left toolbar.
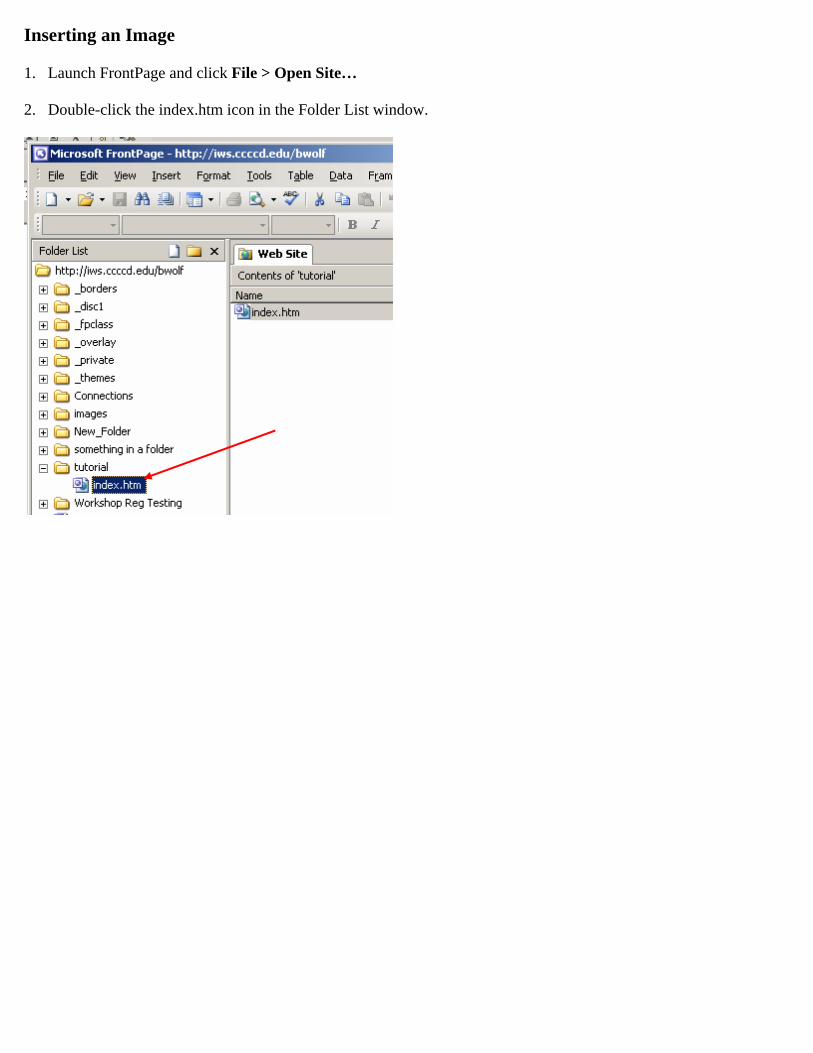
Inserting an Image 1. Launch FrontPage and click File > Open Site… 2. Double-click the index.htm icon in the Folder List window.
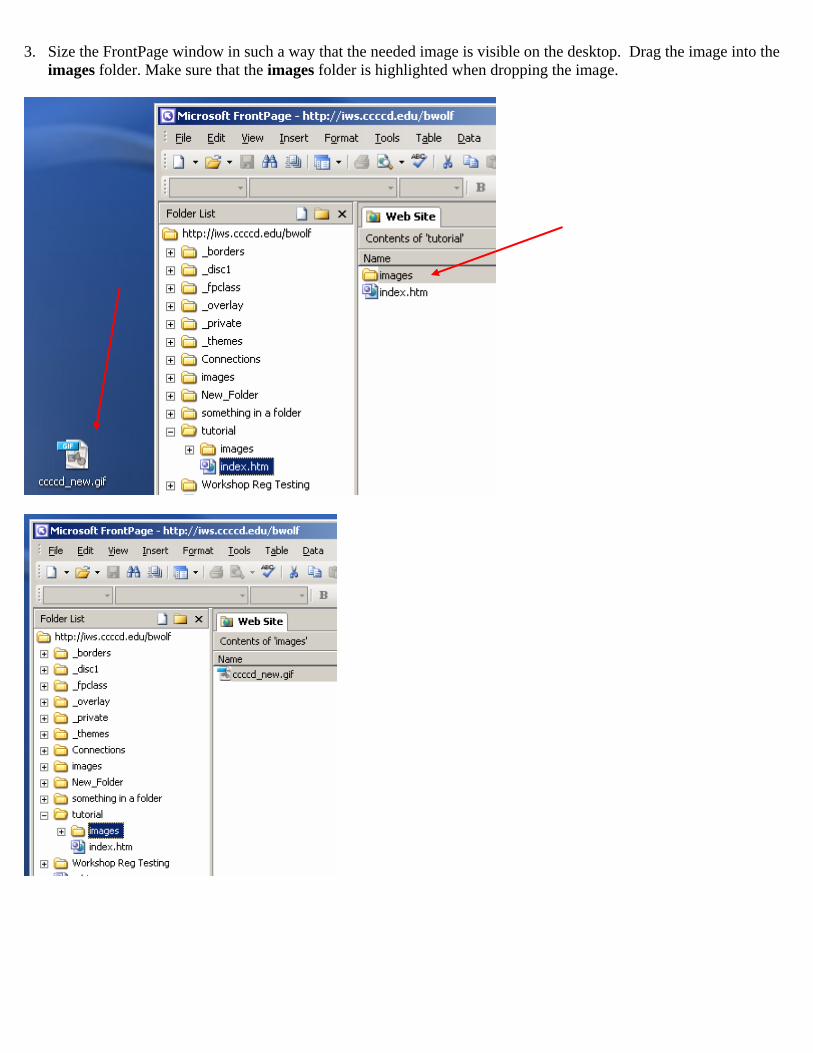
3. Size the FrontPage window in such a way that the needed image is visible on the desktop. Drag the image into the
images folder. Make sure that the images folder is highlighted when dropping the image.
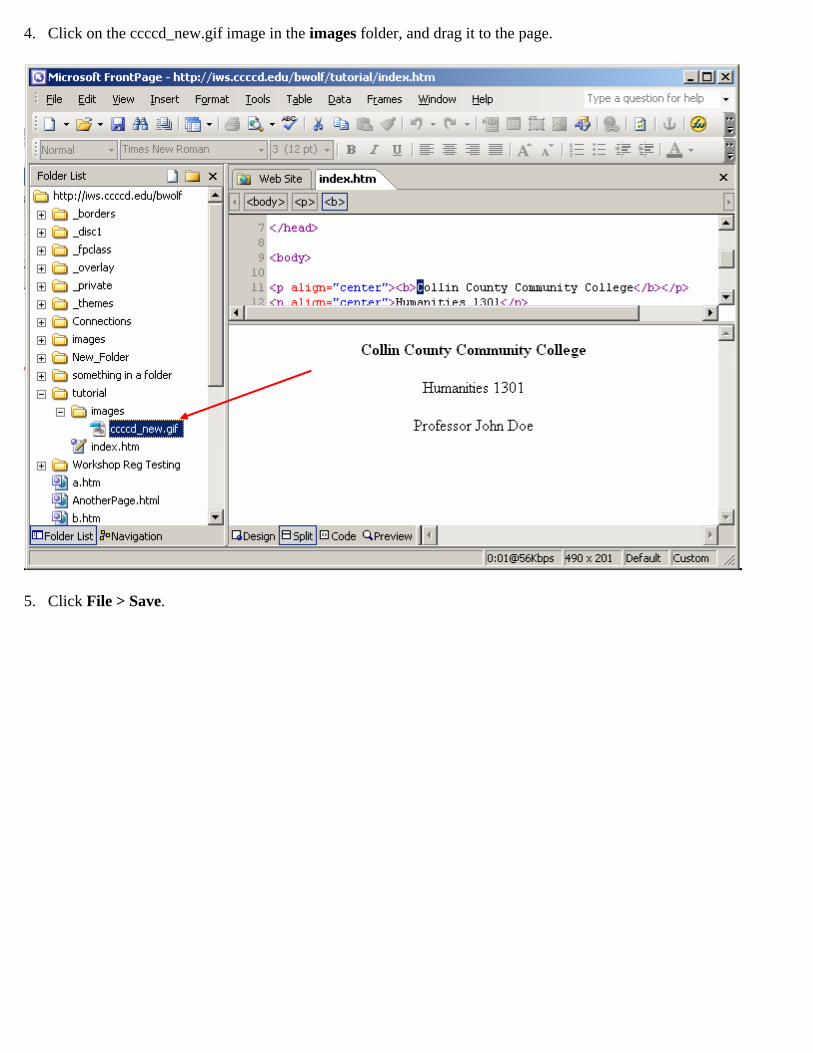
4. Click on the ccccd_new.gif image in the images folder, and drag it to the page.
5. Click File > Save.
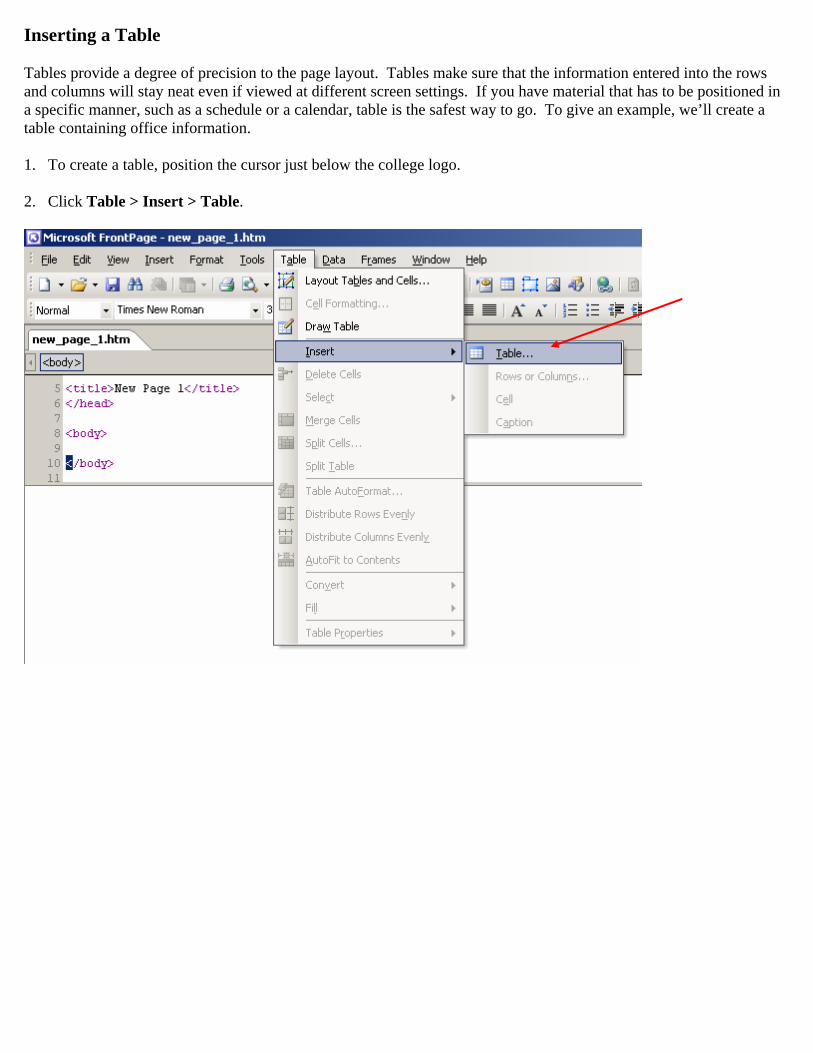
Inserting a Table Tables provide a degree of precision to the page layout. Tables make sure that the information entered into the rows and columns will stay neat even if viewed at different screen settings. If you have material that has to be positioned in a specific manner, such as a schedule or a calendar, table is the safest way to go. To give an example, we’ll create a table containing office information. 1. To create a table, position the cursor just below the college logo. 2. Click Table > Insert > Table.
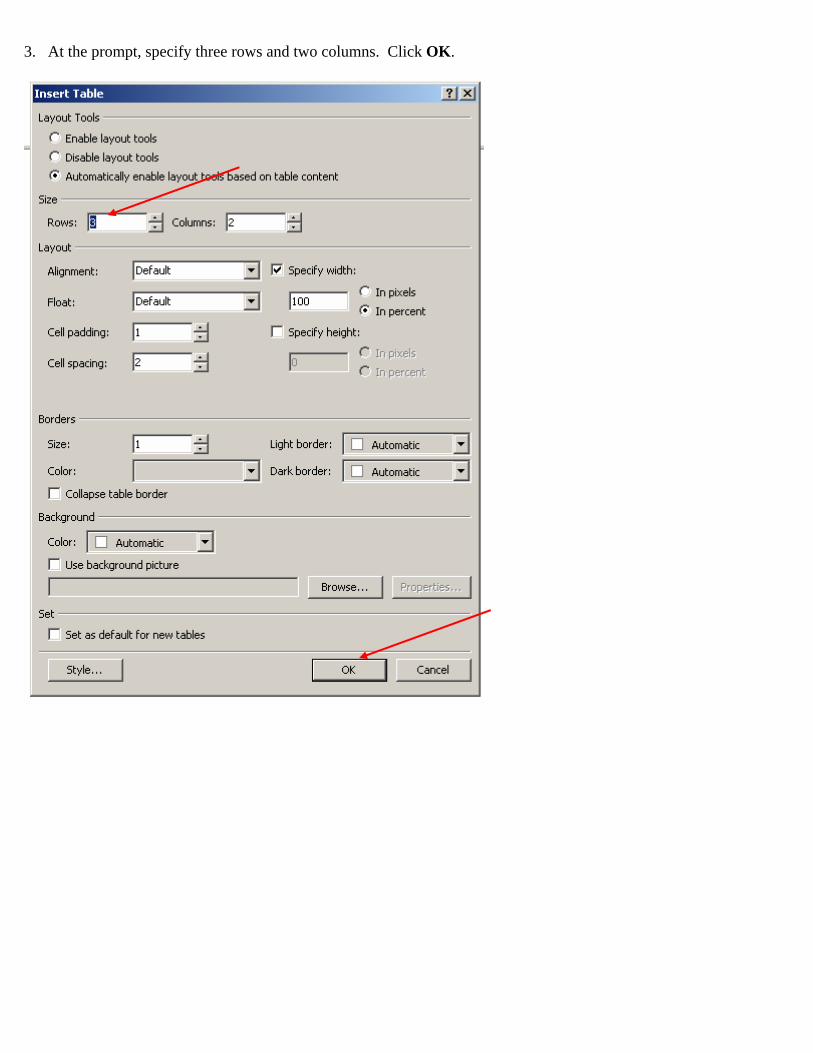
3. At the prompt, specify three rows and two columns. Click OK.

4. A table should appear on the page.
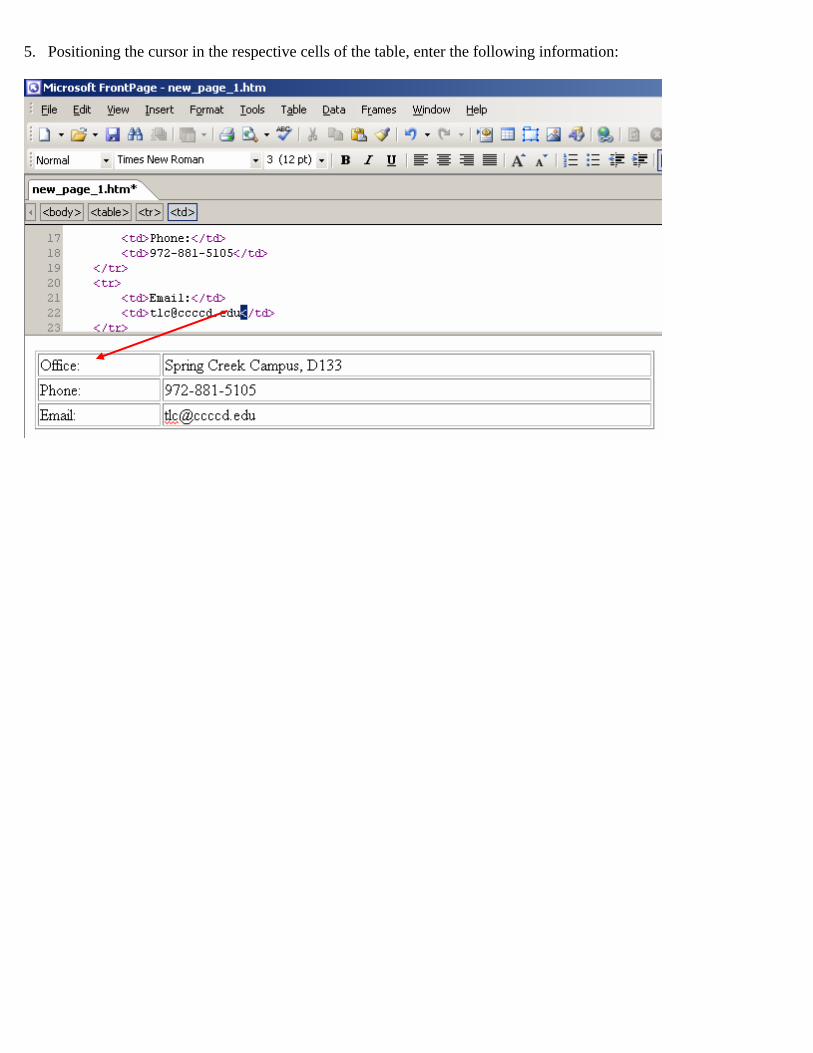
5. Positioning the cursor in the respective cells of the table, enter the following information:
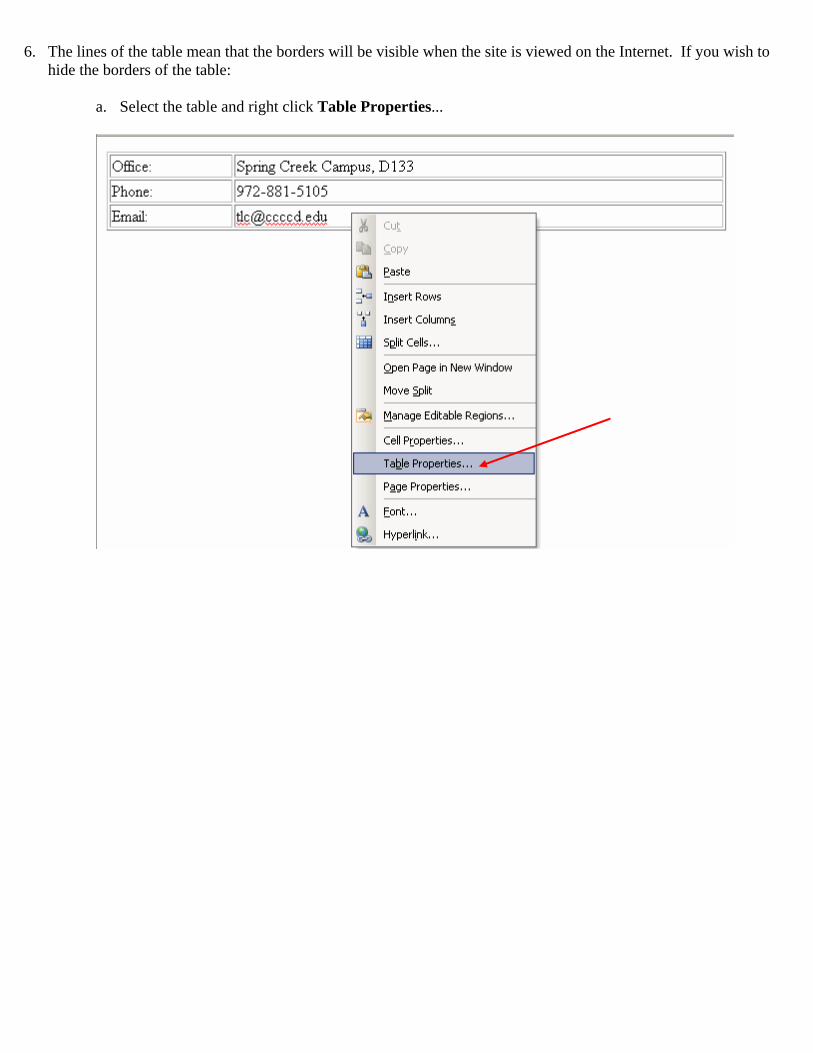
6. The lines of the table mean that the borders will be visible when the site is viewed on the Internet. If you wish to
hide the borders of the table:
a. Select the table and right click Table Properties...
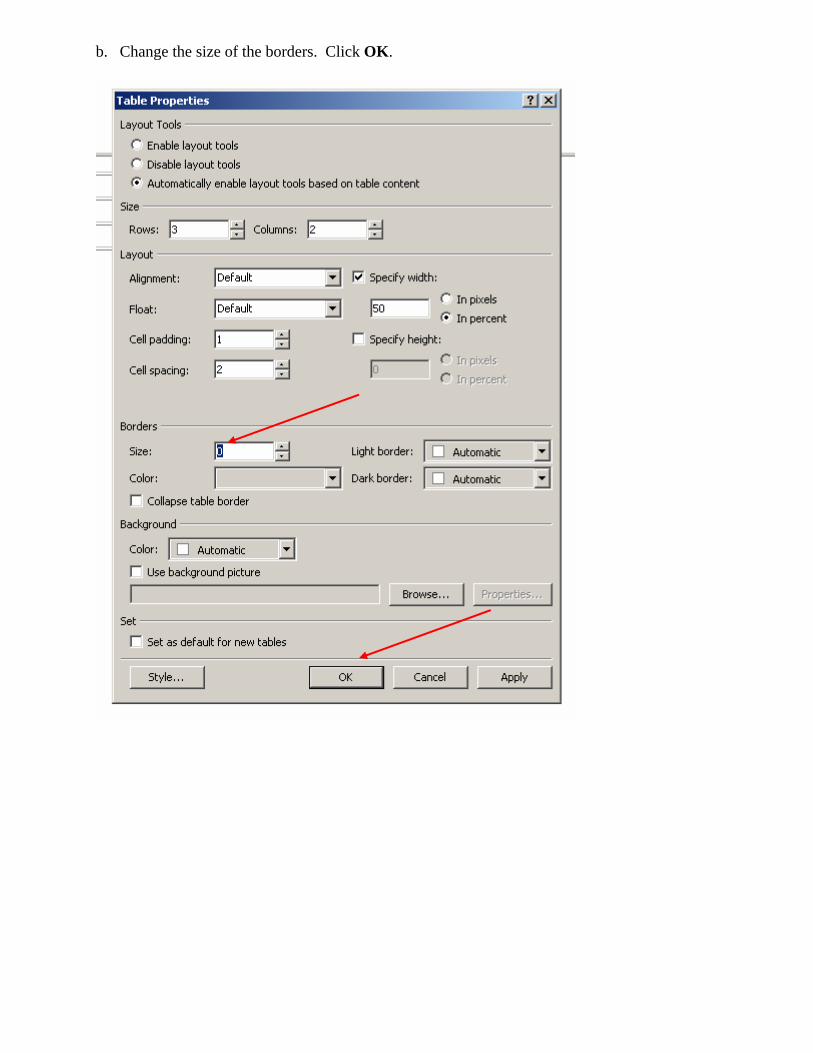
b. Change the size of the borders. Click OK.
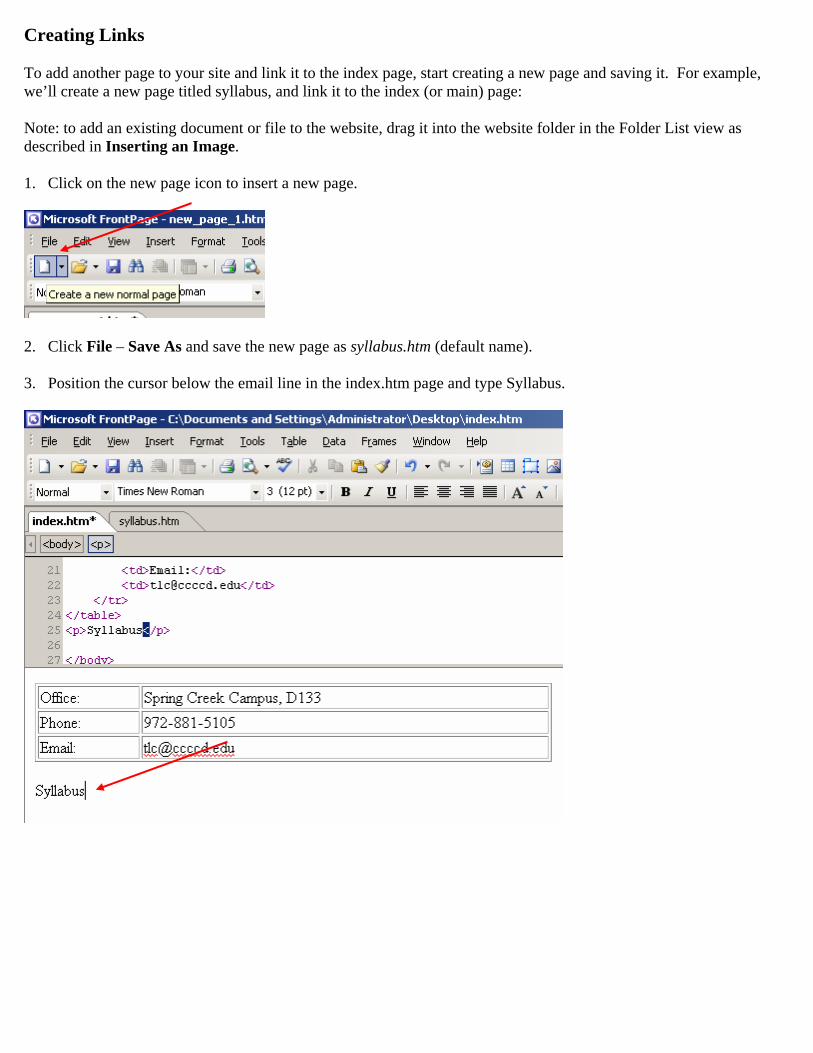
Creating Links To add another page to your site and link it to the index page, start creating a new page and saving it. For example, we’ll create a new page titled syllabus, and link it to the index (or main) page: Note: to add an existing document or file to the website, drag it into the website folder in the Folder List view as described in Inserting an Image. 1. Click on the new page icon to insert a new page.
2. Click File – Save As and save the new page as syllabus.htm (default name). 3. Position the cursor below the email line in the index.htm page and type Syllabus.
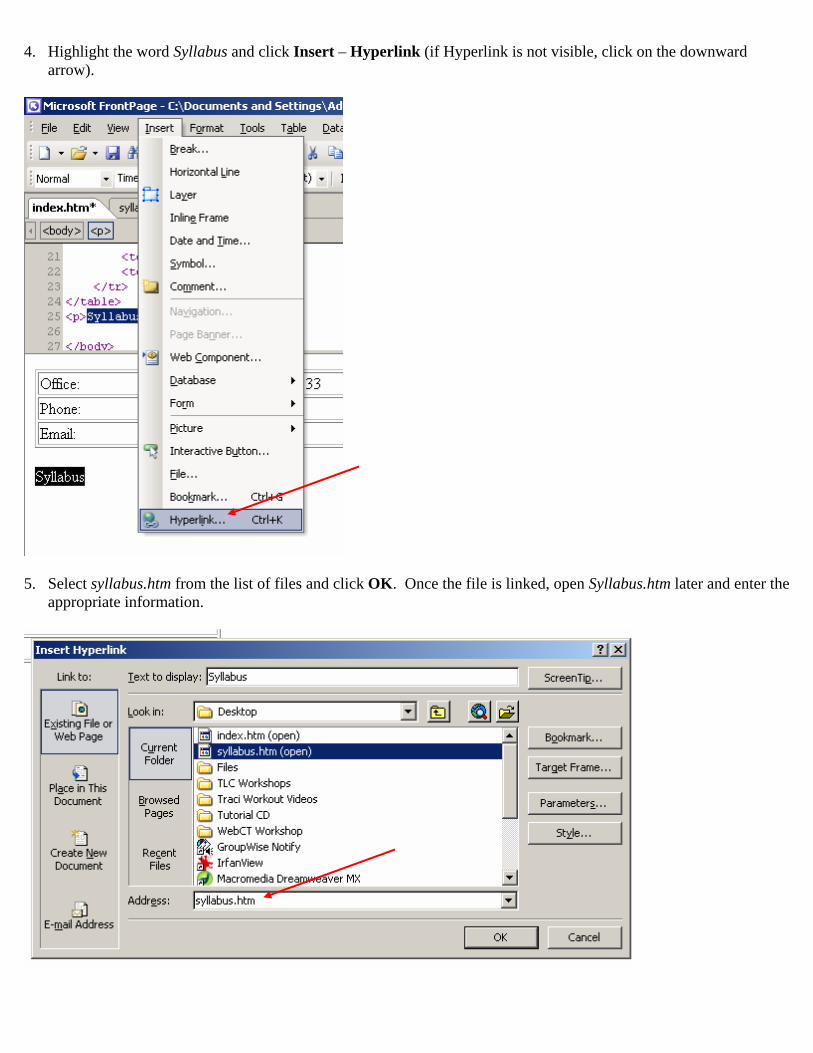
4. Highlight the word Syllabus and click Insert – Hyperlink (if Hyperlink is not visible, click on the downward
arrow).
5. Select syllabus.htm from the list of files and click OK. Once the file is linked, open Syllabus.htm later and enter the
appropriate information.
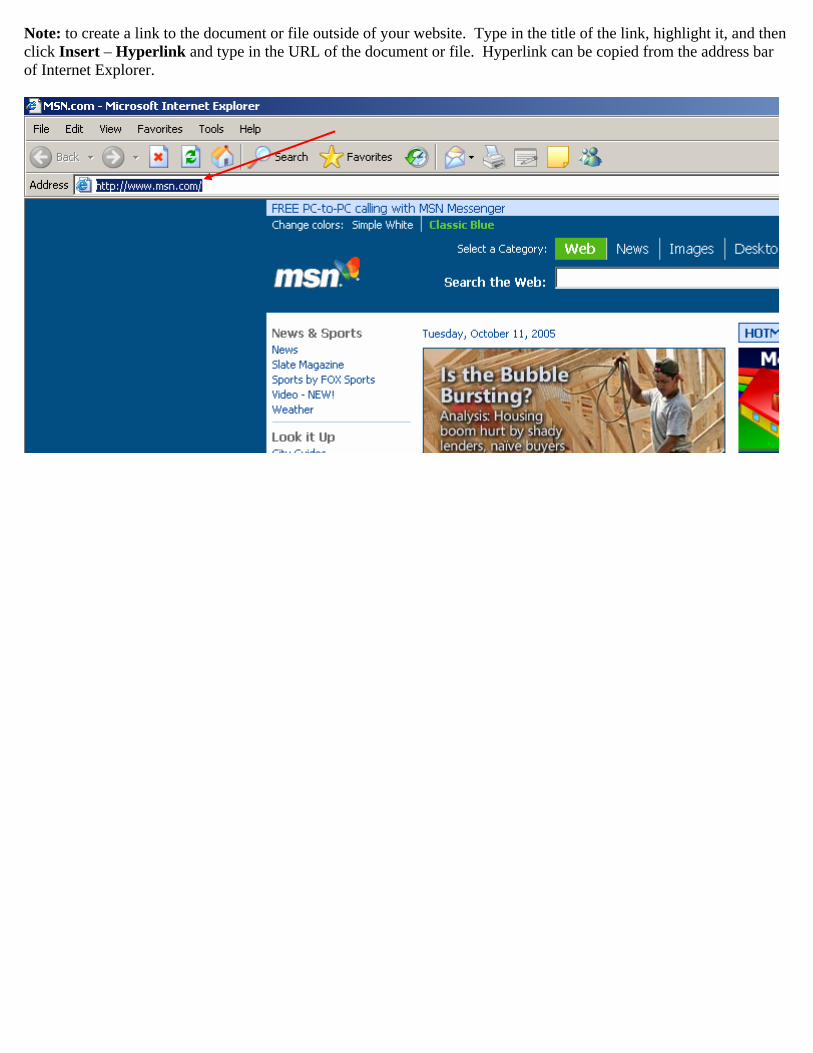
Note: to create a link to the document or file outside of your website. Type in the title of the link, highlight it, and then click Insert – Hyperlink and type in the URL of the document or file. Hyperlink can be copied from the address bar of Internet Explorer.