Embed Size (px)
Citation preview
P U B L I S H I N G
community experience dist i l led
Mastering Joomla! 1.5 Extension and Framework Development
The Professional Guide to Programming Joomla!
Chuck Lanham
James Kennard
Chapter No.8
"Rendering Output"
In this package, you will find: A Biography of the authors of the book
A preview chapter from the book, Chapter NO.8 "Rendering Output"
A synopsis of the book’s content
Information on where to buy this book
About the Authors Chuck Lanham began his career as a database software engineer with Burroughs Corp.
He later worked for Informix Corp. managing the database tools development group
while serving as repository architect. He has founded and managed two successful
software development companies, and taught college courses on database theory, data
communications, and computer technologies. He has also managed the global
development and deployment of leading CRM and CMS systems for many Fortune 500
companies, and managed the development and deployment of some of the largest e-
commerce websites in the world.
In 2002, Chuck left the corporate world and started a new company, Blue Water
Associates. This company is located near the deep blue waters of Lake Tahoe where he
designs, develops, and maintains websites for small to medium sized businesses, both
within the U.S. and abroad.
For More Information: www.PacktPub.com/ mastering-joomla-1-5-extension-framework-
development-2e/book

Chuck has been developing websites using Joomla! since 2007 with the release of version
1.5 and has developed several extensions for use in the websites he has designed. This is
Chuck's first book as an author, although he has reviewed and edited several books and
written numerous technical articles for publication.
I would like to thank James Kennard for the fine work that he did on the
first edition of this book. Of all the books that I have read on Joomla!, his
work was the best. Without his efforts, my work with Joomla! would
have been much the worse. I also wish to thank Darshana Shinde and
Ashwin Shetty of Packt Publishing for their patience and encouragement
during this seemingly long process. To Darshana especially, for giving
me the opportunity to write this book. Thanks for the amazing eye for
detail and technical accuracy provided by Aaron Rosario, you saved me
from myself more than once and always made me smile. And I must give
special recognition to Nancy Lee Teply in Saint Charles County,
Missouri for turning me onto Joomla!. Thank you Nancy, it has been a
great adventure.
I must thank my mother, Nellie Ann Lanham, who was an extraordinary
and gifted writer; she has always been my inspiration. And finally, I
thank my wife, Janet, for being there, and for her understanding and love.
James Kennard is an accomplished programmer with proven experience in many
different types of organization. He has worked as a private consultant and worked in the
public and private sectors for the likes of Logica and the National Library of Wales. He
has over six years of experience working with Joomla!, previously Mambo. As an active
member of the Joomla! community he maintains a popular open source helpdesk
component.
For More Information: www.PacktPub.com/ mastering-joomla-1-5-extension-framework-
development-2e/book
Mastering Joomla! 1.5 Extension and Framework Development The Professional Guide to Programming Joomla! This book will guide you through the complexities of implementing components,
modules, and plugins in Joomla! 1.5. It provides useful reference material that explains
many of the advanced design features and classes available in Joomla! 1.5.
Joomla! is one of the world's top open source content management systems. The main
sources of the PHP MySQL application's success are its comprehensive extension
libraries, which extend Joomla! far beyond content management, and it's very active
forums where one can easily tap into the knowledge of other Joomla! users,
administrators, and developers.
One of the most pleasurable things about working with Joomla! is the encouragement of
openness and friendliness among the members of the Joomla! community. It is, without a
doubt, the community that is driving the Joomla! project. The name 'Joomla!' is derived
from the Swahili word 'Jumla', meaning 'all together'. The Joomla! community lends a
true sense of jumla to the project.
The architecture of the latest version of Joomla! differs in many ways from previous
versions. Resultantly backward-compatibility with some extensions has been broken; the
race is on for developers to update their skills in order to rectify the problems and start
building new extensions. Perhaps the most important of the changes is the reorganization
and classification of fi les and classes. This change encourages but does not force
developers to use the Joomla! libraries consistently between extensions.
What This Book Covers Chapter 1, Introduction to Joomla! introduces the technology in general, covering the
software framework that is the foundation for Joomla! 1.5, along with an overview of
how it can be extended. It briefly discusses development tools that are readily available
for use in developing Joomla! extensions.
Chapter 2, Getting Started covers the basics of object oriented design as it applies to
Joomla! The complete application process, from request to response is covered, a few
core classes are introduced, and the basic Joomla! directory structure discussed.
Chapter 3, The Database deals with the database. It talks about extending the database,
conventions for the database schema, and common fields. Then the focus moves on to
For More Information: www.PacktPub.com/ mastering-joomla-1-5-extension-framework-
development-2e/book
storing data, common types of data in standard fields and dealing with multilingual
requirements. We then cover querying the database and getting results.
Next, the chapter explores how to manipulate common field types. The chapter concludes
with a brief description of the JTable. The JTable is used to display and edit regular
two-dimensional tables of cells. The JTable has many facilities that make it possible to
customize its rendering and editing but provides defaults for these features so that simple
tables can be set up easily.
Chapter 4, Extension Design covers the basics in extension design. We begin with helper
classes, then cover building and using getInstance() methods. We cover the registry
along with saving and loading registry values. We explain the User, Session, Browser and
Assets. We finish the chapter with a discussion on the structure of components, modules,
and plugins and explain extension packaging and developing XML manifest fi les for
each.
Chapter 5, Component Design is about designing components. It starts with the structure
and a basic design of a component using the MVC design pattern. Then we learn
configuring the component and its various elements and parameters.
Chapter 6, Module Design covers designing modules. It explains standalone modules,
module settings, frontend and backend modules, and modules and components working
together. Then we talk about using templates.
Chapter 7, Plugin Design deals with designing plugins. It initially deals with listeners/
observers and then the various plugin groups like authentication, content editors, search,
and others. Then comes loading, translating, and using plugins as libraries. Finally it
deals with, plugin settings.
Chapter 8, Rendering Output explains ways to render output and how to maintain
consistency throughout. It starts with the joomla.html library and then continues to
describe how to build component HTML layouts. Then it discusses how to output the
backend of a component. The chapter ends with the details of itemized data and
pagination.
Chapter 9, Customizing the Page deals with customizing the page. We cover things like
modifying the document and translating, along with a brief explanation of using
JavaScript effects from the Mootools library, which is included in Joomla!.
Chapter 10, APIs and Web Services explores some of the Joomla! APIs, specifi cally in
relation to web services. We also discuss some of the more common web services and
take a more in-depth look at the Yahoo! Search API. The chapter inishes by describing
how we can create our own web services using plugins.
Chapter 11, Error Handling and Security provides an introduction to handling and
throwing errors, warnings, and notices. Further, it talks about building secure Joomla!
For More Information: www.PacktPub.com/ mastering-joomla-1-5-extension-framework-
development-2e/book
extensions. It also describes a number of common mistakes made when coding with
Joomla! and explains how to avoid them.
Chapter 12, Utilities and Useful Classes explains various utilities and useful classes like
dates, arrays, tree structures, and others.
The Appendices detail many of the Joomla! classes. Appendix B-H are only available as
a download at https://www.packtpub.com//sites/default/
files/0523_Code.zip .
Appendix A, Joomla! Core Classes provides detailed information covering the Joomla!
core classes.
Appendix B, Parameters (Core Elements) provides information on how to handle the
ever-useful JParameter class.
Appendix C, Site Configuration Settings describes the Joomla! configuration settings and
the JRegistry class.
Appendix D, Menus and Toolbars details menus and toolbars discussing the JMenu and
JPathway classes and providing complete information on toolbar buttons.
Appendix E, Joomla! HTML Library provides complete coverage of the joomla.html
library along with details on the JPane class.
Appendix F, Joomla! Utility Classes covers twenty Joomla! utility classes that perform
many common tasks.
Appendix G, Request and Session Handling details the Joomla! request and session
handling classes, including caching and routing.
Appendix H, XML Manifest File provides detailed information on the tags available for
use in XML Manifest files.
For More Information: www.PacktPub.com/ mastering-joomla-1-5-extension-framework-
development-2e/book
Rendering OutputThroughout the previous chapters we have become acquainted with the Joomla! framework and learned how to create basic components, modules, and plugins. That is a lot to learn. But wait, there's more…so much more to Joomla! Over the remaining chapters we will delve into some of the more advanced features that will make our extensions more robust, secure, and best of all, professional. In this chapter we will discover:
How to improve the maintainability of our components by building better layouts and templatesHow to order and sort our dataHow to add pagination to our pagesHow to use the wide variety of features and functionality available to us, for free, from the joomla.html library
Improving components In Chapter 5, Component Design we created a basic component, com_boxoffice, to manage movie reviews. While our component is functional, there are quite a few things that we can do to improve it. We are going to be working almost exclusively on the backend component in this chapter but most of what we will be covering could easily be adapted for the frontend component if we wished to do so.
Component backend When we build the backend of a component there are some very important things to consider. Most components will include at least two backend views or forms; one will display a list of items and another will provide a form for creating or editing a single item. There may be additional views depending on the component but for now we will work with our com_boxoffice component, which consists of two views.
•
•••
For More Information: www.PacktPub.com/ mastering-joomla-1-5-extension-framework-
development-2e/book
Rendering Output
[ 244 ]
Toolbars Although we have already built our component toolbars, we didn't spend much time discussing all the features and capabilities that are available to us, so let's start with a bit of a review and then add a few enhancements to our component.
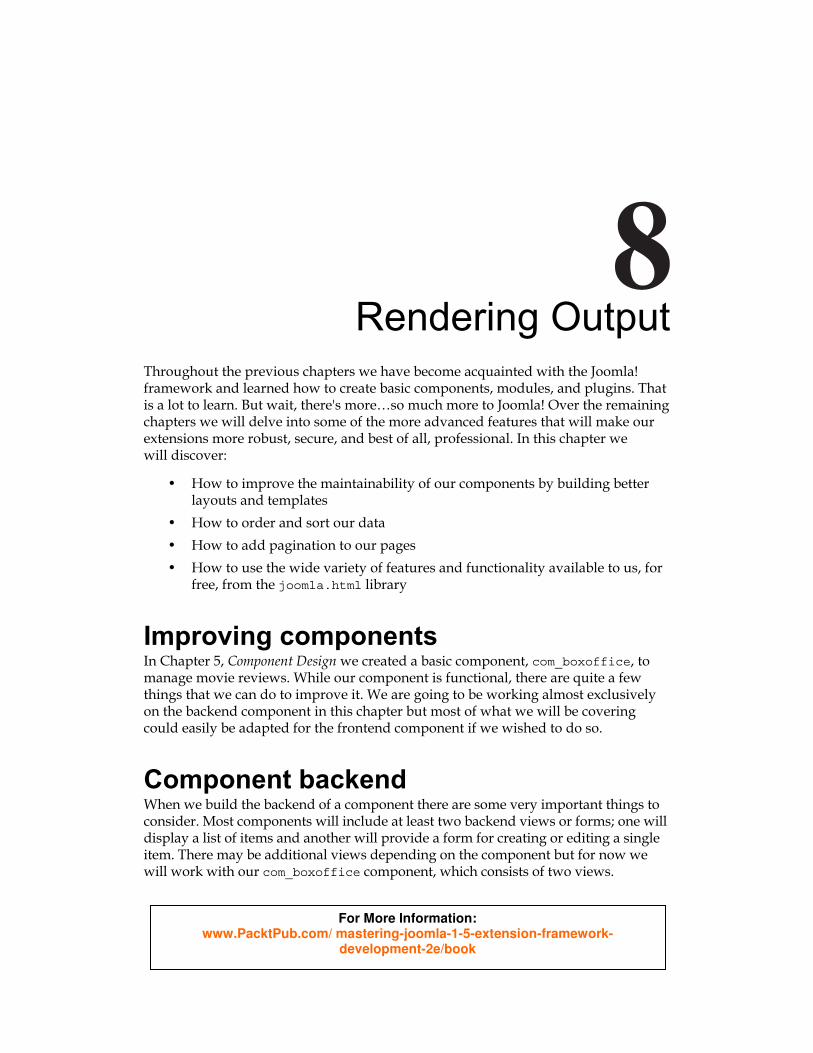
Our backend component has two toolbars. The fi rst is displayed when we access our component from the Components | Box Offi ce Revues menu:
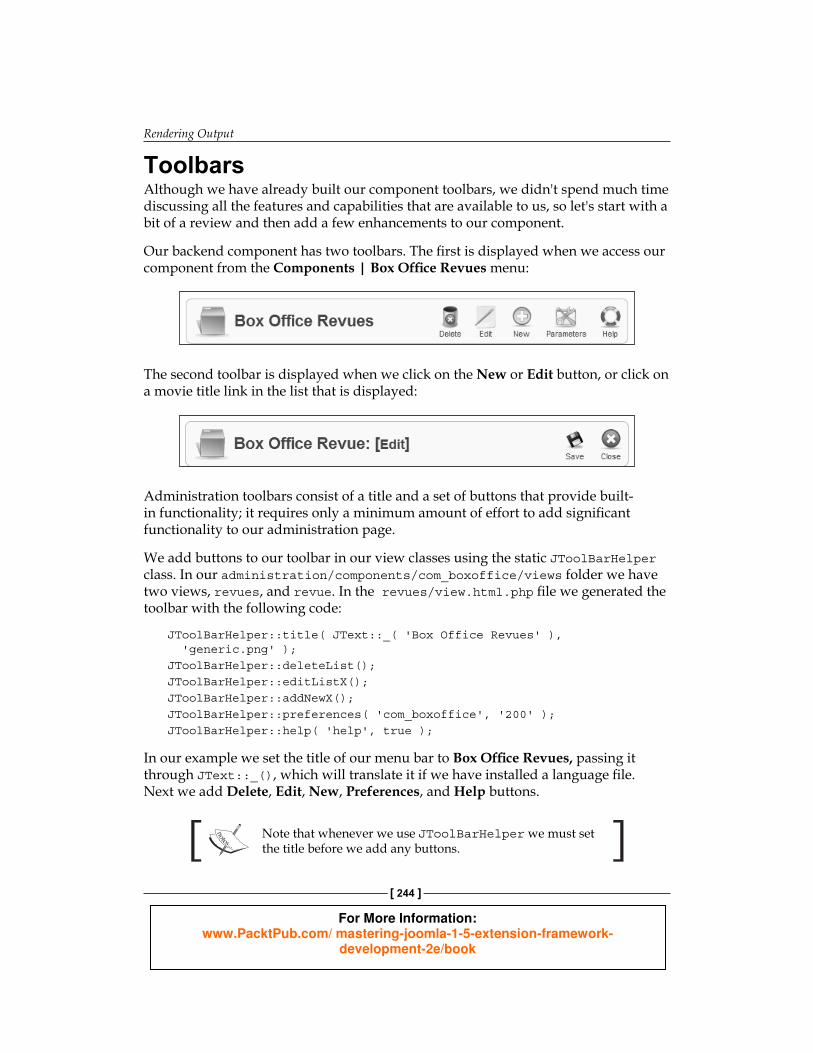
The second toolbar is displayed when we click on the New or Edit button, or click on a movie title link in the list that is displayed:
Administration toolbars consist of a title and a set of buttons that provide built-in functionality; it requires only a minimum amount of effort to add signifi cant functionality to our administration page.
We add buttons to our toolbar in our view classes using the static JToolBarHelper class. In our administration/components/com_boxoffice/views folder we have two views, revues, and revue. In the revues/view.html.php fi le we generated the toolbar with the following code:
JToolBarHelper::title( JText::_( 'Box Office Revues' ), 'generic.png' );JToolBarHelper::deleteList();JToolBarHelper::editListX();JToolBarHelper::addNewX();JToolBarHelper::preferences( 'com_boxoffice', '200' );JToolBarHelper::help( 'help', true );
In our example we set the title of our menu bar to Box Offi ce Revues, passing it through JText::_(), which will translate it if we have installed a language fi le. Next we add Delete, Edit, New, Preferences, and Help buttons.
Note that whenever we use JToolBarHelper we must set the title before we add any buttons.
For More Information: www.PacktPub.com/ mastering-joomla-1-5-extension-framework-
development-2e/book
Chapter 8
[ 245 ]
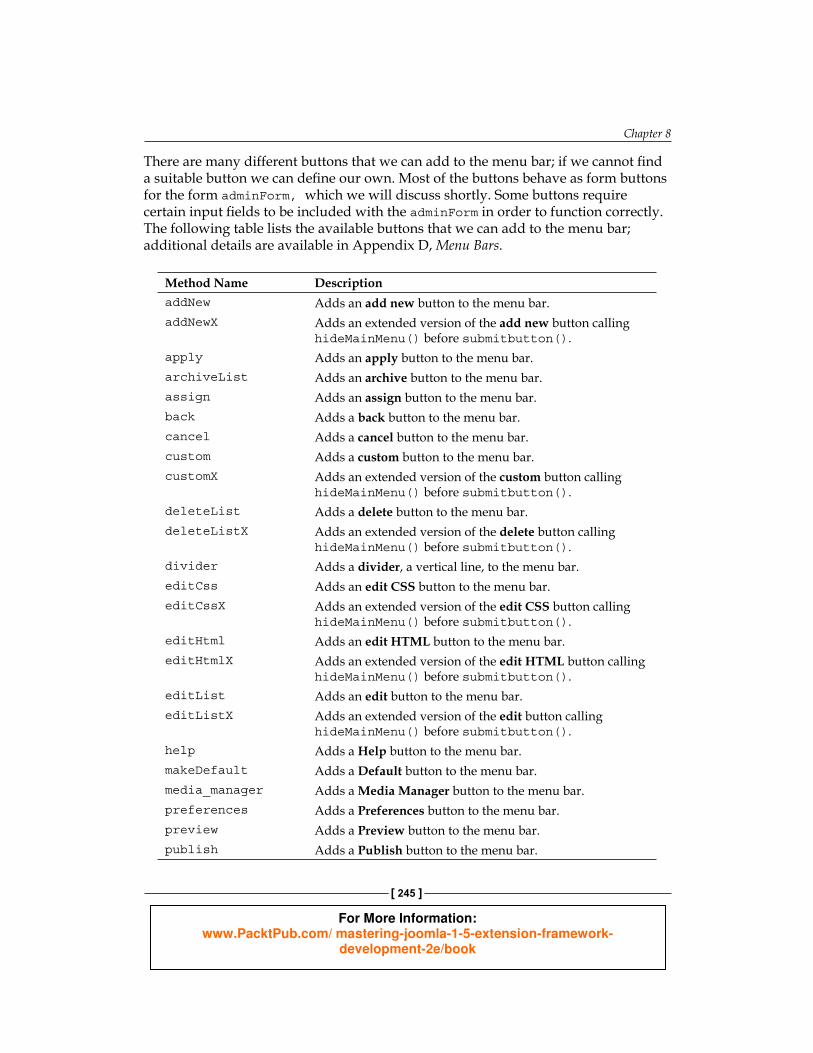
There are many different buttons that we can add to the menu bar; if we cannot fi nd a suitable button we can defi ne our own. Most of the buttons behave as form buttons for the form adminForm, which we will discuss shortly. Some buttons require certain input fi elds to be included with the adminForm in order to function correctly. The following table lists the available buttons that we can add to the menu bar; additional details are available in Appendix D, Menu Bars.
Method Name Description addNew Adds an add new button to the menu bar. addNewX Adds an extended version of the add new button calling
hideMainMenu() before submitbutton(). apply Adds an apply button to the menu bar. archiveList Adds an archive button to the menu bar. assign Adds an assign button to the menu bar. back Adds a back button to the menu bar. cancel Adds a cancel button to the menu bar. custom Adds a custom button to the menu bar. customX Adds an extended version of the custom button calling
hideMainMenu() before submitbutton(). deleteList Adds a delete button to the menu bar. deleteListX Adds an extended version of the delete button calling
hideMainMenu() before submitbutton(). divider Adds a divider, a vertical line, to the menu bar. editCss Adds an edit CSS button to the menu bar. editCssX Adds an extended version of the edit CSS button calling
hideMainMenu() before submitbutton(). editHtml Adds an edit HTML button to the menu bar. editHtmlX Adds an extended version of the edit HTML button calling
hideMainMenu() before submitbutton(). editList Adds an edit button to the menu bar. editListX Adds an extended version of the edit button calling
hideMainMenu() before submitbutton(). help Adds a Help button to the menu bar. makeDefault Adds a Default button to the menu bar. media_manager Adds a Media Manager button to the menu bar. preferences Adds a Preferences button to the menu bar. preview Adds a Preview button to the menu bar. publish Adds a Publish button to the menu bar.
For More Information: www.PacktPub.com/ mastering-joomla-1-5-extension-framework-
development-2e/book
Rendering Output
[ 246 ]
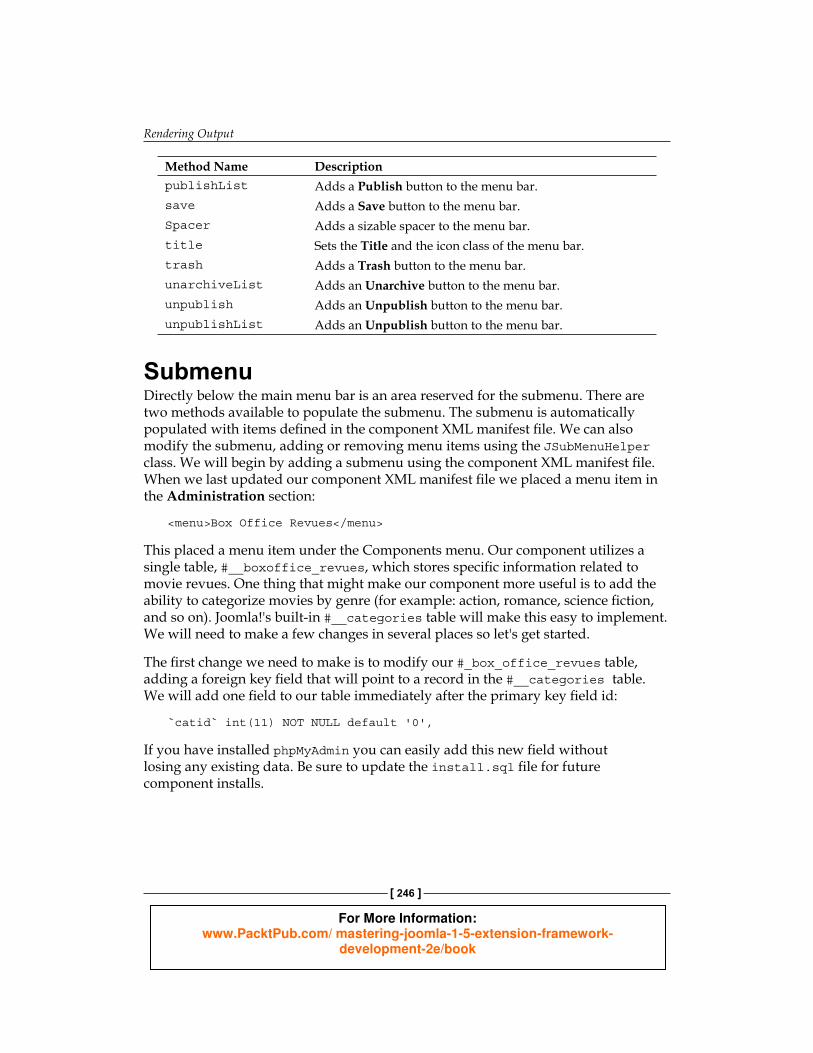
Method Name Description publishList Adds a Publish button to the menu bar. save Adds a Save button to the menu bar. Spacer Adds a sizable spacer to the menu bar. title Sets the Title and the icon class of the menu bar. trash Adds a Trash button to the menu bar. unarchiveList Adds an Unarchive button to the menu bar. unpublish Adds an Unpublish button to the menu bar. unpublishList Adds an Unpublish button to the menu bar.
Submenu Directly below the main menu bar is an area reserved for the submenu. There are two methods available to populate the submenu. The submenu is automatically populated with items defi ned in the component XML manifest fi le. We can also modify the submenu, adding or removing menu items using the JSubMenuHelper class. We will begin by adding a submenu using the component XML manifest fi le. When we last updated our component XML manifest fi le we placed a menu item in the Administration section:
<menu>Box Office Revues</menu>
This placed a menu item under the Components menu. Our component utilizes a single table, #__boxoffice_revues, which stores specifi c information related to movie revues. One thing that might make our component more useful is to add the ability to categorize movies by genre (for example: action, romance, science fi ction, and so on). Joomla!'s built-in #__categories table will make this easy to implement. We will need to make a few changes in several places so let's get started.
The fi rst change we need to make is to modify our #_box_office_revues table, adding a foreign key fi eld that will point to a record in the #__categories table. We will add one fi eld to our table immediately after the primary key fi eld id:
`catid` int(11) NOT NULL default '0',
If you have installed phpMyAdmin you can easily add this new fi eld without losing any existing data. Be sure to update the install.sql fi le for future component installs.
For More Information: www.PacktPub.com/ mastering-joomla-1-5-extension-framework-
development-2e/book
Chapter 8
[ 247 ]
Next we will add our submenu items to the component XML manifest fi le, immediately after the existing menu declaration:
<submenu> <menu link="option=com_boxoffice">Revues</menu> <menu link="option=com_categories &section=com_boxoffice">Categories</menu></submenu>
Note that we use & rather than an ampersand (&) character to avoid problems with XML parsing.
Since we modifi ed our #__boxoffice_revues table we must update our JTable subclass /tables/revue.php to match by adding the following lines immediately after the id fi eld:
/** @var int */var $catid = 0;
And fi nally, we need to modify our layout /views/revue/tmpl/default.php to allow us to select a category or genre for our movie (place this immediately after the </tr> tag of the fi rst table row, the one that contains our movie title):
<tr> <td width="100" align="right" class="key"> <label for="catid"> <?php echo JText::_('Movie Genre'); ?>: </label> </td> <td> <?php echo JHTML::_('list.category', 'catid', 'com_boxoffice', $this->revue->catid );?> </td></tr>
The call to JHTML::_() produces the HTML to display the selection drop-down list of component specifi c categories. The static JHTML class is an integral part of the joomla.html library which we will discuss in the next section.
Creating submenu items through the component XML manifest fi le is not the only method at our disposal; we can modify the submenu using the static JSubMenuHelper class.
For More Information: www.PacktPub.com/ mastering-joomla-1-5-extension-framework-
development-2e/book
Rendering Output
[ 248 ]
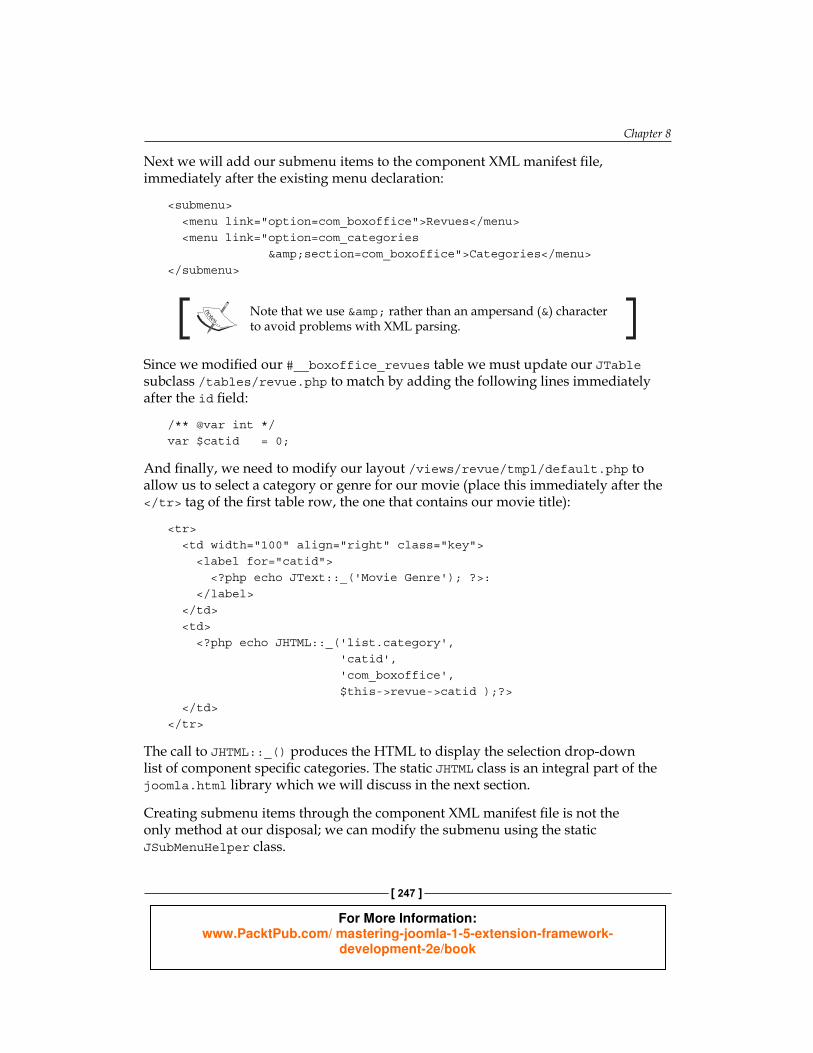
Please note however that these methods differ in a number of ways. Submenu items added using the manifest fi le will appear as submenu items under the Components menu item as well as the submenu area of the menu bar. For example the Components menu will appear as it does in the following screenshot:
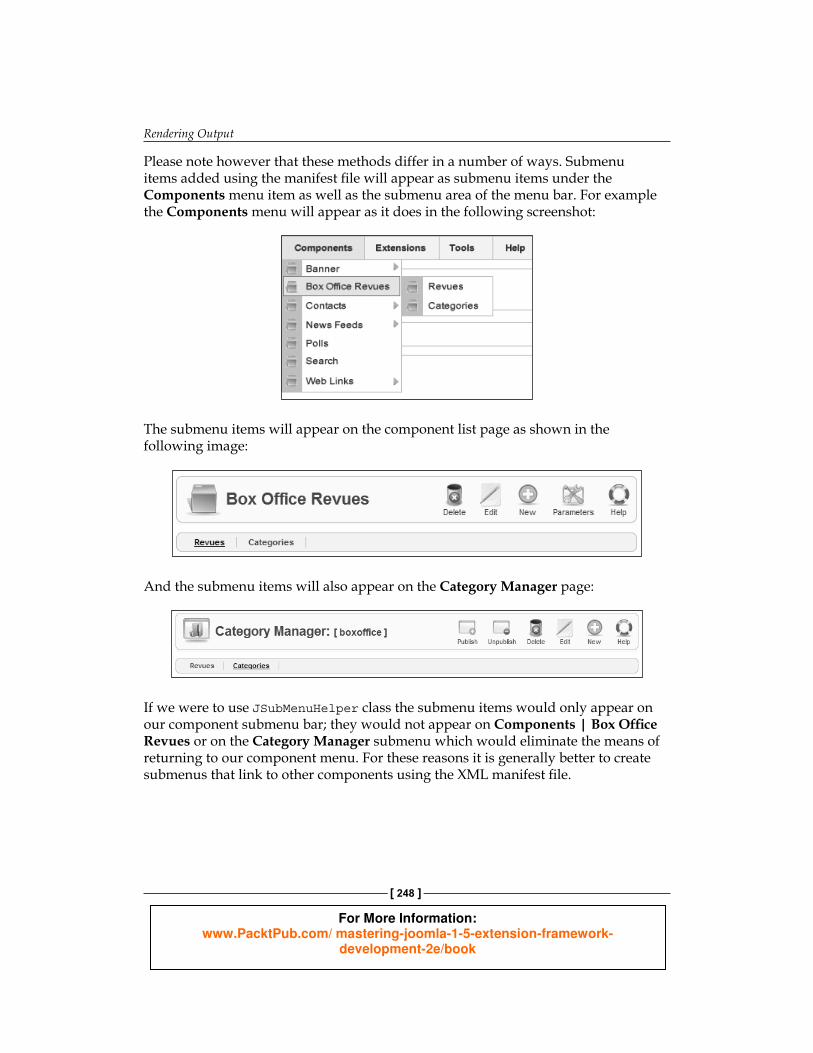
The submenu items will appear on the component list page as shown in the following image:
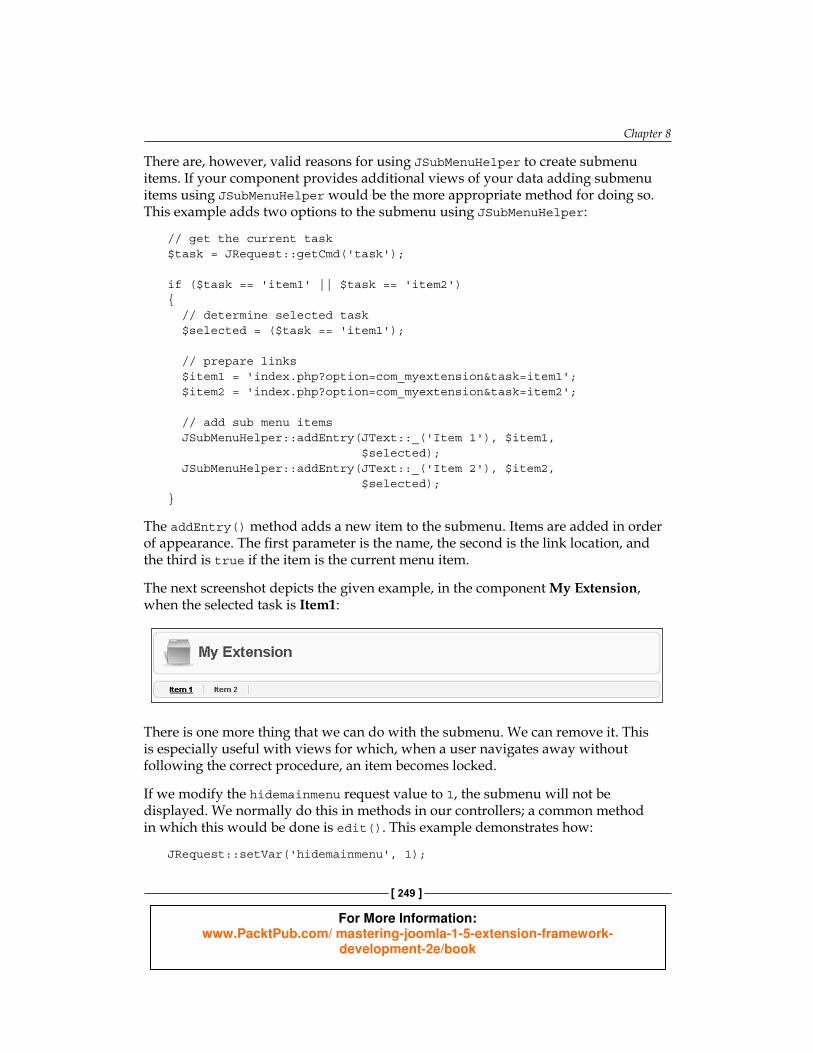
And the submenu items will also appear on the Category Manager page:
If we were to use JSubMenuHelper class the submenu items would only appear on our component submenu bar; they would not appear on Components | Box Offi ce Revues or on the Category Manager submenu which would eliminate the means of returning to our component menu. For these reasons it is generally better to create submenus that link to other components using the XML manifest fi le.
For More Information: www.PacktPub.com/ mastering-joomla-1-5-extension-framework-
development-2e/book
Chapter 8
[ 249 ]
There are, however, valid reasons for using JSubMenuHelper to create submenu items. If your component provides additional views of your data adding submenu items using JSubMenuHelper would be the more appropriate method for doing so. This example adds two options to the submenu using JSubMenuHelper:
// get the current task$task = JRequest::getCmd('task');
if ($task == 'item1' || $task == 'item2'){ // determine selected task $selected = ($task == 'item1');
// prepare links $item1 = 'index.php?option=com_myextension&task=item1'; $item2 = 'index.php?option=com_myextension&task=item2';
// add sub menu items JSubMenuHelper::addEntry(JText::_('Item 1'), $item1, $selected); JSubMenuHelper::addEntry(JText::_('Item 2'), $item2, $selected);}
The addEntry() method adds a new item to the submenu. Items are added in order of appearance. The fi rst parameter is the name, the second is the link location, and the third is true if the item is the current menu item.
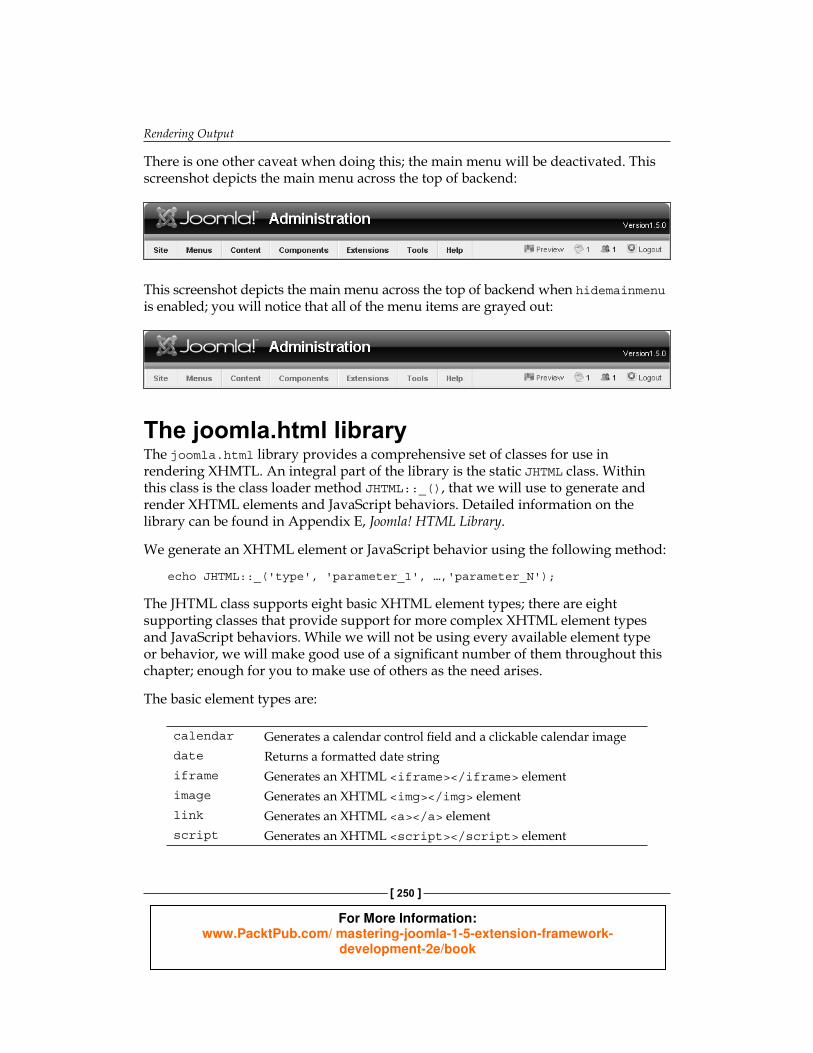
The next screenshot depicts the given example, in the component My Extension, when the selected task is Item1:
There is one more thing that we can do with the submenu. We can remove it. This is especially useful with views for which, when a user navigates away without following the correct procedure, an item becomes locked.
If we modify the hidemainmenu request value to 1, the submenu will not be displayed. We normally do this in methods in our controllers; a common method in which this would be done is edit(). This example demonstrates how:
JRequest::setVar('hidemainmenu', 1);
For More Information: www.PacktPub.com/ mastering-joomla-1-5-extension-framework-
development-2e/book
Rendering Output
[ 250 ]
There is one other caveat when doing this; the main menu will be deactivated. This screenshot depicts the main menu across the top of backend:
This screenshot depicts the main menu across the top of backend when hidemainmenu is enabled; you will notice that all of the menu items are grayed out:
The joomla.html libraryThe joomla.html library provides a comprehensive set of classes for use in rendering XHMTL. An integral part of the library is the static JHTML class. Within this class is the class loader method JHTML::_(), that we will use to generate and render XHTML elements and JavaScript behaviors. Detailed information on the library can be found in Appendix E, Joomla! HTML Library.
We generate an XHTML element or JavaScript behavior using the following method:
echo JHTML::_('type', 'parameter_1', …,'parameter_N');
The JHTML class supports eight basic XHTML element types; there are eight supporting classes that provide support for more complex XHTML element types and JavaScript behaviors. While we will not be using every available element type or behavior, we will make good use of a signifi cant number of them throughout this chapter; enough for you to make use of others as the need arises.
The basic element types are:
calendar Generates a calendar control fi eld and a clickable calendar imagedate Returns a formatted date stringiframe Generates an XHTML <iframe></iframe> elementimage Generates an XHTML <img></img> element link Generates an XHTML <a></a> elementscript Generates an XHTML <script></script> element
For More Information: www.PacktPub.com/ mastering-joomla-1-5-extension-framework-
development-2e/book
Chapter 8
[ 251 ]
style Generates a <link rel="stylesheet" style="text/css" /> element
tooltip Generates a pop-up tooltip using JavaScript
There are eight supporting classes that provide more complex elements and behaviors that we generally defi ne as grouped types. Grouped types are identifi ed by a group name and a type name. The supporting classes and group names are:
Class Group DescriptionJHTMLBehavior behavior Creates JavaScript client-side behaviorsJHTMLEmail Email Provides email address cloakingJHTMLForm Form Generates a hidden token fi eld JHTMLGrid Grid Creates HTML form gridsJHTMLImage image Enables a type of image overriding in templatesJHTMLList list Generates common selection listsJHTMLMenu menu Generates menusJHTMLSelect select Generates dropdown selection boxes
All group types are invoked using the JHTML::_('group.type',…) syntax.
Detailed information on each group type can be found in Appendix E, Joomla! HTML Library.
The following section provides an overview of the available group types.
behavior These types are special because they deal with JavaScript in order to create client-side behaviors.
We'll use behavior.modal as an example. This behavior allows us to display an inline modal window that is populated from a specifi c URI. A modal window is a window that prevents a user from returning to the originating window until the modal window has been closed. A good example of this is the 'Pagebreak' button used in the article manager when editing an article.
The behavior.modal type does not return anything; it prepares the necessary JavaScript. In fact, none of the behavior types return data; they are designed solely to import functionality into the document.
For More Information: www.PacktPub.com/ mastering-joomla-1-5-extension-framework-
development-2e/book
Rendering Output
[ 252 ]
This example demonstrates how we can use the behavior.modal type to open a modal window that uses www.example.org as the source:
// prepare the JavaScript parameters$params = array('size'=>array('x'=>100, 'y'=>100));
// add the JavaScriptJHTML::_('behavior.modal', 'a.mymodal', $params);
// create the modal window linkecho '<a class="mymodal" title="example" href="http://www.example.org" rel="{handler: \'iframe\', size: {x: 400, y: 150}}">Example Modal Window</a>';
The a.mymodal parameter is used to identify the elements that we want to attach the modal window to. In this case, we want to use all <a> tags of class mymodal. This parameter is optional; the default selector is a.modal.
We use $params to specify default settings for modal windows. This list details the keys that we can use in this array to defi ne default values:
ajaxOptions
size
onOpen
onClose
onUpdate
onResize
onMove
onShow
onHide
The link that we create can only be seen as special because of the JavaScript in the rel attribute. This JavaScript array is used to determine the exact behavior of the modal window for this link. We must always specify handler; this is used to determine how to parse the input from the link. In most cases, this will be iframe, but we can also use image, adopt, url, and string.
•
•
•
•
•
•
•
•
•
For More Information: www.PacktPub.com/ mastering-joomla-1-5-extension-framework-
development-2e/book
Chapter 8
[ 253 ]
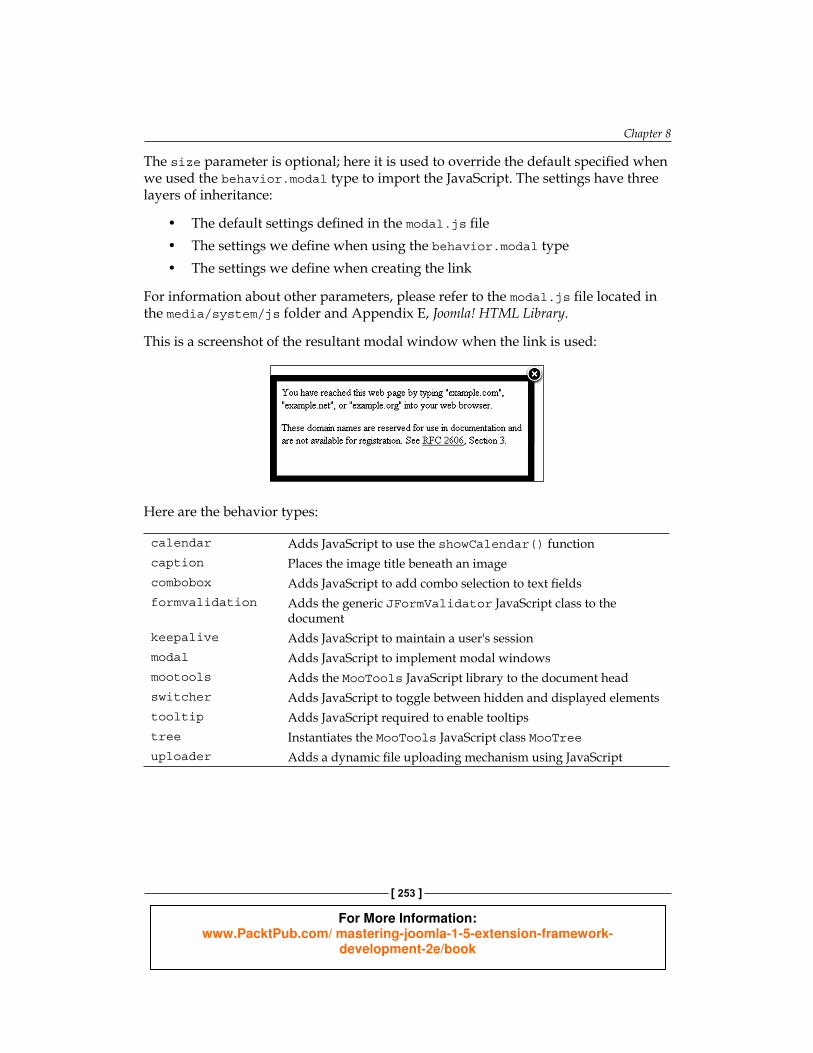
The size parameter is optional; here it is used to override the default specifi ed when we used the behavior.modal type to import the JavaScript. The settings have three layers of inheritance:
The default settings defi ned in the modal.js fi leThe settings we defi ne when using the behavior.modal typeThe settings we defi ne when creating the link
For information about other parameters, please refer to the modal.js fi le located in the media/system/js folder and Appendix E, Joomla! HTML Library.
This is a screenshot of the resultant modal window when the link is used:
Here are the behavior types:
calendar Adds JavaScript to use the showCalendar() functioncaption Places the image title beneath an imagecombobox Adds JavaScript to add combo selection to text fi elds formvalidation Adds the generic JFormValidator JavaScript class to the
documentkeepalive Adds JavaScript to maintain a user's sessionmodal Adds JavaScript to implement modal windowsmootools Adds the MooTools JavaScript library to the document headswitcher Adds JavaScript to toggle between hidden and displayed elements tooltip Adds JavaScript required to enable tooltipstree Instantiates the MooTools JavaScript class MooTreeuploader Adds a dynamic fi le uploading mechanism using JavaScript
•••
For More Information: www.PacktPub.com/ mastering-joomla-1-5-extension-framework-
development-2e/book

Rendering Output
[ 254 ]
email There is only one e-mail type.
cloak Adds JavaScript to encrypt e-mail addresses in the browser
formThere is only one form type.
token Generates a hidden token fi eld to reduce the risk of CSRF exploits
grid The grid types are used for displaying a dataset's item elements in a table of a backend form. There are seven grid types, each of which handles a commonly defi ned database fi eld such as access, published, ordering, checked_out.
The grid types are used within a form named adminForm that must include a hidden fi eld named boxchecked with a default value of 0 and another named task that will be used to determine which task a controller will execute.
To illustrate how the grid types are used we will use grid.id and grid.published along with our component database table #__boxoffice_revues that has a primary key fi eld named id, a fi eld named published, which we use to determine if an item should be displayed, and a fi eld named name.
We can determine the published state of a record in our table by using grid.published.
This example demonstrates how we might process each record in a view form layout and output data into a grid or table ($this->revues is an array of objects representing records from the table):
<?php $i = 0;
foreach ($this->revues as $row) :
$checkbox = JHTML::_('grid.id', ++$i, $row->id); $published = JHTML::_('grid.published', $row, $i); ?>
<tr class=<?php echo "row$i%2"; ?>"> <td><?php echo $checkbox; ?></td> <td><?php echo $row->name; ?></td>
For More Information: www.PacktPub.com/ mastering-joomla-1-5-extension-framework-
development-2e/book
Chapter 8
[ 255 ]
<td align="center"><?php echo $published ?></td> </tr>
<?php endforeach;?>
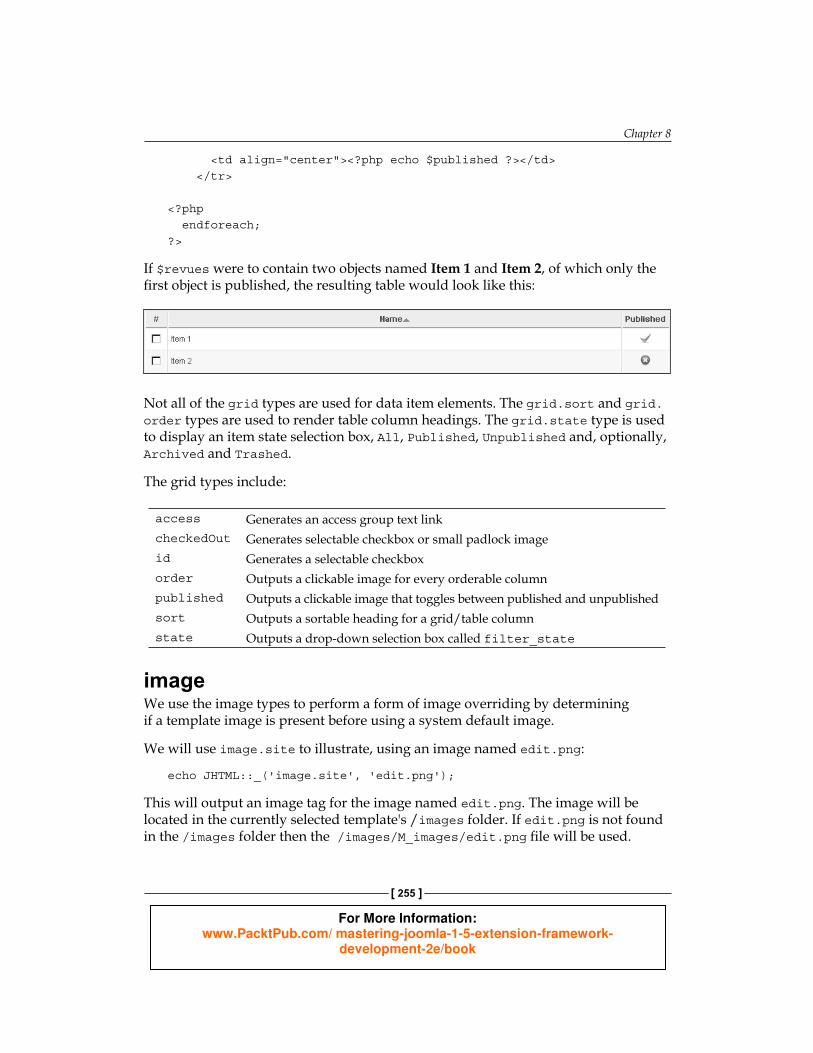
If $revues were to contain two objects named Item 1 and Item 2, of which only the fi rst object is published, the resulting table would look like this:
Not all of the grid types are used for data item elements. The grid.sort and grid.order types are used to render table column headings. The grid.state type is used to display an item state selection box, All, Published, Unpublished and, optionally, Archived and Trashed.
The grid types include:
access Generates an access group text linkcheckedOut Generates selectable checkbox or small padlock imageid Generates a selectable checkbox order Outputs a clickable image for every orderable column published Outputs a clickable image that toggles between published and unpublishedsort Outputs a sortable heading for a grid/table columnstate Outputs a drop-down selection box called filter_state
imageWe use the image types to perform a form of image overriding by determining if a template image is present before using a system default image.
We will use image.site to illustrate, using an image named edit.png:
echo JHTML::_('image.site', 'edit.png');
This will output an image tag for the image named edit.png. The image will be located in the currently selected template's /images folder. If edit.png is not found in the /images folder then the /images/M_images/edit.png fi le will be used.
For More Information: www.PacktPub.com/ mastering-joomla-1-5-extension-framework-
development-2e/book
Rendering Output
[ 256 ]
We can change the default directories using the $directory and $param_directory parameters.
There are two image types, image.administrator and image.site.
administrator Loads image from backend templates image directory or default image
site Loads image from frontend templates image directory or default image
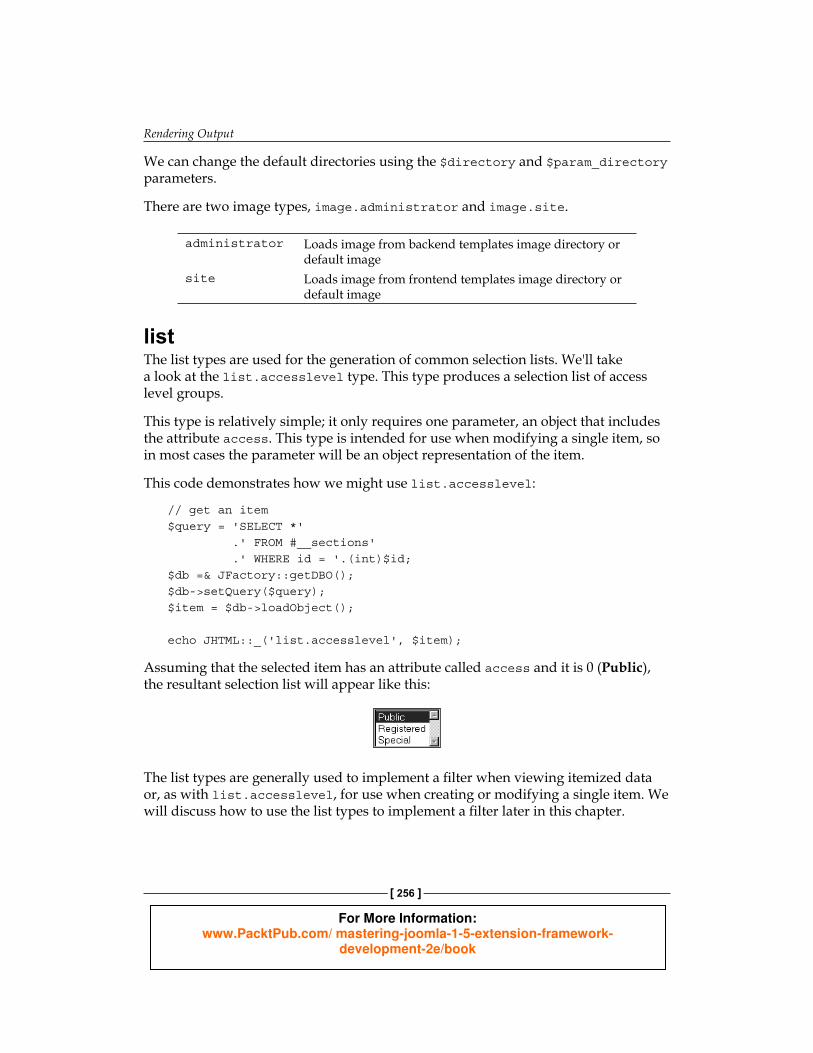
listThe list types are used for the generation of common selection lists. We'll take a look at the list.accesslevel type. This type produces a selection list of access level groups.
This type is relatively simple; it only requires one parameter, an object that includes the attribute access. This type is intended for use when modifying a single item, so in most cases the parameter will be an object representation of the item.
This code demonstrates how we might use list.accesslevel:
// get an item$query = 'SELECT *' .' FROM #__sections' .' WHERE id = '.(int)$id;$db =& JFactory::getDBO();$db->setQuery($query);$item = $db->loadObject();
echo JHTML::_('list.accesslevel', $item);
Assuming that the selected item has an attribute called access and it is 0 (Public), the resultant selection list will appear like this:
The list types are generally used to implement a fi lter when viewing itemized data or, as with list.accesslevel, for use when creating or modifying a single item. We will discuss how to use the list types to implement a fi lter later in this chapter.
For More Information: www.PacktPub.com/ mastering-joomla-1-5-extension-framework-
development-2e/book
Chapter 8
[ 257 ]
accesslevel Generates a drop-down selection box of access level groupscategory Generates a drop-down selection box of categoriesgenericordering Generates an array of objects used with the select typesimages Generates a drop-down selection box of images in a directorypositions Generates a drop-down selection box of positionssection Generates a drop-down selection box of sectionsspecificordering Generates a drop-down selection box of order positionsusers Generates a drop-down selection box of site users
menuThe menu types are designed specifi cally for use with menus. It is unlikely that we should ever need to use any of these because menus are handled for us by Joomla!. However, the menu.treerecurse type may be of interest if we are rendering tree structures.
linkoptions Generates an array of options representing menu itemsordering Generates a drop-down list of menu items to facilitate menu orderingtreerecurse Recursively builds an array of objects from menu items as a tree
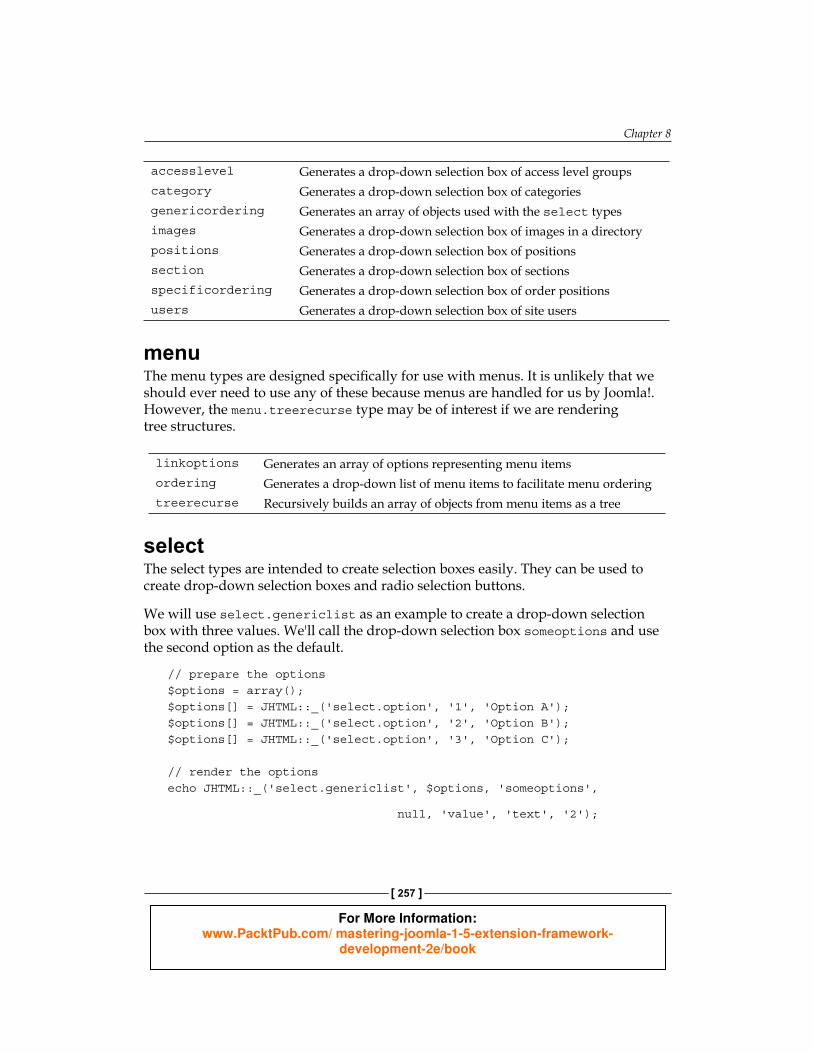
select The select types are intended to create selection boxes easily. They can be used to create drop-down selection boxes and radio selection buttons.
We will use select.genericlist as an example to create a drop-down selection box with three values. We'll call the drop-down selection box someoptions and use the second option as the default.
// prepare the options$options = array();$options[] = JHTML::_('select.option', '1', 'Option A');$options[] = JHTML::_('select.option', '2', 'Option B');$options[] = JHTML::_('select.option', '3', 'Option C');
// render the optionsecho JHTML::_('select.genericlist', $options, 'someoptions',
null, 'value', 'text', '2');
For More Information: www.PacktPub.com/ mastering-joomla-1-5-extension-framework-
development-2e/book
Rendering Output
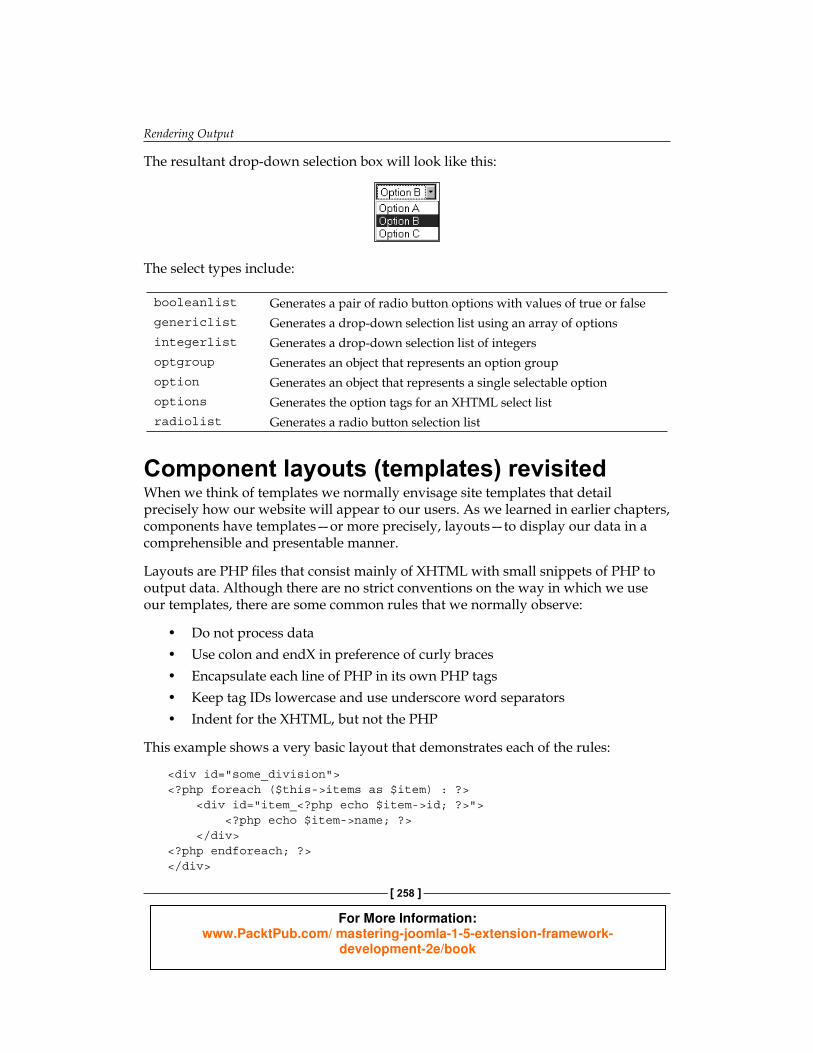
[ 258 ]
The resultant drop-down selection box will look like this:
The select types include:
booleanlist Generates a pair of radio button options with values of true or falsegenericlist Generates a drop-down selection list using an array of optionsintegerlist Generates a drop-down selection list of integersoptgroup Generates an object that represents an option groupoption Generates an object that represents a single selectable optionoptions Generates the option tags for an XHTML select listradiolist Generates a radio button selection list
Component layouts (templates) revisitedWhen we think of templates we normally envisage site templates that detail precisely how our website will appear to our users. As we learned in earlier chapters, components have templates—or more precisely, layouts—to display our data in a comprehensible and presentable manner.
Layouts are PHP fi les that consist mainly of XHTML with small snippets of PHP to output data. Although there are no strict conventions on the way in which we use our templates, there are some common rules that we normally observe:
Do not process dataUse colon and endX in preference of curly bracesEncapsulate each line of PHP in its own PHP tagsKeep tag IDs lowercase and use underscore word separatorsIndent for the XHTML, but not the PHP
This example shows a very basic layout that demonstrates each of the rules:
<div id="some_division"><?php foreach ($this->items as $item) : ?> <div id="item_<?php echo $item->id; ?>"> <?php echo $item->name; ?> </div><?php endforeach; ?></div>
•••••
For More Information: www.PacktPub.com/ mastering-joomla-1-5-extension-framework-
development-2e/book
Chapter 8
[ 259 ]
Take particular note of the use of the colon to denote the start of the foreach block, and endforeach to denote the end of the block. Using this alternative syntax often makes our layouts easier to read; just imagine hunting for the correct ending curly brace in a large template fi le!
You almost certainly noticed the use of $this in the example layout template. Layout templates are always invoked by a view; when we do this we actually incorporate the layout code into the view object's loadTemplate() method.
This means that the variable $this is referring to the view object from which the layout template was invoked. This is why we attach data to our view; it means that in the layout we can access all the data we added to view through $this.
Admin form When we create templates for component backends that require a form, we must always name the form adminForm. This code demonstrates how we normally defi ne adminForm in a template:
<form action="<?php echo $this->request_url; ?>" method="post" name="adminForm" id="adminForm">
Instead of adding buttons to the form in the usual way we add buttons to the toolbar, as we discussed earlier.
It is normal when creating a form in the backend to also include JavaScript validation, although please note that we must never rely on JavaScript validation alone.
Here is an example of a script that verifi es that a text fi eld called name contains a value:
<script language="javascript" type="text/javascript"><!-- function submitbutton(pressbutton) { var form = document.adminForm;
// No need to validate if cancelling if (pressbutton == 'cancel') { submitform( pressbutton ); return; }
For More Information: www.PacktPub.com/ mastering-joomla-1-5-extension-framework-
development-2e/book
Rendering Output
[ 260 ]
// Do validation if (form.name.value == "") { // no name suppliedalert("<?php echo JText::_('You must supply a name', true); ?>" ); } else { submitform( pressbutton ); } } </script>
Most important is our defi ning of the JavaScript function submitbutton(). This function is executed when toolbar buttons are used to submit a form.
The fi rst part of the function checks that the button that has been pressed is not cancel. If it is, then the function stops because no validation is required.
If the name fi eld is empty we display an alert box. When we translate the text to show the alert, we provide a second parameter of true. This makes the translated text JavaScript safe.
If no validation problems are encountered we proceed to submit the form. In order to do this, we use a JavaScript function called submitform().
If you require more complex JavaScript form validation, you might want to investigate using JHTML::_(behavior.formvalidation).
Layout improvements There are many ways we can improve our component functionality.
Adding a WYSIWYG editorLet's start by adding a few features to our backend revue view layout found in the views/revue/tmpl/default.php fi le. The fi rst improvement that we will add is to change the revue fi eld to use the system WYSIWYG editor. This is a fairly simple change but will add signifi cant capabilities to our form, including the ability to format our revue using html tags.
For More Information: www.PacktPub.com/ mastering-joomla-1-5-extension-framework-
development-2e/book
Chapter 8
[ 261 ]
Open the default.php fi le and change the following code which is currently the last <td></td> entry in the fi le:
<td><input class="text_area" type="text" name="revue" id="revue" size="50" maxlength="250" value="<?php echo $this->revue->revue;?>" /></td>
We will change this code to the following:
<td><?php $editor =& JFactory::getEditor(); $params = array('element_path' => '0', 'smilies' => '1', 'fullscreen' => '0', 'layer' => '0', 'xhtmlxtras' => '1' );
echo $editor->display('revue', $this->revue->revue, '100%', '100%', '70', '20', true, $params );?></td>
Let's take a quick look at what we just did. We fi rst obtained a reference to the global editor object.
We then created an array of parameters that will tailor our editor instance to our specifi c requirements:
The editor tool buttons (elements) can be displayed either at the top of the editor window (element_path='1') or the bottom (element_path='0')The second element tells the editor to add the smilies icons to the editor toolbarThe next element disables the ability to expand the editor window to full screenThe layer element is disabled; this removes HTML layer featuresAnd fi nally, xhtmlxtras adds buttons for HTML cite, abbr, acronym, ins, del, and attribs tags
•
•
•
••
For More Information: www.PacktPub.com/ mastering-joomla-1-5-extension-framework-
development-2e/book
Rendering Output
[ 262 ]
There are many other parameter settings that we could set but these will do fi ne for our needs. If you wish to learn more about all the available editor settings take a look at the {editor}.php fi le located in the /plugins/editors folder. Joomla! installs with two editors: xstandard.php and tinymce.php.
There are a number of third-party editors available; verify that the options are available when invoking them as we did previously.
In the fi nal step we display the editor window. The JEditor::display() method is defi ned as follows:
display($name, $html, $width, $height, $col, $row, $buttons, $params)
string $name : The control namestring $html : The contents of the text areastring $width : The width of the text area (px or %)string $height : The height of the text area (px or %)integer $col : The number of columns for the textareainteger $row : The number of rows for the textareaboolean $buttons : Optional; if true the editor buttons will be displayedarray $params : Optional; an associative array of editor parametersvoid : No Return
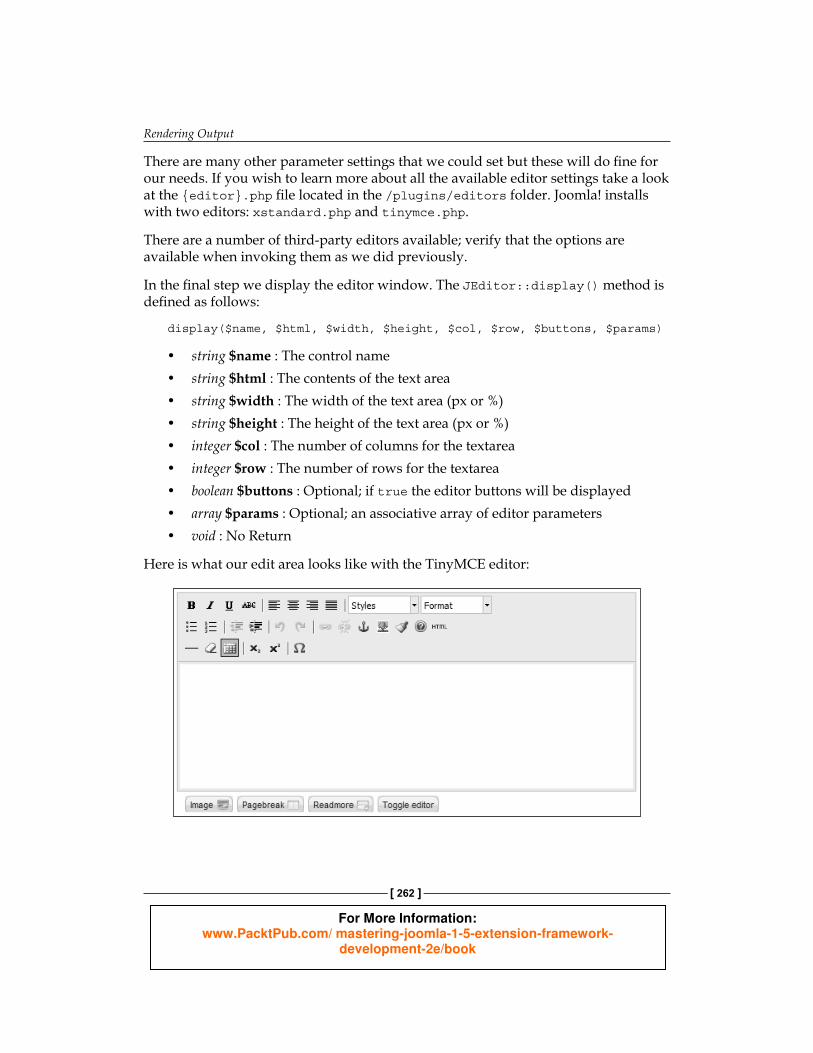
Here is what our edit area looks like with the TinyMCE editor:
•••••••••
For More Information: www.PacktPub.com/ mastering-joomla-1-5-extension-framework-
development-2e/book
Chapter 8
[ 263 ]
Iterative layout templates What will become apparent is that layout templates can grow very large and rapidly become both unmanageable and diffi cult to understand and maintain. The good news is that we can break layout templates into smaller, more manageable pieces. We can split layouts into common or iterative elements of layout code. A major advantage to splitting our layout code is to allow these layouts to be used by other layout templates.
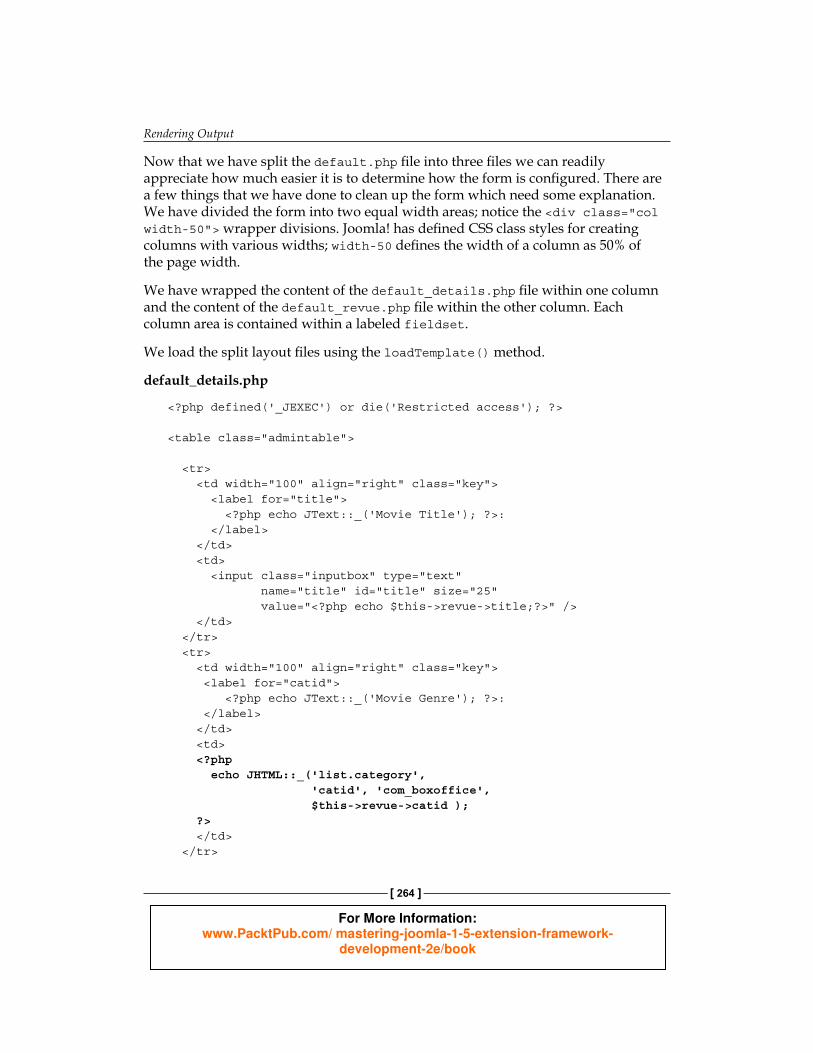
These sub-templates should be prefi xed with the word default_. For example if we had a sub-template to display a form it would be called default_form.php. For our component we will split our layout into three separate fi les: default.php, default_details.php, and default_revue.php.
default. php
<?php defined('_JEXEC') or die('Restricted access'); ?>
<form action="index.php" method="post" name="adminForm" id="adminForm"> <div class="col width-50"> <fieldset class="adminform"> <legend><?php echo JText::_( 'Details' ); ?></legend> <?php echo $this->loadTemplate('details'); ?> </fieldset> </div>
<div class="col width-50"> <fieldset class="adminform"> <legend><?php echo JText::_( 'Revue' ); ?></legend> <?php echo $this->loadTemplate('revue'); ?> </fieldset> </div>
<div class="clr"></div>
<input type="hidden" name="option" value="<?php echo JRequest::getVar('option'); ?>" /> <input type="hidden" name="filter_order" value="<?php echo $this->revue->order; ?>" /> <input type="hidden" name="id" value="<?php echo $this->revue->id; ?>" /> <input type="hidden" name="task" value="" /></form>
For More Information: www.PacktPub.com/ mastering-joomla-1-5-extension-framework-
development-2e/book
Rendering Output
[ 264 ]
Now that we have split the default.php fi le into three fi les we can readily appreciate how much easier it is to determine how the form is confi gured. There are a few things that we have done to clean up the form which need some explanation. We have divided the form into two equal width areas; notice the <div class="col width-50"> wrapper divisions. Joomla! has defi ned CSS class styles for creating columns with various widths; width-50 defi nes the width of a column as 50% of the page width.
We have wrapped the content of the default_details.php fi le within one column and the content of the default_revue.php fi le within the other column. Each column area is contained within a labeled fieldset.
We load the split layout fi les using the loadTemplate() method.
default_details. php
<?php defined('_JEXEC') or die('Restricted access'); ?>
<table class="admintable">
<tr> <td width="100" align="right" class="key"> <label for="title"> <?php echo JText::_('Movie Title'); ?>: </label> </td> <td> <input class="inputbox" type="text" name="title" id="title" size="25" value="<?php echo $this->revue->title;?>" /> </td> </tr> <tr> <td width="100" align="right" class="key"> <label for="catid"> <?php echo JText::_('Movie Genre'); ?>: </label> </td> <td> <?php echo JHTML::_('list.category', 'catid', 'com_boxoffice', $this->revue->catid ); ?> </td> </tr>
For More Information: www.PacktPub.com/ mastering-joomla-1-5-extension-framework-
development-2e/book
Chapter 8
[ 265 ]
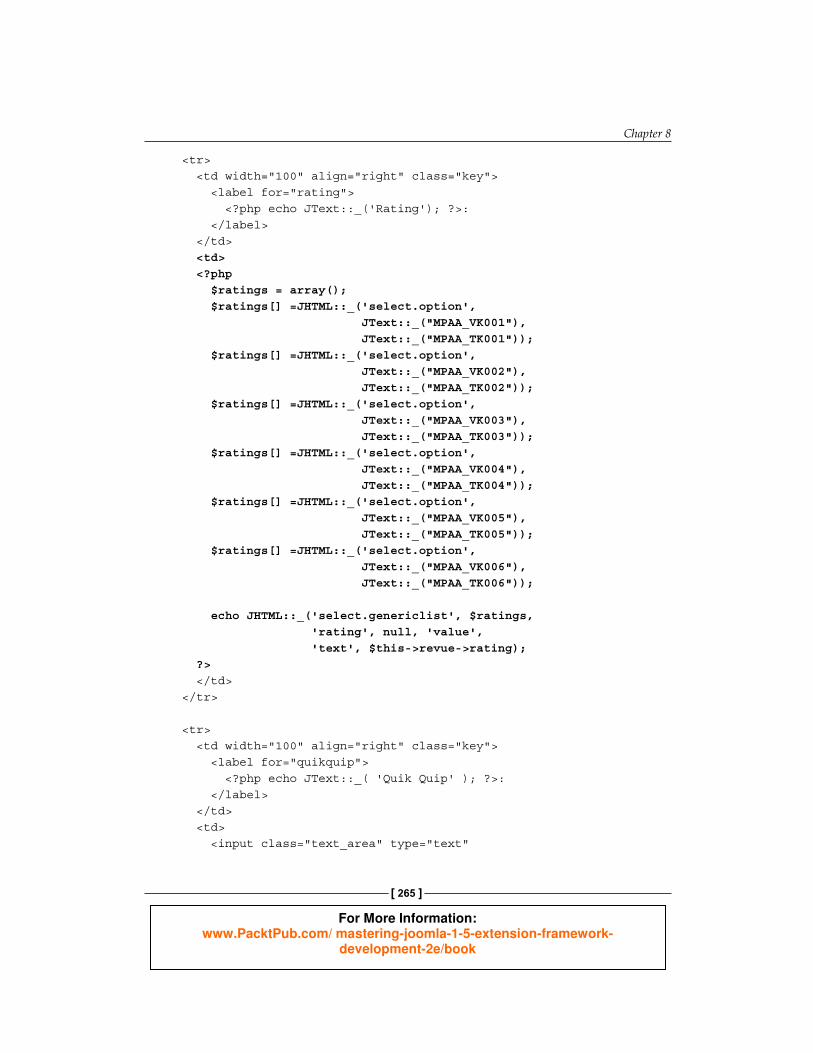
<tr> <td width="100" align="right" class="key"> <label for="rating"> <?php echo JText::_('Rating'); ?>: </label> </td> <td> <?php $ratings = array(); $ratings[] =JHTML::_('select.option', JText::_("MPAA_VK001"), JText::_("MPAA_TK001")); $ratings[] =JHTML::_('select.option', JText::_("MPAA_VK002"), JText::_("MPAA_TK002")); $ratings[] =JHTML::_('select.option', JText::_("MPAA_VK003"), JText::_("MPAA_TK003")); $ratings[] =JHTML::_('select.option', JText::_("MPAA_VK004"), JText::_("MPAA_TK004")); $ratings[] =JHTML::_('select.option', JText::_("MPAA_VK005"), JText::_("MPAA_TK005")); $ratings[] =JHTML::_('select.option', JText::_("MPAA_VK006"), JText::_("MPAA_TK006"));
echo JHTML::_('select.genericlist', $ratings, 'rating', null, 'value', 'text', $this->revue->rating); ?> </td> </tr>
<tr> <td width="100" align="right" class="key"> <label for="quikquip"> <?php echo JText::_( 'Quik Quip' ); ?>: </label> </td> <td> <input class="text_area" type="text"
For More Information: www.PacktPub.com/ mastering-joomla-1-5-extension-framework-
development-2e/book
Rendering Output
[ 266 ]
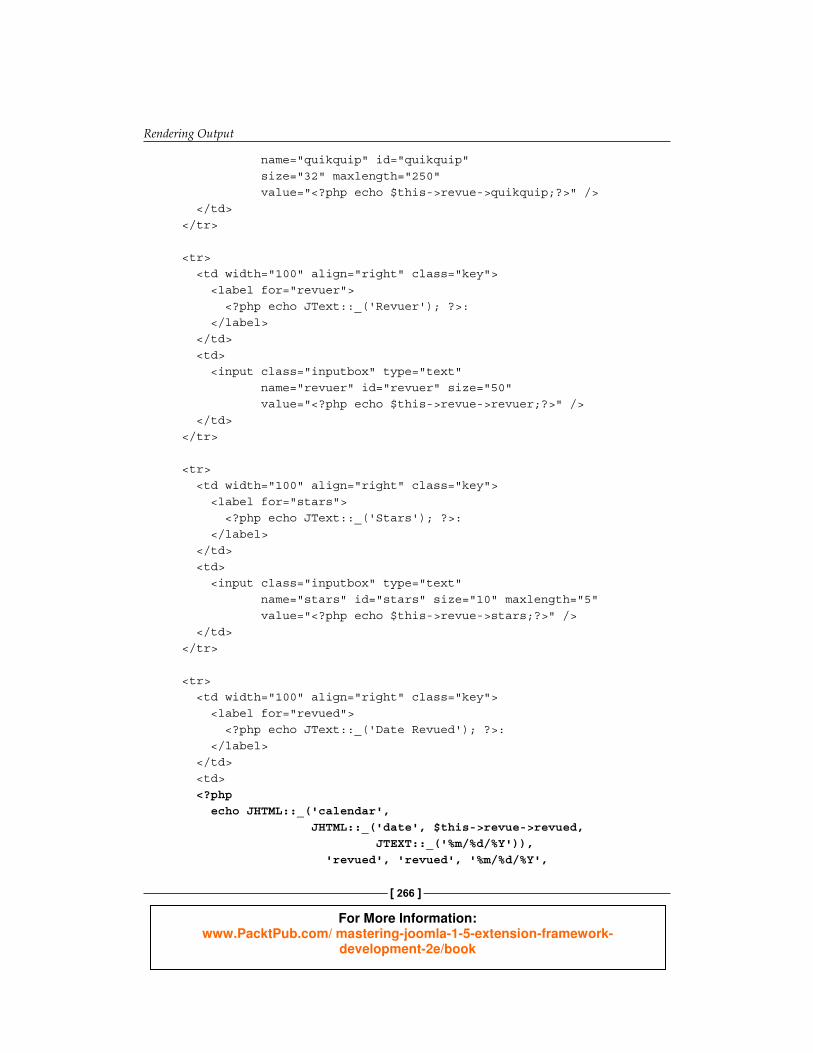
name="quikquip" id="quikquip" size="32" maxlength="250" value="<?php echo $this->revue->quikquip;?>" /> </td> </tr>
<tr> <td width="100" align="right" class="key"> <label for="revuer"> <?php echo JText::_('Revuer'); ?>: </label> </td> <td> <input class="inputbox" type="text" name="revuer" id="revuer" size="50" value="<?php echo $this->revue->revuer;?>" /> </td> </tr>
<tr> <td width="100" align="right" class="key"> <label for="stars"> <?php echo JText::_('Stars'); ?>: </label> </td> <td> <input class="inputbox" type="text" name="stars" id="stars" size="10" maxlength="5" value="<?php echo $this->revue->stars;?>" /> </td> </tr>
<tr> <td width="100" align="right" class="key"> <label for="revued"> <?php echo JText::_('Date Revued'); ?>: </label> </td> <td> <?php echo JHTML::_('calendar', JHTML::_('date', $this->revue->revued, JTEXT::_('%m/%d/%Y')), 'revued', 'revued', '%m/%d/%Y',
For More Information: www.PacktPub.com/ mastering-joomla-1-5-extension-framework-
development-2e/book
Chapter 8
[ 267 ]
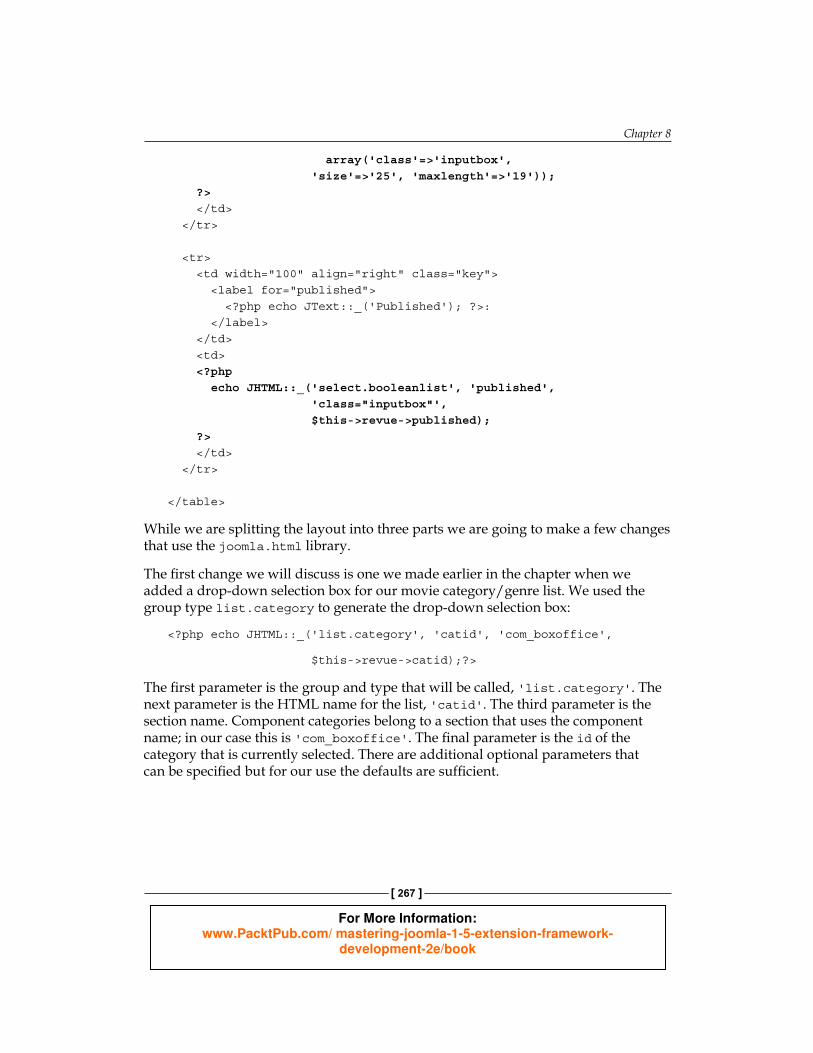
array('class'=>'inputbox', 'size'=>'25', 'maxlength'=>'19')); ?> </td> </tr>
<tr> <td width="100" align="right" class="key"> <label for="published"> <?php echo JText::_('Published'); ?>: </label> </td> <td> <?php echo JHTML::_('select.booleanlist', 'published', 'class="inputbox"', $this->revue->published); ?> </td> </tr>
</table>
While we are splitting the layout into three parts we are going to make a few changes that use the joomla.html library.
The fi rst change we will discuss is one we made earlier in the chapter when we added a drop-down selection box for our movie category/genre list. We used the group type list.category to generate the drop-down selection box:
<?php echo JHTML::_('list.category', 'catid', 'com_boxoffice',
$this->revue->catid);?>
The fi rst parameter is the group and type that will be called, 'list.category'. The next parameter is the HTML name for the list, 'catid'. The third parameter is the section name. Component categories belong to a section that uses the component name; in our case this is 'com_boxoffice'. The fi nal parameter is the id of the category that is currently selected. There are additional optional parameters that can be specifi ed but for our use the defaults are suffi cient.
For More Information: www.PacktPub.com/ mastering-joomla-1-5-extension-framework-
development-2e/book
Rendering Output
[ 268 ]
The next change uses two group types, select.option and select.genericlist, to provide a drop-down list of ratings. We fi rst build an array of options that will be used by the select list. The select.option method takes a key and a value which we provide with calls to JText::_(). The strings that are passed are translation keys located in our translation fi le administrator/language/en-GB/en-GB.com_boxoffice.ini. We have only created a British English translation fi le; we could create and place additional translation fi les for other languages we support in their appropriate directories. We will discuss translation fi les in more detail in the next chapter. Here are the entries used for our ratings drop-down:
# MPAA Ratings
MPAA_VK001=NRMPAA_TK001=Not Rated (NR)MPAA_VK002=GMPAA_TK002=General Audiences (G)MPAA_VK003=PGMPAA_TK003=Parental Guidance Suggested (PG)MPAA_VK004=PG-13MPAA_TK004=Parents Strongly Cautioned (PG-13)MPAA_VK005=RMPAA_TK005=Restricted (R)MPAA_VK006=NC-17MPAA_TK006=17 and under not admitted (NC-17)
JText::_() looks for the key within the language translation fi le and returns the string to the right of the equals sign. In our code above, the fi rst array element will contain an object with two properties, a key of 'NR' and a value of 'Not Rated (NR)'.
The select.genericlist takes a number of parameters. The fi rst is the html name attribute for the select tag, followed by any additional attributes (we have none so we pass null), followed by the property names for the key and value attributes (key='value' and value='text'). The last parameter is the currently selected option.
We have replaced the simple text box for entering a date with a nested set of basic element types, calendar and date. JHTML::_('date',…) returns a formatted date string which is placed within an calendar control text box generated by JHTML::_('calendar',…). The calendar control consists of an input text box and a small clickable calendar image that when clicked, pops up a calendar from which you can select a date.
For More Information: www.PacktPub.com/ mastering-joomla-1-5-extension-framework-
development-2e/book
Chapter 8
[ 269 ]
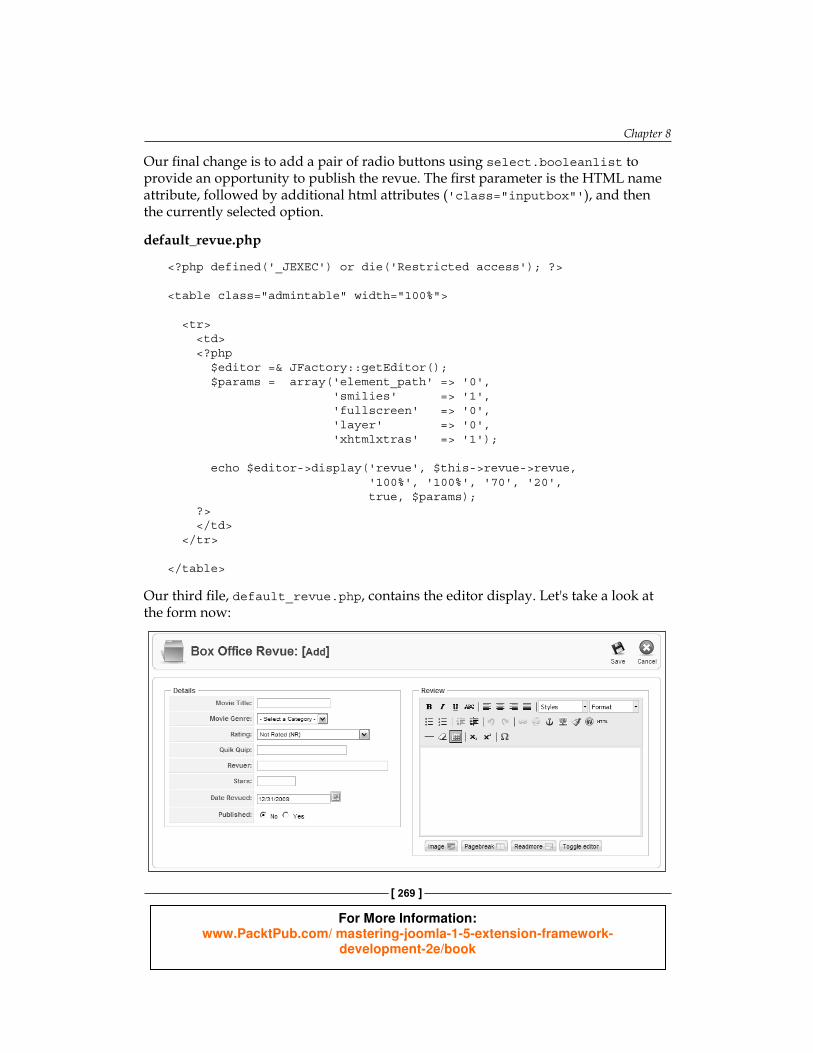
Our fi nal change is to add a pair of radio buttons using select.booleanlist to provide an opportunity to publish the revue. The fi rst parameter is the HTML name attribute, followed by additional html attributes ('class="inputbox"'), and then the currently selected option.
default_revue.php
<?php defined('_JEXEC') or die('Restricted access'); ?>
<table class="admintable" width="100%">
<tr> <td> <?php $editor =& JFactory::getEditor(); $params = array('element_path' => '0', 'smilies' => '1', 'fullscreen' => '0', 'layer' => '0', 'xhtmlxtras' => '1');
echo $editor->display('revue', $this->revue->revue, '100%', '100%', '70', '20', true, $params); ?> </td> </tr>
</table>
Our third fi le, default_revue.php, contains the editor display. Let's take a look at the form now:
For More Information: www.PacktPub.com/ mastering-joomla-1-5-extension-framework-
development-2e/book

Rendering Output
[ 270 ]
This is a much better presentation than our earlier form. We can now create a revue using a WYSIWYG editor and we can select a genre or category for the movie. We also have a translatable drop-down list of ratings, a nice calendar or date picker, and a simple pair of radio buttons to publish or unpublish. But we can do more.
Itemized dataMost components handle and display itemized data. Itemized data is data having many instances; most commonly this refl ects rows in a database table. When dealing with itemized data there are three areas of functionality that users generally expect:
PaginationOrderingFiltering and searching
In this section we will discuss each of these areas of functionality and how to implement them in the backend of a component.
PaginationTo make large amounts of itemized data easier to understand, we can split the data across multiple pages. Joomla! provides us with the JPagination class to help us handle pagination in our extensions.
There are four important attributes associated with the JPagination class:
limitstart: This is the item with which we begin a page, for example the fi rst page will always begin with item 0.limit: This is the maximum number of items to display on a page.total: This is the total number of items across all the pages._viewall: This is the option to ignore pagination and display all items.
Before we dive into piles of code, let's take the time to examine the listFooter, the footer that is used at the bottom of pagination lists:
The box to the far left describes the maximum number of items to display per page (limit). The remaining buttons are used to navigate between pages. The fi nal text defi nes the current page out of the total number of pages.
•••
•
•
•
•
For More Information: www.PacktPub.com/ mastering-joomla-1-5-extension-framework-
development-2e/book
Chapter 8
[ 271 ]
The great thing about this footer is we don't have to work very hard to create it! We can use a JPagination object to build it. This not only means that it is easy to implement, but that the pagination footers are consistent throughout Joomla!. JPagination is used extensively by components in the backend when displaying lists of items.
In order to add pagination to our revues list we must make some modifi cations to our backend revues model. Our current model consists of one private property $_revues and two methods: getRevues() and delete(). We need to add two additional private properties for pagination purposes. Let's place them immediately following the existing $_revues property:
/** @var array of revue objects */var $_revues = null;/** @var int total number of revues */var $_total = null;/** @var JPagination object */var $_pagination = null;
Next we must add a class constructor, as we will need to retrieve and initialize the global pagination variables $limit and $limitstart. JModel objects store a state object in order to record the state of the model. It is common to use the state variables limit and limitstart to record the number of items per page and starting item for the page.
We set the state variables in the constructor:
/** * Constructor */function __construct(){ global $mainframe;
parent::__construct();
// Get the pagination request variables $limit = $mainframe->getUserStateFromRequest( 'global.list.limit', 'limit', $mainframe->getCfg('list_limit')); $limitstart = $mainframe->getUserStateFromRequest( $option.'limitstart', 'limitstart', 0);
// Set the state pagination variables $this->setState('limit', $limit); $this->setState('limitstart', $limitstart);}
For More Information: www.PacktPub.com/ mastering-joomla-1-5-extension-framework-
development-2e/book
Rendering Output
[ 272 ]
Remember that $mainframe references the global JApplication object. We use the getUserStateFromRequest() method to get the limit and limitstart variables.
We use the user state variable, global.list.limit, to determine the limit. This variable is used throughout Joomla! to determine the length of lists. For example, if we were to view the Article Manager and select a limit of fi ve items per page, if we move to a different list it will also be limited to fi ve items.
If a value is set in the request value limit (part of the listFooter), we use that value. Alternatively we use the previous value, and if that is not set we use the default value defi ned in the application confi guration.
The limitstart variable is retrieved from the user state value $option, plus .limitstart. The $option value holds the component name, for example com_content. If we build a component that has multiple lists we should add an extra level to this, which is normally named after the entity.
If a value is set in the request value limitstart (part of the listFooter) we use that value. Alternatively we use the previous value, and if that is not set we use the default value 0, which will lead us to the fi rst page.
The reason we retrieve these values in the constructor and not in another method is that in addition to using these values for the JPagination object, we will also need them when getting data from the database.
In our existing component model we have a single method for retrieving data from the database, getRevues(). For reasons that will become apparent shortly we need to create a private method that will build the query string and modify our getRevues() method to use it.
/** * Builds a query to get data from #__boxoffice_revues * @return string SQL query */function _buildQuery(){ $db =& $this->getDBO(); $rtable = $db->nameQuote('#__boxoffice_revues'); $ctable = $db->nameQuote('#__categories'); $query = ' SELECT r.*, cc.title AS cat_title' . ' FROM ' . $rtable. ' AS r' . ' LEFT JOIN '.$ctable.' AS cc ON cc.id=r.catid;
return $query;}
For More Information: www.PacktPub.com/ mastering-joomla-1-5-extension-framework-
development-2e/book
Chapter 8
[ 273 ]
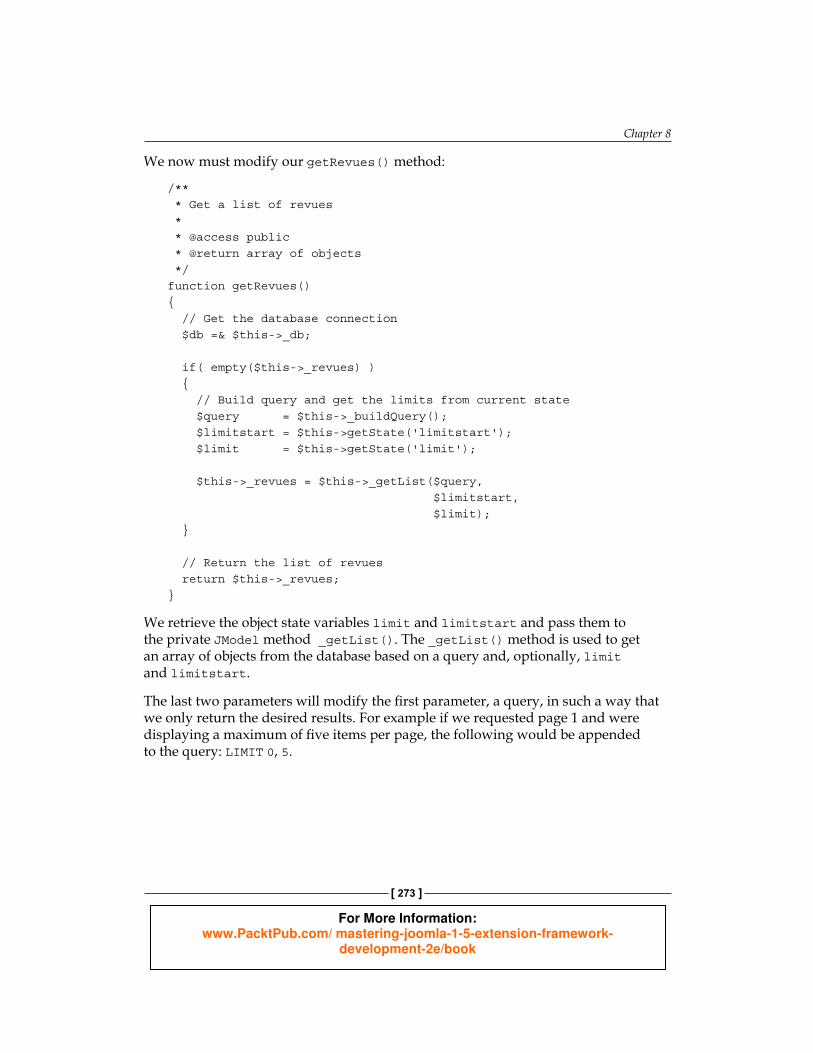
We now must modify our getRevues() method:
/** * Get a list of revues * * @access public * @return array of objects */function getRevues(){ // Get the database connection $db =& $this->_db;
if( empty($this->_revues) ) { // Build query and get the limits from current state $query = $this->_buildQuery(); $limitstart = $this->getState('limitstart'); $limit = $this->getState('limit');
$this->_revues = $this->_getList($query, $limitstart, $limit); } // Return the list of revues return $this->_revues;}
We retrieve the object state variables limit and limitstart and pass them to the private JModel method _getList(). The _getList() method is used to get an array of objects from the database based on a query and, optionally, limit and limitstart.
The last two parameters will modify the fi rst parameter, a query, in such a way that we only return the desired results. For example if we requested page 1 and were displaying a maximum of fi ve items per page, the following would be appended to the query: LIMIT 0, 5.
For More Information: www.PacktPub.com/ mastering-joomla-1-5-extension-framework-
development-2e/book
Rendering Output
[ 274 ]
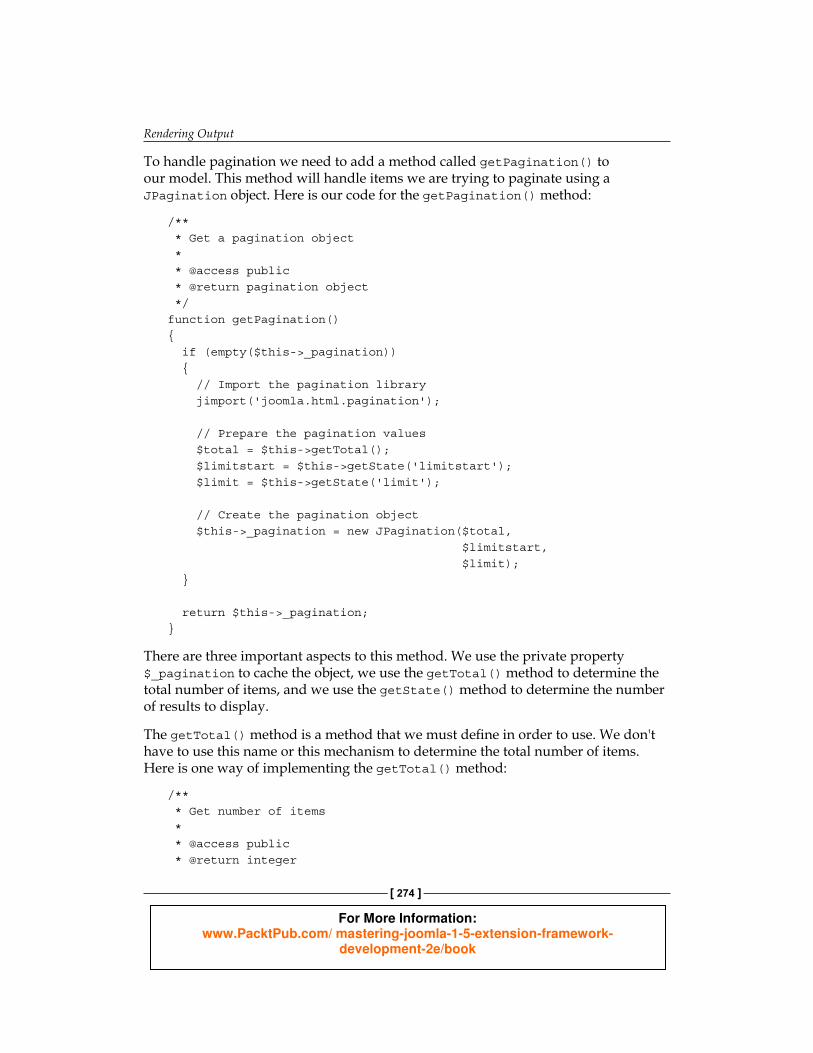
To handle pagination we need to add a method called getPagination() to our model. This method will handle items we are trying to paginate using a JPagination object. Here is our code for the getPagination() method:
/** * Get a pagination object * * @access public * @return pagination object */function getPagination(){ if (empty($this->_pagination)) { // Import the pagination library jimport('joomla.html.pagination');
// Prepare the pagination values $total = $this->getTotal(); $limitstart = $this->getState('limitstart'); $limit = $this->getState('limit');
// Create the pagination object $this->_pagination = new JPagination($total, $limitstart, $limit); }
return $this->_pagination;}
There are three important aspects to this method. We use the private property $_pagination to cache the object, we use the getTotal() method to determine the total number of items, and we use the getState() method to determine the number of results to display.
The getTotal() method is a method that we must defi ne in order to use. We don't have to use this name or this mechanism to determine the total number of items. Here is one way of implementing the getTotal() method:
/** * Get number of items * * @access public * @return integer
For More Information: www.PacktPub.com/ mastering-joomla-1-5-extension-framework-
development-2e/book
Chapter 8
[ 275 ]
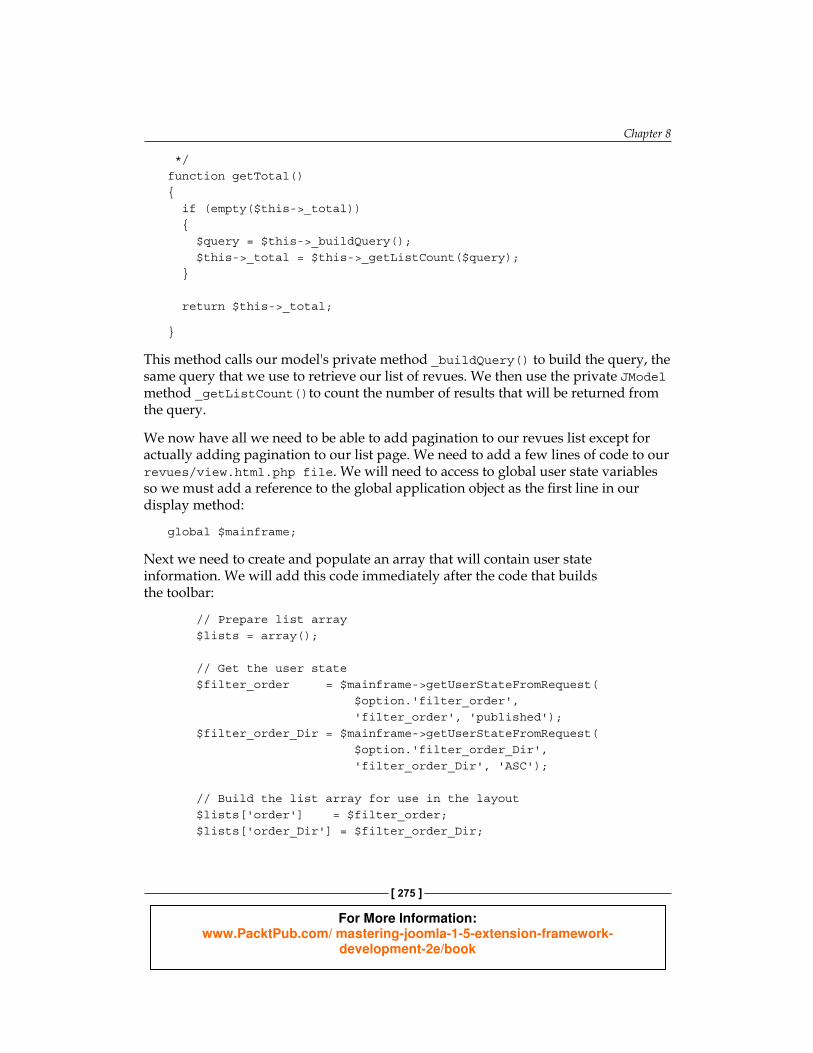
*/function getTotal(){ if (empty($this->_total)) { $query = $this->_buildQuery(); $this->_total = $this->_getListCount($query); }
return $this->_total;
}
This method calls our model's private method _buildQuery() to build the query, the same query that we use to retrieve our list of revues. We then use the private JModel method _getListCount()to count the number of results that will be returned from the query.
We now have all we need to be able to add pagination to our revues list except for actually adding pagination to our list page. We need to add a few lines of code to our revues/view.html.php file. We will need to access to global user state variables so we must add a reference to the global application object as the fi rst line in our display method:
global $mainframe;
Next we need to create and populate an array that will contain user state information. We will add this code immediately after the code that builds the toolbar:
// Prepare list array $lists = array();
// Get the user state $filter_order = $mainframe->getUserStateFromRequest( $option.'filter_order', 'filter_order', 'published'); $filter_order_Dir = $mainframe->getUserStateFromRequest( $option.'filter_order_Dir', 'filter_order_Dir', 'ASC');
// Build the list array for use in the layout $lists['order'] = $filter_order; $lists['order_Dir'] = $filter_order_Dir;
For More Information: www.PacktPub.com/ mastering-joomla-1-5-extension-framework-
development-2e/book
Rendering Output
[ 276 ]
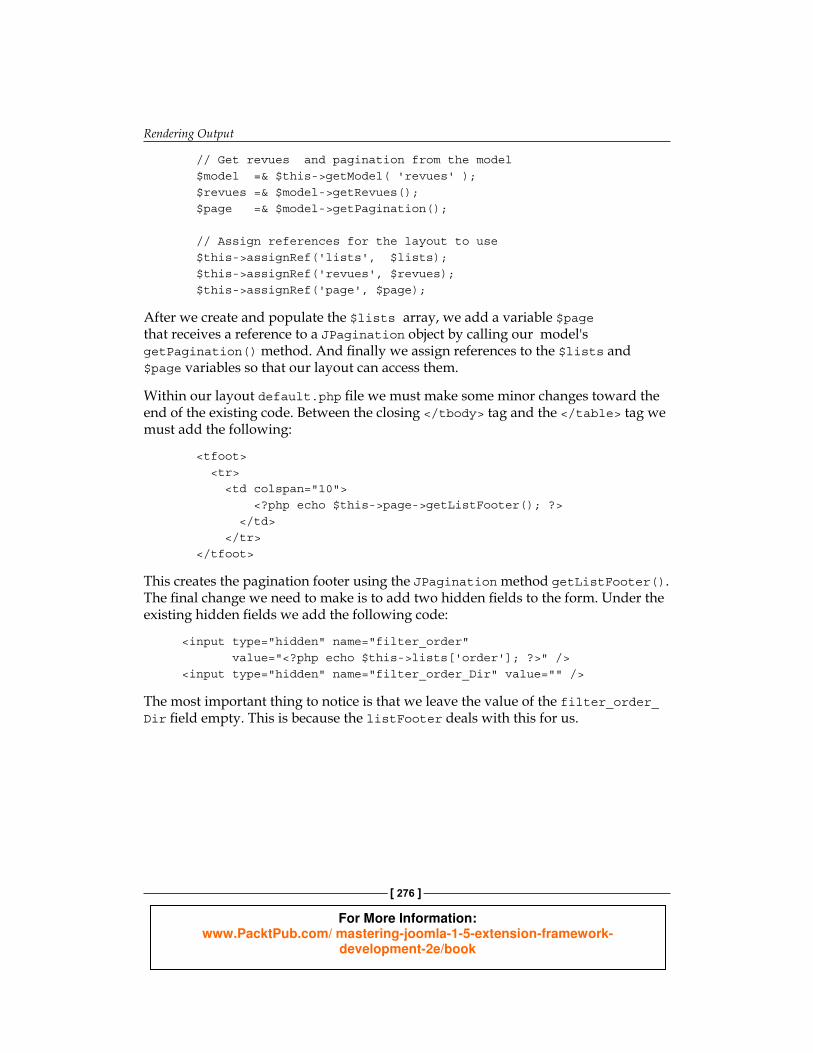
// Get revues and pagination from the model $model =& $this->getModel( 'revues' ); $revues =& $model->getRevues(); $page =& $model->getPagination();
// Assign references for the layout to use $this->assignRef('lists', $lists); $this->assignRef('revues', $revues); $this->assignRef('page', $page);
After we create and populate the $lists array, we add a variable $page that receives a reference to a JPagination object by calling our model's getPagination() method. And fi nally we assign references to the $lists and $page variables so that our layout can access them.
Within our layout default.php fi le we must make some minor changes toward the end of the existing code. Between the closing </tbody> tag and the </table> tag we must add the following:
<tfoot> <tr> <td colspan="10"> <?php echo $this->page->getListFooter(); ?> </td> </tr> </tfoot>
This creates the pagination footer using the JPagination method getListFooter(). The fi nal change we need to make is to add two hidden fi elds to the form. Under the existing hidden fi elds we add the following code:
<input type="hidden" name="filter_order" value="<?php echo $this->lists['order']; ?>" /> <input type="hidden" name="filter_order_Dir" value="" />
The most important thing to notice is that we leave the value of the filter_order_Dir fi eld empty. This is because the listFooter deals with this for us.
For More Information: www.PacktPub.com/ mastering-joomla-1-5-extension-framework-
development-2e/book
Chapter 8
[ 277 ]
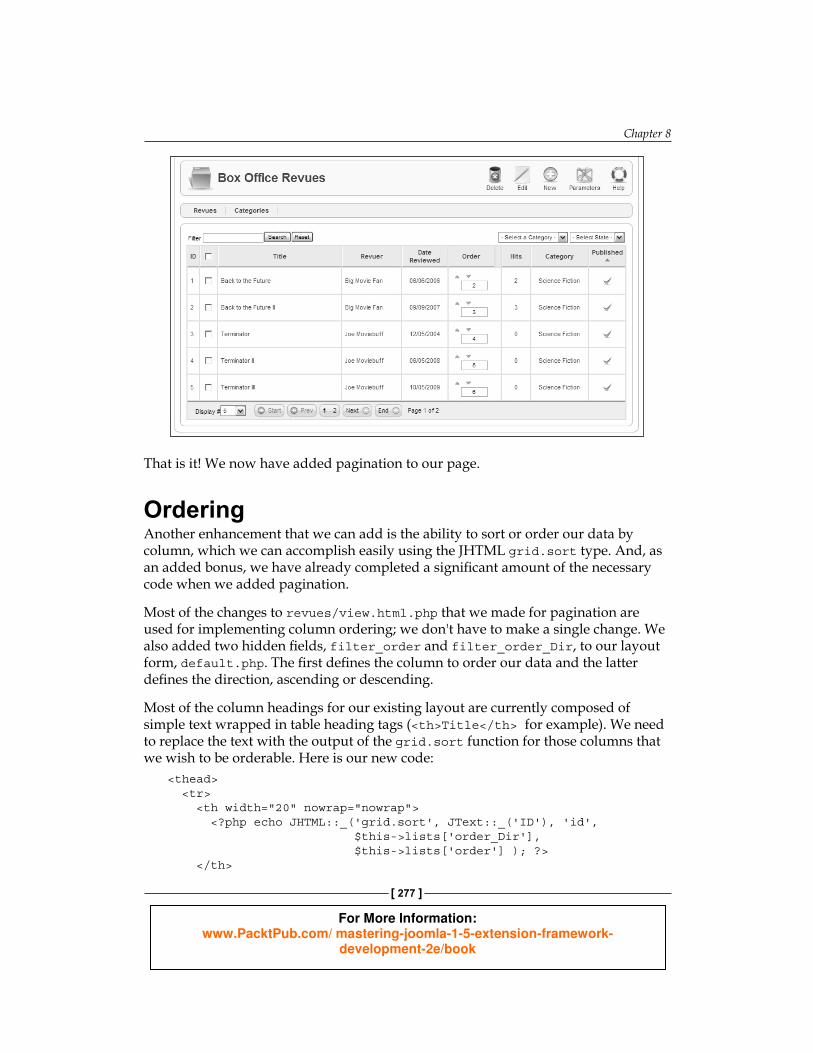
That is it! We now have added pagination to our page.
OrderingAnother enhancement that we can add is the ability to sort or order our data by column, which we can accomplish easily using the JHTML grid.sort type. And, as an added bonus, we have already completed a signifi cant amount of the necessary code when we added pagination.
Most of the changes to revues/view.html.php that we made for pagination are used for implementing column ordering; we don't have to make a single change. We also added two hidden fi elds, filter_order and filter_order_Dir, to our layout form, default.php. The fi rst defi nes the column to order our data and the latter defi nes the direction, ascending or descending.
Most of the column headings for our existing layout are currently composed of simple text wrapped in table heading tags (<th>Title</th> for example). We need to replace the text with the output of the grid.sort function for those columns that we wish to be orderable. Here is our new code:
<thead> <tr> <th width="20" nowrap="nowrap"> <?php echo JHTML::_('grid.sort', JText::_('ID'), 'id', $this->lists['order_Dir'], $this->lists['order'] ); ?> </th>
For More Information: www.PacktPub.com/ mastering-joomla-1-5-extension-framework-
development-2e/book
Rendering Output
[ 278 ]
<th width="20" nowrap="nowrap"> <input type="checkbox" name="toggle" value="" onclick="checkAll( <?php echo count($this->revues); ?>);" /> </th>
<th width="40%"> <?php echo JHTML::_('grid.sort', JText::_('TITLE'), 'title', $this->lists['order_Dir'], $this->lists['order'] ); ?> </th>
<th width="20%"> <?php echo JHTML::_('grid.sort', JText::_('REVUER'), 'revuer', $this->lists['order_Dir'], $this->lists['order'] ); ?> </th>
<th width="80" nowrap="nowrap"> <?php echo JHTML::_('grid.sort', JText::_('REVUED'), 'revued', $this->lists['order_Dir'], $this->lists['order'] ); ?> </th> <th width="80" nowrap="nowrap" align="center"> <?php echo JHTML::_('grid.sort', 'ORDER', 'ordering', $this->lists['order_Dir'], $this->lists['order'] ); ?> </th>
<th width="10" nowrap="nowrap"> <?php if($ordering) echo JHTML::_('grid.order', $this->revues); ?> </th>
<th width="50" nowrap="nowrap"> <?php echo JText::_('HITS'); ?> </th>
<th width="100" nowrap="nowrap" align="center"> <?php echo JHTML::_('grid.sort', JText::_('CATEGORY'), 'category', $this->lists['order_Dir'], $this->lists['order'] ); ?> </th>
For More Information: www.PacktPub.com/ mastering-joomla-1-5-extension-framework-
development-2e/book
Chapter 8
[ 279 ]
<th width="60" nowrap="nowrap" align="center"> <?php echo JHTML::_('grid.sort', JText::_('PUBLISHED'), 'published', $this->lists['order_Dir'], $this->lists['order'] ); ?> </th> </tr></thead>
Let's look at the last column, Published, and dissect the call to grid.sort. Following grid.sort we have the name of the column, fi ltered through JText::_() passing it a key to our translation fi le. The next parameter is the sort value, the current order direction, and the current column by which the data is ordered.
In order for us to be able to use these headings to order our data we must make a few additional modifi cations to our JModel class.
We created the _buildQuery() method earlier when we were adding pagination. We now need to make a change to that method to handle ordering:
/** * Builds a query to get data from #__boxoffice_revues * @return string SQL query */function _buildQuery(){ $db =& $this->getDBO(); $rtable = $db->nameQuote('#__boxoffice_revues'); $ctable = $db->nameQuote('#__categories');
$query = ' SELECT r.*, cc.title AS cat_title' . ' FROM ' . $rtable. ' AS r' . ' LEFT JOIN '.$ctable.' AS cc ON cc.id=r.catid' . $this->_buildQueryOrderBy();
return $query;}
Our method now calls a method named _buildQueryOrderBy() that builds the ORDER BY clause for the query:
/** * Build the ORDER part of a query * * @return string part of an SQL query */
For More Information: www.PacktPub.com/ mastering-joomla-1-5-extension-framework-
development-2e/book
Rendering Output
[ 280 ]
function _buildQueryOrderBy(){ global $mainframe, $option;
// Array of allowable order fields $orders = array('title', 'revuer', 'revued', 'category', 'published', 'ordering', 'id'); // Get the order field and direction, default order field // is 'ordering', default direction is ascending $filter_order = $mainframe->getUserStateFromRequest( $option.'filter_order', 'filter_order', 'ordering'); $filter_order_Dir = strtoupper( $mainframe->getUserStateFromRequest( $option.'filter_order_Dir', 'filter_order_Dir', 'ASC'));
// Validate the order direction, must be ASC or DESC if ($filter_order_Dir != 'ASC' && $filter_order_Dir != 'DESC') { $filter_order_Dir = 'ASC'; }
// If order column is unknown use the default if (!in_array($filter_order, $orders)) { $filter_order = 'ordering'; }
$orderby = ' ORDER BY '.$filter_order.' '.$filter_order_Dir;
if ($filter_order != 'ordering') { $orderby .= ' , ordering '; }
// Return the ORDER BY clause return $orderby;}
As with the view, we retrieve the order column name and direction using the application getUserStateFromRequest() method. Since this data is going to be used to interact with the database, we perform some data sanity checks to ensure that the data is safe to use with the database.
For More Information: www.PacktPub.com/ mastering-joomla-1-5-extension-framework-
development-2e/book
Chapter 8
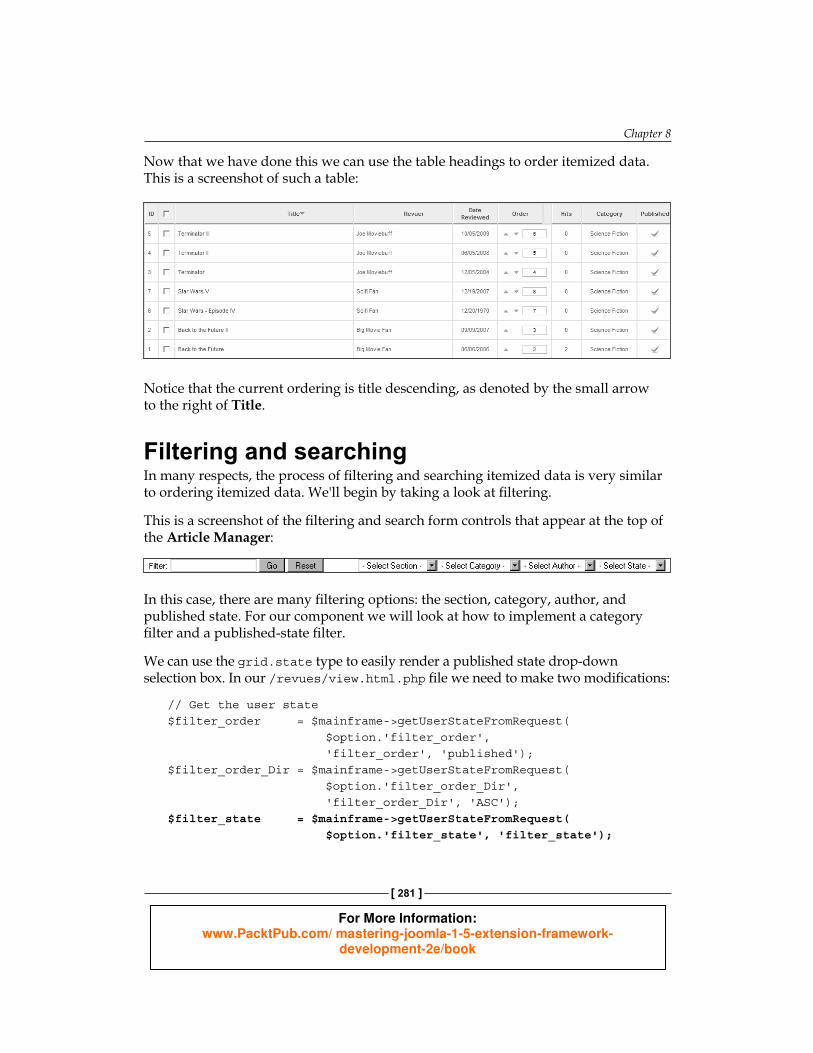
[ 281 ]
Now that we have done this we can use the table headings to order itemized data. This is a screenshot of such a table:
Notice that the current ordering is title descending, as denoted by the small arrow to the right of Title.
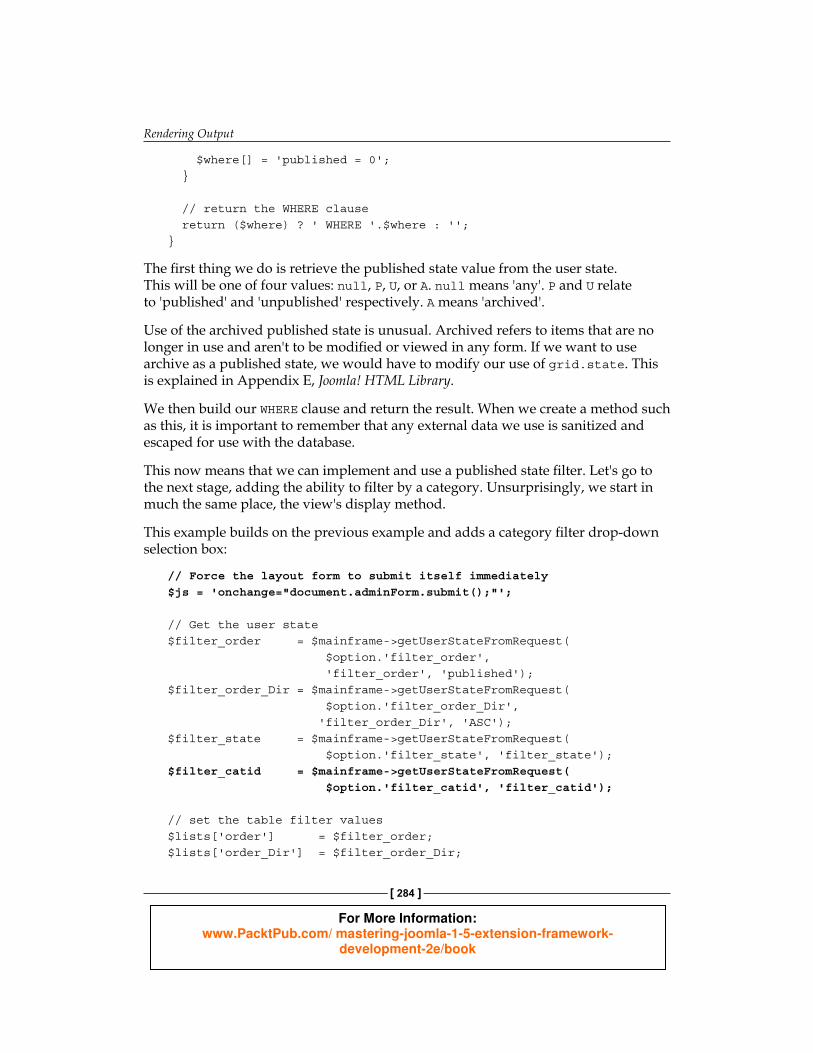
Filtering and searchingIn many respects, the process of fi ltering and searching itemized data is very similar to ordering itemized data. We'll begin by taking a look at fi ltering.
This is a screenshot of the fi ltering and search form controls that appear at the top of the Article Manager:
In this case, there are many fi ltering options: the section, category, author, and published state. For our component we will look at how to implement a category fi lter and a published-state fi lter.
We can use the grid.state type to easily render a published state drop-down selection box. In our /revues/view.html.php fi le we need to make two modifi cations:
/ / Get the user state $filter_order = $mainframe->getUserStateFromRequest( $option.'filter_order', 'filter_order', 'published');$filter_order_Dir = $mainframe->getUserStateFromRequest( $option.'filter_order_Dir', 'filter_order_Dir', 'ASC');$filter_state = $mainframe->getUserStateFromRequest( $option.'filter_state', 'filter_state');
For More Information: www.PacktPub.com/ mastering-joomla-1-5-extension-framework-
development-2e/book

Rendering Output
[ 282 ]
// set the table filter values$lists['order'] = $filter_order;$lists['order_Dir'] = $filter_order_Dir;$lists['state'] = JHTML::_('grid.state', $filter_state);
We use the application getUserStateFromRequest() method to determine the current published state fi lter value, using the path $option plus filter_state. The default value is a null string, which indicates that no selection has been made.
Once we have the published state fi lter value, we use the grid.state type to render a drop-down list form control with the available published state properties. This control has some JavaScript associated with it that automatically submits the form when the JavaScript onChange event is fi red.
A complete description of the grid.state type is available in Appendix E, Joomla! HTML Library.
Now that we have a form control we need to display it. We do this in the default.php layout by placing the following table declaration between the admin form and table declaration:
<table> <tr> <td align="left" width="100%"></td> <td nowrap="nowrap"> <?php echo $this->lists['state']; ?> </td> </tr></table>
It is normal to use a table with one row and two cells to display fi lters and search controls. The left-hand cell is used to display the search and the right-hand cell is used to display the fi lter drop-down selection boxes.
As with most things in Joomla!, there are no strings attached as to how we implement fi ltering and searching. We don't have to format the fi lter in this way, and for those of us who prefer a good dose of CSS, it is perfectly acceptable to implement a table-less design.
The next question is: How do we apply a fi lter? This is far easier than it might sound. When we discussed ordering we described the _buildQuery() method in the model. It's back to that method to make some more changes:
/** * Builds a query to get data from #__boxoffice_revues * @return string SQL query */
For More Information: www.PacktPub.com/ mastering-joomla-1-5-extension-framework-
development-2e/book
Chapter 8
[ 283 ]
function _buildQuery(){ $db =& $this->getDBO(); $rtable = $db->nameQuote('#__boxoffice_revues'); $ctable = $db->nameQuote('#__categories'); $query = ' SELECT r.*, cc.title AS cat_title' . ' FROM ' . $rtable. ' AS r' . ' LEFT JOIN '.$ctable.' AS cc ON cc.id=r.catid' . $this->_buildQueryWhere() . $this->_buildQueryOrderBy();
return $query;}
This time we have added a call to a private _buildQueryWhere() method. This method works in much the same way as the _buildQueryOrderBy() method, except that it returns a WHERE clause instead of an ORDER BY clause.
This example demonstrates how we can implement this method in order to apply the published state fi lter:
/** * Builds the WHERE part of a query * * @return string Part of an SQL query*/function _buildQueryWhere(){ global $mainframe, $option;
// Get the filter values $filter_state = $mainframe->getUserStateFromRequest( $option,'filter_state','filter_state');
// Prepare the WHERE clause $where = array();
// Determine published state if ( $filter_state == 'P' ) { $where[] = 'published = 1'; } elseif($filter_state == 'U') {
For More Information: www.PacktPub.com/ mastering-joomla-1-5-extension-framework-
development-2e/book
Rendering Output
[ 284 ]
$where[] = 'published = 0'; } // return the WHERE clause return ($where) ? ' WHERE '.$where : '';}
The fi rst thing we do is retrieve the published state value from the user state. This will be one of four values: null, P, U, or A. null means 'any'. P and U relate to 'published' and 'unpublished' respectively. A means 'archived'.
Use of the archived published state is unusual. Archived refers to items that are no longer in use and aren't to be modifi ed or viewed in any form. If we want to use archive as a published state, we would have to modify our use of grid.state. This is explained in Appendix E, Joomla! HTML Library.
We then build our WHERE clause and return the result. When we create a method such as this, it is important to remember that any external data we use is sanitized and escaped for use with the database.
This now means that we can implement and use a published state fi lter. Let's go to the next stage, adding the ability to fi lter by a category. Unsurprisingly, we start in much the same place, the view's display method.
This example builds on the previous example and adds a category fi lter drop-down selection box:
// Force the layout form to submit itself immediately $js = 'onchange="document.adminForm.submit();"';
// Get the user state $filter_order = $mainframe->getUserStateFromRequest( $option.'filter_order', 'filter_order', 'published');$filter_order_Dir = $mainframe->getUserStateFromRequest( $option.'filter_order_Dir', 'filter_order_Dir', 'ASC');$filter_state = $mainframe->getUserStateFromRequest( $option.'filter_state', 'filter_state');$filter_catid = $mainframe->getUserStateFromRequest( $option.'filter_catid', 'filter_catid');
// set the table filter values$lists['order'] = $filter_order;$lists['order_Dir'] = $filter_order_Dir;
For More Information: www.PacktPub.com/ mastering-joomla-1-5-extension-framework-
development-2e/book
Chapter 8
[ 285 ]
$lists['state'] = JHTML::_('grid.state', $filter_state);$lists['catid'] = JHTML::_('list.category', 'filter_catid', 'com_boxoffice', (int)$filter_catid, $js);
This time we also retrieve the current value for filter_catid; there are no restrictions on what we call fi lter form controls, but it is normal to prefi x them with filter_. Instead of using grid, we use a list type, list.category, to render the category fi lter form control.
Unlike grid.state, we must tell list.category the name of the control, the extension name (category section), and the current category. Note that we cast the value of $filter_catid to an integer for security reasons. Last of all, we include some JavaScript.
This JavaScript forces the adminForm form to submit itself, applying the fi lter immediately. The fi rst entry in the resultant drop-down list is Select a Category. We can opt to make our JavaScript slightly more intelligent by not submitting the form if the Select a Category option is chosen, as this JavaScript demonstrates:
$js = "onchange=\"if (this.options[selectedIndex].value!='')
{ document.adminForm.submit(); }\"";
Now in our default.php layout we add the lists['catid'] value to the table above the itemized data:
<table> <tr> <td align="left" width="100%"></td> <td nowrap="nowrap"> <?php echo $this->lists['catid']; ?> <?php echo $this->lists['state']; ?> </td> </tr></table>
The fi nal stage is to apply the category fi lter to the itemized data. We do this in much the same way as we modifi ed the results for the published state fi lter. This example shows how we can modify the JModel _buildQueryWhere() method to incorporate the category:
/** * Builds the WHERE part of a query * * @return string Part of an SQL query
For More Information: www.PacktPub.com/ mastering-joomla-1-5-extension-framework-
development-2e/book
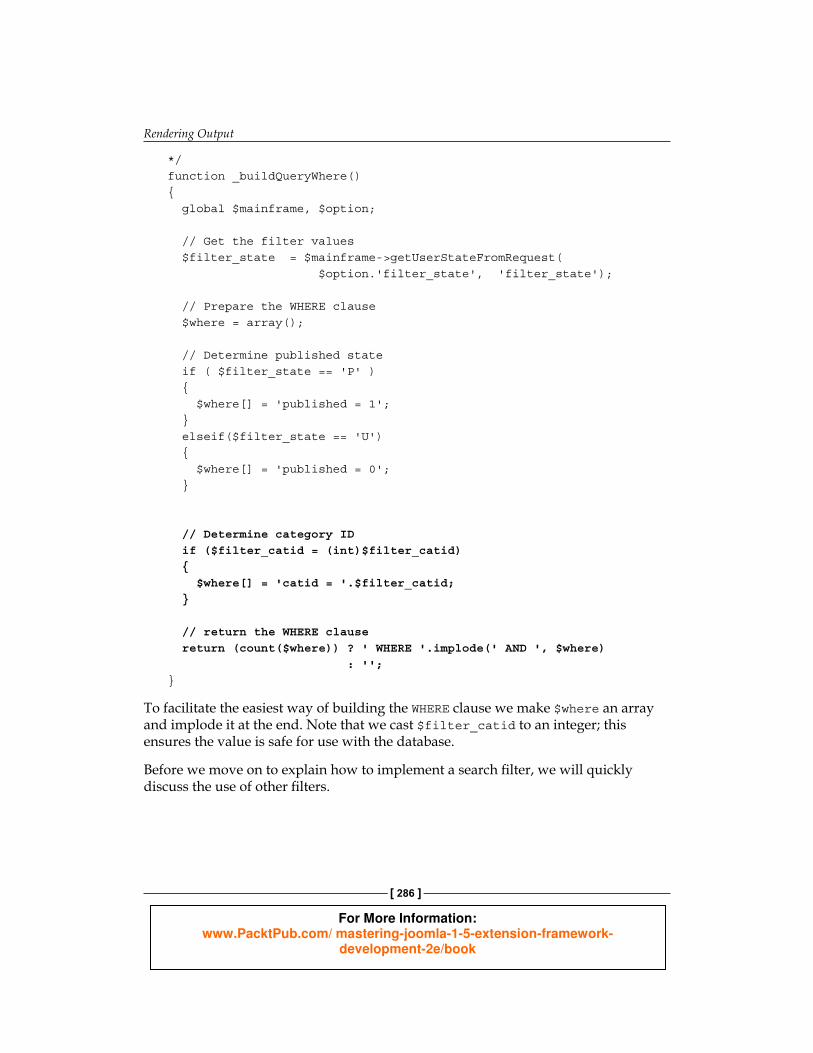
Rendering Output
[ 286 ]
*/function _buildQueryWhere(){ global $mainframe, $option;
// Get the filter values $filter_state = $mainframe->getUserStateFromRequest( $option.'filter_state', 'filter_state');
// Prepare the WHERE clause $where = array();
// Determine published state if ( $filter_state == 'P' ) { $where[] = 'published = 1'; } elseif($filter_state == 'U') { $where[] = 'published = 0'; }
// Determine category ID if ($filter_catid = (int)$filter_catid) { $where[] = 'catid = '.$filter_catid; }
// return the WHERE clause return (count($where)) ? ' WHERE '.implode(' AND ', $where) : '';}
To facilitate the easiest way of building the WHERE clause we make $where an array and implode it at the end. Note that we cast $filter_catid to an integer; this ensures the value is safe for use with the database.
Before we move on to explain how to implement a search fi lter, we will quickly discuss the use of other fi lters.
For More Information: www.PacktPub.com/ mastering-joomla-1-5-extension-framework-
development-2e/book
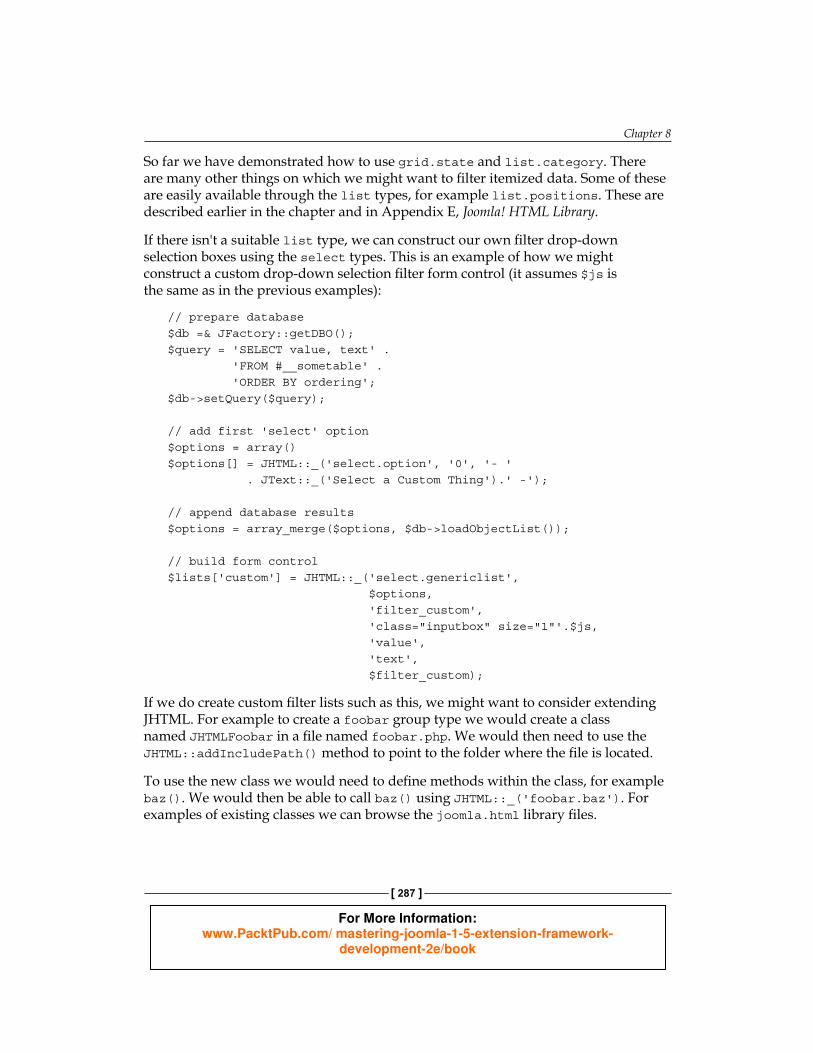
Chapter 8
[ 287 ]
So far we have demonstrated how to use grid.state and list.category. There are many other things on which we might want to fi lter itemized data. Some of these are easily available through the list types, for example list.positions. These are described earlier in the chapter and in Appendix E, Joomla! HTML Library.
If there isn't a suitable list type, we can construct our own fi lter drop-down selection boxes using the select types. This is an example of how we might construct a custom drop-down selection fi lter form control (it assumes $js is the same as in the previous examples):
// prepare database$db =& JFactory::getDBO();$query = 'SELECT value, text' . 'FROM #__sometable' . 'ORDER BY ordering';$db->setQuery($query);
// add first 'select' option$options = array()$options[] = JHTML::_('select.option', '0', '- ' . JText::_('Select a Custom Thing').' -');
// append database results$options = array_merge($options, $db->loadObjectList());
// build form control$lists['custom'] = JHTML::_('select.genericlist', $options, 'filter_custom', 'class="inputbox" size="1"'.$js, 'value', 'text', $filter_custom);
If we do create custom fi lter lists such as this, we might want to consider extending JHTML. For example to create a foobar group type we would create a class named JHTMLFoobar in a fi le named foobar.php. We would then need to use the JHTML::addIncludePath() method to point to the folder where the fi le is located.
To use the new class we would need to defi ne methods within the class, for example baz(). We would then be able to call baz() using JHTML::_('foobar.baz'). For examples of existing classes we can browse the joomla.html library fi les.
For More Information: www.PacktPub.com/ mastering-joomla-1-5-extension-framework-
development-2e/book

Rendering Output
[ 288 ]
Next up is searching. This functionality may sound more complex, but in reality it is relatively simple. As with fi ltering, ordering, and pagination we must make a few modifi cations to our display method in our /revues/view.html.php fi le. Building on our previous modifi cations we modify the display method as follows:
// Force the layout form to submit itself immediately $js = "onchange=\"if (this.options[ selectedIndex].value!='') { document.adminForm.submit(); }\"";
// Get the user state $filter_order = $mainframe->getUserStateFromRequest( $option.'filter_order', 'filter_order', 'published');$filter_order_Dir = $mainframe->getUserStateFromRequest( $option.'filter_order_Dir', 'filter_order_Dir', 'ASC');$filter_state = $mainframe->getUserStateFromRequest( $option.'filter_state', 'filter_state');$filter_catid = $mainframe->getUserStateFromRequest( $option.'filter_catid', 'filter_catid');$filter_search = $mainframe->getUserStateFromRequest( $option.'filter_search', 'filter_search');
// Build the list array for use in the layout$lists['order'] = $filter_order;$lists['order_Dir'] = $filter_order_Dir;$lists['state'] = JHTML::_('grid.state', $filter_state);$lists['catid'] = JHTML::_('list.category', 'filter_catid', 'com_boxoffice', (int)$filter_catid, $js);$lists['search'] = $filter_search;
Now in our default.php layout we add the following code to the fi rst cell in the table above the itemized data:
<table> <tr> <td align="left" width="100%"> <?php echo JText::_('Filter'); ?>: <input type="text" name="filter_search" id="search" value="<?php echo $this->lists['search'];?>" class="text_area"
For More Information: www.PacktPub.com/ mastering-joomla-1-5-extension-framework-
development-2e/book

Chapter 8
[ 289 ]
onchange="document.adminForm.submit();" /> <button onclick="this.form.submit();"> <?php echo JText::_('Search'); ?> </button> <button onclick="document.adminForm. filter_search.value='';this.form.submit();"> <?php echo JText::_('Reset'); ?> </button> </td> <td nowrap="nowrap"> <?php echo $this->lists['catid']; ?> <?php echo $this->lists['state']; ?> </td> </tr></table>
As you can see, this is more complex than displaying the previous fi lter form controls. We output the text Filter and add three form controls—a search text box called filter_search, a reset button, and a search button.
The text box is used to allow the user to defi ne the search terms. The search button submits the form. The reset button sets the search text box value to a null string and then submits the form.
That's it! Now all we need to do is implement the search in the JModel. To do this, we modify the _buildQueryWhere() method:
/** * Builds the WHERE part of a query * * @return string Part of an SQL query*/function _buildQueryWhere(){ global $mainframe, $option;
// Get the filter values $filter_state = $mainframe->getUserStateFromRequest( $option.'filter_state', 'filter_state');
// Prepare the WHERE clause $where = array();
// Determine published state if ( $filter_state == 'P' ) {
For More Information: www.PacktPub.com/ mastering-joomla-1-5-extension-framework-
development-2e/book
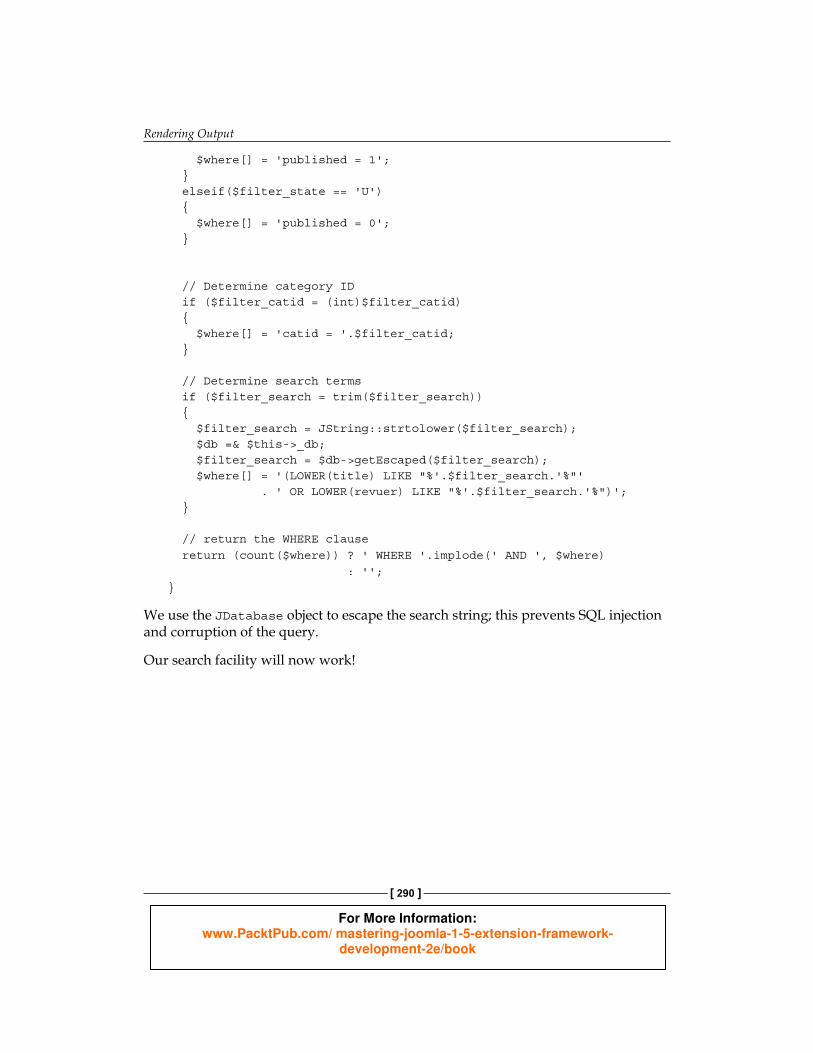
Rendering Output
[ 290 ]
$where[] = 'published = 1'; } elseif($filter_state == 'U') { $where[] = 'published = 0'; }
// Determine category ID if ($filter_catid = (int)$filter_catid) { $where[] = 'catid = '.$filter_catid; }
// Determine search terms if ($filter_search = trim($filter_search)) { $filter_search = JString::strtolower($filter_search); $db =& $this->_db; $filter_search = $db->getEscaped($filter_search); $where[] = '(LOWER(title) LIKE "%'.$filter_search.'%"' . ' OR LOWER(revuer) LIKE "%'.$filter_search.'%")'; }
// return the WHERE clause return (count($where)) ? ' WHERE '.implode(' AND ', $where) : '';}
We use the JDatabase object to escape the search string; this prevents SQL injection and corruption of the query.
Our search facility will now work!
For More Information: www.PacktPub.com/ mastering-joomla-1-5-extension-framework-
development-2e/book
Chapter 8
[ 291 ]
SummaryWe have explored the massive joomla.html library that enables us to create standardized XHTML for rendering in our extensions. It's important to explore the library so as to gain as much from it as possible. There are many useful types that can greatly reduce our overall development time.
We have investigated the use of existing layouts and templates which should put us in good stead for creating our own. Remember to take advantage of the predefi ned CSS styles. This makes it easier for site template developers and ensures that our layouts will not look out of place.
We learned that when we create templates in the backend for components there are a number of rules that we should follow. Using these rules will allow us to create integrated components that adhere to the consistency of the Joomla! interface.
We discovered how to add pagination, ordering, fi ltering, and searching to make our extensions more user-friendly and increase the chances of having successfully created a commercially winning or freely available extension.
In the next chapter we will continue improving our extensions by exploring ways to customize the document properties, add multilingual capabilities, and provide a more interactive user experience.
For More Information: www.PacktPub.com/ mastering-joomla-1-5-extension-framework-
development-2e/book
Where to buy this book You can buy Mastering Joomla! 1.5 Extension and Framework Development from the
Packt Publishing website: https://www.packtpub.com/mastering-joomla-
1-5-extension-framework-development-2e/book.
Free shipping to the US, UK, Europe and selected Asian countries. For more information, please
read our shipping policy.
Alternatively, you can buy the book from Amazon, BN.com, Computer Manuals and
most internet book retailers.
www.PacktPub.com
P U B L I S H I N G
community experience dist i l led
For More Information: www.PacktPub.com/ mastering-joomla-1-5-extension-framework-
development-2e/book