Embed Size (px)
Citation preview

Operations Guide
SAP® Workforce Performance Builder
Manager
Target Audience
■ Administrators
Public Document version 26/11/2012
© Copyright 2012 SAP AG. All rights reserved.
No part of this publication may be reproduced or transmitted in any
form or for any purpose without the express permission of SAP AG.
The information contained herein may be changed without prior
notice.
Some software products marketed by SAP AG and its distributors
contain proprietary software components of other software vendors.
Microsoft, Windows, Excel, Outlook, PowerPoint, Silverlight and
Visual Studio are registered trademarks of Microsoft Corporation.
IBM, DB2, DB2 Universal Database, System i, System i5, System p,
System p5, System x, System z, System z10, z10, z/VM, z/OS,
OS/390, zEnterprise, PowerVM, Power Architecture, Power Systems,
POWER7, POWER6+, POWER6, POWER, PowerHA, pureScale,
PowerPC, BladeCenter, System Storage, Storwize, XIV, GPFS,
HACMP, RETAIN, DB2 Connect, RACF, Redbooks, OS/2, AIX,
Intelligent Miner, WebSphere, Tivoli, Informix and Smarter Planet are
trademarks or registered trademarks of IBM Corporation.
Linux is the registered trademark of Linus Torvalds in the U.S. and
other countries.
Adobe, the Adobe logo, Acrobat, PostScript, and Reader are either
trademarks or registered trademarks of Adobe Systems Incorporated in
the United States and/or other countries.
Oracle and Java are registered trademarks of Oracle and/or its
affiliates.
UNIX, X/Open, OSF/1, and Motif are registered trademarks of the
Open Group.
Citrix, ICA, Program Neighborhood, MetaFrame, WinFrame,
VideoFrame, and MultiWin are trademarks or registered trademarks of
Citrix Systems, Inc.
HTML, XML, XHTML and W3C are trademarks or registered
trademarks of W3C®, World Wide Web Consortium, Massachusetts
Institute of Technology.
Apple, App Store, iBooks, iPad, iPhone, iPhoto, iPod, iTunes, Multi-
Touch, Objective-C, Retina, Safari, Siri and Xcode are trademarks or
registered trademark of Apple Inc.
IOS is a registered trademark of Cisco Systems Inc.
RIM, BlackBerry, BBM, BlackBerry Curve, BlackBerry Bold,
BlackBerry Pearl, BlackBerry Torch, BlackBerry Storm, BlackBerry
Storm2, BlackBerry PlayBook, and BlackBerry App World are
trademarks or registered trademarks of Research in Motion Limited.
Google App Engine, Google Apps, Google Checkout, Google Data
API, Google Maps, Google Mobile Ads, Google Mobile Updater,
Google Mobile, Google Store, Google Sync, Google Updater, Google
Voice, Google Mail, Gmail, YouTube, Dalvik and Android are
trademarks or registered trademarks of Google Inc.
INTERMEC is a registered trademark of Intermec Technologies
Corporation.
Wi-Fi is a registered trademark of Wi-Fi Alliance.
Bluetooth is a registered trademark of Bluetooth SIG Inc.
Motorola is a registered trademark of Motorola Trademark Holdings,
LLC.
Computop is a registered trademark of Computop
Wirtschaftsinformatik GmbH
SAP, R/3, SAP NetWeaver, Duet, PartnerEdge, ByDesign, SAP
BusinessObjects Explorer, StreamWork, SAP HANA, and other SAP
products and services mentioned herein as well as their respective
logos are trademarks or registered trademarks of SAP AG in Germany
and other countries.
Business Objects and the Business Objects logo, BusinessObjects,
Crystal Reports, Crystal Decisions, Web Intelligence, Xcelsius, and
other Business Objects products and services mentioned herein as well
as their respective logos are trademarks or registered trademarks of
Business Objects Software Ltd. Business Objects is an SAP company.
SAP AG
Dietmar-Hopp-Allee 16 69190 Walldorf Germany T +49/18 05/34 34 24 F +49/18 05/34 34 20 www.sap.com

Sybase and Adaptive Server, iAnywhere, Sybase 365, SQL Anywhere,
and other Sybase products and services mentioned herein as well as
their respective logos are trademarks or registered trademarks of
Sybase, Inc. Sybase is an SAP company.
Crossgate, m@gic EDDY, B2B 360°, and B2B 360° Services are
registered trademarks of Crossgate AG in Germany and other
countries. Crossgate is an SAP company.
All other product and service names mentioned are the trademarks of
their respective companies. Data contained in this document serves
informational purposes only. National product specifications may
vary.
These materials are subject to change without notice. These materials
are provided by SAP AG and its affiliated companies ("SAP Group")
for informational purposes only, without representation or warranty of
any kind, and SAP Group shall not be liable for errors or omissions
with respect to the materials. The only warranties for SAP Group
products and services are those that are set forth in the express
warranty statements accompanying such products and services, if any.
Nothing herein should be construed as constituting an additional
warranty.
Disclaimer
Some components of this product are based on Java™. Any code
change in these components may cause unpredictable and severe
malfunctions and is therefore expressly prohibited, as is any
decompilation of these components.
Any Java™ Source Code delivered with this product is only to be used
by SAP’s Support Services and may not be modified or altered in any
way.
Documentation in the SAP Help Portal
You can find this documentation at the following address:
http://help.sap.com/wpb
Terms for Included Open
Source Software
This SAP software contains also the third party open source software
products listed below. Please note that for these third party products
the following special terms and conditions shall apply.
1. This software was developed using ANTLR.
2. gSOAP
Part of the software embedded in this product is gSOAP software.
Portions created by gSOAP are Copyright (C) 2001-2004 Robert A.
van Engelen, Genivia inc. All Rights Reserved.
THE SOFTWARE IN THIS PRODUCT WAS IN PART PROVIDED
BY GENIVIA INC AND ANY EXPRESS OR IMPLIED
WARRANTIES, INCLUDING, BUT NOT LIMITED TO, THE
IMPLIED WARRANTIES OF MERCHANTABILITY AND
FITNESS FOR A PARTICULAR PURPOSE ARE DISCLAIMED.
IN NO EVENT SHALL THE AUTHOR BE LIABLE FOR ANY
DIRECT, INDIRECT, INCIDENTAL, SPECIAL, EXEMPLARY, OR
CONSEQUENTIAL DAMAGES (INCLUDING, BUT NOT
LIMITED TO, PROCUREMENT OF SUBSTITUTE GOODS OR
SERVICES; LOSS OF USE, DATA, OR PROFITS; OR BUSINESS
INTERRUPTION) HOWEVER CAUSED AND ON ANY THEORY
OF LIABILITY, WHETHER IN CONTRACT, STRICT LIABILITY,
OR TORT (INCLUDING NEGLIGENCE OR OTHERWISE)
ARISING IN ANY WAY OUT OF THE USE OF THIS
SOFTWARE, EVEN IF ADVISED OF THE POSSIBILITY OF
SUCH DAMAGE.
3. SAP License Agreement for STLport SAP License Agreement for
STLPort between SAP Aktiengesellschaft Systems, Applications,
Products in Data Processing Neurottstrasse 16 69190 Walldorf,
Germany (hereinafter: SAP) and you (hereinafter: Customer)
a) Subject Matter of the Agreement
A) SAP grants Customer a non-exclusive, non-transferrable, royalty-
free license to use the STLport.org C++ library (STLport) and its
documentation without fee.
B) By downloading, using, or copying STLport or any portion thereof
Customer agrees to abide by the intellectual property laws, and to all
of the terms and conditions of this Agreement.
C) The Customer may distribute binaries compiled with STLport
(whether original or modified) without any royalties or restrictions.
D) Customer shall maintain the following copyright and permissions
notices on STLport sources and its documentation unchanged:
Copyright 2001 SAP AG
E) The Customer may distribute original or modified STLport sources,
provided that:
o The conditions indicated in the above permissions notice are met;
o The following copyright notices are retained when present, and
conditions provided in accompanying permission notices are met:
Coypright 1994 Hewlett-Packard
Company
Copyright 1996,97 Silicon Graphics
Computer Systems Inc.
Copyright 1997 Moscow Center for
SPARC Technology.
Copyright 1999,2000 Boris Fomitchev
Copyright 2001 SAP AG
Permission to use, copy, modify, distribute and sell this software and
its documentation for any purposes is hereby granted without fee,
provided that the above copyright notice appear in all copies and that
both that copyright notice and this permission notice appear in
supporting documentation. Hewlett-Packard Company makes no
representations about the suitability of this software for any purpose.
It is provided “as is” without express or implied warranty.
Permission to use, copy, modify, distribute and sell this software and
its documentation for any purpose is hereby granted without fee,
provided that the above copyright notice appear in all copies and that
both that copyright notice and this permission notice appear in
supporting documentation. Silicon Graphics makes no representations
about the suitability of this software for any purpose. It is provided “as
is” without express or implied warranty.
Permission to use, copy, modify, distribute and sell this software and
its documentation for any purposes is hereby granted without fee,
provided that the above copyright notice appear in all copies and that
both that copyright notice and this permission notice appear in
supporting documentation. Moscow Center for SPARC makes no
representations about the suitability of this software for any purpose. It
is provided “as is” without express or implied warranty.
Boris Fomitchev makes no representations about the suitability of this
software for any purpose. This material is provided "as is", with
absolutely no warranty expressed or implied.
Any use is at your own risk. Permission to use or copy this software
for any purpose is hereby granted without fee, provided the above
notices are retained on all copies.
Permission to modify the code and to distribute modified code is
granted, provided the above notices are retained, and a notice that the
code was modified is included with the above copyright notice.
Permission to use, copy, modify, distribute and sell this software and
its documentation for any purposes is hereby granted without fee,
provided that the above copyright notice appear in all copies and that
both that copyright notice and this permission notice appear in
supporting documentation. SAP makes no representations about the
suitability of this software for any purpose. It is provided with a
limited warranty and liability as set forth in the License Agreement
distributed with this copy.
SAP offers this liability and warranty obligations only towards its
customers and only referring to its modifications.
b) Support and Maintenance SAP does not provide software
maintenance for the STLport. Software maintenance of the STLport
therefore shall be not included.
All other services shall be charged according to the rates for services
quoted in the SAP List of Prices and Conditions and shall be subject to
a separate contract.
c) Exclusion of warranty
As the STLport is transferred to the Customer on a loan basis and free
of charge, SAP cannot guarantee that the STLport is error-free,
without material defects or suitable for a specific application under
third-party rights. Technical data, sales brochures, advertising text and
quality descriptions produced by SAP do not indicate any assurance of
particular attributes.
d) Limited Liability
A) Irrespective of the legal reasons, SAP shall only be liable for
damage, including unauthorized operation, if this (i) can be
compensated under the Product Liability Act or (ii) if caused due to
gross negligence or intent by SAP or (iii) if based on the failure of a
guaranteed attribute.
B) If SAP is liable for gross negligence or intent caused by employees
who are neither agents or managerial employees of SAP, the total
liability for such damage and a maximum limit on the scope of any
such damage shall depend on the extent to which its occurrence ought
to have anticipated by SAP when concluding the contract, due to the
circumstances known to it at that point in time representing a typical
transfer of the software.
C) In the case of Art. 4.2 above, SAP shall not be liable for indirect
damage, consequential damage caused by a defect or lost profit.

D) SAP and the Customer agree that the typical foreseeable extent of
damage shall under no circumstances exceed EUR 5,000.
E) The Customer shall take adequate measures for the protection of
data and programs, in particular by making backup copies at the
minimum intervals recommended by SAP. SAP shall not be liable for
the loss of data and its recovery, notwithstanding the other limitations
of the present Art. 4 if this loss could have been avoided by observing
this obligation.
F) The exclusion or the limitation of claims in accordance with the
present Art. 4 includes claims against employees or agents of SAP.
4. Adobe Document Services Adobe, the Adobe logo, Acrobat,
PostScript, and Reader are either registered trademarks or trademarks
of Adobe Systems Incorporated in the United States and / or other
countries. For information on Third Party software delivered with
Adobe document services and Adobe LiveCycle Designer, see SAP
Note 854621.
Contents
6 11 2012
Contents
Introduction ...................................................................................... 7
System requirements ............................................................................. 8
Installation .............................................................................................. 9
Security ................................................................................................. 10
Server settings ..................................................................................... 11
Versioning ................................................................................................... 11
Notification ................................................................................................. 11
Logging ....................................................................................................... 12
GUI ............................................................................................................... 13
Automatic User Deactivation .................................................................... 14
Automatic Excel Import ............................................................................. 14
Automatic LDAP Import ............................................................................. 14
Single sign-on ............................................................................................ 15
Security ....................................................................................................... 16
Search ......................................................................................................... 17
Miscellaneous ............................................................................................. 17
Import of user structures .................................................................... 19
Import from an excel file ............................................................................ 19
Import from a LDAP structure ................................................................... 21 Adding a connection ............................................................................................................ 21
SSL secured LDAP connection ......................................................................................... 22 Selection of datasets to be imported ................................................................................... 23
Using LDAP search filters ................................................................................................. 24 Increasing the database autogrowth ................................................................................. 25
Imported LDAP Values ........................................................................................................ 26 Update data ......................................................................................................................... 26 Trust Relations ..................................................................................................................... 26 Deleting a connection .......................................................................................................... 27
Working with the Producer ................................................................. 28
How to connect........................................................................................... 28 Step 1: Select Server ........................................................................................................... 28 Step 2: Select workarea ....................................................................................................... 28 Step 3: Personal group ........................................................................................................ 29
First Steps ................................................................................................... 29
Backup and Restore ............................................................................ 30
Backup Database ....................................................................................... 30
Backup Filestorage .................................................................................... 32
Restore Manager ........................................................................................ 34
Log Files ............................................................................................... 37
System requirements
11 2012 7
Introduction Welcome to the SAP Workforce Performance Builder Manager!
The Manager is an web application running on an Apache Tomcat Server. All data created is stored in a Microsoft SQL database and a file storage depicting the workarea as used in a local installation of the SAP Workforce Performance Builder Producer. Nevertheless this combination enriches the functionality of the workarea by delivering collaboration features to each connected author as well as it enables the rollback of contents by storing versions of each workarea object.
To install and maintain the Manager and its third-party components some steps and additional installations are necessary. This document introduces you to all steps you will need to succesfully install, maintain and initially work with your Manager application.
You will find detailed information about installation needs and the setup of security issues within the additional documents Installation Guide and Security Guide.

System requirements
8 11 2012
System requirements Operating system:
Microsoft Windows Server 2003
Microsoft Windows Server 2008 (R2)
Microsoft Windows XP Service Pack 3
Microsoft Windows Vista
Microsoft Windows 7
Processor: Intel® Core™2 Quad Processor or equivalent with at least 2,2 GHz or higher
Memory: At least 2 GB RAM
Hard disk: At least 10 GB free
Required applications:
Windows Installer in version 3.1 or higher
Microsoft .NET Framework 2.0
Java Runtime Environment (JRE) in version 6 Update 30 or higher
Microsoft SQL 2005/2008/2008 R2
Apache Tomcat in version 6.0.29 or higher
Installation
11 2012 9
Installation Setting up the Manager requires to install some third-party software in advance. Basically you need to install the Apache Tomcat Server to run the Manager web application and the Microsoft SQL Server to run the database used by the web application. Nevertheless both applications need a set of available frameworks and windows components to be fully functional.
Please follow the Installation Guide to install necessary third-party software and the Manager itself.

Security
10 11 2012
Security To protect your project and your user data from being attacked the Manager supports several security standards like secured connections, permission based user access and restrictions for the creation of user credentials.
Within the Security Guide you can find the necessary steps for setting up various security parameters to perfect fit your security needs.
Server settings
11 2012 11
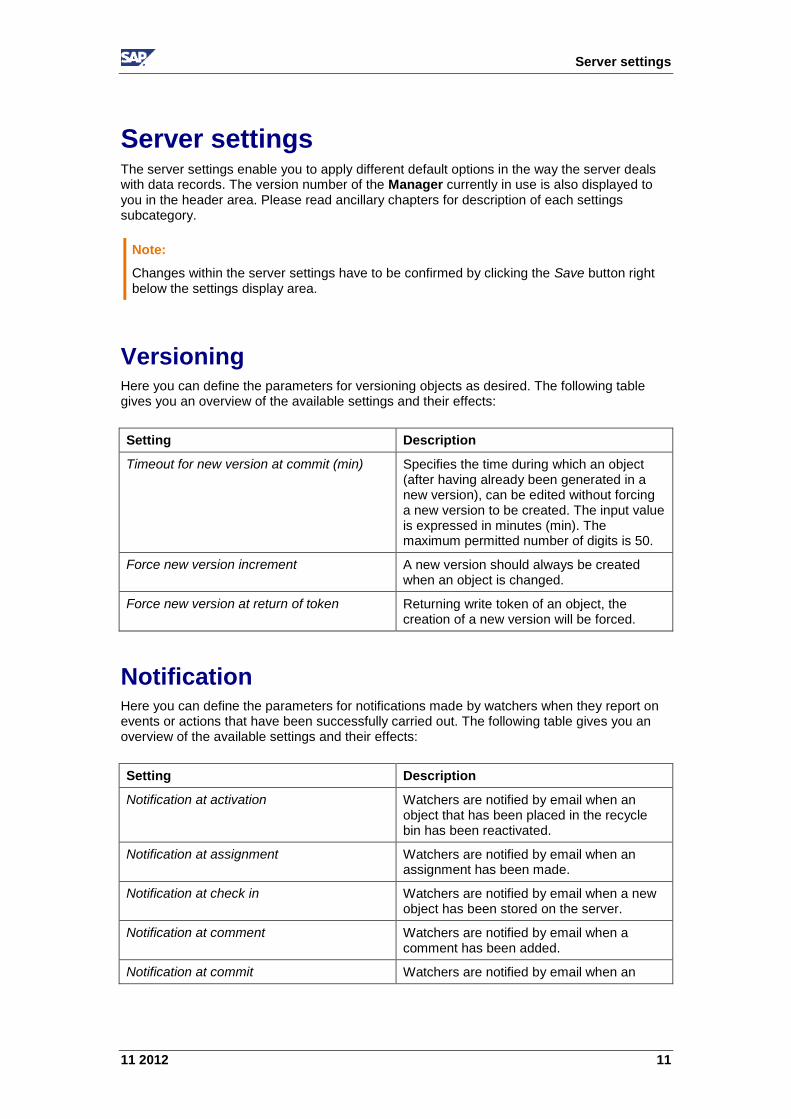
Server settings The server settings enable you to apply different default options in the way the server deals with data records. The version number of the Manager currently in use is also displayed to you in the header area. Please read ancillary chapters for description of each settings subcategory.
Versioning Here you can define the parameters for versioning objects as desired. The following table gives you an overview of the available settings and their effects:
Setting Description
Timeout for new version at commit (min) Specifies the time during which an object (after having already been generated in a new version), can be edited without forcing a new version to be created. The input value is expressed in minutes (min). The maximum permitted number of digits is 50.
Force new version increment A new version should always be created when an object is changed.
Force new version at return of token Returning write token of an object, the creation of a new version will be forced.
Notification Here you can define the parameters for notifications made by watchers when they report on events or actions that have been successfully carried out. The following table gives you an overview of the available settings and their effects:
Setting Description
Notification at activation Watchers are notified by email when an object that has been placed in the recycle bin has been reactivated.
Notification at assignment Watchers are notified by email when an assignment has been made.
Notification at check in Watchers are notified by email when a new object has been stored on the server.
Notification at comment Watchers are notified by email when a comment has been added.
Notification at commit Watchers are notified by email when an
Note:
Changes within the server settings have to be confirmed by clicking the Save button right below the settings display area.
Server settings
12 11 2012
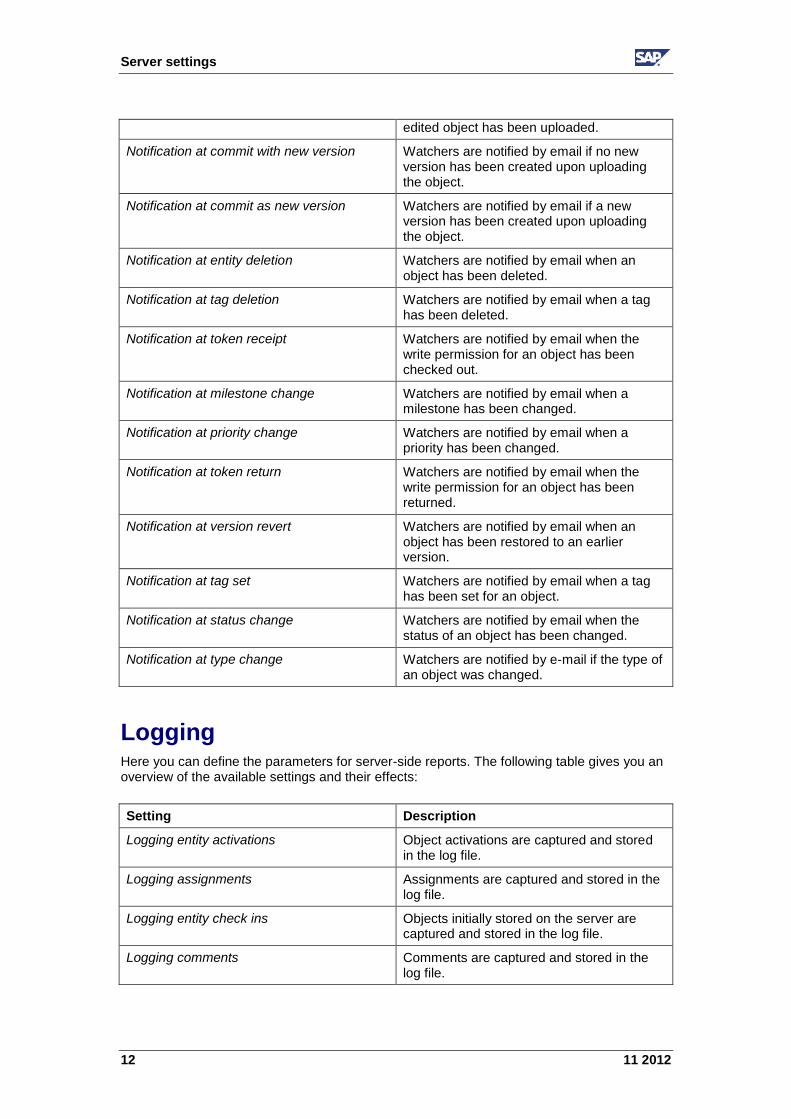
edited object has been uploaded.
Notification at commit with new version Watchers are notified by email if no new version has been created upon uploading the object.
Notification at commit as new version Watchers are notified by email if a new version has been created upon uploading the object.
Notification at entity deletion Watchers are notified by email when an object has been deleted.
Notification at tag deletion Watchers are notified by email when a tag has been deleted.
Notification at token receipt Watchers are notified by email when the write permission for an object has been checked out.
Notification at milestone change Watchers are notified by email when a milestone has been changed.
Notification at priority change Watchers are notified by email when a priority has been changed.
Notification at token return Watchers are notified by email when the write permission for an object has been returned.
Notification at version revert Watchers are notified by email when an object has been restored to an earlier version.
Notification at tag set Watchers are notified by email when a tag has been set for an object.
Notification at status change Watchers are notified by email when the status of an object has been changed.
Notification at type change Watchers are notified by e-mail if the type of an object was changed.
Logging Here you can define the parameters for server-side reports. The following table gives you an overview of the available settings and their effects:
Setting Description
Logging entity activations Object activations are captured and stored in the log file.
Logging assignments Assignments are captured and stored in the log file.
Logging entity check ins Objects initially stored on the server are captured and stored in the log file.
Logging comments Comments are captured and stored in the log file.

Server settings
11 2012 13
Logging entity committings Uploads of edited objects are captured and stored in the log file.
Logging entity deletions Object deletions are captured and stored in the log file.
Logging tag deletions Deletions of tags are captured and stored in the log file.
Logging token receipt The checking out of right permissions is captured and stored in the log file.
Logging milestone changing The changing of milestones is captured and stored in the log file.
Logging priority changing The changing of priorities is captured and stored in the log file.
Logging token returning The return of right permissions is captured and stored in the log file.
Logging version reverting Instances of the restoration of earlier versions are captured and stored in the log file.
Logging tag setting The setting of tags is captured and stored in the log file.
Logging status changing Status changes are captured and stored in the log file.
Logging type changing Type changes are captured and stored in the log file.
GUI Define the parameters for the display interface under GUI. The following table gives you an overview of the possible settings and their effect:
Setting Description
Client Paging Limit This option specifies the maximum amount of displayed objects whereas the client starts to display objects on multiple pages (with same maximum amount each).
Show learnerview search This is the option used to determine whether to display the search function in the learnerview. De/activation of the search function is a global option.
Server settings
14 11 2012
Automatic User Deactivation The automatic user deactivation function allows you to have users who are inactive for a specified period of time be automatically deactivated. By doing so, users who have been inactive for a longer period of time will not be included in reports, for example. The report function will provide you with an overview of all inactive users on the server.
The directions for setting up the automatic user deactivation function are as follows:
1. Select the Automatic user deactivation check box
2. The pull-down menu Deactivate after (type of interval) will appear. Select the desired type of interval from the list.
3. In the field Deactivate after (interval value), enter a numerical value to set the interval type. E.g., if you enter “2” and the interval type is "week", the user will be deactivated after a period of 2 weeks of inactivity.
4. If you would like to be informed via email each time users are automatically deactivated, enter a valid email address in the field Email address for report. Once the system runs the scheduled check for any inactive users, an Excel spreadsheet with a list of the users who were deactivated will automatically be sent to you.
Click on Save in the right-hand side under the viewing area to save your settings.
Automatic Excel Import The automatic Excel import function allows you to import a user list in Excel format at defined time intervals from an existing data path.
The directions for configuring automatic Excel imports are as follows:
1. Activate the Automatic Excel import check box
2. Enter the path to the Excel file. Note that the file must be saved to the server.
Click on Plan... A dialog box appears. To define when the Excel import should occur, enter the desired time and the interval here.
1. Click on OK.
If you would like to be informed of any changes made by the automatic Excel import, enter a valid email address in the text field Email address for report.
Click on Save in the right-hand side under the viewing area to save your settings.
Automatic LDAP Import With the help of the automatic LDAP import function, you can define time intervals to schedule routine user data updates for to be performed by an available LDAP server. In addition, after each update, you can have a report automatically generated in *.xls format and sent to you via email. This report will give you a quick overview of any changes that have been made with the update.
To configure automatic LDAP imports, proceed as follows:
1. Activate the Automatic LDAP import check box.
2. Click on Plan... A dialog box will appear. To define when the automatic LDAP import should occur, enter the desired time and the interval here. Click on OK.

Server settings
11 2012 15
3. If you would like to be informed of any changes made by the automatic LDAP import, enter a valid email address in the text field Email address for report.
Click on Save in the right-hand side under the viewing area to save your settings.
Single sign-on By using automatic user authentication, Single Sign-On allows your users to open protected network areas with the respective restrictions without having to take the extra step to enter their log-in data.
The option Single sign-on allows you to adjust the settings for single sign-on as well as activate or deactivate any functions for this as desired. For more information, please refer to the Installation Guide. The following table will give you an overview of the available settings:
Setting Description
Enable Single sign-on To activate the single sign-on option, click on the check box.
Realm Enter your domain here, e.g., mycompany.de.
Server name Enter the host name for the active director server, e.g., master.
Path to krb5.conf file In the event where a Kerberos service has already been set up on your network and the server access has been set with the help of a config. file, then enter the path to the corresponding file here. In this case, fields 5 and 6 do not have to be filled out. For more information, please refer to:
http://java.sun.com/j2se/1.5.0/docs/g
uide/security/jgss/tutorials/KerberosR
eq.htm
Keytab file path Enter the path to the keytab file that was entered in step 3 here. Use "/" to separate the paths. Store the keytab file anywhere on the Manager Server as desired (e.g.: C:\Manager\Managerpc.HTTP.keytab). Please note: avoid storing the file in the Manager web apps directory because they will be deleted upon updating the program.
Service Principal Enter the service authentication with all the server IDs and domains for the Manager server here, e.g.: http/[email protected]
Use ticket cache Define whether the client tickets that have been created should be saved in the server's cache when the user logs in.

Server settings
16 11 2012
Security The Security area provides various settings that you can use to adjust communication and work with the Manager to your special security specifications. The table below provides a short explanation of the displayed parameters. For detailed information on saving your Manager instance, please see the respective chapter Security settings.
Parameters Description
Administrator IP Ranges Enter one or more IP addresses or IP ranges that are permitted for logging in as an administrator. Access to administrative roles/users from non-specified network addresses is blocked as a result. Placeholders (*) and sub-network separators (e.g. 192.168.1.1/28) may be used when specifying the IP addresses.
Detailed error messages Use this parameter to deactivate the transmission of detailed information to the browser console in the event of error messages. This increases the security of the server against attacks because detailed error messages can also be used by attackers to obtain precise information about the structure of the server.
Filter content permissions if user has admin permissions
If this parameter is activated, access to objects and content is denied to users with admin permissions. This prevents users with admin permissions from being able to execute malicious code implemented in content. To access content, the users affected need a second user profile without admin permissions as a result.
Minimum password length Specify the minimum length of the expected password entry. If you enter 0, user profiles may be created without passwords.
Password must contain number A valid password has to contain at least one number (0-9).
Password must contain special character A valid password has to contain at least one special character ($,_,@,...).
Note:
This part of the server settings allows you to make any further changes to the single sign-on option once this has already been set up. In order to set up the single sign-on for the first time, please refer to the step-by-step instructions which can be found in the Server installation Help Assistant. You can open this help assistant under the menu Server SSO Configuration.
With Kerberos-based single sign-on, this will not work via the local host. In this case, you have to connect to your Manager from another PC in order to maintain the functionality of the single sign-on.

Server settings
11 2012 17
Password must contain lower and upper case letters
A valid password has to contain at least one upper-case letter and one lower-case letter.
Search The search function in the learner view allows your learners to search for the information they need within their assignments or optionally throughout the entire workarea. In addition, you can define the search function to act as a fulltext search on indexed content. All content from groups, projects, books and book pages will be generated with the corresponding text-based readable attachments. Your learners will then receive their search results, which can even be extracted from the learning content's text bubbles or word document attachments.
Setting Description
Enable fulltext search Enables the fulltext search and the essential function of content indexing.
Allow fulltext search in learnerview Determines if the fulltext search should be optionally available in learnerview.
Allow global search in learnerview Determines if the search allows optional searches even within content that is not part of learner's assignments.
Miscellaneous The Miscellaneous Area provides you with all server sided settings which didn't fit to previous shown areas. The following table gives you an overview of the possible settings and their effect:
Setting Description
Caching time range (s) Determines the time the browser will keep objects in browser cache (in seconds). Optionally you can enter -1 to force a permanent revalidation of objects. Since this will increase server traffic dramatically you should avoid that in a productive surrounding.
Email address for entity comments It is to the e-mail address specified here that the comments that are permitted to be made within the learning content will be sent.
Email language of entity comments Determines the language in which the e-mail's automatically generated information is written.
Compress server response Determines, if data will be send compressed (as gzip) to server. This option reduces data traffic, but should be disabled if you are using Internet Explorer 6 or http proxies with http 1.0 protocol. Both are not supporting gzip, which will result in data traffic being blocked.
Server settings
18 11 2012
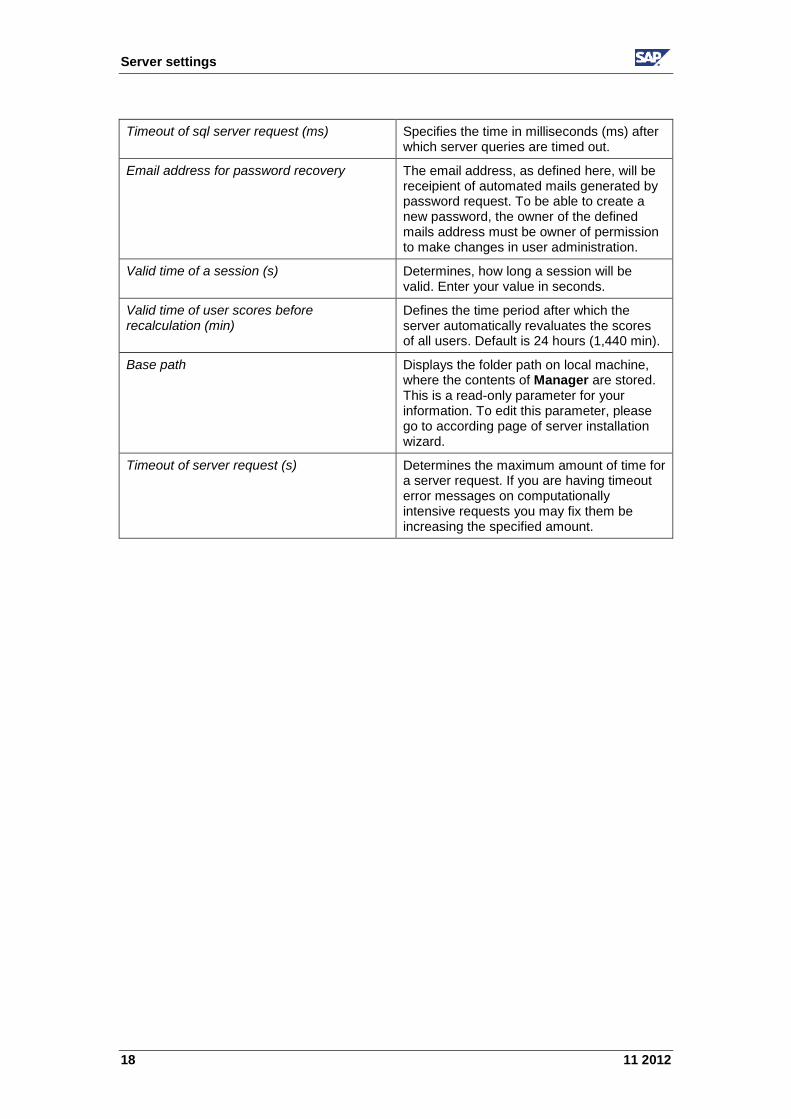
Timeout of sql server request (ms) Specifies the time in milliseconds (ms) after which server queries are timed out.
Email address for password recovery The email address, as defined here, will be receipient of automated mails generated by password request. To be able to create a new password, the owner of the defined mails address must be owner of permission to make changes in user administration.
Valid time of a session (s) Determines, how long a session will be valid. Enter your value in seconds.
Valid time of user scores before recalculation (min)
Defines the time period after which the server automatically revaluates the scores of all users. Default is 24 hours (1,440 min).
Base path Displays the folder path on local machine, where the contents of Manager are stored. This is a read-only parameter for your information. To edit this parameter, please go to according page of server installation wizard.
Timeout of server request (s) Determines the maximum amount of time for a server request. If you are having timeout error messages on computationally intensive requests you may fix them be increasing the specified amount.

Import of user structures
11 2012 19
Import of user structures With the Manager you have the opportunity to import existing user data. Just click on Administration in the menu of the Manager and choose Server Import in the dropdown menu.
The wizard for data import appears. Please select your preferred import option and read the specific subchapter. Available options are:
Excel Upload an Excel sheet containing user data to be imported.
LDAP Configure a connection to an Active Directory server by using the LDAP protocol.
Manager Close wizard and go back to the Manager interface.
Import from an excel file To avoid the creation of users one by one, you have the option to import userlists by an excel file. You only have to take care of the correct syntax of the column identifiers, which have to be placed within the first row of the excel sheet. The order of the columns is irrelevant for that procedure.
Use the identifiers in same syntax as follows:
Identifier Description
username The username to login. Mandatory identifier.
password The password to login.
firstname The first name of the user. Mandatory identifier.
lastname The last Name of the user. Mandatory identifier.
email The mail address of the user. Mandatory identifier.
position This specifies the role of the user. It must be a toplevel role. It will be created automatically, if it is not existent by now.
department This defines the organizational unit, the user will be integrated into. The organizational unit will be created automatically, if it is not existent by now.
parentdepartment This defines the parent organizational unit, the user will be integrated into. The organizational unit will be created
Import of user structures
20 11 2012
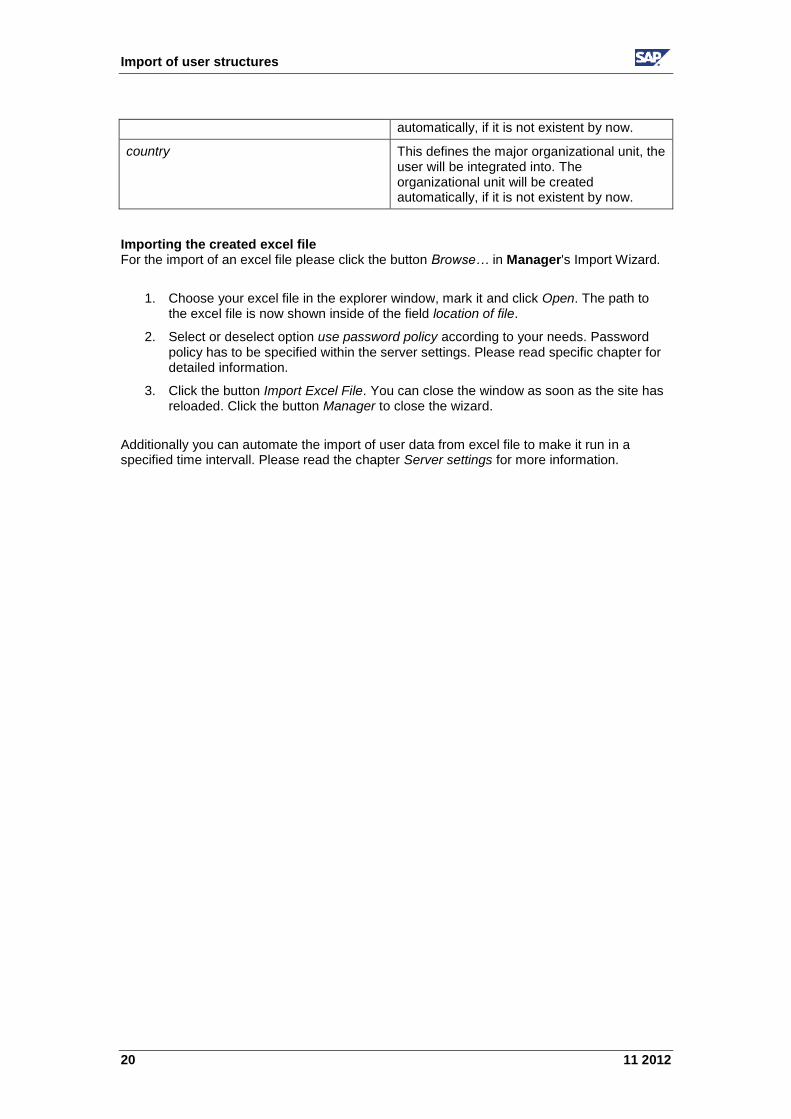
automatically, if it is not existent by now.
country This defines the major organizational unit, the user will be integrated into. The organizational unit will be created automatically, if it is not existent by now.
Importing the created excel file For the import of an excel file please click the button Browse… in Manager's Import Wizard.
1. Choose your excel file in the explorer window, mark it and click Open. The path to the excel file is now shown inside of the field location of file.
2. Select or deselect option use password policy according to your needs. Password policy has to be specified within the server settings. Please read specific chapter for detailed information.
3. Click the button Import Excel File. You can close the window as soon as the site has reloaded. Click the button Manager to close the wizard.
Additionally you can automate the import of user data from excel file to make it run in a specified time intervall. Please read the chapter Server settings for more information.
Import of user structures
11 2012 21
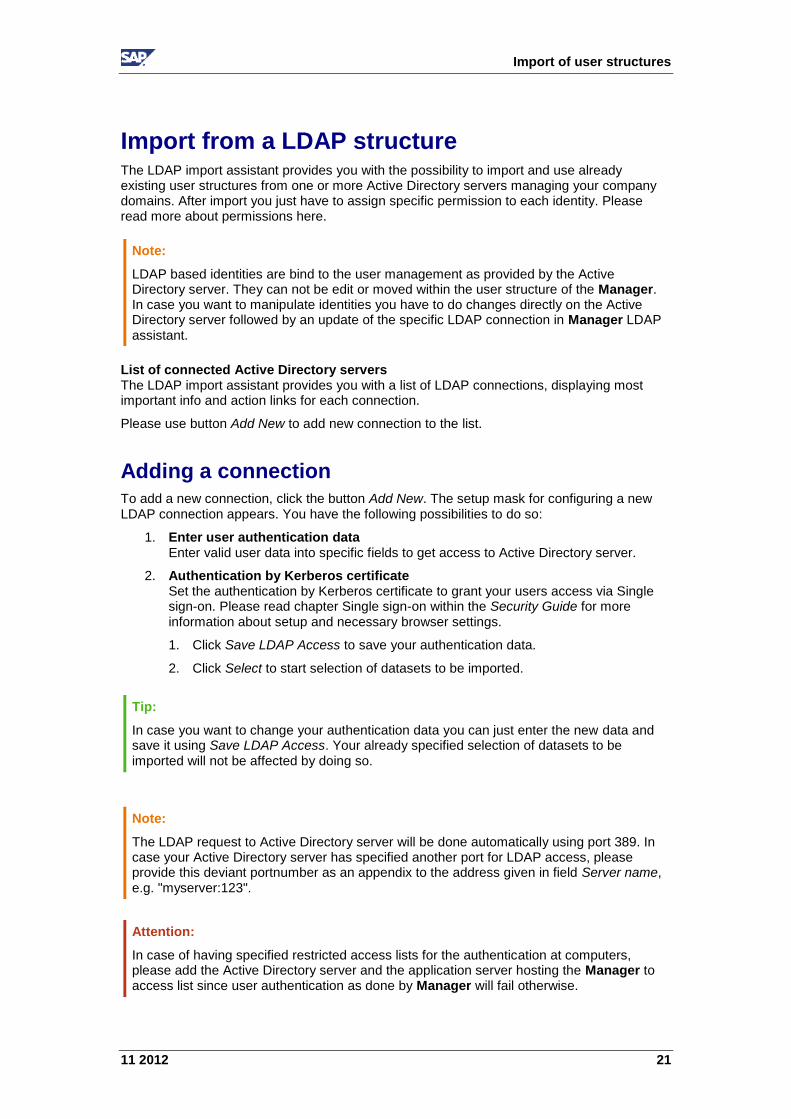
Import from a LDAP structure The LDAP import assistant provides you with the possibility to import and use already existing user structures from one or more Active Directory servers managing your company domains. After import you just have to assign specific permission to each identity. Please read more about permissions here.
List of connected Active Directory servers The LDAP import assistant provides you with a list of LDAP connections, displaying most important info and action links for each connection.
Please use button Add New to add new connection to the list.
Adding a connection
To add a new connection, click the button Add New. The setup mask for configuring a new LDAP connection appears. You have the following possibilities to do so:
1. Enter user authentication data Enter valid user data into specific fields to get access to Active Directory server.
2. Authentication by Kerberos certificate Set the authentication by Kerberos certificate to grant your users access via Single sign-on. Please read chapter Single sign-on within the Security Guide for more information about setup and necessary browser settings.
1. Click Save LDAP Access to save your authentication data.
2. Click Select to start selection of datasets to be imported.
Tip:
In case you want to change your authentication data you can just enter the new data and save it using Save LDAP Access. Your already specified selection of datasets to be imported will not be affected by doing so.
Note:
LDAP based identities are bind to the user management as provided by the Active Directory server. They can not be edit or moved within the user structure of the Manager. In case you want to manipulate identities you have to do changes directly on the Active Directory server followed by an update of the specific LDAP connection in Manager LDAP assistant.
Note:
The LDAP request to Active Directory server will be done automatically using port 389. In case your Active Directory server has specified another port for LDAP access, please provide this deviant portnumber as an appendix to the address given in field Server name, e.g. "myserver:123".
Attention:
In case of having specified restricted access lists for the authentication at computers, please add the Active Directory server and the application server hosting the Manager to access list since user authentication as done by Manager will fail otherwise.
Import of user structures
22 11 2012
SSL secured LDAP connection
By using LDAPS instead of LDAP it is possible to secure the connection to the Active Directory server with SSL protocol. This basically needs some preparation on side of Active Directory server. On side of Manager there is only the server address to be changed.
LDAPs connections to your Active Directory server will be directly available after having installed the Certification Authority and integrated a CA certificate in your Active Directory. This certificate can be created by your own or provided by a Trust Authority Service like Verisign, Thawte or other.
Setting up Certification Authority (CA) On Active Directory server you have to install the Enterprise Root Certification Authority as well as you have to integrate an CA certificate into it. Please read linked documentations to install and configure CA on a Microsoft Windows based Active Directory server.
For Microsoft Windows Server 2003:
For Microsoft Windows Server 2008:
Setting up LDAPs connection in Manager To connect to an Active Directory server supporting SSL-secured connections enter the ldap server address as follows. Replace the red colored part with correct server name:
http://technet.microsoft.com/en-us/library/cc700804.aspx
http://social.technet.microsoft.com/wiki/contents/articles/2980.as
px
ldaps://myADserver:636Note:
Note:
The port number suffix 636 is the default port number for ldaps connections. It's mainly not necessary to add this to address. You have to, if your Active Directory server is setup to use another port for ldaps connections. Please contact your network administrator to gain details about deviant port allocations.

Import of user structures
11 2012 23
Selection of datasets to be imported
In configuration step Config LDAP Data you can select datasets to be imported from Active Directory server as well as you can define advanced rules for the import itself. In case you want to import datasets using LDAP search filters please read chapter Using LDAP search filters before proceeding.
1. Expand the root object as shown below the options by clicking the prepended arrow symbol. You will see a map of the data structure of the selected Active Directory server. Click arrow symbols as prepended to entries to expand each entry.
2. Select entries to be imported by checking the respective checkbox.
By default only users and organizational units will be imported with LDAP import. Alternatively you can specify more or less data types for import by using filter settings as described below:
# Filter Description
1 preserve structure Original structure of the Active Directory server will be preserved. Selecting a subordinated branch each superior organizational unit up to the root item will be imported as well. Users of those superior organizational units won't be imported. Deactivating this option results in storage of each selected branch directly below the root item. User structure as shown in Manager won't mirror original structure from Active Directory anymore.
2 import empty ous By default empty organizational units won't be imported. Checking this option will include empty organizational units for import as well.
3 import computer By default computers included in Active Directory structure won't be imported. Checking this option will include computers for import as well.
4 import groups By default groups included in Active Directory structure won't be imported. Checking this option will include groups for import as well.
Tip:
Importing a very large dataset might result in an SQL Server Exception due to a too small defined growth rate of the database. Importing structures with more than 50.000 users or very high page sizes you should increase autogrowth rate of your database before starting the import.
Import of user structures
24 11 2012
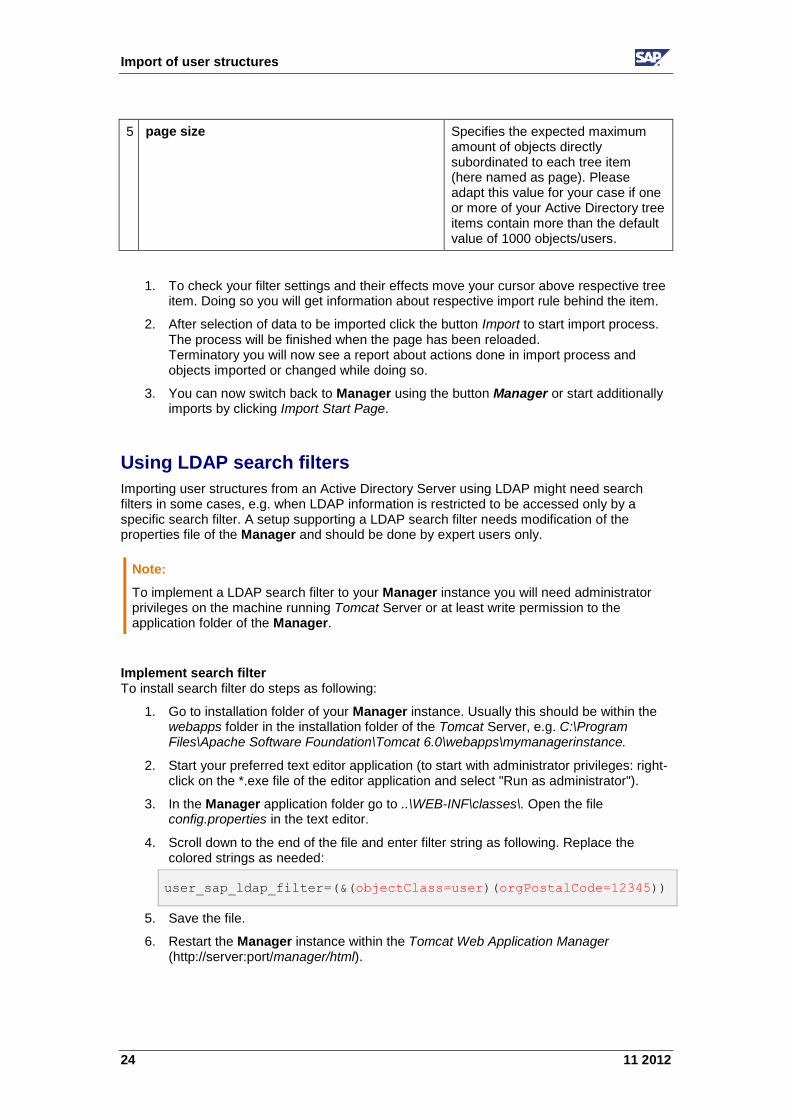
5 page size Specifies the expected maximum amount of objects directly subordinated to each tree item (here named as page). Please adapt this value for your case if one or more of your Active Directory tree items contain more than the default value of 1000 objects/users.
1. To check your filter settings and their effects move your cursor above respective tree item. Doing so you will get information about respective import rule behind the item.
2. After selection of data to be imported click the button Import to start import process. The process will be finished when the page has been reloaded. Terminatory you will now see a report about actions done in import process and objects imported or changed while doing so.
3. You can now switch back to Manager using the button Manager or start additionally imports by clicking Import Start Page.
Using LDAP search filters
Importing user structures from an Active Directory Server using LDAP might need search filters in some cases, e.g. when LDAP information is restricted to be accessed only by a specific search filter. A setup supporting a LDAP search filter needs modification of the properties file of the Manager and should be done by expert users only.
Implement search filter To install search filter do steps as following:
1. Go to installation folder of your Manager instance. Usually this should be within the webapps folder in the installation folder of the Tomcat Server, e.g. C:\Program Files\Apache Software Foundation\Tomcat 6.0\webapps\mymanagerinstance.
2. Start your preferred text editor application (to start with administrator privileges: right-click on the *.exe file of the editor application and select "Run as administrator").
3. In the Manager application folder go to ..\WEB-INF\classes\. Open the file config.properties in the text editor.
4. Scroll down to the end of the file and enter filter string as following. Replace the colored strings as needed:
user_sap_ldap_filter=(&(objectClass=user)(orgPostalCode=12345))
5. Save the file.
6. Restart the Manager instance within the Tomcat Web Application Manager (http://server:port/manager/html).
Note:
To implement a LDAP search filter to your Manager instance you will need administrator privileges on the machine running Tomcat Server or at least write permission to the application folder of the Manager.
Import of user structures
11 2012 25
For further information on how to build up LDAP search filter strings and the syntax to observe read this external documentation:
Search Filter Syntax http://msdn.microsoft.com/en-us/library/windows/desktop/aa746475%28v=vs.85%29.aspx
Creating an LDAP Search String http://technet.microsoft.com/en-us/library/cc261947%28v=office.12%29.aspx
Increasing the database autogrowth
Import of large sized datasets, e.g. a list from a LDAP search filter, might require an adaption of the autogrowth value of your database.
1. Open the SQL Server Management Studio.
2. Right-click the database node of your Manager instance.
3. In context menu select Properties.
4. In properties dialog select the page Files.
5. Within the files list search for the Filegroup entry PRIMARY and click its edit button (...) in column Autogrowth.
6. Change the File Growth value as needed in appearing dialog. Observe that a too large defined value might get in conflict with your available hard disk space soon.
7. Click OK in both open dialogs to save your changes and close.
8. Right-click again the database node of your Manager instance.
9. In context menu now select Tasks > Shrink > Files.
10. In appearing dialog select Shrink action > Release unused space for Filegroup Primary.
11. Click OK to run action and close dialog.
12. Quit the SQL Server Management Studio.

Import of user structures
26 11 2012
Imported LDAP Values
The Manager will import the following LDAP values from your Active Directory server.
sAMAccountName
distinguishedName
sn
givenName
msExchUserCulture
objectGUID
cn
member
name
Update data
You may update your imported data in Manager at every time. There are two possibilities to do so:
1. Update single connection Click on respective action link Update in list entry of the connection to be updated.
2. Update all connections Click on Update All to update all connections in the list.
Deletions in LDAP based structures will be adopted only for organizational units; user and groups will be deactivated in this case.
Additionally you have the possibility to update LDAP connection automatically at specified dates. Please read chapter Automatic LDAP Import in Manager's Online Help.
Trust Relations
Does an Active Directory server host sub domains which you want to import as well, you can setup those as a so called Trust Relation to gain comfort of inheriting authentication data from another already setup connection to this server. In this case you don't have to enter authentication data twice.
Please do as following to setup a Trust Relation:
1. In list of already setup LDAP connections click on the action link show trust for respective list entry.
2. Following to this step you will get a list of all sub domains which are hosted on the selected Active Directory server. Select desired sub domain by clicking the action link select.
3. Now just enter server name as specified in the sub domain in appearing setup mask. Authentication data will be inherited from selected already setup connection. You can see this by the availability of the checkbox Inherit. In case that you want to enter deviant authentication, you may enter this after

Import of user structures
11 2012 27
unchecking the checkbox Inherit.
Deleting a connection
Please do as following to delete an existing LDAP connection from your list:
1. Click the action link delete in your respective list entry of LDAP connections.
2. You now will see a security message ensuring that you really want to delete this connection. Click OK to proceed.
3. Another window appears, providing you with the possibility to delete data structure as imported with this connection. Confirm your selection with OK to proceed with the deletion of the connection.
Attention:
Since the Manager is not saving any credentials it is not possible anymore to gain inherited authentication data by using checkbox Inherit after setup of deviant authentication. In case you decide to switch back authentication to same as inherited, we recommend to delete this connection followed by a newly creation as described above. Already imported data structures won't be deleted by doing so.
Note:
Deletion of a LDAP connection doesn't result in a deletion of the users imported by this connection. Those will be deactivated because of the missing possibility to authenticate. Nevertheless these users will be still available in user management directly subordinated to the root item. Furthermore all tracking and workflow data as connected to these users will still be available after deletion of the connection.

Working with the Producer
28 11 2012
Working with the Producer With the Manager you will have a worldwide accessible central Workarea, in which contents could be edited and updated with the SAP Workforce Performance Builder Producer easily. Read now, how you connect the Producer with the Manager.
How to connect To connect the Producer with the Manager go to the project explorer view in the Producer and choose Workarea -> Administration -> Connect with Manager.
The connection wizard appears, allowing you to input connection data necessary to connect to the server, which is running Manager.
Step 1: Select Server
Edit settings in dialog select server as following:
URL: Enter the address of the server and the installation path of Manager. It could be specified as an IP address or as a string, for example http://192.168.0.1 or http://www.domain.com. Extend the server address for the port as specified within installation process of tomcat. If you haven’t done an extra specification, port number is 8080.
User: Enter your user name.
Password: Enter your password.
Save password: Specifies, if your password should be saved locally.
Click on Establish connection to check your entered data for validity. Note, that the button Next will stay inactive as long as haven’t got a valid response from server.
If connection has been established successfully, you will get served informations about workarea, users and existing status shown in notification area below the button Establish connection.
Click on button Next to go to next step.
Step 2: Select workarea
Click on dropdown button Workarea paths to get the list of existing workareas. Select your according workarea.
After selection of workarea you will get information about existing resources and tags listed in notification area. Based on this information the connection wizard is preselecting the option right below the notification area. Manipulate this options depending on your needs.
1. Use server root This option sets Producer to use the root group of the Manager even in your local workarea. Existing contents of your local workarea will be moved to group of Unreferenced entities.
2. Download resources If your are connecting to an already equipped Manager, this option will download and use the resources existing on server. Existing resources of your local workarea will be overwritten. This option is grayed-out in case of no existing resources on server.
Working with the Producer
11 2012 29
3. Upload resources If you are connecting to a Manager, which is not already equipped with resources or with elder resources, this option will upload your existing resources of your local workarea to the server. This option is grayed-out in case of no existing local resources.
Click on button Next to go to next step.
Step 3: Personal group
Within this step you can specify a personal group for your local workarea. This group will be uploaded to server while connecting and will be usable for editing contents directly after connection process.
Click on Finish to finish process of connecting with Manager. A dialog appears, showing you the status of content synchronization.
The progress dialog shows you information and options as following:
1. Progress of entities Shows the particular entity with its information and result of synchronization.
2. Show details Click on Show details to get detailed information on current marked entity, for example if the synchronization result shows an error.
3. Auto-close on success Select this option to make the dialog closing itself after successful data transfer. If there are errors in transferring data the dialog will stay opened to show you the errors in transfer of entities.
Click on the button Ok. The connection between the Producer and the Manager is ready now.
First Steps After having set the connection to the Manager for first time, you are able to fill the central Workarea with content now or, if there are existing contents on the server yet, to download them into your local Workarea.
For keeping overview even inside of very large structures, you are able to use a group inside your local structure as root. This root group enables you to load just that part from the central Workarea which is important to you. So the root group is to be understand as an entry point to the data structure on the server. In cause of that use the definition of a root group is essential for working together with Manager.
Select a group inside the tree view of the project explorer (in case you have a complete new generated Workarea this might be the group Content) and call the context menu by the right mouse button. Choose Group ops -> Set root. Load the preferred part of the central Workarea by choosing Central Workarea -> Check out Objects…. A dialog appears, in which you can choose your preferred part by using checkboxes. Confirm your choice with the Ok button.
A progress window will show you the status of the check out. After finalizing the check out procedure, you will find the downloaded part inside of the item Unreferenced Entities right at the bottom of the tree. Select the highest level object and drag it with the mouse onto the group, you had defined as root before. Now you may work with your projects as habitual.
Backup and Restore
30 11 2012
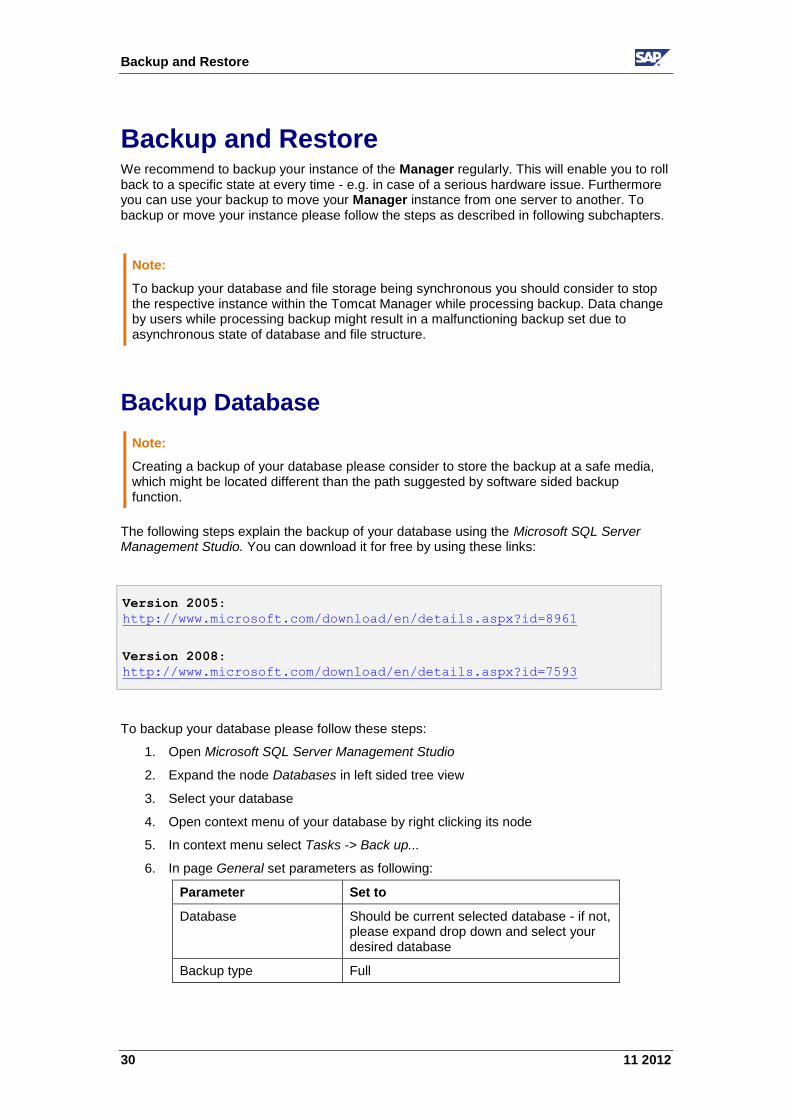
Backup and Restore We recommend to backup your instance of the Manager regularly. This will enable you to roll back to a specific state at every time - e.g. in case of a serious hardware issue. Furthermore you can use your backup to move your Manager instance from one server to another. To backup or move your instance please follow the steps as described in following subchapters.
Backup Database
The following steps explain the backup of your database using the Microsoft SQL Server Management Studio. You can download it for free by using these links:
To backup your database please follow these steps:
1. Open Microsoft SQL Server Management Studio
2. Expand the node Databases in left sided tree view
3. Select your database
4. Open context menu of your database by right clicking its node
5. In context menu select Tasks -> Back up...
6. In page General set parameters as following:
Parameter Set to
Database Should be current selected database - if not, please expand drop down and select your desired database
Backup type Full
Note:
To backup your database and file storage being synchronous you should consider to stop the respective instance within the Tomcat Manager while processing backup. Data change by users while processing backup might result in a malfunctioning backup set due to asynchronous state of database and file structure.
Note:
Creating a backup of your database please consider to store the backup at a safe media, which might be located different than the path suggested by software sided backup function.
Version 2005:
http://www.microsoft.com/download/en/details.aspx?id=8961
Version 2008:
http://www.microsoft.com/download/en/details.aspx?id=7593
Backup and Restore
11 2012 31
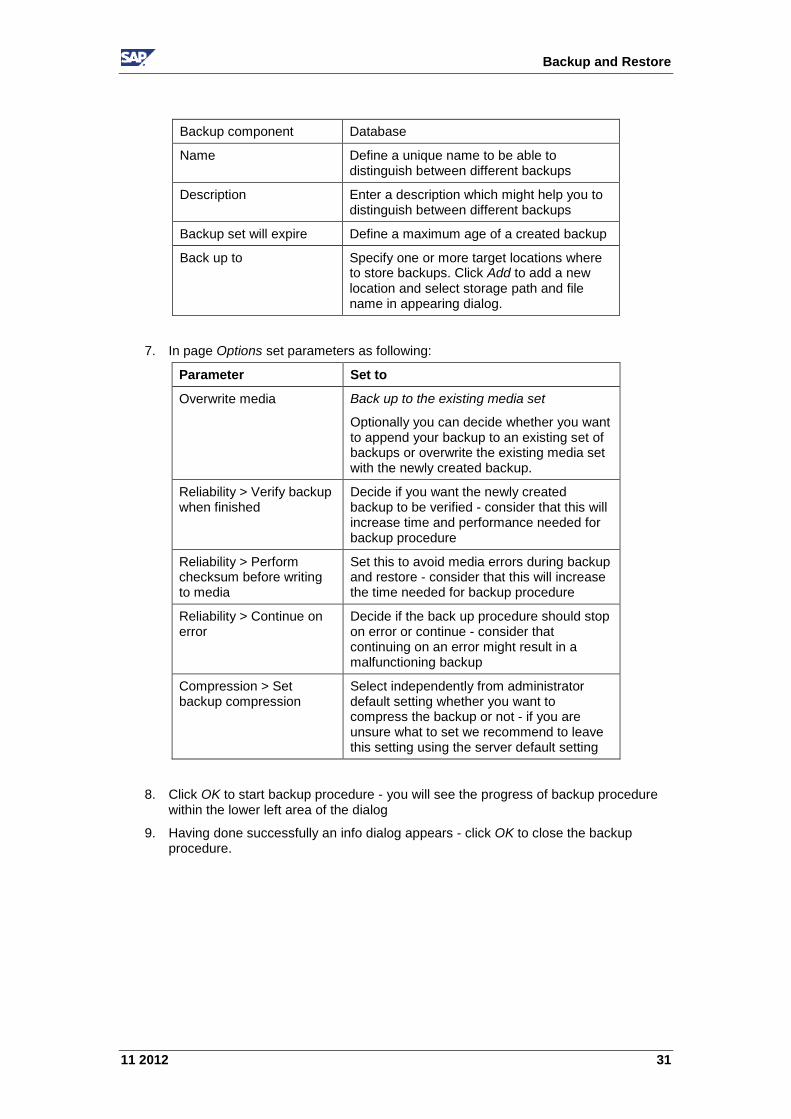
Backup component Database
Name Define a unique name to be able to distinguish between different backups
Description Enter a description which might help you to distinguish between different backups
Backup set will expire Define a maximum age of a created backup
Back up to Specify one or more target locations where to store backups. Click Add to add a new location and select storage path and file name in appearing dialog.
7. In page Options set parameters as following:
Parameter Set to
Overwrite media Back up to the existing media set
Optionally you can decide whether you want to append your backup to an existing set of backups or overwrite the existing media set with the newly created backup.
Reliability > Verify backup when finished
Decide if you want the newly created backup to be verified - consider that this will increase time and performance needed for backup procedure
Reliability > Perform checksum before writing to media
Set this to avoid media errors during backup and restore - consider that this will increase the time needed for backup procedure
Reliability > Continue on error
Decide if the back up procedure should stop on error or continue - consider that continuing on an error might result in a malfunctioning backup
Compression > Set backup compression
Select independently from administrator default setting whether you want to compress the backup or not - if you are unsure what to set we recommend to leave this setting using the server default setting
8. Click OK to start backup procedure - you will see the progress of backup procedure within the lower left area of the dialog
9. Having done successfully an info dialog appears - click OK to close the backup procedure.
Backup and Restore
32 11 2012
Backup Filestorage As well as the database you have to backup the file structure managed by your Manager instance.
According to the needs of an automatic backup of your file storage there has to be an distinction between the use of a Microsoft Server 2008 operating system, which delivers backup functionality itself, and a operating systems like Windows Server 2005, Windows XP, Vista or Windows 7 where you will have to use third party applications handling this tasks.
Since the market of backup tools is wide spread and dependent on personal favorites and pricing issues only the integrated backup functionality of Microsoft Server 2008 will be explained at this place.
To use the backup functionality you have to install this additionally feature in your operating system.
Integration of the Windows Server Backup Feature Follow these steps to integrate the feature:
1. Start the server manager
2. Select menu item Add Features
3. In features list select Windows Server Backup Features and Powershell.
4. Click OK to start installation process.
Configuration of automatic backups Once integrated you can start the mmc snap-in Windows Server Backup from Administrative Tools in Server Manager. To configure automatic backups proceed as follows:
1. In the Actions pane of the snap-in default page, under Windows Server Backup, click Backup Schedule. This opens the Backup Schedule Wizard.
2. On the Getting Started page, click Next.
3. On the Select Backup Configuration page, do one of the following, and then click Next:
a. Click Custom to back up just certain items, and then click Next.
b. On the Select Items for Backup page, click Add Items. In Select Items, select the check box for the the base directory of the Manager. Click OK.
4. On the Specify Backup Time page, do one of the following, and then click Next:
a. Click Once a day, and then select the time from the drop-down list to start running the daily backup.
b. Click More than once a day. Then, to select a start time, under Available time, click the time that you want the backup to start, and then click Add to move the time under Scheduled time. Repeat for each start time that you want to add.
5. On the Specify Destination Type page, select Back up to a volume.
6. On the Select Destination Volume page, click Add. In Add volumes, click the volume(s) that you want to use, and then click OK. Options are available as follows:
a. Remote shared folder If you store your backup in a remote shared folder, your backup will be overwritten each time you create a new backup. Do not choose this option if you want to store multiple backups.

Backup and Restore
11 2012 33
b. Internal hard disk Using this option enables you to use full functions set of scheduling, recovering and shadowing your backup. Nevertheless you should use this option only if selected internal hard disk is protected by any mirroring mechanism.
c. External hard disk Using this option enables you to use full functions set of scheduling, recovering and shadowing your backup. Nevertheless you should use an external hard disk protected by any mirroring mechanism.
Note:
Obey these facts for your decision where to store backup.
The size of location should be at least 1.5 times the estimated backup size.
You cannot use tape drives as a storage location.
You cannot store backups on FAT32-formatted drives - the disk should be formatted NTFS.
You cannot store backups on USB flash drives or pen drives.
7. On the Confirmation page, review the details, and then click Finish. If you have dedicated a disk for storage, the wizard formats the disk, which may take several minutes depending on the size of the disk.
8. On the Summary page, click Close.
Creating a file storage backup manually Follow these steps to backup your file structure in preparation for a data migration:
1. Go to the upload folder as specified within the Server Settings Area in parameter Base path.
2. Compress and save the whole folder structure within the bath path. Ensure to keep folder structure while compressing. In case you want to use Manager's built-in import package functionality you have to use compression format *.zip.
3. Store the created file at a safe place.
Backup and Restore
34 11 2012
Restore Manager
Restore base directory from manual backup In case you stored a backup of file storage as manually created backup unpack your compressed backup of the file storage to the specified base directory of the instance - confirm to overwrite all data. If you are in doubt about an file error maybe causing trouble, it is recommend to wipe the upload directory before unpacking into it.
Restore base directory from automatic backup If you used automatic backup by Windows Server Backup feature please follow these steps to recover the base directory:
1. From the Start menu, click Administrative Tools, and then click Windows Server Backup.
2. In the Actions pane of the snap-in default page, under Windows Server Backup, click Recover. This opens the Recovery Wizard.
3. On the Getting Started page click This server.
4. On the Select Backup Date page, select the date from the calendar and the time from the drop-down list of backup you want to restore from. Then click Next.
5. On the Select Recovery Type page, click Files and folders, and then click Next.
6. On the Select Items to Recover page, under Available items, expand the list until the folder you want is visible. Click the folder to display the contents in the adjacent pane, select all items and then click Next.
7. On the Specify Recovery Options page, under Recovery destination click Original location.
8. Under When this wizard find items in the backup that are already in the recovery destination, click Overwrite the existing versions with the recovered versions.
9. On the Confirmation page, review the details, and then click Recover to restore the specified items.
10. On the Recovery progress page, you can view the status of the recovery operation and whether or not it was successfully completed.
Attention:
Restoring an instance of the Manager please consider to disable any user access to the instance itself. Stop the instance by using the Tomcat Manager or shutdown the Tomcat service itself. Consider that all data of the instance to be restored will be overwritten.

Backup and Restore
11 2012 35
Restore database Open the Microsoft SQL Server Management Studio.
1. Expand the node Databases in left sided tree view
2. Select your database
3. Open context menu of your database by right clicking its node
4. In context menu select Tasks -> Restore -> Database...
5. In dialog's page General set parameters as following:
Parameter Setting
Destination for restore -> To database
Should be current selected database - if not, please expand drop down and select your desired database
Destination for restore -> To a point in time
Specify a point of time until which the restore process shall restore. Transaction logs after specified point won't be processed. Please consider that it is impossible to restore to a point of time which is more actual than the date of last backup.
Source for restore Select if want to restore data from another already existing database (Setting From database) or if you want to use a backup file stored somewhere else (Setting From device)
Select the backup sets to restore
Within displayed list of available backup you can select specific backups to use by checking it in column Restore
6. In dialog's page Options set parameters as following:
Parameter Setting
Restore options Restoring your Manager instance please select the parameter Overwrite the existing database (WITH REPLACE) to avoid data conflicts. Leave the other parameters unselected.
Recovery state Select the options RESTORE WITH RECOVERY since all other options will make your database unusable or inaccessible.
7. Click OK to start rollback procedure - you will see the progress of rollback within the lower left area of the dialog
8. Having done successfully an info dialog appears - click OK to close the rollback procedure.

Backup and Restore
36 11 2012
Migrating to another machine Migrating your data to another machine you can follow the steps described in previous part but you should consider these points.
1. You should restore the database by overwriting an empty or unused database with your backup. Select From device in dialog's page General and locate your backup file.
2. Expand your storage backup to any folder as preferred. If the resulting directory path is different than the one from former machine, please do as following:
a. Copy directory path of new upload folder
b. Open the Microsoft SQL Server Management Studio.
c. Expand the node Databases in left sided tree view
d. Select and expand the node of the database you have previously restored
e. Expand the Tables node
f. Right click the node dbo.server_settings and select Edit Top 200 Rows in context menu
g. Search for entry name storage_dir and replace the value of this row with your copied path
1. Now start installation procedure of the Manager and select the restored database in step of database selection
2. Go through installation process as usual
Alternatively you can use a small SQL script to update your upload folder. To enter it, right click on the node of the database and select New Query. Enter following script into the query window by replacing the red font with your new path. Now run the script by clicking Execute or using F5 key.
UPDATE dbo.server_settings SET value = 'C:\mynewuploadpath'
WHERE name = 'storage_dir'
Log Files
11 2012 37
Log Files The log files enable you to enhance your support request in case of errors. You will find them within the logs folder in your installation directory of Tomcat Server. Each log file is named with instance name to be logged.
There are different log files produced by the Manager:
<instancename>.log
<instancename>_exceptions.log
<instancename>_scheduler.log