Embed Size (px)
Citation preview
8/13/2019 Making a Cloche - Teacher + Student Guide + School
http://slidepdf.com/reader/full/making-a-cloche-teacher-student-guide-school 1/2
The One Pot Pledge® concept was devised by Food Up Front, the urban food growing network. Trade Mark registered to Food Up Front. Garden Organic is a registered charity 298104
P h o t o g r a p h y © R
a y S p e n c e
Making a cloche
Resources
• Stout galvanised wire
• Clear plastic sheeting• Wire cutters
Activity
1. The following are crops that commonly benet
from using cloches.
a. Early or late sown crops, eg lettuce.
b. Cold sensitive plants when late spring or early
autumn frost is forecast, eg peppers.
2. Follow the instructions below for
building a simple tunnel cloche.
Extended activity
1. Make a more robust cloche by replacing wire
with plastic tubing, eg 2.5cm diameter frombuilders’ merchants. Start by making a square/
rectangular wooden batten frame to match the
width of a bed (see photo). Then position one
tube at each end of the frame to make two
hoops, screwing the ends to each corner of the
frame. Cover the outside with plastic, nailing to
the battens to secure. Ventilate by lifting up one
end of the structure and supporting with a brick
or large stone.
2. Cover the design on the next page with nettingas a pest barrier or with horticultural eece for
temporary frost protection.
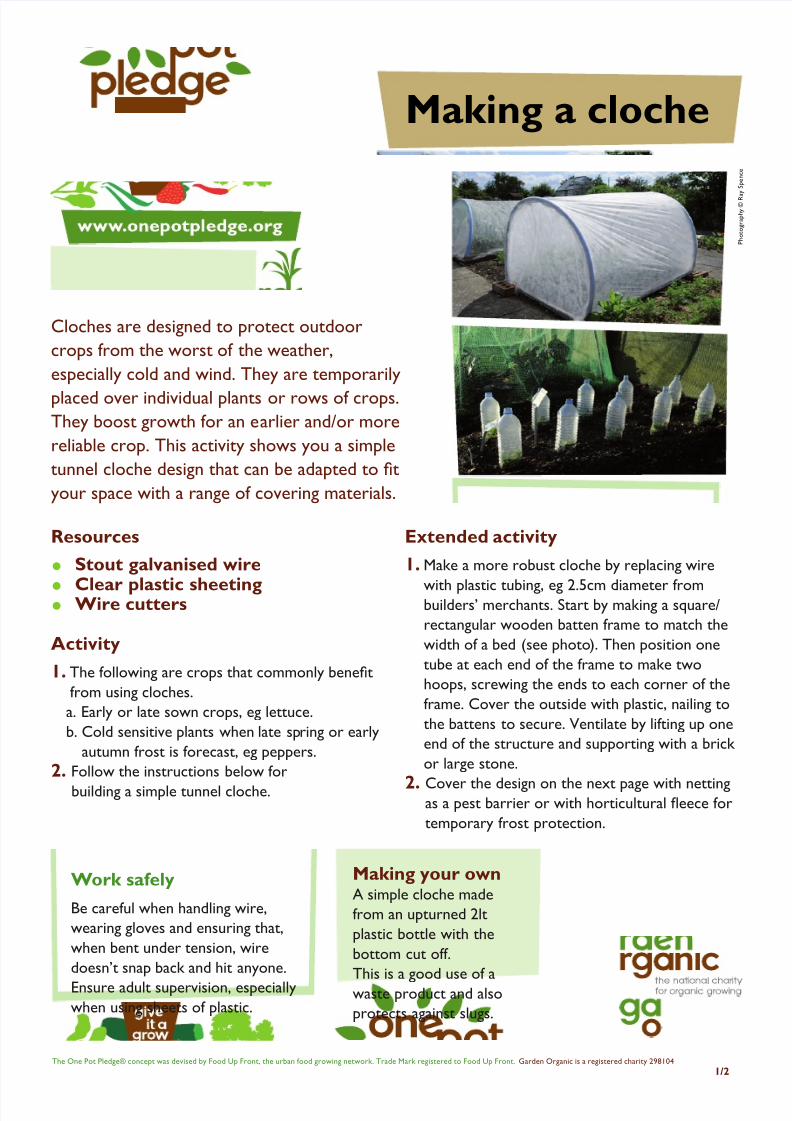
Cloches are designed to protect outdoor
crops from the worst of the weather,
especially cold and wind. They are temporarily
placed over individual plants or rows of crops.They boost growth for an earlier and/or more
reliable crop. This activity shows you a simple
tunnel cloche design that can be adapted to t
your space with a range of covering materials.
Making your ownA simple cloche made
from an upturned 2lt
plastic bottle with the
bottom cut off.
This is a good use of a
waste product and also
protects against slugs.
Work safely Be careful when handling wire,
wearing gloves and ensuring that,
when bent under tension, wire
doesn’t snap back and hit anyone.
Ensure adult supervision, especiallywhen using sheets of plastic.
1/2
8/13/2019 Making a Cloche - Teacher + Student Guide + School
http://slidepdf.com/reader/full/making-a-cloche-teacher-student-guide-school 2/2
P h o t o g r a p h y © R
a y S p e n c e
2/2
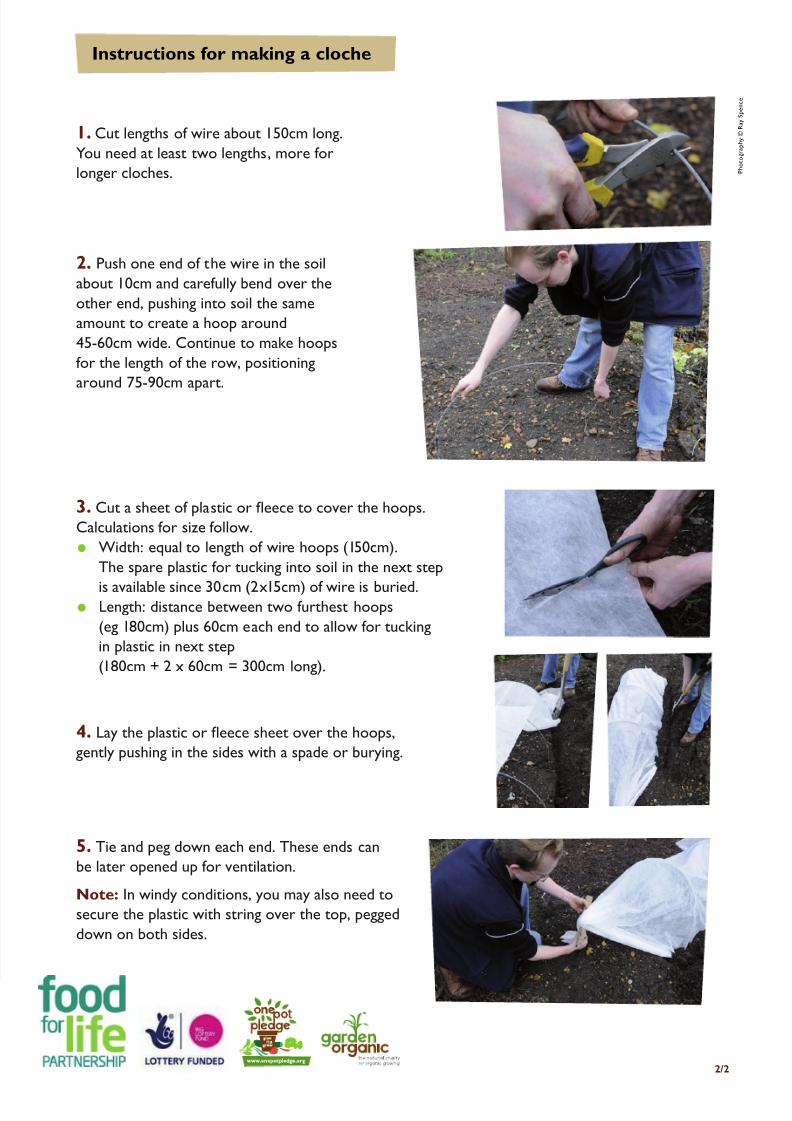
1. Cut lengths of wire about 150cm long.
You need at least two lengths, more for
longer cloches.
2. Push one end of the wire in the soil
about 10cm and carefully bend over the
other end, pushing into soil the same
amount to create a hoop around
45-60cm wide. Continue to make hoops
for the length of the row, positioning
around 75-90cm apart.
4. Lay the plastic or eece sheet over the hoops,
gently pushing in the sides with a spade or burying.
5. Tie and peg down each end. These ends can
be later opened up for ventilation.
Note: In windy conditions, you may also need to
secure the plastic with string over the top, pegged
down on both sides.
3. Cut a sheet of plastic or eece to cover the hoops.
Calculations for size follow.
• Width: equal to length of wire hoops (150cm).
The spare plastic for tucking into soil in the next step
is available since 30cm (2x15cm) of wire is buried.• Length: distance between two furthest hoops
(eg 180cm) plus 60cm each end to allow for tucking
in plastic in next step
(180cm + 2 x 60cm = 300cm long).
Instructions for making a cloche