Embed Size (px)
Citation preview

Rescue Lens UserGuide
Contents
Rescue Lens – At a Glance.......................................................................................................3System Requirements for Rescue Lens...........................................................................................................................3
Starting a Rescue Lens Session..............................................................................................4Starting a Rescue Lens Session from the Technician Console by PIN...................................................................4Starting a Rescue Lens Session from the Technician Console by SMS.................................................................5Starting a Rescue Lens Session from the Technician Console by Email................................................................6Starting a Rescue Lens Session from the Technician Console by Link and Messaging Tool..........................8
Managing a Rescue Lens Session...........................................................................................9What Can the Technician Do?............................................................................................................................................9What Can the Customer Do?..............................................................................................................................................11
Rescue Lens User Guideii
Rescue Lens – At a Glance
Rescue Lens is LogMeIn's video-enabled support solution with integrated VoIP. With Rescue Lens,customers can use a smartphone to stream secure, live video directly back to service representatives.Support agents can see the issue with their own eyes, enabling them to remotely guide end-usersthrough troubleshooting, problem resolution, product setup, claim reporting and more.
Rescue Lens is available both as a service and as a feature of LogMeIn Rescue. For the latest pricingand subscription options, visit https://www.logmeinrescue.com/.
Important: This guide applies to Rescue Lens subscribers. If you are a LogMeIn Rescue subscriber,visit http://help.logmein.com for information about Lens.
Rescue Lens features available for technicians may depend on settings in the Rescue AdministrationCenter. For more information, see the LogMeIn Rescue Administrator's Guide.
System Requirements for Rescue Lens
Visit help.logmein.com for up-to-date system requirements.
3Copyright © 2018 LogMeIn, Inc.
Starting a Rescue Lens Session
Starting a Rescue Lens Session from the Technician Console by PIN
Restriction: A technician can handle only one active Lens session at a time.
1. Log in to the Technician Console.
2. On the Session toolbar, click New Session.
The Create New Session window is displayed.
3. Type the customer's name or identifier in the Name field.This name is shown on the Active Session tab and Session List.
4. Select the PIN Code tab.
5. Click Create PIN Code.A 6-digit PIN code is generated and displayed in the Create New Session window and in the SessionLog.
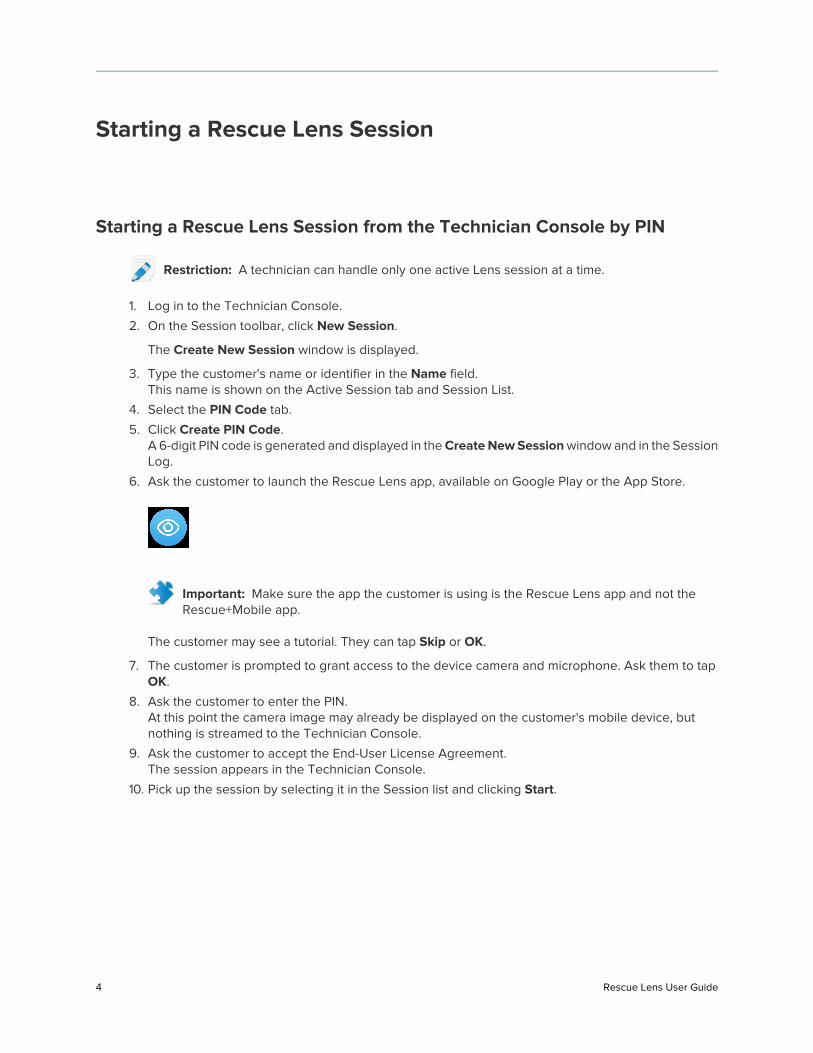
6. Ask the customer to launch the Rescue Lens app, available on Google Play or the App Store.
Important: Make sure the app the customer is using is the Rescue Lens app and not theRescue+Mobile app.
The customer may see a tutorial. They can tap Skip or OK.
7. The customer is prompted to grant access to the device camera and microphone. Ask them to tapOK.
8. Ask the customer to enter the PIN.At this point the camera image may already be displayed on the customer's mobile device, butnothing is streamed to the Technician Console.
9. Ask the customer to accept the End-User License Agreement.The session appears in the Technician Console.
10. Pick up the session by selecting it in the Session list and clicking Start.
Rescue Lens User Guide4
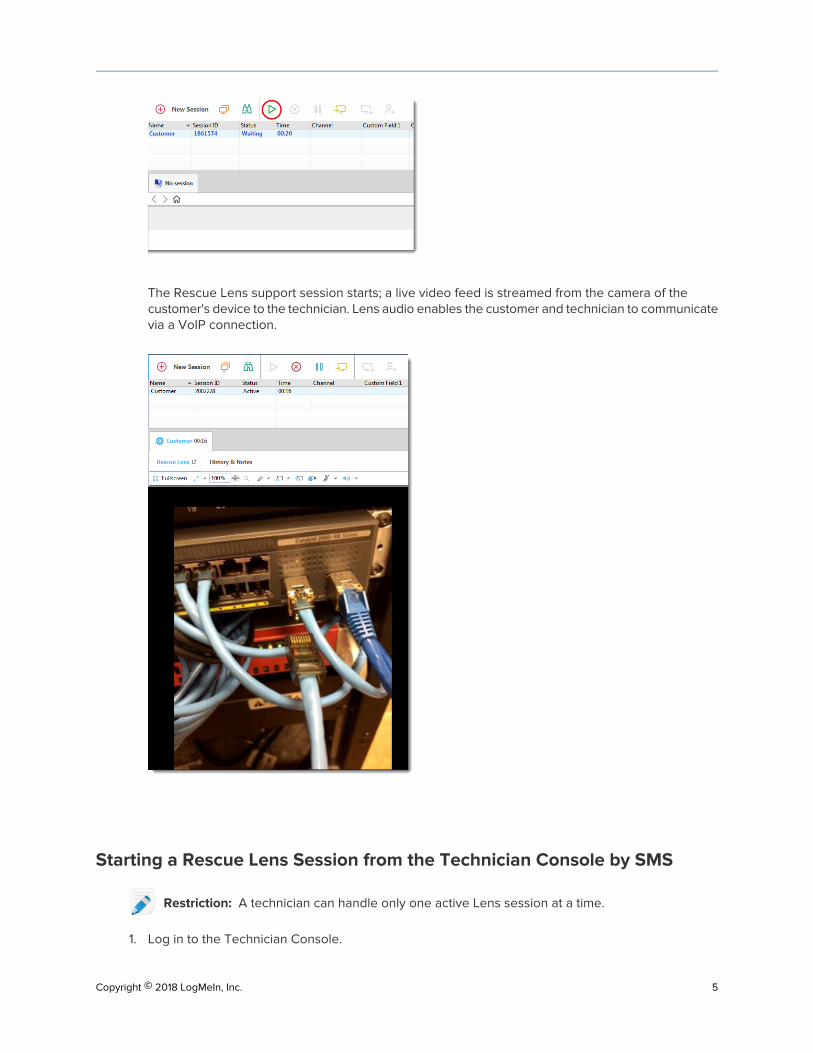
The Rescue Lens support session starts; a live video feed is streamed from the camera of thecustomer's device to the technician. Lens audio enables the customer and technician to communicatevia a VoIP connection.
Starting a Rescue Lens Session from the Technician Console by SMS
Restriction: A technician can handle only one active Lens session at a time.
1. Log in to the Technician Console.
5Copyright © 2018 LogMeIn, Inc.
2. On the Session toolbar, click New Session.
The Create New Session window is displayed.
3. Type the customer's name or identifier in the Name field.This name is shown on the Active Session tab and Session List.
4. Select the SMS tab.
5. Type the customer's phone number into the To: field.The SMS containing the PIN code will be sent to this phone number.
6. Click Send SMS.
7. Ask the customer to open the SMS message, and click the link to launch the Rescue Lens app.
Note: If the Rescue Lens app is not already installed on the customer's device, they areredirected to Google Play or the App Store to install the app first.
Note: The download procedure may vary depending on the customer's operating system.
The customer may see a tutorial. They can tap Skip or OK.
8. The customer is prompted to grant access to the device camera and microphone. Ask them to tapOK.At this point the camera image may already be displayed on the customer's mobile device, butnothing is streamed to the Technician Console.
9. Ask the customer to accept the End-User License Agreement.The session appears in the Technician Console.
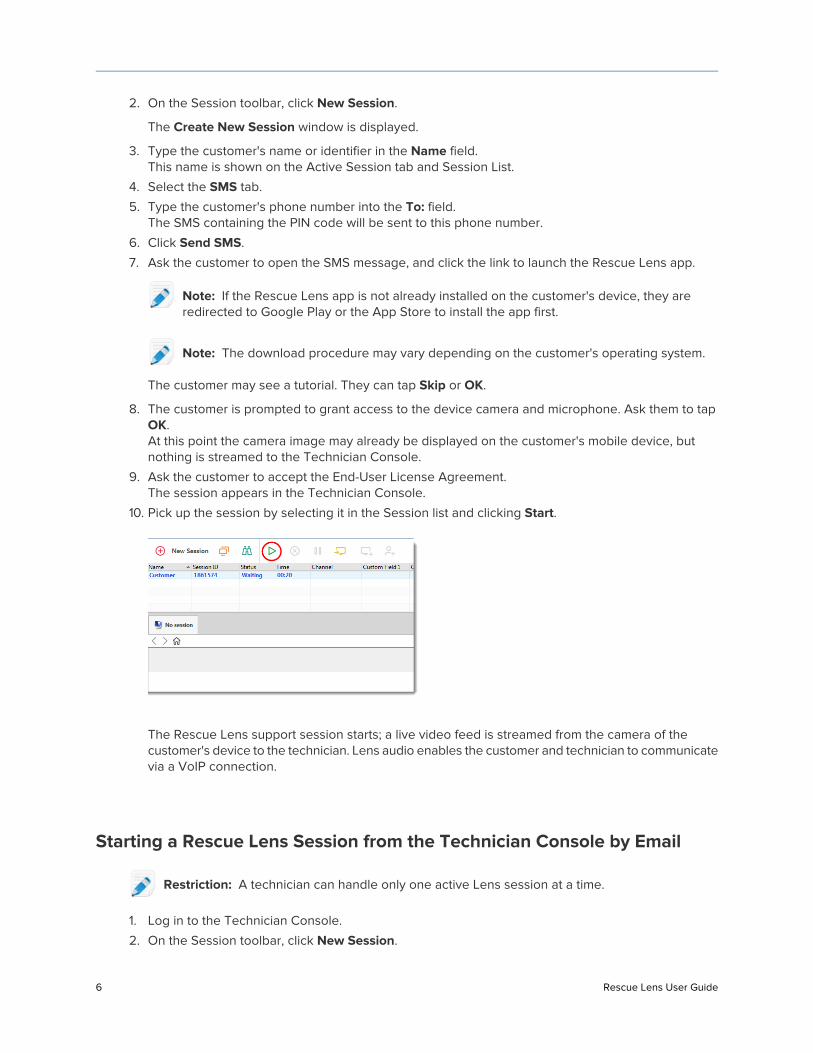
10. Pick up the session by selecting it in the Session list and clicking Start.
The Rescue Lens support session starts; a live video feed is streamed from the camera of thecustomer's device to the technician. Lens audio enables the customer and technician to communicatevia a VoIP connection.
Starting a Rescue Lens Session from the Technician Console by Email
Restriction: A technician can handle only one active Lens session at a time.
1. Log in to the Technician Console.
2. On the Session toolbar, click New Session.
Rescue Lens User Guide6

The Create New Session window is displayed.
3. Type the customer's name or identifier in the Name field.This name is shown on the Active Session tab and Session List.
4. Select the Email tab.
5. Choose how you want to send the email to the customer:
• To use your own email client and account, choose Send email via my default email client onthis computer.
• To allow Rescue to send the email, choose Send email on my behalf via the LogMeIn Rescueservers and enter a valid email address in the To field.
6. Click Email Link.The email is generated (and sent if you chose to send the mail via the Rescue system).
7. Ask the customer to open the message, and click the link to launch the Rescue Lens app.
Note: If the Rescue Lens app is not already installed on the customer's device, they areredirected to Google Play or the App Store to install the app first.
Note: The download procedure may vary depending on the customer's operating system.
The customer may see a tutorial. They can tap Skip or OK.
8. The customer is prompted to grant access to the device camera and microphone. Ask them to tapOK.At this point the camera image may already be displayed on the customer's mobile device, butnothing is streamed to the Technician Console.
9. Ask the customer to accept the End-User License Agreement.The session appears in the Technician Console.
10. Pick up the session by selecting it in the Session list and clicking Start.
The Rescue Lens support session starts; a live video feed is streamed from the camera of thecustomer's device to the technician. Lens audio enables the customer and technician to communicatevia a VoIP connection.
7Copyright © 2018 LogMeIn, Inc.
Starting a Rescue Lens Session from the Technician Console by Link andMessaging Tool
1. Log in to the Technician Console.
2. On the Session toolbar, click New Session.
The Create New Session window is displayed.
3. Type the customer's name or identifier in the Name field.This name is shown on the Active Session tab and Session List.
4. Select the Link tab.
5. Click Copy Link to Clipboard.The link is copied to your clipboard.
6. Paste the link into your messaging tool and send it to your customer.
7. Ask the customer to open the message, and click the link to launch the Rescue Lens app.
Note: If the Rescue Lens app is not already installed on the customer's device, they areredirected to Google Play or the App Store to install the app first.
Note: The download procedure may vary depending on the customer's operating system.
The customer may see a tutorial. They can tap Skip or OK.
8. The customer is prompted to grant access to the device camera and microphone. Ask them to tapOK.At this point the camera image may already be displayed on the customer's mobile device, butnothing is streamed to the Technician Console.
9. Ask the customer to accept the End-User License Agreement.The session appears in the Technician Console.
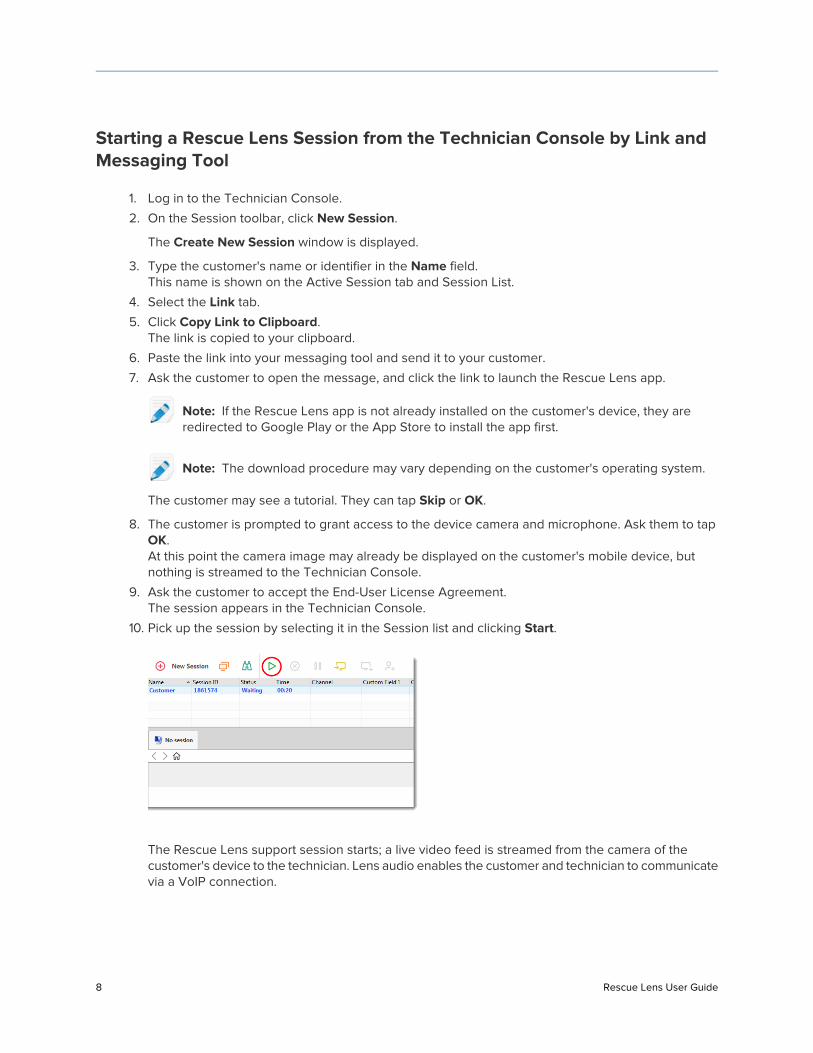
10. Pick up the session by selecting it in the Session list and clicking Start.
The Rescue Lens support session starts; a live video feed is streamed from the camera of thecustomer's device to the technician. Lens audio enables the customer and technician to communicatevia a VoIP connection.
Rescue Lens User Guide8
Managing a Rescue Lens Session
What Can the Technician Do?During a Rescue Lens session, the technician can perform the following actions:
End session
Hold session
When the technician places a session on hold, the camera stream is paused on thecustomer's side and the session goes to On Hold status in the Technician Console.
Tip: For freezing the camera stream, see Freeze on page 10.
Transfer session
Mute/Unmutemicrophone andspeaker
For Lens sessions using audio, the technician can mute/unmute the audio connectionat any time during the session.
The technician can chat with the customer and send predefined URLs.Chat
Annotate the streamed image to highlight particular areas or objects. For example,you can highlight a part that needs to be removed or a switch that needs attention.
Multi-object tracking ensures that whiteboard annotations stay attached to theannotated image. For example, if the customer moves their camera away from a
Whiteboard
circled part, the circle stays "attached" to the part and moves with it, thus ensuringthat the correct part remains highlighted.
To start drawing on the streamed image, click WhiteboardOn.
Whiteboard in theTechnicianConsole
9Copyright © 2018 LogMeIn, Inc.
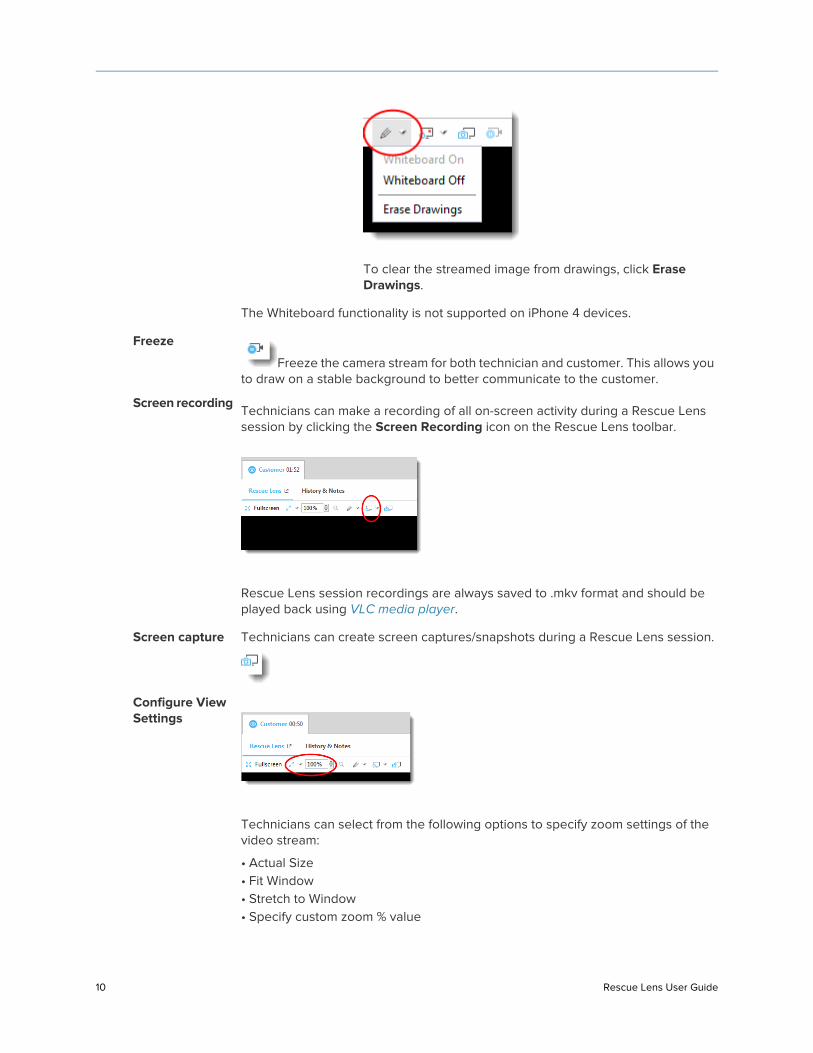
To clear the streamed image from drawings, click EraseDrawings.
The Whiteboard functionality is not supported on iPhone 4 devices.
Freeze the camera stream for both technician and customer. This allows youto draw on a stable background to better communicate to the customer.
Freeze
Technicians can make a recording of all on-screen activity during a Rescue Lenssession by clicking the Screen Recording icon on the Rescue Lens toolbar.
Screen recording
Rescue Lens session recordings are always saved to .mkv format and should beplayed back using VLC media player.
Technicians can create screen captures/snapshots during a Rescue Lens session.Screen capture
Configure ViewSettings
Technicians can select from the following options to specify zoom settings of thevideo stream:
• Actual Size• Fit Window• Stretch to Window• Specify custom zoom % value
Rescue Lens User Guide10
Note: Rescue Lens utilizes HD video streaming with adaptive video qualityto automatically adjust video stream quality based on the available bandwidth.
During a Lens session started from the Rescue Technician Console, Rescue Lensautomatically adjusts the quality of the video stream to suit the quality of service
Manage VideoQuality
provided by the carrier network. The support technician can, however, also changethe video quality manually at any point during the session.
Rescue Lens uses three video stream quality presets.
ActivatingChatCommand
Frame RateResolution foriOS
Resolution forAndroid
Preset Value
_!videoquality high
18 FPS640*480Actual ScreenSize
High
_!videoquality medium
15 FPS480*360352*288
320*244(Nexus 4)
Medium
_!videoquality low
5 FPS480*360352*288
320*244(Nexus 4)
Low
The default setting for each session is the High preset value. When the networkcannot transfer the necessary volume of traffic, Lens temporarily decreases thevideo quality to a lower preset value. The technician can also change the videoquality manually at any point during the session by typing the correspondingcommand in the Chat field.
Tip: Examples for the need to decrease video quality:
• To limit the bandwidth consumed by the video stream• To support video streaming on networks having a bandwidth lower than
400 kbps• In case of slow cellular networks, the automatic network adaptation may
produce slow adaptation, or may stop streaming. To ensure quickeradaptation, use the medium or low preset values
What Can the Customer Do?During a Rescue Lens session, the customer can perform the following actions.
Figure 1: Lens as experienced by the customer
11Copyright © 2018 LogMeIn, Inc.
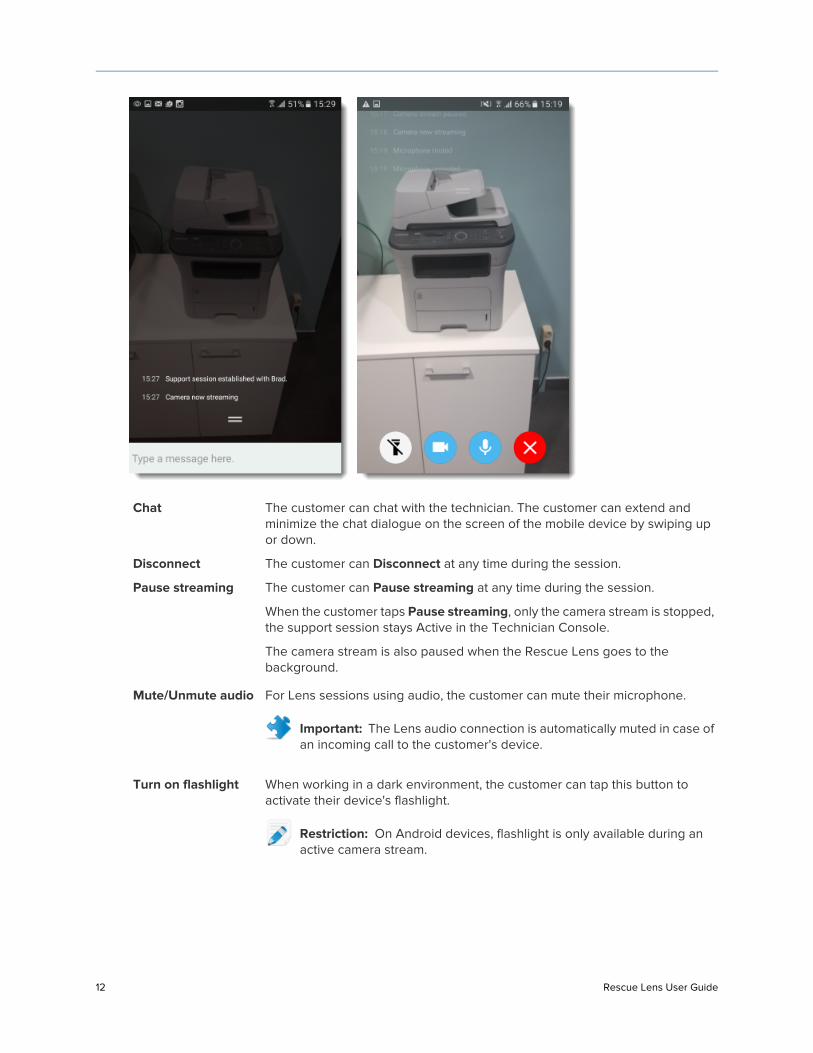
The customer can chat with the technician. The customer can extend andminimize the chat dialogue on the screen of the mobile device by swiping upor down.
Chat
The customer can Disconnect at any time during the session.Disconnect
The customer can Pause streaming at any time during the session.
When the customer taps Pause streaming, only the camera stream is stopped,the support session stays Active in the Technician Console.
Pause streaming
The camera stream is also paused when the Rescue Lens goes to thebackground.
For Lens sessions using audio, the customer can mute their microphone.Mute/Unmute audio
Important: The Lens audio connection is automatically muted in case ofan incoming call to the customer's device.
When working in a dark environment, the customer can tap this button toactivate their device's flashlight.
Turn on flashlight
Restriction: On Android devices, flashlight is only available during anactive camera stream.
Rescue Lens User Guide12
Index
A
audio 9
C
Chat 9
D
domain 3
E
End session 9
F
Flashlight 9Freeze 9
H
Hold session 9
M
managing a Rescue Lens session 9media requirement 3Multi-object tracking 9
mute 9
P
Pause streaming 9port 3
S
screen capture 9Screen recording 9snapshot 9System requirements 3
T
Transfer session 9
U
unmute 9
V
video quality 9
W
Whiteboard 9