Embed Size (px)
Citation preview

PR
AC
TIC
AL T
AS
K M
AN
UA
L
Level 2 Diploma in Dry Lining (6713-23) Task Manual
September 2016 Version 1.2

Contents
Candidate details 2
Instructions to candidates 3
Unit 254 Install Suspended Ceiling Systems 4
Task 1 Prepare to install ceiling systems 4
Task 2 Set out and install ceiling systems 6
Unit 255 Install Partitions 10
Task 1 Prepare to install a metal stud partition 10
Task 2 Set out and install a metal stud partition 12
Unit 256 Prepare to install wall linings and encasement systems 16 Task 1 Prepare to install a wall lining to a solid background and an encasement system to a beam
16
Task 2 Set out and install a wall lining to a solid background and an encasement system to a beam
18
Unit 257 Fix sheet materials using direct bond method 22
Task 1 Prepare to install plasterboards using direct bond method 22
Task 2 Install and fix plasterboards using direct bond method to a background area with a window opening and a pier 24
Unit 258 Apply taping and jointing systems to plasterboard 28
Task 1 Prepare to apply and finish taping and jointing systems to a background area with a window opening and a pier or a junction partition 28
Task 2 Apply and finish taping and jointing systems to a background area with a window opening and a pier or a junction partition 30
Unit 260 Apply finishing plaster to plasterboard 34
Task 1 Prepare to apply finishing plaster to a background area with a window opening and a pier or a junction partition 34
Task 2 Apply finishing plaster to a background area with a window opening and a pier or a junction partition 36
Unit 261 Apply and finish sprayed plasters to plasterboard 40
Task 1 Prepare to operate spray machine, mix, apply and finish sprayed setting plaster to a background area with a window opening and a pier or a junction partition 40
Task 2 Operate spray machine, mix and apply and finish sprayed setting plaster to a background area with a window opening and a pier or a junction partition 42
Drawings and diagrams 47
Unit 254 Figure 1: Install Suspended Ceiling Systems 47
Unit 254 Figure 2: Install Suspended Ceiling Systems 478
Unit 255 Figure 1: Install Partitions 49
Unit 256 Figure 1: Prepare to install wall linings and encasement systems 50
Unit 256 Figure 2: Prepare to install wall linings and encasement systems 501
Unit 256 Figure 3: Prepare to install wall linings and encasement systems 512

Unit 257 Figure 1: Fix sheet materials using direct bond method 53
Unit 257 Figure 2: Fix sheet materials using direct bond method 534
Unit 258 Apply taping and jointing systems to plasterboard 545
Unit 260 Apply finishing plaster to plasterboard 556
Unit 261 Apply and finish sprayed plasters to plasterboard 567
Unit assessment overview 578
Practical task completion record 58
Unit feedback and action planning form 62

Version and date Change detail Section
1.2 September 2016 Added table for Authenticity and IQA/QC sampling
Practical task completion record
Phone numbers deleted;
City & Guilds Group paragraph updated
Final page

Practical task manual: Level 2 Diploma in Dry Lining (6713-23) 2
Candidate details
This Practical task manual is a record of your achievement in practical assessments. You must keep it in good condition and it must be stored in a safe place by your Assessor.
Please fill in all of your details before you carry out any assessments.
Candidate Details
Surname Forename(s)
City & Guilds enrolment number
Centre Details
Name Centre No
I understand the requirements of the qualification and that all the work towards the assessments must be my own.
Candidate signature
Assessor name (please print)
Signed
Date

Practical task manual: Level 2 Diploma in Dry Lining (6713-23) 3
Instructions to candidates
About this document
This Practical task manual contains all of the practical assessment for the 6713-23 Level 2 Diploma in Dry Lining.
Practical tasks
These tasks allow you show your practical skills and are usually graded pass, merit or distinction – a few of the tasks are pass only. These tasks will be assessed by your assessor watching how you carry out the tasks and checking your final pieces of work.
Before you carry out the task you will be told how it will be assessed and you should read the observation checklist at the end of each task so you know what you need to do to get each grade.
You can ask your assessor for help in understanding the task instructions, but all of the work must be your own.
Health and safety
You must use safe working practices at all times.
You are responsible for your own safety and the safety of others. If you behave in an unsafe way, you will be stopped and given a warning. If you do not meet all of the Health and Safety requirements, the assessment will be stopped. Your assessor will not be able to let you try the task again until they are sure you can work safely.
Time considerations
Each task shows how long it is likely to take. This is for guidance and so you can plan your work. If you have a good reason for needing more time you must explain this to your assessor as soon as possible so they can decide whether you can have more time.
Security
Where an assignment is taken over more than one session, all documentation, paperwork and work products must be labelled carefully with your name and kept securely at the centre. Your assessor will give you directions about how to leave your work.
Opportunities to repeat tasks
The tasks are ‘end tests’ so you will only be asked to take the assessment when you have had the chance to do all of the learning and practice you need. You will be able to try the whole task again if you do not pass, but you will not be able to take the assessment again just to try to get a better grade.
Feedback
As well as telling you the result for the task, your assessor will give you feedback. They will give you a feedback sheet with details of what you could do to improve, and also what you did well. This will help you to prepare for other assessments or to retake the assessment if you need to.

Practical task manual: Level 2 Diploma in Dry Lining (6713-23) 4
Unit 254 Install Suspended Ceiling Systems Task 1 Prepare to install ceiling systems
Task coversheet
Expected time 1 hour
Task instructions Prepare to set out and install a metal furring ceiling system to a background area to contain a spotlight opening and an access panel opening.
Using the working drawing and specification, calculate the required quantities of materials and components for the installation (2.1), and then identify the position of the spotlight opening and access panel opening (2.3).
Interpret the risk assessment provided for the installation (2.2), and select the appropriate PPE (2.4).
Select the suitable access equipment (2.8), metal components, fixings, tools (2.5), and sheet materials (2.6) for the installation.
Prepare and protect the working and surrounding area for installation (2.7).
Handle and store the materials and components required for installation according to manufacturer’s guidance (2.10).
Report any problems or issues to the authorised personnel (2.9).
Diagrams Unit 254 Figure 1: Install Suspended Ceiling Systems – page 48
Unit 254 Figure 2: Install Suspended Ceiling Systems – page 48
Assessment criteria checklist
No. Criteria Pass Merit Distinction
2.1 calculated required quantities of materials from specifications and working drawings
working drawing
specification
2.2 interpreted risk assessments for safely installing ceiling systems
risk assessment
2.3 used drawings to identify the location of access panel and spotlight openings
2.4 selected appropriate personal protective equipment (PPE)
2.5 selected tools
2.6 selected metal components, sheet materials and fixings
2.7 prepared and protected working and surrounding areas
2.8 selected access equipment for installing

Practical task manual: Level 2 Diploma in Dry Lining (6713-23) 5
No. Criteria Pass Merit Distinction
2.9 reported problems to authorized personnel (if occurred)
or answered question about reporting procedure correctly
2.10 handled and stored materials in accordance with manufacturers’ guidelines
manufacturer’s guidance
Task grading rules Task grade:
Every activity in the checklist must be successfully achieved to award a pass grade.
Assessor Name
Assessor Signature
Date
Practical task manual: Level 2 Diploma in Dry Lining (6713-23) 6
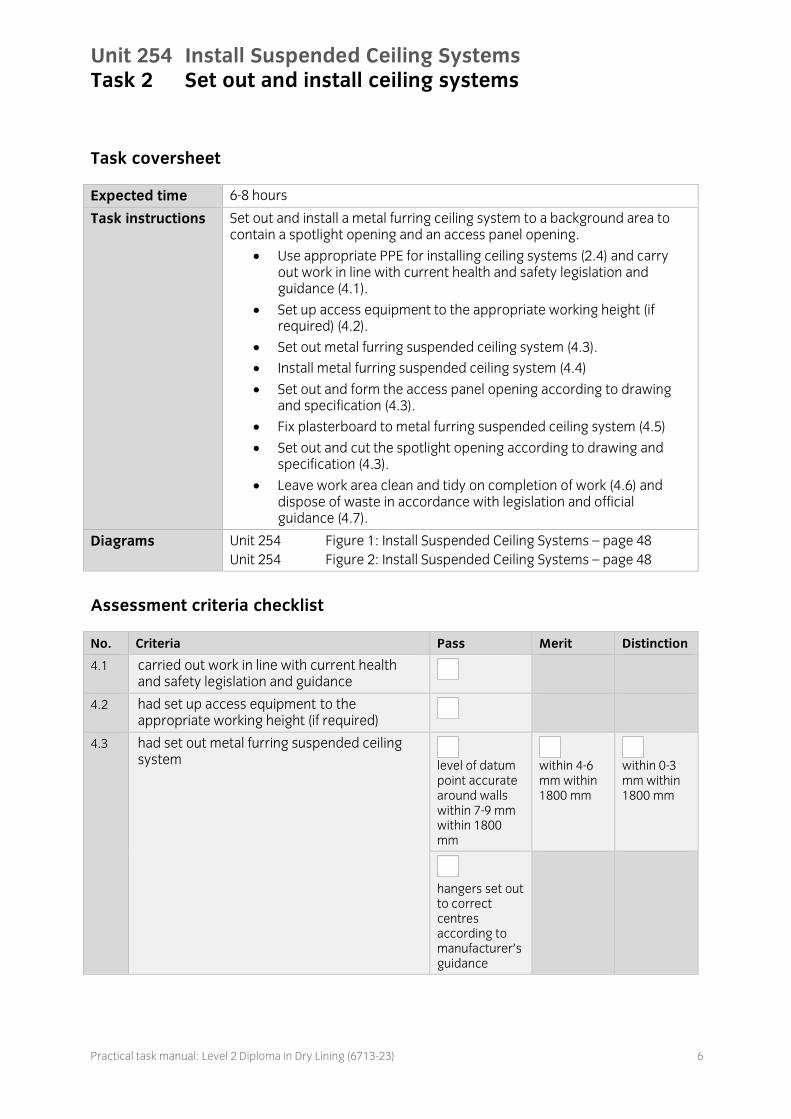
Unit 254 Install Suspended Ceiling Systems Task 2 Set out and install ceiling systems
Task coversheet
Expected time 6-8 hours
Task instructions Set out and install a metal furring ceiling system to a background area to contain a spotlight opening and an access panel opening.
Use appropriate PPE for installing ceiling systems (2.4) and carry out work in line with current health and safety legislation and guidance (4.1).
Set up access equipment to the appropriate working height (if required) (4.2).
Set out metal furring suspended ceiling system (4.3).
Install metal furring suspended ceiling system (4.4)
Set out and form the access panel opening according to drawing and specification (4.3).
Fix plasterboard to metal furring suspended ceiling system (4.5)
Set out and cut the spotlight opening according to drawing and specification (4.3).
Leave work area clean and tidy on completion of work (4.6) and dispose of waste in accordance with legislation and official guidance (4.7).
Diagrams Unit 254 Figure 1: Install Suspended Ceiling Systems – page 48
Unit 254 Figure 2: Install Suspended Ceiling Systems – page 48
Assessment criteria checklist
No. Criteria Pass Merit Distinction
4.1 carried out work in line with current health and safety legislation and guidance
4.2 had set up access equipment to the appropriate working height (if required)
4.3 had set out metal furring suspended ceiling system
level of datum point accurate around walls within 7-9 mm within 1800 mm
within 4-6 mm within 1800 mm
within 0-3 mm within 1800 mm
hangers set out to correct centres according to manufacturer’s guidance

Practical task manual: Level 2 Diploma in Dry Lining (6713-23) 7
No. Criteria Pass Merit Distinction
4.4 installed metal furring suspended ceiling system
perimeter channels fixed to correct centres
perimeter channels level within 7-9 mm within 1800 mm
within 4-6 mm within 1800 mm
within 0-3 mm within 1800 mm
hangers formed according to manufacturer’s guidance
hangers installed according to manufacturer’s guidance
bearers cut to size according to drawing
bearers installed at 1200 mm maximum centres and according to manufacturer’s guidance
metal furrings cut to size according to drawing
metal furrings installed at 400 or 450 mm maximum centres and according to manufacturer’s guidance

Practical task manual: Level 2 Diploma in Dry Lining (6713-23) 8
No. Criteria Pass Merit Distinction
ceiling is level diagonally across from point A to C and B to D, within 7-9 mm within 1800 mm
within 4-6 mm within 1800 mm
within 0-3 mm within 1800 mm
2.4 used appropriate PPE for installing ceiling systems
4.3 had set out and formed the access panel opening according to drawing and specification
access panel opening constructed accurately (drawing and specification), according to manufacturer’s guidance
access panel opening measured and positioned accurately (to drawing and specification), in ceiling within 7-9 mm
within 4-6 mm
within 0-3 mm
access panel opening is square and with a 7-9 mm tolerance around each side of the opening
with a 4-6 mm tolerance
with a 0-3 mm tolerance
4.5 fixed plasterboard to metal furring suspended ceiling system
boards measured, cut, fixed, staggered and aligned correctly
used correct fixings at correct centres
all fixings to correct depths
all gaps in joints between 4-5 mm
between 2-3 mm
butted joints

Practical task manual: Level 2 Diploma in Dry Lining (6713-23) 9
No. Criteria Pass Merit Distinction
boards cut around access opening to size
cut board finished neatly (no rips or torn paper)
4.3 had set out and cut the spotlight opening according to drawing and specification
spotlight opening measured and positioned accurately (to drawing and specification), in ceiling within 7-9 mm
in ceiling within 4-6 mm
in ceiling within 0-3 mm
spotlight opening cut to correct size
cut board finished neatly (no rips or torn paper)
4.6 left area clean and tidy on completion of work
4.7 disposed of waste in accordance with legislation and official guidance
Task grading rules Task grade:
Every activity in the checklist must be successfully achieved to award a pass grade.
In addition to the above, 9 out of 10 graded activities in the checklist must be achieved to at least a merit standard to award a merit grade.
In addition to both of the above, 6 out of 7 graded activities in the checklist must be achieved to at least a distinction standard to award a distinction grade.
Assessor Name
Assessor Signature
Date
Practical task manual: Level 2 Diploma in Dry Lining (6713-23) 10
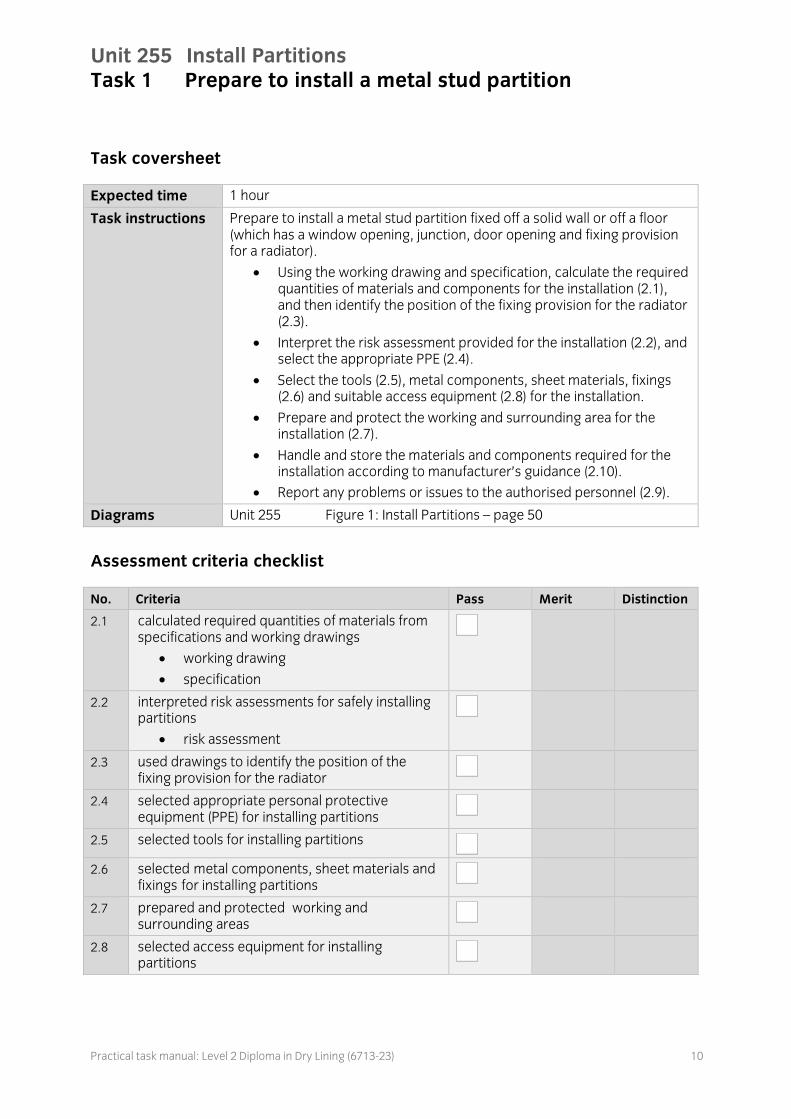
Unit 255 Install Partitions Task 1 Prepare to install a metal stud partition
Task coversheet
Expected time 1 hour
Task instructions Prepare to install a metal stud partition fixed off a solid wall or off a floor (which has a window opening, junction, door opening and fixing provision for a radiator).
Using the working drawing and specification, calculate the required quantities of materials and components for the installation (2.1), and then identify the position of the fixing provision for the radiator (2.3).
Interpret the risk assessment provided for the installation (2.2), and select the appropriate PPE (2.4).
Select the tools (2.5), metal components, sheet materials, fixings (2.6) and suitable access equipment (2.8) for the installation.
Prepare and protect the working and surrounding area for the installation (2.7).
Handle and store the materials and components required for the installation according to manufacturer’s guidance (2.10).
Report any problems or issues to the authorised personnel (2.9).
Diagrams Unit 255 Figure 1: Install Partitions – page 50
Assessment criteria checklist
No. Criteria Pass Merit Distinction
2.1 calculated required quantities of materials from specifications and working drawings
working drawing
specification
2.2 interpreted risk assessments for safely installing partitions
risk assessment
2.3 used drawings to identify the position of the fixing provision for the radiator
2.4 selected appropriate personal protective equipment (PPE) for installing partitions
2.5 selected tools for installing partitions
2.6 selected metal components, sheet materials and fixings for installing partitions
2.7 prepared and protected working and surrounding areas
2.8 selected access equipment for installing partitions
Practical task manual: Level 2 Diploma in Dry Lining (6713-23) 11
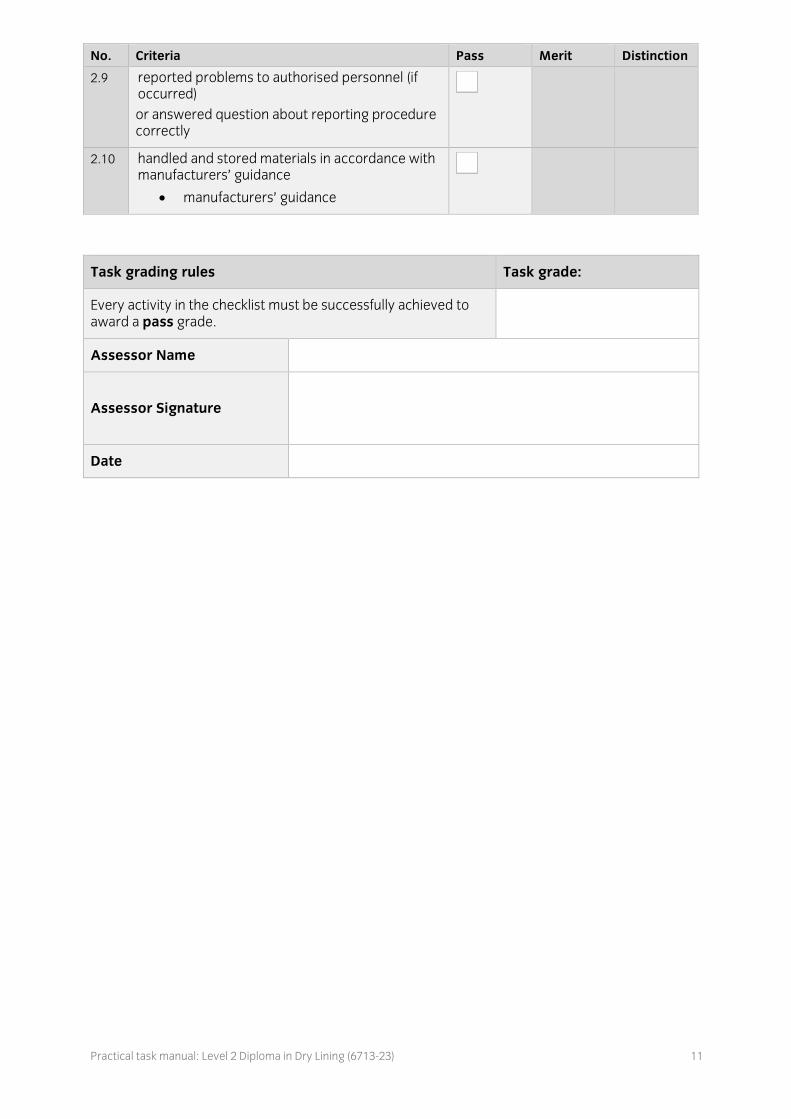
No. Criteria Pass Merit Distinction
2.9 reported problems to authorised personnel (if occurred)
or answered question about reporting procedure correctly
2.10 handled and stored materials in accordance with manufacturers’ guidance
manufacturers’ guidance
Task grading rules Task grade:
Every activity in the checklist must be successfully achieved to award a pass grade.
Assessor Name
Assessor Signature
Date
Practical task manual: Level 2 Diploma in Dry Lining (6713-23) 12
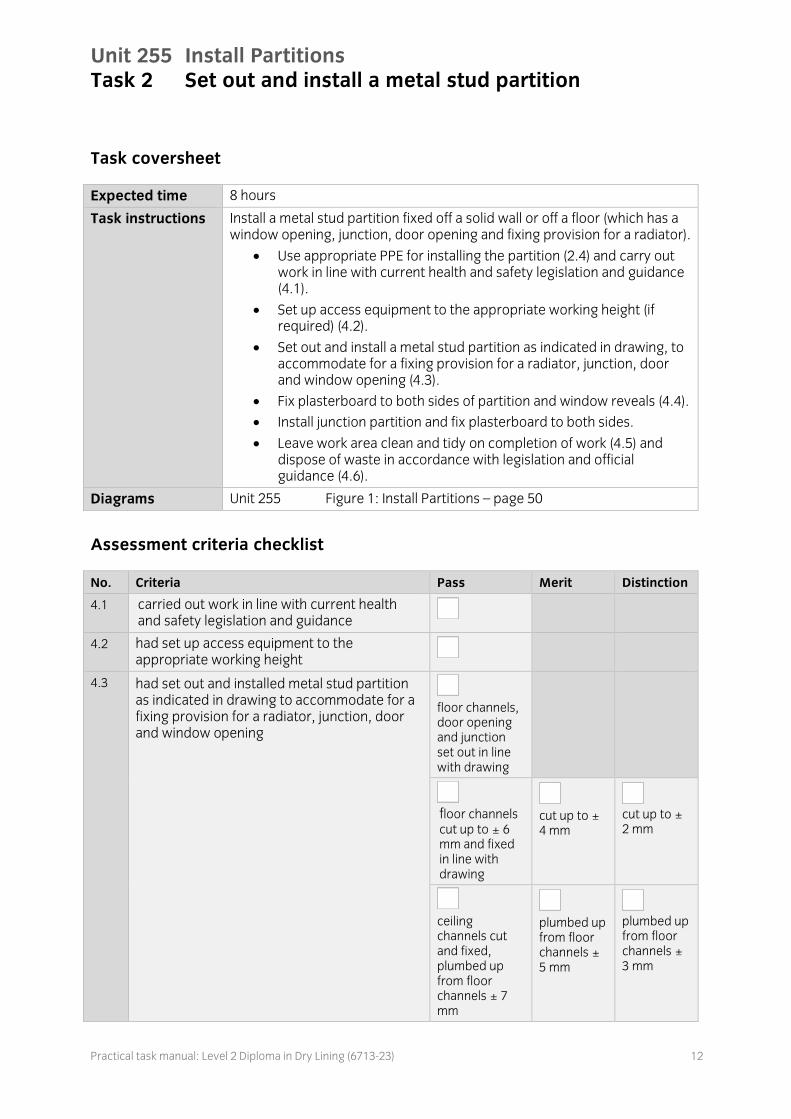
Unit 255 Install Partitions Task 2 Set out and install a metal stud partition
Task coversheet
Expected time 8 hours
Task instructions Install a metal stud partition fixed off a solid wall or off a floor (which has a window opening, junction, door opening and fixing provision for a radiator).
Use appropriate PPE for installing the partition (2.4) and carry out work in line with current health and safety legislation and guidance (4.1).
Set up access equipment to the appropriate working height (if required) (4.2).
Set out and install a metal stud partition as indicated in drawing, to accommodate for a fixing provision for a radiator, junction, door and window opening (4.3).
Fix plasterboard to both sides of partition and window reveals (4.4).
Install junction partition and fix plasterboard to both sides.
Leave work area clean and tidy on completion of work (4.5) and dispose of waste in accordance with legislation and official guidance (4.6).
Diagrams Unit 255 Figure 1: Install Partitions – page 50
Assessment criteria checklist
No. Criteria Pass Merit Distinction
4.1 carried out work in line with current health and safety legislation and guidance
4.2 had set up access equipment to the appropriate working height
4.3 had set out and installed metal stud partition as indicated in drawing to accommodate for a fixing provision for a radiator, junction, door and window opening
floor channels, door opening and junction set out in line with drawing
floor channels cut up to ± 6 mm and fixed in line with drawing
cut up to ± 4 mm
cut up to ± 2 mm
ceiling channels cut and fixed, plumbed up from floor channels ± 7 mm
plumbed up from floor channels ± 5 mm
plumbed up from floor channels ± 3 mm

Practical task manual: Level 2 Diploma in Dry Lining (6713-23) 13
No. Criteria Pass Merit Distinction
metal studs cut to size and set out to form window and door openings
window opening head and sill channels extended down/up the stud to a minimum of 150 mm
two fixings either side of each stud
window opening width measured across centre within 8-10 mm
within 4-7 mm
within 0-3 mm
window opening height within 8-10 mm
within 4-7 mm
within 0-3 mm
door opening head channels extended down the stud to a minimum of 150 mm
two fixings either side of each stud
door opening floor channel extended up the stud to a minimum of 300
four fixings at the foot of the stud
door opening width measured across centre within 8-10 mm
within 4-7 mm
within 0-3 mm
door opening height within 8-10 mm
within 4-7 mm
within 0-3 mm

Practical task manual: Level 2 Diploma in Dry Lining (6713-23) 14
No. Criteria Pass Merit Distinction
individual studs installed according to manufacturer’s guidance on centres
provision for fixing radiator installed in line with drawing
stud (nib) installed to form junction to project outwardly to correct dimensions
junction partition installed square along top and bottom ± 5 mm within 1.8 m
± 3 mm within 1.8 m
junction partition return end plumb ± 3 mm within 1.8 m
± 3 mm within 1.8 m
4.4 fixed plasterboard to both sides of partition and window reveals (including junction partition)
boards measured, cut, fixed and aligned correctly
used correct fixings at correct centres
all fixings to correct depths
all gaps in joints and angles between 3-5 mm
between 2-3 mm
butted joints and
bound edged external angles

Practical task manual: Level 2 Diploma in Dry Lining (6713-23) 15
No. Criteria Pass Merit Distinction
4.3
4.4
installed junction partition
and fixed plasterboard to both sides
(use checklist in row above for 4.4)
junction fixed, to back up stud (if required), to correct dimension
partition installed plumb ± 8 mm within 1.8 m
± 5 mm within 1.8 m
± 3 mm within 1.8 m
2.4 used appropriate PPE for installing the partition
4.5 left area clean and tidy on completion of work
4.6 disposed of waste in accordance with legislation and official guidance
Task grading rules Task grade:
Every activity in the checklist must be successfully achieved to award a pass grade.
In addition to the above, 12 out of 14 graded activities in the checklist must be achieved to at least a merit standard to award a merit grade.
In addition to both of the above, 7 out of 8 graded activities in the checklist must be achieved to at least a distinction standard to award a distinction grade.
Assessor Name
Assessor Signature
Date
Practical task manual: Level 2 Diploma in Dry Lining (6713-23) 16
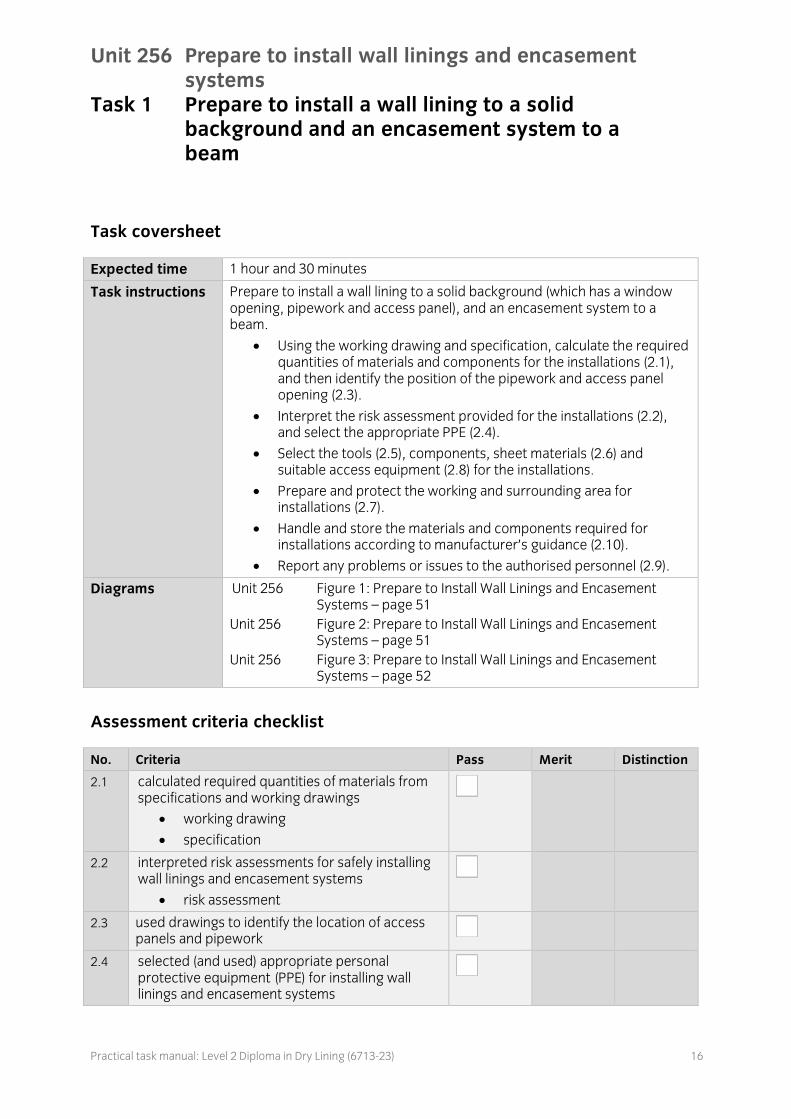
Unit 256 Prepare to install wall linings and encasement systems
Task 1 Prepare to install a wall lining to a solid background and an encasement system to a beam
Task coversheet
Expected time 1 hour and 30 minutes
Task instructions Prepare to install a wall lining to a solid background (which has a window opening, pipework and access panel), and an encasement system to a beam.
Using the working drawing and specification, calculate the required quantities of materials and components for the installations (2.1), and then identify the position of the pipework and access panel opening (2.3).
Interpret the risk assessment provided for the installations (2.2), and select the appropriate PPE (2.4).
Select the tools (2.5), components, sheet materials (2.6) and suitable access equipment (2.8) for the installations.
Prepare and protect the working and surrounding area for installations (2.7).
Handle and store the materials and components required for installations according to manufacturer’s guidance (2.10).
Report any problems or issues to the authorised personnel (2.9).
Diagrams Unit 256 Figure 1: Prepare to Install Wall Linings and Encasement Systems – page 51
Unit 256 Figure 2: Prepare to Install Wall Linings and Encasement Systems – page 51
Unit 256 Figure 3: Prepare to Install Wall Linings and Encasement Systems – page 52
Assessment criteria checklist
No. Criteria Pass Merit Distinction
2.1 calculated required quantities of materials from specifications and working drawings
working drawing
specification
2.2 interpreted risk assessments for safely installing wall linings and encasement systems
risk assessment
2.3 used drawings to identify the location of access panels and pipework
2.4 selected (and used) appropriate personal protective equipment (PPE) for installing wall linings and encasement systems

Practical task manual: Level 2 Diploma in Dry Lining (6713-23) 17
No. Criteria Pass Merit Distinction
2.5 selected tools for installing wall linings and encasement systems
2.6 selected components, sheet materials and fixings for installing wall linings and encasement systems
2.7 prepared and protected working and surrounding areas
2.8 selected access equipment for installing wall linings and encasement systems
2.10 handled and stored materials in accordance with manufacturers’ guidance
manufacturers’ guidance
2.9 reported problems to authorised personnel (if occurred)
or answered question about reporting procedure correctly
Task grading rules Task grade:
Every activity in the checklist must be successfully achieved to award a pass grade.
Assessor Name
Assessor Signature
Date

Practical task manual: Level 2 Diploma in Dry Lining (6713-23) 18
Unit 256 Prepare to install wall linings and encasement systems
Task 2 Set out and install a wall lining to a solid background and an encasement system to a beam
Task coversheet
Expected time 10 hours and 30 mins
Task instructions Set out and install a wall lining to a solid background (which has a window opening, pipework and access panel), and an encasement system to a beam.
Use appropriate PPE for installing wall linings and encasement systems (2.4) and carry out work in line with current health and safety legislation and guidance (4.1).
Set up access equipment to the appropriate working height (if required) (4.2).
Set out to include pipework, window opening and access panel and install wall linings and framed encasement system (4.3).
Install sheet material according to specification.
Leave work area clean and tidy on completion of work (4.4) and dispose of waste in accordance with legislation and official guidance (4.5).
Diagrams Unit 256 Figure 1: Prepare to Install Wall Linings and Encasement Systems – page 51
Unit 256 Figure 2: Prepare to Install Wall Linings and Encasement Systems – page 51
Unit 256 Figure 3: Prepare to Install Wall Linings and Encasement Systems – page 52
Assessment criteria checklist
No. Criteria Pass Merit Distinction
2.4 used appropriate PPE for installing wall linings and encasement systems
4.1 carried out work in line with current health and safety legislation and guidance
4.2 had set up access equipment to the appropriate working height (if required)
4.3 had set out to include pipework and access panel and window opening and
installed wall linings and framed encasement system
metal furrings cut to size to fit between floor and ceiling channels

Practical task manual: Level 2 Diploma in Dry Lining (6713-23) 19
No. Criteria Pass Merit Distinction
metal furrings fixed according to manufacturer’s guidance
brackets fixed level and to correct centres
brackets fixed to wall securely, and vertically inline, according to manufacturer’s guidance
metal furring cut to size and fixed to brackets securely and plumb to 7-9 mm within 1.8 m
to 4-6 mm within 1.8 m
to 0-3 mm within 1.8 m
metal furrings fixed to floor and ceiling channels at window opening
window opening head and sill channels extended down/up the stud to a minimum of 150 mm
two fixings either side of each stud
1 window reveal or soffit return plumb and square with equal margins
2 window reveals or soffit returns plumb and square with equal margins
3 window reveals/soffit returns plumb/level and square with equal margins

Practical task manual: Level 2 Diploma in Dry Lining (6713-23) 20
No. Criteria Pass Merit Distinction
clips fixed to beam, and metal furrings attached correctly, according to manufacturer’s guidance
metal furrings cut and fixed securely to size, to form the access panel opening
4.3 installed sheet material according to specification
boards measured, cut, fixed and aligned correctly
used correct fixings at correct centres
all fixings to correct depths
all gaps in joints and angles between 4-5 mm
between 2-3 mm
butted joints and
bound edged external angles
access panel opening cut to correct size
cut board finished neatly (no rips or torn paper)
pipework opening measured and positioned accurately (to drawing and specification), in wall within 7-9 mm
in wall within 4-6 mm
in wall within 0-3 mm
pipework opening cut to correct size
cut board finished neatly (no rips or torn paper)

Practical task manual: Level 2 Diploma in Dry Lining (6713-23) 21
No. Criteria Pass Merit Distinction
4.4 left work area clean and tidy on completion of work
4.5 disposed of waste in accordance with legislation and official guidance
Task grading rules Task grade:
Every activity in the checklist must be successfully achieved to award a pass grade.
In addition to the above, 7 out of 8 graded activities in the checklist must be achieved to at least a merit standard to award a merit grade.
In addition to both of the above, all 4 graded activities in the checklist must be achieved to at least a distinction standard to award a distinction grade.
Assessor Name
Assessor Signature
Date

Practical task manual: Level 2 Diploma in Dry Lining (6713-23) 22
Unit 257 Fix sheet materials using direct bond method Task 1 Prepare to install plasterboards using direct
bond method
Task coversheet
Expected time 1 hour
Task instructions Prepare to install and fix plasterboards using direct bond method to a background area with a window opening, electrical socket (backbox) opening and a pier.
Using the working drawing and specification, calculate the required quantities of materials for the installation (2.1) and identify the location of the electrical socket (backbox) opening (2.4)
Interpret the risk assessment provided for the installation (2.2), and select the appropriate PPE (2.5).
Assess the suitability of the background for receiving direct bond adhesive (2.3)
Select the suitable access equipment (2.8), and tools and equipment (2.6) for the installation.
Prepare and protect the working and surrounding area for installation (2.7).
Handle and store the materials required for installation according to manufacturer’s guidance (2.10).
Report any problems or issues to the authorised personnel (2.9).
Diagrams Unit 257 Figure 1: Fix Sheet Materials Using Direct Bond Method – page 54
Unit 257 Figure 2: Fix Sheet Materials Using Direct Bond Method – page 54
Assessment criteria checklist
No. Criteria Pass Merit Distinction
2.1 calculated required quantities of materials from specifications and working drawings
specification
working drawings
2.2 interpreted risk assessments for safely fixing plasterboards using direct bond
risk assessments
2.3 assessed the suitability of the background prior to installing plasterboard using direct bond method
manufacturer’s guidance
2.4 used drawings to identify the location of services
working drawings
2.5 selected appropriate personal protective equipment (PPE)

Practical task manual: Level 2 Diploma in Dry Lining (6713-23) 23
No. Criteria Pass Merit Distinction
2.6 selected tools and equipment to install plasterboards
2.7 prepared and protected working and surrounding areas
2.8 selected access equipment for installing plasterboards
2.9 reported problems when mixing, selecting and fixing materials (if occurred)
or answered question about reporting procedure correctly
2.10 handled and stored materials in accordance with manufacturers’ guidelines
manufacturers’ guidance
Task grading rules Task grade:
Every activity in the checklist must be successfully achieved to award a pass grade.
Assessor Name
Assessor Signature
Date

Practical task manual: Level 2 Diploma in Dry Lining (6713-23) 24
Unit 257 Fix sheet materials using direct bond method Task 2 Install and fix plasterboards using direct
bond method to a background area with a window opening and a pier.
Task coversheet
Expected time 11 hours
Task instructions Install and fix plasterboards using direct bond method to a background area with a window opening, electrical socket (backbox) opening and a pier.
Use appropriate PPE for installing plasterboards using direct bond method (2.4) and carry out work in line with current health and safety legislation and guidance (4.1).
Set up access equipment to the appropriate working height (if required) (4.2).
Identify, prepare background and set out for installing plasterboard using direct bond method. (4.4).
Measure and cut plasterboards to size. (4.4).
Mix direct bond adhesives/compounds (4.3).
Install plasterboards using direct bond method (4.4).
Leave work area clean and tidy on completion of work (4.5) and dispose of waste in accordance with legislation and official guidance (4.6).
Diagrams Unit 257 Figure 1: Fix Sheet Materials Using Direct Bond Method – page 54
Unit 257 Figure 2: Fix Sheet Materials Using Direct Bond Method – page 54
Assessment criteria checklist
No. Criteria Pass Merit Distinction
4.1 carried out work in line with current health and safety legislation and guidance
2.4 used appropriate PPE for installing plasterboards using direct bond method
4.2 had set up access equipment to the appropriate working height (if required)
4.4 identified, prepared background and set out for installing plasterboard using direct bond method
identified and prepared background appropriately to receive bonding adhesive

Practical task manual: Level 2 Diploma in Dry Lining (6713-23) 25
No. Criteria Pass Merit Distinction
set out installation guide lines /chalk lines to floor for window wall and pier according to drawing (with no more than 3 adjustments)
set out with minor adjustments (1-2)
set out with no adjustments
set out installation guide lines /chalk lines to window according to drawing (with no more than 3 adjustments)
set out with minor adjustments (1-2)
set out with no adjustments
4.4 measured and cut plasterboards to size
plasterboards measured and cut correctly to window wall and pier (and used no more than 2 additional sheets of plasterboards)
used one additional sheet of plasterboard for re-cuts
used correct amount of plasterboard with no additional sheets required
4.3 mixed direct bond adhesives and compounds
adhesives/compound mixed to correct consistency with minimal wastage
mixing tools and equipment left clean and tidy
4.4 installed plasterboards using direct bond method
Note: The total tolerance for the grading is the result of assessing the individual tolerances of the six points (A, B,C ,D) on the working drawing and totalling them.
dabs applied to window wall (including, reveals, soffits and electrical socket) and pier to form a perimeter seal according to manufacturer’s guidance

Practical task manual: Level 2 Diploma in Dry Lining (6713-23) 26
No. Criteria Pass Merit Distinction
dabs measured correctly and applied to window wall and pier to correct centres, according to manufacturer’s guidance
plasterboard installed to window wall according to drawing and:
*plumb from points A to D , B to C, and
*lineable from points A to B and C to D, and
*diagonal from points B to D and A to C , and
*plumbed and lined to total tolerance of 42mm for all points
plumbed and lined to total tolerance of 30 mm for all points
plumbed and lined to total tolerance of 18 mm for all points
1 window return plumb/level and square with equal margins
2 window returns plumb/level and square with equal margins
3 window returns plumb/level and square with equal margins
electrical socket (back box) opening cut out in correct position and size in plasterboard (to drawing), with a 7-9 mm tolerance around each side of the socket
cut out with a 4-6 mm tolerance around each side of the socket
cut out with a 0-3 mm tolerance around each side of the socket
pier return and face is square and plumb

Practical task manual: Level 2 Diploma in Dry Lining (6713-23) 27
No. Criteria Pass Merit Distinction
parallel margins along length of pier return with a 7-9 mm tolerance
margins with a 4-6 mm tolerance
margins with a 0-3 mm tolerance
all gaps in joints between 4-5 mm
between 2-3 mm
butted joints
4.5 left area clean and tidy on completion of work
4.6 disposed of waste in accordance with legislation and official guidance
Task grading rules Task grade:
Every activity in the checklist must be successfully achieved to award a pass grade.
In addition to the above, 7 out of 8 graded activities in the checklist must be achieved to at least a merit standard to award a merit grade.
In addition to both of the above, all 7 out of 8 graded activities in the checklist must be achieved to at least a distinction standard to award a distinction grade.
Assessor Name
Assessor Signature
Date

Practical task manual: Level 2 Diploma in Dry Lining (6713-23) 28
Unit 258 Apply taping and jointing systems to plasterboard
Task 1 Prepare to apply and finish taping and jointing systems to a background area with a window opening and a pier or a junction partition
Task coversheet
Expected time 1 hour
Task instructions Prepare to apply and finish taping and jointing systems to a background area with a window opening and a pier or a junction partition.
Using the working drawing and specification, calculate the required quantities of materials for applying and finishing taping and jointing systems (2.1).
Interpret the risk assessment provided for safely applying and finishing taping and jointing systems (2.2), and select the appropriate PPE (2.3).
Select the suitable access equipment for taping and jointing (2.7), tools and equipment (2.4) and materials and jointing compounds (2.5).
Prepare and protect the working and surrounding areas (2.6).
Handle and store the materials required for installation according to manufacturer’s guidance (2.9).
Report any problems with materials and background surfaces (2.8).
Diagrams Unit 255 Figure 1: Install Partitions – page 50
OR
Unit 257 Figure 1: Fix Sheet Materials Using Direct Bond Method – page 54
Assessment criteria checklist
No. Criteria Pass Merit Distinction
2.1 calculated required quantities of materials from specifications and working drawings
specification
working drawings
2.2 interpreted risk assessments for safely applying and finishing taping and jointing systems
risk assessments
2.3 select appropriate personal protective equipment (PPE)
2.4 selected tools and equipment for applying and finishing taping and jointing systems
2.5 selected materials and jointing compounds according to specification
specification

Practical task manual: Level 2 Diploma in Dry Lining (6713-23) 29
No. Criteria Pass Merit Distinction
2.6 prepared and protected working and surrounding areas
2.7 select accessed equipment for taping and jointing
2.8 reported problems with materials or background surfaces (if occurred)
or answered question about reporting procedure correctly
2.9 handled and stored materials in accordance with manufacturers’ guidelines
manufacturers’ guidance
Task grading rules Task grade:
Every activity in the checklist must be successfully achieved to award a pass grade.
Assessor Name
Assessor Signature
Date

Practical task manual: Level 2 Diploma in Dry Lining (6713-23) 30
Unit 258 Apply taping and jointing systems to plasterboard Task 2 Apply and finish taping and jointing systems
to a background area with a window opening and a pier or a junction partition
Task coversheet
Expected time 12 hours
Task instructions Apply and finish taping and jointing systems to a background area with a window opening and a pier or a junction partition.
Use appropriate PPE for applying and finishing taping and jointing systems (2.4) and carry out work in line with current health and safety legislation and guidance (4.1).
Set up access equipment to the appropriate working height (if required) (4.2).
Fix beads and reinforcement corner tape to external angle and window opening (4.3).
Apply jointing compound and reinforcement tape to all plasterboard joints, external / internal angle and fixings using a minimum of two coats (4.3, 4.4).
Sand all plasterboard joints, external / internal angle and fixings to finish.
Apply primer or sealer to finished plasterboard surface (4.5).
Carry out minor repairs to finished surface (4.6).
Leave work area clean and tidy on completion of work (4.7) and dispose of waste in accordance with legislation and official guidance (4.8).
Diagrams Unit 255 Figure 1: Install Partitions – page 50
OR
Unit 257 Figure 1: Fix Sheet Materials Using Direct Bond Method – page 54
Assessment criteria checklist
No. Criteria Pass Merit Distinction
4.1 carried out work in line with current health and safety legislation and guidance
4.2 had set up access equipment to the appropriate working height (if required)
2.4 used appropriate PPE for applying and finishing taping and jointing systems

Practical task manual: Level 2 Diploma in Dry Lining (6713-23) 31
No. Criteria Pass Merit Distinction
4.3 fixed beads and reinforcement corner tape to external angle and window opening
corner/skim beads cut and fixed accurately to external angle within 7-10 mm of the ceiling line
within 4-6 mm of the ceiling line
within 0-3 mm of the ceiling line
reinforced corner tape fixed around window opening
no blisters present or splitting in reinforcement tape
reinforced corner tape fixed around window opening and aligned in reveals and soffit to ± 2 mm for both window opening sides
reinforced corner tape fixed to reveals and soffits are cut to ± 2 mm for one out of two window opening sides
reinforced corner tape fixed to reveals and soffit cut accurately (with no steps) and flush for both window opening sides
4.3
4.4
applied jointing compound and reinforcement tape to all plasterboard joints, external / internal angles and fixings using a minimum of two coats
all reinforcement paper tape or scrim for straight and internal joints (including window reveal and soffit) cut accurately within 7-10 mm of the ceiling line
within 4-6 mm of the ceiling line
within 0-3 mm of the ceiling line

Practical task manual: Level 2 Diploma in Dry Lining (6713-23) 32
No. Criteria Pass Merit Distinction
jointing compound applied evenly and covering all joints, angles and fixings
unjointed areas are kept clean of jointing compound during the jointing process
no blisters, gauls, grit marks or blemishes / crevasses present on surface of jointing
4.5 sanded all plasterboard joints, external / internal angles and fixings to finish
a maximum of 8 minor defects (scratches , visible high edges or over sanding) present on surface of jointing that can be repaired
a maximum of 6 minor defects
a maximum of 4 minor defects
4.5 applied primer or sealer to finished plasterboard surface
applied coat evenly with no drips/runs and adequate coverage of all area of plasterboard
4.6 carried out minor repairs to finished surface
damaged area filled in, repaired and made good
4.7 left area clean and tidy on completion of work
4.8 disposed of waste in accordance with legislation and official guidance

Practical task manual: Level 2 Diploma in Dry Lining (6713-23) 33
Task grading rules Task grade:
Every activity in the checklist must be successfully achieved to award a pass grade.
In addition to the above, 4 out of 5 graded activities in the checklist must be achieved to at least a merit standard to award a merit grade.
In addition to both of the above, 3 out of 4 graded activities in the checklist must be achieved to at least a distinction standard to award a distinction grade.
Assessor Name
Assessor Signature
Date
Practical task manual: Level 2 Diploma in Dry Lining (6713-23) 34
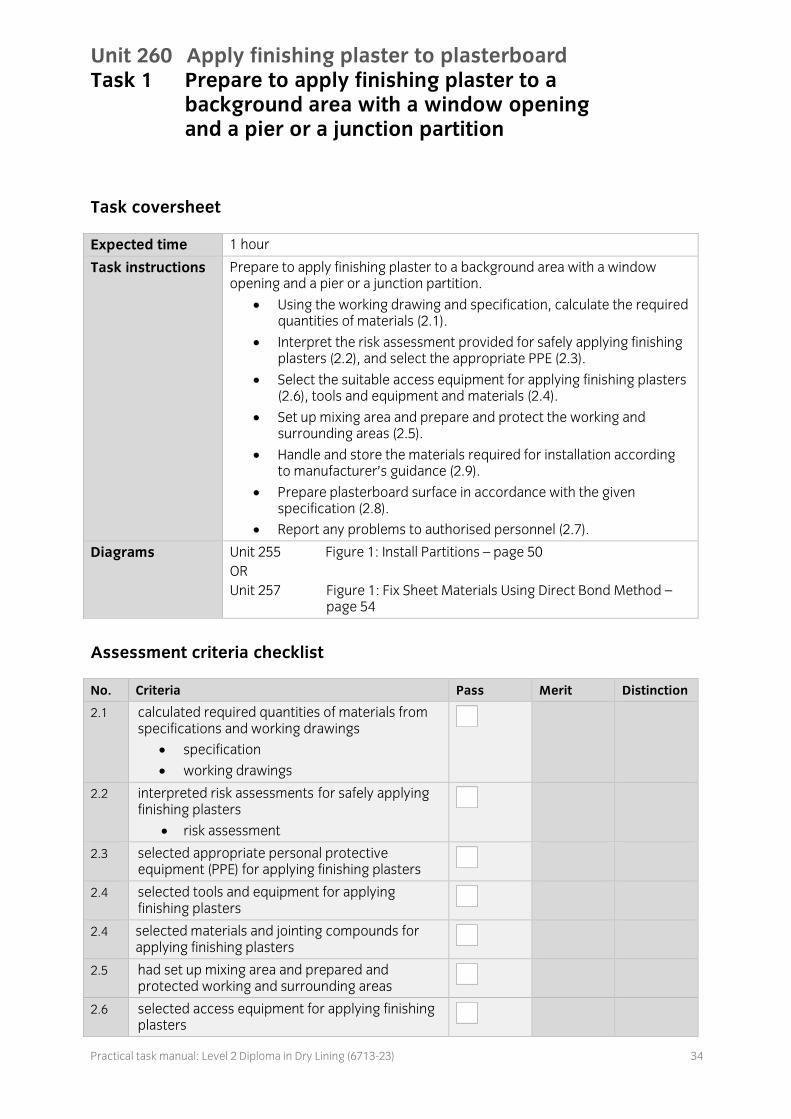
Unit 260 Apply finishing plaster to plasterboard Task 1 Prepare to apply finishing plaster to a
background area with a window opening and a pier or a junction partition
Task coversheet
Expected time 1 hour
Task instructions Prepare to apply finishing plaster to a background area with a window opening and a pier or a junction partition.
Using the working drawing and specification, calculate the required quantities of materials (2.1).
Interpret the risk assessment provided for safely applying finishing plasters (2.2), and select the appropriate PPE (2.3).
Select the suitable access equipment for applying finishing plasters (2.6), tools and equipment and materials (2.4).
Set up mixing area and prepare and protect the working and surrounding areas (2.5).
Handle and store the materials required for installation according to manufacturer’s guidance (2.9).
Prepare plasterboard surface in accordance with the given specification (2.8).
Report any problems to authorised personnel (2.7).
Diagrams Unit 255 Figure 1: Install Partitions – page 50
OR
Unit 257 Figure 1: Fix Sheet Materials Using Direct Bond Method – page 54
Assessment criteria checklist
No. Criteria Pass Merit Distinction
2.1 calculated required quantities of materials from specifications and working drawings
specification
working drawings
2.2 interpreted risk assessments for safely applying finishing plasters
risk assessment
2.3 selected appropriate personal protective equipment (PPE) for applying finishing plasters
2.4 selected tools and equipment for applying finishing plasters
2.4 selected materials and jointing compounds for applying finishing plasters
2.5 had set up mixing area and prepared and protected working and surrounding areas
2.6 selected access equipment for applying finishing plasters

Practical task manual: Level 2 Diploma in Dry Lining (6713-23) 35
No. Criteria Pass Merit Distinction
2.8 prepared plasterboard surface in accordance with the given specification
specification
2.7 reported problems to authorised personnel (if occurred)
or answered question about reporting procedure correctly
2.9 handled and stored materials in accordance with manufacturers’ guidance
manufacturers’ guidance
Task grading rules Task grade:
Every activity in the checklist must be successfully achieved to award a pass grade.
Assessor Name
Assessor Signature
Date

Practical task manual: Level 2 Diploma in Dry Lining (6713-23) 36
Unit 260 Apply finishing plaster to plasterboard Task 2 Apply finishing plaster to a background area
with a window opening and a pier or a junction partition
Task coversheet
Expected time 8 -10 hours
Task instructions Apply finishing plaster to a background area with a window opening and a pier or a junction partition.
Use appropriate PPE for applying finishing plasters (2.4) and carry out work in line with current health and safety legislation and guidance (4.1).
Set up access equipment to the appropriate working height (if required) (4.2).
Fix beads to external angles, window opening returns, soffit, and pier or junction partition return.
Apply reinforcement mesh/scrim tape to all plasterboard joints.
Mix and apply finishing plaster to plasterboards following manufacturer’s guidelines (4.3).
Carry out minor repairs to finished surface (4.4).
Leave work area clean and tidy on completion of work (4.5) and dispose of waste in accordance with legislation and official guidance (4.6).
Diagrams Unit 255 Figure 1: Install Partitions – page 50
OR
Unit 257 Figure 1: Fix Sheet Materials Using Direct Bond Method – page 54
Assessment criteria checklist
No. Criteria Pass Merit Distinction
4.1 carried out work in line with current health and safety legislation and guidance
2.4 used appropriate PPE for applying finishing plasters
4.2 had set up access equipment to the appropriate working height (if required)
2.8 fixed beads to external angles, window opening returns and soffits, and pier or junction partition return
Note: The total tolerance for the grading is the result of assessing the individual tolerances.
skim bead cut and fixed accurately to external angle of pier/junction partition return within 7-10 mm of the ceiling line
within 4-6 mm of the ceiling line
within 0-3 mm of the ceiling line

Practical task manual: Level 2 Diploma in Dry Lining (6713-23) 37
No. Criteria Pass Merit Distinction
skim beads measured, cut and fixed accurately around window opening and the overall tolerance between reveals and soffit is ± 6 mm for both window opening sides
overall tolerance between reveals and soffit to ± 4 mm for both window opening sides
overall tolerance between reveals and soffit to ± 2 mm for both window opening sides
tolerance for steps between intersection of reveal and soffit bead is ± 2 mm for both window opening sides
tolerance for steps between intersection of reveal and soffit bead to ± 2 mm for one out of two window opening sides
no steps between intersection of both reveals and soffit bead of window opening
2.8 applied reinforcement mesh/scrim tape to all plasterboard joints
all reinforcement scrim or paper tape for straight and internal joints (including window reveal and soffit) cut accurately within 7-10 mm of the ceiling line
within 4-6 mm of the ceiling line
within 0-3 mm of the ceiling line
4.3 mixed and applied finishing plaster to plasterboards following manufacturer’s guidelines
finishing plaster mixed to correct consistency with minimal wastage
mixing tools and equipment left clean and tidy
Practical task manual: Level 2 Diploma in Dry Lining (6713-23) 38
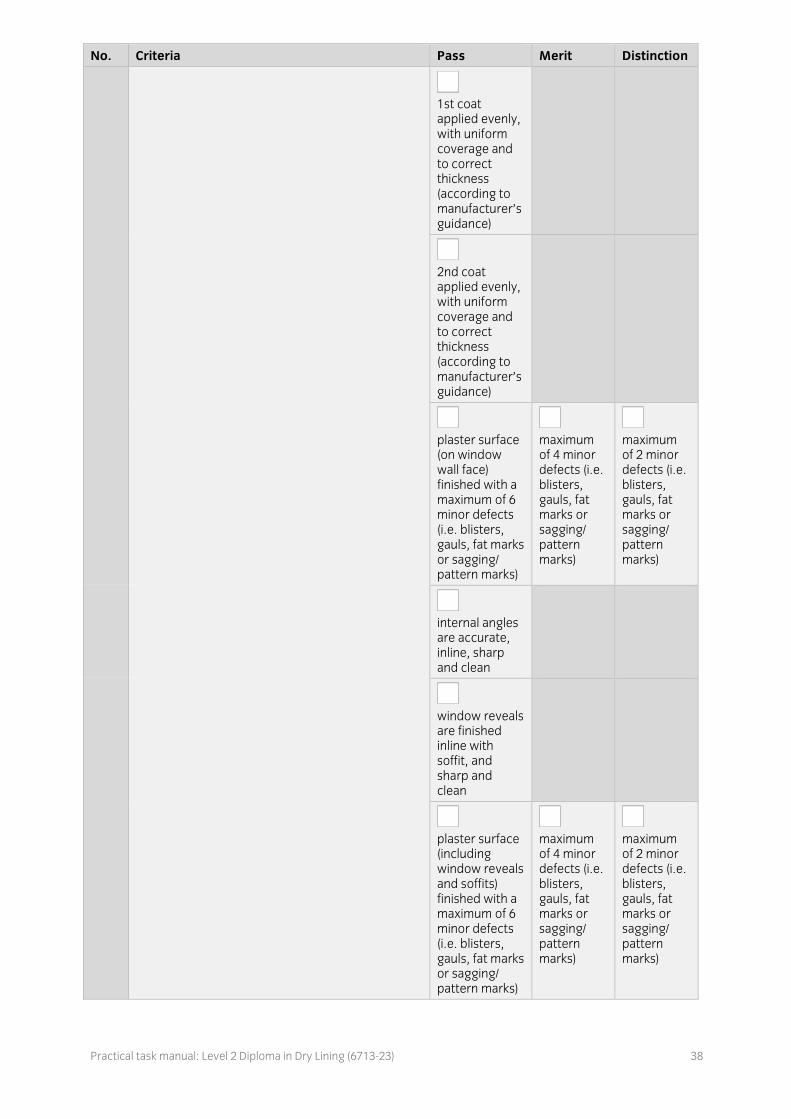
No. Criteria Pass Merit Distinction
1st coat applied evenly, with uniform coverage and to correct thickness (according to manufacturer’s guidance)
2nd coat applied evenly, with uniform coverage and to correct thickness (according to manufacturer’s guidance)
plaster surface (on window wall face) finished with a maximum of 6 minor defects (i.e. blisters, gauls, fat marks or sagging/ pattern marks)
maximum of 4 minor defects (i.e. blisters, gauls, fat marks or sagging/ pattern marks)
maximum of 2 minor defects (i.e. blisters, gauls, fat marks or sagging/ pattern marks)
internal angles are accurate, inline, sharp and clean
window reveals are finished inline with soffit, and sharp and clean
plaster surface (including window reveals and soffits) finished with a maximum of 6 minor defects (i.e. blisters, gauls, fat marks or sagging/ pattern marks)
maximum of 4 minor defects (i.e. blisters, gauls, fat marks or sagging/ pattern marks)
maximum of 2 minor defects (i.e. blisters, gauls, fat marks or sagging/ pattern marks)
Practical task manual: Level 2 Diploma in Dry Lining (6713-23) 39
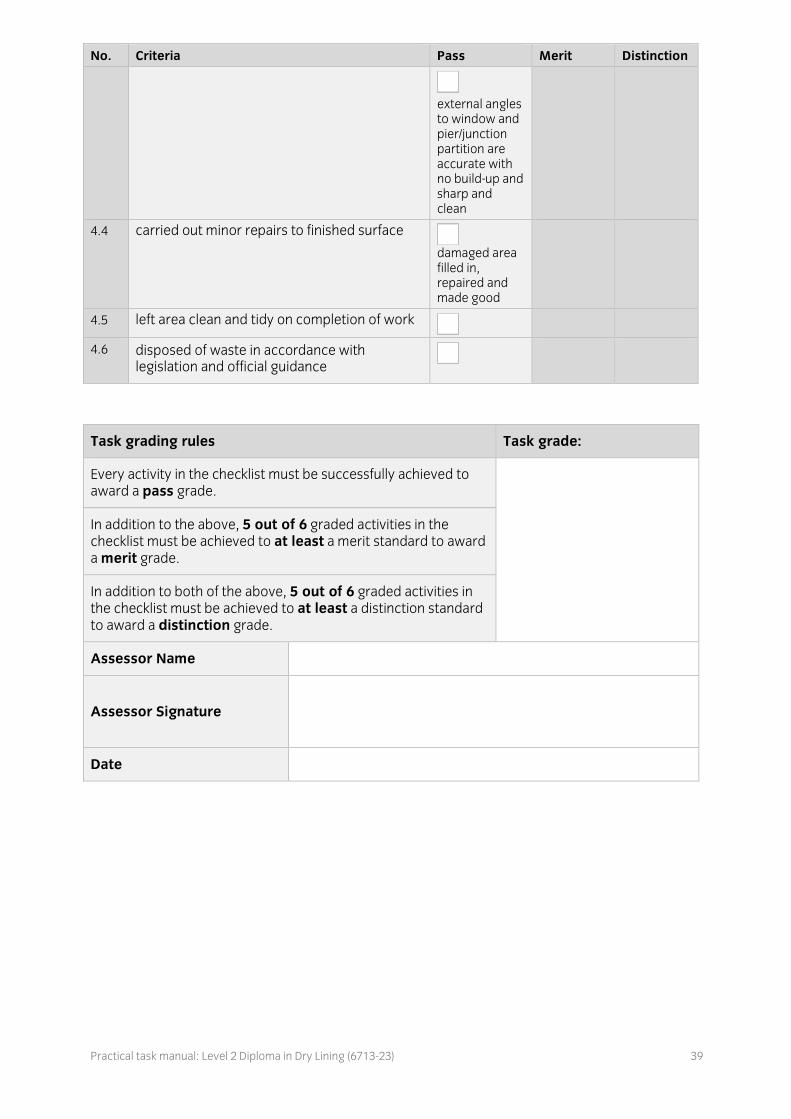
No. Criteria Pass Merit Distinction
external angles to window and pier/junction partition are accurate with no build-up and sharp and clean
4.4 carried out minor repairs to finished surface
damaged area filled in, repaired and made good
4.5 left area clean and tidy on completion of work
4.6 disposed of waste in accordance with legislation and official guidance
Task grading rules Task grade:
Every activity in the checklist must be successfully achieved to award a pass grade.
In addition to the above, 5 out of 6 graded activities in the checklist must be achieved to at least a merit standard to award a merit grade.
In addition to both of the above, 5 out of 6 graded activities in the checklist must be achieved to at least a distinction standard to award a distinction grade.
Assessor Name
Assessor Signature
Date
Practical task manual: Level 2 Diploma in Dry Lining (6713-23) 40
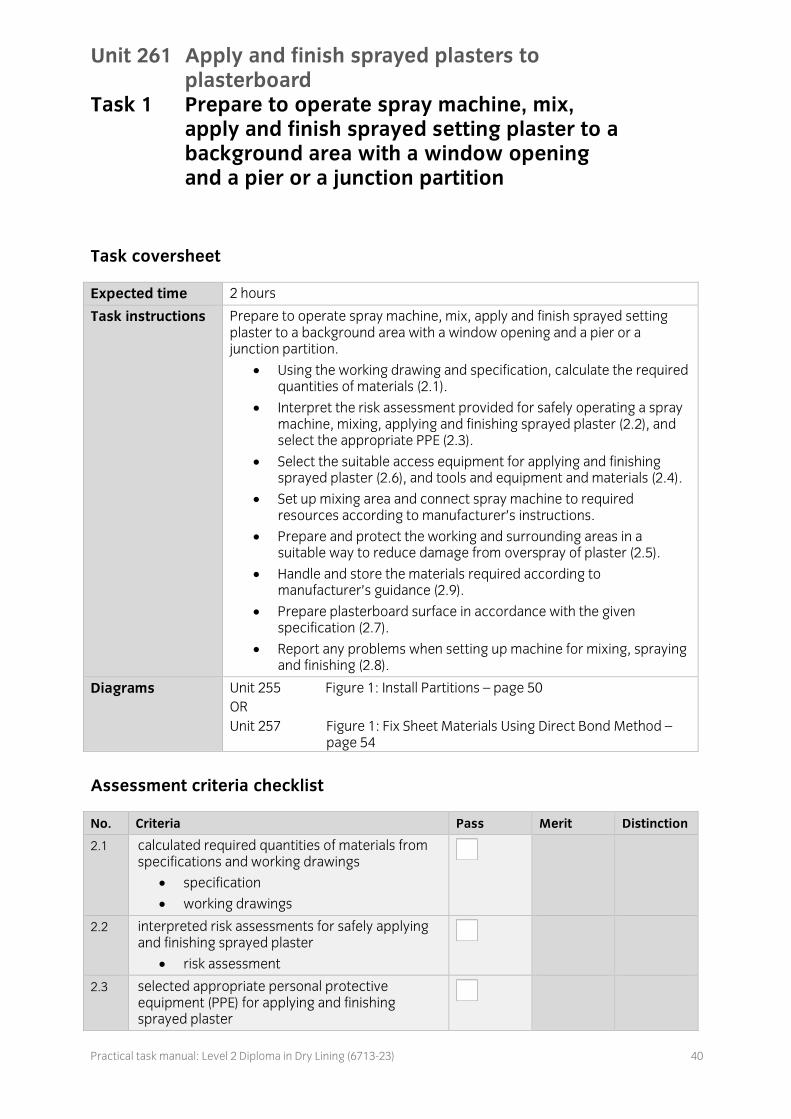
Unit 261 Apply and finish sprayed plasters to plasterboard
Task 1 Prepare to operate spray machine, mix, apply and finish sprayed setting plaster to a background area with a window opening and a pier or a junction partition
Task coversheet
Expected time 2 hours
Task instructions Prepare to operate spray machine, mix, apply and finish sprayed setting plaster to a background area with a window opening and a pier or a junction partition.
Using the working drawing and specification, calculate the required quantities of materials (2.1).
Interpret the risk assessment provided for safely operating a spray machine, mixing, applying and finishing sprayed plaster (2.2), and select the appropriate PPE (2.3).
Select the suitable access equipment for applying and finishing sprayed plaster (2.6), and tools and equipment and materials (2.4).
Set up mixing area and connect spray machine to required resources according to manufacturer’s instructions.
Prepare and protect the working and surrounding areas in a suitable way to reduce damage from overspray of plaster (2.5).
Handle and store the materials required according to manufacturer’s guidance (2.9).
Prepare plasterboard surface in accordance with the given specification (2.7).
Report any problems when setting up machine for mixing, spraying and finishing (2.8).
Diagrams Unit 255 Figure 1: Install Partitions – page 50
OR
Unit 257 Figure 1: Fix Sheet Materials Using Direct Bond Method – page 54
Assessment criteria checklist
No. Criteria Pass Merit Distinction
2.1 calculated required quantities of materials from specifications and working drawings
specification
working drawings
2.2 interpreted risk assessments for safely applying and finishing sprayed plaster
risk assessment
2.3 selected appropriate personal protective equipment (PPE) for applying and finishing sprayed plaster

Practical task manual: Level 2 Diploma in Dry Lining (6713-23) 41
No. Criteria Pass Merit Distinction
2.4 selected tools, equipment and materials for applying and finishing sprayed plaster finishes
2.5 had set up mixing area and connected spray machine to required resources according to manufacturer’s instructions
manufacturer’s guidance
2.5 prepared and protected working and surrounding areas
2.6 selected access equipment for applying and finishing sprayed plaster
2.7 prepared plasterboard surface in accordance with the given specification
specification
2.8 reported problems when setting up for spraying and finishing (if occurred)
or answered question about reporting procedure correctly
2.9 handled and stored materials in accordance with manufacturers’ guidance
manufacturers’ guidance
Task grading rules Task grade:
Every activity in the checklist must be successfully achieved to award a pass grade.
Assessor Name
Assessor Signature
Date

Practical task manual: Level 2 Diploma in Dry Lining (6713-23) 42
Unit 261 Apply and finish sprayed plasters to plasterboard Task 2 Operate spray machine, mix and apply and
finish sprayed setting plaster to a background area with a window opening and a pier or a junction partition
Task coversheet
Expected time 10 -12 hours
Task instructions Operate spray machine, mix and apply finishing plaster to a background area with a window opening and a pier or a junction partition.
Use appropriate PPE for operating a spray machine, mixing, applying and finishing sprayed plaster (2.4) and carry out work in line with current health and safety legislation and guidance (4.1).
Set up access equipment to the appropriate working height (if required) (4.2).
Fix beads to external angles, window opening returns, soffit, and pier or junction partition return.
Apply reinforcement mesh/scrim tape to all plasterboard joints.
Set up spray machine for mixing plaster to the correct consistency (4.4) and for applying sprayed plaster in line with manufacturer’s instructions (4.3).
Apply and finish spray plaster to given specification (4.5).
clean machine, tools and equipment in line with manufacturer’s instructions (4.6).
Carry out minor repairs to finished surface by hand.
Leave work area clean and tidy on completion of work (4.7) and dispose of waste in accordance with legislation and official guidance (4.8).
Diagrams Unit 255 Figure 1: Install Partitions – page 50
OR
Unit 257 Figure 1: Fix Sheet Materials Using Direct Bond Method – page 54
Assessment criteria checklist
No. Criteria Pass Merit Distinction
4.1 carried out work in line with current health and safety legislation and guidance
2.4 used appropriate PPE for operating a spray machine, mixing, applying and finishing sprayed plaster
4.2 set up access equipment to the appropriate working height( If required)

Practical task manual: Level 2 Diploma in Dry Lining (6713-23) 43
No. Criteria Pass Merit Distinction
2.7 fix beads to external angles, window opening returns and soffits, and pier or junction partition return
Note: The total tolerance for the grading is the result of assessing the individual tolerances.
skim bead cut and fixed accurately to external angle of pier/junction partition return within 7-10 mm of the ceiling line
within 4-6 mm of the ceiling line
within 0-3 mm of the ceiling line
skim beads measured, cut and fixed accurately around window opening and the overall tolerance between reveals and soffit is ± 6 mm for both window opening sides
overall tolerance between reveals and soffit to ± 4 mm for both window opening sides
overall tolerance between reveals and soffit to ± 2 mm for both window opening sides
tolerance for steps between intersection of reveal and soffit bead is ± 2 mm for both window opening sides
tolerance for steps between intersection of reveal and soffit bead to ± 2 mm for one out of two window opening sides
no steps between intersection of both reveals and soffit bead of window opening
2.7 applied reinforcement mesh/scrim tape to all plasterboard joints
all reinforcement scrim or paper tape for straight and internal joints (including window reveal and soffit) cut accurately within 7-10 mm of the ceiling line
within 4-6 mm of the ceiling line
within 0-3 mm of the ceiling line
4.3
4.4
had set up spray machine for mixing plaster to the correct consistency and for applying sprayed plaster in line with manufacturer’s instructions
Note: Candidates must be assessed
spray machine air and water pressure set according to manufacturer’s instructions

Practical task manual: Level 2 Diploma in Dry Lining (6713-23) 44
No. Criteria Pass Merit Distinction
individually for the criteria highlighted in red on the checklist, and will have to take turns when operating the spray machine in pairs.
plaster mixed by machine to required consistency
plaster mixed by machine with minimal wastage
air and plaster hoses connected correctly
adequate water and plaster supply made ready for use
spray machine operator set up machine and supply efficiently
spray machine operator anticipated problems with setup and supply
4.5 applied and finished spray plaster to given specification
Note: Candidates must be assessed individually for the criteria highlighted in red on the checklist, and will have to take turns when operating the spray machine in pairs.
1st spray coat applied horizontally with uniform coverage and to correct thickness (according to manufacturer’s guidance)
no interruptions to spray machine supply, with consistent feed of plaster
2nd spray coat applied vertically, with uniform coverage and to correct thickness (according to manufacturer’s guidance)
no interruptions to spray machine supply, with consistent feed of plaster
spray machine operator communicated regularly with sprayer

Practical task manual: Level 2 Diploma in Dry Lining (6713-23) 45
No. Criteria Pass Merit Distinction
plaster surface (on window wall face) finished with a maximum of 6 minor defects (i.e. blisters, gauls, fat marks or sagging/ pattern marks)
plaster surface finished with a maximum of 4 minor defects (i.e. blisters, gauls, fat marks or sagging/ pattern marks)
maximum of 2 minor defects (i.e. blisters, gauls, fat marks or sagging/ pattern marks)
internal angles are accurate, inline, sharp and clean
window reveals are finished inline with soffit, and sharp and clean
plaster surface (including window reveals and soffits) finished with a maximum of 6 minor defects (i.e. blisters, gauls, fat marks or sagging/ pattern marks)
maximum of 4 minor defects (i.e. blisters, gauls, fat marks or sagging/ pattern marks)
maximum of 2 minor defects (i.e. blisters, gauls, fat marks or sagging/ pattern marks)
external angles to window and pier/junction partition are accurate with no build-up and sharp and clean
4.6 cleaned machine, tools and equipment in line with manufacturer’s instructions
Note: Candidates must be assessed individually for the criteria highlighted in red on the checklist, and will have to take turns when operating the spray machine in pairs.
spray machine, nozzles, hoses, tools and equipment left clean and tidy

Practical task manual: Level 2 Diploma in Dry Lining (6713-23) 46
No. Criteria Pass Merit Distinction
4.5 carried out minor repairs to finished surface by hand application
damaged area filled in, repaired by hand application and made good
4.7 left area clean and tidy on completion of work
4.8 disposed of waste in accordance with legislation and official guidance
Task grading rules Task grade:
Every activity in the checklist must be successfully achieved to award a pass grade.
In addition to the above, 9 out of 10 graded activities in the checklist (to include all red criteria) must be achieved to at least a merit standard to award a merit grade.
In addition to both of the above, 6 out of 7 graded activities in the checklist (to include all red criteria) must be achieved to at least a distinction standard to award a distinction grade.
Assessor Name
Assessor Signature
Date
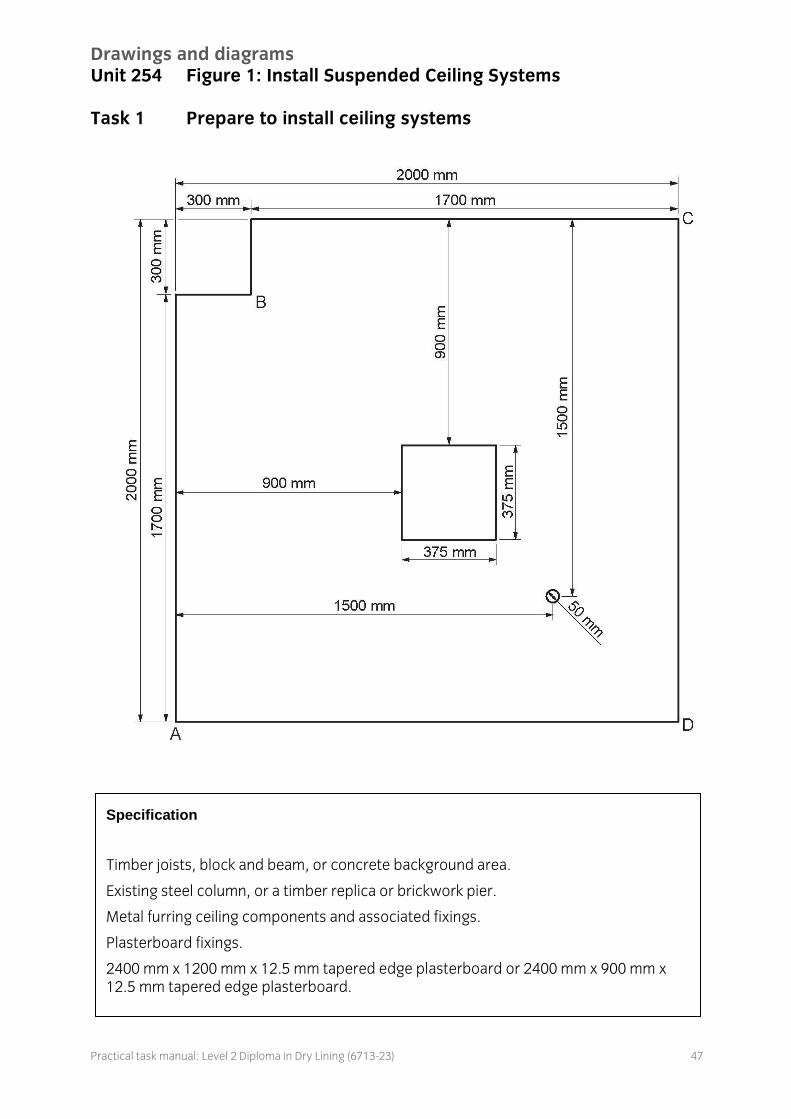
Practical task manual: Level 2 Diploma in Dry Lining (6713-23) 47
Drawings and diagrams Unit 254 Figure 1: Install Suspended Ceiling Systems Task 1 Prepare to install ceiling systems
Specification
Timber joists, block and beam, or concrete background area.
Existing steel column, or a timber replica or brickwork pier.
Metal furring ceiling components and associated fixings.
Plasterboard fixings.
2400 mm x 1200 mm x 12.5 mm tapered edge plasterboard or 2400 mm x 900 mm x 12.5 mm tapered edge plasterboard.

Practical task manual: Level 2 Diploma in Dry Lining (6713-23) 48
Drawings and diagrams Unit 254 Figure 2: Install Suspended Ceiling Systems Task 2 Set out and install ceiling systems
Specification
Timber joists, block and beam, or concrete background area.
Existing steel column, or a timber replica or brickwork pier.
Metal furring ceiling components and associated fixings.
Plasterboard fixings.
2400 mm x 1200 mm x 12.5 mm tapered edge plasterboard or 2400 mm x 900 mm x 12.5 mm tapered edge plasterboard.

Practical task manual: Level 2 Diploma in Dry Lining (6713-23) 49
Drawings and diagrams Unit 255 Figure 1: Install Partitions Task 1 Prepare to install a metal stud partition Task 2 Set out and install a metal stud partition
Specification
Solid wall or solid floor.
72 mm metal tracks and 70 mm studs or 50 mm metal tracks and 48 mm studs.
Metal and plasterboard fixings.
2400 mm x 1200 mm x 12.5 mm tapered edge plasterboard or 2400 mm x 900 mm x 12.5 mm tapered edge plasterboard.

Practical task manual: Level 2 Diploma in Dry Lining (6713-23) 50
Drawings and diagrams Unit 256 Figure 1: Prepare to install wall linings and encasement
systems Task 1 Prepare to install a wall lining to a solid background and an
encasement system to a beam
Specification
Internal block/brick wall with window opening, pipework, access panel and attached or standalone timber replica beam or steel beam.
2400 mm x 1200 mm x 12.5 mm tapered edge plasterboard or 2400 mm x 900 mm x 12.5 mm tapered edge plasterboard.
Metal components and fixings.

Practical task manual: Level 2 Diploma in Dry Lining (6713-23) 51
Drawings and diagrams Unit 256 Figure 2: Prepare to install wall linings and encasement
systems Task 2 Set out and install a wall lining to a solid background and
an encasement system to a beam
Specification
Internal block/brick wall with window opening, pipework, access panel and attached or standalone timber replica beam or steel beam.
2400 mm x 1200 mm x 12.5 mm tapered edge plasterboard or 2400 mm x 900 mm x 12.5 mm tapered edge plasterboard.
Metal components and fixings.

Practical task manual: Level 2 Diploma in Dry Lining (6713-23) 52
Drawings and diagrams Unit 256 Figure 3: Prepare to install wall linings and encasement
systems Task 2 Set out and install a wall lining to a solid background and
an encasement system to a beam
Specification
Internal block/brick wall with window opening, pipework, access panel and attached or standalone timber replica beam or steel beam.
2400 mm x 1200 mm x 12.5 mm tapered edge plasterboard or 2400 mm x 900 mm x 12.5 mm tapered edge plasterboard.
Metal components and fixings.
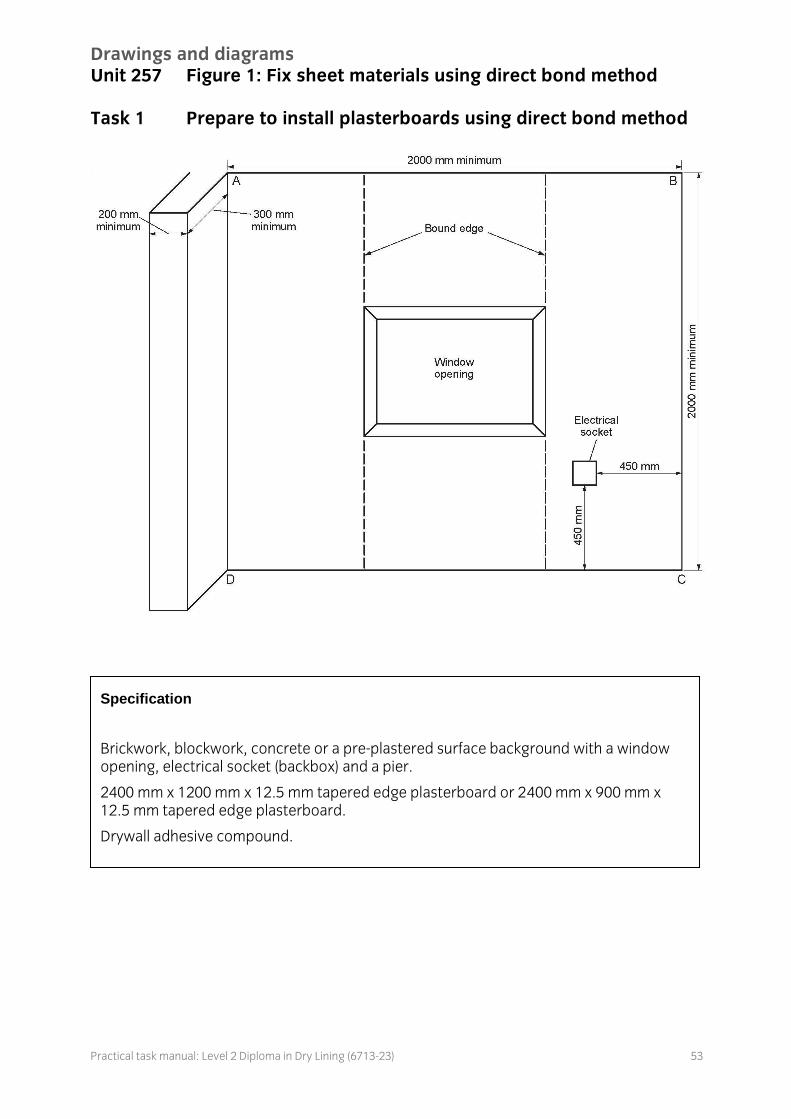
Practical task manual: Level 2 Diploma in Dry Lining (6713-23) 53
Drawings and diagrams Unit 257 Figure 1: Fix sheet materials using direct bond method Task 1 Prepare to install plasterboards using direct bond method
Specification
Brickwork, blockwork, concrete or a pre-plastered surface background with a window opening, electrical socket (backbox) and a pier.
2400 mm x 1200 mm x 12.5 mm tapered edge plasterboard or 2400 mm x 900 mm x 12.5 mm tapered edge plasterboard.
Drywall adhesive compound.

Practical task manual: Level 2 Diploma in Dry Lining (6713-23) 54
Drawings and diagrams Unit 257 Figure 2: Fix sheet materials using direct bond method Task 2 Install and fix plasterboards using direct bond method to a
background area with a window opening and a pier
Specification
Brickwork, blockwork, concrete or a pre-plastered surface background with a window opening, electrical socket (backbox) and a pier.
2400 mm x 1200 mm x 12.5 mm tapered edge plasterboard or 2400 mm x 900 mm x 12.5 mm tapered edge plasterboard.
Drywall adhesive compound.
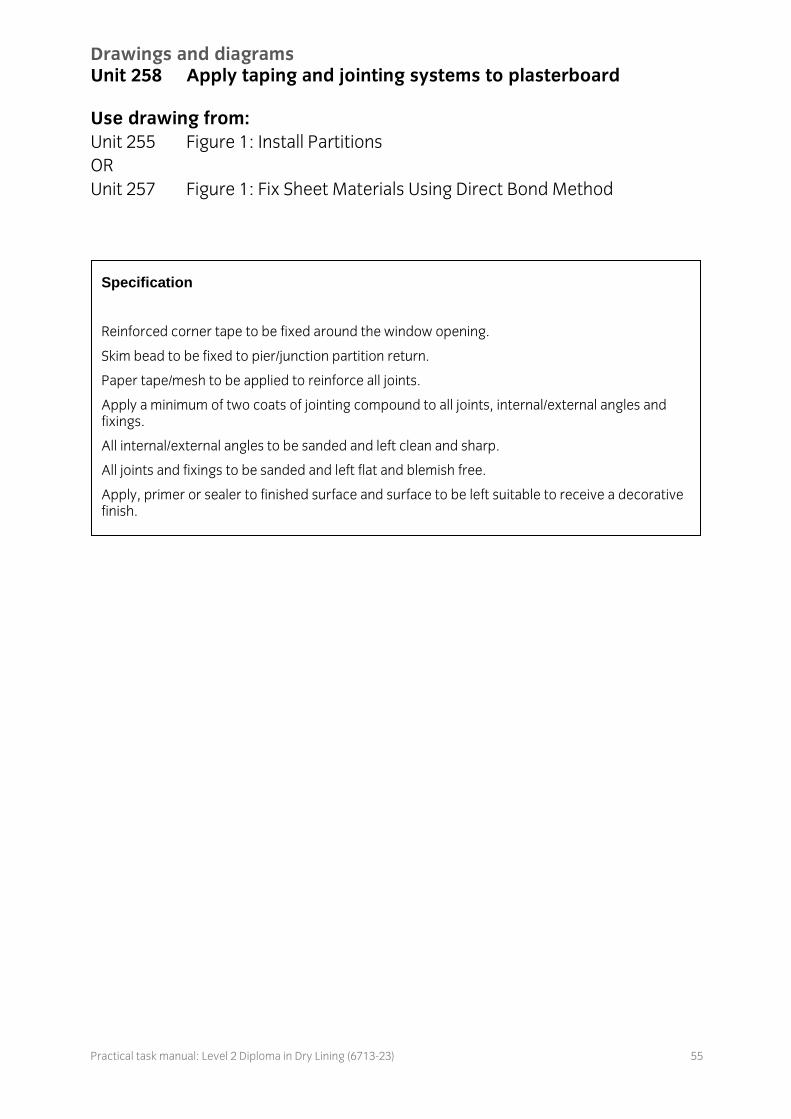
Practical task manual: Level 2 Diploma in Dry Lining (6713-23) 55
Drawings and diagrams Unit 258 Apply taping and jointing systems to plasterboard Use drawing from:
Unit 255 Figure 1: Install Partitions
OR
Unit 257 Figure 1: Fix Sheet Materials Using Direct Bond Method
Specification
Reinforced corner tape to be fixed around the window opening.
Skim bead to be fixed to pier/junction partition return.
Paper tape/mesh to be applied to reinforce all joints.
Apply a minimum of two coats of jointing compound to all joints, internal/external angles and fixings.
All internal/external angles to be sanded and left clean and sharp.
All joints and fixings to be sanded and left flat and blemish free.
Apply, primer or sealer to finished surface and surface to be left suitable to receive a decorative finish.

Practical task manual: Level 2 Diploma in Dry Lining (6713-23) 56
Drawings and diagrams Unit 260 Apply finishing plaster to plasterboard Use drawing from:
Unit 255 Figure 1: Install Partitions
OR
Unit 257 Figure 1: Fix Sheet Materials Using Direct Bond Method
Specification
Skim beads to be fixed around the window opening.
Mesh/paper tape to be applied to reinforce all joints.
Apply finishing plaster to the window wall, reveals, soffit and attached pier.
Wall and pier/junction partition surface to be finished with 2-3 mm of a suitable finishing plaster.
All internal and external angles should be left clean and sharp.
Finishing plaster coat should be left suitable to receive a paint finish.

Practical task manual: Level 2 Diploma in Dry Lining (6713-23) 57
Drawings and diagrams Unit 261 Apply and finish sprayed plasters to plasterboard Use drawing from:
Unit 255 Figure 1: Install Partitions
OR
Unit 257 Figure 1: Fix Sheet Materials Using Direct Bond Method
Specification
Skim beads to be fixed around the window opening.
Mesh/paper tape to be applied to reinforce all joints.
Apply finishing plaster to the window wall, reveals, soffit and attached pier.
Wall and pier/junction partition surface to be finished with 2-3 mm of a suitable finishing plaster.
All internal and external angles should be left clean and sharp.
Finishing plaster coat should be left suitable to receive a paint finish.

Practical task manual: Level 2 Diploma in Dry Lining (6713-23) 58
Unit assessment overview
Practical task completion record
To be completed by Assessor:
For each task, the points for each grade are Pass = 1, Merit = 2, and Distinction = 3 points.
†All tasks must be passed for the unit to be achieved.
Unit 254 Install Suspended Ceiling Systems
Task Grade for task† Weighting for task (if appropriate)
Weighted Points (graded tasks)
1 Prepare to install ceiling systems P/X
2 Set out and install ceiling systems P/M/D
End of unit knowledge test P/X
Total
Assessor signature and date: For graded tasks, divide total points by total of weightings
÷
Average =
Overall grade (see conversion chart)
Unit 255 Install Partitions
Task Grade for task† Weighting for task (if appropriate)
Weighted Points (graded tasks)
1 Prepare to install a metal stud partition. P/X
2 Set out and install a metal stud partition. P/M/D
End of unit knowledge test P/X
Total
Assessor signature and date: For graded tasks, divide total points by total of weightings
÷
Average =
Overall grade (see conversion chart)
Conversion chart
Average Overall Grade
1 – 1.5 Pass
1.6 – 2.5 Merit
2.6 – 3 Distinction

Practical task manual: Level 2 Diploma in Dry Lining (6713-23) 59
Unit 256 Prepare to install wall linings and encasement systems
Task Grade for task† Weighting for task (if appropriate)
Weighted Points (graded tasks)
1 Prepare to install a wall lining to a solid background and an encasement system to a beam.
P/X
2 Set out and install a wall lining to a solid background and an encasement system to a beam.
P/M/D
End of unit knowledge test P/X
Total
Assessor signature and date: For graded tasks, divide total points by total of weightings
÷
Average =
Overall grade (see conversion chart)
Unit 257 Fix sheet materials using direct bond method
Task Grade for task† Weighting for task (if appropriate)
Weighted Points (graded tasks)
1 Prepare to install plasterboards using direct bond method
P/X
2 Install and fix plasterboards using direct bond method to a background area with a window opening and a pier.
P/M/D
End of unit knowledge test P/X
Total
Assessor signature and date: For graded tasks, divide total points by total of weightings
÷
Average =
Overall grade (see conversion chart)

Practical task manual: Level 2 Diploma in Dry Lining (6713-23) 60
Unit 258 Apply taping and jointing systems to plasterboard
Task Grade for task† Weighting for task (if appropriate)
Weighted Points (graded tasks)
1 Prepare to apply and finish taping and jointing systems to a background area with a window opening and a pier or a junction partition.
P/X
2 Apply and finish taping and jointing systems to a background area with a window opening and a pier or a junction partition.
P/M/D
End of unit knowledge test P/X
Total
Assessor signature and date: For graded tasks, divide total points by total of weightings
÷
Average =
Overall grade (see conversion chart)
Unit 260 Apply finishing plaster to plasterboard
Task Grade for task† Weighting for task (if appropriate)
Weighted Points (graded tasks)
1 Prepare to apply finishing plaster to a background area with a window opening and a pier or a junction partition.
P/X
2 Apply finishing plaster to a background area with a window opening and a pier or a junction partition.
P/M/D
End of unit knowledge test P/X
Total
Assessor signature and date: For graded tasks, divide total points by total of weightings
÷
Average =
Overall grade (see conversion chart)
Practical task manual: Level 2 Diploma in Dry Lining (6713-23) 61
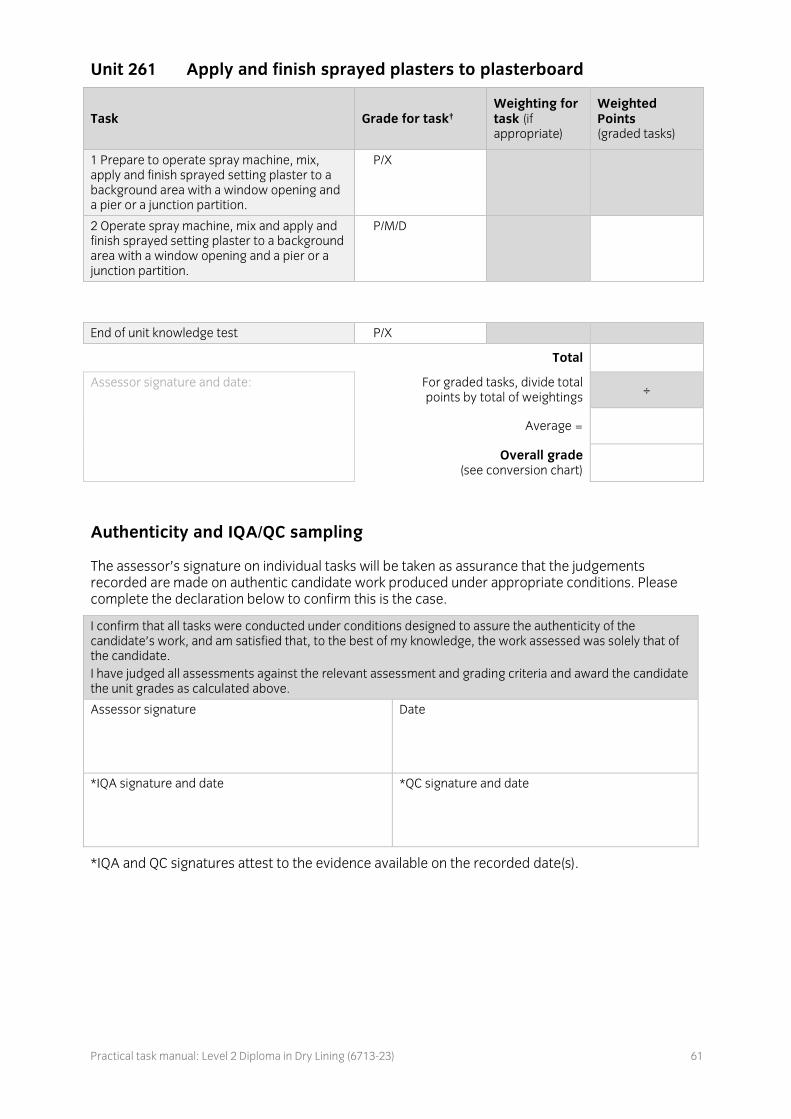
Unit 261 Apply and finish sprayed plasters to plasterboard
Task Grade for task† Weighting for task (if appropriate)
Weighted Points (graded tasks)
1 Prepare to operate spray machine, mix, apply and finish sprayed setting plaster to a background area with a window opening and a pier or a junction partition.
P/X
2 Operate spray machine, mix and apply and finish sprayed setting plaster to a background area with a window opening and a pier or a junction partition.
P/M/D
End of unit knowledge test P/X
Total
Assessor signature and date: For graded tasks, divide total points by total of weightings
÷
Average =
Overall grade (see conversion chart)
Authenticity and IQA/QC sampling
The assessor’s signature on individual tasks will be taken as assurance that the judgements recorded are made on authentic candidate work produced under appropriate conditions. Please complete the declaration below to confirm this is the case.
I confirm that all tasks were conducted under conditions designed to assure the authenticity of the candidate’s work, and am satisfied that, to the best of my knowledge, the work assessed was solely that of the candidate.
I have judged all assessments against the relevant assessment and grading criteria and award the candidate the unit grades as calculated above.
Assessor signature
Date
*IQA signature and date
*QC signature and date
*IQA and QC signatures attest to the evidence available on the recorded date(s).
Practical task manual: Level 2 Diploma in Dry Lining (6713-23) 62
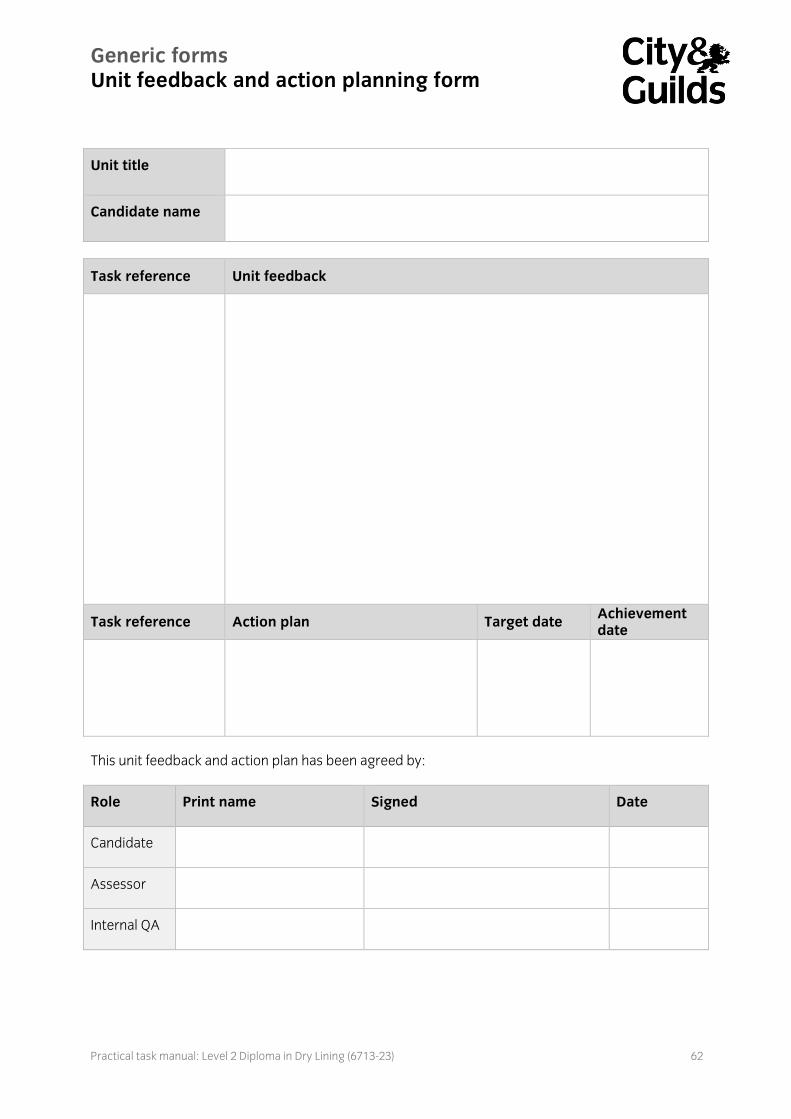
Generic forms Unit feedback and action planning form
Unit title
Candidate name
Task reference Unit feedback
Task reference Action plan Target date Achievement date
This unit feedback and action plan has been agreed by:
Role Print name Signed Date
Candidate
Assessor
Internal QA

Published by City & Guilds 1 Giltspur Street London EC1A 9DD www.cityandguilds.com City & Guilds is a registered charity established to promote education and training
About City & Guilds
As the UK’s leading vocational education organisation, City & Guilds is leading the talent revolution by inspiring people to unlock their potential and develop their skills. We offer over 500 qualifications across 28 industries through 8500 centres worldwide and award around two million certificates every year. City & Guilds is recognised and respected by employers across the world as a sign of quality and exceptional training.
City & Guilds Group
The City & Guilds Group is a leader in global skills development. Our purpose is to help people and organisations to develop their skills for personal and economic growth. Made up of City & Guilds, City & Guilds Kineo, The Oxford Group and ILM, we work with education providers, businesses and governments in over 100 countries.
Copyright
The content of this document is, unless otherwise indicated, © The City and Guilds of London Institute and may not be copied, reproduced or distributed without prior written consent. However, approved City & Guilds centres and candidates studying for City & Guilds qualifications may photocopy this document free of charge and/or include a PDF version of it on centre intranets on the following conditions:
centre staff may copy the material only for the purpose of teaching candidates working towards a City & Guilds qualification, or for internal administration purposes
candidates may copy the material only for their own use when working towards a City & Guilds qualification
The Standard Copying Conditions (see the City & Guilds website) also apply.
Published by City & Guilds, a registered charity established to promote education and training
Every effort has been made to ensure that the information contained in this publication is true and correct at the time of going to press. However, City & Guilds’ products and services are subject to continuous development and improvement and the right is reserved to change products and services from time to time. City & Guilds cannot accept liability for loss or damage arising from the use of information in this publication.