Embed Size (px)
Citation preview

73
Lessons
The following lessons are grouped into three categories: pre-trip, during the trip, and
post-trip. If you do pre-trip lessons, plan how to refer to them while on the trip. If
you plan to do any of the post-trip lessons, be aware of ways to prepare the students
while on the trip by making observations or asking questions.
Each category is further divided into Hands-On Activities and Other Activities of
various types.
California State Content Standards that can easily be addressed through the lessons
are referenced by subject and number. See pages 143–146 for abbreviated summaries
of the standards.
Some of the hands-on activities are intended to be discovery activities (experiments)
in which the students don’t know the answers ahead of time. The teacher should try
to facilitate the students’ discoveries rather than telling them what to expect.
Whenever possible, be a guide on the side!
Also . . . it is HIGHLY recommended that the teacher:
� Try out all experiments before having students do them.
� Enlist the help of parent volunteers before, during, and after experiments.
� Feel free to adapt, expand, or alter experiments to suit your needs, student
needs, and resources.
Hands-on or “lab” type activities are presented in a detailed lesson plan format.
A few “other” activities are given as examples, but the resources in the curriculum of
the resources section (p. 158) give many additional worthwhile activities.
Many of the lessons begin before the field trip and continue with activities to be done
while at the coast. Others that are listed as pre-trip can also be done after the trip.
For some lessons, I have provided a reference to a book in which there is a similar
lesson. Variations on many of these lessons can be found in several books.
Pre-Trip Lessons and Activities
Before bringing students to study the intertidal zone, the teacher should visit the area
and discuss the field trip with the ranger or interpretive specialist. It would be best
to join a tide pool walk at a low tide. The interpreter will be able to provide
information about unique opportunities at the particular field trip site. He or she will
also be able to tell you about any special safety or conservation concerns. Discuss
planned activities with the interpreter.

Lessons: Pre-Trip Activities A Guide to the Side of the Sea
74
It is recommended that each student have a plastic magnifier on a string around his or
her neck when at the tide pools. Have the students get used to using these magnifiers
before going on the trip.
The teacher should also bring some plastic bowls or Petri dishes, a large plastic pan or
bucket, “bug boxes” or “2-way magnifiers,” towels, and, possibly, binoculars.
Pre-trip hands-on activities begin on page 76.

A Guide to the Side of the Sea Lessons: Pre-Trip Activities
75
Underwater Viewers
Students can make underwater viewers for studying intertidal life. These are most
useful if the students will sit beside a tide pool for several minutes and use them to
look beneath the surface.
Be sure to have someone watching for waves!
Viewers can be made from #10 cans with both ends removed (from the cafeteria or
a restaurant), 3 pound coffee cans, juice cans, or even 1’-3’ lengths of plastic pipe.
There will be less glare if the inside is painted black.
Cover the lower end with a clear plastic bag or plastic food wrap, extending it up
as far as possible, pulled tight and attached with heavy rubber bands or plastic
tape.
Cover any sharp edges with duct tape.
A building or plumbing supply store or building contractor might donate plastic pipe.
A plastic supply company might even donate clear plastic and glue to make
permanent viewers.
Cover sharp
edges with tape.
Number 10 can or 3 pound
coffee can with both ends
removed or plastic pipe
Inside can be painted
black, or you might use
black pipe.
Heavy rubber band(s)
and/or plastic tape
Note: Clear plastic storage boxes or plastic jars with clear (smooth) bottoms can
also be used.
NEVER use glass jars at the beach because of the danger of breakage.
Reference
Brown, Exploring Tidepools, p. 12
Clear plastic bag or
plastic food wrap,
pulled tightly and
extending as far as
possible up the side
of the can (the
farther up the side
the plastic goes,k
the less likely to
leak)

Lessons: Pre-Trip Activities A Guide to the Side of the Sea
76
The Name Game
Activity Summary
Students give descriptive names to organisms they find at the coast.
Introduction
The first thing people usually want to know about an organism is its name. Before
telling students the name of an organism, it is sometimes a good idea to let them
name it. If they are encouraged to give it a descriptive name, they have to examine
the organism more closely as they look for distinctive characteristics.
Grouping
Tide pool exploration groups
Time
Varies
Anticipated Outcomes
Students will examine organisms closely.
Students will use descriptive words to make up names for organisms.
Standard(s)
Grade 3 - Writing 2.2; Life Science 3.a, Investigation 5.a, 5.b
Grade 4 - Reading 1.3, 1.4; Investigation 6.a
Grade 5 - Investigation 6.a
Materials
� Magnifiers
Teacher Preparation
� Consider doing some word root study at school before the field trip.
Procedure
Before the trip:
1. Study word roots with the students and discuss how they can be used to name
organisms. Examples of descriptive names of tide pool animals include lined
chiton as compared to mossy chiton, giant green anemone, lined shore crab,
black abalone, and black turban snail.
During the trip:
1. As students find organisms, discuss how they got their names. (See examples
above.)
2. Sometimes when a student finds an organism, rather than telling the name,
have the group examine the organism and come to consensus about an
appropriate descriptive name.

A Guide to the Side of the Sea Lessons: Pre-Trip Activities
77
Food Chains
Activity Summary
Students learn about tide pool organisms and how they relate in food chains. (This
activity should be followed by the following Food Web activity.)
Introduction
Food chains represent a simplified view of the passage of energy and materials
through an ecosystem. They are useful because they are much less complex than
the more realistic food webs. See pages 23-24 for a review of food webs and food
chains.
This activity provides a good opportunity to reinforce the idea that all living things
depend on the non-living environment.
You might consider putting together sets of food chain cards for various habitats such
as grasslands, fresh water, redwood forests and deserts. (See Roa, The
Environmental Science Activities Kit, pages 151-162.)
Grouping
4-6 students per food chain
Time
Research: Varies (15-30 minutes)
Doing the activity and discussion: 15-30 minutes
Anticipated Outcomes
Students will understand that all organisms depend on the physical environment.
Students will understand the concept of food chains.
Students will know about the niches and foods of various organisms.
Students will improve their research skills.
Standard(s)
Grade 3 - Life Science 3.a, 3.b
Grade 4 - Life Science 2.a, 2.b, 2.c, 3.a, 3.b, 3.c
Grade 5 - Listening and Speaking 1.1
Grade 6 - Ecology 5.a-5.e

Lessons: Pre-Trip Activities A Guide to the Side of the Sea
78
Materials
� Reference books or other resources that tell about organisms’ feeding/food needs
� White paper or tag board, approx 8" x 8" (1 per student)
� Colored pencils, pens, or crayons
� Optional: pictures of organisms from magazines such as National Geographic
(often available at garage sales, libraries, or flea markets) or from calendars
(often available from bookstores for free after the Christmas season—or ask
parents for last year’s nature calendars).
Teacher Preparation
� Consider having a parent volunteer mount and laminate pictures of various
organisms on the paper or tag board heavy paper; or,
� Obtain pictures of various organisms. (See the book listed in the Reference
section on next page.)
� Either prepare a large drawing or find a picture to represent the physical
environment, including sunlight, water, and minerals. (This might be a picture of
the sun over a rocky coast.)
� Group the food chains into groups of 4-6 organisms. Have some optional
organisms in case some students are absent. Some examples of groups are:
Food Chains (continued)
Procedure
1. Assign one organism to each student.
2. The student does research to find out what their organism eats and what eats it.
3. Unless a picture is provided on a card, the student draws a picture of the
organism.
4. The student then gets together with his or her food chain group and decides the
order of the food chain, starting with the physical environment.
5. Students line up in food chain order.
6. For each chain, the teacher holds up the large physical environment card and
reminds the students about the importance of sunlight, minerals, and water. This
is the start of the food chain.
Abiotic Factors Producer
Herbivore
(first degree
consumer)
Carnivore
(second
degree
consumer)
Carnivore
or OmnivoreNext Step
diatoms
diatoms
algae
algae
surf grass
sun, water, and
minerals (or sea
water, which
contains
minerals)
zooplankton
turban snail
sea urchin
abalone
crab
mussel
small fish
crab
sea otter
sea anemone
algae
zooplankton
sea star
salmon
octopus
killer whale
small fish
sea star
bacteria
fisherman
shark
bacteria
bacteria
sea gull
Other types of organisms to consider for cards: dead fish, other people, shark, pelican
crab

A Guide to the Side of the Sea Lessons: Pre-Trip Activities
79
7. When all food chains are formed, students explain to the other groups why they
are in this order. They might hold up their picture and say something like “I’m a
turban snail. I eat algae from the rocks, and sea gulls feed on me.”
8. Tell the students that when they see an organism at the tide pools, they should
be ready to tell what it eats and what eats it.
9. Remind the students that most organisms eat many different things and many
things eat each organism. See the next activity “Food Webs.”
Discussion
1. See steps 6-9 above. Discuss what would happen if something happened to the
physical environment (water pollution, sediments blocking sunlight), or if some-
thing happened to an animal’s food source.
Assessment
• Can students tell about “their” organism’s food and predators?
Reference
Roa, The Environmental Science Activities Kit, p. 151-162
Food Chains (continued)

Lessons: Pre-Trip Activities A Guide to the Side of the Sea
80
Food Webs
Activity Summary
After learning about food chains, students form a model of a food web,
demonstrating the interconnectedness of organisms.
Introduction
While a food chain makes it easy to see how some organisms are related to each
other in their habitat, it is an oversimplification. In reality, most organisms eat and
are eaten by several types of organisms. These interconnecting relationships can be
viewed as a food web. See pages 23-24 for a discussion of food chains and food
webs.
Grouping
About 10-12 students will form the food web. The rest of the class can observe.
Time
10-30 minutes, including discussion
Anticipated Outcomes
Students will increase their understanding of food webs.
Students will understand how something affecting one part of a food web or
environment can affect other parts.
Standard(s)
Grade 3 - S.S. 3.1.2, 3.2.2, 3.4.2; Life Science 3.c, 3.d
Grade 4 - S.S. 4.2.1, Life Science 2.a, 2.b, 2.c, 3.b, 3.c, Investigation 6.a
Grade 5 - Life Sciences 2.a, Investigation 6.a
Grade 6 - S.S. 6.1.2; Ecology 5.a-5.e; Investigation 7.d, 7.g, 7.h
Materials
� Drawings or pictures of organisms and abiotic environmental factors,
approximately 8" x 8" in size, mounted on tag board, with strings for hanging
around the students’ necks.
� Have pictures to represent, for example:
**Also have one card to represent people: On one side label the person
something like “Wasteful Wally” and the other side “Wonderful Wally.”
� String or yarn (approx. 50’)
Sunlight Water MineralsDecomposers
(bacteria)
Producer
(algae)
Herbivore
(abalone)
Herbivore
(turban snail)
Carnivore
(sea otter)
Carnivore
(fish)
Scavenger
(sea gull)
Scavenger
(crab)
Carnivore
(mussel)

A Guide to the Side of the Sea Lessons: Pre-Trip Activities
81
Teacher Preparation
� Obtain pictures or drawings of the above. Pictures or drawings used in the Food
Chains activity might be used.
� Mount the pictures on tag board. Attach string so that each picture can be worn
around a student’s neck.
Procedure
1. Select 10-12 students to represent the parts of the environment listed under
Materials above. Have the students form a circle, facing inward.
2. Give the students their role cards and have them hang them around their necks.
The human card should have “Wasteful Wally” facing outward. Be sure to issue
the role cards in such a way that a web will form. (Have the sun across the
circle from the algae.)
3. Have the “sun” student hold the end of the string. As you connect the sun to the
algae by bringing the string to the algae student, ask one of the class members to
explain how the sun affects the algae. The “algae” student grasps the string. Ask
another to discuss how the algae is related to minerals as you bring the string to
the student with the mineral card. Ask another student to tell how minerals
affect herbivores (herbivores need algae, which need minerals) as you bring the
string to the herbivore
student. Continue in this
way until all organisms
are in the web, connect-
ing to the “human’ and
then finally back to the
sun. (The human is con-
nected to the sun because
humans need food that
needs the sun to grow.)
Food Webs (continued)

Lessons: Pre-Trip Activities A Guide to the Side of the Sea
82
4. Now have all of the students hold their string firmly in one hand and pull the
string taut. A web should be formed among the “organisms.” Point out that
everything is connected (or “hitched to everything else,” as John Muir said).
5. Tell the students that you are going to tap a student and tell something that hap-
pened to that part of the environment.
6. Instruct the students to hold their string firmly, and to tug gently when they feel a
tug.
7. Walk around the circle and tap a student on the shoulder and tell about something
that happened to the organism. This is the initial event. The tapped student is
to give a tug on the string. (The abalone was eaten by an otter, or the crab was
accidentally killed by a student on a field trip, or the water was polluted by a
factory, etc.)
8. This should start a chain reaction, and every part of the environment should soon
have been affected by the initial event. Have each affected student (or some-
one in the class) tell how they were affected.
9. Do this several times, with different initial events, pointing out that if one part
of the environment is affected, all parts are affected.
Discussion
1. It is easy to see how the environment is harmed by many things. It is very im-
portant that the students see that people can also help the environment. Discuss
how Wasteful Wally can also choose to be Wonderful Wally. Ask for examples of
how Wally could help improve and protect the environment.
2. Compare organisms’ roles or niches to the various niches that people with differ-
ent jobs fill in the human community. Discuss how people with different jobs
depend upon each other.
Assessment
• Are the students able to tell how organisms are interconnected?
• Are the students able to tell how organisms depend on the abiotic factors?
• Can the students tell ways that Wasteful Wally can be Wonderful Wally?
References
Roa: Environmental Science Activity Kit, p.152-162.
Snively: Once Upon a Seashore, p. 138-140.
Food Webs (continued)

A Guide to the Side of the Sea Lessons: Pre-Trip Activities
83
Slow Motion Ocean (Making Waves)
Activity Summary
Students create waves by blowing through straws on a pan of water. They then use
a model to observe the way that approaching shallow water causes waves to break.
Introduction
Most ocean waves are caused by wind blowing across the surface of the ocean. The
stronger the wind and the longer the time it blows across the water, the larger the
waves.
As a wave approaches a beach, it encounters shallow water. The lower part of the
wave, being in contact with the land under the sea, is more influenced by friction
with the bottom and slows down more than the top. Thus, the top of the wave
“outruns” the bottom, which is what causes waves to “break.”
If a wave encounters a reef or shallow bottom far from the shore, much of the
energy is dissipated by the offshore breakers. When the water remains deep until
close to shore, the waves tend to hit the shore with much more force.
Students should be reminded that a wave isn’t a mass of water moving from one
place to another. If it were, the place from which the waves came would soon run
out of water. Rather, a wave is energy moving through the water, which displaces
the water slightly.
Grouping
3-5 students per group
Time
Approximately 30 minutes, if the wave bottles are already made; more if the
students are making the bottles
Anticipated Outcomes
Students will understand that wind is the cause of most waves.
Students will understand why waves “break.”
Standard(s)
Grade 3 - Writing 2.2; Physical Science 1.d, Investigation 5.a, 5.b
Grade 4 - Earth Science 5.c, Investigation 6.a-d
Grade 5 - Earth Sciences 3.c, Investigation 6.b-6.i
Grade 6 - Earth Science 2.c, Physical Science 3.a, Investigation 7.a-h

Lessons: Pre-Trip Activities A Guide to the Side of the Sea
84
Materials
For each group:
� 1 shallow pan (pie tin, baking pan, paint tray, or? ... maybe with sand in it?)
� 1 or 2 straws
� 1 clear large ketchup or other bottle with a long tapered neck and cap (see
diagram)
� Corn syrup and vegetable oil (the amount will depend on the bottle size)
� Blue food coloring
� Recommended: plastic tape for taping the cap on the bottle
� Alternative to straws: battery operated or electric fan
Teacher Preparation: Try this activity yourself before doing it with students!
� Obtain materials above
� Depending on students, either have them prepare the wave bottles, or try to
arrange for a parent volunteer to do so. To make the wave bottle:
� Obtain one bottle per group. The bottle should have a long tapered neck.
� Fill the bottle about a quarter full with corn syrup.
� Mix in a few drops of blue food coloring.
� Slowly pour in some vegetable oil until the thick part of the bottle is about half
full.
� Cap the bottle tightly, and seal the cap with plastic tape.
Procedure
Making Waves:
1. Ask students what they think causes waves.
2. Ask students what they predict will happen if wind blows across
the surface of water.
3. Either demonstrate or have students experiment with
forming waves by either blowing across the surface of
water in a pan or using a fan to blow wind across
the surface.
4. If using an electric fan, caution students
about the danger of water and electric-
ity.
5. Have students experiment (or demon-
strate) with the fan on fast and slow
speeds.
6. If using straws, have students blow on the
water without straws, then with straws
to concentrate the force. Have them
blow hard and soft, and at different
angles.
Slow Motion Ocean (continued)

A Guide to the Side of the Sea Lessons: Pre-Trip Activities
85
Breakers:
1. Have the students slowly tip the
wave bottles, observing what
happens as the mixture ap-
proaches the narrow end,
which simulates a coast getting
shallower.
2. Call on students to describe
their observations.
Discussion
1. See above.
2. Discuss the difference between wind-driven waves and tsunamis.
3. Discuss the effect of waves breaking on tide pool organisms, and on wave spray
on zone 1.
Assessment
• Can students explain what causes waves and what causes waves to break?
References
Littlefield: Awesome Ocean Science!, p. 26
Project WET Curriculum Activity Guide, p. 450-451
Slow Motion Ocean (continued)

Lessons: Pre-Trip Activities A Guide to the Side of the Sea
86
Planet Water
Activity Summary
This Activity has two parts:
• In Part 1, students toss an inflatable globe around. When a student catches the
globe, he or she reports whether their right thumb is on land or water. This
information is recorded, and after 10 or 15 catches, the percentage of the
Earth’s surface covered with oceans is calculated.
• In Part 2, the teacher does a demonstration to show how much of the Earth’s
water is potable (drinkable).
Introduction
While we live on planet Earth, in reality most of the planet is covered with water.
We artificially divide the Earth’s ocean water into five oceans. In reality, the oceans
are all interconnected and could be considered one ocean that covers about 70% of
the Earth’s surface.
While there is lots of water on the Earth, only a small fraction is unpolluted and
available as liquid fresh water. Most of the water is either salty, frozen, far under
the surface, or polluted.
Grouping:
Whole class
Time:
Part 1: 15 minutes
Part 2: 15 minutes
Anticipated Outcomes
Students will understand that the Earth has lots of water, but that only a small
fraction is available for our consumption.
Students will understand the need to not pollute or waste fresh water.
Standard(s)
Grade 3 - S.S. 3.1.1, 3.4.2; Math Number Sense 1.1, Measurement 1.1; Science Inves-
tigation 5.a-c
Grade 4 - S.S. 4.2.2; Math 3.1; Science Investigation 6.a-e
Grade 5 - Math: Measurement and Geometry 1.3; Earth Science 3.a
Grade 6 - Resources 6.b
Materials
Part 1:
� Inflatable globe
� White board, chalk board, or overhead projector

A Guide to the Side of the Sea Lessons: Pre-Trip Activities
87
Part 2:
� 1000 mL beaker or 1 quart measuring cup
� 100 mL graduated cylinders
� Eyedropper/pipette or glass stirring rod
� Small metal bucket or other container
� Ice cube tray
� 2 small bowls, cups, or glasses
� Salt
Teacher Preparation: Try this activity yourself before doing it with students!
� Obtain materials
Procedure
Part 1: Activity:
1. Ask the students why Earth is called “Earth.”
2. Ask them how much of the Earth they think is actually covered with water.
Record answers on the board or overhead.
3. Show the inflated globe. Toss it up and catch it. Show the students where your
right thumb tip is and point out whether it is on land or water. Repeat a couple
of times.
4. Explain that the students are going to gently toss the globe to each other 10
times, each time recording whether the right thumb is on land or water. Repeat
more times if by chance the ratio of water to land isn’t nearly 7:3.
5. Discuss the significance of the fact that most of the Earth is covered by ocean
water.
Part 2: Demonstration:
1. Show the students 1 L of water in a beaker. This represents all of the water on
Earth.
Ask what fraction of the total they think is fresh water.
2. Pour 30 mL into a 100 mL graduated cylinder. This 3% represents all of the Earth’s
fresh water. Put some salt into the 970 mL of water in the beaker.
Ask students what fraction of the fresh water they think is frozen in ice caps and
glaciers.
3. Pour 6 mL of the 30 mL into a small bowl and pour the other 24 mL into the ice
tray.
(The 6 mL is about 0.6% of the total liquid fresh water on Earth.) Ask what frac-
tion of the 6 mL representing liquid fresh water the students think is drinkable
surface water.
4. Use the dropper to drop 30 drops (about 1.5 mL … 1/4 of the liquid fresh water)
into a small glass. This represents the fresh surface water: The rest is under-
ground and unavailable to us or not drinkable.
Planet Water (continued)

Lessons: Pre-Trip Activities A Guide to the Side of the Sea
88
5. Now take 1 drop of the 30 drops and dramatically show it as you release it into
the bucket. This 1 drop, about 0.003% (3/1000 of one percent) of the total
water, is available for people to use for drinking, washing, agriculture, and all
other uses.
Planet Water (continued)
Discussion
1. Discuss why it is important for us to conserve our water.
2. Discuss the importance of not polluting water.
3. Discuss the effect of more people competing for the same fresh water.
Assessment
• Can the students explain that only a small fraction of the Earth’s water is
available for us to use for drinking, cooking, washing, etc?
• Can the students explain the importance of not wasting or polluting water?
Resources
Davenport: Waves, Wetlands, and Watersheds, p. 45-48
Project Wet, p. 238-241 (Has a table for converting mL to “standard,” but why not
teach metric?)
Step 1
Step 2
Step 3
Step 4
Step 5
1000 mL
970 mL salt
water
30 mL
fresh water
24 mL ice 6 mL liquid
4.5 mL
underground
1.5 mL
surface fresh
29 drops
unavailable
1 drop available
for human use

A Guide to the Side of the Sea Lessons: Pre-Trip Activities
89
What is Salt Water?
Activity Summary
Students allow distilled, tap, and sea (salty) water to evaporate. They then examine
and describe the residue (if any).
Introduction
Sea water is salty, i.e., it contains chemicals that are called “salts.” To a chemist,
the term “salt” includes many other chemicals besides common table salt or sodium
chloride (NaCl). While the salts in ocean water contain many other chemicals, NaCl
makes up the vast majority of sea salt. The other chemicals are important, though,
as they provide nutrients for marine plants and protists.
The amount of dissolved salt(s) is called the salinity of a solution. Sea water is
typically about 3.5% dissolved salts, which is often stated as 35 parts per thousand.
Water can be more or less salty, though. It is interesting to ask students where the
salt in the sea came from. When they realize that it was brought to the sea by
streams, they can see that even “fresh” water streams must have some dissolved
chemicals. Students who obtain their domestic water from wells may have
experience with dissolved iron, sulfur, or other chemicals. River water averages
about 0.02% salts.
Students may have heard about or even experienced the very salty water of the
Great Salt Lake in Utah. Scientists believe that the Great Salt Lake was once part of
an ancient fresh water lake called Lake Bonneville. Over the years, the waters of
Lake Bonneville drained away or evaporated, leaving the Great Salt Lake behind.
The size and salinity of the Great Salt Lake vary depending on the precipitation in its
drainage basin. The Great Salt Lake is divided into two parts by an earthen railroad
causeway. The salinity of the northern part varies from 16-27%, while the southern
part ranges from 5-14% salt. The overall average is about 20%.
Salt (NaCl) is an important mineral for many reasons. As students study Native
Americans, they often learn how they harvested salt from the coast for their own
use and for trade. In some places in Africa, salt was sometimes literally worth its
weight in gold. This can lead to a discussion of wants vs. needs. (We all need salt to
live; gold is something that many people want, but isn’t a necessity.)
Dietary salt doesn’t come only as the salt that we buy as such, though. Salt is
present in many of our foods.
Grouping
Variable, depending on materials available.

Lessons: Pre-Trip Activities A Guide to the Side of the Sea
90
Time
Day 1: 10-30 minutes.
Day 2: 10-30 minutes
Anticipated Outcomes
Students will understand that the water can dissolve some other substances and that
the salts in the oceans are dissolved minerals.
Standard(s)
Grade 3 - S.S. 3.1.2, 3.2.2; Writing 2.2
Grade 4 - S.S. 4.2.1; Earth Science 5.a, 5.c, Life Science 3.b, 3.c, Investigation 6.a,
6.c
Grade 5 - S.S. 5.1.1; Physical Sciences 1.b, 1.h, 1.i, Earth Sciences 3.a, 3.b
Grade 6 - S.S. 6.1.1, 6.1.2; Ecology 5.b, Resources 6.b, 6.c
Materials
� Distilled water
� Tap water
� Well water with high mineral content (check with families, local drilling com-
pany, or water district)
� Sea water
� Saturated salt solution
(“Saturated” means that no more salt will dissolve in the water. Make it by
dissolving rock salt in warm or hot tap water in a gallon jug. Shake/stir, add
more until no more will dissolve. Let it sit overnight. Add more salt until no
more will dissolve with stirring. Rock salt is better for this than table salt, be-
cause table salt has chemicals added which will make the solution cloudy.)
� Evaporating plates:
• Glass or plastic microscope slides or other thin, clear glass or plastic
• Black or other dark colored plastic, maybe spoons - see teacher preparation
• Chemists use glass “watch glasses” for evaporating dishes
• Plastic Petri dishes (culture dishes) can be used for this and for many other
experiments.
• Black plastic caps from 35 mm. film “cans” can be used
� Medicine droppers (pipettes)
� Masking tape and pencils or wax pencils for marking
� Magnifying glasses or low power microscopes
Teacher Preparation: Try this experiment yourself before doing it with students!
� Obtain materials
� Depending on the students’ ages, you may want to mark the slides/plates to
indicate what type of water was placed on them.
What is Salt Water? (continued)

A Guide to the Side of the Sea Lessons: Pre-Trip Activities
91
� Use masking tape and pencil to label 2-3 droppers for each water type. (2-3 “tap
water,” 2-3 “sea water,” etc.) This is to avoid contaminating one water sample
with another type of water.
Procedure
1. Ask the students what they predict will happen if water is placed on a micro-
scope slide or dark colored plate and allowed to evaporate overnight. Have
them discuss this and write down their predictions.
2. Ask what will happen if sea water is allowed to evaporate. Have them record
their predictions.
3. Show the various water samples and demonstrate how to:
a. label the plates/slides so that they know what was there at the start
b. put the same amount of each sample (20 drops) on different plates
c. set the plates aside in a place where they won’t be disturbed
4. Have students label the plates/slides with the various types of water samples.
5. Have the students place 20 drops (1 ml) of distilled water on one plate, 20 drops
(1 ml) of tap water on another, etc. Caution the students not to switch the
droppers around, as this will “contaminate” the samples.
6. The next day, have students use magnifiers to observe the plates and record their
observations. (They should see mineral residues on some plates and, in some
cases, salt crystals.)
Discussion
1. What causes the water to leave the plate?
(Energy from the sun or other heat source causes water molecules to move rap-
idly enough to break free of attraction to other water molecules, which we call
evaporating. Note: Just naming it “evaporating” doesn’t show an understanding
of the process.)
2. Where did the minerals come from?
3. What would happen to the salinity in a shallow tide pool on a warm day? On a
rainy day?
4. Point out that plants and animals die if the water gets too salty. A fresh water
fish can not live in the ocean. So, tide pool organisms must be adapted to sur-
vive a wide range of salinities.
Assessment
• Do the students follow directions when preparing their slides, observing, and
cleaning up?
• Do the students record their observations clearly?
• Can students explain how the seas got salty?
What is Salt Water? (continued)

Lessons: Pre-Trip Activities A Guide to the Side of the Sea
92
Hot Stuff! Tide Pool Temperatures
Activity Summary
Students predict whether water temperature will change more in a small or large
quantity of water. They then test their predictions, and compare temperature
changes in water and sand.
Introduction
One important environmental factor with which tide pool organisms must contend is
temperature changes. As compared to sand, water tends not to change temperature
very much, as is shown by the cold temperatures along northern California’s coast
even on hot summer days. The water in tide pools, though, can change temperature
significantly because the volume of water is relatively small, it is exposed to the air,
and because tide pools tend to be dark in color, which increases the absorption of
energy on summer days. Most marine organisms don’t have to deal with large
temperature fluctuations; intertidal organisms do. This is especially true of the
organisms in the upper tide pool zones and of organisms such as algae, barnacles and
mussels that are attached to the rocks. (Refer to pages 8-11 and 16.)
Grouping
Teams of 2-3 students
Time
15 minutes to start the experiment, then 30-60 minutes during which thermometers
are read every 10 minutes. Discussion time.
Anticipated Outcomes
Students will know that water changes temperature relatively little when compared
to sand under the same conditions.
Students will know that smaller quantities of water change temperature more than
larger quantities under the same conditions.
Students will know that tide pool organisms must be adapted to a larger range of
temperatures than organisms living in the open ocean.
Standard(s)
Grade 3 - S.S. 3.1.1, 3.2.2; Writing 2.2; Physical Science 1.f, Life Science 3.d,
Investigation 5.a, 5.b, 5.c
Grade 4 - Math 3.1; Life Science 3.b, Investigation 6.a-6.f
Grade 5 - S.S. 5.1.1; Math 1.3; Listening and Speaking 1.1; Earth Science 3.b, 3.c,
4.b, Investigation 6.a-6.i
Grade 6 - S.S. 6.1.2; Ecology 5.a, 5.e, Investigation 7.a-7.h

A Guide to the Side of the Sea Lessons: Pre-Trip Activities
93
Materials
� 4 thermometers per group of students
� 4 plastic cups, baby food jars, beakers, or other containers per group
� Approximately 500 ml (2 cups) of sand and water per group
� Refrigerator
� Source of moderate heat…incandescent light bulbs, sunlight, hot plate, or?
Teacher Preparation (Try this experiment yourself before doing it with students!)
� Obtain materials.
� Practice the experiment yourself to see how long it will take your heat source
and refrigerator to cause a significant temperature change in the sand.
� Decide on composition and numbers of student groups. To reduce the amount of
material needed, you might have 2 groups compare large and small amounts of
sand, 2 groups compare large and small amounts of water, 2 groups compare small
but equal amounts of sand and water, and 2 groups compare larger but equal
amounts of sand and water.
Procedure
1. Depending on the students’ ability, either the students, a parent volunteer, or
you: measure out equal amounts of sand and water into 2 containers for half of
the groups. The amount needs to be enough to cover the bulb of the thermom-
eter in the containers that the students will be using.
2. In two other containers, measure out twice the amount of sand and water as in
step 1. These larger quantities will be tested by other groups.
3. Discuss with the students whether they think that equal amounts of water and
sand will change temperatures the same amount if exposed to a heat source and/
or refrigeration.
4. Discuss with the students whether they think the larger quantities of sand and
water will change temperature as much as the smaller quantities.
5. Have the students write down their predictions for both sand compared to water
and different quantities.
6. Either provide the students with a data table such as the one on the next page or
have them design a similar data table.
Predictions:
a. I predict that sand will change temperature (more or less…circle) than
water when equal amounts are placed in a refrigerator.
b. I predict that sand will change temperature (more or less…circle) than
water when equal amounts are heated equally.
c. I predict that a larger amount of sand will change temperature (more or
less…circle) than a smaller amount of sand when placed in a refrigerator.
d. I predict that a larger amount of water will change temperature (more or
less…circle) than a smaller amount of water when both are heated
equally.
Hot Stuff! Tide Pool Temeratures (continued)

Lessons: Pre-Trip Activities A Guide to the Side of the Sea
94
7. Have the students decide on time intervals at which to check the temperatures.
8. Be sure that the students know how to read the thermometers…Teach them if
necessary.
9. Have the students measure and record the starting temperatures of the sand and
water samples in the containers.
10.Have the students place one large and one small of both sand and water in the
refrigerator and the others near the heat source.
11.At the agreed upon intervals, have the students check and record the tempera-
tures of the samples.
12.After the experiment is finished, collect the sand for use in other experiments,
and have the students rinse out the sand containers.
13.Have the student groups share their results. Record the results on the board or an
overhead transparency of the data table.
14.Discuss, including the significance to tide pool organisms.
Discussion
1. Discuss the significance of this experiment to tide pool organisms.
2. Discuss the changes in the temperature of the sand at the beach on a summer day
as compared to the water’s temperature change.
3. Discuss the implications on weather in the U.S. Coastal climates tend to be
moderated by the oceans. For a given latitude, the temperature extremes tend
to be in places far from the ocean.
(You might bring in a newspaper with national temperature data and compare the
Mendocino coast, Denver, and Helena, Montana. It is also interesting to compare
Fairbanks and Anchorage, and Mendocino or Fort Bragg to Ukiah or Lakeport.)
Hot Stuff! Tide Pool Temeratures (continued)
TimeTemp. of small
sample of
sand
Temp. of large
sample of
sand
Temp. of small
sample of
water
Temp. of large
sample of
water
Temp. change
Start (0 minutes)
+ 10 minutes
+ 20 minutes
+ 30 minutes
+ 40 minutes

A Guide to the Side of the Sea Lessons: Pre-Trip Activities
95
4. Optional: While on a field trip to the tide pools, have students check the tem-
perature near the surface and near the bottom of a tide pool that has been ex-
posed to the sun for a while. Better yet: Have them check the top, middle, and
bottom temperatures over a period of a few hours.
Assessment
• Do the students demonstrate their ability to use the thermometers properly?
• Can the students tell that small quantities of water change temperature more
than large quantities, other things being equal?
• Can the students tell that sand will change temperature more than water, other
things being equal?
• Can the students discuss the significance of tide pool size and exposure with
regards to tide pool organisms?
Hot Stuff! Tide Pool Temeratures (continued)

Lessons: Pre-Trip Activities A Guide to the Side of the Sea
96
Drying Out in the Water?
Activity Summary
Students place pieces of carrot in the air, tap water, sea water, saturated salt
solution, and salt. They then observe the carrot pieces the next day and observe
changes in size and turgidity (rigidity).
Introduction
Few fresh water organisms can live in ocean water, and few marine organisms can
survive in fresh water. One reason for this is osmosis, or movement of water across a
semi-permeable membrane such as a cell membrane, from an area of high
concentration (of water) to the other side of the membrane where there is a lower
concentration of water. Most fresh water organisms will lose water from their cells
if placed in sea water. If they lose too much water, they die.
Tide pool organisms, especially those in small pools in the upper zones, must be able
to either leave the tide pool or deal with very salty water on a warm summer day
when water evaporates from the pool, or with water that is less salty than ocean
water on a rainy day. Some deal with this varying salinity by clamping down on rocks
or closing shells. Others have tough skins that aren’t very permeable to water.
Others have a high tolerance for a range of salinities.
Grouping
Groups of 2-4 students
Time
Day 1: 10-30 minutes
Day 2: 15-30 minutes + discussion
Anticipated Outcomes
Students will understand that water can move in and out of cells and organisms.
Students will understand that losing too much water is harmful to an organism.
Students will understand that tide pool organisms must have adaptations for dealing
with a variety of salinities.
Standard(s)
Grade 3 - Writing 2.2; Math: Number Sense 1.1, Measurement and Geometry 1.1;
Life Science 3.a, 3.b, 3.d, Investigation 5.a, 5.c
Grade 4 - Life Science 3.b, 3.c, Investigation 6.a-6.f
Grade 5 - Math: Measurement and Geometry 1.3; Physical Science 1.i, Earth
Science 3.a, 3.b, Investigation 6.b-i
Grade 6 - Ecology 5.e, Investigation 7.a-7.h

A Guide to the Side of the Sea Lessons: Pre-Trip Activities
97
Materials
� Paper and pencils
� Rock salt and table salt
� Carrots (“baby carrots?”)
� Knife (teacher or parent volunteer uses)
� 5 similar containers for each group: plastic cups, baby food jars, beakers, or?
� 6" of masking tape or some other way to label containers
� Optional: ruler with millimeters
Teacher Preparation (Try this experiment yourself before doing it with students!)
� For each group, cut 5 carrot slices of approximately equal diameter and thick-
ness. “Baby carrots” are good for this because their sides are less tapered than
fresh carrots, and they have had the outer layers removed.
� Alternatively, use large carrots and cut cubes of equal size. This may be prefer-
able if you choose to have the students measure the sides of the carrots and
calculate volume.
� Either obtain some sea water or prepare an artificial sea water sample by dis-
solving about 28 grams (1 ounce) of table or rock salt in a liter (quart) of water.
� Make a saturated salt solution by adding salt to a liter of warm water until no
more will dissolve, then add more. Let this stand overnight, and add more if all
of the salt has dissolved. Keep doing this until no more will dissolve. Regular
table salt will produce “cloudy” water; rock salt is recommended.
� Either put together sets of materials for the students or set up stations where
they will pick up their materials. Each group will need the following:
• 5 containers such as plastic cups, baby food jars, Petri dishes, or beakers
• Tap water, sea water, saturated salt solution, dry table salt
• Pencil (not pen, as pen will run if it gets wet while pencil won’t)
• White paper
• 6 inches of masking tape or some other way to label the containers
� Consider starting this experiment late one day and finishing it the next morning.
Procedure
1. Ask the students to tell what they think would happen to a fresh water animal if
it were put into the ocean.
2. Ask the students what they think would happen to an ocean animal if it were
placed in a fresh water lake.
3. Ask the students to predict, in writing, what they think would happen to a piece
of carrot if it were put overnight in ocean water, very salty water, dry salt, tap
water, and the air.
Drying Out in the Water? (continued)

Lessons: Pre-Trip Activities A Guide to the Side of the Sea
98
4. Explain the following procedure to the students, using materials to demonstrate:
a. Use masking tape to number the 5 containers. Place the following into the
containers:
#1: nothing (air)
#2: tap water (approx 1" deep)
#3: 1"of sea water
#4: 1" of saturated salt solution
#5: nothing yet…will add dry salt after the carrot piece is in the container
b. Place 5 carrot disks on a piece of
paper and draw around each of them
with a pencil. Be sure to keep track
of which piece goes with each circle
by numbering the circles to correspond
with the 5 numbered containers.
c. Place the carrot disks into the
containers, being sure that the numbers
correspond. For #5, place the carrot disk in
and cover it with table salt. Set the
experiment aside where it won’t be disturbed.
d. The next day, have students observe the
containers/carrots, then have them remove
the carrot disks and record their observations
about both their size and turgidity (stiffness).
• Students should notice that the carrot disk
in the saturated solution is floating, while
the others are on the bottom. This is
because the saturated salt solution is denser
than the carrot disk.
• They might measure the diameters, or simply place the disk on the
corresponding circle drawn the day before.
• For older students, consider having them calculate the volume before
and after.
Drying Out in the Water? (continued)
1 2 3 4 5
2

A Guide to the Side of the Sea Lessons: Pre-Trip Activities
99
5. After the students have recorded their observations, discuss the observations and
the implications for organisms. (Do this before cleaning up, so you can show
examples.)
Typical results might be: (water moves from a high density [%] of water to
where there is a lower % of water)
Carrot in air - will lose about 1/3 of its diameter and become soft (air has
little water in it)
Carrot in tap water - will stay the same, and may become more turgid/firm
(higher % water outside carrot)
Carrot in sea water - will lose about 1/10 of diameter and become softer
(lower % water outside carrot)
Carrot in saturated salt solution - will lose a little more, become softer, and
float (still lower % water outside, and carrot cellulose tissue is less dense
than water)
Carrot in dry salt - will lose about 1/3 of its diameter and become soft (water
diffuses out into salt)
Discussion
1. Why did some of the disks shrink? (Water left the cells because there was more
water (a higher percentage) in them at the start than in the surrounding water
(or air or salt), so more molecules were moving outward from the cells than
inward. This is called osmosis.
2. Why didn’t the tap water disk shrink? (water entered cells as fast as it left)
3. Why did some carrots get soft? (water left the cells)
4. What would happen to a fresh water animal placed into the ocean? Why can’t
people on a life raft in the ocean just drink the ocean water?
5. What would happen to an ocean animal placed in fresh water?
6. How might tide pool organisms deal with a salty pool on a sunny day? With a tide
pool that was becoming more diluted (less salty) during a rain storm?
Assessment
• Can the students discuss the above questions?
Drying Out in the Water? (continued)

Lessons: Pre-Trip Activities A Guide to the Side of the Sea
100
Wet is Wonderful!
Activity Summary
Students experiment to determine how well various covering materials will delay
the drying out of a sponge. This is to demonstrate the importance of re-covering
organisms after moving a rock or clump of algae to examine them.
Introduction
One of the most important limiting factors for tide pool organisms is the drying
effect of exposure to the air. Many organisms obtain oxygen through gills, which,
like our lungs, must be kept moist. When students explore the tide pool area, they
will generally turn over rocks and clumps of algae (“sea weed”) to look for
organisms. This, of course, exposes the organisms underneath not only to
desiccation, but also to capture by predators, injury from the students, and injury
both from the removal and the replacement of the rock or algae.
Grouping
2-4 students per group
Time
Time will vary depending on a number of things, including air temperature, wind,
type of soil or sand, and other factors. Start the activity in the morning and check
the experiment periodically throughout the day.
Anticipated Outcomes
Students will understand the importance of being careful when moving rocks or
algae at the tide pools.
Students will understand the importance of replacing rocks and algae after moving
them to look for organisms.
Standard(s)
Grade 3 - S.S. 3.1.1, 3.1.2, 3.4.2; Writing 2.2; Physical Sciences 1.f, Life Science
3.a, 3.d, Investigation 5.a. 5.b
Grade 4 - Life Science 3.a, 3.b, 3.c, Investigation 6.a-f
Grade 5 - S.S. 5.1.1; Life Sciences 2.a, Earth Sciences 3.b, 3.c, 4.b, Investigation
6.b-i
Grade 6 - Ecology 5.e, Investigation 7.a-7.h
Materials
� Thin pieces of sponge or paper towels or cloth towel scraps: 3 per group
� Water
� Sand or soil in plastic pans or cardboard boxes lined with waxed paper (or area
outside where experiments will not be disturbed)

A Guide to the Side of the Sea Lessons: Pre-Trip Activities
101
� Rocks, approximately 5" x 7" or ?: 1/group
� Clumps of algae, large, flexible leaves (not dry), or cloth torn into strips to simu-
late clumps of algae (If you obtain algae from the coast, you may be able to dry it
thoroughly after the experiment and store it for future use.)
� Half of a rinsed out egg shell
� Recommended:
“Cobblestone Hotel” transparencies from Once Upon a Seashore by Snively.
Teacher Preparation
� Either cut out small sponge pieces (approx ½” thick x 1"x 2") or make paper
towel or cloth pieces about 4" x 4.”
� If doing the activity inside:
Obtain plastic pans (1/group) or line cardboard boxes with waxed paper, plas-
tic, or foil.
Fill the pans or boxes with approximately 2" of dry soil or sand each.
� If doing the activity outside:
Find a place where the experiments can be set up and not be disturbed.
� Obtain clumps of algae, or leaves, or simulate algae with strips of damp cloth.
� Obtain a half of a rinsed out egg shell for each group.
� Try out the experiment yourself a day or two before the students do the experi-
ment. This will enable you to decide on appropriate intervals for checking the
sponges. If it is warm and dry, you may want to have them checked every 15
minutes. If it is cool and humid, you may only need to check every 45 minutes.
� Recommended: Make transparency of “Cobblestone Hotel” masters from Snively.
Procedure
1. Discuss the importance of organisms remaining moist to tide pool animals.
2. Ask the students how long a tide pool animal might remain moist if it is uncov-
ered by someone moving a rock or clump of algae.
3. Describe the experiment to the students, or ask them how they might use the
materials to design an experiment.
4. Either provide the students with a data table like the one on the next page or
have them create their own.
Descriptors: wet, very damp, damp, slightly damp, dry
5. Have the students write down their predictions for how long they think it might
take a piece of damp sponge (or paper towel or cloth towel) to dry out if it is
exposed to the air, under a rock, and under some algae.
6. Have each group moisten three sponge pieces (or folded up towel pieces).
7. Have the students place half of an egg shell on the soil or sand to simulate an
organism.
8. Have the students place one of their sponges on top of the moist soil or sand, and
the others under the rock and the algae clump (or leaves or damp cloth strips).
Wet is Wonderful! (continued)

Lessons: Pre-Trip Activities A Guide to the Side of the Sea
102
9. Check the sponges every 15-30 minutes, recording whether they are wet, very
damp, damp, slightly damp, or dry.
Discussion
1. How close were the predictions?
2. Which provided better protection from drying out: rock or algae?
Wet is Wonderful! (continued)
3. Why is it important to carefully replace rocks or algae clumps?
4. Use the “Cobblestone Hotel” overhead transparency to discuss the various kinds
of organisms that live on and under rocks and why it is important to be careful
when moving or even walking on rocks in the tide pool area.
Assessment
• Are the students able to explain why it is important to carefully replace rocks or
algae?
References
Snively: Beach Explorations, p. 73-79 and Once Upon a Seashore, p. 97-103
Time Exposed to air Under rock Under “algae”Condition of
eggshell
Start (0 minutes)
+ 15 minutes
+ 30 minutes
+ 45 minutes
Etc.

A Guide to the Side of the Sea Lessons: Pre-Trip Activities
103
Now You See Me, Now You Don’t
Activity Summary
Students experiment with paper “fish” and find that camouflage is an adaptation
that helps fish (and other organisms) avoid getting caught by predators.
Introduction
Intertidal animals need to contend with many things, and predators are a constant
threat to most. Animals have evolved a variety of ways of defending against
predators, including sharp pinchers, stinging cells, hard shells, the ability to flee
quickly, and camouflage. Many organisms combine camouflage with other defenses.
For predators, camouflage is not only a defense against other predators, but also a
way to sneak up on their prey.
Grouping
Groups of 3 students
Time
10-30 minutes, including discussion
Anticipated Outcomes
Students will be able to define camouflage and tell how it helps animals survive.
While at the tide pools, students will be able to point out examples of camouflage.
Standard(s)
Grade 3 - Writing 2.2; Life Science 3.a, 3.b, 3.d, Science Investigation 5.a-5.c
Grade 4 - Life Science 3.a, 3.b, Science Investigation 6.a
Grade 5 - Science Investigation 6.a-f
Grade 6 - S.S. 6.1.1, 6.1.2; Ecology 5.a-5.e
Materials
� Scissors
� Newspaper (classified section)
� Colored and white construction paper
� 2 envelopes per group
Teacher Preparation
� Cut out (or have a parent volunteer do it) paper “fish” from the
classified section of a newspaper and from colored construction
paper. Make about 20 newspaper and 20 colored (light and dark)
construction paper “fish” per student group.
1” - 2”

Lessons: Pre-Trip Activities A Guide to the Side of the Sea
104
� Put together “sets” of materials that include:
• ½ page of newspaper classified section
• 1 colored and 1 white sheet of construction paper
• An envelope with 20 newspaper “fish”
• An envelope with 20 construction paper “fish” (of the same color as the sheet)
Procedure
1. Issue sets of materials to student groups (3 students per group). One student is
designated as the predator and the other(s) as “mother nature.”
2. Have the “predator” student turn around while the others scatter both the news-
print and colored construction paper fish on the sheet of newsprint.
3. Tell the other student (the predator) that on “go” they are to turn around and
pick up as many of the fish as they can in 10 seconds, ONE AT A TIME, using only
the thumb and forefinger of one hand.
4. Start the “hunting” with “Go!” and stop the hunting after 10 seconds.
5. Have the students count and record how many newsprint fish and how many
colored fish they collected from the newsprint background.
6. Designate a different student as the predator and have them repeat the above
with the colored construction paper
as a background.
7. Designate the third student as the
predator, and have them repeat the
above with the white paper as a
background.
8. Tally the class data for each trial on
the board or overhead projector.
Discussion
1. Which type of fish “survived” best
in each trial?
2. Which type of fish would have been
able to produce the most offspring in each trial?
3. How does camouflage help the individual survive?
4. How does camouflage help the species survive?
Assessment
• Can the students define camouflage?
• Can the students explain how camouflage helps the individual and the species
survive?
• Can the students point out examples of camouflage at the tide pool?
Now You See Me, Now You Don’t (continued)

A Guide to the Side of the Sea Lessons: Pre-Trip Activities
105
Other Activities
Virtual Field Trip
While you are previewing the trip, you might take slides or make a video. These can
be used to help prepare the students for the trip through a “virtual field trip” in
which the students see pictures of many of the organisms that they will see on the
trip. This preview will help the students know what to expect without diminishing
their excitement and interest. Students enjoy seeing an organism in real life after
seeing it in pictures, and they are more likely to remember it.
A virtual field trip can also be used to review what was seen at the coast. You might
have the students prepare a slide show of their trip for parents … maybe a digital
slide show using Power Point?
There are several good DVDs and video tapes about the intertidal zone. See Appendix
D - Resources.
Standard(s)
Grade 3 - S.S. 3.1.1; Life Science 3.a-d
Grade 4 - S.S. 4.2.2; Life Science 3.a
Grade 5 - S.S. 5.1.1; Life Science 2.a, Earth Science 3.c
Grade 6 - S.S. 6.1.2; Earth Science 1.f, 2.c, 2.d
Research Teams of Experts
Some teachers prepare their students by forming teams, with students becoming
“experts” on certain organisms before the trip. One student may learn about crabs,
another about algae, and another about anemones. The teacher can provide
information, or the students can do research in the library or on the Internet. The
information in this guide, including the resources listed at the end will be useful.
While on the trip, they can share their knowledge with their team mates.
Standard(s)
Grade 3 - Writing 2.2; Life Science 3.a
Grade 4 - Life Science 3.a, 3.b, 3.c, Science Investigation 6.a
Grade 5 - Writing 2.3; Life Sciences 2.a, Science Investigation 6.a
Grade 6 - Ecology 5.a-e

Lessons: Pre-Trip Activities A Guide to the Side of the Sea
106
Notebooks and Journals
Students can prepare for the trip by making notebooks or journals in which to record
their observations. Students might:
• Sit quietly and observe an organism … describe behaviors or draw.
• Describe and draw one or more adaptations that organisms exhibit.
Standard(s)
Grade 3 - Writing 2.2; Life Science 3.a-d
Grade 4 - Life Science 2.b, 2.c, 3.a-c, Investigation 6.a-c
Grade 5 - Writing 2.3; Life Sciences 2.a, Earth Sciences 3.a-d
Grade 6 - Writing 2.3; Earth Science 1.f, 2.c
Checklists
Teachers can provide checklists of things for the students to look for. Two examples
are given below. (See pages 107-108.)
Standard(s)
Grade 3 - Writing 2.2; Life Science 3.a, 3.b, Science Investigation 5.a
Grade 4 - Life Science 3.a, 3.b, Science Investigation 6.a
Grade 5 - Life Sciences 2.a, Science Investigation 6.a, 6.g
Grade 6 - Life Sciences 5.c, 5.e

A Guide to the Side of the Sea Lessons: Pre-Trip Activities
107
Sea Shore Organisms Checklist
Which of these organisms have you seen before going on the field trip to the rocky
coast pools? Which organisms do you see on the trip?
Notes or Sketches:OrganismBefore field
trip?
On field
trip?
Sea Palm
Rockweed
Coralline Red Algae
Surf Grass
Giant Green Sea Anemone
Acorn Barnacle
Lined Shore Crab
Hermit Crab
Chiton
Gumboot Chiton
Limpet
Abalone
Turban Snail
Mussel
Ochre Star
Bat Star
Sea Urchin
Cormorant
Sea Gull

Lessons: Pre-Trip Activities A Guide to the Side of the Sea
108
Seashore Organism Adaptations Checklist
Which of the following adaptations have you seen before? Which do you see while on
the field trip to the rocky coast?
Notes or Sketches:AdaptationBefore
field trip?
On field
trip?
Example from
trip:
Biting mouth parts
Streamlined shape
Glue for attaching
to rock
Hard shell
Flexible stalk or
stem
Pinchers
Tentacles that sting
Camouflage
Hiding in holes or
cracks
Hiding under algae
or sandAbility to move
quickly

A Guide to the Side of the Sea Lessons: Pre-Trip Activities
109
Sensory Awareness
We tend to be very sight oriented. Students can be encouraged to use other senses.
One way to do this is to have students complete a Sensory Awareness Chart. This, of
course, can be extended to other environments, including the classroom, playground,
home, or other places. This can also be used to help teach about similes and
metaphors. Space has been left in the charts below for students or teachers to add
items.
Standard(s)
Grade 3 - Writing 2.2; Life Science 3.a, 3.b, Science Investigation 5.a-c
Grade 4 - Science Investigation 6.a-b
Grade 5 - Listening and Speaking 1.1; Life Sciences 2.a, Science Investigation 6.a, 6.g
Grade 6 - Math Statistics 2.1, 2.2
Sense of Touch
Sense of Hearing
Notes or Sketches:How many of these
have you felt?
Before field
trip?
On field
trip?
Sliminess of wet algae
Sharp points of a barnacle
Wood grain on driftwood
Ridges on a mussel shell
Tickling of a hermit crab
walking
Notes or Sketches:How many of these
have you heard?
Before field
trip?
On field
trip?
Waves crashing against
rocksWaves breaking on a sandy
beach
Seagulls calling

Lessons: Pre-Trip Activities A Guide to the Side of the Sea
110
Sensory Awareness (continued)
Notes or Sketches:Before field
trip?
On field
trip?
Sea air
A dead animal on the beach
A wet feather
Moist soil near the beach
How many of these
have you smelled?
Notes or Sketches:How many of these
have you tasted?
Before field
trip?
On field
trip?
Crab
Abalone
Shrimp
Fresh algae
Dried algae
Clam chowder
Squid (calamari)
Sea urchin eggs (roe)
Sense of Smell
Sense of Taste

A Guide to the Side of the Sea Lessons: Pre-Trip Activities
111
Reference
Snively: Once Upon a Seashore, p. 234-237
Sensory Awareness (continued)
How many of these
have you seen?
Before field
trip?
Individual grains of sand
Grain in driftwood
Star pattern on sea urchin or
sand dollar
Coiled chambers in a broken
snail shell
Anemones waving their
tentacles in the water
A sea star walking
Rainbow colors on wet algae
Sand and shells on an
anemone
Crabs running sideways to
hide
Notes or Sketches:On field
trip?
Fish darting for cover
Sense of Sight

Lessons: During the Field Trip A Guide to the Side of the Sea
112
Lessons and Activities to do During the Tide Pool Field Trip
While on the trip, the safety of both the students and the environment are of utmost
concern. For this and other reasons, it is important that the teacher preview the trip,
preferably with a ranger or interpretive specialist.
While at the tide pools, the emphasis should be on doing learning activities that
cannot be done elsewhere.
Hands-On Activities
Litter Getters
Before leaving the beach, have students collect any litter that they can find. Caution
them about sharp glass or metal, fish hooks, syringes, or other dangerous items. After
they have collected the litter, have them sort it into categories. Discuss what people
could have done rather than pollute the beach. Dispose of the material properly,
recycling what you can.
Standard(s)
Grade 3 - S.S. 3.4.2; Math Number Sense 1.1; Writing 2.3
Grade 4 - Math 3.1
Grade 5 - Science: Investigation 6.g
Grade 6 - Science Resources 6.b, 6.c
References (See the “Resources” section at the back of this Guide)
Armstrong: Sea Searcher’s Handbook, p. 189-195
Brown-Babcock: Save Our Seas, the whole thing!
California Coastal Commission, especially the Adopt-A-Beach program

A Guide to the Side of the Sea Lessons: During the Field Trip
113
In the Zone
Activity Summary
This activity can be done before or after the students have been taught about
zonation.
While at the coast, students are asked to look carefully at an area that shows bands
of different algae types, mussels, anemones, etc., i.e., an area or rock that shows
zonation. The teacher leads the students to notice the zonation and then discusses
what might cause the organisms to form the bands/zones.
Introduction
Different organisms have different tolerances for such things as exposure to the air,
variations in temperatures, and wave action. As a result, intertidal organisms tend
to form bands called zones, based on which organisms can tolerate and thrive in the
physical environments at various levels in the intertidal area. Scientists generally
describe 4 zones in the intertidal environment. See pages 8-11.
Grouping
Whole class or smaller groups
Time
5-15 minutes, depending on the students’ prior knowledge and their ability to
observe the zones
Anticipated Outcomes
Students will understand the reasons behind zonation in the tide pool ecosystem.
Students will develop their ability to distinguish between various organisms.
Students will increase their ability to describe organisms and zones.
Standard(s)
Grade 3 - Writing 2.2; Life Science 3.a, 3.b, 3.c, 3.d, Investigation 5.a
Grade 4 - Life Science 3.a, 3.b, 3.c, Investigation 6.a-d
Grade 5 - Listening and Speaking 1.1, 1.2; Life Sciences 2.a, Investigation 6.h
Grade 6 - Ecology 5.e
Materials
� None needed
� Optional: Binoculars

Lessons: During the Field Trip A Guide to the Side of the Sea
114
Teacher Preparation
� The teacher must preview the field trip site, preferably with the ranger or
interpreter that will be working with the students. Select a point from which
the students will be able to clearly see the pattern of bands of organisms indicat-
ing the zones.
Procedure
1. Gather the students at the point from which the zonation is easily seen.
2. Ask the students what they notice about the organisms living on the rocks.
3. Lead the students to observe the zonation.
4. Ask the students to hypothesize about why the organisms grow/live in bands.
Discussion
1. What do you notice about the way that the different kinds of organisms are
arranged?
2. Have you ever been to the Sierra Nevada Mountains? Are the pine trees and
cones the same there as at the coast (in the Sierra, students will have seen
several kinds of pine cones, including large sugar pine, smaller lodge pole pine,
and medium Jeffrey and Ponderosa; at the coast, the most common is the
Monterey Pine, which has medium sized cones.)
3. If you have plants at your house, or a garden, do some plants do better in shade
than in sun, and vice verse?
4. Are jungle plants and animals the same as desert plants and animals?
5. What determines which organisms will be able to live in a place?
6. What would happen to an organism that was moved from its normal home (zone)
to another?
Assessment
• Do the students notice the bands?
• Can they form reasonable explanations for the bands of organisms?
In the Zone (continued)

A Guide to the Side of the Sea Lessons: During the Field Trip
115
Holdfast Hideouts
Activity Summary
Students examine an alga holdfast, looking for organisms living under, in or on it.
Introduction
The convoluted shape of kelp holdfasts makes them ideal hiding places for small
worms, snails, crabs, and many other organisms. Not only are organisms found in
the many nooks and crannies, but they seek shelter under the alga mass itself.
Grouping
Grouping will depend on the numbers of algal clumps/holdfasts, pans, and
magnifiers. Groups of 2-4 students are recommended.
Time
10-30 min +
Anticipated Outcomes
Students will increase their observation abilities.
Students will learn about organisms’ adaptations, especially camouflage.
Standard(s)
Grade 3 - Writing 2.2; Life Science 3.a, 3.b
Grade 4 - Life Science 2.a, 2.b, 2.c, 3.b, 3.c, Investigation 6.a
Grade 5 - Life Sciences 2.a, Investigation 6.a
Grade 6 - Ecology 5.a-5.e
Materials
For each team of students:
� aluminum pie tin, plastic or metal pan, preferably with white bottom
� plastic magnifiers
� plastic forceps
� a cloth towel for drying hands and materials
Teacher Preparation
� Obtain and prepare materials.
� If the pans don’t have white bottoms, white paper or poster board can be cut to
fit. Butcher paper, with the coated side up works well.
� Attach strings to the plastic magnifiers so that they can be worn around the neck.

Lessons: During the Field Trip A Guide to the Side of the Sea
116
Procedure
Before the trip:
1. Consider having students practice with the materials in the classroom before
going to the coast. Emphasize safety and not losing equipment.
2. Also emphasize that many of the organisms that they will find will be very diffi-
cult to see. Discuss the value of camouflage.
During the trip:
1. This activity might be done after exploring the tide pools, as it requires the
students to focus closely.
2. Find (or have the students find) several clumps of algae, preferably but not nec-
essarily, with holdfasts.
3. Place the algae into pans, and have students look carefully for creatures hiding
there.
4. Students can sketch or describe (in writing or verbally) what they find.
5. Emphasize taking care of the organisms. Keep them damp, return to where they
were found.
Discussion
1. Discuss the value of camouflage. What would happen to an organism that isn’t
well hidden?
2. Discuss the use of the algae as food, shelter from drying out, shelter from preda-
tors.
3. What happens to the dead algae? (food for various organisms, including decom-
posers)
Assessment
• Are the students taking the time and effort to look closely?
• Can they define camouflage and give an example?
References
Brown: Exploring Tidepools, p. 19
Holdfast Hideouts (continued)

A Guide to the Side of the Sea Lessons: During the Field Trip
117
The Pyramid of Numbers
Activity Summary
Before the field trip, students are asked to predict the relative numbers of various
kinds of organisms they will see. While on the field trip, they note and discuss how
many they actually see. Presumably, they will see fewer top carnivores than they
will herbivores in a given area.
Introduction
The farther “up” a food chain one goes, or the closer to the top of a food pyramid,
the fewer the organisms. This is due to the fact that organisms are not 100%
efficient in converting their food to their own tissue. Most of the energy and matter
that organisms take in is returned to the environment. (Consider how much food
you eat each day. How much weight would you gain if you converted even 25% to
your own body tissue each week?) This reduction in numbers (and mass) of
organisms as one goes up the food chain is called the “pyramid of numbers,”
“pyramid of biomass,” or “food pyramid.” See pages 26-27.
Grouping
Tide pool groups
Time
5 minutes to observe and discuss
Anticipated Outcomes
Students will understand the concept of the pyramid of numbers/biomass.
Students will understand why a given area of land can support more herbivores than
carnivores.
Standard(s)
Grade 3 - S.S. 3.1.2, 3.2.2, 3.4.2; Math 1.1; Writing 2.2; Life Science 3.c, 3.d
Grade 4 - S.S. 4.2.1; Life Science 2.a, 2.b, 2.c, 3.b, 3.c, Investigation 6.a, 6.b. 6.c
Grade 5 - S.S. 5.1.1; Investigation 6.a, 6.b, 6.g, 6.h
Grade 6 - S.S. 6.1.1, 6.1.2; Math 2.1, 2.2; Writing 2.2; Ecology 5.a-5.e
Materials
None needed
Teacher Preparation
None needed

Lessons: During the Field Trip A Guide to the Side of the Sea
118
Procedure
Before the trip:
1. Identify some of the organisms that students are likely to see on the tide pool
field trip. List the organisms on the board and discuss the idea that there won’t
be equal numbers of each kind of organism in a tide pool. (Try NOT to let stu-
dents who have been to tide pools before tell the rest of the class about the
relative abundance of the organisms.)
2. Have the students copy the list (or use the data table below), and have them, as
individuals, indicate (write) whether they think they will see very few, few,
many, or very many in a given tide pool.
During the trip:
1. Select a typical tide pool in which the students can see several of the organisms.
2. Have them estimate how many of each are in the tide pool.
3. Have the students record the relative numbers on their data tables.
4. Discuss
The Pyramid of Numbers (continued)
OrganismType of organism
(producer, herbivore,
carnivore)
Relative # or
amount (mass)
predicted
Relative # or
amount (mass)
observed
Algae
Turban snail
Limpet
Mussel
Crab
Sculpin (fish)
Octopus
Relative amounts:
3 = many/lots
4 = very many/quite a lot
0 = none
1 = very few/very little mass
2 = few/little mass

A Guide to the Side of the Sea Lessons: During the Field Trip
119
Discussion
1. Students will probably see that there is more mass of algae than of animals, and
that there are more herbivores than carnivores. Discuss the idea that animals
are not 100% efficient in converting their food to their body masses.
2. Discuss also the significance of this with regards to how many people the Earth
can support. If people ate only plants, a given amount of farm land could support
more people. In the United States, a lot of corn, wheat, and other plants that
could be eaten by people is fed to cattle so that people can eat the meat.
3. Point out that the phytoplankton and zooplankton, which they won’t see without
a microscope, are extremely important parts of the intertidal ecosystem.
Assessment
• Can students explain why there are generally fewer carnivores than herbivores?
Reference
Roa: The Environmental Science Activity Kit, p. 158
The Pyramid of Numbers (continued)

Lessons: During the Field Trip A Guide to the Side of the Sea
120
Sea Star Surprise…How Does That Grab You?
Activity Summary
Students look closely at the tube feet and pedicellariae (singular: pedicellaria) of a
common Ochre Sea Star (Pisaster).
Introduction
Sea stars (a.k.a. starfish) and their relatives have several unique adaptations. The
Ochre Star (Pisaster) is common in the tide pools and is a good animal to examine
closely. However … Do not pull on it hard to pick it up. If the sea star doesn’t
come off easily, leave it be. Sea stars attach themselves to rocks and mussel beds
with thousands of “tube feet,” which work like suction cups. Pulling hard on an
attached sea star may tear many of those tube feet, which the animal needs for
walking and capturing food.
The sea star uses its tube feet when feeding. It attaches itself to the two shells of a
clam or mussel with hundreds of its tube feet. The combined pulling power and
endurance of hundreds of tube feet is enough to overcome the power of the one or
two muscles of the mussel or clam, which eventually open their shells a small
amount. The sea star then everts its stomach (turns it inside out) into the shell,
digesting the mussel in its own shell.
Even without picking up a sea star, students can discover the tiny pedicelliariae,
which are tiny pincher-like structures on its back. The sea star uses its pedicellariae
to remove bits of matter or even other organisms that settle onto its back.
Grouping
The whole class or group should examine the same sea star so that others don’t have
to be disturbed.
Time
5-10 minutes per class
Anticipated Outcomes
Students will observe tube feet and pedicellariae.
Students will increase understanding of some adaptations.
Standard(s)
Grade 3 - Writing 2.2; Life Science 3.a, 3.b, Investigation 5.a
Grade 4 - Life Science 2.b, 2.c, 3.b, Investigation 6.a
Grade 5 - Listening 1.h; Life Sciences 2.a
Grade 6 - Investigation 7.a

A Guide to the Side of the Sea Lessons: During the Field Trip
121
Materials
� Plastic magnifiers
� Plastic/rubber pipette/”eyedropper”
Teacher Preparation
None needed
Procedure
Before the trip:
1. Discuss this activity with the ranger or interpreter who is leading the trip.
2. Decide whether to do it or not, and who will lead it.
During the trip:
1. Find a sea star such as the ochre star, Pisaster. Have the students observe it in
place.
If the sea star can be removed from the rock or mussel bed easily (without
tearing tube feet), the teacher may gently remove it and show it to the stu-
dents.
2. Have the students use a magnifier to observe the tube feet. Explain that they
act like tiny suction cups to attach the sea star to rocks or mussel shells. Explain
the sea star feeding process of everting its stomach and digesting the mussel in
its shell.
3. Students can gently lay their forearm on top of a sea star, whether the sea star is
attached to the rock/mussel bed or not. Have the student leave his or her arm in
place, gently touching the dorsal (back/top) surface for several seconds. When
the arm is removed, it will feel like it is stuck to the sea star. This is caused by
the pincer-like pedicellariae grabbing the hair of the arm. Essentially, the sea
star is treating the arm as if it were a piece of litter that fell on the sea star’s
back! Have students observe the pedicellariae with their magnifiers.
Discussion
1. Discuss the points mentioned above.
Assessment
• Do students refrain from pulling organisms, including sea stars, off of the rocks?
• Can students explain the functions of tube feet and pedicellariae?
Reference
Brown: Exploring Tidepools, p. 41
Sea Star Suprise...How Does That Grab You? (continued)

Lessons: During the Field Trip A Guide to the Side of the Sea
122
Other Activities
The curriculum resources listed in Appendix D (page 158) provide numerous activities
that can be done at the coast. Students should be allowed to have as much time as
possible actually observing the organisms.
Sometimes there is enough time for students to have some time to sketch, write
poetry, write in a journal, or simply think about the tide pool experience before
returning home.
Alone Activities
If there is some time, I recommend that the students be given some alone time.
Maybe have them spread out where the teacher or other adult can see them but far
enough apart to discourage talking. Give a simple assignment such as:
• Sketch your favorite tide pool organism and tell why it’s your favorite.
• Write a brief note to a tide pool organism. Tell the organism what you liked,
or what you learned, or what you wonder about.
• Write a short poem about what you saw or learned today.
• Write a note to your parents. Tell them something about the tide pools.
• Sit quietly, close your eyes, listen and smell. Arrange to have an adult tell you
when 5 minutes are up. Write down what you heard, felt, and smelled.
• Go to a spot that is “natural” (not a park bench or parking lot). Spend 5
minutes looking as closely as you can at an area half the size of a piece of
binder paper. Write and sketch what you see. Write down 5 questions about
what you see.

A Guide to the Side of the Sea Lessons: During the Field Trip
123
Group Activities
As a class, discuss what they saw and learned.
• What was most interesting?
• What was most surprising?
• What would they like to see again, or what did they miss?
• What do intertidal organisms do at night?
• Be sure to include discussion about threats to the marine environment and
how they as individuals and as a class can help protect the environment.
Before leaving the beach, have students do a “beach patrol” to pick up any litter.
Recycle whatever is possible. Leave the area cleaner than you found it!
Role play
While it is still fresh in their minds, have students act out such tide pool events as:
(teacher can describe scenario)
• Waves crashing on a rock
• An oystercatcher looking for food
• A hermit crab moving into a new shell
• An anemone capturing a fish
• A snail feeding on algae
• A sculpin darting for cover at the approach of a gull
• A sea star prying open and feeding on a mussel
• A water molecule evaporating and going through the whole water cycle
• A barnacle feeding with its legs at high tide and closing up at low tide
• A crab walking sideways, defending itself with its claws
• An organism reacting to the tide going out and then coming in
Reference (for role playing)
Snively: Once Upon a Seashore, p.211-232

Lessons: Post-Trip Activities A Guide to the Side of the Sea
124
Post-Trip Lessons and Activities
Too many field trips are isolated experiences. It is important that students are able to
relate what they learned on the trip to their everyday lives and future activities and
choices.
Hands-On Activities
Adopt-A-Beach
After visiting the coast, students (and parents) may be willing to “adopt” a beach,
park, or section of roadside. Adopting a beach essentially means committing to
periodically visiting the area and cleaning it up. You might consider having a school
adopt a beach, with different classes doing the cleanup each month.
This can be done informally, or through the state’s Adopt-A-Beach program. Contact
the local park officials, and go to the Coastal Commission’s web site (below) and
click on “Programs and Contests.” This is also the site for information on the
Coastal Cleanup Day in September.
< www.coastal.ca.gov >
Standard(s)
Grade 3 - S.S. 3.4.2; Math Number Sense 1.1; Writing 2.3
Grade 4 - Math 3.1
Grade 5 - Science: Investigation 6.g
Grade 6 - Science Resources 6.b, 6.c
References (See the “Resources” section at the back of this Guide)
Armstrong: Sea Searcher’s Handbook, p. 189-199
Brown-Babcock: Save Our Seas, the whole thing
California Coastal Commission, especially Adopt-A-Beach program
Snively: Once Upon a Seashore, p. 266-296
Snively: Beach Explorations, p. 73-74

A Guide to the Side of the Sea Lessons: Post-Trip Activities
125
Oil on the Water!
Activity Summary
Students use vegetable oil to model an oil spill; then they use various materials in an
attempt to clean it up.
Note: This activity is closely related to the following two activities, “Like Water Off
a Duck?” and “You Can Help!”
Introduction
Oil can enter coastal ecosystems from many sources. Huge spills such as the Exxon
Valdez receive headline coverage, but thousands of small spills add oil to the ocean
every day. These spills come from oil platforms, pipelines, oil tankers, and cargo,
cruise, and fishing ships and boats. Some areas of California’s coast have always
experienced natural seepage. California Indians even used globs of the tarry oil that
washed up on the coast for sealing their canoes.
Another source of oil pollution is storm drains that bring oil from the streets. Some
people change their engine oil and dump it into the gutter, which adds more oil to
the storm drains. Storm drains bring not only oil, but also engine coolants,
insecticides and fertilizers from lawns and gardens, soap from cleaning cars, litter,
and anything else that falls into the gutter.
Oil is harmful to marine organisms for many reasons. Oil, especially crude oil, is a
mixture of chemicals, many of which are toxic. Crude oil is often very sticky and
can cover organisms with a thick, tar-like coating, smothering them, preventing
them from moving, coating their food sources, sticking shells together, or simply
poisoning them. Warm blooded animals such as birds, seals, and otters depend on
their feathers and fur to provide insulation from cold ocean waters. Oil destroys the
insulating value of their fur or feathers. The barbules on feathers of marine birds
are so tightly interwoven that water can’t penetrate them. Mammals have some
natural oils, but are harmed when they try to clean themselves and ingest the toxic
chemicals. Chemicals that remove spilled oil also remove this oil from the animals’
fur, and the cleaning process can damage feathers.
Since so much of the oil that we use goes to energy generation and transportation,
anything that we can do to reduce energy and private auto use will reduce the
demand to drill for, transport, and refine more oil.
Grouping
Groups of 2-4 students
Time
30-60 minutes
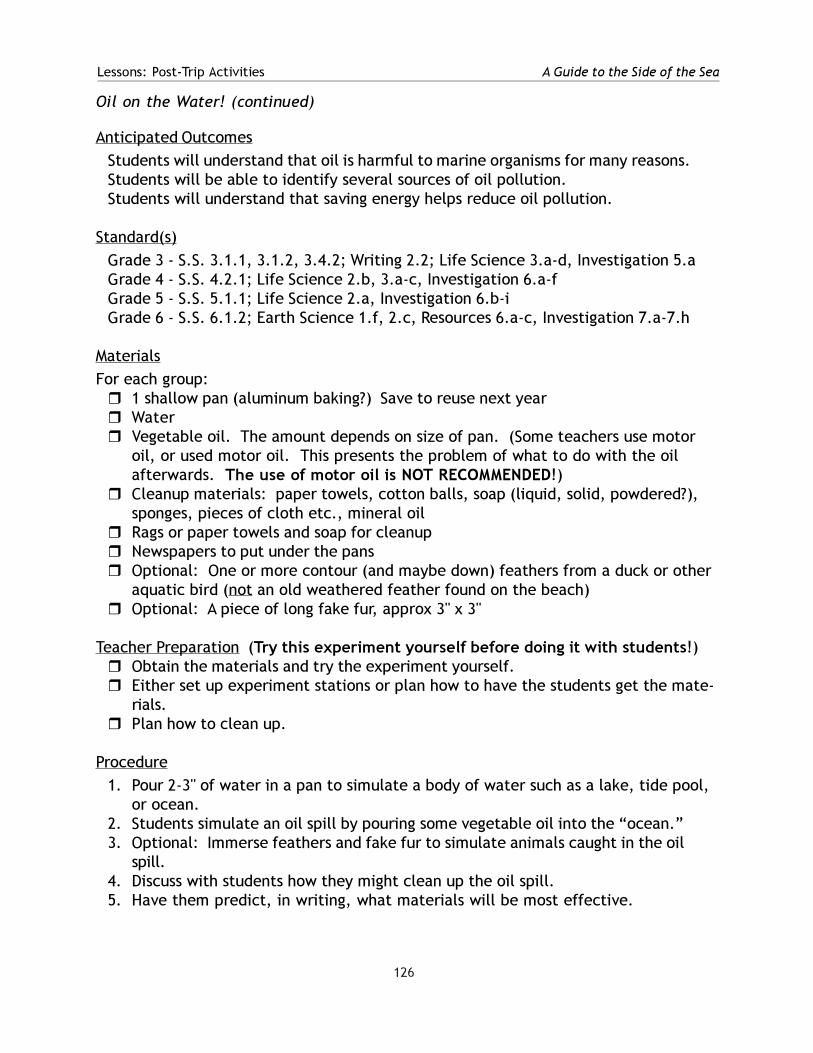
Lessons: Post-Trip Activities A Guide to the Side of the Sea
126
Anticipated Outcomes
Students will understand that oil is harmful to marine organisms for many reasons.
Students will be able to identify several sources of oil pollution.
Students will understand that saving energy helps reduce oil pollution.
Standard(s)
Grade 3 - S.S. 3.1.1, 3.1.2, 3.4.2; Writing 2.2; Life Science 3.a-d, Investigation 5.a
Grade 4 - S.S. 4.2.1; Life Science 2.b, 3.a-c, Investigation 6.a-f
Grade 5 - S.S. 5.1.1; Life Science 2.a, Investigation 6.b-i
Grade 6 - S.S. 6.1.2; Earth Science 1.f, 2.c, Resources 6.a-c, Investigation 7.a-7.h
Materials
For each group:
� 1 shallow pan (aluminum baking?) Save to reuse next year
� Water
� Vegetable oil. The amount depends on size of pan. (Some teachers use motor
oil, or used motor oil. This presents the problem of what to do with the oil
afterwards. The use of motor oil is NOT RECOMMENDED!)
� Cleanup materials: paper towels, cotton balls, soap (liquid, solid, powdered?),
sponges, pieces of cloth etc., mineral oil
� Rags or paper towels and soap for cleanup
� Newspapers to put under the pans
� Optional: One or more contour (and maybe down) feathers from a duck or other
aquatic bird (not an old weathered feather found on the beach)
� Optional: A piece of long fake fur, approx 3" x 3"
Teacher Preparation (Try this experiment yourself before doing it with students!)
� Obtain the materials and try the experiment yourself.
� Either set up experiment stations or plan how to have the students get the mate-
rials.
� Plan how to clean up.
Procedure
1. Pour 2-3" of water in a pan to simulate a body of water such as a lake, tide pool,
or ocean.
2. Students simulate an oil spill by pouring some vegetable oil into the “ocean.”
3. Optional: Immerse feathers and fake fur to simulate animals caught in the oil
spill.
4. Discuss with students how they might clean up the oil spill.
5. Have them predict, in writing, what materials will be most effective.
Oil on the Water! (continued)

A Guide to the Side of the Sea Lessons: Post-Trip Activities
127
6. Have the students attempt to clean up the oil spill with various materials, record-
ing how effective each is.
7. Have students clean up.
Discussion
1. See above.
2. How difficult would it be to try to clean up a coastal oil spill with something like
cotton balls or paper towels? How would you clean a 500 pound seal or sharp
beaked bird?
3. How might an oil spill affect coastal organisms?
4. How can oil spills be prevented? (Be sure to discuss sources like storm drains and
boats.)
5. Some people have used hot water under pressure to clean oil-covered rocks.
What do you think that would do to plants and animals? What about mineral oil
or detergents?
Assessment
• Can students describe various sources of oil pollution?
• Can students describe problems caused by oil pollution?
• Can students suggest ways that they can help prevent oil pollution?
References
International Bird Rescue Research Center
Roa: Environmental Science Activities Kit, p. 89-98
Oil on the Water! (continued)

Lessons: Post-Trip Activities A Guide to the Side of the Sea
128
Like Water off a Duck’s Back?
Activity Summary
Students see that an aquatic bird feather sheds water, then apply oil to it and
remove the oil, after which the feather doesn’t shed water as well.
Note: This activity is closely related to the previous activity (Oil on the Water!) and
the following activity (You Can Help!).
Introduction
Oil can enter coastal ecosystems from many sources. Huge spills such as the Exxon
Valdez receive headline coverage, but thousands of small spills add oil to the ocean
every day. These spills come from oil platforms, pipelines, oil tankers, and cargo,
cruise, and pleasure ships and boats. Some areas of California’s coast have always
experienced natural seepage.
Another source of oil pollution is storm drains that bring oil from the streets. Some
people change their engine oil and dump it into the gutter, which adds more oil to
the storm drains. Storm drains bring not only oil, but also engine coolants,
insecticides and fertilizers from lawns and gardens, soap from cleaning cars, litter,
and anything else that falls into the gutter.
Oil is harmful to marine organisms for many reasons. Oil, especially crude oil, is a
mixture of chemicals, many of which are toxic. Crude oil is often very sticky and
can cover organisms with a thick, tar-like coating, smothering them, preventing
them from moving, coating their food sources, sticking shells together, or simply
poisoning them. Warm blooded animals such as birds, seals, and otters depend on
their feathers and fur to provide insulation from cold ocean waters. Oil destroys the
insulating value of their fur or feathers. The barbules on feathers of marine birds
are so tightly interwoven that water can’t penetrate them. Mammals have some
natural oils, but are harmed when they try to clean themselves and ingest the toxic
chemicals. Chemicals that remove spilled oil also remove this oil from the animals’
fur, and the cleaning process can damage feathers.
Since so much of the oil that we use goes to energy generation and transportation,
anything that we can do to reduce energy and private auto use will reduce the
demand to drill for, transport, and refine more oil.
Grouping
Groups of 2-4 students
Time
20-45 minutes

A Guide to the Side of the Sea Lessons: Post-Trip Activities
129
Anticipated Outcomes
Students will understand that oil is harmful to marine organisms for many reasons.
Students will be able to identify several sources of oil pollution.
Students will understand how oil affects marine birds.
Students will undertake action to try to reduce oil pollution.
Standard(s)
Grade 3 - S.S. 3.1.1, 3.1.2, 3.4.2; Writing 2.2; Life Science 3.a-d, Investigation 5.a
Grade 4 - S.S. 4.2.1; Life Science 2.b, 3.a-c, Investigation 6.a-f
Grade 5 - S.S. 5.1.1; Life Science 2.a, Investigation 6.b-i
Grade 6 - S.S. 6.1.2; Earth Science 1.f, 2.c, Resources 6.a-c, Investigation 7.a-7.h
Materials
For each group:
� Magnifiers or microscope
� Droppers (plastic pipettes)
� Shallow pan such as an aluminum pie tin or baking pan
� Vegetable oil…amount depends on size of pan
� Soap…liquid or powdered
� One or more contour (and maybe down) feathers from a duck or goose
� Rags or paper towels for cleanup
� Newspapers to put under the pans
Teacher Preparation (Try this experiment yourself before doing it with students!)
� Obtain feathers from ducks or other aquatic birds. The feathers should be fairly
fresh, and in good condition, rather than feathers that have washed
up on the beach. This is because new feathers will have intact
barbules, and oils that help repel water. You might look in the
yellow pages under “Birds” or contact a local 4-H or FFA group,
duck hunter, or taxidermist. You might be able to contact
someone who raises ducks through a feed store. When
at the beach, watch for fresh dead birds.
Procedure
1. Students first use the magnifier to examine their
clean, dry feather describing it in as much detail
as possible, possibly sketching details. Have them
look for the interlocking barbules.
2. Students then use a dropper to drop a small
amount of water on the feather. They describe
what happens. (If the feather is in good shape,
the water should bead up and roll off.)
Like Water Off a Duck’s Back? (continued)
Barbules

Lessons: Post-Trip Activities A Guide to the Side of the Sea
130
3. They then pour some oil onto the feather and massage it in. (This simulates a
feather from a bird that got caught in an oil spill. Point out that cooking oil is
not as sticky as crude oil.)
4. Students then use soap and other materials to remove the oil, then they rinse the
cleaned feather in water. (Usually the barbules will have been messed up and the
natural oil lost.)
5. After drying the feather, students examine and describe the feather again, and
again test it for water repellency.
Discussion
1. How does having water-repellant feathers help aquatic birds survive? (Even
when in the water, the skin remains dry, with trapped air providing insulation
from cold water.)
2. What would probably happen to a bird that had been cleaned by rubbing it with
soap if it were immediately returned to the ocean?
3. How can they, the students, reduce oil entering the ocean?
Assessment
• Can students tell how oil pollution affects aquatic birds?
• Can students suggest ways that they can help prevent oil pollution?
References
Roa: Environmental Science Activities Kit, p. 89-98
International Bird Rescue and Research Center
Like Water Off a Duck’s Back? (continued)

A Guide to the Side of the Sea Lessons: Post-Trip Activities
131
You Can Help!
Activity Summary
Students make posters, write letters, or produce flyers to encourage people to
reduce oil and other types of ocean pollution.
Note: This activity is closely related to the preceding two activities, “Oil on the
Water!” and “Like Water off a Duck?”
Introduction
Oil can enter coastal ecosystems from many sources. Huge spills such as the Exxon
Valdez receive headline coverage, but thousands of small spills add oil to the ocean
every day. These spills come from oil platforms, pipelines, oil tankers, and cargo,
cruise, and pleasure ships and boats. Some areas of California’s coast have always
experienced natural seepage. California Indians even used globs of the tarry oil that
washed up on the coast for sealing their canoes.
Another source of oil pollution is storm drains that bring oil from the streets. Some
people change their engine oil and dump it into the gutter, which adds more oil to
the storm drains. Storm drains bring not only oil, but also engine coolants,
insecticides and fertilizers from lawns and gardens, soap from cleaning cars, litter,
and anything else that falls into the gutter.
Oil is harmful to marine organisms for many reasons. Oil, especially crude oil, is a
mixture of chemicals, many of which are toxic. Crude oil is often very sticky and
can cover organisms with a thick, tar-like coating, smothering them, preventing
them from moving, coating their food sources, sticking shells together, or simply
poisoning them. Warm blooded animals such as birds, seals, and otters depend on
their feathers and fur to provide insulation from cold ocean waters. Oil destroys the
insulating value of their fur or feathers. The barbules on feathers of marine birds
are so tightly interwoven that water can’t penetrate them. Mammals have some
natural oils, but are harmed when they try to clean themselves and ingest the toxic
chemicals. Chemicals that remove spilled oil also remove this oil from the animals’
fur, and the cleaning process can damage feathers.
Since so much of the oil that we use goes to energy generation and transportation,
anything that we can do to reduce energy and private auto use will reduce the
demand to drill for, transport, and refine more oil.
Grouping
Individuals or groups of 2-4 students
Time
30-60 minutes

Lessons: Post-Trip Activities A Guide to the Side of the Sea
132
Anticipated Outcomes
Students will understand that oil is harmful to marine organisms for many reasons.
Students will be able to identify several sources of oil pollution.
Students will understand how oil affects marine birds.
Students will undertake action to try to reduce oil pollution.
Standard(s)
Grade 3 - S.S. 3.1.1, 3.1.2, 3.4.2; Writing 2.2; Life Science 3.a-d, Investigation 5.a
Grade 4 - S.S. 4.2.1; Life Science 2.b, 3.a-c, Investigation 6.a-f
Grade 5 - S.S. 5.1.1; Life Science 2.a, Investigation 6.b-i
Grade 6 - S.S. 6.1.2; Earth Science 1.f, 2.c, Resources 6.a-c, Investigation 7.a-7.h
Materials
� Art supplies
Teacher Preparation
� If you are having the students write letters to the editor, obtain the address for
the paper.
� To obtain a storm drain stenciling kit or to find out about any local stenciling
projects, contact:
Your local public works department (They may be willing to obtain the kit.)
Ocean Conservancy at: < www.oceanconservancy.org > (click on “programs”)
� Contact the California Coastal Commission for many ways to get students in-
volved: < www.coastal.ca.gov >
Procedure
There are a number of things that students can do to reduce oil spillage. Among them
are:
1. Anything that reduces energy use also reduces oil use. Have students find out
ways to conserve energy.
2. Have students keep track of the kinds of things that they observe in rain gutters
along streets, including evidence of oil or soap. They can then write an article or
letter to the editor for a local newspaper.
3. Students can write articles for the school newspaper.
4. Students can make a flyer to tell people about the problem of oil pollution and
what people can do to reduce it. They can distribute the flyer to parents and at
local stores.
5. Students can create an insert to be added to water or sewer bills to inform
people about the problems associated with oil runoff.
6. Students can make posters to put up at stores that sell motor oil.
7. Students can stencil signs on sidewalks above storm drains. The signs can say
something like:
You Can Help! (continued)

A Guide to the Side of the Sea Lessons: Post-Trip Activities
133
Discussion
1. How might oil or other chemicals from storm drains affect coastal organisms?
2. How can we reduce pollution from storm drains?
You Can Help! (continued)
Assessment
• Can students describe various sources of oil pollution?
• Can students describe problems caused by oil pollution?
• Can students suggest ways that they can help prevent oil pollution?
References (See the “Resources” section at the back of this Guide.)
Brown-Babcock: Save Our Seas, pp. 16-17, 56-59, 66-70
Roa: Environmental Science Activities Kit, p. 89-98
PLEASE ... NO OIL OR
OTHER CHEMICALS
DRAINS TO SEA ...
PLEASE ... NO OIL!
NO DUMPING ...
DRAINS TO BAY
or or

Lessons: Post-Trip Activities A Guide to the Side of the Sea
134
Other Activities
Letter Writing
• After the field trip, every student should write a letter of appreciation. Letters
should go to parent volunteers and helpers and to park personnel or volunteer
docents. (Be sure to get names before or during the trip.)
• Students can write letters to organizations that are working to protect and im-
prove the environment. See the resources in Appendix C, pages 155-157.
• Students can write letters to newspapers. They might express concern about
environmental problems, suggest ways to protect and improve the environment,
or express their appreciation for those who have helped.
Some suggestions for letter writing:
1. Have the students use the complete writing process that you use as part of your
language arts program: brainstorming, mind mapping, writing and editing drafts,
etc.
2. Check spelling, especially of names.
3. Keep letters brief. If it’s a letter to a legislator, it probably won’t get read by
the legislator himself or herself, but will be added to a tally.
4. Be sure that the student makes a point, rather than just complaining. What do
they want done?
5. Look for opportunities to write positive letters praising individuals or groups for
doing good things!
6. Be sure to request a response and supply a name and address, perhaps c/o the
teacher at the school. (Students should not give their home addresses.)
More suggestions for letter writing can be found in:
Brown-Babcock: Save Our Seas, p. 97
Davenport: Waves, Wetlands, and Watersheds, p. 149
Roa: Environmental Science Activities Kit, p. 323-327
Standard(s)
Grade 3 - S.S. 3.4.2; Writing 2.2, 2.3; Science Investigation 5.b
Grade 4 - none
Grade 5 - Listening and Speaking 1.2; Science Investigation 6.h, 6.i
Grade 6 - none

A Guide to the Side of the Sea Lessons: Post-Trip Activities
135
Debates
After discussing various environmental issues and threats, students can debate such
topics as:
• Should people be allowed to buy land and build where there are now tide pools
or beach access?
• Should tide pools be given a 5 year recovery period in which nobody is allowed
to visit them except scientists?
• Should people be prohibited from gathering mussels, abalone, and sea urchins
for food?
• Should people be allowed to take home rocks, shells or organisms that they find
dead?
• Should all whale hunting be banned?
• Should fishermen be allowed to shoot sea lions and seals that compete with
them for salmon?
• Should there be a 5 year moratorium on abalone fishing?
• Should logging companies have to pay for damage caused by silt from their
logging operations far from the coast?
Be careful not to let the debates get personal.
Standard(s)
Grade 3 - S.S. 3.4.2; Writing 2.2; Science Investigation 5.b, 5.c
Grade 4 - Science Investigation 6.a-c, 6.e
Grade 5 - Listening and Speaking 1.1, 1.2; Science Investigation 6.h
Grade 6 - Science Investigation 7.d, 7.g, 7.h
Reports
Students can write reports or give oral reports on various organisms, physical
factors, or environmental issues. Reports can be illustrated with student drawn
pictures or images from the Internet.
Standard(s)
Grade 3 - S.S. 3.1.1, 3.1.2, 3.2.2, 3.4.2; Writing 2.2; All Science topics, including
experiments, offer potential report topics.
Grade 4 - S.S. 4.2.1, 4.2.1; All Science topics, including experiments, offer potential
report topics.
Grade 5 - S.S. 5.1.1; Writing 2.3; All Science topics, including experiments, offer
potential report topics.
Grade 6 - S.S. 6.1.1, 6.1.2; Writing 2.3; All Science topics, including experiments,
offer potential report topics.

Lessons: Post-Trip Activities A Guide to the Side of the Sea
136
Storytelling
California Indians, like all people, wondered about the causes of natural phenomena
such as moon phases, tides, storms, and the creation of the earth, life on earth, and
humans.
The following books may be useful in teaching about California Indian stories:
Caduto, Michael and Joseph Bruchac. Keepers of the Earth. Golden, CO: Fulcrum
Publishing, 1988.
Clark, Ella. Indian Legends of the Pacific Northwest. Berkeley: University of
California Press, 1953.
Gifford, Edward et al. California Indian Nights. Lincoln, Nebraska: University of
Nebraska Press, 1990.
Kroeber, Theodora. The Inland Whale – Nine Stories Retold from California Indian
Legends. Berkeley: University of California Press, 1959.
Lake-Thom, Bobby. Spirits of the Earth. NY: Penguin Books, 1997.
Margolin, Malcom, ed. The Way We Lived – California Indian Reminiscences, Stories,
and Songs. Berkeley: Heyday Books, 1993.
Monroe, Jean Guard and Ray Williamson. They Dance in the Sky. Boston: Houghton
Mifflin, 1988.
Sarris, Greg. Keeping Slug Woman Alive. Berkeley: University of California Press,
1993.
Have the students make up and illustrate their own stories. Some topic ideas:
• How/why the barnacle got its plates
• Why the clam lives in the mud
• Why the gull squawks so much
• How the oystercatcher got its long legs
• How the crab got its pinchers
• How the sea star got the ability to regenerate lost legs
• Why some ochre stars are purple and some are orange
• Why we have tides
• Where waves come from
• Why hermit crabs don’t have their own shells
• How the ocean became salty
Students can ask their own questions and make up their own topics.
Standard(s)
Grade 3 - S.S. 3.1-3.4; Writing 2.2; All Physical, Earth and Life Science phenomena
offer potential as bases for myths.
Grade 4 - S.S. 4.2.1, 4.2.2; All Physical, Earth and Life Science phenomena offer
potential as bases for myths.
Grade 5 - S.S. 5.1.1; Writing 2.3; All Physical, Earth and Life Science phenomena
offer potential as bases for myths.
Grade 6 - S.S. 6.1.1, 6.1.2; Writing 2.3; All Physical, Earth and Life Science phenom-
ena offer potential as bases for myths.

A Guide to the Side of the Sea Lessons: Post-Trip Activities
137
Gotta Love It!
Students can produce written, drawn, or acted out advertisements:
• for an organism of their choice. The ads would tell something interesting about
the organism and why it is important.
• to encourage people to protect the environment or to take action to improve
it.
• to teach about an organism or phenomenon such as tides.
Standard(s)
Grade 3 - S.S. 3.4.2; Writing 2.2; All Science topics, especially organisms, are poten-
tial topics for such projects
Grade 4 - S.S. 4.2.1, 4.2.2; All Science topics, especially organisms, are potential
topics for such projects
Grade 5 - Writing 2.3; All Science topics, especially organisms, are potential topics
for such projects
Grade 6 - Writing 2.3; All Science topics, especially organisms, are potential topics
for such projects
Reference
Roa: Environmental Science Activities Kit, p. 70-85
Who am I?
After studying tide pool organisms, play a game of 20 Questions by having students
draw names of organisms from a jar. Classmates ask “yes or no” questions to
determine the type of organism.
Variation: A student has the name of an organism taped to her back and she asks
questions of others to try to figure out who she “is.” The illustrations of organisms
in this Guide, with the accompanying information, could be used for this.
Standard(s)
Grade 3 - Writing 2.2; Life Science 3.a, 3.b, 3.c
Grade 4 - Life Science 2.b, 2.c, 3.a, 3.b, 3.c
Grade 5 - Life Sciences 2.a, Investigation 6.a
Grade 6 - Life Science 5.c, 5.d, 5.e
References (See the “Resources” section at the back of this Guide)
Armstrong: Sea Searcher’s Handbook - Includes drawings and descriptions of many
organisms
Snively: Once Upon a Seashore, p. 47-77

Lessons: Post-Trip Activities A Guide to the Side of the Sea
138
Bulletin Boards
Students can produce a bulletin board illustrating the intertidal zones and the organ-
isms found in each zone. Consider using folded paper, cardboard, or other materials
to make it 3-dimensional. The display might represent a rocky coast, sandy shore,
kelp “forest,” or wharf piling.
Standard(s)
Grade 3 - S.S. 3.1.1, 3.1.2, 3.2.2, 3.4.2; Writing 2.2; All Science topics, including
experiments, offer potential bulletin board topics
Grade 4 - S.S. 4.2.1, 4.2.2; All Science topics, including experiments, offer potential
bulletin board topics
Grade 5 - S.S. 5.1.1; All Science topics, including experiments, offer potential
bulletin board topics
Grade 6 - S.S. 6.1.1, 6.1.2; All Science topics, including experiments, offer potential
bulletin board topics
Skits
Students can create skits or plays in which they act out such events as:
• a sea star feeding on a mussel
• a sea anemone capturing a crab
• an abalone or snail feeding on algae
• a barnacle using its legs for feeding
• a porpoise getting caught in a fishing net
• a bird diving into an oil spill
• a hermit crab moving into an empty shell
• organisms living under a rock or algal mass when it is lifted up by a curious
student
• a student meeting someone who is taking organisms from a tide pool
Standard(s)
Grade 3 - S.S. 3.1.2, 3.2.2, 3.4.2; Writing 2.2; Life Science 3.a-d
Grade 4 - S.S. 4.2.1; Life Science 2.a-c, 3.a-c
Grade 5 - S.S. 5.1.1; Listening and Speaking 1.2; Life Sciences 2.a-g, Earth Sciences
3.a-c
Grade 6 - S.S. 6.1.1, 6.1.2; Earth Science 2.c, 2.d, Ecology 5.a-5.e
References (See the “Resources” section at the back of this guide)
Armstrong: Sea Searcher’s Handbook, several activities
Snively: Beach Explorations, several activities
Snively: Once Upon a Seashore, several activities

A Guide to the Side of the Sea Lessons: Post-Trip Activities
139
Models
Students can make models of tide pool organisms. Have them write a paragraph or a
page about the organism and its unique adaptations.
Standard(s)
Grade 3 - S.S. 3.1.1, 3.1.2; Math Measurement 1.1; Writing 2.2; Life Science 3.a, 3.b,
Grade 4 - S.S. 4.2.1, 4.2.2; Life Science 2.b, 3.a
Grade 5 - S.S. 5.1.1; Math Measurement 1.3; Writing 2.3; Physical Sciences 1.b, Life
Sciences 2.a
Grade 6 - S.S. 6.1.1, 6.1.2; Earth Science 1.f, 2.c, 2.d, Ecology 5.a-5.e, Resources
6.a-c
Dioramas
Students can make dioramas of tide pools.
• Consider having teams of students responsible for large dioramas of the zones.
• Display the dioramas in the school or public library.
• A very interesting diorama can be made with a box in which a hole is cut in the
cover. The hole is covered with plastic wrap or clear or colored cellophane
(blue, green, or aqua), which provides an interest-ing lighting effect. The
diorama is viewed through a hole in the side. The viewing hole can be
covered with clear plastic or cellophane
Standard(s)
Grade 3 - S.S. 3.1.1, 3.1.2; Math Measurement 1.1; Writing 2.2; Life Science 3.a,
3.b,
Grade 4 - S.S. 4.2.1, 4.2.2; Life Science 2.b, 3.a
Grade 5 - S.S. 5.1.1; Math Measurement 1.3; Writing 2.3; Physical Sciences 1.b,
Life Sciences 2.a
Grade 6 - S.S. 6.1.1, 6.1.2; Earth Science 1.f, 2.c, 2.d, Ecology 5.a-5.e,
Resources 6.a-c
Colored
Cellophane
Viewing Holes

Lessons: Post-Trip Activities A Guide to the Side of the Sea
140
Create a Critter
Students can design and either draw or build models of animals with adaptations to
live in tide pools (or wetlands, the deep ocean, on a sandy beach, kelp forest, or?).
The organisms should have adaptations for:
• obtaining oxygen
• obtaining food…What does it eat?
• dealing with or avoiding predators…What preys on it?
• getting rid of waste
• finding a mate
• dealing with crashing waves (or other environmental factors)
Have the students write about the adaptations and explain them to you or to the class.
Have the students give their organism a scientific name that describes it (possibly
using Latin word roots). To what other organisms is it related?
Standard(s)
Grade 3 - Writing 2.2; Life Science 3.a-d
Grade 4 - Reading 1.3, 1.4; Life Science 2.a-c, 3.a-c
Grade 5 - Life Sciences 2.a
Grade 6 - Life Science 5.c-e
Reference (See the “Resources” section at the back of this Guide)
Armstrong: Sea Searcher’s Handbook, p. 80, 97

A Guide to the Side of the Sea Lessons: Post-Trip Activities
141
Sea Songs
Students can make up songs about marine organisms or the coast. A couple of starters:
• The waves on the coast go crash, crash, crash…
(to “The Wheels on the Bus go Round and Round)
• Old MacKerricher had a coast, e-i, e-i, oh!...
(to Old MacDonald Had a Farm)
• The itsy bitsy crab crawled up the tidal pool…
(to Itsy Bitsy Spider)
• Crawl, crawl, crawl around, in the tidal pool…
(to Row, Row, Row Your Boat)
Standard(s)
Grade 3 - Writing 2.2; Life Science 3.a-d
Grade 4 - Life Science 2.a-c, 3.a-d
Grade 5 - Life Sciences 2.a-g
Grade 6 - Writing 2.3; any other Science topics
Reference (See the “Resources” section at the back of this Guide)
Armstrong: Sea Searcher’s Handbook, p. 49, 197

Lessons: Post-Trip Activities A Guide to the Side of the Sea
142
See Sea Art
Students will often want to bring shells or rocks home from the beach. Before going
on the field trip, discuss why they shouldn’t do so. You may be able to arrange for
seafood restaurants to save oyster shells for you. Obtain one oyster shell for each
student.
• Students can paint ocean scenes, plants, or animals on the smooth inside
surface.
• If the shells are large, they can use the shell as a base for a clay seashore
scene/diorama.
• Shells can be used as a mold/base for making candles.
• Challenge students to find the matching top and bottom halves of the shells.
• Have them examine the shells carefully for the muscle scar where the muscle
was attached, for tube worm cases or barnacles on the outside, or any other
details that they might notice.
Students enjoy making fish prints, but the benefits of using a food fish for making
prints must be considered.
• The Dick Blick art supply company (< www.dickblick.com >) and Acorn
Naturalists (< www.acornnaturalists.com >) have rubber replicas of several
kinds of fish that can be substituted for real fish when making fish prints.
Sand candles can be made either at the beach or at school. They can be decorated
with bits of driftwood or shells collected from beaches other than state or national
parks.
Mobiles can be made from driftwood and shells collected from beaches other than
state or national parks.
Cover Art: The cover illustration of this Guide can be colored by students. They can
identify/label the various organisms seen in the illustration.
Standard(s)
Grade 3 - S.S. 3.4.2; Measurement 1.1; Writing 2.2; Life Science 3.a, 3.b
Grade 4 - Life Science 3.a
Grade 5 - Investigation 6.a
Grade 6 - Science Resources 6.c