Embed Size (px)
Citation preview
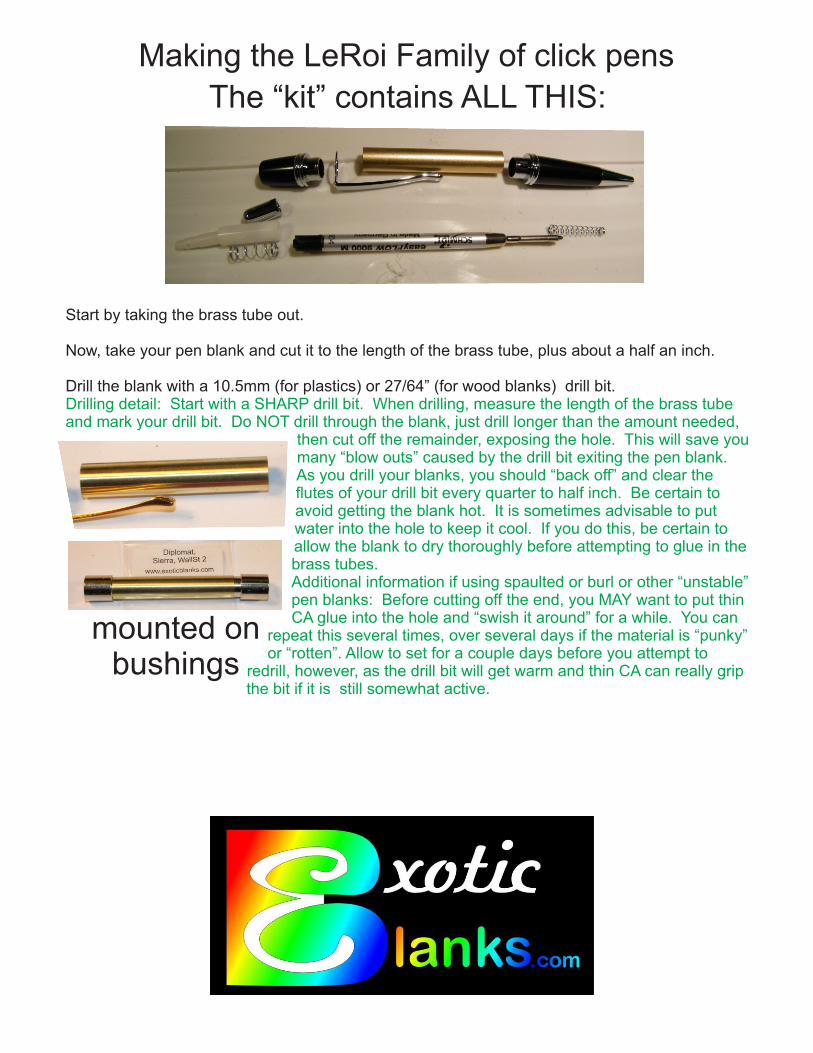
Making the LeRoi Family of click pens
The “kit” contains ALL THIS:
Start by taking the brass tube out.
Now, take your pen blank and cut it to the length of the brass tube, plus about a half an inch.
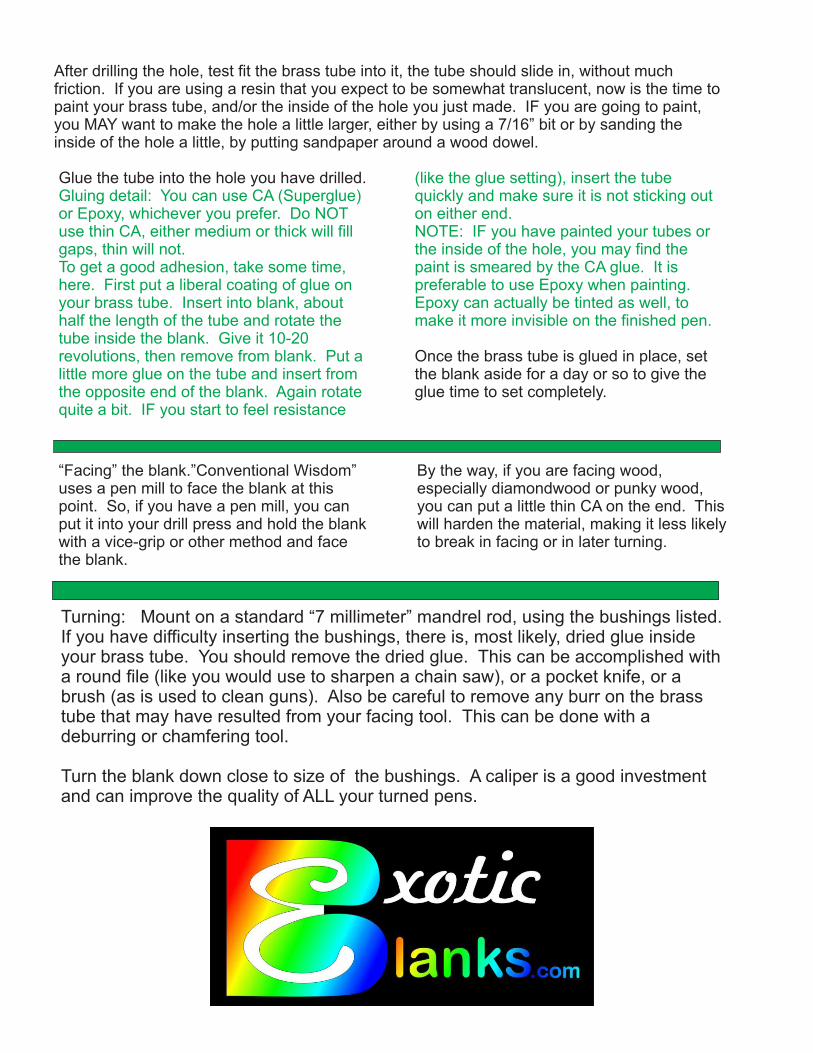
Drill the blank with a 10.5mm (for plastics) or 27/64” (for wood blanks) drill bit. Drilling detail: Start with a SHARP drill bit. When drilling, measure the length of the brass tube and mark your drill bit. Do NOT drill through the blank, just drill longer than the amount needed,
then cut off the remainder, exposing the hole. This will save you many “blow outs” caused by the drill bit exiting the pen blank.As you drill your blanks, you should “back off” and clear the flutes of your drill bit every quarter to half inch. Be certain to avoid getting the blank hot. It is sometimes advisable to put water into the hole to keep it cool. If you do this, be certain to allow the blank to dry thoroughly before attempting to glue in the brass tubes.Additional information if using spaulted or burl or other “unstable” pen blanks: Before cutting off the end, you MAY want to put thin CA glue into the hole and “swish it around” for a while. You can
repeat this several times, over several days if the material is “punky” or “rotten”. Allow to set for a couple days before you attempt to
redrill, however, as the drill bit will get warm and thin CA can really grip the bit if it is still somewhat active.
mounted onbushings
Glue the tube into the hole you have drilled.Gluing detail: You can use CA (Superglue) or Epoxy, whichever you prefer. Do NOT use thin CA, either medium or thick will fill gaps, thin will not. To get a good adhesion, take some time, here. First put a liberal coating of glue on your brass tube. Insert into blank, about half the length of the tube and rotate the tube inside the blank. Give it 10-20 revolutions, then remove from blank. Put a little more glue on the tube and insert from the opposite end of the blank. Again rotate quite a bit. IF you start to feel resistance
(like the glue setting), insert the tube quickly and make sure it is not sticking out on either end.NOTE: IF you have painted your tubes or the inside of the hole, you may find the paint is smeared by the CA glue. It is preferable to use Epoxy when painting. Epoxy can actually be tinted as well, to make it more invisible on the finished pen.
Once the brass tube is glued in place, set the blank aside for a day or so to give the glue time to set completely.
“Facing” the blank.”Conventional Wisdom” uses a pen mill to face the blank at this point. So, if you have a pen mill, you can put it into your drill press and hold the blank with a vice-grip or other method and face the blank.
By the way, if you are facing wood, especially diamondwood or punky wood, you can put a little thin CA on the end. This will harden the material, making it less likely to break in facing or in later turning.
Turning: Mount on a standard “7 millimeter” mandrel rod, using the bushings listed. If you have difficulty inserting the bushings, there is, most likely, dried glue inside your brass tube. You should remove the dried glue. This can be accomplished with a round file (like you would use to sharpen a chain saw), or a pocket knife, or a brush (as is used to clean guns). Also be careful to remove any burr on the brass tube that may have resulted from your facing tool. This can be done with a deburring or chamfering tool.
Turn the blank down close to size of the bushings. A caliper is a good investment and can improve the quality of ALL your turned pens.
After drilling the hole, test fit the brass tube into it, the tube should slide in, without much friction. If you are using a resin that you expect to be somewhat translucent, now is the time to paint your brass tube, and/or the inside of the hole you just made. IF you are going to paint, you MAY want to make the hole a little larger, either by using a 7/16” bit or by sanding the inside of the hole a little, by putting sandpaper around a wood dowel.
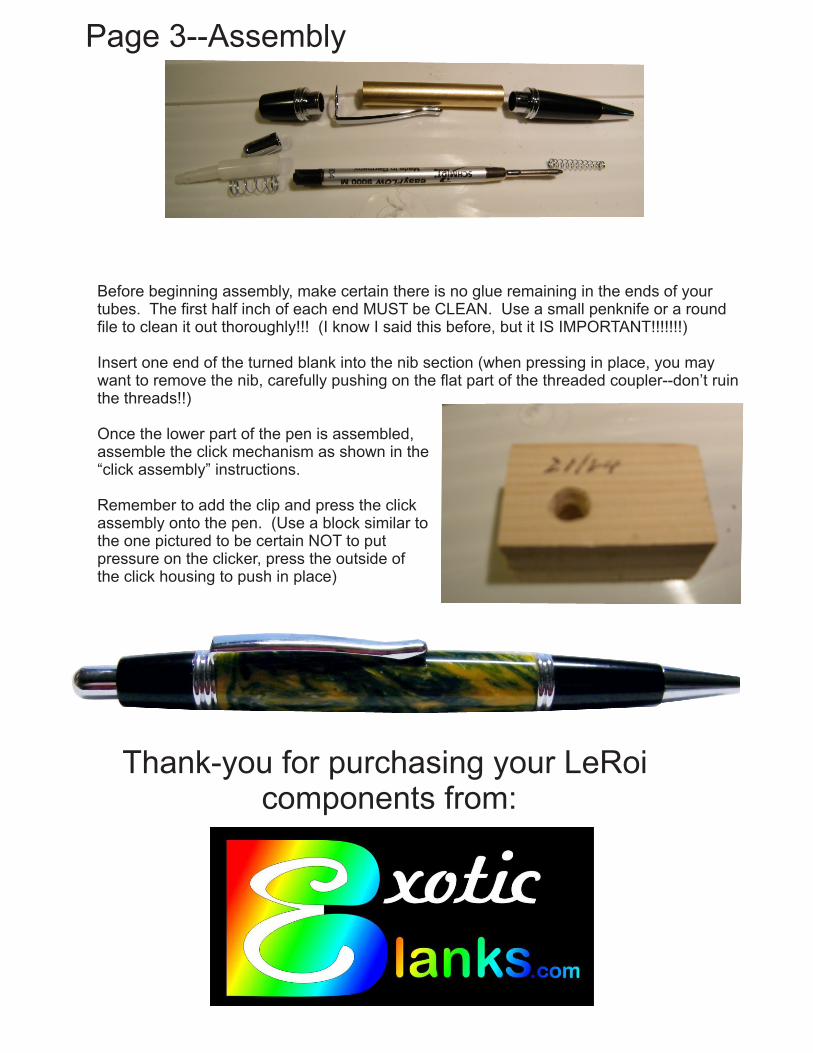
Page 3--Assembly
Before beginning assembly, make certain there is no glue remaining in the ends of your tubes. The first half inch of each end MUST be CLEAN. Use a small penknife or a round file to clean it out thoroughly!!! (I know I said this before, but it IS IMPORTANT!!!!!!!)
Insert one end of the turned blank into the nib section (when pressing in place, you may want to remove the nib, carefully pushing on the flat part of the threaded coupler--don’t ruin the threads!!)
Once the lower part of the pen is assembled, assemble the click mechanism as shown in the “click assembly” instructions.
Remember to add the clip and press the click assembly onto the pen. (Use a block similar to the one pictured to be certain NOT to put pressure on the clicker, press the outside of the click housing to push in place)
Thank-you for purchasing your LeRoi components from: