Embed Size (px)
Citation preview
LED Taillight Install InstructionsEuro Mode. Blinkers will flash AMBER
Tools Required:
• VAG-COM and HEX+CAN cable
• Ratchet with 10mm deep socket or regular 10mm socket and extension
• 10mm box / open end wrench
• Flat end screwdriver
• 1 Paperclip
• Electrical Tape
• Lots of patience
First: Open the trunk
Second: Remove the negative cable from the battery using the 10mm wrench.
Third: Get to work
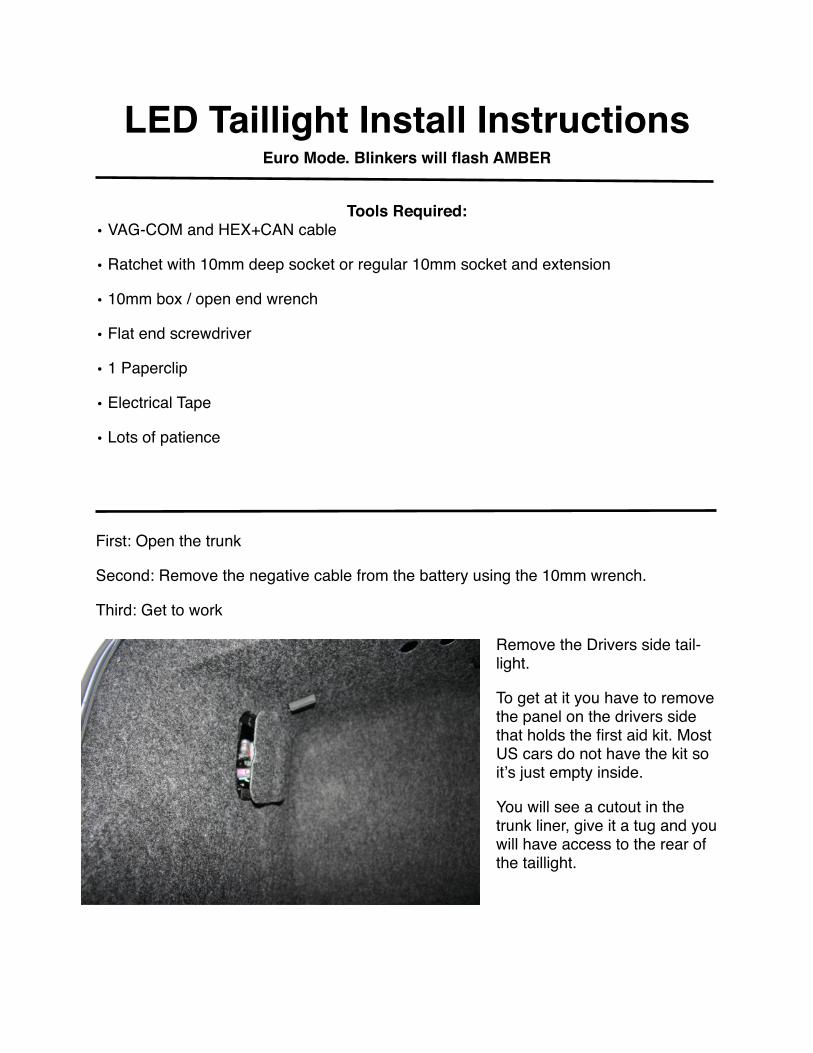
Remove the Drivers side tail-light.
To get at it you have to remove the panel on the drivers side that holds the first aid kit. Most US cars do not have the kit so it!s just empty inside.
You will see a cutout in the trunk liner, give it a tug and you will have access to the rear of the taillight.
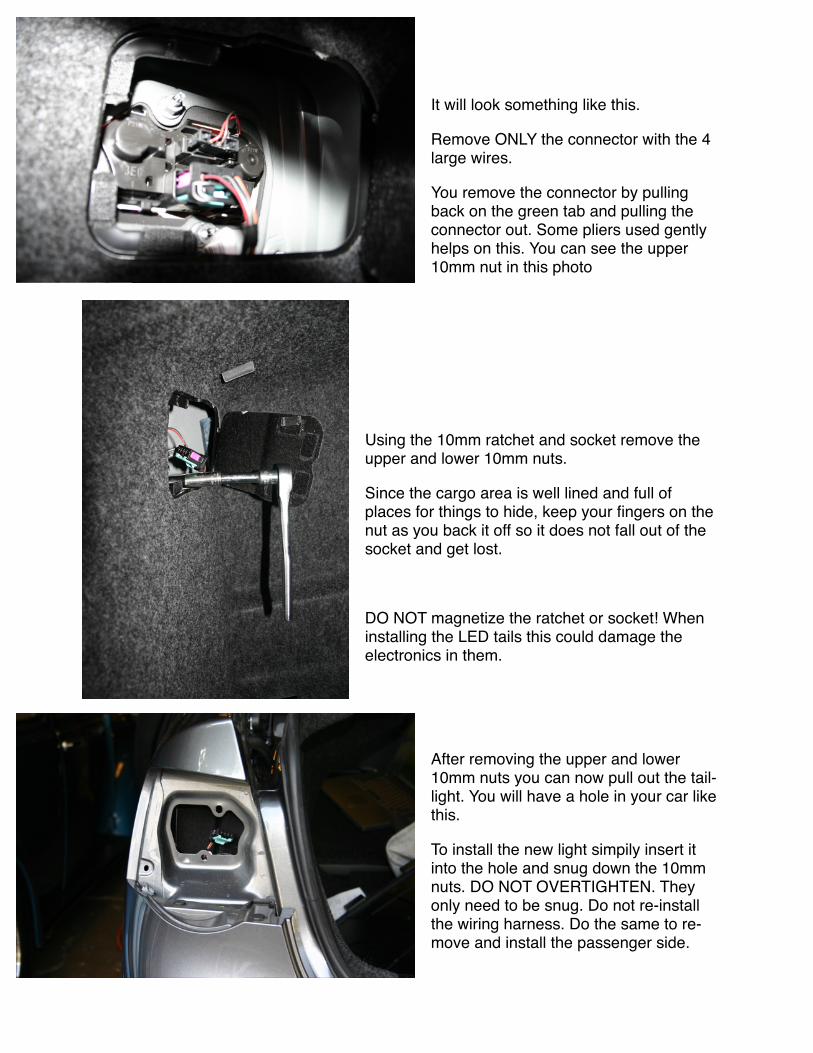
It will look something like this.
Remove ONLY the connector with the 4 large wires.
You remove the connector by pulling back on the green tab and pulling the connector out. Some pliers used gently helps on this. You can see the upper 10mm nut in this photo
Using the 10mm ratchet and socket remove the upper and lower 10mm nuts.
Since the cargo area is well lined and full of places for things to hide, keep your fingers on the nut as you back it off so it does not fall out of the socket and get lost.
DO NOT magnetize the ratchet or socket! When installing the LED tails this could damage the electronics in them.
After removing the upper and lower 10mm nuts you can now pull out the tail-light. You will have a hole in your car like this.
To install the new light simpily insert it into the hole and snug down the 10mm nuts. DO NOT OVERTIGHTEN. They only need to be snug. Do not re-install the wiring harness. Do the same to re-move and install the passenger side.
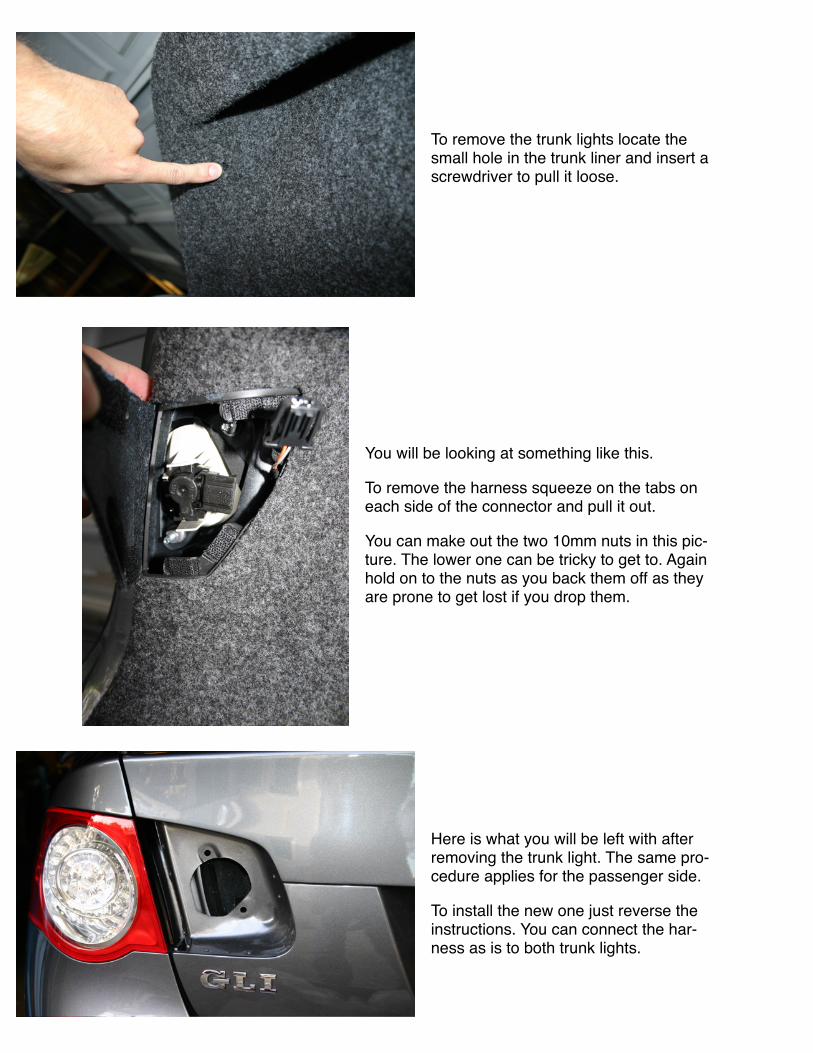
To remove the trunk lights locate the small hole in the trunk liner and insert a screwdriver to pull it loose.
You will be looking at something like this.
To remove the harness squeeze on the tabs on each side of the connector and pull it out.
You can make out the two 10mm nuts in this pic-ture. The lower one can be tricky to get to. Again hold on to the nuts as you back them off as they are prone to get lost if you drop them.
Here is what you will be left with after removing the trunk light. The same pro-cedure applies for the passenger side.
To install the new one just reverse the instructions. You can connect the har-ness as is to both trunk lights.
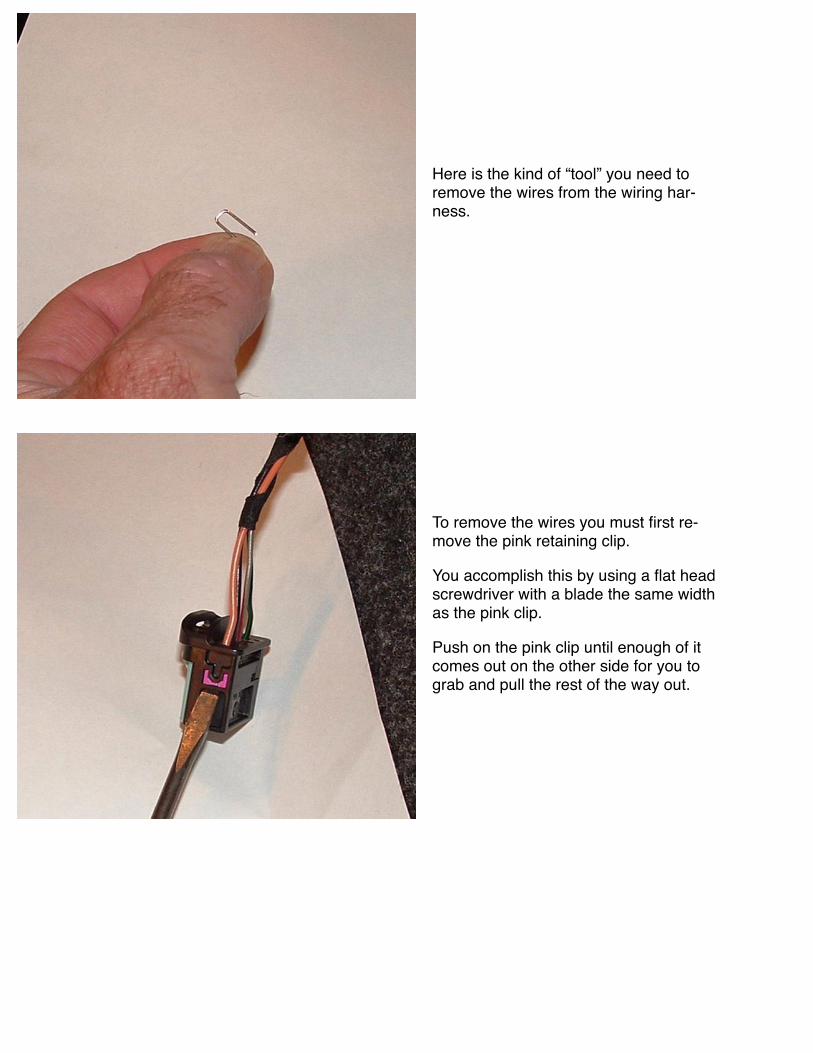
Here is the kind of “tool” you need to remove the wires from the wiring har-ness.
To remove the wires you must first re-move the pink retaining clip.
You accomplish this by using a flat head screwdriver with a blade the same width as the pink clip.
Push on the pink clip until enough of it comes out on the other side for you to grab and pull the rest of the way out.
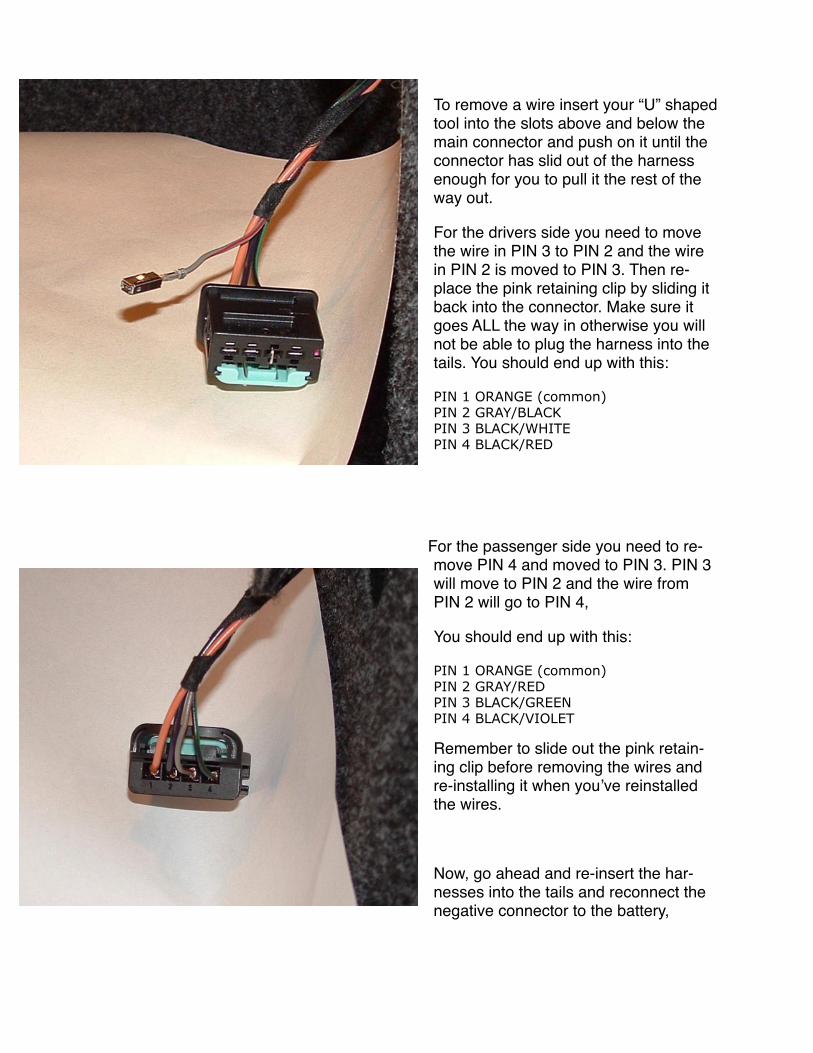
To remove a wire insert your “U” shaped tool into the slots above and below the main connector and push on it until the connector has slid out of the harness enough for you to pull it the rest of the way out.
For the drivers side you need to move the wire in PIN 3 to PIN 2 and the wire in PIN 2 is moved to PIN 3. Then re-place the pink retaining clip by sliding it back into the connector. Make sure it goes ALL the way in otherwise you will not be able to plug the harness into the tails. You should end up with this:
PIN 1 ORANGE (common)PIN 2 GRAY/BLACKPIN 3 BLACK/WHITEPIN 4 BLACK/RED
For the passenger side you need to re-move PIN 4 and moved to PIN 3. PIN 3 will move to PIN 2 and the wire from PIN 2 will go to PIN 4,
You should end up with this:
PIN 1 ORANGE (common)PIN 2 GRAY/REDPIN 3 BLACK/GREENPIN 4 BLACK/VIOLET
Remember to slide out the pink retain-ing clip before removing the wires and re-installing it when you!ve reinstalled the wires.
Now, go ahead and re-insert the har-nesses into the tails and reconnect the negative connector to the battery,

Now, comes the difficult part. You need to re-code module 9 to get the turn signals to blink amber properly and the brake lights to go on properly.
Bytes 0 through 8 are more particular to options, and not generic LED/Lamp Tail Lights. BYTES 9 through 20 Are the ones of concern.
However, the specific coding is unique to each vehicle. So, go to forums.vwvortex.com in the MKV Jetta / Golf forum and look in the FAQ to find the thread where you can get
help determining the long coding for your vehicle.
If you don!t have a VAG-COM and don!t want to purchase one check www.steve-hall.com/cgi-bin/VAG-Locator.pl to find a VAG-COM owner in your area who
might be willing to help you out.
You can order a HEX-CAN cable from:
www.ross-tech.com
The cable comes in either USB or Serial versions and for convience is best used with a laptop. However, you can move a desktop computer into your garage and work on it like that as well. VAG-COM only runs on Windows but, runs fine under the latest version of
Virtual PC running WinXP Home on OS X Tiger as well.
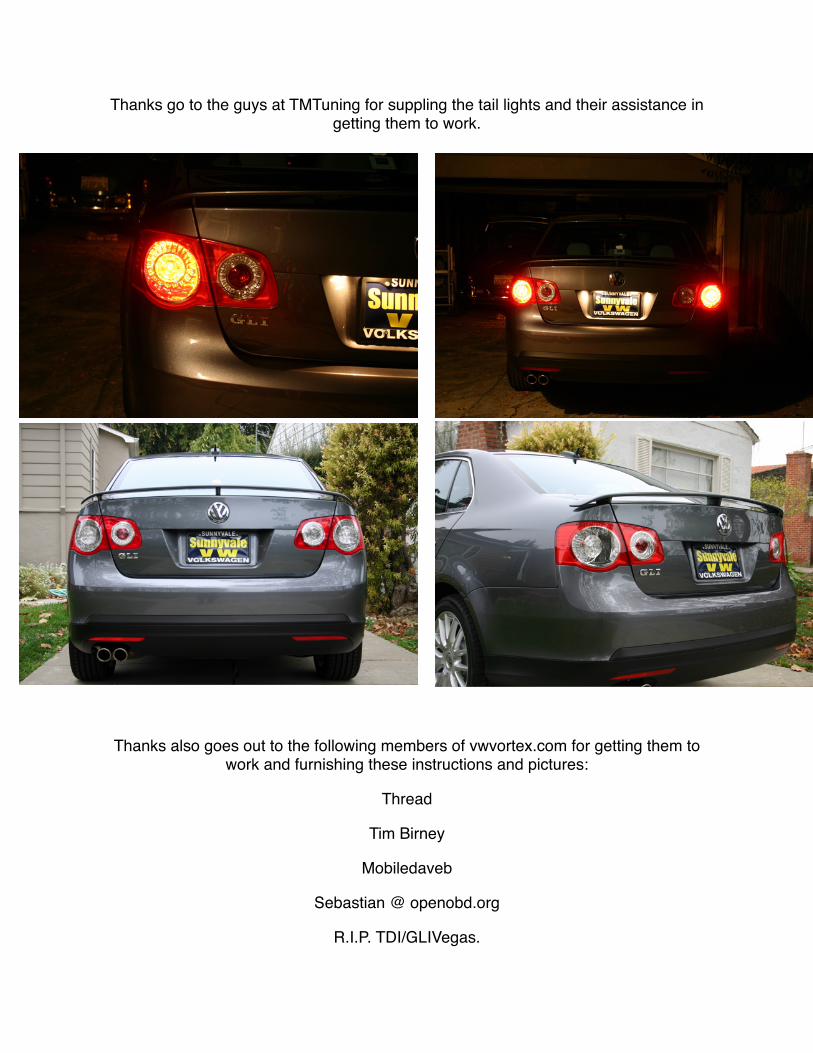
Thanks go to the guys at TMTuning for suppling the tail lights and their assistance in getting them to work.
Thanks also goes out to the following members of vwvortex.com for getting them to work and furnishing these instructions and pictures:
Thread
Tim Birney
Mobiledaveb
Sebastian @ openobd.org
R.I.P. TDI/GLIVegas.