Embed Size (px)
Citation preview
S | C
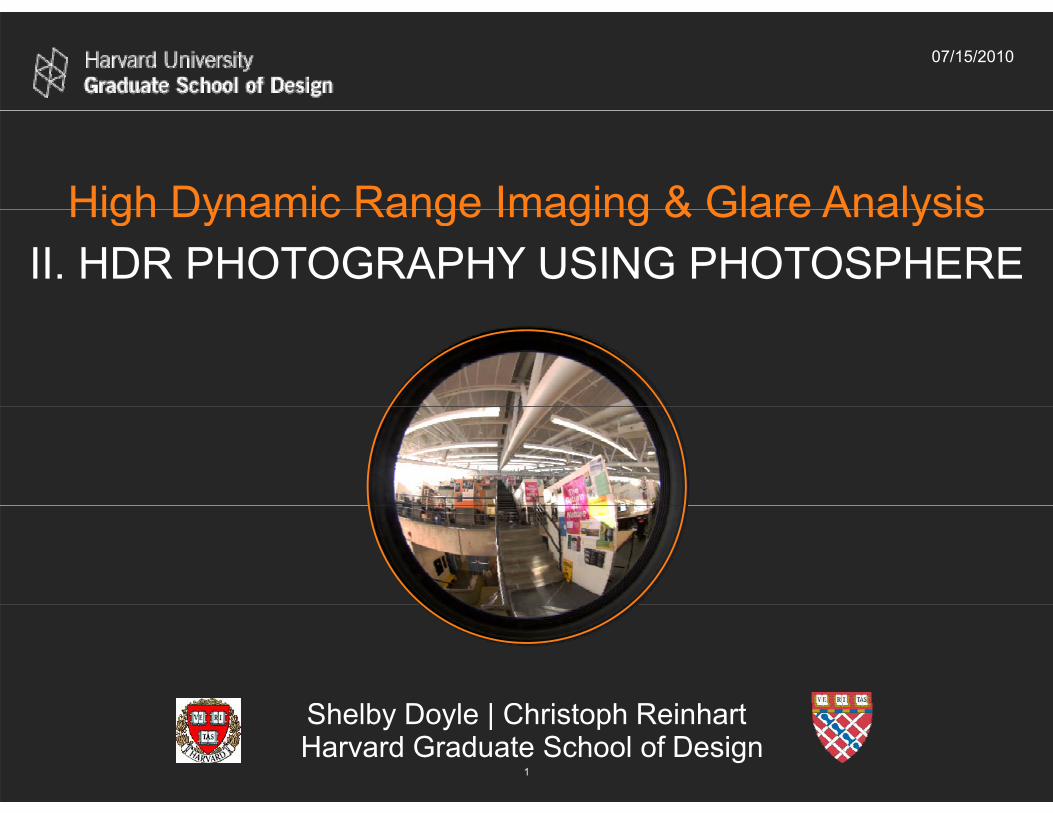
07/15/2010
High Dynamic Range Imaging & Glare AnalysisHigh Dynamic Range Imaging & Glare Analysis II. HDR PHOTOGRAPHY USING PHOTOSPHERE
Harvard Graduate School of Design Shelby Doyle | Christoph Reinhart
11
Thi d i
t t t t t
can e
itt b A d M h
07/15/2010
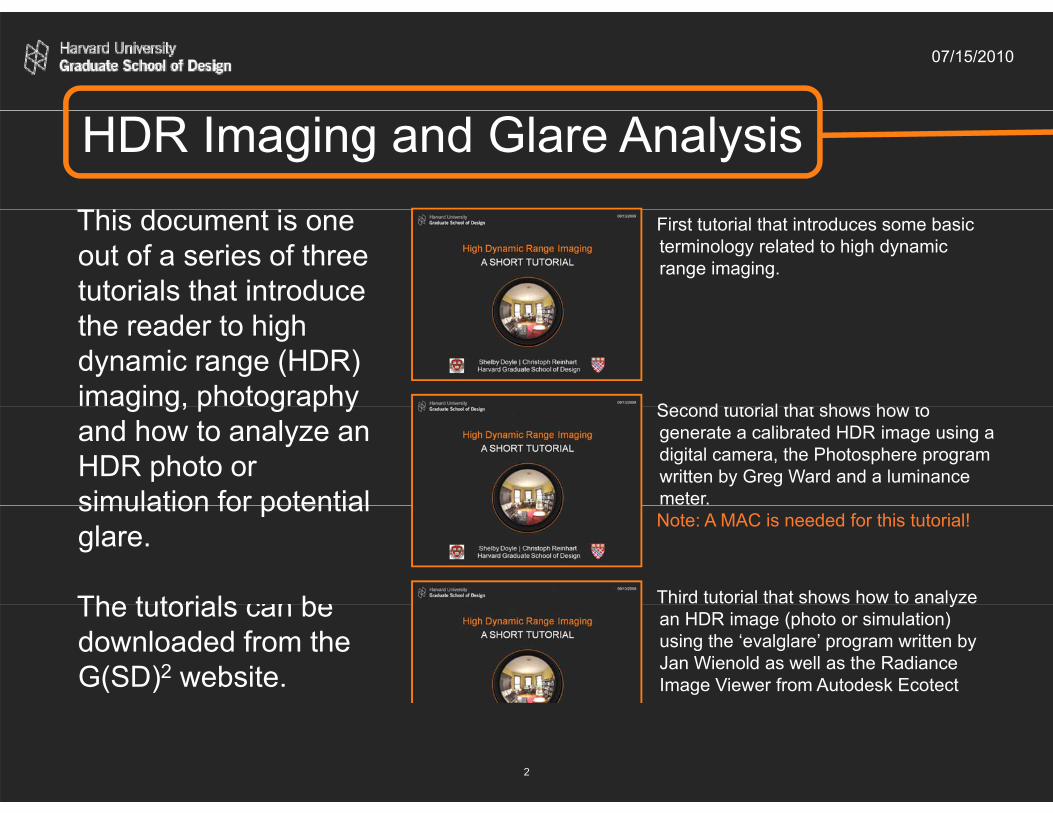
HDR Imaging and Glare Analysis This document is one out of a series of three tutorials that introduce
First tutorial that introduces some basic terminology related to high dynamic range imaging.
the reader to high dynamic range (HDR) imaging, photography S d i l h h h g g, p g p y and how to analyze an HDR photo or simulation for potential
Second tutorial that shows how to generate a calibrated HDR image using a digital camera, the Photosphere program written by Greg Ward and a luminance meter. simulation for potential
glare.
The tutorials b
Note: A MAC is needed for this tutorial!
Third tutorial that shows how to analyze The tutorials can be downloaded from the G(SD)2 website.
y an HDR image (photo or simulation) using the ‘evalglare’ program written by Jan Wienold as well as the Radiance Image Viewer from Autodesk Ecotect written by Andrew Marsh. Note: A PC is needed for this tutorial!
22

C t L i R di
Save the for Glare
07/15/2010
In This Tutorial
* Note: You will need a MAC to follow this tutorial. • Download Photosphere Software • Set Up Camera • Select a Scene • Capture Luminance Reading • Take Photo Series • Make an HDRI Photo • Make an HDRI Photo • Calibrate Camera • Save the image for Glare Analysisimage Analysis • More available tools.
33

07/15/2010
Photosphere
Download and install a copy of Photosphere a software designed to easily create HDRI images from multiple images. Note: This is a Mac program.
www.anyhere.comy
Link named: Æ Download a copy of Photosphere
44

Sh tt S d
07/15/2010
Setting Up
What you need:
Digital Camera w/Manual Settings Aperture Shutter Speed Exposure Value
Mac ComputerMac Computer Luminance Meter (+ Tripod)
55

07/15/2010
Aperture
Controls the amount of light reaching the image sensor. In combination with variation of shutter speed, the aperture size will regulate the image sensor’s degree of exposure to light.
F 2.8 F 3.2
F 4.0 F 5.6
F 6.43 F 8.0
The smaller F Stop number the larger the opening and the greater the amount of light entering the camera.
66

i Th 1/60
sensor. s
07/15/2010
Shutter Speed
The effective length of time a shutter is
1/1000 s 1/500 sas
ter
open or duration of light reaching the
1/250 s 1/125 s
Fa
image sensor. The longer the shutter is open the more light
1/60 s 1/30 s 1/15 s open the more light
reaches the image sensor.
1/15 s 1/8 s 1/4 s er
1/4 1/2 s 1 sS
low
e
77

d
07/15/2010
Exposure Value
1.How much light will be admitted to the film by the combination of lens aperture and shutter speed.
2.How much exposure is required by the combination of subject luminance (e.g., how bright it is) and film speed.
Under Exposed Over Exposed Correctly
0 +1 +2-1-2
Under Exposed (Too little light)
Over Exposed (Too much light)
Correctly Exposed
It is common practice among photographic equipment manufacturers to express luminance in EV for ISO 100 speed. Set your camera’s ISO speed to 100.
88

07/15/2010
Set Aperture
Take a photo at each EV to capture a full range of light.
0 +1 +2-1-2
99

07/15/2010
Upload Photos
Save the photos in an easy to locate folder
1010
07/15/2010
Open PhotosphereOpen Photosphere.
1111

07/15/2010
Double click the folder name to load the photos Double click the folder name to load the photos.
1212

07/15/2010
Select the photos needed to make an HDR photo Select the photos needed to make an HDR photo.
1313

07/15/2010
Select File then Make HDR Select File then Make HDR
1414

07/15/2010
Select the below HDR settings Select the below HDR settings.
1515

h ti
07/15/2010
Photosphere HDR settings explainedPhotosphere HDR settings explained.
Automatically aligns images if tripod shake occurred
Once a calibration response is saved for the camera it can be used instead of recalibrating
Save a calibration response for the identified camera, in this case a Panasonic DMC-LX2
each time Automatically fine-tune exposures for exposure values
Automatically skips LX2
Removes light artifacts from the scene, such as from the sun.
Automatically skips unnecessary exposures
Removes people from a scene
1616
07/15/2010
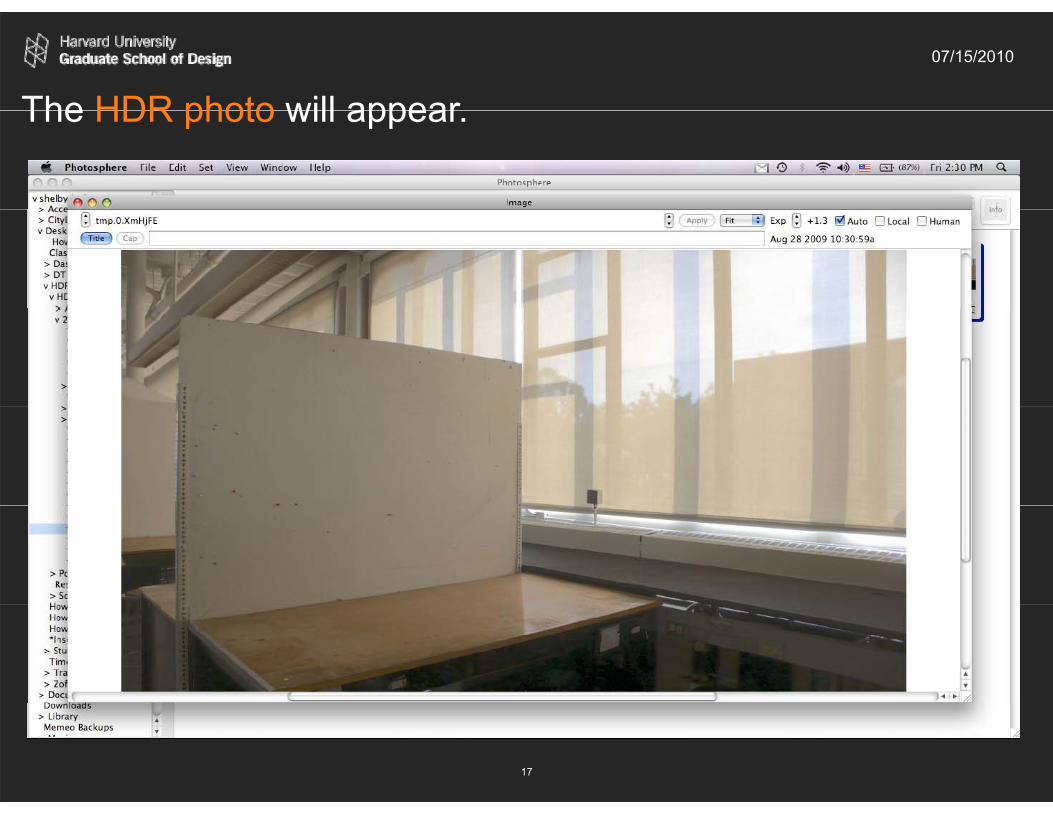
The HDR photo will appear The HDR photo will appear.
1717

07/15/2010
Pick a spot in the actual space to calibrate with the Pick a spot in the actual space to calibrate with the Luminance Meter.
Record the cd/m2
1818

07/15/2010
Pick the same spot in the photoPick the same spot in the photo.
1919

07/15/2010
Select Calibration from the Apply Menu Select Calibration from the Apply Menu.
2020

07/15/2010
Enter the cd/m2 value from the Luminance Meter Enter the cd/m2 value from the Luminance Meter.
2121
07/15/2010
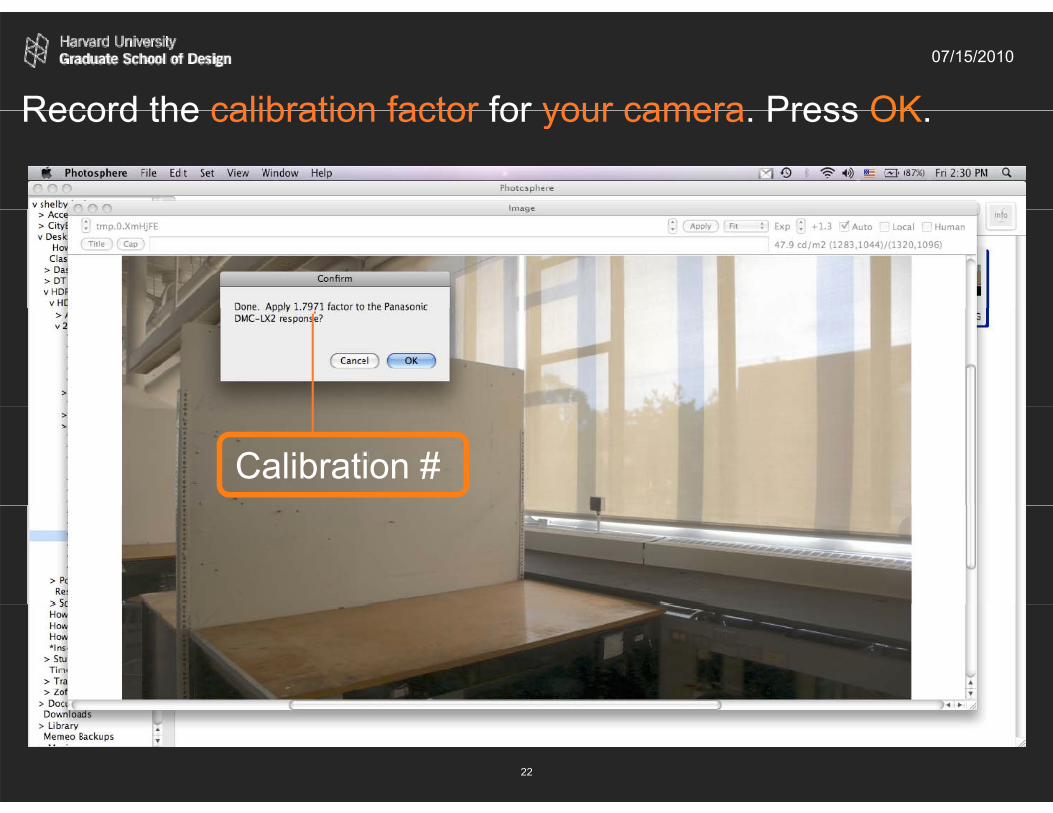
Record the calibration factor for your camera Press OKRecord the calibration factor for your camera. Press OK.
Calibration #
2222

07/15/2010
Save the HDR ImageSave the HDR Image.
2323

07/15/2010
Save the HDR Image in High Dynamic Range Save the HDR Image in High Dynamic Range.
2424

07/15/2010
Save the HDR Image as an hdr file extension Save the HDR Image as an .hdr file extension.
NO spaces in file name
2525

a can
g
07/15/2010
Note that an .hdr file extension is the SAME file format as a Radiance .pic file extension which is created during simulation Both file types becreated during a simulation. Both file types can be used to do an Evalglare glare analysis.
.hdr = .pic
To run Evalglare an image of less than 800x800 pixels is needed If possible adjust the size of thepixels is needed. If possible adjust the size of the image now. Otherwise this can be done in Evalglare.
2626

07/15/2010
Switch to a PC to begin HDRI Glare Analysis.
Hi h D i R I iHigh Dynamic Range Imaging III. GLARE ANALYSIS: EVALGLARE
http://www.gsd.harvard.edu/research/gsdsquare/tutorials.html
For HDRI Background Information.
High Dynamic Range Imaging I DEFINITIONSI. DEFINITIONS
http://www.gsd.harvard.edu/research/gsdsquare/tutorials.html
2727

MIT OpenCourseWarehttp://ocw.mit.edu
4.430 DaylightingSpring 2012 For information about citing these materials or our Terms of Use, visit: http://ocw.mit.edu/terms.
28