Embed Size (px)
Citation preview
KU970 User Guide- English
Disposal of your old appliance1. When this crossed-out wheeled bin symbol is attached to a product it means
the product is covered by the European Directive 2002/96/CE.2. All electrical and electronic products should be disposed of separately from the
municipal waste stream via designated collection facilities appointed by thegovernment or the local authorities.
3. The correct disposal of your old appliance will help prevent potential negativeconsequences for the environment and human health.
4. For more detailed information about disposal of your old appliance, pleasecontact your city office, waste disposal service or the shop where you purchasedthe product.
This document is the user guide for the LG KU970 3G Video Mobile Phone. All rights for this document are reserved by LG Electronics. Copying, modifying anddistributing this document without theconsent of LG Electronics are prohibited.
KU970_Eng(AUS)_0312 07.03.12 11:3 AM Page 1
Table of Contents
2Table of C
ontents
Introduction 5For Your Safety 6Guidelines for Safe andEfficient Use 7Getting Started 18Installing the USIM cardand battery Charging the Battery 19Turning the handset on/off
21Access codesDisplay information 22
General Functions 25Making and answering callsEntering text 27Changing the text input mode
28Using the T9 ModeUsing the ABC Mode 29Using the 123 (Number) mode
30Using the symbol mode
Overview of MenuFunctions 31USIM Tool Kit 32Music 33Now playingAll tracksPlaylistsSong recognitionMusic store
Camera 34CameraVideo recorder 37
Video call 39During a video callReceiving a video call
Calls 41All callsDialled callsReceived callsMissed calls
Messaging 42Create newMessagePostcard 43E-Mail 44
Inbox 45Drafts 46OutboxSent messages 47E-Mail
KU970_Eng(AUS)_0312 07.03.12 11:3 AM Page 2
Table of Contents
Templates 49Text templates Multimedia templates
Media AlbumMessaging settingsSMS MMS 50E-Mail 52Info. service 55Service message
Contacts 56Add newContacts listGroupsSpeed dialsService dial numbersOwn number 57SettingsView contacts from Show image/avatar Copy all Move all Clear contacts
Vodafone live! 58HomepageEnter URLEnter addressRecent pages
BookmarksSaved pages 59Browser settingsProfilesSecurity Character encoding Scrolling control Show image 60Cache Cookies JavaScript Reset settings
Entertainment 61Games & ApplicationsMobile TVJava settings
My Files 62Pictures 63SoundsVideosGames & Applications 65Bluetooth dataOther files 66
3
KU970_Eng(AUS)_0312 07.03.12 11:3 AM Page 3
Table of Contents
4Table of C
ontents
Organiser & Tools 67Alarms Calendar Tasks 69Memo 70Calculator Converter 71World timeVoice recorder
Settings 73Phone settingsProfiles Date & Time 74Auto key lock 75Language Security Power save 77Memory status 78Handset informationReset settings
Display settings 79Main displayMenu styleFontBacklightWelcome message
Java 80Messaging settingsCall settingsCall durations Call barring 81Fixed dial numbers 83Data volume Call costs Diverts 84Call waiting 87VoicemailVideo call Common settings 88
Contact settings 89ConnectivityBluetooth Synchronisation 93Network Access points 94Browser settings 95Streaming 96Dial-up network
Accessories 97Technical data 98Index 99
KU970_Eng(AUS)_0312 07.03.12 11:3 AM Page 4
5
Introduction
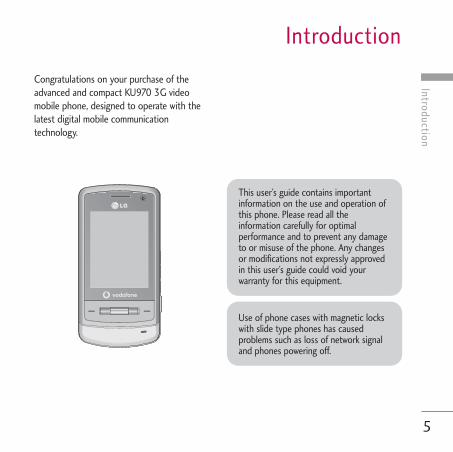
Congratulations on your purchase of theadvanced and compact KU970 3G videomobile phone, designed to operate with thelatest digital mobile communicationtechnology.
Introduction
This user’s guide contains importantinformation on the use and operation ofthis phone. Please read all theinformation carefully for optimalperformance and to prevent any damageto or misuse of the phone. Any changesor modifications not expressly approvedin this user’s guide could void yourwarranty for this equipment.
Use of phone cases with magnetic lockswith slide type phones has causedproblems such as loss of network signaland phones powering off.
KU970_Eng(AUS)_0312 07.03.12 11:3 AM Page 5
6
For Your Safety
Please read these simple guidelines. Notfollowing these guidelines may be dangerousor illegal. Further detailed information isgiven in this manual.
WARNING! • Mobile Phones must be switched off at all
times in aircrafts.• Do not hold the phone in your hand while
driving.• Do not use your phone near petrol stations,
fuel depots, chemical plants or blastingoperations.
• For your safety, use ONLY specifiedORIGINAL batteries and chargers.
• Do not handle the phone with wet handswhile it is being charged. It may cause anelectric shock or seriously damage yourphone.
• Keep the phone in a safe place out of smallchildren’s reach. It includes small parts which,if detached, may cause a choking hazard.
CAUTION!• Switch off the phone in any area where
required by special regulations. For example,do not use your phone in hospitals or it mayaffect sensitive medical equipment.
• Emergency calls may not be available underall mobile networks. Therefore, you shouldnever depend solely on your mobile phone foremergency calls.
• Only use ORIGINAL accessories to avoiddamage to your phone.
• All radio transmitters carry risks ofinterference with electronics in close proximity.Minor interference may affect TVs, radios,PCs, etc.
• Batteries should be disposed of in accordancewith relevant legislation.
• Do not dismantle the phone or battery.
For Your Safety
KU970_Eng(AUS)_0312 07.03.12 11:3 AM Page 6
7
Guidelines for Safe and Efficient UseG
uidelines for Safe and Efficient Use
Please read these simple guidelines. Notfollowing these guidelines may be dangerousor illegal. Further detailed information isgiven in this manual.
Certification information(SAR)THIS DEVICE MEETS INTERNATIONALGUIDELINES FOR EXPOSURE TO RADIOWAVES
Your mobile device is a radio transmitter andreceiver. It is designed and manufactured notto exceed the limits for exposure to radiofrequency (RF) recommended by internationalguidelines (ICNIRP). These limits are part ofcomprehensive guidelines and establishpermitted levels of RF energy for the generalpopulation. The guidelines were developed byindependent scientific organisations throughperiodic and thorough evaluation of scientificstudies. The guidelines include a substantialsafety margin designed to assure the safety ofall persons, regardless of age and health.
The exposure standard for mobile devicesemploys a unit of measurement known as theSpecific Absorption Rate, or SAR. The SARlimit stated in the international guidelines is2.0 W/kg*. Tests for SAR are conducted usingstandard operating positions with the devicetransmitting at its highest certified power levelin all tested frequency bands. Although theSAR is determined at the highest certifiedpower level, the actual SAR of the device whileoperating can be well below the maximumvalue. This is because the device is designed tooperate at multiple power levels so as to useonly the power required to reach the network.In general, the closer you are to a base station,the lower the power output of the device.Before a phone model is available for sale tothe public, compliance with the EuropeanR&TTE directive must be shown. This directiveincludes as one essential requirement theprotection of the health and the safety for theuser and any other person. The highest SARvalue for this device when tested for use at theear is 0.756 W/kg.
KU970_Eng(AUS)_0312 07.03.12 11:3 AM Page 7
8
Guidelines for Safe and Efficient Use
Guidelines for Safe and Efficient U
se
This device meets RF exposure guidelines whenused either in the normal use position againstthe ear or when positioned at least 1.5 cmaway from the body. When a carry case, beltclip or holder is used for body-worn operation,it should not contain metal and shouldposition the product at least 1.5 cm away fromyour body. In order to transmit data files ormessages, this device requires a qualityconnection to the network. In some cases,transmission of data files or messages may bedelayed until such a connection is available.Ensure the above separation distanceinstructions are followed until the transmissionis completed. The highest SAR value for thisdevice when tested for use at the body is0.327 W/kg.
* The SAR limit for mobile devices used by thepublic is 2.0 watts/kilogram (W/kg) averagedover ten grams of body tissue. The guidelinesincorporate a substantial margin of safety togive additional protection for the public and toaccount for any variations in measurements.SAR values may vary depending on nationalreporting requirements and the network band.
For SAR information in other regions pleaselook under product information atwww.lgmobile.com.
Product care andmaintenance
] Do not disassemble this unit. Take it to aqualified service technician when repairwork is required.
] Keep away from electrical appliances suchas a TV's, radios or personal computers.
] The unit should be kept away from heatsources such as radiators or cookers.
] Never place your phone in a microwaveoven as it will cause the battery to explode.
] Do not drop.
] Do not subject this unit to mechanicalvibration or shock.
WARNING! Only use batteries, chargers and accessoriesapproved for use with this particular phonemodel. The use of any other types mayinvalidate any approval or warranty applyingto the phone, and may be dangerous.
KU970_Eng(AUS)_0312 07.03.12 11:3 AM Page 8
9
Guidelines for Safe and Efficient U
se
] The coating of the phone may be damagedif covered with wrap or vinyl wrapper.
] Do not use harsh chemicals (such asalcohol, benzene, thinners, etc.) ordetergents to clean your phone. There is arisk of this causing a fire.
] Do not subject this unit to excessive smokeor dust.
] Do not keep the phone next to credit cardsor transport tickets; it can affect theinformation on the magnetic strips.
] Do not tap the screen with a sharp objectas it may damage the phone.
] Do not expose the phone to liquid ormoisture.
] Use accessories, such as earphones andheadsets, with caution. Ensure that cablesare tucked away safely and do not touchthe antenna unnecessarily.
] Please remove the data cable beforepowering on the handset.
Efficient phone operationTo enjoy optimum performance withminimum power consumption please.] Do not hold the antenna when the phone is
in use. If you hold it, it can affect call quality,it may also cause the phone to operate at ahigher power level than needed and shortentalk and standby times.
Electronic devicesAll mobile phones may get interference,which could affect performance.] Do not use your mobile phone near
medical equipment without requestingpermission. Avoid placing the phone overpacemakers (i.e. in your breast pocket.)
] Some hearing aids might be disturbed bymobile phones.
] Minor interference may affect TVs, radios,PCs, etc.
KU970_Eng(AUS)_0312 07.03.12 11:3 AM Page 9
10
Guidelines for Safe and Efficient Use
Guidelines for Safe and Efficient U
se
Road safetyCheck the laws and regulations on theuse of mobile phones in the areas whenyou drive.
] Do not use a hand-held phone whiledriving.
] Give full attention to driving.
] Use a hands-free kit, if available.
] Pull off the road and park before making oranswering a call if driving conditions sorequire.
] RF energy may affect some electronicsystems in your motor vehicle such as a carstereo or safety equipment.
] If your vehicle is equipped with an air bag,do not obstruct it with installed orportable wireless equipment. It can causeserious injury due to improperperformance.
If you are listening to music whilst outsideand about, please ensure that the volumeis at a reasonable level so that you are
aware of your surroundings. This isparticularly imperative when attemptingto cross the street.
Avoid damage to yourhearingDamage to your hearing can occur if you areexposed to loud sound for long periods oftime. We therefore recommend that you donot turn on or off the handset close to yourear. We also recommend that music and callvolumes are set to a reasonable level.
Blasting areaDo not use the phone where blasting is inprogress. Observe restrictions, and follow anyregulations or rules.
Potentially explosiveatmospheres] Do not use the phone at a refueling point.
Don't use near fuel or chemicals.
] Do not transport or store flammable gas,
KU970_Eng(AUS)_0312 07.03.12 11:3 AM Page 10
11
Guidelines for Safe and Efficient U
se
liquid, or explosives in the compartment ofyour vehicle, which contains your mobilephone and accessories.
In aircraftWireless devices can cause interference inaircraft.] Turn off your mobile phone before
boarding any aircraft.
] Do not use it on the ground without crewpermission.
ChildrenKeep the phone in a safe place out of smallchildren's reach. It includes small parts whichif detached may cause a choking hazard.
Emergency callsEmergency calls may not be available underall mobile networks. Therefore, you shouldnever depend solely on your mobile phonefor emergency calls. Check with your localservice provider.
Battery information andcare] You do not need to completely discharge
the battery before recharging. Unlike otherbattery systems, there is no memory effectthat could compromise the battery'sperformance.
] Use only LG batteries and chargers. LGchargers are designed to maximize thebattery life.
] Do not disassemble or short-circuit thebattery pack.
] Keep the metal contacts of the batterypack clean.
] Replace the battery when it no longerprovides acceptable performance. Thebattery pack may be recharged hundreds oftimes until it needs replacing.
] Recharge the battery if it has not beenused for a long time to maximize usability.
] Do not expose the battery charger todirect sunlight or use it in high humidity,such as the bathroom.
KU970_Eng(AUS)_0312 07.03.12 11:3 AM Page 11
Guidelines for Safe and Efficient Use
12G
uidelines for Safe and Efficient Use
] Do not leave the battery in hot or coldplaces, this may deteriorate the batteryperformance.
] Risk of explosion if battery is replaced byan incorrect type.
] Dispose of used batteries according to themanufacturer’s instructions.
Driver Safety TipsYour wireless telephone gives you thepowerful ability to communicate by voice - almost anywhere, anytime. But animportant responsibility accompanies thebenefits of wireless phones, one thatevery user must uphold. When driving a car, driving is your firstresponsibility. When using your wirelessphone behind the wheel of a car, practicegood common sense and remember thefollowing tips:
] Use a hands free device. If possible, add anadditional layer of convenience and safetyto your wireless phone with one of themany hands free accessories available today.
] Let the person you are speaking with knowyou are driving; if necessary, suspend thecall in heavy traffic or hazardous weatherconditions. Rain, sleet, snow, ice and evenheavy traffic can be hazardous.
] Do not take notes or look up phonenumbers while driving. Jotting down a “todo” list or flipping through your addressbook takes attention away from yourprimary responsibility, driving safely.
] If possible, place calls when you are notmoving or before pulling into traffic. Try toplan calls when you will not be driving.
] Do not engage in stressful or emotionalconversations that may be distracting. Makepeople you are talking with aware you aredriving and suspend conversations that havethe potential to divert your attention fromthe road.
KU970_Eng(AUS)_0312 07.03.12 11:3 AM Page 12

Guidelines for Safe and Efficient U
se
] Use your wireless phone to call emergencyservices for yourself or others. Dial 0-0-0local emergency number in the case of fire,traffic accident or medical emergencies.Remember, it is a free call on your wirelessphone! Dial 1-1-2 internationally foremergency services.
] Use your wireless phone to help others inemergencies, if you see an auto accidentcrime in progress or other seriousemergency where lives are in danger, call 0-0-0 to call emergency number, as you wouldwant others to do for you.
] Call roadside assistance or a special non-emergency wireless assistance number whennecessary. If you see a broken down vehicleposing no serious hazard, a broken trafficsignal, a minor traffic accident where no oneappears injured, or a vehicle you know to bestolen, call roadside assistance or otherspecial nonemergency wireless number.
13
KU970_Eng(AUS)_0312 07.03.12 11:3 AM Page 13
14
KU970 Features
KU970 Features
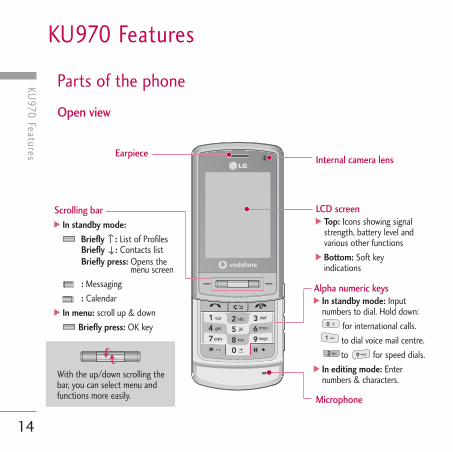
Parts of the phone
Open view
Earpiece
Scrolling bar] In standby mode:
Briefly : List of ProfilesBriefly : Contacts listBriefly press: Opens the
menu screen: Messaging: Calendar
] In menu: scroll up & downBriefly press: OK key
LCD screen] Top: Icons showing signal
strength, battery level andvarious other functions
] Bottom: Soft keyindications
Internal camera lens
Microphone
Alpha numeric keys ] In standby mode: Input
numbers to dial. Hold down:for international calls.to dial voice mail centre.to for speed dials.
] In editing mode: Enternumbers & characters.With the up/down scrolling the
bar, you can select menu andfunctions more easily.
KU970_Eng(AUS)_0312 07.03.12 11:3 AM Page 14
15
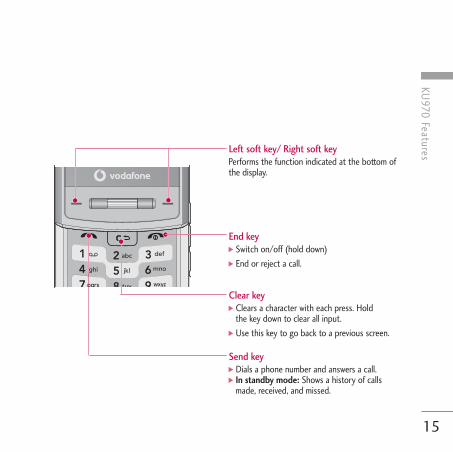
KU970 FeaturesLeft soft key/ Right soft key
Performs the function indicated at the bottom ofthe display.
Clear key] Clears a character with each press. Hold
the key down to clear all input. ] Use this key to go back to a previous screen.
End key] Switch on/off (hold down)] End or reject a call.
Send key ] Dials a phone number and answers a call.] In standby mode: Shows a history of calls
made, received, and missed.
KU970_Eng(AUS)_0312 07.03.12 11:3 AM Page 15
16
KU970 Features
KU970 Features
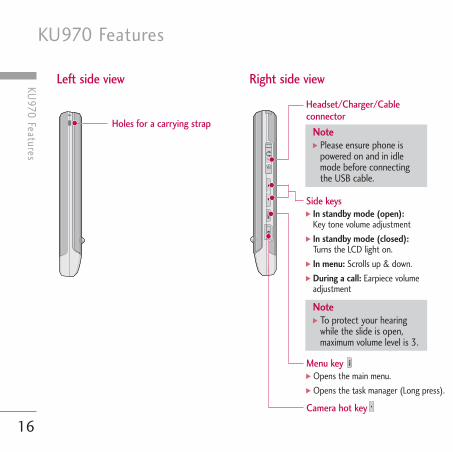
Left side view Right side view
Side keys ] In standby mode (open):
Key tone volume adjustment] In standby mode (closed):
Turns the LCD light on.] In menu: Scrolls up & down.] During a call: Earpiece volume
adjustment
Headset/Charger/Cableconnector
Note] To protect your hearing
while the slide is open,maximum volume level is 3.
Note] Please ensure phone is
powered on and in idlemode before connectingthe USB cable.
Menu key] Opens the main menu.] Opens the task manager (Long press).
Camera hot key
Holes for a carrying strap
KU970_Eng(AUS)_0312 07.03.12 11:3 AM Page 16
17
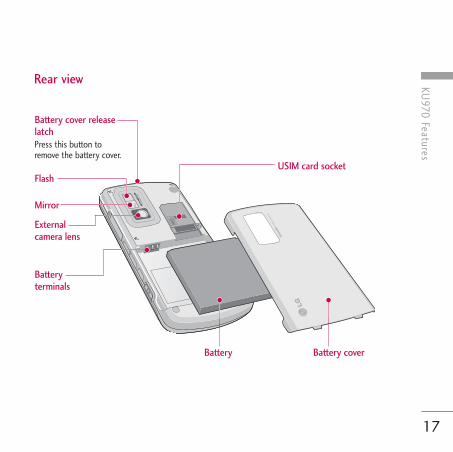
Rear view
USIM
Battery
External camera lens
Flash
Battery cover releaselatchPress this button toremove the battery cover.
USIM card socket
Mirror
Batteryterminals
KU970 Features
Menu key] Opens the main menu.] Opens the task manager (Long press).
Camera hot key
Battery cover
KU970_Eng(AUS)_0312 07.03.12 11:3 AM Page 17
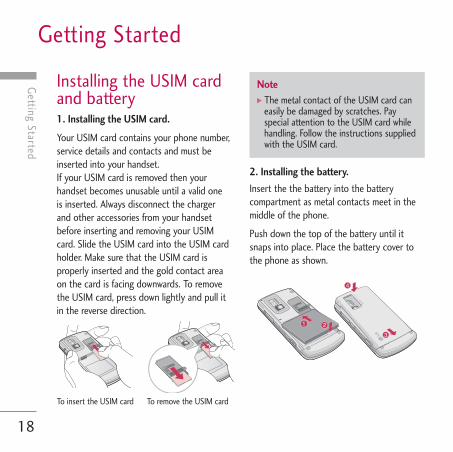
Installing the USIM cardand battery1. Installing the USIM card.
Your USIM card contains your phone number,service details and contacts and must beinserted into your handset.If your USIM card is removed then yourhandset becomes unusable until a valid oneis inserted. Always disconnect the chargerand other accessories from your handsetbefore inserting and removing your USIMcard. Slide the USIM card into the USIM cardholder. Make sure that the USIM card isproperly inserted and the gold contact areaon the card is facing downwards. To removethe USIM card, press down lightly and pull itin the reverse direction.
To insert the USIM card To remove the USIM card
2. Installing the battery.
Insert the the battery into the batterycompartment as metal contacts meet in themiddle of the phone.
Push down the top of the battery until itsnaps into place. Place the battery cover tothe phone as shown.
Getting Started
18G
etting Started
Note] The metal contact of the USIM card can
easily be damaged by scratches. Payspecial attention to the USIM card whilehandling. Follow the instructions suppliedwith the USIM card.
USIM
USIM
USIM
USIM
KU970_Eng(AUS)_0312 07.03.12 11:3 AM Page 18
Getting Started
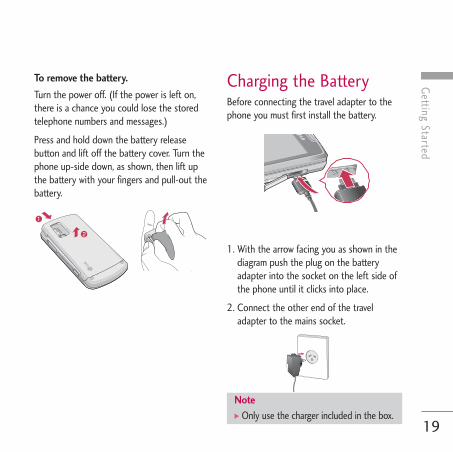
To remove the battery.
Turn the power off. (If the power is left on,there is a chance you could lose the storedtelephone numbers and messages.)
Press and hold down the battery releasebutton and lift off the battery cover. Turn thephone up-side down, as shown, then lift upthe battery with your fingers and pull-out thebattery.
Charging the BatteryBefore connecting the travel adapter to thephone you must first install the battery.
1. With the arrow facing you as shown in thediagram push the plug on the batteryadapter into the socket on the left side ofthe phone until it clicks into place.
2. Connect the other end of the traveladapter to the mains socket.
19
Note] Only use the charger included in the box.
KU970_Eng(AUS)_0312 07.03.12 11:3 AM Page 19
Getting Started
20G
etting Started
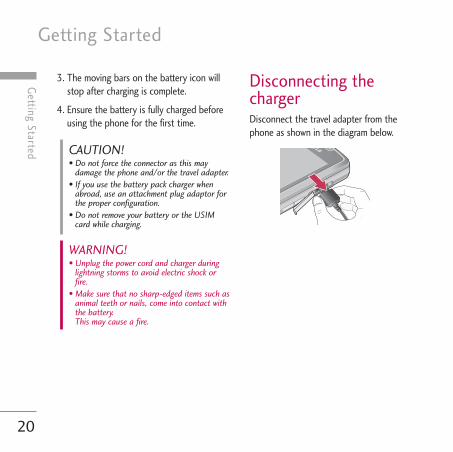
3. The moving bars on the battery icon willstop after charging is complete.
4. Ensure the battery is fully charged beforeusing the phone for the first time.
Disconnecting thechargerDisconnect the travel adapter from thephone as shown in the diagram below.
WARNING! • Unplug the power cord and charger during
lightning storms to avoid electric shock orfire.
• Make sure that no sharp-edged items such asanimal teeth or nails, come into contact withthe battery. This may cause a fire.
CAUTION!• Do not force the connector as this may
damage the phone and/or the travel adapter.• If you use the battery pack charger when
abroad, use an attachment plug adaptor forthe proper configuration.
• Do not remove your battery or the USIMcard while charging.
KU970_Eng(AUS)_0312 07.03.12 11:3 AM Page 20

Getting Started
21
Turning the handseton/off
Turning your handset onEnsure that your USIM card is in yourhandset and the battery is charged. Press andhold until the power comes on. Enterthe USIM PIN code that was supplied withyour USIM card if the PIN code request isset to On. (Note: Please refer to page 75) After a few seconds you will be registered onthe network.
Turning your handset off Press and hold until the power goes off.There may be a few seconds delay while thehandset powers down.Do not turn the handset on again during thistime.
Access codesYou can use the access codes described inthis section to avoid unauthorised use ofyour phone. The access codes (except thePUK and PUK2 codes) can be changed byusing the Change codes feature [Menu#.1.5.3].
PIN code (4 to 8 digits)The PIN (Personal Identification Number)code protects your USIM card againstunauthorised use. The PIN code is usuallysupplied with the USIM card. When the PINcode request is set to On, your phone willrequest the PIN code every time it isswitched on. When the PIN code request isset to Off, your phone connects to thenetwork directly without the PIN code.
PIN2 code (4 to 8 digits)The PIN2 code, supplied with some USIMcards, is required to access functions such asFixed dial number. These functions are onlyavailable if supported by your USIM card.
KU970_Eng(AUS)_0312 07.03.12 11:3 AM Page 21
Getting Started
22G
etting Started
PUK code (4 to 8 digits)The PUK (PIN Unblocking Key) code isrequired to unblock a blocked PIN code. ThePUK code may be supplied with the USIMcard. If not, contact your network operator’scustomer service department for the code. Ifyou lose the code, contact your networkoperator’s customer service department.
PUK2 code (4 to 8 digits)The PUK2 code, supplied with some USIMcards, is required to unblock a blocked PIN2code. If you lose the code, contact yournetwork operator’s customer servicedepartment.
Security code (4 to 8digits)The security code prevents unauthorised useof your phone. The default security code isset to ‘0000’ and the security code isrequired to delete all phone entries and torestore the handset to the factory settings.
Display information
No USIM idle screenThis is the initial screen of the phone thatappears when there is no USIM card installedin the phone, or the installed USIM card isinvalid. In this screen, users can only makeemergency calls, and turn the phone off. Toturn the phone off, press and hold down
for a few seconds.
Screen structureIf there is no USIM card installed, ananimation telling you to insert a USIM cardappears. If the USIM card inserted into thephone is invalid, an animation telling you thatthe USIM card is locked appears.
Emergency call functionThe right soft key is represented by“Emergency” on the screen. Press the rightsoft key or dial your emergency numberusing the number keys, and then press to make an emergency call.
KU970_Eng(AUS)_0312 07.03.12 11:3 AM Page 22
Getting Started
23
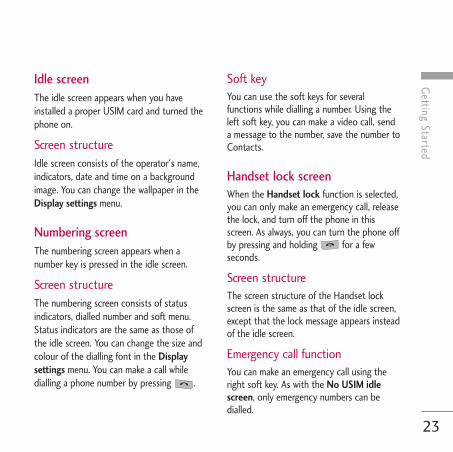
Idle screenThe idle screen appears when you haveinstalled a proper USIM card and turned thephone on.
Screen structureIdle screen consists of the operator's name,indicators, date and time on a backgroundimage. You can change the wallpaper in theDisplay settings menu.
Numbering screenThe numbering screen appears when anumber key is pressed in the idle screen.
Screen structureThe numbering screen consists of statusindicators, dialled number and soft menu.Status indicators are the same as those ofthe idle screen. You can change the size andcolour of the dialling font in the Displaysettings menu. You can make a call whiledialling a phone number by pressing .
Soft keyYou can use the soft keys for severalfunctions while dialling a number. Using theleft soft key, you can make a video call, senda message to the number, save the number toContacts.
Handset lock screenWhen the Handset lock function is selected,you can only make an emergency call, releasethe lock, and turn off the phone in thisscreen. As always, you can turn the phone offby pressing and holding for a fewseconds.
Screen structureThe screen structure of the Handset lockscreen is the same as that of the idle screen,except that the lock message appears insteadof the idle screen.
Emergency call functionYou can make an emergency call using theright soft key. As with the No USIM idlescreen, only emergency numbers can bedialled.
KU970_Eng(AUS)_0312 07.03.12 11:3 AM Page 23
Getting Started
24G
etting Started
Unlock functionIf you press , a popup screen appearsasking you to input the Security code tounlock the phone. The Security code isconfigured in the Change codes (#. Settings> 1. Phone settings > 5. Security > 3. Changecodes). If you key in an incorrect SecurityCode, the phone will remain in Handset lockstatus. If you key in the correct Securitycode, the phone will be unlocked, and theidle screen will be displayed. If you haveturned the phone off in the Handset lockstatus, you will find the phone remains inHandset lock status when you turn it on.
Barring passwordThis service obstructs calling service in someconditions. This condition can be editedusing the Call barring feature (#. Settings >5. Call settings > 2. Call barring). The barringpassword is required when you use the callbarring function. The password is obtainedfrom your network operator's customerservice when you subscribe to this service.While this service is activated, the caller willhear the information message that the call isnot connected because of the call barring.
KU970_Eng(AUS)_0312 07.03.12 11:3 AM Page 24
General Functions
General Functions
25
Making and answering calls
Making a voice call1. Enter the number including the full area
code.
] To delete a digit press .To delete all digits press and hold .
2. Press to make the call.3. Press to finish the call, or close the
handset.
Making a call from the call logs1. In standby mode, press and the
latest incoming, outgoing and missedphone numbers will be displayed.
2. Select the desired number by scrolling.
3. Press to call the number.
Making a video callYou can make a video call in a 3G coveredservice area. If the called user has a 3G videophone in a 3G covered service area, the callwill be established. You can also answer avideo call for video incoming call. Tomake/answer a video call, do the following.
1. Input the phone number using the keypad,or select the phone number from the callsmade/received lists.
] To correct mistakes, press brieflyto delete the last number, or press andhold to delete all numbers.
2. If you do not want to use thespeakerphone, ensure you have theheadset plugged in.
3. To start the video function, press the leftsoft key [Options] and select Make videocall.
] You will be notified that you will need toclose other applications to make thevideo call.
Note] To activate the speakerphone during a
call, press .
KU970_Eng(AUS)_0312 07.03.12 11:3 AM Page 25
General Functions
26G
eneral Functions
4. Adjust the camera position if necessary.
5. Press to finish the call, or close thehandset.
Making a voice/video call fromContactsIt is easy to call anyone whose number youhave stored in your Contacts.
1. Scroll down to access the contactslist.
2. Scroll to the contact to make a call.
3. Press to make a voice call. Press theleft soft key and select Make video call tomake a video call.
4. Press to finish the call.
Making international calls1. Press and hold for the international
prefix. The ‘+’ character prefixes theinternational access code.
2. Enter the country code, area code, andthe phone number.
3. Press .
Adjusting the volumeDuring a call, if you want to adjust theearpiece volume, use on the left side of thephone. In idle mode, you can adjust the keyvolume using .
Answering a callWhen you receive a call, the phone rings andthe flashing phone icon appears on thescreen. If the caller can be identified, thecaller’s phone number (or name if stored inyour Contacts) is displayed.
Note] The video call may take some time to
connect. Please be patient. Theconnection time will also depend on howquickly the other party answers the call.While the video call is connecting, youwill see your own image; after the otherparty has answered, their image will bedisplayed on the screen.
KU970_Eng(AUS)_0312 07.03.12 11:3 AM Page 26
General Functions
27
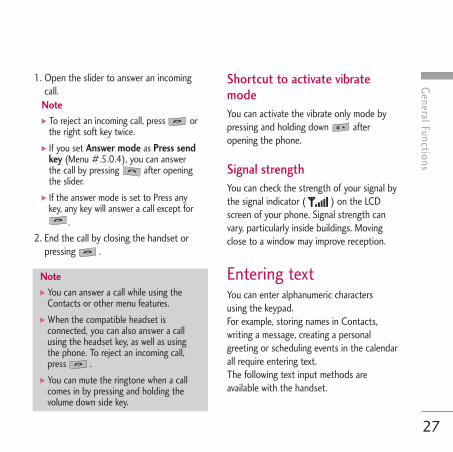
1. Open the slider to answer an incomingcall.
Note] To reject an incoming call, press or
the right soft key twice.
] If you set Answer mode as Press sendkey (Menu #.5.0.4), you can answerthe call by pressing after openingthe slider.
] If the answer mode is set to Press anykey, any key will answer a call except for
.
2. End the call by closing the handset orpressing .
Shortcut to activate vibratemodeYou can activate the vibrate only mode bypressing and holding down afteropening the phone.
Signal strength You can check the strength of your signal bythe signal indicator ( ) on the LCDscreen of your phone. Signal strength canvary, particularly inside buildings. Movingclose to a window may improve reception.
Entering text You can enter alphanumeric characters using the keypad.For example, storing names in Contacts,writing a message, creating a personalgreeting or scheduling events in the calendarall require entering text.The following text input methods areavailable with the handset.
Note] You can answer a call while using the
Contacts or other menu features.
] When the compatible headset isconnected, you can also answer a callusing the headset key, as well as usingthe phone. To reject an incoming call,press .
] You can mute the ringtone when a callcomes in by pressing and holding thevolume down side key.
KU970_Eng(AUS)_0312 07.03.12 11:3 AM Page 27

General Functions
28G
eneral Functions
Changing the text input mode 1. When you are in a field that allows
characters to be entered, you will noticethe text input mode indicator in the upperright corner of the LCD screen.
2. Press to cycle between T9Abc,T9abc, Abc, abc and 123.
Using the T9 ModeThe T9 predictive text input mode allows youto enter words easily with a minimum numberof key presses. As you press each key, thehandset begins to display the characters thatit thinks you are typing based on a built-indictionary. As new letters are added, the wordchanges to reflect the most likely candidatefrom the dictionary.
1. When you are in the T9 predictive textinput mode, start entering a word bypressing to . Press one key perletter.
T9 mode This mode lets you enter words with onlyone keystroke per letter. Each key on thekeypad has more than one letter. The T9mode automatically compares yourkeystrokes with an internal dictionary todetermine the correct word, thus requiringfar fewer keystrokes than the traditionalABC mode. This is sometimes known aspredictive text.
ABC mode This mode lets you enter letters bypressing the key labelled with the requiredletter once, twice, three or four times untilthe letter is displayed.
123 mode (Number mode) Type numbers using one keystroke pernumber. To change to 123 mode in a textentry field, press until 123 mode isdisplayed.
KU970_Eng(AUS)_0312 07.03.12 11:3 AM Page 28
General Functions
29
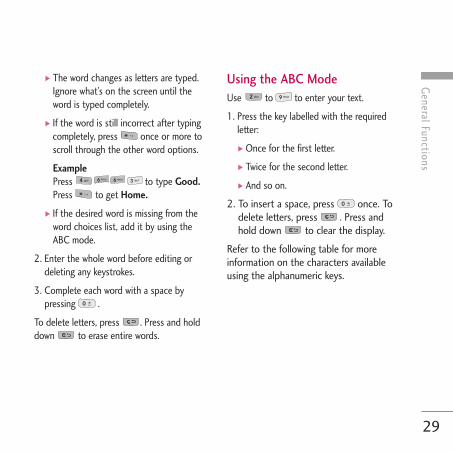
] The word changes as letters are typed.Ignore what’s on the screen until theword is typed completely.
] If the word is still incorrect after typingcompletely, press once or more toscroll through the other word options.
ExamplePress to type Good.Press to get Home.
] If the desired word is missing from theword choices list, add it by using theABC mode.
2. Enter the whole word before editing ordeleting any keystrokes.
3. Complete each word with a space bypressing .
To delete letters, press . Press and holddown to erase entire words.
Using the ABC ModeUse to to enter your text.
1. Press the key labelled with the requiredletter:
] Once for the first letter.
] Twice for the second letter.
] And so on.
2. To insert a space, press once. Todelete letters, press . Press andhold down to clear the display.
Refer to the following table for moreinformation on the characters availableusing the alphanumeric keys.
KU970_Eng(AUS)_0312 07.03.12 11:3 AM Page 29
General Functions
30G
eneral Functions
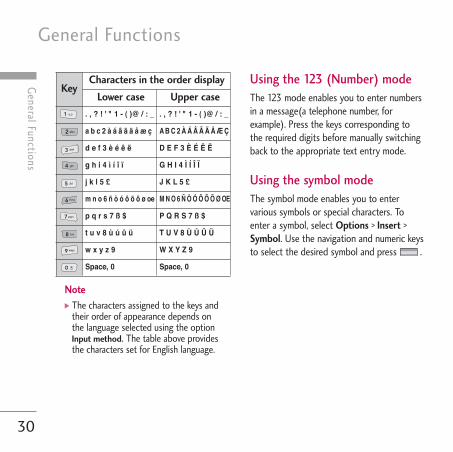
Note] The characters assigned to the keys and
their order of appearance depends onthe language selected using the optionInput method. The table above providesthe characters set for English language.
Using the 123 (Number) modeThe 123 mode enables you to enter numbersin a message(a telephone number, forexample). Press the keys corresponding tothe required digits before manually switchingback to the appropriate text entry mode.
Using the symbol modeThe symbol mode enables you to entervarious symbols or special characters. Toenter a symbol, select Options > Insert >Symbol. Use the navigation and numeric keysto select the desired symbol and press .
Upper caseLower case. , ? ! ' " 1 - ( )@ / : _. , ? ! ' " 1 - ( )@ / : _
A B C 2 À Á Â Ã Ä Å Æ Ça b c 2 à á â ã ä å æ ç
D E F 3 È É Ê Ëd e f 3 è é ê ë
G H I 4 Ì Í Î Ïg h i 4 ì í î ï
J K L 5 £j k l 5 £
M N O 6 Ñ Ò Ó Ô Õ Ö Ø OEm n o 6 ñ ò ó ô õ ö ø oe
P Q R S 7 ß $p q r s 7 ß $
T U V 8 Ù Ú Û Üt u v 8 ù ú û ü
W X Y Z 9w x y z 9
Space, 0Space, 0
Characters in the order displayKey
KU970_Eng(AUS)_0312 07.03.12 11:3 AM Page 30
Overview of M
enu FunctionsOverview of Menu Functions
31
2.1 Now playing2.2 All tracks2.3 Playlists2.4 Song recognition2.5 Music store
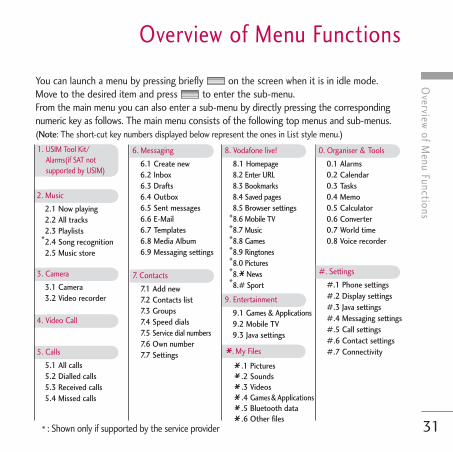
2. Music
3.1 Camera3.2 Video recorder
3. Camera
6.1 Create new6.2 Inbox6.3 Drafts6.4 Outbox6.5 Sent messages6.6 E-Mail6.7 Templates6.8 Media Album6.9 Messaging settings
6. Messaging
7.1 Add new7.2 Contacts list7.3 Groups7.4 Speed dials7.5 Service dial numbers7.6 Own number7.7 Settings
7. Contacts
4. Video Call
* : Shown only if supported by the service provider
You can launch a menu by pressing briefly on the screen when it is in idle mode.Move to the desired item and press to enter the sub-menu.From the main menu you can also enter a sub-menu by directly pressing the correspondingnumeric key as follows. The main menu consists of the following top menus and sub-menus.(Note: The short-cut key numbers displayed below represent the ones in List style menu.)
8.1 Homepage8.2 Enter URL8.3 Bookmarks8.4 Saved pages8.5 Browser settings8.6 Mobile TV8.7 Music8.8 Games8.9 Ringtones8.0 Pictures8. News8.# Sport
8. Vodafone live!
.1 Pictures
.2 Sounds
.3 Videos
.4 Games&Applications
.5 Bluetooth data
.6 Other files
. My Files
0.1 Alarms0.2 Calendar0.3 Tasks0.4 Memo0.5 Calculator0.6 Converter0.7 World time0.8 Voice recorder
0. Organiser & Tools
#.1 Phone settings#.2 Display settings#.3 Java settings#.4 Messaging settings#.5 Call settings#.6 Contact settings#.7 Connectivity
#. Settings
1. USIM Tool Kit/Alarms(if SAT notsupported by USIM)
*******
5.1 All calls5.2 Dialled calls5.3 Received calls5.4 Missed calls
5. Calls
9.1 Games & Applications9.2 Mobile TV9.3 Java settings
9. Entertainment
*
KU970_Eng(AUS)_0312 07.03.12 11:3 AM Page 31
USIM Tool Kit [Menu 1]
32U
SIM Tool Kit
Depending on whether you have SAT supportservices or not (i.e. USIM Application Toolkit)on the USIM card, this menu (Menu 1) maybe different.If the USIM card supports SAT services, thismenu will be the operator-specific servicename stored on the USIM card, for instance“Special”. Please refer in that case to theinformation provided with your USIM cardfor further information on how to use therelated options.
If the USIM card does not support SATservices, this menu will be Alarms.For the Alarms menu feature, please refer topage 67.
KU970_Eng(AUS)_0312 07.03.12 11:3 AM Page 32
Music
Now playing Menu 2.1
This menu will be activated when there aresome tracks currently played.
All tracks Menu 2.2
You can view the entire music files in thephone memory.
Playlists Menu 2.3
You can create your own playlists bychoosing tracks from the All tracks menu list.
Song recognition Menu 2.4
Selecting this menu starts dialling a numberfor song recognition. For further information,please contact your service provider.
Music store Menu 2.5
Connects to the Vodafone music downloadsite.
Music [Menu 2]
33
NoteAdditional charges may be incurred whendownloading music.Contact your service provider for furtherinformation.
KU970_Eng(AUS)_0312 07.03.12 11:3 AM Page 33
Camera [Menu 3]
34C
amera
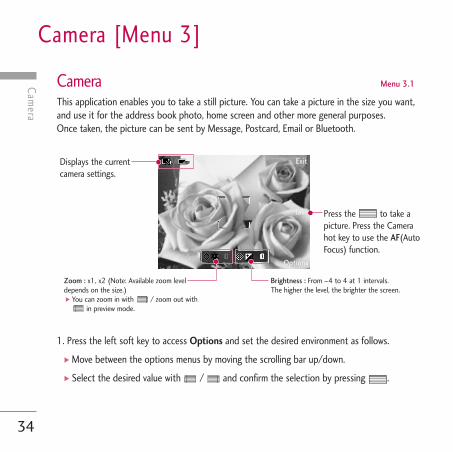
Camera Menu 3.1
This application enables you to take a still picture. You can take a picture in the size you want,and use it for the address book photo, home screen and other more general purposes. Once taken, the picture can be sent by Message, Postcard, Email or Bluetooth.
1. Press the left soft key to access Options and set the desired environment as follows.
] Move between the options menus by moving the scrolling bar up/down.
] Select the desired value with / and confirm the selection by pressing .
Press the to take apicture. Press the Camerahot key to use the AF(AutoFocus) function.
Zoom : x1, x2 (Note: Available zoom leveldepends on the size.) ] You can zoom in with / zoom out with
in preview mode.
Brightness : From –4 to 4 at 1 intervals. The higher the level, the brighter the screen.
Displays the currentcamera settings.
TTakakee
OpOptionstions
ExitExit
KU970_Eng(AUS)_0312 07.03.12 11:3 AM Page 34
Cam
era
35
Menu Icon
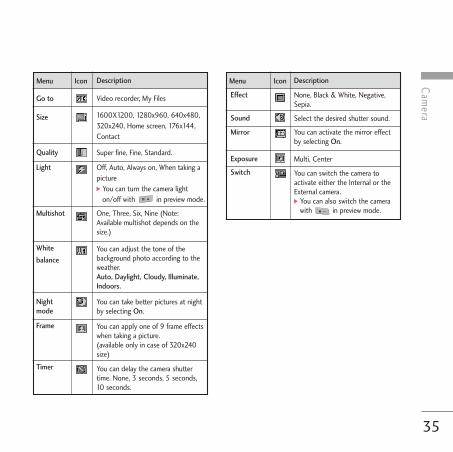
Super fine, Fine, Standard.Quality
Video recorder, My FilesGo to
1600X1200, 1280x960, 640x480,320x240, Home screen, 176x144,Contact
Size
Off, Auto, Always on, When taking apicture ] You can turn the camera light
on/off with in preview mode.
Light
Multishot
White
balance
You can take better pictures at nightby selecting On.
You can apply one of 9 frame effectswhen taking a picture. (available only in case of 320x240size)
You can delay the camera shuttertime. None, 3 seconds, 5 seconds,10 seconds.
None, Black & White, Negative,Sepia.
Nightmode
Frame
Timer
Effect
Select the desired shutter sound.Sound
You can activate the mirror effectby selecting On.
Mirror
You can switch the camera toactivate either the Internal or theExternal camera. ] You can also switch the camera
with in preview mode.
Switch
One, Three, Six, Nine (Note:Available multishot depends on thesize.)
You can adjust the tone of thebackground photo according to theweather.Auto, Daylight, Cloudy, Illuminate,Indoors.
Description Menu Icon Description
Multi, CenterExposure
KU970_Eng(AUS)_0312 07.03.12 11:4 AM Page 35
Camera
36C
amera
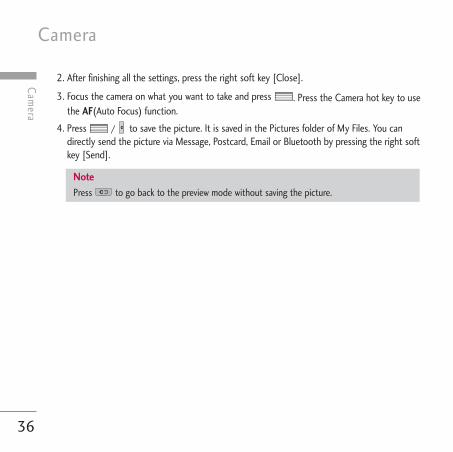
2. After finishing all the settings, press the right soft key [Close].
3. Focus the camera on what you want to take and press . Press the Camera hot key to usethe AF(Auto Focus) function.
4. Press / to save the picture. It is saved in the Pictures folder of My Files. You candirectly send the picture via Message, Postcard, Email or Bluetooth by pressing the right softkey [Send].
NotePress to go back to the preview mode without saving the picture.
KU970_Eng(AUS)_0312 07.03.12 11:4 AM Page 36
Cam
era
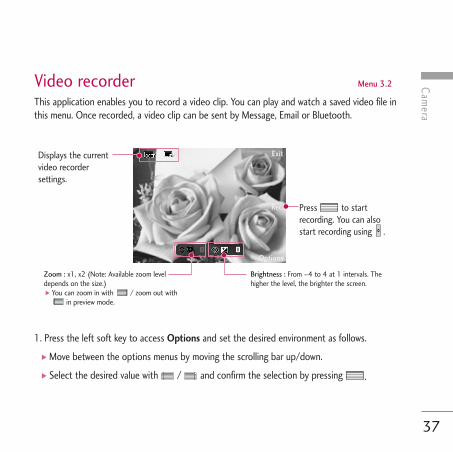
Video recorder Menu 3.2
This application enables you to record a video clip. You can play and watch a saved video file inthis menu. Once recorded, a video clip can be sent by Message, Email or Bluetooth.
1. Press the left soft key to access Options and set the desired environment as follows.
] Move between the options menus by moving the scrolling bar up/down.
] Select the desired value with / and confirm the selection by pressing .
37
Zoom : x1, x2 (Note: Available zoom leveldepends on the size.) ] You can zoom in with / zoom out with
in preview mode.
Brightness : From –4 to 4 at 1 intervals. Thehigher the level, the brighter the screen.
ExitExit
RRec.ec.
OpOptionstions
Displays the currentvideo recordersettings.
Press to startrecording. You can alsostart recording using .
KU970_Eng(AUS)_0312 07.03.12 11:4 AM Page 37
Camera
38C
amera
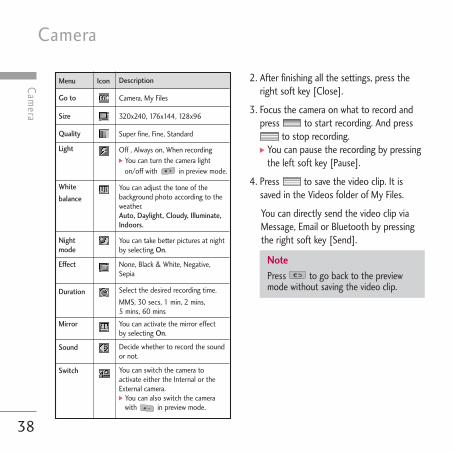
2. After finishing all the settings, press theright soft key [Close].
3. Focus the camera on what to record andpress to start recording. And press
to stop recording.] You can pause the recording by pressing
the left soft key [Pause].
4. Press to save the video clip. It issaved in the Videos folder of My Files.
You can directly send the video clip viaMessage, Email or Bluetooth by pressingthe right soft key [Send].
Menu Icon
Super fine, Fine, StandardQuality
Camera, My FilesGo to
320x240, 176x144, 128x96Size
Off , Always on, When recording ] You can turn the camera light
on/off with in preview mode.
Light
White
balance
You can take better pictures at nightby selecting On.
None, Black & White, Negative,Sepia
Nightmode
Effect
Select the desired recording time.
MMS, 30 secs, 1 min, 2 mins, 5 mins, 60 mins
Duration
You can activate the mirror effectby selecting On.
Mirror
You can switch the camera toactivate either the Internal or theExternal camera. ] You can also switch the camera
with in preview mode.
Switch
You can adjust the tone of thebackground photo according to theweather.Auto, Daylight, Cloudy, Illuminate,Indoors.
Description
Decide whether to record the soundor not.
Sound
NotePress to go back to the previewmode without saving the video clip.
KU970_Eng(AUS)_0312 07.03.12 11:4 AM Page 38
Video call
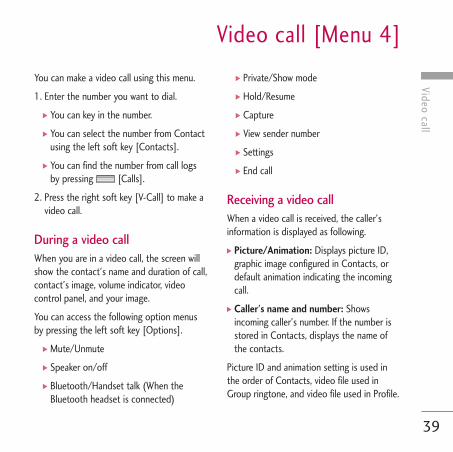
You can make a video call using this menu.
1. Enter the number you want to dial.
] You can key in the number.
] You can select the number from Contactusing the left soft key [Contacts].
] You can find the number from call logsby pressing [Calls].
2. Press the right soft key [V-Call] to make avideo call.
During a video callWhen you are in a video call, the screen willshow the contact's name and duration of call,contact's image, volume indicator, videocontrol panel, and your image.
You can access the following option menusby pressing the left soft key [Options].
] Mute/Unmute
] Speaker on/off
] Bluetooth/Handset talk (When theBluetooth headset is connected)
] Private/Show mode
] Hold/Resume
] Capture
] View sender number
] Settings
] End call
Receiving a video callWhen a video call is received, the caller'sinformation is displayed as following.
] Picture/Animation: Displays picture ID,graphic image configured in Contacts, ordefault animation indicating the incomingcall.
] Caller's name and number: Showsincoming caller's number. If the number isstored in Contacts, displays the name ofthe contacts.
Picture ID and animation setting is used inthe order of Contacts, video file used inGroup ringtone, and video file used in Profile.
Video call [Menu 4]
39
KU970_Eng(AUS)_0312 07.03.12 11:4 AM Page 39
Video call
40Video call
Also, sound can be set for the incomingvideo call. The sound setting is used in theorder of Contacts, Group ringtone, andProfile.
You can accept the incoming call by pressingthe left soft key [Accept].
The incoming call ringing can be silenced bypressing the right soft key [Silent]. It can bealso silenced by long press on on the leftside of the phone.
When ringing is silenced, press the right softkey [Reject] to reject the call.
KU970_Eng(AUS)_0312 07.03.12 11:4 AM Page 40

Calls
You can check the record of missed, received,and dialled calls only if the network supportsCaller Line Identification (CLI) within theservice area.
The number and name (if available) aredisplayed together with the date and time atwhich the call was made. You can also viewcall times.
All calls Menu 5.1
Allows you to view the missed, received, anddialled call records. You can make a call, orsend a message to the number you haveselected from the records. You can also savethe number in Contacts.
Dialled calls Menu 5.2
Allows you to view dialled call records, make acall, send a message, and save the number inContacts.
Received calls Menu 5.3
Allows you to view received call records, makea call, send a message, and save the numberin Contacts.
Missed calls Menu 5.4
Allows you to view missed call records, makea call, send a message, and save the numberin Contacts.
Calls [Menu 5]
41
KU970_Eng(AUS)_0312 07.03.12 11:4 AM Page 41
Messaging [Menu 6]
42M
essaging
Create new Menu 6.1
Message (Menu 6.1.1)
You can write and edit a message containinga combination of text, image, video andaudio.
1. Enter your message in the Message field.
Option menus in Message field
] Insert: You can perform the followingactions:
1. Pictures: You can insert an image.(One image per slide)
2. Take Picture: The camera moduleopens and you can take a picture. Thepicture is then inserted in the messagewindow. (One picture per slide).
3. Videos: You can insert a video clip.(One video clip per slide)
4. Take Video: The video recordermodule opens and you can record avideo. The recorded video is insertedin the message. (One video clip perslide)
5. Sounds: You can insert a sound file.(One sound per slide)
6. Record Sound: The voice recordermodule opens and you can record asound. The recorded sound is insertedin the message. (One sound per slide)
7. Contact details: You can add a nameand/or a number stored in theContacts. Make your selection to sendeither the Name, Number or Name &Number and press . The Contactslist opens and you can search thedesired contact to be inserted.
8. Templates: You can insert a texttemplate saved on the phone. After selecting one, press . The selected template is inserted intothe Message window.
9. Cc: Select this to insert Cc.
0. Subject: Select this to insert asubject.
. New slide: Select this to add a newslide.
#. Symbol: You can insert symbols.After entering the correspondingnumber keys, press .
KU970_Eng(AUS)_0312 07.03.12 11:4 AM Page 42
Messaging
] Add recipients: You can add recipientsfrom your Contacts or enter the numberdirectly.
] Send: Select this to send the createdmessage.
] Save to drafts: Select this to save themessage to drafts.
] Input method: Select the desireddictionary mode.
] Add to dictionary: You can add a wordto the dictionary.
] Cancel: Select this to cancel editing.
2. Press the right soft key [Continue]. Youcan add recipients from Contacts or enterthe number directly. (You can enter up to10 numbers.)
Option menus in To field
] Add recipients: You can add recipientsfrom your Contacts or enter the numberdirectly.
] Send: Select this to send the message.
] Save to drafts: Saves the message to drafts.
] Cancel: Select this to cancel editing.
3. Press the right soft key [Send] to send themessage. The message will automaticallybe saved in the Sent messages folder. Ifthe message has not been sent, it willremain in the Outbox with a failed status.
Postcard (Menu 6.1.2)(Note: This service is not available in all countries. Pleasecontact your service provider for further information.)
1. Key in a message.
2. Press the right soft key [Insert]. You caninsert a stored image or newly takenpicture.
3. After an image is inserted, the format willbe changed to Postcard format.
4. Fill out the fields: Name, Additional info,Address, Post code, City, State, Country.
5. Press the right soft key [Send] to send thecreated postcard.
43
KU970_Eng(AUS)_0312 07.03.12 11:4 AM Page 43
Messaging
44M
essaging
E-Mail (Menu 6.1.3)
To send/receive an email, you should set upthe email account. (Refer to page 52-54 forhow to set up an Email account.)
1. Enter the email addresses of the recipientsin the To, Cc, Bcc fields. You can searchthe Contacts by pressing .
2. Move the cursor to the Subject field andkey in the subject.
3. You can enter the message contents bymoving the cursor to the Message field.
4. Use the following functions by using theleft soft key [Options].
] Insert: Select this menu to insert specialcharacters, templates, and contacts. It isalso possible to attach multimedia files(pictures, videos and sounds).
] Add recipients: Select this menu toinsert email addresses saved in Contacts.(Only shown in Option menu whencursor is located in To/Cc/Bcc fields.)
] Send: Sends the created email.
] Save to drafts: Select this menu to savethe message in Drafts.
] Preview: You can preview the created email before sending it.
] View attachment: Shows the attachedfiles. (This item is only available whensome files have been attached.)
Note• Enter the reference email address to
forward the email in Cc(Carbon copy)field.
• Enter a hidden reference email address toforward the email without forwardinginformation in Bcc(Blind Carbon Copy)field.
• Only valid email addresses are allowed forthe recipient (To), reference address (Cc)and hidden reference address (BCC)fields. When an email address has beenspecified, another field where you canspecify another address appears. You canspecify up to 20 recipients for the Toand Cc address fields and 10 recipientsfor the BCC address field.
KU970_Eng(AUS)_0312 07.03.12 11:4 AM Page 44
Messaging
] Input method: Select the desireddictionary mode.
] Add to dictionary: You can add a newword to the dictionary.
] Set mail priority: You can configure thepriority of the email you wish to send.
] Cancel: Exits the email composer.
5. When you have finished writing an email,press the right soft key [Send] to send the email.
Inbox Menu 6.2
1. You can view saved messages. Select amessage and then press to view themessage.
2. You can view the previous or next messageby using .
3. To view a multimedia message(Notification), select Retrieve in themessage notification view screen. Themessage will then begin transmission, andyou can view the message after it iscomplete.
You can use the following functions by usingthe left soft key [Options] in the Inbox.
] View: Opens the selected message.
] Reply: Creates a reply to the sender orall recipients of the selected message.
] Forward: Forwards the selected message.
] Make voice call: You can make a voicecall.
] Make video call: You can make a videocall.
] Delete: Deletes the current message.
] Create new message: You can write anew message or an Email.
] Mark/Unmark: You can select one ormore messages for multiple deletion.
] Filter: Displays messages by desiredmessage types.
] Copy: In case of SMS, you can copy themessage into handset or USIM.
45
NoteNot supported for multimedia message(Notification) and WAP push messages.
KU970_Eng(AUS)_0312 07.03.12 11:4 AM Page 45
Messaging
46M
essaging
] Move: In case of SMS, you can move themessage into handset or USIM.
] Message info.: You can check themessage type, date and time and whereit is saved.
Drafts Menu 6.3
You can view saved messages. Select amessage and then press to edit themessage.After saving the message in drafts, you canuse the following functions by using the leftsoft key [Options].
] Edit: You can edit messages.
] Delete: Deletes the selected message.
] Create new message: You can write a newmessage or an Email.
] Mark/Unmark: You can select one ormore messages for multiple deletion.
] Filter: Displays messages by desiredmessage types.
] Message info.: You can check the messagetype, date and time and where it's saved.
Outbox Menu 6.4
The Outbox is a temporary storage place formessages waiting to be sent. Failed messagesare also placed in Outbox. For example,Emails will be placed in Outbox if the Emailaccount is not correctly configured.
1. Select a message and then press toview the message.
2. You can use the following functions byusing the left soft key [Options].
[For sending / waiting messages] /] Create new message: You can write a new
message or an Email.
] Cancel: You can stop sending/waitingstatus.
] Message info.: You can check the messagetype, date and time and where it's saved.
NoteYou can check the saved Emails in Email[Menu 6.6].
KU970_Eng(AUS)_0312 07.03.12 11:4 AM Page 46
Messaging
[For sending a failed message] /] Resend: Resends the selected message.
] Forward: Forwards the selected message.
] Edit: You can edit the selected message.
] Delete: Deletes the current message.
] Create new message: You can write a newmessage or an Email.
] Mark/Unmark: You can select one ormore messages for multiple deletion.
] Message info.: You can check the messagetype, date and time and where it's saved.
Sent messages Menu 6.5
Shows the messages you sent (Message/Postcard/ Email).
[Options]
] View: Opens the selected message.
] Reply: Creates a reply to sender or allrecipients of the selected message.
] Forward: Forwards the selected message.
] Delete: Deletes the current message.
] Edit: You can edit the selected message.
] Create new message: You can write a newmessage.
] Save number: Save the sender's number.
] Mark/Unmark: You can select one ormore messages for multiple deletion.
] Filter: Displays messages by desiredmessage types.
] Copy: In case of SMS, you can copy themessage into handset or USIM.
] Move: In case of SMS, you can move themessage into handset or USIM.
] Message info.: You can check the messagetype, date and time and where it is saved.
E-Mail Menu 6.6
Viewing email message list
1. Select an email account and then pressto view the received email list.
2. Using the right soft key [Retrieve], you
47
KU970_Eng(AUS)_0312 07.03.12 11:4 AM Page 47
Messaging
48M
essaging
can retrieve a new email list from the emailserver of the selected account.
3. In email list, you can use the followingfunctions by using the left soft key[Options].
] View: Opens selected email.
] Reply: Creates a reply to the selectedemail.
] Forward: Forwards the selected emailmessage to others.
] Retrieve: Retrieves new email messages.
] Delete: Deletes the email.
] Create new message: Creates a newmessage or Email.
] Save address: Save sender's address toContacts.
] Mark/Unmark: Use mark/unmarkoption for multiple deletion.
] Set as read/unread: You can set theselected email to read or unread.
] Message info.: Brief information on themessage including size, type, date, timeand filenames.
Viewing an email message1. Select one of the received emails and
press the Open key to receive thecontents of the email.
2. The contents of the received email areautomatically displayed in the View screen.
3. You can view the contents of the previousor next email by using .
4. In the email View screen, you can selectthe following functions by using the leftsoft key [Options].
] Reply: Creates a reply to the selectedemail.
] Forward: Forwards the selected emailmessage to others.
] Delete: Deletes the email.
] Save address: Saves the sender'saddress to Contacts.
] Create new message: Creates a newmessage.
] Use: Extracts the number, email addressor Web address from email message.
] View attachment: Shows the attachedfile.
KU970_Eng(AUS)_0312 07.03.12 11:4 AM Page 48
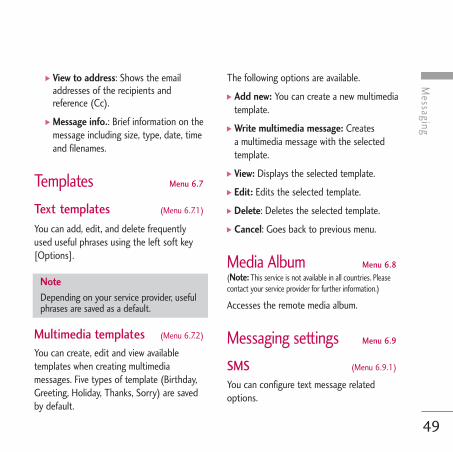
Messaging
] View to address: Shows the emailaddresses of the recipients andreference (Cc).
] Message info.: Brief information on themessage including size, type, date, timeand filenames.
Templates Menu 6.7
Text templates (Menu 6.7.1)
You can add, edit, and delete frequently used useful phrases using the left soft key[Options].
Multimedia templates (Menu 6.7.2)
You can create, edit and view availabletemplates when creating multimediamessages. Five types of template (Birthday,Greeting, Holiday, Thanks, Sorry) are savedby default.
The following options are available.
] Add new: You can create a new multimediatemplate.
] Write multimedia message: Creates a multimedia message with the selectedtemplate.
] View: Displays the selected template.
] Edit: Edits the selected template.
] Delete: Deletes the selected template.
] Cancel: Goes back to previous menu.
Media Album Menu 6.8(Note: This service is not available in all countries. Pleasecontact your service provider for further information.)
Accesses the remote media album.
Messaging settings Menu 6.9
SMS (Menu 6.9.1)
You can configure text message relatedoptions.
49
NoteDepending on your service provider, usefulphrases are saved as a default.
KU970_Eng(AUS)_0312 07.03.12 11:4 AM Page 49
Messaging
50M
essaging
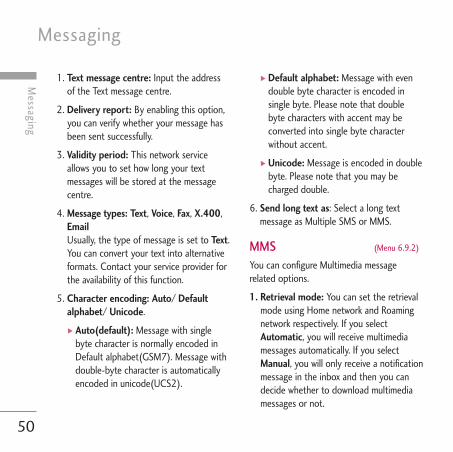
1. Text message centre: Input the addressof the Text message centre.
2. Delivery report: By enabling this option,you can verify whether your message hasbeen sent successfully.
3. Validity period: This network serviceallows you to set how long your textmessages will be stored at the messagecentre.
4. Message types: Text, Voice, Fax, X.400,Email Usually, the type of message is set to Text.You can convert your text into alternativeformats. Contact your service provider forthe availability of this function.
5. Character encoding: Auto/ Defaultalphabet/ Unicode.
] Auto(default): Message with singlebyte character is normally encoded inDefault alphabet(GSM7). Message withdouble-byte character is automaticallyencoded in unicode(UCS2).
] Default alphabet: Message with evendouble byte character is encoded insingle byte. Please note that doublebyte characters with accent may beconverted into single byte characterwithout accent.
] Unicode: Message is encoded in doublebyte. Please note that you may becharged double.
6. Send long text as: Select a long textmessage as Multiple SMS or MMS.
MMS (Menu 6.9.2)
You can configure Multimedia messagerelated options.
1. Retrieval mode: You can set the retrievalmode using Home network and Roamingnetwork respectively. If you selectAutomatic, you will receive multimediamessages automatically. If you selectManual, you will only receive a notificationmessage in the inbox and then you candecide whether to download multimediamessages or not.
KU970_Eng(AUS)_0312 07.03.12 11:4 AM Page 50
Messaging
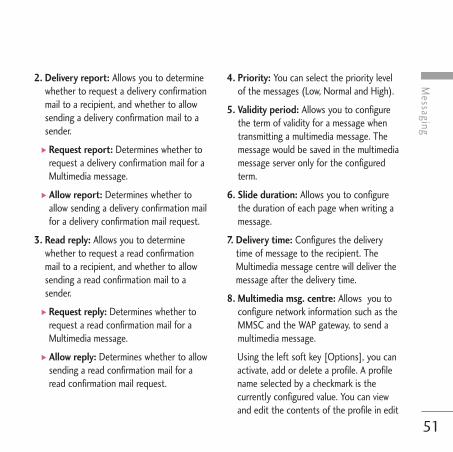
2. Delivery report: Allows you to determinewhether to request a delivery confirmationmail to a recipient, and whether to allowsending a delivery confirmation mail to asender.
] Request report: Determines whether torequest a delivery confirmation mail for aMultimedia message.
] Allow report: Determines whether toallow sending a delivery confirmation mailfor a delivery confirmation mail request.
3. Read reply: Allows you to determinewhether to request a read confirmationmail to a recipient, and whether to allowsending a read confirmation mail to asender.
] Request reply: Determines whether torequest a read confirmation mail for aMultimedia message.
] Allow reply: Determines whether to allowsending a read confirmation mail for aread confirmation mail request.
4. Priority: You can select the priority levelof the messages (Low, Normal and High).
5. Validity period: Allows you to configurethe term of validity for a message whentransmitting a multimedia message. Themessage would be saved in the multimediamessage server only for the configuredterm.
6. Slide duration: Allows you to configurethe duration of each page when writing amessage.
7. Delivery time: Configures the deliverytime of message to the recipient. TheMultimedia message centre will deliver themessage after the delivery time.
8. Multimedia msg. centre: Allows you toconfigure network information such as theMMSC and the WAP gateway, to send amultimedia message.
Using the left soft key [Options], you canactivate, add or delete a profile. A profilename selected by a checkmark is thecurrently configured value. You can viewand edit the contents of the profile in edit
51
KU970_Eng(AUS)_0312 07.03.12 11:4 AM Page 51
Messaging
52M
essaging
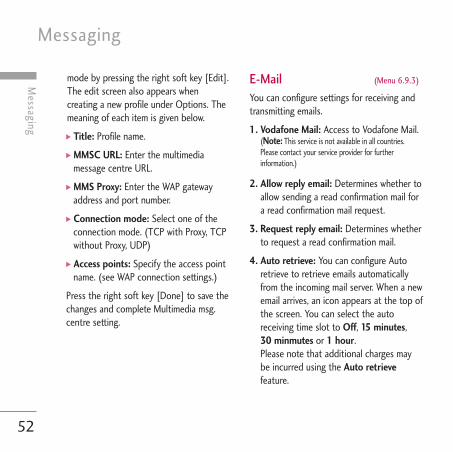
mode by pressing the right soft key [Edit].The edit screen also appears whencreating a new profile under Options. Themeaning of each item is given below.
] Title: Profile name.
] MMSC URL: Enter the multimediamessage centre URL.
] MMS Proxy: Enter the WAP gatewayaddress and port number.
] Connection mode: Select one of theconnection mode. (TCP with Proxy, TCPwithout Proxy, UDP)
] Access points: Specify the access pointname. (see WAP connection settings.)
Press the right soft key [Done] to save thechanges and complete Multimedia msg.centre setting.
E-Mail (Menu 6.9.3)
You can configure settings for receiving andtransmitting emails.
1. Vodafone Mail: Access to Vodafone Mail.(Note: This service is not available in all countries.Please contact your service provider for furtherinformation.)
2. Allow reply email: Determines whether toallow sending a read confirmation mail fora read confirmation mail request.
3. Request reply email: Determines whetherto request a read confirmation mail.
4. Auto retrieve: You can configure Autoretrieve to retrieve emails automaticallyfrom the incoming mail server. When a newemail arrives, an icon appears at the top ofthe screen. You can select the autoreceiving time slot to Off, 15 minutes, 30 minmutes or 1 hour. Please note that additional charges maybe incurred using the Auto retrievefeature.
KU970_Eng(AUS)_0312 07.03.12 11:4 AM Page 52
Messaging
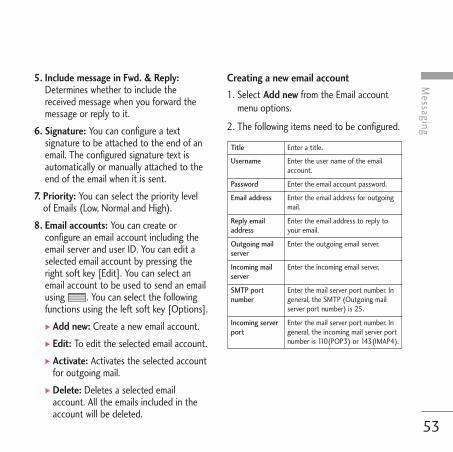
5. Include message in Fwd. & Reply:Determines whether to include thereceived message when you forward themessage or reply to it.
6. Signature: You can configure a textsignature to be attached to the end of anemail. The configured signature text isautomatically or manually attached to theend of the email when it is sent.
7. Priority: You can select the priority levelof Emails (Low, Normal and High).
8. Email accounts: You can create orconfigure an email account including theemail server and user ID. You can edit aselected email account by pressing theright soft key [Edit]. You can select anemail account to be used to send an emailusing . You can select the followingfunctions using the left soft key [Options].
] Add new: Create a new email account.
] Edit: To edit the selected email account.
] Activate: Activates the selected accountfor outgoing mail.
] Delete: Deletes a selected emailaccount. All the emails included in theaccount will be deleted.
Creating a new email account
1. Select Add new from the Email accountmenu options.
2. The following items need to be configured.
53
Enter the user name of the emailaccount.
Username
Enter a title.Title
Enter the email account password.Password
Enter the email address for outgoingmail.
Email address
Enter the email address to reply toyour email.
Reply emailaddress
Enter the outgoing email server.Outgoing mailserver
Enter the incoming email server.Incoming mailserver
Enter the mail server port number. Ingeneral, the SMTP (Outgoing mailserver port number) is 25.
SMTP portnumber
Enter the mail server port number. Ingeneral, the incoming mail server portnumber is 110(POP3) or 143(IMAP4).
Incoming serverport
KU970_Eng(AUS)_0312 07.03.12 11:4 AM Page 53
Messaging
54M
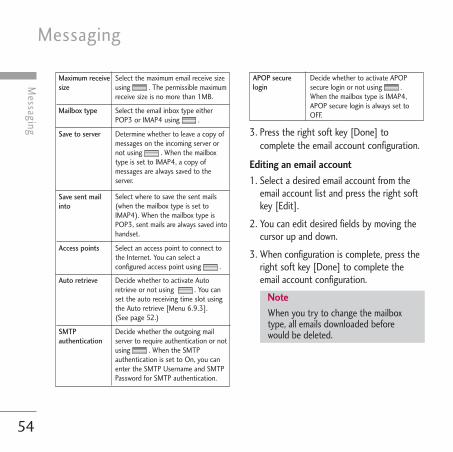
essaging 3. Press the right soft key [Done] tocomplete the email account configuration.
Editing an email account1. Select a desired email account from the
email account list and press the right softkey [Edit].
2. You can edit desired fields by moving thecursor up and down.
3. When configuration is complete, press theright soft key [Done] to complete theemail account configuration.
Maximum receivesize
Decide whether the outgoing mailserver to require authentication or notusing . When the SMTPauthentication is set to On, you canenter the SMTP Username and SMTPPassword for SMTP authentication.
SMTPauthentication
Decide whether to activate Autoretrieve or not using . You canset the auto receiving time slot usingthe Auto retrieve [Menu 6.9.3]. (See page 52.)
Auto retrieve
Select an access point to connect tothe Internet. You can select aconfigured access point using .
Access points
Select where to save the sent mails(when the mailbox type is set toIMAP4). When the mailbox type isPOP3, sent mails are always saved intohandset.
Select the email inbox type eitherPOP3 or IMAP4 using .
Save to server
Save sent mailinto
Mailbox type
Determine whether to leave a copy ofmessages on the incoming server ornot using . When the mailboxtype is set to IMAP4, a copy ofmessages are always saved to theserver.
Select the maximum email receive sizeusing . The permissible maximumreceive size is no more than 1MB.
Decide whether to activate APOPsecure login or not using . When the mailbox type is IMAP4,APOP secure login is always set toOFF.
APOP securelogin
NoteWhen you try to change the mailboxtype, all emails downloaded beforewould be deleted.
KU970_Eng(AUS)_0312 07.03.12 11:4 AM Page 54
Messaging
Info. service (Menu 6.9.4)
] Cell broadcast: You can set the receptionstatus.
] Channels: You can add or modify thechannels.
] Languages: You can select the languageyou want by pressing . Then, the infoservice message will be shown in thelanguage that you have selected.
Service message (Menu 6.9.5)
You can configure the service messagereceipt option.
55
KU970_Eng(AUS)_0312 07.03.12 11:4 AM Page 55
Contacts [Menu 7]
56C
ontacts
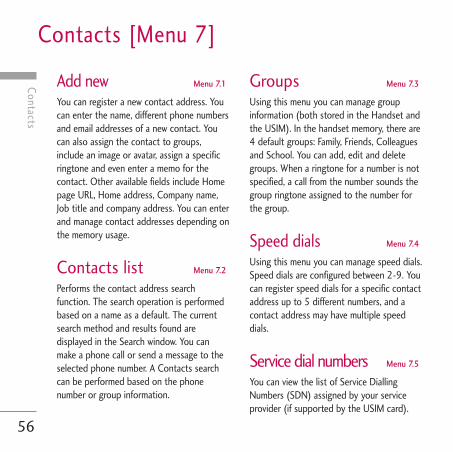
Add new Menu 7.1
You can register a new contact address. Youcan enter the name, different phone numbersand email addresses of a new contact. Youcan also assign the contact to groups,include an image or avatar, assign a specificringtone and even enter a memo for thecontact. Other available fields include Homepage URL, Home address, Company name,Job title and company address. You can enterand manage contact addresses depending onthe memory usage.
Contacts list Menu 7.2
Performs the contact address searchfunction. The search operation is performedbased on a name as a default. The currentsearch method and results found aredisplayed in the Search window. You canmake a phone call or send a message to theselected phone number. A Contacts searchcan be performed based on the phonenumber or group information.
Groups Menu 7.3
Using this menu you can manage groupinformation (both stored in the Handset andthe USIM). In the handset memory, there are4 default groups: Family, Friends, Colleaguesand School. You can add, edit and deletegroups. When a ringtone for a number is notspecified, a call from the number sounds thegroup ringtone assigned to the number forthe group.
Speed dials Menu 7.4
Using this menu you can manage speed dials.Speed dials are configured between 2-9. Youcan register speed dials for a specific contactaddress up to 5 different numbers, and acontact address may have multiple speeddials.
Service dial numbers Menu 7.5
You can view the list of Service DiallingNumbers (SDN) assigned by your serviceprovider (if supported by the USIM card).
KU970_Eng(AUS)_0312 07.03.12 11:4 AM Page 56
Contacts
Such numbers include emergency, directoryenquiries and voice mail numbers. Afterselecting a service number, press to dialthe service.
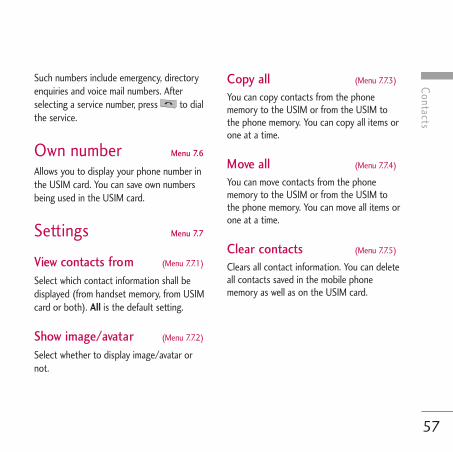
Own number Menu 7.6
Allows you to display your phone number inthe USIM card. You can save own numbersbeing used in the USIM card.
Settings Menu 7.7
View contacts from (Menu 7.7.1)
Select which contact information shall bedisplayed (from handset memory, from USIMcard or both). All is the default setting.
Show image/avatar (Menu 7.7.2)
Select whether to display image/avatar ornot.
Copy all (Menu 7.7.3)
You can copy contacts from the phonememory to the USIM or from the USIM tothe phone memory. You can copy all items orone at a time.
Move all (Menu 7.7.4)
You can move contacts from the phonememory to the USIM or from the USIM tothe phone memory. You can move all items orone at a time.
Clear contacts (Menu 7.7.5)
Clears all contact information. You can deleteall contacts saved in the mobile phonememory as well as on the USIM card.
57
KU970_Eng(AUS)_0312 07.03.12 11:4 AM Page 57
Vodafone live! [Menu 8]
58Vodafone live!
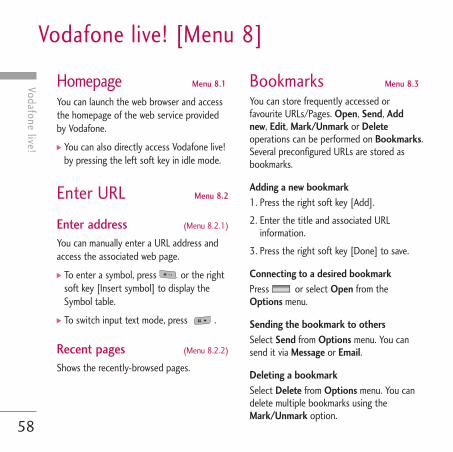
Homepage Menu 8.1
You can launch the web browser and accessthe homepage of the web service providedby Vodafone.
] You can also directly access Vodafone live!by pressing the left soft key in idle mode.
Enter URL Menu 8.2
Enter address (Menu 8.2.1)
You can manually enter a URL address andaccess the associated web page.
] To enter a symbol, press or the rightsoft key [Insert symbol] to display theSymbol table.
] To switch input text mode, press .
Recent pages (Menu 8.2.2)
Shows the recently-browsed pages.
Bookmarks Menu 8.3
You can store frequently accessed orfavourite URLs/Pages. Open, Send, Addnew, Edit, Mark/Unmark or Deleteoperations can be performed on Bookmarks.Several preconfigured URLs are stored asbookmarks.
Adding a new bookmark 1. Press the right soft key [Add].
2. Enter the title and associated URLinformation.
3. Press the right soft key [Done] to save.
Connecting to a desired bookmark Press or select Open from theOptions menu.
Sending the bookmark to others Select Send from Options menu. You cansend it via Message or Email.
Deleting a bookmarkSelect Delete from Options menu. You candelete multiple bookmarks using theMark/Unmark option.
KU970_Eng(AUS)_0312 07.03.12 11:4 AM Page 58

Vodafone live!
Saved pages Menu 8.4
The phone can save the page on display asan offline file. Up to 20 pages can be saved.
Browser settings Menu 8.5
You can change the settings for browserdisplay, security, and certificates.
Profiles (Menu 8.5.1)
Select the appropriate profile by pressing . This will activate the profile to initiate
the browser launch.
Security (Menu 8.5.2)
CertificatesIf stored, a list of root/ca certificates requiredfor WTLS/TLS can be found here.Certificates can be viewed from the list.
Session clearSecure (WTLS/TLS) session data can becleared using this option. Session datashould be cleared to establish a new securesession.
Character encoding (Menu 8.5.3)
Sets the browser default character set to oneof the following:
Automatic, English(ASCII), English(ISO),English(LATIN), Unicode(UCS2 BE),Unicode(UCS2 LE), Unicode(UCS2 Auto),Unicode(UTF-16 BE), Unicode(UTF-16LE), Unicode(UTF-16 Auto), Unicode(UTF-8).
Scrolling control (Menu 8.5.4)
Allows you to set the scroll speed byselecting the number of lines to scroll. Select one from Small(1 line), Medium(2 lines), Large(3 lines).
59
KU970_Eng(AUS)_0312 07.03.12 11:4 AM Page 59
Vodafone live!
60Vodafone live!
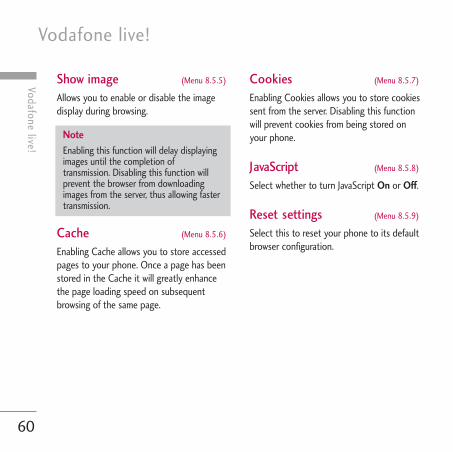
Show image (Menu 8.5.5)
Allows you to enable or disable the imagedisplay during browsing.
Cache (Menu 8.5.6)
Enabling Cache allows you to store accessedpages to your phone. Once a page has beenstored in the Cache it will greatly enhancethe page loading speed on subsequentbrowsing of the same page.
Cookies (Menu 8.5.7)
Enabling Cookies allows you to store cookiessent from the server. Disabling this functionwill prevent cookies from being stored onyour phone.
JavaScript (Menu 8.5.8)
Select whether to turn JavaScript On or Off.
Reset settings (Menu 8.5.9)
Select this to reset your phone to its defaultbrowser configuration.
NoteEnabling this function will delay displayingimages until the completion oftransmission. Disabling this function willprevent the browser from downloadingimages from the server, thus allowing fastertransmission.
KU970_Eng(AUS)_0312 07.03.12 11:4 AM Page 60
Entertainment
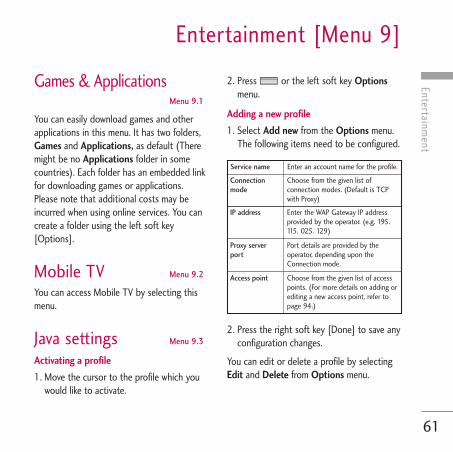
Games & ApplicationsMenu 9.1
You can easily download games and otherapplications in this menu. It has two folders,Games and Applications, as default (Theremight be no Applications folder in somecountries). Each folder has an embedded linkfor downloading games or applications.Please note that additional costs may beincurred when using online services. You cancreate a folder using the left soft key[Options].
Mobile TV Menu 9.2
You can access Mobile TV by selecting thismenu.
Java settings Menu 9.3
Activating a profile
1. Move the cursor to the profile which youwould like to activate.
2. Press or the left soft key Optionsmenu.
Adding a new profile
1. Select Add new from the Options menu.The following items need to be configured.
2. Press the right soft key [Done] to save anyconfiguration changes.
You can edit or delete a profile by selectingEdit and Delete from Options menu.
Entertainment [Menu 9]
61
Enter an account name for the profile.Service name
Choose from the given list ofconnection modes. (Default is TCPwith Proxy)
Connectionmode
Enter the WAP Gateway IP addressprovided by the operator. (e.g. 195.115. 025. 129)
IP address
Port details are provided by theoperator, depending upon theConnection mode.
Proxy serverport
Choose from the given list of accesspoints. (For more details on adding orediting a new access point, refer topage 94.)
Access point
KU970_Eng(AUS)_0312 07.03.12 11:4 AM Page 61
My Files [Menu ]
62M
y Files
Pictures Menu .1
The Pictures folder consists of embeddedlinks for downloading pictures through theInternet and Default images.Pictures taken using the camera are stored inthe Pictures folder and you can create newfolders to manage them. You can also saveselected files as animated Gifs and sendmultiple files to other people.
When a file is selected, the following optionswill be displayed by pressing the left soft key[Options].
] View: You can view the selected picture.
] Create new folder: You can create a newfolder within the folder currently selected.
] Send: You can send the selected image viaMessage, Postcard, Email or Bluetooth.
] File
- Move: Enables the file to be moved toother folder.
- Copy: Enables the file to be copied toother folder.
- Rename: You can rename the image.
- Edit: Enables the image to be edited.
- Make GIF animation: You can create ananimated GIF file with different photos(up to 10 files of 240X320 resolutionwith a 2Mbyte file size limit for display).
- Info.: Shows information on the selectedimage file.
] Delete: Deletes the selected image.
] Mark/Unmark: Using the Mark function,you can send, delete, move and copymultiple files.
] Main display: You can set an image as thescreen theme (Home screen, Outgoing call,Start up image, Power off image).
] Slide show: You can start a slide show.
] Sort by: You can sort the files by name,date, or file type.
] List view/Grid view: You can view theimages as a List view or Grid view.
] Memory status: You can view the memorystatus.
KU970_Eng(AUS)_0312 07.03.12 11:4 AM Page 62
My Files
Sounds Menu .2
The Sounds folder consists of embeddedlinks for downloading ringtones and music aswell as folders containing the Voicerecordings and Default sounds. Here you canmanage, send or set sounds as ringtones.
Videos Menu .3
Here you can manage or send downloaded orcaptured videos clips.
The following are available using the left softkey [Options] in the Video list.
] Play: Plays the video.
] Create new folder: You can create a newfolder.
] Send: You can send the selected video clipvia Message, Email or Bluetooth if notprotected by Digital Rights Management(DRM).
] File
- Move: Moves the file into handsetmemory.
- Copy: Copies the file in handset memory.
- Rename: You can rename the video.
- Info.: Shows information on the selectedvideo file.
] Delete: Deletes the selected video.
] Mark/Unmark: Using the Mark function,you can send, delete, move and copymultiple files.
] Sound theme: You can set a video as thevoice ringtone or video ringtone.
] Sort by: You can sort files by name, date,or file type.
] List view/Grid view: Displays the videofiles as a List view or Grid view.
] Memory status: Displays the memorystatus.
63
KU970_Eng(AUS)_0312 07.03.12 11:4 AM Page 63
My Files
64M
y Files
You can view a video using the video player.Video files are displayed in the list asthumbnails. You can select a desired video byusing the . Select a desired video andselect Play to view the recorded video.
Select the right soft key [Send] to attach theselected video to a message, Email orBluetooth.
When option 1. Play is selected, the videoclip will be played with the Media Player. Topause the playback, press during theplayback. To resume the paused playback,press once again.
To capture the screen shot, press the rightsoft key [Capture] when the playback ispaused.
To view the current playback in full screen,press the right soft key during the playback.
To return to the previous screen size, pressthe right soft key once again in full screenmode.
When viewing video clips in the Media Player,the following options are available:
] Pause/Play: You can play or pause playinga file for a moment.
] Send: You can send the video via Message,Email or Bluetooth if the file is notprotected by Digital Rights Management(DRM).
] Go to list: Goes back to the list.
] Delete: Deletes the selected video.
] Sound theme: You can set a video as thevoice ringtone or video ringtone.
] Wide view: You can view the video in wideview mode.
] Mute/Unmute: If the Volume is set tomore than 0, Mute mode is activated and ifthe Volume is set to 0, the Unmute mode isactivated.
] Capture: You can save what is on thepaused screen as an image file (onlypossible in Pause mode).
] Set repeat: You can set the repeat option(None/Current file/All files).
KU970_Eng(AUS)_0312 07.03.12 11:4 AM Page 64
My Files
] Move to
- Previous file: Plays the previous video file.
- Next file: Plays the next video file.
] File info.: You can check information onfiles being played(File name, Size, Date,Type, Duration, Protection).
Games & Applications Menu .4
You can easily download games and otherapplications in this menu. It has two folders,Games and Applications, as default (Theremight be no Applications folder in somecountries).
Each folder has an embedded link fordownloading games or applications. Pleasenote that additional cost may be incurredwhen using online services. You can create afolder using the left soft key [Options].
Bluetooth data Menu .5
The files received using Bluetooth are savedin this folder. You cannot create a sub-folderwithin the Bluetooth data folder.
You cannot copy or move files that are notmanaged by My Files.
The options displayed depend on the type offile selected. For instance, in case of animage, the following functions are supported.
] View/Edit/Move/Copy/Delete/Renamefile(s).
] Mark/Unmark one or all file(s).
] Send a file via MMS, Email or Bluetooth ifnot protected by Digital RightsManagement (DRM).
] If relevant, you can set an image as thescreen theme (Home screen, Outgoing call,Start up image, Power off image).
] If relevant, start or set (normal or fullscreen, at what pace) a slide show.
] If relevant, create an animated GIF file withdifferent pictures.
] Sort the files by name, date or file type. 65
NoteFor the image files of which resolution is640x480 or above, you can send themvia Postcard.
KU970_Eng(AUS)_0312 07.03.12 11:4 AM Page 65
My Files
66M
y Files
] Memory info.
] View file information.
Other files Menu .6
Other files except pictures, sounds, videos,games & applications are stored in thisfolder.
KU970_Eng(AUS)_0312 07.03.12 11:4 AM Page 66
Organiser &
Tools
Alarms Menu 0.1
If you set the alarm, the appears on theindicator bar. The specified alarm sounds atthe scheduled time. Press to stop thealarm, and the alarm is released. Press theright soft key [Snooze] and choose thesnooze interval. The alarm sound stops andresumes after the selected Snooze duration.You can configure up to 5 alarms.
1. Select your desired alarm to configure inthe alarm list. If there is no alarm, pressthe right soft key [Add] to add a newalarm.
2. Set/Cancel alarm: Set or cancel thealarm using the options for specifyingwhether the alarm is on or by choosingthe alarm time.
3. Input alarm time: Input your desiredalarm time by specifying Hour and Minute.Choose either ‘AM’ or ‘PM’ which is visibleif 12 hour format is specified for thephone.
4. Select repeat mode: Select the desiredrepeat mode using / or select thedesired one from the list by pressing .
5. Select bell: Select the bell to ring at thealarm time using / or openingthe list by pressing .
6. Input memo: Input alarm name.
7. Snooze: You can set the snooze durationfor the alarm.
8. When you have finished setting the alarm,press the right soft key [Done].
Calendar Menu 0.2
Schedule inquiry and search
1. Reference by MonthsYou can refer to your schedule by months.The cursor is on the current date, and theregistered date is marked.
Organiser & Tools [Menu 0]
67
NoteThe alarm will go off even when the phoneis switched off.
KU970_Eng(AUS)_0312 07.03.12 11:4 AM Page 67
Organiser & Tools
68O
rganiser & Tools
The schedule saved for the date where thecursor is located is represented by an icon.Pressing the shortcut key moves to theprevious year and pressing move to thenext year and pressing moves to today.Pressing moves to the previous month,and moves to the next month. Pressing
moves to the weekly calendar, and moves to the monthly calendar. You can movethe date scrolling .2. Reference by Days
Pressing in the reference by monthmoves to reference by day where you canrefer to your schedule by days. You canrefer to the moving date tab using /
. As a search result, briefschedule contents, repetition set upconfiguration, and alarm set upconfiguration are displayed. You can sendthe schedule to another phone or anInternet site through SMS(Text message)or MMS(Picture message) or Email orBluetooth.
3. Detailed referenceYou can refer to a detailed schedule, thatis the whole contents of the scheduleconfigured by the user. You can send theschedule to another phone or an Internetsite through SMS(Text message) orMMS(Picture message) or Email orBluetooth using the left soft key[Options].
Search schedule
You can add a schedule. You can configurethe start date, end date, start time, end time,contents, type of schedule, repetition, alarmof the schedule.
] Set type: Appointment, Anniversary,Birthday, Others
] Set repeat: Once, Daily, Weekly, Monthly,Annually, User setting
] Set alarm: No alarm, On time, 15 minsbefore, 30 mins before, 1 hour before, 1 day before, 3 days before, 1 week before
KU970_Eng(AUS)_0312 07.03.12 11:4 AM Page 68
Organiser &
Tools
Delete schedule
1. Previous entries
You can delete all elapsed schedules usingthis function.
2. All entries
You can delete all saved schedule contentsusing this function.
Set up and release holiday
You can set up or release user holidays. Press theleft soft key [Options] and select Set holiday.The selected date will be displayed in red.
To release the holiday, press the left soft key[Options] and select Reset holiday.
Schedule notification
If the user has configured the alarm setting,the specified alarm sound will ring. If thenotification time is before the schedule starttime, you can set up the alarm again.
Tasks Menu 0.3
You can view, edit and add tasks to do. Tasksare displayed in time order. Tasks that havebeen completed or not completed aredisplayed in different ways.
Add
To add a task, press the right soft key [Add]in the Tasks list management screen. Theninput the date, description and priority forthe task.When you have finished entering the data,press the right soft key [Done] to save thenew task.
Detailed view and Edit
To view detailed task contents, locate thecursor on the desired item in the Tasks list,and then press . You can edit anddelete a task using the left soft key[Options]. You can also delete multiple or alltasks at once using the Mark/Unmarkoption.
69
KU970_Eng(AUS)_0312 07.03.12 11:4 AM Page 69
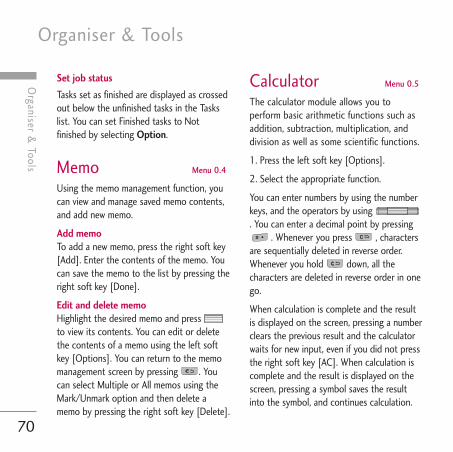
Organiser & Tools
70O
rganiser & Tools
Set job status
Tasks set as finished are displayed as crossedout below the unfinished tasks in the Taskslist. You can set Finished tasks to Notfinished by selecting Option.
Memo Menu 0.4
Using the memo management function, youcan view and manage saved memo contents,and add new memo.
Add memoTo add a new memo, press the right soft key[Add]. Enter the contents of the memo. Youcan save the memo to the list by pressing theright soft key [Done].
Edit and delete memoHighlight the desired memo and press to view its contents. You can edit or deletethe contents of a memo using the left softkey [Options]. You can return to the memomanagement screen by pressing . Youcan select Multiple or All memos using theMark/Unmark option and then delete amemo by pressing the right soft key [Delete].
Calculator Menu 0.5
The calculator module allows you toperform basic arithmetic functions such asaddition, subtraction, multiplication, anddivision as well as some scientific functions.
1. Press the left soft key [Options].
2. Select the appropriate function.
You can enter numbers by using the numberkeys, and the operators by using . You can enter a decimal point by pressing
. Whenever you press , charactersare sequentially deleted in reverse order.Whenever you hold down, all thecharacters are deleted in reverse order in onego.
When calculation is complete and the resultis displayed on the screen, pressing a numberclears the previous result and the calculatorwaits for new input, even if you did not pressthe right soft key [AC]. When calculation iscomplete and the result is displayed on thescreen, pressing a symbol saves the resultinto the symbol, and continues calculation.
KU970_Eng(AUS)_0312 07.03.12 11:4 AM Page 70
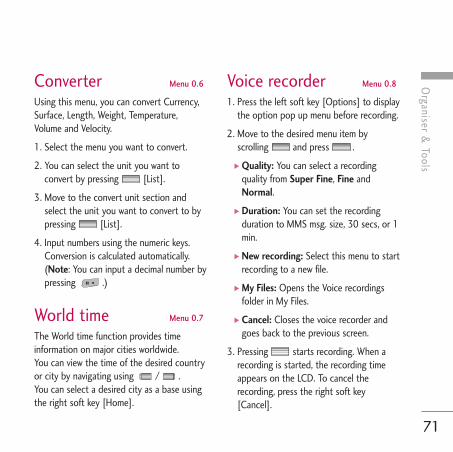
Organiser &
Tools
Converter Menu 0.6
Using this menu, you can convert Currency,Surface, Length, Weight, Temperature,Volume and Velocity.
1. Select the menu you want to convert.
2. You can select the unit you want toconvert by pressing [List].
3. Move to the convert unit section andselect the unit you want to convert to bypressing [List].
4. Input numbers using the numeric keys.Conversion is calculated automatically.(Note: You can input a decimal number bypressing .)
World time Menu 0.7
The World time function provides timeinformation on major cities worldwide.You can view the time of the desired countryor city by navigating using / .You can select a desired city as a base usingthe right soft key [Home].
Voice recorder Menu 0.8
1. Press the left soft key [Options] to displaythe option pop up menu before recording.
2. Move to the desired menu item byscrolling and press .
] Quality: You can select a recordingquality from Super Fine, Fine andNormal.
] Duration: You can set the recordingduration to MMS msg. size, 30 secs, or 1min.
] New recording: Select this menu to startrecording to a new file.
] My Files: Opens the Voice recordingsfolder in My Files.
] Cancel: Closes the voice recorder andgoes back to the previous screen.
3. Pressing starts recording. When arecording is started, the recording timeappears on the LCD. To cancel therecording, press the right soft key[Cancel].
71
KU970_Eng(AUS)_0312 07.03.12 11:4 AM Page 71
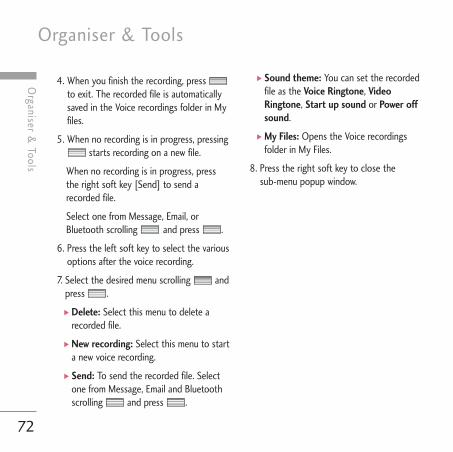
Organiser & Tools
72O
rganiser & Tools
4. When you finish the recording, press to exit. The recorded file is automaticallysaved in the Voice recordings folder in Myfiles.
5. When no recording is in progress, pressingstarts recording on a new file.
When no recording is in progress, pressthe right soft key [Send] to send arecorded file.
Select one from Message, Email, orBluetooth scrolling and press .
6. Press the left soft key to select the variousoptions after the voice recording.
7. Select the desired menu scrolling andpress .
] Delete: Select this menu to delete arecorded file.
] New recording: Select this menu to starta new voice recording.
] Send: To send the recorded file. Selectone from Message, Email and Bluetoothscrolling and press .
] Sound theme: You can set the recordedfile as the Voice Ringtone, VideoRingtone, Start up sound or Power offsound.
] My Files: Opens the Voice recordingsfolder in My Files.
8. Press the right soft key to close the sub-menu popup window.
KU970_Eng(AUS)_0312 07.03.12 11:4 AM Page 72
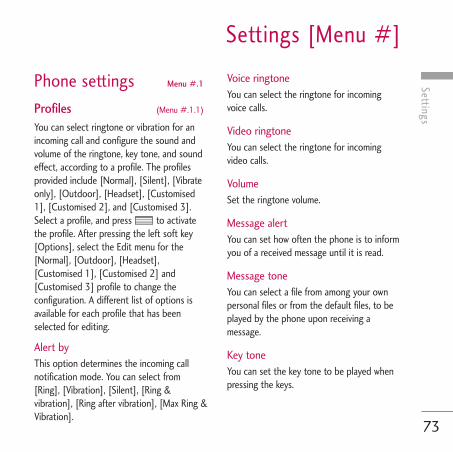
Settings
Phone settings Menu #.1
Profiles (Menu #.1.1)
You can select ringtone or vibration for anincoming call and configure the sound andvolume of the ringtone, key tone, and soundeffect, according to a profile. The profilesprovided include [Normal], [Silent], [Vibrateonly], [Outdoor], [Headset], [Customised1], [Customised 2], and [Customised 3].Select a profile, and press to activatethe profile. After pressing the left soft key[Options], select the Edit menu for the[Normal], [Outdoor], [Headset],[Customised 1], [Customised 2] and[Customised 3] profile to change theconfiguration. A different list of options isavailable for each profile that has beenselected for editing.
Alert byThis option determines the incoming callnotification mode. You can select from[Ring], [Vibration], [Silent], [Ring &vibration], [Ring after vibration], [Max Ring &Vibration].
Voice ringtoneYou can select the ringtone for incomingvoice calls.
Video ringtoneYou can select the ringtone for incomingvideo calls.
VolumeSet the ringtone volume.
Message alertYou can set how often the phone is to informyou of a received message until it is read.
Message toneYou can select a file from among your ownpersonal files or from the default files, to beplayed by the phone upon receiving amessage.
Key toneYou can set the key tone to be played whenpressing the keys.
Settings [Menu #]
73
KU970_Eng(AUS)_0312 07.03.12 11:4 AM Page 73
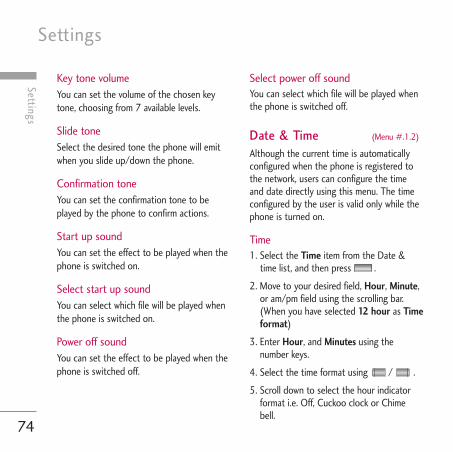
Settings
74Settings
Key tone volumeYou can set the volume of the chosen keytone, choosing from 7 available levels.
Slide toneSelect the desired tone the phone will emitwhen you slide up/down the phone.
Confirmation toneYou can set the confirmation tone to beplayed by the phone to confirm actions.
Start up soundYou can set the effect to be played when thephone is switched on.
Select start up soundYou can select which file will be played whenthe phone is switched on.
Power off soundYou can set the effect to be played when thephone is switched off.
Select power off sound You can select which file will be played whenthe phone is switched off.
Date & Time (Menu #.1.2)
Although the current time is automaticallyconfigured when the phone is registered tothe network, users can configure the timeand date directly using this menu. The timeconfigured by the user is valid only while thephone is turned on.
Time1. Select the Time item from the Date &
time list, and then press .
2. Move to your desired field, Hour, Minute,or am/pm field using the scrolling bar.(When you have selected 12 hour as Timeformat)
3. Enter Hour, and Minutes using thenumber keys.
4. Select the time format using / .
5. Scroll down to select the hour indicatorformat i.e. Off, Cuckoo clock or Chimebell.
KU970_Eng(AUS)_0312 07.03.12 11:4 AM Page 74
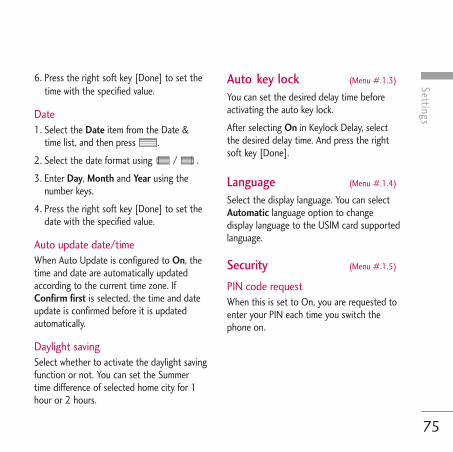
Settings
6. Press the right soft key [Done] to set thetime with the specified value.
Date1. Select the Date item from the Date &
time list, and then press .
2. Select the date format using / .
3. Enter Day, Month and Year using thenumber keys.
4. Press the right soft key [Done] to set thedate with the specified value.
Auto update date/timeWhen Auto Update is configured to On, thetime and date are automatically updatedaccording to the current time zone. IfConfirm first is selected, the time and dateupdate is confirmed before it is updatedautomatically.
Daylight savingSelect whether to activate the daylight savingfunction or not. You can set the Summertime difference of selected home city for 1hour or 2 hours.
Auto key lock (Menu #.1.3)
You can set the desired delay time beforeactivating the auto key lock.
After selecting On in Keylock Delay, selectthe desired delay time. And press the rightsoft key [Done].
Language (Menu #.1.4)
Select the display language. You can selectAutomatic language option to changedisplay language to the USIM card supportedlanguage.
Security (Menu #.1.5)
PIN code requestWhen this is set to On, you are requested toenter your PIN each time you switch thephone on.
75
KU970_Eng(AUS)_0312 07.03.12 11:4 AM Page 75
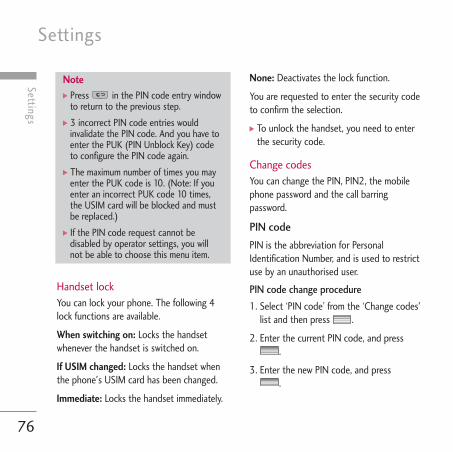
Settings
76Settings
Handset lockYou can lock your phone. The following 4lock functions are available.
When switching on: Locks the handsetwhenever the handset is switched on.
If USIM changed: Locks the handset whenthe phone's USIM card has been changed.
Immediate: Locks the handset immediately.
None: Deactivates the lock function.
You are requested to enter the security codeto confirm the selection.
] To unlock the handset, you need to enterthe security code.
Change codesYou can change the PIN, PIN2, the mobilephone password and the call barringpassword.
PIN code
PIN is the abbreviation for PersonalIdentification Number, and is used to restrictuse by an unauthorised user.
PIN code change procedure
1. Select ‘PIN code’ from the ‘Change codes'list and then press .
2. Enter the current PIN code, and press.
3. Enter the new PIN code, and press .
Note] Press in the PIN code entry window
to return to the previous step.
] 3 incorrect PIN code entries wouldinvalidate the PIN code. And you have toenter the PUK (PIN Unblock Key) codeto configure the PIN code again.
] The maximum number of times you mayenter the PUK code is 10. (Note: If youenter an incorrect PUK code 10 times,the USIM card will be blocked and mustbe replaced.)
] If the PIN code request cannot bedisabled by operator settings, you willnot be able to choose this menu item.
KU970_Eng(AUS)_0312 07.03.12 11:4 AM Page 76
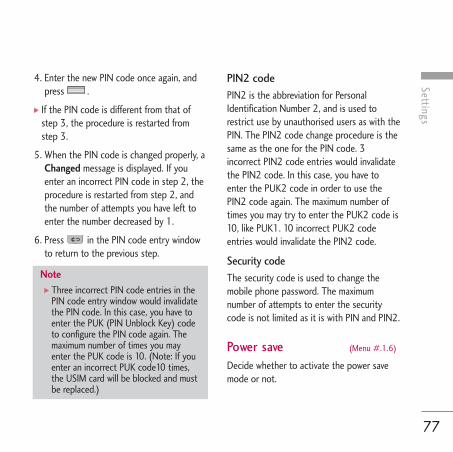
Settings
4. Enter the new PIN code once again, andpress .
] If the PIN code is different from that ofstep 3, the procedure is restarted fromstep 3.
5. When the PIN code is changed properly, aChanged message is displayed. If youenter an incorrect PIN code in step 2, theprocedure is restarted from step 2, andthe number of attempts you have left toenter the number decreased by 1.
6. Press in the PIN code entry windowto return to the previous step.
PIN2 codePIN2 is the abbreviation for PersonalIdentification Number 2, and is used torestrict use by unauthorised users as with thePIN. The PIN2 code change procedure is thesame as the one for the PIN code. 3incorrect PIN2 code entries would invalidatethe PIN2 code. In this case, you have toenter the PUK2 code in order to use thePIN2 code again. The maximum number oftimes you may try to enter the PUK2 code is10, like PUK1. 10 incorrect PUK2 codeentries would invalidate the PIN2 code.
Security codeThe security code is used to change themobile phone password. The maximumnumber of attempts to enter the securitycode is not limited as it is with PIN and PIN2.
Power save (Menu #.1.6)
Decide whether to activate the power savemode or not.
77
Note] Three incorrect PIN code entries in the
PIN code entry window would invalidatethe PIN code. In this case, you have toenter the PUK (PIN Unblock Key) codeto configure the PIN code again. Themaximum number of times you mayenter the PUK code is 10. (Note: If youenter an incorrect PUK code10 times,the USIM card will be blocked and mustbe replaced.)
KU970_Eng(AUS)_0312 07.03.12 11:4 AM Page 77
Settings
78Settings
Memory status (Menu #.1.7)
User memoryThis function shows the status of the usermemory of the mobile phone. Since thisfunction scans the overall file system forstatistics, a few seconds are required.
User reserved memoryThis function shows the status of the Userreserved memory. The usual contents areText messages, Contacts, Calendar, Tasks,Memo. And it gives a clear illustration of theactual amount compared with the totalamount for each item.
Mass storageThis function shows the status of Massstorage.
USIM memoryThis function shows the status of the USIMcard user memory.
Format mass storageYou can format the mass storage in phone.
Handset information (Menu #.1.8)
This functions shows the USIM cardtelephone number, model name and softwareversion of the mobile phone.
Reset settings (Menu #.1.9)
Clear memorySelect this to clear the memory. You arerequested to enter the security code.
] Handset contents: Deletes all themultimedia contents downloaded.
] Handset personal info.: Deletes personalinformation such as received messages oremails.
Default settingSelect this to reset your phone to its defaultconfiguration. You are requested to enter thesecurity code.
KU970_Eng(AUS)_0312 07.03.12 11:4 AM Page 78
Settings
Display settings Menu #.2
This menu allows you to personalise thedisplay options of the screens and of themenus entire graphic interface.
Main display (Menu #.2.1)
You can set the screen theme to be displayedon the main screen.
Home screen] Wallpaper: You can select an image to be
displayed on the main screen.
] Display items: You can select which itemsto display on the screen: Calendar + Clock,Calendar, Clock, Dual clock or Do not show.
Outgoing callYou can select the image to be displayedwhile dialling a number.
Start up imageYou can select the image to be displayedwhile the phone is being switched on.
Power off imageYou can select the image to be displayedwhile the phone is being switched off.
Menu style (Menu #.2.2)
You can select the desired menu style fromGrid style and List style.
Font (Menu #.2.3)
You can set the font style, dialling font size,and dialling font colour using .
Backlight (Menu #.2.4)
You can set the backlight duration andbrightness on the Home screen.
Welcome message (Menu #.2.5)
After selecting On, you can write a welcomemessage.
79
KU970_Eng(AUS)_0312 07.03.12 11:4 AM Page 79
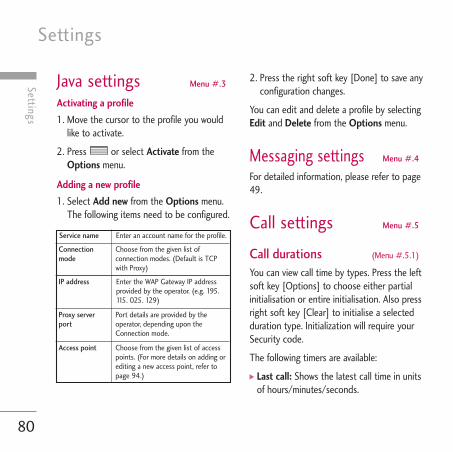
Settings
80Settings
Java settings Menu #.3
Activating a profile
1. Move the cursor to the profile you wouldlike to activate.
2. Press or select Activate from theOptions menu.
Adding a new profile
1. Select Add new from the Options menu.The following items need to be configured.
2. Press the right soft key [Done] to save anyconfiguration changes.
You can edit and delete a profile by selectingEdit and Delete from the Options menu.
Messaging settings Menu #.4
For detailed information, please refer to page49.
Call settings Menu #.5
Call durations (Menu #.5.1)
You can view call time by types. Press the leftsoft key [Options] to choose either partialinitialisation or entire initialisation. Also pressright soft key [Clear] to initialise a selectedduration type. Initialization will require yourSecurity code.
The following timers are available:
] Last call: Shows the latest call time in unitsof hours/minutes/seconds.
Enter an account name for the profile.Service name
Choose from the given list ofconnection modes. (Default is TCPwith Proxy)
Connectionmode
Enter the WAP Gateway IP addressprovided by the operator. (e.g. 195.115. 025. 129)
IP address
Port details are provided by theoperator, depending upon theConnection mode.
Proxy serverport
Choose from the given list of accesspoints. (For more details on adding orediting a new access point, refer topage 94.)
Access point
KU970_Eng(AUS)_0312 07.03.12 11:4 AM Page 80
Settings
] Received calls: Shows incoming call time.
] Dialled calls: Shows outgoing call time.
] All calls: Shows total call time.
Call barring (Menu #.5.2)
Call barring menus for Voice and Video callsare provided.
The menu consists of Voice calls, Video callsand Deactivate all. The Voice calls and Videocalls menus have the following submenus.
The Call barring menu consists of Alloutgoing, Outgoing international,Outgoing international calls except homecountry, All incoming and Incoming whenabroad submenus.
The All outgoing menu bars dialling alloutgoing calls, the Outgoing internationalmenu bars dialling outgoing internationalcalls, and the Outgoing international callsexcept home country menu bars diallingoutgoing international calls except for theHome PLMN country. All incoming rejects all incoming calls and the Incoming when
abroad menu rejects incoming calls whenroaming.
Video calls & Voice callsAll outgoing
1. When is selected, it receives theBarring password from user, and activatesthe barring service on the network. Arequesting message and animationappears. When the network answers, theresult of the operation is displayed.
2. When the Options menu is selected, itactivates the Outgoing calls menu. Selectthe Options menu from the soft menus onthe lowest menu. Then Deactivate,Activate, Deactivate all, View status andChange password menus appear. Selectthe Activate menu to receive the Barringpassword from the user and activate thebarring service on the network.The Deactivate menu deactivates thebarring service after the user's Barringpassword is entered. The Deactivate allmenu deactivates all barring servicesconfigured in the network after the user's
81
KU970_Eng(AUS)_0312 07.03.12 11:4 AM Page 81
Settings
82Settings
Barring password has been entered. TheView status menu enables users to viewthe current network configuration.Selecting View status menu displays theRequesting message with animation andthe result of the operation when thenetwork answers. Change password menuenables users to change the currentbarring password.
Outgoing international
1. When is selected, it operates in thesame way as the Outgoing calls menu.
2. When the Options menu is selected, itactivates and operates the Internationalcalls menu. It operates in the same way asthe Outgoing calls menu.
Outgoing international calls except homecountry
1. When is selected, it operates in thesame way as the Outgoing calls menu.
2. When the Options menu is selected – Itactivates and operates the Internationalexcept home country menu. It operatesin the same way as the Outgoing callsmenu.
All incoming
1. When is selected, it operates in thesame way as the Outgoing calls menu.
2. When the Options menu is selected, itactivates and operates the Incoming callsmenu. It operates in the same way as theOutgoing calls menu.
Incoming when abroad
1. When is selected, it operates in thesame way as the Outgoing calls menu.
2. When the Options menu is selected, itactivates and operates the Incoming callswhen abroad menu. It operates in thesame way as the Outgoing calls menu.
KU970_Eng(AUS)_0312 07.03.12 11:4 AM Page 82
Settings
Fixed dial numbers (Menu #.5.3)
] FDN ON/OFF: Select whether to activateFDN or not. PIN authentication is required.
] FDN List: Displays the current FDN list.You can edit, add, or delete fixed dialnumbers. PIN2 authentication is requiredto edit the list. And the configurationinformation is saved on the USIM. Theinformation saved on the USIM is usedwhen FDN restricts outgoing calls.
Data volume (Menu #.5.4)
Allows you to check the sent, received and alldata volume transferred. (Data volumetransferred through TE connection isexcluded from counting.)
Press the left soft key [Options] to choosefor partial initialization or entire initialization.You can also use the right soft key [Clear]for the initialization of the selected volumetype. Initialization will require your Securitycode.
Call costs (Menu #.5.5)
1. This function displays the call costs of theLast call and All calls.
2. To initialise, press the right soft key[Clear] and enter the PIN2 code.
3. You can select either Units or Currency inSet call cost. According to your setting,the call cost is displayed during a call (IfUSIM and Network support Advice OfCharge(AOC)).
4. In the Set limit configuration, select Onto configure the cost limit. When a costlimit is configured, and the call costs reachthe limit, making a call will not be allowed.
83
KU970_Eng(AUS)_0312 07.03.12 11:4 AM Page 83
Settings
84Settings
Diverts (Menu #.5.6)
Call divert menus for voice and video callsare provided.
The menu consists of Voice calls, Video callsand Deactivate all.
Voice callsAll voice calls
When busy
No answer
Not reachable
1. When the Deactivate menu is selected Deletes Call Divert Number registered tothe network. While waiting for the resultfrom the network, Requesting messageand animation appears. When the networkanswers, the result of the operation isdisplayed.
2. When To a number is selectedA dialogue window appears allowing youto enter a phone number to divert to.Input a phone number to divert calls to,and press . While waiting the result
from the network, Requesting messageand animation appears. When the networkanswers, the result of the operation isdisplayed.
3. When Recent divert number list is selectedDivert registration is performed with theselected number. Select the number, andpress . While waiting for the resultfrom the network, a Requesting messageand animation appears. When the networkanswers, the result of the operation isdisplayed.
4. Options menuAfter activating All voice calls menu,selecting the Options menu at the bottomof the menus displays the Deactivate,Activate, Deactivate all, View status andclear list menus.Activate: Move to Settings menu toactivate call divert.The View status menu shows the settingson the network. If you select this menu,Requesting. message and animationappear. Then the network settings aredisplayed when the information is received
KU970_Eng(AUS)_0312 07.03.12 11:4 AM Page 84
Settings
from the network. Selecting Status in theright soft menu gives the same result. Ifyou select the Deactivate menu, the calldivert numbers registered in the networkare deleted after user confirmation.Selecting the Cancel all menu will displaythe operation result after showing theRequesting message and animation.Clear list menu will delete all divertnumber list.
Video callsAll video calls
1. When the Deactivate menu is selected Deletes Call Divert Number registered tothe network. While waiting for the resultfrom the network, Requesting messageand animation appears. When the networkanswers, the result of the operation isdisplayed.
2. When To a number is selectedA dialogue window appears allowing youto enter a phone number to divert to.Input a phone number to divert calls to,and press . While awaiting the result
from the network, Requesting messageand animation appears. When the networkanswers, the result of the operation isdisplayed.
3. When Recent divert number list is selectedDivert registration is performed with theselected number. Select the number, andpress . While waiting for the resultfrom the network, a Requesting messageand animation appears. When the networkanswers, the result of the operation isdisplayed.
4. Options menuAfter activating the All video calls menu,selecting the Options menu at the bottomof the menus displays the Deactivate,Activate, Deactivate all, View status andclear list menus.Activate: Move to Settings menu(above1~4) to activate call divert. TheView status menu shows the settings onthe network. If you select this menu,Requesting. Message and animationappear. Then the network settings aredisplayed when the information is received
85
KU970_Eng(AUS)_0312 07.03.12 11:4 AM Page 85
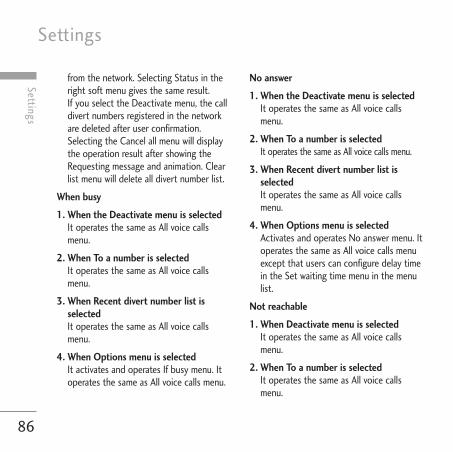
Settings
86Settings
from the network. Selecting Status in theright soft menu gives the same result.If you select the Deactivate menu, the calldivert numbers registered in the networkare deleted after user confirmation.Selecting the Cancel all menu will displaythe operation result after showing theRequesting message and animation. Clearlist menu will delete all divert number list.
When busy
1. When the Deactivate menu is selectedIt operates the same as All voice callsmenu.
2. When To a number is selectedIt operates the same as All voice callsmenu.
3. When Recent divert number list isselectedIt operates the same as All voice callsmenu.
4. When Options menu is selectedIt activates and operates If busy menu. Itoperates the same as All voice calls menu.
No answer
1. When the Deactivate menu is selectedIt operates the same as All voice callsmenu.
2. When To a number is selectedIt operates the same as All voice calls menu.
3. When Recent divert number list isselected It operates the same as All voice callsmenu.
4. When Options menu is selectedActivates and operates No answer menu. Itoperates the same as All voice calls menuexcept that users can configure delay timein the Set waiting time menu in the menulist.
Not reachable
1. When Deactivate menu is selectedIt operates the same as All voice callsmenu.
2. When To a number is selectedIt operates the same as All voice callsmenu.
KU970_Eng(AUS)_0312 07.03.12 11:4 AM Page 86
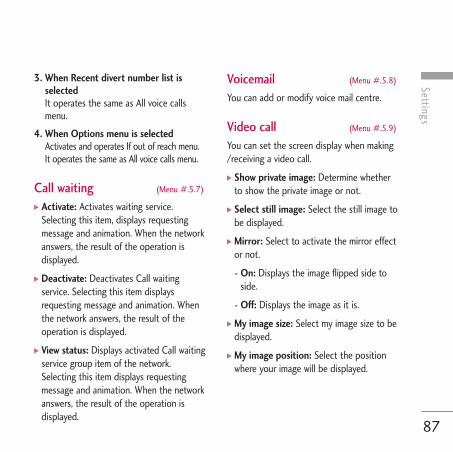
Settings
3. When Recent divert number list isselectedIt operates the same as All voice callsmenu.
4. When Options menu is selectedActivates and operates If out of reach menu. It operates the same as All voice calls menu.
Call waiting (Menu #.5.7)
] Activate: Activates waiting service.Selecting this item, displays requestingmessage and animation. When the networkanswers, the result of the operation isdisplayed.
] Deactivate: Deactivates Call waitingservice. Selecting this item displaysrequesting message and animation. Whenthe network answers, the result of theoperation is displayed.
] View status: Displays activated Call waitingservice group item of the network.Selecting this item displays requestingmessage and animation. When the networkanswers, the result of the operation isdisplayed.
Voicemail (Menu #.5.8)
You can add or modify voice mail centre.
Video call (Menu #.5.9)
You can set the screen display when making/receiving a video call.
] Show private image: Determine whetherto show the private image or not.
] Select still image: Select the still image tobe displayed.
] Mirror: Select to activate the mirror effector not.
- On: Displays the image flipped side toside.
- Off: Displays the image as it is.
] My image size: Select my image size to bedisplayed.
] My image position: Select the positionwhere your image will be displayed.
87
KU970_Eng(AUS)_0312 07.03.12 11:4 AM Page 87
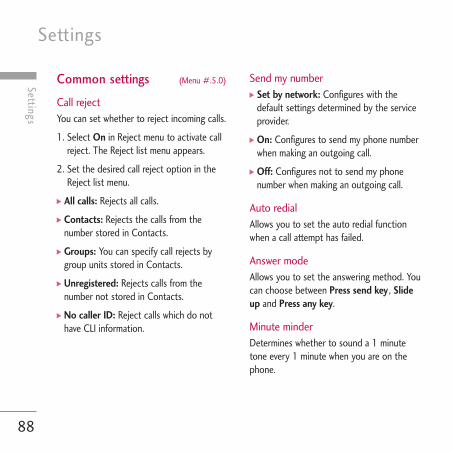
Settings
88Settings
Common settings (Menu #.5.0)
Call rejectYou can set whether to reject incoming calls.
1. Select On in Reject menu to activate callreject. The Reject list menu appears.
2. Set the desired call reject option in theReject list menu.
] All calls: Rejects all calls.
] Contacts: Rejects the calls from thenumber stored in Contacts.
] Groups: You can specify call rejects bygroup units stored in Contacts.
] Unregistered: Rejects calls from thenumber not stored in Contacts.
] No caller ID: Reject calls which do nothave CLI information.
Send my number] Set by network: Configures with the
default settings determined by the serviceprovider.
] On: Configures to send my phone numberwhen making an outgoing call.
] Off: Configures not to send my phonenumber when making an outgoing call.
Auto redialAllows you to set the auto redial functionwhen a call attempt has failed.
Answer modeAllows you to set the answering method. Youcan choose between Press send key , Slideup and Press any key.
Minute minderDetermines whether to sound a 1 minutetone every 1 minute when you are on thephone.
KU970_Eng(AUS)_0312 07.03.12 11:4 AM Page 88
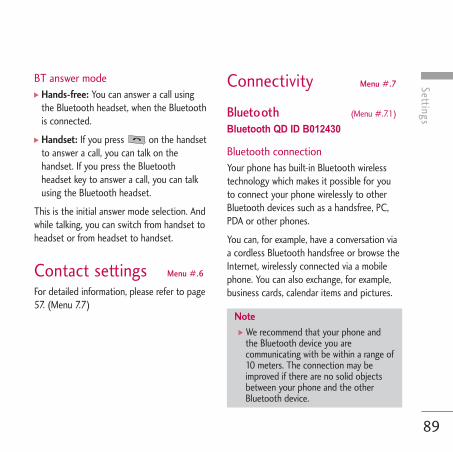
Settings
BT answer mode] Hands-free: You can answer a call using
the Bluetooth headset, when the Bluetoothis connected.
] Handset: If you press on the handsetto answer a call, you can talk on thehandset. If you press the Bluetoothheadset key to answer a call, you can talkusing the Bluetooth headset.
This is the initial answer mode selection. Andwhile talking, you can switch from handset toheadset or from headset to handset.
Contact settings Menu #.6
For detailed information, please refer to page57. (Menu 7.7)
Connectivity Menu #.7
Bluetooth (Menu #.7.1)
Bluetooth QD ID B012430
Bluetooth connectionYour phone has built-in Bluetooth wirelesstechnology which makes it possible for youto connect your phone wirelessly to otherBluetooth devices such as a handsfree, PC,PDA or other phones.
You can, for example, have a conversation viaa cordless Bluetooth handsfree or browse theInternet, wirelessly connected via a mobilephone. You can also exchange, for example,business cards, calendar items and pictures.
89
Note] We recommend that your phone and
the Bluetooth device you arecommunicating with be within a range of10 meters. The connection may beimproved if there are no solid objectsbetween your phone and the otherBluetooth device.
KU970_Eng(AUS)_0312 07.03.12 11:4 AM Page 89
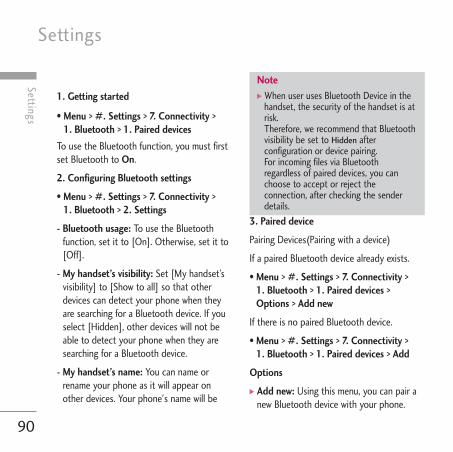
Settings
90Settings
1. Getting started
• Menu > #. Settings > 7. Connectivity > 1. Bluetooth > 1. Paired devices
To use the Bluetooth function, you must firstset Bluetooth to On.
2. Configuring Bluetooth settings
• Menu > #. Settings > 7. Connectivity > 1. Bluetooth > 2. Settings
- Bluetooth usage: To use the Bluetoothfunction, set it to [On]. Otherwise, set it to[Off].
- My handset’s visibility: Set [My handset’svisibility] to [Show to all] so that otherdevices can detect your phone when theyare searching for a Bluetooth device. If youselect [Hidden], other devices will not beable to detect your phone when they aresearching for a Bluetooth device.
- My handset’s name: You can name orrename your phone as it will appear onother devices. Your phone's name will be
shown on other devices only when [Myhandset’s visibility] is set to [Show to all].
3. Paired device
Pairing Devices(Pairing with a device)
If a paired Bluetooth device already exists.
• Menu > #. Settings > 7. Connectivity >1. Bluetooth > 1. Paired devices >Options > Add new
If there is no paired Bluetooth device.
• Menu > #. Settings > 7. Connectivity > 1. Bluetooth > 1. Paired devices > Add
Options
] Add new: Using this menu, you can pair anew Bluetooth device with your phone.
Note] When user uses Bluetooth Device in the
handset, the security of the handset is atrisk.Therefore, we recommend that Bluetoothvisibility be set to Hidden afterconfiguration or device pairing.For incoming files via Bluetoothregardless of paired devices, you canchoose to accept or reject theconnection, after checking the senderdetails.
KU970_Eng(AUS)_0312 07.03.12 11:4 AM Page 90
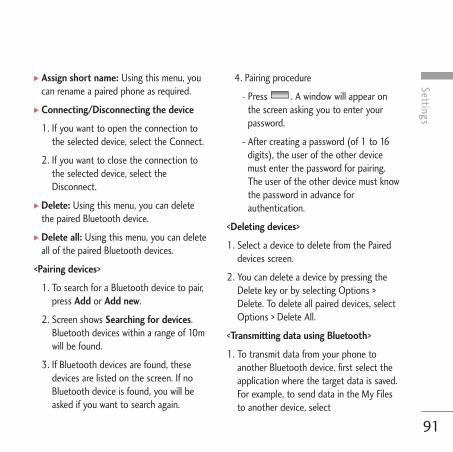
Settings
] Assign short name: Using this menu, youcan rename a paired phone as required.
] Connecting/Disconnecting the device
1. If you want to open the connection tothe selected device, select the Connect.
2. If you want to close the connection tothe selected device, select theDisconnect.
] Delete: Using this menu, you can deletethe paired Bluetooth device.
] Delete all: Using this menu, you can deleteall of the paired Bluetooth devices.
<Pairing devices>
1. To search for a Bluetooth device to pair,press Add or Add new.
2. Screen shows Searching for devices.Bluetooth devices within a range of 10mwill be found.
3. If Bluetooth devices are found, thesedevices are listed on the screen. If noBluetooth device is found, you will beasked if you want to search again.
4. Pairing procedure
- Press . A window will appear onthe screen asking you to enter yourpassword.
- After creating a password (of 1 to 16digits), the user of the other devicemust enter the password for pairing.The user of the other device must knowthe password in advance forauthentication.
<Deleting devices>
1. Select a device to delete from the Paireddevices screen.
2. You can delete a device by pressing theDelete key or by selecting Options >Delete. To delete all paired devices, selectOptions > Delete All.
<Transmitting data using Bluetooth>
1. To transmit data from your phone toanother Bluetooth device, first select theapplication where the target data is saved.For example, to send data in the My Filesto another device, select
91
KU970_Eng(AUS)_0312 07.03.12 11:4 AM Page 91
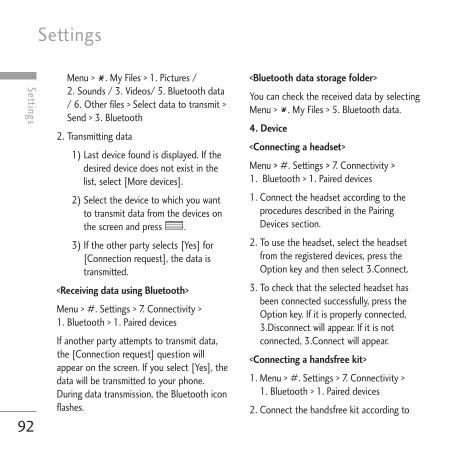
Settings
92Settings
Menu > . My Files > 1. Pictures /2. Sounds / 3. Videos/ 5. Bluetooth data/ 6. Other files > Select data to transmit >Send > 3. Bluetooth
2. Transmitting data
1) Last device found is displayed. If thedesired device does not exist in thelist, select [More devices].
2) Select the device to which you wantto transmit data from the devices onthe screen and press .
3) If the other party selects [Yes] for[Connection request], the data istransmitted.
<Receiving data using Bluetooth>
Menu > #. Settings > 7. Connectivity > 1. Bluetooth > 1. Paired devices
If another party attempts to transmit data,the [Connection request] question willappear on the screen. If you select [Yes], thedata will be transmitted to your phone.During data transmission, the Bluetooth iconflashes.
<Bluetooth data storage folder>
You can check the received data by selectingMenu > . My Files > 5. Bluetooth data.
4. Device
<Connecting a headset>
Menu > #. Settings > 7. Connectivity >1. Bluetooth > 1. Paired devices
1. Connect the headset according to theprocedures described in the PairingDevices section.
2. To use the headset, select the headsetfrom the registered devices, press theOption key and then select 3.Connect.
3. To check that the selected headset hasbeen connected successfully, press theOption key. If it is properly connected,3.Disconnect will appear. If it is notconnected, 3.Connect will appear.
<Connecting a handsfree kit>
1. Menu > #. Settings > 7. Connectivity > 1. Bluetooth > 1. Paired devices
2. Connect the handsfree kit according to
KU970_Eng(AUS)_0312 07.03.12 11:4 AM Page 92
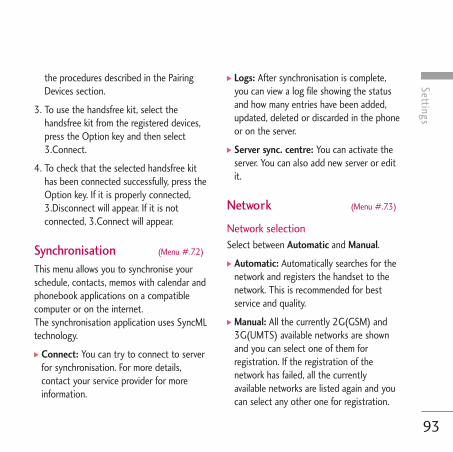
Settings
the procedures described in the PairingDevices section.
3. To use the handsfree kit, select thehandsfree kit from the registered devices,press the Option key and then select3.Connect.
4. To check that the selected handsfree kithas been connected successfully, press theOption key. If it is properly connected,3.Disconnect will appear. If it is notconnected, 3.Connect will appear.
Synchronisation (Menu #.7.2)
This menu allows you to synchronise yourschedule, contacts, memos with calendar andphonebook applications on a compatiblecomputer or on the internet. The synchronisation application uses SyncMLtechnology.
] Connect: You can try to connect to serverfor synchronisation. For more details,contact your service provider for moreinformation.
] Logs: After synchronisation is complete,you can view a log file showing the statusand how many entries have been added,updated, deleted or discarded in the phoneor on the server.
] Server sync. centre: You can activate theserver. You can also add new server or editit.
Network (Menu #.7.3)
Network selectionSelect between Automatic and Manual.
] Automatic: Automatically searches for thenetwork and registers the handset to thenetwork. This is recommended for bestservice and quality.
] Manual: All the currently 2G(GSM) and3G(UMTS) available networks are shownand you can select one of them forregistration. If the registration of thenetwork has failed, all the currentlyavailable networks are listed again and youcan select any other one for registration.
93
KU970_Eng(AUS)_0312 07.03.12 11:4 AM Page 93
Settings
94Settings
Network modeYou can set a type of network to search forwhen networks are searched in the networkselection.
] Automatic: Searches all the networksconnectable.
] UMTS: Searches only networks supporting3G.
] GSM 900/1800: Searches only networkssupporting GSM 900/1800 band.
] GSM 1900: Searches only networkssupporting GSM 1900 band.
Preferred lists
If the network is searching automatically, youcan add a preferable network to beconnected to. And the following options areavailable.
] Add new: You can add a new network usingthe followings.
- Search: You can select one from thenetwork list stored in the phone.
- Enter new network: You can enter thecountry code (MCC) and the networkcode (MNC) to add. After setting, pressDone key.
] Edit: You can modify the information ofthe selected network.
] Delete: Deletes the selected network.
] Move up: Moves the selected networkupward.
] Move down: Moves the selected networkdownward.
Access points (Menu #.7.4)
This menu shows the access point list. Youcan create new profiles, delete or edit themby using the Option Menu. However, youcannot delete or edit default configurationsdepending on country variant.You can edit the following configurationitems by selecting the right soft key.
KU970_Eng(AUS)_0312 07.03.12 11:4 AM Page 94
Settings
] Press Done key to save any configurationchanges.
Browser settings (Menu #.7.5)
ProfilesSelect the appropriate profile by pressing
. This will activate the profile to initiatebrowser launch.
SecurityIf user presses Certificates, certificationinformation is shown.User can clear secure session information bypressing Session clear.
CertificatesIf stored, a list of root/ca certificates requiredfor WTLS/TLS can be found here.Certificates can be viewed from the list.
Session clearSecure (WTLS/ TLS) session data can becleared using this option. Session datashould be cleared to establish a new securesession.
Character encoding
Sets the browser default character set to oneof the following.
] Automatic, English(ASCII), English(ISO),English(LATIN), Unicode(UCS2 BE),Unicode(UCS2 LE), Unicode(UCS2 Auto),Unicode(UTF-16 BE), Unicode(UTF-16 LE),Unicode(UTF-16 Auto), Unicode(UTF-8).
Scrolling controlAllows you to set the scroll speed byselecting the number of lines to scroll. Select from Small(1 line), Medium(2 lines),Large(3 lines).
95
Access Point profile name.Connection title
Choose the bearer from the list.(Default is UMTS.)
Bearer
Choose the authentication from thelist. (Default is No auth)
Authentication
Information provided by serviceprovider.
User name
Information provided by serviceprovider.
Password
APN name to access network.Information provided by serviceprovider.
APN
KU970_Eng(AUS)_0312 07.03.12 11:4 AM Page 95
Settings
96Settings
Show Image Allows you to enable or disable image displayduring browsing.
CacheEnabling Cache allows you to store accessedpages to your phone. Once a page has beenstored in cache it will greatly enhance thepage loading speed on subsequent browsingof the same page.
Cookies Enabling Cookies allows you to store cookiessent from the server. Disabling this functionwill prevent cookies from being stored onyour phone.
JavaScriptSelect On/Off.
Reset settingsSelect this to reset your phone to its defaultconfiguration.
Streaming (Menu #.7.6)
If you want to set different network setting toplay streaming content, you can set differentnetwork settings.
Dial-up network (Menu #.7.7)
You can use your phone with a variety of PCconnectivity and data communicationsapplications. Select USB and Bluetooth youwant to use for the data connection.
Note] Enabling this function will delay
displaying of images until transmission iscompleted. Disabling this function willprevent the browser from downloadingimages from the server, thus allowingfaster transmission.
KU970_Eng(AUS)_0312 07.03.12 11:4 AM Page 96
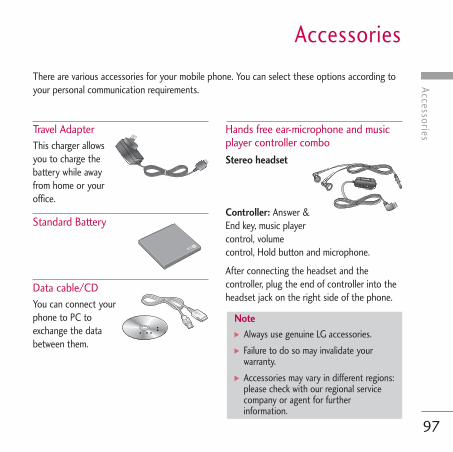
AccessoriesAccessories
97
There are various accessories for your mobile phone. You can select these options according toyour personal communication requirements.
Travel Adapter This charger allowsyou to charge thebattery while awayfrom home or youroffice.
Standard Battery
Data cable/CD You can connect yourphone to PC toexchange the databetween them.
Hands free ear-microphone and musicplayer controller combo Stereo headset
Controller: Answer &End key, music playercontrol, volumecontrol, Hold button and microphone.
After connecting the headset and thecontroller, plug the end of controller into theheadset jack on the right side of the phone.
Note] Always use genuine LG accessories.
] Failure to do so may invalidate yourwarranty.
] Accessories may vary in different regions:please check with our regional servicecompany or agent for furtherinformation.
KU970_Eng(AUS)_0312 07.03.12 11:4 AM Page 97
98Technical data
Technical data
General Product name: KU970
System: GSM900/DCS1800/PCS 1900,WCDMA 2100
Net weight: 67.5g(Without battery)
Ambient TemperaturesMax: +55°C (Normal) / 45°C (Charging)
Min: -10°C
KU970_Eng(AUS)_0312 07.03.12 11:4 AM Page 98
Index
99
Index
AAccess codes 21Access points 94Add memo 70Add new 56Alarms 67Answer mode 88
BBacklight 79Barring password 24Battery 17, 97Battery information and care 11Bluetooth 89Bluetooth data 65Browser settings 59, 95
CCalculator 70Calendar 67
Call barring 80Camera 34Charging the battery 19Converter 71
DData cable 97Dialled calls 41Display information 22Display settings 79Diverts 84
EE-Mail 44, 47, 52Entering text 27
HHandset Information 78Handset lock 76
KU970_Eng(AUS)_0312 07.03.12 11:4 AM Page 99
IInbox 45
JJavaScript 60, 96Java settings 61, 80
KKey tone 73
LLanguage 75
MMemo 67Memory status 78Message alert 73Message tone 73Missed calls 41MMS 50
NNetwork 93Network selection 93
OOwn number 57
PPIN code 21PIN code request 75PIN2 code 20, 77Playlists 33Profiles 59, 73PUK code 22PUK2 code 22
100Index
Index
KU970_Eng(AUS)_0312 07.03.12 11:4 AM Page 100
Index
101
RReceived calls 41
SSAR 7Screen structure 23Security 59, 75, 95Security code 22, 77Signal Strength 27Speed dials 56Stereo headset 97
TTasks 67Templates 49
UUSIM memory 78USIM Tool Kit 32
VVideos 62Voice calls 84Voice mail 87Voice recorder 71Volume 73
WWorld time 71
KU970_Eng(AUS)_0312 07.03.12 11:4 AM Page 101
KU970_Eng(AUS)_0312 07.03.12 11:4 AM Page 102