Embed Size (px)
Citation preview

Instructions for Use
A competitive immunoenzymatic assay for the quantitative measurement of Estrogen BPA Environmental in urine, serum, plasma, cells and tissues.
This product is for research use only and is not intended for diagnostic use.
ab175820 – Estrogen BPA Environmental ELISA Kit

Discover more at www.abcam.com 1
Table of Contents
INTRODUCTION1. BACKGROUND 22. ASSAY SUMMARY 4
GENERAL INFORMATION3. PRECAUTIONS 54. STORAGE AND STABILITY 55. MATERIALS SUPPLIED 56. MATERIALS REQUIRED, NOT SUPPLIED 67. LIMITATIONS 68. TECHNICAL HINTS 7
ASSAY PREPARATION9. REAGENT PREPARATION 810. STANDARD PREPARATION 911. SAMPLE COLLECTION AND STORAGE 1012. PLATE PREPARATION 14
ASSAY PROCEDURE13. ASSAY PROCEDURE 15
DATA ANALYSIS14. CALCULATIONS 1615. TYPICAL DATA 1716. ASSAY SPECIFICITY 18
RESOURCES17. TROUBLESHOOTING 1918. NOTES 21

Discover more at www.abcam.com 2
INTRODUCTION
1. BACKGROUND
Abcam’s Estrogen BPA Environmental competitive in vitro ELISA (Enzyme-Linked Immunosorbent Assay) kit is designed for of Estrogen BPA Environmental in urine, serum, plasma, cells, and tissues following proper isolation and purification. Estrogen BPA Environmental is a phenolic environmental estrogen1 which disrupts endocrine activity. In human, an Estrogen BPA Environmental glucuronide was a primary metabolite of BPA. In a recent study, the age group with highest Estrogen BPA Environmental exposure was 6-11 years old with a mean total (free + glucuronidated) Estrogen BPA Environmental level of 4.33 ng/g of creatinine. Urinary Estrogen BPA Environmental levels were correlated with cardiovascular diseases and diabetes. A recent study revealed that a 12-ounce serving of canned soup for 5 days increased urinary Estrogen BPA Environmental level 12-fold due to Estrogen BPA Environmental -containing epoxy resin lining of the cans. The free Estrogen BPA Environmental level in urine or cell culture media can be measured using the Estrogen BPA Environmental ELISA, without ethyl acetate extraction after 4-fold dilution of the sample. The glucuronidated Estrogen BPA Environmental level can also be measured without extraction after beta-glucuronidase treatment using our specific protocol.

Discover more at www.abcam.com 3
INTRODUCTION
This competitive ELISA kit, based on competition between the Estrogen BPA Environmental epitope and Estrogen BPA Environmental-HRP conjugate for a limited number of binding sites available from the anti- Estrogen BPA Environmental antibody, which is coated on the bottom of the wells of the 96 well ELISA plate. The conjugate concentration is held constant in each well, while the concentration of the Estrogen BPA Environmental is variable, based on the concentration of the sample or standard. Thus the amount of the Estrogen BPA Environmental conjugate which is able to bind to each of the wells is inversely proportional to the concentration of Estrogen BPA Environmental in the standard or sample. The amount of the conjugate which is bound to each well is then determined by the amount of color obtained, when TMB is added. The TMB reacts with the HRP available in the well. With the addition of sulfuric acid, the blue colored product is converted into a yellow colored product, which can be read on a plate reader at 450 nm.

Discover more at www.abcam.com 4
INTRODUCTION
2. ASSAY SUMMARY
Prepare all reagents and samples as instructed.
Add standards and samples to each well used.
Add prepared HRP conjugate to each well and incubate at room temp.
Add TMB substrate to each well. Incubate at room temperature. Add Stop Solution to each well. Read immediately.

Discover more at www.abcam.com 5
GENERAL INFORMATION
3. PRECAUTIONSPlease read these instructions carefully prior to beginning the assay.All kit components have been formulated and quality control tested to function successfully as a kit. Modifications to the kit components or procedures may result in loss of performance.
4. STORAGE AND STABILITYStore kit at 2-8°C or -20°C immediately upon receipt.Refer to list of materials supplied for storage conditions of individual components. Observe the storage conditions for individual prepared components in section 9. Reagent Preparation.
5. MATERIALS SUPPLIED
Item AmountStorage
Condition(After
Preparation)BPA ELISA Plate 96 Wells -20°C
BPA Standard 2 µL -20°C
BPA-HRP Conjugates 12 µL -20°C
10X Sample Dilution Buffer 25 mL -20°C
HRP Buffer 15 mL -20°C
10X Wash Buffer Solution 25 mL -20°C
TMB Substrate 24 mL -20°C

Discover more at www.abcam.com 6
GENERAL INFORMATION
6. MATERIALS REQUIRED, NOT SUPPLIEDThese materials are not included in the kit, but will be required to successfully utilize this assay:
Deionized water
An 8-channel adjustable pipette and an adjustable pipette
Storage bottles
Costar cluster tubes (1.2 mL) and microcentrifuge tubes
2N Sulfuric acid
7. LIMITATIONS ELISA kit intended for research use only. Not for use in diagnostic
procedures
Use only clean pipette tips, dispensers, and lab ware
Do not interchange screw caps of reagent vials to avoid cross-contamination
Close reagent vials tightly immediately after use to avoid evaporation and microbial contamination
After first opening and subsequent storage check conjugate and control vials for microbial contamination prior to further use
To avoid cross-contamination and falsely elevated results pipette patient samples and dispense conjugate, without splashing, accurately to the bottom of wells
Discover more at www.abcam.com 7
GENERAL INFORMATION
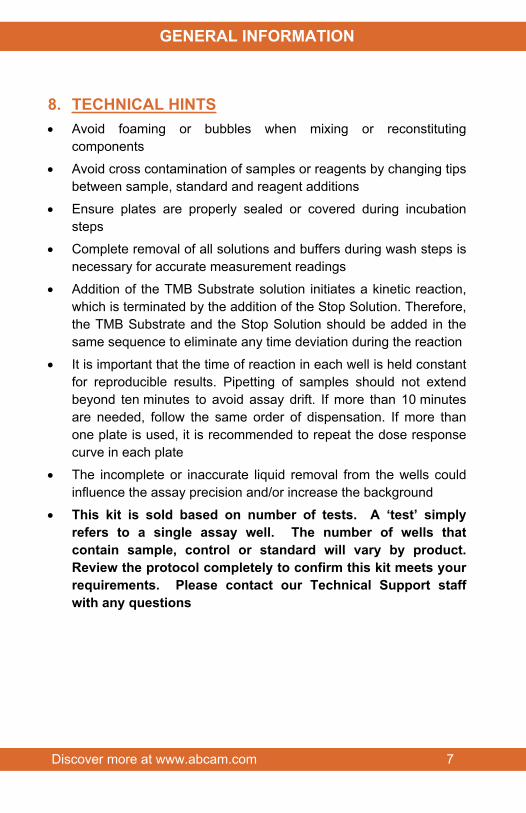
8. TECHNICAL HINTS Avoid foaming or bubbles when mixing or reconstituting
components
Avoid cross contamination of samples or reagents by changing tips between sample, standard and reagent additions
Ensure plates are properly sealed or covered during incubation steps
Complete removal of all solutions and buffers during wash steps is necessary for accurate measurement readings
Addition of the TMB Substrate solution initiates a kinetic reaction, which is terminated by the addition of the Stop Solution. Therefore, the TMB Substrate and the Stop Solution should be added in the same sequence to eliminate any time deviation during the reaction
It is important that the time of reaction in each well is held constant for reproducible results. Pipetting of samples should not extend beyond ten minutes to avoid assay drift. If more than 10 minutes are needed, follow the same order of dispensation. If more than one plate is used, it is recommended to repeat the dose response curve in each plate
The incomplete or inaccurate liquid removal from the wells could influence the assay precision and/or increase the background
This kit is sold based on number of tests. A ‘test’ simply refers to a single assay well. The number of wells that contain sample, control or standard will vary by product. Review the protocol completely to confirm this kit meets your requirements. Please contact our Technical Support staff with any questions

Discover more at www.abcam.com 8
ASSAY PREPARATION
9. REAGENT PREPARATIONEquilibrate all reagents, samples and controls to room temperature (18-25°C) prior to use.
9.1 1X Wash BufferMix the 10X Wash Buffer Solution with a stir bar, applying low, gentle heat until a clear colorless solution is obtained. Dilute the entire contents of the 10X Wash Buffer Solution (25 mL) with 225 mL of deionized water to yield a final volume of 250 mL of 1 X Wash Buffer. This can then be refrigerated for the entire life of the kit.
9.2 1X HRP ConjugateDilute 1 vial of the Estrogen BPA Environmental -HRP conjugate (12 µL) with 12 mL of HRP Buffer. One vial makes enough conjugate for one plate. The conjugate must be used the same day and should not be stored for later use.
9.3 1X Sample Dilution BufferPrepare 1X Sample Dilution Buffer by adding 25 mL of 10X Sample Dilution Buffer to 225 mL of dH20. Mix gently and thoroughly.

Discover more at www.abcam.com 9
ASSAY PREPARATION
10.STANDARD PREPARATIONPrepare serially diluted standards immediately prior to use. Always prepare a fresh set of positive controls for every use.
10.1 Label 5 microtubes as Standard # 2 - 6.10.2 Add 900 µL of the 1X Sample Dilution Buffer to the
microtubes for Standards # 2 to 6. 10.3 Prepare a 1 µg/mL Standard #1 by first spinning down the
enclosed Estrogen BPA Environmental standard vial (2 μL, filled with inert gas) and then adding 1.998 mL of 1X Sample Dilution Buffer to obtain 2 mL of solution.
10.4 Prepare Standard #2 by adding 100 µL of the Standard #1 to the microtube labeled Standard #2. Mix thoroughly and gently.
10.5 Prepare Standard #3 by adding 100 µL of the Standard #2 to the microtube labeled Standard #3. Mix thoroughly and gently.
10.6 Using the table below as a guide, repeat for tubes #4 through #6.
10.7 Standard Bo contains no protein and is blank control
Standard #
Sample to Dilute
Volume to Dilute(µL)
Volume of Diluent (µL)
StartingConc.(pg/mL)
Final Conc.(pg/mL)
1 Step 10.3 1,000,0002 Standard #1 100 900 1,000,000 100,0003 Standard #2 100 900 100,000 10,0004 Standard #3 100 900 10,000 1,0005 Standard #4 100 900 1,000 1006 Standard #5 100 900 100 10Bo None 900 -

Discover more at www.abcam.com 10
ASSAY PREPARATION
11.SAMPLE COLLECTION AND STORAGEThere are different protocols for isolating and purifying Estrogen BPA Environmental depending on the medium in which it is in. Listed below are the different protocols for sample preparation. For optimal results follow the appropriate protocol based on the biological sample present.
11.1 Estrogen BPA Environmental measurement in urine11.1.1 Make 8.0 mL of a 1.0 M citrate buffer solution, pH
5.511.1.2 Dissolve the 8 mg of beta-glucuronidase enzyme
provided with the kit in 8.0 mL of the 1M citrate buffer.
11.1.3 Centrifuge the urine sample to remove any solids11.1.4 Dilute 1.0 mL of human urine 4-fold with 1X Sample
Dilution Buffer. (You must dilute the 10X Sample Dilution Buffer provided in the kit).
11.1.5 Divide the diluted urine sample into two equal aliquots of 2.0 mL
11.1.6 Add 0.5 mL of the beta-glucuronidase enzyme solution you prepared ahead of time to both of the diluted 2.0 mL urine aliquots.

Discover more at www.abcam.com 11
ASSAY PREPARATION
11.1.7 To one of the aliquots, quickly add 2.0 mL of ethyI acetate, vortex vigorously and centrifuge for 3 minutes at > 5,000 g to separate the aqueous and organic layers.
11.1.8 Remove and save the ethyl acetate layer in a clean tube and place on ice. This is the zero time point sample.
11.1.9 Incubate the other 2.0 mL aliquot at 37oC for 3 hours (A shaking water bath is recommended). This is the 3 hour time point sample.
11.1.10 After the three hour incubation, extract with ethyl acetate as you did with the zero time point sample.
11.1.11 Evaporate the ethyl acetate using a speed vac or a gentle stream of nitrogen or argon.
11.1.12 Resuspend the dried extract with 20 µL of ethanol. Vortex sample to ensure the extract is completely dissolved.
11.1.13 Add 1.0 mL of the 1X Sample Dilution Buffer to the tube.
11.1.14 Add 100 µL to the sample wells of the ELISA plate. If necessary, the sample can be diluted to ensure that the absorbance reading of the well falls within the limits of the standard curve.
11.1.15 Follow the instructions in the Estrogen BPA Environmental instruction booklet to perform the ELISA.
11.1.16 Subtract the value obtained with the zero time point from the 3 hour time point for a measurement of the Estrogen BPA Environmental level in the urine sample. Make sure to include all dilution factors in your calculations.
11.2 Estrogen BPA Environmental measurement in cells

Discover more at www.abcam.com 12
ASSAY PREPARATION
11.2.1 Collect and homogenize and/or sonicate the cells.11.2.2 Acidify the whole homogenized cells with acetic acid to
a pH of approximately 3-4. Measure using standard pH paper.
11.2.3 Extraction with ethyl acetate. Add an equal volume of ethyl acetate to the homogenized cells and vortex very well. Place the upper organic phase into a fresh clean tube after centrifugation. Then add another equal volume of ethyl acetate to the homogenized cells to start the second-time extraction. It is strongly recommended that extraction is performed three times.
11.2.4 Evaporate the pooled ethyl acetate from the extractions until all has dried up under argon or nitrogen gas.
11.2.5 Add 10 μL to 20 μL ethanol, or N, N-dimethyl-formamide (DMF), to reconstitute the dried-up residue from above step # 11.2.4. Add 0.5 mL of 1x Sample Dilution Buffer (provided in kit). Load 100 μL in each well, in triplicates, on the ELISA plate. (Note: We recommend measuring a different dilution of sample in attempt to fit the results to the standard curve. e.g., add 3 wells with 50 μL of the rest of sample plus 50 μL 1x Sample Dilution Buffer, and 3 wells with 10 μL of the rest of sample plus 90 μL of 1x Sample Dilution Buffer.)
11.2.6 Perform the ELISA for Estrogen BPA Environmental (according to the instructions of the manufacturer).
11.3 Estrogen BPA Environmental measurement in tissues11.3.1 Homogenize 1 g of tissue, 4 mL of H2O.11.3.2 Acidify the homogenate by adding 8 μL of acetic
acid to each homogenate.11.3.3 Extract with an equal amount of ethyl acetate,
vortex thoroughly, spin down, and collect the organic phase. Repeat this extraction twice more and combine all of the organic phases.

Discover more at www.abcam.com 13
ASSAY PREPARATION
11.3.4 Dry the organic phase with argon or nitrogen gas.11.3.5 Dissolve the dried residue from above step with
ethanol or DMF. (Add approximately 20 μL of ethanol or DMF to reconstitute the dried-up residue.)
11.3.6 Dilute further with 1X Sample Dilution Buffer: Add approximately 500 µL of 1x Sample Dilution Buffer and centrifuge at 10,000 rpm for five minutes at room temperature. The supernatant will be used for ELISA.
11.3.7 Perform the ELISA for Estrogen BPA Environmental (according to the instructions of the manufacturer).
11.4 Estrogen BPA Environmental measurement in plasma or serum
11.4.1 Combine 1.0 mL of plasma (adjusted with acetic acid to pH 4) and 1.0 mL of ethyl acetate. Vortex thoroughly. Centrifuge at 2000 rpm for ten minutes at 22°C. Three phases should result:
11.4.1.1 Upper organic phase – ethyl acetate phase (lipoproteins)
11.4.1.2 Interphase – proteins11.4.1.3 Lower phase – aqueous phase
11.4.2 Collect the upper organic phase (a) and set aside.11.4.3 Discard the interphase. Transfer the lower phase
with a glass pipette to a new tube, and repeat the ethyl acetate extraction step 2 more times.
11.4.4 Evaporation of pooled organic phase: There should be approximately 3 mL of the ethyl acetate phase (a). Dry the pooled organic phase in a Speedvac to get the extracted sediment (b).

Discover more at www.abcam.com 14
ASSAY PREPARATION
11.4.5 Store the sediment (e) at -20°C if performing assay later. For ELISA assay, dissolve the sediment (e) in 20 μL of ethanol or DMF, and then add 130 μL of 1x Sample Dilution Buffer.
11.4.6 For the competitive Estrogen BPA Environmental ELISA, the above 150 μL sample needs to be further diluted: When calculating the concentration, consider any dilution factors.
11.4.7 Perform the ELISA for Estrogen BPA Environmental (according to the instructions of the manufacturer).
12.PLATE PREPARATION The 96 well plate included with this kit are supplied ready to use. It
is not necessary to rinse the plate prior to adding reagents
Unused well strips should be returned to the plate packet and stored at 4°C
For each assay performed, a minimum of 2 wells must be used as a blank, omitting sample and conjugate from well addition. Another 2 wells must be used for a maximum binding control
For statistical reasons, we recommend each standard and sample should be assayed with a minimum of two replicates (duplicates)

Discover more at www.abcam.com 15
ASSAY PROCEDURE
13.ASSAY PROCEDURE Equilibrate all materials and prepared reagents to room
temperature prior to use Please read the test protocol carefully before performing the
assay. Result reliability depends on strict adherence to the test protocol as described
If performing the test on an automatic ELISA system we recommend increasing the washing steps from three to five and the volume of 1X Wash Buffer from 300 µL to 350 µL to avoid washing effects
Assay all standards, controls and samples in duplicate
13.1 Add 200 µL of 1X Sample Dilution Buffer into the blank wells and 100 µL of 1X Sample Dilution Buffer into maximum binding control wells.
13.2 Add 100 µL of each of the standards or samples into the appropriate wells.
13.3 Add 100 µL of the 1X-HRP conjugate in the all wells except the blank control wells.
13.4 Incubate the plate at room temperature for two hours.13.5 Wash the plate three times with 400 µL of 1X Wash Buffer
per well.13.6 After the last of the three wash cycles pat the inverted plate
dry onto some paper towels.13.7 Add 200 µL of the TMB substrate to all of the wells.13.8 Incubate the plate at room temperature for 15-30 minutes.13.9 Add 50 µL of 2 N sulfuric acid to all of the wells.13.10 Read the plate at 450 nm.

Discover more at www.abcam.com 16
DATA ANALYSIS
14.CALCULATIONSIf data redaction software is not available on your plate reader then the results can be obtained manually as follows:14.1 Average the absorbance (Abs) readings from the blank wells
and subtract that value from each well of the plate to obtain the corrected readings. (Note: Some plate readers do this automatically. Consult the user manual of your plate reader.)
14.2 Average the corrected absorbance readings from the maximum binding control wells. This is your maximum binding.
14.3 Calculate the % Abs for Standard 1 by averaging the corrected absorbance of the two wells; divide the average by the Maximum Binding Control well average absorbance, then multiply by 100. Repeat this formula for the remaining standards.
14.4 Plot the % Abs versus the concentration of Estrogen BPA Environmental from the standards using semi-log paper.
14.5 Calculate the % Abs for the samples and determine the concentrations, utilizing the standard curve.
14.6 Multiply the concentrations obtained for each of the samples by their corresponding dilution factor.

Discover more at www.abcam.com 17
DATA ANALYSIS
15.TYPICAL DATATYPICAL STANDARD CURVE – Data provided for demonstration purposes only. A new standard curve must be generated for each assay performed. The data shown here is an example of typical results obtained using the Abcam’s Estrogen BPA Environmental ELISA kit. These results are only a guideline, and should not be used to determine values from your samples.
Blank well mean abs = 0.052Maximum Control Well mean abs = 2.870
Conc. (pg/mL) O.D
%(Abs Blank / Abs Sample)
1 2.834 98.710 2.555 89.0
100 2.077 72.31,000 1.172 40.8
10,000 0.388 13.5100,000 0.209 7.3

Discover more at www.abcam.com 18
DATA ANALYSIS
16.ASSAY SPECIFICITYThe specificity of the Estrogen BPA Environmental ELISA was investigated using authentic Estrogen BPA Environmental and a panel of bisphenols and related chemicals.
Chemicals ReactivityEstrogen BPA Environmental 100.00%
BPF <0.01%BPS <0.01%Resveratrol <0.01%
SENSITIVITY-The calculated minimal detectable (MDD) dose is 3 pg/mL. The MDD was determined by calculating the mean of zero standard replicates.

Discover more at www.abcam.com 19
RESOURCES
17.TROUBLESHOOTING
Problem Cause Solution
Incubation time to short Try overnight incubation at 4 °C
Precipitate can form in wells upon substrate addition when concentration of target is too high
Increase dilution factor of sample
Using incompatiblesample type (e.g. serum vs. cell extract)
Detection may be reducedor absent in untested sample types
Low signal
Sample prepared incorrectly
Ensure proper sample preparation/dilution
Bubbles in wells Ensure no bubbles present prior to reading plate
All wells not washedequally/thoroughly
Check that all ports of plate washer are unobstructed/wash wells as recommended
Incomplete reagent mixing
Ensure all reagents/master mixes are mixed thoroughly
Inconsistent pipetting Use calibrated pipettes & ensure accurate pipetting
Large CV
Inconsistent samplepreparation or storage
Ensure consistent samplepreparation and optimalsample storage conditions(e.g. minimize freeze/thaws cycles)

Discover more at www.abcam.com 20
RESOURCES
Problem Cause Solution
Wells are insufficientlywashed
Wash wells as per protocol recommendations
Contaminated wash buffer Make fresh wash bufferHigh
background
Waiting too long to read plate after adding stop solution
Read plate immediatelyafter adding stop solution
Improper storage ofELISA kit
Store all reagents as recommended. Please note all reagents may not have identical storage requirements.Low
sensitivity Using incompatiblesample type (e.g. Serum vs. cell extract)
Detection may be reducedor absent in untested sample types

Discover more at www.abcam.com 21
RESOURCES
18.NOTES

Discover more at www.abcam.com 22
RESOURCES

RESOURCES 23
UK, EU and ROWEmail: [email protected] | Tel: +44-(0)1223-696000
AustriaEmail: [email protected] | Tel: 019-288-259
FranceEmail: [email protected] | Tel: 01-46-94-62-96 GermanyEmail: [email protected] | Tel: 030-896-779-154 SpainEmail: [email protected] | Tel: 911-146-554 SwitzerlandEmail: [email protected] Tel (Deutsch): 0435-016-424 | Tel (Français): 0615-000-530
US and Latin AmericaEmail: [email protected] | Tel: 888-77-ABCAM (22226)
CanadaEmail: [email protected] | Tel: 877-749-8807
China and Asia Pacific Email: [email protected] | Tel: 108008523689 (中國聯通) JapanEmail: [email protected] | Tel: +81-(0)3-6231-0940
www.abcam.com | www.abcam.cn | www.abcam.co.jp
Copyright © 2013 Abcam, All Rights Reserved. The Abcam logo is a registered trademark.
All information / detail is correct at time of going to print.


![Histoloical and Biochemichal Study on the Toxic Effects of ... · studies[12] hence, it mimics the estrogen role once it enters into living systems. Therefore, BPA belongs to a group](https://img.pdfslide.us/doc/110x75/5ed9247f6714ca7f47693a00/histoloical-and-biochemichal-study-on-the-toxic-effects-of-studies12-hence.jpg)