Embed Size (px)
Citation preview
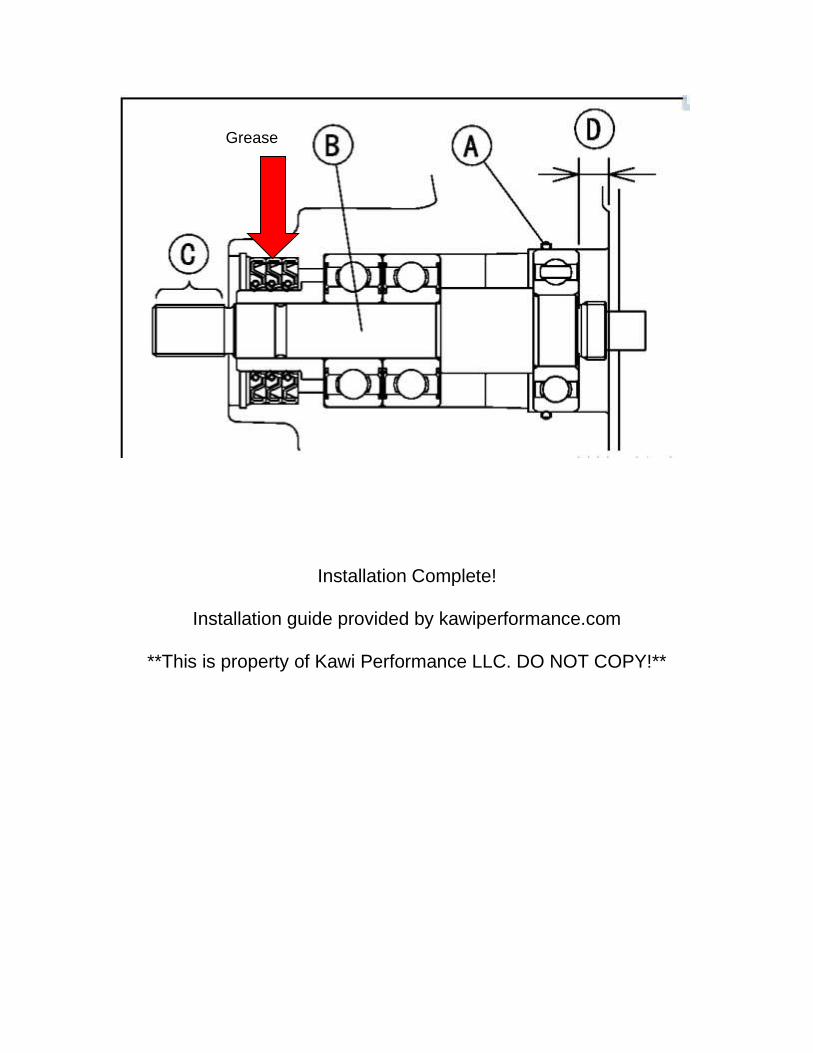
Kawasaki Ultra 250X and 260X Pump Upgrade Instructions
Necessary Tools: 1) Solas Impeller Removal Tool 2) Tabletop Mounted Vice 3) Torque Wrench ft*lbs 4) 24 mm Socket For Shaft Nut 5) Required Socket For Impeller Removal Tool 6) 2 Ton Press 7) Large Screw Driver 8) Breaker Bar 9) Grey RTV Silicone 10) Pump Upgrade Kit 11) Bearing Puller 12) Brake Cleaner Pump Disassembly Procedure:
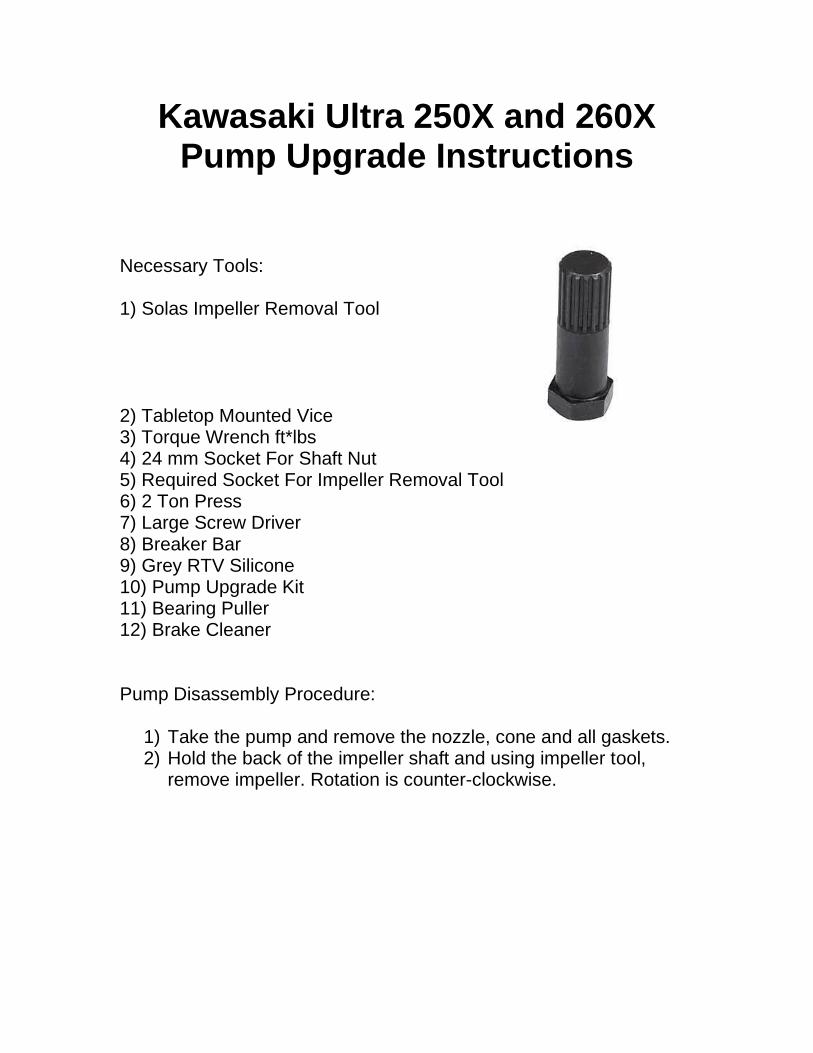
1) Take the pump and remove the nozzle, cone and all gaskets. 2) Hold the back of the impeller shaft and using impeller tool,
remove impeller. Rotation is counter-clockwise.
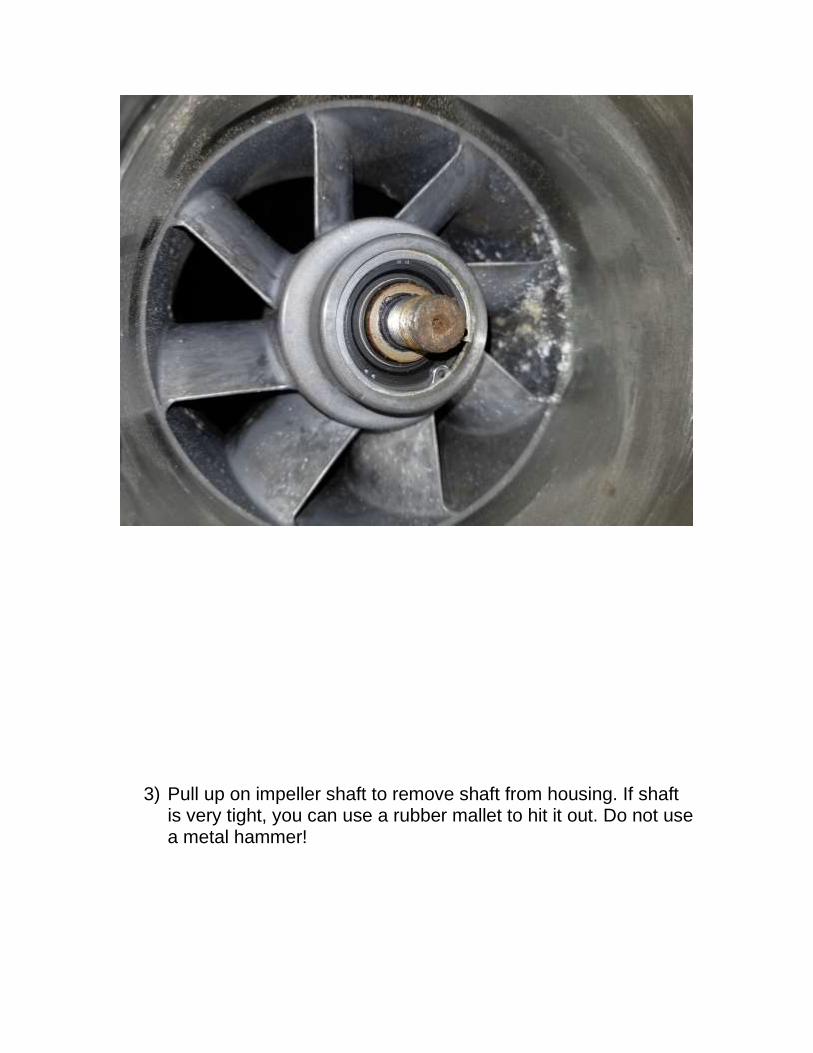
3) Pull up on impeller shaft to remove shaft from housing. If shaft is very tight, you can use a rubber mallet to hit it out. Do not use a metal hammer!
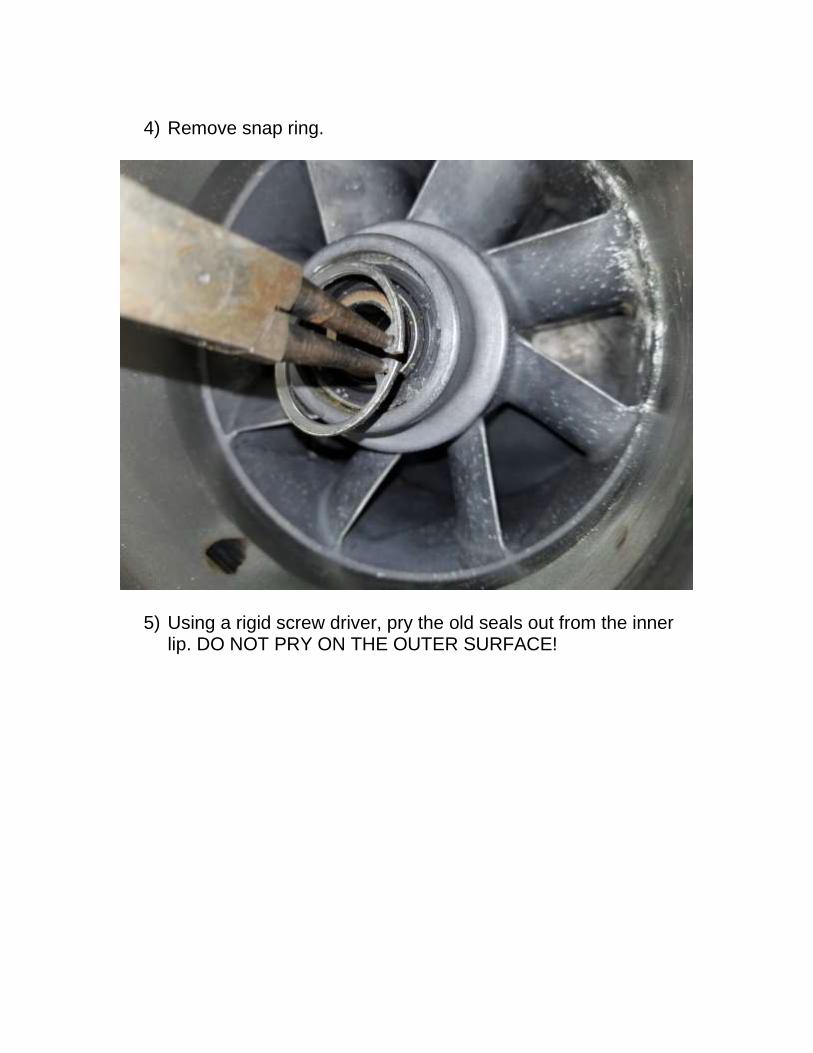
4) Remove snap ring.
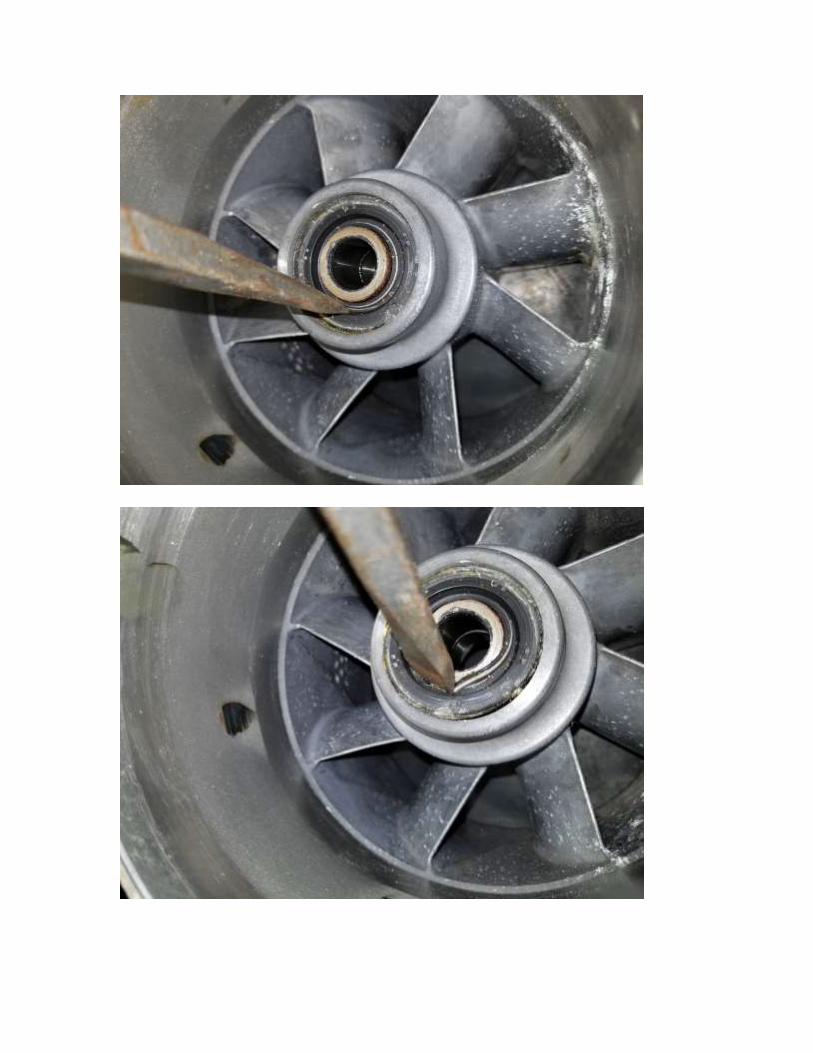
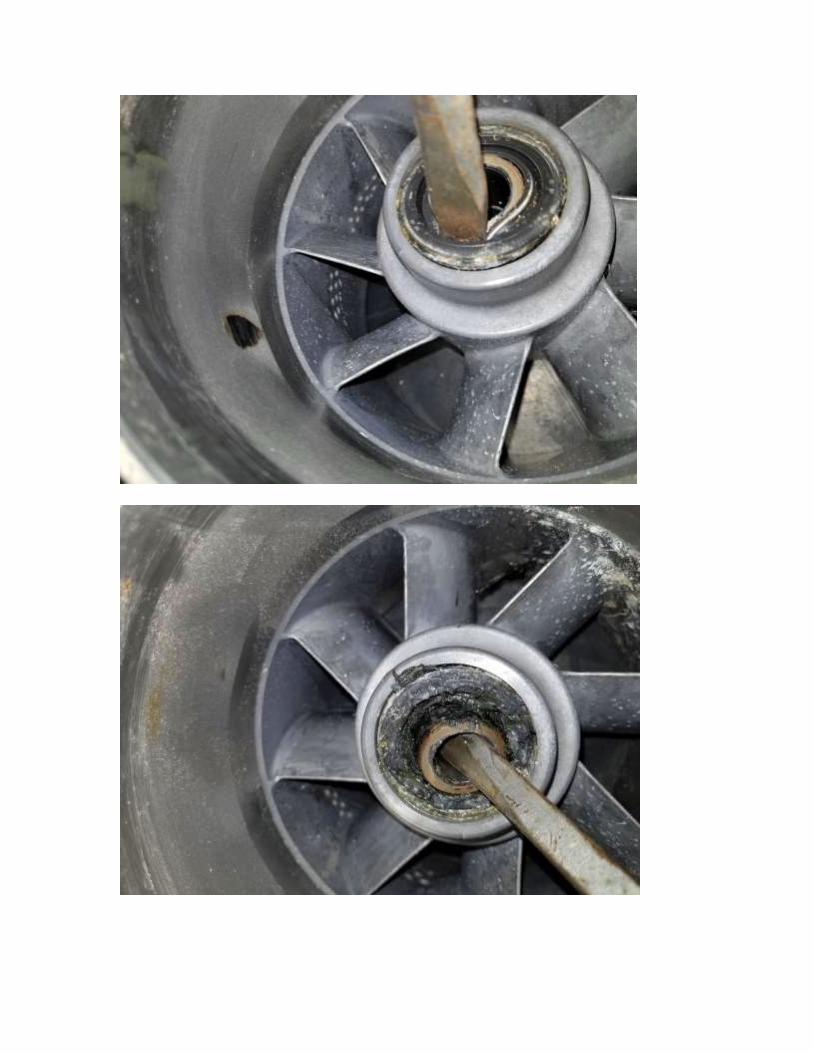
5) Using a rigid screw driver, pry the old seals out from the inner
lip. DO NOT PRY ON THE OUTER SURFACE!
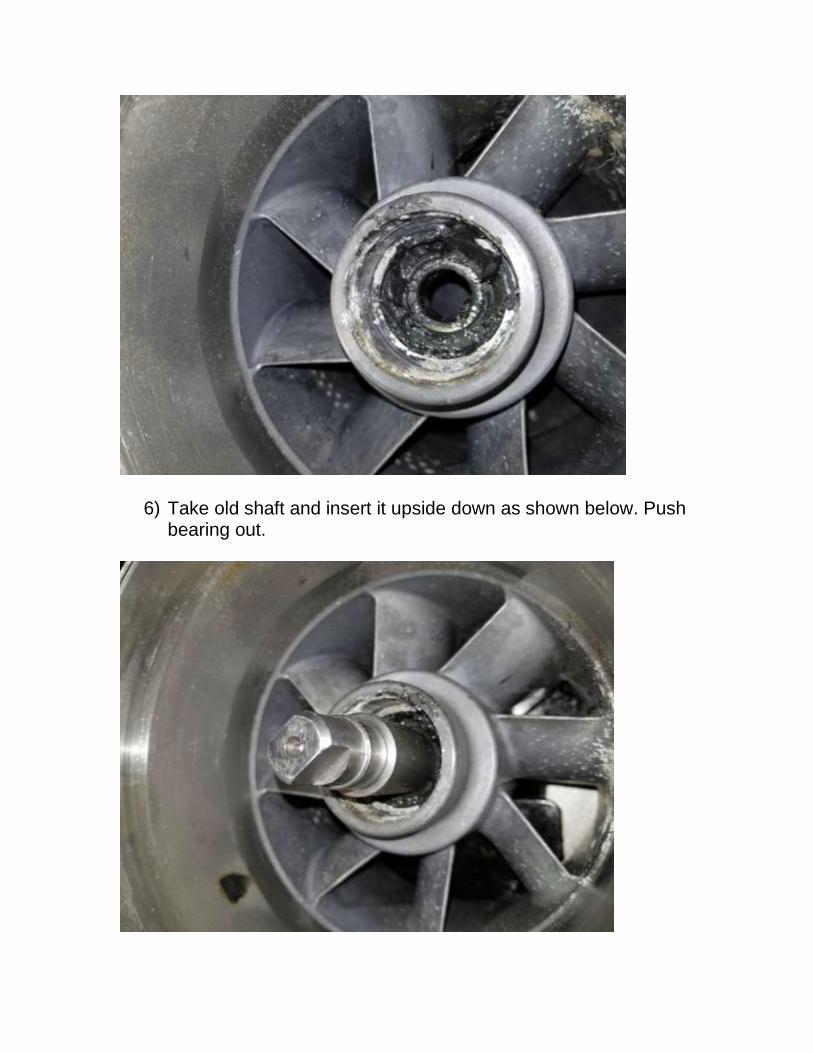
6) Take old shaft and insert it upside down as shown below. Push bearing out.

7) Remove new shaft and rear bearing from upgrade kit. Press the bearing on the back as shown below. Please make sure to only press down on the inner race, pushing on the outer race will damage the bearing.
8) Install small brown o-ring on shaft as shown below.
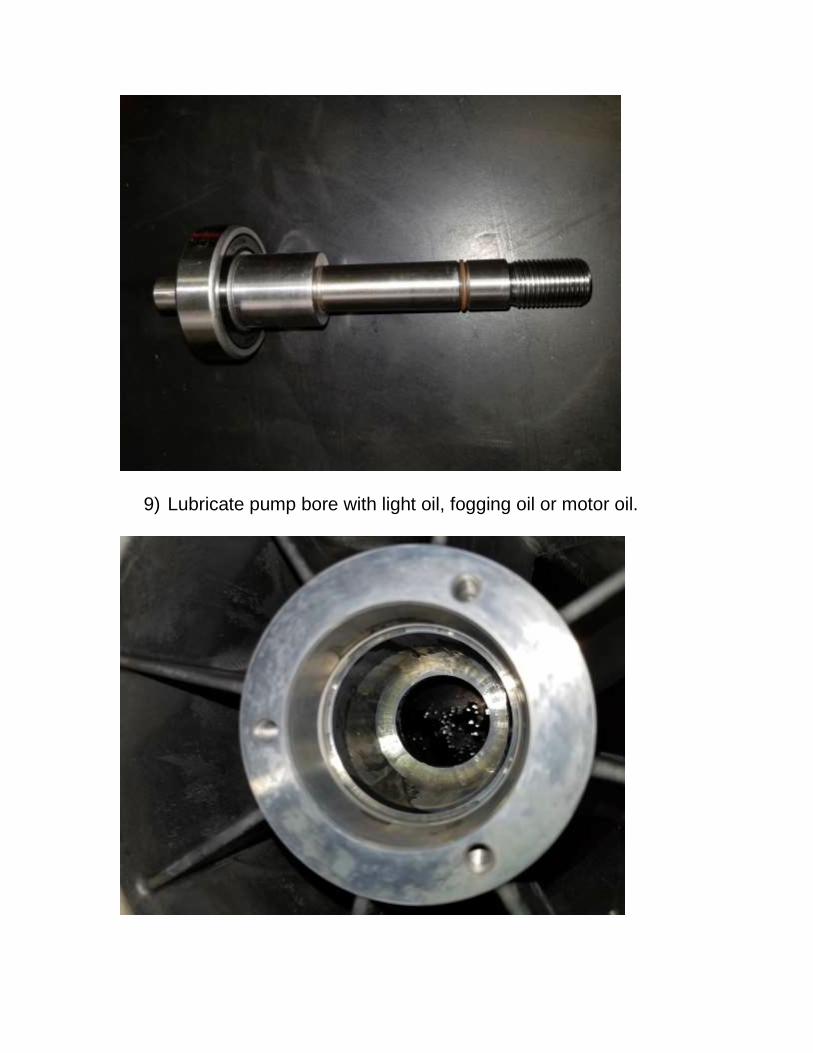
9) Lubricate pump bore with light oil, fogging oil or motor oil.
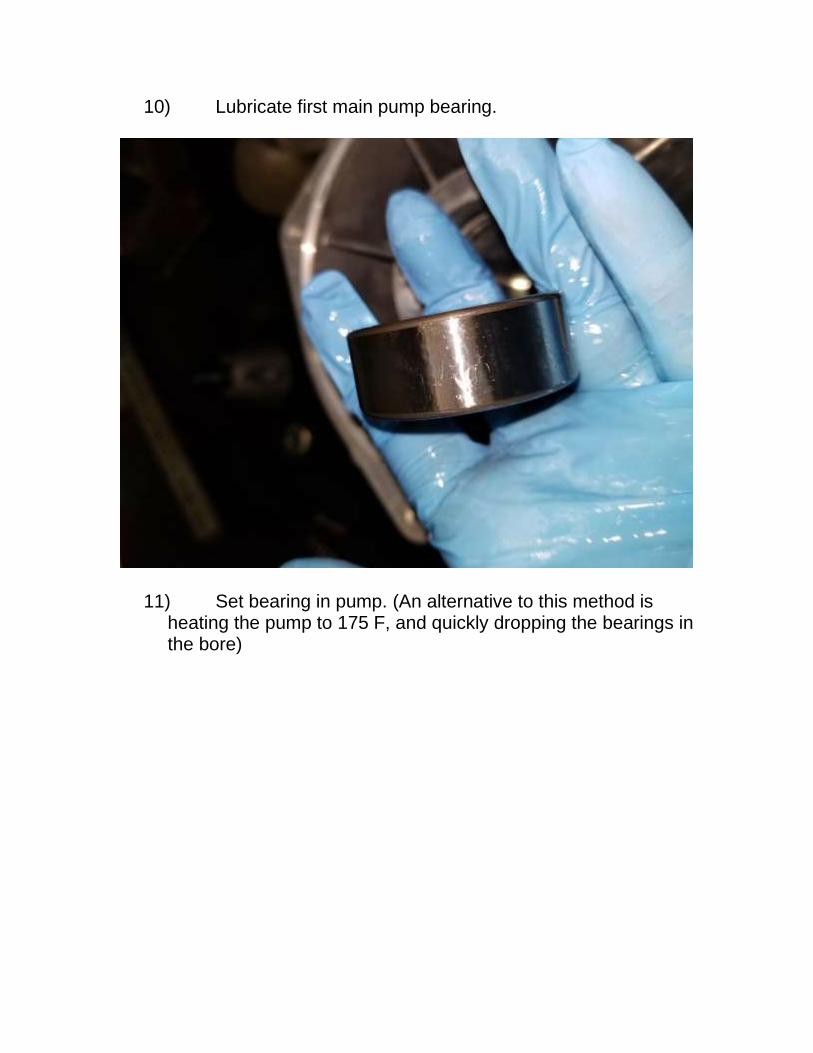
10) Lubricate first main pump bearing.
11) Set bearing in pump. (An alternative to this method is heating the pump to 175 F, and quickly dropping the bearings in the bore)
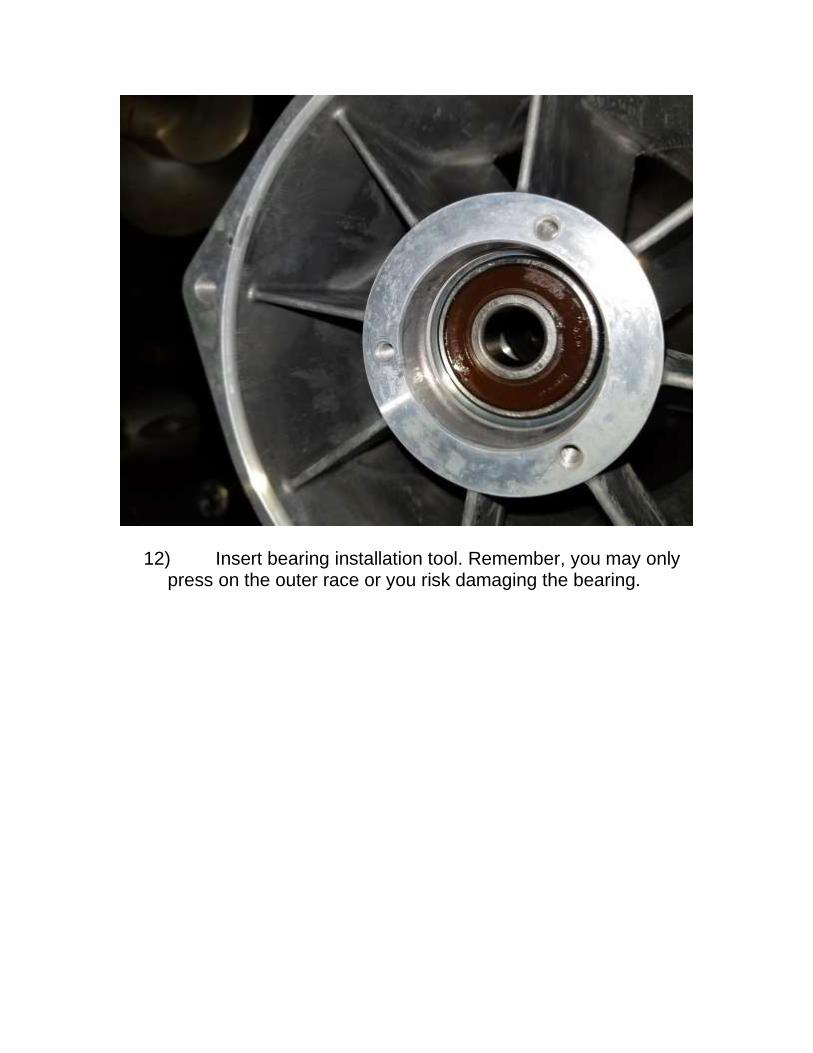
12) Insert bearing installation tool. Remember, you may only press on the outer race or you risk damaging the bearing.
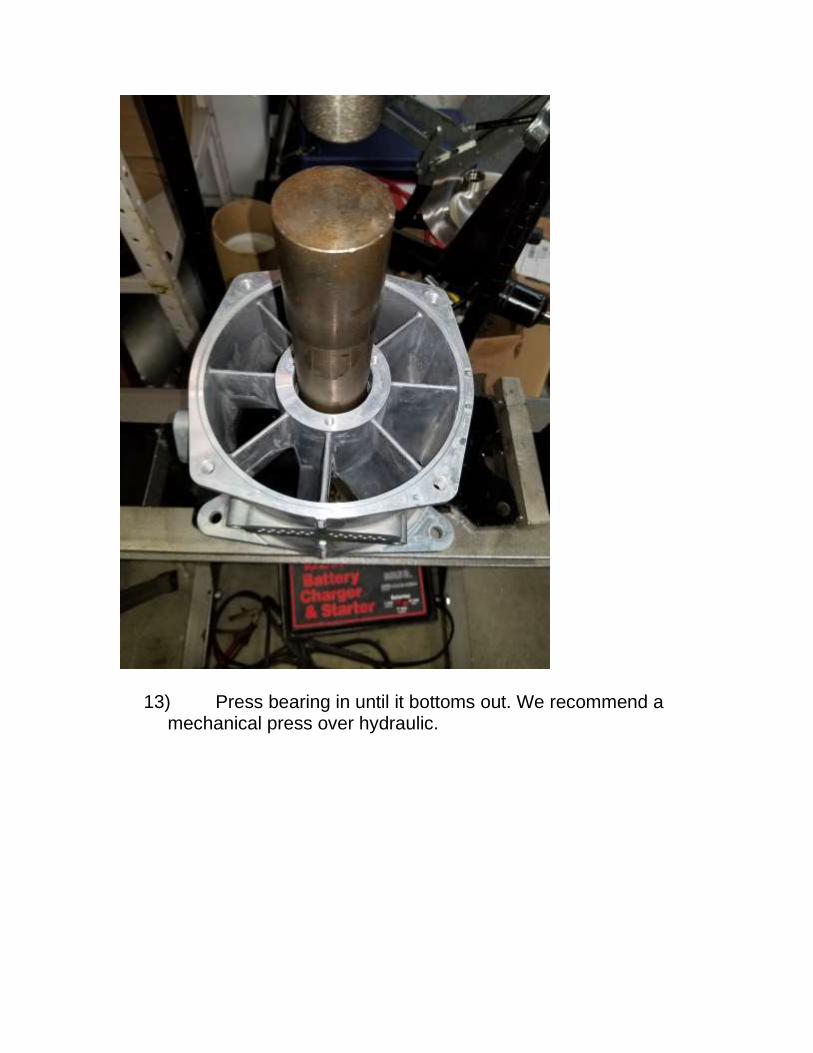
13) Press bearing in until it bottoms out. We recommend a mechanical press over hydraulic.

14) Repeat process and install second bearing.
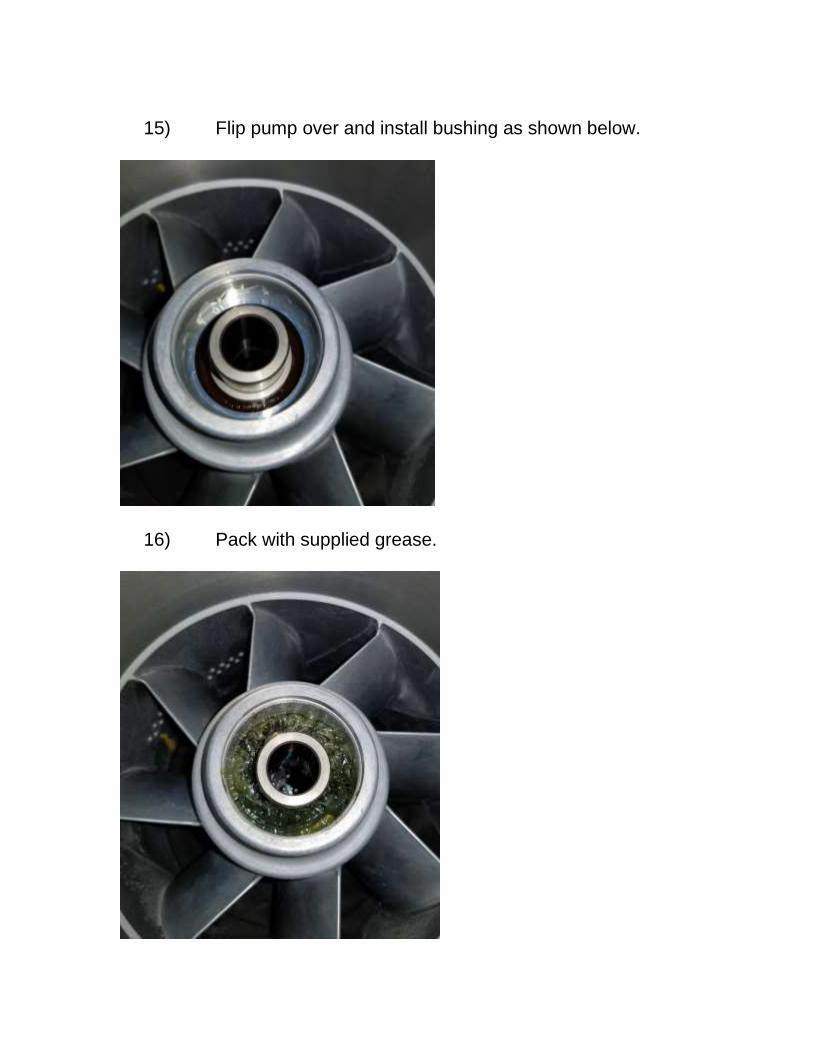
15) Flip pump over and install bushing as shown below.
16) Pack with supplied grease.
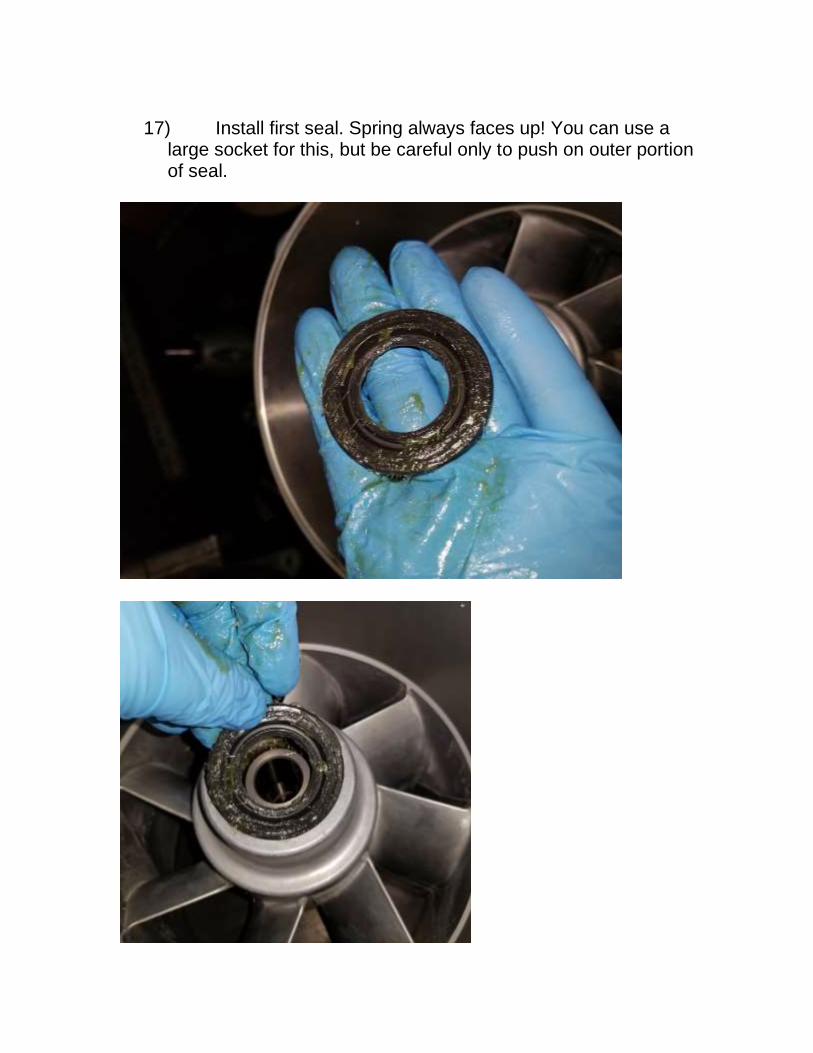
17) Install first seal. Spring always faces up! You can use a
large socket for this, but be careful only to push on outer portion of seal.
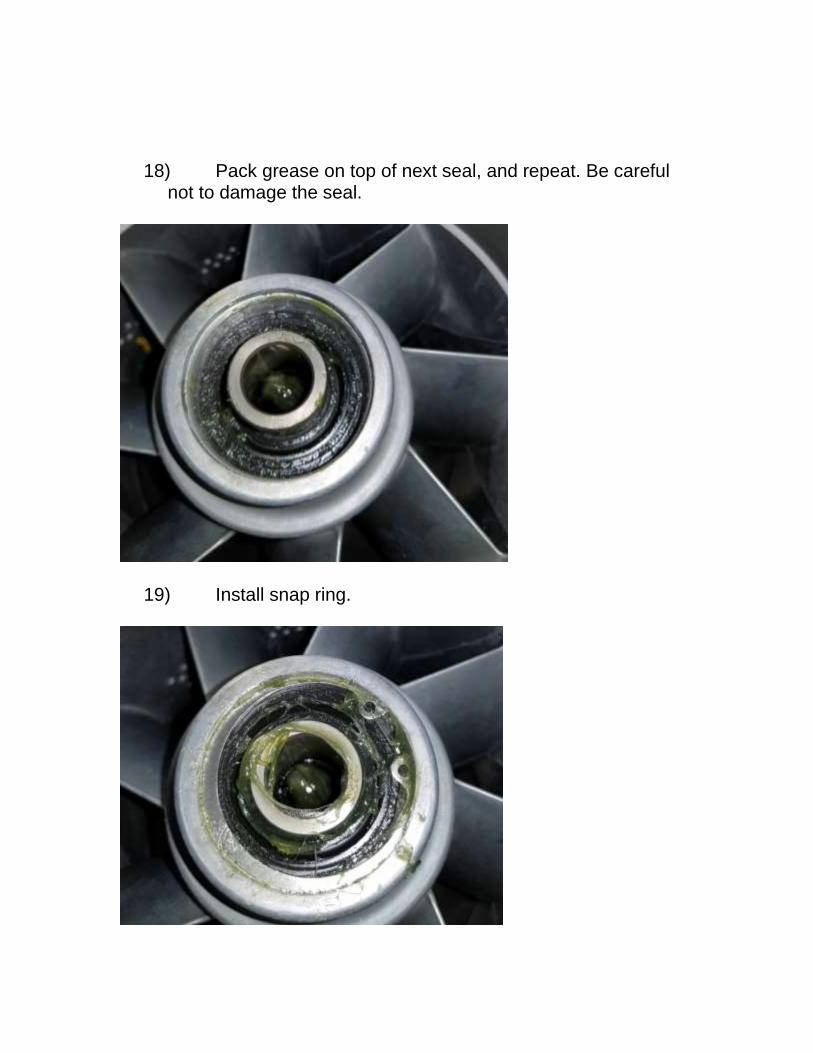
18) Pack grease on top of next seal, and repeat. Be careful not to damage the seal.
19) Install snap ring.

20) Coat impeller o-ring with grease.
21) Flip pump over, install impeller shaft.
22) Hold back of impeller shaft in vice as shown.
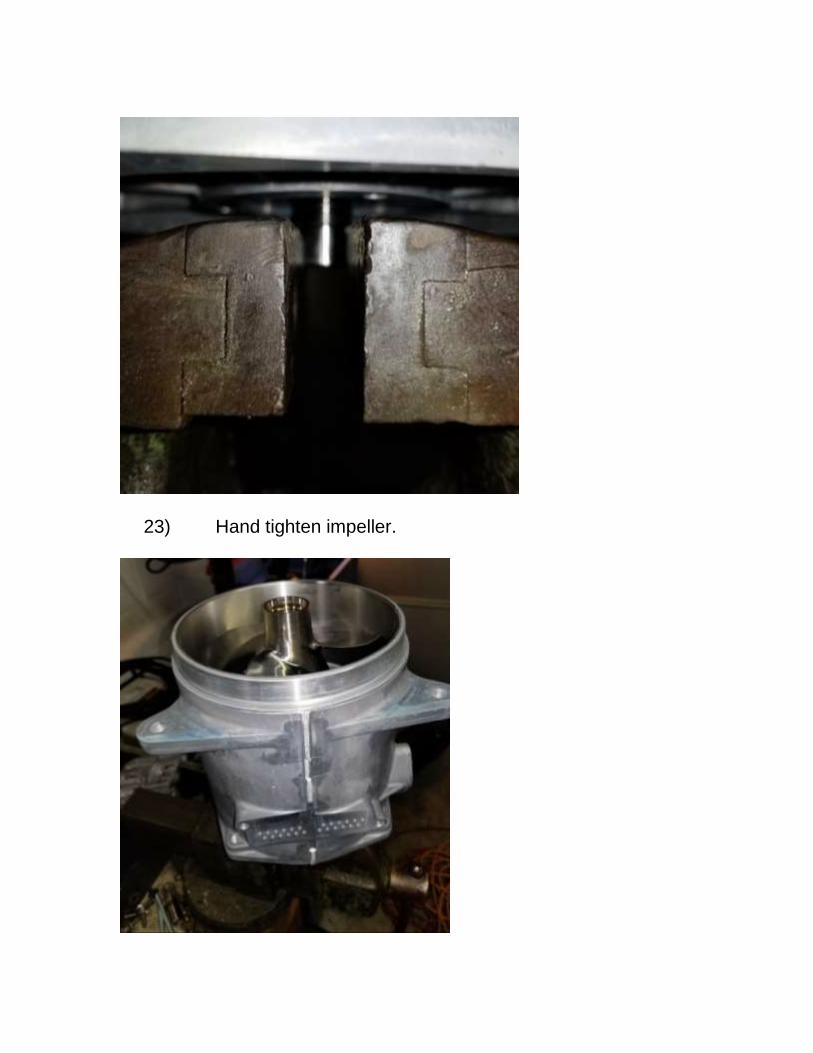
23) Hand tighten impeller.
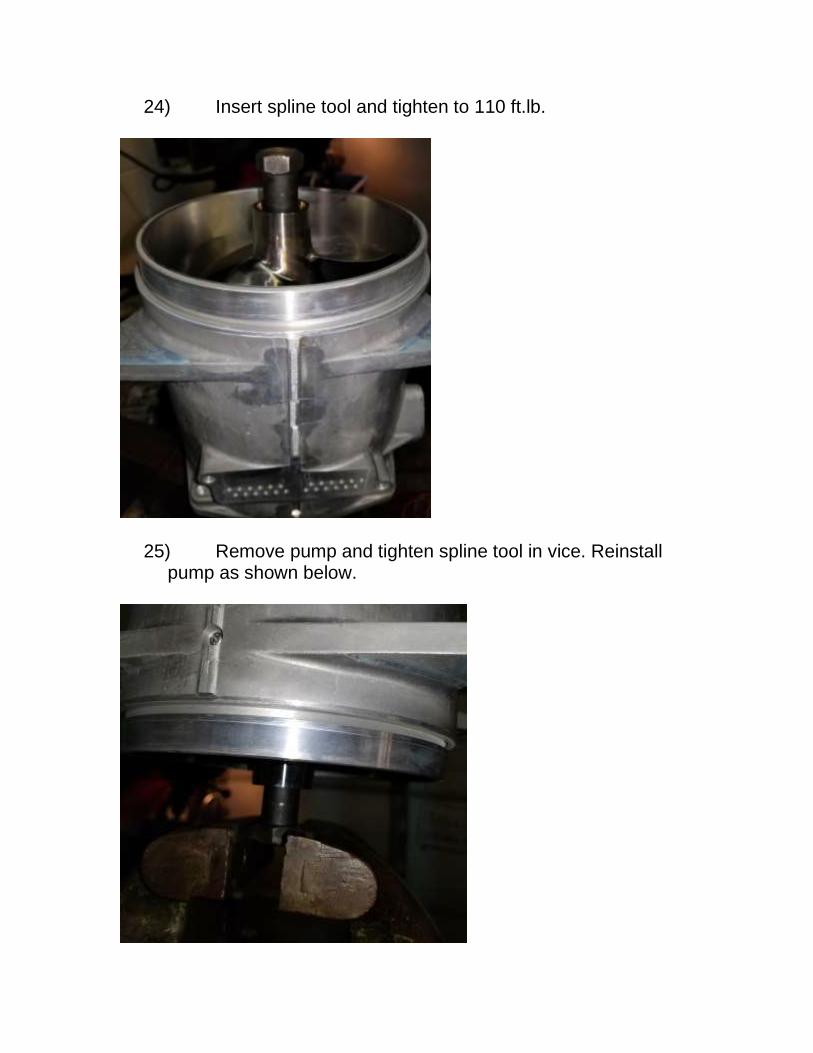
24) Insert spline tool and tighten to 110 ft.lb.
25) Remove pump and tighten spline tool in vice. Reinstall pump as shown below.
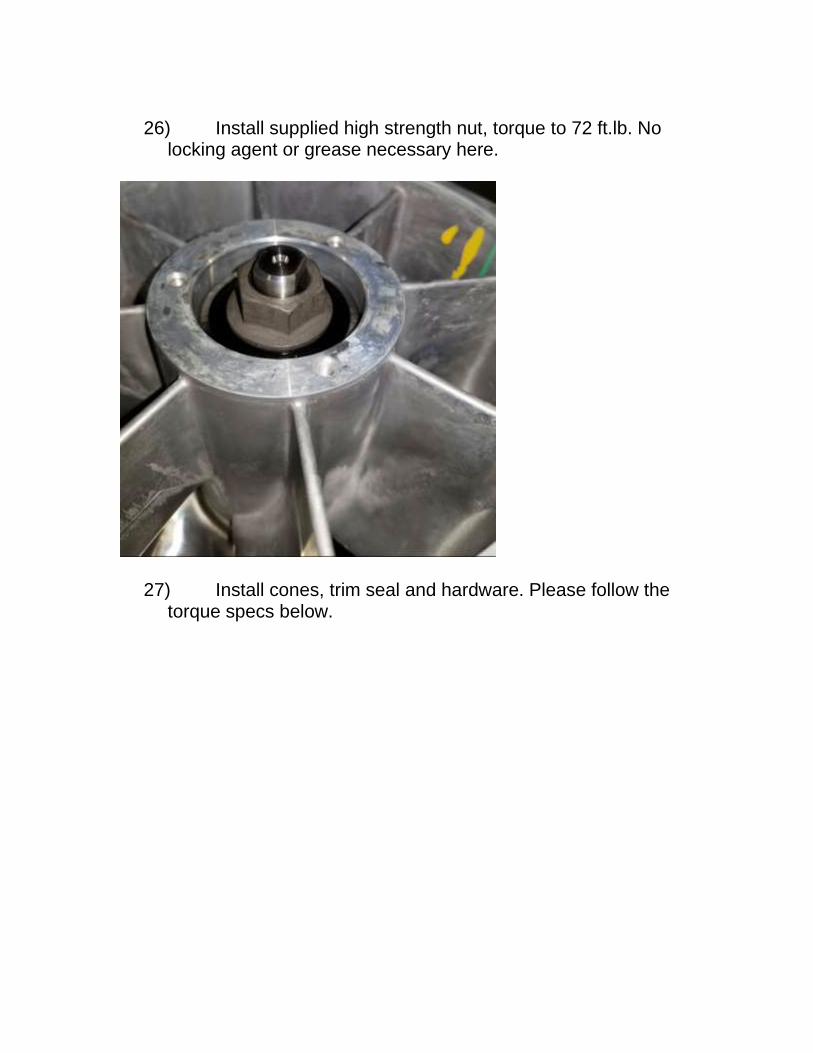
26) Install supplied high strength nut, torque to 72 ft.lb. No
locking agent or grease necessary here.
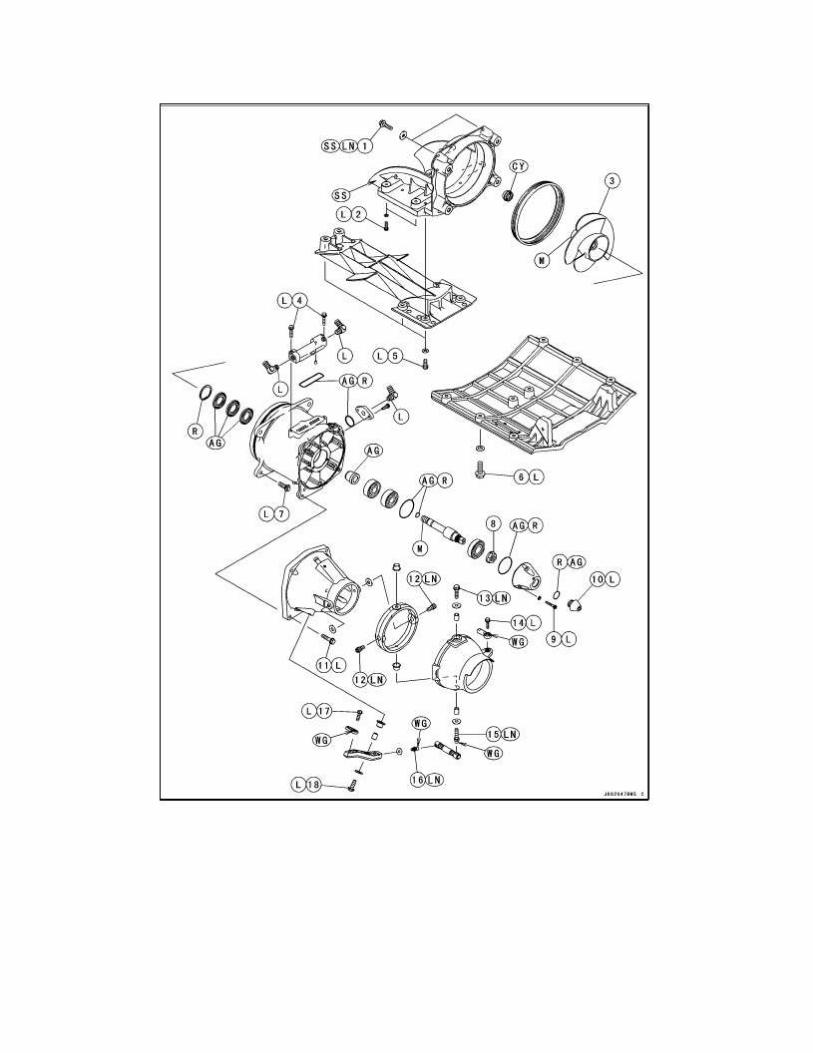
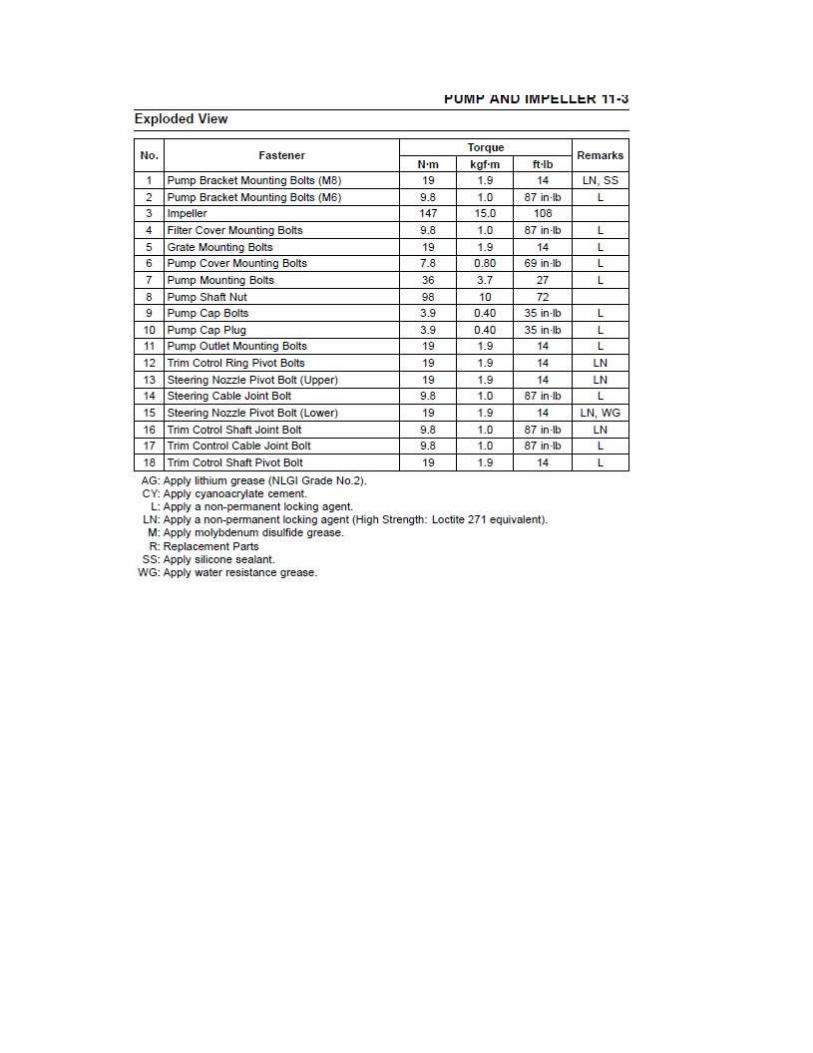
27) Install cones, trim seal and hardware. Please follow the torque specs below.
Installation Complete!
Installation guide provided by kawiperformance.com
**This is property of Kawi Performance LLC. DO NOT COPY!**
Grease


![Kawasaki Robot K series · Kawasaki Robot K series] ... Kawasaki Robotics (USA), Inc. Kawasaki Robot Corporate Headquarters for Americas ... Japan & Asia ] 3 Combination of](https://img.pdfslide.us/doc/110x75/5b52f2687f8b9a056a8df79c/kawasaki-robot-k-series-kawasaki-robot-k-series-kawasaki-robotics-usa.jpg)