Embed Size (px)
Citation preview
Kanguru Cloud Provisioning Guide
Copyright 2016, All Rights Reserved
2
NotiCes aNd iNformatioNPlease be aware of the following points
Copyright © 2016 Kanguru Solutions. All rights reserved. Windows Vista, Windows 7, Windows 8 and Windows 10 are registered trademarks of Microsoft Inc. All other brands or product names are trademarks of their respective companies or organizations.
Kanguru Solutions will not be held responsible for any illegal use of this product nor any losses incurred while using this product. The user is solely responsible for the copyright laws, and is fully responsible for any illegal actions taken.
Customer service
To obtain service or technical support for your system, please contact Kanguru Solutions Technical Support Department at 508-376-4245, or visit www.Kanguru.com for web support.
Legal notice
In no event shall Kanguru Solutions’ liability exceed the price paid for the product from direct, indirect, special, incidental, or consequential software, or its documentation. Kanguru Solutions offers no refunds for its products. Kanguru Solutions makes no warranty or representation, expressed, implied, or statutory, with respect to its products or the contents or use of this documentation and all accompanying software, and specifically disclaims its quality, performance, merchantability, or fitness for any particular purpose. Kanguru Solutions reserves the right to revise or update its products, software, or documentation without obligation to notify any individual or entity.
export Law Compliance
Regardless of any disclosure made to Kanguru Solutions pertaining to the ultimate destination of the specific Kanguru product, you warrant that you will not export, directly or indirectly, any Kanguru product without first obtaining the approval of Kanguru Solutions and the appropriate export license from the Department of Commerce or other agency of the United States Government. Kanguru Solutions has a wide range of products and each product family has different license requirements relative to exports.
Notices and Information
3
Table of Contents
table of Contents
1. introduction ................................................................................................................. 4
2. devices Configured Using Kanguru Cloud Provisioning tool ................................ 5
3. devices Configured Using UKLa .............................................................................. 7
4. devices Configured Using Kanguru defender manager setup Wizard ................ 9
5. tech support ............................................................................................................... 11
4
Introduction
1. introduction
Kanguru Remote Management Console: Cloud Edition (referred to throughout this manual as KRMC Cloud) is a revolutionary product that places a complete USB security policy into your hands giving you the ability to remotely manage your secure Kanguru USB storage devices from anywhere in the world.
KRMC Cloud was designed to work specifically with Kanguru Defender drives by remotely managing your devices through a secure internet connection. You MUST configure and register each of your Kanguru Defender drives in order for them to communicate with your KRMC Cloud account.
The steps to enable KRMC functionality and to register your devices will vary depending on which method you use to configure KRMC Cloud during the initial setup process:
• KRMC Cloud configured using the Kanguru Cloud Provisioning tool (recommended) .....p. 5• KRMC Cloud configured using Kanguru’s Local Administrator tool (UKLA) ...................p. 7• KRMC Cloud configured using the Kanguru Defender Manager Setup Wizard .................p. 9
important! All three methods require network connection to krmc.kanguru.com. The PC being used for drive provisioning MUST have a clear network connection to krmc.kanguru.com. If you are behind a firewall or connect to the internet through a proxy, you may experience connectivity issues which will lead to errors.
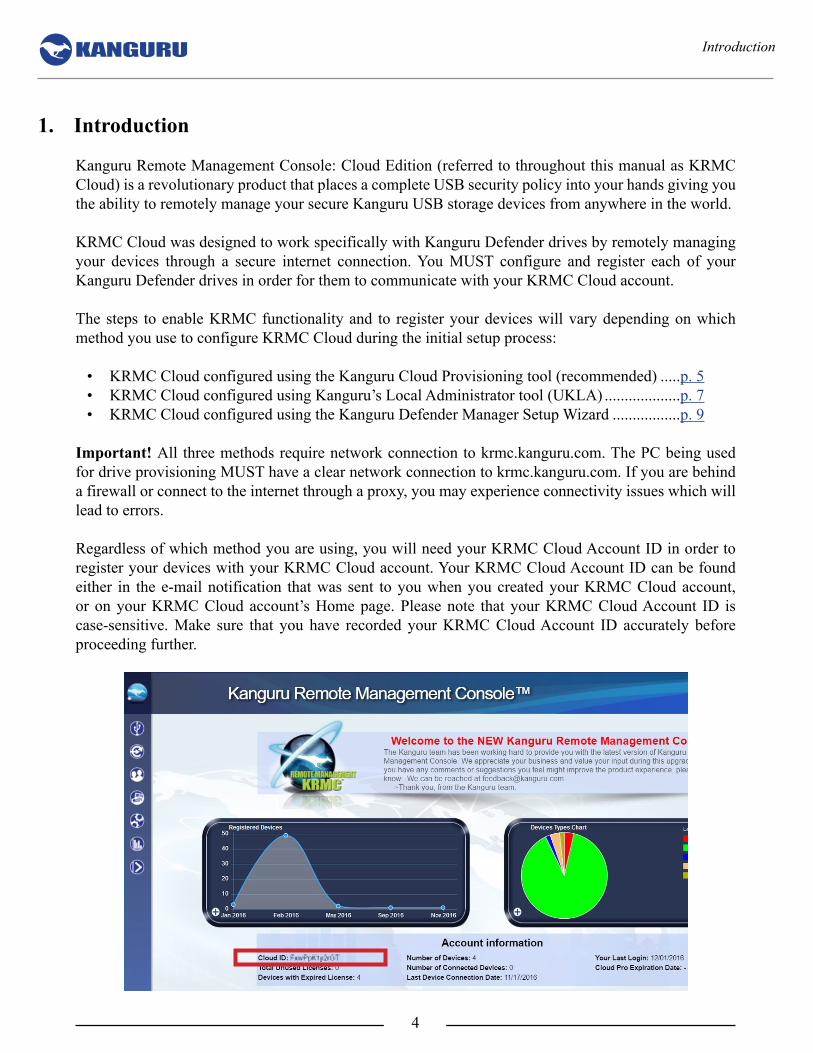
Regardless of which method you are using, you will need your KRMC Cloud Account ID in order to register your devices with your KRMC Cloud account. Your KRMC Cloud Account ID can be found either in the e-mail notification that was sent to you when you created your KRMC Cloud account, or on your KRMC Cloud account’s Home page. Please note that your KRMC Cloud Account ID is case-sensitive. Make sure that you have recorded your KRMC Cloud Account ID accurately before proceeding further.
5
2. devices Configured Using Kanguru Cloud Provisioning tool
This section only applies if you are using the Kanguru Cloud Provisioning Tool to enable KRMC Cloud and/or to disable on-board anti-virus. The Kanguru Cloud Provisioning Tool must be used to configure devices before they are provided to the end user.
Note: If KRMC Cloud was previously disabled on the device through the Kanguru Defender Manager Setup Wizard, you will need to reset the device before using it with the Kanguru Cloud Provisioning Tool.
To enable KRMC Cloud and register your Defender devices with your KRMC Cloud account using the Kanguru Cloud Provisioning Tool:
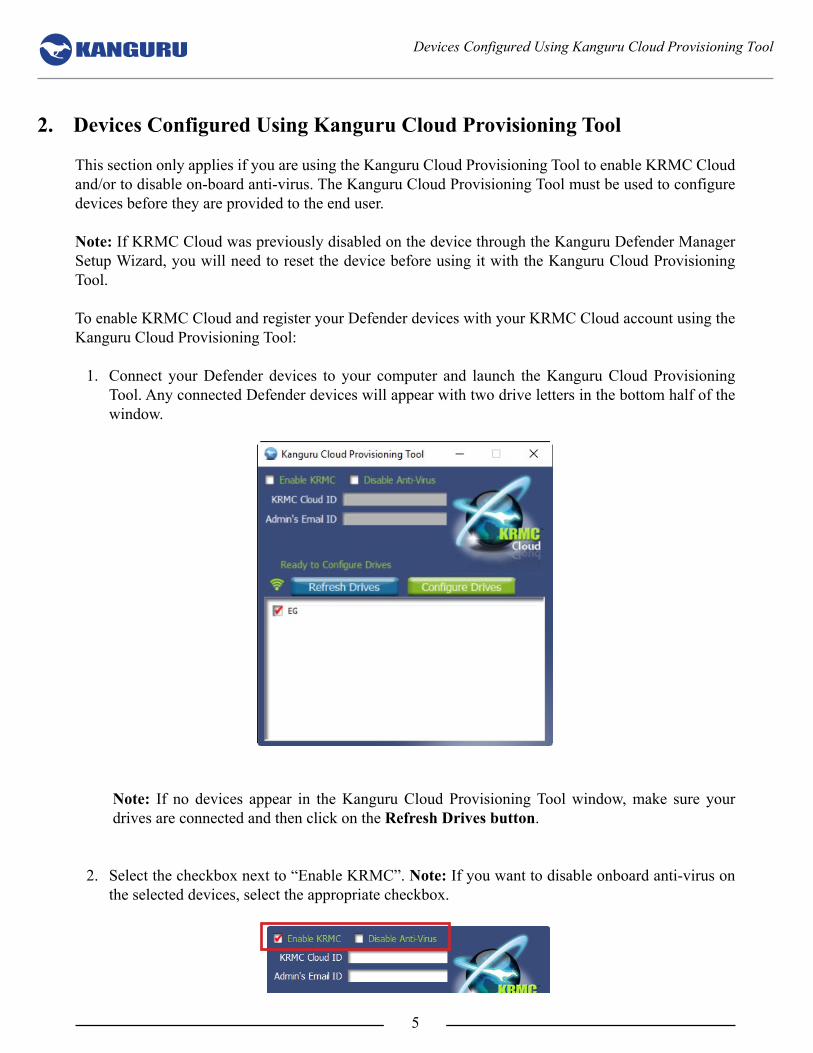
1. Connect your Defender devices to your computer and launch the Kanguru Cloud Provisioning Tool. Any connected Defender devices will appear with two drive letters in the bottom half of the window.
Note: If no devices appear in the Kanguru Cloud Provisioning Tool window, make sure your drives are connected and then click on the refresh drives button.
2. Select the checkbox next to “Enable KRMC”. Note: If you want to disable onboard anti-virus on the selected devices, select the appropriate checkbox.
Devices Configured Using Kanguru Cloud Provisioning Tool
6
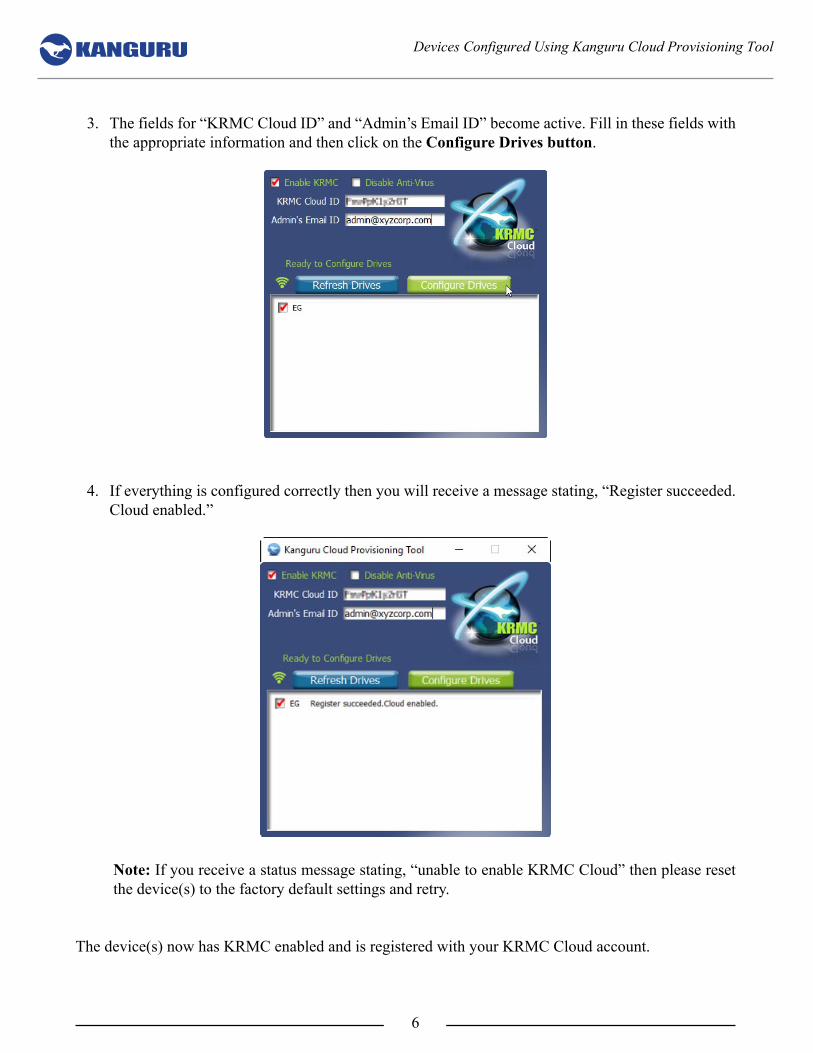
3. The fields for “KRMC Cloud ID” and “Admin’s Email ID” become active. Fill in these fields with the appropriate information and then click on the Configure drives button.
4. If everything is configured correctly then you will receive a message stating, “Register succeeded. Cloud enabled.”
Note: If you receive a status message stating, “unable to enable KRMC Cloud” then please reset the device(s) to the factory default settings and retry.
The device(s) now has KRMC enabled and is registered with your KRMC Cloud account.
Devices Configured Using Kanguru Cloud Provisioning Tool
7
3. devices Configured Using UKLa
This section only applies if your Defender devices are being managed locally with Kanguru’s Local Administrator tool (UKLA) and you want to use KRMC Cloud to manage your device remotely. If your devices are currently in the possession of the end users, they will have to be returned to the UKLA administrator. Contact the device end users and advise them to backup their data and return their devices to the UKLA administrator. For this document, we will assume that you are the UKLA administrator.
Once you have all devices in your possession:
1. Connect your devices to your computer and launch UKLA. Note: All connected Defender devices should be the same model (e.g. Elite300, 2000, 3000). Although UKLA is capable of configuring multiple devices simultaneously, it is unable to configure more than one model type at a time. So for example, it is possible to configure five Defender Elites and then configure five Defender 2000s afterwards, but you cannot configure five Defender Elites and five Defender 2000s at the same time.
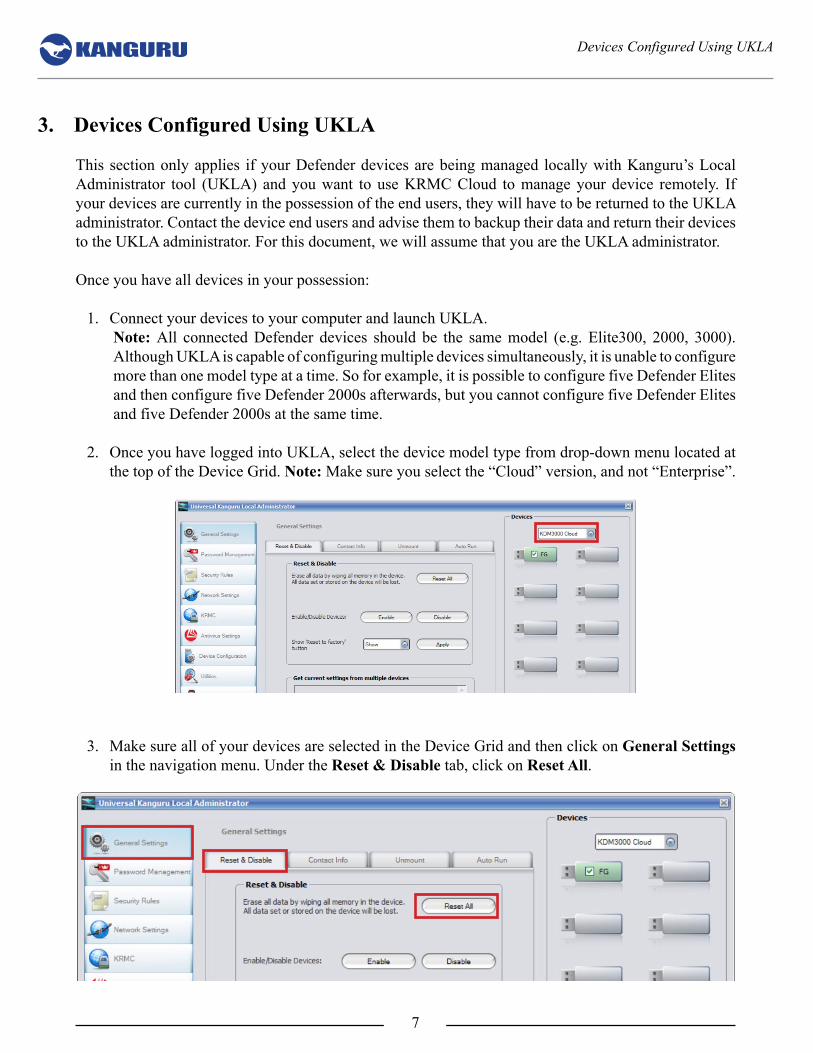
2. Once you have logged into UKLA, select the device model type from drop-down menu located at the top of the Device Grid. Note: Make sure you select the “Cloud” version, and not “Enterprise”.
3. Make sure all of your devices are selected in the Device Grid and then click on General settings in the navigation menu. Under the reset & disable tab, click on reset all.
Devices Configured Using UKLA
8
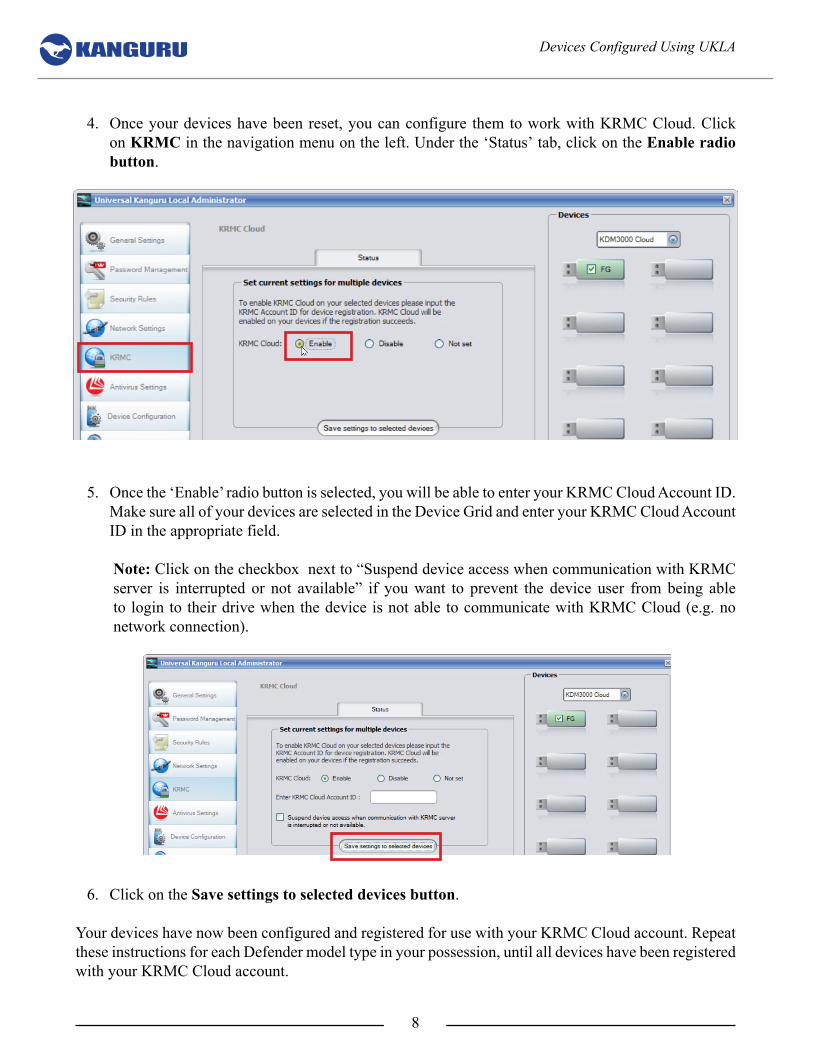
4. Once your devices have been reset, you can configure them to work with KRMC Cloud. Click on KrmC in the navigation menu on the left. Under the ‘Status’ tab, click on the enable radio button.
5. Once the ‘Enable’ radio button is selected, you will be able to enter your KRMC Cloud Account ID. Make sure all of your devices are selected in the Device Grid and enter your KRMC Cloud Account ID in the appropriate field.
Note: Click on the checkbox next to “Suspend device access when communication with KRMC server is interrupted or not available” if you want to prevent the device user from being able to login to their drive when the device is not able to communicate with KRMC Cloud (e.g. no network connection).
6. Click on the save settings to selected devices button.
Your devices have now been configured and registered for use with your KRMC Cloud account. Repeat these instructions for each Defender model type in your possession, until all devices have been registered with your KRMC Cloud account.
Devices Configured Using UKLA
9
4. devices Configured Using Kanguru defender manager setup Wizard
This section only applies if your Defender devices are NOT being managed locally with Kanguru Local Administrator tool (UKLA) or the Kanguru Cloud Provisioning Tool and you want to enable KRMC Cloud functionality for your devices.
If your devices are in your possession then you can follow these instructions to manually configure and register your devices with your KRMC Cloud account. If your devices are in the possession of the end user, send a copy of these instructions to the end user along with your KRMC Cloud Account ID and each end user will be responsible for configuring and registering their own devices.
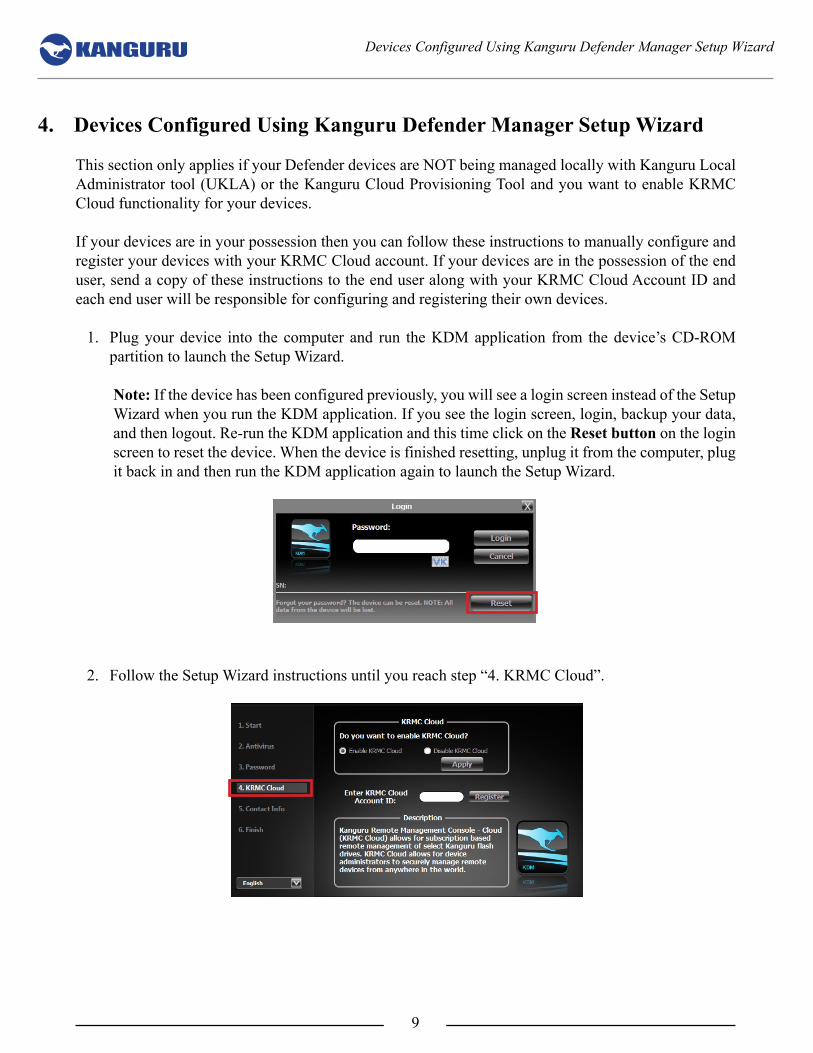
1. Plug your device into the computer and run the KDM application from the device’s CD-ROM partition to launch the Setup Wizard.
Note: If the device has been configured previously, you will see a login screen instead of the Setup Wizard when you run the KDM application. If you see the login screen, login, backup your data, and then logout. Re-run the KDM application and this time click on the reset button on the login screen to reset the device. When the device is finished resetting, unplug it from the computer, plug it back in and then run the KDM application again to launch the Setup Wizard.
2. Follow the Setup Wizard instructions until you reach step “4. KRMC Cloud”.
Devices Configured Using Kanguru Defender Manager Setup Wizard
10
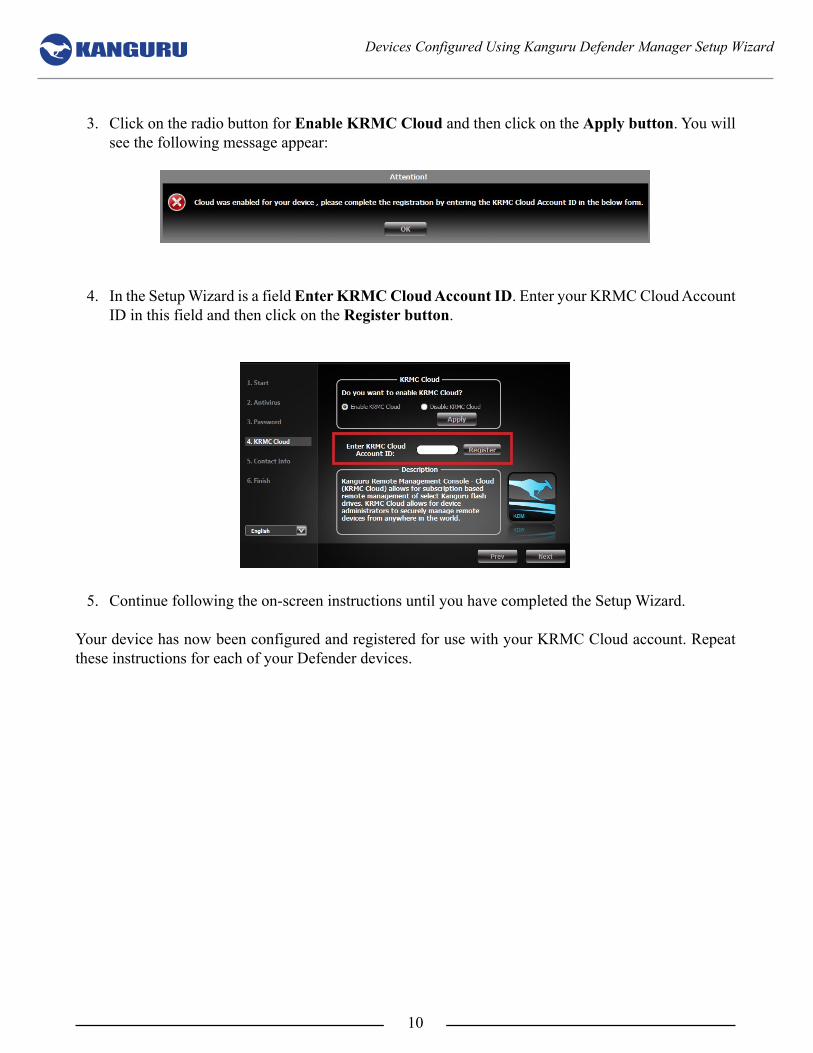
3. Click on the radio button for enable KrmC Cloud and then click on the apply button. You will see the following message appear:
4. In the Setup Wizard is a field enter KrmC Cloud account id. Enter your KRMC Cloud Account ID in this field and then click on the register button.
5. Continue following the on-screen instructions until you have completed the Setup Wizard.
Your device has now been configured and registered for use with your KRMC Cloud account. Repeat these instructions for each of your Defender devices.
Devices Configured Using Kanguru Defender Manager Setup Wizard
11
5. tech support
If you experience any problems configuring your Kanguru Defender flash drive or have any technical questions regarding any of our products, please call our technical support department. Our tech support is free and available Monday thru Friday, 9am to 5pm EST.
Call 1-508-376-4245 orVisit our website at www.Kanguru.com
Tech Support

Legal terms and conditions available at www.kanguru.com. Please review and agree before use. Thank you.
Kanguru Solutions 1360 Main StreetMillis, MA 02054www.kanguru.com12.01.16 v1.1 © 2016 Kanguru Solutions