Embed Size (px)
Citation preview

Java Demonstration Software
for Differential Geometry and Polyhedral Theories
David Eigen
May 2003
Contents
I Introduction 3
II The Demonstration Software and Illustrating Demonstrations 4
1 Java Applet Approach 4
2 Software Features 5
2.1 Automatic Updating . . . . . . . . . . . . . . . . . . . . . . . . . . . . . . . . . . . . 5
2.2 Expression Language . . . . . . . . . . . . . . . . . . . . . . . . . . . . . . . . . . . . 5
2.3 Colorings . . . . . . . . . . . . . . . . . . . . . . . . . . . . . . . . . . . . . . . . . . 5
2.4 Linked Rotation . . . . . . . . . . . . . . . . . . . . . . . . . . . . . . . . . . . . . . 7
2.5 2D and 3D Input . . . . . . . . . . . . . . . . . . . . . . . . . . . . . . . . . . . . . . 7
3 Significant Applications 8
1

3.1 Gauss-Bonnet . . . . . . . . . . . . . . . . . . . . . . . . . . . . . . . . . . . . . . . . 8
3.2 Cusps of Gauss Mappings . . . . . . . . . . . . . . . . . . . . . . . . . . . . . . . . . 10
3.3 Polyhedra . . . . . . . . . . . . . . . . . . . . . . . . . . . . . . . . . . . . . . . . . . 10
III The Expression Language 12
4 Introduction 12
4.1 Notation . . . . . . . . . . . . . . . . . . . . . . . . . . . . . . . . . . . . . . . . . . . 12
5 Building Expressions 13
6 Function Composition 14
7 Derivatives 16
7.1 Introduction . . . . . . . . . . . . . . . . . . . . . . . . . . . . . . . . . . . . . . . . . 16
7.2 The Chain Rule . . . . . . . . . . . . . . . . . . . . . . . . . . . . . . . . . . . . . . . 17
7.2.1 Chain Rule: An Example . . . . . . . . . . . . . . . . . . . . . . . . . . . . . 18
7.3 Function Argument Types . . . . . . . . . . . . . . . . . . . . . . . . . . . . . . . . . 20
2

Part I
Introduction
A goal of this project was to create effective demonstrations for calculus and differential geometry.
We achieved this using Java applets. There are several advantages to this approach, described
in section 1 of Part II. The advantages include the fact that the applets can run anywhere, are
interactive, and are easy for non-programmers to use and create demonstrations with.
In addition to creating demonstrations for differential geometry, we also use and develop the soft-
ware to investigate mathematics problems. In one major application, we used the program to
investigate critical point behavior in polyhedral catastrophe theory. One advantage to developing
and using our own software to do this is that we want to show demos of what we find. This means
that the software needs to be able to handle what we want to show; using it for investigation ensures
that it can. Another advantage is that by using the program, we are able to evaluate it ourselves,
and know what parts need work. It also provides additional real-world testing.
Part II of this paper describes many of the major features of the software, and has links to demon-
strations that use these features. Implementation is sometimes touched on, but it is not the focus.
At the end of Part II, two major applications of the software are discussed: the Gauss-Bonnet
theorem demos, and the polyhedral surface demos. For each, I describe what the demos are for
and how the different parts of the software are used and combined to make them. I also discuss
some of the issues involved in creating them, and how we addressed those issues.
Part III describes some of the more interesting issues in the design and implementation of the
language used to enter mathematical expressions in the Java applet program.
3

Part II
The Demonstration Software and Illustrating
Demonstrations
1 Java Applet Approach
The program is written in Java as an applet/application, and so all demos can be viewed (or
created) in any web browser. An advantage of this approach is that the demos can run anywhere.
Students can run the demo from a lab, library, their own room, or anywhere else. This means that
they can easily view demos related to problems they are working on at any point, and even create
their own demonstrations (in fact, this is not uncommon in MA35 and 106). In addition, demos
can just as easily be presented over the internet, in other projects geared toward people who are
not in the Brown community.
A key aspect of the software is that there is no separate “viewer” applet: the program used to
create and edit demos is the same as the one used to view them. Thus, a person “viewing” an
already-created demo is free to modify or build on anything. This allows anyone to come up with
discoveries that are not presented in a demonstration or lab, and to easily create demos for their
own projects. A critical feature for this approach is that the the program can generate an applet
tag saving its state, which can be copied into any HTML document. Thus, it is very easy for users
to share their modifications or demos with other people.
In addition, users viewing a demo may modify the demo just as much as they feel comfortable
doing; if they are not comfortable using a computer, they can start off only modifying the things
that are presented in a lab or description of a demo. However, if at some point a user becomes
more comfortable using the software and wants to make further changes, he/she does not need to
learn a new “editor” application. In fact, the user can even apply the experience he/she gained
from doing labs and viewing demos to creating their own demonstration.
A challenge to this approach is to make the interface powerful enough to create the demos we
4
want, yet simple enough to allow people with little computer experience to make the interactions
necessary to complete a lab. An example of a concrete feature that works toward this goal is that
controls may be shown and hidden; thus, it is possible to display only the controls that are essential
to operate a demo. To do less basic modifications, a user may choose to show any of the hidden
items.
2 Software Features
2.1 Automatic Updating
When a user makes a change (for example, changing the definition of a function or the value of
a variable), everything that is affected by the modification is automatically updated. Thus, the
user does not need to manually update all the results that he/she wants to see. In addition,
everything that is shown is consistent. This is important because if the user were presented with
results obtained from two different sets of definitions, the results might contradict each other; worse,
the user might even draw a wrong conclusion. Although this feature seems obvious, many other
programs do not seem to have it (e.g., Mathematica worksheets and all the programs and applets
that are riddled with “update” buttons).
2.2 Expression Language
The language used to enter mathematical expressions into the program is very simple, yet powerful.
A description of it along with a description of the implementation of some of its unique features is
in Part III.
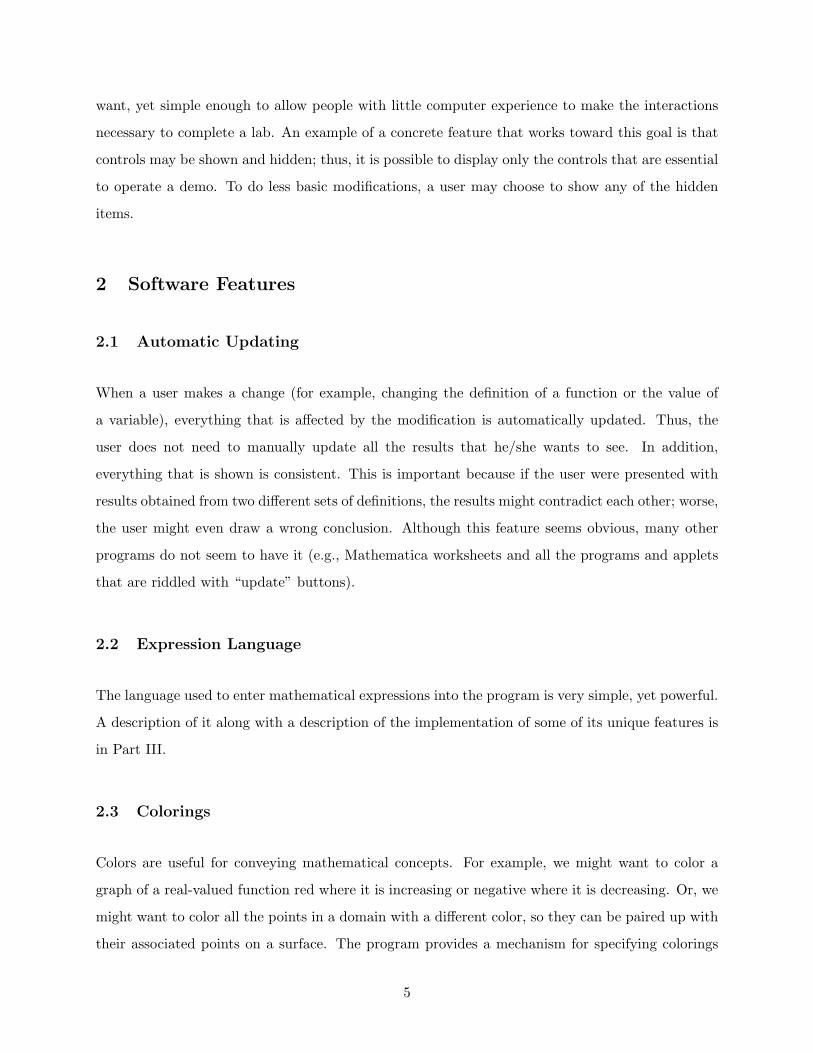
2.3 Colorings
Colors are useful for conveying mathematical concepts. For example, we might want to color a
graph of a real-valued function red where it is increasing or negative where it is decreasing. Or, we
might want to color all the points in a domain with a different color, so they can be paired up with
their associated points on a surface. The program provides a mechanism for specifying colorings
5

like these, as well as many more.
Demonstration 1. Increasing/Decreasing
Demonstration 2. Surface Colored by its Domain
Colorings are implemented simply as objects that evaluate to a color. There are currently five
types: Constant, Expression Spectrum, Gradient, Checkered, and Group. They are presented to
the user in an easy-to-use interface, similar to Photoshop layers.
Constant colorings always evaluate to a user-specified color. One way they are useful is to specify
different colors for different objects in a scene. For example, we might want to show the Frenet-
frame of a curve at a point. We can make each of the vectors T , P , B a different color, so the user
can easily see which is which.
Demonstration 3. Frenet Frame
Expression spectrum automatically assigns a color in the hue spectrum according to what a user-
specified expression evaluates to. This is useful for quickly coloring according to a function. A
common use is to associate points on different curves or surfaces (the fact that there are many
colors helps for this).
Demonstration 4. Parallel Curves and the Evolute
With the gradient coloring, the user specifies an expression, along with a list of (value, color)
pairs. The resulting color is linearly interpolated between the colors associated to the two values
surrounding the value that the expression evaluates to. This coloring can be used to make gradual
changes from one color to another, as well as piecewise-defined colorings.
Demonstration 5. Surface Colored by Height
Demonstration 6. Surface Colored by Sign of Gaussian Curvature
The checkered coloring can be used to easily create a checker, stripe or dashed pattern on a surface
or curve. The user simply specifies the intervals being plotted over, and the checker or stripe
pattern is automatically generated.
6

Demonstration 7. A Checkered Surface
The group coloring type can be used to layer multiple colorings. The user specifies a list of colorings,
each with an associated opacity value. The colorings are then evaluated, and the resulting colors
alpha-blended according to how they are layered. This is useful to put multiple colorings together.
For example, we can color a surface from white to red in the u direction and blue in the v direction;
the areas where u and v are both large would be purple.
Demonstration 8. Surface Colored by u and v
2.4 Linked Rotation
The user can link the rotation between two 3D displays. Although simple, this feature is surprisingly
absent in many programs, even though it is essential for displaying the normal map of a surface.
Without linked rotation, the normal map is not intuitive to view, since the normal vectors do not
point in the same direction as they do in the window with the surface. However, if the displays
for the surface and Gauss map are linked together, the person using the demonstration can easily
make the connections between the two.
Note that we do not want to link translations or scaling between a surface and its Gauss map, since
the Gauss map is on the unit sphere and the surface can be anywhere in R3. However, in other
situations the user may want to link all these transformations (for example, if one window shows a
surface and another shows a set of slices). Thus, the user can choose whether to link just rotations,
or all transformations.
Demonstration 9. Normal Map of a Surface
Demonstration 10. Slices of a Surface by the Coordinate Planes
2.5 2D and 3D Input
“Hotspots” can be placed in both 2D and 3D graphs. The user of a demonstration can click and
drag around the hotspots in order to specify points or regions. Furthermore, the user may specify
constraints for a hotspot. A hotspot can be constrained with two methods: In one method, the
7

user specifies an expression dependent on the hotspots pre-constraint position. When the hotspot
is moved, its pre-constraint position is plugged into the expression, and its final position is set to
the result. In the other method, the user can specify a plot to constrain the hotspot to; in this
case, the hotspot is constrained to stay on the plot.
The following demos illustrate some uses of this. In the first two demos, 2D input is used to specify
a patch in the domain of a function; this patch can then be displayed on the surface and in the
Gauss map. In the third demo, a normal plane of the surface can be chosen by a point and a
tangent vector in the domain. In addition, there is another plane specified by an angle alpha; this
plane is a rotation of the normal plane about the tangent vector. This demo illustrates how the
osculating circle to the intersection of this plane with the surface sweeps out a sphere.
Demonstration 11. Circular Patch
Demonstration 12. Square Patch
Demonstration 13. Osculating Circle in the Normal Plane
3 Significant Applications
3.1 Gauss-Bonnet
One of the most significant set of demos we created illustrates the Gauss-Bonnet theorem.
The first two demos begin with a parallel curve of a user-defined non-closed curve in the plane. The
curve itself is in yellow, and the two parallel offsets of the curve are magenta. At the endpoints, the
parallel curve is filled in with green hemispheres. This creates a closed curve, from which we derive
two related surfaces: the tube (“hot dog”) surface, and the surface of revolution (“bowl”). In each
case, the surface and a perturbed slice of its gauss map are displayed. Note that because of the
rotational symmetry, a 2D slice of the gauss map tells the whole story. This is good because a 2D
slice is less cluttered, easier to work with, and more comprehendible than a 3D representation of
the entire gauss map. In each demo, the surface is colored according to its gaussian curvature, and
the parallel curve and gauss map are colored correspondingly. Light green and magenta are used
for positive curvature, while dark green and purple are used for negative curvature (in general, the
8

lighter version of the color means positive curvature). This allows the user to easily see where the
positive and negative contributions are in the gauss map. In addition, the user can also see how
the curvature of the curve corresponds to the curvature of the surface. In the case of the tube,
the gaussian curvature of the surface corresponds to the geodesic curvature of the plane curve.
For the surface of revolution, it corresponds to a combination of the concavity of the curve as a
local function graph, whether the curve is increasing or decreasing, and which side of the y-axis
it is on. Note that we color according to the sign of the curvature, and not by the curvature
itself. This provides a sharp distinction between positive and negative regions, which is easy to see.
Furthermore, it provides the user with just the right amount of information: enough to understand
the behavior, but not so much that it is incomprehensible.
Demonstration 14. Surface of Revolution around a Plane Curve (“bowl”)
Demonstration 15. Tube around a Plane Curve (“hot dog”)
These two demos also provide a nice segue from curves to surfaces. Our two demos for surfaces are
called the “Moldy Potato Chip”, and the “Moldy Frito”. In each demo, a region in a 2D domain
is sent up to a surface in 3-space. A circular patch is used for the moldy potato chip (creating
a potato chip-like shape), while a square patch is used for the frito. A parallel surface is created
from this region by pushing it out along the surface’s normal vector; half-tubes are created around
the edges. In the case of the moldy frito, we also fill in the four angles with parts of spheres. The
coloring used for this surface parallels the previous demos: magenta is used for the offsets of the
patch, and green is used for the tube around the edge. The corner spheres for the frito, which did
not come up for curves, are orange. In addition, the parallel surface is light or dark according to
its gaussian curvature, and the gauss map is colored correspondingly.
Demonstration 16. Moldy Potato Chip
Demonstration 17. Moldy Frito
Unlike the curve demos, there is no really good way to display the gauss map. Currently, the
gauss map is displayed as-is; this results in feathering where it intersects itself. With this display,
it is possible to see where the normals for each of the differently colored parts of the surface are.
However, it is hard to tell where one color double-covers a region. Thus, although the user may
see some positive contributions and some negative contributions in a region, they would probably
9

not be able to tell how many there are of each. This is essential to the theorem, as all parts of the
sphere should have a net covering of +1. Being able to show or hide the normal images different
parts of the surface helps, but it’s not quite good enough. We are currently working on ways to
interact with the gauss map in order to see how positive and negative contributions cancel.
One possible approach is in the following moldy potato chip demo; here, the gauss map is perturbed,
and the user can select a slicing plane of the gauss map. The slice is shown in another window.
Demonstration 18. Moldy Potato Chip with Gauss Map Slice
3.2 Cusps of Gauss Mappings
These demos simply display a surface and its gauss map. Each demo shows a family of surfaces;
the particular member of the family may be changed using variables for the control space. One of
the problems we applied the software to was trying to find polyhedra with the same behavior as
the smooth surfaces (this is described more in the next section).
Demonstration 19. Menn’s Surface
Demonstration 20. Handkerchief Surface
Demonstration 21. The Smooth Elliptic Umbilic
3.3 Polyhedra
We also applied the software to the problem of finding coarsely triangulated analogs to families of
smooth surfaces. Our goal was to find a family of polyhedra with the same critical point behavior
as the smooth surfaces. We worked mostly with the elliptic umbilic. The following demo shows our
triangulation with 3-fold symmetry.
Demonstration 22. Triangulation of the Elliptic Umbilic
Next, we show some of the critical point behavior by calculating the critical index of the four
internal vertices. The critical index of a vertex is 1 − 12(# line segments in the level set of the
vertex with the vertex as an endpoint); it is 1 for a minimum/maximum, 0 for an ordinary point, -1
10

for a saddle and -2 for a monkey saddle. The vertices are color-coded as blue, white, yellow or red,
corresponding to a min/max, ordinary point, saddle and monkey saddle, respectively. In addition,
in order to easily see how the faces go up and down around a vertex, the level sets of the four
internal vertices is also shown, colored according to the color of the vertex. Finally, if two vertices
are at the same height h, then the edge between them is critical if the two faces adjacent to the
edge are on the same side of the z = h plane; if this is the case, the entire edge is a local minimum
or maximum. Critical edges (to within some tolerance) are colored magenta. One of the things
to note is that in cases where there are no critical edges, the sum of the indices of the vertices is
always -2, since globally the whole shape is a monkey saddle. This exactly parallels the case of the
smooth surface, where the exact same thing is true.
Demonstration 23. Level Sets and Critical Indices of the Elliptic Umbilic
An advantage of working with the polyhedral case is that this sort of critical point behavior is
not difficult to compute in real-time, and can be handled even in a Java applet. By contrast, the
smooth case requires manipulating nonlinear equations to find the critical points.
The next demo shows the projected normal image of the faces adjacent to each of the four internal
vertices. The normal image of each link of faces is a polygon on the sphere, where each vertex of
the polygon is a normal of a face. The polygon is formed by going through the faces in counter-
clockwise order. These four sphere polygons are radially projected to the z = 1 plane, to form
planar polygons. Because the original polyhedron is a function graph, there are no horizontal
normal vectors, and so this projection is well-defined. To make things easier to see, a cone from
the origin can be displayed for any of these curves. For each vertex, the winding number of the
normal image of its adjacent faces is equal to its critical index. Note we can get a negative winding
number from a normal image that goes around the z-axis clockwise; this corresponds to a saddle.
Demonstration 24. Winding of Normal Curves of the Elliptic Umbilic
11

Part III
The Expression Language
4 Introduction
This part of the paper describes some of the more interesting issues in designing the language used to
enter mathematical expressions in the Java applet program. My key aim in designing this language
is to allow users to enter mathematical expressions as simply as possible, while still allowing a
powerful programming language. The following examples illustrate the power and simplicity of the
language by showing a mathematical formula, followed by how one would write it in the expression
language:
Mathematics Expression Language
c(t) = (t, t2, t3) c(t) = (t,t^2,t^3)
T (X) = X ′/ ‖X ′‖ T(X) = X’ / length(X’)
f(u, v) = (u, v, u2 − v2) f(u,v) = (u,v,u^2 - v^2)
N(X) = unit(X1 ×X2) N(X) = unit(cross(X__1, X__2))
n(u, v) = N(f)(u, v) n(u,v) = N(f)(u,v)
Rot(θ) =
cos θ − sin θ
sin θ cos θ
Rot(t) = [cos t, -sin t ; sin t, cos t]
The language features real, vector, matrix and function types; first-class functions; the ability to
take derivatives analytically; and the ability to combine functions as one would write in mathemat-
ics, without the need for a wrapper lambda-form.
4.1 Notation
Throughout this discussion of the expression language, I will use the following notation. Text in
typewriter type should be considered expressions, such as those the user might enter. R denotes
the type for real numbers. A parenthesized list (t1, . . . , tn) denotes the vector type with component
types t1,. . . ,tn. A list in square brackets, [t11, . . . , tnm] denotes the matrix type with n rows and
12

m columns, with component types t11,. . . ,tnm. An arrow indicates a function type: t1, . . . , tn → τ
denotes the function type whose argument types are t1,. . . ,tn and whose return type is τ . Finally,
e : t means that the expression e has type t.
5 Building Expressions
Plaintext expressions are turned into executable objects as shown below. An executable object is
a Java object that can be told to execute itself and return the resulting value.
tokenize parse build
plaintext =⇒ token tree =⇒ syntax tree =⇒ executable tree
The tokenize phase tokenizes the input, and reads it so that a tree is created according to how the
token stream is parenthesized. Each node of the tree corresponds to a set of matching parentheses;
the children of the node are created from the tokens within the parentheses. For example, the text
(x, sin(2*x)) would be tokenized into the tree
( )
�������
���
@@@
PPPPPPP
x , sin ( )
�� HH
2 * x
The parse phase parses a token tree into an abstract syntax tree. This is done in two steps: First,
a built-in preprocessor transforms the token tree. Second is the actual parsing step, which creates
an abstract syntax tree from the preprocessed token stream. The preprocessor is primarily used to
group together some token strings with more parentheses (such as the first-class function construct,
func(<vars>)<expr>, which is transformed to (func(<vars>)<expr>)). This makes the parsing
step easier, since token strings that should be treated as a group are in fact in their own node of
the token tree.
The build phase compiles the syntax tree into an executable object tree. This allows type checking,
derivative taking and function composition to be performed only once, before runtime. Right now,
13

there is no static type-checking phase before the build phase. This actually proves to be a major
problem for taking the derivatives of functions. In fact there is still an unresolved bug due to this,
which I discuss in section 7.3.
There is overloading for built-in operators. For example, + can be used for scalar, vector or matrix
addition. Since the types that an operator is applied to are known at build-time, the build phase
type-checks the expression, and outputs the executable appropriate for the types. Thus, there are
different executor objects for + in, for example, R + R and (R,R) + (R,R). Because of this, minimal
(if any) type-checking needs to happen during runtime.
6 Function Composition
One of the key features unique to this language is that functions may be composed together without
creating a wrapper lambda-form. For example, if f and g are both functions of type R,R→R, then
the user may write f + g to mean the function of type R,R→R, where (f+g)(u, v) = f(u, v) +
g(u, v). There are two methods that I thought of for combining functions; I will call them function
composition (a term taken from categorial grammar, a linguistic theory), and function building.
The method currently implemented is function building. However, it is quite possible that some
variation of function composition is actually better, for reasons I will discuss later.
Function composition relies on having a static unification type-checker before the build phase. It
uses the type judgment
f : t1, . . . , tn → τ gi : α1, . . . , αk → ti or gi : ti ∀i = 1, . . . , n
f(g1, . . . , gn) : α1, . . . , αk → τ
Here, f and the gi are expressions of function type; of course, the application of f may have
a different syntax than the one shown (such as the infix syntax of +). During the build phase,
when a function application or operator syntax node is encountered that matches this type pat-
tern, the resulting output is the function λ(x1, . . . , xk).f(h1(x1, . . . , xk), . . . , hn(x1, . . . , xk)), where
hi(x1, . . . , xk) =
gi(x1, . . . , xk) if gi is a function
gi if gi is not a function.
Although apparently simple, this approach has a major drawback. The type judgement, together
14

with the standard function application type judgement, produces an ambiguity. Consider h(f, g) =
f(g). Then from the type judgments for application, h can have type (α → β), α → β, or (α →
β), (γ → α) → (γ → β).
Given only this example, it might be the case these ambiguities are only temporary. That is, it
might be that the ambiguity of a function type will always go away once the function is applied
enough. The following example, though, shows that the problem is much worse. Let f = λx.λy.x+3
and g = λx.x, and consider f(g)(1)(2). The function f can be typed in two ways: either f takes
g directly, or f takes R and is composed with g. That is, f : (R → R) → α → (R → R) or
f : R → α → R. The evaluations corresponding to each case are the following.
First Case: f : (R → R) → α → (R → R)
f(g) ⇒ λy.g + 3
f(g)(1) ⇒ g + 3 ⇒ λx.x + 3
f(g)(1)(2) ⇒ 2 + 3 ⇒ 5
Second Case: f : R → α → R
f(g) ⇒ λx.λy.x + 3
f(g)(1) ⇒ λy.1 + 3
f(g)(1)(2) ⇒ 1 + 3 ⇒ 4
Thus, there are two possible evaluations for f(g)(1)(2): the expression can evaluate to either
2 + 3 = 5 or 1 + 3 = 4.
Function building is a more bottom-up approach. While building, functions are composed only
when we reach a built-in operator, such as +. For example, let f , g and h be arbitrary user-defined
functions, and consider building the expression f(g, h). First, (g, h) would be applied to f , and so
we build the body of f . If we reach a built-in operator ⊗ that is applied to g and h and does not
take function types, then we combine the functions: If g and h have the same number of arguments,
then the result of g ⊗ h is the function λ(x1, . . . , xn).g(x1, . . . , xn) ⊗ h(x1, . . . , xn). The argument
and return types of this application of g and h are type-checked when the resulting function is
applied. This process of combining functions propagates upward through the body of f , with a
function combination potentially happening at each operator in f ’s body. Note that the only type
15

information we used was the number of arguments that g and h take. Thus, function building does
not require a static type-checking phase before the build phase.
Note that there is no ambiguity in this method. In fact, in the ambiguous example from before, we
necessarily get that f(x) = λy.g + 3, and so f(x)(1)(2) = 2 + 3 = 5.
An unsatisfying property of function building is that it does not readily allow functions to be opaque,
since the result of function building depends on the internal definition of f. A nicer solution might
try to compose functions as early in the application process as possible. It’s not clear how this
would work, though, and it is even possible it may confuse the user (since composition could happen
at different times for different cases).
An advantage of function building is that it is not necessary to have a static type checker. Since the
language has parametric polymorphism, a unification type checker would be necessary, and operator
overloading would make it hard to implement. Furthermore, from the discussion above, it is not
at all clear how to put function composition into such a type checker. This is the largest reason I
decided to go with function building. However, as I discuss in section 7.3, there is a big problem
with taking derivatives that is related to this decision, and there is a (very rarely encountered) bug
still in the program due to this.
7 Derivatives
7.1 Introduction
Derivatives of a function are taken during the build phase. This allows complete executable objects
to be built, eliminating any cost of derivatives at runtime. Derivatives are performed as a macro-
transformation on the syntax of the body of the function. For example, say f(x, y) = x^2 + y, and
consider the expression f_x(3,5). When f_x is built, the body of f is transformed by derivative
and simplifying transformations:
16

+
�� HH
Λ
x 2
y
derivative=⇒ +
��� HHH
*
���HHH
*
�� HH
2 Λ
�� HH
x -
2 1
1
0
simplify=⇒ *
2 x
The body of f_x is set to the final tree above.
7.2 The Chain Rule
It is possible that functions have argument types that are not just real numbers (e.g., the vector type
(R,R)). Furthermore, even if we do not allow the user to take derivatives with respect to arguments
of non-scalar type, this case still comes up. For example, consider the two function expressions
g(x,y) = f(x,y) and f(A) = (-A_2, A_1). Here, g is a function of two real numbers, while f is a
function of a 2D vector. If we want to take the derivative of g with respect to x, would use the chain
rule and take the derivative of f. Thus, the derivative program must be able to handle derivatives
of functions with respect to non-real variables, using a definition for this that is consistent with the
chain rule.
The chain rule used by the derivative program makes use of the ability to have vectors as the
component types of vectors. The chain rule is formulated as follows:
dx(f(a1, . . . , an)) = (~∇f(a1, . . . , an), (dxf)(a1, . . . , an)) · ((dxa1, . . . , dxan), 1) (1)
17

Here, the dot product is recursively defined:
u · v =
uv u : R or v : R∑n
i=1 ui · vi u : (t1, . . . , tn) and v : (τ1, . . . , τn)∑ni=1
∑mj=1 uij · vij u : [t11 . . . tnm] and v : [τ11 . . . τnm]
(2)
The gradient ~∇f is defined as usual: if f is a function of n variables, ~∇f = (d1f, . . . , dnf). However,
any of the argument types of f might not be R. The following procedure extends the notion of
derivative to non-real types in order to make the chain rule work.
Let t1, . . . , tn be the argument types of f . For each argument i, ti is a tree whose internal nodes are
vector and matrix types, and whose leaf nodes are R (for now, ignore function types as arguments; I
will discuss them later). Call these leaf nodes l1, . . . , lk, and denote by 〈e1, . . . , ek〉i the construction
(of either expressions or types) obtained from plugging each ej into the place lj . For example, if
ti = ((R, R), R), then 〈1, 2, 3〉i = ((1, 2), 3). Define dif as
dif = 〈dl1f, . . . , dlkf〉i
where dljf is the expression obtained by differentiating f with respect to the argument i using the
macro transformations, and using dii = 〈0, . . . , 0, 1, 0, . . . , 0〉i, where the 1 is in the jth place.
7.2.1 Chain Rule: An Example
This definition coincides with the normal definition of the chain rule. As an example, take f :
R2 → R3 and g : R → R2, and consider differentiation with respect to the (real-valued) argument
of g. Say f is a function of u = (u1, u2), f(u), and g is a function of x, g(x). Using the ordinary
definition of the chain rule, we know that
dx(f(g)) =
∂f1/∂u1 ∂f1/∂u2
∂f2/∂u1 ∂f2/∂u2
∂f3/∂u1 ∂f3/∂u2
∂g1/∂x
∂g2/∂x
(3)
We can view these matrices as vectors of vectors; this gives us
dx(f(g)) =
∂f1/∂u1
∂f2/∂u1
∂f3/∂u1
∂f1/∂u2
∂f2/∂u2
∂f3/∂u2
·
∂g1/∂x
∂g2/∂x
(4)
18

where the “dot product” used is the one defined in (2) (note that the distinction between a “row
vector” and a “column vector” is not used due to this definition).
The result of the dot product in (4) is the same as the matrix multiplication in (3):
∂f1/∂u1
∂f2/∂u1
∂f3/∂u1
∂f1/∂u2
∂f2/∂u2
∂f3/∂u2
·
∂g1/∂x
∂g2/∂x
=
∂f1/∂u1
∂f2/∂u1
∂f3/∂u1
· ∂g1
∂x+
∂f1/∂u2
∂f2/∂u2
∂f3/∂u2
· ∂g2
∂x
=
∂f1
∂u1
∂g1
∂x + ∂f1
∂u2
∂g2
∂x
∂f2
∂u1
∂g1
∂x + ∂f2
∂u2
∂g2
∂x
∂f3
∂u1
∂g1
∂x + ∂f3
∂u2
∂g2
∂x
Furthermore, equation (4) is precisely what the chain rule (1) gives us: Since f ’s argument u is of
type (R, R), the procedure in section 7.2 gives us
duf = 〈dl1f, dl2f〉u
=
(∂f
∂u
∣∣∣∣duu=(1,0)
,∂f
∂u
∣∣∣∣duu=(0,1)
)
=(
∂f
∂u1,
∂f
∂u2
)=
(∂
∂u1(f1, f2, f3),
∂
∂u2(f1, f2, f3)
)Similarly, since g’s argument is of type R, using the same procedure we get
dxg =∂g
∂x
∣∣∣∣dxx=1
=∂
∂x(g1, g2)
Plugging these into (1), we get
dx(f(g)) = (duf(g), (0, 0, 0)) · (dxg, 1)
= duf(g) · dxg + (0, 0, 0) · 1
=(
∂
∂u1(f1, f2, f3),
∂
∂u2(f1, f2, f3)
)· ∂
∂x(g1, g2) + (0, 0, 0)
=
∂f1/∂u1
∂f2/∂u1
∂f3/∂u1
∂f1/∂u2
∂f2/∂u2
∂f3/∂u2
·
∂g1/∂x
∂g2/∂x
Thus, (4) is exactly what we get from applying the chain rule (1).
19

7.3 Function Argument Types
Functions can be arguments to functions. Taking the derivative with respect to a function does not
make sense, and thus the user should not be allowed to do this. However, this case may still come
up in the chain rule. Suppose F : R, (R → R) → R, f : R → R, and g : R → R, g(x) = F (x, f).
Then the user may take the derivative g′.
This can be handled simply leaving out the derivatives for function arguments in the chain rule.
We can define the chain rule as
dx(f(a1, . . . , an)) = (~∇∗f(a1, . . . , an), (dxf)(a1, . . . , an)) · (dxai)i∈I , 1) (5)
where ~∇∗f = (dif)i∈I , and I = {i : ti does not contain a function type}. Here, ti is the ith
argument type of f .
While I believe this works if we know the argument types of f , we do not always know f ’s argument
types if we do not have a static type-checker before the build phase. Without a static type-checker, I
find f ’s argument types by seeing what types it (or its derivative) is applied to. Since the derivative
function might not be immediately applied, I lazily put off taking the derivative of a function until
it is applied; thus, whenever a derivative is actually taken, the types of the arguments it is applied
to are known.
However, with this strategy it is not always possible to ignore function argument types. For
example, if X : R2 → R3 and c : R → R2, then the user may write X_u(c)(3). Then X_u is directly
applied to c, but c has type R → (R, R). To solve this, I take the derivative using the macro
transformations, plugging in a placeholder node for dii. When the derivative function is applied
and building the placeholder node results in a non-function type, the argument type of the function
is known. At this point, an escaper is invoked, and the derivative syntax tree is rebuilt with the
appropriate value(s) for dii.
This approach (although is very complicated) works for functions that are applied to functions,
but whose argument types are not actually function types. However, it breaks down for functions
whose argument types actually are function types. This is a bug that currently remains in the
program. For example, suppose F : R, (R → R) → R, F (x, f) = f(x); f : R → R; and g : R → R,
g(x) = F (x, f). Then the program will not correctly be able to handle g′. In our normal use of the
20

program, cases like this have not come up much. This is due to the fact that the chain rule only
applies when the syntax in the body of a function contains a function application. It does not apply
when the function itself is found through function applications. For example, in the expression
N(X)(c)’, the program first creates the function N(X)(c), and then takes its derivative; the chain
rule is never used. In the expression func(t){N(X)(c)(t)}’, the chain rule applies, but N(X)(c) is
the function being applied; thus, the chain rule is not applied to N(X)(c)—this function’s derivative
is found after the applications are performed.
This bug is a major bug, though, and I hope to fix it in the future. However, it’s not clear exactly
how this can be fixed. One approach would be to have some sort of a type checking phase before
taking the derivatives. In section 6, though, I show that there are problems with using unification
type checkers. An observation that might help here, however, is that we don’t need to know full
types of arguments, only whether they must be functions (due to being applied, etc.). Another
approach could be to substitute function arguments before taking the derivative.
21