Embed Size (px)
Citation preview
iVMS-5200 Professional
Remote Site Manager
User Manual UD01665B
User Manual of iVMS-5200 Professional Remote Site Manager
1
User Manual
COPYRIGHT © 2016 Hangzhou Hikvision Digital Technology Co., Ltd.
ALL RIGHTS RESERVED.
Any and all information, including, among others, wordings, pictures, graphs are the properties of
Hangzhou Hikvision Digital Technology Co., Ltd. or its subsidiaries (hereinafter referred to be
“Hikvision”). This user manual (hereinafter referred to be “the Manual”) cannot be reproduced,
changed, translated, or distributed, partially or wholly, by any means, without the prior written
permission of Hikvision. Unless otherwise stipulated, Hikvision does not make any warranties,
guarantees or representations, express or implied, regarding to the Manual.
About this Manual
This Manual is applicable to iVMS-5200 Professional Remote Site Manager.
The Manual includes instructions for using and managing the product. Pictures, charts, images and all
other information hereinafter are for description and explanation only. The information contained in
the Manual is subject to change, without notice, due to firmware updates or other reasons. Please
find the latest version in the company website (http://overseas.hikvision.com/en/).
Please use this user manual under the guidance of professionals.
Trademarks Acknowledgement
and other Hikvision’s trademarks and logos are the properties of Hikvision in
various jurisdictions. Other trademarks and logos mentioned below are the properties of their
respective owners.
Legal Disclaimer
TO THE MAXIMUM EXTENT PERMITTED BY APPLICABLE LAW, THE PRODUCT DESCRIBED, WITH ITS
HARDWARE, SOFTWARE AND FIRMWARE, IS PROVIDED “AS IS”, WITH ALL FAULTS AND ERRORS, AND
HIKVISION MAKES NO WARRANTIES, EXPRESS OR IMPLIED, INCLUDING WITHOUT LIMITATION,
MERCHANTABILITY, SATISFACTORY QUALITY, FITNESS FOR A PARTICULAR PURPOSE, AND
NON-INFRINGEMENT OF THIRD PARTY. IN NO EVENT WILL HIKVISION, ITS DIRECTORS, OFFICERS,
EMPLOYEES, OR AGENTS BE LIABLE TO YOU FOR ANY SPECIAL, CONSEQUENTIAL, INCIDENTAL, OR
INDIRECT DAMAGES, INCLUDING, AMONG OTHERS, DAMAGES FOR LOSS OF BUSINESS PROFITS,
User Manual of iVMS-5200 Professional Remote Site Manager
2
BUSINESS INTERRUPTION, OR LOSS OF DATA OR DOCUMENTATION, IN CONNECTION WITH THE USE
OF THIS PRODUCT, EVEN IF HIKVISION HAS BEEN ADVISED OF THE POSSIBILITY OF SUCH DAMAGES.
REGARDING TO THE PRODUCT WITH INTERNET ACCESS, THE USE OF PRODUCT SHALL BE WHOLLY AT
YOUR OWN RISKS. HIKVISION SHALL NOT TAKE ANY RESPONSIBILITIES FOR ABNORMAL OPERATION,
PRIVACY LEAKAGE OR OTHER DAMAGES RESULTING FROM CYBER ATTACK, HACKER ATTACK, VIRUS
INSPECTION, OR OTHER INTERNET SECURITY RISKS; HOWEVER, HIKVISION WILL PROVIDE TIMELY
TECHNICAL SUPPORT IF REQUIRED.
SURVEILLANCE LAWS VARY BY JURISDICTION. PLEASE CHECK ALL RELEVANT LAWS IN YOUR
JURISDICTION BEFORE USING THIS PRODUCT IN ORDER TO ENSURE THAT YOUR USE CONFORMS THE
APPLICABLE LAW. HIKVISION SHALL NOT BE LIABLE IN THE EVENT THAT THIS PRODUCT IS USED WITH
ILLEGITIMATE PURPOSES.
IN THE EVENT OF ANY CONFLICTS BETWEEN THIS MANUAL AND THE APPLICABLE LAW, THE LATER
PREVAILS.
User Manual of iVMS-5200 Professional Remote Site Manager
3
Contents Chapter 1 Overview.......................................................................................................................... 4
1.1 About This Document ...................................................................................................... 4
1.2 Administrator Rights ........................................................................................................ 4
Chapter 2 Accessing the iVMS-5200 Pro RSM .................................................................................. 5
Chapter 3 Adding the CMS (Central Management Server) .............................................................. 7
Chapter 4 Role and User Management ............................................................................................ 9
4.1 Role Management ........................................................................................................... 9
4.2 User Management ......................................................................................................... 10
Chapter 5 System Configuration..................................................................................................... 13
5.1 Log Configuration .......................................................................................................... 13
5.2 IP Address Settings ........................................................................................................ 13
5.3 NTP Settings ................................................................................................................... 14
5.4 Active Directory Settings ............................................................................................... 14
Appendix ................................................................................................................................................. 16
Important Ports .............................................................................................................................. 16
User Manual of iVMS-5200 Professional Remote Site Manager
4
Chapter 1 Overview
1.1 About This Document
iVMS-5200 Professional Remote Site Manager (hereafter simplified as iVMS-5200 Pro RSM) is the
management center of iVMS-5200 Pro CMSs (Central Management Server) and can view all the video
and receive all the alarm information of the managed CMSs.
This user manual is written for the administrator who needs to configure the iVMS-5200 Professional
Remote Site Manager (hereafter simplified as iVMS-5200 Pro RSM). Follow this document to properly
configure the iVMS-5200 Pro RSM, including iVMS-5200 Pro CMS management, user management,
and local settings.
1.2 Administrator Rights
When you install and run the server modules, clients and software, it is important that you have
administrator rights on the PCs or servers that should run these components. Otherwise, you cannot
manage the iVMS-5200 Pro RSM.
Consult your IT system administrator if in doubt about your rights.
User Manual of iVMS-5200 Professional Remote Site Manager
5
Chapter 2 Accessing the iVMS-5200 Pro
RSM
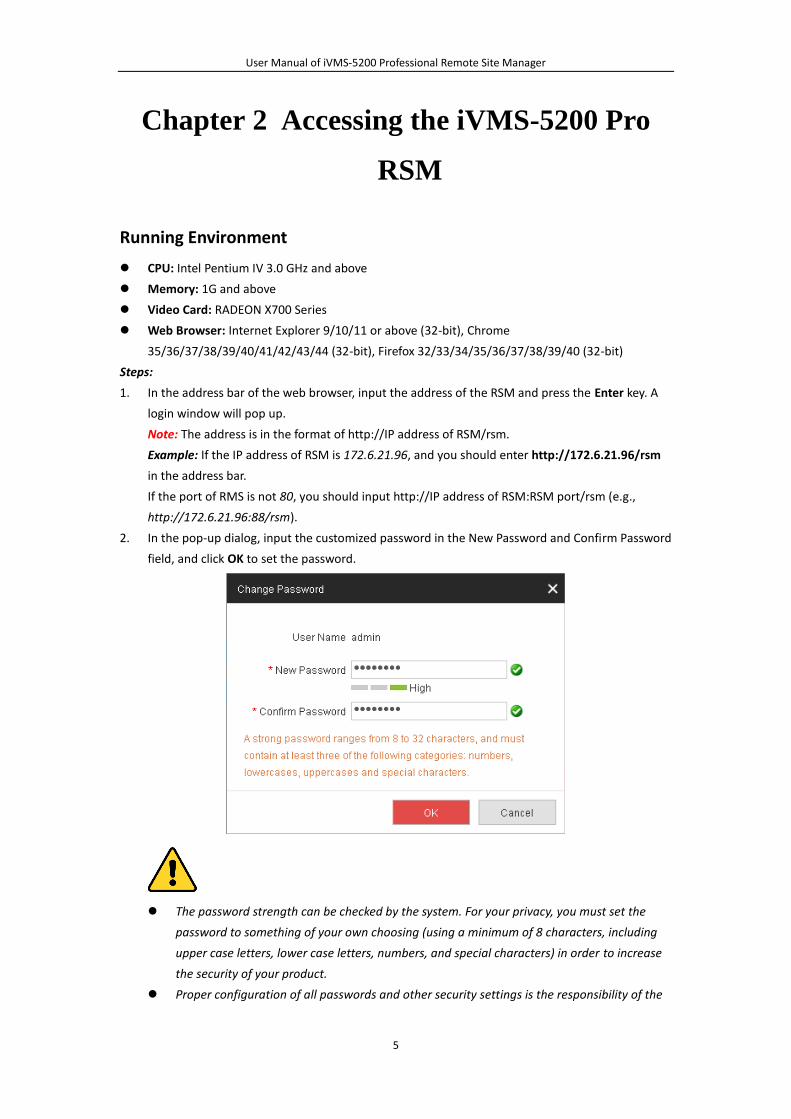
Running Environment
CPU: Intel Pentium IV 3.0 GHz and above
Memory: 1G and above
Video Card: RADEON X700 Series
Web Browser: Internet Explorer 9/10/11 or above (32-bit), Chrome
35/36/37/38/39/40/41/42/43/44 (32-bit), Firefox 32/33/34/35/36/37/38/39/40 (32-bit)
Steps:
1. In the address bar of the web browser, input the address of the RSM and press the Enter key. A
login window will pop up.
Note: The address is in the format of http://IP address of RSM/rsm.
Example: If the IP address of RSM is 172.6.21.96, and you should enter http://172.6.21.96/rsm
in the address bar.
If the port of RMS is not 80, you should input http://IP address of RSM:RSM port/rsm (e.g.,
http://172.6.21.96:88/rsm).
2. In the pop-up dialog, input the customized password in the New Password and Confirm Password
field, and click OK to set the password.
The password strength can be checked by the system. For your privacy, you must set the
password to something of your own choosing (using a minimum of 8 characters, including
upper case letters, lower case letters, numbers, and special characters) in order to increase
the security of your product.
Proper configuration of all passwords and other security settings is the responsibility of the
User Manual of iVMS-5200 Professional Remote Site Manager
6
installer and/or end-user.
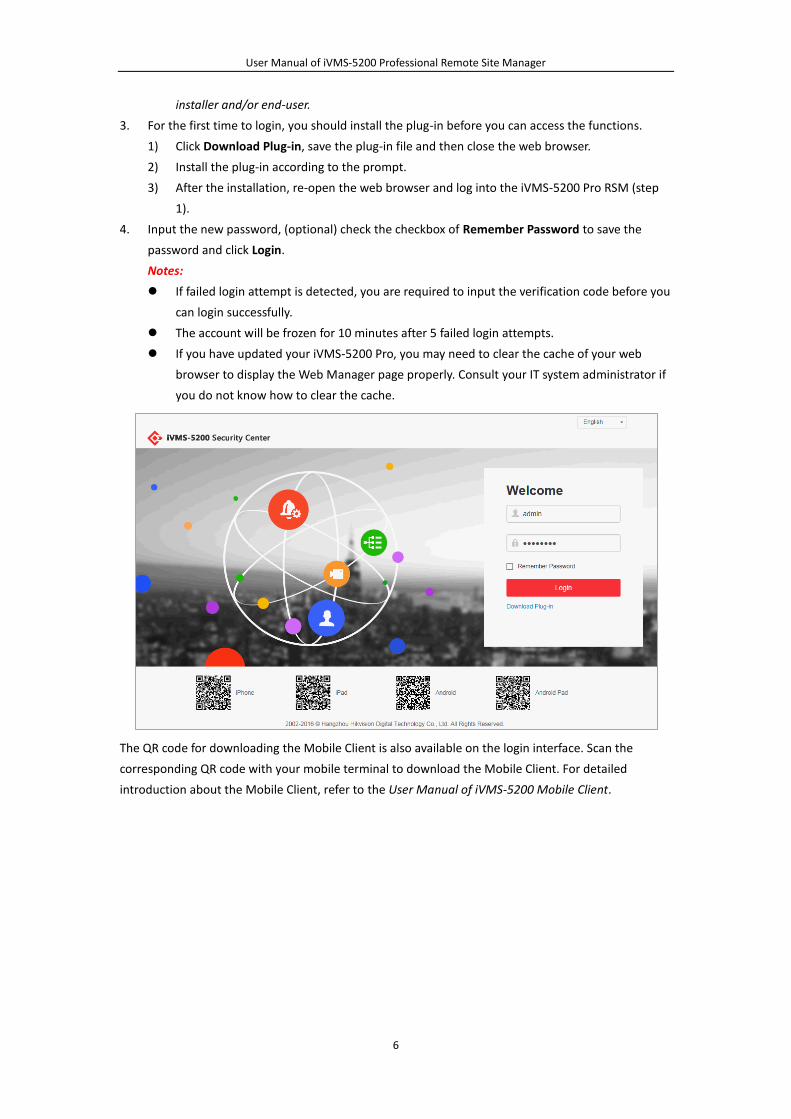
3. For the first time to login, you should install the plug-in before you can access the functions.
1) Click Download Plug-in, save the plug-in file and then close the web browser.
2) Install the plug-in according to the prompt.
3) After the installation, re-open the web browser and log into the iVMS-5200 Pro RSM (step
1).
4. Input the new password, (optional) check the checkbox of Remember Password to save the
password and click Login.
Notes:
If failed login attempt is detected, you are required to input the verification code before you
can login successfully.
The account will be frozen for 10 minutes after 5 failed login attempts.
If you have updated your iVMS-5200 Pro, you may need to clear the cache of your web
browser to display the Web Manager page properly. Consult your IT system administrator if
you do not know how to clear the cache.
The QR code for downloading the Mobile Client is also available on the login interface. Scan the
corresponding QR code with your mobile terminal to download the Mobile Client. For detailed
introduction about the Mobile Client, refer to the User Manual of iVMS-5200 Mobile Client.
User Manual of iVMS-5200 Professional Remote Site Manager
7
Chapter 3 Adding the CMS (Central
Management Server)
Purpose:
Add CMSs to RSM for centralized management.
Steps:
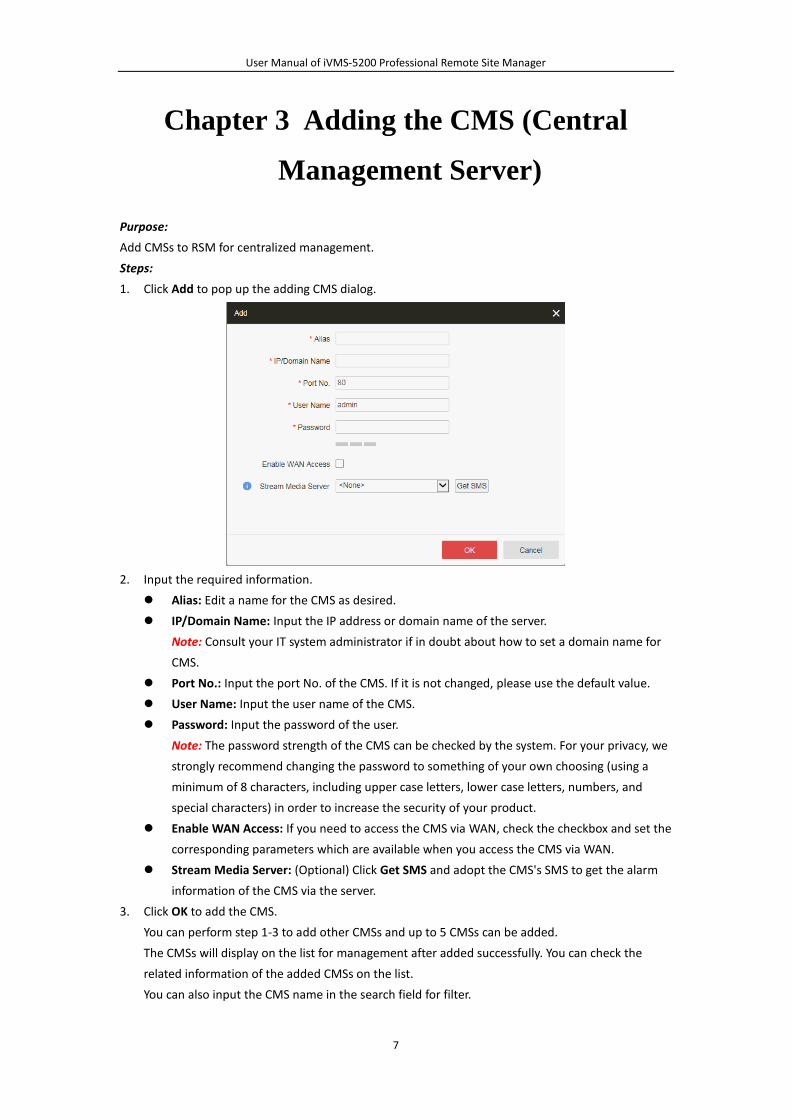
1. Click Add to pop up the adding CMS dialog.
2. Input the required information.
Alias: Edit a name for the CMS as desired.
IP/Domain Name: Input the IP address or domain name of the server.
Note: Consult your IT system administrator if in doubt about how to set a domain name for
CMS.
Port No.: Input the port No. of the CMS. If it is not changed, please use the default value.
User Name: Input the user name of the CMS.
Password: Input the password of the user.
Note: The password strength of the CMS can be checked by the system. For your privacy, we
strongly recommend changing the password to something of your own choosing (using a
minimum of 8 characters, including upper case letters, lower case letters, numbers, and
special characters) in order to increase the security of your product.
Enable WAN Access: If you need to access the CMS via WAN, check the checkbox and set the
corresponding parameters which are available when you access the CMS via WAN.
Stream Media Server: (Optional) Click Get SMS and adopt the CMS's SMS to get the alarm
information of the CMS via the server.
3. Click OK to add the CMS.
You can perform step 1-3 to add other CMSs and up to 5 CMSs can be added.
The CMSs will display on the list for management after added successfully. You can check the
related information of the added CMSs on the list.
You can also input the CMS name in the search field for filter.

User Manual of iVMS-5200 Professional Remote Site Manager
8
Click the Alias field of the CMS and you can edit the information of the CMS.
Select the CMS(s) from the list, and click Delete to remove the selected CMS(s).
Click Login CMS on the Operation column to access the corresponding CMS via Web Client. For
detailed configuration, please refer to the User Manual of iVMS-5200 Professional Web Client.
User Manual of iVMS-5200 Professional Remote Site Manager
9
Chapter 4 Role and User Management
Purpose:
The Security page allows you to add and delete users, assign user's permissions for accessing CMS and
managing RSM. Before adding users to the system, you should create roles to define the user's access
rights to system resources and then assign the role to the user for granting the permissions to the user.
A user can link with many different roles.
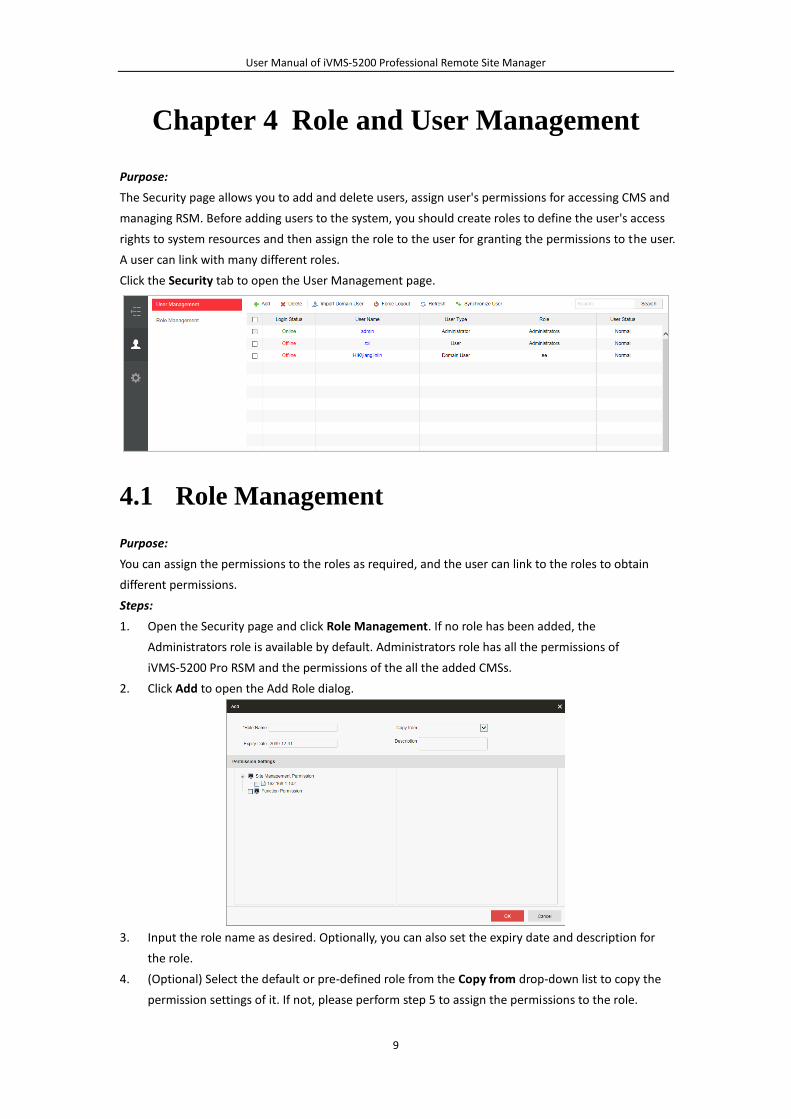
Click the Security tab to open the User Management page.
4.1 Role Management
Purpose:
You can assign the permissions to the roles as required, and the user can link to the roles to obtain
different permissions.
Steps:
1. Open the Security page and click Role Management. If no role has been added, the
Administrators role is available by default. Administrators role has all the permissions of
iVMS-5200 Pro RSM and the permissions of the all the added CMSs.
2. Click Add to open the Add Role dialog.
3. Input the role name as desired. Optionally, you can also set the expiry date and description for
the role.
4. (Optional) Select the default or pre-defined role from the Copy from drop-down list to copy the
permission settings of it. If not, please perform step 5 to assign the permissions to the role.
User Manual of iVMS-5200 Professional Remote Site Manager
10
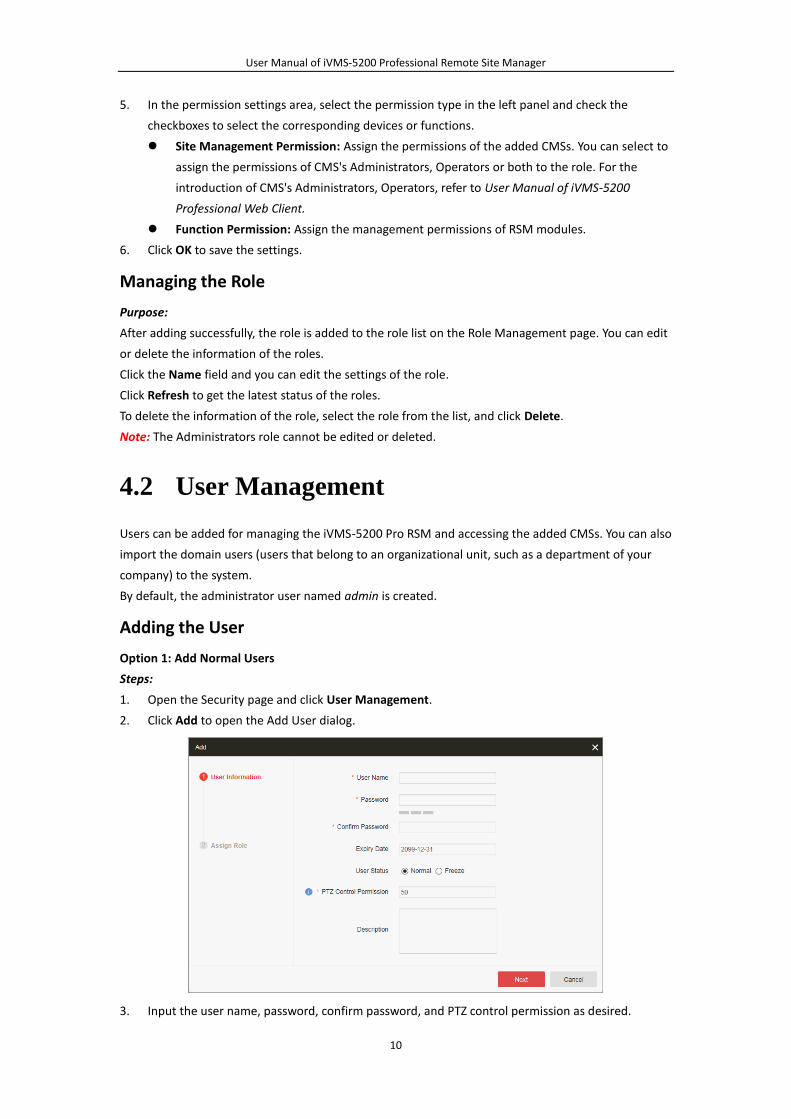
5. In the permission settings area, select the permission type in the left panel and check the
checkboxes to select the corresponding devices or functions.
Site Management Permission: Assign the permissions of the added CMSs. You can select to
assign the permissions of CMS's Administrators, Operators or both to the role. For the
introduction of CMS's Administrators, Operators, refer to User Manual of iVMS-5200
Professional Web Client.
Function Permission: Assign the management permissions of RSM modules.
6. Click OK to save the settings.
Managing the Role
Purpose:
After adding successfully, the role is added to the role list on the Role Management page. You can edit
or delete the information of the roles.
Click the Name field and you can edit the settings of the role.
Click Refresh to get the latest status of the roles.
To delete the information of the role, select the role from the list, and click Delete.
Note: The Administrators role cannot be edited or deleted.
4.2 User Management
Users can be added for managing the iVMS-5200 Pro RSM and accessing the added CMSs. You can also
import the domain users (users that belong to an organizational unit, such as a department of your
company) to the system.
By default, the administrator user named admin is created.
Adding the User
Option 1: Add Normal Users
Steps:
1. Open the Security page and click User Management.
2. Click Add to open the Add User dialog.
3. Input the user name, password, confirm password, and PTZ control permission as desired.
User Manual of iVMS-5200 Professional Remote Site Manager
11
Optionally, you can set the expiry date, user status and description.
A user name cannot contain any of the following characters: / \ : * ? “ < > |.
The password must contain 8 to 32 characters, including at least three of the following
categories: upper case letters, lower case letters, numbers, and special characters.
Proper configuration of all passwords and other security settings is the responsibility of the
installer and/or end-user.
Expiry Date: The date that this user account becomes invalid.
User Status: Two kinds of status are available. If you select freeze, the user account is inactive
until you set the user status as normal.
PTZ Control Permission: Set the permission level (1~100) for PTZ control and the larger the value
is, the higher permission the user has. E.g., when user1 and user2 control the PTZ unit at the
same time, the user who has the larger PTZ control permission will take the control of the PTZ
movement.
4. Click Next, check the checkboxes of the existing roles and click Add>> to assign the role(s) for the
created user.
Note: If no role has been added, Administrators role is available by default which owns all the
permission of the iVMS-5200 Pro RSM. If you want to add customized roles, click Add to activate
the role adding dialog. For detailed configuration about adding the roles, please refer to Chapter
4.1 Role Management.
5. Click OK to save the settings.
Option 2: Add Domain Users
Before you start:
You should configure the active directory settings. Please refer to Chapter 5.4 Active Directory
Settings.
Note: The domain user can only access to the iVMS-5200 Pro RSM or added CMS via Control Client
and Mobile Client.
Steps:
1. Open the User Management page and click User Management.
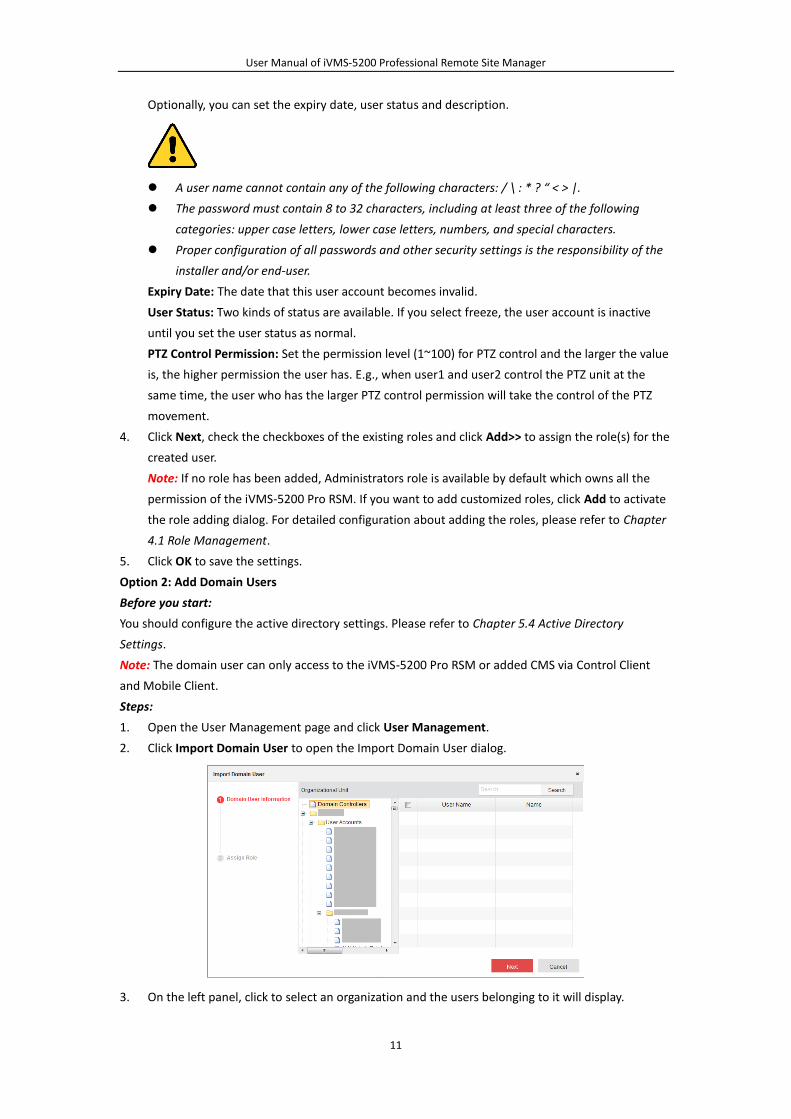
2. Click Import Domain User to open the Import Domain User dialog.
3. On the left panel, click to select an organization and the users belonging to it will display.
User Manual of iVMS-5200 Professional Remote Site Manager
12
4. Check the checkboxes to select the users and click Next.
5. Check the checkboxes of the existing roles and click Add>> to assign the role(s) for the created
user.
Note: If no role has been added, Administrators role is available by default which owns all the
permission of the iVMS-5200 Pro RSM. If you want to add customized roles, click Add to activate
the role adding dialog. For detailed configuration about adding the roles, please refer to Chapter
4.1 Role Management.
6. Click OK to save the settings. After successfully adding the domain users, the users can log into
the iVMS-5200 Pro RSM or added CMS via Control Client and Mobile Client by their domain
account and password.
You can also click Synchronize User to synchronize the added users to corresponding CMSs manually.
Managing the User
Purpose:
After created successfully, the user account is added to the user list on the User Management page.
The following operations are available for managing the user.
Edit: Click the User Name field of the user to edit the information or change the password of the user.
Delete: To delete the information of the user, select the user from the list, and click Delete.
Refresh: You can click the Refresh to get the latest information of the users.
Force Logout: You can also select the online user and click Force Logout to log out the online user.
Note: The admin user cannot be deleted or be forced to log out.
Changing the Password of Admin User
The password of the admin user can only be changed when you log into the system as admin.
Steps:
1. At the top right corner of the system, click the current login user and select Change Password.
2. Input the old password, new password and confirm password.
The password strength can be checked by the system. For your privacy, we strongly
recommend changing the password to something of your own choosing (using a minimum
of 8 characters, including upper case letters, lower case letters, numbers, and special
characters) in order to increase the security of your product.
Proper configuration of all passwords and other security settings is the responsibility of the
installer and/or end-user.
3. Click OK to save the settings.
User Manual of iVMS-5200 Professional Remote Site Manager
13
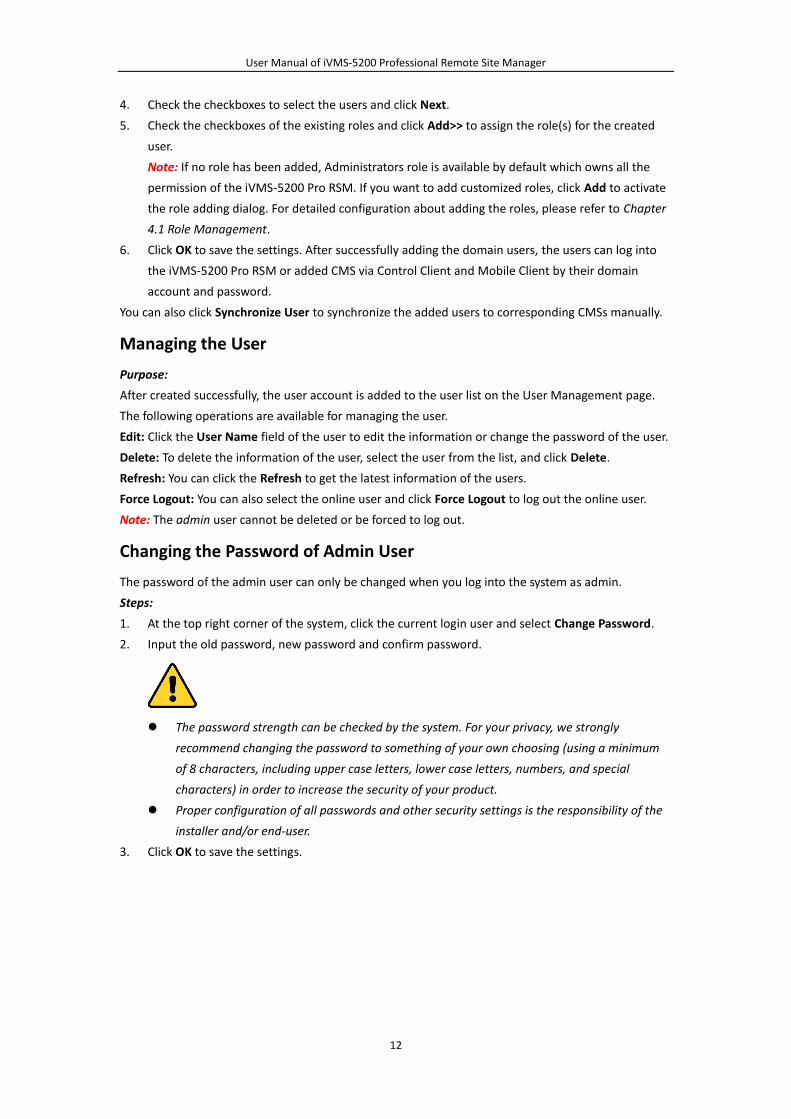
Chapter 5 System Configuration
Purpose:
The log files expiration date, IP address settings, NTP settings, and active directory can be configured.
Click the System tab to open the System Configuration page.
5.1 Log Configuration
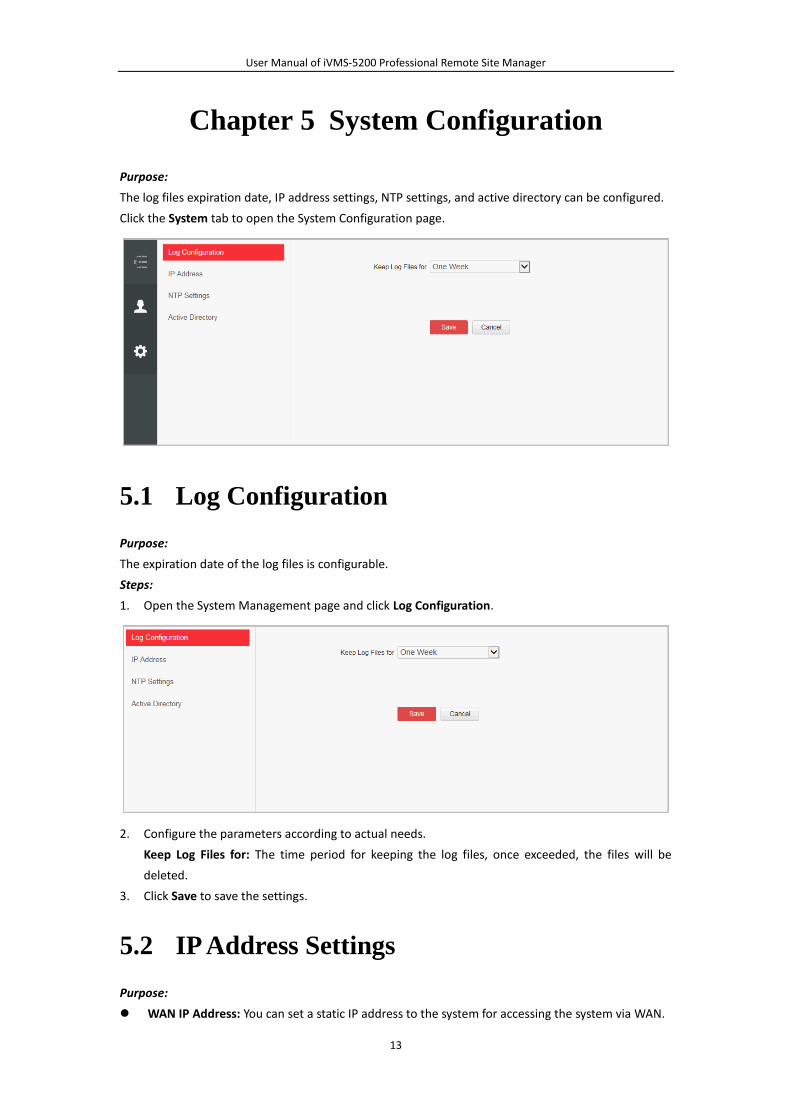
Purpose:
The expiration date of the log files is configurable.
Steps:
1. Open the System Management page and click Log Configuration.
2. Configure the parameters according to actual needs.
Keep Log Files for: The time period for keeping the log files, once exceeded, the files will be
deleted.
3. Click Save to save the settings.
5.2 IP Address Settings
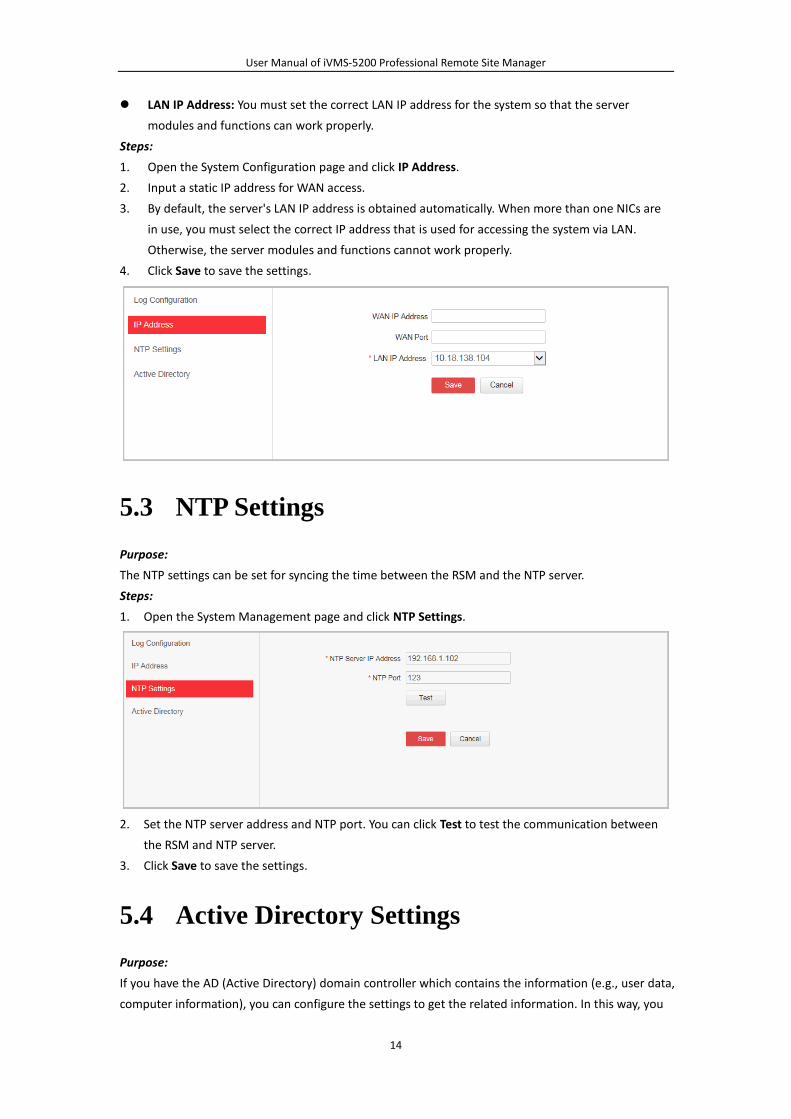
Purpose:
WAN IP Address: You can set a static IP address to the system for accessing the system via WAN.
User Manual of iVMS-5200 Professional Remote Site Manager
14
LAN IP Address: You must set the correct LAN IP address for the system so that the server
modules and functions can work properly.
Steps:
1. Open the System Configuration page and click IP Address.
2. Input a static IP address for WAN access.
3. By default, the server's LAN IP address is obtained automatically. When more than one NICs are
in use, you must select the correct IP address that is used for accessing the system via LAN.
Otherwise, the server modules and functions cannot work properly.
4. Click Save to save the settings.
5.3 NTP Settings
Purpose:
The NTP settings can be set for syncing the time between the RSM and the NTP server.
Steps:
1. Open the System Management page and click NTP Settings.
2. Set the NTP server address and NTP port. You can click Test to test the communication between
the RSM and NTP server.
3. Click Save to save the settings.
5.4 Active Directory Settings
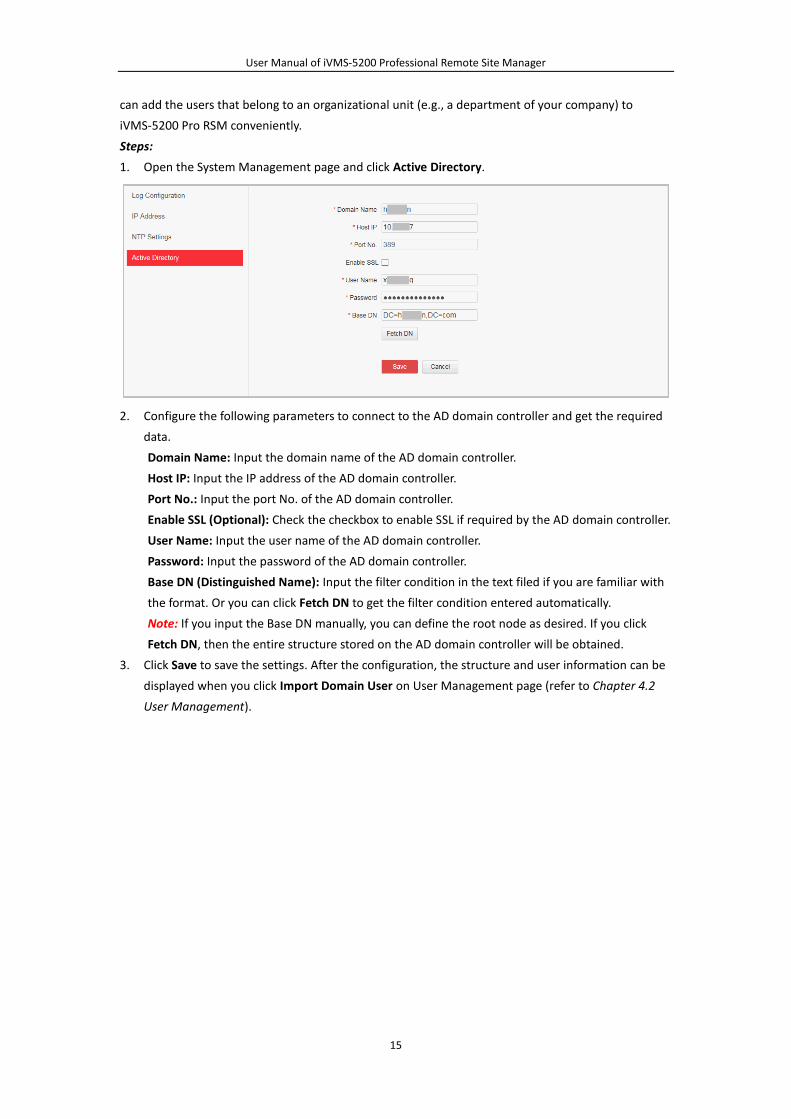
Purpose:
If you have the AD (Active Directory) domain controller which contains the information (e.g., user data,
computer information), you can configure the settings to get the related information. In this way, you
User Manual of iVMS-5200 Professional Remote Site Manager
15
can add the users that belong to an organizational unit (e.g., a department of your company) to
iVMS-5200 Pro RSM conveniently.
Steps:
1. Open the System Management page and click Active Directory.
2. Configure the following parameters to connect to the AD domain controller and get the required
data.
Domain Name: Input the domain name of the AD domain controller.
Host IP: Input the IP address of the AD domain controller.
Port No.: Input the port No. of the AD domain controller.
Enable SSL (Optional): Check the checkbox to enable SSL if required by the AD domain controller.
User Name: Input the user name of the AD domain controller.
Password: Input the password of the AD domain controller.
Base DN (Distinguished Name): Input the filter condition in the text filed if you are familiar with
the format. Or you can click Fetch DN to get the filter condition entered automatically.
Note: If you input the Base DN manually, you can define the root node as desired. If you click
Fetch DN, then the entire structure stored on the AD domain controller will be obtained.
3. Click Save to save the settings. After the configuration, the structure and user information can be
displayed when you click Import Domain User on User Management page (refer to Chapter 4.2
User Management).
User Manual of iVMS-5200 Professional Remote Site Manager
16
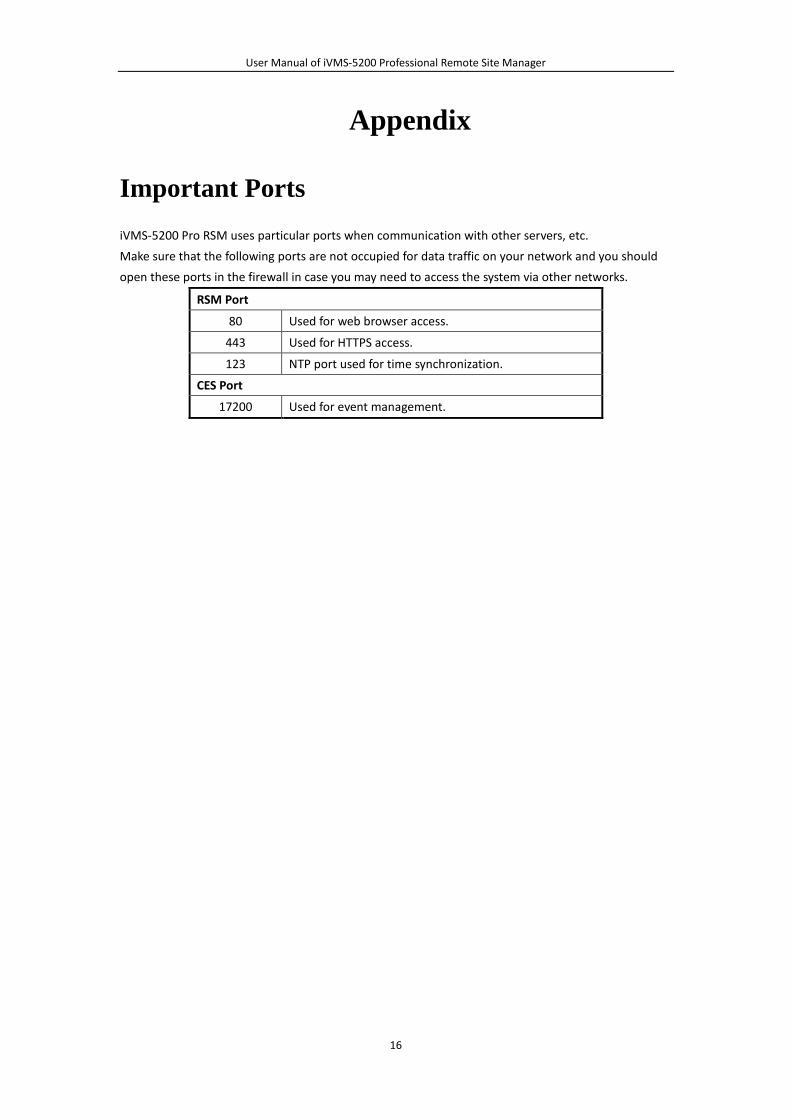
Appendix
Important Ports
iVMS-5200 Pro RSM uses particular ports when communication with other servers, etc.
Make sure that the following ports are not occupied for data traffic on your network and you should
open these ports in the firewall in case you may need to access the system via other networks.
RSM Port
80 Used for web browser access.
443 Used for HTTPS access.
123 NTP port used for time synchronization.
CES Port
17200 Used for event management.
User Manual of iVMS-5200 Professional Remote Site Manager
17