Embed Size (px)
DESCRIPTION
iTRACK. http://www.itracktaks.com/donnaisd. Type in your username and password and click Login. Reports. Click on Report, then View Inventory Dashboard. Reports. Booklet Inventory. RUNN EL. RUNN EL. Numbers will change as you scan. - PowerPoint PPT Presentation
Citation preview
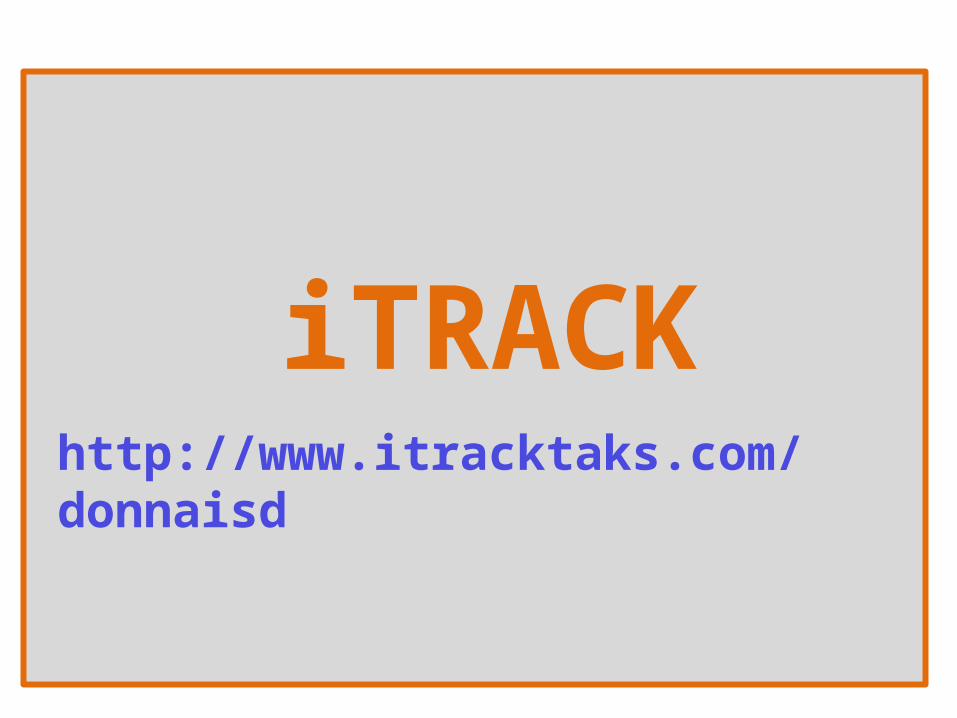
iTRACKhttp://www.itracktaks.com/donnaisd
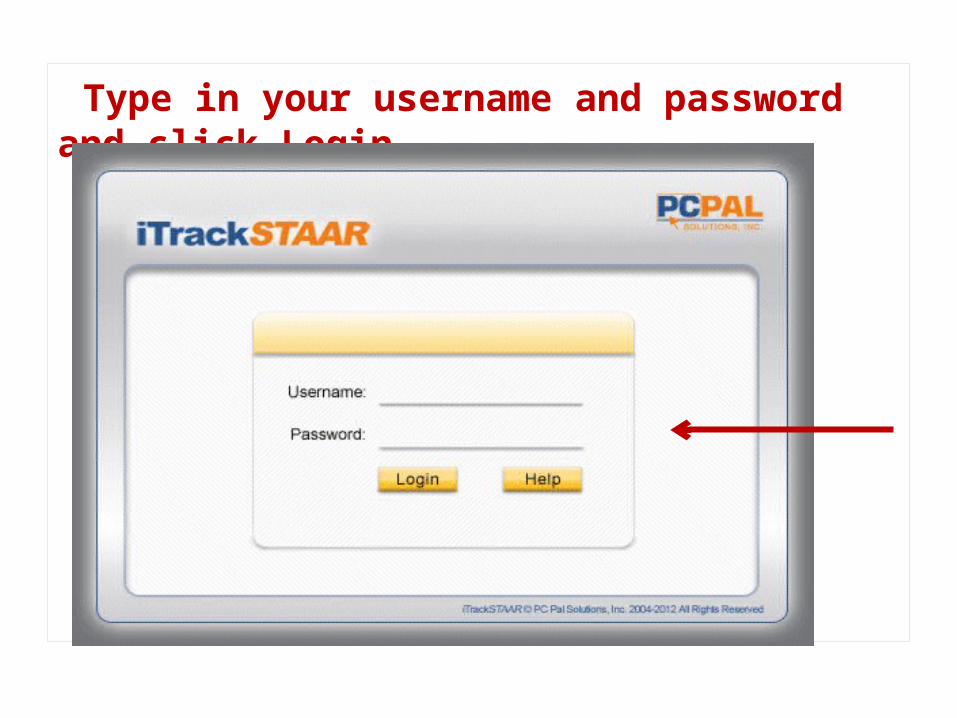
Type in your username and password and click Login

Click on Report, then View Inventory Dashboard
Reports

Reports

Booklet Inventory
Numbers will change as you scan. Assigned-will always stay (300) the since that’s the number that Pearson says you should have.
Inventory-Will build up (to 300) when you scan booklets from Ms. Vasquez
NRS-Not Returned Scanned-will be 300 also. But will return to zero (0) when the Test Admin return booklets
Missing-Will originally be 300 but will change to (0) when you have booklets returned. This will help you know if someone has not returned one. Extra-will remain zero (0)
RUNN EL
RUNN EL

If you click on the Missing 300, it’ll show you the booklets that have been assigned to you. It’ll list the Test Administrator you have assigned booklet to. This is where you can see what teacher had that booklet
History – will tell you the history of scans, where they have been.
RUNN EL
RUNN EL
RUNN EL
1 SEC TB GR3 MR STAAR-M APR 11 PK5
2 SEC TB GR3 MR STAAR-M APR 11 PK5

The only report you’ll need to run is the 2014 STAAR Materials Control Form. Go to View Reports

On Step 1: Select Report Type- Select H-STAAR MaterialsOn Step 2: Run the Report - Click on the pie chart to run the report
H - STAAR Materials
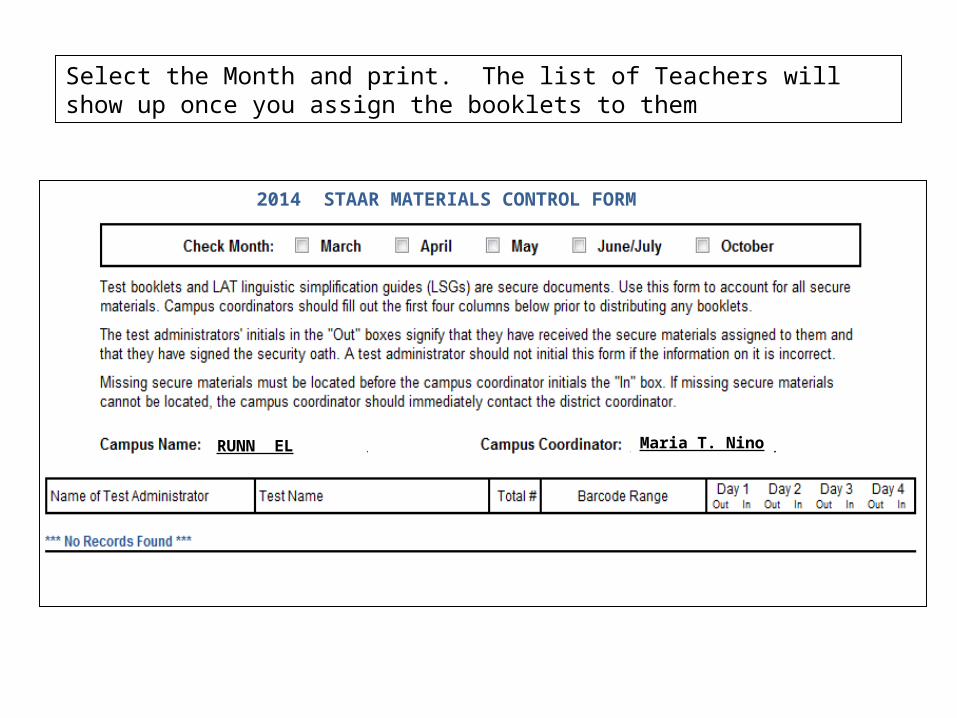
Select the Month and print. The list of Teachers will show up once you assign the booklets to them
RUNN EL Maria T. Nino
2014 STAAR MATERIALS CONTROL FORM
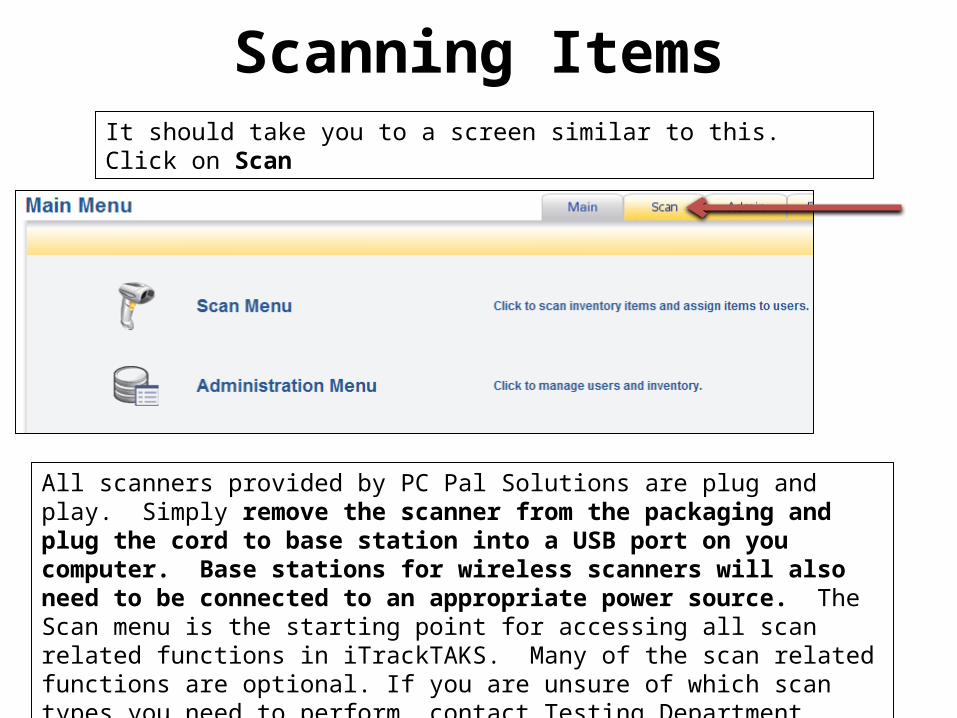
Scanning ItemsIt should take you to a screen similar to this. Click on Scan
All scanners provided by PC Pal Solutions are plug and play. Simply remove the scanner from the packaging and plug the cord to base station into a USB port on you computer. Base stations for wireless scanners will also need to be connected to an appropriate power source. The Scan menu is the starting point for accessing all scan related functions in iTrackTAKS. Many of the scan related functions are optional. If you are unsure of which scan types you need to perform, contact Testing Department.
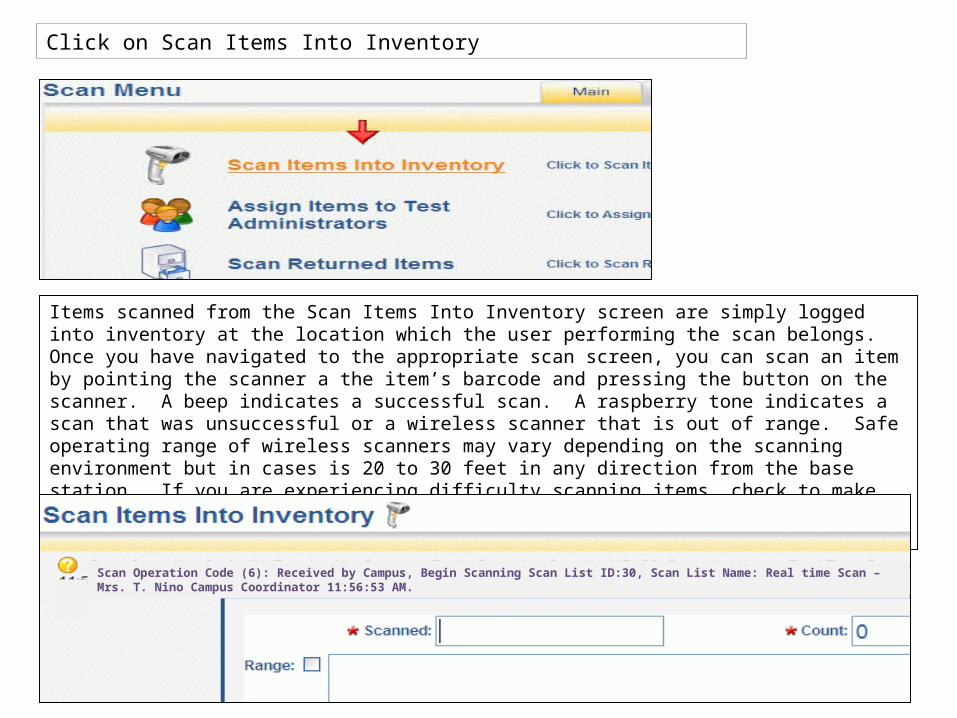
Click on Scan Items Into Inventory
Items scanned from the Scan Items Into Inventory screen are simply logged into inventory at the location which the user performing the scan belongs. Once you have navigated to the appropriate scan screen, you can scan an item by pointing the scanner a the item’s barcode and pressing the button on the scanner. A beep indicates a successful scan. A raspberry tone indicates a scan that was unsuccessful or a wireless scanner that is out of range. Safe operating range of wireless scanners may vary depending on the scanning environment but in cases is 20 to 30 feet in any direction from the base station. If you are experiencing difficulty scanning items, check to make sure the scanner is still connected to the appropriate USB port. Let’s simulate a few scans.
Scan Operation Code (6): Received by Campus, Begin Scanning Scan List ID:30, Scan List Name: Real time Scan – Mrs. T. Nino Campus Coordinator 11:56:53 AM.

This is what you’ll see when you scan something.
The barcode of the item we scanned appeared in the main portion of the screen and the Count field shows 1. As you continue to scan items the Count field will show the total number of scans since the last time the Submit button was clicked. Don't worry if you accidentally scan an item multiple times. The item will only be "counted" once.
Scan Operation Code (6): Received by Campus, Begin Scanning Scan List ID:30, Scan List Name: Real time Scan – Mrs. T. Nino Campus Coordinator 11:56:53 AM.

Submitting or clearing items. Items that you have scanned into iTrackTAKS will not be processed until you click the Submit button in the bottom of the screen. For this reason, it is imperative that you click the Submit button frequently. We do not recommend that you scan more than 100 items without clicking the Submit button as unsubmitted scans could be lost in the unlikely event of a power or network failure. By looking at the Count field, you can see that we have scanned 12 items.
You can process all of the scanned barcodes by clicking the Submit button or clear the barcodes without processing them by clicking the Clear button. It is important to note that if you exit a scan screen without processing scanned items, the items will be processed automatically as if you clicked the Submit button.

Click the Submit button. You will see a progress bar showing that the scan was processed successfully and count will be reset to zero (0).
Real Time Scan – Maria T. Nino Campus Coordinator – 8/18/2009 2:00:30 PM Processed Success

Scanning a range of items.
It's also possible to process a range of items by scanning the starting and ending barcodes on the appropriate Assembly ID sheet. This feature is extremely useful when you want to process items without removing them from shrink-wrap packaging. The Range check box is available on all scan related screens. Simply click the Range check box to indicate you are scanning a range.
Once the Range check box is selected, simply scan the starting and ending barcode on the Assembly ID sheet. It does not matter if you scan the ending barcode first so long as you scan the starting barcode next. Individual items that are scanned when the range check box is selected will not be processed and vice-versa. Once you have completed scanning ranges, click the Submit button to process the scan.

Assigning Items to Test AdministratorsClick on Assign Items to Test Administrators
Next, we are going scan several items and assign the items to test administrators. This accomplishes two steps. First, it logs the items into inventory. Second, it indicates the items have been assigned to the selected test administrators.
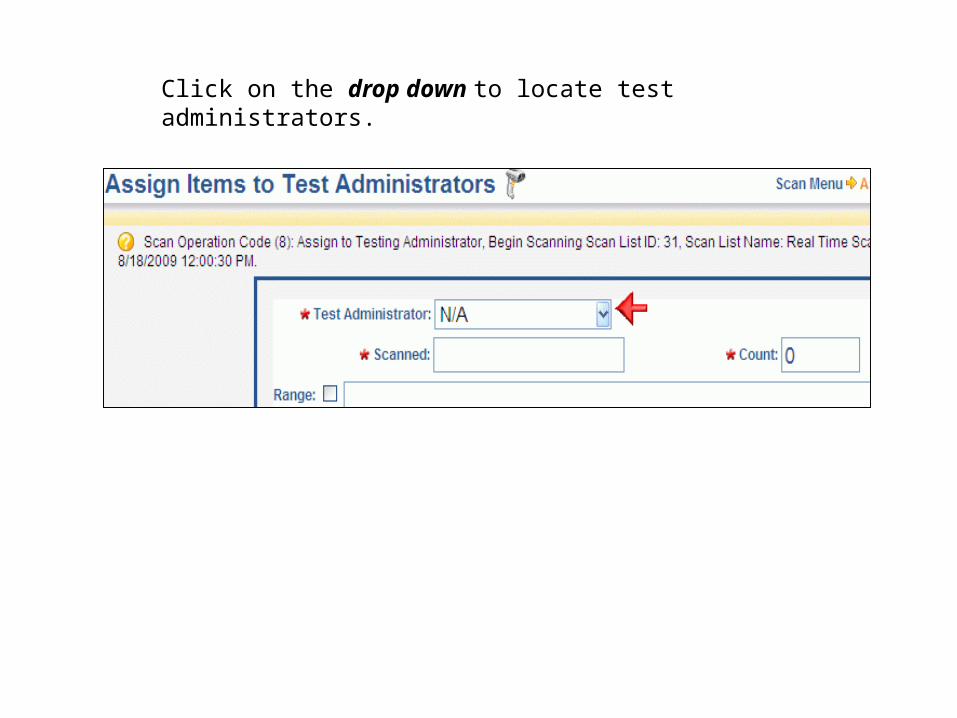
Click on the drop down to locate test administrators.

Next, select a name the test administrator to assign the items you are about to scan. All test administrators will be automatically imported into the system for you. Click Scan and Submit
RUNN EL

You should see a confirmation like the one below and the Count should reset to zero (0).
Real Time Scan – Maria T. Nino Campus Coordinator – 8/18/2009 2:00:30 PM Processed Success

NOTE: It’s best to have the campus log in to view exactly what they have.
What has been assigned by TEA
What has been scanned by campus
What has been assigned but not scanned by respective campus.
Ie…someone has those booklets But have not scanned them.
DONNA ISD
2 DONNA H S
1 DONNA H S