Embed Size (px)
Citation preview

UM11087 IoT Toolbox Mobile Application User Manual Rev. 0 — 19 December 2017 User Manual
Document information
Info Content
Keywords User Manual, IoT, Toolbox
Abstract The IoT Toolbox is a mobile application developed by NXP Semiconductors and designed for the Android™ and iOS™ handheld devices.

NXP Semiconductors UM11087 IoT Toolbox Mobile Application User Manual
UM11087 © NXP B.V.2017. All rights reserved.
User Manual Rev. 0 — 19 December 2017 2 of 32
Contact information For additional information, please visit: http://www.nxp.com
Revision history
Rev Date Description
0 20171219 Initial version
NXP Semiconductors UM11087 IoT Toolbox Mobile Application User Manual
UM11087 © NXP B.V.2017. All rights reserved.
User Manual Rev. 0 — 19 December 2017 3 of 32
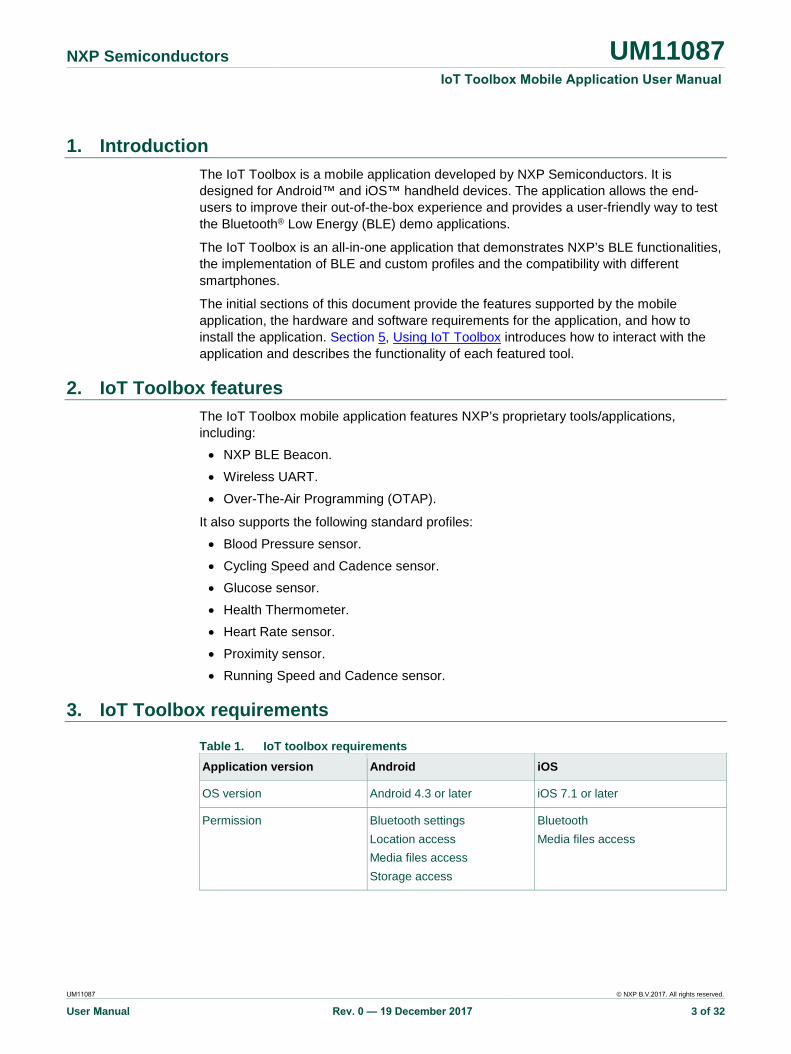
1. IntroductionThe IoT Toolbox is a mobile application developed by NXP Semiconductors. It is designed for Android™ and iOS™ handheld devices. The application allows the end-users to improve their out-of-the-box experience and provides a user-friendly way to test the Bluetooth® Low Energy (BLE) demo applications.
The IoT Toolbox is an all-in-one application that demonstrates NXP’s BLE functionalities, the implementation of BLE and custom profiles and the compatibility with different smartphones.
The initial sections of this document provide the features supported by the mobile application, the hardware and software requirements for the application, and how to install the application. Section 5, Using IoT Toolbox introduces how to interact with the application and describes the functionality of each featured tool.
2. IoT Toolbox featuresThe IoT Toolbox mobile application features NXP’s proprietary tools/applications, including: • NXP BLE Beacon.• Wireless UART.• Over-The-Air Programming (OTAP).
It also supports the following standard profiles: • Blood Pressure sensor.• Cycling Speed and Cadence sensor.• Glucose sensor.• Health Thermometer.• Heart Rate sensor.• Proximity sensor.• Running Speed and Cadence sensor.
3. IoT Toolbox requirements
Table 1. IoT toolbox requirements Application version Android iOS
OS version Android 4.3 or later iOS 7.1 or later
Permission Bluetooth settings Location access Media files access Storage access
Bluetooth Media files access

NXP Semiconductors UM11087 IoT Toolbox Mobile Application User Manual
UM11087 © NXP B.V.2017. All rights reserved.
User Manual Rev. 0 — 19 December 2017 4 of 32
4. Installing IoT ToolboxThe mobile application is free in App Store® and Google Play™. To install the application, perform these steps: 1. Open the app store.2. Search for IoT Toolbox.
Fig 1. IoT Toolbox search
3. Select IoT Toolbox application.4. Click INSTALL.
Fig 2. Install button
5. When asked for permissions, click Accept.
Remark: If running Android 6 (or later), you are not asked for permissions during theinstallation. You are going to be prompted when the application requires to accesseach function.
6. You can launch the application from the app drawer now.
5. Using IoT ToolboxBefore launching the application, make sure that the location services are enabled and the Bluetooth radio is turned on. When the application asks for permission to use Bluetooth or location services, click YES. Otherwise, the application will not work.
NXP Semiconductors UM11087 IoT Toolbox Mobile Application User Manual
UM11087 © NXP B.V.2017. All rights reserved.
User Manual Rev. 0 — 19 December 2017 5 of 32
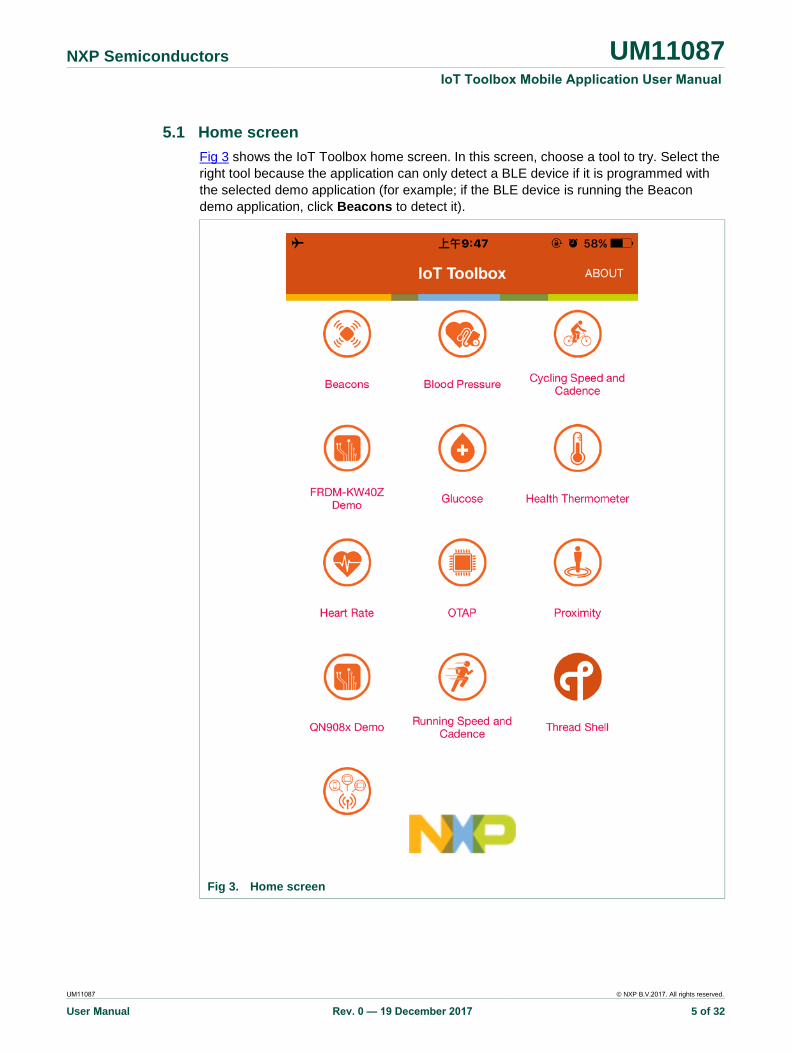
5.1 Home screen Fig 3 shows the IoT Toolbox home screen. In this screen, choose a tool to try. Select the right tool because the application can only detect a BLE device if it is programmed with the selected demo application (for example; if the BLE device is running the Beacon demo application, click Beacons to detect it).
Fig 3. Home screen

NXP Semiconductors UM11087 IoT Toolbox Mobile Application User Manual
UM11087 © NXP B.V.2017. All rights reserved.
User Manual Rev. 0 — 19 December 2017 6 of 32
5.2 Connecting to BLE devices To access a certain feature, press the corresponding button on the home screen.
Fig 4. Accessing a feature
When a tool/application is selected, the BLE devices screen appears. This screen shows all the BLE devices running the corresponding demo. These BLE devices must be in the range and in the advertising mode. The application automatically starts scanning for BLE devices in the range. If not, the scanning can be manually started or stopped by pressing SCAN or STOP in the upper right corner.

NXP Semiconductors UM11087 IoT Toolbox Mobile Application User Manual
UM11087 © NXP B.V.2017. All rights reserved.
User Manual Rev. 0 — 19 December 2017 7 of 32
Fig 5. SCAN button
If a BLE device is not listed, make sure it is turned on, in the range, and in the advertising mode. Select the correct tool in the IoT Toolbox application because the BLE device is only detected when it is programmed with the profile that the tool is looking for (to find and connect to a Heart Rate sensor BLE device, run the Heart Rate tool).
Fig 6. STOP button
When the desired sensor is found, select it to create a connection. When the connection is made, the application cannot connect to any other sensor in the range because it can only be connected to one BLE device at a time.
This connection process applies to every tool within the IoT Toolbox application, except for the BLE Beacon tool because there is no exclusive connection between the BLE Beacon and the device running the IoT Toolbox application. The BLE Beacons are broadcasting and always in the advertising mode.
5.3 Disconnecting from BLE devices To disconnect from a BLE device, click DISCONNECT in the upper right corner of the screen.

NXP Semiconductors UM11087 IoT Toolbox Mobile Application User Manual
UM11087 © NXP B.V.2017. All rights reserved.
User Manual Rev. 0 — 19 December 2017 8 of 32
Fig 7. DISCONNECT button
Remark: If running the Beacons tool, this option is not available because there is no connection to start with.
Click BACK to return to the BLE devices screen, where the BLE devices in the range and in the advertising mode appear again. To go back to the home screen, click BACK.
Fig 8. CONNECT button
5.4 Beacons tool To access the Beacons tool, click BEACONS on the main screen.

NXP Semiconductors UM11087 IoT Toolbox Mobile Application User Manual
UM11087 © NXP B.V.2017. All rights reserved.
User Manual Rev. 0 — 19 December 2017 9 of 32
Fig 9. Beacons button
After you click BEACONS, the BLE devices screen appears.
Fig 10. SCAN button
NXP Semiconductors UM11087 IoT Toolbox Mobile Application User Manual
UM11087 © NXP B.V.2017. All rights reserved.
User Manual Rev. 0 — 19 December 2017 10 of 32
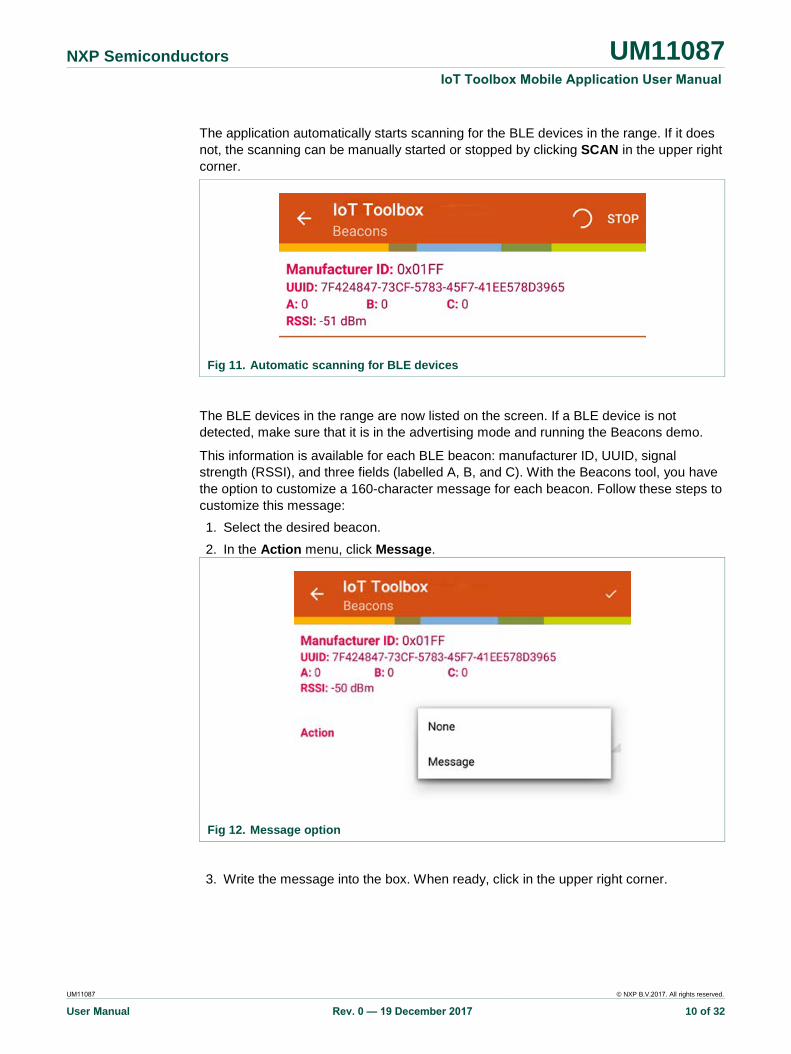
The application automatically starts scanning for the BLE devices in the range. If it does not, the scanning can be manually started or stopped by clicking SCAN in the upper right corner.
Fig 11. Automatic scanning for BLE devices
The BLE devices in the range are now listed on the screen. If a BLE device is not detected, make sure that it is in the advertising mode and running the Beacons demo.
This information is available for each BLE beacon: manufacturer ID, UUID, signal strength (RSSI), and three fields (labelled A, B, and C). With the Beacons tool, you have the option to customize a 160-character message for each beacon. Follow these steps to customize this message: 1. Select the desired beacon.2. In the Action menu, click Message.
Fig 12. Message option
3. Write the message into the box. When ready, click in the upper right corner.

NXP Semiconductors UM11087 IoT Toolbox Mobile Application User Manual
UM11087 © NXP B.V.2017. All rights reserved.
User Manual Rev. 0 — 19 December 2017 11 of 32
Fig 13. Message set
4. When detected, the beacon now displays the custom message.
Fig 14. Custom message
5.5 Blood Pressure tool Fig 15 shows the Blood Pressure sensor screen. To get to this screen, follow the steps shown in Section 5.2, Connecting to BLE devices and select the Blood Pressure tool.

NXP Semiconductors UM11087 IoT Toolbox Mobile Application User Manual
UM11087 © NXP B.V.2017. All rights reserved.
User Manual Rev. 0 — 19 December 2017 12 of 32
Fig 15. Blood pressure tool
The screen shows the systolic, diastolic, and main arterial pressures, as well as the pulse. The time, date, connection status, and the remaining battery life of the BLE device are shown in the lower part of the screen.
5.6 Cycling Speed and Cadence tool Fig 16 shows the Cycling Speed and Cadence sensor screen. To get to this screen, follow the steps shown in Section 5.2, Connecting to BLE devices and select the Cycling Speed and Cadence tool.

NXP Semiconductors UM11087 IoT Toolbox Mobile Application User Manual
UM11087 © NXP B.V.2017. All rights reserved.
User manual Rev. 0 — 19 December 2017 13 of 32
Fig 16. Cycling speed and cadence tool
The screen shows the current speed (measured in kilometers per hour) and the pedaling rate (cadence, measured in revolutions per minute). Below is the option to change the wheel size. It is important to select the right size, because the speed shown above depends on the wheel size. The location of the sensor, the connection status, and the remaining battery life of the BLE device are shown in the lower part of the screen.
To change the wheel size, click gear in the middle of the screen.
Fig 17. Wheel size adjustment

NXP Semiconductors UM11087 IoT Toolbox Mobile Application User Manual
UM11087 © NXP B.V.2017. All rights reserved.
User Manual Rev. 0 — 19 December 2017 14 of 32
Select the correct wheel size from the menu. Click ACCEPT.
Fig 18. ACCEPT button
5.7 Glucose tool Fig 19 shows the Glucose sensor screen. To get to this screen, follow the steps shown in Section 5.2, Connecting to BLE devices and select the Glucose tool.
Fig 19. Glucose tool

NXP Semiconductors UM11087 IoT Toolbox Mobile Application User Manual
UM11087 © NXP B.V.2017. All rights reserved.
User Manual Rev. 0 — 19 December 2017 15 of 32
The screen initially shows no information, except for the connection status and the remaining battery life of the BLE device (in the lower part of the screen).
To show a measurement, press the corresponding switch in the BLE device to take a measurement and, when taken, it is sent to the device running the IoT Toolbox application. When the measurement is received, it appears as Fig 20:
Fig 20. Measurement received
Each measurement contains the glucose level and the time and date of the measurement. If more measurements are made, the latest one is shown. Use the arrows to navigate to the previously-received measurements.
Fig 21. Navigate to previous measurements
5.8 Health Thermometer tool Fig 22 shows the Health Thermometer sensor screen. To get to this screen, follow the steps shown in Section 5.2, Connecting to BLE devices and select the Health Thermometer tool.

NXP Semiconductors UM11087 IoT Toolbox Mobile Application User Manual
UM11087 © NXP B.V.2017. All rights reserved.
User Manual Rev. 0 — 19 December 2017 16 of 32
Fig 22. Health thermometer tool
It displays the temperature measured by the sensor located at the indicated place. The connection status and the remaining battery life of the BLE device are shown in the lower part of the screen.
5.9 Heart Rate tool Fig 23 shows the Heart Rate sensor screen. To get to this screen, follow the steps shown in Section 5.2, Connecting to BLE devices and select the Heart Rate tool.
Fig 23. Heart rate tool

NXP Semiconductors UM11087 IoT Toolbox Mobile Application User Manual
UM11087 © NXP B.V.2017. All rights reserved.
User Manual Rev. 0 — 19 December 2017 17 of 32
It displays the heart rate (in beats per minute), the sensor location, and a real-time plot of the received measurements (time of measurement vs. beats per minute). The connection status and the remaining battery life of the BLE device are shown in the lower part of the screen.
5.10 Proximity tool Fig 24 shows the Proximity sensor screen. To get to this screen, follow the steps shown in Section 5.2, Connecting to BLE devices and select the Proximity tool.
Fig 24. Proximity tool
It displays the signal strength (RSSI) and the transmission strength. There are two alert level option buttons below that information. The connection status and the remaining battery life of the BLE device are shown in the lower part of the screen.
The “Link Loss Alert Level” field sets the alert level when the connection between the BLE device and the device running the IoT Toolbox application is lost. The “Immediate Alert” field changes the alert level in the BLE device in real time. To change the alert level in either of the settings, click HIGH, MIDDLE, or OFF.

NXP Semiconductors UM11087 IoT Toolbox Mobile Application User Manual
UM11087 © NXP B.V.2017. All rights reserved.
User Manual Rev. 0 — 19 December 2017 18 of 32
Fig 25. Link Loss Alert field
5.11 Running Speed and Cadence tool Fig 26 shows the Running Speed and Cadence sensor screen. To get to this screen, follow the steps shown in Section 5.2, Connecting to BLE devices and select the Running Speed and Cadence tool.
Fig 26. Running speed and cadence tool
It displays the current speed, steps per minute (cadence), the activity being measured (running or walking), the stride length, and the total distance traveled. The location of the sensor, the connection status, and the remaining battery life of the BLE device are shown in the lower part of the screen.
NXP Semiconductors UM11087 IoT Toolbox Mobile Application User Manual
UM11087 © NXP B.V.2017. All rights reserved.
User Manual Rev. 0 — 19 December 2017 19 of 32
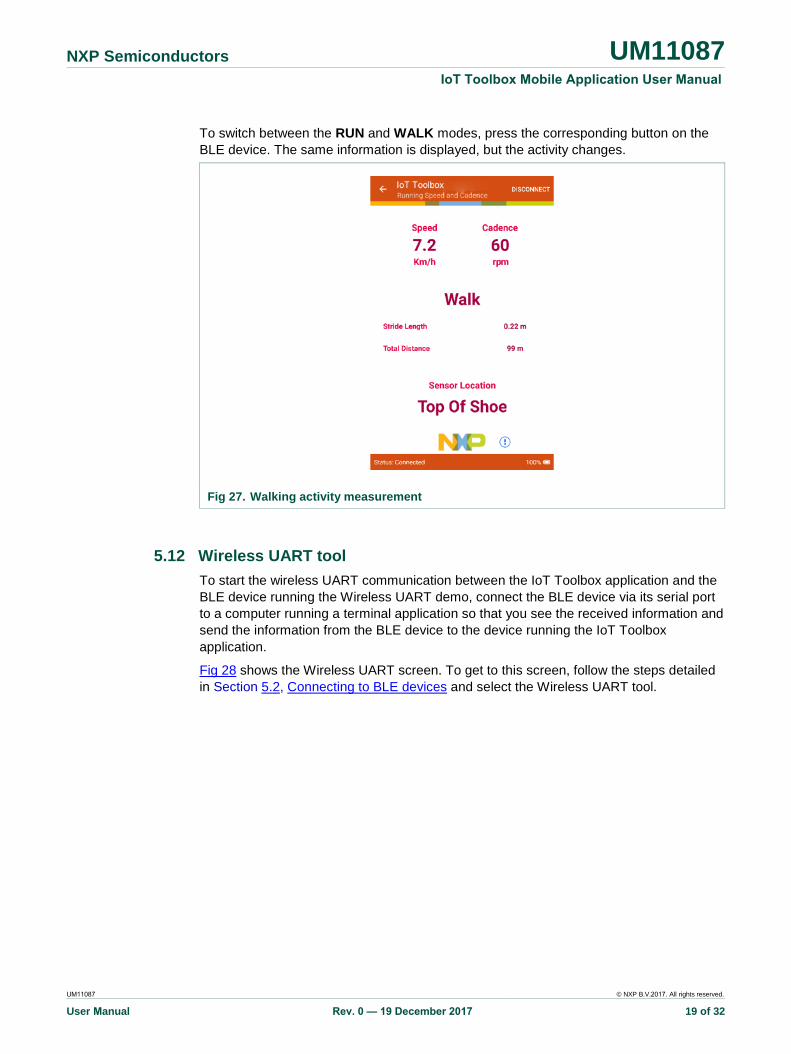
To switch between the RUN and WALK modes, press the corresponding button on the BLE device. The same information is displayed, but the activity changes.
Fig 27. Walking activity measurement
5.12 Wireless UART tool To start the wireless UART communication between the IoT Toolbox application and the BLE device running the Wireless UART demo, connect the BLE device via its serial port to a computer running a terminal application so that you see the received information and send the information from the BLE device to the device running the IoT Toolbox application.
Fig 28 shows the Wireless UART screen. To get to this screen, follow the steps detailed in Section 5.2, Connecting to BLE devices and select the Wireless UART tool.

NXP Semiconductors UM11087 IoT Toolbox Mobile Application User Manual
UM11087 © NXP B.V.2017. All rights reserved.
User Manual Rev. 0 — 19 December 2017 20 of 32
Fig 28. Wireless UART tool
The dialog box enables you to send an ASCII character to the BLE device. When received, the BLE device displays it in the terminal that it is connected to. When a message is sent from the terminal that the BLE device is connected to, it is received by the device running the IoT Toolbox application and displayed in the Wireless UART tool screen.
Fig 29. Sending an ADCII character to BLE device

NXP Semiconductors UM11087 IoT Toolbox Mobile Application User Manual
UM11087 © NXP B.V.2017. All rights reserved.
User Manual Rev. 0 — 19 December 2017 21 of 32
Fig 30. Receiving a message
On the screen, the characters on the right side are sent from the BLE device. The messages on the left side are sent from the application itself.
To configure the terminal to receive and send data from the BLE device, follow these steps: 1. Connect the BLE device to a computer through its serial port.
2. On the computer, open your preferred terminal application.3. In the terminal, establish a connection with the serial port that the BLE device is
connected to.
Fig 31. Configuring the terminal
4. Configure the connection with the settings shown in Fig 32.

NXP Semiconductors UM11087 IoT Toolbox Mobile Application User Manual
UM11087 © NXP B.V.2017. All rights reserved.
User Manual Rev. 0 — 19 December 2017 22 of 32
Fig 32. Configuring connection
5. Now you can send messages from the BLE devices and see the messages received.• If you want to see the message that you are going to send from the BLE device,
enable the “Local echo” setting in your terminal application.
Fig 33. Local echo setting
5.13 Over-the-Air Programming (OTAP) tool The OTAP tool enables you to program the BLE device with a different profile without connecting it to a computer. You may select the firmware file of the new profile from the device running the IoT Toolbox and send it to the BLE device wirelessly. The BLE device is flashed with the new profile and restarted automatically. The BLE device is then programmed with the new profile.
Fig 34 shows the OTAP screen. To get to this screen, follow the steps detailed in Section 5.2, Connecting to BLE devices and select the OTAP tool.

NXP Semiconductors UM11087 IoT Toolbox Mobile Application User Manual
UM11087 © NXP B.V.2017. All rights reserved.
User Manual Rev. 0 — 19 December 2017 23 of 32
Fig 34. OTAP tool
To load the profile to be flashed on the BLE device, click OPEN and select the new firmware.
Fig 35. Loading a profile

NXP Semiconductors UM11087 IoT Toolbox Mobile Application User Manual
UM11087 © NXP B.V.2017. All rights reserved.
User Manual Rev. 0 — 19 December 2017 24 of 32
If the selected firmware file is not valid, the IoT Toolbox application does not load it. If the file is valid, the application recognizes it and the option to upload the firmware file to the BLE device is available. If the firmware file is valid, click UPLOAD to start the update.
Fig 36. Firmware updating
This process can take some time (up to 10 minutes). When it is done, the “transfer successful” message appears. The BLE device restarts and boots with the new profile loaded.
5.14 QN908x Demo Turn on BLE device to run the ISSDK Sensor BLE Example Firmware. Open the phone application and click QN908x Demo on the main screen, as shown in Fig 37.

NXP Semiconductors UM11087 IoT Toolbox Mobile Application User Manual
UM11087 © NXP B.V.2017. All rights reserved.
User Manual Rev. 0 — 19 December 2017 25 of 32
Fig 37. QN908x demo
The mobile phone starts scanning BLE devices automatically in the range and lists devices in the table, as shown in Fig 38.
Fig 38. Connect BLE device
NXP Semiconductors UM11087 IoT Toolbox Mobile Application User Manual
UM11087 © NXP B.V.2017. All rights reserved.
User Manual Rev. 0 — 19 December 2017 26 of 32
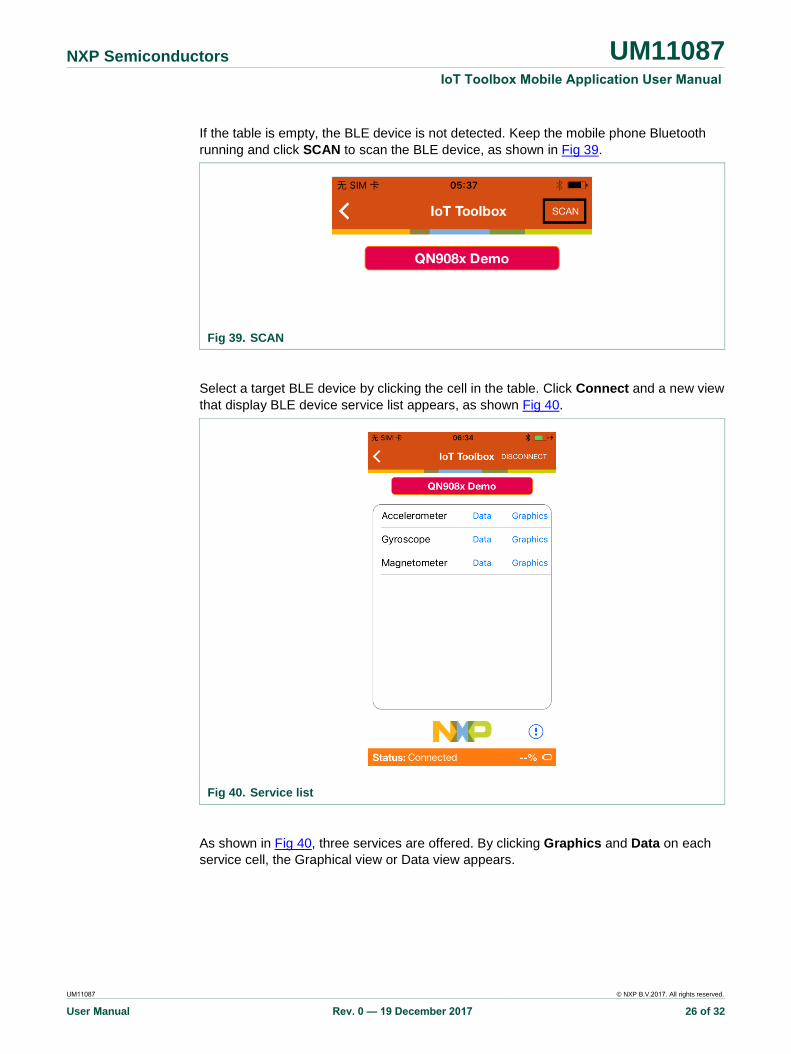
If the table is empty, the BLE device is not detected. Keep the mobile phone Bluetooth running and click SCAN to scan the BLE device, as shown in Fig 39.
Fig 39. SCAN
Select a target BLE device by clicking the cell in the table. Click Connect and a new view that display BLE device service list appears, as shown Fig 40.
Fig 40. Service list
As shown in Fig 40, three services are offered. By clicking Graphics and Data on each service cell, the Graphical view or Data view appears.

NXP Semiconductors UM11087 IoT Toolbox Mobile Application User Manual
UM11087 © NXP B.V.2017. All rights reserved.
User Manual Rev. 0 — 19 December 2017 27 of 32
1. Accelerometer
a. Graphics b. Data
Fig 41. Accelerometer
2. Gyroscope
a. Graphics b. Data
Fig 42. Gyroscope

NXP Semiconductors UM11087 IoT Toolbox Mobile Application User Manual
UM11087 © NXP B.V.2017. All rights reserved.
User Manual Rev. 0 — 19 December 2017 28 of 32
3. Magnetometer
a. Graphics b. Data
Fig 43. Magnetometer

NXP Semiconductors UM11087 IoT Toolbox Mobile Application User Manual
UM11087 © NXP B.V.2017. All rights reserved.
User Manual Rev. 0 — 19 December 2017 29 of 32
6. Legal information
6.1 Disclaimers Limited warranty and liability — Information in this document is believed to be accurate and reliable. However, NXP Semiconductors does not give any representations or warranties, expressed or implied, as to the accuracy or completeness of such information and shall have no liability for the consequences of use of such information.
In no event shall NXP Semiconductors be liable for any indirect, incidental, punitive, special or consequential damages (including - without limitation - lost profits, lost savings, business interruption, costs related to the removal or replacement of any products or rework charges) whether or not such damages are based on tort (including negligence), warranty, breach of contract or any other legal theory.
Notwithstanding any damages that customer might incur for any reason whatsoever, NXP Semiconductors’ aggregate and cumulative liability towards customer for the products described herein shall be limited in accordance with the Terms and conditions of commercial sale of NXP Semiconductors.
Right to make changes — NXP Semiconductors reserves the right to make changes to information published in this document, including without limitation specifications and product descriptions, at any time and without notice. This document supersedes and replaces all information supplied prior to the publication hereof.
Suitability for use — NXP Semiconductors products are not designed, authorized or warranted to be suitable for use in life support, life-critical or safety-critical systems or equipment, nor in applications where failure or malfunction of an NXP Semiconductors product can reasonably be expected to result in personal injury, death or severe property or environmental damage. NXP Semiconductors accepts no liability for inclusion and/or use of NXP Semiconductors products in such equipment or applications and therefore such inclusion and/or use is at the customer’s own risk.
Applications — Applications that are described herein for any of these products are for illustrative purposes only. NXP Semiconductors makes no representation or warranty that such applications will be suitable for the specified use without further testing or modification.
Customers are responsible for the design and operation of their applications and products using NXP Semiconductors products, and NXP Semiconductors accepts no liability for any assistance with applications or customer product design. It is customer’s sole responsibility to determine whether the NXP Semiconductors product is suitable and fit for the customer’s applications and products planned, as well as for the planned application and use of customer’s third party customer(s). Customers should
provide appropriate design and operating safeguards to minimize the risks associated with their applications and products.
NXP Semiconductors does not accept any liability related to any default, damage, costs or problem which is based on any weakness or default in the customer’s applications or products, or the application or use by customer’s third party customer(s). Customer is responsible for doing all necessary testing for the customer’s applications and products using NXP Semiconductors products in order to avoid a default of the applications and the products or of the application or use by customer’s third party customer(s). NXP does not accept any liability in this respect.
Export control — This document as well as the item(s) described herein may be subject to export control regulations. Export might require a prior authorization from competent authorities.
In no event shall NXP Semiconductors, its affiliates or their suppliers be liable to customer for any special, indirect, consequential, punitive or incidental damages (including without limitation damages for loss of business, business interruption, loss of use, loss of data or information, and the like) arising out the use of or inability to use the product, whether or not based on tort (including negligence), strict liability, breach of contract, breach of warranty or any other theory, even if advised of the possibility of such damages.
Notwithstanding any damages that customer might incur for any reason whatsoever (including without limitation, all damages referenced above and all direct or general damages), the entire liability of NXP Semiconductors, its affiliates and their suppliers and customer’s exclusive remedy for all of the foregoing shall be limited to actual damages incurred by customer based on reasonable reliance up to the greater of the amount actually paid by customer for the product or five dollars (US$5.00). The foregoing limitations, exclusions and disclaimers shall apply to the maximum extent permitted by applicable law, even if any remedy fails of its essential purpose.
6.2 Trademarks Android™ — is a trademark of Google LLC
Google Play™ — is a trademark of Google LLC
iOS™ — is a trademark or registered trademark of Apple Inc.
App Store® — is a trademark of Apple Inc.

NXP Semiconductors UM11087 IoT Toolbox Mobile Application User Manual
UM11087 © NXP B.V. 2017. All rights reserved.
User Manual Rev. 0 — 19 December 2017 30 of 32
7. List of figuresFig 1. IoT Toolbox search ..................................... 4 Fig 2. Install button ................................................ 4 Fig 3. Home screen ............................................... 5 Fig 4. Accessing a feature .................................... 6 Fig 5. SCAN button ............................................... 7 Fig 6. STOP button ............................................... 7 Fig 7. DISCONNECT button ................................. 8 Fig 8. CONNECT button ....................................... 8 Fig 9. Beacons button ........................................... 9 Fig 10. SCAN button ............................................... 9 Fig 11. Automatic scanning for BLE devices ........ 10 Fig 12. Message option ......................................... 10 Fig 13. Message set .............................................. 11 Fig 14. Custom message ...................................... 11 Fig 15. Blood pressure tool ................................... 12 Fig 16. Cycling speed and cadence tool ............... 13 Fig 17. Wheel size adjustment .............................. 13 Fig 18. ACCEPT button ........................................ 14 Fig 19. Glucose tool .............................................. 14 Fig 20. Measurement received ............................. 15 Fig 21. Navigate to previous measurements ........ 15 Fig 22. Health thermometer tool ........................... 16 Fig 23. Heart rate tool ........................................... 16 Fig 24. Proximity tool ............................................ 17 Fig 25. Link Loss Alert field ................................... 18 Fig 26. Running speed and cadence tool ............. 18 Fig 27. Walking activity measurement .................. 19 Fig 28. Wireless UART tool ................................... 20 Fig 29. Sending an ADCII character to BLE device
20 Fig 30. Receiving a message................................ 21 Fig 31. Configuring the terminal ............................ 21 Fig 32. Configuring connection ............................. 22 Fig 33. Local echo setting ..................................... 22 Fig 34. OTAP tool ................................................. 23 Fig 35. Loading a profile ....................................... 23 Fig 36. Firmware updating .................................... 24 Fig 37. QN908x demo ........................................... 25 Fig 38. Connect BLE device ................................. 25 Fig 39. SCAN ........................................................ 26 Fig 40. Service list ................................................. 26 Fig 41. Accelerometer ........................................... 27 Fig 42. Gyroscope ................................................. 27 Fig 43. Magnetometer ........................................... 28

NXP Semiconductors UM11087 IoT Toolbox Mobile Application User Manual
UM11087 © NXP B.V.2017. All rights reserved.
User Manual Rev. 0 — 19 December 2017 31 of 32
8. List of tablesTable 1. IoT toolbox requirements ....................... 3
NXP Semiconductors UM11087 IoT Toolbox Mobile Application User Manual
Please be aware that important notices concerning this document and the product(s) described herein, have been included in the section 'Legal information'.
© NXP B.V. 2017. All rights reserved. For more information, please visit: http://www.nxp.com
Date of release: 19 December 2017 Document identifier: UM11087
9. Contents
1. Introduction ......................................................... 3 2. IoT Toolbox features ........................................... 3 3. IoT Toolbox requirements .................................. 3 4. Installing IoT Toolbox ......................................... 4 5. Using IoT Toolbox ............................................... 4 5.1 Home screen ...................................................... 5 5.2 Connecting to BLE devices ................................ 6 5.3 Disconnecting from BLE devices ........................ 7 5.4 Beacons tool ...................................................... 8 5.5 Blood Pressure tool .......................................... 11 5.6 Cycling Speed and Cadence tool ..................... 12 5.7 Glucose tool ..................................................... 14 5.8 Health Thermometer tool ................................. 15 5.9 Heart Rate tool ................................................. 16 5.10 Proximity tool .................................................... 17 5.11 Running Speed and Cadence tool ................... 18 5.12 Wireless UART tool .......................................... 19 5.13 Over-the-Air Programming (OTAP) tool ........... 22 5.14 QN908x Demo ................................................. 24 6. Legal information .............................................. 29 6.1 Disclaimers....................................................... 29 6.2 Trademarks ...................................................... 29 7. List of figures ..................................................... 30 8. List of tables ...................................................... 31 9. Contents ............................................................. 32