Embed Size (px)
Citation preview
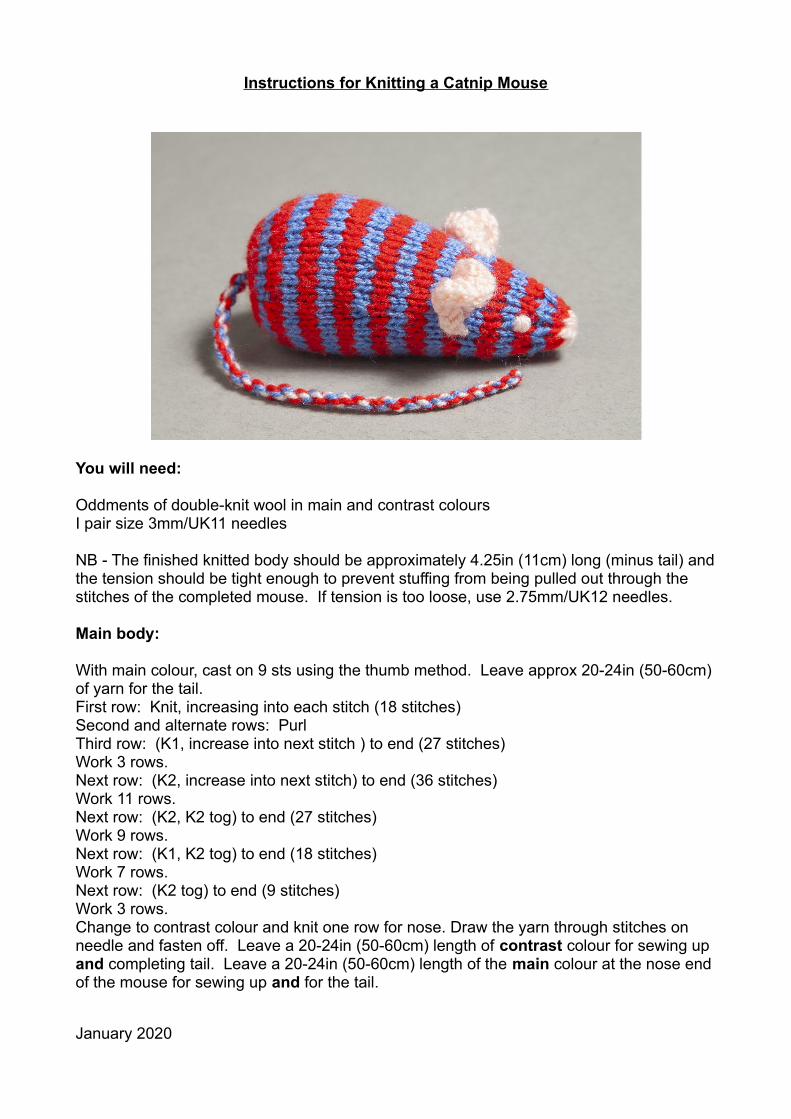
Instructions for Knitting a Catnip Mouse
stripy mouse side view 0776
You will need:
Oddments of double-knit wool in main and contrast coloursI pair size 3mm/UK11 needles
NB - The finished knitted body should be approximately 4.25in (11cm) long (minus tail) andthe tension should be tight enough to prevent stuffing from being pulled out through the stitches of the completed mouse. If tension is too loose, use 2.75mm/UK12 needles.
Main body:
With main colour, cast on 9 sts using the thumb method. Leave approx 20-24in (50-60cm)of yarn for the tail.First row: Knit, increasing into each stitch (18 stitches)Second and alternate rows: PurlThird row: (K1, increase into next stitch ) to end (27 stitches)Work 3 rows.Next row: (K2, increase into next stitch) to end (36 stitches)Work 11 rows.Next row: (K2, K2 tog) to end (27 stitches)Work 9 rows.Next row: (K1, K2 tog) to end (18 stitches)Work 7 rows.Next row: (K2 tog) to end (9 stitches)Work 3 rows.Change to contrast colour and knit one row for nose. Draw the yarn through stitches on needle and fasten off. Leave a 20-24in (50-60cm) length of contrast colour for sewing up and completing tail. Leave a 20-24in (50-60cm) length of the main colour at the nose end of the mouse for sewing up and for the tail.
January 2020

Ears:
Using contrast colour and leaving approx 8in (20cm) of yarn to enable sewing to the head, cast on 18 stitches.First row: Knit.Second row: PurlThird row: (K2 tog) to end (9 stitches)Leaving a further 8in (20cm) of yarn to enable sewing onto the head, pull yarn through stitches and fasten off.
This is the basic pattern for the mouse body and ears. Fair Isle style random wools make interesting patterns but you can also make stripy mice, multicoloured mice or any other variety of mouse that you can think of! We just ask that you use nice bright colours. The cats don’t care what they look like, but the customers do! Please send the mice bodies and ears to CRRC at Holborow Lodge, Chalder Lane, Sidlesham, Chichester PO20 7RJ for completion. If you would like to complete them yourself then the instructions for this can be found on our website: www.crrc.co.uk
Thank you for offering to knit our catnip mice.
Group of mice 0768
January 2020