Embed Size (px)
Citation preview

Contents
Page 2 Product Overview Page 3 Installation Notes Page 3 Electrical Provision Page 4 Preparation Page 5 Heating Cable Installation Page 8 Heating Mat Installation Page 12 Troubleshooting & FAQ’s
Instructions for installation of Undertile Heating Undertile Cable Kit & Undertile Cable Mat
Revision 5, 16/06/08
For help and advice regarding this product, please contact the Floor Heating Helpline: 0870 199 7842

Under-Tile Heating
Page 2
Product Overview
Overview: This instruction manual covers the electrical provision and installation of both the Undertile heating cable kit and cable mat. Before you begin installing please read through these instructions carefully and check that you have all the components required. These systems are designed for installation below tiles, stone or marble flooring. They may also be installed below vinyl, laminate and thin carpets but in these cases must be first covered with a flexible floor levelling compound.
Important Notes: DO NOT cut or cross the heating cable DO NOT fit the system without testing the heating element(s) DO NOT supply power to the heating element whilst it is coiled or partially coiled
Contents of heating kit: • 3mm twin-core Heating Element (mat or loose cable) • Acrylic floor primer 500ml • Disposable roller for application of primer • High adhesion fixing tape (loose cable systems only) • Digital thermostat and separate floor sensor • Guarantee Certificate Additional Items that will aid installation • Tape Measure • Electrical Test Equipment *(see note below)
• Marker Pen or Pencil (Loose Cable system) • Self-Adhesive Cloth tape (Cable mat system) • Knee Pads
* Note: A multi-meter will suffice for preliminary testing of the cable prior to laying of the floor finish. Final testing for completion of the guarantee must be performed by your electrician with calibrated test equipment.
For help and advice regarding this product, please contact the Floor Heating Helpline: 0870 199 7842

Under-Tile Heating
Page 3
Important Notes: Make the electrical provision as per the diagram Fig.1. The circuit must incorporate a 30mA RCD protection For installations below 13Amp, A fused spur or combined spur/ RCD is recommended. For installations over 13Amp a suitable isolated supply should be provided incorporating 30mA RCD protection. The thermostat rating is 15amps & this is capable of control-ling approx 3450watts of heating. (most domestic installations are within this figure). If the system supplied is over 3.45kW it will be subject to a more comprehensive electrical installation. (Your electrician will be able to advise you on this). Note: all electrical connections should be made in compliance with building regulation Part 'P' and current wiring regulations. Note if installing in a bathroom or other 'wet' room the thermo-stat must be located OUTSIDE of the room, on the opposite side of the wall, for example in a bedroom or hallway/landing.
Installation Notes • The system requires a mains voltage 230V AC and must be connected in compliance with building regulations Part 'P'
and current wiring regulations. • The ‘cold’ cable attached to each heating element is double insulated and the first outer sheath (coloured black) carries
an earth screen (the silver coloured braid). The heating element also contains a built in return meaning that the cable only has to be connected to the thermostat from one end. Inside the outer sheath there are 2 wires, these are the live and neutral.
• For larger areas, if two or more heating elements are supplied, these can usually be connected together at the thermo-
stat or by using a small blank fronted connection box. • The system is suitable for installing on any sub-floor which is sound and suitable for tiling. In the main this will be con-
crete, plywood or cement faced tile-backer boards. Some water resistant composite boards may also be suitable, but it is not recommended to tile directly onto hardboard, MDF or standard grade chipboard as these substances absorb moisture and subsequent swelling could cause tiles to crack or dislodge. Note - if installing on a newly finished concrete screed the required minimum drying out or ‘curing’ period should be followed before installing (this is typically 1day per millimetre in good conditions).
• The electrical and electromagnetic fields generated are negligible and well within all recommended European and Inter-
national guidelines. • The heater cable MUST NOT be cut or cross at any point.
Electrical Provision
Fig. 1

Under-Tile Heating
Page 4
Step 2
Step 3 Prime the floor or the tile backer boards using the Acrylic primer con-tained in the kit. If installing over a large area or on an absorbent sur-face the primer may need to be diluted in accordance with the primer instructions. Once primed leave to dry (typically 1-3 hours) and avoid foot traffic over this area. The purpose of priming is to promote greater adhesion and reduce the amount of moisture absorbed into the sub-floor Fig. 4. Before proceeding to step 4 see note below
Preparation Ensure that the sub-floor is solid, suitable for tiling and free from dust and debris. Wood flooring with more than 40cms between the joists should ideally be reinforced to prevent flexing and the possibility of tiles dislodging. Wood flooring can be reinforced using 18mm WBP plywood, Marine plywood or insulated tile-backer boards.
Insulation The insulation levels of a floor will affect both the performance and running costs of an underfloor heating system and al-though not essential in many cases, it is recommended wherever possible. For example it would not be considered neces-sary to insulate small areas where the requirement is simply to ‘take the chill off the floor’, however in cases where the heating is being installed over large areas, particularly as the primary heating source in a ground floor room or conserva-tory, insulation boards will greatly reduce warm-up times and running costs. Suitable insulation boards are available from your underfloor heating retailer/supplier.
First prepare the sub-floor ensuring that it is clean and free from grease, dirt or debris. Fig.2
Note - if installing on a bitumen base, this must either be removed or covered. For further information, refer to the FAQ’s on the back page of this manual or contact the floor heating helpline.
The most suitable sub-floors are: concrete, tile-backer boards, exist-ing tiles, water-resistant timber e.g. WBP Ply.
Step 1
Cable Kit Installation instructions go to step 4 on page 5 Cable Mat Installation instructions go to step 4 on page 8
Fig. 3
Fig. 2
Fig. 4
If fixing tile-backer boards, do so in accordance with the separate instructions provided, using tile adhesive on a concrete sub-floor Fig 3, or galvanised screws with washers/fixings on timber sub-floors.

Under-Tile Heating
Page 5
Cable Kit Installation Important notes The system is intended for heating tiles, stone or marble flooring, it may also be installed below vinyl, laminate and thin carpets but in these cases must be first covered with a suitable levelling compound. The optimum recommended output is approx 150W/m² achieved by spacing the cable at around 6.5cms between the loops. Exact cable spacing should be cal-culated before installation (see step 5). Note: A multi-meter will suffice for preliminary testing of the cable prior to laying of the floor finish. Final testing for comple-tion of the guarantee must be performed by your electrician using calibrated test equipment.
Calculate the cable spacing. This is a very important step and MUST be done correctly to ensure all the cable is used up and avoid extra work later. First measure the area to be heated in sqm (do not include the area taken up by fixed objects such as baths/showers and kitchen units), then divide this area by the length of the cable shown on the drum. The cable is 10 watts per linear metre so, for example, a 750 watt kit contains 75 metres of heating cable. The spacing is calculated by dividing the total sqm of the area to be heated by the cable length in metres. Example Fig 5.
Step 4
Fig. 5
Example room: 2m x 3m (6sqm) less 0.9m for shower & WC = 5.1sqm. A 750watt (75metre cable) kit is ideal Cable Spacing is calculated at 5.1 ÷ 75 = 0.068m (6.8cms) leaving a gap of approx 4cms from the perimeter of the room.
Fig. 6
Once the spacing has been determined, leaving a perimeter of 3-5cms around the edge of the room, mark out on the floor at the cal-culated intervals. This will usually be between 6 and 8cms Fig 6. If your calculated spacing is less than 5cms STOP and do not in-stall – the kit size is too large for the room. A spacing of 10cms will in many cases only take the chill off the floor. Used as a heating source in most domestic situations the spacing should be between 6-8cms (this is always dependent on insulation levels and type of floor construction).
Step 5
Test the resistance of the cable prior to installing, Fig 7 and ensure that the reading is as per manufactures design reading This can be found on the silver label on the packaging or printed on the PVC sheath (± 10%). Make a note of the reading. Test the insulation of the cable by checking that there is no electrical continuity between each of the conductors and the earth braid. If you find there is conti-nuity contact your underfloor heating supplier or the floor heating helpline printed on the back of these instructions. Do not tile over the cable without testing it.
Step 6
Fig. 7

Under-Tile Heating
Page 6
Once marked out, position one roll of tape in each corner of the room Fig 8. Begin to loop out the cable as shown. At this stage only use a single line of tape at each edge in case you have to adjust the spacing slightly later. Fig 9.
You must ensure that the cable is only installed in the ‘free floor area’ and is NOT routed below any fixed objects or drains. Note – the joint between the black ‘cold’ cable and the ‘heater’ cable MUST be located under the final floor covering. Eg. under the tiles.
Cable Kit Installation Continued…….. Step 7
Fig. 8 Fig. 9
Adjust the spacing if necessary to ensure all the cable is used up and the floor has an even covering. Cables should be spaced no closer than 50mm (5cm). Tape over the cable at regular intervals ensuring that it is well secured to the floor Fig 10.
Step 8
Test the resistance of the floor probe. Refer to the label on the floor probe wrapper for desired resistance readings. Make a note of the reading.
Position the sensor between two runs of cable, in a position that will not be covered by rugs or low profile furniture. Once a suitable loca-tion is established, tape into position Fig 11. The sensor wire should not cross the heating cable at any point. The sensor wire can be shortened or if necessary, lengthened with 2 core flex cable mini-mum 0.75mm² to a maximum length of 50m. If you need to cut the sensor wire you must only cut the cable end. DO NOT cut the end which contains the plastic floor sensor.
Step 9
Fig. 10
Fig. 11

Under-Tile Heating
Page 7
Cable Kit Installation Continued……..
Test the cable resistance and the insulation along with the floor probe immediately prior to tiling to ensure that neither has been damaged. Compare readings with those recorded earlier. Note: This test can be performed at any stage of tiling for peace of mind. A cable break monitor device can also be used to alert you if the cable has been damaged. Such devices are available from you underfloor heating supplier. UNDER NO CIRCUMSTANCES should power be supplied to the cable when it is still on the drum or partly coiled up.
Step 10
If possible cover the cables with a thin layer of flexible levelling screed (3-4mm) this will help protect the cables when tiling Fig 12. Suitable products will usually be available from your tile supplier. If you have any difficulties refer to FAQ’s on the back page of this manual or contact the floor heating helpline. If you do not wish to use a levelling screed, you may tile directly over the cables in a sin-gle operation, however extra care must be taken not to damage or dislodge the cables. Tile the floor using a flexible tile adhesive and grout as per industry standards and the manufacturers instructions. If you are using a suitable vinyl or thin carpet as the final flooring we recommend a minimum of a 6mm layer of levelling screed over the cables to en-sure even heat distribution.
Step 11
After the floor covering has been laid, test the Cable and Floor Probe one last time to ensure that neither have been dam-aged. Record final readings and complete the Guarantee Certificate as per the instructions on the certificate. If this is not done the Guarantee is invalid. Retain the certificate for your records.
Step 12
The connections to the thermostat can now be made. (see separate thermostat instructions). Final connections to the ther-mostat must be performed by a competent person. Refer to Electrical Industry standards and Building Regulation Part 'P'.
Step 13
NOTE: The heating may be slow to react at first especially if installed on a new screed floor or in a new building. Start by setting the floor temperature at around 20-22°C and build up by 1°C per day until your desired temperature is reached. DO’S and DON’TS DO Read through these instructions carefully before beginning work DO Use flexible adhesives and grouts DO Test the cable BEFORE tiling. See steps 6, 9, 10 and 12 DO Be careful not to damage or dislodge the cable during tiling DO Ensure the cable is spaced no closer than 50mm between loops DO Try to protect the cable with cardboard or carpet during tiling DO Wait at least 7 days before turning on the system DO Read the separate installation and operating instructions for the thermostat DO Ensure that the joint between the black ‘cold’ cable and ‘heater’ cable is beneath the tiles. DO Take a photograph of the floor heating cables or draw a plan before they are tiled over for future reference. DON’T Attempt to cut the heater cable at any point DON’T Allow the wires to cross or touch DON’T Allow excessive foot traffic over the wire before tiling DON’T Cut tiles directly over the cable DON’T Place tools or stacks of tiles on top of the cable DON’T Turn the system on until the floor covering has been laid and allowed time to set.
Fig. 12

Under-Tile Heating
Page 8
Cable Mat Installation Important notes The system is intended for heating tiles, stone or marble flooring, it may also be installed below vinyl, laminate and thin carpets but in these cases must be first covered with a suitable latex based levelling compound. Note: A multi-meter will suffice for preliminary testing of the cable prior to laying of the floor finish. Final testing for comple-tion of the guarantee must be performed by your electrician with calibrated test equipment.
Read through steps 4-12 of the cable mat installation instructions fully, then plan the mat layout. This is a very important step and MUST be done correctly to ensure all the mat is used up. Once the mat has been un-rolled it cannot be returned.
It is advisable to produce a drawing showing the proposed mat layout. Start by measuring the floor area to be heated (do not include the area taken up by fixed objects such as baths/showers and kitchen units). The following examples will help you to plan your layout. Please note these are only to be used as a general guide. There are hints and tips in each of the examples so it may be beneficial to read all of them if you have not installed cable matting before.
If the heated area is smaller than the chosen mat size STOP and return or exchange for the correct size.
Step 4
Example 1: Fig.13 Typical mat installation in a rectangular shaped room. Example shown is a 5m² cable mat (10m total length of mat) divided into 5 runs each of 2m long with a 50mm gap between each run of matting to maintain minimum cable spacing
Thermostat
Cold Cable Joint
Sensor Tip
Fig. 13
Fig. 14
Example 2: Fig.14 A sample mat installation in a kitchen. Example shown is a 2.5m² cable mat (5m total length of mat) 3 full width runs each laid to maintain a 50mm gap between cable loops. Two of the mat runs are approximately 2.2m long and the third run is 0.9m. The remainder of the cable is removed from the mesh matting, laid loose and fixed in place with self adhesive cloth tape (duct tape). When run loose, the cable should be spaced, similarly to when it is attached to the matting. Cables should be spaced no closer than 50mm.

Under-Tile Heating
Page 9
Example 3: Fig.15 Typical bathroom installation: Example shown is a 2.5m² cable mat (5m total length of mat) 2 full width runs in front of the bath, each laid to maintain a 50mm gap between cable loops. Areas where a full width of mat cannot be laid, the cable is removed from the mesh matting, laid loose and fixed in place with self adhesive cloth tape (duct tape). When run loose, the cable should be spaced, similarly to when it is attached to the matting. Cables should be spaced no closer than 50mm. Matting can also be laid 90° to main runs of matting.
Example 4: Fig.16 Victorian Style Conservatory installation: Example shown is a 9m² cable mat (18m total length of mat) 6 full width runs of mat, each laid to maintain a 50mm gap between cable loops. The angled sides of the room create irregular areas which can be filled by removing the cable from the mesh matting, laid loose and fixed in place with self adhesive cloth tape (duct tape). When run loose, the cable should be spaced, similarly to when it is attached to the matting. Cables should be spaced no closer than 50mm.
Fig. 15
Fig. 16
Example 5: Fig.17 Multiple mat installation: Example shown is a 13m² cable mat (14m+12m total lengths of mat) 8 full width runs of mat, each laid to maintain a 50mm gap between cable loops. As the thermostat is located at one end of the room, the matting has been laid so that the cold tails from each mat can be connected directly into the thermostat without the need to extend the cold tail.
Fig. 17
Cable Mat Installation Continued……..

Under-Tile Heating
Page 10
Step 5 Test the resistance of the cable mat prior to installing and ensure that the reading is as per manufactures design reading. This can be found on the silver label on the packaging or printed on the PVC sheath (± 10%). Make a note of the reading. Test the insulation of the cable by checking that there is no electrical continuity between each of the con-ductors and the earth braid. If you find there is continuity contact your underfloor heating supplier or the floor heating helpline printed on the back of these instructions. Do not tile over the cable without testing it.
Step 6 Only when you have planned the mat layout and are sure the mat will fit into the room, should you begin to lay. Beginning at the corner closest to where you have located the thermostat, position the mat ready to start rolling out. Important: Before rolling out, check that the black cold lead will reach the location of the thermostat. If it does not, you should either change the starting point, or remove some of the cable from the starting end of the mat and run this along the edge of the room to al-low the cold cable to reach the thermostat. Important Note: The joint between the black 'cold' cable and heater cable must be located under the final floor covering. This loose cable can be fixed down with a self adhesive cloth tape.
Step 7 From the start point roll out the mat. The mat is self-adhesive and can be laid either way up. When you reach the opposite corner of the room cut through the mesh. DO NOT CUT THE CABLE. Turn the mat through 180 degrees and roll back the other way, making sure that there is at lease 50mm clearance between each cable loop. Continue this process until the entire mat is used up. If you are using two or more mats, try to finish off at the opposite wall so that the second mat is eas-ier to lay, see example 5, Page 9: Once all the matting is laid out, you can make slight adjustments to the positioning of the mat runs. When you are satisfied with the layout, firmly press down the matting with the palm of your hand to ensure the mat is fixed to the floor. Any irregular shaped areas or a section of floor that will not accommodate a full width on matting, can be heated by remov-ing the cable from the mesh matting. It can then be laid loose on the floor and fixed in place with self adhesive cloth tape (duct tape). When running the cable loose from the matting the cable should be spaced similarly to when it is attached to the mat. Cables should be spaced no closer than 50mm.
Fig. 18
Cable Mat Installation Continued……..
Fig. 19 Fig. 20

Under-Tile Heating
Page 11
Step 9 Test the cable mat resistance and the cable insulation along with the floor probe immediately prior to tiling to ensure that neither has been damaged. Compare readings with those recorded earlier. Note: This test can be performed at any stage of tiling for peace of mind. A cable break monitor device can also be used to alert you if the cable has been damaged. Such devices are available from you underfloor heating supplier. UNDER NO CIRCUMSTANCES should power be supplied to the cable mat when it is still rolled or partly rolled up.
Cable Mat Installation Continued…….. Step 8 Test the resistance of the floor probe. Refer to the label on the floor probe wrapper for desired resistance readings. Make a note of the reading. Position the sensor between two runs of cable, in a position that will not be covered by rugs or low profile furniture. Once a suitable location is established, tape into position Fig 21. The sensor wire should not cross the heating cable at any point. The sensor wire can be shortened or if necessary, lengthened with 2 core flex cable minimum 0.75mm² to a maximum length of 50m. If you need to cut the sensor wire you must only cut the cable end. DO NOT cut the end which contains the plastic floor sensor.
Step 10 If possible cover the mat with a levelling screed (3-4mm) Fig 22. This will help protect the mat when tiling. If you do not wish to use a levelling screed, you may tile directly over the mat in a single op-eration. Tile the floor using a flexible tile adhesive and grout as per in-dustry standards and the manufacturer's instructions. Wait at least ONE WEEK before turning the heating system on to allow time to dry. If you are using a suitable vinyl or thin carpet as the final flooring, you will need to cover the mat with a suitable levelling screed - we recommend a minimum of a 6mm covering over the mat to ensure even heat distri-bution.
Step 11 After the floor covering has been laid, test the Cable and Floor Probe one last time to ensure that neither have been damaged. Record final readings and complete the Guarantee Certificate as per the instructions on the certificate. If this is not done the Guarantee is invalid. Retain the certificate for your records.
Step 12 The connections to the thermostat can now be made. (see separate thermostat instructions). Final connections to the ther-mostat must be performed by a competent person. Refer to Electrical Industry standards regulations and Building Regula-tion Part 'P' . DO NOT turn the system on until the floor covering has been laid and allowed time to set. NOTE: The heating may be slow to react at first especially if installed on a new screed floor or in a new building. Start by setting the floor temperature at around 20-22°C and build up by 1°C per day until your desired temperature is reached. Please see separate instructions for connection and operation of the digital thermostat.
Fig. 21
Fig. 22
Under-Tile Heating
Page 12
These instructions are correct at time of writing For help and advice regarding this product, please contact the Floor Heating Helpline: 0870 199 7842
Trouble shooting & FAQ’s
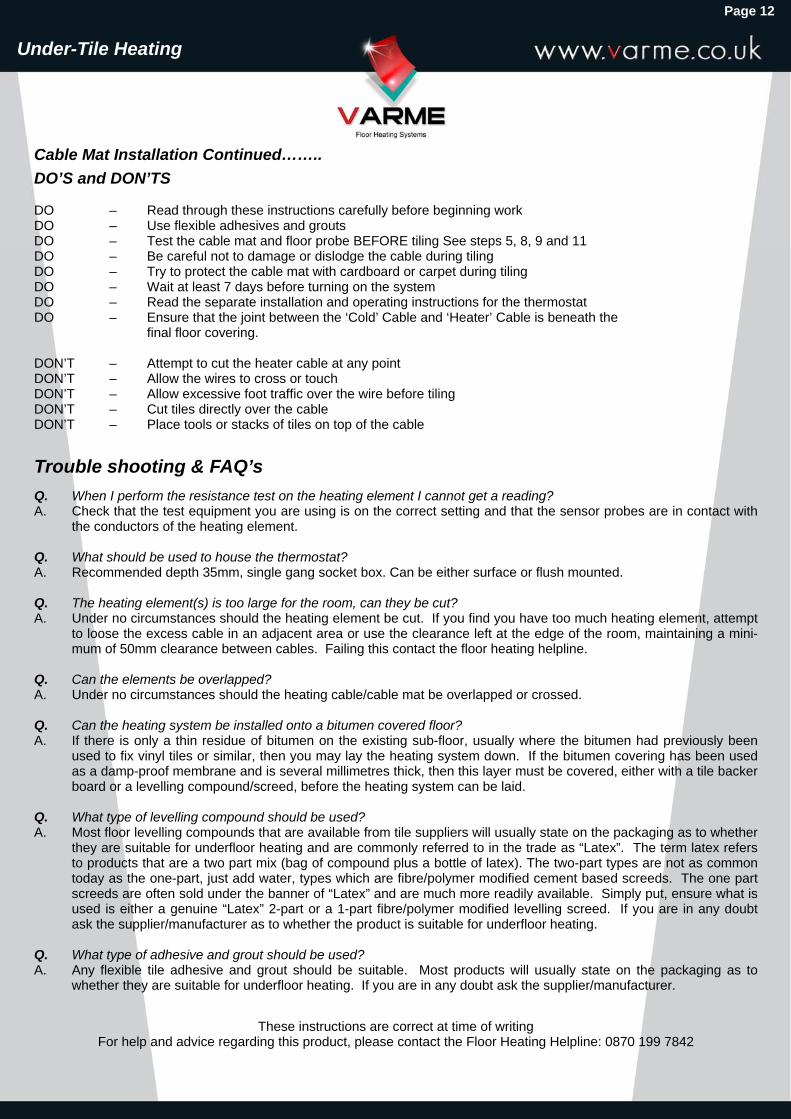
Cable Mat Installation Continued…….. DO’S and DON’TS DO – Read through these instructions carefully before beginning work DO – Use flexible adhesives and grouts DO – Test the cable mat and floor probe BEFORE tiling See steps 5, 8, 9 and 11 DO – Be careful not to damage or dislodge the cable during tiling DO – Try to protect the cable mat with cardboard or carpet during tiling DO – Wait at least 7 days before turning on the system DO – Read the separate installation and operating instructions for the thermostat DO – Ensure that the joint between the ‘Cold’ Cable and ‘Heater’ Cable is beneath the final floor covering. DON’T – Attempt to cut the heater cable at any point DON’T – Allow the wires to cross or touch DON’T – Allow excessive foot traffic over the wire before tiling DON’T – Cut tiles directly over the cable DON’T – Place tools or stacks of tiles on top of the cable
Q. When I perform the resistance test on the heating element I cannot get a reading? A. Check that the test equipment you are using is on the correct setting and that the sensor probes are in contact with
the conductors of the heating element. Q. What should be used to house the thermostat? A. Recommended depth 35mm, single gang socket box. Can be either surface or flush mounted. Q. The heating element(s) is too large for the room, can they be cut? A. Under no circumstances should the heating element be cut. If you find you have too much heating element, attempt
to loose the excess cable in an adjacent area or use the clearance left at the edge of the room, maintaining a mini-mum of 50mm clearance between cables. Failing this contact the floor heating helpline.
Q. Can the elements be overlapped? A. Under no circumstances should the heating cable/cable mat be overlapped or crossed. Q. Can the heating system be installed onto a bitumen covered floor? A. If there is only a thin residue of bitumen on the existing sub-floor, usually where the bitumen had previously been
used to fix vinyl tiles or similar, then you may lay the heating system down. If the bitumen covering has been used as a damp-proof membrane and is several millimetres thick, then this layer must be covered, either with a tile backer board or a levelling compound/screed, before the heating system can be laid.
Q. What type of levelling compound should be used? A. Most floor levelling compounds that are available from tile suppliers will usually state on the packaging as to whether
they are suitable for underfloor heating and are commonly referred to in the trade as “Latex”. The term latex refers to products that are a two part mix (bag of compound plus a bottle of latex). The two-part types are not as common today as the one-part, just add water, types which are fibre/polymer modified cement based screeds. The one part screeds are often sold under the banner of “Latex” and are much more readily available. Simply put, ensure what is used is either a genuine “Latex” 2-part or a 1-part fibre/polymer modified levelling screed. If you are in any doubt ask the supplier/manufacturer as to whether the product is suitable for underfloor heating.
Q. What type of adhesive and grout should be used? A. Any flexible tile adhesive and grout should be suitable. Most products will usually state on the packaging as to
whether they are suitable for underfloor heating. If you are in any doubt ask the supplier/manufacturer.