Embed Size (px)
Citation preview
Instruction manualChess Tutor
Cor van WijgerdenEiko BleicherStefan Meyer-KahlenJürgen DanielEnglish translation: Ian Adams
Contents:Installing the program ............................................................... 3Starting the program ................................................................. 3The overview............................................................................. 5
Lessons ............................................................................ 6The exercise window ................................................................ 8
The board ......................................................................... 8Text boxes ....................................................................... 8The buttons ...................................................................... 9Navigation buttons........................................................... 9Info buttons.................................................................... 10Types of exercise ........................................................... 10Scoring........................................................................... 11Mini-games .................................................................... 11Games ............................................................................ 12
The instruction window .......................................................... 13The menu ............................................................................... 15
File . ............................................................................... 15Change user ................................................................... 15Preferences .................................................................... 15
Board Orientation..................................................... 16Show Coordinates .................................................... 16Board and pieces ...................................................... 16Animation speed ...................................................... 16Delete user................................................................ 16Clear results.............................................................. 16Quit .......................................................................... 17
Edit ............................................................................... 17Show moves ............................................................. 17Window size............................................................. 17
Help ............................................................................... 17Open Help Document .................................................... 17Check for new version ................................................... 17Help ............................................................................... 17
2
Installing the programTo install the program you need:
o The file SetupChessTutor3.exeo The licence code with the name which is linked to it (Steps 1, 2 and 3 have different codes!)
A double click on SetupChessTutor3.exe starts the installation. For a standard installation the files are copied to the folderPrograms\Chess Tutor\Chess Tutor Step3.
Normally the start icon for Chess Tutor with a link to the program is set up on your desktop. TheChess Tutor requires the Microsoft .NET libraries. If these are not yet present on your system they will be installed automatically.
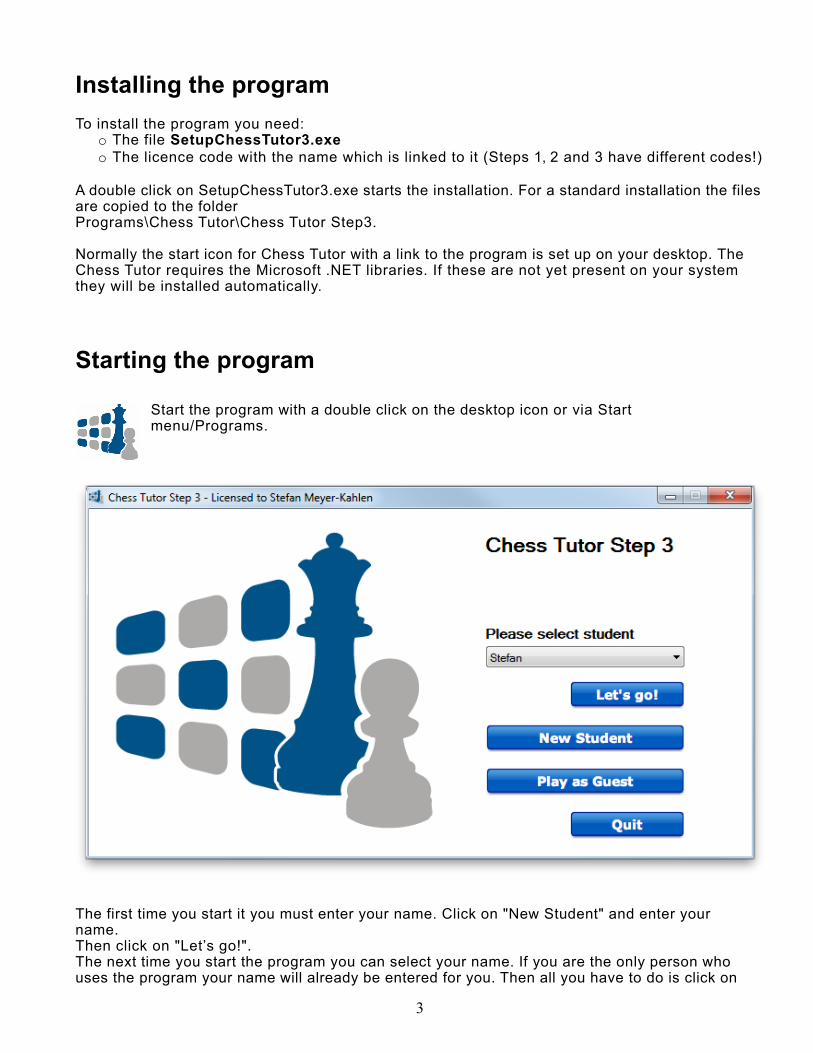
Starting the program
Start the program with a double click on the desktop icon or via Start menu/Programs.
The first time you start it you must enter your name. Click on "New Student" and enter your name.Then click on "Let’s go!".The next time you start the program you can select your name. If you are the only person whouses the program your name will already be entered for you. Then all you have to do is click on
3
"Let’s go!".
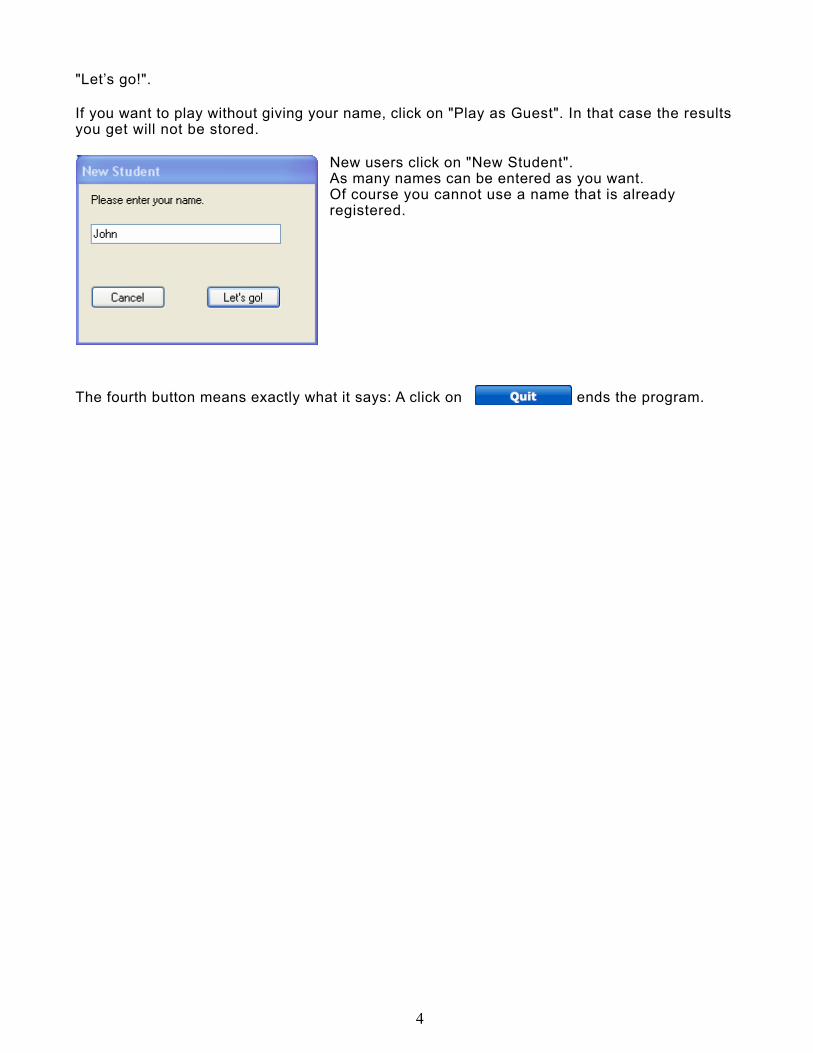
If you want to play without giving your name, click on "Play as Guest". In that case the results you get will not be stored.
New users click on "New Student".As many names can be entered as you want.Of course you cannot use a name that is already registered.
The fourth button means exactly what it says: A click on ends the program.
4
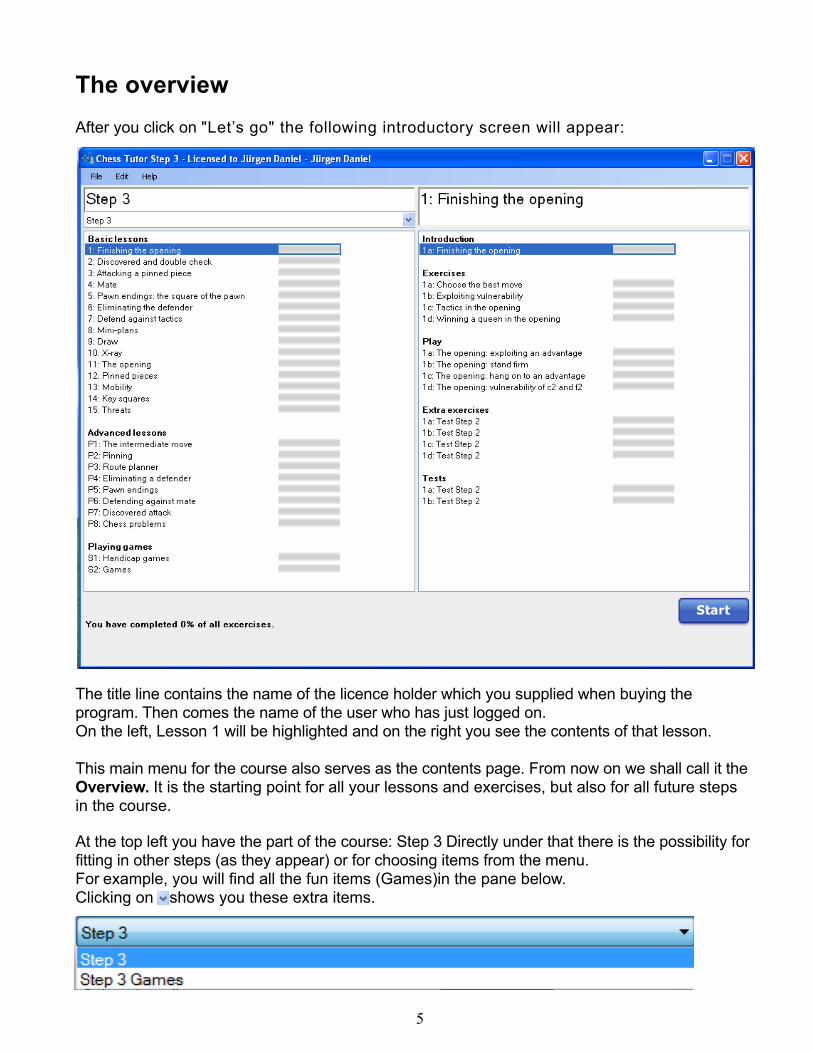
The overviewAfter you click on "Let’s go" the following introductory screen will appear:
The title line contains the name of the licence holder which you supplied when buying the program. Then comes the name of the user who has just logged on.On the left, Lesson 1 will be highlighted and on the right you see the contents of that lesson.
This main menu for the course also serves as the contents page. From now on we shall call it theOverview. It is the starting point for all your lessons and exercises, but also for all future steps in the course.
At the top left you have the part of the course: Step 3 Directly under that there is the possibility for fitting in other steps (as they appear) or for choosing items from the menu.For example, you will find all the fun items (Games)in the pane below. Clicking on shows you these extra items.
5
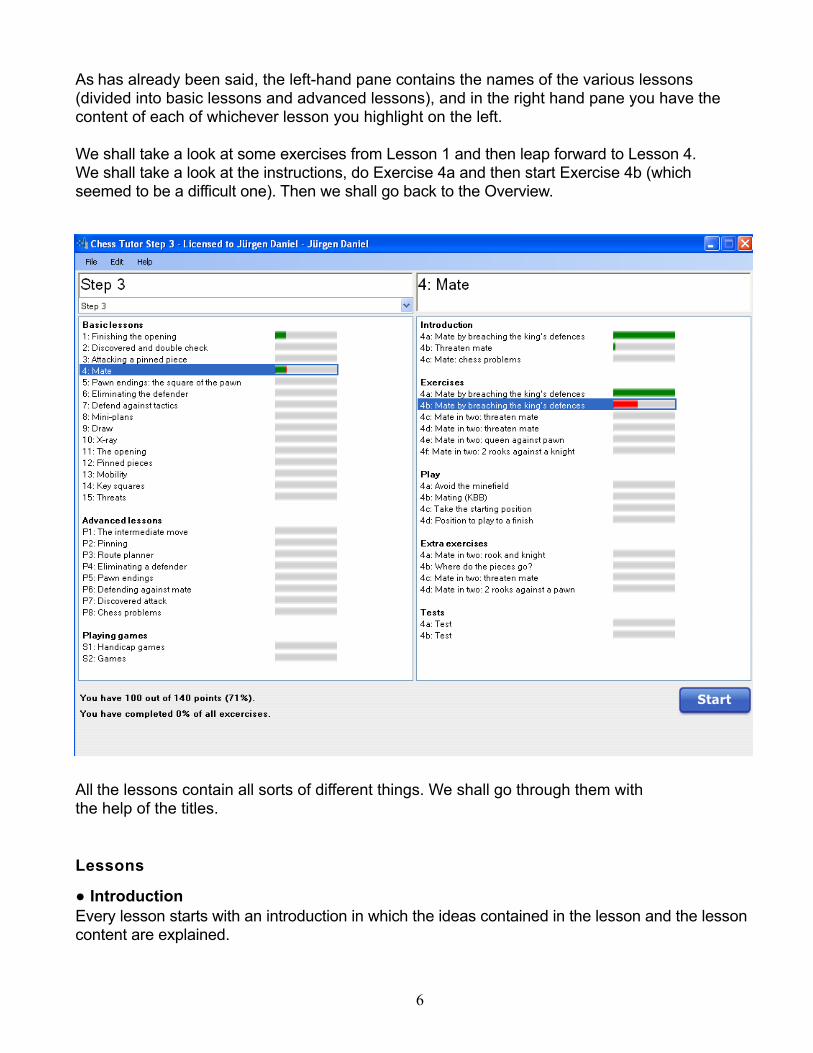
As has already been said, the left-hand pane contains the names of the various lessons (divided into basic lessons and advanced lessons), and in the right hand pane you have the content of each of whichever lesson you highlight on the left.
We shall take a look at some exercises from Lesson 1 and then leap forward to Lesson 4.We shall take a look at the instructions, do Exercise 4a and then start Exercise 4b (which seemed to be a difficult one). Then we shall go back to the Overview.
All the lessons contain all sorts of different things. We shall go through them with the help of the titles.
Lessons
● IntroductionEvery lesson starts with an introduction in which the ideas contained in the lesson and the lesson content are explained.
6
● ExercisesA basic exercise consists of 10 tasks. The exercises are varied: play the best move, multiple choice, tasks involving clicking and many more.
● GamesThis refers to "mini-games" against the computer, but not real games of chess. Here too there is a lot of variety: capturing, route planning, coin collecting and others.In addition there are positions to play from against the computer. You are given a certain position from which you must either beat the computer or defend yourself as well as you can.
● Extra exercisesThe extra exercises are linked to the lesson you are studying and as a rule are a bit more difficult than the basic exercises.
● TestsTests are tasks in which you are not told what the theme is. Themes from all previous lessons can also appear in them.
Choosing a lesson or an exercise is easy. Double click on your choice and then a click on STARTand then off you go.
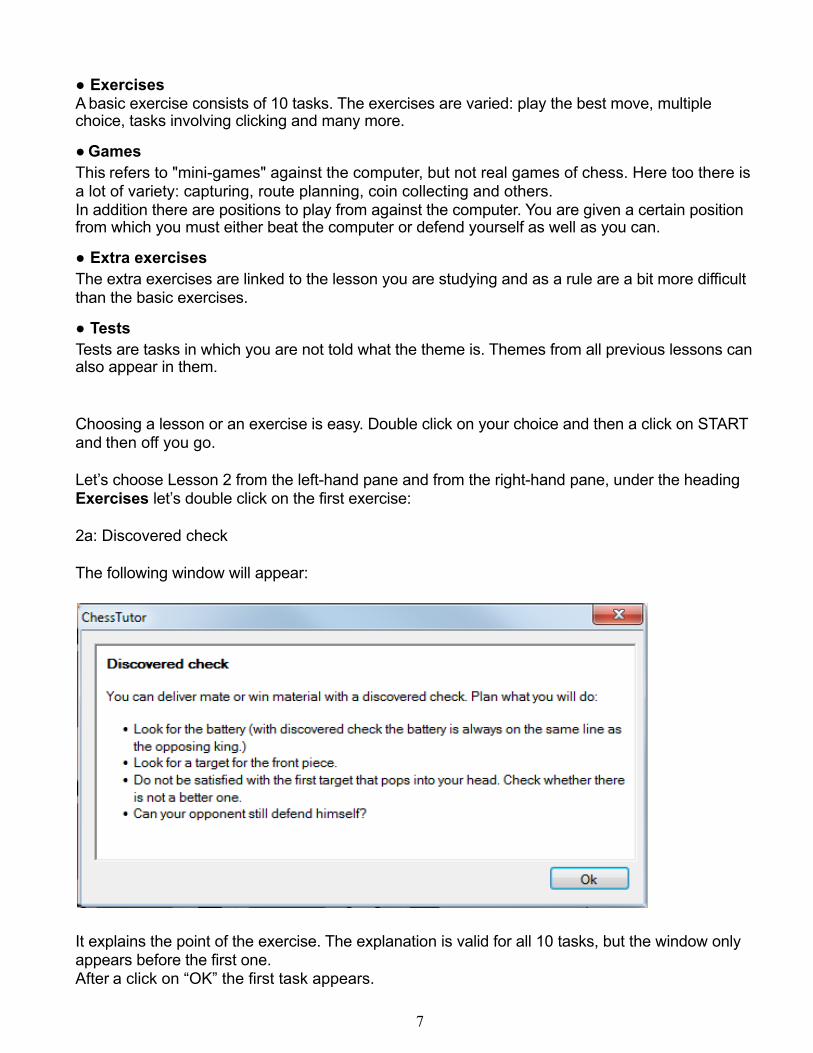
Let’s choose Lesson 2 from the left-hand pane and from the right-hand pane, under the headingExercises let’s double click on the first exercise:
2a: Discovered check
The following window will appear:
It explains the point of the exercise. The explanation is valid for all 10 tasks, but the window only appears before the first one.After a click on “OK” the first task appears.
7
The exercise window
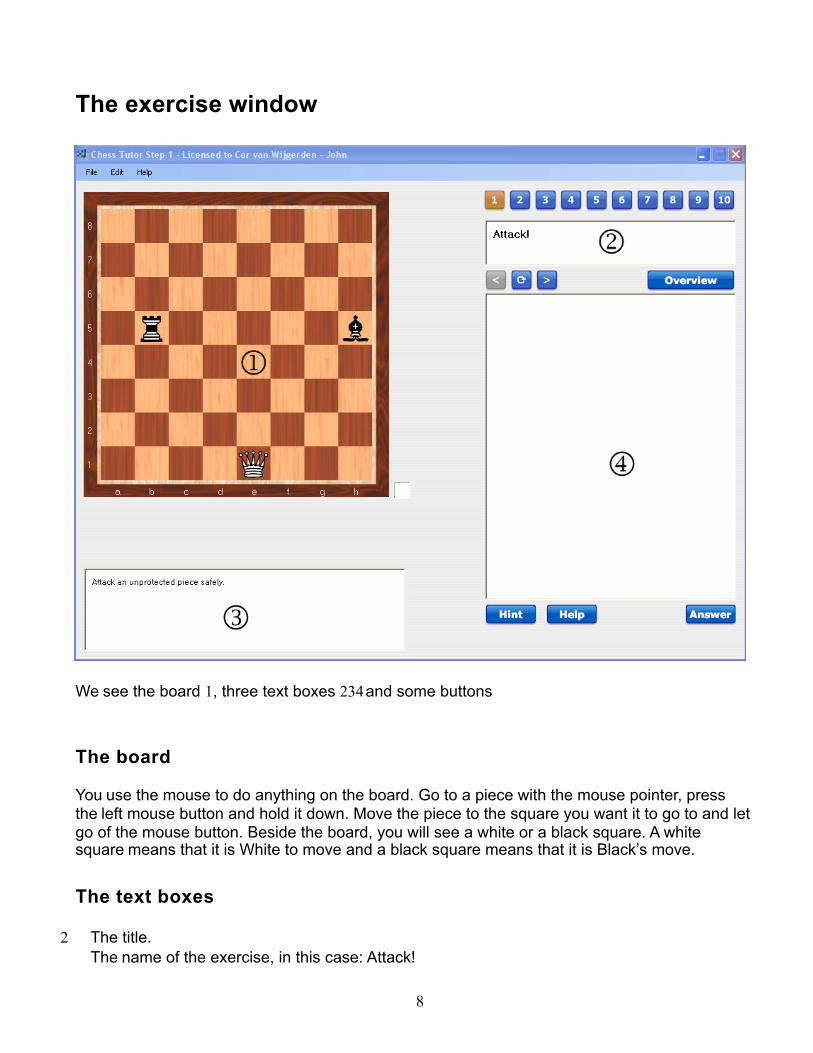
We see the board 1, three text boxes 234 and some buttons
The board
You use the mouse to do anything on the board. Go to a piece with the mouse pointer, pressthe left mouse button and hold it down. Move the piece to the square you want it to go to and let go of the mouse button. Beside the board, you will see a white or a black square. A whitesquare means that it is White to move and a black square means that it is Black’s move.
The text boxes
2 The title.The name of the exercise, in this case: Attack!
8
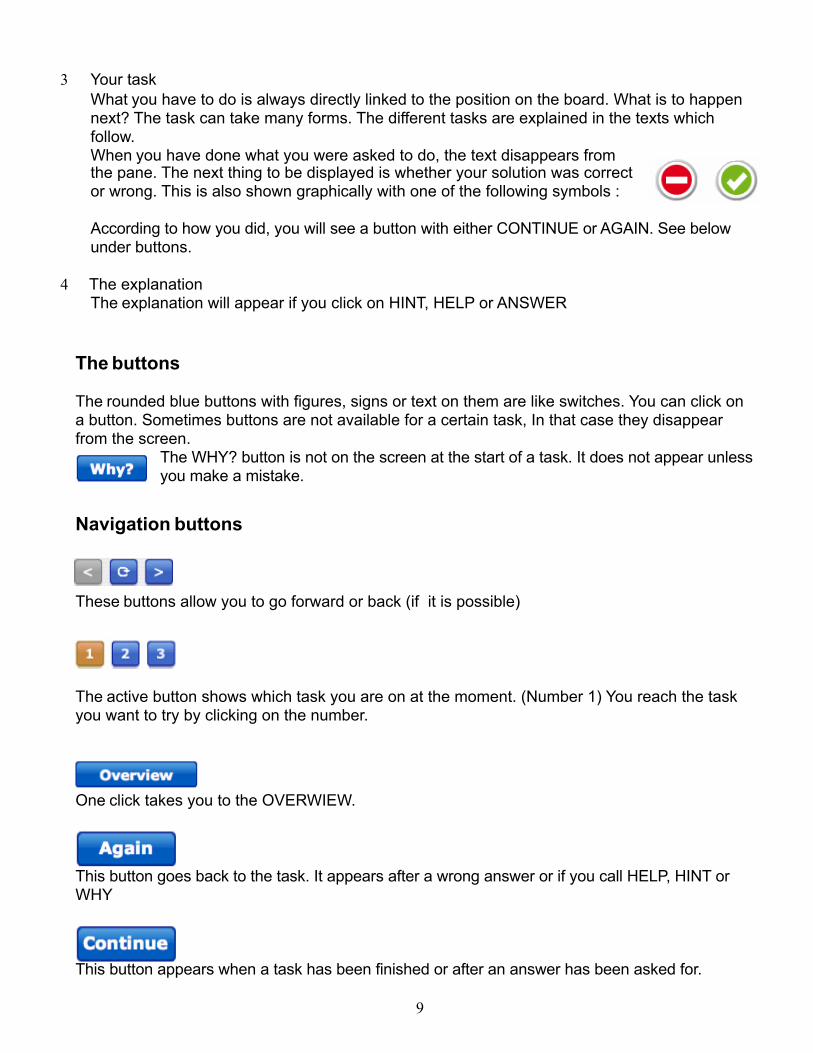
3 Your taskWhat you have to do is always directly linked to the position on the board. What is to happen next? The task can take many forms. The different tasks are explained in the texts which follow.When you have done what you were asked to do, the text disappears from the pane. The next thing to be displayed is whether your solution was correct or wrong. This is also shown graphically with one of the following symbols :
According to how you did, you will see a button with either CONTINUE or AGAIN. See below under buttons.
4 The explanationThe explanation will appear if you click on HINT, HELP or ANSWER
The buttons
The rounded blue buttons with figures, signs or text on them are like switches. You can click on a button. Sometimes buttons are not available for a certain task, In that case they disappear from the screen.
The WHY? button is not on the screen at the start of a task. It does not appear unless you make a mistake.
Navigation buttons
These buttons allow you to go forward or back (if it is possible)
The active button shows which task you are on at the moment. (Number 1) You reach the task you want to try by clicking on the number.
One click takes you to the OVERWIEW.
This button goes back to the task. It appears after a wrong answer or if you call HELP, HINT orWHY
This button appears when a task has been finished or after an answer has been asked for.
9
Info buttons
A click on HELP explains the task once more, usually with some graphic help. But using theHELP button costs you points.
A click on HINT brings you a tip as to where to look. Using HINT also costs points every time you click on it.
This button is not active at the start of the task. It only becomes active when an exercise has not been solved correctly. A click on it will bring you information about the mistake you made. This also costs you points.
When you click on this button you get the solution. If you click on it, there are no more points for this task.
Types of exercise
● Play the best move.Here you have to make a move on the board. In many of the tasks the computer makes a move in reply and you have to make a second move.
● Multiple ChoiceYou have to choose the correct answer from a number of possible answers. One variation of this type of task asks you to select more than one correct solution.
● Route plannerWhat is special about this type of task is that only White moves. Otherwise the normal rules apply.
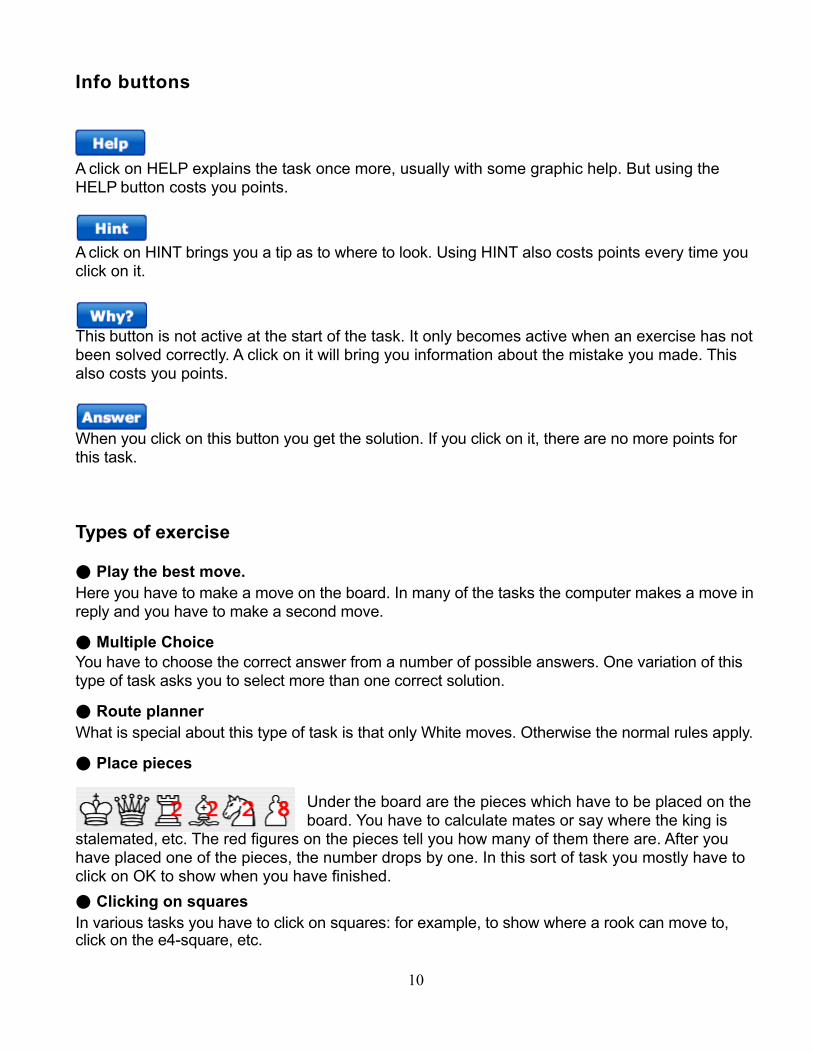
● Place pieces
Under the board are the pieces which have to be placed on the board. You have to calculate mates or say where the king is
stalemated, etc. The red figures on the pieces tell you how many of them there are. After you have placed one of the pieces, the number drops by one. In this sort of task you mostly have to click on OK to show when you have finished.● Clicking on squaresIn various tasks you have to click on squares: for example, to show where a rook can move to, click on the e4-square, etc.
10
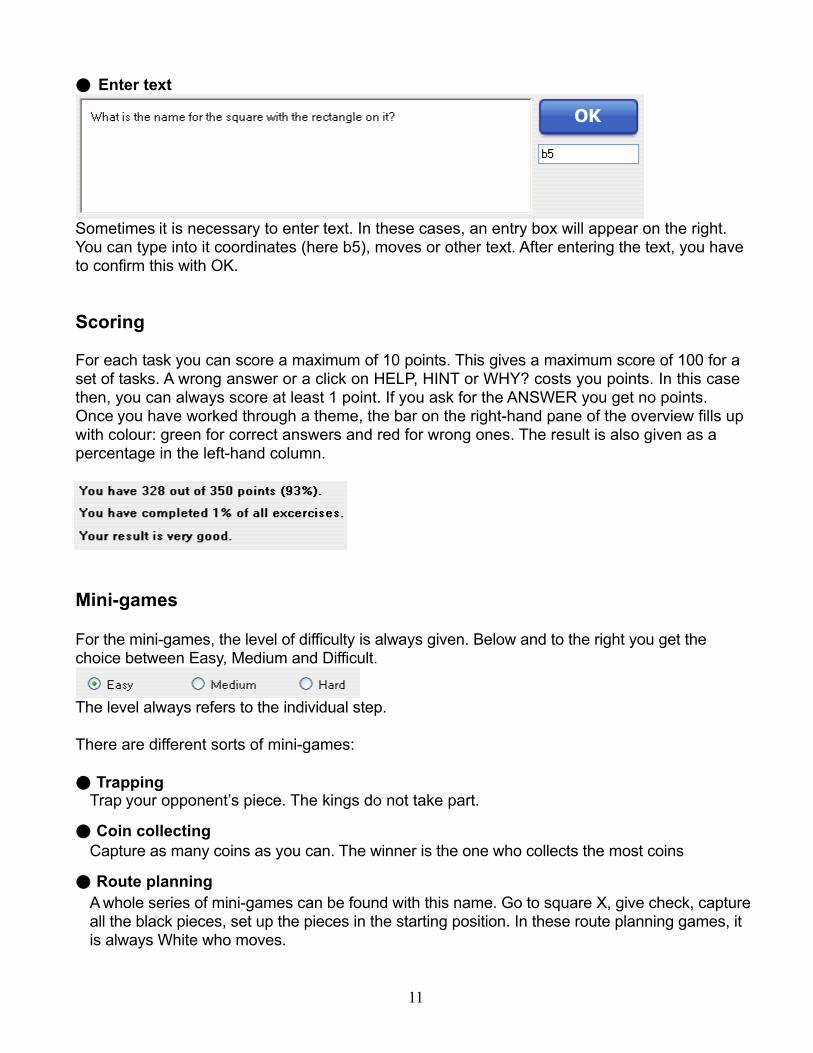
● Enter text
Sometimes it is necessary to enter text. In these cases, an entry box will appear on the right. You can type into it coordinates (here b5), moves or other text. After entering the text, you have to confirm this with OK.
Scoring
For each task you can score a maximum of 10 points. This gives a maximum score of 100 for a set of tasks. A wrong answer or a click on HELP, HINT or WHY? costs you points. In this case then, you can always score at least 1 point. If you ask for the ANSWER you get no points.Once you have worked through a theme, the bar on the right-hand pane of the overview fills up with colour: green for correct answers and red for wrong ones. The result is also given as a percentage in the left-hand column.
Mini-games
For the mini-games, the level of difficulty is always given. Below and to the right you get the choice between Easy, Medium and Difficult.
The level always refers to the individual step.
There are different sorts of mini-games:
● TrappingTrap your opponent’s piece. The kings do not take part.
● Coin collectingCapture as many coins as you can. The winner is the one who collects the most coins
● Route planningA whole series of mini-games can be found with this name. Go to square X, give check, capture all the black pieces, set up the pieces in the starting position. In these route planning games, itis always White who moves.
11
● P l a c i n g pieces
Try to place on the board the pieces which are shown underneath it. This can be pretty tricky!
● Stop the passed pawns
One or more pieces have to capture or stop the opposing passed pawns.
●
MatingThese fun games are the closest to real games of chess, even if sometimes there is only one king.
Games
In all the lessons you also get to play complete games. The computer is your opponent. Now it is not easy for a chess program to play as low as the level of Step 3, because programs are much stronger than most humans. So the program has been set to lose pieces from time to time and even to allow itself to be mated. Don’t be sad if you more often lose. Practice makes perfect!
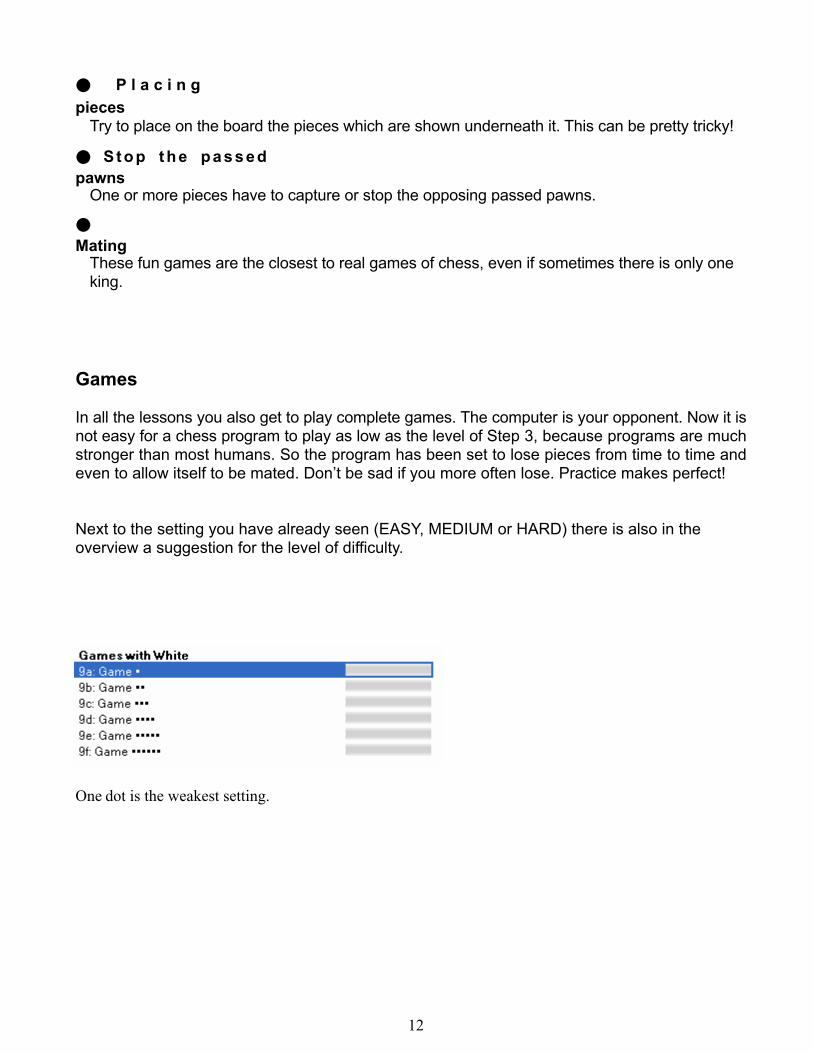
Next to the setting you have already seen (EASY, MEDIUM or HARD) there is also in the overview a suggestion for the level of difficulty.
One dot is the weakest setting.
12
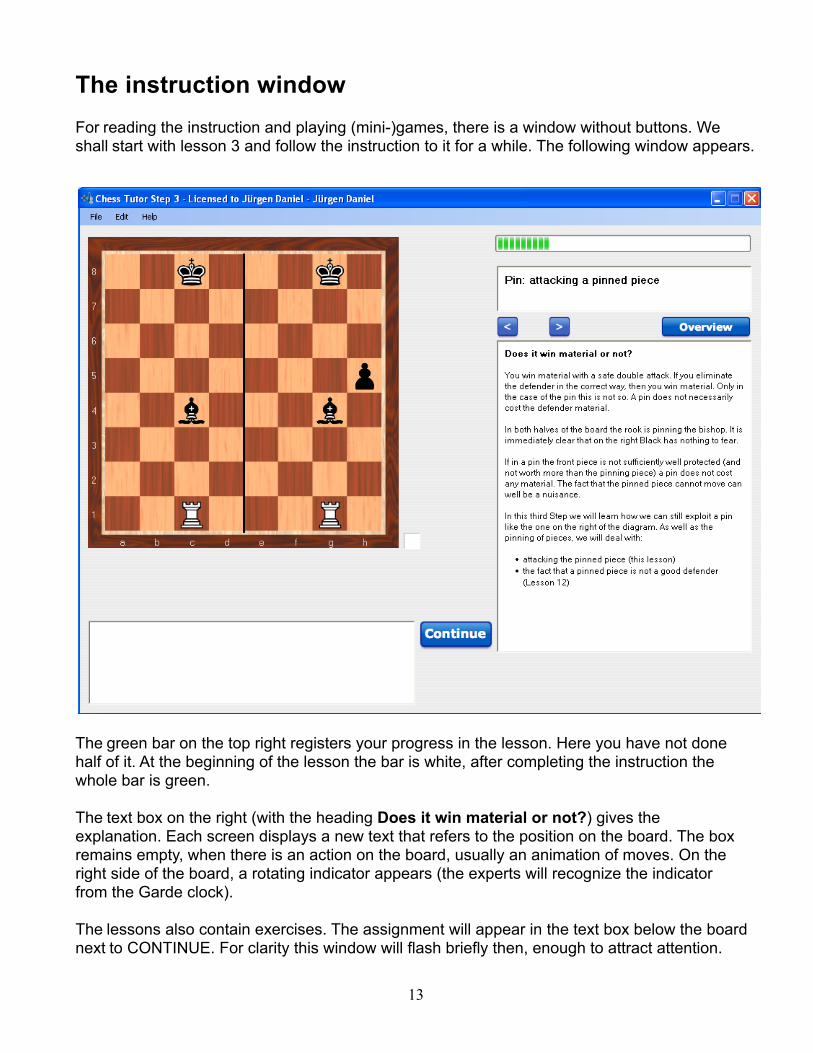
The instruction windowFor reading the instruction and playing (mini-)games, there is a window without buttons. Weshall start with lesson 3 and follow the instruction to it for a while. The following window appears.
The green bar on the top right registers your progress in the lesson. Here you have not done half of it. At the beginning of the lesson the bar is white, after completing the instruction the whole bar is green.
The text box on the right (with the heading Does it win material or not?) gives the explanation. Each screen displays a new text that refers to the position on the board. The box remains empty, when there is an action on the board, usually an animation of moves. On the right side of the board, a rotating indicator appears (the experts will recognize the indicator from the Garde clock).
The lessons also contain exercises. The assignment will appear in the text box below the boardnext to CONTINUE. For clarity this window will flash briefly then, enough to attract attention.
13
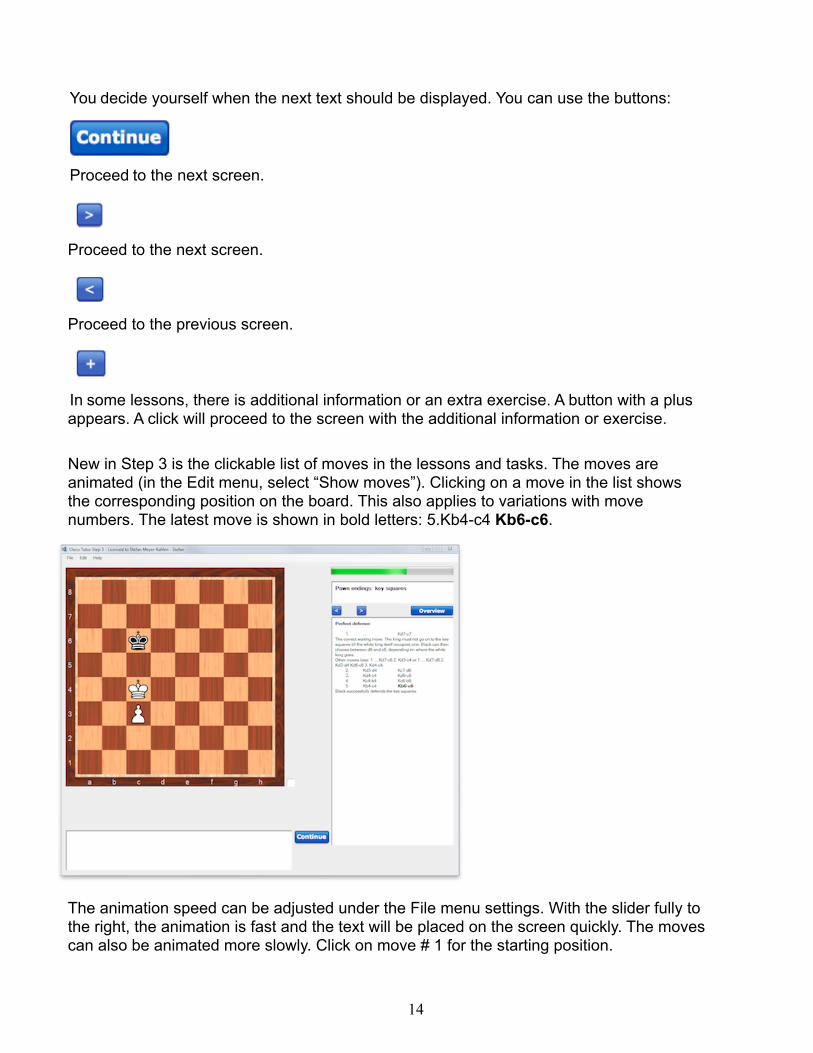
You decide yourself when the next text should be displayed. You can use the buttons:
Proceed to the next screen.
Proceed to the next screen.
Proceed to the previous screen.
In some lessons, there is additional information or an extra exercise. A button with a plus appears. A click will proceed to the screen with the additional information or exercise.
New in Step 3 is the clickable list of moves in the lessons and tasks. The moves are animated (in the Edit menu, select “Show moves”). Clicking on a move in the list shows the corresponding position on the board. This also applies to variations with move numbers. The latest move is shown in bold letters: 5.Kb4-c4 Kb6-c6.
The animation speed can be adjusted under the File menu settings. With the slider fully to the right, the animation is fast and the text will be placed on the screen quickly. The moves can also be animated more slowly. Click on move # 1 for the starting position.
14
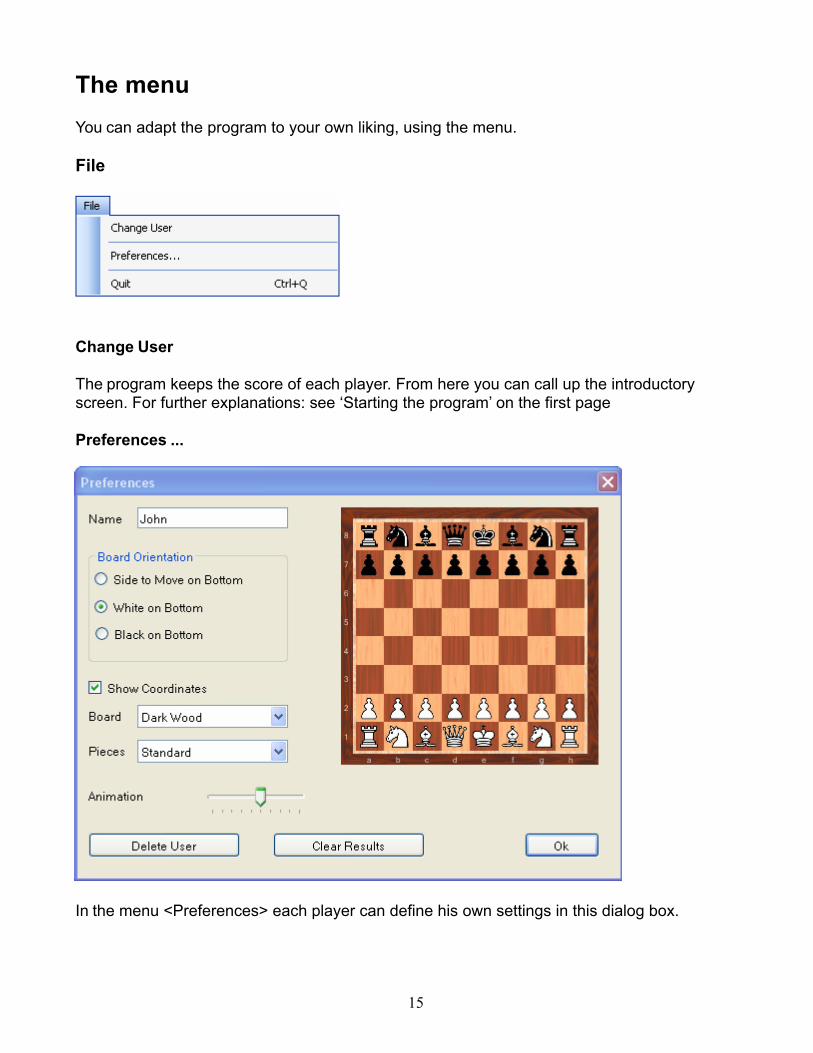
The menuYou can adapt the program to your own liking, using the menu.
File
Change User
The program keeps the score of each player. From here you can call up the introductory screen. For further explanations: see ‘Starting the program’ on the first page
Preferences ...
In the menu <Preferences> each player can define his own settings in this dialog box.
15
Board Orientation
In chess books, White is always shown playing up the board. In the setting ‘White on Bottom' the white pieces move from bottom to top. The board never flips, not even if Black is to move. For the sake of completeness, there is a setting in which Black always plays up the board.In the setting 'Side to Move on Bottom’ the black pieces move from bottom to top. If you like, you can activate the setting: ‘Black on bottom’.The instruction lessons always have the setting ‘White on Bottom’ (otherwise the text may not be correct). Sometimes the location of the board cannot to be influenced by the user. In the exercise 'Click on the correct square (from Black’s side)’ Black is on bottom, regardless of the settings.
Show CoordinatesThe coordinates are visible when the box is checked. Sometimes you don’t have any influence on the coordinates (i.e. in the lesson about the notation).
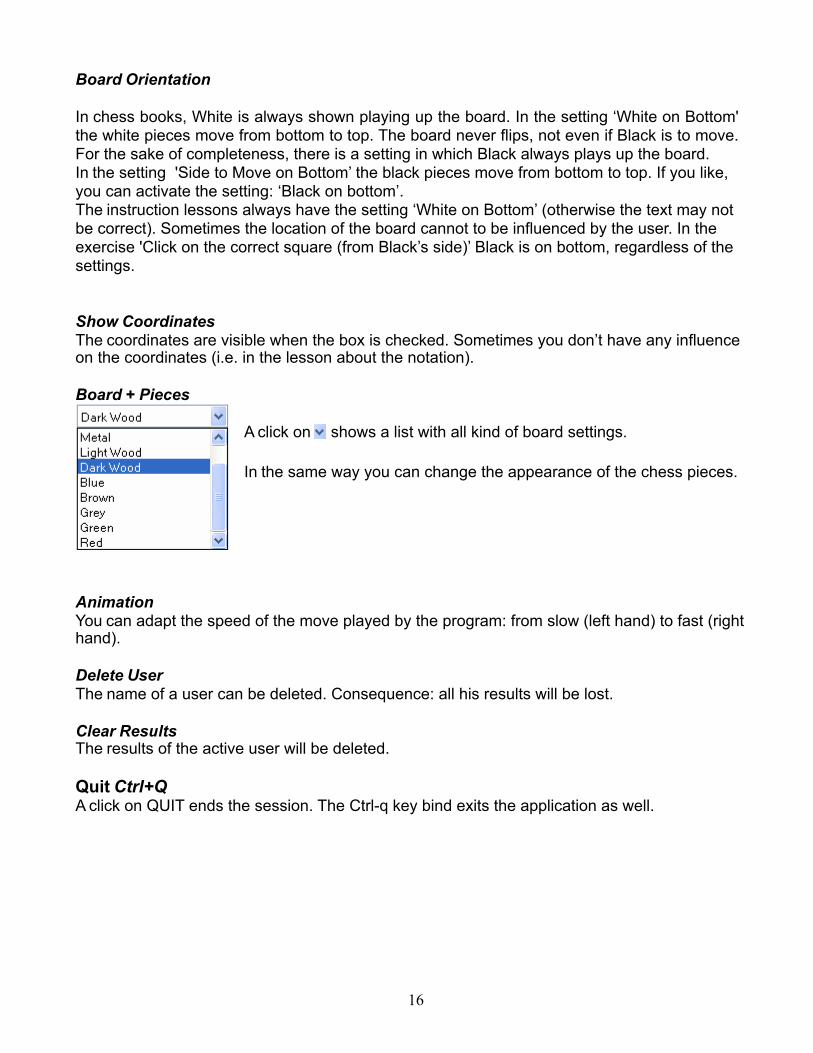
Board + Pieces
A click on shows a list with all kind of board settings.
In the same way you can change the appearance of the chess pieces.
AnimationYou can adapt the speed of the move played by the program: from slow (left hand) to fast (right hand).
Delete UserThe name of a user can be deleted. Consequence: all his results will be lost.
Clear ResultsThe results of the active user will be deleted.
Quit Ctrl+QA click on QUIT ends the session. The Ctrl-q key bind exits the application as well.
16
Edit
Show Moves
If this item is checked, the notation of the moves is visible in the large text box. After you have solved a puzzle or after you have played a game, you can click on the list of moves and call up to the board the position at that point in the game.
Window SizeThree settings are possible: small, medium and large.
The best choice is a matter of taste and depends on the resolution of the monitor. In most cases, medium might be the best choice.The disadvantage of a small window is that scrolling in the overview is a necessity.
Your preferences are automatically saved after exiting the program.
Help
Open Help DocumentOpens this manual. You need to have on your computer a program which can read .pdf files.
Checking for new versionYou need to be online to check if an update is available.
About...Information about the producers of the Chess Tutor: Cor van WijgerdenStefan Meyer-KahlenEiko BleicherJürgen DanielEnglish translation: Ian Adams
17


![Chess Self-Tutor [Yuri Averbakh, Mikhail Beilin, 1970 - Russian]](https://img.pdfslide.us/doc/110x75/55cf97c8550346d0339399be/chess-self-tutor-yuri-averbakh-mikhail-beilin-1970-russian.jpg)