Embed Size (px)
Citation preview

1
Inst
ruct
ion
Man
ual
Original Instruction Manual in GermanRead this Instruction Manual prior to use
3
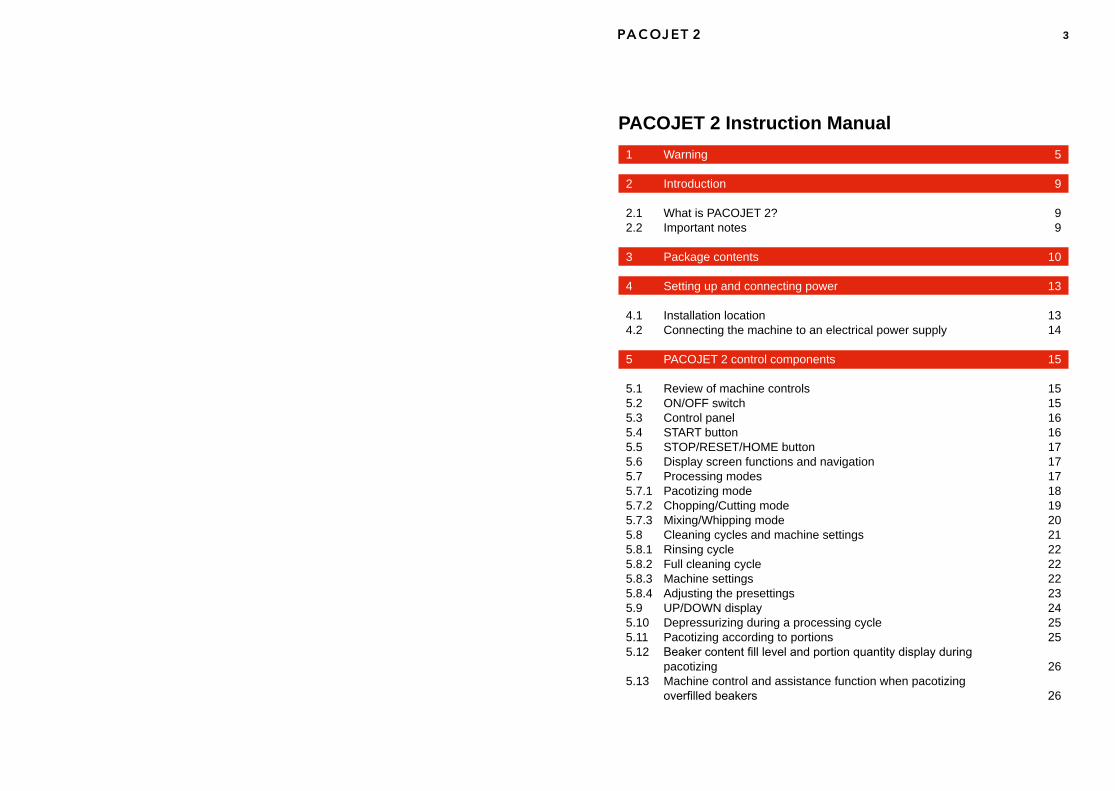
1 Warning 5
2 Introduction 9
2.1 What is PACOJET 2? 92.2 Important notes 9
3 Package contents 10
4 Setting up and connecting power 13
4.1 Installation location 134.2 Connecting the machine to an electrical power supply 14
5 PACOJET 2 control components 15
5.1 Review of machine controls 155.2 ON/OFF switch 155.3 Control panel 165.4 START button 165.5 STOP/RESET/HOME button 175.6 Display screen functions and navigation 175.7 Processing modes 175.7.1 Pacotizing mode 185.7.2 Chopping/Cutting mode 195.7.3 Mixing/Whipping mode 205.8 Cleaning cycles and machine settings 215.8.1 Rinsing cycle 225.8.2 Full cleaning cycle 225.8.3 Machine settings 225.8.4 Adjusting the presettings 235.9 UP/DOWN display 245.10 Depressurizing during a processing cycle 255.11 Pacotizing according to portions 255.12 Beakercontentfilllevelandportionquantitydisplayduring
pacotizing 265.13 Machine control and assistance function when pacotizing
overfilledbeakers 26
PACOJET 2 Instruction Manual
4 5
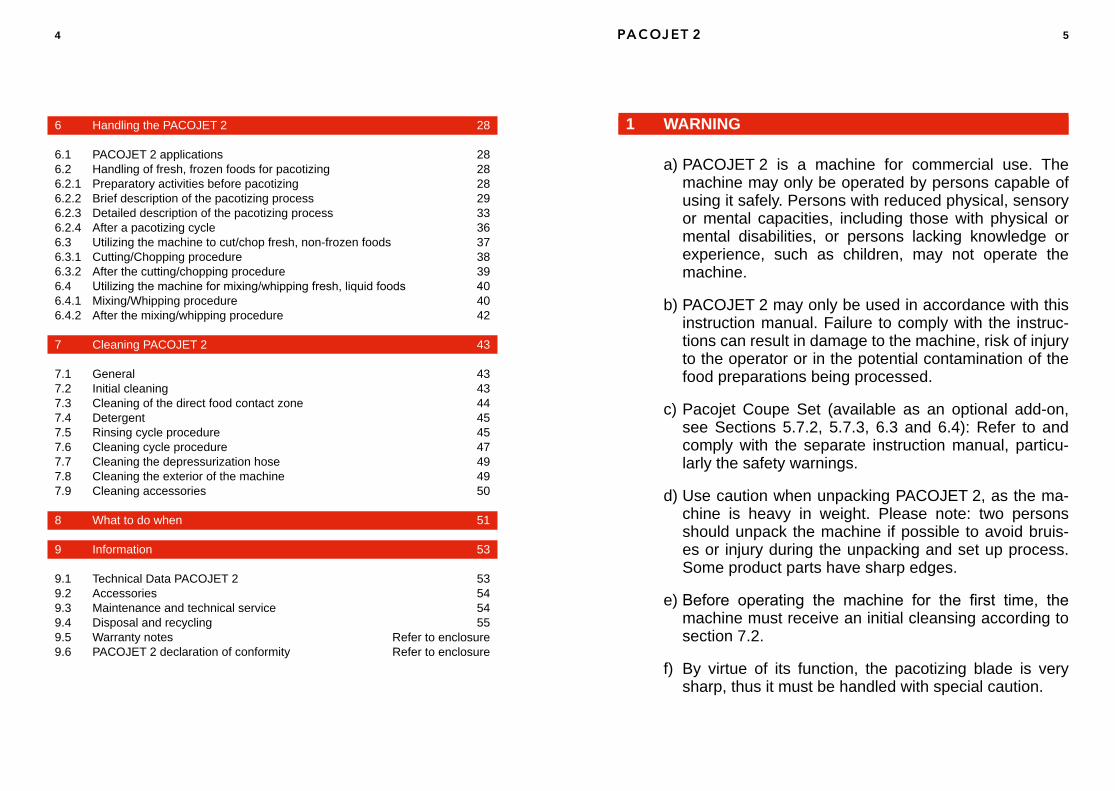
6 Handling the PACOJET 2 28
6.1 PACOJET 2 applications 286.2 Handling of fresh, frozen foods for pacotizing 286.2.1 Preparatory activities before pacotizing 286.2.2 Brief description of the pacotizing process 296.2.3 Detailed description of the pacotizing process 336.2.4 After a pacotizing cycle 366.3 Utilizing the machine to cut/chop fresh, non-frozen foods 376.3.1 Cutting/Chopping procedure 386.3.2 After the cutting/chopping procedure 396.4 Utilizingthemachineformixing/whippingfresh,liquidfoods 406.4.1 Mixing/Whipping procedure 406.4.2 After the mixing/whipping procedure 42
7 Cleaning PACOJET 2 43
7.1 General 437.2 Initial cleaning 437.3 Cleaning of the direct food contact zone 447.4 Detergent 457.5 Rinsing cycle procedure 457.6 Cleaning cycle procedure 477.7 Cleaning the depressurization hose 497.8 Cleaning the exterior of the machine 497.9 Cleaning accessories 50
8 What to do when 51
9 Information 53
9.1 Technical Data PACOJET 2 539.2 Accessories 549.3 Maintenance and technical service 549.4 Disposal and recycling 559.5 Warranty notes 559.6 PACOJET 2 declaration of conformity 55
Warning1
PACOJET 2 is a machine for commercial use. The a) machine may only be operated by persons capable of using it safely. Persons with reduced physical, sensory or mental capacities, including those with physical or mental disabilities, or persons lacking knowledge or experience, such as children, may not operate the machine.
PACOJET 2 may only be used in accordance with this b) instruction manual. Failure to comply with the instruc-tions can result in damage to the machine, risk of injury to the operator or in the potential contamination of the food preparations being processed.
Pacojet Coupe Set (available as an optional add-on, c) see Sections 5.7.2, 5.7.3, 6.3 and 6.4): Refer to and comply with the separate instruction manual, particu-larly the safety warnings.
Use caution when unpacking PACOJET 2, as the ma-d) chine is heavy in weight. Please note: two persons should unpack the machine if possible to avoid bruis-es or injury during the unpacking and set up process. Some product parts have sharp edges.
Before operating the machine for the first time, thee) machine must receive an initial cleansing according to section 7.2.
By virtue of its function, the pacotizing blade is very f) sharp, thus it must be handled with special caution.
Refer to enclosure Refer to enclosure
WARnInG1
6 7
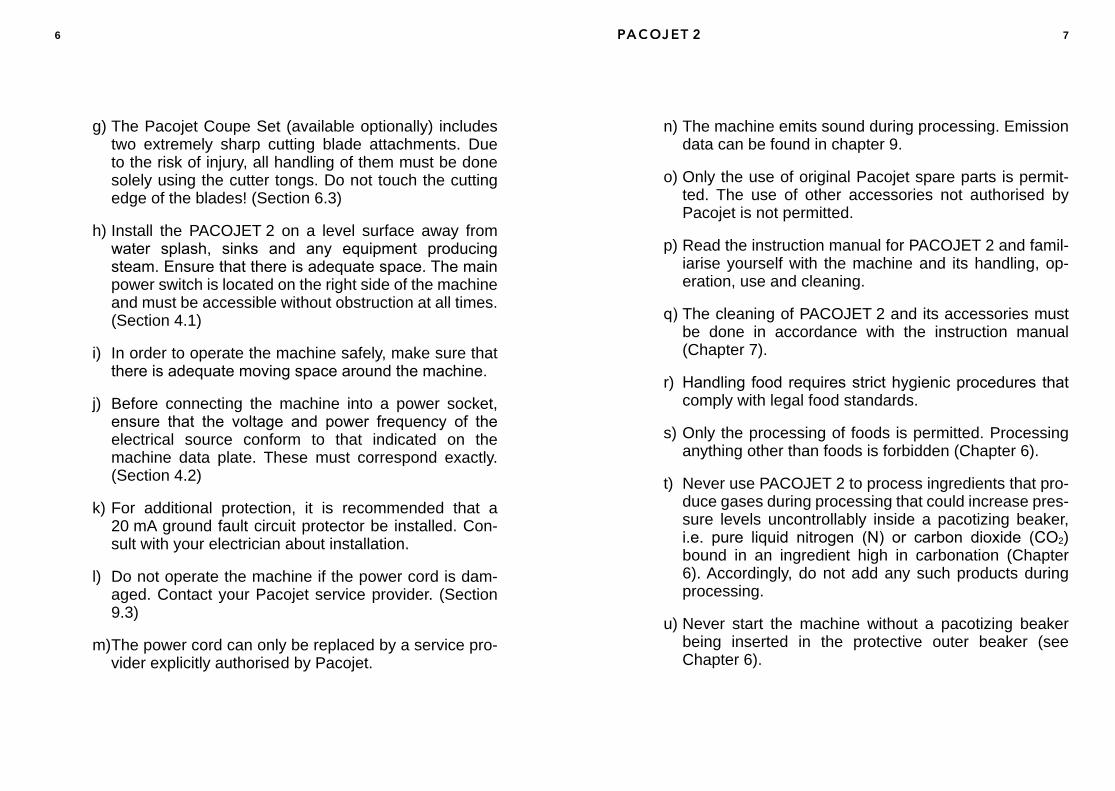
The machine emits sound during processing. Emission n) data can be found in chapter 9.
Only the use of original Pacojet spare parts is permit-o) ted. The use of other accessories not authorised by Pacojet is not permitted.
Read the instruction manual for PACOJET 2 and famil-p) iarise yourself with the machine and its handling, op-eration, use and cleaning.
The cleaning of PACOJET 2 and its accessories must q)be done in accordance with the instruction manual (Chapter 7).
Handlingfoodrequiresstricthygienicproceduresthatr) comply with legal food standards.
Only the processing of foods is permitted. Processing s) anything other than foods is forbidden (Chapter 6).
Never use PACOJET 2 to process ingredients that pro-t) duce gases during processing that could increase pres-sure levels uncontrollably inside a pacotizing beaker, i.e. pure liquid nitrogen (N) or carbon dioxide (CO2) bound in an ingredient high in carbonation (Chapter 6). Accordingly, do not add any such products during processing.
Never start the machine without a pacotizing beaker u) being inserted in the protective outer beaker (see Chapter 6).
The Pacojet Coupe Set (available optionally) includes g) two extremely sharp cutting blade attachments. Due to the risk of injury, all handling of them must be done solely using the cutter tongs. Do not touch the cutting edge of the blades! (Section 6.3)
Install the PACOJET 2 on a level surface away from h) water splash, sinks and any equipment producingsteam.Ensurethatthereisadequatespace.Themainpower switch is located on the right side of the machine and must be accessible without obstruction at all times. (Section 4.1)
In order to operate the machine safely, make sure that i) thereisadequatemovingspacearoundthemachine.
Before connecting the machine into a power socket, j) ensure that the voltage and power frequency of theelectrical source conform to that indicated on the machine data plate. These must correspond exactly. (Section 4.2)
For additional protection, it is recommended that a k) 20 mA ground fault circuit protector be installed. Con-sult with your electrician about installation.
Do not operate the machine if the power cord is dam-l) aged. Contact your Pacojet service provider. (Section 9.3)
The power cord can only be replaced by a service pro-m) vider explicitly authorised by Pacojet.
8 9
Introduction2
What is PACOJET 2?2.1
PACOJET 2 is an innovative professional kitchen machine designed to puree fresh, frozen foods without thawing into ultrasmooth mousses, naturally-fresh icecreamsandsorbets,aswell as intenselyflavourful soups, saucesandcreams/fillings.Thisprocessiscarriedoutwithorwithouttheapplicationofpressure. Processing foods with PACOJET 2 is known as “pacotizing”.
The Pacojet Coupe Set expands the processing capabilities of the PACOJET 2 to non-frozen, fresh food products and is available separately.
Important notes2.2
Thisinstructionmanualcontainsallsignificantinformationthatyouneeda) to use the PACOJET 2 kitchen machine, hereafter referred to as the PACOJET 2. To ensure user security, PACOJET 2 should be used accord-ing to the instructions presented in this manual. Please comply with the caution notes in Chapter 1. Failure to comply with the recommendations of this instruction manual will result in the refusal to assume any liability or guarantee for damages.
ThePacojetCoupeSet isnotpartof thestandardequipmentdeliveredb) with PACOJET 2; it is available as an option. The Pacojet Coupe Set is designed exclusively for chopping, mixing and beating fresh, non-frozen foods with a Pacojet machine. Please comply strictly to the instructions given in the separate instruction manual delivered with the Pacojet Cou-pe Set when using this product, as well as to these instructions for the PACOJET 2.
Thecontentofthismanualmaybemodifiedwithoutpreviousnotice.c)
Do not attempt to override safety sensors installed on v) the PACOJET 2 that ensure the proper mounting of the protective outer beaker with inserted pacotizing beaker (see Chapter 6).
If the screen displays an “Error” message, consult w) Chapter 8. If you are still unable to resolve the issue, power off the machine and unplug it from the electrical power supply. Contact your Pacojet service provider.
It is not permitted to operate PACOJET 2 with a defect. x) If a defect is noticed, stop use of the machine immedi-ately, power it off using the ON/OFF switch and discon-nect the power cord from the electrical outlet.
The machine is sealed and may only be opened by an y) authorised service provider (Section 9.3).

10 11
one spray guard of black nitrile rubber incl. inner sealing ring
one rinsing insert of green nitrile rubber
one cleaning insert of blue plastic, with brushes
one blue sealing ring
two beaker lids of white polypropylene
Package contents3
Using this instruction manual as a reference, please take a complete inven-tory of the package to ensure the components are complete. Contents should include:
one PACOJET 2 kitchen machine
one protective outer beaker (polyamide)
two chrome steel pacotizing beakers
one steel-cast pacotizing blade
12 13
Setting up and connecting power4
Installation location 4.1
The PACOJET 2 machine should only be installed in a dry location with ade-quateventilationonastable,flatsurfacemeasuringatleast50cm×50cm.
ThePACOJET2machinemustsitfirmlyandlevel,withitsplacementpositionensuringthefree-flowofcoolingairfortherearintakevent.Likewise,ensurethereisampleclearanceunderneaththemachineforthefree-flowofexhaustair without any obstructions.
IMPORTANT! Î
Never use the machine:
in direct proximity of a heat source (i.e. grill)•in direct proximity of a source from which steam or greasy vapours are •emitted (i.e. fryer)in direct proximity of an exhaust from which warm or hot air is emitted (i.e. •combi steaming oven)indirectproximityofawaterconnectionorintheareaofequipmentthatis•cleaned using a water hose or high-pressure sprayer/steameron surfaces prone to heavy vibration•
Non-compliance with the above instructions may result in a malfunction or damage to the machine.
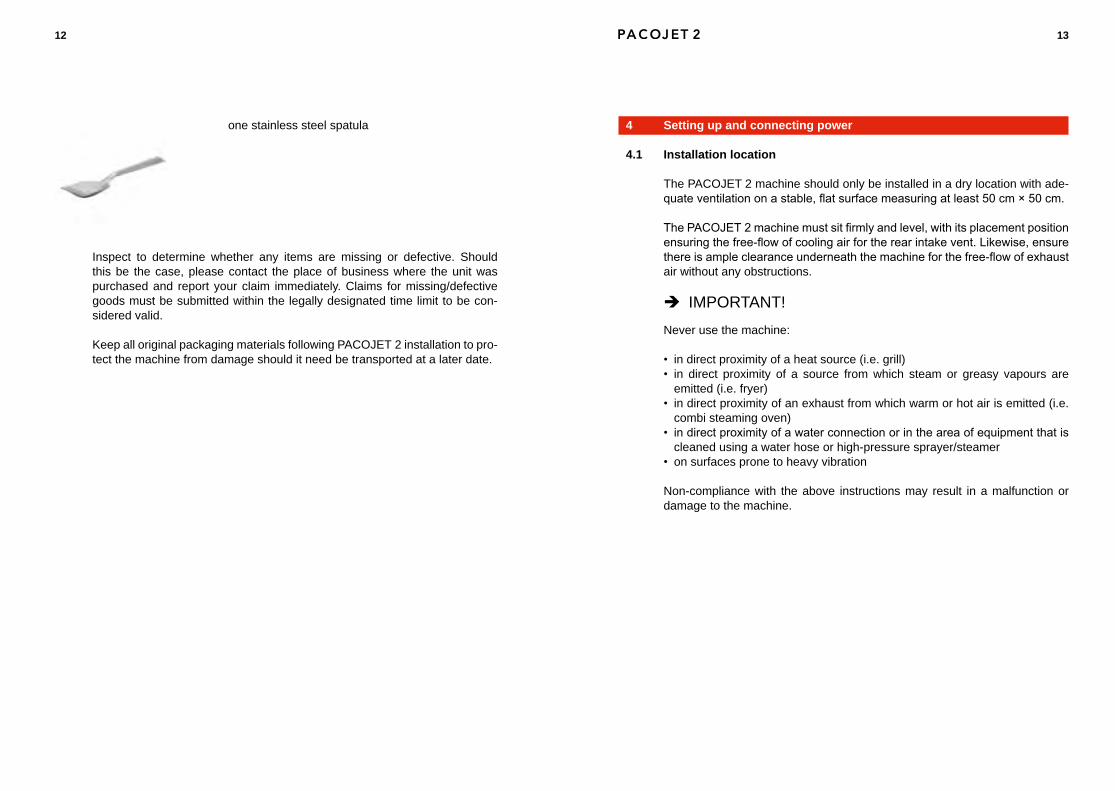
one stainless steel spatula
Inspect to determine whether any items are missing or defective. Should this be the case, please contact the place of business where the unit was purchased and report your claim immediately. Claims for missing/defective goods must be submitted within the legally designated time limit to be con-sidered valid.
Keep all original packaging materials following PACOJET 2 installation to pro-tect the machine from damage should it need be transported at a later date.
14 15
PACOJET 2 control components5
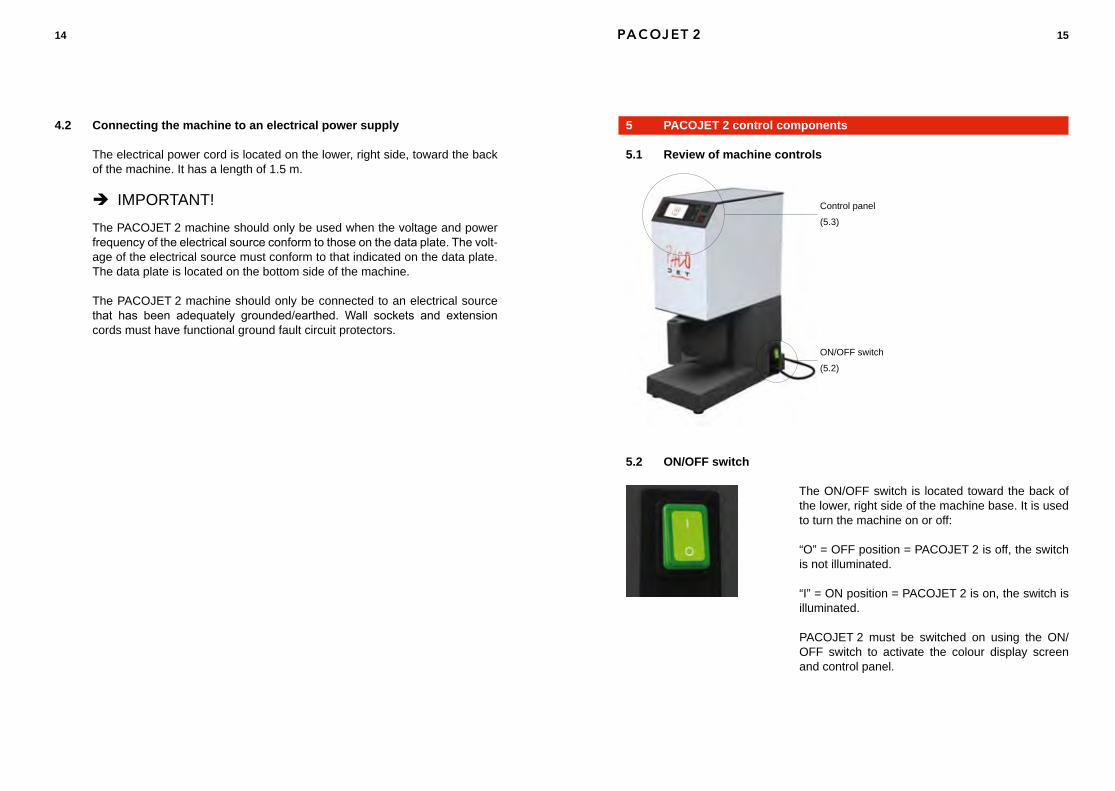
Review of machine controls5.1
On/OFF switch5.2
The ON/OFF switch is located toward the back of the lower, right side of the machine base. It is used to turn the machine on or off:
“O” = OFF position = PACOJET 2 is off, the switch is not illuminated.
“I” = ON position = PACOJET 2 is on, the switch is illuminated.
PACOJET 2 must be switched on using the ON/OFF switch to activate the colour display screen and control panel.
Connecting the machine to an electrical power supply4.2
The electrical power cord is located on the lower, right side, toward the back of the machine. It has a length of 1.5 m.
IMPORTANT! Î
The PACOJET 2 machine should only be used when the voltage and power frequencyoftheelectricalsourceconformtothoseonthedataplate.Thevolt-age of the electrical source must conform to that indicated on the data plate. The data plate is located on the bottom side of the machine.
The PACOJET 2 machine should only be connected to an electrical source that has been adequately grounded/earthed. Wall sockets and extensioncords must have functional ground fault circuit protectors.
Control panel
(5.3)
ON/OFF switch
(5.2)
16 17
Control panel5.3
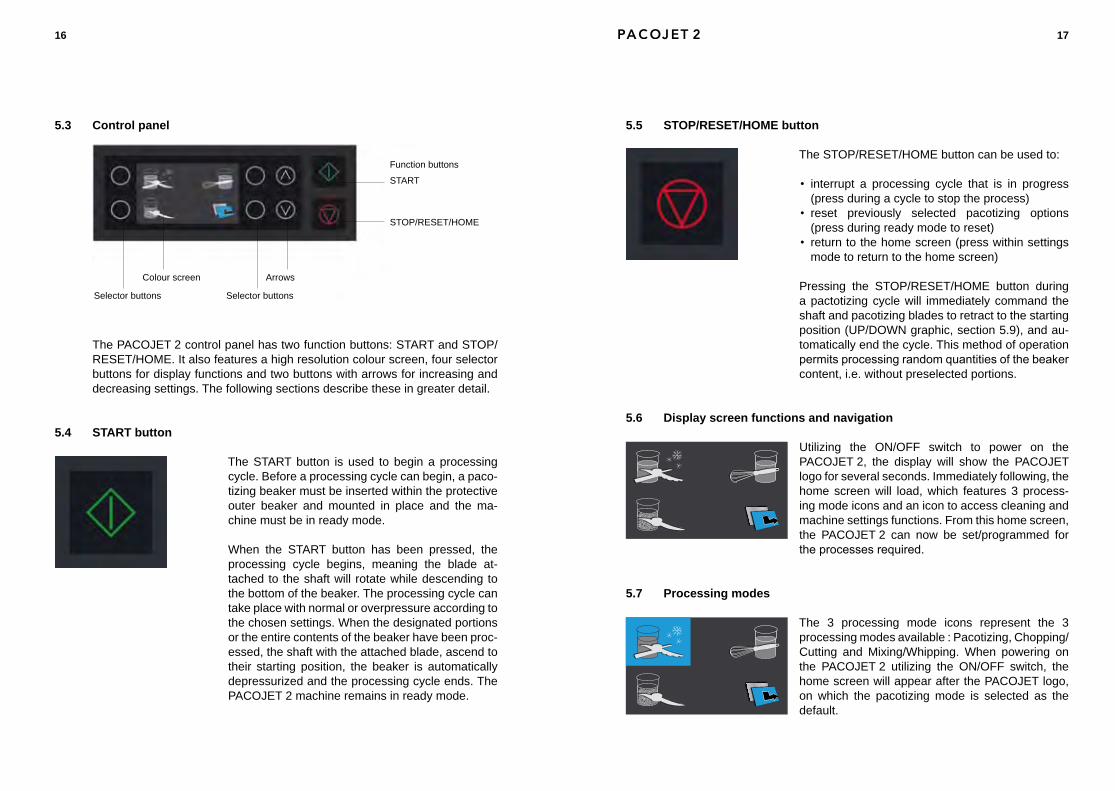
The PACOJET 2 control panel has two function buttons: START and STOP/RESET/HOME. It also features a high resolution colour screen, four selector buttons for display functions and two buttons with arrows for increasing and decreasing settings. The following sections describe these in greater detail.
START button5.4
The START button is used to begin a processing cycle. Before a processing cycle can begin, a paco-tizing beaker must be inserted within the protective outer beaker and mounted in place and the ma-chine must be in ready mode.
When the START button has been pressed, the processing cycle begins, meaning the blade at-tached to the shaft will rotate while descending to the bottom of the beaker. The processing cycle can take place with normal or overpressure according to the chosen settings. When the designated portions or the entire contents of the beaker have been proc-essed, the shaft with the attached blade, ascend to their starting position, the beaker is automatically depressurized and the processing cycle ends. The PACOJET 2 machine remains in ready mode.
STOP/RESET/HOME button5.5
The STOP/RESET/HOME button can be used to:
interrupt a processing cycle that is in progress •(press during a cycle to stop the process)reset previously selected pacotizing options •(press during ready mode to reset) return to the home screen (press within settings •mode to return to the home screen)
Pressing the STOP/RESET/HOME button during a pactotizing cycle will immediately command the shaft and pacotizing blades to retract to the starting position (UP/DOWN graphic, section 5.9), and au-tomatically end the cycle. This method of operation permitsprocessingrandomquantitiesofthebeakercontent, i.e. without preselected portions.
Display screen functions and navigation5.6
Utilizing the ON/OFF switch to power on the PACOJET 2, the display will show the PACOJET logo for several seconds. Immediately following, the home screen will load, which features 3 process-ing mode icons and an icon to access cleaning and machine settings functions. From this home screen, the PACOJET 2 can now be set/programmed for theprocessesrequired.
Processing modes5.7
The 3 processing mode icons represent the 3 processing modes available : Pacotizing, Chopping/Cutting and Mixing/Whipping. When powering on the PACOJET 2 utilizing the ON/OFF switch, the home screen will appear after the PACOJET logo, on which the pacotizing mode is selected as the default.
Function buttons
START
Colour screen
Selector buttons Selector buttons
Arrows
STOP/RESET/HOME

18 19
Chopping/Cutting mode5.7.2
Chopping or cutting fresh, non-frozen foods with ei-ther the 2- or 4-blade-cutter that are included in the optional Pacojet Coupe Set (see page 21).
Please refer to the separate instruction manual for the Pacojet Coupe Set (see page 21), giving par-ticular attention to the safety guidelines.
For further programming the processing options within the chopping/cutting mode, either the 2- or 4-blade-cutter must be positioned within the spray guard with the help of the cutter tongs (as supplied within the Pacojet Coupe Set package) and correctly secured onto the magnetic, splined shaft of the PACOJET 2 machine.
Then the pacotizing beaker and the protective outer beaker must be correctly mounted in the machine.
Each processing mode can be selected by press-ing the appropriate selector button adjacent to each processing mode icon, as shown on the display.
Pacotizing mode5.7.1
Usetopureefresh,frozenfoods(−18°Cto−23°C)intoanultrafinetexturewithoutthawing.
All of the necessary accessories for this process-ing mode are included in the original PACOJET 2 system package.
To access further settings in the pacotizing mode, the pacotizing blade, the spray guard, the pacotiz-ing beaker and the protective outer beaker must be correctly mounted in the machine.
As soon as the protective outer beaker is mounted and rotated into the correct position, the next dis-play screen will appear with the default process-ing settings selected for “Process entire contents of beaker” and “overpressure”; together, with the options of selecting the processing options “whole portions and decimal portions” and/or “deactivate overpressure before pacotizing”.
Each of the processing options can be selected by pressing the appropri-ate selector button adjacent to each processing mode icon, as shown on the display and be further defined using the arrow buttons to increase and/ordecrease the settings.
20 21
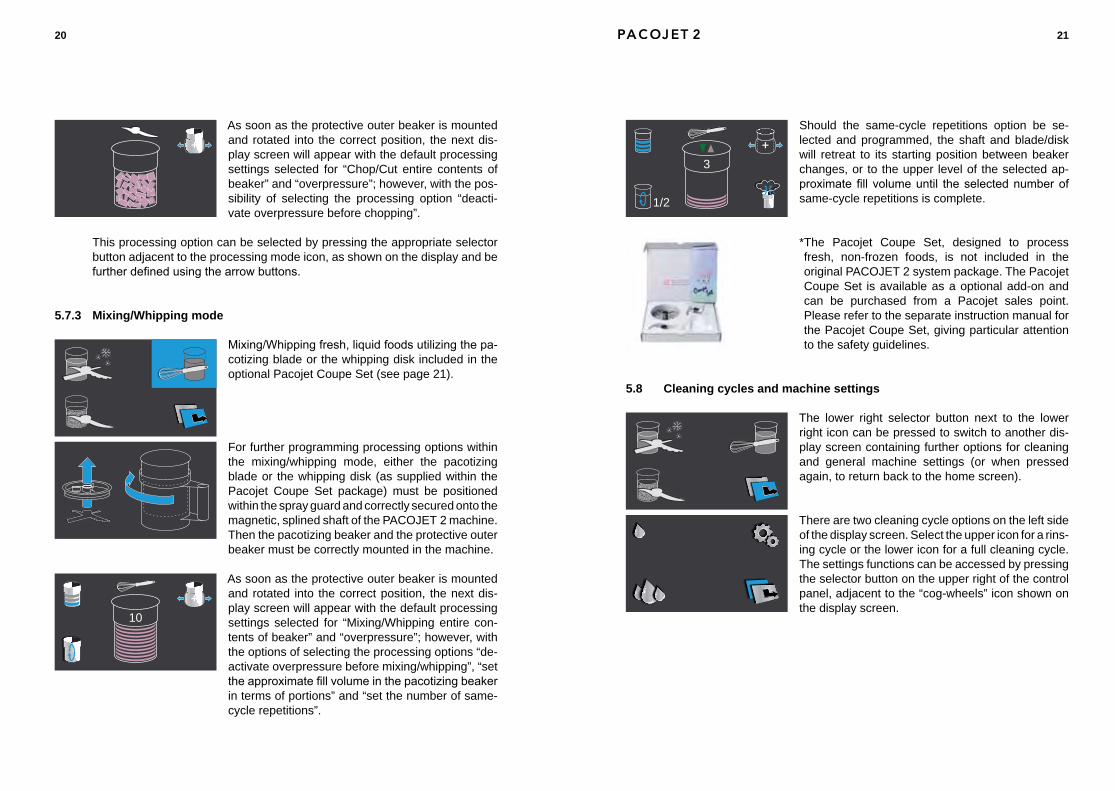
Should the same-cycle repetitions option be se-lected and programmed, the shaft and blade/disk will retreat to its starting position between beaker changes, or to the upper level of the selected ap-proximatefill volumeuntil theselectednumberofsame-cycle repetitions is complete.
* The Pacojet Coupe Set, designed to process fresh, non-frozen foods, is not included in the original PACOJET 2 system package. The Pacojet Coupe Set is available as a optional add-on and can be purchased from a Pacojet sales point. Please refer to the separate instruction manual for the Pacojet Coupe Set, giving particular attention to the safety guidelines.
Cleaning cycles and machine settings5.8
The lower right selector button next to the lower right icon can be pressed to switch to another dis-play screen containing further options for cleaning and general machine settings (or when pressed again, to return back to the home screen).
There are two cleaning cycle options on the left side of the display screen. Select the upper icon for a rins-ing cycle or the lower icon for a full cleaning cycle. The settings functions can be accessed by pressing the selector button on the upper right of the control panel, adjacent to the “cog-wheels” icon shown on the display screen.
1/2
3
As soon as the protective outer beaker is mounted and rotated into the correct position, the next dis-play screen will appear with the default processing settings selected for “Chop/Cut entire contents of beaker” and “overpressure”; however, with the pos-sibility of selecting the processing option “deacti-vate overpressure before chopping”.
This processing option can be selected by pressing the appropriate selector button adjacent to the processing mode icon, as shown on the display and be furtherdefinedusingthearrowbuttons.
Mixing/Whipping mode5.7.3
Mixing/Whippingfresh,liquidfoodsutilizingthepa-cotizing blade or the whipping disk included in the optional Pacojet Coupe Set (see page 21).
For further programming processing options within the mixing/whipping mode, either the pacotizing blade or the whipping disk (as supplied within the Pacojet Coupe Set package) must be positioned within the spray guard and correctly secured onto the magnetic, splined shaft of the PACOJET 2 machine. Then the pacotizing beaker and the protective outer beaker must be correctly mounted in the machine.
As soon as the protective outer beaker is mounted and rotated into the correct position, the next dis-play screen will appear with the default processing settings selected for “Mixing/Whipping entire con-tents of beaker” and “overpressure”; however, with the options of selecting the processing options “de-activate overpressure before mixing/whipping”, “set theapproximatefillvolumeinthepacotizingbeakerin terms of portions” and “set the number of same-cycle repetitions”.
10
22 23
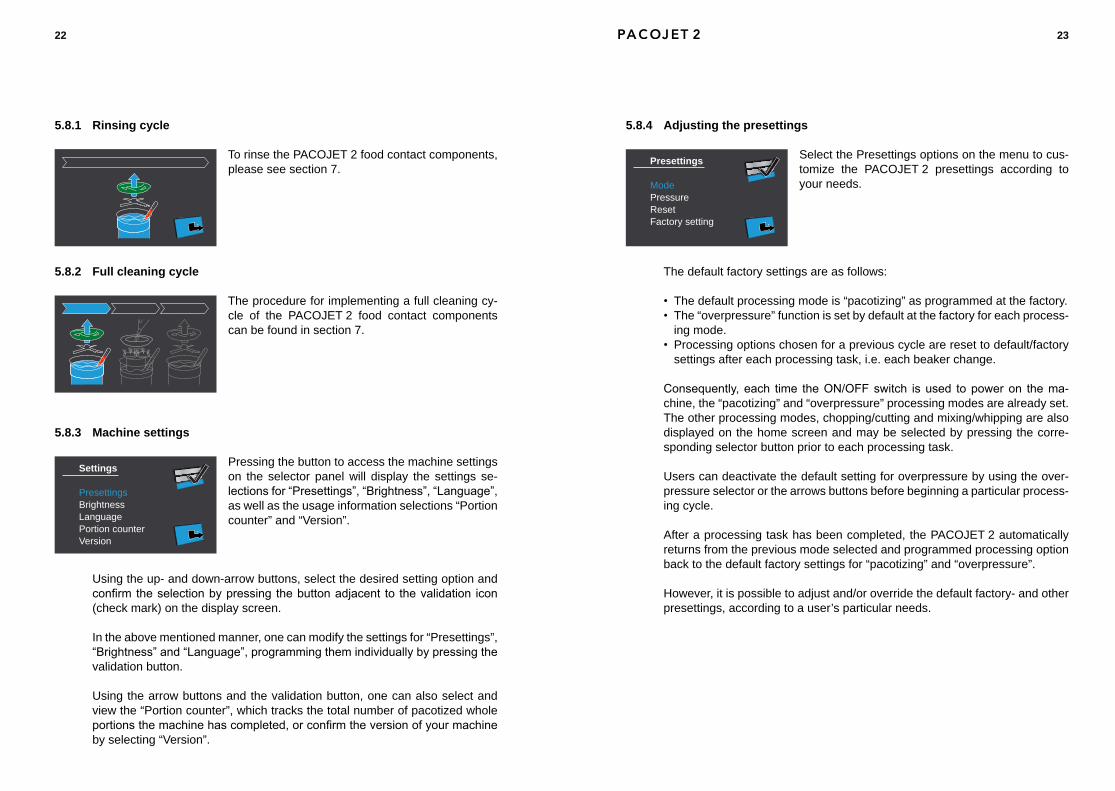
Adjusting the presettings5.8.4
Select the Presettings options on the menu to cus-tomize the PACOJET 2 presettings according to your needs.
The default factory settings are as follows:
The default processing mode is “pacotizing” as programmed at the factory. •The “overpressure” function is set by default at the factory for each process-•ing mode.Processing options chosen for a previous cycle are reset to default/factory •settings after each processing task, i.e. each beaker change.
Consequently,each time theON/OFFswitch isused topoweron thema-chine, the “pacotizing” and “overpressure” processing modes are already set. The other processing modes, chopping/cutting and mixing/whipping are also displayed on the home screen and may be selected by pressing the corre-sponding selector button prior to each processing task.
Users can deactivate the default setting for overpressure by using the over-pressure selector or the arrows buttons before beginning a particular process-ing cycle.
After a processing task has been completed, the PACOJET 2 automatically returns from the previous mode selected and programmed processing option back to the default factory settings for “pacotizing” and “overpressure”.
However, it is possible to adjust and/or override the default factory- and other presettings, according to a user’s particular needs.
Presettings
ModePressureResetFactory setting
Rinsing cycle5.8.1
To rinse the PACOJET 2 food contact components, please see section 7.
Full cleaning cycle5.8.2
The procedure for implementing a full cleaning cy-cle of the PACOJET 2 food contact components can be found in section 7.
Machine settings5.8.3
Pressing the button to access the machine settings on the selector panel will display the settings se-lectionsfor“Presettings”,“Brightness”,“Language”,as well as the usage information selections “Portion counter” and “Version”.
Using the up- and down-arrow buttons, select the desired setting option and confirmtheselectionbypressing thebuttonadjacent to thevalidation icon(check mark) on the display screen.
In the above mentioned manner, one can modify the settings for “Presettings”, “Brightness”and“Language”,programmingthemindividuallybypressingthevalidation button.
Using the arrow buttons and the validation button, one can also select and view the “Portion counter”, which tracks the total number of pacotized whole portionsthemachinehascompleted,orconfirmtheversionofyourmachineby selecting “Version”.
Settings
PresettingsBrightnessLanguagePortion counterVersion
24 25
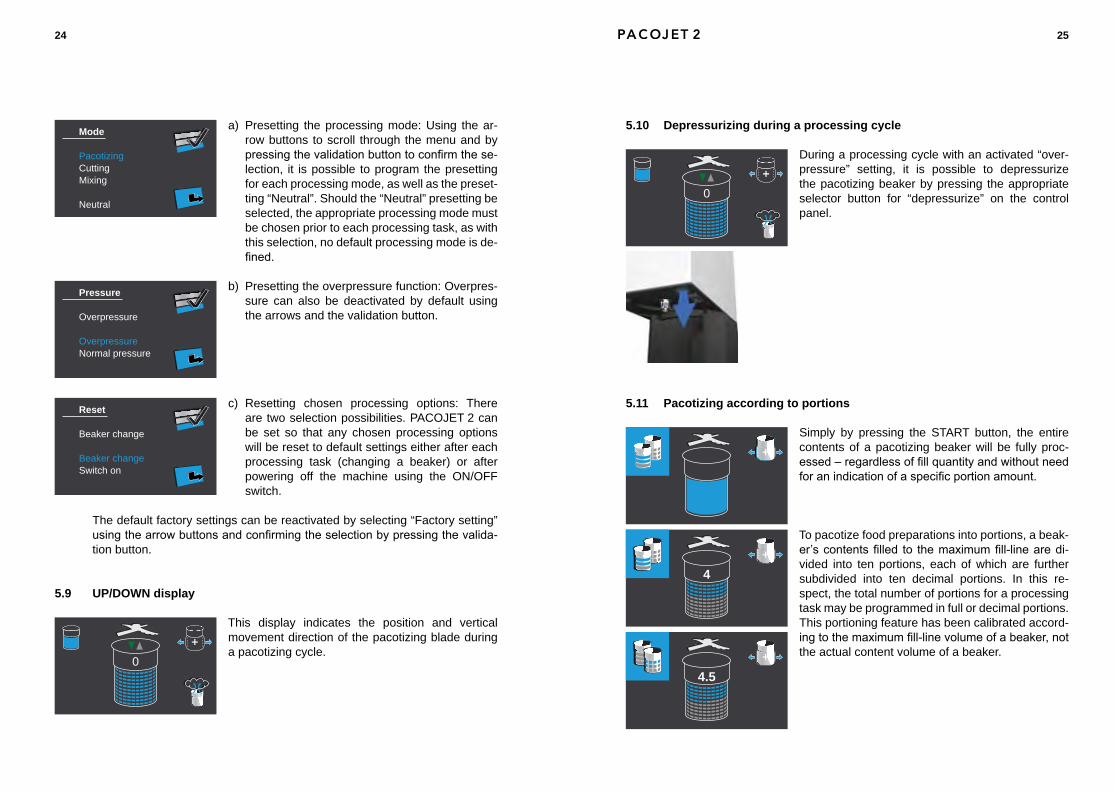
Depressurizing during a processing cycle5.10
During a processing cycle with an activated “over-pressure” setting, it is possible to depressurize the pacotizing beaker by pressing the appropriate selector button for “depressurize” on the control panel.
Pacotizing according to portions5.11
Simply by pressing the START button, the entire contents of a pacotizing beaker will be fully proc-essed–regardlessoffillquantityandwithoutneedforanindicationofaspecificportionamount.
To pacotize food preparations into portions, a beak-er’scontentsfilled to themaximumfill-linearedi-vided into ten portions, each of which are further subdivided into ten decimal portions. In this re-spect, the total number of portions for a processing task may be programmed in full or decimal portions. This portioning feature has been calibrated accord-ingtothemaximumfill-linevolumeofabeaker,notthe actual content volume of a beaker.
0
4.5
4
a) Presetting the processing mode: Using the ar-row buttons to scroll through the menu and by pressingthevalidationbuttontoconfirmthese-lection, it is possible to program the presetting for each processing mode, as well as the preset-ting “Neutral”. Should the “Neutral” presetting be selected, the appropriate processing mode must be chosen prior to each processing task, as with this selection, no default processing mode is de-fined.
b) Presetting the overpressure function: Overpres-sure can also be deactivated by default using the arrows and the validation button.
c) Resetting chosen processing options: There are two selection possibilities. PACOJET 2 can be set so that any chosen processing options will be reset to default settings either after each processing task (changing a beaker) or after powering off the machine using the ON/OFF switch.
The default factory settings can be reactivated by selecting “Factory setting” usingthearrowbuttonsandconfirmingtheselectionbypressingthevalida-tion button.
UP/DOWn display5.9
This display indicates the position and vertical movement direction of the pacotizing blade during a pacotizing cycle.
Mode
PacotizingCuttingMixing
Neutral
Pressure
Overpressure
OverpressureNormal pressure
Reset
Beaker change
Beaker changeSwitch on
0
26 27
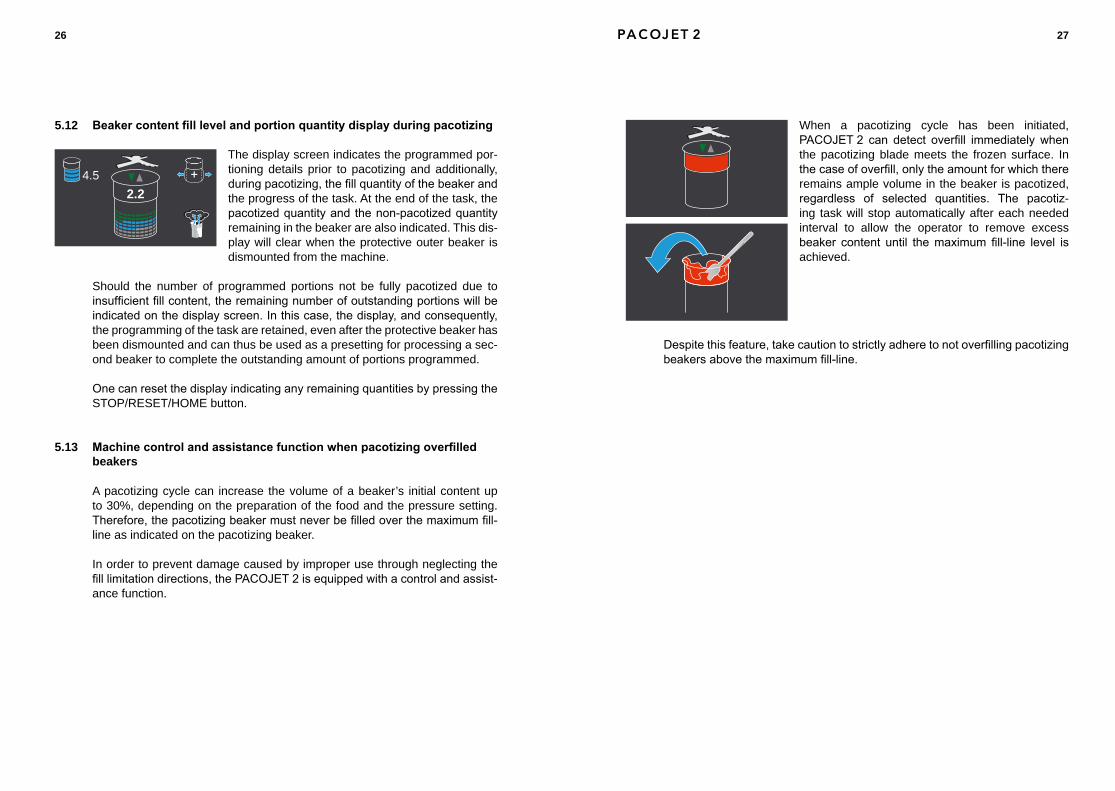
When a pacotizing cycle has been initiated, PACOJET2 can detect overfill immediately whenthe pacotizing blade meets the frozen surface. In thecaseofoverfill,onlytheamountforwhichthereremains ample volume in the beaker is pacotized, regardless of selected quantities. The pacotiz-ing task will stop automatically after each needed interval to allow the operator to remove excess beaker content until themaximum fill-line level isachieved.
Despitethisfeature,takecautiontostrictlyadheretonotoverfillingpacotizingbeakersabovethemaximumfill-line.
Beaker content fill level and portion quantity display during pacotizing5.12
The display screen indicates the programmed por-tioning details prior to pacotizing and additionally, duringpacotizing,thefillquantityofthebeakerandthe progress of the task. At the end of the task, the pacotizedquantityandthenon-pacotizedquantityremaining in the beaker are also indicated. This dis-play will clear when the protective outer beaker is dismounted from the machine.
Should the number of programmed portions not be fully pacotized due to insufficientfillcontent,theremainingnumberofoutstandingportionswillbeindicatedonthedisplayscreen.Inthiscase,thedisplay,andconsequently,the programming of the task are retained, even after the protective beaker has been dismounted and can thus be used as a presetting for processing a sec-ond beaker to complete the outstanding amount of portions programmed.
OnecanresetthedisplayindicatinganyremainingquantitiesbypressingtheSTOP/RESET/HOME button.
Machine control and assistance function when pacotizing overfilled 5.13 beakers
A pacotizing cycle can increase the volume of a beaker’s initial content up to 30%, depending on the preparation of the food and the pressure setting. Therefore,thepacotizingbeakermustneverbefilledoverthemaximumfill-line as indicated on the pacotizing beaker.
In order to prevent damage caused by improper use through neglecting the filllimitationdirections,thePACOJET2isequippedwithacontrolandassist-ance function.
2.24.5
28 29
IMPORTANT! Î
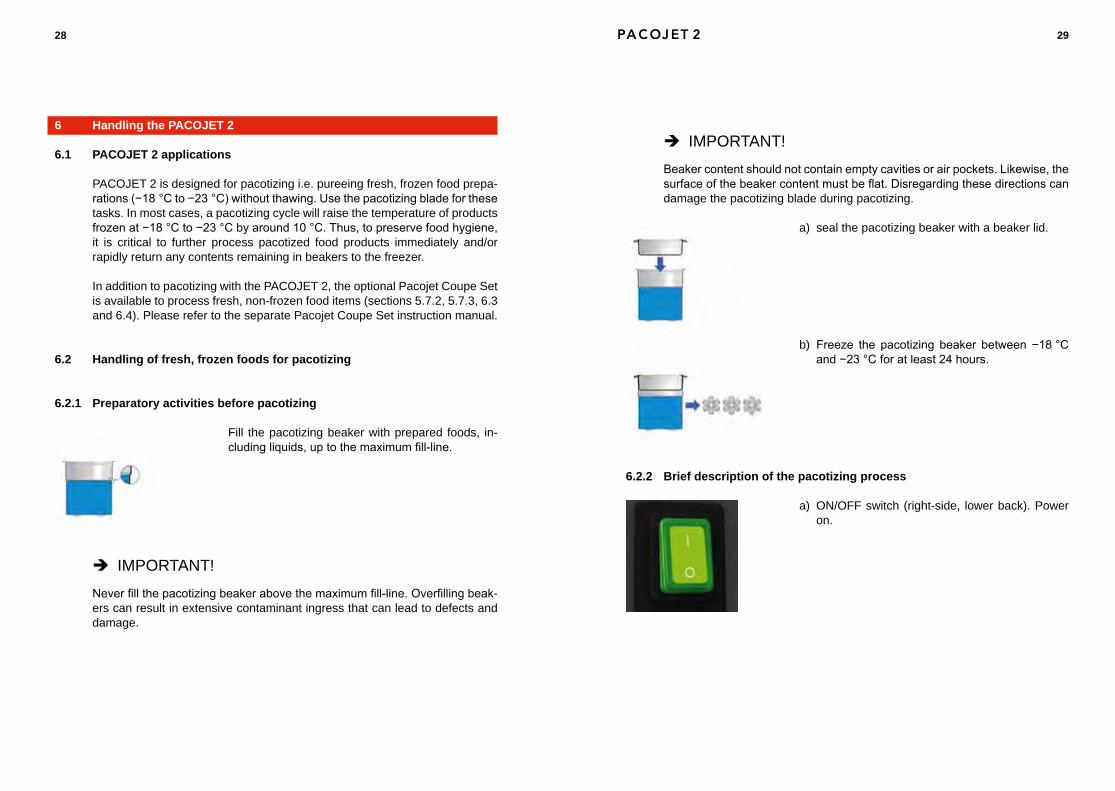
Beakercontentshouldnotcontainemptycavitiesorairpockets.Likewise,thesurfaceofthebeakercontentmustbeflat.Disregardingthesedirectionscandamage the pacotizing blade during pacotizing.
a) seal the pacotizing beaker with a beaker lid.
b) Freeze the pacotizing beaker between −18°Cand−23°Cforatleast24hours.
Brief description of the pacotizing process6.2.2
a) ON/OFF switch (right-side, lower back). Power on.
Handling the PACOJET 26
PACOJET 2 applications 6.1
PACOJET 2 is designed for pacotizing i.e. pureeing fresh, frozen food prepa-rations(−18°Cto−23°C)withoutthawing.Usethepacotizingbladeforthesetasks. In most cases, a pacotizing cycle will raise the temperature of products frozenat−18°Cto−23°Cbyaround10°C.Thus,topreservefoodhygiene,it is critical to further process pacotized food products immediately and/or rapidly return any contents remaining in beakers to the freezer.
In addition to pacotizing with the PACOJET 2, the optional Pacojet Coupe Set is available to process fresh, non-frozen food items (sections 5.7.2, 5.7.3, 6.3 and 6.4). Please refer to the separate Pacojet Coupe Set instruction manual.
Handling of fresh, frozen foods for pacotizing6.2
Preparatory activities before pacotizing6.2.1
Fill the pacotizing beaker with prepared foods, in-cludingliquids,uptothemaximumfill-line.
IMPORTANT! Î
Neverfillthepacotizingbeakerabovethemaximumfill-line.Overfillingbeak-ers can result in extensive contaminant ingress that can lead to defects and damage.
30 31
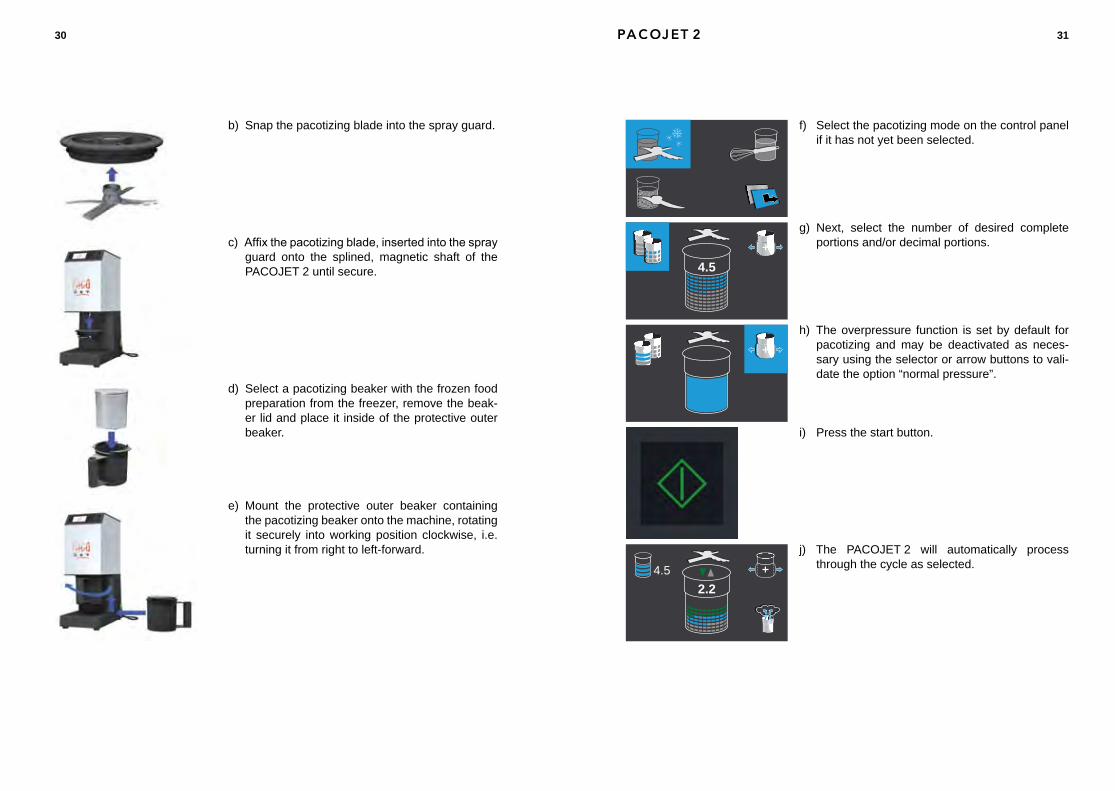
f) Select the pacotizing mode on the control panel if it has not yet been selected.
g) Next, select the number of desired complete portions and/or decimal portions.
h) The overpressure function is set by default for pacotizing and may be deactivated as neces-sary using the selector or arrow buttons to vali-date the option “normal pressure”.
i) Press the start button.
j) The PACOJET 2 will automatically process through the cycle as selected.
4.5
2.24.5
b) Snap the pacotizing blade into the spray guard.
c) Affixthepacotizingblade,insertedintothesprayguard onto the splined, magnetic shaft of the PACOJET 2 until secure.
d) Select a pacotizing beaker with the frozen food preparation from the freezer, remove the beak-er lid and place it inside of the protective outer beaker.
e) Mount the protective outer beaker containing the pacotizing beaker onto the machine, rotating it securely into working position clockwise, i.e. turning it from right to left-forward.
32 33
Detailed description of the pacotizing process6.2.3
Insertion of the pacotizing blade with the spray guard into the a) machine
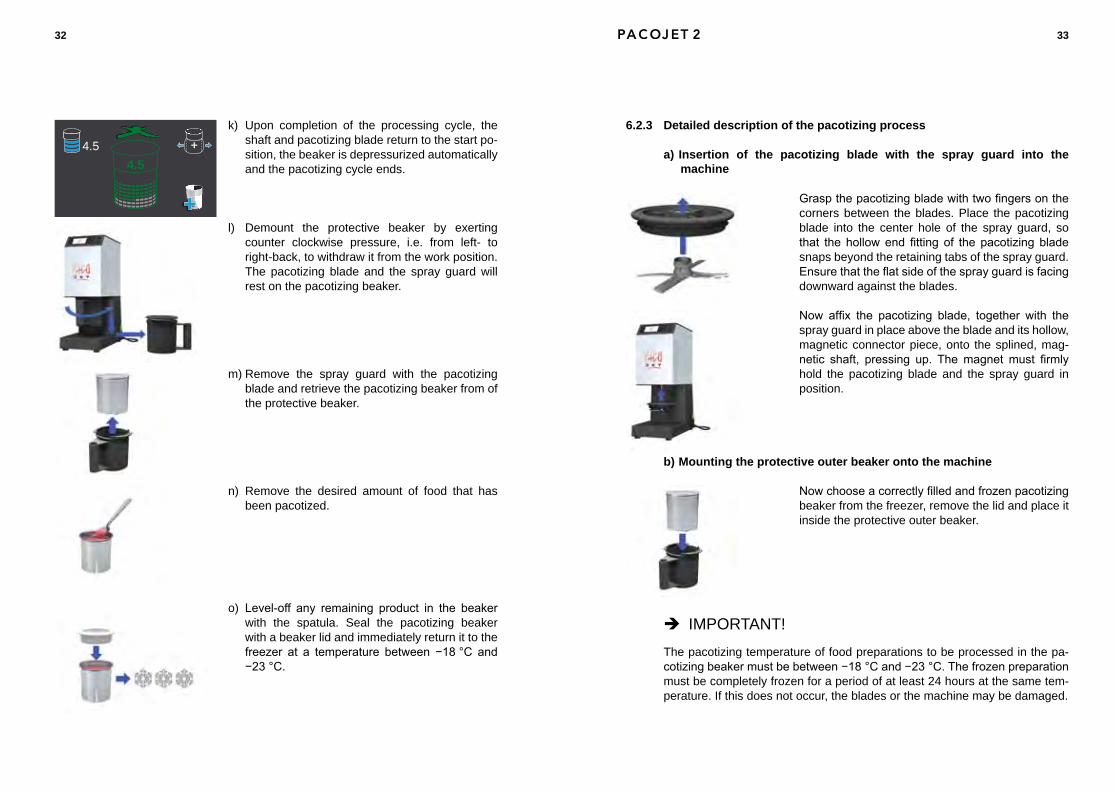
Graspthepacotizingbladewithtwofingersonthecorners between the blades. Place the pacotizing blade into the center hole of the spray guard, so that the hollowend fitting of the pacotizing bladesnaps beyond the retaining tabs of the spray guard. Ensurethattheflatsideofthesprayguardisfacingdownward against the blades.
Now affix the pacotizing blade, together with thespray guard in place above the blade and its hollow, magnetic connector piece, onto the splined, mag-netic shaft, pressing up. Themagnet must firmlyhold the pacotizing blade and the spray guard in position.
Mounting the protective outer beaker onto the machineb)
Nowchooseacorrectlyfilledandfrozenpacotizingbeaker from the freezer, remove the lid and place it inside the protective outer beaker.
IMPORTANT! Î
The pacotizing temperature of food preparations to be processed in the pa-cotizingbeakermustbebetween−18°Cand−23°C.Thefrozenpreparationmust be completely frozen for a period of at least 24 hours at the same tem-perature. If this does not occur, the blades or the machine may be damaged.
k) Upon completion of the processing cycle, the shaft and pacotizing blade return to the start po-sition, the beaker is depressurized automatically and the pacotizing cycle ends.
l) Demount the protective beaker by exerting counter clockwise pressure, i.e. from left- to right-back, to withdraw it from the work position. The pacotizing blade and the spray guard will rest on the pacotizing beaker.
m) Remove the spray guard with the pacotizing blade and retrieve the pacotizing beaker from of the protective beaker.
n) Remove the desired amount of food that has been pacotized.
o) Level-off any remaining product in the beakerwith the spatula. Seal the pacotizing beaker with a beaker lid and immediately return it to the freezer at a temperature between −18°C and−23°C.
4.54.5
34 35
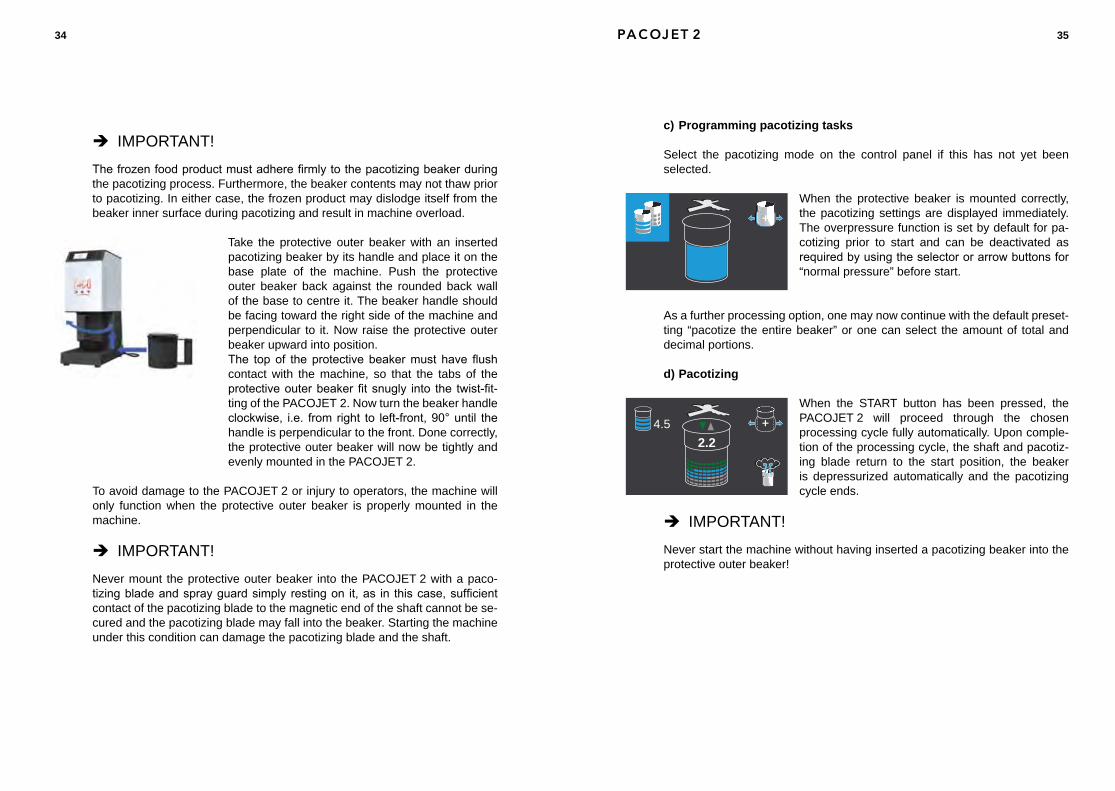
Programming pacotizing tasksc)
Select the pacotizing mode on the control panel if this has not yet been selected.
When the protective beaker is mounted correctly, the pacotizing settings are displayed immediately. The overpressure function is set by default for pa-cotizing prior to start and can be deactivated as requiredbyusingtheselectororarrowbuttonsfor“normal pressure” before start.
As a further processing option, one may now continue with the default preset-ting “pacotize the entire beaker” or one can select the amount of total and decimal portions.
Pacotizingd)
When the START button has been pressed, the PACOJET 2 will proceed through the chosen processing cycle fully automatically. Upon comple-tion of the processing cycle, the shaft and pacotiz-ing blade return to the start position, the beaker is depressurized automatically and the pacotizing cycle ends.
IMPORTANT! Î
Never start the machine without having inserted a pacotizing beaker into the protective outer beaker!
2.24.5
IMPORTANT! Î
Thefrozenfoodproductmustadherefirmlytothepacotizingbeakerduringthe pacotizing process. Furthermore, the beaker contents may not thaw prior to pacotizing. In either case, the frozen product may dislodge itself from the beaker inner surface during pacotizing and result in machine overload.
Take the protective outer beaker with an inserted pacotizing beaker by its handle and place it on the base plate of the machine. Push the protective outer beaker back against the rounded back wall of the base to centre it. The beaker handle should be facing toward the right side of the machine and perpendicular to it. Now raise the protective outer beaker upward into position.The topof theprotectivebeakermust have flushcontact with the machine, so that the tabs of the protectiveouterbeakerfitsnugly into the twist-fit-ting of the PACOJET 2. Now turn the beaker handle clockwise, i.e. fromright to left-front,90°until thehandle is perpendicular to the front. Done correctly, the protective outer beaker will now be tightly and evenly mounted in the PACOJET 2.
To avoid damage to the PACOJET 2 or injury to operators, the machine will only function when the protective outer beaker is properly mounted in the machine.
IMPORTANT! Î
Never mount the protective outer beaker into the PACOJET 2 with a paco-tizingbladeandsprayguardsimplyrestingon it,as in thiscase,sufficientcontact of the pacotizing blade to the magnetic end of the shaft cannot be se-cured and the pacotizing blade may fall into the beaker. Starting the machine under this condition can damage the pacotizing blade and the shaft.
36 37
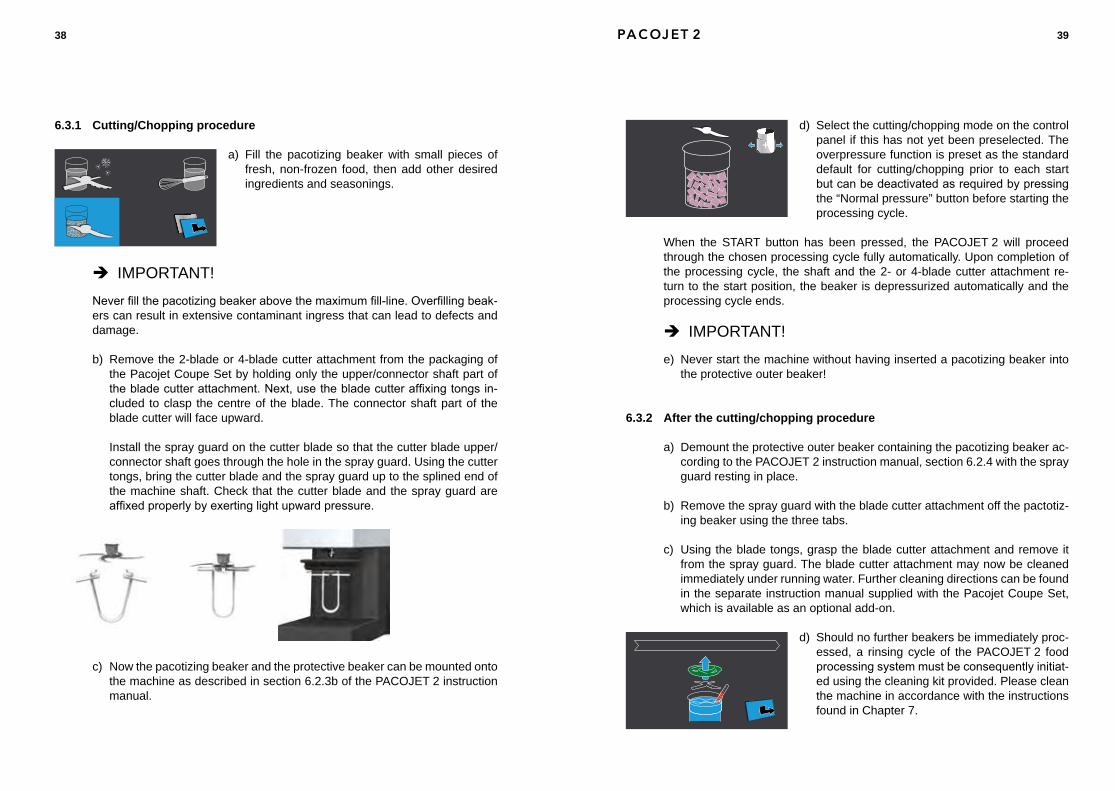
If the entire contents of the pacotizing beaker has not been pacotized, the remaining contents must be returned immediately to the freezer! If any paco-tized food content remain in the beaker, the surface mustbeflattenedusingthespatulabeforereplac-ing into the freezer.
Holdingtemperaturesbetween−18°Cand−23°C
e) Should no further beakers be immediately proc-essed, a rinsing cycle of the PACOJET 2 food processingsystemmustbeconsequentlyimple-mented using the cleaning kit provided. Please clean the machine in accordance with the in-structions found in Chapter 7.
6.3 Utilizing the machine to cut/chop fresh, non-frozen foods
One requires the 2-blade or 4-blade cutter attachments contained in thePacojet Coupe Set, which is available as an add-on option.
Exercise extreme caution handling the 2-blade and 4-blade cutter attachments contained in the Pacojet Coupe Set as they are very sharp! Touch only the upper/connector shaft part of the blade cutter at-tachment. Use the blade cutter affixing tongs in-cluded in the Pacojet Coupe Set. Do not ever come into contact with the blades of any Pacojet Coupe Set attachment.
Please adhere to the instruction manual provided separately with the Pacojet Coupe Set.
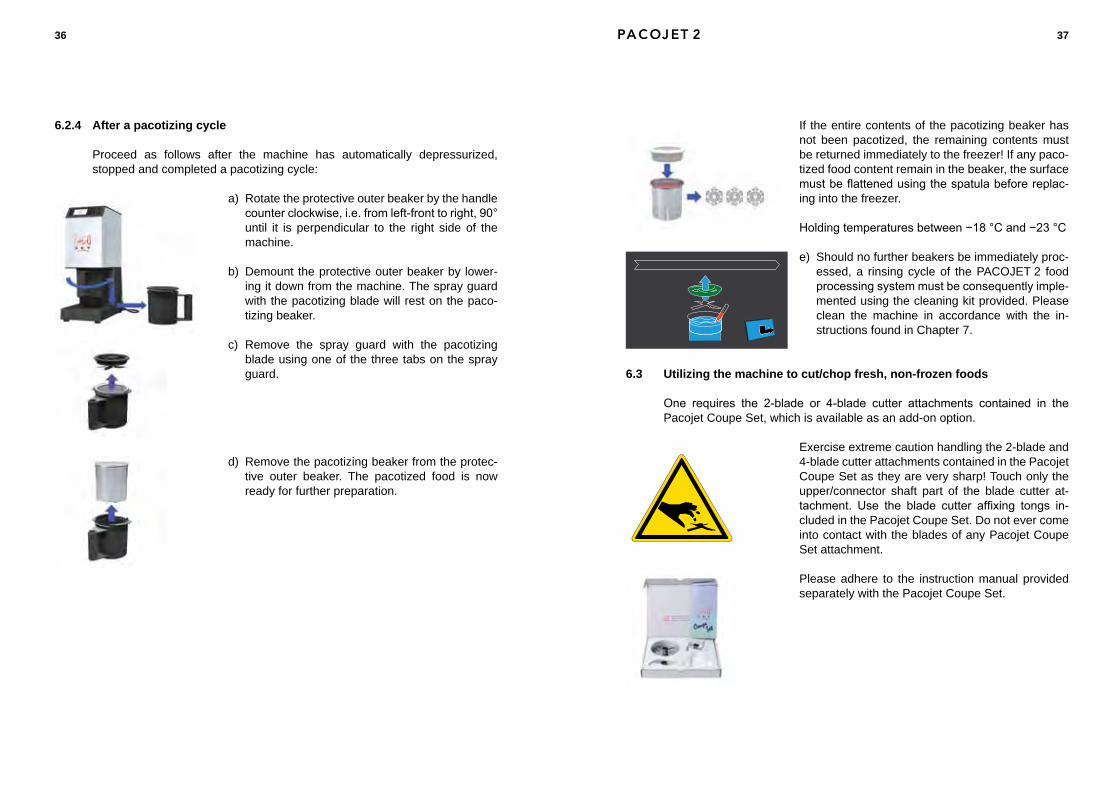
After a pacotizing cycle6.2.4
Proceed as follows after the machine has automatically depressurized, stopped and completed a pacotizing cycle:
a) Rotate the protective outer beaker by the handle counterclockwise,i.e.fromleft-fronttoright,90°until it is perpendicular to the right side of the machine.
Demount the protective outer beaker by lower-b) ing it down from the machine. The spray guard with the pacotizing blade will rest on the paco-tizing beaker.
c) Remove the spray guard with the pacotizing blade using one of the three tabs on the spray guard.
d) Remove the pacotizing beaker from the protec-tive outer beaker. The pacotized food is now ready for further preparation.
38 39
d) Select the cutting/chopping mode on the control panel if this has not yet been preselected. The overpressure function is preset as the standard default for cutting/chopping prior to each start butcanbedeactivatedasrequiredbypressingthe “Normal pressure” button before starting the processing cycle.
When the START button has been pressed, the PACOJET 2 will proceed through the chosen processing cycle fully automatically. Upon completion of the processing cycle, the shaft and the 2- or 4-blade cutter attachment re-turn to the start position, the beaker is depressurized automatically and the processing cycle ends.
IMPORTANT! Î
Never start the machine without having inserted a pacotizing beaker into e) the protective outer beaker!
After the cutting/chopping procedure6.3.2
Demount the protective outer beaker containing the pacotizing beaker ac-a) cording to the PACOJET 2 instruction manual, section 6.2.4 with the spray guard resting in place.
Remove the spray guard with the blade cutter attachment off the pactotiz-b) ing beaker using the three tabs.
Using the blade tongs, grasp the blade cutter attachment and remove it c) from the spray guard. The blade cutter attachment may now be cleaned immediately under running water. Further cleaning directions can be found in the separate instruction manual supplied with the Pacojet Coupe Set, which is available as an optional add-on.
d) Should no further beakers be immediately proc-essed, a rinsing cycle of the PACOJET 2 food processingsystemmustbeconsequentlyinitiat-ed using the cleaning kit provided. Please clean the machine in accordance with the instructions found in Chapter 7.
Cutting/Chopping procedure6.3.1
a) Fill the pacotizing beaker with small pieces of fresh, non-frozen food, then add other desired ingredients and seasonings.
IMPORTANT! Î
Neverfillthepacotizingbeakerabovethemaximumfill-line.Overfillingbeak-ers can result in extensive contaminant ingress that can lead to defects and damage.
b) Remove the 2-blade or 4-blade cutter attachment from the packaging of the Pacojet Coupe Set by holding only the upper/connector shaft part of thebladecutterattachment.Next,usethebladecutteraffixingtongsin-cluded to clasp the centre of the blade. The connector shaft part of the blade cutter will face upward.
Install the spray guard on the cutter blade so that the cutter blade upper/connector shaft goes through the hole in the spray guard. Using the cutter tongs, bring the cutter blade and the spray guard up to the splined end of the machine shaft. Check that the cutter blade and the spray guard are affixedproperlybyexertinglightupwardpressure.
Now the pacotizing beaker and the protective beaker can be mounted onto c) the machine as described in section 6.2.3b of the PACOJET 2 instruction manual.
40 41
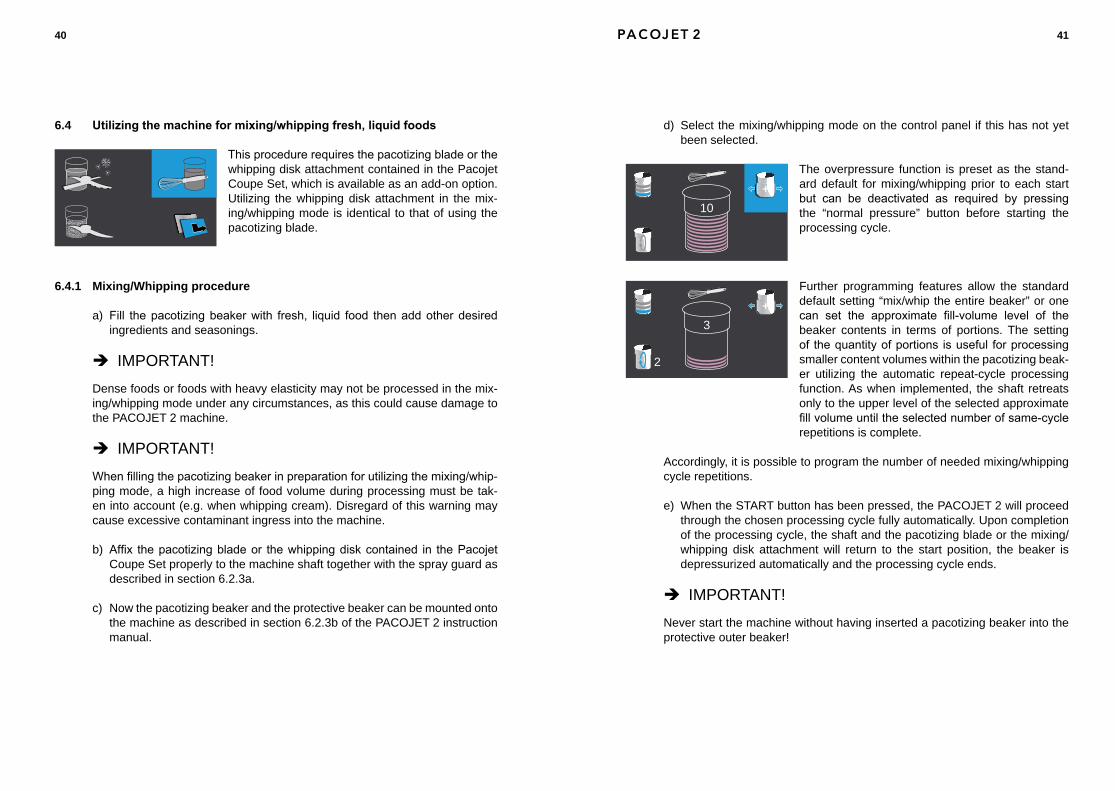
Select the mixing/whipping mode on the control panel if this has not yet d) been selected.
The overpressure function is preset as the stand-ard default for mixing/whipping prior to each start but can be deactivated as required by pressingthe “normal pressure” button before starting the processing cycle.
Further programming features allow the standard default setting “mix/whip the entire beaker” or one can set the approximate fill-volume level of thebeaker contents in terms of portions. The setting of thequantityofportions isuseful forprocessingsmaller content volumes within the pacotizing beak-er utilizing the automatic repeat-cycle processing function. As when implemented, the shaft retreats only to the upper level of the selected approximate fillvolumeuntiltheselectednumberofsame-cyclerepetitions is complete.
Accordingly, it is possible to program the number of needed mixing/whipping cycle repetitions.
When the START button has been pressed, the PACOJET 2 will proceed e) through the chosen processing cycle fully automatically. Upon completion of the processing cycle, the shaft and the pacotizing blade or the mixing/whipping disk attachment will return to the start position, the beaker is depressurized automatically and the processing cycle ends.
IMPORTANT! Î
Never start the machine without having inserted a pacotizing beaker into the protective outer beaker!
10
2
3
Utilizing the machine for mixing/whipping fresh, liquid foods6.4
Thisprocedurerequiresthepacotizingbladeorthewhipping disk attachment contained in the Pacojet Coupe Set, which is available as an add-on option. Utilizing the whipping disk attachment in the mix-ing/whipping mode is identical to that of using the pacotizing blade.
Mixing/Whipping procedure6.4.1
Fill thepacotizingbeakerwith fresh, liquid food thenaddotherdesireda) ingredients and seasonings.
IMPORTANT! Î
Dense foods or foods with heavy elasticity may not be processed in the mix-ing/whipping mode under any circumstances, as this could cause damage to the PACOJET 2 machine.
IMPORTANT! Î
Whenfillingthepacotizingbeakerinpreparationforutilizingthemixing/whip-ping mode, a high increase of food volume during processing must be tak-en into account (e.g. when whipping cream). Disregard of this warning may cause excessive contaminant ingress into the machine.
Affix thepacotizingbladeor thewhippingdiskcontained in thePacojetb) Coupe Set properly to the machine shaft together with the spray guard as described in section 6.2.3a.
Now the pacotizing beaker and the protective beaker can be mounted onto c) the machine as described in section 6.2.3b of the PACOJET 2 instruction manual.
42 43
Cleaning PACOJET 27
General7.1
As with all machines used in food preparation, special attention must be paid to the cleaning procedures for PACOJET 2. Meticulously adhering to the cleaning directions is especially crucial when processing animal protein and fatsinthePACOJET2(fish,meats,dairyproducts,etc.).
Thorough cleaning of the machine
isrequiredforfirst-classqualityproducts•will extend the life of the machine•extends the time between service calls•helps avoid the proliferation of germs on the machine •
IMPORTANT! Î
Never submerge PACOJET 2 in water!•Never place the machine under running water!•Never spray the machine with water, a high-pressure steam washer or any •other similar device!
Initial cleaning7.2
PACOJET 2 and all of its accessories must be meticulously cleaned before its firstuse.Useareadyavailabledishwashingliquidforthispurpose.
The pacotizing beakersmust also be thoroughly cleaned prior to the firstuse.
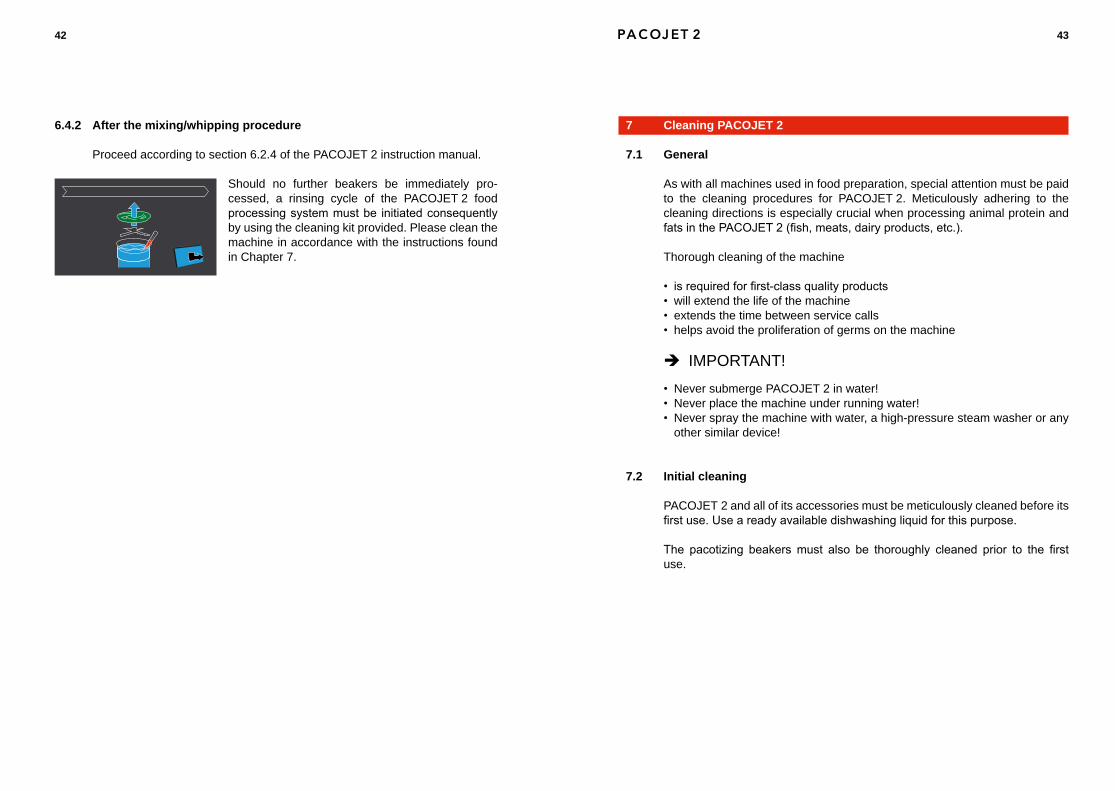
After the mixing/whipping procedure6.4.2
Proceed according to section 6.2.4 of the PACOJET 2 instruction manual.
Should no further beakers be immediately pro-cessed, a rinsing cycle of the PACOJET 2 food processingsystemmustbe initiatedconsequentlyby using the cleaning kit provided. Please clean the machine in accordance with the instructions found in Chapter 7.
44 45
Detergent7.4
In order to achieve a proper hygienic cleaning, use a non-foaming disinfecting detergent in connection with the cleaning process.
The following detergents are appropriate examples:
ECOLAB• ® P3 Asepto 2000 etc.ECOLAB• ® Micro Quat ExtraProcter & Gamble Milton Sterilizing Fluid•
Consult yourpoint of purchase to inquireaboutappropriatedetergents foryourcountry,ascountryspecificdifferencesmayprevail.
IMPORTANT! Î
Never use the following in any instance:
foam causing detergents•harsh, aggressive solvents that deteriorate or dissolve aluminium, rubber, •plastics or painted surfacestoxic detergents•
Rinsing cycle procedure7.5
Accessoriesrequired:greenrinsinginsertwiththepacotizingblade
Rinsing with the green rinsing insert removes general residue. After the clean-ing cycle with the blue cleaning insert is complete, any remaining residual detergent is removed by implementing a second rinsing cycle. The rinsing cycle with the rinsing insert is also appropriate for inbetween processes, i.e. changing foods to be pacotized.
Cleaning of the direct food contact zone7.3
Thecleaningproceduresdefinedbelowareabsolutelyrequired.
PACOJET 2 must be cleaned regularly by initiating a full cleaning cycle utiliz-ing the supplied PACOJET 2 cleaning accessories that are intended for this purpose:
after processing, no later than before closing up the kitchen•after an extended period of time during which PACOJET 2 has not been in •usebeforethefirstprocessingtaskoftheday•
The PACOJET 2 kitchen machine is so conceived, that any dismantling for cleaning of the machine is not necessary. The cleaning procedure is largely done automatically.
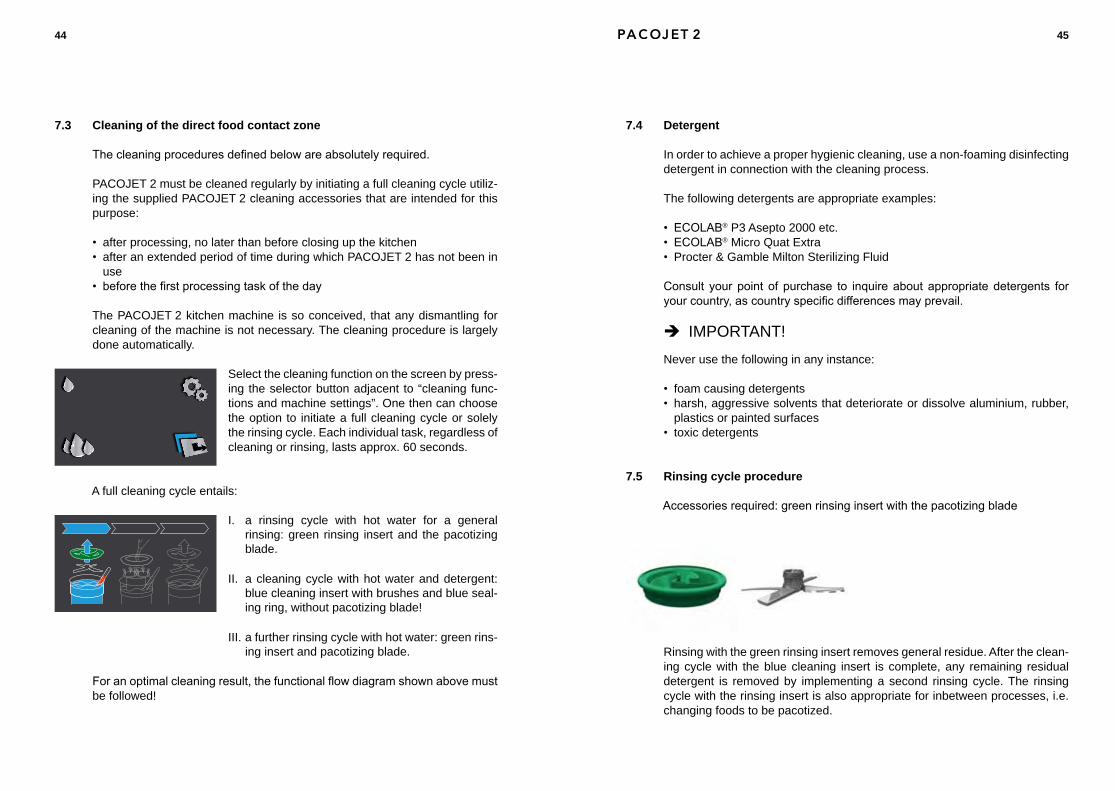
Select the cleaning function on the screen by press-ing the selector button adjacent to “cleaning func-tions and machine settings”. One then can choose the option to initiate a full cleaning cycle or solely the rinsing cycle. Each individual task, regardless of cleaning or rinsing, lasts approx. 60 seconds.
A full cleaning cycle entails:
a rinsing cycle with hot water for a general I. rinsing: green rinsing insert and the pacotizing blade.
a cleaning cycle with hot water and detergent: II. blue cleaning insert with brushes and blue seal-ing ring, without pacotizing blade!
a further rinsing cycle with hot water: green rins-III. ing insert and pacotizing blade.
Foranoptimalcleaningresult,thefunctionalflowdiagramshownabovemustbe followed!
46 47
Select “rinsing cycle” from the display screen and press the START button (see section 5.8).
After the completion of a successful rinsing cycle and automatic depressu-rizing, a message appears on the screen informing the operator it is safe to demount the protective beaker. Demount the protective beaker from the machine and dispose of the rinsing water.
Cleaning cycle procedure 7.6
Accessoriesrequired:bluecleaninginsertwithbluesealingring,withoutpa-cotizing blade!
The cleaning cycle is a part of the full cleaning procedure for PACOJET 2, which consists of pre-rinsing,cleaningandfinal-rinsing.
The complete cleaning procedure can be programmed by selecting the option “cleaning functions and machine settings” using the selector buttons adjacent to the display screen. Then, on the following display screen, select “full clean-ing procedure” (see section 5.8).
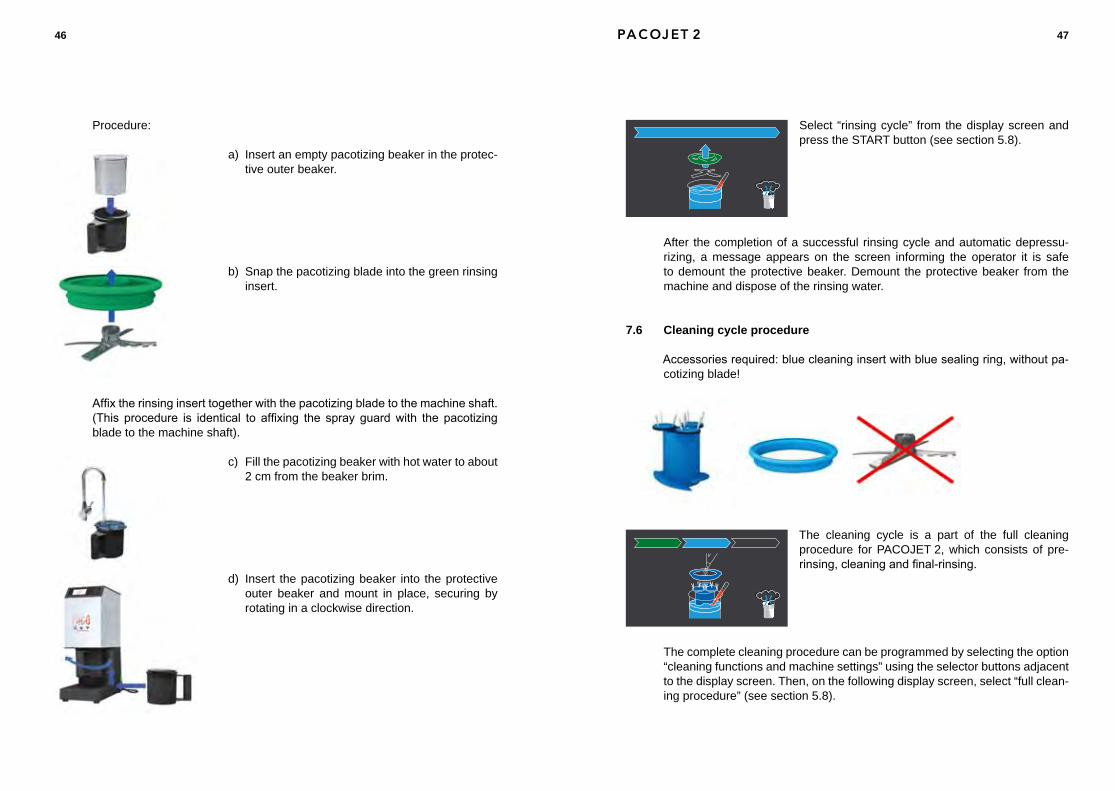
Procedure:
a) Insert an empty pacotizing beaker in the protec-tive outer beaker.
b) Snap the pacotizing blade into the green rinsing insert.
Affixtherinsinginserttogetherwiththepacotizingbladetothemachineshaft.(This procedure is identical to affixing the spray guardwith the pacotizingblade to the machine shaft).
c) Fill the pacotizing beaker with hot water to about 2 cm from the beaker brim.
d) Insert the pacotizing beaker into the protective outer beaker and mount in place, securing by rotating in a clockwise direction.

48 49
The process of cleaning with the blue cleaning insert and disinfecting deter-gent will protect the PACOJET 2 food processing system from germs accu-mulation and also, cleanse any remaining food trace elements after a rinsing cycle.
Procedure:
a) Insert an empty pacotizing beaker in the protec-tive outer beaker.
b) Place the blue cleaning insert with brushes fac-ing up into the pacotizing beaker, then place the blue sealing ring onto the pacotizing beaker.
c) Fill the pacotizing beaker with hot water up to the base of the brushes.
Addtherequiredquantityofdetergent(seesec-tion 7.4).
Mount the protective beaker onto the machine, rotating clockwise.
Press the START button and remove the protective beaker after the cleaning cycle is complete, then dispose of the remnants.
Cleaning the depressurization hose7.7
Rinsing the depressurization hose during a clean-ing or rinsing cycle is possible by pressing the se-lector button for the depressurization function. Be sure to hold a cup under the hose outlet to collect any cleaning- or rinse-water that will be released.
Cleaning the exterior of the machine7.8
Rub the chrome-steel exterior and base using a damp cloth and a readily available cleansing agent.
50 51
Cleaning accessories7.9
The parts listed below can be cleaned in a dishwasher:
Pacotizing beaker of chrome-steel•Protective outer beaker•Pacotizing blade•Spray guard, black•Sealing ring, blue•Rinsing insert, green•Spatula•
In order to prevent the accumulation of germs, the pacotizing blade and the spray guard must be:
rinsed in order to remove general residue•soaked in a cleaning/disinfectant solution to kill any germs and then•rinsed under water or through a dishwasher •
The pacotizing blade will remain rust-free with proper care. It should be han-dled as one would a meat-grinding blade to prevent the development of rust. Afterthepacotizingbladehasbeencleaned,itiseasytoapplyafilmofoil. A food-safe oil or lubricant must be used.
Beaker lids should only be cleaned in a dishwasher under certain condi-tions to preserve the integrity of their shape. They are temperature resistant between −25°C and +85°C. Please verify the temperature range of yourdishwasher before using it to clean beaker lids.
What to do when8
? PACOJET2 stopped theprocessing cycle, though thedesired quantityhas not been or only partially processed.
The display screen shows “error”.
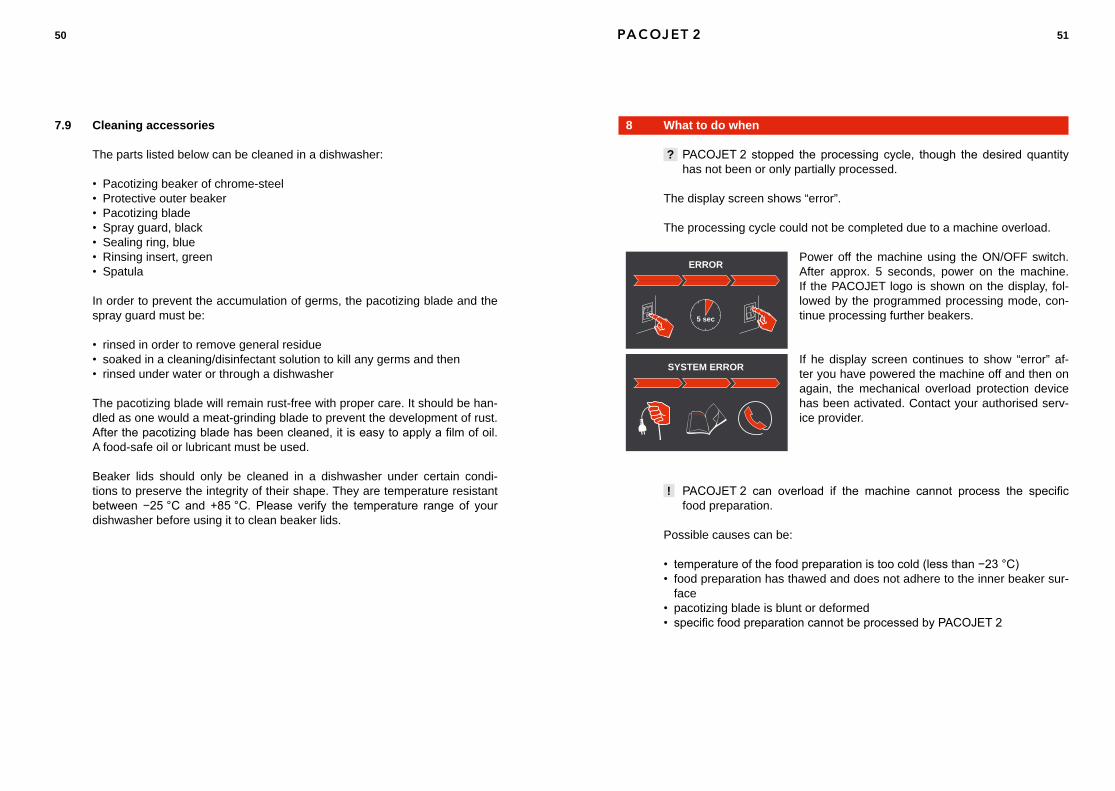
The processing cycle could not be completed due to a machine overload.
Power off the machine using the ON/OFF switch. After approx. 5 seconds, power on the machine. If the PACOJET logo is shown on the display, fol-lowed by the programmed processing mode, con-tinue processing further beakers.
If he display screen continues to show “error” af-ter you have powered the machine off and then on again, the mechanical overload protection device has been activated. Contact your authorised serv-ice provider.
! PACOJET2 can overload if the machine cannot process the specificfood preparation.
Possible causes can be:
temperatureofthefoodpreparationistoocold(lessthan−23°C)•food preparation has thawed and does not adhere to the inner beaker sur-•facepacotizing blade is blunt or deformed•specificfoodpreparationcannotbeprocessedbyPACOJET2•
5 sec
ERROR
SYSTEM ERROR
52 53
? PACOJET 2 does not create overpressure during a processing cycle
The surface of the spray guard is not smooth. Since the spray guard also provides a seal during of the processing cycle, the contact surfaces must be clean and fully intact.
Inspect the spray guard for residue or damage. Clean if necessary. If this does not alleviate the pressure inconsistency, contact an authorised service provider.
? Thepacotizingbladecanno longerbemagneticallyaffixedsecurely tothe splined end of the machine shaft.
The pacotizing blade is held in place through a magnetic force at the end of the machine shaft. Residue collection on the end of the machine shaft or withinthehollowendfittingofthepacotizingbladewillweakenthemagneticbondtotheextentthatthepacotizingbladecannotbeaffixed.
Cleanthesplinedendofthemachineshaftandthehollowendfittingofthe pacotizing blade.
Information 9
Technical Data PACOJET 29.1
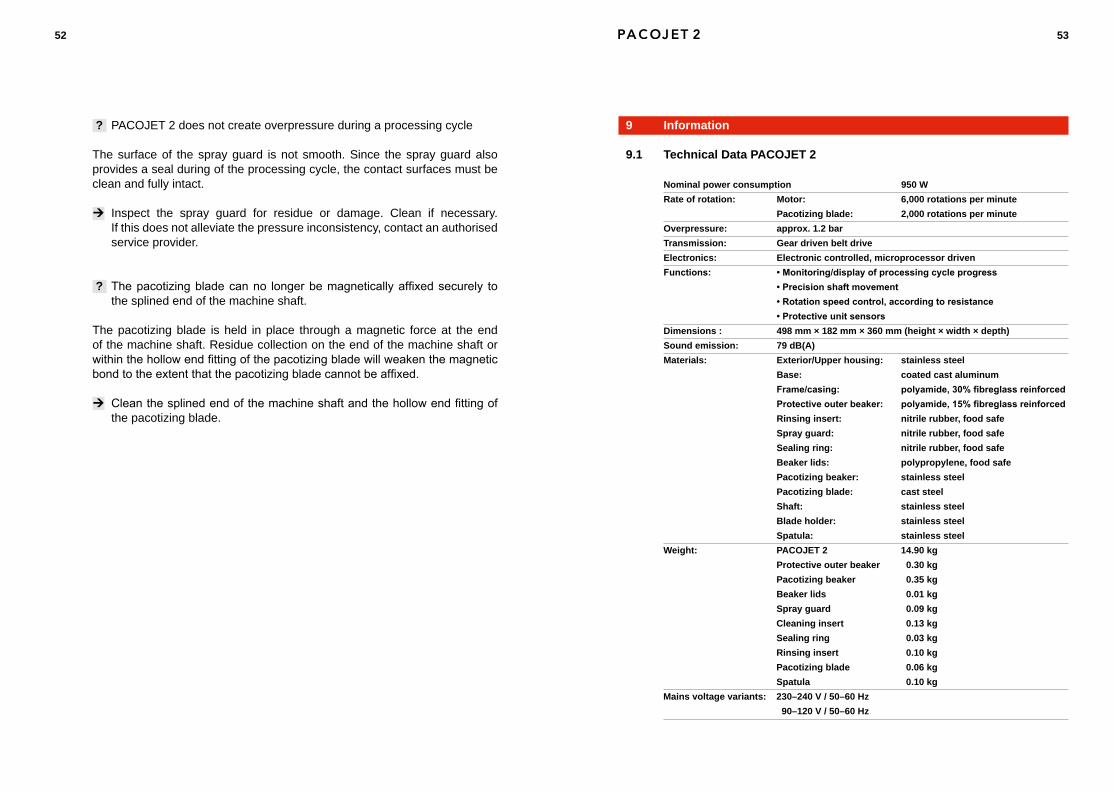
nominal power consumption 950 WRate of rotation: Motor: 6,000 rotations per minute Pacotizing blade: 2,000 rotations per minuteOverpressure: approx. 1.2 barTransmission: Gear driven belt driveElectronics: Electronic controlled, microprocessor drivenFunctions: • Monitoring/display of processing cycle progress • Precision shaft movement • Rotation speed control, according to resistance • Protective unit sensorsDimensions : 498 mm × 182 mm × 360 mm (height × width × depth)Sound emission: 79 dB(A)Materials: Exterior/Upper housing: stainless steel Base: coated cast aluminum Frame/casing: polyamide, 30% fibreglass reinforced Protective outer beaker: polyamide, 15% fibreglass reinforced Rinsing insert: nitrile rubber, food safe Spray guard: nitrile rubber, food safe Sealing ring: nitrile rubber, food safe Beaker lids: polypropylene, food safe Pacotizing beaker: stainless steel Pacotizing blade: cast steel Shaft: stainless steel Blade holder: stainless steel Spatula: stainless steelWeight: PACOJET 2 14.90 kg Protective outer beaker 0.30 kg Pacotizing beaker 0.35 kg Beaker lids 0.01 kg Spray guard 0.09 kg Cleaning insert 0.13 kg Sealing ring 0.03 kg Rinsing insert 0.10 kg Pacotizing blade 0.06 kg Spatula 0.10 kgMains voltage variants: 230–240 V / 50–60 Hz 90–120 V / 50–60 Hz
54 55
Accessories9.2
The following accessories are available from your Pacojet dealer:
ItemPacotizing beaker kit, small (4 chrome steel beakers with lids) Pacotizing beaker kit, medium (6 chrome steel beakers with lids)Pacotizing beaker kit, large (10 chrome steel beakers with lids)Pacojet Coupe Set Protective outer beakerPacotizing blade StandardPacotizing blade GoldSpray protectorRinsing insert (green)Sealing ring (blue)Cleaning insert (blue)SpatulaPACOJET 2 Recipe BookAdhesive labels
Maintenance and technical service9.3
Regular maintenance will prevent downtime and will extend the performance life of your PACOJET 2 machine. Repairs and maintenance may only be per-formed by authorised Pacojet service providers.
To source information regarding your Pacojet service provider, contact your point of purchase or consult www.pacojet.com.
Disposal and recycling9.4
PACOJET 2, its accessories and packaging must be recycled according to environmental regulations.
Recycle the original PACOJET 2 packaging only along with the machine it-self. It is recommended to store the original packaging in the case of later transports (i.e. moving locations, for shipping to a service provider).
Only applicable to EU countries:
Do not dispose of the PACOJET 2 in a household waste bin! According to EU-Directive2002/96/EConelectronicsandelectronicequipmentwasteanditsapplicationaccordingtonationallaws,unneededelectronicequipmentmustbe collected separately and recycled in a method appropriate to protect the environment.
Warranty notes9.5
Please refer to the enclosure.
PACOJET 2 declaration of conformity9.6
Please refer to the enclosure.