Embed Size (px)
Citation preview

RICOH ProcessDirector
Read this manual carefully and keep it handy for future reference.
Installing DocumentProcessing Features
Version 3.6.0
Overview 1
Planning for installation 2
Installing features 3
Reference 4
Accessibility
For information not in thismanual, refer to the HelpSystem in your product.


1
Introduction
Important ............................................................................................................................................ 3
Cautions regarding this guide............................................................................................................. 3
Publications for this product ................................................................................................................ 3
How to read the documentation ......................................................................................................... 4
Before installing a document processing feature ................................................................................. 4
How to use the manuals ..................................................................................................................... 4
Related information ............................................................................................................................ 6
Symbols.............................................................................................................................................. 6
Abbreviations ..................................................................................................................................... 6
Trademarks......................................................................................................................................... 7
1 Overview
Documents ...........................................................................................................................................10
Document properties file ......................................................................................................................10
Document database.............................................................................................................................10
2 Planning for installation
Planning to install document processing features..................................................................................11
Software requirements ......................................................................................................................11
Gathering your document requirements ............................................................................................11
Performance and capacity considerations with document processing features ..................................12
Hardware and software requirements for Ricoh ProcessDirector Plug-in for Adobe Acrobat ................16
Migrating from Adobe Acrobat Professional version X or XI to version DC ..........................................17
3 Installing features
Installing the feature on the Ricoh ProcessDirector primary computer ...................................................19
Installing document processing features using Feature Manager ......................................................19
Defining custom document properties ...............................................................................................20
Naming custom document properties in more than one language ....................................................24
Updating custom document properties..............................................................................................27
Installing Ricoh ProcessDirector Plug-in for Adobe Acrobat..................................................................28
Running the installation program.......................................................................................................28
Loading Ricoh ProcessDirector document properties.........................................................................29
Loading media objects .....................................................................................................................30
Uninstalling Ricoh ProcessDirector Plug-in for Adobe Acrobat ..........................................................31
TABLE OF CONTENTS

4 Reference
Installation and configuration checklist .................................................................................................33
docCustomDefinitions.xml file...............................................................................................................34
docCustomDefinitions.properties file ....................................................................................................45
Document properties template file ........................................................................................................47
Document properties file ......................................................................................................................48
Property conditions file.........................................................................................................................49
5 Accessibility
2

3
IInnttrroodduuccttiioonn
Important
To the maximum extent permitted by applicable laws, in no event will the manufacturer be liable for anydamages whatsoever arising out of failures of this product, losses of documents or data, or the use ornon-use of this product and operation manuals provided with it.
Make sure that you always copy or have backups of important documents or data. Documents or datamight be erased due to your operational errors or malfunctions of the software. Also, you areresponsible for taking protective measures against computer viruses, worms, and other harmful software.
In no event will the manufacturer be responsible for any documents created by you using this product orany results from the data executed by you.
Cautions regarding this guide
• Some illustrations or explanations in this guide could differ from your product due to improvement orchange in the product.
• The contents of this document are subject to change without notice.
• No part of this document may be duplicated, replicated, reproduced in any form, modified, orquoted without prior consent of the supplier.
• Throughout this publication, references to directory paths indicate the default paths only. If youinstall Ricoh ProcessDirector or Ricoh ProcessDirector Plug-in for Adobe Acrobat in a differentlocation, including a different drive, you must adjust the paths accordingly.For example, if you install Ricoh ProcessDirector Plug-in for Adobe Acrobat on the D: drive of acomputer running a Windows operating system, replace C: with D: in the directory paths.
Publications for this product
The following publications are available for Ricoh ProcessDirector document processing features.
Instruction manuals
These instruction manuals are included:
• Ricoh ProcessDirector: Installing Document Processing Features in PDF formatThis guide explains how to install Ricoh ProcessDirector document features that control both jobsand the individual documents in jobs. The guide includes instructions for installing RicohProcessDirector Plug-in for Adobe Acrobat, which is included with the PDF Document Supportfeature.
• Ricoh ProcessDirector: Using Ricoh ProcessDirector Plug-in for Adobe Acrobat in PDFformatThis guide explains how to use Ricoh ProcessDirector Plug-in for Adobe Acrobat. You can use theAdobe Acrobat plug-in to define text, barcodes, images, and other enhancements in a PDF file.

After you save your enhancements in a control file, Ricoh ProcessDirector workflows can use thecontrol file to make similar enhancements to PDF files.
You can download English publications in PDF format from the Ricoh Production Print Information Center(http://info.rpp.ricoh-usa.com/help/index.jsp).
Ricoh ProcessDirector Information Center
The Ricoh ProcessDirector Information Center contains topics that help administrators, supervisors, andoperators learn about and use Ricoh ProcessDirector document features. The Information Center isavailable from the Ricoh ProcessDirector user interface and provides quick navigation and searchfeatures.
Ricoh ProcessDirector Help
Field help is available on many screens for Ricoh ProcessDirector document processing features toprovide information for specific tasks and settings.
Ricoh ProcessDirector Plug-in for Adobe Acrobat help system
On many screens, you can click Help to see a help topic that provides information for a specific task ora group of settings. After you display a topic, you can go to other topics in the help system.
How to read the documentation
Before installing a document processing feature
This manual contains instructions and cautions for correct installation of document processing features.Before installing a document processing feature, read this manual thoroughly and completely. Keep thismanual handy for future reference.
How to use the manuals
Use the instruction manuals according to your needs.
To learn how to install a document processing feature:See Ricoh ProcessDirector: Installing Document Processing Features.
To learn how to use the functions and operations of a document processing feature:See the Ricoh ProcessDirector Information Center.
To learn how to use the functions and operations of Ricoh ProcessDirector Plug-in for AdobeAcrobat:
See Ricoh ProcessDirector: Using Ricoh ProcessDirector Plug-in for Adobe Acrobat. Thisinformation is also available in the Acrobat plug-in help system and the Ricoh ProcessDirectorInformation Center.
4

Displaying the publications
Ricoh ProcessDirector: Installing Document Processing Features and other publications areavailable on the Ricoh ProcessDirector publications CD, so you can access them before you install theapplication.
• A PDF viewer, such as Adobe Acrobat Reader, is required to view the publications.
To access the Ricoh ProcessDirector publications CD on Windows:
1. Insert the CD in the CD drive.If the Windows system is configured to autorun CDs, Windows Explorer opens automatically toshow the contents of the CD.
2. If Windows Explorer does not start automatically, open it and display the contents of the CD drive.
3. Open the readme.txt file for information about the contents of the CD, including instructions forlaunching the Ricoh ProcessDirector Information Center from the CD.
Displaying the Ricoh ProcessDirector Information Center
The Ricoh ProcessDirector Information Center is available from the Ricoh ProcessDirector user interface.
In version 3.5, Ricoh ProcessDirector introduced an updated user interface with a streamlinedappearance and modern capabilities. The updated user interface supports many of the functions thatare available in the legacy user interface.
• To display the Information Center for the updated user interface:
– On the top menu bar of the Ricoh ProcessDirector user interface, click the button andselect Help.
– If you are not logged in to Ricoh ProcessDirector, enter this URL in the address bar of yourbrowser:
http://hostname:15080/pdhelp/index.jsp
In the URL, hostname is the host name or IP address of the computer where RicohProcessDirector is installed.
• To display the Information Center for the legacy user interface:
– On the top menu bar of the Ricoh ProcessDirector user interface, click the button andselect Help.
– If you are not logged in to Ricoh ProcessDirector, enter this URL in the address bar of yourbrowser:
http://hostname:15080/help/index.jsp
In the URL, hostname is the host name or IP address of the computer where RicohProcessDirector is installed.
In addition, you can bookmark the location of the Information Center in your browser and open it atany time outside of Ricoh ProcessDirector.
5

Information about use the functions and operations of features are available only when the features areinstalled in the system.
Related information
For information about our products, see:
• Ricoh web site (http://rpp.ricoh-usa.com)
• Ricoh Production Print Information Center (http://info.rpp.ricoh-usa.com/help/index.jsp)
Symbols
The following symbols are used in this manual to help you to identify content quickly.
• This symbol indicates points to pay attention to when using the product. Be sure to read theseexplanations.
• This symbol indicates information about restraints or restrictions when using the product. Be sure toread these explanations.
• This symbol indicates helpful supplementary information that is not essential to completing a task.
BoldBold type indicates the names of dialogs, menus, menu items, settings, field labels, buttons, andkeys.
IIttaalliiccItalic type indicates the titles of manuals and variables that you must replace with your owninformation.
MMoonnoossppaacceeMonospace type indicates computer input and output.
Abbreviations
AFPAdvanced Function Presentation
CSVComma-Separated Values
HTTP
6

Hyper Text Transfer Protocol
IPInternet Protocol
PDFPortable Document Format
Trademarks
Adobe, Reader, and PostScript are either registered trademarks or trademarks of Adobe Systems, Inc inthe United States and/or other countries.
IBM and AIX are either registered trademarks or trademarks of International Business MachinesCorporation in the United States and/or other countries.
Microsoft, Windows, Windows Server, and Internet Explorer are either registered trademarks ortrademarks of Microsoft Corporation in the United States and/or other countries.
Oracle and Java are registered trademarks of Oracle and/or its affiliates.
UNIX is a registered trademark of The Open Group.
SafeNet code: The license management portion of this Licensee Application is based on one or more ofthe following copyrights:
Sentinel RMSCopyright 1989-2006 SafeNet, Inc.All rights reserved.
Sentinel Caffe (TM)Copyright 2008-2009 SafeNet, Inc.All rights reserved.
Sentinel EMSCopyright 2008-2009 SafeNet, Inc.All rights reserved.
The proper names of the Windows operating systems are as follows:
• The product names of Windows 7 are as follows:
Microsoft Windows 7 Professional
Microsoft Windows 7 Ultimate
Microsoft Windows 7 Enterprise
• The product names of Windows 8 are as follows:
Microsoft Windows 8 Pro
Microsoft Windows 8 Enterprise
• The product names of Windows 8.1 are as follows:
Microsoft Windows 8.1 Pro
7

Microsoft Windows 8.1 Enterprise
• The product names of Windows 10 are as follows:
Microsoft Windows 10 Pro
Microsoft Windows 10 Enterprise
• The product names of Windows Server 2012 are as follows:
Microsoft Windows Server 2012 Standard
Microsoft Windows Server 2012 Datacenter
• The product names of Windows Server 2012 R2 are as follows:
Microsoft Windows Server 2012 R2 Standard
Microsoft Windows Server 2012 R2 Enterprise
• The product names of Windows Server 2016 are as follows:
Microsoft Windows Server 2016 Standard
Microsoft Windows Server 2016 Datacenter
Other product names used herein are for identification purposes only and might be trademarks of theirrespective companies. We disclaim any and all rights to those marks.
8

1
9
11.. Overview
•Documents•Document properties file•Document database
Document processing features expand the concept of controlling and tracking print jobs to controllingand tracking individual documents in a print job. Additional installation tasks are required to install thesefeatures.
Two features add basic functions and objects for processing documents. Installing one of these featuresis a prerequisite for installing the other document processing features:
• PDF Document Support adds functions and objects for processing documents in PDF jobs. This no-charge feature is provided with the base product but is not installed by default.
• AFP Support adds functions and objects for processing documents in AFP jobs.
The other document processing features add functions and objects for specialized needs such asarchiving document information in a repository or inserting documents into envelopes. Before installingthese features, you install PDF Document Support, AFP Support, or both. If you install PDF DocumentSupport, the other document processing features work with PDF files. If you install AFP Support, theywork with AFP files. If you install both, they work with both types of files. Examples of these documentprocessing features are:
• Archive
• Automated Verification
• Electronic Presentment
• Inserter
• Postal Enablement
• Preference Management
Installing a document processing feature involves:
• Planning for the installation
• Installing the feature
• Defining custom document properties
• Updating custom document properties
Installing the PDF Document Support feature also involves:
• Installing Ricoh ProcessDirector Plug-in for Adobe Acrobat for PDF document processing
• Loading Ricoh ProcessDirector document properties
• Loading Ricoh ProcessDirector media objects for PDF document processing
Examples, lists of step templates, and lists of properties sometimes refer to objects in specific documentprocessing features. If you do not have these features installed, the objects do not exist on your system.

1
10
DDooccuummeennttssA document is the smallest unit that can be tracked by a workflow. For example, a document can be aset of pages that make up one bill, one statement, or one mailpiece.
A print file can contain thousands of documents. If the print file is in AFP format, each document isbounded by the Begin Page Group and End Page Group AFP structured fields.
DDooccuummeenntt pprrooppeerrttiieess ffiilleeThe document properties file (DPF) can contain properties of documents in a job. The file is stored in thespool directory for the job.
The document properties file is created automatically by the step templates IdentifyPDFDocuments,IdentifyDocuments, ReadDocumentsFromDatabase, CreateJobsFromDocuments, andCreateAFPJobsFromDocuments. The file is structured like a table; the first line identifies the propertiesthat are in the file, and each additional line contains the property values for each document. RicohProcessDirector uses the information in the document properties file to keep track of the documentsassociated with each job.
DDooccuummeenntt ddaattaabbaasseeThe document database is an internally managed database that stores and manages the properties ofindividual documents in the system. You do not do actions directly on the document database, but onthe documents that it contains.
During the configuration process, you work with your Ricoh support representative to decide whether todefine document properties as database properties or as limited properties.
1 Overview

2
11
22.. Planning for installation
•Planning to install document processing features•Hardware and software requirements for Ricoh ProcessDirector Plug-in for Adobe Acrobat•Migrating from Adobe Acrobat Professional version X or XI to version DC
When you install Ricoh ProcessDirector document processing features, you install the RicohProcessDirector components on the primary server. If you install the PDF Document Support feature, youalso install Ricoh ProcessDirector Plug-in for Adobe Acrobat onto a computer with a Windowsoperating system and Adobe Acrobat Professional.
PPllaannnniinngg ttoo iinnssttaallll ddooccuummeenntt pprroocceessssiinngg ffeeaattuurreessAll document processing features include Ricoh ProcessDirector components that you install on anexisting Ricoh ProcessDirector server. Before installing a feature, make sure your system meets thefollowing requirements.
Software requirements
Make sure that your system has the required software before installing any document processingfeatures. In addition to the required software described in this section, we recommend that you use anXML editor to edit the required XML configuration files. The installer does a schema-based validation ofXML files but does not validate all syntax.
IBM C++ Runtime and Utilities Components
This section applies only to features installed with Ricoh ProcessDirector for AIX.
Document processing features installed with Ricoh ProcessDirector for AIX require the IBM XL C/C++Enterprise Edition for AIX, V9.0, Runtime Environment and Utilities packages.
Make sure you download both the Runtime Environment package and the Utilities package.
You can download them from this Web site:
http://www-01.ibm.com/support/docview.wss?rs=2030&context=SSJT9L&uid=swg24015997&loc=en_US&cs=utf-8&lang=en
Follow the installation instructions on the site.
Gathering your document requirements
Determine what document properties are relevant for the workflows that you want to create.
1. Ask yourself questions like these:
• What document properties will you use to distinguish your documents? (What makes onedocument different from another?)
• What document properties do you need to identify to make use of data defined in thedocument properties in your PDF file?

2
12
• What document properties do you need to identify to make use of data defined in the indextags (also called Tagged Logical Elements (TLEs)) in your Advanced Function Presentation(AFP) file?
• What properties do you want to use as criteria for tracking documents? For example, youcould define a property called “account number” so that you can track documents accordingto account number.
• If you have a feature that includes the InsertJobs step template, what information do you wantto include in inserter barcodes or in inserter control files? For example, to include thedocument's ZIP code in the inserter control file, you could define a document property called“ZIP code”.
• If you have a feature used for postal processing, what information does your postal softwarerequire about each document?
• If you have a feature that is used to add barcodes, what document properties do you need toinclude in the barcode data?
• If you have the Archive feature, what document properties do you want to use to retrievedocuments from the repository where they are stored?
• If you have the Preference Management feature, what document properties do you need todefine to handle preference information in Ricoh ProcessDirector?
2. From your answers, decide what properties to define. Some properties that you might want todefine are:
• Account number
• Address line
• Postal keyline
• Data that you want to put into a barcode that is unique for each document
• ZIP code
• Dispatch type, such as express or regular mail
• Encloser type, such as flat or fold
Performance and capacity considerations with document processing features
Keep these performance and system capacity considerations in mind as you configure and usedocument processing features.
Document properties and document management
Use these document management tips to help you optimize system performance.
Carefully assess your document management needs before you define document properties. Not onlymust you control the number of properties, but also consider their size. A 1024-character property usesmore storage space than a 32-character property.
2 Planning for installation

2
13
Limited document properties do not need database table space; however, they occupy space for eachdocument in each document properties file that contains the property.
Using database document properties lets you display document information in the user interface and letsyou process documents globally (without knowing which job contains each document), but puttingdocument information in the database has a performance cost. Document properties in the databaseuse space in the database tables. Updates to properties increase logging activity and create possibledatabase contention. The database caches information in memory. With fewer and smaller-sizedproperties, the database can cache more records in memory and provide better system performance.
Several steps and actions process documents in the database. The database system locks databaserows during processing. As more document processing occurs, the impact on system resourcesincreases. You might want to tune your step templates to limit the number of concurrent steps thatprocess documents in the database.
These steps and user-interface actions do database processing:
• WriteDocumentsToDatabase adds entries for each document to the database and assigns eachsuch entry a document identifier.
• ReadDocumentsFromDatabase retrieves document information from the database and stores it ina document properties file. No updates are done on the database.
• CompleteDocuments changes the state of all documents in the job to Complete.
• CreateJobsFromDocuments and CreateAFPJobsFromDocuments create a new associationbetween documents and the child jobs that are created.
• RemoveJobs notifies Ricoh ProcessDirector when jobs are deleted. When Ricoh ProcessDirectordeletes a job that has documents in the database, it deletes the documents from the database.
• UpdateDocumentsInDatabase updates the document properties in the database using the valuesfrom the document properties file.
• The Process Again action requires approval from document processing features. Documentprocessing features do not let Ricoh ProcessDirector process an original job again if the documentsfor that job are also associated with other jobs.
• Opening the Document properties notebook from the Documents table of the legacy user interfaceretrieves document property values from the database. Only properties that are stored in thedatabase appear in the property notebook.
This list shows steps and actions in order according to how many database resources they use. The mostresource-intensive items are at the top.
1. RemoveJobs
2. CompleteDocuments
3. WriteDocumentsToDatabase
4. CreateJobsFromDocuments or CreateAFPJobsFromDocuments
5. Displaying the Documents table in the user interface
6. ReadDocumentsFromDatabase
7. Process Again
8. Opening the Documents property notebook from the Documents table
Planning to install document processing features

2
14
Use in old UI. The system and user interface work best with the Documents portlet minimized. When theportlet is not minimized, the system must load document information each time the user interface isrefreshed. View the Documents table only when you need to see information about specific documents.
Memory usage
Keep these memory usage considerations in mind as you configure and use document processingfeatures.
Document processing features might not include all of the step templates discussed in this section.
Some steps might need a lot of memory to process a job.
For example, steps based on the CreateJobsFromDocuments, CreateAFPJobsFromDocuments,BuildPDFFromDocuments, BuildAFPFromDocuments, IdentifyPDFDocuments, and IdentifyDocuments steptemplates read information into memory to do their processing. The system keeps a record for eachdocument in memory.
Steps based on the GroupDocuments, SortDocuments, and SplitDocuments step templates also readinformation into memory to do their processing. The system keeps a record for each document inmemory. The amount of memory needed by GroupDocuments and SortDocuments varies depending onwhich properties you use for grouping and sorting. When more data exists for those properties, thesystem uses more memory.
If you process jobs using any of these step templates, increase the amount of memory that the JavaVirtual Machine (JVM) can use for Ricoh ProcessDirector steps to at least 6 GB of memory:
• BuildAFPFromDocuments
• BuildPDFFromDocuments
• BuildPDFFromZip
• CreateAFPJobsFromDocuments
• CreateJobsFromDocuments
• GroupDocuments
• IdentifyDocuments
• IdentifyPDFDocuments
• SortDocuments
• SplitDocuments
• ReadDocumentsFromDatabase
• UpdateDocumentsInDatabase
• WriteDocumentsToDatabase
See Defining the JVM memory pool allocation, p. 16 for additional information.
By default, steps are tuned to run on the primary computer, which uses up to 2000 MB of memorywhen it runs. The primary computer uses the memory for system management, user interface and Web
2 Planning for installation

2
15
service requests, printer management, input device management, and running steps. Jobs with manydocuments that sort or group using many properties can use a significant amount of memory.
You can optimize step tuning to minimize memory usage:
1. Define one or more Ricoh ProcessDirector secondary servers on the primary server. The secondaryservers should not be in the general server pool. The servers should allow only one step to run at atime.
2. Change the tuning of these step templates to run only on the secondary servers:
• BuildAFPFromDocuments
• BuildPDFFromDocuments
• CreateAFPJobsFromDocuments
• CreateJobsFromDocuments
• GroupDocuments
• IdentifyDocuments
• IdentifyPDFDocuments
• SortDocuments
• SplitDocuments
Setting the maximum number of open files (optional)
This section is not applicable to Windows. The system setting for the maximum number of open filesprevents an uncontrolled process from taking over your system, but you might need a higher limit thanthe default if you are processing jobs with many files. Changing the open file limit lets your documentprocessing feature use more system resources. This task is optional, but if File Not Found errorsfrequently appear in the job log during job processing, you should do this task.
To set the open file limit:
1. Log in to your system as the root user, or use sudo or the su command to become the root user.
2. On AIX: Open the file /etc/security/limits.3. On Linux: Open the file /etc/security/limits.conf.4. Find the line in the file that sets the open file limit. For example, on a Linux system it might look like
this: aiw1 - nofile 4096.If the line does not exist, add it in the next step.
5. Edit the line, or add a new line if needed, to set a higher limit for the Ricoh ProcessDirector systemuser (aiw1 is the default). This example sets the limit to 15,000 on Linux: aiw1 - nofile15000. This example sets the limit to 15,000 on AIX: aiw1 - nofiles 15000.Check with your system administrator to determine a reasonable upper limit for the number ofopen files.
6. Log out as root and log in to make the change take effect.
Planning to install document processing features

2
16
Defining the JVM memory pool allocation
Depending on the size of your production files, processing a workflow can involve several memory-intensive operations. If you do not allocate enough memory to these processes in Ricoh ProcessDirector,you might encounter processing errors or slow processing.
You can configure the Java Virtual Machine memory pool allocation by editing the /aiw/aiw1/config/jvmsettings.cfg (UNIX-based operating systems) or C:\aiw\aiw1\config\jvmsettings.cfg (Windows) file. If you change the settings in this configuration file, you need toreset the system using the stopaiw and startaiw commands for the change to take effect.
The primary setting defines the maximum amount of memory allocated to a Java Virtual Machineprocess. You can change that setting to match your memory usage needs. The default is 2 GB, and youwant to allocate at least 6 GB. In the jvmsettings.cfg file you change:
primary=-Xmx2048m
to
primary=-Xmx6144m
You change the Ricoh ProcessDirector Plug-in for Adobe Acrobat JVM memory allocation by clickingRicoh→ Preferences from the Adobe Acrobat menu bar.
HHaarrddwwaarree aanndd ssooffttwwaarree rreeqquuiirreemmeennttss ffoorr RRiiccoohh PPrroocceessssDDiirreeccttoorrPPlluugg--iinn ffoorr AAddoobbee AAccrroobbaattThis section describes the hardware and software requirements for the computer that you install RicohProcessDirector Plug-in for Adobe Acrobat on. The plug-in is included with the PDF Document Supportfeature.
Hardware requirements
The system hardware requirements for the computer that Ricoh ProcessDirector Plug-in for AdobeAcrobat is installed on are:
• Monitor resolution of 1024 by 768 pixels or higher
• A minimum of 2 GB RAM
Depending on the number of documents you process, additional free hard-drive space and memorymight be required.
Operating system and software requirements
Ricoh ProcessDirector Plug-in for Adobe Acrobat requires one of these operating systems:
• Windows 7 Professional or above with Service Pack 1 (32 or 64 bit)
• Windows 10
• Windows Server 2012
• Windows Server 2016
2 Planning for installation
2
17
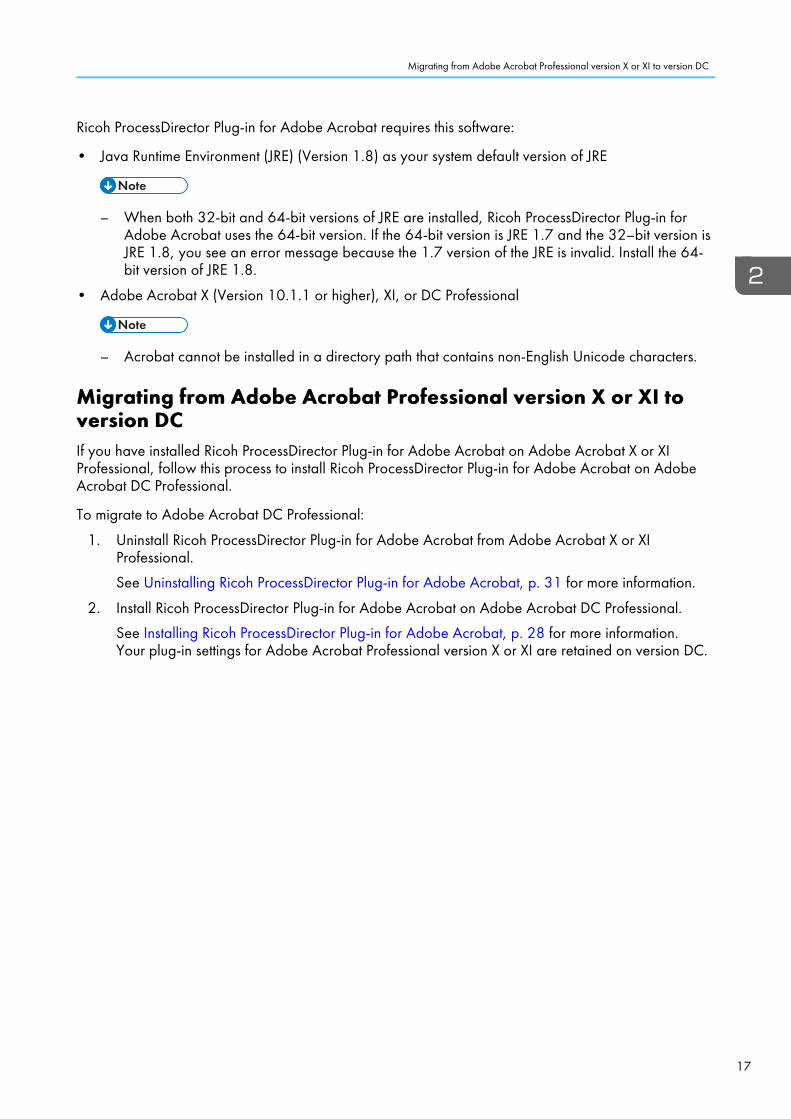
Ricoh ProcessDirector Plug-in for Adobe Acrobat requires this software:
• Java Runtime Environment (JRE) (Version 1.8) as your system default version of JRE
– When both 32-bit and 64-bit versions of JRE are installed, Ricoh ProcessDirector Plug-in forAdobe Acrobat uses the 64-bit version. If the 64-bit version is JRE 1.7 and the 32–bit version isJRE 1.8, you see an error message because the 1.7 version of the JRE is invalid. Install the 64-bit version of JRE 1.8.
• Adobe Acrobat X (Version 10.1.1 or higher), XI, or DC Professional
– Acrobat cannot be installed in a directory path that contains non-English Unicode characters.
MMiiggrraattiinngg ffrroomm AAddoobbee AAccrroobbaatt PPrrooffeessssiioonnaall vveerrssiioonn XX oorr XXII ttoovveerrssiioonn DDCCIf you have installed Ricoh ProcessDirector Plug-in for Adobe Acrobat on Adobe Acrobat X or XIProfessional, follow this process to install Ricoh ProcessDirector Plug-in for Adobe Acrobat on AdobeAcrobat DC Professional.
To migrate to Adobe Acrobat DC Professional:
1. Uninstall Ricoh ProcessDirector Plug-in for Adobe Acrobat from Adobe Acrobat X or XIProfessional.
See Uninstalling Ricoh ProcessDirector Plug-in for Adobe Acrobat, p. 31 for more information.
2. Install Ricoh ProcessDirector Plug-in for Adobe Acrobat on Adobe Acrobat DC Professional.
See Installing Ricoh ProcessDirector Plug-in for Adobe Acrobat, p. 28 for more information.Your plug-in settings for Adobe Acrobat Professional version X or XI are retained on version DC.
Migrating from Adobe Acrobat Professional version X or XI to version DC

2
18

3
19
33.. Installing features
•Installing the feature on the Ricoh ProcessDirector primary computer•Installing Ricoh ProcessDirector Plug-in for Adobe Acrobat
To install document processing features, you install Ricoh ProcessDirector components, includingworkflows and step templates. If you have the PDF Document Support feature, you also install RicohProcessDirector Plug-in for Adobe Acrobat.
IInnssttaalllliinngg tthhee ffeeaattuurree oonn tthhee RRiiccoohh PPrroocceessssDDiirreeccttoorr pprriimmaarryyccoommppuutteerrYou install the document processing feature on a server on which you have already installed the RicohProcessDirector base product.
Installing document processing features using Feature Manager
Follow these steps to install document processing features using the Ricoh ProcessDirector FeatureManager.
Notes
• Features are installed in trial mode. After the features are installed in trial mode, you can downloadand install the license key for it using the instructions in the Ricoh ProcessDirector: Planning andInstalling guide.
• To see whether a feature is running in trial mode, open the Ricoh ProcessDirector Feature Managerand look at the License State column. To see how many days remain for the feature in trial mode,select View log in the Ricoh ProcessDirector System Summary portlet to open the system log.
To install one or more document processing features:
1. Log in to Ricoh ProcessDirector as a user authorized to use Feature Manager.
2. Click the Administration tab.
3. In the left pane, choose System→ Features.
4. If the feature that you want to install is not listed, you must import it.
1. Make sure that you have either downloaded the feature package from the Ricoh website orthat you have a CD or DVD that contains the package inserted in the drive.
If you download the feature package file, download it onto the primary computer andremember where you put it so you can browse to it. Additionally, you must extract the file inthat location so Ricoh ProcessDirector can see the EPK file within the downloaded file.
2. Click Import package.
3. Navigate to the location that holds the feature package.
4. Find the EPK file for the feature and select it.
For example, if you downloaded the Automated Verification feature, find the fileAutomatedVerification.epk.
5. Click Open.

3
20
5. If the feature that you want to install is in the list, select the check box next to it.
6. In the Action column, select the version of the feature you want to install.
7. Click Apply.
8. Review the information in the confirmation window, then click OK to continue.
The feature or features are installed and Ricoh ProcessDirector is restarted to finish the install process.
If you see error messages during the installation process, you can review the logs located in /path/extensions/doc1 (AIX and Linux) or \path\extensions\doc1 (Windows). For example,on AIX or Linux, the path is /opt/infoprint/ippd. On Windows, the path is C:\ProgramFiles\Ricoh\ProcessDirector.
Defining custom document properties
You use custom document properties to extract data from each document in a job. First you define thecustom document properties in Ricoh ProcessDirector, and then you map data in the documents to thedocument properties. As a job goes through the workflow, the IdentifyPDFDocuments step (PDF files)or IdentifyDocuments step (AFP files) extracts the data.
Identify data that you want to extract from documents. If Ricoh ProcessDirector supplies an appropriatedocument property, use it instead of defining a custom document property.
For example, you want to extract account number, customer name, email address, and statement datefrom each document in a job. Ricoh ProcessDirector supplies a document property, Email address, forextracting email addresses. You define custom document properties for account number, customername, and statement date.
To define custom document properties:
1. Choose the type of custom document property:
• Database property
• Limited property
For more information about the docCustomDefinitions.xml file, seedocCustomDefinitions.xml file, p. 34.
2. Choose a database (internal) name for the custom document property.
For example, define a custom document property with the database name Doc.Custom.AccountNumber.
3 Installing features

3
21
• We recommend that the database names of your custom document properties start with Doc.Custom. If you do not use this naming convention, verify that none of your custom documentproperties have the same database name as a document property supplied with RicohProcessDirector.
• Do not use a number immediately after the period (.) in the database name. For example, thedatabase name Doc.3rdLineAddress is not valid.
• Do not delete custom document properties after you add them to thedocCustomDefinitions.xml file.
• Do not change the name (database name), dataType, or dbType of a custom documentproperty. The system lets you change caption (user interface name), shortCaption,description, and access.
3. Choose a user interface name (caption) for the custom document property.
For example, define a custom document property with the user interface name Account number.
• We recommend that you do not define a custom document property with the same userinterface name as a document property supplied by Ricoh ProcessDirector.
4. Choose a datatype (dataType) for the custom document property.
Examples include String, Integer, IntegerNonNeg, and Timestamp.5. For database properties:
1. Choose a database type (dbType).
For the String datatype, database types are char, varchar, and long varchar.
For the Integer datatype, database types are smallint, bigint, and integer.
For the Timestamp datatype, the database type is Timestamp.2. OOppttiioonnaall:: Choose the level of access that users have to the custom document property:
• attrWriteAdmin
Members of the Administrator security group have write access. Members of the Monitor,Operator, and Supervisor security groups have read access.
• attrWriteAdminSuper
Supervisors and Administrators have write access. Monitors and Operators have readaccess.
• attrWriteAdminSuperOper
Operators, Supervisors, and Administrators have write access. Monitors have readaccess.
If you do not specify an access level, Administrators have write access. Monitors, Operators,and Supervisors have read access.
Installing the feature on the Ricoh ProcessDirector primary computer

3
22
• If you created your own security groups, they receive the same access to customdocument properties as the Ricoh ProcessDirector security groups that you copied tocreate your groups.
3. Choose a short caption.
The short caption is displayed in table column headings.
For example, define a custom document property with the short caption Acct Nmbr.
4. Choose a description.
The user interface displays the description as help for the custom document property.
For example, define a custom document property with the description Customer accountnumber.
6. Edit the document properties configuration file:
• The first time that you define custom document properties, make a copy of the suppliedsample file. Go to this directory:
– /aiw/aiw1/samples/config on AIX and Linux
– C:\aiw\aiw1\samples\config on Windows
• When you define more document properties, make a copy of the active file. Go to thisdirectory:
– /aiw/aiw1/config on AIX and Linux
– C:\aiw\aiw1\config on Windows
7. Copy the docCustomDefinitions.xml file to a working directory, and edit the file.
Keep a backup copy of the edited file for recovery purposes.
For example, these lines add two database document properties with the database names Doc.Custom.AccountNumber and Doc.Custom.StatementDate to the file:
<docProperty name="Doc.Custom.AccountNumber"datatype="String"dbType="varchar (32)"access="attrWriteAdmin"shortCaption="Acount number"caption="Account number"description="Customer account number"/>
<docProperty name="Doc.Custom.StatementDate"datatype="Timestamp"dbType="Timestamp"access="attrWriteAdmin"shortCaption="Statement date"caption="Statement date"description="The date the statement was created"/>
3 Installing features

3
23
• The name line defines the database name. The caption line defines the user interfacename.
These lines add two limited document properties with the internal names Doc.Custom.SSNumber and Doc.Custom.CheckAmt to the file:
<limitedProperties>
<docProperty name="Doc.Custom.SSNumber"datatype="String"caption="Social Security number"/>
<docProperty name="Doc.Custom.CheckAmt"datatype="String"caption="Check total"/>
</limitedProperties>
8. Use an XML editor to validate your syntax.
9. Copy the edited file to:
• /aiw/aiw1/config/docCustomDefinitions.xml (AIX and Linux)
• C:\aiw\aiw1\config\docCustomDefinitions.xml (Windows)
10. Make the custom document properties that you have defined available to Ricoh ProcessDirector:
1. Run the docCustom utility.
The first time that you run the docCustom utility, it creates the Custom Document Propertiesfeature and adds it to Feature Manager. When you run the utility again, it adds an updatedCustom Document Properties feature to Feature Manager.
2. Use Feature Manager to install or update the Custom Document Properties feature.
11. Load the Ricoh ProcessDirector updated custom document properties to the tool you use toconfigure document properties:
• If you have the PDF Document Support feature, load Ricoh ProcessDirector documentproperties to Ricoh ProcessDirector Plug-in for Adobe Acrobat.For more information, see the related topic in the information center.
• If you have the AFP Support feature, use one of these methods to start Ricoh VisualWorkbench:
– Start Ricoh Visual Workbench from the Ricoh ProcessDirector server.
– Replace the Ricoh Visual Workbench application on your desktop:
♦ Delete the VisualWorkbench.zip file and all of the unzipped files.
♦ Download the VisualWorkbench.zip file from the Ricoh ProcessDirector userinterface.
♦ Unzip the file, and start the new Ricoh Visual Workbench desktop application.
The document properties are loaded automatically.
Installing the feature on the Ricoh ProcessDirector primary computer

3
24
Naming custom document properties in more than one language
To define user interface names and descriptive information for your custom document properties in morethan one language, you edit a language-specific version of the docCustomDefinitions.properties file for each language. After you update your custom document properties, RicohProcessDirector displays the user interface names and descriptive information for the custom documentproperties in each language.
In a single-language environment, the preferred method of defining user interface text for customdocument properties is to use the caption and description attributes of the docProperty element in thedocCustomDefinitions.xml file. If you are using a single language and all custom documentproperty descriptive text is defined in docCustomDefinitions.xml, do not edit thedocCustomDefinitions.properties file.
For more information about the format of the docCustomDefinitions.properties file, seedocCustomDefinitions.properties file, p. 45.
To name custom document properties in more than one language:
1. Make a working copy of the docCustomDefinitions.properties file for eachlanguage:
• The first time that you name custom document properties in more than one language, makeone copy of the sample docCustomDefinitions.properties file for eachlanguage except your default language. Navigate to this directory:
– /aiw/aiw1/samples/config on AIX and Linux
– C:\aiw\aiw1\samples\config on Windows
Copy the docCustomDefinitions.properties file to a working directory.
Name each file docCustomDefinitions_language.properties. For example:
– docCustomDefinitions_de.properties (German)
– docCustomDefinitions_en.properties (English)
– docCustomDefinitions_es.properties (Spanish)
– docCustomDefinitions_fr.properties (French)
– docCustomDefinitions_it.properties (Italian)
– docCustomDefinitions_ja.properties (Japanese)
– docCustomDefinitions_pt.properties (Brazilian Portuguese)
– Do not create a docCustomDefinitions_language.properties file foryour default language.
– Make sure each file is owned by the Ricoh ProcessDirector system user and group (aiw1and aiwgrp1 are the defaults).
• When you name additional document properties in more than one language, navigate to thisdirectory:
3 Installing features

3
25
– /aiw/aiw1/config on AIX and Linux
– C:\aiw\aiw1\config on Windows
Copy each docCustomDefinitions_language.properties file to a workingdirectory.
2. Edit each file to add your new custom document properties.
The entry for each custom document property has three lines:
• Short caption
• User interface name
• Description
These lines add two custom document properties with the database names Doc.Custom.AccountNumber and Doc.Custom.StatementDate to the docCustomDefinitions_es.properties file:
Doc.Custom.AccountNumber.Short=Número de cuentaDoc.Custom.AccountNumber=Número de cuentaDoc.Custom.AccountNumber.Description=Número de cuenta del clienteDoc.Custom.StatementDate.Short=Fecha de extractoDoc.Custom.StatementDate=Fecha de extractoDoc.Custom.StatementDate.Description=Fecha en que se creó el extracto
Keep a backup copy of each edited file for recovery purposes.
3. If you did not create the file in Latin-1 or Unicode format, run the native2ascii utility to convertthe file to Unicode Latin-1 format.
• On AIX and Linux, the native2ascii utility is at /opt/infoprint/ippd/jre/bin.• On Windows, the native2ascii.exe utility is at C:\Program Files\Ricoh
\ProcessDirector\jre\bin.
For detailed information, see Considerations for a system with more than one language, p. 26.
4. Make sure that each docCustomDefinitions_language.properties file uses theISO-8859-1 character encoding format (codepage).
If your files use a different format, such as Shift JIS or UTF-8, convert them to ISO-8859-1 formatbefore placing them in the configuration directory.
5. Copy each edited file to the configuration directory:
• /aiw/aiw1/config on AIX and Linux
• C:\aiw\aiw1\config on Windows
Do not delete the docCustomDefinitions.properties file. The system requires a filewith that name in the configuration directory.
6. Make the custom document properties that you have named in multiple languages available toRicoh ProcessDirector:
1. Run the docCustom utility.
The first time that you run the docCustom utility, it creates the Custom Document Propertiesfeature and adds it to Feature Manager. When you run the utility again, it adds an updatedCustom Document Properties feature to Feature Manager.
2. Use Feature Manager to install or update the Custom Document Properties feature.
Installing the feature on the Ricoh ProcessDirector primary computer

3
26
7. Load the Ricoh ProcessDirector updated custom document properties to the tool you use toconfigure document properties:
• If you have the PDF Document Support feature, load Ricoh ProcessDirector documentproperties to Ricoh ProcessDirector Plug-in for Adobe Acrobat.For more information, see the related topic in the information center.
• If you have the AFP Support feature, use one of these methods to start Ricoh VisualWorkbench:
– Start Ricoh Visual Workbench from the Ricoh ProcessDirector server.
– Replace the Ricoh Visual Workbench application on your desktop:
♦ Delete the VisualWorkbench.zip file and all of the unzipped files.
♦ Download the VisualWorkbench.zip file from the Ricoh ProcessDirector userinterface.
♦ Unzip the file, and start the new Ricoh Visual Workbench desktop application.
The document properties are loaded automatically.
Considerations for a system with more than one language
If you are using a language other than English on your system, or if you want to let users see userinterface text for custom document properties in more than one language, you might need to do thesetasks.
Identifying the code page in docCustomDefinitions.xml
At the top of the docCustomDefinitions.xml file, make sure you correctly identify the code page so thatthe file can be processed correctly when you update configuration files. Here are some examples ofvalid code page declarations:
• <?xml version="1.0" encoding="UTF-8"?> (specified in the sample file)
• <?xml version="1.0" encoding="iso-8859-1"?> (Latin-1)
• <?xml version="1.0" encoding="shift_jis"?> (Japanese)
Making sure the document properties names files are in ISO-8859-1 format
The docCustomDefinitions.properties file and docCustomDefinitions_language.properties files mustcontain only Latin-1 or Unicode-encoded (\udddd notation) characters. If you created yourdocCustomDefinitions.properties and docCustomDefinitions_language.properties files in a differentformat (such as Shift JIS or UTF-8), you must convert each file to ISO-8859-1 before placing it in the/aiw/aiw1/config (UNIX-based operating systems) or C:\aiw\aiw1\config (Windows)directory. Although you can convert the files using whatever method you choose, this section describesone possible method: using the native2ascii utility.
The native2ascii utility converts text to Unicode Latin-1. It is shipped with Ricoh ProcessDirector.
• On AIX and Linux, the native2ascii utility is at /opt/infoprint/ippd/jre/bin.• On Windows, the native2ascii.exe utility is at C:\Program Files\Ricoh
\ProcessDirector\jre\bin.
3 Installing features
3
27
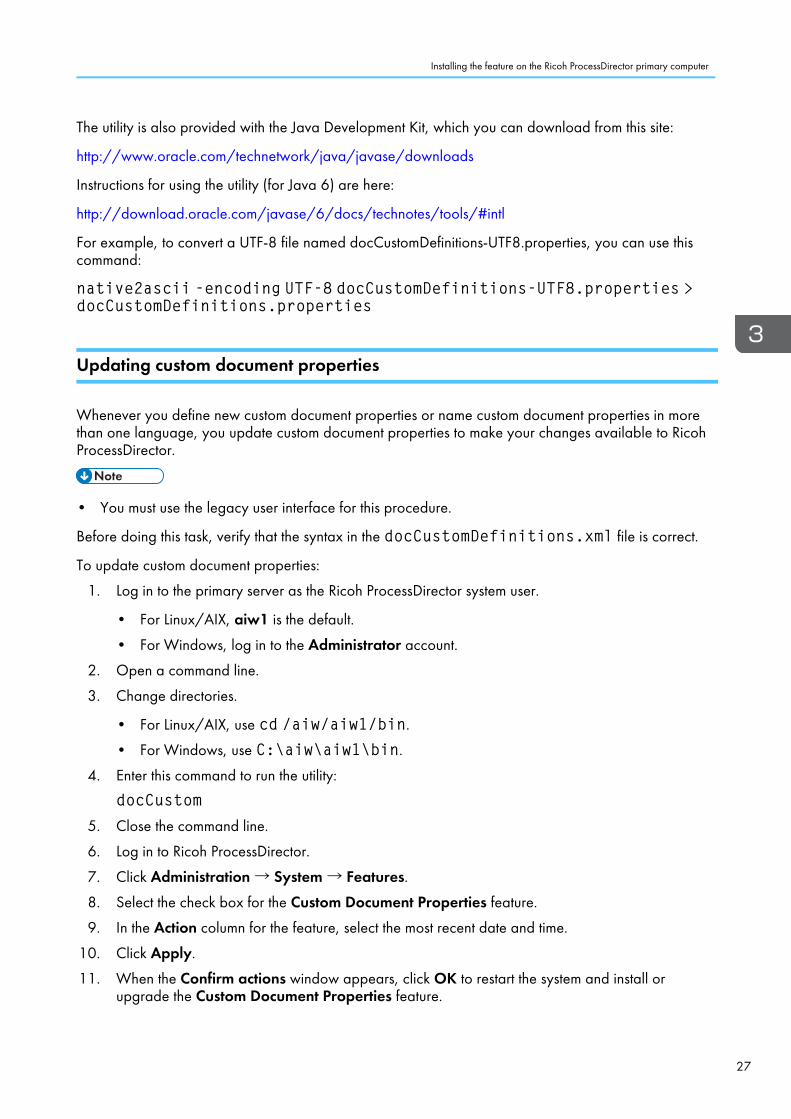
The utility is also provided with the Java Development Kit, which you can download from this site:
http://www.oracle.com/technetwork/java/javase/downloads
Instructions for using the utility (for Java 6) are here:
http://download.oracle.com/javase/6/docs/technotes/tools/#intl
For example, to convert a UTF-8 file named docCustomDefinitions-UTF8.properties, you can use thiscommand:
native2ascii -encoding UTF-8 docCustomDefinitions-UTF8.properties >docCustomDefinitions.properties
Updating custom document properties
Whenever you define new custom document properties or name custom document properties in morethan one language, you update custom document properties to make your changes available to RicohProcessDirector.
• You must use the legacy user interface for this procedure.
Before doing this task, verify that the syntax in the docCustomDefinitions.xml file is correct.
To update custom document properties:
1. Log in to the primary server as the Ricoh ProcessDirector system user.
• For Linux/AIX, aiw1 is the default.
• For Windows, log in to the Administrator account.
2. Open a command line.
3. Change directories.
• For Linux/AIX, use cd /aiw/aiw1/bin.• For Windows, use C:\aiw\aiw1\bin.
4. Enter this command to run the utility:
docCustom5. Close the command line.
6. Log in to Ricoh ProcessDirector.
7. Click Administration→ System→ Features.
8. Select the check box for the Custom Document Properties feature.
9. In the Action column for the feature, select the most recent date and time.
10. Click Apply.
11. When the Confirm actions window appears, click OK to restart the system and install orupgrade the Custom Document Properties feature.
Installing the feature on the Ricoh ProcessDirector primary computer

3
28
The Update in progress window appears.
12. When the update completes, click Finish.
The Custom Document Properties feature is installed or upgraded, and you are redirected tothe login page.
13. Check that your new document properties are defined on the system:
1. Log in to Ricoh ProcessDirector.
2. Open Property Search on the Documents portlet and scroll through the Property list to seeif it includes your new properties.
If you have the PDF Document Support feature installed and you change document property names inRicoh ProcessDirector, load a new document properties list into Ricoh ProcessDirector Plug-in for AdobeAcrobat. See Loading Ricoh ProcessDirector document properties, p. 29 for more information.
If you have the AFP Support feature installed and you change document property names in RicohProcessDirector, access Ricoh Visual Workbench from the Ricoh ProcessDirector user interface. Newdocument properties are loaded to Ricoh Visual Workbench when it opens on your workstation.
IInnssttaalllliinngg RRiiccoohh PPrroocceessssDDiirreeccttoorr PPlluugg--iinn ffoorr AAddoobbee AAccrroobbaattThis section describes how to install and uninstall Ricoh ProcessDirector Plug-in for Adobe Acrobat. Theplug-in is included with the PDF Document Support feature.
Make sure the system on which you install Ricoh ProcessDirector Plug-in for Adobe Acrobat meets thehardware and software requirements. See Planning for installation, p. 11 for more information. If youhave a previous version of Ricoh ProcessDirector Plug-in for Adobe Acrobat on the system, uninstall it.
Running the installation program
Follow these steps to install Ricoh ProcessDirector Plug-in for Adobe Acrobat using the plug-in installerfile that is copied to the primary computer during installation of the PDF Document Support feature.
The installer file that comes with the PDF Document Support feature is placed here:
• On Windows: C:\aiw\aiw1\share\Ricoh-ProcessDirector-Plug-in-for-AdobeAcrobat-Setup.exe.
• On Linux or AIX: /aiw/aiw1/share/Ricoh-ProcessDirector-Plug-in-for-AdobeAcrobat-Setup.exe.
Follow the appropriate steps depending on the type of system where the PDF Document Support featureis installed:
1. On a Linux or AIX primary computer:
1. Log in to the primary computer as the Ricoh ProcessDirector system user (aiw1 is the default),or with a user ID that is a member of the Ricoh ProcessDirector system group (aiwgrp1 is thedefault).
2. Navigate to the plug-in installer file: /aiw/aiw1/share/Ricoh-ProcessDirector-Plug-in-for-AdobeAcrobat-Setup.exe.
2. On a Windows primary computer:
3 Installing features

3
29
1. Log in as an administrator. Close all open applications that could be using Adobe AcrobatProfessional, Distiller, or Reader. Many Web browsers use Adobe Acrobat Reader, so makesure to close all Web browsers.
2. Navigate to the plug-in installer file: C:\aiw\aiw1\share\Ricoh-ProcessDirector-Plug-in-for-AdobeAcrobat-Setup.exe.
3. Copy the plug-in installer file to a location on the client Windows computer.
4. On the client Windows computer: log in as an administrator, navigate to the location of theinstaller file, and double-click it.
5. OOppttiioonnaall:: For setup information including hardware and software requirements, click SetupGuide.Adobe Acrobat must be closed during the installation process. Print these instructions if you wantto view them during installation.
6. Follow the prompts to complete the installation.
7. Depending on your current configuration, the installer might ask to update some Microsoftlibraries.
8. Verify the installation by opening a PDF file using Adobe Acrobat. The Acrobat menu bar shouldinclude the Ricoh menu.
Before you start using the plug-in to enhance PDF files, open Adobe Acrobat and click Ricoh→ Help.Review the topics about preferences, loading document properties, and adding the plug-in icon to theAcrobat quick launch bar. These topics describe how to tailor the plug-in to your environment.
Loading Ricoh ProcessDirector document properties
To use Ricoh ProcessDirector Plug-in for Adobe Acrobat to define text in a PDF file as a RicohProcessDirector document property, you must import the list of Ricoh ProcessDirector documentproperties.
You must do this task:
• After you install Ricoh ProcessDirector Plug-in for Adobe Acrobat.
• After changes are made to property definition files, you have run the docCustom utility, and youhave installed or upgraded the Custom Document Properties feature.
1. Close Adobe Acrobat Professional.
2. Retrieve the definitions.zip file from this directory on the Ricoh ProcessDirector serverthat processes your PDF files:
• Unix-based systems, /aiw/aiw1/share• Windows, C:\aiw\aiw1\shareThis file is generated when you install one of the document processing features and is updatedwhen you run the docCustom utility and install or upgrade the Custom Document Propertiesfeature.
Installing Ricoh ProcessDirector Plug-in for Adobe Acrobat

3
30
3. On the system where you installed Ricoh ProcessDirector Plug-in for Adobe Acrobat, place thedefinitions.zip file in the <user_home_directory\AppData>\Roaming\InfoPrint\InfoPrintPlugin\ directory.
For <user_home_directory\AppData>, substitute the name of the home directoryapplication data directory for the current user.
You can view the application data directory location for the current user by typing %appdata%in the Windows Run command line and clicking OK.
4. Restart Adobe Acrobat Professional and click Ricoh→ Select to activate Ricoh ProcessDirectorPlug-in for Adobe Acrobat. The list of Ricoh ProcessDirector document properties in thedefinitions.zip file is automatically imported into the areas of the plug-in that usedocument properties.
The definitions.zip file contains document properties and limited document properties. Limiteddocument properties are not saved to a database, but they are stored in the document properties filethat contains the property. For more information about both types of properties, see the topics related todocument properties in the information center, for example see the topic on editing the sampledocument properties template.
Loading media objects
After installing Ricoh ProcessDirector Plug-in for Adobe Acrobat, load Ricoh ProcessDirector mediaobjects. After you load them, you can use them to define media and finishing options for specific pagesin a PDF file.
Whenever you change Ricoh ProcessDirector media objects, do this task to load them into RicohProcessDirector Plug-in for Adobe Acrobat.
To load media objects:
1. Close Adobe Acrobat Professional.
2. On the Ricoh ProcessDirector primary server, go to this directory:
• /aiw/aiw1/share on AIX and Linux
• C:\aiw\aiw1\share on Windows
3. Copy the media.zip file to the <user_home_directory\AppData>\Roaming\InfoPrint\InfoPrintPlugin\ directory on the system where you installed RicohProcessDirector Plug-in for Adobe Acrobat.
For <user_home_directory\AppData>, substitute the name of the home directoryapplication data directory for the current user.
3 Installing features

3
31
• You can view the application data directory location for the current user by typing %appdata% in the Windows Run command line and clicking OK.
• If the directory includes both a media.zip file and a media.xml file, RicohProcessDirector Plug-in for Adobe Acrobat uses the media.zip file to load the mediaobjects.
4. Restart Adobe Acrobat Professional and click Ricoh→ Select.
The media objects now are available in Ricoh ProcessDirector Plug-in for Adobe Acrobat for definingmedia and finishing options.
If your Ricoh ProcessDirector system includes the Preprinted Forms Replacement feature, the electronicforms defined for media objects also are available.
Uninstalling Ricoh ProcessDirector Plug-in for Adobe Acrobat
If you need to uninstall Ricoh ProcessDirector Plug-in for Adobe Acrobat, use your system's method toremove programs.
To uninstall Ricoh ProcessDirector Plug-in for Adobe Acrobat:
1. Close all instances of Adobe Acrobat.
2. Log in to Windows as an administrator.
3. Locate Ricoh ProcessDirector Plug-in for Adobe Acrobat in your installed program list.
4. Select it and remove it.
Installing Ricoh ProcessDirector Plug-in for Adobe Acrobat

3
32

4
33
44.. Reference
•Installation and configuration checklist•docCustomDefinitions.xml file•docCustomDefinitions.properties file•Document properties template file•Document properties file•Property conditions file
This section includes format information and examples of configuration files.
IInnssttaallllaattiioonn aanndd ccoonnffiigguurraattiioonn cchheecckklliissttThis checklist can help you plan your installation and configuration process.
Task Notes
Decide which documentproperties you want to use forall the applications that youprocess.
Define custom documentproperties in the documentproperties configuration file(docCustomDefinitions.xml).
Optional: To name customdocument properties in morethan one language, edit theassociateddocCustomDefinitions.properties file.
Optional: Edit the sampledocument properties templatefile.
Run the docCustom utility andinstall or update the CustomDocument Properties feature.
If you have the PDF DocumentSupport feature, load RicohProcessDirector documentproperties to RicohProcessDirector Plug-in forAdobe Acrobat.
If you have the PDF DocumentSupport feature, use RicohProcessDirector Plug-in forAdobe Acrobat to define thedocument properties and mapthem to document data.

4
34
Task Notes
If you have the AFP Supportfeature, use the AFP Indexermode of Ricoh VisualWorkbench to create indextags in AFP files. Use theDocument Property Designermode to link custom documentproperties to the index tags.
Create or edit step templatesand workflows as needed.
Optional: If you have the AFPSupport feature, create theEnhance AFP control file.
ddooccCCuussttoommDDeeffiinniittiioonnss..xxmmll ffiilleeThe document properties configuration file (docCustomDefinitions.xml) defines properties that are usedto manage documents. The installation process places a sample file in /aiw/aiw1/samples/config on UNIX-based operating systems, and in C:\aiw\aiw1\samples\config onWindows.
If you change the docCustomDefinitions.xml file after installing AFP Support or PDF Document Support:
• Run the docCustom utility and install or upgrade the Custom Document Properties feature.
• For the PDF Document Support feature, load the document properties to Ricoh ProcessDirector Plug-in for Adobe Acrobat.
• For the AFP Support feature, access Ricoh Visual Workbench from the Ricoh ProcessDirector userinterface. New document properties are loaded to Ricoh Visual Workbench when it opens on yourworkstation.
Database properties and limited properties
You can define two types of document properties:
• Database properties
• Limited properties
You can store and manipulate both types of properties in a document properties file, but only databaseproperties are stored in the database.
You can work with both types of properties in these ways:
• You can use them with steps in a workflow to group or sort documents (for example, with theSortDocuments step template).
4 Reference
4
35
• You can link them to AFP index tags using the Ricoh Visual Workbench Document PropertyDesigner.
• You can map document data in PDF jobs to them using Ricoh ProcessDirector Plug-in for AdobeAcrobat.
• If you have the Archive feature, you can store them in a repository. After you store them, you canuse them to search the repository and retrieve jobs, documents, and history information. The valuesof the properties appear on the Properties tab when you click Show details on the Results table.
• If you have the Preference Management feature, you can use an external preferences file to set thevalues of the properties.
You can work with database properties, but not limited properties, in these ways:
• You can use them to search for documents on the Documents portlet on the Main page of the userinterface.
• When you select a document on the Documents portlet, the values of database properties aredisplayed.
• You can use them to search for documents to display in the viewer.
• You can determine their values in one job, update their values in another job, and use the updatedvalues in the original job.
• If you have the Automated Verification or Inserter feature, you can use database properties tosearch for documents to reconcile or reprint.
• If you have the Document Pool extended feature, you can use selectors to manipulate documentsbased on their property values.
Limited properties offer these advantages:
• You can use them to avoid displaying sensitive property values in the user interface, such as SocialSecurity numbers or check amounts.
• They maximize system performance. Database property manipulation can degrade performance ifyou process a significant number of documents.
Work with your support representative to determine your needs for database and limited documentproperties.
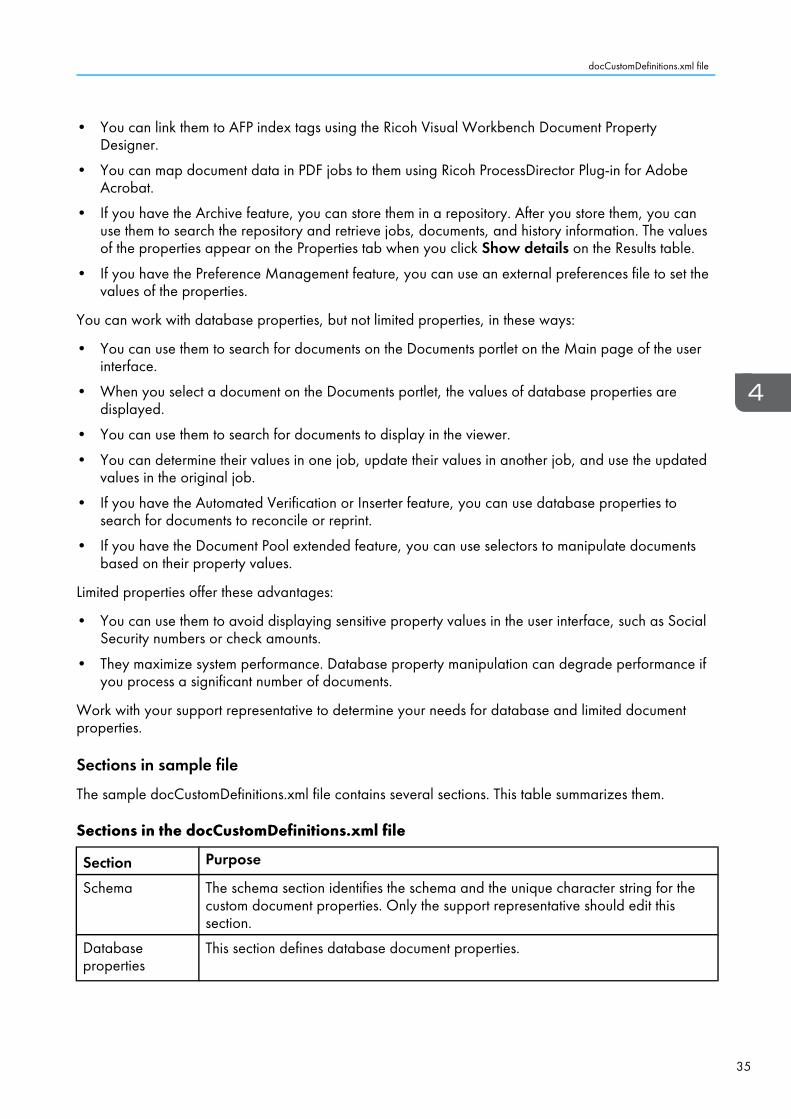
Sections in sample file
The sample docCustomDefinitions.xml file contains several sections. This table summarizes them.
SSeeccttiioonnss iinn tthhee ddooccCCuussttoommDDeeffiinniittiioonnss..xxmmll ffiillee
Section Purpose
Schema The schema section identifies the schema and the unique character string for thecustom document properties. Only the support representative should edit thissection.
Databaseproperties
This section defines database document properties.
docCustomDefinitions.xml file

4
36
Section Purpose
Limited properties This section defines limited document properties.
Userauthorizationproperties
This section is optional. User authorization properties specify custom authoritygroups for access to database properties.
Schema section
The Schema section contains one docCustomDefinitions element and one schema element. Onlysupport representatives should edit the schema section.
Database properties section
The Database properties section contains the docProperty element.
• Do not define a property as both a database property and a limited property. Unexpected behaviormight occur.
• Do not define a document property with the same name as a property that Ricoh ProcessDirectordefines automatically. For a list, see Automatically defined document properties, p. 41.
<docProperty >Defines document properties that are in the database.
AAttttrriibbuutteess ffoorr tthhee ddooccPPrrooppeerrttyy eelleemmeenntt
docProperty attribute Required? Notesname Yes The database name (internal name) for the
property. Programs that read or write properties usethis name. We recommend that you use a consistentnaming convention for your custom propertynames, so they are unique across the entire system.For example, the sample docCustomDefinitions.xmlfile uses the prefix Doc.Custom to make itsproperties unique from those of the base product.
Do not use any special characters (such as @, #, $,%, or - (dash)) or spaces in the property name. Youcan use periods and underscores.
Do not use a number immediately after the period(.) in the property database name. For example, theproperty Doc.3rdLineAddress is not valid.
access No The user access level for the property. You can usean access level that is already defined in theproduct, or you can create a custom access level ifan existing one does not meet your needs. See theAccess section for more information.
4 Reference

4
37
docProperty attribute Required? Notesdatatype Yes The data type to use for the property. See the next
table.
dbType Yes A database parameter that specifies the type ofdata. See the next table.
caption Yes The user interface name (default caption) for theproperty. If you are setting up captions in only onelanguage, define them in this file. If you are settingup user interface names in more than onelanguage, create additional document propertiesnames files (docCustomDefinitions_language.properties) for the other languages. For moreinformation, see docCustomDefinitions.propertiesfile, p. 45.
shortCaption Yes The default short caption displayed for this propertywhere required, such as in table column headings.If you are setting up short captions in only onelanguage, define them in this file. If you are settingup short captions in more than one language,create additional document properties names files(docCustomDefinitions_language.properties) forthe other languages. For more information, seedocCustomDefinitions.properties file, p. 45.
description Yes The default description of the document property,which displays in the user interface as help text. Ifyou are setting up descriptions in only onelanguage, define them in this file. If you are settingup descriptions in more than one language, createadditional document properties names files(docCustomDefinitions_language.properties) forthe other languages. For more information, seedocCustomDefinitions.properties file, p. 45.
You can use these data types and database types in database property definitions. Keep in mindthat the database definition might further restrict the values that can be stored, in addition to thevalidation rules shown in this table. For example, a SMALLINT can store integers from 0 to 32,767and a VARCHAR(12) does not permit strings longer than 12 characters. Database type values arenot case-sensitive.
docCustomDefinitions.xml file

4
38
DDaattaa ttyyppeess aanndd ddaattaabbaassee ttyyppeess ffoorr ddooccPPrrooppeerrttyy ddeeffiinniittiioonnss
Data typeDatabase type(used in SQL) Validation for data type
String CHARVARCHAR-LONG VARCHAR
CHAR: fixed length, 1–254charactersVARCHAR: variablelength, 1–32,672 charactersLONGVARCHAR: variable length, 1–32,700 characters
IntegerNonNeg SMALLINTBIGIN-TINTEGER
SMALLINT: 2 bytesBIGINT: 4bytesINTEGER: 8 bytesMinimum=0
Timestamp TIMESTAMP TIMESTAMP: Must contain valuesfor day (D), month (M), and year(Y).Those components can appearin one of these formats:MM DDYYYYDD MM YYYYYYYY MM DDDay andmonth must be represented by atwo-digit number.You can add atime of day in this format:hh:mm:ss
Limited properties section
The Limited properties section contains one or more docProperty elements.
• Do not define a property as both a database property and a limited property. Unexpected behaviormight occur.
• Do not define a document property with the same name as a property that Ricoh ProcessDirectordefines automatically. For a list, see Automatically defined document properties, p. 41.
<docProperty >Defines document properties that are manipulated only in the document properties file and not in thedatabase.
4 Reference

4
39
AAttttrriibbuutteess ffoorr tthhee ddooccPPrrooppeerrttyy eelleemmeenntt
docProperty attribute Required? Notesname Yes We recommend that you use a consistent naming
convention for your custom property names, so thatthey are unique across the entire system. Forexample, the sample docCustomDefinitions.xml fileuses the prefix Doc.Custom to make its propertiesunique from the base product.
Do not use any special characters (such as @, #, $,%, or - (dash)) or spaces in the property name. Youcan use periods and underscores.
Do not use a number immediately after the period(.) in the property database name. For example, theproperty Doc.3rdLineAddress is not valid.
datatype No See the next table.
caption No The caption displayed in drop-down lists in the userinterface for this property. If you are setting upcaptions in only one language, define them in thisfile. If you are setting up captions in more than onelanguage, create a document properties names file(docCustomDefinitions_language.properties) forthe other languages. See the related informationcenter topic for details.
You can use these data types in docProperty definitions:
DDaattaa ttyyppeess ffoorr tthhee ddooccPPrrooppeerrttyy eelleemmeenntt
Data type Validation for data type
String NoneIntegerNonNeg Integer between 0 and 2147483647
Timestamp TIMESTAMP: Must contain values for day (D),month (M), and year (Y).Those components canappear in one of these formats:MM DD YYYYDD MMYYYYYYYY MM DDDay and month must berepresented by a two-digit number.You can adda time of day in this format:hh:mm:ss
User authorization properties section
The User authorization properties section is optional. User authorization properties specify customauthority groups for access to database properties. This section contains one or more access elements.
<access >
docCustomDefinitions.xml file

4
40
Used to define the ability to read or edit custom properties. You use these access levels in thedocProperty element. You can use one of the default security groups that Ricoh ProcessDirectorprovides, or define your own. These are the attributes:
AAttttrriibbuutteess ffoorr tthhee aacccceessss eelleemmeenntt
access attribute Notesname Name of the access level.
groupAttributeAccess Ability of the user group to read or edit the attribute.
These are the default access levels and authorizations that Ricoh ProcessDirector provides:
DDeeffaauulltt aacccceessss lleevveellss aanndd aauutthhoorriizzaattiioonnss
Access name Group name Access levelgeneric AnyAuthenticated Attribute access: read
Operator Attribute access: read
Supervisor Attribute access: read
Administrator Attribute access: write
attrWriteAdmin Operator Attribute access: read
Supervisor Attribute access: read
Administrator Attribute access: write
Everyone Attribute access: read
Monitor Attribute access: read
attrWriteAdminSuper Operator Attribute access: read
Supervisor Attribute access: write
Administrator Attribute access: write
Everyone Attribute access: read
Monitor Attribute access: read
attrWriteAdminSuperOper Operator Attribute access: write
Supervisor Attribute access: write
Administrator Attribute access: write
Everyone Attribute access: read
Monitor Attribute access: read
actionAdmin Operator Action access: false
Supervisor Action access: false
Administrator Action access: true
Everyone Action access: false
4 Reference

4
41
Access name Group name Access levelMonitor Action access: false
actionAdminSuper Operator Action access: false
Supervisor Action access: true
Administrator Action access: true
Everyone Action access: false
Monitor Action access: false
actionAdminSuperOper Operator Action access: true
Supervisor Action access: true
Administrator Action access: true
Everyone Action access: false
Monitor Action access: false
Automatically defined document properties
This table lists document properties that Ricoh ProcessDirector automatically defines during installation.Do not define these properties in the docCustomDefinitions.xml file.
AAuuttoommaattiiccaallllyy ddeeffiinneedd ddooccuummeenntt pprrooppeerrttiieess
Property databasename Packaged with... NotesDoc.Address.1 Postal Enablement Specifies the first line of the address block
in the document.
Doc.Address.Company
Postal Enablement Specifies the company name in thedocument.
Doc.Address.PostalCode
Postal Enablement Specifies the zip code in the document.
Doc.Address.ZipCode Postal Enablement Specifies the zip code in the document.
Doc.AV.ScanCount Automated Verification Shows the number of times the barcode ona document is scanned.
Doc.ChildJobID All document processingfeatures
A grouping identifier for child jobs.Although the value is initially defined inIdentifyDocuments orIdentifyPDFDocuments, it can be updatedby any step that changes the documentproperties file, such as SplitDocuments orCreateJobsFromDocuments.
Doc.CurrentFirstPage All document processingfeatures
The page number of the first page of thedocument in the current print file.
docCustomDefinitions.xml file

4
42
Property databasename Packaged with... NotesDoc.CurrentJobID All document processing
featuresThe associated job number.
Doc.CurrentPages All document processingfeatures
The number of pages for the document inthe current job.
Doc.CurrentSequence All document processingfeatures
The sequence of the document in thecurrent job.
Doc.CurrentSheets All document processingfeatures
The number of sheets for the document inthe current job.
Doc.Custom.MemberLevel
Electronic Presentment The customer’s level of membership at thetime the statement was created.
Doc.Custom.PURL Electronic Presentment A personalized URL linking to the locationwhere the customer can retrieve thestatement.
Doc.Custom.StatementDate
Electronic Presentment The date of when the statement was firstissued.
Doc.DataLen All document processingfeatures
The length (in bytes) of the document in theprint file.
Doc.DataOffset All document processingfeatures
The byte offset of the document in the printfile of the original job. This value is used byBuildAFPFromDocuments andCreateAFPJobsFromDocuments to locatethe AFP to extract from the original job.
Doc.DocSize.PieceThickness
Postal Enablement Specifies the thickness of a mail piece whenthe mail pieces in a job have differentthicknesses.
Doc.DocSize.PieceWeight
Postal Enablement Specifies the weight of a mail piece whenthe mail pieces in a job have differentweights.
Doc.Email.Sent All document processingfeatures
Specifies whether an email with anattached document has been created anddelivered to the SMTP server by theEmailDocuments step in a workflow.
Doc.EmailAddress All document processingfeatures
The email address associated with thedocument.
Doc.ID All document processingfeatures
A unique identifier for the document.
Doc.Insert.BinTriggers Inserter The inserter bins that should deliver insertsfor this document.
Doc.Insert.DivertBin Inserter The number of the inserter output bin towhich the document is diverted afterinsertion.
4 Reference

4
43
Property databasename Packaged with... NotesDoc.Insert.OriginalBarCode
Inserter The data in the barcode that controlsinsertion of the document.
Doc.Insert.RecipientName
Inserter The name of the person to whom thisdocument is mailed.
Doc.Insert.ReprintJobId
Inserter For an inserter reprint job, the parent job IDthat created the job.
Doc.Member.Number Archive Specifies the member number in thedocument. The RepositorySample suppliedworkflow uses this property.
Doc.OriginalFirstPage All document processingfeatures
The page number of the first page of thedocument.
Doc.OriginalJobID All document processingfeatures
The job ID of the original job.
Doc.OriginalPages All document processingfeatures
The number of pages in the document.
Doc.OriginalSequence
All document processingfeatures
The sequence of the document in theoriginal job. The system gives the firstdocument the sequence value 1, the nextdocument has the sequence value 2, andso on.
Doc.OriginalSheets All document processingfeatures
The number of sheets needed to print thedocument.
Doc.Postal.AddressProcessingRC
Postal Enablement A value returned from postal software toindicate if an address change is availablefor the document.
Doc.Postal.Category Postal Enablement Specifies the pallet break mark for thedocument.
Doc.Postal.ChangeAddressRC
Postal Enablement Specifies the pallet number for thedocument.
Doc.Postal.ContainerBreakMark
Postal Enablement Specifies the container break mark for thedocument.
Doc.Postal.ContainerNumber
Postal Enablement Specifies the container number for thedocument.
Doc.Postal.HandlingUnitBreak-Mark
Postal Enablement Specifies the package break mark for thedocument.
Doc.Postal.HandlingUnitNumber
Postal Enablement Specifies the package number for thedocument.
Doc.Postal.PackageBreakMark
Postal Enablement Specifies the postage rate for thedocument.
docCustomDefinitions.xml file

4
44
Property databasename Packaged with... NotesDoc.Postal.PackageNumber
Postal Enablement Specifies the postage rate code for thedocument.
Doc.Postal.PostageRate
Postal Enablement Specifies the presort sequence number forthe document.
Doc.Postal.PostageRateCode
Postal Enablement A value returned from postal sortingsoftware to indicate the result of itsprocessing.
Doc.Postal.SequenceNumber
Postal Enablement The sequence of the document in the childjob.
Doc.Postal.SequencingProces-singRC
Postal Enablement The state of the document.
Doc.Pref.Member Preference Management Can be used with a property mappingobject to identify the documents in a job.The DelimitedSample supplied propertymapping object and PreferencesSamplesupplied workflow use this property.
Doc.Pref.Output Preference Management Can be used with a property mappingobject to indicate the output type (such asEmail, Print, or Suppress) for a document.The DelimitedSample supplied propertymapping object and PreferencesSamplesupplied workflow use this property.
Doc.Pull All document processingfeatures
Can be used with theSetDocPropsFromList step template toindicate that a document should beremoved from a job. The PullPDFSampleand PullAFPSample supplied workflows usethis property.
Doc.PullProp All document processingfeatures
Can be used with theSetDocPropsFromList step template toidentify which document propertydetermines the documents to be removedfrom a job. The PullPDFSample andPullAFPSample supplied workflows use thisproperty.
Doc.SequenceInChild All document processingfeatures
The sequence of a document in a child job.Although the value is initially defined inIdentifyDocuments, it can be updated byany step that changes the documentproperties file, such as SortDocuments orCreateJobsFromDocuments.
4 Reference

4
45
Property databasename Packaged with... NotesDoc.SourceFileName All document processing
featuresThe name of the input file that contained thedocument.
Doc.State All document processingfeatures
The current state of the document.
Doc.TT.BarcodeStatus1
Automated Verification Shows whether the barcode on a documenthas been read correctly by the camera orbarcode scanner associated with aReadBarcodeData step.
Doc.TT.BarcodeStatus2
Automated Verification Shows whether the barcode on a documenthas been read correctly by the camera orbarcode scanner associated with aReadBarcodeData step.
Doc.TT.BarcodeStatus3
Automated Verification Shows whether the barcode on a documenthas been read correctly by the camera orbarcode scanner associated with aReadBarcodeData step.
Doc.TT.BarcodeStatus4
Automated Verification Shows whether the barcode on a documenthas been read correctly by the camera orbarcode scanner associated with aReadBarcodeData step.
Doc.TT.BarcodeStatus5
Automated Verification Shows whether the barcode on a documenthas been read correctly by the camera orbarcode scanner associated with aReadBarcodeData step.
Doc.Verification.Recipient
Automated Verification Specifies information, such as accountname, that helps you to identify adocument.
ddooccCCuussttoommDDeeffiinniittiioonnss..pprrooppeerrttiieess ffiilleeThe document properties names file (docCustomDefinitions.properties) defines user interface informationfor custom document properties. The entries in the docCustomDefinitions.properties file correspond tothe docProperty elements in the docCustomDefinitions.xml file.
docCustomDefinitions.properties file

4
46
• If you change the docCustomDefinitions.properties file or any docCustomDefinitions_language.properties files after installing the feature:
– Run the docCustom utility and install or upgrade the Custom Document Properties feature.
– For PDF document processing features, load the document properties to Ricoh ProcessDirectorPlug-in for Adobe Acrobat.
– For AFP document processing features, access Ricoh Visual Workbench from the RicohProcessDirector user interface. New document properties are loaded to Ricoh VisualWorkbench when it opens on your workstation.
The entries in the docCustomDefinitions.properties file are used in the Ricoh ProcessDirector userinterface when you select custom document properties from lists, or when you view field help for acustom document property. A sample file is in the /samples directory on the feature CD, and theinstallation process places a sample file in /aiw/aiw1/samples/config on AIX or Linux, and inC:\aiw\aiw1\samples\config on Windows.
Create a separate docCustomDefinitions_language.properties file for each additional language thatyou want to support, using a language identifier in each file name. For example:
• docCustomDefinitions_de.properties (German)
• docCustomDefinitions_en.properties (English)
• docCustomDefinitions_es.properties (Spanish)
• docCustomDefinitions_fr.properties (French)
• docCustomDefinitions_it.properties (Italian)
• docCustomDefinitions_ja.properties (Japanese)
• docCustomDefinitions_pt.properties (Brazilian Portuguese)
You create a stanza of caption and description values for every document property.
[[pprrooppeerrttyy]]The full property name.
[[pprrooppeerrttyy]]..DDeessccrriippttiioonnA description of the property. Use HTML tags if you want to format the text. This content appears inthe field help when the user clicks the ? button.
For example:
Doc.Custom.Zip=ZIP codeDoc.Custom.Zip.Description=The ZIP code of an address
4 Reference
4
47
• Do not rename the default docCustomDefinitions.properties file; a file with this name must exist inyour configuration directory (/aiw/aiw1/config). Copy the file and name the copy with theappropriate language identifier as needed.
• The docCustomDefinitions.properties file and any docCustomDefinitions_language.properties filesmust use the ISO-8859-1 character encoding (code page). If you create yourdocCustomDefinitions.properties files in a different format (such as Shift JIS or UTF-8), you mustconvert the file to ISO-8859-1 when placing it in the /aiw/aiw1/config directory.
DDooccuummeenntt pprrooppeerrttiieess tteemmppllaattee ffiilleeThe document properties template file, if it exists, determines which properties go into the documentproperties file for each job. The template file lets you control the number of document properties to beused, as well as the order of the columns in the document properties file. If you need to maximizeperformance on your system by assigning only a subset of document properties, make sure that anyproperties needed by your workflow steps are listed in the document properties template file.
A sample document properties template file is located on the product CD in the /samples directory.After installation, you can find it in the directory /path/extensions/doc/samples/. For example, onAIX or Linux, the path is /opt/infoprint/ippd. On Windows, the path is C:\ProgramFiles\Ricoh\ProcessDirector.
The document properties template file lists the database names of document properties. You can includeall entries on a single line with a space or a tab character between each property, or you can placeeach entry on a separate line. When a step based on the ReadDocumentsFromDatabase step templatecreates the document properties file, it copies the first line from the template file. Then the step creates aseparate line for each document associated with the job. Each document description line lists theproperty values, separated by a tab or space character, in the same order that they appear in the firstline. If a value is Not set, an empty string ('') is placed in the file.
Using a document properties template file is optional, but recommended if you need to maximizeperformance. If you do not use it, all document properties are included in the generated documentproperties file.
The document properties template file must include all the properties needed by steps that process thedocument properties file. In addition, the document properties template file must include certainproperties, depending on the step that is using the template file. These properties are required byBuildPDFFromDocuments, CreateAFPJobsFromDocuments, and BuildAFPFromDocuments:
• Doc.ChildJobID (*)
• Doc.OriginalJobID (*)
• Doc.OriginalSequence (*)
• Doc.SequenceInChild (*)
• Doc.OriginalSheets
• Doc.DataOffset (for AFP jobs)
• Doc.DataLen (for AFP jobs)
Document properties marked with an asterisk (*), as well as the Doc.ID property, are automaticallyincluded in the document properties file whether or not they are defined in the template.
Document properties template file

4
48
DDooccuummeenntt pprrooppeerrttiieess ffiilleeYour feature uses information from the document properties file in these processes:
• Steps that sort, group, and split documents. For example, if you want to use a step to sort documentsby ZIP code, a property such as Doc.Custom.ZipCode must be in the document properties file.
• External programs that process document properties.
• Steps that process document properties files for use with postal software. The Postal Enablementfeature provides these steps: BuildExternalDocPropsFle, MapExternalResultsFileToDocProps, andUpdateDocPropsFromExtResultsFile. For these steps to run successfully, the Doc.ID or Doc.SequenceInChild property must be included in the document properties file.
• Steps that process document properties files for use with values from external files. All documentprocessing features provide the SetDocPropsFromList and EmailDocuments steps. The PreferenceManagement feature provides the ApplyPreferences step.
• Steps that process AFP documents, such as steps based on the CreateAFPJobsFromDocuments andBuildAFPFromDocuments step templates. For either the CreateAFPJobsFromDocuments orBuildAFPFromDocuments steps to run successfully, these properties must be included in thedocument properties file:
– Doc.OriginalJobID
– Doc.ChildJobId
– Doc.SequenceInChild
– Doc.OriginalSequence
– Doc.OriginalSheets
– Doc.DataOffset
– Doc.DataLen
• Steps that process PDF documents, such as steps based on the BuildPDFFromDocuments steptemplate. For the BuildPDFFromDocuments steps to run successfully, these properties must beincluded in the document properties file:
– Doc.OriginalJobID
– Doc.ChildJobId
– Doc.SequenceInChild
– Doc.OriginalSequence
– Doc.OriginalSheets
The first line in the document properties file contains the information from the document propertiestemplate file. Each additional line contains values for each of the properties from one document.
These steps automatically create the document properties file:
• A step based on the IdentifyDocuments step template creates the document properties file using theVisual Workbench control file as a guide.
• A step based on the IdentifyPDFDocuments step template creates the document properties file usingthe Ricoh ProcessDirector Plug-in for Adobe Acrobat control file as a guide.
4 Reference

4
49
• A step based on the ReadDocumentsFromDatabase step template creates the document propertiesfile using a document properties template file as a guide.
• A step based on the CreateJobsFromDocuments or CreatePDFJobsFromDocuments step templatecreates the document properties file for child jobs using the document properties file of the parent(current) job as a guide.
The GroupDocuments, SortDocuments, SplitDocuments, SetDocPropsFromList, ApplyPreferences(Preference Management only), and UpdateDocPropsFromExtResultsFile (Postal Enablement only) stepscan manipulate the document properties file. The document properties file might also be used by anexternal program or a custom step that you create.
A document properties file always contains the properties Doc.ChildJobId and Doc.SequenceInChild. Ifa step (such as GroupDocuments) that creates document groups runs, the document properties file willcontain more than one value for Doc.ChildJobId.
Ricoh ProcessDirector provides methods, including getFileName and getAbsoluteFileName, that let youprovide access for external programs to read and write spool files in the spool directory for the job. Formore information, see “Using Ricoh ProcessDirector methods such as getFileName”.
The document properties file is stored in the spool directory for the job. When the IdentifyDocuments orIdentifyPDFDocuments step creates the file, the file name is in the format: jobid.original.dpf(for example, 10000009.original.dpf). When the WriteDocumentsToDatabase step runs, itcopies the file and adds additional properties, including Doc.ID. The new file is saved with a file namein this format: jobid.document.dpf (for example, 10000009.document.dpf). The valuesare in UTF-8 format and separated by tabs.
Some information in the document properties file is not stored in the database but is used only during theprocessing of steps. This information, for example, is in the document properties file but not in thedatabase:
Doc.DataOffsetThe offset of the print data for the document in the original job's AFP print file.
Doc.DataLenThe length of the print data for the document in the original job's AFP print file.
PPrrooppeerrttyy ccoonnddiittiioonnss ffiilleeSteps based on the SetDocPropsFromConditions step template set document properties or job propertiesin the current job using a property conditions file. The conditions defined in the file use a comma-separated value (CSV) format. A sample property conditions file is in/aiw/aiw1/samples/doc/DocPropConditions.csv. If you have the Postal Enablement feature, more sample files are in/aiw/aiw1/samples/control_files/postal.
• When you edit the property conditions file, open it in a text editor. Do not edit the file in MicrosoftExcel.
You can use the property conditions file to set values for properties with conditions or without conditions.You can also use a separate include file to define properties using a property = value format.
Property conditions file

4
50
Setting values using conditions
The first line in the property conditions file is a header row that lists the database names of document orjob properties, separated by commas. Normally the leftmost part of the header row specifies theproperties to test for one or more conditions, although this order is not required.
The header row is followed by one or more condition rows that define the conditions, and the propertyvalues to be set when all the conditions in that row are true. You can think of each condition row asrepresenting an if-then statement. All specified conditions in a row are logically ANDed together andmust all be true. If any of the conditions in a row are not true, none of the values in that row are set. Thevalues in the condition rows are separated by commas.
This example shows the contents of a property conditions file that sets property values based onconditions:
Doc.Custom.MailCategory,Job.Name,Doc.Run.PAVE=USPS,,Yes=USPS,~XYZ*,No=NonUSPS,,No=Exception,,No
The first if-then condition specifies that if a mailpiece category is USPS, Ricoh ProcessDirector sets theDoc.Run.PAVE property to Yes. The second row sets the value of Doc.Run.PAVE to No when the jobname begins with XYZ.
We recommend that you place all properties that are part of conditions to the left of the properties thatare receiving values.
Properties that are part of conditions use condition characters from this set:
CCoonnddiittiioonn cchhaarraacctteerrss iinn tthhee ccoonnddiittiioonnss ffiillee
Condition characters Condition Example/Notes
=[value] equal to =Fir
<>[value] not equal to <>Fir
<[value] less than <4900000
>[value] greater than >61000
<=[value] less than or equal to <=61207
>=[value] greater than or equal to >=61207
~[value] like ~INSURE*.PDF
!~[value] not like !~*.PDF
"([val1],[val2],...)" in (must start and end withparentheses surrounded byquotation marks)
"(PRTA, PRTB)"
4 Reference

4
51
Condition characters Condition Example/Notes
"!([val1],[val2],...)" not in (must start and end withparentheses surrounded byquotation marks)
"!(PRTA, PRTB)"
(blank) wildcard (*) When a condition is blank, it isconsidered always true.
• You can use the pound sign (#) to add comments. Only complete lines can be comments; the #character must be in the first position in the line.
• Spaces can separate keyword characters from condition values.
• When setting positional properties, you can choose one of these two formats: property-name[process-name][phase-name][step-name] or [phase-name][step-name]. Youcannot use positional properties to set other properties.
• The ? and * characters are wildcard characters used with the like and not like conditions. Thequestion mark matches single characters and the asterisk matches any number of characters.
• You can use Ricoh ProcessDirector symbol notation in the conditions file to set conditions or assignvalues based on the current value of a particular document or job property. See the topic titledRicoh ProcessDirector symbol notation in the Information Center for a description of symbolnotation syntax. You can also use symbol notation with literal string values; see below for moreinformation.
• If a condition field has an equal sign (=) without a value, the condition is true if the job's propertyvalue is null. If a field has an empty value, the property is ignored for that row; it is not part of anycondition and its value is not changed. Because of this rule, the step cannot set a job property tonull. To set a property to null manually, use the expression ${null}.
• Each row is evaluated independently.
• All rows with conditions that match a job's or document's properties are applied. The rows areapplied in the order that they occur in the conditions file. Within each row, property values areapplied from left to right.
• Leading and trailing blanks are removed from field values before any comparison or set operationtakes place. Blanks within a value (not leading or trailing) are retained.
Using a segment of a property value with symbol notation and the substring specifier
If you want to use only a portion of a property in a condition - such as using only the first 5 charactersof a property's value - you can use the substring specifier to indicate the portion of the property that youwant to use.
The syntax is:
${property_name;substr;start;length}where:
property_name is the name of the property, such as Job.Name.
start is the position in the string that you want to start from.
Property conditions file
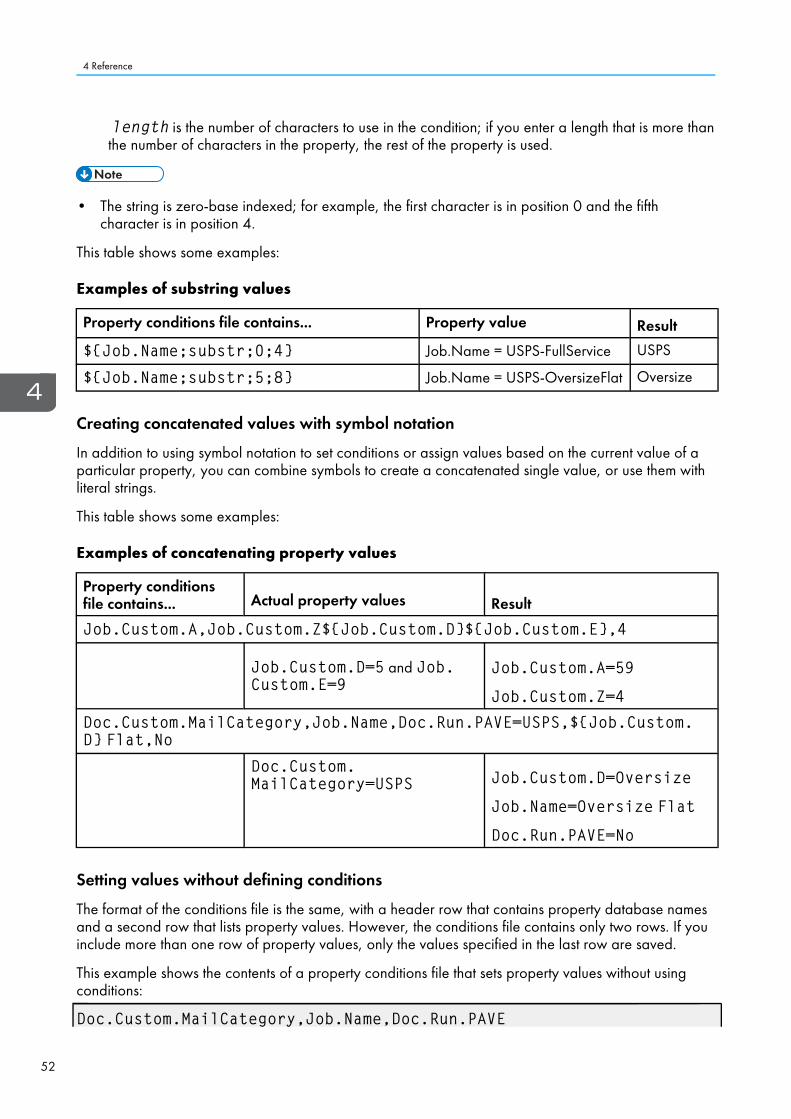
4
52
length is the number of characters to use in the condition; if you enter a length that is more thanthe number of characters in the property, the rest of the property is used.
• The string is zero-base indexed; for example, the first character is in position 0 and the fifthcharacter is in position 4.
This table shows some examples:
EExxaammpplleess ooff ssuubbssttrriinngg vvaalluueess
Property conditions file contains... Property value Result
${Job.Name;substr;0;4} Job.Name = USPS-FullService USPS
${Job.Name;substr;5;8} Job.Name = USPS-OversizeFlat Oversize
Creating concatenated values with symbol notation
In addition to using symbol notation to set conditions or assign values based on the current value of aparticular property, you can combine symbols to create a concatenated single value, or use them withliteral strings.
This table shows some examples:
EExxaammpplleess ooff ccoonnccaatteennaattiinngg pprrooppeerrttyy vvaalluueess
Property conditionsfile contains... Actual property values Result
Job.Custom.A,Job.Custom.Z${Job.Custom.D}${Job.Custom.E},4
Job.Custom.D=5 and Job.Custom.E=9
Job.Custom.A=59
Job.Custom.Z=4Doc.Custom.MailCategory,Job.Name,Doc.Run.PAVE=USPS,${Job.Custom.D} Flat,No
Doc.Custom.MailCategory=USPS Job.Custom.D=Oversize
Job.Name=Oversize Flat
Doc.Run.PAVE=No
Setting values without defining conditions
The format of the conditions file is the same, with a header row that contains property database namesand a second row that lists property values. However, the conditions file contains only two rows. If youinclude more than one row of property values, only the values specified in the last row are saved.
This example shows the contents of a property conditions file that sets property values without usingconditions:
Doc.Custom.MailCategory,Job.Name,Doc.Run.PAVE
4 Reference

4
53
USPS,PostalDiscount,Yes
Setting values with a separate include file
If you have a collection of properties that remain the same for several workflows, you can define thoseproperties in a separate include file that you refer to in the property conditions file.
To refer to a separate include file, put @include in the header row of the property conditions file,and specify the relative or absolute path to the include file in the second row of the property conditionsfile.
• Use the Linux delimiting character (/) to specify the absolute directory path to the include file on aWindows system. For example, if the include file on a Windows system is at C:\Projects\data.txt, specify /Projects/data.txt.
This example shows the contents of a property conditions file that contains @include and a path to aseparate include file:
Doc.Custom.MailCategory,Job.Name,@includeUSPS,Priority,../prop-assignments/usps-properties.txt
In this example, the Mail Category property is assigned the value of USPS, the Job Name property isassigned the value Priority, and the relative path to the include file usps-properties.txt isspecified.
The include file defines property values using the format Property name = Value. This exampleshows the format of the include file:
Doc.Insert.RecipientName=George RogersJob.CustomerName=CerbCo
The conditions file is processed from left to right and from top to bottom. This table contains examples toshow how the property conditions file and the include file can override properties that were previouslyset. (These examples are for illustration only and are not intended as actual uses of the conditions file.)
EExxaammpplleess ooff pprroocceessssiinngg oorrddeerr ffoorr tthhee ccoonnddiittiioonnss ffiillee aanndd iinncclluuddee ffiillee
Property conditionsfile contains... Include file contains... Result
Job.Name,@include=,../prop-assignments/usps-properties.txt
Job.Name=FlatFoldIf the Job Name is not already defined,the include file defines it as FlatFold.
Doc.Custom.Zip, Doc.Custom.Location, Doc.Custom.Location,@include<50000, EAST, NEW HAMPSHIRE, /Projects/data.txt
Doc.Custom.Location =CONCORDJob.CityPopulation = 42400
If Zip is <50000, the conditions file setsLocation = EAST, then the conditions filesets Location = NEW HAMPSHIRE,then the include file /Projects/data.txtsets CityPopulation = 42400.
Property conditions file

4
54
Property conditionsfile contains... Include file contains... Result
Doc.Custom.Location =CONCORDJob.CityPopulation= 42400
Doc.Custom.Zip, Doc.Custom.Location, @include, Doc.Custom.Location<50000, EAST, /Projects/data.txt, NEW HAMPSHIRE
Doc.Custom.Location =CONCORDJob.CityPopulation = 42400
If Zip is <50000, the conditions file setsLocation = EAST, then the include file/Projects/data.txt sets Location =CONCORD and CityPopulation =42400, then the conditions file setsLocation = NEW HAMPSHIRE.Doc.Custom.Location = NEWHAMPSHIREJob.CityPopulation = 42400
Doc.Custom.Zip, Doc.Custom.Location, @include, @include<50000, EAST,/Projects/data.txt, /Projects/data2.txt
/Projects/data.txtDoc.Custom.Location =CONCORDJob.CityPopulation = 42400
/Projects/data2.txtDoc.Custom.Location =US ROUTE 202Job.CityPopulation = 52400
If Zip is <50000, the conditions file setsLocation = EAST, then the include file/Projects/data.txt sets Location =CONCORD and Population = 42400,then the include file /Projects/data2.txtsets Location = US ROUTE 202 andCityPopulation = 52400.Doc.Custom.Location = USROUTE 202Job.CityPopulation = 52400
• You can use Ricoh ProcessDirector symbol notation as part of the include file name. For example, ifyou use the include file name ${Job.RequestedPrinter}.equipmentprops.txt, thesystem can choose the correct set of properties to define for each requested printer (for each valueof Job.RequestedPrinter). See the related Reference topic for a description of symbol notationsyntax.
4 Reference

4
55
5. Accessibility
Ricoh strives to provide products with usable access for everyone, regardless of age or ability.
For more information about the commitment that we have made to accessibility, refer to the Accessibilitypage on the Ricoh web site.
Accessibility features
Accessibility features help users who have disabilities, such as restricted mobility or limited vision, useinformation technology products successfully.
The major accessibility features in this product let you:
• Use screen readers, screen magnifiers, and other assistive technologies.
• Use a keyboard instead of a mouse.
• Change attributes such as volume, color, contrast, and font size.
• Distinguish keys by touch without activating them.
• Attach alternative input and output devices such as special pointing devices and Braille displays.
In addition, the information center and the publications for the product are in an accessible format.
Ricoh ProcessDirector Plug-in for Adobe Acrobat Markup Navigator shortcut keys
When a markup object that you defined has focus in the Markup Navigator, you can use these shortcutkeys:
Markup Navigator shortcut keys
Description Key
Opens the Edit dialog Enter
Deletes a markup object Delete
Keyboard navigation
This product uses standard Microsoft Windows navigation keys.

4
56

Copyright© 2013, 2017 Ricoh Company, Ltd. All rights reserved.

USEN GB AUEN EN 10/2017 G550-20312-06
RICOHPro
cessDirecto
rInstallin
gDocumentPro
cessingFeatu
res
RICOH COMPANY, LTD.
8-13-1, Ginza, Chuo-ku, Tokyo 104-8222, Japanhttp://www.ricoh.com