Embed Size (px)
Citation preview

INSTALLATIONPROCEDURE
CHOCKFAST REDCHOCKFAST RED
PREPARATION FOR GROUTING• Chip new concrete to remove all laitance, exposing 50% aggregate.
• Use leveling screws to set clearance between top of concrete & bottom of base plate (min. 50mm) and wax them to enable removal after grouting; supporting pads should be rounded
• Isolate anchor bolts to a length of 12 times bolt diameter with duct tape.
• Install wooden formwork with a minimum clearance of 50mm from the edge of the m/c base and a maximum clearance of 100mm.
• Install 450 chamfer strips at all corners and along all sides of formwork at a minimum elevation of 15mm above the bottom of the base plate, or as advised by the Machinery OEM (to ensure grout makes good contact with bottom of base plate).
• Install expansion joints every 1.5 to 2M (5 to 7 ft.) along the exposed portion of grout between the forms and base plate; install head boxes between these joints for placement.Use paste wax on the inside surface of forms for easy removal.
• Store all components (Resin/Hardener cans, Aggregate bags) in a dry, enclosed or air-conditioned area between 200C & 300C for 48 hours before grouting.
• In hot weather ( >350C), erect a shade over the foundation 48 hours before grouting.
• In cold weather (<150C), erect a tent type insulating cover around the foundation and heat the area with suitable space heaters (hot air blowers) to warm the concrete surface to a minimum of 200C. Keep the mixing equipment in the enclosed area.
BEFORE STARTING THE GROUTING OPERATION• Ensure that the concrete & base plate are dry, clean and free of dust and their surface temperature is between 200 & 350C.
• Ensure that the temperature of the mixing equipment and all Epoxy Grout components is between 250C & 300C.
• Ensure that the mixing equipment is clean and dry, and in good working condition.
• Ensure that a spare concrete mixer is available for the mixing operation described below.
• Keep Chockfast Red components and mixing equipment at site under the shade, protected from direct sunlight during summer.
MIXING CHOCKFAST RED EPOXY GROUT
• Pour the Hardener into the Resin can and mix for 3 to 4 minutes with a slow-speed drill at 200 - 250 rpm with Jiffy Mixer attachment.
• Pour mixed liquids into a small mortar or concrete mixer (~ 120 litres capacity).
• Mix 4 bags of aggregate, one at a time, until all aggregate is fully wetted out by epoxy liquid (usually takes about 3-4 minutes). Do not overmix. Mixer speed should be 15-20 rpm.
• Use 3½ bags of aggregate (instead of 4) for the first unit only, while starting up.
PLACEMENT OF CHOCKFAST RED EPOXY GROUT
• Fill all anchor bolt pockets and let the grout cure before starting the base plate grouting.Anchor Bolts
For flat base plates or skids• For flat sole plates, rails etc. pour the grout from one side till it reaches the other.
• Pour in a continuous operation along the length and across the width of the base plate.• Pour until the grout reaches the level of chamfer strips. After completion monitor the grout for leaks until it sets up.
• For large skids, provide fill holes in deck plate on top of skid to pour grout in all areas and use head boxes to cover the area within the working time.
AFTER PLACEMENT
• Clean spillage of grout on base plate and foundation with water, while it is wet. Clean mixers, tools with water after completing the job.
• After the grout is fully cured, remove the shading, formwork & leveling screws (Refer to Bulletin 617).
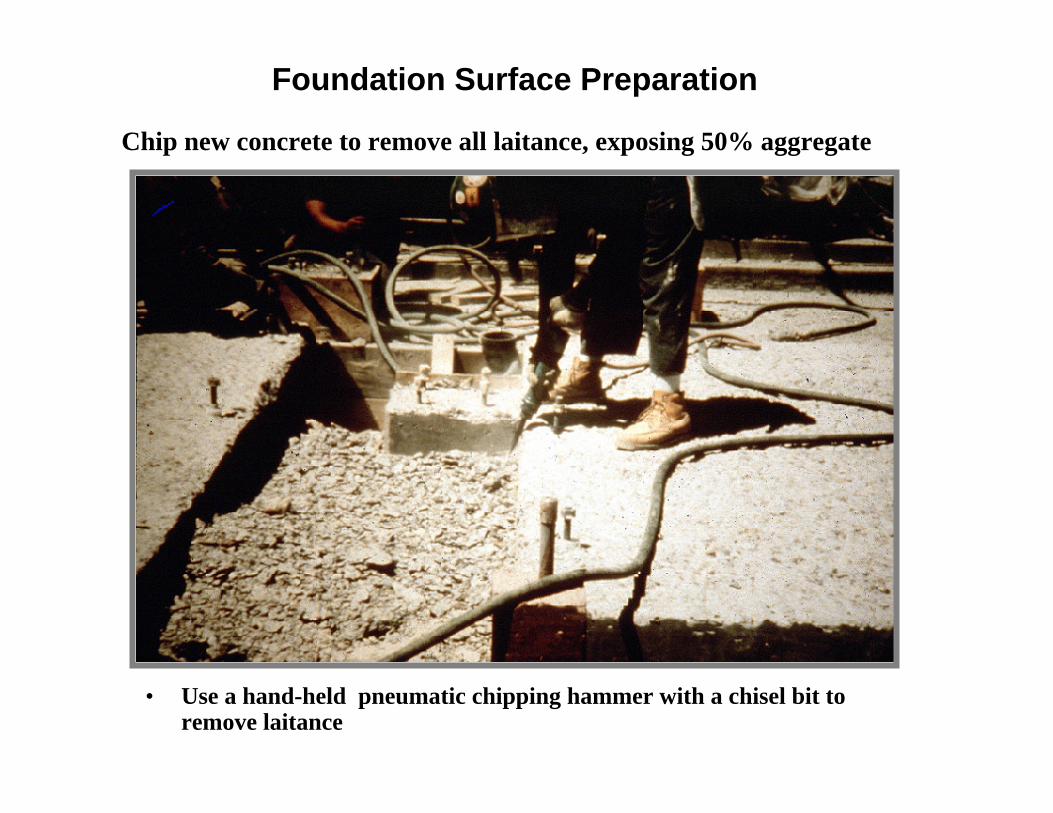
Foundation Surface Preparation
• Use a hand-held pneumatic chipping hammer with a chisel bit to remove laitance
Chip new concrete to remove all laitance, exposing 50% aggregate
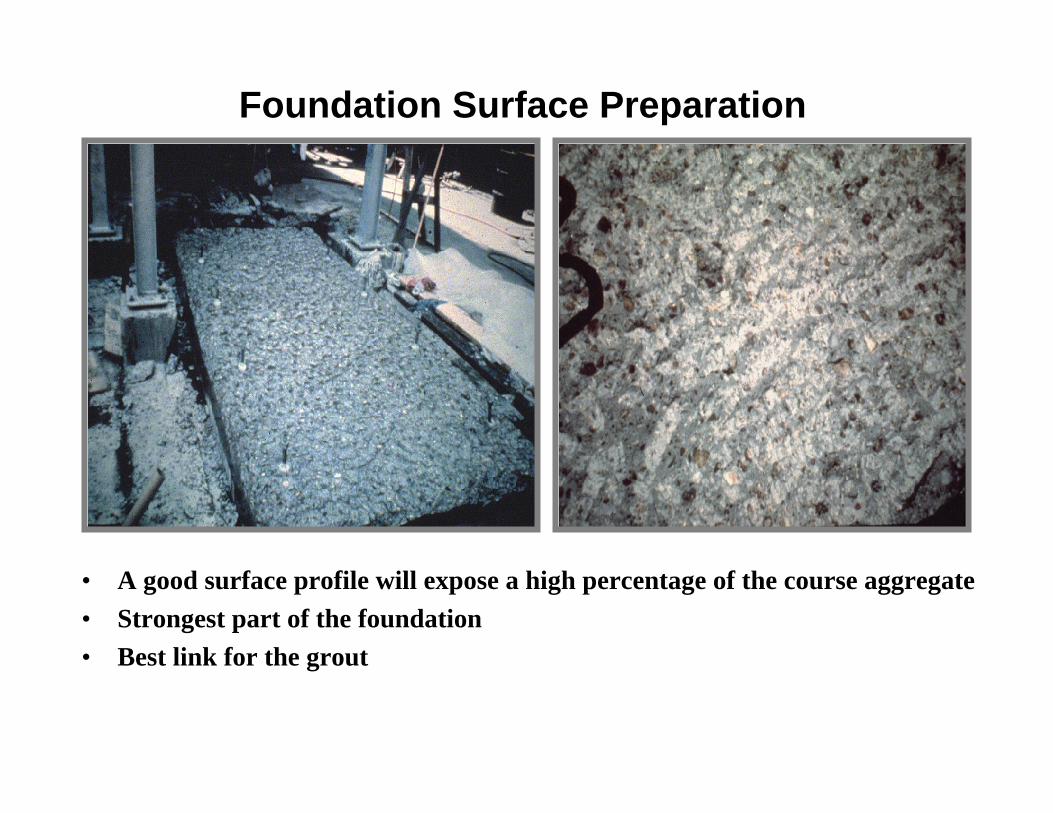
Foundation Surface Preparation
• A good surface profile will expose a high percentage of the course aggregate• Strongest part of the foundation• Best link for the grout
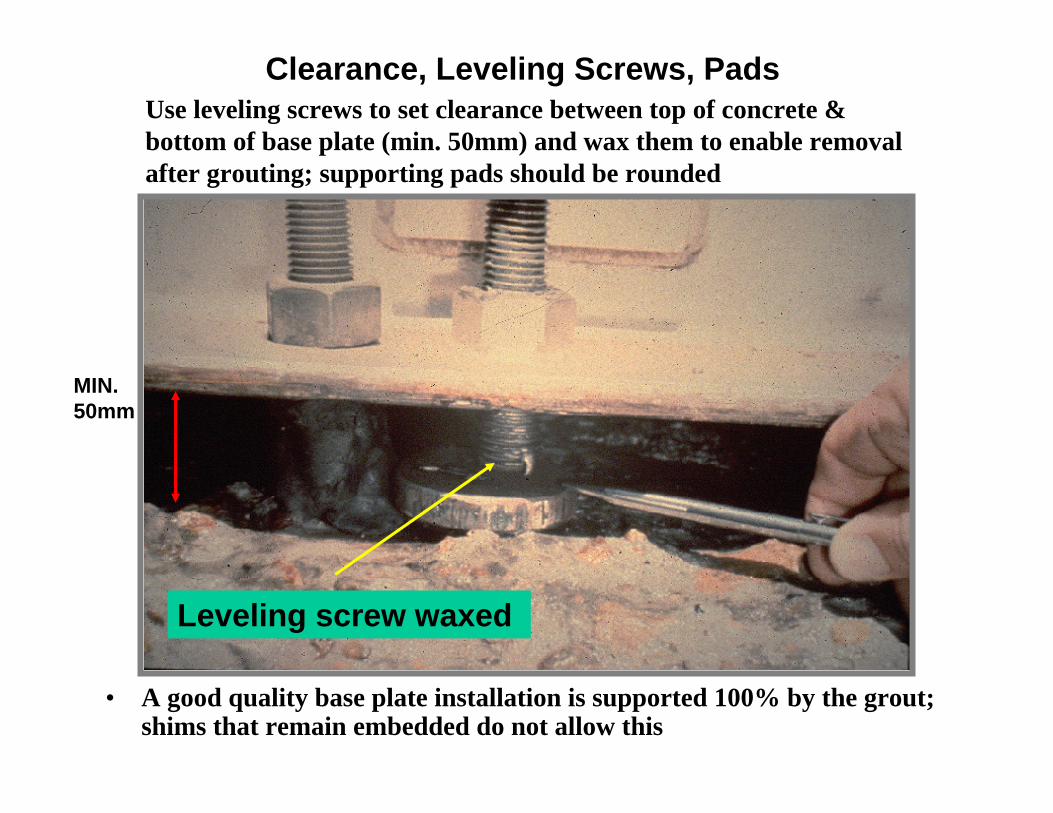
Clearance, Leveling Screws, Pads
• A good quality base plate installation is supported 100% by the grout; shims that remain embedded do not allow this
MIN.50mm
Leveling screw waxed
Use leveling screws to set clearance between top of concrete & bottom of base plate (min. 50mm) and wax them to enable removal after grouting; supporting pads should be rounded
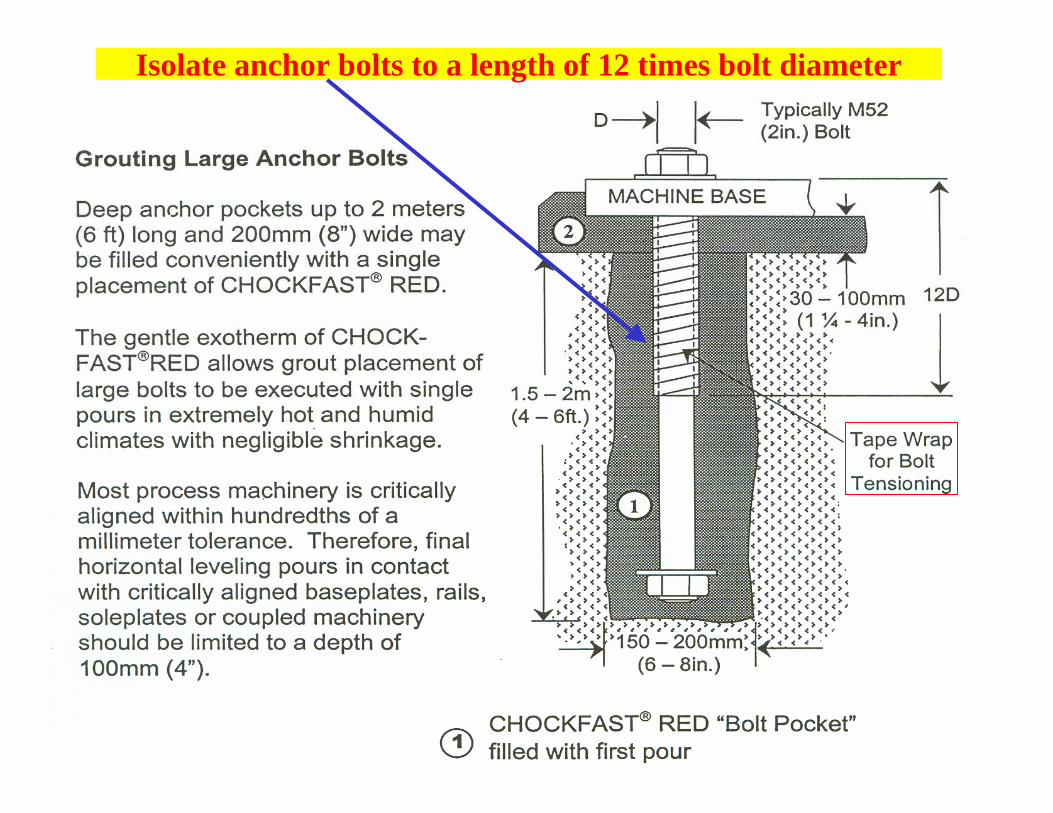
Isolate anchor bolts to a length of 12 times bolt diameter
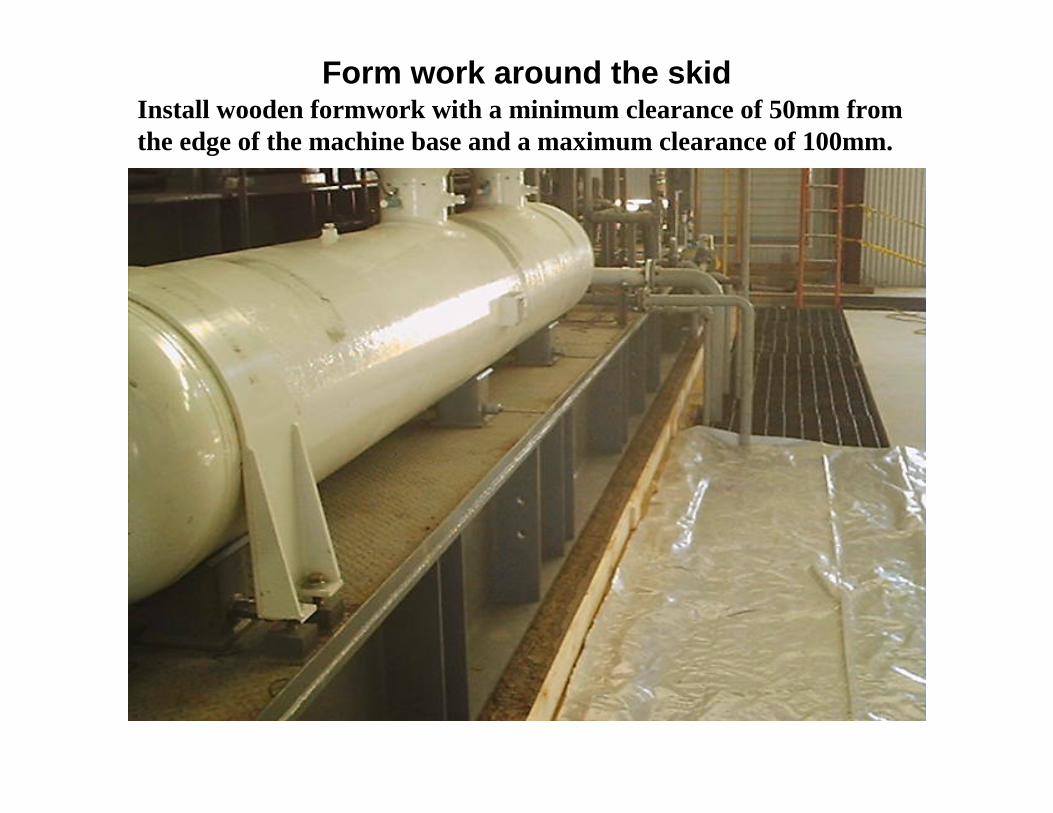
Install wooden formwork with a minimum clearance of 50mm from the edge of the machine base and a maximum clearance of 100mm.
Form work around the skid
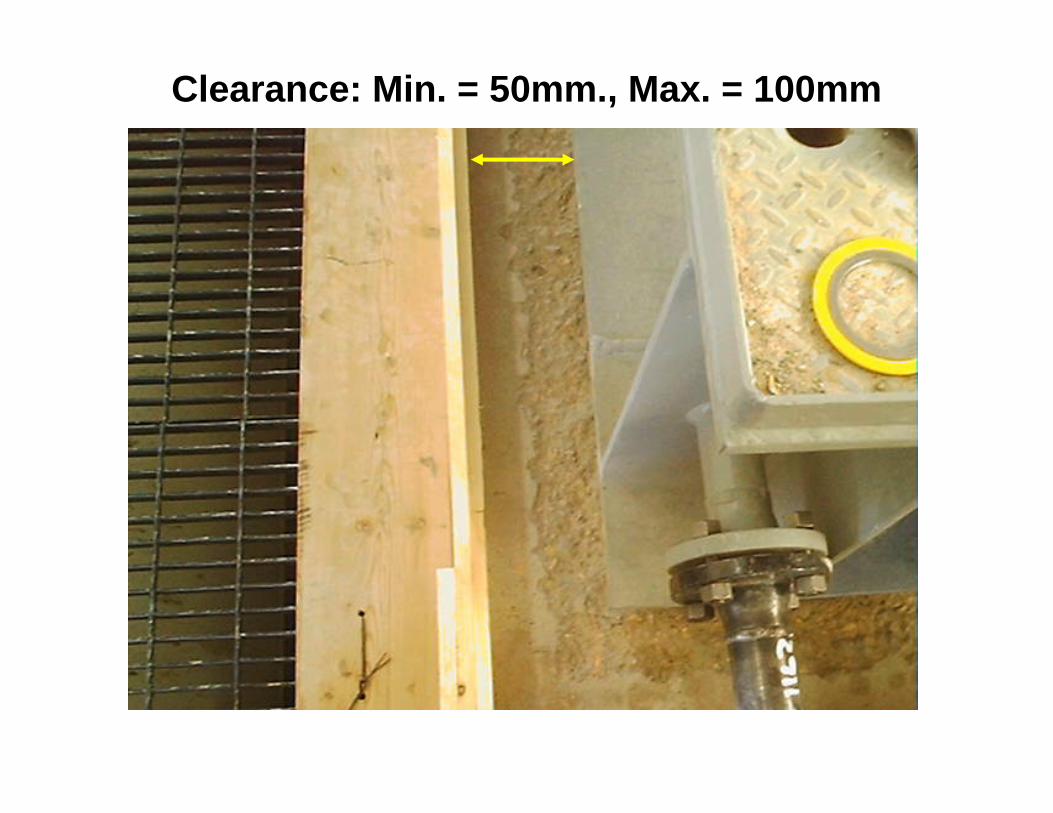
Clearance: Min. = 50mm., Max. = 100mm
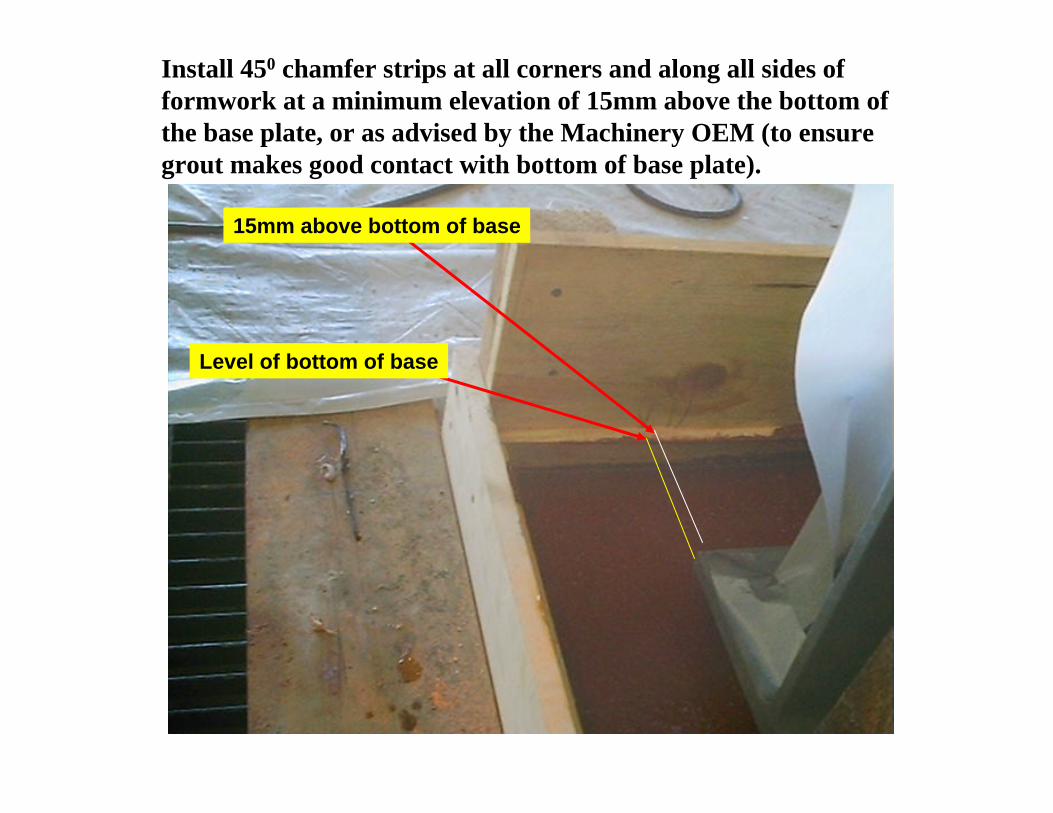
Install 450 chamfer strips at all corners and along all sides of formwork at a minimum elevation of 15mm above the bottom of the base plate, or as advised by the Machinery OEM (to ensure grout makes good contact with bottom of base plate).
15mm above bottom of base
Level of bottom of base

Install expansion joints every 1.5 to 2M (5 to 7 ft.) along the exposed portion of grout between the forms and base plate; install head boxes between these joints for placement.
Waxing form work & head box between exp. joints for easy removal
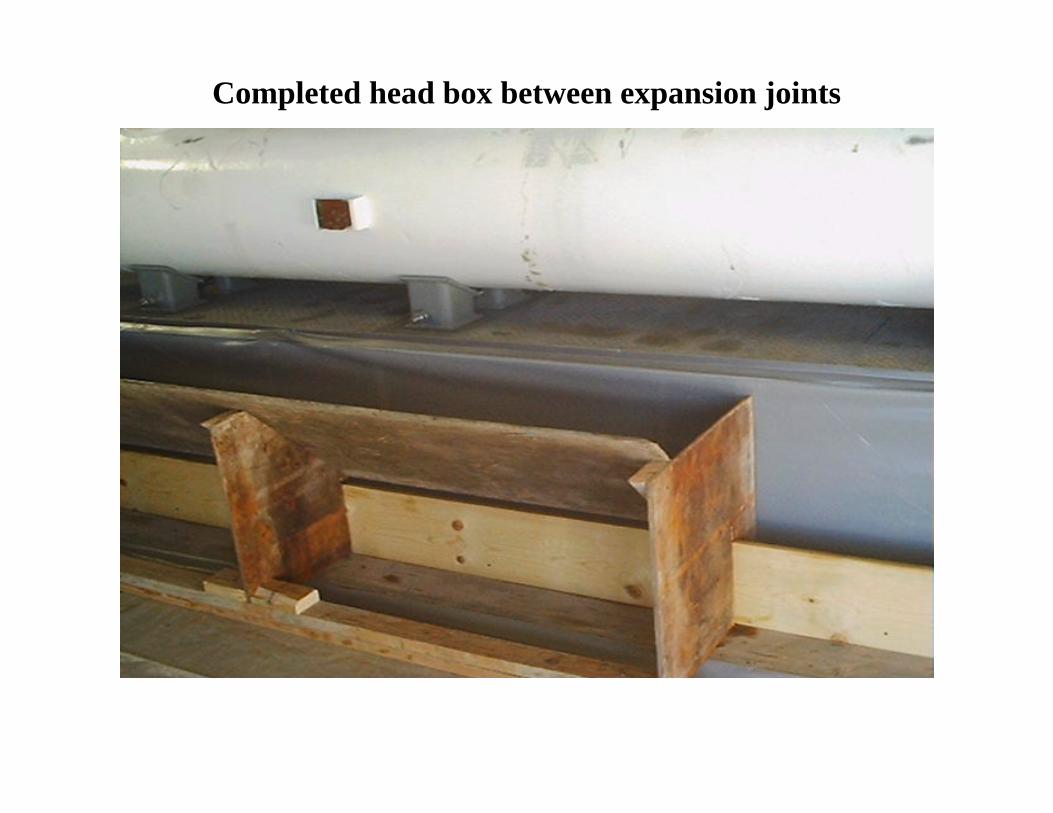
Completed head box between expansion joints
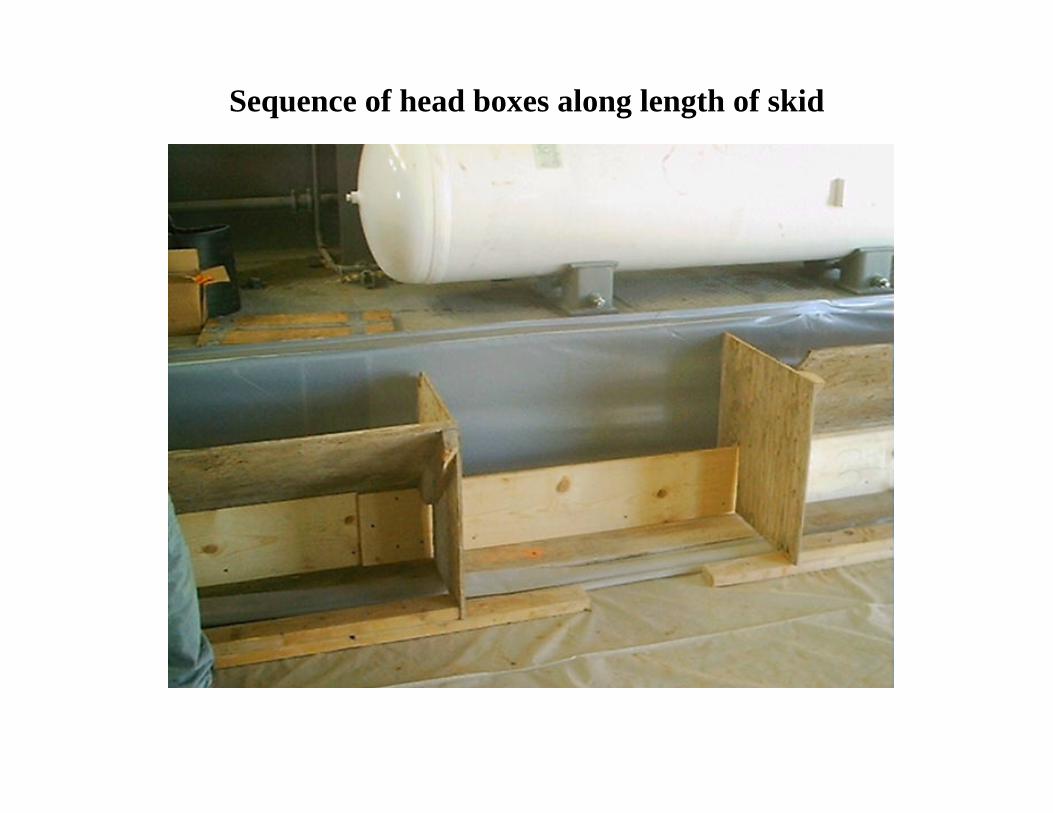
Sequence of head boxes along length of skid
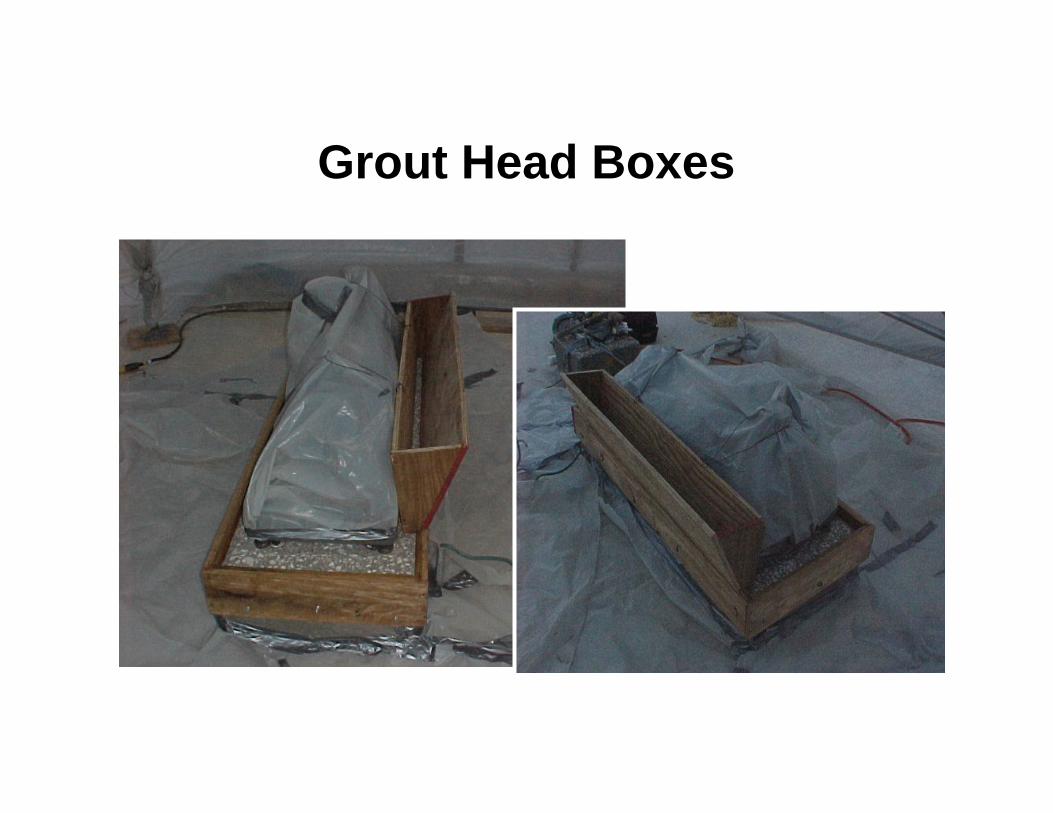
Grout Head Boxes
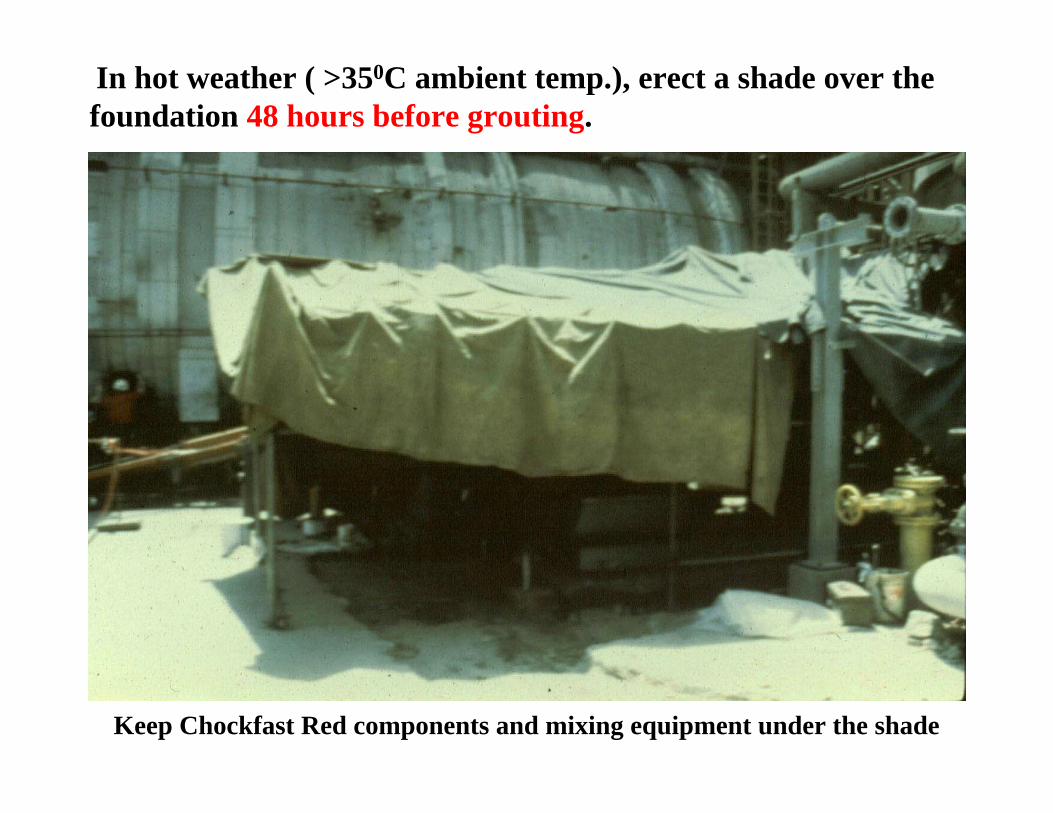
In hot weather ( >350C ambient temp.), erect a shade over the foundation 48 hours before grouting.
Keep Chockfast Red components and mixing equipment under the shade
BEFORE STARTING THE GROUTING OPERATION
• Ensure that the concrete & base plate are dry, clean and free of dust and their surface temperature is between 200 & 350C.
• Ensure that the temperature of the mixing equipment and all Epoxy Grout components is between 250C & 300C.
• Ensure that the mixing equipment is clean and dry, and in good working condition.
• Ensure that a spare concrete mixer is available for the mixing operation described below.
• While grouting, keep Chockfast Red components and mixing equipment at site under the shade, protected from direct sunlight during summer.

Pour the Hardener into the Resin can and mix for 3 to 4 minutes with a slow-speed drill at 200 - 250 rpm with Jiffy Mixer attachment.
First Stage – Mixing Liquids of Chockfast Red
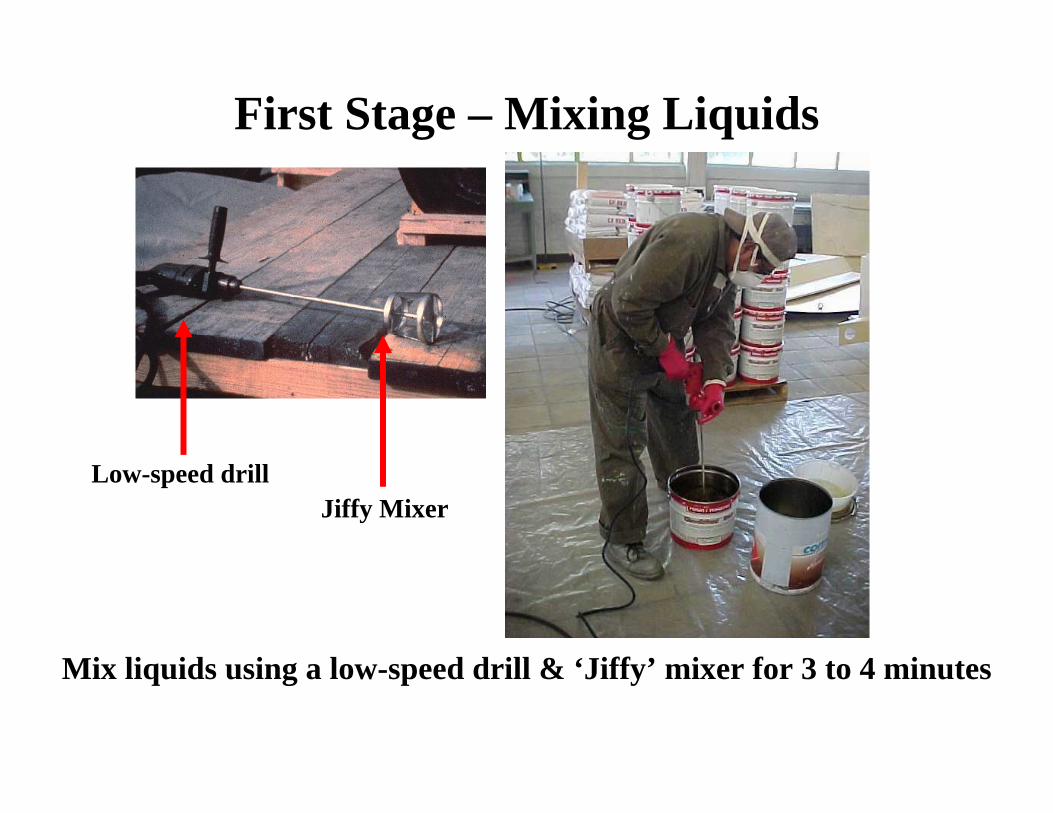
First Stage – Mixing Liquids
Mix liquids using a low-speed drill & ‘Jiffy’ mixer for 3 to 4 minutes
Jiffy MixerLow-speed drill
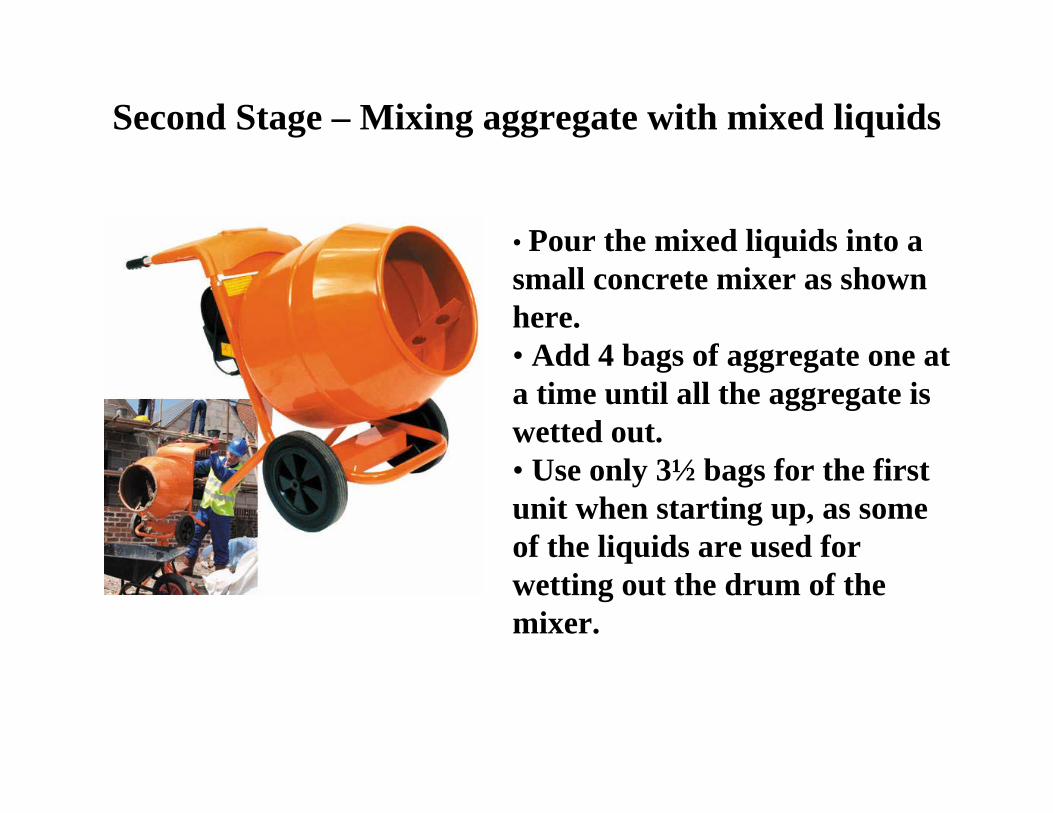
Second Stage – Mixing aggregate with mixed liquids
• Pour the mixed liquids into a small concrete mixer as shown here.• Add 4 bags of aggregate one at a time until all the aggregate is wetted out.• Use only 3½ bags for the first unit when starting up, as some of the liquids are used for wetting out the drum of the mixer.
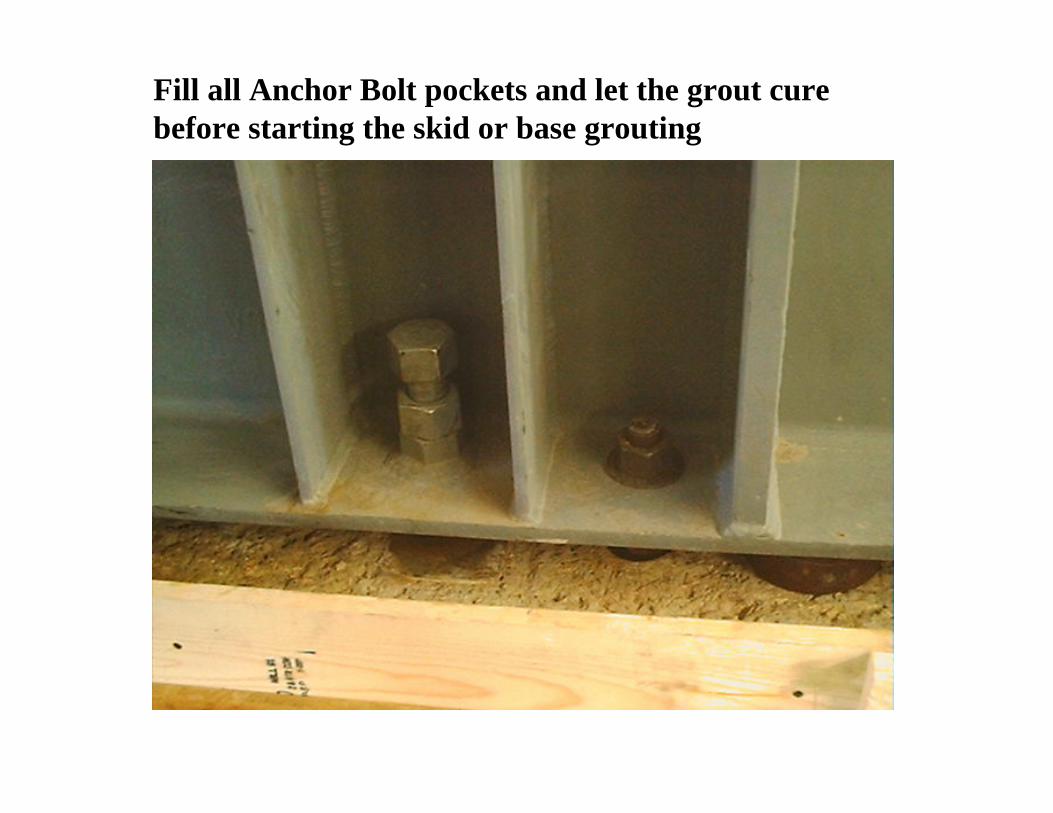
Fill all Anchor Bolt pockets and let the grout cure before starting the skid or base grouting

Fill hole made in deck plate of skid
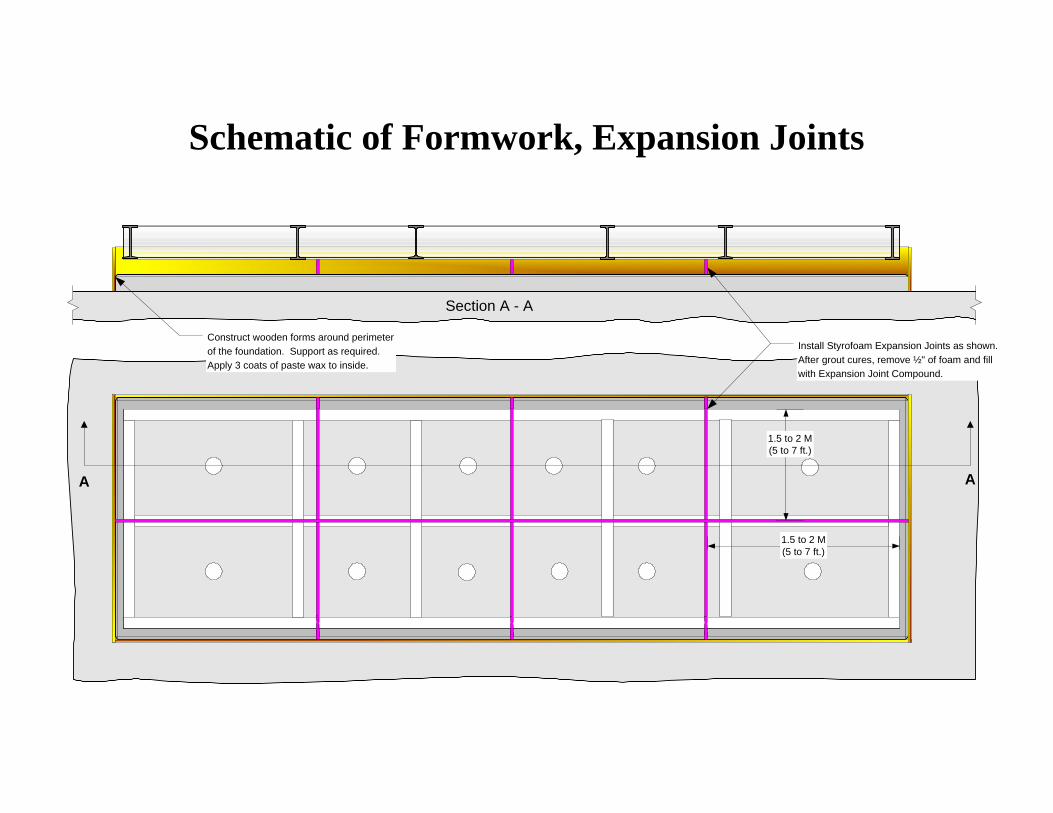
Install Styrofoam Expansion Joints as shown.After grout cures, remove ½" of foam and fillwith Expansion Joint Compound.
Construct wooden forms around perimeterof the foundation. Support as required.Apply 3 coats of paste wax to inside.
1.5 to 2 M(5 to 7 ft.)
1.5 to 2 M(5 to 7 ft.)
A A
Section A - A
Schematic of Formwork, Expansion Joints
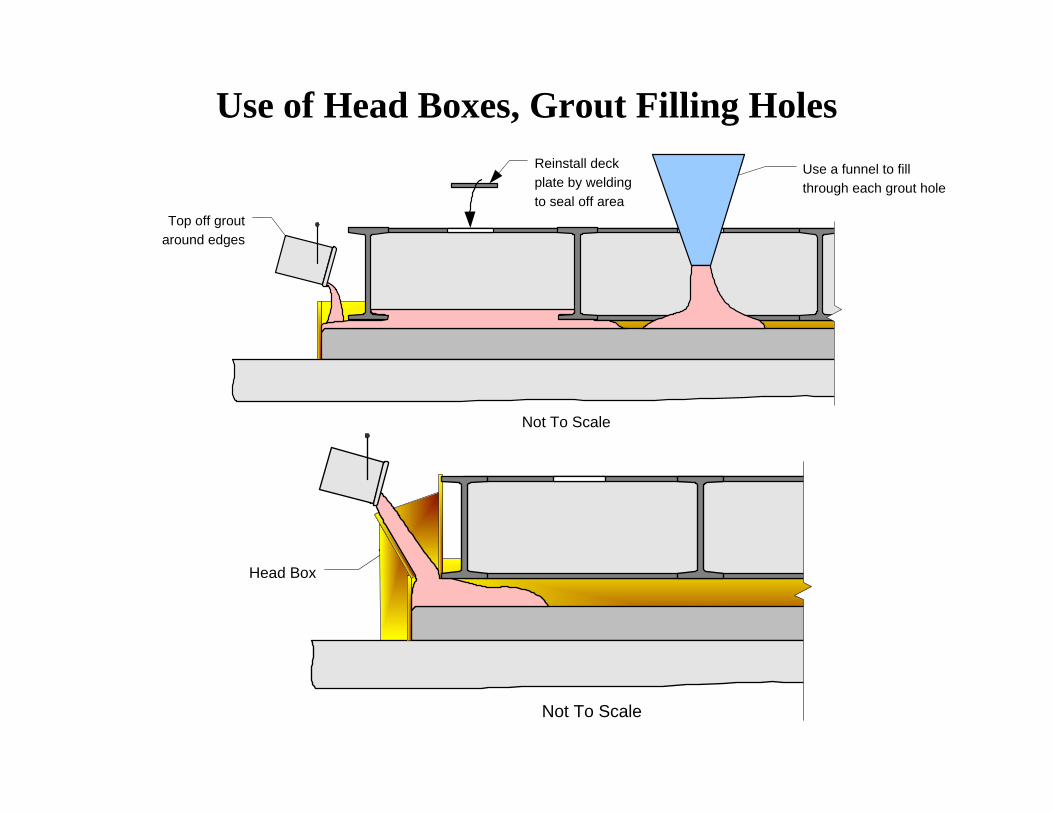
Reinstall deckplate by weldingto seal off area
Use a funnel to fillthrough each grout hole
Top off groutaround edges
Not To Scale
Head Box
Not To Scale
Use of Head Boxes, Grout Filling Holes
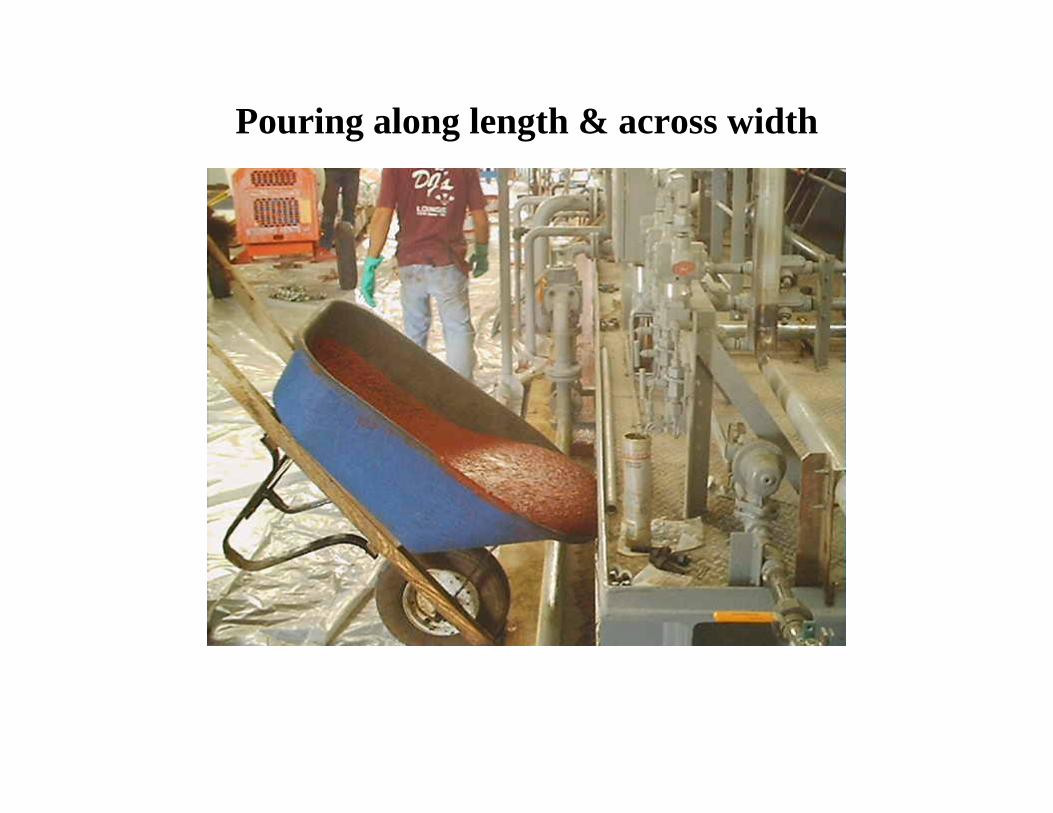
Pouring along length & across width
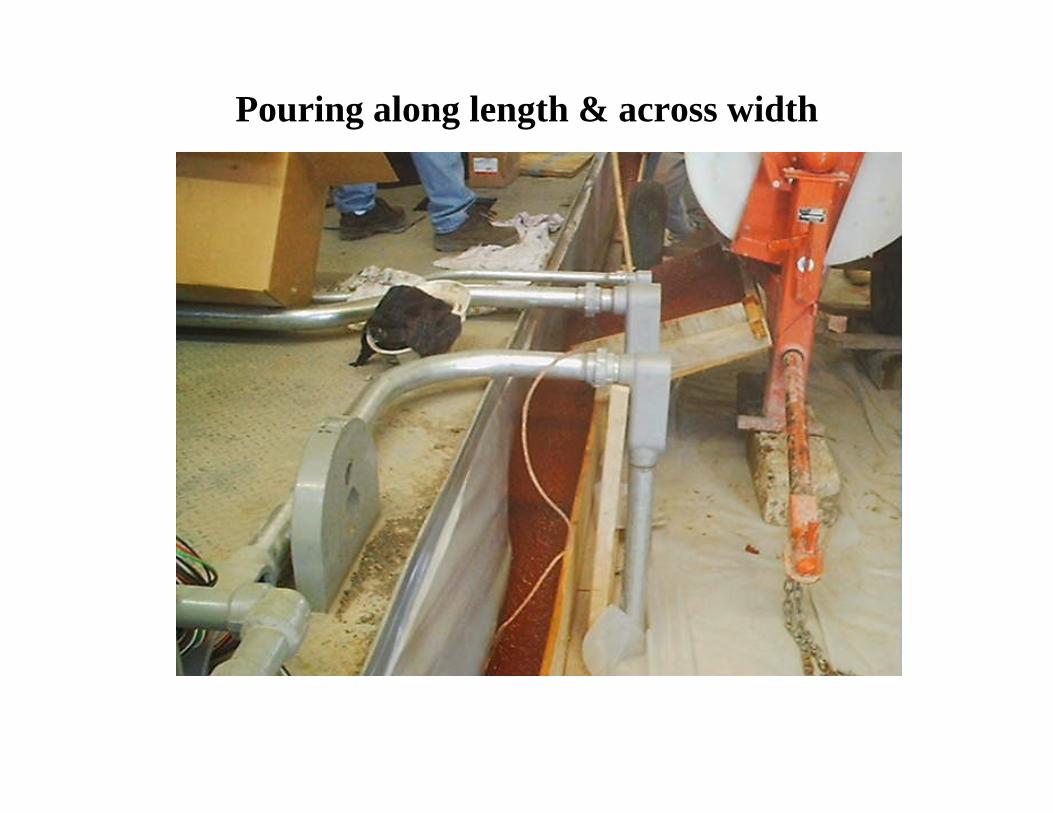
Pouring along length & across width
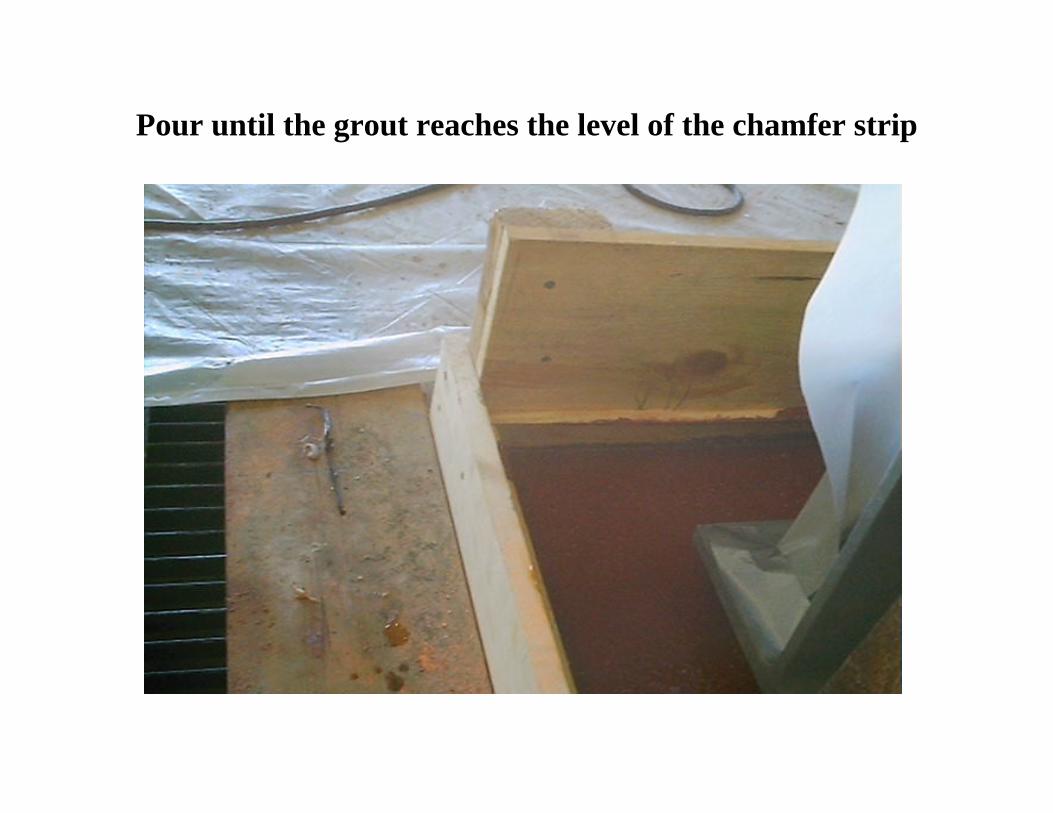
Pour until the grout reaches the level of the chamfer strip
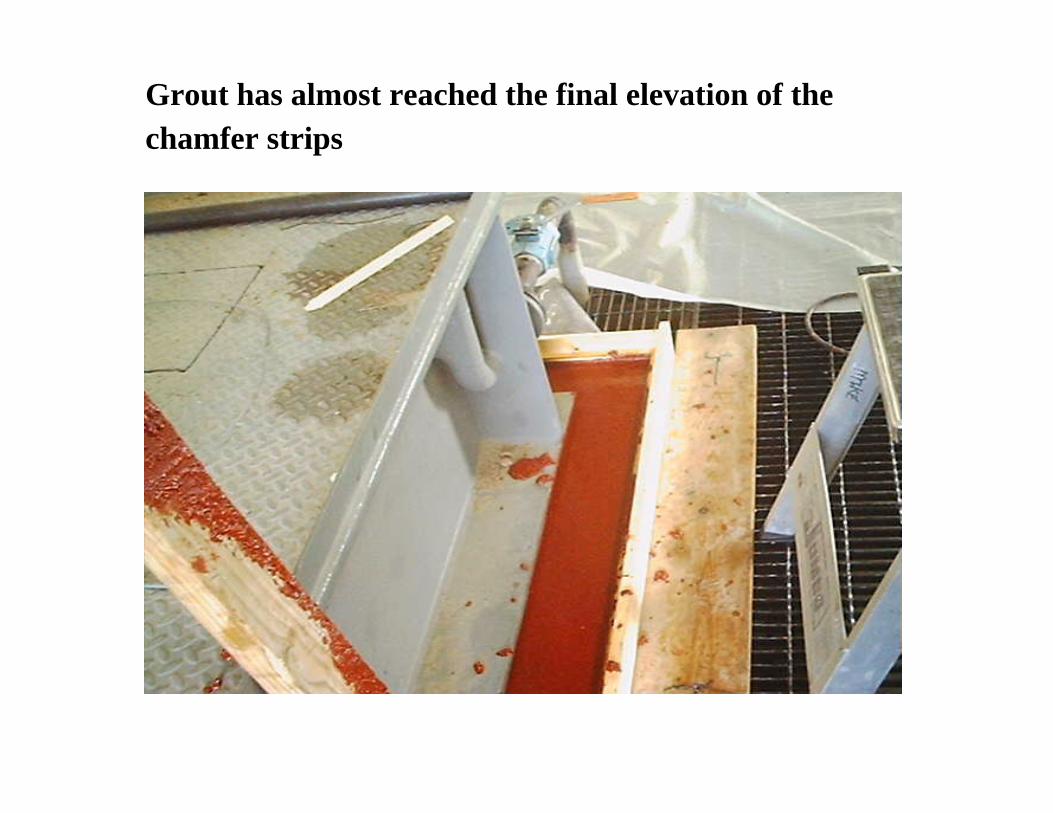
Grout has almost reached the final elevation of the chamfer strips

Clean spillage of grout on base plate & foundation with water, while it is wet. Clean mixers, tools with water after completingthe job
Remove shade, formwork, levelling screws after grout has cured