Embed Size (px)
Citation preview

1
ImageNow™ Client Training Last Updated: November 1, 2014

2
LAUNCHING THE IMAGENOW™ CLIENT SOFTWARE
1. Double click on the ImageNow™ icon on the desktop to display the login screen. Log into ImageNow™ with your Campus
Connection user name and password:
2. Upon authentication, the ImageNow™ toolbar will appear below. Depending on your level of security, items such as
applications, batches and documents (as seen below) will appear:

3
CAPTURING DOCUMENTS INTO IMAGENOW™
ImageNow™ provides three choices for importing documents into system. Depending on the choice selected, you must complete various steps to import a document. Additionally, certain choices are more advantageous than others, depending on your usage intent.
Import from disk
Important Considerations
Use this option when the document/record already exists on a drive (such as the W:\ drive).
When imported from disk, the document/record maintains a “native” file format. For example, if you import an Excel Spreadsheet, the file will remain an Excel Spreadsheet within ImageNow. This will allow you to export a copy of the spreadsheet and edit the contents.
Unless the file is imported as a .TIFF, you will be unable to use annotations on the document.
Scanner
Important Considerations:
All documents/records scanned into ImageNow™ are saved as .TIFF files in the system.
Use this option when the document/record is on paper and you want to import it into ImageNow™.
Use this option if you desire to annotate on the document.
ImageNow™ Printer
Important Considerations
All documents/records printed into ImageNow™ are saved as .TIFF files in the system.
This method can be used to “print” PDF files into ImageNow™ to be saved as individual images.

4
IMPORTING DOCUMENTS INTO IMAGENOW™
1. To import an item from a disk (such as the W:\ drive, a flash drive, etc.), select “Import from disk”, as seen below:
2. Select the applicable page(s) to import into ImageNow™ system and click “ok”:
3. To scan an item, select “scanner”, as seen below. Depending on the make/model of your scanner, a different name than
below may appear. Ensure the document is in the scanner and prepped, including removing all staples, sticky notes and
paper clips:

5
QUALITY ASSURANCE & LINKING DOCUMENTS
1. After importing a document into ImageNow, you must first perform quality assurance. Click on the down arrow for batches
and click, “Ready for QA”, as seen below:
2. The ImageNow Explorer will appear below, displaying all documents in the, “Ready for QA” queue. Double click on the row
which corresponds to the imported document. As a rule, the most recently imported/scanned documents will appear at the
top of the list. If you do not see your batch, click the green refresh arrows:

6
3. Upon clicking a row, the appropriate document will appear as seen below. In this stage, verify the document quality is
acceptable. In this stage, you are verifying the document is visually readable to the degree acceptable to shred the paper
document. Depending on the outcome of the QA, select the appropriate action under “Batch Processing”. If you are
satisfied with the document quality, click “mark page as ok”:
Options in the QA Stage
Mark as OK: This page has met the minimum standards established by the drawer data steward. The image is machine
readable and acceptable for indexing within ImageNow.
Rescan this Page: If the document page must be rescanned, you can place the particular page on the scanner and select this
option. Then, the newly scanned image will replace the existing image.
Delete this Page: This option will completely remove the document page from the batch.

7
4. Next, click on the “Ready for Linking” area to display all documents which are ready for linking to PeopleSoft. Double click
on the appropriate row to display the document:
5. Once the document has opened, launch Campus Connection and search for the appropriate screen as identified during
training. Then, from the “application plan” drop down, select the appropriate plan as identified during training. You may
also click “Link this page” from the Batch Processing panel, assuming the correct application plan is displayed:

8
6. The document keys will now populate. If the keys do not populate, refresh Internet Explorer (by clicking F5 on your
keyboard) and repeat step 5. Be sure to select the document type and enter the document date. If the correct document
type is not found in the list, contact your data steward for assistance. When finished, click “save this page”:

9
ADDING A PAGE TO AN EXISTING DOCUMENT – ADD BY FILE IMPORT
1. If you wish to add a page to an existing document (example: adding an paper document to an existing form), open the
already existing document in ImageNow as seen below:
2. With the existing document open, navigate in the toolbar to File → Capture from Disk:
3. Locate and select the appropriate file(s) and click “ok”:
10
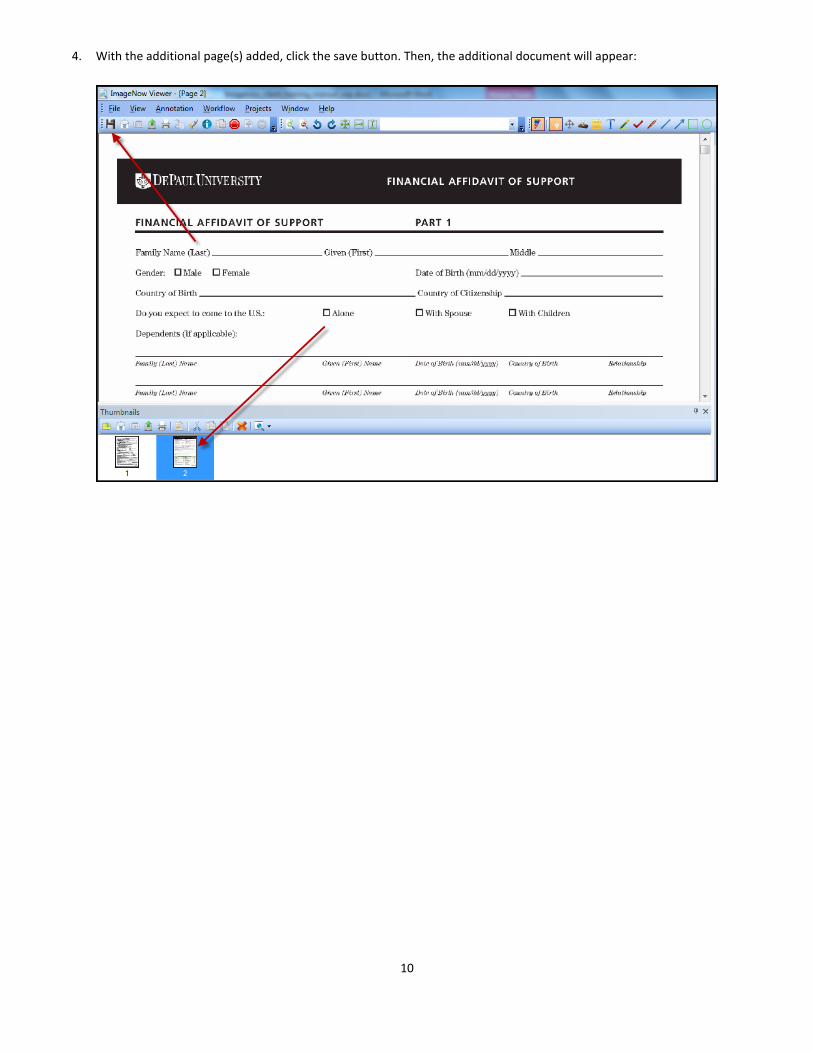
4. With the additional page(s) added, click the save button. Then, the additional document will appear:

11
ADDING A PAGE TO AN EXISTING DOCUMENT – ADD BY SCAN
1. If you wish to add a page to an existing document (example: adding an paper document to an existing form), open the
already existing document in ImageNow as seen below:
2. With the existing document open, navigate to View → Toolbars → Scan to ensure the “Scan” toolbar is enabled. Then, from
the scan toolbar, click the scan icon. When scanned, click save and the document will appear:

12
MERGING DOCUMENTS
If you wish to merge two existing documents into one document type, perform the following functions:
1. Search for the two documents you wish to merge:
2. Select both documents with your mouse, holding down on the shift key. Then, right click with your mouse and select merge, as seen below:
3. ImageNow™ will launch a dialogue box, asking if you wish to continue. Click “yes”:
4. The screen will then refresh, resulting in one document in the search grid.

13
DELETING IMAGENOW™ DOCUMENTS
Given the appropriate permissions, you may delete documents from a record.
1. Search for the appropriate ID number or document:
2. Right click on the appropriate record in the grid. Then, select “delete”:
3. Click “ok” to confirm the deletion:

14
DUPLICATING A DOCUMENT IN IMAGENOW
1. If you have a document which must be duplicated for individuals within ImageNow™ (example: a spreadsheet with ten
employees’ line itemed on the document), you must first scan and link the document to the first employee on the list. In
this example, International Dude was the first employee of ten on the spreadsheet. After linking, locate International
Dude’s document (as seen below), right click on the row and select “copy document”:
2. The “Copy Document” dialogue box will launch. If Todd is the next employee on the spreadsheet, pull up his profile in
Campus Connection (as seen below). In the “Copy Document” screen, select your application plan from the list. Then, click
link. After linking, Todd’s information will display as seen below. When complete, click ok.
3. Search for Todd’s new document. It should be exactly the same as International Dude’s document. If you have more people
on the invoice, continue steps one and two as described above until each student has a copy of the document under his/her
EmplID.
15
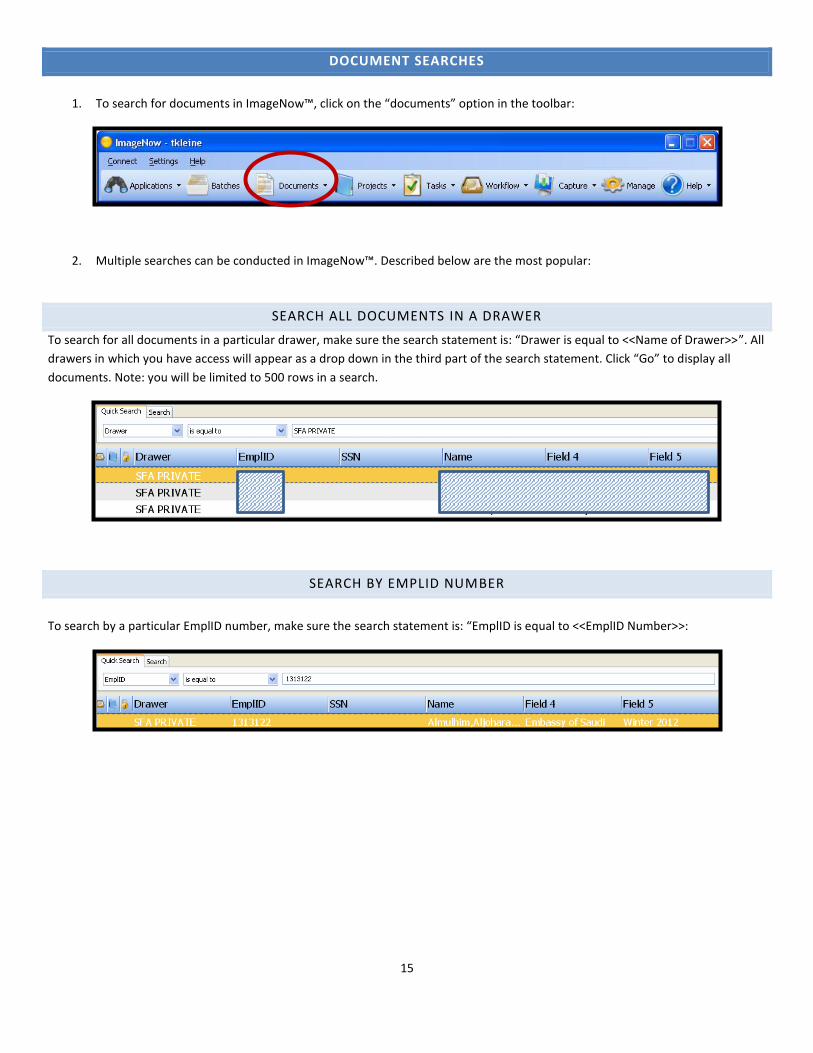
DOCUMENT SEARCHES
1. To search for documents in ImageNow™, click on the “documents” option in the toolbar:
2. Multiple searches can be conducted in ImageNow™. Described below are the most popular:
SEARCH ALL DOCUMENTS IN A DRAWER
To search for all documents in a particular drawer, make sure the search statement is: “Drawer is equal to <<Name of Drawer>>”. All
drawers in which you have access will appear as a drop down in the third part of the search statement. Click “Go” to display all
documents. Note: you will be limited to 500 rows in a search.
SEARCH BY EMPLID NUMBER
To search by a particular EmplID number, make sure the search statement is: “EmplID is equal to <<EmplID Number>>:
16
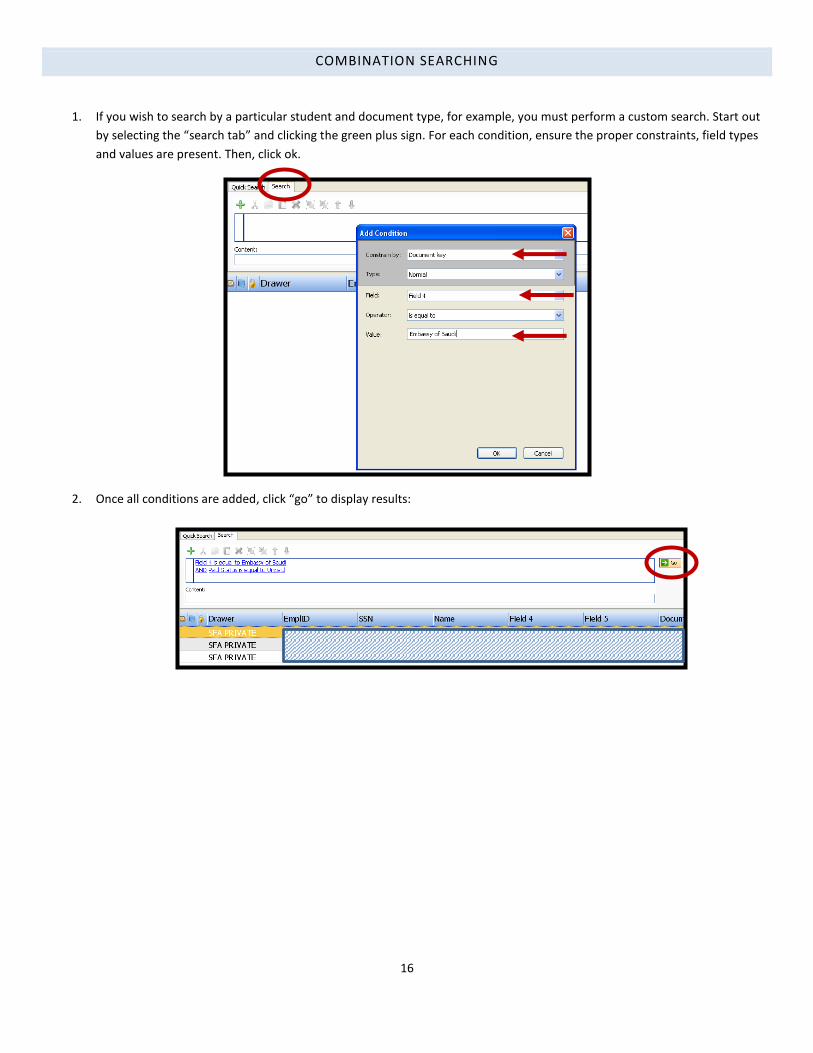
COMBINATION SEARCHING
1. If you wish to search by a particular student and document type, for example, you must perform a custom search. Start out
by selecting the “search tab” and clicking the green plus sign. For each condition, ensure the proper constraints, field types
and values are present. Then, click ok.
2. Once all conditions are added, click “go” to display results:

17
EXPORTING DOCUMENTS FROM IMAGENOW
If you wish to export documents from ImageNow™, retaining the original image in the database, perform the following steps:
1. With the document open in the ImageNow™ Viewer, select “File” then “Export…:”
2. From the “Export” Dialogue box, select the file format. Also, select the file name and location. Additionally, select the pages
to export and if you wish to include annotations. When finished, select “OK:”