Embed Size (px)
Citation preview

VRC Extension Ideas VEMA Conference October 29, 2010
Janice Raspen
*reprinted here with the author’s permission.
I Ain’t Gonna Paint No More by Karen Beaumont
1. Writing lesson created by *Corbett Harrison on www.writingfix.com :
Pre-Step (before sharing the published model): There are many renditions of the song "It Ain't Gonna Rain No More" available for download at iTunes. Several Disney children's albums feature this song, but there are also some very interesting blues and country renditions to share with your students.
Step one (sharing the published model): Karen Beaumont has cleverly adapted the old song, “It Ain’t Gonna Rain No More,” in her book, I Ain’t Gonna Paint No More! David Catrow uses his witty and crazily colored illustrations to visually enhance the story of the little boy who paints his whole body while introducing a series of hilarious rhyming couplets. While this book is specifically targeted at pre-school to kindergartners, all ages will enjoy the song, the illustrations, and the last slightly naughty innuendo in rhyme. Teachers are going to want to read and sing “I Ain’t Gonna Paint No More” several times with their students prior to attempting the writing activity. The uniquely colorful illustrations serve to tell the story as humorously as the text does and students will want to pour over them time and time again.
Teachers of younger students should stress, during oral readings, how the words, the rhyming scheme, the punctuation and the illustrations let us hear so clearly the voice of the main character as he goes about doing exactly what his mother doesn’t want him to do. These initial readings and discussions can flow naturally into some whole class sharing about things all of us have to do, want to do or don’t want to do.
Step two (introducing models of writing): In small groups, have your students read and respond to any or all of the student models that come with this lesson. The groups will certainly talk about the sentence fluency, since that's the focus of this lesson, but you might prompt your students to talk about each model's word choice as well.

VRC Extension Ideas VEMA Conference October 29, 2010
Janice Raspen
*reprinted here with the author’s permission.
Step three (thinking and pre-writing): For students' internal rhymes to match the rhythm, students will have to use words that rhyme with helping verbs (auxiliaries). The worksheet below will help them brainstorm these types of words. Have student groups brainstorm as many words as they can on this sheet; it will give them more options for their own attempts at writing.
Once the first line is crafted to nicely fit the rhythm of the original song, the second and fourth lines are pretty much created too. The next trick is to create the third line, which will require some more rhyming and word experimentation. The interactive button game on the Student Instructions Page might give your students some ideas for writing the third line of their stanzas, so might the website Rhymezone, but so might just a good discussion with a partner or writing buddy.
Rhyme and rhythm are not easy for many developing writers. Some of your students will quickly finish a four-line stanza, and they should be encouraged to create more of the same. A page in a Writer's Notebook that is devoted to stanzas that can be sung to this tune might be something you encourage these students to set aside.
A brainstorming and rhyming worksheet
Step four (revising with specific trait language): Two tools for revision are provided below. You can use one or both, depending on how much time you have to spend on this assignment.
To promote response and revision to rough draft writing, attach WritingFix's Revision and Response Post-Its to your students' drafts. Make sure the students rank their use of the trait-specific skills on the Post-Its, which means they'll only have one "1" and one "5." Have them commit to ideas for revision based on their Post-It rankings. For more ideas on WritingFix's Revision & Response Post-Its, click here.
Sheet of 6 Sentence Fluency Post-It Notes Sheet of 6 Word Choice Post-It Note
Step five (editing for conventions): After students apply their revision ideas to their drafts and re-write neatly, require them to find an editor. If you've established a "Community of Editors" among your students, have each student exchange his/her paper with multiple peers. With yellow high-lighters in hand, each peer reads for and highlights suspected errors for just one item from the Editing Post-it. The "Community of Editors" idea is just one of dozens and dozens of inspiring ideas that is talked about in detail in the Northern Nevada Writing Project's Going Deep with 6 Trait Language Workbook for Teachers.

VRC Extension Ideas VEMA Conference October 29, 2010
Janice Raspen
*reprinted here with the author’s permission.
2. Painting activity from a teacher’s webpage from the Omaha Public Schools.
This lesson was just plain fun! The students were reciting the main character’s line, “I ain’t gonna paint no more, no more. I ain’t gonna paint no more!” over and over again. We made a connection between literature and art by looking at people around the world who make marks on their body on purpose. First we considered our own “lick’em and stick’em” washable tattoos. Next we looked the henna painting of Sudanese people (it washes off after a few months) and the permanent tattoos with which people around the country are covering themselves. Finally, we compared these styles to the Moko’s of the New Zealand aboriginal people called the Maori. A Moko is a prestigious facial tattoo. For our lesson, the students painted on their “skin.” We started by tracing our hands, then we used a pencil to draw doodles, and added some color with crayons. Next we painted our paper hands and while we were waiting for them to dry we prepared our mounts and added colorful patterns and doodles to those papers as well. To finish we cut out our hands and attached them. 3. Ask your children to "retell" the story by changing the title to something they have gotten in trouble for doing - I Ain't Gonna _______ No More! Use the words/format of the book as a template, changing words when necessary to make sense with the new title. 4. As a class, make a list of the body parts the child in the book paints. Choose one body part and ask the students to think of other words that rhyme with that body part (ex. Head, bed, fed, read, thread, bread, etc.). Explain to the students that in small groups they are going to trace a child—another idea
Step six (publishing for the portfolio): After revising, invite your students to come back to this piece once more during an upcoming writer's workshop block. The writing started with this lesson might become even more polished for final placement in the portfolio, or the big ideas being written about here might transform into a completely different piece of writing. Most likely, your students will enjoy creating an illustration for this writing as they ready to place final drafts in their portfolios.

VRC Extension Ideas VEMA Conference October 29, 2010
Janice Raspen
*reprinted here with the author’s permission.
is to use the blackline drawing of a body that’s included below, pick a body part to paint, and write rhyming words all around their painting. Demonstrate how the students will trace one student in their group onto bulletin board paper, write “Gonna paint my______” on the top of their paper in large letters, filling in the blank with their group’s body part; as a group, take turns writing words that rhyme with that body part on the white space outside the student’s outline. They should have at least five and can have more. They should use their student dictionaries to help find spellings for unknown words; paint that body part on their picture using patterns, shapes, and other designs; when finished, write more rhyming words until other groups have also finished. Have students share their posters, and hang them in the hallway with the book’s title above. 5. Rhyming matching game: Print the activity cards on cardstock and make enough copies for students to work in pairs or small groups. This activity works well as a literacy station or for those students not yet reading, as it contains both words and pictures. A hint is to print the activity on different colored sheets of cardstock, and then to switch out the two strips of ‘body parts’ in a complementary color—it was easier and faster for the children to separate out the body parts if they were printed on a different color. 6. If your school subscribes to Music K-8 magazine, the song “It Ain’t Gonna Rain No More” is included in the March/April 1999 edition (Vol. 9, Number 4). We have both the CD and sheet music with our subscription.

This overhead was designed to accompany one of WritingFix’s on-line, interactive writing prompts.
©2006 Northern Nevada Writing Project. All rights reserved. This resource comes from the best website for writers and writing teachers: http//writingfix.com and http://writingfix.org
Use of this document in the classroom is encouraged and supported. Others must request permission from the website to reproduce.
It ain't gonna rain no more no more. It ain't gonna rain no more. How in the heck can I wash my neck If it ain't gonna rain no more?
In her picture book, Karen Beaumont takes this traditional campfire song and adds another rhyme to it. It’s kind of more fun her way because you get to say the poem with a rhyme in the first line as well as the third. Listen to her rhymes again, if you missed that the first time you heard the book.
I ain’t gonna paint no more no more… What Karen Beaumont does is add an internal rhyme to the first line of her poem. Why do you suppose it’s called internal rhyme? Talk to your neighbor. Students are often inspired to write their own versions of this simple song. Many of them like to do what Karen Beaumont did, by using internal rhymes in the first and the third line of the poem. Two internal rhymes makes it more fun to say!
I can’t eat a plant if it’s green if it’s green. I can’t eat a plant if it’s green. I’d rather eat bark from the tree in the park. I can’t eat a plant if it’s green. --by Stefanie, age 9
Josh’s poem actually has a bonus internal rhyme. Can you find the one that’s not underlined?
I did fight the kid with the horn in the morn. I did fight the kid with the horn. He thought he was rad but he played it so badThat I did fight the kid with the horn. --by Josh, age 14
Today, you’ll be writing your own version of this type of poem. How many internal rhymes can you use? How many different 4-line poems can you
write today during writing time? Which will be your favorite?

head
bed
bread
neck
check
Shrek
deck
chest
nest
vest
rest
arm
farm
alarm
charm
thread

hand
band
sand
rubber band
back
tack
track
backpack
leg
beg
egg
peg
feet
meat
cleat
wheat


VRC Extensions VEMA Conference October 29, 2010
Janice Raspen
*Reprinted here with the author’s permission.
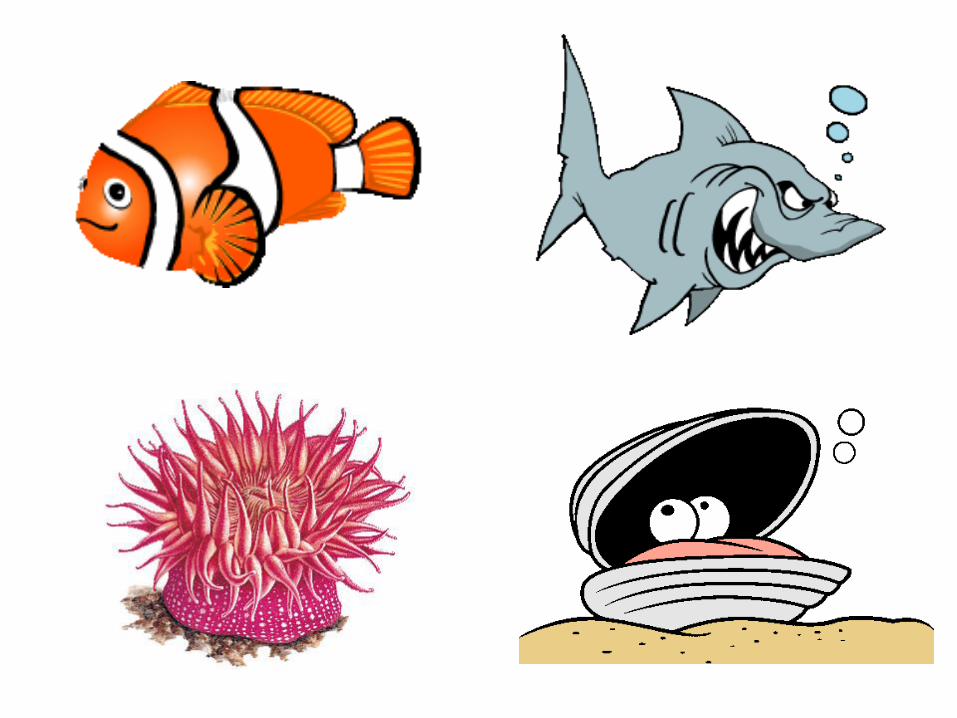
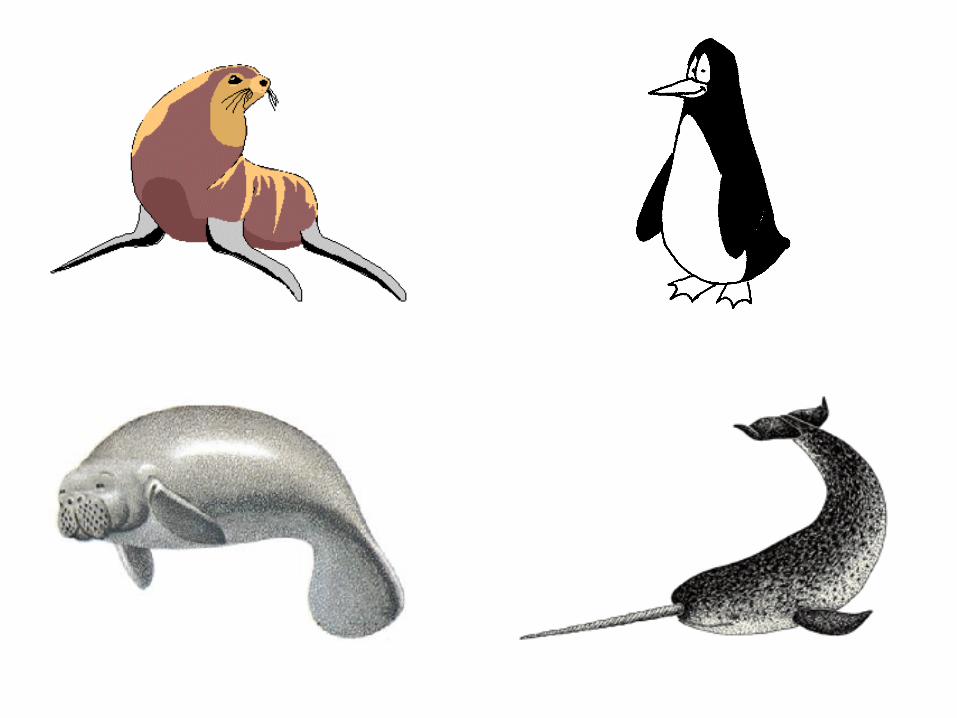
I’m the Biggest Thing in the Ocean by Kevin Sherry
1. Check out this very funny (about four minutes long) video on youtube. It’s Salt Lake City’s public library’s rendition of the book using puppets and shadow puppets. http://www.youtube.com/watch?v=M3ylcwm0xR8 2. Here’s another cute clip from youtube (about 1 ½ minutes long). It’s an animated version of the book. http://www.youtube.com/watch?v=EjsLgzyuP1o&feature=related
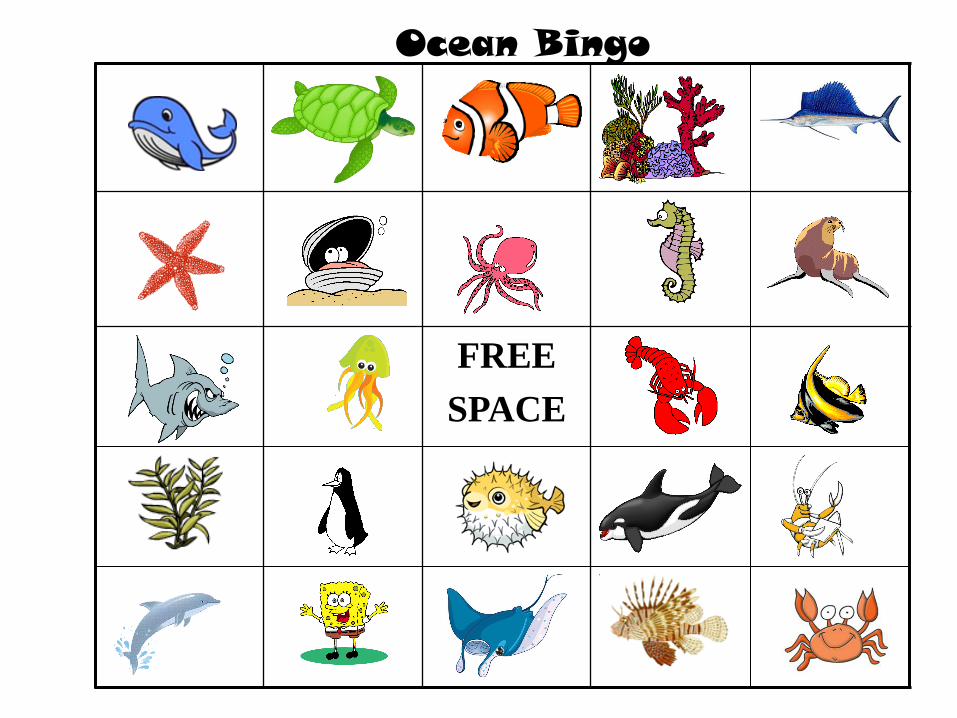
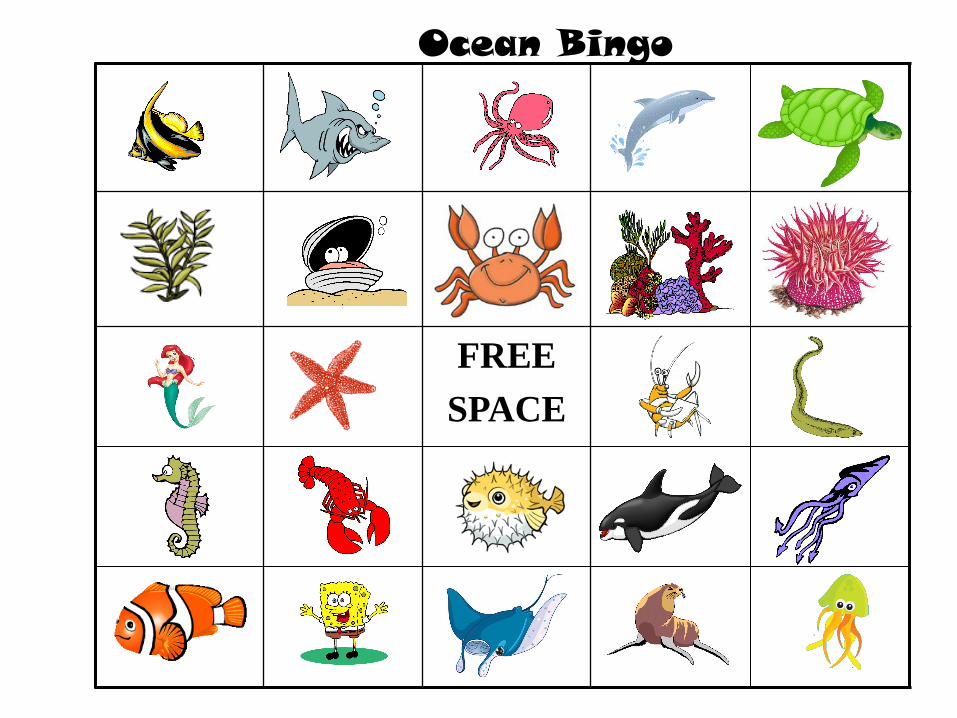
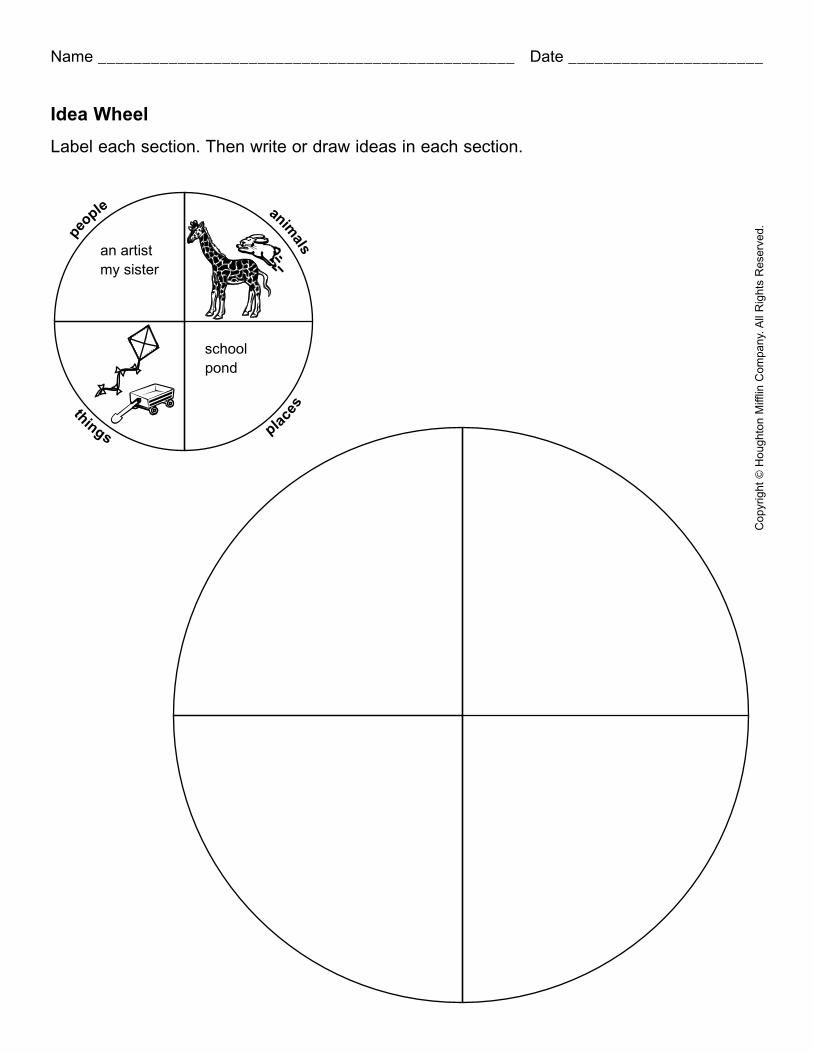
3. Word Choice Mini-lesson—from Anastasia Suen’s blog: http://6traits.wordpress.com Ask students to write their own “big creature” story. Use the *Idea Wheel graphic organizer to make a list of other creatures that are smaller than the one they selected. 4. Flannel Board patterns from www.kizclub.com are below. I just printed them and attached a popsicle stick for students to hold them during a dramatic performance of the book (as I read). 5. *How Big is a Whale lesson plan from Angela Hopkins (Stafford County Public Schools) is in the folder for this book. The two pictures below show you the whale she created in her library. 6. Create a Giant Squid puzzle (*How Big Really is a squid?) for students to put together. This lesson is from Carol Hugar (Stafford County Public Schools). I made the squid as a floor puzzle and also as a table puzzle. I colored and copied the full puzzle picture to have at the tables and at the floor for those putting these together. After trying this with first and second graders, I made an L-shaped grid label to act as a frame for our squid, and then I labeled each of the squares A-1, A-2, A-3, etc. This helped us put the puzzle together and also added a math component to the lesson. 7. Play *ocean bingo with your students after discussing the book and ocean habitats. This lesson is from Brenda Love (Stafford County Public Schools). 8. The lesson called “I’m the Biggest Thing in the Classroom” was developed by students at Nipissing University. It is quite detailed and includes an interesting math (measurement) activity.

How Big is a Whale
SOL:
1.12 The student will use nonstandard units to measure length and weight.
2.13 The student, given grid paper, will estimate and then count the number of square
units needed to cover a given surface in order to determine area.
Materials:
100 feet of rope or twine
Markers or crayons
Paper
A long hallway or wall
Paper plates
Procedures:
1. Before starting the lesson, the teacher should cut the shape of a whale’s head and
the shape of a whale’s tail out of chart paper. Make them as life-sized as possible.
2. Break the students into two groups and assign them to either the head or tail for
the whale.
3. Ask each group to draw eyes, scales, etc. onto the paper whale’s head or tail using
the crayons or markers.
4. Mount the head at one end of the hallway and ask one student to stand next to it
holding the end of the rope.
5. Have a different student unravel the twine all the way to the end and mount the
tail on the wall at that spot.
6. Once the students see how long a blue whale is, ask them to predict how many
children it would take, stretched end-to-end, to fill the length of a blue whale.
7. Have students write down their predictions on a piece of paper.
8. Using strips of adding machine tape, measure each child’s height and give each
student their strip of paper.
9. Ask the students to write their name on their own strip of paper
10. Tape the strips end-to-end on the wall between the whale’s head and tail. Have
students count how many strips it takes to make up the length of the whale.
11. See which students came closest to predicting correctly.
12. Now ask students to predict how many paper plates would make up the size of the
whale and repeat the activity.
13. As a culminating activity, have a discussion about size, using comparing and
contrasting to help students understand the enormous size of a whale. Ask the
students if they think a whale would fit in their house or car. Ask students what
else they think might be as big as a whale. Lesson created by Angela Hopkins, SCPS


VARC: I’m the Biggest Thing in the Ocean How BIG really is a squid?
Grade Level: K, 1st, 2nd Book: I’m the Biggest Thing in the Ocean by Kevin Sherry Objective: After reading the book, students will put together a giant squid puzzle and then measure the squid to determine how big really is a squid. SOL Correlation: Eng. K.1, K.2, 1.1, 1.2, 2.2, 2.3 Math K.8, 1.12, 2.12 Schedule: One 45 minute class plus time for check out. Materials Needed: I’m the Biggest Thing in the Ocean by Kevin Sherry, Giant Squid Puzzle, rulers or nonstandard units for measurement. Lesson: Pre-Reading Activity: Show book cover and ask students if they know what kind of animal is on the cover (octopus, squid). Continue the discussion by asking them if their guesses agree with what they think or know to be the biggest animal in the ocean (whale). Have them guess the size of the cover animal and/or size of a whale. Read: I’m the Biggest Thing in the Ocean After reading discussion: Was the squid the biggest? Who was the biggest? Which pre-reading predictions were correct? Is the squid still the biggest in his mind? How? Are squids still big? After-Reading Activity: Tell kids that they will measure a squid to find out just how big they really are. Then we’ll discuss if we think squids are big, small, the biggest, etc. Take turns coming up with comparisons: a squid is bigger than me but smaller than a whale, etc. In the library, I would split kids into two groups—squid and check-out groups. Squid group will arrange puzzle pieces and then measure the squid; check out group chooses books and reads them until time to switch. Related books: Display other ocean animal books (especially by Steve Jenkins) and Actual Size books. Squid Grid: To make my giant squid puzzle, I used a scale of one block equals one foot. I used different colored poster paper. If you don’t want to make a giant puzzle, you could make table-sized ones using the poster maker machine. My squid is actually little—depending on where you research, giant squid can grow to be over 50 feet long!
Lesson reprinted with permission from Carol Hugar


1. Lesson Plan Information Subject/Course: Mathematics Name: Kim Oxley & Crystal Archambault Grade Level: 1 Date: TBA Topic: Measurement Time and Length of Period: 60 minutes 2. Expectation(s) and Learning Skills The students will:
• Compare two or three objects using measurable attributes (e.g., length, height, width,
area, temperature, mass, capacity), and describe the objects using relative terms (e.g., taller, heavier, faster, bigger, warmer; "If I put an eraser, a pencil, and a metre stick beside each other, I can see that the eraser is shortest and the metre stick is longest.");
Today, students will:
• Explore the concept of size by identifying and classifying objects as either larger or smaller.
3. Pre-assessment A. (i) Students
• Will require some abilities in printing (ii) Differentiation of content, process, and/or product (may be accommodations and/or modifications)
• Students who are unable to print the words on their own will be provided with a sheet that
has the words ready to be cut out and pasted in the proper location on the worksheet (see attached sheet).
B. Learning Environment
• Group learning will take place on the carpet • Students will work in small groups (4-5 students per group) at their desks
C. Resources/Materials
• Book “I’m the Biggest Thing in the Ocean” by Kevin Sherry • A mixture of large and small objects • Two containers each large enough to hold the objects to be sorted • 20 copies of the “I am the biggest thing in the classroom!” sheet • Copies of the accommodation sheet • Copies of the marking checklist • Chart Paper
Direct Instruction Planning Format 2008-2009
1

4. Content (The What) Teaching/Learning Strategies (The How) (Time: 5 minutes) A. Introduction (motivational steps/hook/activation of students’ prior knowledge)
• Start lesson with the ‘guess my rule’ sorting game. o Teacher will hold up objects one at a time and place them in a container based
on their size. E.g., large objects are placed in one container and small objects are placed in another.
o As the teacher is placing the objects into the containers, students are asked to determine what sorting rule is being used.
o Students are to raise their hand if they feel they have determined the rule. o The teacher will call on students who are sitting appropriately to share their
guess. o Once the students have determined the correct rule, have the class assist in
sorting the remaining objects.
(Time: 10 minutes) B. Content for New Learning 1. Brainstorm alternate
vocabulary for the adjectives large and small
a. Big b. Huge c. Giant d. Enormous e. Little f. Small g. Tiny h. Miniature
2. Introduce story
Title: I’m the Biggest Thing in the Ocean” Author: Kevin Sherry
B. Teaching/Learning Strategies for New Learning 1. Key Question – What are some other adjectives
(describing words) that we could use instead of large or small? Inform the students that there are many ways to describe objects that are big and small. As a class we have come up with a list of different words that we can use instead of big and small.
2. Have the students make predictions based on the coverKey Question – What do you think this story is about? Key Question – What sea creature do you think will be the biggest in the ocean? Key Question – What sea creature do you think will be the smallest thing in the ocean? Read the book. As the book is being read the teacher will ask the following; Page 3: Ask the students if they agree that the squid is bigger than the shrimp. Page 5: Ask the students if they agree that the squid is bigger than the mussels. Page 8: Before reading this page, ask the students; which sea creature is bigger, the squid or the crab? Page 16: Ask the students; do you think that the squid is a lot bigger than the shark or just a little bit bigger? Page 19: Ask the students, is the squid really the biggest thing in the ocean? Or can you think of
2

something larger? Page 21: Was he the biggest thing in the ocean?
5. Consolidation/Recapitulation Questions (Check for understanding/scaffolded practice) (Time: 10 minutes)
• With the objects that were used in the introductory sorting activity, call one student at a time and ask them to choose two objects, have them describe the objects using the new adjectives we brainstormed together.
• As a class, brainstorm a list of objects that can be found in the classroom that are large and small. (The teacher will make a list on chart paper or board)
6. Application (Moving from guided, scaffolded practice to increasingly
independent practice and understanding / gradual release of responsibility) (Time: 25 minutes) Complete worksheet
• Show the students the worksheet and explain the following: o Instruct the students to choose two of the brainstormed objects or other objects in
the class that they would like to use. o The paper will be divided in half; the students will draw a picture of a large object
of their choice on one side and a small object of their choice on the other. o The student is to then to complete the sentence found under each picture. (i.e.,
The ________ is ________.). Students will refer to the list of adjectives and objects found on the board to complete their sentences.
7. Lesson Conclusion (Time: 10 minutes)
• Have students return to the carpet with their work. • Ask the following question to the students:
o Who thinks they have drawn the smallest object in our classroom? - select a student and have them come up to the front to share what they have drawn.
o Who feels that they have drawn a smaller object? - have them come up and share what they have drawn.
o Who thinks they have drawn the largest object in our classroom? - select a student and have them share what they have drawn
o Who feels that they have drawn a larger object? - have them come up and share what they have drawn.
• Continue this process until the group has found the smallest and largest objects drawn from the classroom
8. Assessment (collection of data) / Evaluation (interpretation of data)
• The teacher will walk around the room during the application to observe the students and ensure that they stay on task.
• A checklist with brief anecdotal notes will be used to assess the students’ work (see attached checklist)
3

Note to teacher: Use this aid to write down the brainstormed words for the student is experiencing difficulties printing on their own

Checklist and Anecdotal Comments for Measurement Lesson Date:________________
Student Name
Filled in sentence correctly using
appropriate words from the brainstormed list or
created their own
Chose appropriate objects to compare (either used objects
from brainstormed list or created their own)
Completed drawings
appropriately to illustrate the
objects chosen
Anecdotal Notes

Children’s Literature and Mathematics
Assignment #3
Students: Kim Oxley & Crystal Archambault
Course: Mathematics Education EDUC 4274
Professor: Dr. Daniel Jarvis
Date Due: January 21st, 2009

“I’m the Biggest Thing in the Ocean”
1. Summary of the book ‐ Title: I’m the Biggest Thing in The Ocean” By Kevin Sherry ‐ ISBN: 978-0803731929 ‐ Summary: A fun educational story about a giant blue squid who swims through the
ocean proclaiming that he is ‘the biggest thing in the ocean.” Along the way he meets many different sea creatures of various shapes and continues to believe and say that he is ‘the biggest thing in the ocean.” At one point in the story the giant blue squid encounters a large whale by which he is eaten. Once inside he finds out that he is not the biggest thing in the ocean but exclaims “I’m the biggest thing in this whale!”
2. Critique of the book ‐ Accuracy
Score: 4.5 Justification: The mathematical concepts in this book are not overly apparent, however, the relationship between big and small objects is presented in a clear and accurate way. The comparison between the squid and all other sea creatures are visually presented in an accurate way. For example, the squid is drawn larger than the crab. The text in the book also reflects the meaning of the word. For example, the words ‘giant’ and ‘biggest’ are capitalized and made larger than the other words in the text. We did not award this category a score of six due to the fact that it only focused on sea creatures that were smaller than the squid, with the exception of the whale. Our point being, the words small, little, etc. are not used in the book.
‐ Visual and Verbal Appeal Score: 6 Justification: The pictures are bright and fun. The pictures are also tied very closely to the text. The pictures are engaging and motivate the reader to continue reading the story. The pages are not cluttered with unnecessary detail and the text flows nicely with the pictures. The pictures are shown in a way that helps the story to flow but at the same time keeps the reader in suspense.
‐ Connections Score: 5.5 Justification: This book has strong connections between children and the real world. The deep sea theme is very relatable to children and easily gains their interest. It also demonstrates that the mathematical concept can be applied to anything in a child’s world. i.e., they can compare the concept of big and small to objects found in the classroom.

‐ Audience Score: 3 Justification: Although this book can be entertaining for all ages, the concept presented is more directed at a younger audience. This book strictly presents only one concept and does not allow for further discussion for older grades. However, this book could also be used to discuss the opposite of big, small.
‐ “Wow” factor Score: 4 Justification: Although this book does not necessarily present students with the “Wow” factor, there are points in the story which may produce aspects of it. For example, there is a flip-out page in the story which grabs the students’ attention. The students are also left in wonderment for three sets of pages as the giant squid is being eaten by the whale.
3. Overall Impression and rating of the book Score: 4.5 Justification: Overall we feel that this is a fun and educational book to use when teaching young students the measurement concept of big and small. The theme of deep sea creatures is enjoyable to both children and adults alike. The bright and colorful pictures are appealing and tied in closely with the text. It is of our opinion that this book is an excellent resource to any teacher who uses it.
4. Self-Assessment Mark: 19 Justification: We feel that our Children’s Literature and Mathematics assignment was thoroughly completed. Our questions included a variety of levels to give every student an opportunity to express their thoughts and feelings. The questions also related back to the mathematical concept. The writing in our report and lesson plan is clear and concise. The lesson plan is easy for teachers to follow and incorporate in the classroom. Our book critique was closely tied into Hellwig’s five categories. Each category was discussed individually and in-depth.

I’m the Biggest Thing in the Ocean
Grade Level: 1 and 2
SOL: Reading 1.9 and 2.8: Read and demonstrate the comprehension of fiction
Reading 1.7 and 2.5: Use meaning clues and language structure to expand vocabulary
Oral Language 1.2 and 2.2: Expand listening and speaking vocabularies
Science 1.5: Understand animals have life needs, certain physical characteristics, and can be
classified according to certain characteristics.
Science 2.5: Understand living things are part of a system
Objectives: Students will:
1. Identify different animals that live in the ocean
2. View pictures of a giant squid in a nonfiction book and discuss interesting facts about it, including
size, diet, habitat, invertebrate classification
3. Listen to the book I’m the Biggest Thing in the Ocean by Kevin Sherry
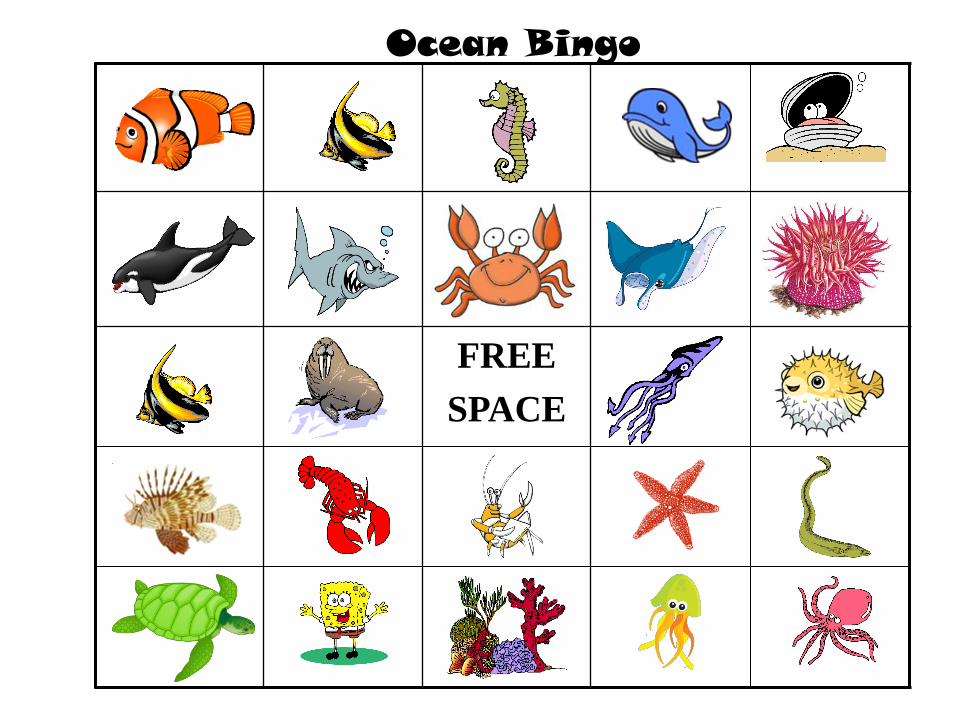
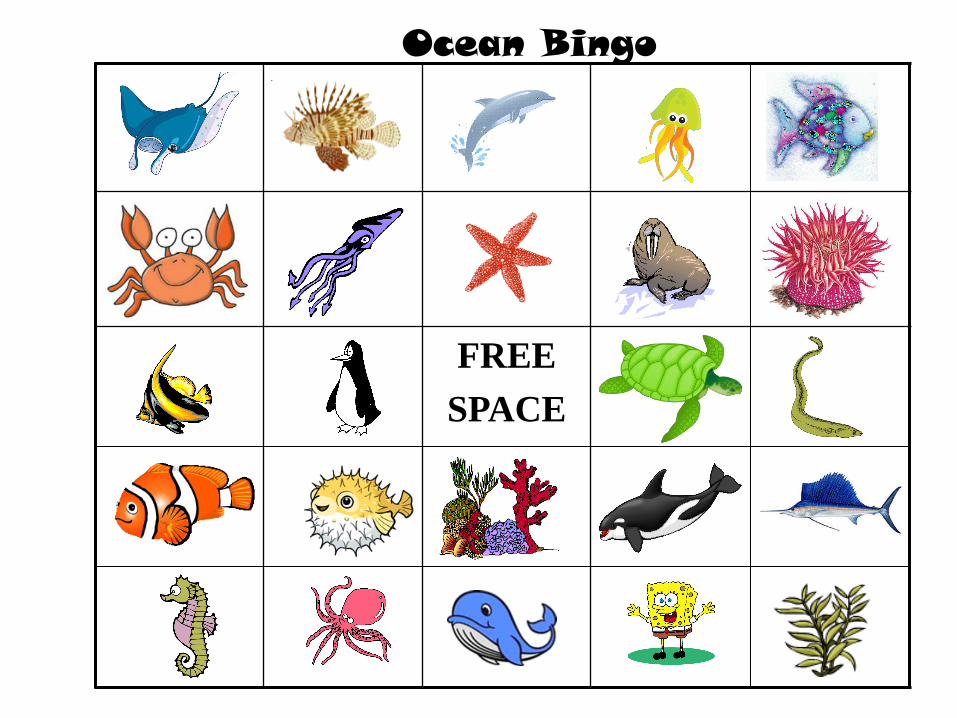
4. Identify animals that are part of the Ocean Bingo game
5. Play Ocean Bingo
Materials: I’m the Biggest Thing in the Ocean by Kevin Sherry, Nonfiction books on giant squid
Ocean Bingo player cards and caller cards, markers
Learning Activities:
1. Pre-reading activity:
-Ask students to name different animals that live in the ocean. Also, identify some book character
that live in the ocean.
-Show pictures of a giant squid in a nonfiction book. Tell interesting facts about its size, diet, habitat,
and explain why it is an invertebrate.
2. Read the book to the class.
5. Post reading activities:
-Ask students which other animal in the story was most like the squid? Why?
-Ask what is the largest animal that is known to have ever lived on earth? Compare size of blue whale
to giant squid.
-Show Ocean Bingo game card to students and explain game rules.
-Show larger pictures of each animal in the game using the caller cards and have students help name the
animals.
Ask which animals do not live in the water all of the time.
Ask which are book or movie characters.
Play the Ocean Bingo game. Lesson by Brenda Love, Stafford County Public Schools

FREE
SPACE
Ocean Bingo

FREE
SPACE
Ocean Bingo


by KIZCLUB.COM. All rights reserved.Copyright C
I’m The Biggest Thing In The Ocean

by KIZCLUB.COM. All rights reserved.Copyright C

by KIZCLUB.COM. All rights reserved.Copyright C

by KIZCLUB.COM. All rights reserved. Copyright C

by KIZCLUB.COM. All rights reserved. Copyright C
by KIZCLUB.COM. All rights reserved.Copyright C
GLUE
Name _______________________________________________ Date ______________________
Idea Wheel
Label each section. Then write or draw ideas in each section.
an artistmy sister
schoolpond
pla
ces
animals
pe
ople
things
Cop
yrig
ht ©
Hou
ghto
n M
ifflin
Com
pany
. All
Rig
hts
Res
erve
d.

VRC Extensions VEMA Conference
October 29-2010 Janice Raspen
*reprinted here with the author’s permission.
Katie Loves the Kittens by John Himmelman
From the North Carolina Children’s Book Awards Packet: Discussion questions:
Who has pets? Do you have more than one type of pet? Do they get along?
Why were the kittens afraid of Katie?
What did Katie do so the kittens wouldn’t be afraid?
Do you think Katie will scare the kittens again? Why or why not? Internet sites:
Author’s web site: www.johnhimmelman.com
Youtube video of the author discussing the artwork for Katie Loves the Kittens: http://www.youtube.com/watch?v=jQdD9h5D4_E&feature=related
Language Arts
Katie has a hard time controlling herself when she gets excited. List different ways to calm down or control yourself when excited or agitated.
Write a letter to Katie suggesting how she should behave to make friends with the kittens. It could be written from either Katie’s point of view, or the kittens’.
Science/Math
Poll students to see what kind of pets and how many of each they have. As a group, create and display a bar graph.
Choose a pet to research. Find out the following: diet, life expectancy, lives inside or outside, type of bedding they need, health care needs, etc.
Creative arts
Partner with an art teacher or local artist to explore the illustrator’s method of drawing lines around a still picture to depict movement as done with Katie’s tail and in one scene, her entire body. Have children draw their own pictures, using lines to show movement.
Katie experiences many emotions throughout the story. Make a different sign for each emotion (happy, sad, excited). While listening to the story, children hold up the appropriate sign.
Each student silently picks their favorite pet. On cue, students begin acting out the behavior of their pet, finding others who are acting out the same type of pet.
Make stick puppets of Katie and the three kittens. Now that they are friends, role-play various fun activities they can do together.
Katie controlled her movement to make friends with the kittens. Play the game “freeze.”
Children move about freely while music plays until leader calls out “freeze” and children must hold whatever position they are in until the music begins again.

VRC Extensions VEMA Conference
October 29-2010 Janice Raspen
*reprinted here with the author’s permission.
A fun lesson from *Brenda Love, librarian at Park Ridge Elementary in Stafford County, is included on the CD. She created a baby animal memory game for students to play.

Katie Loves the Kittens
Lesson plan from Brenda Love
Grade Level: 1 and 2
SOL: Reading 1.9 and 2.8: Read and demonstrate the comprehension of fiction
Reading 1.7 and 2.5: Use meaning clues and language structure to expand vocabulary
Oral Language 1.2 and 2.2: Expand listening and speaking vocabularies
Objectives: Students will:
1 Listen to the book Katie Loves the Kittens by John Himmelman
2. Identify how the feelings of the characters changed throughout the story
3. Identify the names of the young of different animals and play a memory matching card games using
those names
Materials: Katie Loves the Kittens by John Himmelman, Nonfiction animal books,
Memory Card Game of Young Animal Names
Learning Activities:
1. Pre-reading activity:
-Hold up front cover of book and ask students to predict what story may be about.
-Tell class to listen carefully to how the main characters (Katie, Sara Ann and kittens) feelings
Change throughout the story.
2. Read the book Katie Loves the Kittens to the class.
5. Post reading activities:
-Ask class how did the characters’ feelings change throughout the story.
-Ask students what is a kitten? Then ask if they know that a baby skunk or squirrel can also be called a
kitten.
-Show pictures of these baby animals and explain that they are all called calves: buffalo, camel, cow,
dolphin, elk, elephant, giraffe, hippopotamus, moose, ox, rhinoceros, reindeer, and whale.
-Show pictures of these baby animals and ask students to guess what they are called: armadillo, bat,
beaver, gerbil, guinea pig, mole, otter, prairie dog, rat, seal and wolf They are all called pups.
-Explain that students will play a memory card game at their tables which tests their knowledge of
baby animal names. Show each of the baby animal pictures in the card game and the name for each
baby. You can let students guess the names before you hold up the name cards.
-Students play memory card game at their tables in groups of four. All cards are placed face down on the
table and each student turns over 2 cards during his/her turn to try to match the animal baby picture to
its name.


KITTEN KIT PIGLET

DUCKLING CUB FAWN
TADPOLE KID CALF

BUNNY JOEY CHICK
ANTLING FOAL PUP

VRC Extensions VEMA Conference October 29, 2010
Janice Raspen
Lady Liberty: a Biography by Doreen Rappaport
A teacher’s guide from the publisher’s website, Candlewick Press: http://www.candlewick.com/book_files/0763625302.btg.1.pdf In this intensive lesson from a teacher in Nevada, Christy Hodge, students learn about primary resources and the symbolism in the Statue of Liberty: http://www.writingfix.com/WAC/HistoryFix/Lady_Liberty1.htm This learning guide is from the author’s website: http://www.doreenrappaport.com/guide-lady-liberty.html Official Statue of Liberty website: http://www.nps.gov/stli/ A readers’ theatre written by Dixie Allen is included below.

Lady Liberty: A Biography by Doreen Rappaportillustrated by Matt TavaresISBN: 978-0-7636-2530-6 Grades 3-7, Ages 8–12
About the bookLady Liberty: A Biography tells the story of the creation of the Statue of Liberty from its initial
conception by Édouard de Laboulaye in 1865 to its unveiling in New York Harbor in 1886.
Told through historically accurate, poetic vignettes by Doreen Rappaport and illustrated with
Matt Tavares’s magnificent images, this is a powerfully moving, authentic portrait of our national
symbol and of the many people involved in making the dream of its construction a reality.
This book is a valuable resource for teachers, parents, librarians, students, and people everywhere
who care about the story of this American icon, a story that is in turn made up of smaller stories,
of the people from diverse walks of life who helped build her. We hope this guide will help you
share the compelling tale of Lady Liberty’s creation.
L a d y Li b e r t y : A B i o g ra p hy Te a c h e r s’ Gu i d e • C a n d l e w i c k P re s s • w w w. c a n d l e w i c k . c o m

Vocabulary Before students begin reading, distribute this list of words or write them on the board. Read each word to the class, one at a time, and ask for a volunteer to tell what the word means. Then have a student look up the word in the dictionary and read its definition aloud.
Understanding the Tasks at Hand Ask for volunteers to name all the jobs they can think of that are needed to create buildings or public structures. Start a chart listing those jobs, and distribute copies of the chart to the class. Have students add to the chart as they read, listing the job titles of people who contributed to the Statue of Liberty.
Responsive Writing Ask students to write in a journal as they read, noting their thoughts about the book and discussing the ideas it presents. To get them started, have them respond in writing to these pre-reading prompts:
1. What is your first impression of the book, based on the title and cover?
2. What do you already know about the Statue of Liberty?
3. What you think you might learn from the book?
Comprehension Questions After students have finished reading, have them answer these questions about the book, either in writing or aloud in class:
1. Why did Édouard de Laboulaye want to give America a gift?
2. Where is the Statue of Liberty located? Why was this location selected?
3. Why do you think some people mocked the statue?
4. Why do you think soldiers who fought in the Civil War gave so much money to fund the Statue of Liberty?
5. Why do you think Joseph Pulitzer called some rich people “croakers” and “laggards”?
6. Describe the process used by the builders to create the Statue of Liberty. How was the final construction like a puzzle?
7. What were the obstacles overcome by those working to create this statue and build it in America?
8. How many years of planning and work did it take to make the Statue of Liberty a reality?
Discussion Questions You may choose to read these discussion questions aloud in class or to distribute them to students for written responses
1. The American Revolution is said to have inspired the French Revolution, and many French soldiers fought and died for American liberty as well. The long-standing belief in freedom that connects France with America is symbolized by the Statue of Liberty, a gift from one country that fought for freedom to another that did the same.
In the book, structural engineer Gustave Eiffel says that Lady Liberty inspires him and quotes a famous slogan of the French Revolution, saying that “liberté, égalité, and fraternité are in the air.”
liberté (lee-bair-TAY): liberty égalité (ay-GAH-lee-TAY): equality fraternité (frah-TAIR-nee-TAY): brotherhood
Why does Eiffel uses those words in reference to the Statue of Liberty? How are the ideas of liberty, equality and brother-hood important in Lady Liberty?
2. How does the Statue of Liberty serve as a symbol for America and the world?
3. What does liberty mean to you in your daily life?
4. On page 9, what words offer clues to the meaning of the word colossal?
5. What does the word makeshift means when used to describe the workers’ tents (page 18)? What does this word tell us about the conditions for workers on Bedloe’s Island?
6. Writers and illustrators use different tools — words or art — to tell a tale. Look at each illustration in Lady Liberty and discuss the way it helps readers understand something important about that part of the story.
7. The author allows each person to tell his or her story as if it is happening right now. Do you think this is a successful storytelling technique? Why do you think the author told the story this way? How does this narrative method differ from other books that focus on historical events?
8. When you saw the foldout of the Statue of Liberty for the first time, what did you feel? Describe how you might have felt if you had been there in person to see the statue unveiled. What do the other illustrations of the Statue of Liberty make you feel?
9. Choose the illustration that you think best shows the main idea of the book and explain why you selected it.
libertydictatorsculptor
L a d y Li b e r t y : A B i o g ra p hy Te a c h e r s’ Gu i d e • C a n d l e w i c k P re s s • w w w. c a n d l e w i c k . c o m
Pre-reAding Activities
coppersmitharchitectural engineerpublisher

Activities 1. Have each student imagine himself or herself as a statue
of liberty. Ask students to draw pictures of what they might wear or hold and to label what those things represent to them.
2. Invite students to write about what they might have done to support the creation and installation of the Statue of Liberty. To get them started, offer a partial list of jobs they could have performed.
3. Have students pick their favorite person in the book and write a letter to that person explaining how they feel about him or her. Work with students to develop criteria for their letters.
4. Turn the book into a Readers’ Theater script to perform. Choose characters from the book and edit their sections to create parts. Add the role of a narrator or narrators to help the audience understand the transitions between characters.
5. Have students create a chart listing the monuments they know of. First ask them to name the location of each monument and what it commemorates. Then have them learn more about selected monuments and record their findings on the chart.
Name of monument Where is this monument? What does this monument commemorate? What else we learned about this monument Invite them to choose the monument that has the most meaning to them and write a poem or story about it.
6. Break the class into small groups and ask each group to conceptualize a statue or other type of monument they would like to create for their local community. Have each group decide what their monument would represent, why it would be important, how they would design it, what it would be made of, where it might be located, and how they could best promote it. Consider sending the proposed monument ideas to the city council or local newspaper.
7. Invite students to create an oral history project by interviewing immigrants in their area. A list of questions might include:
When did you first come to the United States? How did you get here? Whom did you come with? How long have you been here? Did you come to America to seek liberty? Did you find it? What was the best thing about arriving in the U.S.? What sorts of challenges did you face? What did you miss most about the country you left? Have you been able to go back to visit? What is your favorite of the foods you first ate in the U.S.?
Students may want to gather interviews into a book and include photos of the people they interviewed.
8. Study the poem “The New Colossus” by Emma Lazarus (1883) using the activities and questions below.
Ask students to list any unfamiliar words, look up their meaning, and talk about their use in the poem.
Note that in the Emma Lazarus piece in Lady Liberty (page 17), Jews are described as “persecuted.” Ask students what this word means, based on its context in the sentence. Then ask how the concept of persecution is reflected in “The New Colossus.”
Ask how the word yearning relates to the way immigrants felt about the Statue of Liberty and coming to America.
Explain that the poem is a sonnet, and discuss the rules and rhymes of that type of poem.
Ask students to compare the Colossus of Rhodes to the Statue of Liberty. Explain that the Colossus, one of the seven wonders of the ancient world, was a giant statue of the Greek god Helios, placed at the entrance to a harbor. Note that it was the largest statue of the time, with its legs placed on either side of the entrance to the harbor, as if guarding the land, and was reported to have held a flame.
L a d y Li b e r t y : A B i o g ra p hy Te a c h e r s’ Gu i d e • C a n d l e w i c k P re s s • w w w. c a n d l e w i c k . c o m

About the illustrAtorMatt Tavares grew up surrounded by books and reading. From the time he was very young, his mother read to him every night, and his family made countless trips to the public library. Years later, as a junior in college, he rediscovered his love of picture books and decided to try to make his own. “I thought back to my own childhood and tried to make a book that I would have liked when I was a kid,” he says. From this was born Zachary’s Ball, a classic picture book about a boy’s baseball fantasies coming true. Matt Tavares is also the author-illustrator of two more baseball books, Oliver’s Game and Mudball, and the illustrator of such classics as ’Twas the Night Before Christmas, Jack and the Beanstalk, and Iron Hans. He lives with his wife and their two daughters in Ogunquit, Maine. Catching a foul ball at a Red Sox game, he says, remains a fantasy.
reseArch Questions The following questions and activities are designed to help move students beyond the book by inspiring them to research concepts or people introduced in it.
1. Remind students that Gustave Eiffel was responsible for another famous structure. Ask them to tell what it is, what its reception was like, and what it symbolizes now.
2. Note that the Pulitzer Prize, which began to be awarded in 1917, is given to people who excel in their fields. Invite students to find out more about the Pulitzer Prize, including who has received it in the past and why.
3. Present students a national map on which you have indicated the location of some important monuments around the country. (Examples might include the Washington Monument, the Lincoln Memorial, Mount Rushmore, the USS Arizona Memorial at Pearl Harbor, and St. Louis’s Gateway Arch.) Ask each student to select a monument, conduct research about it, and write a brief description of it, including specifics
such as its size, the date it was constructed, what it commemorates, and so forth. Use this information to create a key for the map. You may want to post the map in a central location in your school or have students use the map to give presentations to other classes.
4. Inform your class that in the years between 1892 and 1954, nearly 12 million people came to the United States to seek freedom and opportunity. Note that there are many websites and books that offer extensive information on this important time. Invite students to start with the Ellis Island Immigration Museum website, where some may be able to find information about the arrival of an ancestor.
5. On the last page of Lady Liberty, the author lists her research sources and additional books to read. Have students use these resources to find out more about the Statue of Liberty and the era in which it was constructed.
About the Author Doreen Rappaport has written many books of fiction and nonfiction for young readers, specializing in thoroughly researched multicultural history, historical fiction, retellings of folktales and myths, and stories of those she calls the “not yet celebrated.” In 1965, she went to McComb, Mississippi, to teach at a freedom school, and the experience changed her life. She says, “I met extraordinary ordinary people — black Americans who had been deprived of rights that I took for granted and who were threatened with death every day. Their courage inspired me. They were heroic. I knew there had to be many more unknown heroes, people who helped change history. I set out to recover and write about this lost history.” Her trilogy on the experience of black Americans includes the books No More! Stories and Songs of Slave Resistance; Free at Last: Stories and Songs of Emancipation; and Nobody Gonna Turn Me ’Round: Stories and Songs of the Civil Rights Movement. Doreen Rappaport divides her time between New York City and a village in upstate New York.
Teachers’ guide written by Dr. E. D. Woodworth, freelance writer and educational consultant. Illustrations copyright © 2008 by Matt Tavares.
L a d y Li b e r t y : A B i o g ra p hy Te a c h e r s’ Gu i d e • C a n d l e w i c k P re s s • w w w. c a n d l e w i c k . c o m

Lady Liberty: A Biography by Doreen Rappaport The following guide was prepared for Candlewick Press by Dr. E. D. Woodworth.
Vocabulary
Before students begin reading, distribute this list of words or write them on the board. Read each word and ask for a volunteer to tell what the word means. Liberty; dictator sculptor; coppersmith; architectural engineer; publisher. Then have a student look up the word in the dictionary and read its definition aloud.
Discussion Questions
You may read these questions aloud or to distribute them to students for written responses.
1. The American Revolution is said to have inspired the French Revolution, and many French
soldiers fought and died for American liberty as well. The long-standing belief in freedom
that connects France with America is symbolized by the Statue of Liberty. In the book,
structural engineer Gustave Eiffel says that Lady Liberty inspires him and quotes a famous
slogan of the French Revolution, saying that “liberté, égalité, and fraternité are in the air.”
liberté (lee-bair-TAY): liberty égalité (ay-GAH-lee-TAY): equality fraternité (frah-TAIR-nee-
TAY): brotherhood
Why does Eiffel uses those words in reference to the Statue of Liberty? How are the ideas
of liberty, equality and brother- hood important in Lady Liberty?
2. How does the Statue of Liberty serve as a symbol for America and the world?
3. What does liberty mean to you in your daily life?
4. On page 9, what words offer clues to the meaning of the
word colossal?
5. What does the word makeshift means when used to describe the workers’ tents (page 18)?
What does this word tell us about the conditions for workers on Bedloe’s Island?
6. Writers and illustrators use different tools— words or art — to tell a tale. Look at each
illustration in Lady Liberty and discuss the way it helps readers understand something
important about that part of the story.
7. The author allows each person to tell his or her story as if it is happening right now. Do
you think this is a successful storytelling technique? Why do you think the author told the
story this way? How does this narrative method differ from other books that focus on
historical events?
8. When you saw the foldout of the Statue of Liberty for the first time, what did you feel?
Describe how you might have felt if you had been there in person to see the statue
unveiled. What do the other illustrations of the Statue of Liberty make you feel?
9. Choose the illustration that you think best shows the main idea of the book and explain
why you selected it.
Understanding the Tasks at Hand
Ask for volunteers to name all the jobs they can think of that are needed to create buildings or public structures. Start a chart listing those jobs, and distribute copies of the chart to the class. Have

students add to the chart as they read, listing the job titles of people who contributed to the Statue of Liberty.
Responsive Writing
Ask students to write in a journal as they read, noting their thoughts about the book and discussing the ideas it presents. To get them started, have them respond in writing to these pre-reading prompts:
1. What is your first impression of the book, based on the title and cover?
2. What do you already know about the Statue of Liberty? 3. What you think you might learn
from the book?
Comprehension Questions
1. Why did Édouard de Laboulaye want to give America a gift?
2. Where is the Statue of Liberty located? Why was this location selected?
3. Why do you think some people mocked the statue?
4. Why do you think soldiers who fought in the Civil War gave so much money to fund the
Statue of Liberty?
5. Why do you think Joseph Pulitzer called some rich people “croakers” and “laggards”?
6. Describe the process used by the builders to create the Statue of Liberty. How was the
final construction like a puzzle?
7. What were the obstacles overcome by those working to create this statue and build it in
America?
8. How many years of planning and work did it take to make the Statue of Liberty a reality?
Activities
1. Have each student imagine himself or herself as a statue of liberty. Ask students to draw
pictures of what they might wear or hold and to label what those things represent to them.
2. Invite students to write about what they might have done to support the creation and
installation of the Statue of Liberty. To get them started, offer a partial list of jobs they
could have performed.
3. Have students pick their favorite person in the book and write a letter to that person
explaining how they feel about him or her. Work with students to develop criteria for their
letters.
4. Turn the book into a Readers’ Theater script to perform. Choose characters from the book
and edit their sections to create parts. Add the role of a narrator or narrators to help the
audience understand the transitions between characters.
5. Have students create a chart listing monuments they know. Ask them to name the location
of each monument and what it commemorates. Invite them to choose the monument that
has the most meaning to them and write a poem or story about it.

6. Break the class into small groups and ask each group to conceptualize a statue or other
type of monument they would like to create for their local community. Have each group
decide what their monument would represent, why it would be important, how they would
design it, what it would be made of, where it might be located, and how they could best
promote it. Consider sending the proposed monument ideas to the city council or local
newspaper.
7. Invite students to create an oral history project by interviewing immigrants in their area. A
list of questions might include: When did you first come to the United States? How did you
get here? Whom did you come with? How long have you been here? Did you come to
America to seek liberty? Did you find it? What was the best thing about arriving in the
U.S.? What sorts of challenges did you face? What did you miss most about the country
you left? Have you been able to go back to visit? What is your favorite of the foods you
first ate in the U.S.?
Students may want to gather the interviews into a book and include photos of the people
they interviewed.
8. Study the poem “The New Colossus” by Emma Lazarus (1883) using the activities and
questions below.
Ask students to list any unfamiliar words, look up their meaning, and talk about their use
in the poem. Note that in the Emma Lazarus piece in Lady Liberty (page 17), Jews are
described as “persecuted.” Ask students what this word means, based on its context in the
sentence. Then ask how the concept of persecution is reflected in “The New Colossus.”
Ask how the word yearning relates to the way immigrants felt about the Statue of Liberty
and coming to America.
Explain that the poem is a sonnet, and discuss the rules and rhymes of that type of poem.
Ask students to compare the Colossus of Rhodes to the Statue of Liberty. Explain that the
Colossus, one of the seven wonders of the ancient world, was a giant statue of the Greek
god Helios, placed at the entrance to a harbor. Note that it was the largest statue of the
time, with its legs placed on either side of the entrance to the harbor, as if guarding the
land, and was reported to have held a flame.
Research Questions
1. The following questions and activities are designed to help move students beyond the book
by inspiring them to research concepts or people introduced in it.
2. Remind students that Gustave Eiffel was responsible for another famous structure. Ask
them to tell what it is, what its reception was like, and what it symbolizes now.
3. Note that the Pulitzer Prize, which began to be awarded in 1917, is given to people who
excel in their fields. Invite students to find out more about the Pulitzer Prize, including who
has received it in the past and why.
4. Present students a national map on which you have indicated the location of some
important monuments around the country. (Examples might include the Washington
Monument, the Lincoln Memorial, Mount Rushmore, the USS Arizona Memorial at Pearl
Harbor, and St. Louis’s Gateway Arch.)
5. Inform your class that in the years between 1892 and 1954, nearly 12 million people came
to the United States to seek freedom and opportunity. Note that there are many websites
and books that offer extensive information on this important time. Invite students to start
with the Ellis Island Immigration Museum website, where they might find find information
about the arrival of an ancestor.

6. On the last page of Lady Liberty, the author lists her research sources and additional books
to read. Have students use these resources to find out more about the Statue of Liberty.

A Writing across the Curriculum Lesson from HistoryFix Historical Topic: Lady Liberty Students Write: A paragraph about symbols
Lady Liberty: A Symbol of America
This writing across the curriculum lesson was created by Nevada teacher Christy Hodge. Christy considers this history lesson to be appropriate for students in grades 2-6.
Lesson Overview:
Objectives/Overview: The students will have a better understanding of the hard labor necessary to make the Statue of Liberty through the use of primary source documents. The students will associate primary source documents to those pictures represented in the story.
The people of France gave the Statue to the people of the United States over one hundred twenty-two years ago in recognition of the friendship established during the American Revolution. The students will learn about the symbolism represented by the Statue of Liberty through the children’s book Lady Liberty: A Biography by Doreen Rappaport and Matt Tavares and be able to describe it. The students will write a journal entry reflecting on how seeing the statue of liberty would make them feel as an immigrant coming to America for the first time.
Time Needed: four 90-minute class sessions.
Writing skills (traits) to stress while teaching this lesson:
Idea Development (writing with a clear, central idea or theme in mind; putting researched ideas into one's own words)
Organization (beginning the writing with a strong introduction; ending the writing with a satisfying conclusion by linking theconclusion back to the introduction)
Voice (conveying passion towards the message of the writing or the topic; making decisions based on awareness of audience)
Background Information:
The people of France gave the Statue to the people of the United States over one hundred twenty-two years ago in recognition of the friendship established during the American Revolution. Over the years, the Statue of Liberty's symbolism has grown to

include freedom and democracy as well as an international friendship.
Edouard De Laboulaye, a professor of law, thought up the idea of the Statue of Liberty in 1865. He shared his dream of making it with a sculptor Auguste Bartholdi. Ten years later Napoleon III would no longer rule France. The two men could make this dream of building a symbolic figure representing friendship and a celebration of independence, a dream come true. Sculptor Frederic Auguste Bartholdi was set to design a sculpture by the year 1876. The Statue was to commemorate the centennial of the American Declaration of Independence. The Statue was an effort between America and France. The Statue took longer than expected due to lack of funds. It was completed in France in July of 1884, and arrived in New York Harbor in June of 1885. The Statue was made into 350 individual pieces and placed into 214 crates, all carried by boat to America. It took four months for the Statue to be re-assembled on the pedestal. On October 28th 1886, the dedication of the Statue of Liberty took place. She has become a symbolism of freedom and America to so many.
Materials List:
Lady Liberty: A Biography by Doreen Rappaport and Matt Tavares Lesson Packet: Prompt (pre- and post-assessment), Primary Source
Analysis Worksheet, and Statue of Liberty Coloring Page Chart paper for writing facts for class discussion These three primary sources. You will need to print out at least ten of each of the
three primary source documents. Each primary source will need to be printed out and glued on an 8 ½ *11 piece of construction paper. These can be laminated for use the following year:
o The building of the Statue of Liberty o Reconstruction of the Statue of Liberty o Dedication of the Statue of Liberty
Teaching Instructions:
Day One: Prior Knowledge and use for final evaluation The teacher will ask the students what symbolism means to them. They will briefly write their answer down on a piece of paper to refer back to later in the lesson. (Prompt is page one of the lesson packet)
Day Two: The teacher will begin this lesson by putting the students into groups of four. Each group will receive a copy or two of the building of the statue of liberty primary source document, and a photo analysis worksheet. The teacher will not tell the students what the unit of study is, nor will the teacher give any clues as to what the picture entails. The students analyze the picture writing down as many details as he/she can on

the analysis worksheet. (This worksheet is page two of the lesson packet)
(See directions for preparing the primary sources above)
The teacher will ask the students to share out what they found in the picture. The students will share the details they found and what they think the picture may represent. The teacher may want to write the facts shared by the students on a sheet of chart paper. (Ask the students what they think the picture represents?)
The teacher will then pass out the second primary source document, the re-construction of the Statue of Liberty. The students will compare the two primary source documents. They will discuss with their group clues that may or may not have led them to believe it was a picture of the Statue of Liberty. At this point they will determine that the first document was the making of the Statue of Liberty.
The teacher will then pass out third primary source document, the dedication of the Statue of Liberty. The teacher will ask the students what they think the picture represents. After listening to the story the students will be able to tell that the picture represents the dedication of the Statue of Liberty on October 28th 1886.
2. The teacher will read aloud Lady Liberty: A Biography by Doreen Rappaport and Matt Tavares. The book represents the history of the Statue of Liberty. The teacher can stop and discuss important events. The students will also notice that the primary source documents studied are similar to the pictures represented in the book.
3. The teacher will chart down the symbolic feature represented on the Statue of Liberty. These can be found in the book. It will make the symbolism of the statue more meaningful if the students understand the details sculpted onto this beautiful statue. (For example: What do the shackles represent? What does the torch represent? etc.)
4. The students will create their own drawing of the Statue of Liberty and label all symbolic parts discussed and represented on the statue. The students should label the picture with the key dates and people that worked on the statue. (There is a coloring page on page three of the lesson packet, if you choose not to have the students draw the Statue of Liberty.)
Day Three: At the end of the book, many stories are shared by those immigrants coming to America, and how they felt seeing the Statue of Liberty for the first time. This was a symbol of coming to America.
Writing Lesson:
Have your students find something in their community that is symbolic to them. The students will find a picture in a magazine, on a post card, the internet, or the students can take a picture of the symbol. The students will write about the symbolic feature

represented within their community.
For example: A student living in Anaheim, California, may take a picture of Disneyland and write about it.
Have the students answer the following questions about their symbolic feature within their community:
What is it?
Where is it located?
Why or how is this symbolic to you?
Do you think this is a symbolic representation of your community to others? Why or why not?
Day Four: Have the students share their picture of the symbolic feature they chose and read what they wrote about it to the class.
Assessment: The students will be asked to write what symbolism in America has come to mean to them. There is a prompt on the bottom of the first page of the lesson attachment. The page can be used to represent prior knowledge before the lesson and knowledge gained after the lesson.

ELD Lesson Plan
Name: Christina Mathiesen Date: January 28, 2010
Strategy: Visual Scaffolding
Grade Level: Third ELD Level: Level 3 Intermediate
Subject: Language Arts
Content Standards: ELD: Listening and Speaking: Listen attentively to stories and information and identify important details and concepts by using both verbal and nonverbal responses. ELD Reading: Read narrative and expository texts aloud with the correct pacing, intonation, and expression. ELA: Listening and Speaking Strategies: Organization and Delivery of Oral Communication 1.9: Read prose and poetry aloud with fluency, rhythm, and pace, using appropriate intonation and vocal patterns to emphasize important passages of the text being read.
Performance/Learning Objectives: Students will listen attentively as I model how to read the song’s lyrics with correct pacing, intonation, and expression. Students will listen to me as I explain some of the more abstract verses of the song. Students will read the song’s lyrics chorally echoing my own voice using correct rhythm, intonation, and expression to emphasize the most important lines in the passage. During this lesson, students will read through the poem line by line and, by using the think/pair/share method of learning, select important concepts and information which are presented in the poem and discuss what they believe those concepts represent. Students will demonstrate their learning of the information through discussing their ideas with the whole class and will engage in a conversation about the poem’s overall meaning. Students will individually meet with me and read the lyrics with the correct rhythm, intonation, and expression. Individually, students will tell me what they believe the poem means for them, for their family, for their community, and for their country.
Materials: - Copy of Lady Liberty: A Biography by Doreen Rappaport - One copy of “Give Me Your Tired, Your Poor” for each student – 22 copies in all - Multiple photographs of the Statue of Liberty, Liberty Island, and the surrounding areas
Strategy: Visual Scaffolding Visual Scaffolding is a wonderful and very powerful teaching strategy that can benefit all students, especially English Learners because it connects visual images, such as pictures, drawings, or posters, to people, things, and ideas. The connections that are made between spoken and written language to a visual representation are more understandable with the proper use of visual scaffolding. Visual scaffolding works especially well when abstract concepts and ideas or places are being taught. For this lesson, I will identify key vocabulary such as: the Statue of Liberty, Liberty Island, Ellis Island, harbor, lamp, torch, flame, beacon-hand, crown, torch, pedestal, base, docks, Declaration of Independence, Roman numerals, and then point out these words and their corresponding images which are displayed in the incorporated visuals. The visuals which will be used for this activity will be the illustrations in the Lady Liberty:

A Biography book, the pictures from my own trip to see the Statue of Liberty, and images taken from an educational website.
Instruction/Activity: Our school is hosting its annual Oral Language Fair in February. Each year, the third grade classes come together to recite a poem or song which has a special meaning to our students, their families, their community, and their country. The piece of work that was chosen this year is the song, “Give Me Your Tired, Your Poor (The Statue of Liberty Song), which is based on Emma Lazarus’ poem “The New Colossus”, which was written in 1883. The students will be expected to recite the song from memory by the date of the fair in the middle of February. -I will initiate the lesson by holding up a picture of the Statue of Liberty and asking if anyone has ever heard about the statue or actually visited it themselves. I intend to engage students by activating their prior knowledge about the statue and any prior experiences visiting the statue. -I will then bring out the book, Lady Liberty: A Biography which is a larger book with beautiful illustrations that depict the different stages of the construction of the Statue of Liberty. The book also talks about Emma Lazarus, the poem’s author, as well as the architect of the statue. This book also introduces the students to Ellis Island and the reasons that many immigrants wanted to come to America to seek a better life for their family. There are illustrations which depict all of these points. -I will then show the students pictures from my own trip to New York City to see the Statue of Liberty, Liberty Island, and Ellis Island. At this time I will also present some photos taken off of an educational website that show aerial views of the statue and the harbor so that the students can see where the statue is located in relation to New York City and Ellis Island. After I talk about each photo, I will pass them around so the students can see them up close. -I will distribute copies of the song’s lyrics to each student. -I will discuss with students how we read poems or lyrics differently than other passages and talk about how this poem is structured. I will make sure to point out how many stanzas there are, how many lines there are, and talk about why there is no punctuation at the end of some of the lines. -I will read through the song’s lyrics using correct pacing, rhythm, intonation, and expression. -I will ask students to find a partner and think/pair/share. I will make sure that my English Learners are paired with a stronger English speaker. I will ask the students to think about some of the more abstract and important verses and concepts which are presented in the song, such as “Your huddled masses yearning to breathe free” or “Mother of Exiles” and talk about it with their partner. -The partnered groups will participate in a whole-class discussion about the meaning of the information and concepts which are presented in this song and their importance and relevance to our lives and to our country’s history. -I will read through the song and the students will chorally read echoing my own voice line-by-line. -Students will chorally read without my modeling. -After having some time to practice, students will individually meet with me to read or recite (if they are comfortable) the song’s lyrics with correct pacing and rhythm, intonation, and expression. I will ask the students to explain what the song is trying to convey and what the message means to them.

Evaluation: I will know that the students met my objectives because I will hear both their think/pair/share discussion as well as the whole-class discussion about the meaning of the song and its importance to our lives and to our country. I will also be able to see and hear the students reading the poem with proper intonation, expression, and pacing and rhythm. Through having the students individually come to me to accurately read the poem and explain its meaning I will be able to assess whether or not the student met my learning objectives.
Closure: Discuss the main theme to the song and its implications to our country’s history and us as Americans. Students may respond using information gathered from the text and from partner and whole group discussion. Remind students to practice memorizing the poem for the Oral Language Fair. Reflections: Were my students engaged throughout the lesson? Could I have incorporated additional visuals to enhance student learning? Were all of my learning objectives for my students met?
“Give Me Your Tired, Your Poor”
A song based on the poem by Emma Lazarus, written in 1883
Give me your tired, your poor Your huddled masses yearning to breathe free;
The wretched refuse of your teeming shore, Send these, the homeless, tempest-tossed to me-
I lift my lamp beside the golden door!
Not like the brazen giant of Greek fame, With conquering limbs astride from land to land; Here at our sea-washed, sunset gates shall stand
A mighty woman with a torch, whose flame Is the imprisoned lightning, and her name Mother of Exiles. From her beacon-hand
Glows world-wide welcome; her mild eyes command The air-bridged harbor that twin cities frame.
"Keep, ancient lands, your storied pomp!" cries she With silent lips. "Give me your tired, your poor, Your huddled masses yearning to breathe free,
The wretched refuse of your teeming shore. Send these, the homeless, tempest-tossed to me,
I lift my lamp beside the golden door!"

A Reader’s Theater adaptation of Doreen Rappaport’s Lady Liberty: A Biography
By Dixie Allen
February 2009
©Lady Liberty: a Biography by Doreen Rappaport, published by Candlewick Press.
Approximately 4 minutes.
Readers:
Narrator
Doreen Rappaport
Emma Lazarus
Edouard de LaBoulaye
Auguste Bartholdi
Marie Simon
Gustave Eiffel
Joseph Pulitzer
Narrator: This is taken from the pages of Lady Liberty: a Biography by Doreen
Rappaport.
Emma Lazarus: “Give me your tired, your poor, your huddled masses yearning to
breathe free, the wretched refuse of your teeming shore.”
Doreen Rappaport: One hundred twenty years ago, my grandfather fled his home in
Latvia, thousands of miles away. He left his mother and father and brothers and
sisters and uncles and cousins to come to a country where he knew no one. He
came to build a better life. As the ferry nears the Statue of Liberty, I try to
imagine his ocean journey and how he felt when he saw her for the first time…..I
wonder if my grandfather ever thought about how she came to be.
Edouard de LaBoulaye: I am Edouard de LaBoulaye and a Professor of Law in France.
The year is 1865. Soon America will be one hundred years old. I share my dream
of a birthday gift. My friend Henri tells me Emperor Napoleon III will not allow
it.
Auguste Bartholdi: I am Auguste Bartholdi and I am an artist. I make things with my
hands. The year is 1875. My dream is Edouard’s dream. I draw pictures of Liberty
and build clay models of her. Napoleon III rules France no more. America shares
our dream but not the money to build it. We will raise the money in France.
Marie Simon: I am Marie Simon and I am Bartholdi’s assistant. He draws--I build. We
measure and multiply and build it bigger. Then, we measure and multiply again,
and we build some more. We build day in and day out, rapping and banging, as

the copper is pounded on the molds until the shapes are perfect. Now it is Eiffel’s
turn. He must make sure Liberty stands tall.
Gustave Eiffel: I am Gustave Eiffel and I am a structural engineer. The year is 1883 and
Lady Liberty is the talk of Paris. To keep Liberty upright is a challenge. But we
have a plan. She inspires me.
Narrator: Workers dig with their shovels. They mix and pour cement. Bedloe’s Island is
readying a foundation for the magnificent gift from France. But wait. There is still
money needed to pay for this foundation.
Joseph Pulitzer: More than one hundred thousand French people-shopkeepers, artisans,
farmers, and children-gave their hard-earned money to build Liberty. As publisher
of New York’s World in New York City, I, Joseph Pulitzer, feel we can count on
the American citizens to come forward but am disgusted when they do not. I turn
to the readers of my newspaper and the campaign works. Americans have given
pennies, nickels, dimes, and dollars (and 2 pet roosters).
Emma Lazarus: “Send these, the homeless, the tempest-tost to me: I lift my lamp beside
the golden door.”
Narrator: Liberty arrived in 214 crates. Slowly each copper sheet is hoisted up with
heavy ropes. Fit and tug, tug and fit, try this sheet, try that one.
Joseph Pulitzer: Each day she grows more beautiful. I predict that those who once
mocked her will soon love her and understand her power and significance.
Auguste Bartholdi: Liberty’s face is hidden beneath the Frendh tricolors. So much
fanfare--tugboats in the harbor, soldiers marching, children and their families
everywhere. And I wait.
Narrator: The crowds are everywhere. Bartholdi winds his way through the crowd to
climb up to Liberty’s crown. Surrounded by her beams and ribs, he mounts the
354 steps, remembering the hundreds of thousands of people—French and
American—who helped to realize his dream.
Auguste Bartholdi: If only Laboulaye were alive to see her.
Narrator: Bartholdi waits for a signal. The boy waves his hand.
Auguste Bartholdi: At last, it is time. I loosen the cord holding the tricolors over
Liberty’s face.
Edouard de LaBoulaye: I dreamed of Lady Liberty
Auguste Bartholdi: I dreamed it too and designed a model for her.

Marie Simon: He designs, I build…and build…and build.
Gustave Eiffel: I help her to stand straight and tall.
Emma Lazarus: And I wrote the poem that would beckon immigrants and become
known around the world.
Joseph Pulitzer: I helped to raise the money to give Lady Liberty a place to stand.
All: The dreams of our lives have been accomplished. And now Lady Liberty truly does
lift her lamp beside the golden door.