Embed Size (px)
Citation preview
HP Photosmart 2600/2700 series all-in-one
User Guide
HP Photosmart 2600/2700 series all-in-one
User Guide
© Copyright 2004 Hewlett-PackardDevelopment Company, L.P.The information contained herein issubject to change without notice.Reproduction, adaptation or translationwithout prior written permission isprohibited, except as allowed undercopyright laws.
Adobe and the Acrobat logo are eitherregistered trademarks or trademarks ofAdobe Systems Incorporated in theUnited States and/or other countries.Windows®, Windows NT®, WindowsME®, Windows XP®, and Windows2000® are U.S. registered trademarksof Microsoft Corporation.Intel® and Pentium® are registeredtrademarks of Intel Corporation.Energy Star® and Energy Star logo®are US registered marks of the UnitedStates Environmental ProtectionAgency.Publication number: Q3450-90196Second edition
NoticeThe only warranties for HP productsand services are set forth in theexpress warranty statementsaccompanying such products andservices. Nothing herein should beconstrued as constituting an additionalwarranty. HP shall not be liable fortechnical or editorial errors oromissions contained herein.The Hewlett-Packard Company shallnot be liable for incidental orconsequential damages in connectionwith, or arising out of the furnishing,performance, or use of this documentand the program material which itdescribes.Note: Regulatory information can befound in the technical informationchapter of this guide.
It is not lawful in many places to makecopies of the following items. When indoubt, check with a legalrepresentative first.● Governmental paper or
documents:– Passports– Immigration papers
– Selective service papers– Identification badges,
cards, or insignias● Governmental stamps:
Postage stampsFood stamps
● Checks or drafts drawn onGovernmental agencies
● Paper currency, traveler’schecks, or money orders
● Certificates of deposit● Copyrighted works
Safety information
Warning To prevent fire orshock hazard, do not exposethis product to rain or any typeof moisture.
Always follow basic safety precautionswhen using this product to reduce riskof injury from fire or electric shock.
Warning Potential shockhazard
1 Read and understand allinstructions in the setup poster.
2 Use only a grounded electricaloutlet when connecting thedevice to a power source. If youdo not know whether the outlet isgrounded, check with a qualifiedelectrician.
3 Observe all warnings andinstructions marked on theproduct.
4 Unplug this product from walloutlets before cleaning.
5 Do not install or use this productnear water or when you are wet.
6 Install the product securely on astable surface.
7 Install the product in a protectedlocation where no one can stepon or trip over the line cord, andwhere the line cord will not bedamaged.
8 If the product does not operatenormally, see the onlineTroubleshooting help.
9 No operator-serviceable partsinside. Refer servicing toqualified service personnel.
10 Use in a well-ventilated area.
Warning This equipmentwill be inoperable when mainspower fails.
Contents
1 HP all-in-one overview.........................................................................................5The HP all-in-one at a glance.................................................................................5Control panel overview...........................................................................................6Menu Overview.....................................................................................................10Use the HP Image Zone to do more with your HP all-in-one................................12
2 Find more information........................................................................................ 193 Connection information.....................................................................................21
Supported connection types.................................................................................21Connect using a USB cable..................................................................................21Connect using Ethernet........................................................................................21Connect using wireless.........................................................................................22Connect using the HP bt300 Bluetooth Wireless Printer Adapter.........................22Set Bluetooth security for your HP all-in-one........................................................23Use Webscan.......................................................................................................24
4 Work with photos...............................................................................................27Transfer photos....................................................................................................27Edit photos............................................................................................................28Share photos........................................................................................................30Print photos..........................................................................................................31
5 Load originals and load paper...........................................................................35Load an original....................................................................................................35Choose papers for printing and copying...............................................................36Load paper...........................................................................................................37Avoid paper jams..................................................................................................43
6 Use a memory card or PictBridge camera........................................................45The memory card slots and camera port..............................................................45Control memory card security on a network.........................................................46Transfer photos to your computer.........................................................................46Print photos from a proof sheet............................................................................48Set photo print options..........................................................................................50Use the edit features............................................................................................52Print photos directly from a memory card.............................................................53Print photos from a PictBridge-compatible digital camera....................................55Use quick print to print the current photo..............................................................55Print a DPOF file...................................................................................................55Use the slide show feature...................................................................................56Share photos through HP Instant Share...............................................................57Use the HP Image Zone.......................................................................................58
7 Use the copy features........................................................................................59Set the copy paper size........................................................................................59Set the copy paper type........................................................................................60Increase copy speed or quality.............................................................................61Select an input tray...............................................................................................61Change default copy settings...............................................................................62Make multiple copies of the same original............................................................62
User Guide 1
Copy a two-page black-and-white document........................................................62Make a 10 by 15 cm (4 by 6 inch) borderless copy of a photo..............................63Copy a 10 by 15 cm (4 by 6 inch) photo onto a full-size page..............................63Copy a photo several times on one page.............................................................64Resize an original to fit onto letter or A4 paper.....................................................65Copy a faded original............................................................................................65Copy a document that has been faxed several times...........................................66Enhance light areas of your copy.........................................................................66Make a poster.......................................................................................................67Prepare a color iron-on transfer............................................................................68Stop copying.........................................................................................................68
8 Use the scan features......................................................................................... 69Scan to an application..........................................................................................69Send a scan to an HP Instant Share destination..................................................71Send a scan to a memory card.............................................................................72Stop scanning.......................................................................................................73
9 Print from your computer..................................................................................75Print from a software application..........................................................................75Change the print settings......................................................................................76Stop a print job.....................................................................................................77
10 Fax setup.............................................................................................................79Case A: Separate fax line (no voice calls received)..............................................79Case B: Set up your HP all-in-one with DSL.........................................................80Case C: Set up your HP all-in-one with a PBX phone system or an ISDN line.....81Case D: Fax with a distinctive ring service on the same line................................82Case E: Shared voice/fax line...............................................................................83Case F: Shared voice/fax line with voice mail.......................................................84Test your fax setup...............................................................................................85
11 Use the fax features...........................................................................................87Set up the HP all-in-one to receive faxes.............................................................. 87Send a fax............................................................................................................89Receive a fax........................................................................................................93Set the date and time...........................................................................................94Set the fax header................................................................................................95Enter text and symbols.........................................................................................95Print reports..........................................................................................................96Set up speed dialing.............................................................................................97Change the fax resolution and lighter/darker settings...........................................99Set fax options....................................................................................................100Reprint or delete the faxes in memory................................................................104Fax over the Internet..........................................................................................105Stop faxing..........................................................................................................105
12 Use HP Instant Share (USB)............................................................................107Overview.............................................................................................................107Get started..........................................................................................................108Send images using your HP all-in-one................................................................ 108Send images using your computer.....................................................................111
13 Use HP Instant Share (networked)..................................................................115Overview.............................................................................................................115Get started..........................................................................................................117
2 HP Photosmart 2600/2700 series all-in-one
Send images directly from your HP all-in-one.....................................................119Send images using your computer.....................................................................122Receive images..................................................................................................124Print received images.........................................................................................125Remove received images...................................................................................129Remote print documents..................................................................................... 129Set HP Instant Share options.............................................................................130
14 Order supplies..................................................................................................133Order paper, transparency film, or other media..................................................133Order print cartridges..........................................................................................133Order accessories..............................................................................................133Order other supplies...........................................................................................134
15 Maintain your HP all-in-one.............................................................................137Clean the HP all-in-one....................................................................................... 137Check the estimated ink levels...........................................................................138Print a self-test report ........................................................................................139Work with print cartridges...................................................................................140Change the device settings................................................................................149Self-maintenance sounds...................................................................................150
16 Troubleshooting information...........................................................................151Before you call HP Support................................................................................151View the Readme file..........................................................................................152Setup troubleshooting.........................................................................................152Operational troubleshooting................................................................................173Device update.....................................................................................................181
17 Get HP support.................................................................................................183Get support and other information from the Internet...........................................183HP customer support..........................................................................................183Access your serial number and service ID..........................................................183Call in North America during warranty................................................................184Call elsewhere in the world.................................................................................184Call in Australia post-warranty............................................................................186Call HP Korea customer support........................................................................187Call HP Japan customer support........................................................................187Prepare your HP all-in-one for shipment............................................................. 188
18 Warranty information.......................................................................................193Duration of limited warranty................................................................................193Warranty service.................................................................................................193Warranty upgrades.............................................................................................193Returning your HP all-in-one for service.............................................................193Hewlett-Packard limited global warranty statement............................................194
19 Technical information......................................................................................197System requirements..........................................................................................197Paper specifications...........................................................................................197Print specifications..............................................................................................199Copy specifications.............................................................................................200Fax specifications...............................................................................................200Memory card specifications................................................................................201Scan specifications.............................................................................................201Physical specifications........................................................................................201
Contents
User Guide 3

Power specifications...........................................................................................201Environmental specifications..............................................................................201Additional specifications.....................................................................................202Environmental product stewardship program.....................................................202Regulatory notices..............................................................................................203Regulatory notices for wireless products............................................................206Declaration of conformity (European Economic Area) .......................................208HP Photosmart 2600 series declaration of conformity........................................208HP Photosmart 2700 series declaration of conformity........................................209
Index.........................................................................................................................211
4 HP Photosmart 2600/2700 series all-in-one
1 HP all-in-one overviewMany HP all-in-one functions can be accessed directly, without turning on yourcomputer. Tasks such as making a copy, sending a fax, or printing photos from amemory card can be accomplished quickly and easily from your HP all-in-one. Thischapter describes the HP all-in-one hardware features, control panel functions, and howto access the HP Image Zone software.
Note The HP Photosmart 2600 series and HP Photosmart 2700 series all-in-oneshave slightly different features. Some of the features described in this guidemight not apply to the model you purchased.
Tip You can do more with your HP all-in-one by using the HP Image Zone softwareinstalled on your computer. The software includes enhanced copy, fax, scan, andphoto functionality, as well as troubleshooting tips and product-specific help. Formore information, see the onscreen HP Image Zone Help and Use the HP ImageZone to do more with your HP all-in-one.
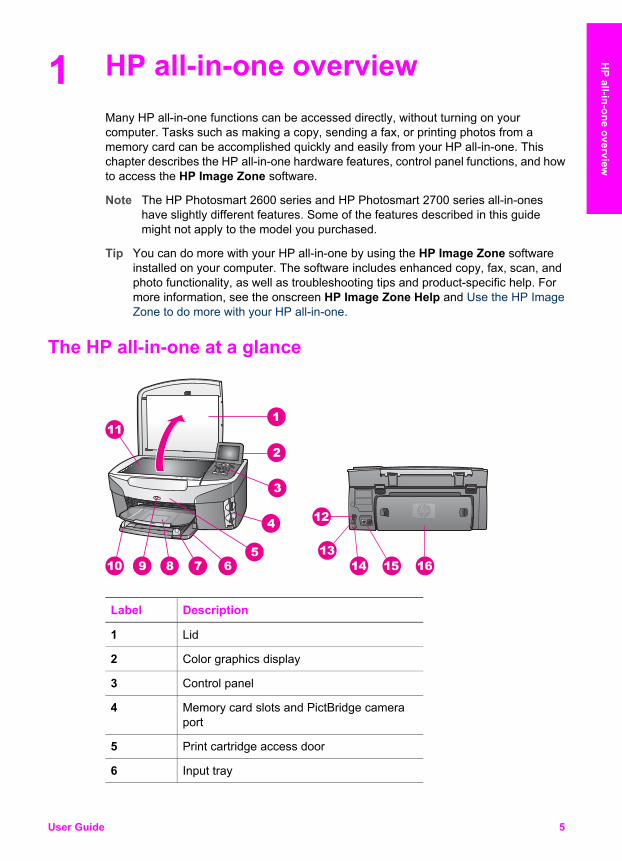
The HP all-in-one at a glance
Label Description
1 Lid
2 Color graphics display
3 Control panel
4 Memory card slots and PictBridge cameraport
5 Print cartridge access door
6 Input tray
User Guide 5
HP all-in-one overview
Label Description
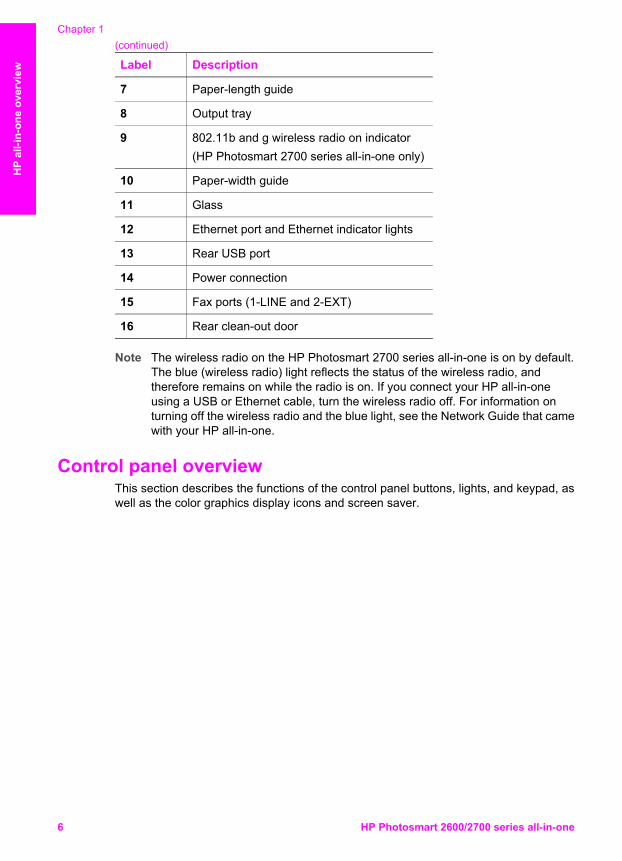
7 Paper-length guide
8 Output tray
9 802.11b and g wireless radio on indicator(HP Photosmart 2700 series all-in-one only)
10 Paper-width guide
11 Glass
12 Ethernet port and Ethernet indicator lights
13 Rear USB port
14 Power connection
15 Fax ports (1-LINE and 2-EXT)
16 Rear clean-out door
Note The wireless radio on the HP Photosmart 2700 series all-in-one is on by default.The blue (wireless radio) light reflects the status of the wireless radio, andtherefore remains on while the radio is on. If you connect your HP all-in-oneusing a USB or Ethernet cable, turn the wireless radio off. For information onturning off the wireless radio and the blue light, see the Network Guide that camewith your HP all-in-one.
Control panel overview This section describes the functions of the control panel buttons, lights, and keypad, aswell as the color graphics display icons and screen saver.
Chapter 1(continued)
6 HP Photosmart 2600/2700 series all-in-one
HP
all-i
n-on
e ov
ervi
ew
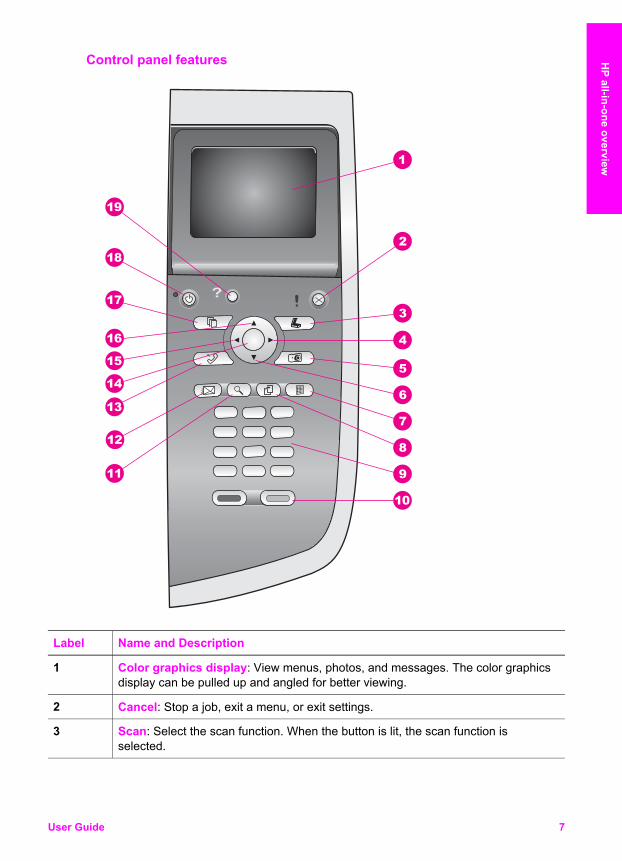
Control panel features
Label Name and Description
1 Color graphics display: View menus, photos, and messages. The color graphicsdisplay can be pulled up and angled for better viewing.
2 Cancel: Stop a job, exit a menu, or exit settings.
3 Scan: Select the scan function. When the button is lit, the scan function isselected.
User Guide 7
HP all-in-one overview
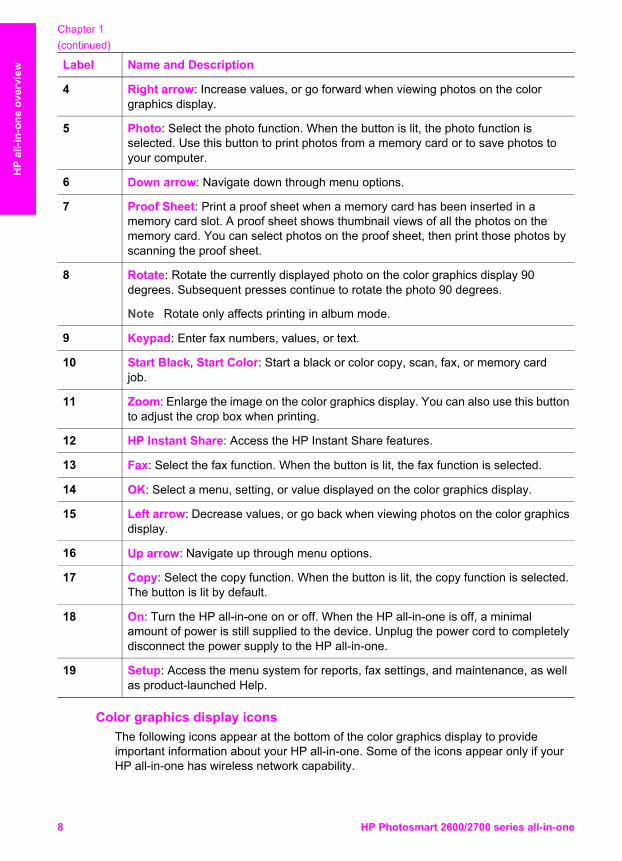
Label Name and Description
4 Right arrow: Increase values, or go forward when viewing photos on the colorgraphics display.
5 Photo: Select the photo function. When the button is lit, the photo function isselected. Use this button to print photos from a memory card or to save photos toyour computer.
6 Down arrow: Navigate down through menu options.
7 Proof Sheet: Print a proof sheet when a memory card has been inserted in amemory card slot. A proof sheet shows thumbnail views of all the photos on thememory card. You can select photos on the proof sheet, then print those photos byscanning the proof sheet.
8 Rotate: Rotate the currently displayed photo on the color graphics display 90degrees. Subsequent presses continue to rotate the photo 90 degrees.
Note Rotate only affects printing in album mode.
9 Keypad: Enter fax numbers, values, or text.
10 Start Black, Start Color: Start a black or color copy, scan, fax, or memory cardjob.
11 Zoom: Enlarge the image on the color graphics display. You can also use this buttonto adjust the crop box when printing.
12 HP Instant Share: Access the HP Instant Share features.
13 Fax: Select the fax function. When the button is lit, the fax function is selected.
14 OK: Select a menu, setting, or value displayed on the color graphics display.
15 Left arrow: Decrease values, or go back when viewing photos on the color graphicsdisplay.
16 Up arrow: Navigate up through menu options.
17 Copy: Select the copy function. When the button is lit, the copy function is selected.The button is lit by default.
18 On: Turn the HP all-in-one on or off. When the HP all-in-one is off, a minimalamount of power is still supplied to the device. Unplug the power cord to completelydisconnect the power supply to the HP all-in-one.
19 Setup: Access the menu system for reports, fax settings, and maintenance, as wellas product-launched Help.
Color graphics display icons The following icons appear at the bottom of the color graphics display to provideimportant information about your HP all-in-one. Some of the icons appear only if yourHP all-in-one has wireless network capability.
Chapter 1(continued)
8 HP Photosmart 2600/2700 series all-in-one
HP
all-i
n-on
e ov
ervi
ew
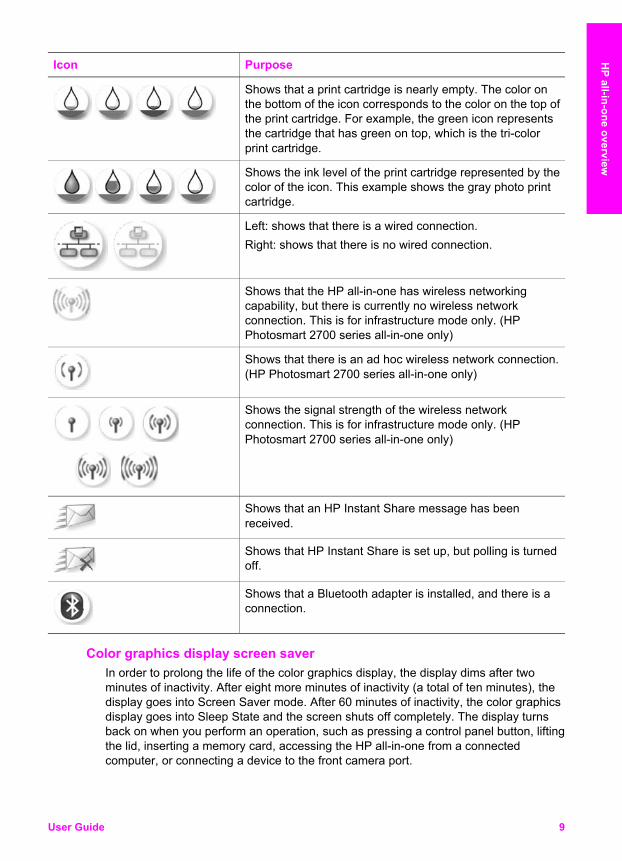
Icon Purpose
Shows that a print cartridge is nearly empty. The color onthe bottom of the icon corresponds to the color on the top ofthe print cartridge. For example, the green icon representsthe cartridge that has green on top, which is the tri-colorprint cartridge.
Shows the ink level of the print cartridge represented by thecolor of the icon. This example shows the gray photo printcartridge.
Left: shows that there is a wired connection.Right: shows that there is no wired connection.
Shows that the HP all-in-one has wireless networkingcapability, but there is currently no wireless networkconnection. This is for infrastructure mode only. (HPPhotosmart 2700 series all-in-one only)
Shows that there is an ad hoc wireless network connection.(HP Photosmart 2700 series all-in-one only)
Shows the signal strength of the wireless networkconnection. This is for infrastructure mode only. (HPPhotosmart 2700 series all-in-one only)
Shows that an HP Instant Share message has beenreceived.
Shows that HP Instant Share is set up, but polling is turnedoff.
Shows that a Bluetooth adapter is installed, and there is aconnection.
Color graphics display screen saver In order to prolong the life of the color graphics display, the display dims after twominutes of inactivity. After eight more minutes of inactivity (a total of ten minutes), thedisplay goes into Screen Saver mode. After 60 minutes of inactivity, the color graphicsdisplay goes into Sleep State and the screen shuts off completely. The display turnsback on when you perform an operation, such as pressing a control panel button, liftingthe lid, inserting a memory card, accessing the HP all-in-one from a connectedcomputer, or connecting a device to the front camera port.
User Guide 9
HP all-in-one overview
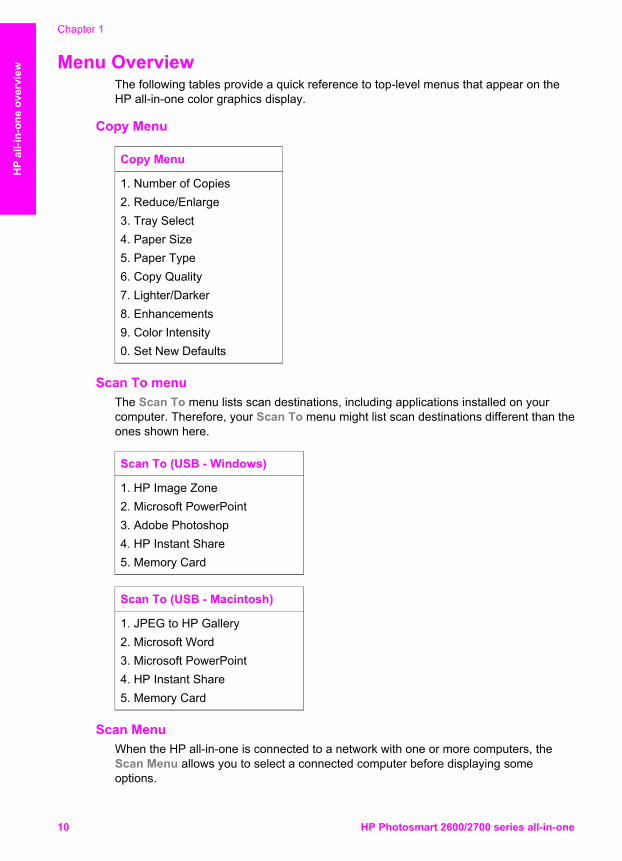
Menu OverviewThe following tables provide a quick reference to top-level menus that appear on theHP all-in-one color graphics display.
Copy Menu
Copy Menu
1. Number of Copies2. Reduce/Enlarge3. Tray Select4. Paper Size5. Paper Type6. Copy Quality7. Lighter/Darker8. Enhancements9. Color Intensity0. Set New Defaults
Scan To menuThe Scan To menu lists scan destinations, including applications installed on yourcomputer. Therefore, your Scan To menu might list scan destinations different than theones shown here.
Scan To (USB - Windows)
1. HP Image Zone2. Microsoft PowerPoint3. Adobe Photoshop4. HP Instant Share5. Memory Card
Scan To (USB - Macintosh)
1. JPEG to HP Gallery2. Microsoft Word3. Microsoft PowerPoint4. HP Instant Share5. Memory Card
Scan MenuWhen the HP all-in-one is connected to a network with one or more computers, theScan Menu allows you to select a connected computer before displaying someoptions.
Chapter 1
10 HP Photosmart 2600/2700 series all-in-one
HP
all-i
n-on
e ov
ervi
ew
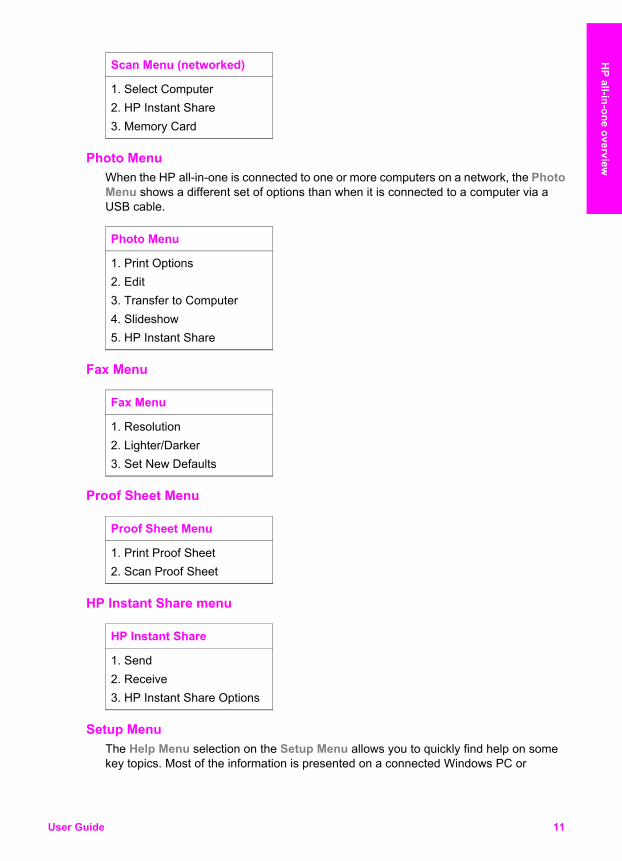
Scan Menu (networked)
1. Select Computer2. HP Instant Share3. Memory Card
Photo MenuWhen the HP all-in-one is connected to one or more computers on a network, the PhotoMenu shows a different set of options than when it is connected to a computer via aUSB cable.
Photo Menu
1. Print Options2. Edit3. Transfer to Computer4. Slideshow5. HP Instant Share
Fax Menu
Fax Menu
1. Resolution2. Lighter/Darker3. Set New Defaults
Proof Sheet Menu
Proof Sheet Menu
1. Print Proof Sheet2. Scan Proof Sheet
HP Instant Share menu
HP Instant Share
1. Send2. Receive3. HP Instant Share Options
Setup MenuThe Help Menu selection on the Setup Menu allows you to quickly find help on somekey topics. Most of the information is presented on a connected Windows PC or
User Guide 11
HP all-in-one overview

Macintosh computer screen. However, information about the color graphics displayicons is presented on the color graphics display.
Setup Menu
1. Help Menu2. Print Report3. Speed Dial Setup4. Basic Fax Setup5. Advanced Fax Setup6. Tools7. Preferences8. Network9. HP Instant Share0. Bluetooth
Use the HP Image Zone to do more with your HP all-in-one
The HP Image Zone software is installed on your computer when you set up yourHP all-in-one. For further information, see the Setup Guide that came with your device.Access to the HP Image Zone software differs by operating system (OS). For example,if you have a PC and are running Windows, the HP Image Zone software entry point isthe HP Director. If you have a Macintosh and are running OS X V10.1.5 or later, theHP Image Zone software entry point is the HP Image Zone window. Regardless, theentry point serves as the launching pad for the HP Image Zone software and services.
You can quickly and easily expand the functionality of your HP all-in-one by using theHP Image Zone software. Look for boxes like this throughout the guide that providetopic-specific tips and helpful information for your projects.
Access the HP Image Zone software (Windows) Open the HP Director from the desktop icon, system tray icon, or from the Start menu.The HP Image Zone software features appear in the HP Director.
To open the HP Director1 Do one of the following:
– On the Windows desktop, double-click the HP Director icon.– In the system tray at the far right of the Windows taskbar, double-click the
Hewlett-Packard Digital Imaging Monitor icon.– On the taskbar, click Start, point to Programs or All Programs, select HP,
and then click HP Director.2 In the Select Device box, click to see a list of installed devices.3 Select the HP all-in-one.
Chapter 1
12 HP Photosmart 2600/2700 series all-in-one
HP
all-i
n-on
e ov
ervi
ew
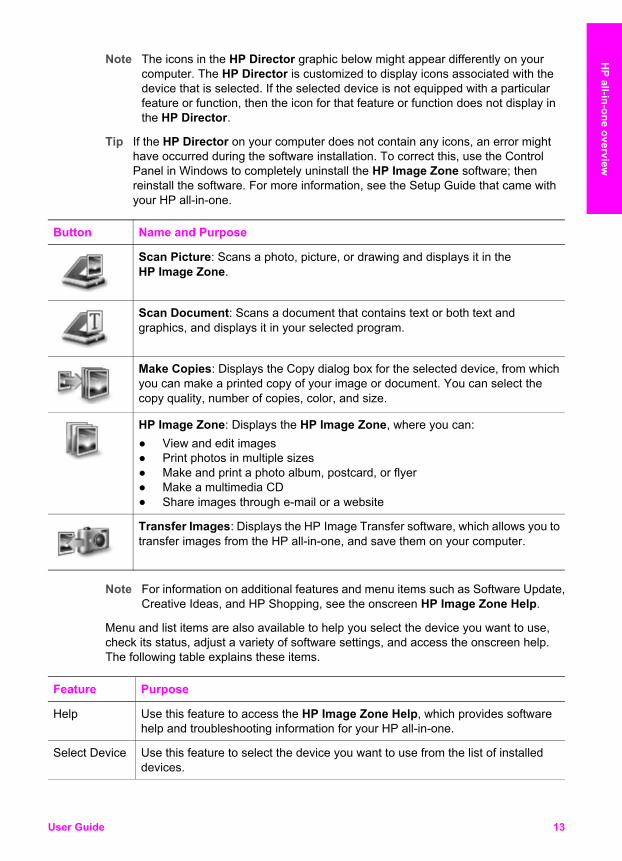
Note The icons in the HP Director graphic below might appear differently on yourcomputer. The HP Director is customized to display icons associated with thedevice that is selected. If the selected device is not equipped with a particularfeature or function, then the icon for that feature or function does not display inthe HP Director.
Tip If the HP Director on your computer does not contain any icons, an error mighthave occurred during the software installation. To correct this, use the ControlPanel in Windows to completely uninstall the HP Image Zone software; thenreinstall the software. For more information, see the Setup Guide that came withyour HP all-in-one.
Button Name and Purpose
Scan Picture: Scans a photo, picture, or drawing and displays it in theHP Image Zone.
Scan Document: Scans a document that contains text or both text andgraphics, and displays it in your selected program.
Make Copies: Displays the Copy dialog box for the selected device, from whichyou can make a printed copy of your image or document. You can select thecopy quality, number of copies, color, and size.
HP Image Zone: Displays the HP Image Zone, where you can:● View and edit images● Print photos in multiple sizes● Make and print a photo album, postcard, or flyer● Make a multimedia CD● Share images through e-mail or a website
Transfer Images: Displays the HP Image Transfer software, which allows you totransfer images from the HP all-in-one, and save them on your computer.
Note For information on additional features and menu items such as Software Update,Creative Ideas, and HP Shopping, see the onscreen HP Image Zone Help.
Menu and list items are also available to help you select the device you want to use,check its status, adjust a variety of software settings, and access the onscreen help.The following table explains these items.
Feature Purpose
Help Use this feature to access the HP Image Zone Help, which provides softwarehelp and troubleshooting information for your HP all-in-one.
Select Device Use this feature to select the device you want to use from the list of installeddevices.
User Guide 13
HP all-in-one overview
Feature Purpose
Settings Use this feature to view or change various settings for your HP all-in-one, suchas print, scan, or copy.
Status Use this feature to display the current status of your HP all-in-one.
Open the HP Image Zone software (Macintosh OS X v10.1.5or later)
Note Macintosh OS X v10.2.1 and v10.2.2 are not supported.
When you install the HP Image Zone software, the HP Image Zone icon is placed inthe Dock.
Note If you install more than one HP all-in-one, an HP Image Zone icon for eachdevice is displayed in the Dock. For example, if you have an HP scanner and anHP all-in-one installed, two HP Image Zone icons are present in the Dock, onefor each device. However, if you installed two of the same kind of device (forexample, two HP all-in-ones) only one HP Image Zone icon is displayed in theDock to represent all devices of that kind.
You can access the HP Image Zone software in one of two ways:● Through the HP Image Zone window● Through the HP Image Zone Dock menu
Open the HP Image Zone windowSelect the HP Image Zone icon to open the HP Image Zone window. The HP ImageZone window has two main elements:● The display area for the Products/Services tabs
– The Products tab gives you access to many of the features of your HP imaging products, such as an installed products pop-up menu and a list oftasks available for the current product. The list may include tasks such ascopy, scan, fax, or transfer images. Clicking on a task opens an application toassist you with that task.
– The Services tab gives you access to digital imaging applications that canhelp you view, edit, manage, and share you images.
● The Search HP Image Zone Help text entry fieldThe Search HP Image Zone Help text entry field lets you search HP Image ZoneHelp for keywords or phrases.
To open the HP Image Zone window➔ Click the HP Image Zone icon in the Dock.
The HP Image Zone window appears.The HP Image Zone window displays only the HP Image Zone features that areappropriate for the selected device.
Note The icons in the table below might appear differently on your computer. TheHP Image Zone window is customized to display feature icons associated withthe device that is selected. If the selected device is not equipped with aparticular feature or function, then that feature or function does not display in theHP Image Zone window.
Chapter 1(continued)
14 HP Photosmart 2600/2700 series all-in-one
HP
all-i
n-on
e ov
ervi
ew
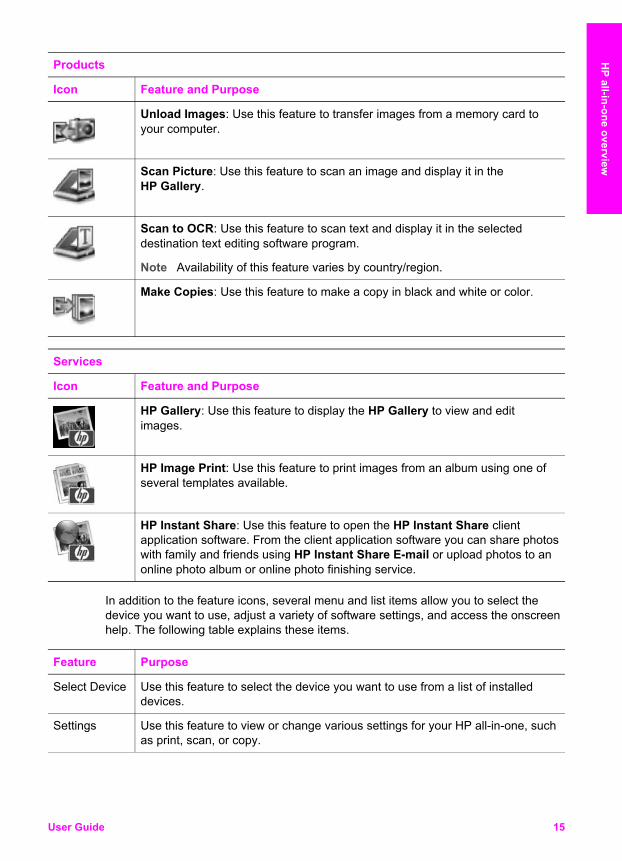
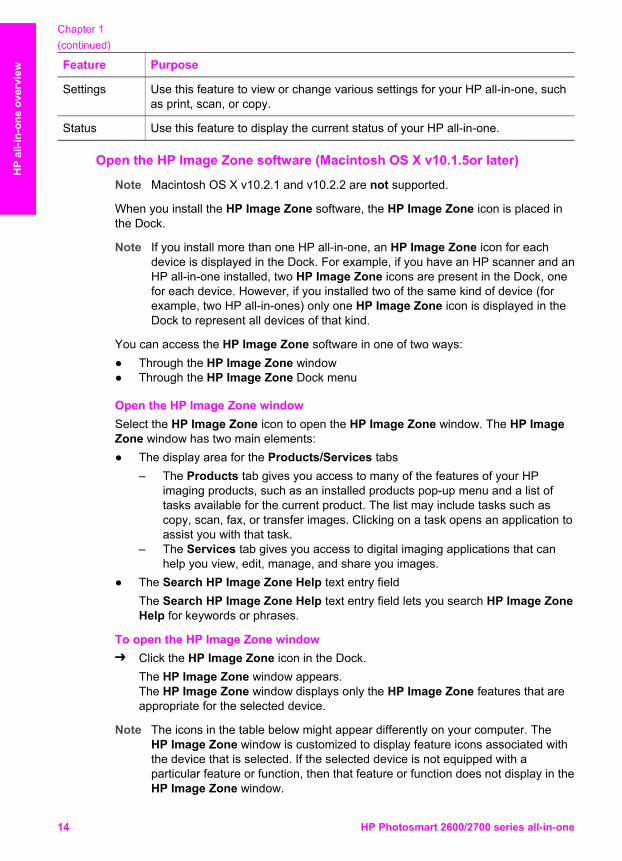
Products
Icon Feature and Purpose
Unload Images: Use this feature to transfer images from a memory card toyour computer.
Scan Picture: Use this feature to scan an image and display it in theHP Gallery.
Scan to OCR: Use this feature to scan text and display it in the selecteddestination text editing software program.
Note Availability of this feature varies by country/region.
Make Copies: Use this feature to make a copy in black and white or color.
Services
Icon Feature and Purpose
HP Gallery: Use this feature to display the HP Gallery to view and editimages.
HP Image Print: Use this feature to print images from an album using one ofseveral templates available.
HP Instant Share: Use this feature to open the HP Instant Share clientapplication software. From the client application software you can share photoswith family and friends using HP Instant Share E-mail or upload photos to anonline photo album or online photo finishing service.
In addition to the feature icons, several menu and list items allow you to select thedevice you want to use, adjust a variety of software settings, and access the onscreenhelp. The following table explains these items.
Feature Purpose
Select Device Use this feature to select the device you want to use from a list of installeddevices.
Settings Use this feature to view or change various settings for your HP all-in-one, suchas print, scan, or copy.
User Guide 15
HP all-in-one overview
Feature Purpose
Search HPImage ZoneHelp
Use this feature to search the HP Image Zone Help, which provides softwarehelp and troubleshooting information for your HP all-in-one.
Display the HP Image Zone Dock menuThe HP Image Zone Dock menu provides a shortcut to HP Image Zone services. TheDock menu automatically contains all of the applications available in the HP ImageZone window Services tab list. You can also set HP Image Zone preferences to addother items to the menu, such as tasks from the Products tab list or HP Image ZoneHelp.
To display the HP Image Zone Dock menu➔ Do one of the following:
– Set either HP Gallery or iPhoto as your preferred photo manager.– Set additional options associated with your preferred photo manager.– Customize the list of items displayed in the HP Image Zone Dock menu.
Access the HP Image Zone software (Macintosh OS earlier than X v10.1.5)
Note Macintosh OS 9 v9.1.5 and later and v9.2.6 and later are supported. MacintoshOS X v10.0 and v10.0.4 are not supported.
The HP Director is the entry point to the HP Image Zone software. Depending on thecapabilities of your HP all-in-one, the HP Director lets you initiate device functions suchas scanning, copying, faxing, or unloading images from a digital camera or memorycard. You can also use the HP Director to open the HP Gallery to view, modify, andmanage the images on your computer.Use one of the following methods to open the HP Director. The methods are MacintoshOS specific..● Macintosh OS X: The HP Director opens automatically during HP Image Zone
software installation, and an HP Director icon is created in the Dock for yourdevice. To display the HP Director menu:In the Dock, click the HP Director icon for your device.
The HP Director menu appears.
Chapter 1(continued)
16 HP Photosmart 2600/2700 series all-in-one
HP
all-i
n-on
e ov
ervi
ew
Note If you install several HP devices of different kinds (for example, anHP all-in-one, a camera, and an HP scanner), an HP Director icon foreach kind of device is displayed in the Dock. However, if you install twoof the same kind of device (for example, you may have a laptop that youconnect to two different HP all-in-one devices -- one at work and one athome) only one HP Director icon is displayed in the Dock to representall devices of that kind.
● Macintosh OS 9: The HP Director is a standalone application that must be openedbefore its features can be accessed. Use one of the following methods to open theHP Director:– Double-click the HP Director alias on the desktop.– Double-click the HP Director alias in the Applications:Hewlett-Packard:HP
Photo and Imaging Software folder.The HP Director displays only the task buttons that pertain to the selecteddevice.
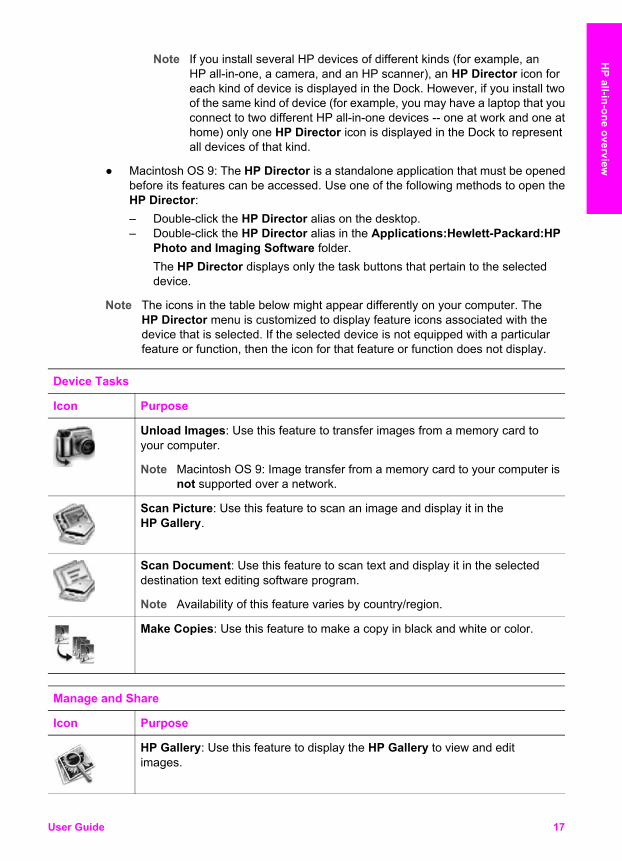
Note The icons in the table below might appear differently on your computer. TheHP Director menu is customized to display feature icons associated with thedevice that is selected. If the selected device is not equipped with a particularfeature or function, then the icon for that feature or function does not display.
Device Tasks
Icon Purpose
Unload Images: Use this feature to transfer images from a memory card toyour computer.
Note Macintosh OS 9: Image transfer from a memory card to your computer isnot supported over a network.
Scan Picture: Use this feature to scan an image and display it in theHP Gallery.
Scan Document: Use this feature to scan text and display it in the selecteddestination text editing software program.
Note Availability of this feature varies by country/region.
Make Copies: Use this feature to make a copy in black and white or color.
Manage and Share
Icon Purpose
HP Gallery: Use this feature to display the HP Gallery to view and editimages.
User Guide 17
HP all-in-one overview
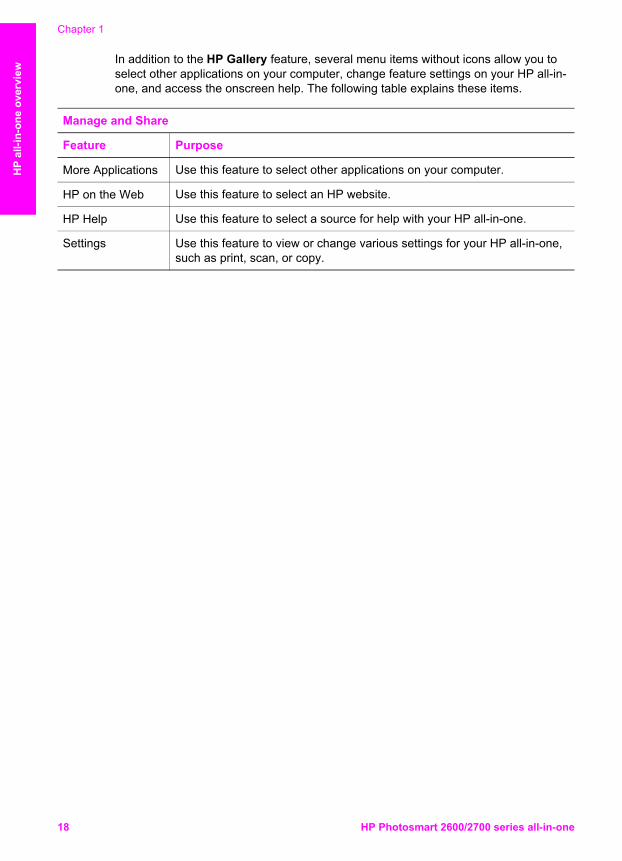
In addition to the HP Gallery feature, several menu items without icons allow you toselect other applications on your computer, change feature settings on your HP all-in-one, and access the onscreen help. The following table explains these items.
Manage and Share
Feature Purpose
More Applications Use this feature to select other applications on your computer.
HP on the Web Use this feature to select an HP website.
HP Help Use this feature to select a source for help with your HP all-in-one.
Settings Use this feature to view or change various settings for your HP all-in-one,such as print, scan, or copy.
Chapter 1
18 HP Photosmart 2600/2700 series all-in-one
HP
all-i
n-on
e ov
ervi
ew
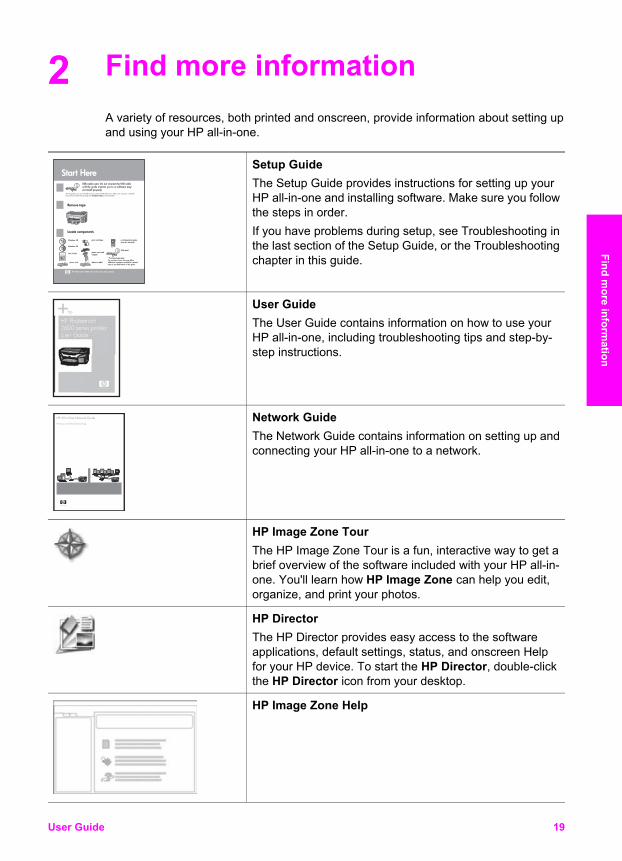
2 Find more informationA variety of resources, both printed and onscreen, provide information about setting upand using your HP all-in-one.
Setup GuideThe Setup Guide provides instructions for setting up yourHP all-in-one and installing software. Make sure you followthe steps in order.If you have problems during setup, see Troubleshooting inthe last section of the Setup Guide, or the Troubleshootingchapter in this guide.
HP Photosmart 2600 series printer User Guide
User GuideThe User Guide contains information on how to use yourHP all-in-one, including troubleshooting tips and step-by-step instructions.
HP All-in-One Network Guide
Wireless and Wired NetworkingNetwork GuideThe Network Guide contains information on setting up andconnecting your HP all-in-one to a network.
HP Image Zone TourThe HP Image Zone Tour is a fun, interactive way to get abrief overview of the software included with your HP all-in-one. You'll learn how HP Image Zone can help you edit,organize, and print your photos.
HP DirectorThe HP Director provides easy access to the softwareapplications, default settings, status, and onscreen Helpfor your HP device. To start the HP Director, double-clickthe HP Director icon from your desktop.
HP Image Zone Help
User Guide 19
Find more inform
ation
The HP Image Zone Help provides detailed information onusing the software for your HP all-in-one.● The Get step-by-step instructions topic provides
information on using the HP Image Zone softwarewith HP devices.
● The Explore what you can do topic provides moreinformation about the practical and creative things youcan do with the HP Image Zone software and your HPdevices.
● If you need further assistance or want to check for HPsoftware updates, see the Troubleshooting andsupport topic.
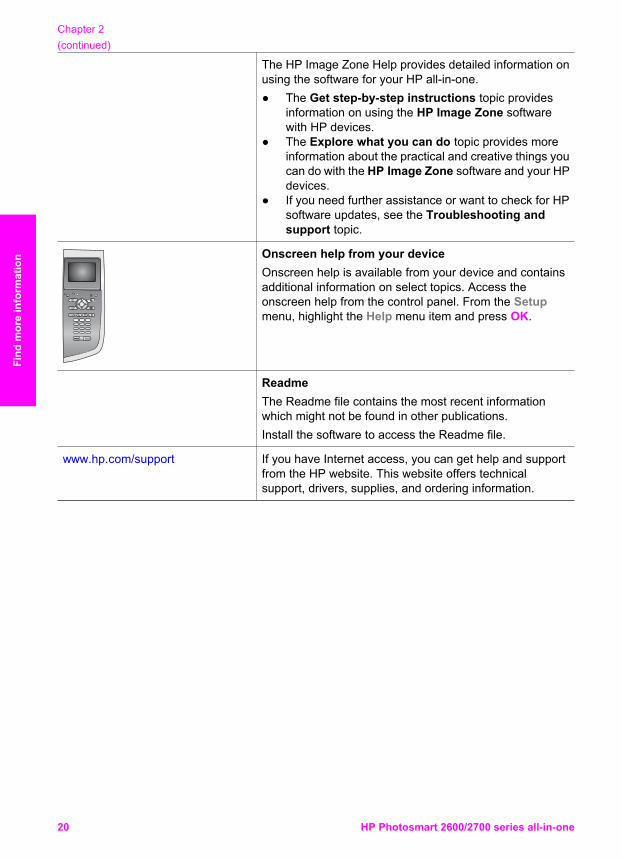
Onscreen help from your deviceOnscreen help is available from your device and containsadditional information on select topics. Access theonscreen help from the control panel. From the Setupmenu, highlight the Help menu item and press OK.
ReadmeThe Readme file contains the most recent informationwhich might not be found in other publications.Install the software to access the Readme file.
www.hp.com/support If you have Internet access, you can get help and supportfrom the HP website. This website offers technicalsupport, drivers, supplies, and ordering information.
Chapter 2(continued)
20 HP Photosmart 2600/2700 series all-in-one
Find
mor
e in
form
atio
n
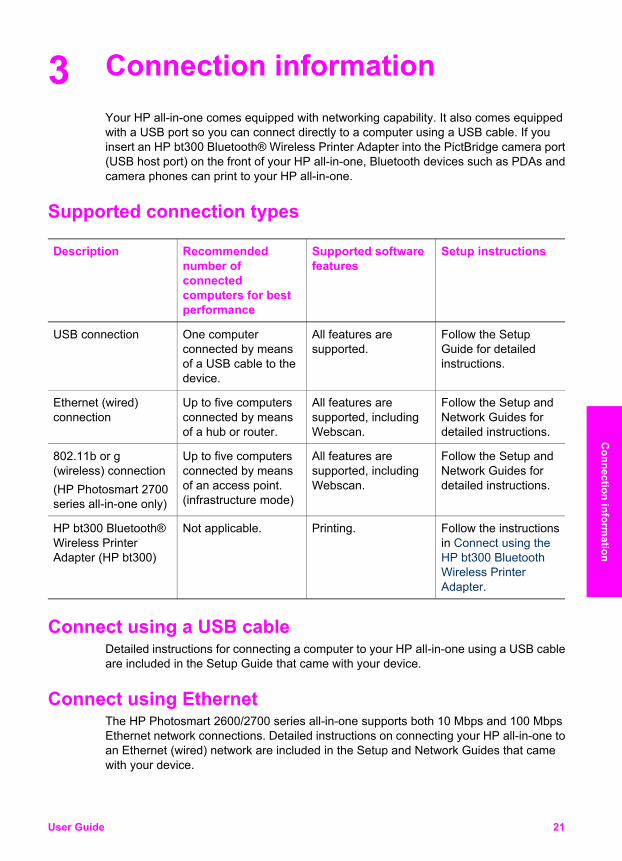
3 Connection informationYour HP all-in-one comes equipped with networking capability. It also comes equippedwith a USB port so you can connect directly to a computer using a USB cable. If youinsert an HP bt300 Bluetooth® Wireless Printer Adapter into the PictBridge camera port(USB host port) on the front of your HP all-in-one, Bluetooth devices such as PDAs andcamera phones can print to your HP all-in-one.
Supported connection types
Description Recommendednumber ofconnectedcomputers for bestperformance
Supported softwarefeatures
Setup instructions
USB connection One computerconnected by meansof a USB cable to thedevice.
All features aresupported.
Follow the SetupGuide for detailedinstructions.
Ethernet (wired)connection
Up to five computersconnected by meansof a hub or router.
All features aresupported, includingWebscan.
Follow the Setup andNetwork Guides fordetailed instructions.
802.11b or g(wireless) connection(HP Photosmart 2700series all-in-one only)
Up to five computersconnected by meansof an access point.(infrastructure mode)
All features aresupported, includingWebscan.
Follow the Setup andNetwork Guides fordetailed instructions.
HP bt300 Bluetooth®Wireless PrinterAdapter (HP bt300)
Not applicable. Printing. Follow the instructionsin Connect using theHP bt300 BluetoothWireless PrinterAdapter.
Connect using a USB cable Detailed instructions for connecting a computer to your HP all-in-one using a USB cableare included in the Setup Guide that came with your device.
Connect using Ethernet The HP Photosmart 2600/2700 series all-in-one supports both 10 Mbps and 100 MbpsEthernet network connections. Detailed instructions on connecting your HP all-in-one toan Ethernet (wired) network are included in the Setup and Network Guides that camewith your device.
User Guide 21
Connection inform
ation
Connect using wireless The HP Photosmart 2700 series all-in-one uses an internal networking component thatsupports a wireless network. Detailed instructions on connecting your HP all-in-one to awireless (802.11b or g) network are included in the Setup and Network Guides thatcame with your device.
Connect using the HP bt300Bluetooth Wireless PrinterAdapter
The HP bt300 allows you to print images from most Bluetooth devices directly to yourHP all-in-one without a cable connection. Simply insert the HP bt300 into the PictBridgecamera port located on the front of the HP all-in-one and print from a Bluetooth devicesuch as a PDA or camera phone.
Note Using Bluetooth technology to print from a PC or laptop to your HP all-in-one isnot supported at this time.
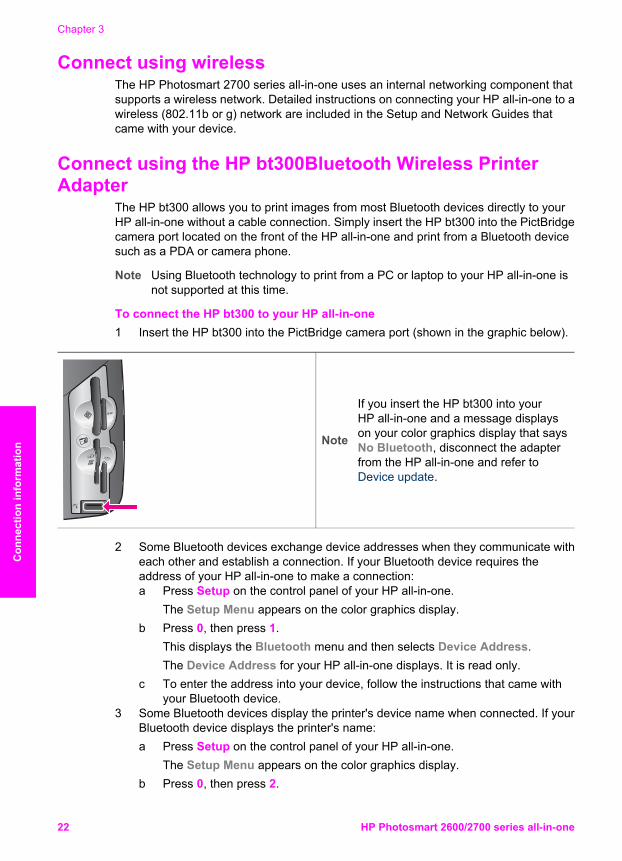
To connect the HP bt300 to your HP all-in-one1 Insert the HP bt300 into the PictBridge camera port (shown in the graphic below).
Note
If you insert the HP bt300 into yourHP all-in-one and a message displayson your color graphics display that saysNo Bluetooth, disconnect the adapterfrom the HP all-in-one and refer toDevice update.
2 Some Bluetooth devices exchange device addresses when they communicate witheach other and establish a connection. If your Bluetooth device requires theaddress of your HP all-in-one to make a connection:a Press Setup on the control panel of your HP all-in-one.
The Setup Menu appears on the color graphics display.b Press 0, then press 1.
This displays the Bluetooth menu and then selects Device Address.The Device Address for your HP all-in-one displays. It is read only.
c To enter the address into your device, follow the instructions that came withyour Bluetooth device.
3 Some Bluetooth devices display the printer's device name when connected. If yourBluetooth device displays the printer's name:a Press Setup on the control panel of your HP all-in-one.
The Setup Menu appears on the color graphics display.b Press 0, then press 2.
Chapter 3
22 HP Photosmart 2600/2700 series all-in-one
Con
nect
ion
info
rmat
ion
This displays the Bluetooth menu and then selects Device Name.The Device Name screen appears.
Note Your HP all-in-one ships with the predefined name of TBD.
c Use the visual keyboard on the Device Name screen to enter a new name.For more information on using the visual keyboard, see Enter text and symbols.
d When you have finished entering a name for your HP all-in-one, highlight Doneon the visual keyboard and press OK.The name you entered will appear on your Bluetooth device when youconnect to the HP all-in-one to print.
Set Bluetooth security for your HP all-in-one You can enable printer security settings through the Bluetooth menu on your HP all-in-one. Simply press Setup on the control panel, and select Bluetooth from the SetupMenu. From the Bluetooth menu, you can:● Require passkey authentication prior to someone printing to your HP all-in-one from
a Bluetooth device● Make your HP all-in-one visible or invisible to Bluetooth devices that are within
range
Use a passkey to authenticate Bluetooth devicesYou can set the security level of your HP all-in-one to either Low or High:● Low: The HP all-in-one does not require a passkey. Any Bluetooth device within
range can print to it.● High: The HP all-in-one requires a passkey from the Bluetooth device before
allowing the device to send a print job to it.
To set your HP all-in-one to require passkey authentication1 Press Setup on the control panel of your HP all-in-one.
The Setup Menu appears on the color graphics display.2 Press 0, then press 3.
This displays the Bluetooth menu and then selects Passkey.The Passkey screen appears.
Note Your HP all-in-one ships with a predefined passkey that is set to fourzeroes.
3 Use the numbered keypad on the control panel of your HP all-in-one to enter a newpasskey.For more information on using the keypad, see Enter text and symbols.
4 When you have finished entering your passkey, press OK.The Bluetooth menu appears.
5 Press 5.This selects Security Level and displays the Security Level menu.
6 Press 1 to select High.High level security requires authentication.
User Guide 23
Connection inform
ation
Note The default security setting is Low. Low level security does not requireauthentication.
Passkey authentication is now set for your HP all-in-one.
Set your HP all-in-one to be invisible to Bluetooth devicesYou can set your HP all-in-one to be either Visible to all Bluetooth devices (public) orNot visible to any (private):● Visible to all: Any Bluetooth device within range can print to the HP all-in-one.● Not visible: Only Bluetooth devices that have stored the device address of the
HP all-in-one can print to it.
To set your HP all-in-one to be Not visible1 Press Setup on the control panel of your HP all-in-one.
The Setup Menu appears on the color graphics display.2 Press 0, then press 4.
This displays the Bluetooth menu and then selects Accessibility.The Accessibility menu appears.
Note Your HP all-in-one ships with a default accessibility level of Visible to all.
3 Press 2 to select Not visible.Your HP all-in-one is inaccessible to Bluetooth devices that have not stored itsdevice address.
Reset Bluetooth settings on your HP all-in-oneIf you want to reconfigure all of the Bluetooth settings on your HP all-in-one, you canreset them to factory defaults by performing the following:1 Press Setup on the control panel of your HP all-in-one.
The Setup Menu appears on the color graphics display.2 Press 0, then press 6.
This displays the Bluetooth menu and then selects Reset Bluetooth.
Note Only select Reset Bluetooth if you want all of your HP all-in-one Bluetoothsettings returned to factory defaults.
Use WebscanWebscan lets you perform a basic scan through your HP all-in-one using just a Webbrowser. It also lets you perform the scan from your HP all-in-one without the devicesoftware installed on your computer. Just enter the IP address of the HP all-in-one in aWeb browser and access the HP all-in-one embedded Web server Home page andWebscan.The user interface for Webscan is unique to using the HP all-in-one and does notsupport scan-to destinations like the HP Image Zone scanning software. The e-mailfunctionality of Webscan is limited, so it is recommended you use the HP Image Zonescanning software for this feature instead.
To use Webscan1 Enter the IP address of the HP all-in-one in a Web browser on your computer.
Chapter 3
24 HP Photosmart 2600/2700 series all-in-one
Con
nect
ion
info
rmat
ion
Note For more information on printing a network configuration page to obtain theIP address of your HP all-in-onet, see the Network Guide that came withyour device.
The embedded Web server Home page appears in the browser window.2 In the left hand column, under Applications, select Scan.3 Follow the onscreen instructions.
User Guide 25
Connection inform
ation

Chapter 3
26 HP Photosmart 2600/2700 series all-in-one
Con
nect
ion
info
rmat
ion
4 Work with photosYour HP all-in-one allows you to transfer, edit, share, and print photos in severaldifferent ways. This chapter contains a brief overview of the wide range of options forperforming each of these tasks, depending on your preferences and computer setup.More detailed information for each task is available in other chapters within this guide,or in the onscreen HP Image Zone Help that came with your software.
Transfer photosYou have several different options for transferring photos. You can transfer photos toyour HP all-in-one, your computer, or a memory card. For more information, see thesection below specific to your operating system.
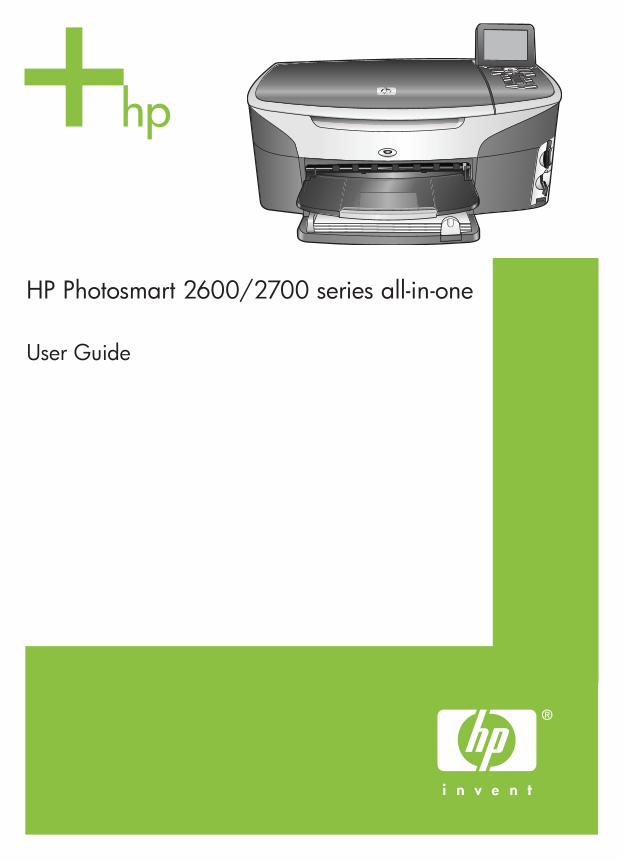
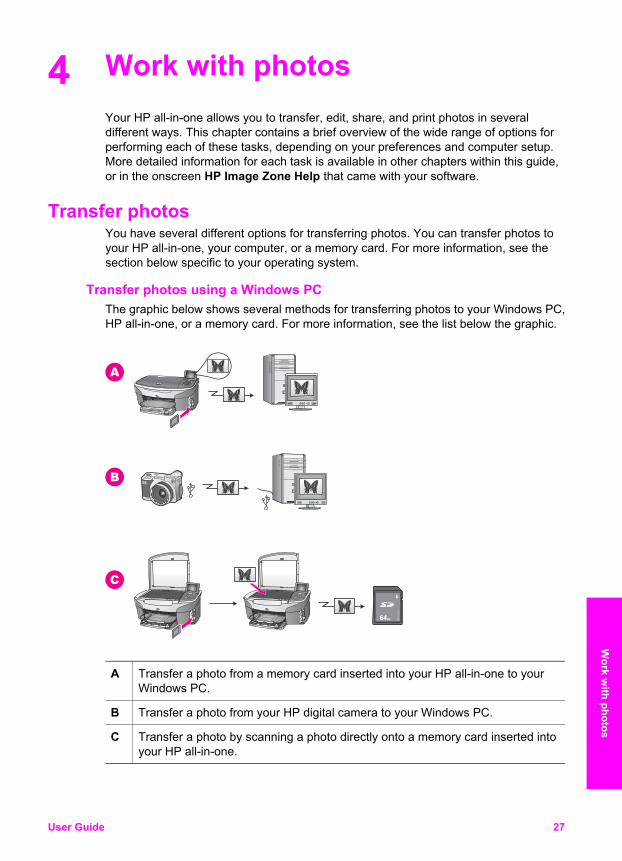
Transfer photos using a Windows PCThe graphic below shows several methods for transferring photos to your Windows PC,HP all-in-one, or a memory card. For more information, see the list below the graphic.
A Transfer a photo from a memory card inserted into your HP all-in-one to yourWindows PC.
B Transfer a photo from your HP digital camera to your Windows PC.
C Transfer a photo by scanning a photo directly onto a memory card inserted intoyour HP all-in-one.
User Guide 27
Work w
ith photos
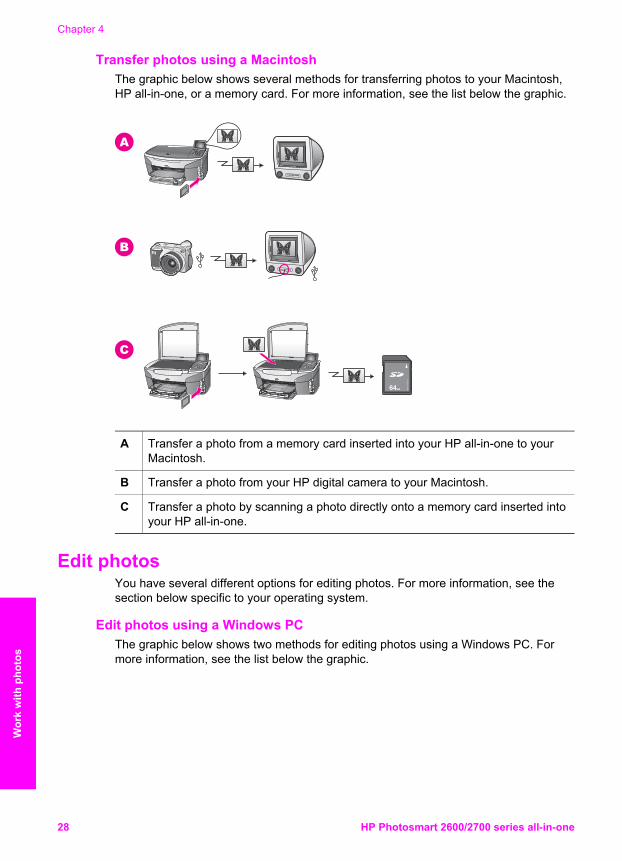
Transfer photos using a MacintoshThe graphic below shows several methods for transferring photos to your Macintosh,HP all-in-one, or a memory card. For more information, see the list below the graphic.
A Transfer a photo from a memory card inserted into your HP all-in-one to yourMacintosh.
B Transfer a photo from your HP digital camera to your Macintosh.
C Transfer a photo by scanning a photo directly onto a memory card inserted intoyour HP all-in-one.
Edit photosYou have several different options for editing photos. For more information, see thesection below specific to your operating system.
Edit photos using a Windows PCThe graphic below shows two methods for editing photos using a Windows PC. Formore information, see the list below the graphic.
Chapter 4
28 HP Photosmart 2600/2700 series all-in-one
Wor
k w
ith p
hoto
s
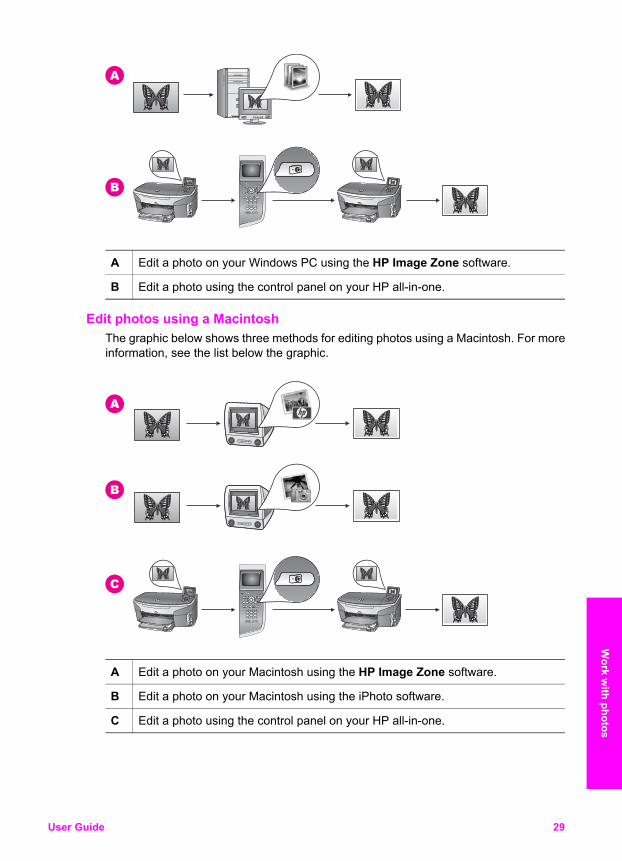
A Edit a photo on your Windows PC using the HP Image Zone software.
B Edit a photo using the control panel on your HP all-in-one.
Edit photos using a MacintoshThe graphic below shows three methods for editing photos using a Macintosh. For moreinformation, see the list below the graphic.
A Edit a photo on your Macintosh using the HP Image Zone software.
B Edit a photo on your Macintosh using the iPhoto software.
C Edit a photo using the control panel on your HP all-in-one.
User Guide 29
Work w
ith photos
Share photosYou have several different options for sharing photos with friends and family. For moreinformation, see the section below specific to your operating system.
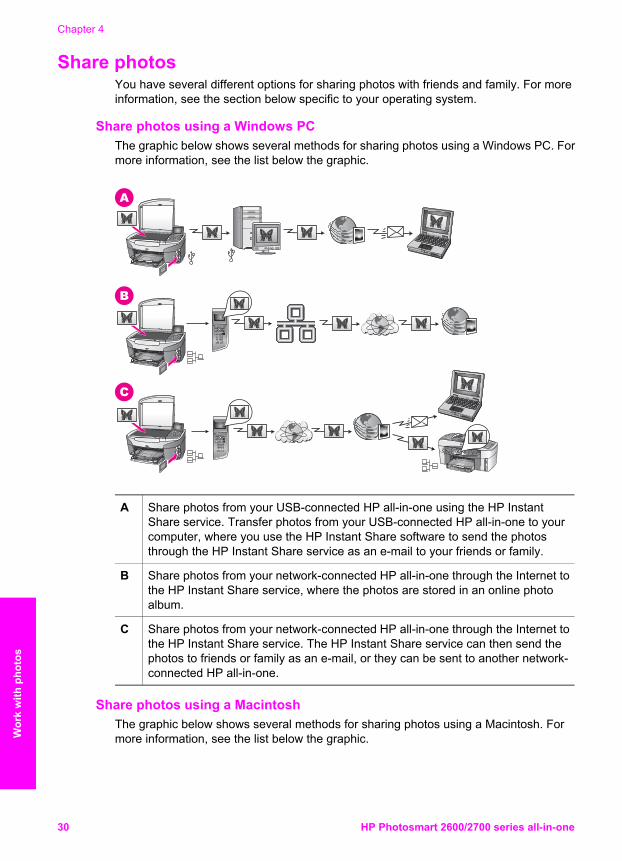
Share photos using a Windows PCThe graphic below shows several methods for sharing photos using a Windows PC. Formore information, see the list below the graphic.
A Share photos from your USB-connected HP all-in-one using the HP InstantShare service. Transfer photos from your USB-connected HP all-in-one to yourcomputer, where you use the HP Instant Share software to send the photosthrough the HP Instant Share service as an e-mail to your friends or family.
B Share photos from your network-connected HP all-in-one through the Internet tothe HP Instant Share service, where the photos are stored in an online photoalbum.
C Share photos from your network-connected HP all-in-one through the Internet tothe HP Instant Share service. The HP Instant Share service can then send thephotos to friends or family as an e-mail, or they can be sent to another network-connected HP all-in-one.
Share photos using a MacintoshThe graphic below shows several methods for sharing photos using a Macintosh. Formore information, see the list below the graphic.
Chapter 4
30 HP Photosmart 2600/2700 series all-in-one
Wor
k w
ith p
hoto
s
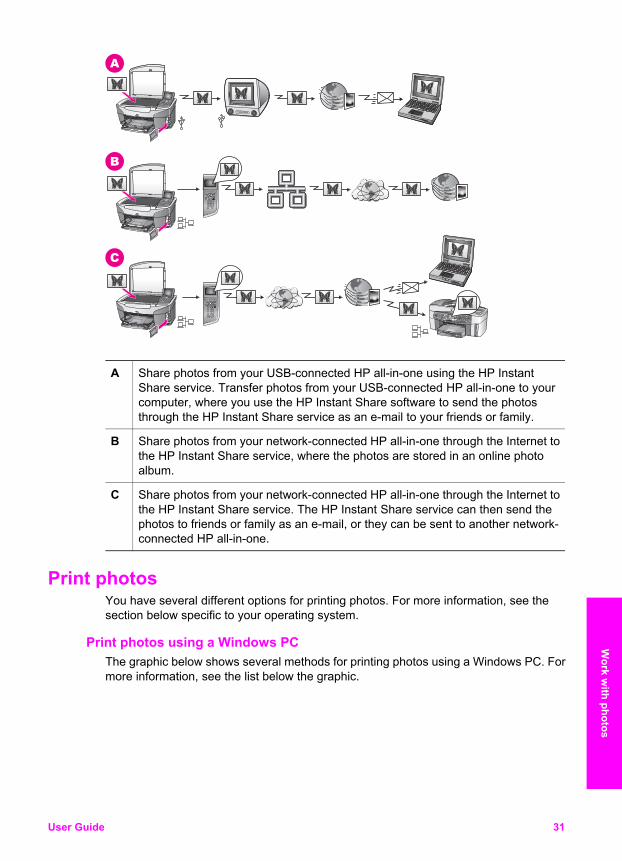
A Share photos from your USB-connected HP all-in-one using the HP InstantShare service. Transfer photos from your USB-connected HP all-in-one to yourcomputer, where you use the HP Instant Share software to send the photosthrough the HP Instant Share service as an e-mail to your friends or family.
B Share photos from your network-connected HP all-in-one through the Internet tothe HP Instant Share service, where the photos are stored in an online photoalbum.
C Share photos from your network-connected HP all-in-one through the Internet tothe HP Instant Share service. The HP Instant Share service can then send thephotos to friends or family as an e-mail, or they can be sent to another network-connected HP all-in-one.
Print photosYou have several different options for printing photos. For more information, see thesection below specific to your operating system.
Print photos using a Windows PCThe graphic below shows several methods for printing photos using a Windows PC. Formore information, see the list below the graphic.
User Guide 31
Work w
ith photos

A Print photos from your PictBridge digital camera using PictBridge.
Note If your digital camera is an HP model that does not support PictBridge,you can still print directly to the HP all-in-one. Connect the camera to theUSB port on the back of the HP all-in-one instead of to the camera port.This works with HP digital cameras only.
B Print photos from your camera using a software application on your computer.
C Print photos from a memory card using the control panel on the HP all-in-one.
D Print photos from a memory card by transferring photos to your Windows PCand printing them using the HP Image Zone software.
Print photos using a MacintoshThe graphic below shows several methods for printing photos using a Macintosh. Formore information, see the list below the graphic.
Chapter 4
32 HP Photosmart 2600/2700 series all-in-one
Wor
k w
ith p
hoto
s
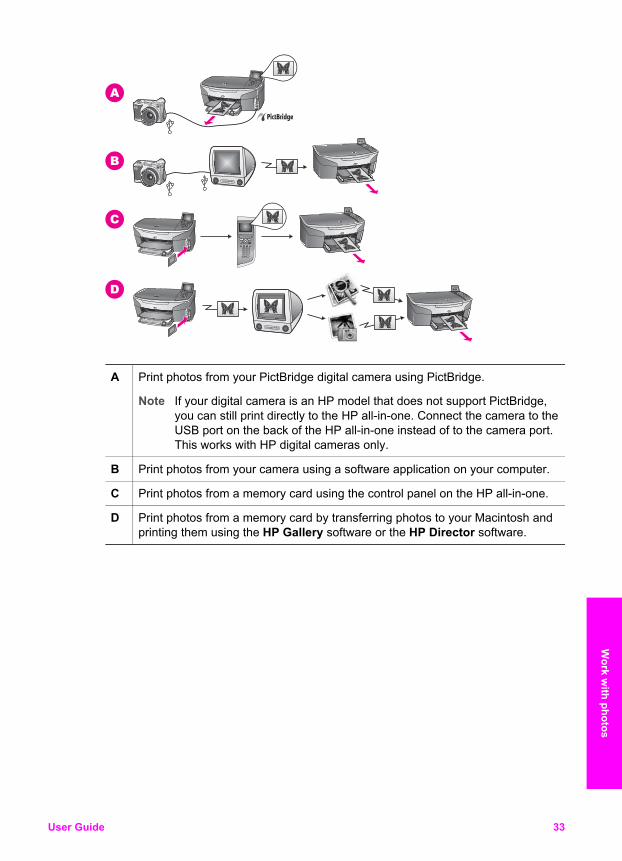
A Print photos from your PictBridge digital camera using PictBridge.
Note If your digital camera is an HP model that does not support PictBridge,you can still print directly to the HP all-in-one. Connect the camera to theUSB port on the back of the HP all-in-one instead of to the camera port.This works with HP digital cameras only.
B Print photos from your camera using a software application on your computer.
C Print photos from a memory card using the control panel on the HP all-in-one.
D Print photos from a memory card by transferring photos to your Macintosh andprinting them using the HP Gallery software or the HP Director software.
User Guide 33
Work w
ith photos

Chapter 4
34 HP Photosmart 2600/2700 series all-in-one
Wor
k w
ith p
hoto
s
5 Load originals and load paperThis chapter provides instructions for loading originals on the glass to copy, scan, orfax; choosing the best paper type for your job; loading paper in the input tray; andavoiding paper jams.
Load an original You can copy, scan, or fax up to letter- or A4-size originals by loading them on theglass, as described here. You should also follow these instructions when loading aproof sheet on the glass for photo printing.
Note Many of the special features will not work correctly if the glass and lid backingare not clean. For more information, see Clean the HP all-in-one.
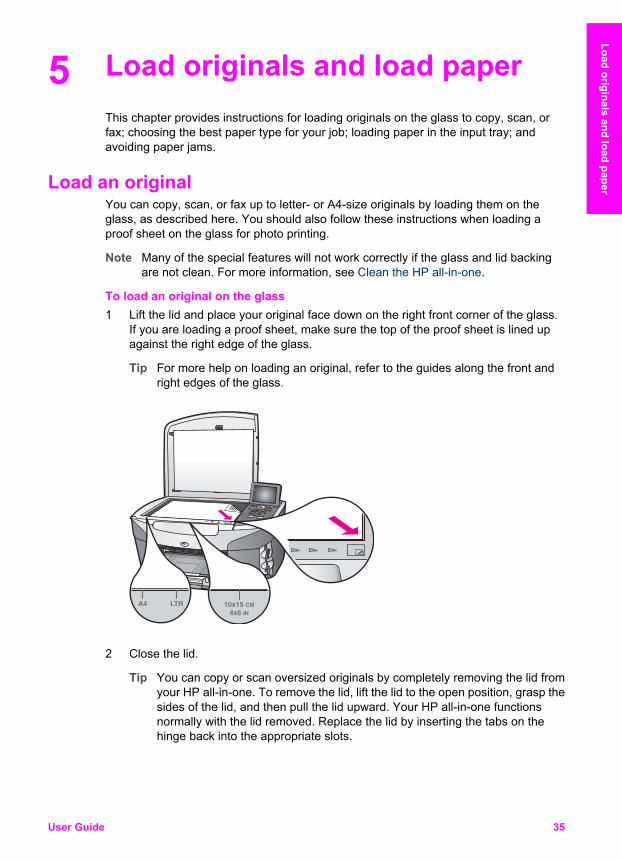
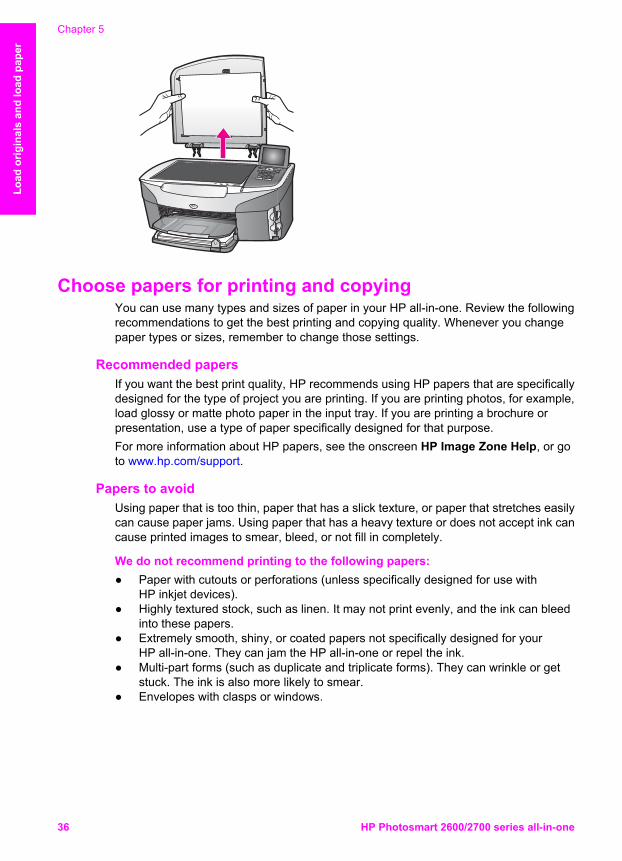
To load an original on the glass1 Lift the lid and place your original face down on the right front corner of the glass.
If you are loading a proof sheet, make sure the top of the proof sheet is lined upagainst the right edge of the glass.
Tip For more help on loading an original, refer to the guides along the front andright edges of the glass.
2 Close the lid.
Tip You can copy or scan oversized originals by completely removing the lid fromyour HP all-in-one. To remove the lid, lift the lid to the open position, grasp thesides of the lid, and then pull the lid upward. Your HP all-in-one functionsnormally with the lid removed. Replace the lid by inserting the tabs on thehinge back into the appropriate slots.
User Guide 35
Load originals and load paper
Choose papers for printing and copyingYou can use many types and sizes of paper in your HP all-in-one. Review the followingrecommendations to get the best printing and copying quality. Whenever you changepaper types or sizes, remember to change those settings.
Recommended papers If you want the best print quality, HP recommends using HP papers that are specificallydesigned for the type of project you are printing. If you are printing photos, for example,load glossy or matte photo paper in the input tray. If you are printing a brochure orpresentation, use a type of paper specifically designed for that purpose.For more information about HP papers, see the onscreen HP Image Zone Help, or goto www.hp.com/support.
Papers to avoid Using paper that is too thin, paper that has a slick texture, or paper that stretches easilycan cause paper jams. Using paper that has a heavy texture or does not accept ink cancause printed images to smear, bleed, or not fill in completely.
We do not recommend printing to the following papers:● Paper with cutouts or perforations (unless specifically designed for use with
HP inkjet devices).● Highly textured stock, such as linen. It may not print evenly, and the ink can bleed
into these papers.● Extremely smooth, shiny, or coated papers not specifically designed for your
HP all-in-one. They can jam the HP all-in-one or repel the ink.● Multi-part forms (such as duplicate and triplicate forms). They can wrinkle or get
stuck. The ink is also more likely to smear.● Envelopes with clasps or windows.
Chapter 5
36 HP Photosmart 2600/2700 series all-in-one
Load
orig
inal
s an
d lo
ad p
aper
We do not recommend copying to the following papers:● Any size paper other than letter, A4, 10 by 15 cm (4 by 6 inch), 5 by 7 inch,
Hagaki, or L. Depending on your country/region, some of these papers might not beavailable to you.
● Paper with cutouts or perforations (unless specifically designed for use withHP inkjet devices).
● Photo paper other than HP Premium Photo Paper orHP Premium Plus Photo Paper.
● Envelopes.● Banner paper.● Transparency film other than HP Premium Inkjet Transparency Film or
HP Premium Plus Inkjet Transparency Film.● Multiple-part forms or label stock.
Load paper This section describes the procedure for loading different types and sizes of paper intoyour HP all-in-one for your copies, printouts, or faxes.
Tip To help prevent rips, wrinkles, and curled or bent edges, store all paper flat in aresealable bag. If the paper is not stored properly, extreme changes intemperature and humidity might result in curled paper that does not work well inthe HP all-in-one.
Load full-size paper You can load many types of letter, A4, or legal paper into the main input tray of yourHP all-in-one.
Tip If you have the optional HP 250 Sheet Plain Paper Tray installed, you can load anadditional 250 sheets of plain letter or A4 paper into the lower tray. Paper loadedin the optional lower tray is only available for printouts you print from the softwareapplications on your computer. It is not available for copying or printing receivedfaxes.
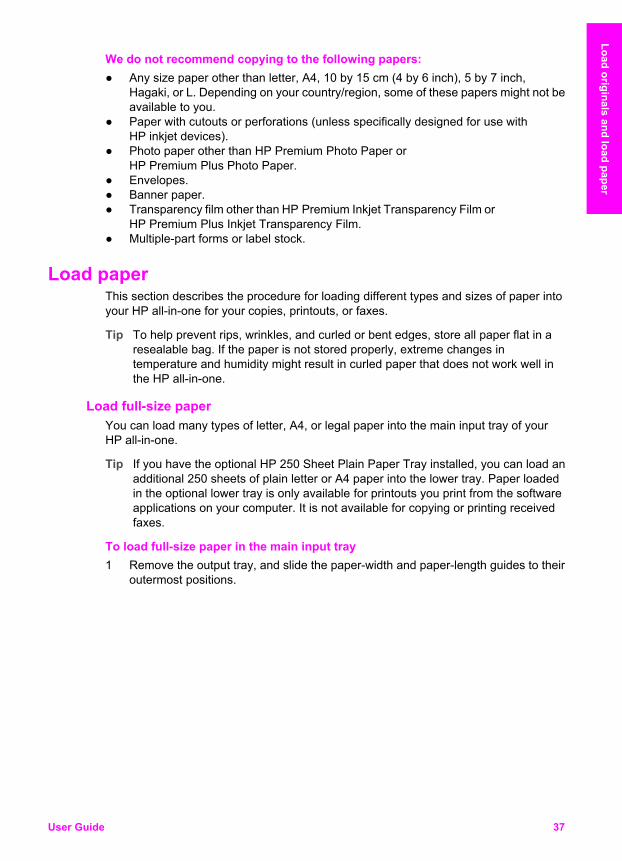
To load full-size paper in the main input tray1 Remove the output tray, and slide the paper-width and paper-length guides to their
outermost positions.
User Guide 37
Load originals and load paper
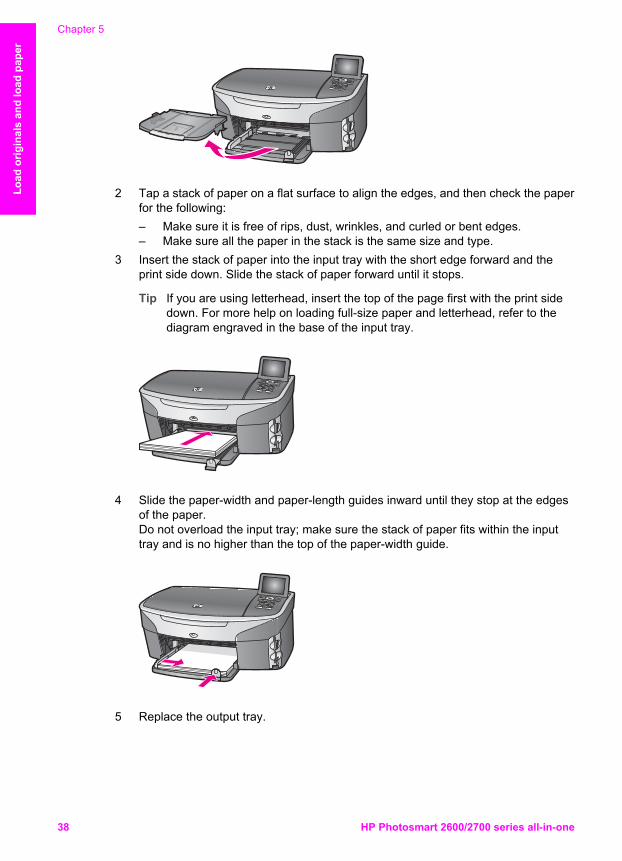
2 Tap a stack of paper on a flat surface to align the edges, and then check the paperfor the following:– Make sure it is free of rips, dust, wrinkles, and curled or bent edges.– Make sure all the paper in the stack is the same size and type.
3 Insert the stack of paper into the input tray with the short edge forward and theprint side down. Slide the stack of paper forward until it stops.
Tip If you are using letterhead, insert the top of the page first with the print sidedown. For more help on loading full-size paper and letterhead, refer to thediagram engraved in the base of the input tray.
4 Slide the paper-width and paper-length guides inward until they stop at the edgesof the paper.Do not overload the input tray; make sure the stack of paper fits within the inputtray and is no higher than the top of the paper-width guide.
5 Replace the output tray.
Chapter 5
38 HP Photosmart 2600/2700 series all-in-one
Load
orig
inal
s an
d lo
ad p
aper
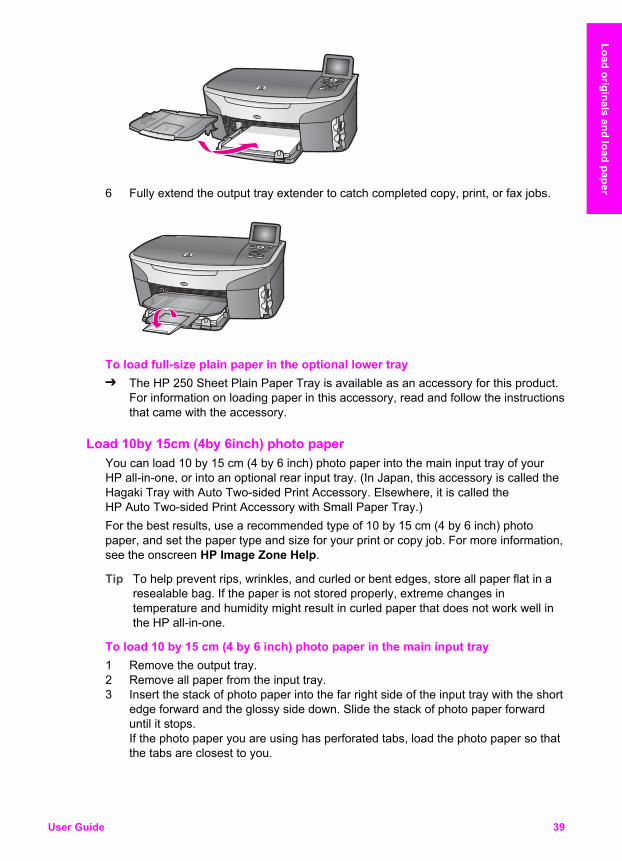
6 Fully extend the output tray extender to catch completed copy, print, or fax jobs.
To load full-size plain paper in the optional lower tray➔ The HP 250 Sheet Plain Paper Tray is available as an accessory for this product.
For information on loading paper in this accessory, read and follow the instructionsthat came with the accessory.
Load 10by 15cm (4by 6inch) photo paper You can load 10 by 15 cm (4 by 6 inch) photo paper into the main input tray of yourHP all-in-one, or into an optional rear input tray. (In Japan, this accessory is called theHagaki Tray with Auto Two-sided Print Accessory. Elsewhere, it is called theHP Auto Two-sided Print Accessory with Small Paper Tray.)For the best results, use a recommended type of 10 by 15 cm (4 by 6 inch) photopaper, and set the paper type and size for your print or copy job. For more information,see the onscreen HP Image Zone Help.
Tip To help prevent rips, wrinkles, and curled or bent edges, store all paper flat in aresealable bag. If the paper is not stored properly, extreme changes intemperature and humidity might result in curled paper that does not work well inthe HP all-in-one.
To load 10 by 15 cm (4 by 6 inch) photo paper in the main input tray1 Remove the output tray.2 Remove all paper from the input tray.3 Insert the stack of photo paper into the far right side of the input tray with the short
edge forward and the glossy side down. Slide the stack of photo paper forwarduntil it stops.If the photo paper you are using has perforated tabs, load the photo paper so thatthe tabs are closest to you.
User Guide 39
Load originals and load paper
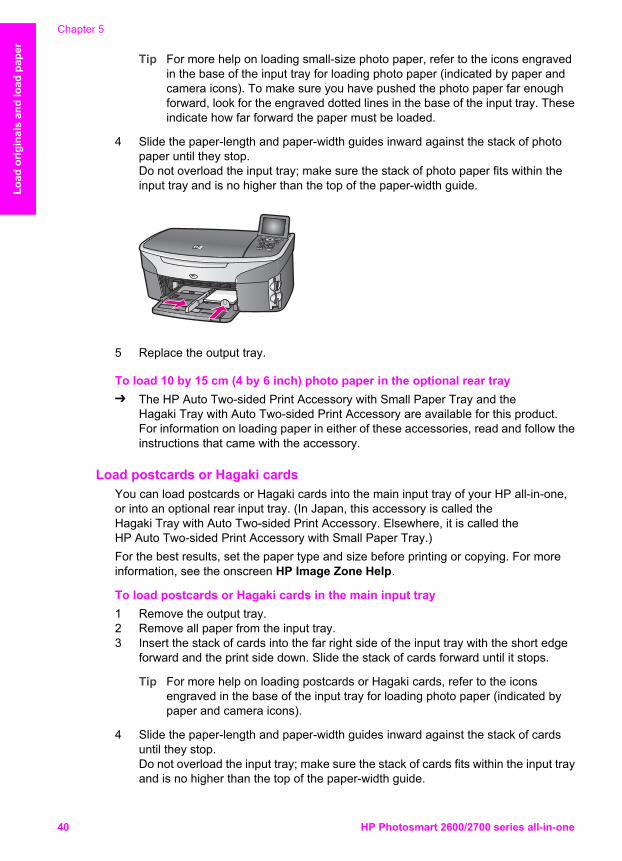
Tip For more help on loading small-size photo paper, refer to the icons engravedin the base of the input tray for loading photo paper (indicated by paper andcamera icons). To make sure you have pushed the photo paper far enoughforward, look for the engraved dotted lines in the base of the input tray. Theseindicate how far forward the paper must be loaded.
4 Slide the paper-length and paper-width guides inward against the stack of photopaper until they stop.Do not overload the input tray; make sure the stack of photo paper fits within theinput tray and is no higher than the top of the paper-width guide.
5 Replace the output tray.
To load 10 by 15 cm (4 by 6 inch) photo paper in the optional rear tray➔ The HP Auto Two-sided Print Accessory with Small Paper Tray and the
Hagaki Tray with Auto Two-sided Print Accessory are available for this product.For information on loading paper in either of these accessories, read and follow theinstructions that came with the accessory.
Load postcards or Hagaki cards You can load postcards or Hagaki cards into the main input tray of your HP all-in-one,or into an optional rear input tray. (In Japan, this accessory is called theHagaki Tray with Auto Two-sided Print Accessory. Elsewhere, it is called theHP Auto Two-sided Print Accessory with Small Paper Tray.)For the best results, set the paper type and size before printing or copying. For moreinformation, see the onscreen HP Image Zone Help.
To load postcards or Hagaki cards in the main input tray1 Remove the output tray.2 Remove all paper from the input tray.3 Insert the stack of cards into the far right side of the input tray with the short edge
forward and the print side down. Slide the stack of cards forward until it stops.
Tip For more help on loading postcards or Hagaki cards, refer to the iconsengraved in the base of the input tray for loading photo paper (indicated bypaper and camera icons).
4 Slide the paper-length and paper-width guides inward against the stack of cardsuntil they stop.Do not overload the input tray; make sure the stack of cards fits within the input trayand is no higher than the top of the paper-width guide.
Chapter 5
40 HP Photosmart 2600/2700 series all-in-one
Load
orig
inal
s an
d lo
ad p
aper
5 Replace the output tray.
To load postcards or Hagaki cards in the optional rear tray➔ The HP Auto Two-sided Print Accessory with Small Paper Tray and the
Hagaki Tray with Auto Two-sided Print Accessory are available for this product.For information on loading paper in either of these accessories, read and follow theinstructions that came with the accessory.
Load envelopes You can load one or more envelopes into the input tray of your HP all-in-one. Do notuse shiny or embossed envelopes or envelopes that have clasps or windows.
Note For specific details on how to format text for printing on envelopes, consult thehelp files in your word processing software. For best results, consider using alabel for the return address on envelopes.
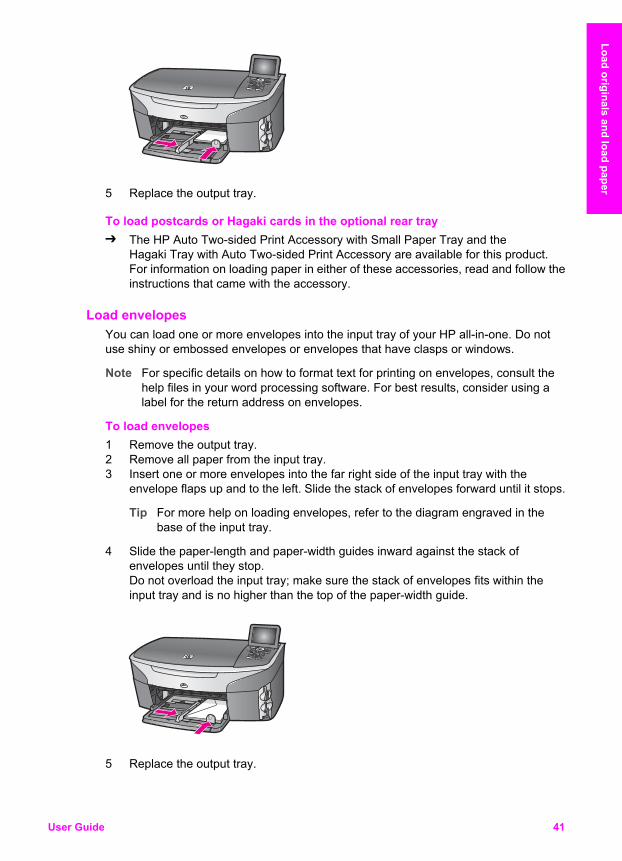
To load envelopes1 Remove the output tray.2 Remove all paper from the input tray.3 Insert one or more envelopes into the far right side of the input tray with the
envelope flaps up and to the left. Slide the stack of envelopes forward until it stops.
Tip For more help on loading envelopes, refer to the diagram engraved in thebase of the input tray.
4 Slide the paper-length and paper-width guides inward against the stack ofenvelopes until they stop.Do not overload the input tray; make sure the stack of envelopes fits within theinput tray and is no higher than the top of the paper-width guide.
5 Replace the output tray.
User Guide 41
Load originals and load paper
Load other types of paper The following table provides guidelines for loading certain types of paper. For bestresults, adjust the paper settings each time you change paper sizes or paper types. Forinformation on changing paper settings, see the onscreen HP Image Zone Help.
Note Not all paper sizes and paper types are available with all the functions on theHP all-in-one. Some paper sizes and paper types can only be used if you arestarting a print job from the Print dialog box in a software application. They arenot available for copying, faxing, or printing photos from a memory card or digitalcamera. Papers that are only available for printing from a software applicationare indicated as such, below.
Paper Tips
HP papers ● HP Premium Paper: Locate the gray arrow on the nonprinting sideof the paper, and then slide the paper into the input tray with thearrow side facing up.
● HP Premium Inkjet Transparency Film: Insert the film so that thewhite transparency strip (with arrows and the HP logo) is on top andis going into the input tray first.
Note The HP all-in-one might not automatically detecttransparency film if it is loaded incorrectly, or if you usetransparency film other than HP transparency film. For bestresults, set the paper type to transparency film before printingor copying onto transparency film.
● HP Iron-On Transfers: Flatten the transfer sheet completely beforeusing it; do not load curled sheets. (To prevent curling, keep transfersheets sealed in the original package until you are ready to usethem.) Locate the blue stripe on the nonprinting side of the transferpaper and then manually feed one sheet at a time into the input traywith the blue stripe facing up.
● HP Matte Greeting Cards, HP Photo Greeting Cards, orHP Textured Greeting Cards: Insert a small stack of HP greetingcard paper into the input tray with the print side down; slide the stackof cards forward until it stops.
Labels(for printing from asoftware applicationonly)
Always use letter or A4 label sheets designed for use with HP inkjetdevices (such as Avery inkjet labels), and make sure that the labels arenot more than two years old. Labels on older sheets might peel off whenthe paper is pulled through the HP all-in-one, causing subsequent paperjams.1 Fan the stack of labels to make sure none of the pages are sticking
together.2 Place a stack of label sheets on top of full-size plain paper in the
input tray, label side down. Do not insert labels one sheet at a time.
Continuous bannerpaper
Continuous banner paper is also known as computer or z-fold paper.1 Remove the output tray.
Chapter 5
42 HP Photosmart 2600/2700 series all-in-one
Load
orig
inal
s an
d lo
ad p
aper
Paper Tips
(for printing from asoftware applicationonly)
2 Remove all paper from the input tray.
Note Leave the output tray off of the HP all-in-one while thebanner prints to prevent the continuous banner paper fromtearing.
3 Verify that the stack of banner paper contains at least five pages inthe stack.
Note If you use non-HP banner paper, make sure you use 20-lb.paper.
4 Carefully tear off the perforated edge strips from both sides of thepaper stack, if any, and unfold and refold the paper to make sure thepages do not stick together.
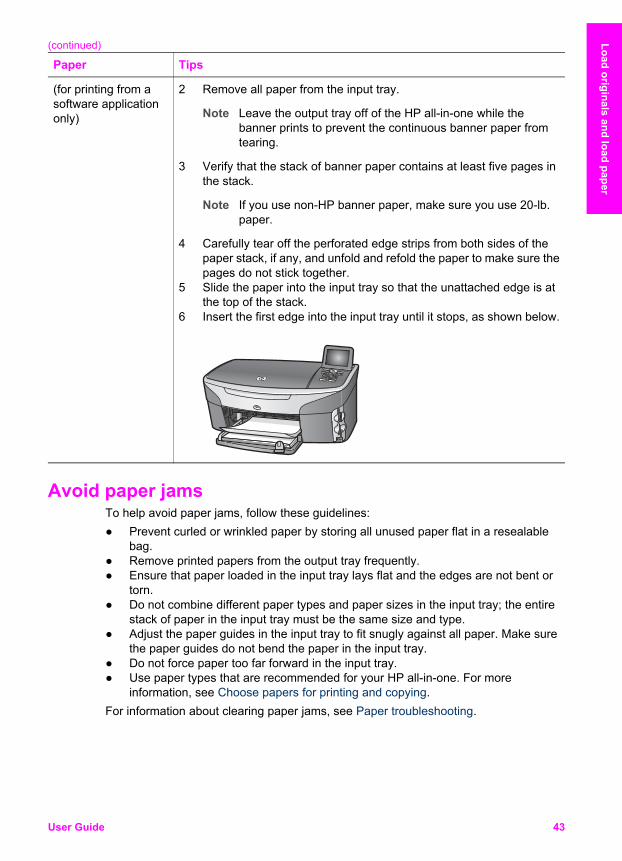
5 Slide the paper into the input tray so that the unattached edge is atthe top of the stack.
6 Insert the first edge into the input tray until it stops, as shown below.
Avoid paper jams To help avoid paper jams, follow these guidelines:● Prevent curled or wrinkled paper by storing all unused paper flat in a resealable
bag.● Remove printed papers from the output tray frequently.● Ensure that paper loaded in the input tray lays flat and the edges are not bent or
torn.● Do not combine different paper types and paper sizes in the input tray; the entire
stack of paper in the input tray must be the same size and type.● Adjust the paper guides in the input tray to fit snugly against all paper. Make sure
the paper guides do not bend the paper in the input tray.● Do not force paper too far forward in the input tray.● Use paper types that are recommended for your HP all-in-one. For more
information, see Choose papers for printing and copying.For information about clearing paper jams, see Paper troubleshooting.
(continued)
User Guide 43
Load originals and load paper

Chapter 5
44 HP Photosmart 2600/2700 series all-in-one
Load
orig
inal
s an
d lo
ad p
aper
6 Use a memory card or PictBridgecameraThe HP all-in-one can access the memory cards used in most digital cameras so youcan print, store, manage, and share your photos. You can insert the memory card intothe HP all-in-one, or connect your camera directly, letting the HP all-in-one read thecontents of the memory card while it is still in the camera.This chapter contains information on using memory cards or a PictBridge camera withyour HP all-in-one. Read this chapter for information on transferring photos to yourcomputer, setting photo print options, printing photos, editing photos, viewing slideshows, and sharing photos with your family and friends.
The memory card slots and camera port If your digital camera uses a memory card to store photos, you can insert the memorycard in your HP all-in-one to print or save your photos.You can print a proof sheet, which might be several pages long and shows thumbnailviews of photos stored on the memory card, and print photos from the memory card,even if your HP all-in-one is not connected to a computer. You can also connect adigital camera that supports PictBridge to the HP all-in-one through the camera port andprint directly from the camera.Your HP all-in-one can read the following memory cards: CompactFlash (I, II), MemorySticks, MultiMediaCard (MMC), Secure Digital, SmartMedia, and xD-Picture Card.
Note You can scan a document and send the scanned image to an inserted memorycard. For more information, see Send a scan to a memory card.
Your HP all-in-one features four slots for memory cards, shown in the followingillustration, with the memory cards that correspond to each slot.
The slots are configured as follows:● Top left slot: CompactFlash (I, II)● Top right slot: Secure Digital, MultiMediaCard (MMC)● Bottom left slot: SmartMedia, xD-Picture Card (fits in top right of the slot)
User Guide 45
Mem
ory Card and PictB
ridge
● Bottom right slot: Memory Stick, Magic Gate Memory Stick, Memory Stick Duo (withuser-supplied adapter), Memory Stick Pro
● PictBridge camera port (below the memory card slots): compatible with any USB-equipped digital camera that supports PictBridge
Note The camera port only supports USB-equipped digital cameras that supportPictBridge. If you attach a USB device that is not a compatible digital camera (orBluetooth adapter) to the camera port , an error message appears on the colorgraphics display. If you have an older HP-brand digital camera, try using the USBcable that came with the camera. Plug it into the USB port on the back of theHP all-in-one and not into the camera port near the memory card slots. Thisworks with HP digital cameras only.
Tip By default, Windows XP will format a memory card of 8 MB or less and 64 MB ormore with the FAT32 format. Digital cameras and other devices use the FAT(FAT16 or FAT12) format and cannot operate with a FAT32 formatted card. Eitherformat your memory card in your camera or select FAT format to format yourmemory card in a Windows XP PC.
Control memory card security on a networkYour HP all-in-one, if networked, lets computers on your network access the contentsof memory cards. When used on a wireless network that does not have wirelessencryption enabled, anyone within wireless range who knows your network name andthe HP all-in-one network ID can access the contents of your memory card while it isinserted in the HP all-in-one.You can increase the privacy of data on your memory cards by establishing a WEP(Wired Equivalent Privacy) key or WPA/PSK (Wi-Fi Protected Access/Pre-Shared Key) )on your wireless network or by setting the HP all-in-one so it never shares an insertedmemory card with networked computers, wireless or not. This means that othercomputers on your network will also not be able to access the files on the memorycard.For more information on adding encryption to a wireless network, see the NetworkGuide.
Note The HP all-in-one never shares the contents of a memory card in a digitalcamera that is connected to the HP all-in-one through the camera port.
1 Press Setup.2 Press 8, and then press 3.
This displays the Network menu and then selects Advanced Setup.3 Press 3 to select Memory Card Security.4 Press the number next to the desired security option:
– 1. Share Files– 2. Do Not Share Files
Transfer photos to your computer After you take photos with your digital camera, you can print them immediately or savethem directly to your computer. To save them to your computer, you need to remove the
Chapter 6
46 HP Photosmart 2600/2700 series all-in-one
Mem
ory
Car
d an
d Pi
ctB
ridge
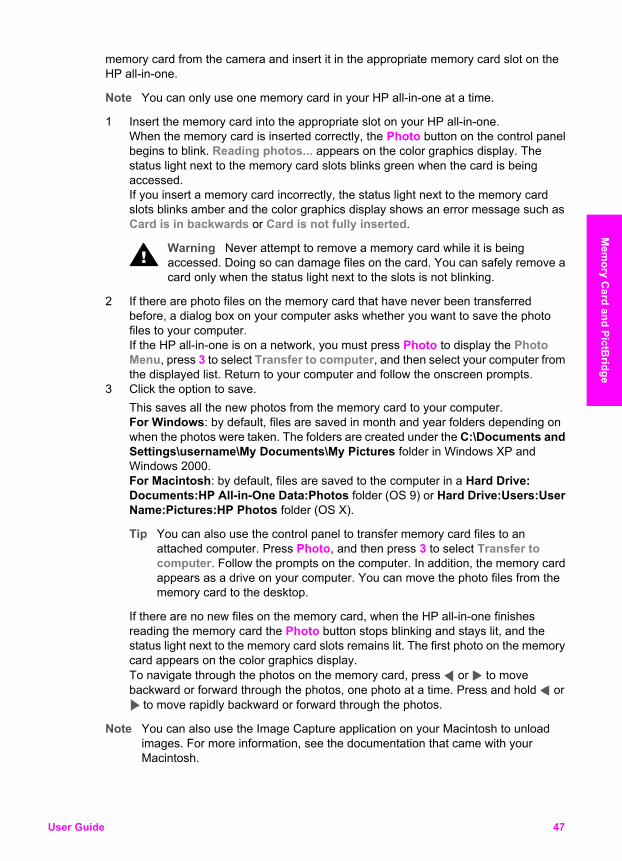
memory card from the camera and insert it in the appropriate memory card slot on theHP all-in-one.
Note You can only use one memory card in your HP all-in-one at a time.
1 Insert the memory card into the appropriate slot on your HP all-in-one.When the memory card is inserted correctly, the Photo button on the control panelbegins to blink. Reading photos... appears on the color graphics display. Thestatus light next to the memory card slots blinks green when the card is beingaccessed.If you insert a memory card incorrectly, the status light next to the memory cardslots blinks amber and the color graphics display shows an error message such asCard is in backwards or Card is not fully inserted.
Warning Never attempt to remove a memory card while it is beingaccessed. Doing so can damage files on the card. You can safely remove acard only when the status light next to the slots is not blinking.
2 If there are photo files on the memory card that have never been transferredbefore, a dialog box on your computer asks whether you want to save the photofiles to your computer.If the HP all-in-one is on a network, you must press Photo to display the PhotoMenu, press 3 to select Transfer to computer, and then select your computer fromthe displayed list. Return to your computer and follow the onscreen prompts.
3 Click the option to save.This saves all the new photos from the memory card to your computer.For Windows: by default, files are saved in month and year folders depending onwhen the photos were taken. The folders are created under the C:\Documents andSettings\username\My Documents\My Pictures folder in Windows XP andWindows 2000.For Macintosh: by default, files are saved to the computer in a Hard Drive:Documents:HP All-in-One Data:Photos folder (OS 9) or Hard Drive:Users:UserName:Pictures:HP Photos folder (OS X).
Tip You can also use the control panel to transfer memory card files to anattached computer. Press Photo, and then press 3 to select Transfer tocomputer. Follow the prompts on the computer. In addition, the memory cardappears as a drive on your computer. You can move the photo files from thememory card to the desktop.
If there are no new files on the memory card, when the HP all-in-one finishesreading the memory card the Photo button stops blinking and stays lit, and thestatus light next to the memory card slots remains lit. The first photo on the memorycard appears on the color graphics display.To navigate through the photos on the memory card, press or to movebackward or forward through the photos, one photo at a time. Press and hold or
to move rapidly backward or forward through the photos.
Note You can also use the Image Capture application on your Macintosh to unloadimages. For more information, see the documentation that came with yourMacintosh.
User Guide 47
Mem
ory Card and PictB
ridge
Print photos from a proof sheet A proof sheet is a simple and convenient way to select photos and make prints directlyfrom a memory card without the need for a computer. A proof sheet, which might beseveral pages long, shows thumbnail views of photos stored on the memory card. Thefile name, index number, and date appear under each thumbnail. Proof sheets are also aquick way to create a printed catalog of your photos. In order to print photos using aproof sheet, you need to print the proof sheet, complete it, and then scan it.
Note You can only print a proof sheet for a memory card inserted into the HP all-in-one. You cannot print photos from a PictBridge camera connected to thePictBridge camera port.
Printing photos from a proof sheet is done in three steps: printing a proof sheet,completing the proof sheet, and scanning the proof sheet. This section contains detailedinformation on all three steps.
Tip You can also improve the quality of the photos you print with the HP all-in-one bypurchasing a photo or gray photo print cartridge. With the tri-color print cartridgeand photo print cartridge installed, you have a six-ink system, which providesenhanced quality color photos. With the tri-color print cartridge and the gray photoprint cartridge installed, you can print a full range of gray tones, which providesenhanced quality black-and-white photos. For more information on the photo printcartridge, see Use a photo print cartridge. For more information on the gray photoprint cartridge, see Use a gray photo print cartridge.
Print a proof sheetThe first step in using a proof sheet is to print it from the HP all-in-one.1 Insert the memory card into the appropriate slot on your HP all-in-one.2 Press Proof Sheet, and then press 1.
This displays the Proof Sheet Menu and then selects Print Proof Sheet.
Note Depending on how many photos are on the memory card, the time it takes toprint a proof sheet can vary greatly.
3 If there are more than 20 photos on the card, the Select Photos Menu appears.Press the number next to the command you want to select:– 1. All– 2. Last 20– 3. Custom Range
Note Use the proof sheet index number to select which photos to print for acustom range. This number might be different from the number associatedwith the photo on your digital camera. If you add or delete photos from yourmemory card, reprint the proof sheet to see accurate index numbers.
4 If you choose Custom Range, enter the photo index numbers for the first and lastphotos you want to print.
Note You can erase index numbers by pressing to backspace.
Chapter 6
48 HP Photosmart 2600/2700 series all-in-one
Mem
ory
Car
d an
d Pi
ctB
ridge
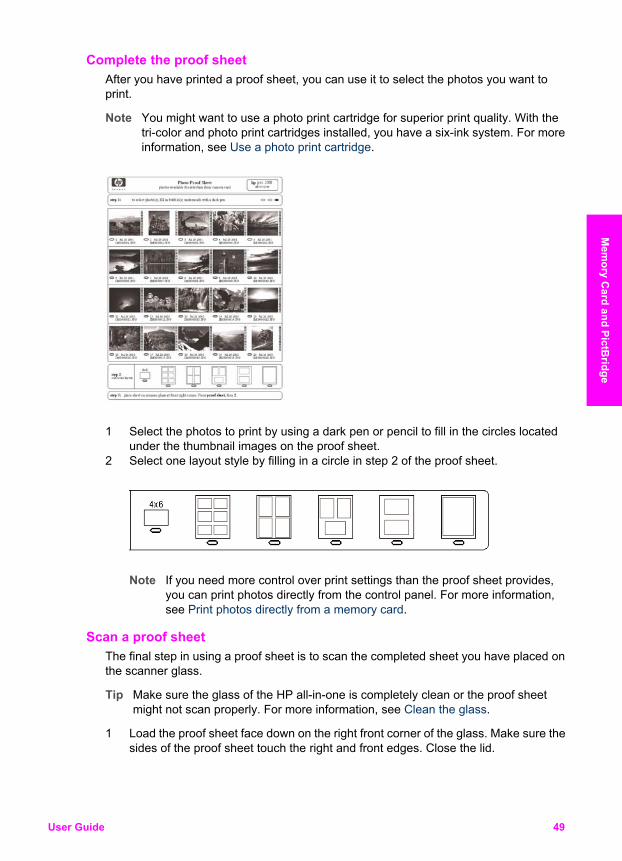
Complete the proof sheet After you have printed a proof sheet, you can use it to select the photos you want toprint.
Note You might want to use a photo print cartridge for superior print quality. With thetri-color and photo print cartridges installed, you have a six-ink system. For moreinformation, see Use a photo print cartridge.
1 Select the photos to print by using a dark pen or pencil to fill in the circles locatedunder the thumbnail images on the proof sheet.
2 Select one layout style by filling in a circle in step 2 of the proof sheet.
Note If you need more control over print settings than the proof sheet provides,you can print photos directly from the control panel. For more information,see Print photos directly from a memory card.
Scan a proof sheet The final step in using a proof sheet is to scan the completed sheet you have placed onthe scanner glass.
Tip Make sure the glass of the HP all-in-one is completely clean or the proof sheetmight not scan properly. For more information, see Clean the glass.
1 Load the proof sheet face down on the right front corner of the glass. Make sure thesides of the proof sheet touch the right and front edges. Close the lid.
User Guide 49
Mem
ory Card and PictB
ridge
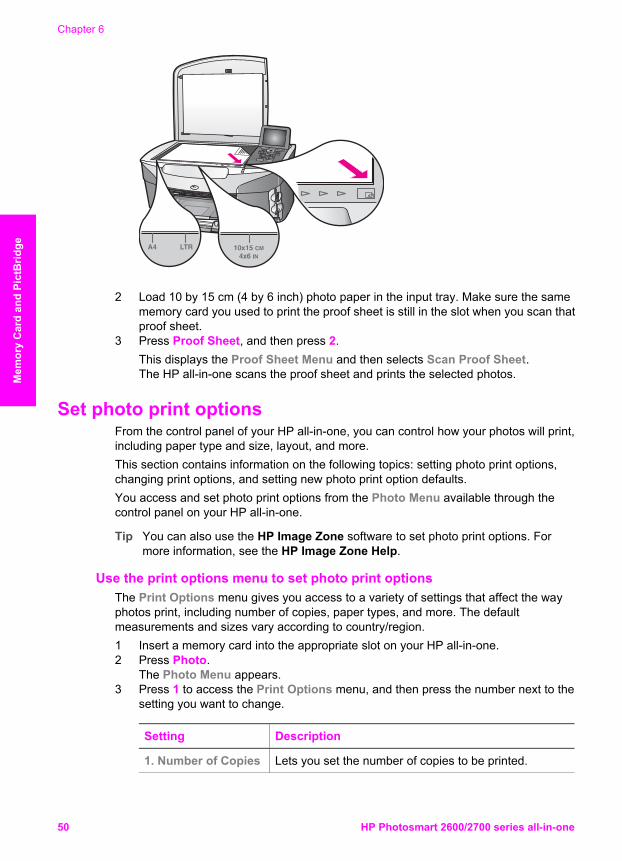
2 Load 10 by 15 cm (4 by 6 inch) photo paper in the input tray. Make sure the samememory card you used to print the proof sheet is still in the slot when you scan thatproof sheet.
3 Press Proof Sheet, and then press 2.This displays the Proof Sheet Menu and then selects Scan Proof Sheet.The HP all-in-one scans the proof sheet and prints the selected photos.
Set photo print optionsFrom the control panel of your HP all-in-one, you can control how your photos will print,including paper type and size, layout, and more.This section contains information on the following topics: setting photo print options,changing print options, and setting new photo print option defaults.You access and set photo print options from the Photo Menu available through thecontrol panel on your HP all-in-one.
Tip You can also use the HP Image Zone software to set photo print options. Formore information, see the HP Image Zone Help.
Use the print options menu to set photo print optionsThe Print Options menu gives you access to a variety of settings that affect the wayphotos print, including number of copies, paper types, and more. The defaultmeasurements and sizes vary according to country/region.1 Insert a memory card into the appropriate slot on your HP all-in-one.2 Press Photo.
The Photo Menu appears.3 Press 1 to access the Print Options menu, and then press the number next to the
setting you want to change.
Setting Description
1. Number of Copies Lets you set the number of copies to be printed.
Chapter 6
50 HP Photosmart 2600/2700 series all-in-one
Mem
ory
Car
d an
d Pi
ctB
ridge

Setting Description
2. Image Size Lets you set the size at which you want the imageprinted. Most choices are self-explanatory, but tworequire some explanation: Fill Entire Page and Fit toPage.The Fill Entire Page setting scales the image to coverall of the printable area on the paper. If you insertedphoto paper in the input tray, there will not be a whiteborder around the photo. Some cropping may occur. Fitto Page scales the image to cover as much of the pageas possible while keeping the original aspect ratiowithout cropping. The image is centered on the pageand is surrounded by a white border.
3. Tray Select Lets you select the input tray (front or rear) that theHP all-in-one should use. This setting is only available ifa rear tray is detected when you turn on the HP all-in-one.
4. Paper Size Lets you select the paper size for the current print job.The Automatic setting defaults to a large (letter or A4)and small 10 by 15 cm (4 by 6 inch) paper size thatvaries by country/region. When Paper Size and PaperType are both set to Automatic, the HP all-in-oneselects the best print options for the current print job.The other Paper Size settings let you override theautomatic settings.
5. Paper Type Lets you select the paper type for the current print job.The Automatic setting lets the HP all-in-one detect andset the paper type automatically. When Paper Size andPaper Type are both set to Automatic, the HP all-in-one selects the best options for the current print job. Theother Paper Type settings let you override the automaticsettings.
6. Layout Style Lets you select one of three layout styles for the currentprint job.The Paper Saver layout fits as many photos on thepaper as possible, rotating and cropping photos ifnecessary.The Album layouts keep the orientation of the originalphotos. Some cropping might occur.
7. Smart Focus Lets you enable or disable automatic digital sharpeningof photos. Smart Focus affects only printed photos. Itdoes not change the appearance of photos on the colorgraphics display or the actual image file on the memorycard. Smart Focus is enabled by default.
User Guide 51
Mem
ory Card and PictB
ridge
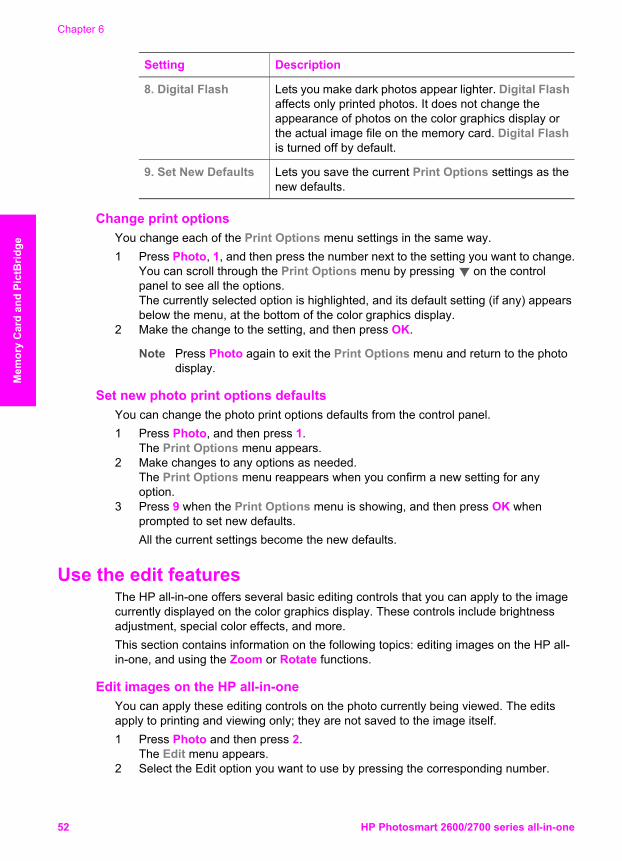
Setting Description
8. Digital Flash Lets you make dark photos appear lighter. Digital Flashaffects only printed photos. It does not change theappearance of photos on the color graphics display orthe actual image file on the memory card. Digital Flashis turned off by default.
9. Set New Defaults Lets you save the current Print Options settings as thenew defaults.
Change print optionsYou change each of the Print Options menu settings in the same way.1 Press Photo, 1, and then press the number next to the setting you want to change.
You can scroll through the Print Options menu by pressing on the controlpanel to see all the options.The currently selected option is highlighted, and its default setting (if any) appearsbelow the menu, at the bottom of the color graphics display.
2 Make the change to the setting, and then press OK.
Note Press Photo again to exit the Print Options menu and return to the photodisplay.
Set new photo print options defaultsYou can change the photo print options defaults from the control panel.1 Press Photo, and then press 1.
The Print Options menu appears.2 Make changes to any options as needed.
The Print Options menu reappears when you confirm a new setting for anyoption.
3 Press 9 when the Print Options menu is showing, and then press OK whenprompted to set new defaults.All the current settings become the new defaults.
Use the edit featuresThe HP all-in-one offers several basic editing controls that you can apply to the imagecurrently displayed on the color graphics display. These controls include brightnessadjustment, special color effects, and more.This section contains information on the following topics: editing images on the HP all-in-one, and using the Zoom or Rotate functions.
Edit images on the HP all-in-oneYou can apply these editing controls on the photo currently being viewed. The editsapply to printing and viewing only; they are not saved to the image itself.1 Press Photo and then press 2.
The Edit menu appears.2 Select the Edit option you want to use by pressing the corresponding number.
Chapter 6
52 HP Photosmart 2600/2700 series all-in-one
Mem
ory
Car
d an
d Pi
ctB
ridge
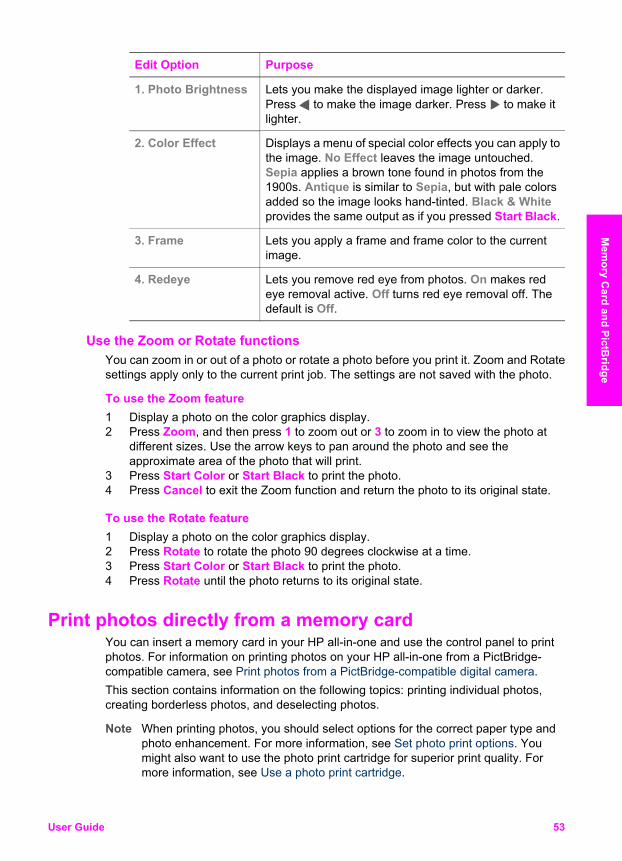
Edit Option Purpose
1. Photo Brightness Lets you make the displayed image lighter or darker.Press to make the image darker. Press to make itlighter.
2. Color Effect Displays a menu of special color effects you can apply tothe image. No Effect leaves the image untouched.Sepia applies a brown tone found in photos from the1900s. Antique is similar to Sepia, but with pale colorsadded so the image looks hand-tinted. Black & Whiteprovides the same output as if you pressed Start Black.
3. Frame Lets you apply a frame and frame color to the currentimage.
4. Redeye Lets you remove red eye from photos. On makes redeye removal active. Off turns red eye removal off. Thedefault is Off.
Use the Zoom or Rotate functionsYou can zoom in or out of a photo or rotate a photo before you print it. Zoom and Rotatesettings apply only to the current print job. The settings are not saved with the photo.
To use the Zoom feature1 Display a photo on the color graphics display.2 Press Zoom, and then press 1 to zoom out or 3 to zoom in to view the photo at
different sizes. Use the arrow keys to pan around the photo and see theapproximate area of the photo that will print.
3 Press Start Color or Start Black to print the photo.4 Press Cancel to exit the Zoom function and return the photo to its original state.
To use the Rotate feature1 Display a photo on the color graphics display.2 Press Rotate to rotate the photo 90 degrees clockwise at a time.3 Press Start Color or Start Black to print the photo.4 Press Rotate until the photo returns to its original state.
Print photos directly from a memory card You can insert a memory card in your HP all-in-one and use the control panel to printphotos. For information on printing photos on your HP all-in-one from a PictBridge-compatible camera, see Print photos from a PictBridge-compatible digital camera.This section contains information on the following topics: printing individual photos,creating borderless photos, and deselecting photos.
Note When printing photos, you should select options for the correct paper type andphoto enhancement. For more information, see Set photo print options. Youmight also want to use the photo print cartridge for superior print quality. Formore information, see Use a photo print cartridge.
User Guide 53
Mem
ory Card and PictB
ridge
You can do more than print your photos if you use the HP Image Zone software. Thissoftware lets you use photos for iron-on transfers, posters, banners, stickers, and othercreative projects. For more information, see the onscreen HP Image Zone Help.
Print individual photosYou can print photos directly from the control panel without using a proof sheet.1 Insert the memory card into the appropriate slot on your HP all-in-one.
The Photo button lights up.2 Display a photo on the color graphics display and press OK to select it for printing. A
selected photo bears a checkmark. Use or to move backward or forwardthrough the photos, one photo at a time. Press and hold or to move rapidlythrough the photos.
Note You can also select photos to print by entering the index numbers of thephotos you want to print. Press the pound key (#) to specify a range: 21-30.Press OK when you are finished entering the photo index numbers. If you donot know the photo index number, print a photo proof sheet before selectingindividual photos to print.
3 Press Photo to display the Photo Menu, and then modify the photo print optionsas desired. The print option settings revert back to the default settings after theprint job is completed.
4 Press Start Black or Start Color to print the selected photos.
Create borderless prints An exceptional feature of your HP all-in-one is its ability to turn photos on a memorycard into professional, borderless prints.1 Insert the memory card into the appropriate slot on your HP all-in-one.
The Photo button lights up.2 Display a photo on the color graphics display and press OK to select it for printing. A
selected photo bears a checkmark. Use or to move backward or forwardthrough the photos, one photo at a time. Press and hold or to move rapidlythrough the photos.
Note You can also select photos by entering the index numbers of the photos youwant to print. Press the pound key (#) to specify a range: 21-30. Press OKwhen you finish entering the photo index numbers.
3 Load photo paper face down in the back right corner of the input tray and adjust thepaper guides.
Tip If the photo paper you are using has perforated tabs, load the photo paper sothat the tabs are closest to you.
4 Press Start Black or Start Color to print the selected photos as borderless prints.
Chapter 6
54 HP Photosmart 2600/2700 series all-in-one
Mem
ory
Car
d an
d Pi
ctB
ridge
Deselect photos You can deselect photos from the control panel.➔ Do one of the following:
– Press OK to deselect the currently selected photo shown in the display.– Press Cancel to deselect all photos and return to the idle screen.
Print photos from a PictBridge-compatible digital camera The HP all-in-one supports the PictBridge standard, which lets you connect anyPictBridge-compatible camera to the camera port and print photos contained on thememory card in the camera.1 Connect your PictBridge-compatible digital camera to the camera port on the front
of your HP all-in-one using the USB cable supplied with your camera.2 Turn on your camera and make sure it is in PictBridge mode.
Note When the camera is connected correctly, the status light next to the memory cardslots is illuminated. The status light blinks green when printing from the camera.If the camera is not PictBridge-compliant or is not in PictBridge mode, the statuslight blinks amber and an error message displays on your computer monitor (ifyou have the HP all-in-one software installed). Disconnect the camera, correctthe problem on the camera and reconnect. For more information aboutPictBridge camera port troubleshooting, see the onscreen TroubleshootingHelp that came with your HP Image Zone software.
After you successfully connect your PictBridge-compliant camera to the HP all-in-one,you can print your photos. Make sure the size of the paper loaded in the HP all-in-onematches the setting on your camera. If the paper size setting on your camera is set tothe default, the HP all-in-one uses the paper that is currently loaded in the input tray.Refer to the user guide that came with your camera for detailed information on printingfrom the camera.
Tip If your digital camera is an HP model that does not support PictBridge, you canstill print directly to the HP all-in-one. Connect the camera to the USB port on theback of the HP all-in-one instead of to the camera port. This works with HP digitalcameras only.
Use quick print to print the current photo You can use the Quick Print feature to print the photo currently being viewed on thecolor graphics display.1 Insert the memory card into the appropriate slot on your HP all-in-one.2 Navigate to a photo you want to print.3 Press Start Black or Start Color to print the photo using the current settings.
Print a DPOF file The Digital Print Order Format (DPOF) is an industry-standard file that can be createdby some digital cameras. Camera-selected photos are photos you marked for printingwith your digital camera. When you select photos with your camera, the camera creates a
User Guide 55
Mem
ory Card and PictB
ridge
DPOF file that identifies which photos have been tagged for printing. Your HP all-in-onecan read the DPOF file from the memory card so you do not have to reselect the photosto print.
Note Not all digital cameras allow you to tag your photos for printing. See your digitalcamera documentation to see if it supports DPOF. Your HP all-in-one supportsDPOF file format 1.1.
When you print camera-selected photos, the HP all-in-one print settings do not apply;the settings in the DPOF file for photo layout and number of copies override those ofyour HP all-in-one.The DPOF file is stored by the digital camera on a memory card and specifies thefollowing information:● Which photos to print● The quantity of each photo to print● Rotation applied to a photo● Cropping applied to a photo● Index printing (thumbnails of selected photos)
To print camera-selected photos1 Insert the memory card into the appropriate slot on your HP all-in-one. If there are
DPOF-tagged photos, the Print DPOF Photos prompt appears on the colorgraphics display.
2 Do one of the following:– Press 1 to print all DPOF-tagged photos on the memory card.– Press 2 to bypass DPOF printing.
Use the slide show feature You can use the Slide Show option on the Photo Menu to view all the photos on amemory card as a slide show.
View or print photos in a slide showYou can view or print photos displayed in a slide show using the Slide Show feature ofthe HP all-in-one.
To view a slide show1 Insert the memory card into the appropriate slot on your HP all-in-one.2 Press Photo to display the Photo Menu.3 Press 4 to start the slide show.4 Press Cancel to end the slide show.
To print the currently displayed photo in a slide show1 When the photo you want to print appears on the color graphics display, press
Cancel to cancel the slide show.2 Press Start Black or Start Color to print the photo using the current settings.
Chapter 6
56 HP Photosmart 2600/2700 series all-in-one
Mem
ory
Car
d an
d Pi
ctB
ridge
Share photos through HP Instant Share The HP all-in-one and its software can help you share photos with friends and familymembers using a technology called HP Instant Share. You can use HP Instant Shareto:● Share photos with friends and relatives through e-mail.● Create online albums.● Order printed photos online.
Note Not all countries/regions can order printed photos online.
In order to take full advantage of the HP Instant Share features available from thecontrol panel of your HP all-in-one, you must set up HP Instant Share on your HP all-in-one. For information on setting up HP Instant Share on your HP all-in-one, see UseHP Instant Share (USB) or Use HP Instant Share (networked).
Note If you set up HP Instant Share on a network, you will not be able to useHP Instant Share on a USB-connected device.
Share photos from a memory card with friends and relatives (USB-connected)
Your HP all-in-one allows you to share photos immediately upon inserting a memorycard. Simply insert the memory card into the appropriate card slot, select one or morephotos, and press Photo on the control panel.
Note If you previously set up HP Instant Share on a network, you will not be able touse HP Instant Share on a USB-connected device.
1 Make sure the memory card is inserted into the appropriate card slot on yourHP all-in-one.
2 Select one or more photos.3 Press Photo on the control panel of your HP all-in-one.
The Photo Menu appears on the color graphics display.4 Press 5 to select HP Instant Share.
For Windows users, the HP Image Zone software opens on your computer. The HPInstant Share tab appears. Thumbnails of your photos appear in the SelectionTray. For more information, see the onscreen HP Image Zone Help.For Macintosh users, the HP Instant Share client application software opens onyour computer. Thumbnails of your photos appear in the HP Instant Sharewindow.
Note If you are using a version of the Macintosh OS earlier than OS X v10.1.5(including OS 9), your photos are uploaded to the HP Gallery on yourMacintosh. Click E-mail. Send the photos as an e-mail attachment byfollowing the prompts on your computer screen.
Follow the prompts on your computer for sharing the photos with others using HPInstant Share.
User Guide 57
Mem
ory Card and PictB
ridge
Share photos from a memory card with friends and relatives (network-connected)
Your HP all-in-one allows you to share photos immediately upon inserting a memorycard. Simply insert the memory card into the appropriate card slot, select one or morephotos, and press Photo on the control panel.Before you can share photos on your memory card on a network-connected HP all-in-one, you must first have HP Instant Share set up on the device. For more information onsetting up HP Instant Share on your device, see Get started.1 Make sure the memory card is inserted into the appropriate card slot on your
HP all-in-one.2 Select one or more photos.3 From the control panel, press Photo.
The Photo Menu appears on the color graphics display.4 Press 5 to select HP Instant Share.
The Share Menu appears.5 Use the and arrows to highlight a destination to which you want to send your
photos.6 Press OK to select the destination and send the photos.
Use the HP Image ZoneYou can use the HP Image Zone for viewing and editing image files. You can also printimages, send images by e-mail or fax to friends and relatives, upload images to awebsite, or use images in fun and creative printing projects. The HP software lets youdo all this and much more. Explore the software to take full advantage of the features ofyour HP all-in-one.For more information, see the onscreen HP Image Zone Help that came with yoursoftware.For Windows: If you want to open the HP Image Zone at a later time, open theHP Director and click the HP Image Zone icon.For Macintosh: If you want to open the HP Gallery component of the HP Image Zoneat a later time, open the HP Director and click HP Gallery (OS 9), or click HP Directorin the Dock and select HP Gallery from the Manage and Share section of theHP Director menu (OS X).
Chapter 6
58 HP Photosmart 2600/2700 series all-in-one
Mem
ory
Car
d an
d Pi
ctB
ridge
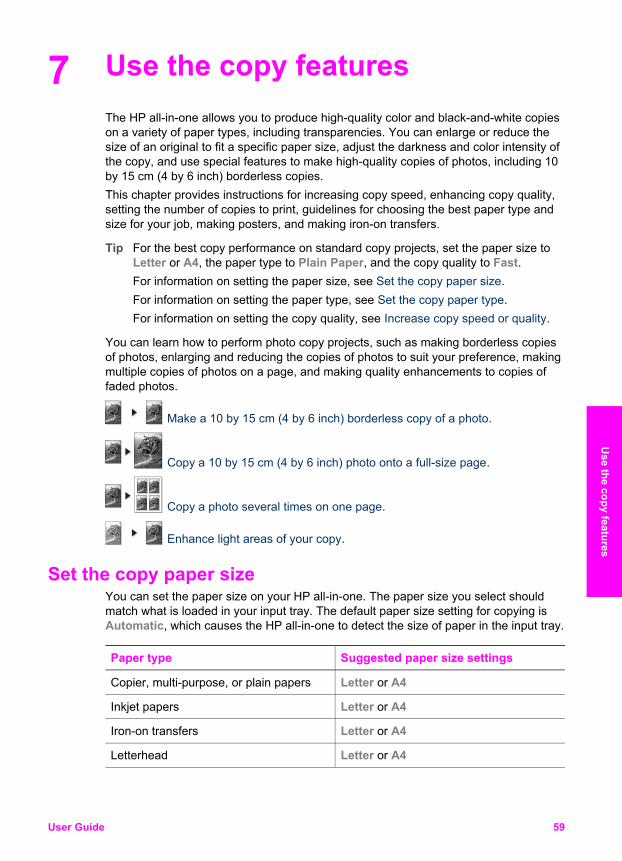
7 Use the copy featuresThe HP all-in-one allows you to produce high-quality color and black-and-white copieson a variety of paper types, including transparencies. You can enlarge or reduce thesize of an original to fit a specific paper size, adjust the darkness and color intensity ofthe copy, and use special features to make high-quality copies of photos, including 10by 15 cm (4 by 6 inch) borderless copies.This chapter provides instructions for increasing copy speed, enhancing copy quality,setting the number of copies to print, guidelines for choosing the best paper type andsize for your job, making posters, and making iron-on transfers.
Tip For the best copy performance on standard copy projects, set the paper size toLetter or A4, the paper type to Plain Paper, and the copy quality to Fast.For information on setting the paper size, see Set the copy paper size.For information on setting the paper type, see Set the copy paper type.For information on setting the copy quality, see Increase copy speed or quality.
You can learn how to perform photo copy projects, such as making borderless copiesof photos, enlarging and reducing the copies of photos to suit your preference, makingmultiple copies of photos on a page, and making quality enhancements to copies offaded photos.
Make a 10 by 15 cm (4 by 6 inch) borderless copy of a photo.
Copy a 10 by 15 cm (4 by 6 inch) photo onto a full-size page.
Copy a photo several times on one page.
Enhance light areas of your copy.
Set the copy paper size You can set the paper size on your HP all-in-one. The paper size you select shouldmatch what is loaded in your input tray. The default paper size setting for copying isAutomatic, which causes the HP all-in-one to detect the size of paper in the input tray.
Paper type Suggested paper size settings
Copier, multi-purpose, or plain papers Letter or A4
Inkjet papers Letter or A4
Iron-on transfers Letter or A4
Letterhead Letter or A4
User Guide 59
Use the copy features
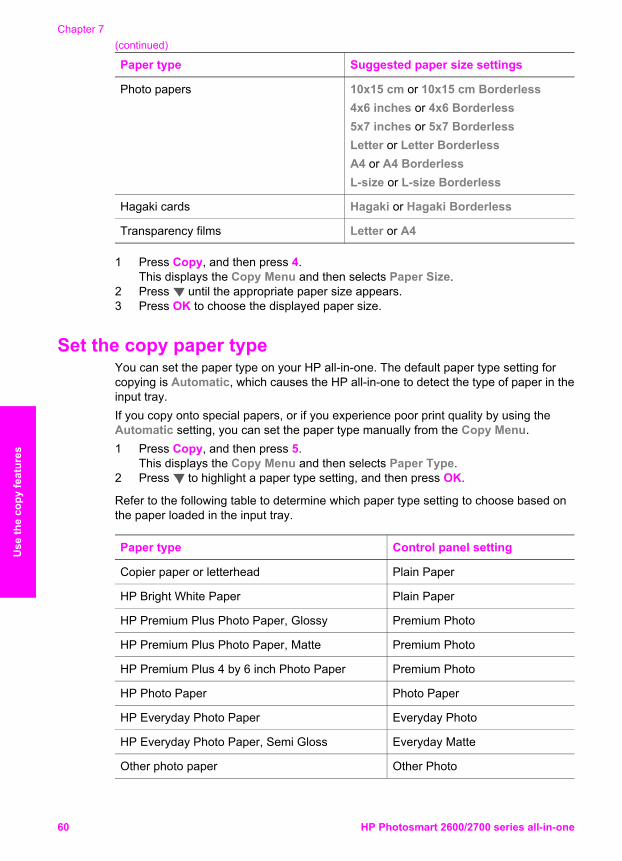
Paper type Suggested paper size settings
Photo papers 10x15 cm or 10x15 cm Borderless4x6 inches or 4x6 Borderless5x7 inches or 5x7 BorderlessLetter or Letter BorderlessA4 or A4 BorderlessL-size or L-size Borderless
Hagaki cards Hagaki or Hagaki Borderless
Transparency films Letter or A4
1 Press Copy, and then press 4.This displays the Copy Menu and then selects Paper Size.
2 Press until the appropriate paper size appears.3 Press OK to choose the displayed paper size.
Set the copy paper type You can set the paper type on your HP all-in-one. The default paper type setting forcopying is Automatic, which causes the HP all-in-one to detect the type of paper in theinput tray.If you copy onto special papers, or if you experience poor print quality by using theAutomatic setting, you can set the paper type manually from the Copy Menu.1 Press Copy, and then press 5.
This displays the Copy Menu and then selects Paper Type.2 Press to highlight a paper type setting, and then press OK.
Refer to the following table to determine which paper type setting to choose based onthe paper loaded in the input tray.
Paper type Control panel setting
Copier paper or letterhead Plain Paper
HP Bright White Paper Plain Paper
HP Premium Plus Photo Paper, Glossy Premium Photo
HP Premium Plus Photo Paper, Matte Premium Photo
HP Premium Plus 4 by 6 inch Photo Paper Premium Photo
HP Photo Paper Photo Paper
HP Everyday Photo Paper Everyday Photo
HP Everyday Photo Paper, Semi Gloss Everyday Matte
Other photo paper Other Photo
Chapter 7(continued)
60 HP Photosmart 2600/2700 series all-in-one
Use
the
copy
feat
ures
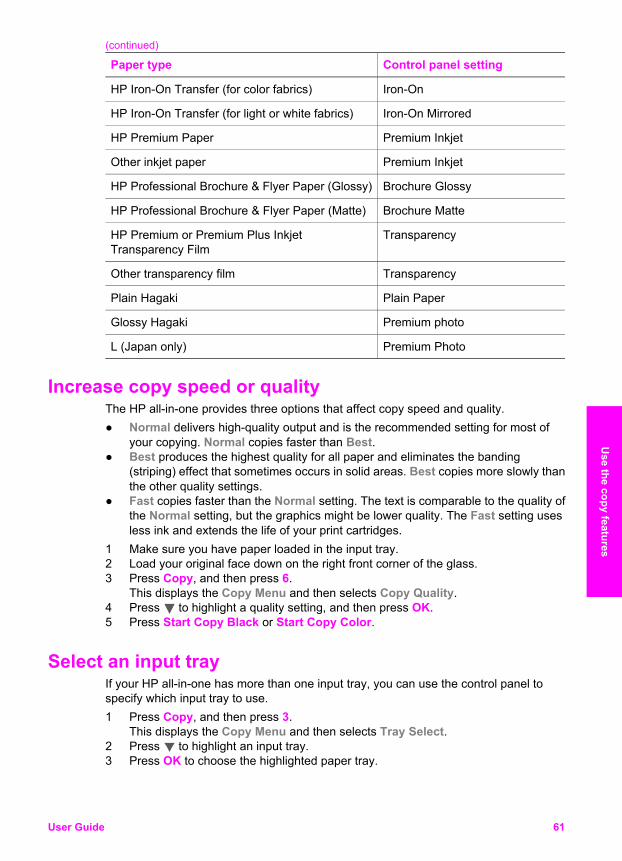
Paper type Control panel setting
HP Iron-On Transfer (for color fabrics) Iron-On
HP Iron-On Transfer (for light or white fabrics) Iron-On Mirrored
HP Premium Paper Premium Inkjet
Other inkjet paper Premium Inkjet
HP Professional Brochure & Flyer Paper (Glossy) Brochure Glossy
HP Professional Brochure & Flyer Paper (Matte) Brochure Matte
HP Premium or Premium Plus InkjetTransparency Film
Transparency
Other transparency film Transparency
Plain Hagaki Plain Paper
Glossy Hagaki Premium photo
L (Japan only) Premium Photo
Increase copy speed or quality The HP all-in-one provides three options that affect copy speed and quality.● Normal delivers high-quality output and is the recommended setting for most of
your copying. Normal copies faster than Best.● Best produces the highest quality for all paper and eliminates the banding
(striping) effect that sometimes occurs in solid areas. Best copies more slowly thanthe other quality settings.
● Fast copies faster than the Normal setting. The text is comparable to the quality ofthe Normal setting, but the graphics might be lower quality. The Fast setting usesless ink and extends the life of your print cartridges.
1 Make sure you have paper loaded in the input tray.2 Load your original face down on the right front corner of the glass.3 Press Copy, and then press 6.
This displays the Copy Menu and then selects Copy Quality.4 Press to highlight a quality setting, and then press OK.5 Press Start Copy Black or Start Copy Color.
Select an input tray If your HP all-in-one has more than one input tray, you can use the control panel tospecify which input tray to use.1 Press Copy, and then press 3.
This displays the Copy Menu and then selects Tray Select.2 Press to highlight an input tray.3 Press OK to choose the highlighted paper tray.
(continued)
User Guide 61
Use the copy features
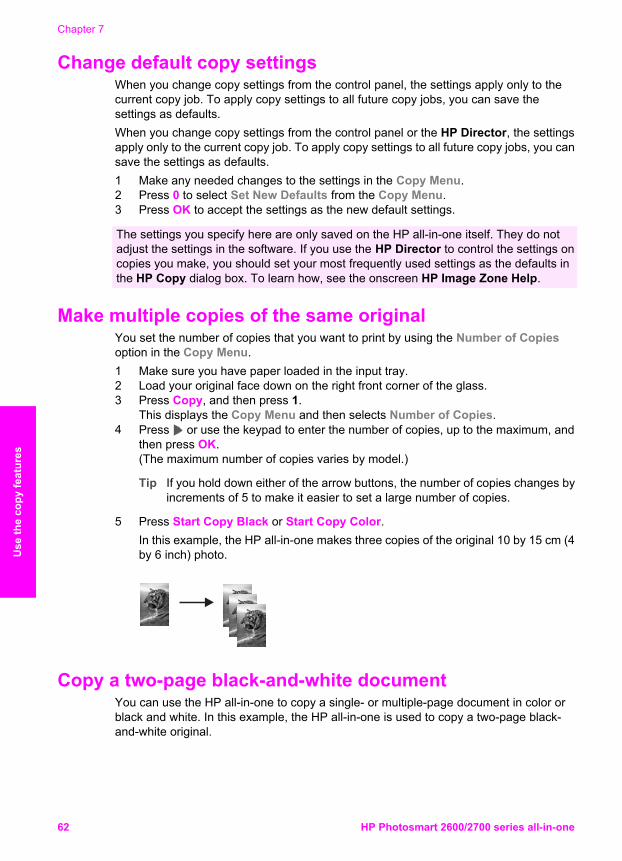
Change default copy settings When you change copy settings from the control panel, the settings apply only to thecurrent copy job. To apply copy settings to all future copy jobs, you can save thesettings as defaults.When you change copy settings from the control panel or the HP Director, the settingsapply only to the current copy job. To apply copy settings to all future copy jobs, you cansave the settings as defaults.1 Make any needed changes to the settings in the Copy Menu.2 Press 0 to select Set New Defaults from the Copy Menu.3 Press OK to accept the settings as the new default settings.
The settings you specify here are only saved on the HP all-in-one itself. They do notadjust the settings in the software. If you use the HP Director to control the settings oncopies you make, you should set your most frequently used settings as the defaults inthe HP Copy dialog box. To learn how, see the onscreen HP Image Zone Help.
Make multiple copies of the same original You set the number of copies that you want to print by using the Number of Copiesoption in the Copy Menu.1 Make sure you have paper loaded in the input tray.2 Load your original face down on the right front corner of the glass.3 Press Copy, and then press 1.
This displays the Copy Menu and then selects Number of Copies.4 Press or use the keypad to enter the number of copies, up to the maximum, and
then press OK.(The maximum number of copies varies by model.)
Tip If you hold down either of the arrow buttons, the number of copies changes byincrements of 5 to make it easier to set a large number of copies.
5 Press Start Copy Black or Start Copy Color.In this example, the HP all-in-one makes three copies of the original 10 by 15 cm (4by 6 inch) photo.
Copy a two-page black-and-white document You can use the HP all-in-one to copy a single- or multiple-page document in color orblack and white. In this example, the HP all-in-one is used to copy a two-page black-and-white original.
Chapter 7
62 HP Photosmart 2600/2700 series all-in-one
Use
the
copy
feat
ures
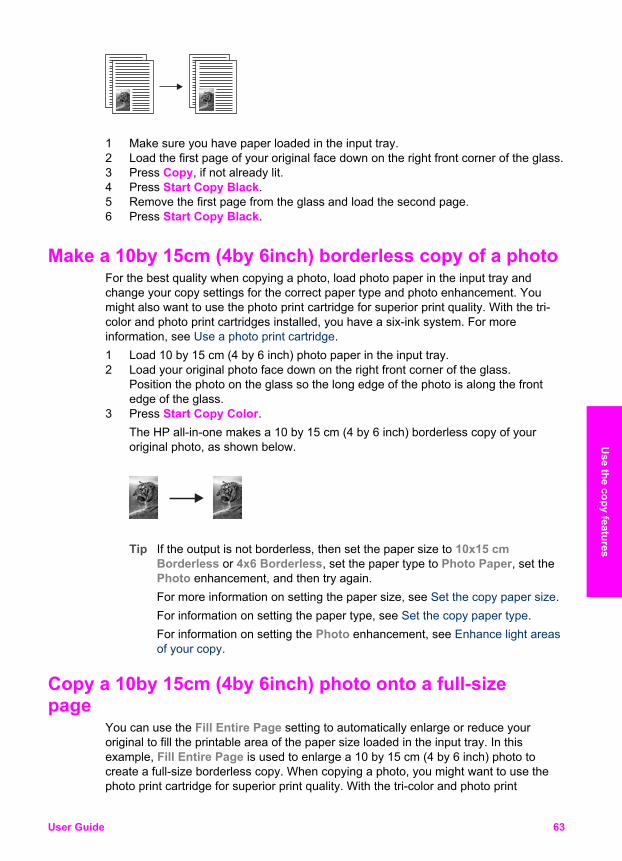
1 Make sure you have paper loaded in the input tray.2 Load the first page of your original face down on the right front corner of the glass.3 Press Copy, if not already lit.4 Press Start Copy Black.5 Remove the first page from the glass and load the second page.6 Press Start Copy Black.
Make a 10by 15cm (4by 6inch) borderless copy of a photo For the best quality when copying a photo, load photo paper in the input tray andchange your copy settings for the correct paper type and photo enhancement. Youmight also want to use the photo print cartridge for superior print quality. With the tri-color and photo print cartridges installed, you have a six-ink system. For moreinformation, see Use a photo print cartridge.1 Load 10 by 15 cm (4 by 6 inch) photo paper in the input tray.2 Load your original photo face down on the right front corner of the glass.
Position the photo on the glass so the long edge of the photo is along the frontedge of the glass.
3 Press Start Copy Color.The HP all-in-one makes a 10 by 15 cm (4 by 6 inch) borderless copy of youroriginal photo, as shown below.
Tip If the output is not borderless, then set the paper size to 10x15 cmBorderless or 4x6 Borderless, set the paper type to Photo Paper, set thePhoto enhancement, and then try again.For more information on setting the paper size, see Set the copy paper size.For information on setting the paper type, see Set the copy paper type.For information on setting the Photo enhancement, see Enhance light areasof your copy.
Copy a 10by 15cm (4by 6inch) photo onto a full-sizepage
You can use the Fill Entire Page setting to automatically enlarge or reduce youroriginal to fill the printable area of the paper size loaded in the input tray. In thisexample, Fill Entire Page is used to enlarge a 10 by 15 cm (4 by 6 inch) photo tocreate a full-size borderless copy. When copying a photo, you might want to use thephoto print cartridge for superior print quality. With the tri-color and photo print
User Guide 63
Use the copy features
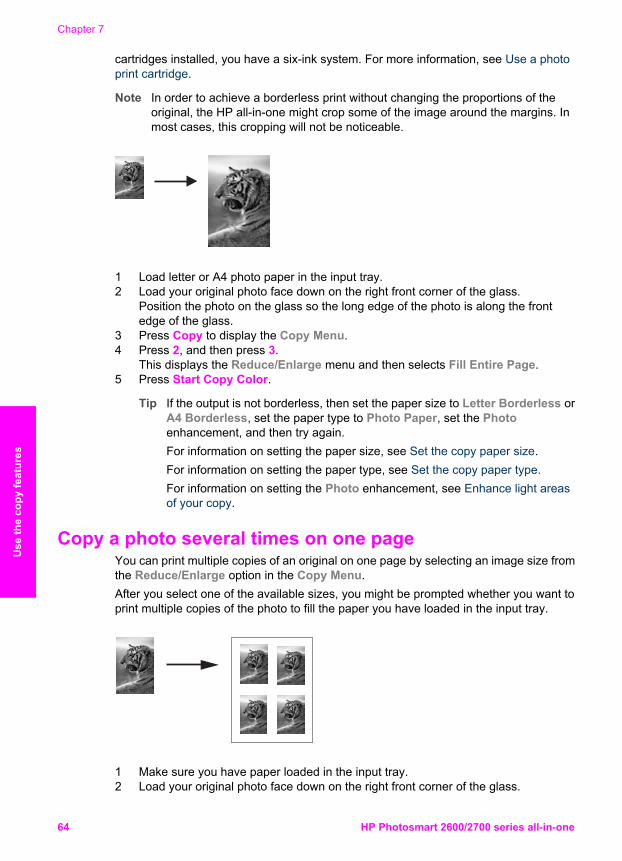
cartridges installed, you have a six-ink system. For more information, see Use a photoprint cartridge.
Note In order to achieve a borderless print without changing the proportions of theoriginal, the HP all-in-one might crop some of the image around the margins. Inmost cases, this cropping will not be noticeable.
1 Load letter or A4 photo paper in the input tray.2 Load your original photo face down on the right front corner of the glass.
Position the photo on the glass so the long edge of the photo is along the frontedge of the glass.
3 Press Copy to display the Copy Menu.4 Press 2, and then press 3.
This displays the Reduce/Enlarge menu and then selects Fill Entire Page.5 Press Start Copy Color.
Tip If the output is not borderless, then set the paper size to Letter Borderless orA4 Borderless, set the paper type to Photo Paper, set the Photoenhancement, and then try again.For information on setting the paper size, see Set the copy paper size.For information on setting the paper type, see Set the copy paper type.For information on setting the Photo enhancement, see Enhance light areasof your copy.
Copy a photo several times on one page You can print multiple copies of an original on one page by selecting an image size fromthe Reduce/Enlarge option in the Copy Menu.After you select one of the available sizes, you might be prompted whether you want toprint multiple copies of the photo to fill the paper you have loaded in the input tray.
1 Make sure you have paper loaded in the input tray.2 Load your original photo face down on the right front corner of the glass.
Chapter 7
64 HP Photosmart 2600/2700 series all-in-one
Use
the
copy
feat
ures
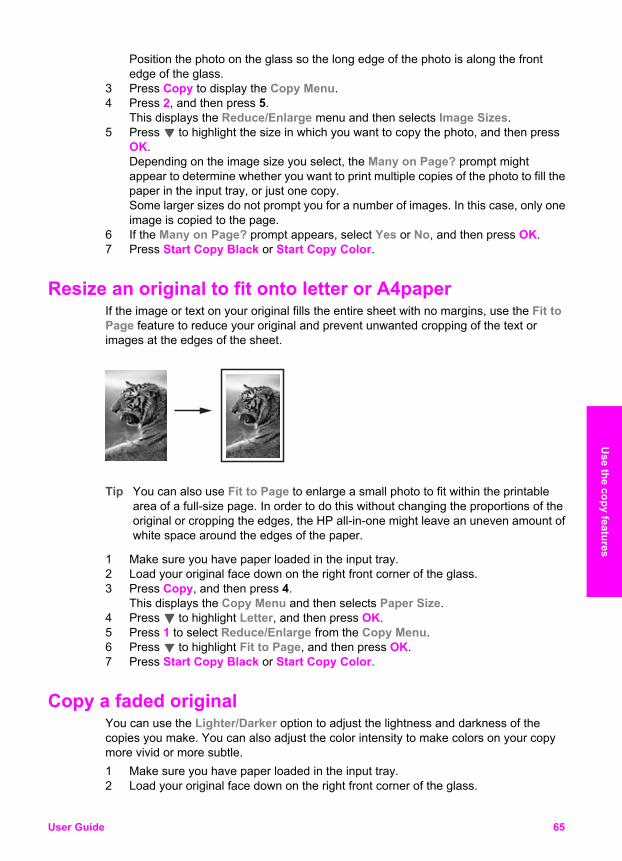
Position the photo on the glass so the long edge of the photo is along the frontedge of the glass.
3 Press Copy to display the Copy Menu.4 Press 2, and then press 5.
This displays the Reduce/Enlarge menu and then selects Image Sizes.5 Press to highlight the size in which you want to copy the photo, and then press
OK.Depending on the image size you select, the Many on Page? prompt mightappear to determine whether you want to print multiple copies of the photo to fill thepaper in the input tray, or just one copy.Some larger sizes do not prompt you for a number of images. In this case, only oneimage is copied to the page.
6 If the Many on Page? prompt appears, select Yes or No, and then press OK.7 Press Start Copy Black or Start Copy Color.
Resize an original to fit onto letter or A4paper If the image or text on your original fills the entire sheet with no margins, use the Fit toPage feature to reduce your original and prevent unwanted cropping of the text orimages at the edges of the sheet.
Tip You can also use Fit to Page to enlarge a small photo to fit within the printablearea of a full-size page. In order to do this without changing the proportions of theoriginal or cropping the edges, the HP all-in-one might leave an uneven amount ofwhite space around the edges of the paper.
1 Make sure you have paper loaded in the input tray.2 Load your original face down on the right front corner of the glass.3 Press Copy, and then press 4.
This displays the Copy Menu and then selects Paper Size.4 Press to highlight Letter, and then press OK.5 Press 1 to select Reduce/Enlarge from the Copy Menu.6 Press to highlight Fit to Page, and then press OK.7 Press Start Copy Black or Start Copy Color.
Copy a faded original You can use the Lighter/Darker option to adjust the lightness and darkness of thecopies you make. You can also adjust the color intensity to make colors on your copymore vivid or more subtle.1 Make sure you have paper loaded in the input tray.2 Load your original face down on the right front corner of the glass.
User Guide 65
Use the copy features

3 Press Copy, and then press 7.This displays the Copy Menu and then selects Lighter/Darker. The range ofLighter/Darker values appears as a scale on the color graphics display.
4 Press to darken the copy, and then press OK.
Note You can also press to lighten the copy.
5 Press 9 to select Color Intensity from the Copy Menu.The range of color intensity values appears as a scale on the color graphicsdisplay.
6 Press to make the image more vivid, and then press OK.
Note You can also press to make the image more pale.
7 Press Start Copy Black or Start Copy Color.
Copy a document that has been faxed several times You can use the Enhancements feature to automatically adjust the quality of textdocuments by sharpening edges of black text or adjust photographs by enhancing lightcolors that might otherwise appear white.The Mixed enhancement is the default option. Use the Mixed enhancement to sharpenedges of most originals.
To copy a blurred document from the control panel1 Make sure you have paper loaded in the input tray.2 Load your original face down on the right front corner of the glass.3 Press Copy, and then press 8.
This displays the Copy Menu and then selects Enhancements.4 Press to highlight the Text enhancement setting, and then press OK.5 Press Start Copy Black or Start Copy Color.
Tip If any of the following occur, turn off Text enhancement by selecting Photo orNone:
● Stray dots of color surround some text on your copies● Large, black typefaces look splotchy (not smooth)● Thin, colored objects or lines contain black sections● Horizontal grainy or white bands appear in light- to medium-gray areas
Enhance light areas of your copy You can use Photo enhancements to enhance light colors that might otherwise appearwhite. You can also use Photo enhancements to eliminate or reduce any of thefollowing that might occur when copying with Text enhancements:● Stray dots of color surround some text on your copies● Large, black typefaces look splotchy (not smooth)● Thin, colored objects or lines contain black sections● Horizontal grainy or white bands appear in light- to medium-gray areas
To copy an overexposed photo from the control panel1 Make sure you have paper loaded in the input tray.
Chapter 7
66 HP Photosmart 2600/2700 series all-in-one
Use
the
copy
feat
ures
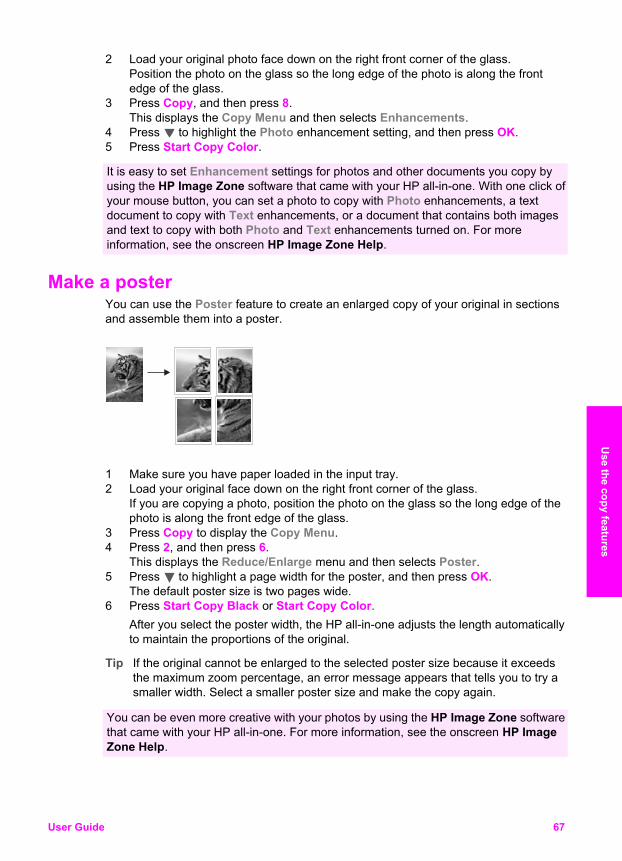
2 Load your original photo face down on the right front corner of the glass.Position the photo on the glass so the long edge of the photo is along the frontedge of the glass.
3 Press Copy, and then press 8.This displays the Copy Menu and then selects Enhancements.
4 Press to highlight the Photo enhancement setting, and then press OK.5 Press Start Copy Color.
It is easy to set Enhancement settings for photos and other documents you copy byusing the HP Image Zone software that came with your HP all-in-one. With one click ofyour mouse button, you can set a photo to copy with Photo enhancements, a textdocument to copy with Text enhancements, or a document that contains both imagesand text to copy with both Photo and Text enhancements turned on. For moreinformation, see the onscreen HP Image Zone Help.
Make a poster You can use the Poster feature to create an enlarged copy of your original in sectionsand assemble them into a poster.
1 Make sure you have paper loaded in the input tray.2 Load your original face down on the right front corner of the glass.
If you are copying a photo, position the photo on the glass so the long edge of thephoto is along the front edge of the glass.
3 Press Copy to display the Copy Menu.4 Press 2, and then press 6.
This displays the Reduce/Enlarge menu and then selects Poster.5 Press to highlight a page width for the poster, and then press OK.
The default poster size is two pages wide.6 Press Start Copy Black or Start Copy Color.
After you select the poster width, the HP all-in-one adjusts the length automaticallyto maintain the proportions of the original.
Tip If the original cannot be enlarged to the selected poster size because it exceedsthe maximum zoom percentage, an error message appears that tells you to try asmaller width. Select a smaller poster size and make the copy again.
You can be even more creative with your photos by using the HP Image Zone softwarethat came with your HP all-in-one. For more information, see the onscreen HP ImageZone Help.
User Guide 67
Use the copy features
Prepare a color iron-on transfer You can copy an image or text onto an iron-on transfer, then iron it onto a T-shirt, pillowcover, place mat, or other piece of fabric.
Tip Practice applying a iron-on transfer on an old garment first.
1 Load the iron-on transfer paper in the input tray.2 Load your original face down on the right front corner of the glass.
If you are copying a photo, position the photo on the glass so the long edge of thephoto is along the front edge of the glass.
3 Press Copy, and then press 5.This displays the Copy Menu and then selects Paper Type.
4 Press to highlight Iron-On or Iron-On Mirrored, and then press OK.
Note Select Iron-On as the paper type for dark-colored fabrics, and Iron-OnMirrored for white and light-colored fabrics.
5 Press Start Copy Black or Start Copy Color.
Note When you select Iron-On Mirrored as the paper type, the HP all-in-oneautomatically copies a mirror image of your original so that it will appearproperly when you iron it onto fabric.
Stop copying ➔ To stop copying, press Cancel on the control panel.
Chapter 7
68 HP Photosmart 2600/2700 series all-in-one
Use
the
copy
feat
ures
8 Use the scan featuresThis chapter contains information on scanning to an application, to an HP Instant Sharedestination, and to a memory card.Scanning is the process of converting text and pictures into an electronic format foryour computer. You can scan just about anything: photos, magazine articles, textdocuments, and even 3D objects, as long as you are careful not to scratch the glass onyour HP all-in-one. Scanning to a memory card makes your scanned images even moreportable.You can use the scanning features of your HP all-in-one to do the following:● Scan text from an article into your word processor and quote it in a report.● Print business cards and brochures by scanning a logo and using it in your
publishing software.● Send photos to friends and relatives by scanning your favorite prints and including
them in e-mail messages.● Create a photographic inventory of your house or office.● Archive treasured photos in an electronic scrapbook.
Note Scanning text (also known as optical character recognition or OCR) lets youbring the content of magazine articles, books, and other printed matter into yourfavorite word processor and many other programs as fully editable text. Learningto do OCR right is important if you want to obtain the best results. Do not expectscanned text documents to be letter-perfect the first time you use your OCRsoftware. Using OCR software is an art that takes time and practice to master.For more information about scanning documents, especially documentscontaining both text and graphics, see the documentation that came with yourOCR software.
To use the scan features, your HP all-in-one and computer must be connected andturned on. The HP all-in-one software must also be installed and running on yourcomputer prior to scanning. To verify that the HP all-in-one software is running on aWindows PC, look for the HP all-in-one icon in the system tray at the lower right side ofthe screen, near the time. On a Macintosh, the HP all-in-one software is alwaysrunning.
Note Closing the HP Windows system tray icon can cause your HP all-in-one to losesome of its scan functionality and result in the No Connection error message. Ifthis happens, you can restore full functionality by restarting your computer or bystarting the HP Image Zone software.
For information about how to scan from the computer, and how to adjust, resize, rotate,crop, and sharpen your scans, see the onscreen HP Image Zone Help that came withyour software.
Scan to an application You can scan originals placed on the glass directly from the control panel.
User Guide 69
Scan
Note The menus shown in this section may vary in content depending on yourcomputer's operating system and which applications you set up as scandestinations in the HP Image Zone.
Scan an original (USB-connected) Follow these steps if your HP all-in-one is directly connected to a computer through aUSB cable.1 Load your original face down in the right front corner of the glass.2 Press Scan, if it is not already lit.
The Scan Menu appears, listing destinations, including applications, for anythingyou scan. The default destination is whichever one you selected the last time youused this menu. You designate which applications and other destinations appearon the Scan Menu by using the HP Image Zone on your computer.
3 To select an application to receive the scan, press its number on the control panelor use the arrow keys to highlight it and then press OK or Start Color. To force thescan to be in black and white, press Start Black instead of OK.A preview image of the scan appears in the HP Scan window on the computer,where you can edit it.For more information about editing a preview image, see the onscreen HP ImageZone Help that came with your software.
4 Make any edits to the preview image in the HP Scan window. When you havefinished, click Accept.The HP all-in-one sends the scan to the selected application. For example, if youchose the HP Image Zone, it automatically opens and displays the image.
Scan an original (network-connected) Follow these steps if your HP all-in-one is connected to one or more computers over anetwork.1 Load your original face down in the right front corner of the glass.2 Press Scan, if it is not already lit.
The Scan Menu appears, listing various options.3 Press 1 to choose Select Computer or use the arrow keys to highlight it and then
press OK.The Select Computer menu appears, listing computers connected to the HP all-in-one.
Note The Select Computer menu may list computers with a USB connection inaddition to those connected through the network.
4 To select the default computer, press OK. To select another computer, press itsnumber on the control panel or use the arrow keys to highlight your selection andthen press OK. To send the scan to an application on your computer, choose yourcomputer in the menu.The Scan Menu appears, listing destinations, including applications, for anythingyou scan. The default destination is whichever one you selected the last time youused this menu. You designate which destinations appear on the Scan Menu byusing the HP Image Zone on your computer. For more information, see theonscreen HP Image Zone Help that came with your software.
Chapter 8
70 HP Photosmart 2600/2700 series all-in-one
Scan
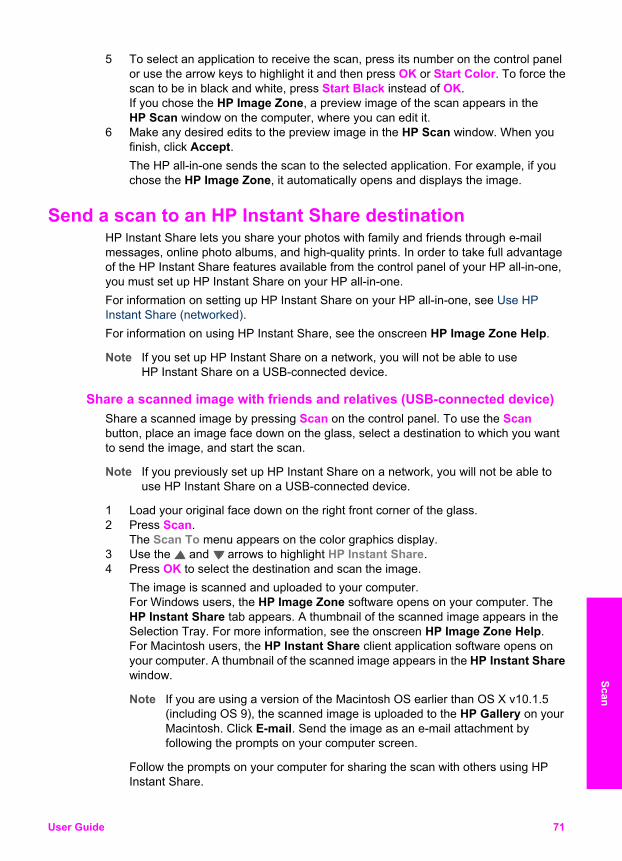
5 To select an application to receive the scan, press its number on the control panelor use the arrow keys to highlight it and then press OK or Start Color. To force thescan to be in black and white, press Start Black instead of OK.If you chose the HP Image Zone, a preview image of the scan appears in theHP Scan window on the computer, where you can edit it.
6 Make any desired edits to the preview image in the HP Scan window. When youfinish, click Accept.The HP all-in-one sends the scan to the selected application. For example, if youchose the HP Image Zone, it automatically opens and displays the image.
Send a scan to an HP Instant Share destination HP Instant Share lets you share your photos with family and friends through e-mailmessages, online photo albums, and high-quality prints. In order to take full advantageof the HP Instant Share features available from the control panel of your HP all-in-one,you must set up HP Instant Share on your HP all-in-one.For information on setting up HP Instant Share on your HP all-in-one, see Use HPInstant Share (networked).For information on using HP Instant Share, see the onscreen HP Image Zone Help.
Note If you set up HP Instant Share on a network, you will not be able to useHP Instant Share on a USB-connected device.
Share a scanned image with friends and relatives (USB-connected device)Share a scanned image by pressing Scan on the control panel. To use the Scanbutton, place an image face down on the glass, select a destination to which you wantto send the image, and start the scan.
Note If you previously set up HP Instant Share on a network, you will not be able touse HP Instant Share on a USB-connected device.
1 Load your original face down on the right front corner of the glass.2 Press Scan.
The Scan To menu appears on the color graphics display.3 Use the and arrows to highlight HP Instant Share.4 Press OK to select the destination and scan the image.
The image is scanned and uploaded to your computer.For Windows users, the HP Image Zone software opens on your computer. TheHP Instant Share tab appears. A thumbnail of the scanned image appears in theSelection Tray. For more information, see the onscreen HP Image Zone Help.For Macintosh users, the HP Instant Share client application software opens onyour computer. A thumbnail of the scanned image appears in the HP Instant Sharewindow.
Note If you are using a version of the Macintosh OS earlier than OS X v10.1.5(including OS 9), the scanned image is uploaded to the HP Gallery on yourMacintosh. Click E-mail. Send the image as an e-mail attachment byfollowing the prompts on your computer screen.
Follow the prompts on your computer for sharing the scan with others using HPInstant Share.
User Guide 71
Scan
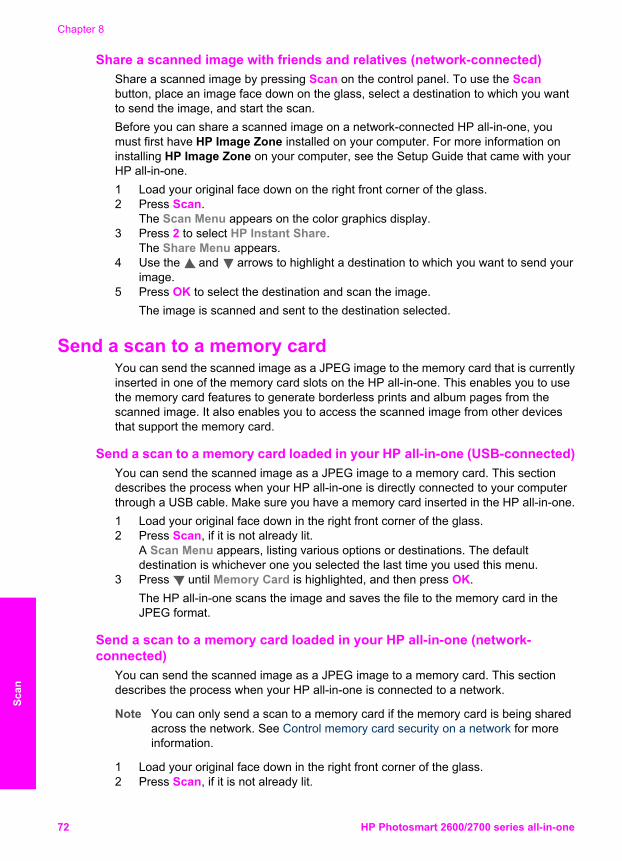
Share a scanned image with friends and relatives (network-connected)Share a scanned image by pressing Scan on the control panel. To use the Scanbutton, place an image face down on the glass, select a destination to which you wantto send the image, and start the scan.Before you can share a scanned image on a network-connected HP all-in-one, youmust first have HP Image Zone installed on your computer. For more information oninstalling HP Image Zone on your computer, see the Setup Guide that came with yourHP all-in-one.1 Load your original face down on the right front corner of the glass.2 Press Scan.
The Scan Menu appears on the color graphics display.3 Press 2 to select HP Instant Share.
The Share Menu appears.4 Use the and arrows to highlight a destination to which you want to send your
image.5 Press OK to select the destination and scan the image.
The image is scanned and sent to the destination selected.
Send a scan to a memory card You can send the scanned image as a JPEG image to the memory card that is currentlyinserted in one of the memory card slots on the HP all-in-one. This enables you to usethe memory card features to generate borderless prints and album pages from thescanned image. It also enables you to access the scanned image from other devicesthat support the memory card.
Send a scan to a memory card loaded in your HP all-in-one (USB-connected)You can send the scanned image as a JPEG image to a memory card. This sectiondescribes the process when your HP all-in-one is directly connected to your computerthrough a USB cable. Make sure you have a memory card inserted in the HP all-in-one.1 Load your original face down in the right front corner of the glass.2 Press Scan, if it is not already lit.
A Scan Menu appears, listing various options or destinations. The defaultdestination is whichever one you selected the last time you used this menu.
3 Press until Memory Card is highlighted, and then press OK.The HP all-in-one scans the image and saves the file to the memory card in theJPEG format.
Send a scan to a memory card loaded in your HP all-in-one (network-connected)
You can send the scanned image as a JPEG image to a memory card. This sectiondescribes the process when your HP all-in-one is connected to a network.
Note You can only send a scan to a memory card if the memory card is being sharedacross the network. See Control memory card security on a network for moreinformation.
1 Load your original face down in the right front corner of the glass.2 Press Scan, if it is not already lit.
Chapter 8
72 HP Photosmart 2600/2700 series all-in-one
Scan
A Scan Menu appears, listing various options or destinations.3 Press 3 to select Memory Card or use the arrow keys to highlight it and then press
OK.The HP all-in-one scans the image and saves the file to the memory card in theJPEG format.
Stop scanning ➔ To stop scanning, press Cancel on the control panel.
User Guide 73
Scan

Chapter 8
74 HP Photosmart 2600/2700 series all-in-one
Scan
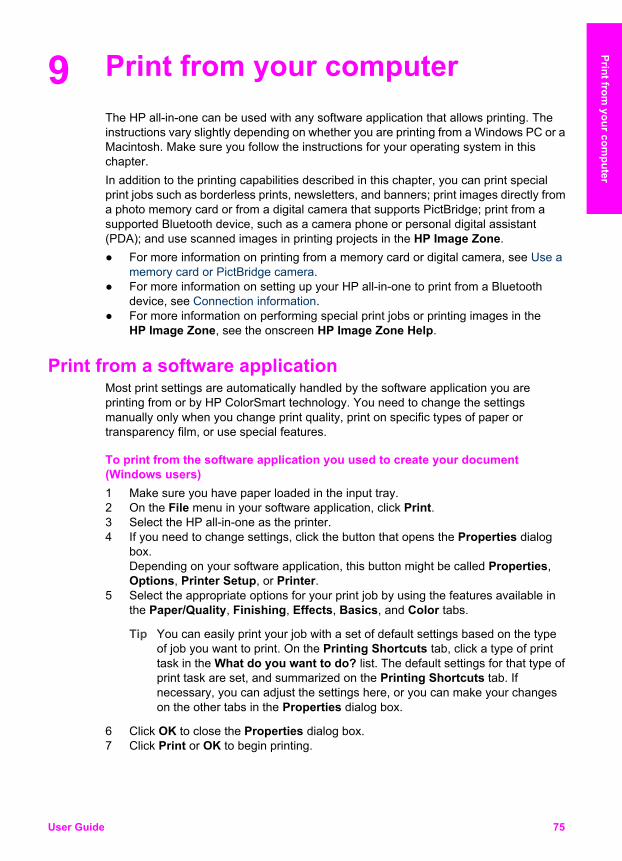
9 Print from your computer The HP all-in-one can be used with any software application that allows printing. Theinstructions vary slightly depending on whether you are printing from a Windows PC or aMacintosh. Make sure you follow the instructions for your operating system in thischapter.In addition to the printing capabilities described in this chapter, you can print specialprint jobs such as borderless prints, newsletters, and banners; print images directly froma photo memory card or from a digital camera that supports PictBridge; print from asupported Bluetooth device, such as a camera phone or personal digital assistant(PDA); and use scanned images in printing projects in the HP Image Zone.● For more information on printing from a memory card or digital camera, see Use a
memory card or PictBridge camera.● For more information on setting up your HP all-in-one to print from a Bluetooth
device, see Connection information.● For more information on performing special print jobs or printing images in the
HP Image Zone, see the onscreen HP Image Zone Help.
Print from a software application Most print settings are automatically handled by the software application you areprinting from or by HP ColorSmart technology. You need to change the settingsmanually only when you change print quality, print on specific types of paper ortransparency film, or use special features.
To print from the software application you used to create your document(Windows users)1 Make sure you have paper loaded in the input tray.2 On the File menu in your software application, click Print.3 Select the HP all-in-one as the printer.4 If you need to change settings, click the button that opens the Properties dialog
box.Depending on your software application, this button might be called Properties,Options, Printer Setup, or Printer.
5 Select the appropriate options for your print job by using the features available inthe Paper/Quality, Finishing, Effects, Basics, and Color tabs.
Tip You can easily print your job with a set of default settings based on the typeof job you want to print. On the Printing Shortcuts tab, click a type of printtask in the What do you want to do? list. The default settings for that type ofprint task are set, and summarized on the Printing Shortcuts tab. Ifnecessary, you can adjust the settings here, or you can make your changeson the other tabs in the Properties dialog box.
6 Click OK to close the Properties dialog box.7 Click Print or OK to begin printing.
User Guide 75
Print from your com
puter
To print from the software application you used to create your document(Macintosh users)1 Make sure you have paper loaded in the input tray.2 Select the HP all-in-one in the Chooser (OS 9), Print Center (OS 10.2 or earlier),
or Printer Setup Utility (OS 10.3 or later) before you begin printing.3 From the File menu in your software application, choose Page Setup.
The Page Setup dialog box appears, allowing you to specify the paper size,orientation, and scaling.
4 Specify the page attributes:– Choose the paper size.– Select the orientation.– Enter the scaling percentage.
Note For OS 9, the Page Setup dialog box also includes options to print amirrored (or reversed) version of the image, and to adjust the page marginsfor two-sided printing.
5 Click OK.6 From the File menu in your software application, choose Print.
The Print dialog box appears. If you are using OS 9, the General panel opens. Ifyou are using OS X, the Copies & Pages panel opens.
7 Change the print settings for each option in the pop-up menu, as appropriate foryour project.
8 Click Print to begin printing.
Change the print settings You can customize the print settings of the HP all-in-one to handle nearly any printtask.
Windows usersBefore you change print settings, you should decide if you want to change the settingsfor the current print job only, or if you want to make the settings the defaults for all futureprint jobs. How you display print settings depends on whether or not you want to applythe change to all future print jobs or just to the current print job.
To change the print settings for all future jobs1 In the HP Director, click Settings, point to Print Settings, and then click Printer
Settings.2 Make changes to the print settings, and click OK.
To change the print settings for the current job1 On the File menu in your software application, click Print.2 Make sure the HP all-in-one is the selected printer.3 Click the button that opens the Properties dialog box.
Depending on your software application, this button might be called Properties,Options, Printer Setup, or Printer.
4 Make changes to the print settings, and click OK.5 Click Print or OK in the Print dialog box to print the job.
Chapter 9
76 HP Photosmart 2600/2700 series all-in-one
Prin
t fro
m y
our c
ompu
ter
Macintosh usersUse the Page Setup and Print dialog boxes to change the settings for your print job.Which dialog box you use depends on which setting you want to change.
To change the paper size, orientation, or scaling percentage1 Select the HP all-in-one in the Chooser (OS 9), Print Center (OS 10.2 or earlier),
or Printer Setup Utility (OS 10.3 or later) before you begin printing.2 From the File menu in your software application, choose Page Setup.3 Make changes to the paper size, orientation, and scaling percentage settings, and
click OK.
To change all other print settings1 Select the HP all-in-one in the Chooser (OS 9), Print Center (OS 10.2 or earlier),
or Printer Setup Utility (OS 10.3 or later) before you begin printing.2 From the File menu in your software application, choose Print.3 Make changes to the print settings, and click Print to print the job.
Stop a print job Although you can stop a print job from either the HP all-in-one or the computer, werecommend you stop it from the HP all-in-one for best results.
To stop a print job from the HP all-in-one➔ Press Cancel on the control panel. Look for the Print Cancelled message on the
color graphics display. If the message does not appear, press Cancel again.
User Guide 77
Print from your com
puter

Chapter 9
78 HP Photosmart 2600/2700 series all-in-one
Prin
t fro
m y
our c
ompu
ter

10 Fax setup After completing all steps in the Setup Guide, use the instructions in this chapter tocomplete your fax setup. Please keep your Setup Guide for later use.In this chapter, you will learn how to set up your HP all-in-one so that faxing workssuccessfully with equipment and services you might already have on the same phoneline as your HP all-in-one.Before you begin setting up your HP all-in-one for faxing, determine which type ofequipment or services you have on the same phone line. From the first column in thefollowing table, choose the combination of equipment and services applicable to yourhome or office setting. Then look up the appropriate setup case in the second column.Step-by-step instructions are included for each case later in this chapter.
Other equipment/services sharingyour fax line
Recommended fax setup
None.You have a dedicated phone line forfaxing.
Case A: Separate fax line (no voice callsreceived)
A digital subscriber line (DSL) servicethrough your telephone company.
Case B: Set up your HP all-in-one withDSL
A private branch exchange (PBX) phonesystem or an integrated services digitalnetwork (ISDN) system.
Case C: Set up your HP all-in-one with aPBX phone system or an ISDN line
A distinctive ring service through yourtelephone company.
Case D: Fax with a distinctive ring serviceon the same line
Voice calls.You receive both voice and fax call on thisphone line.
Case E: Shared voice/fax line
Voice calls and voice mail service.You receive both voice and fax calls onthis phone line and subscribe to a voicemail service through your telephonecompany.
Case F: Shared voice/fax line with voicemail
Case A: Separate fax line (no voice calls received) If you have a separate phone line on which you receive no voice calls, and you have noother equipment connected on this phone line, set up your HP all-in-one as described inthis section.
User Guide 79
Fax setup
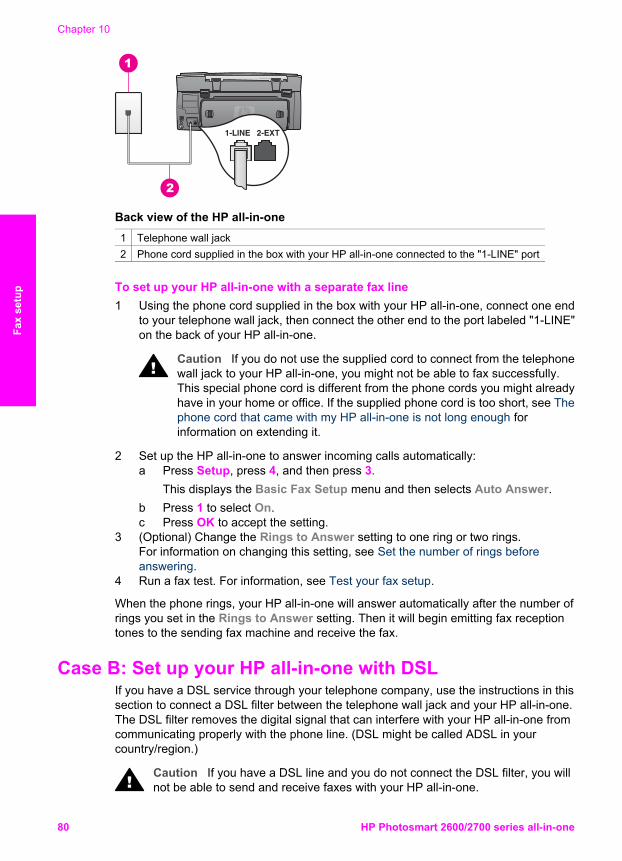
Back view of the HP all-in-one1 Telephone wall jack2 Phone cord supplied in the box with your HP all-in-one connected to the "1-LINE" port
To set up your HP all-in-one with a separate fax line1 Using the phone cord supplied in the box with your HP all-in-one, connect one end
to your telephone wall jack, then connect the other end to the port labeled "1-LINE"on the back of your HP all-in-one.
Caution If you do not use the supplied cord to connect from the telephonewall jack to your HP all-in-one, you might not be able to fax successfully.This special phone cord is different from the phone cords you might alreadyhave in your home or office. If the supplied phone cord is too short, see Thephone cord that came with my HP all-in-one is not long enough forinformation on extending it.
2 Set up the HP all-in-one to answer incoming calls automatically:a Press Setup, press 4, and then press 3.
This displays the Basic Fax Setup menu and then selects Auto Answer.b Press 1 to select On.c Press OK to accept the setting.
3 (Optional) Change the Rings to Answer setting to one ring or two rings.For information on changing this setting, see Set the number of rings beforeanswering.
4 Run a fax test. For information, see Test your fax setup.
When the phone rings, your HP all-in-one will answer automatically after the number ofrings you set in the Rings to Answer setting. Then it will begin emitting fax receptiontones to the sending fax machine and receive the fax.
Case B: Set up your HP all-in-one with DSL If you have a DSL service through your telephone company, use the instructions in thissection to connect a DSL filter between the telephone wall jack and your HP all-in-one.The DSL filter removes the digital signal that can interfere with your HP all-in-one fromcommunicating properly with the phone line. (DSL might be called ADSL in yourcountry/region.)
Caution If you have a DSL line and you do not connect the DSL filter, you willnot be able to send and receive faxes with your HP all-in-one.
Chapter 10
80 HP Photosmart 2600/2700 series all-in-one
Fax
setu
p
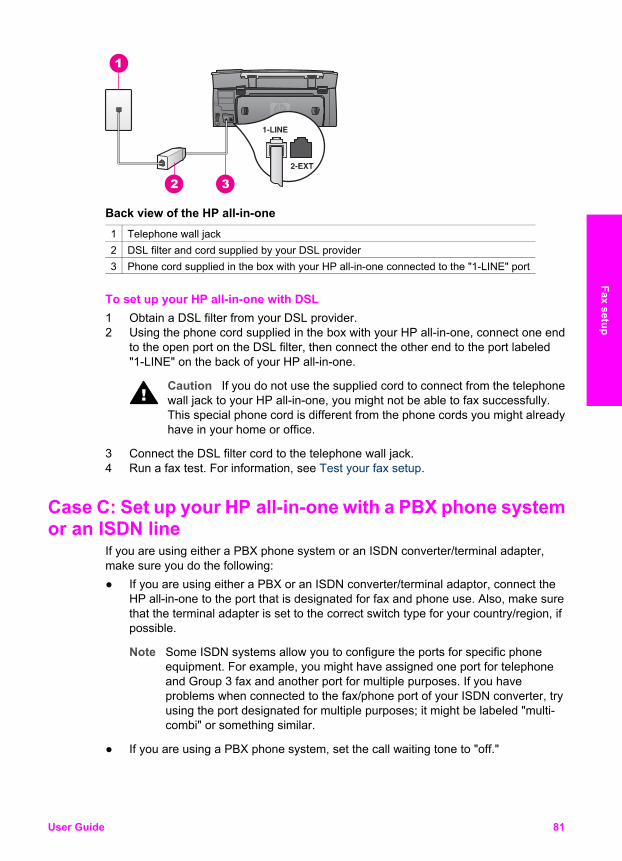
Back view of the HP all-in-one1 Telephone wall jack2 DSL filter and cord supplied by your DSL provider3 Phone cord supplied in the box with your HP all-in-one connected to the "1-LINE" port
To set up your HP all-in-one with DSL1 Obtain a DSL filter from your DSL provider.2 Using the phone cord supplied in the box with your HP all-in-one, connect one end
to the open port on the DSL filter, then connect the other end to the port labeled"1-LINE" on the back of your HP all-in-one.
Caution If you do not use the supplied cord to connect from the telephonewall jack to your HP all-in-one, you might not be able to fax successfully.This special phone cord is different from the phone cords you might alreadyhave in your home or office.
3 Connect the DSL filter cord to the telephone wall jack.4 Run a fax test. For information, see Test your fax setup.
Case C: Set up your HP all-in-one with a PBX phone systemor an ISDN line
If you are using either a PBX phone system or an ISDN converter/terminal adapter,make sure you do the following:● If you are using either a PBX or an ISDN converter/terminal adaptor, connect the
HP all-in-one to the port that is designated for fax and phone use. Also, make surethat the terminal adapter is set to the correct switch type for your country/region, ifpossible.
Note Some ISDN systems allow you to configure the ports for specific phoneequipment. For example, you might have assigned one port for telephoneand Group 3 fax and another port for multiple purposes. If you haveproblems when connected to the fax/phone port of your ISDN converter, tryusing the port designated for multiple purposes; it might be labeled "multi-combi" or something similar.
● If you are using a PBX phone system, set the call waiting tone to "off."
User Guide 81
Fax setup
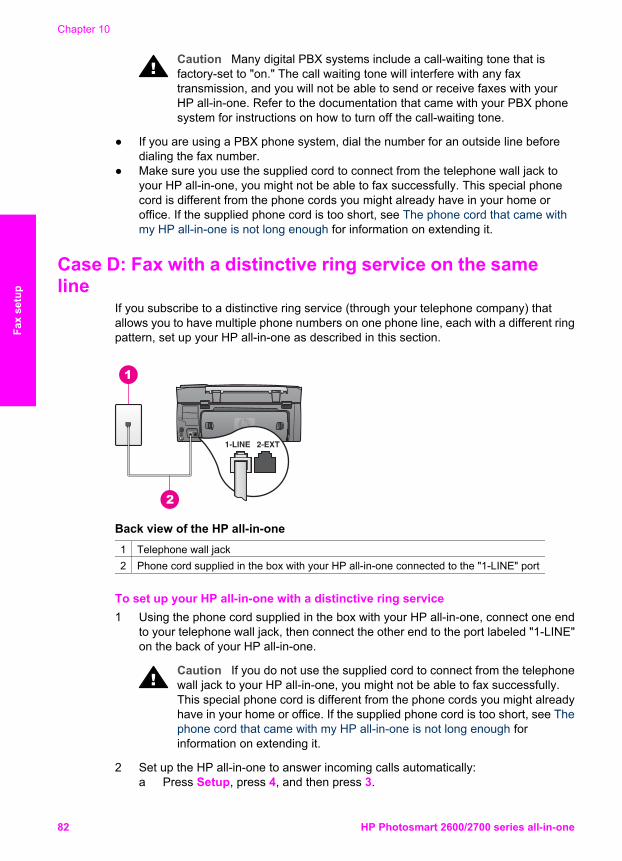
Caution Many digital PBX systems include a call-waiting tone that isfactory-set to "on." The call waiting tone will interfere with any faxtransmission, and you will not be able to send or receive faxes with yourHP all-in-one. Refer to the documentation that came with your PBX phonesystem for instructions on how to turn off the call-waiting tone.
● If you are using a PBX phone system, dial the number for an outside line beforedialing the fax number.
● Make sure you use the supplied cord to connect from the telephone wall jack toyour HP all-in-one, you might not be able to fax successfully. This special phonecord is different from the phone cords you might already have in your home oroffice. If the supplied phone cord is too short, see The phone cord that came withmy HP all-in-one is not long enough for information on extending it.
Case D: Fax with a distinctive ring service on the sameline
If you subscribe to a distinctive ring service (through your telephone company) thatallows you to have multiple phone numbers on one phone line, each with a different ringpattern, set up your HP all-in-one as described in this section.
Back view of the HP all-in-one1 Telephone wall jack2 Phone cord supplied in the box with your HP all-in-one connected to the "1-LINE" port
To set up your HP all-in-one with a distinctive ring service1 Using the phone cord supplied in the box with your HP all-in-one, connect one end
to your telephone wall jack, then connect the other end to the port labeled "1-LINE"on the back of your HP all-in-one.
Caution If you do not use the supplied cord to connect from the telephonewall jack to your HP all-in-one, you might not be able to fax successfully.This special phone cord is different from the phone cords you might alreadyhave in your home or office. If the supplied phone cord is too short, see Thephone cord that came with my HP all-in-one is not long enough forinformation on extending it.
2 Set up the HP all-in-one to answer incoming calls automatically:a Press Setup, press 4, and then press 3.
Chapter 10
82 HP Photosmart 2600/2700 series all-in-one
Fax
setu
p
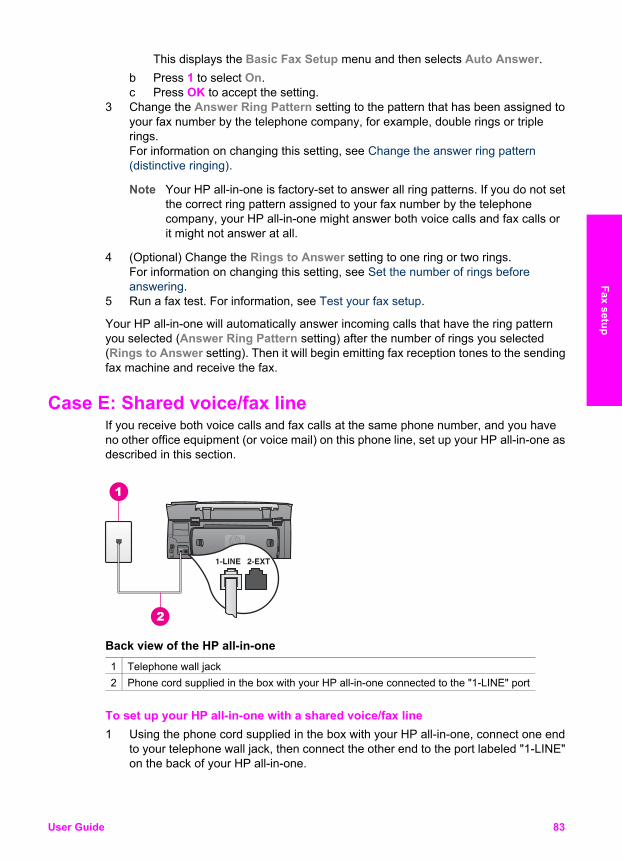
This displays the Basic Fax Setup menu and then selects Auto Answer.b Press 1 to select On.c Press OK to accept the setting.
3 Change the Answer Ring Pattern setting to the pattern that has been assigned toyour fax number by the telephone company, for example, double rings or triplerings.For information on changing this setting, see Change the answer ring pattern(distinctive ringing).
Note Your HP all-in-one is factory-set to answer all ring patterns. If you do not setthe correct ring pattern assigned to your fax number by the telephonecompany, your HP all-in-one might answer both voice calls and fax calls orit might not answer at all.
4 (Optional) Change the Rings to Answer setting to one ring or two rings.For information on changing this setting, see Set the number of rings beforeanswering.
5 Run a fax test. For information, see Test your fax setup.
Your HP all-in-one will automatically answer incoming calls that have the ring patternyou selected (Answer Ring Pattern setting) after the number of rings you selected(Rings to Answer setting). Then it will begin emitting fax reception tones to the sendingfax machine and receive the fax.
Case E: Shared voice/fax line If you receive both voice calls and fax calls at the same phone number, and you haveno other office equipment (or voice mail) on this phone line, set up your HP all-in-one asdescribed in this section.
Back view of the HP all-in-one1 Telephone wall jack2 Phone cord supplied in the box with your HP all-in-one connected to the "1-LINE" port
To set up your HP all-in-one with a shared voice/fax line1 Using the phone cord supplied in the box with your HP all-in-one, connect one end
to your telephone wall jack, then connect the other end to the port labeled "1-LINE"on the back of your HP all-in-one.
User Guide 83
Fax setup
Caution If you do not use the supplied cord to connect from the telephonewall jack to your HP all-in-one, you might not be able to fax successfully.This special phone cord is different from the phone cords you might alreadyhave in your home or office. If the supplied phone cord is too short, see Thephone cord that came with my HP all-in-one is not long enough forinformation on extending it.
2 Now you need to decide how you want the HP all-in-one to answer calls,automatically or manually:– If you set up the HP all-in-one to answer calls automatically, it answers all
incoming calls and receives faxes. Your HP all-in-one will not be able todistinguish between fax and voice calls in this case; if you suspect the call is avoice call, you will need to answer it before the HP all-in-one answers the call.
– If you set up the HP all-in-one to answer faxes manually, you must be availableto respond in person to incoming fax calls or your HP all-in-one cannot receivefaxes.
a Press Setup, press 4, and then press 3.This displays the Basic Fax Setup menu and then selects Auto Answer.
b Press 1 to select On (automatic), or press 2 to select Off (manual).c Press OK to accept the setting.
3 Run a fax test. For information, see Test your fax setup.
If you pick up the phone before the HP all-in-one and hear fax tones from a sending faxmachine, you will need to answer the fax call manually. For information, see Receive afax manually.
Case F: Shared voice/fax line with voice mail If you receive both voice calls and fax calls at the same phone number, and you alsosubscribe to a voice mail service through your telephone company, set up your HP all-in-one as described in this section.
Note You cannot receive faxes automatically if you have a voice mail service at thesame phone number you use for fax calls. You must receive faxes manually; thismeans you must be available to respond in person to incoming fax calls. If youwant to receive faxes automatically instead, contact your telephone company tosubscribe to a distinctive ring service, or to obtain a separate phone line forfaxing.
Chapter 10
84 HP Photosmart 2600/2700 series all-in-one
Fax
setu
p
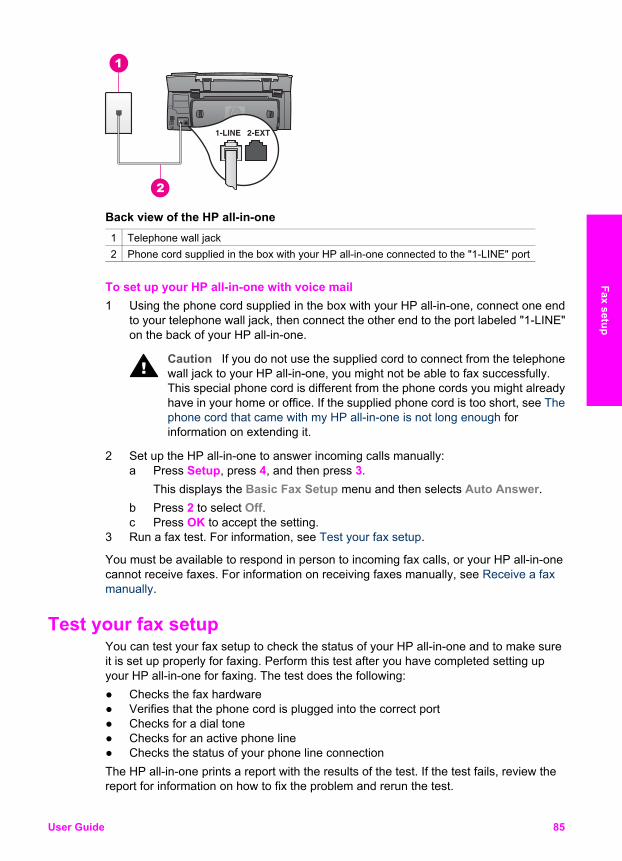
Back view of the HP all-in-one1 Telephone wall jack2 Phone cord supplied in the box with your HP all-in-one connected to the "1-LINE" port
To set up your HP all-in-one with voice mail1 Using the phone cord supplied in the box with your HP all-in-one, connect one end
to your telephone wall jack, then connect the other end to the port labeled "1-LINE"on the back of your HP all-in-one.
Caution If you do not use the supplied cord to connect from the telephonewall jack to your HP all-in-one, you might not be able to fax successfully.This special phone cord is different from the phone cords you might alreadyhave in your home or office. If the supplied phone cord is too short, see Thephone cord that came with my HP all-in-one is not long enough forinformation on extending it.
2 Set up the HP all-in-one to answer incoming calls manually:a Press Setup, press 4, and then press 3.
This displays the Basic Fax Setup menu and then selects Auto Answer.b Press 2 to select Off.c Press OK to accept the setting.
3 Run a fax test. For information, see Test your fax setup.
You must be available to respond in person to incoming fax calls, or your HP all-in-onecannot receive faxes. For information on receiving faxes manually, see Receive a faxmanually.
Test your fax setup You can test your fax setup to check the status of your HP all-in-one and to make sureit is set up properly for faxing. Perform this test after you have completed setting upyour HP all-in-one for faxing. The test does the following:● Checks the fax hardware● Verifies that the phone cord is plugged into the correct port● Checks for a dial tone● Checks for an active phone line● Checks the status of your phone line connectionThe HP all-in-one prints a report with the results of the test. If the test fails, review thereport for information on how to fix the problem and rerun the test.
User Guide 85
Fax setup
To test your fax setup from the control panel1 Set up your HP all-in-one for faxing according to the setup instructions in this
chapter.2 Make sure you have inserted the print cartridges and loaded paper before starting
the test.For more information, see Replace the print cartridges and Load full-size paper.
3 Press Setup.4 Press 6, then press 5.
This displays the Tools menu and then selects Run Fax Test.The HP all-in-one displays the status of the test on the color graphics display andprints a report.
5 Review the report.– If the test passes and you are still having problems faxing, check the fax
settings listed in the report to verify the settings are correct. A blank orincorrect fax setting can cause problems faxing.
– If the test fails, review the report for more information on how to fix anyproblems found.
6 After you pick up the fax report from your HP all-in-one, press OK.If necessary, resolve any problems found and rerun the test.For more information on resolving any problems found during the test, see The faxtest failed.
Chapter 10
86 HP Photosmart 2600/2700 series all-in-one
Fax
setu
p
11 Use the fax featuresYou can use your HP all-in-one to send and receive faxes, including color faxes. Youcan set up speed dials to send faxes quickly and easily to frequently used numbers.From the control panel, you can also set a number of fax options, such as resolution.
You should explore the HP Director that came with your HP Image Zone software totake full advantage of all of its features. Using the HP Director, you can send a fax fromyour computer, include a computer-generated cover page, and quickly set up speeddials. For more information, see the onscreen HP Image Zone Help.For information on accessing the HP Director and the onscreen help, see Use theHP Image Zone to do more with your HP all-in-one.
Set up the HP all-in-one to receive faxes Your HP all-in-one can be set up to receive faxes automatically or manually, dependingon your home or office setup. If you set up the HP all-in-one to answer faxesautomatically, it answers all incoming calls and receives faxes. If you set up the HP all-in-one to answer faxes manually, you must be available to respond in person to theincoming fax call, or your HP all-in-one cannot receive faxes. For more information onreceiving faxes manually, see Receive a fax manually.In certain situations you might want to receive faxes manually. For example, if youshare a line between your HP all-in-one and phone and you do not have distinctiveringing or an answering machine, you will need to set up the HP all-in-one to answer faxcalls manually. If you subscribe to a voice mail service, you will also need to answer faxcalls manually. This is because the HP all-in-one will not be able to distinguish betweenfax calls and phone calls.For more information on setting up your office equipment with the HP all-in-one, seeFax setup.
Choose the recommended answer mode for your setup Refer to the table below to determine how you should answer incoming fax calls basedon your home or office setup. From the first column in the table, choose the type ofequipment and services applicable to your office setup. Then, look up the appropriatesetting in the second column. The third column describes how the HP all-in-one willanswer incoming calls.After you have determined the recommended answer mode setting for your home oroffice setup, see Set the answer mode for more information.
Equipment/servicessharing your fax line
RecommendedAuto Answersetting
Description
None.(You have a separate faxline on which you receiveonly fax calls.)
On The HP all-in-one automatically answers allincoming calls using the Rings to Answersetting. For more information on setting the
User Guide 87
Use the fax features
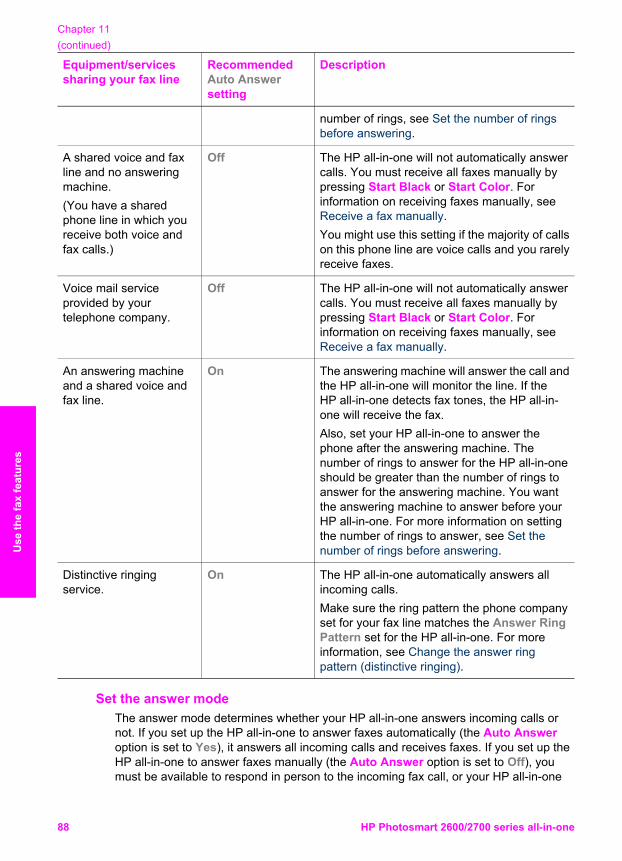
Equipment/servicessharing your fax line
RecommendedAuto Answersetting
Description
number of rings, see Set the number of ringsbefore answering.
A shared voice and faxline and no answeringmachine.(You have a sharedphone line in which youreceive both voice andfax calls.)
Off The HP all-in-one will not automatically answercalls. You must receive all faxes manually bypressing Start Black or Start Color. Forinformation on receiving faxes manually, seeReceive a fax manually.You might use this setting if the majority of callson this phone line are voice calls and you rarelyreceive faxes.
Voice mail serviceprovided by yourtelephone company.
Off The HP all-in-one will not automatically answercalls. You must receive all faxes manually bypressing Start Black or Start Color. Forinformation on receiving faxes manually, seeReceive a fax manually.
An answering machineand a shared voice andfax line.
On The answering machine will answer the call andthe HP all-in-one will monitor the line. If theHP all-in-one detects fax tones, the HP all-in-one will receive the fax.Also, set your HP all-in-one to answer thephone after the answering machine. Thenumber of rings to answer for the HP all-in-oneshould be greater than the number of rings toanswer for the answering machine. You wantthe answering machine to answer before yourHP all-in-one. For more information on settingthe number of rings to answer, see Set thenumber of rings before answering.
Distinctive ringingservice.
On The HP all-in-one automatically answers allincoming calls.Make sure the ring pattern the phone companyset for your fax line matches the Answer RingPattern set for the HP all-in-one. For moreinformation, see Change the answer ringpattern (distinctive ringing).
Set the answer mode The answer mode determines whether your HP all-in-one answers incoming calls ornot. If you set up the HP all-in-one to answer faxes automatically (the Auto Answeroption is set to Yes), it answers all incoming calls and receives faxes. If you set up theHP all-in-one to answer faxes manually (the Auto Answer option is set to Off), youmust be available to respond in person to the incoming fax call, or your HP all-in-one
Chapter 11(continued)
88 HP Photosmart 2600/2700 series all-in-one
Use
the
fax
feat
ures
will not receive faxes. For more information on receiving faxes manually, see Receive afax manually.If you do not know which answer mode to use, see Choose the recommended answermode for your setup.1 Press Setup.2 Press 4, and then press 3.
This displays the Basic Fax Setup menu and then selects Auto Answer.3 Press 1 to select On, or press 2 to select Off.4 Press OK to accept the setting.
Send a fax You can send a fax in a variety of ways. Using the control panel, you can send a black-and-white or color fax from your HP all-in-one. You can also send a fax manually froman attached phone. This allows you to speak with the recipient before sending the fax.If you frequently send faxes to the same numbers, you can set up speed dials. Reviewthis section for more information on all the ways you can send faxes.
Send a basic fax You can send a basic multiple-page fax by using the control panel.
Note If you need printed confirmation that your faxes were successfully sent, enablefax confirmation before sending any faxes. For information, see Enable faxconfirmation.
Tip You can also send a fax using monitor dialing. This allows you to control the paceof your dialing. This feature is useful when you want to use a calling card to chargethe call and you need to respond to tone prompts while dialing. For moreinformation, see Send a fax using monitor dialing.
1 Load the first page face down on the right front corner of the glass.2 Press Fax.
The Enter Fax Number screen appears.3 Enter the fax number by using the keypad.
Tip To enter a pause within a number sequence, press the Space (#) buttonrepeatedly, until a dash appears on the color graphics display.
4 Press Start Black.5 If the most recently sent black-and-white fax is stored in memory, the Fax Mode
screen appears. Press 1 to send a new fax.6 Press Start Black again.7 If you have another page to fax, when prompted, press 1. Load the next page face
down on the right front corner of the glass, and then press Start Black. If you donot have another page to fax, press 2.After all the pages are scanned, the HP all-in-one sends the fax.
Tip You can also send a fax in color, such as a photo, from your HP all-in-one.Just press Start Color instead of Start Black.
User Guide 89
Use the fax features
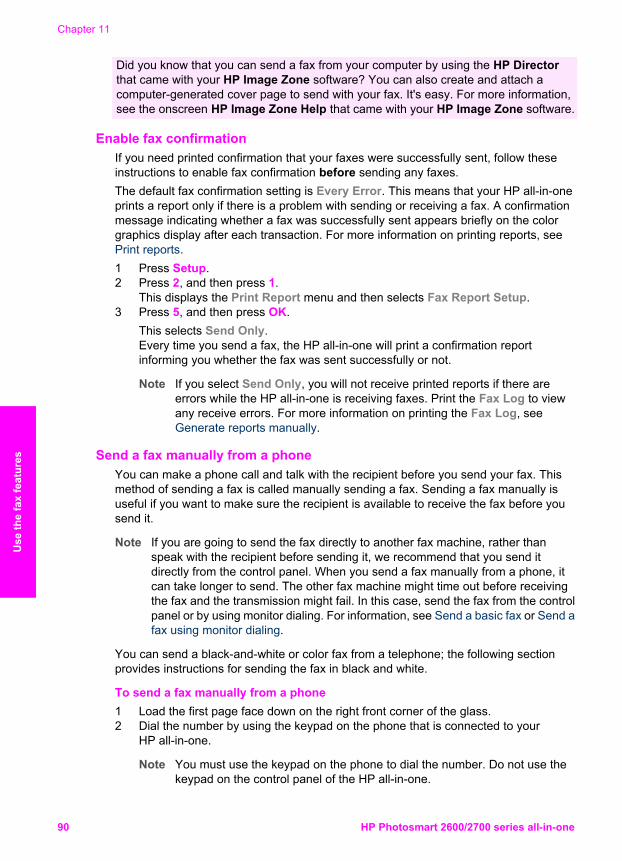
Did you know that you can send a fax from your computer by using the HP Directorthat came with your HP Image Zone software? You can also create and attach acomputer-generated cover page to send with your fax. It's easy. For more information,see the onscreen HP Image Zone Help that came with your HP Image Zone software.
Enable fax confirmation If you need printed confirmation that your faxes were successfully sent, follow theseinstructions to enable fax confirmation before sending any faxes.The default fax confirmation setting is Every Error. This means that your HP all-in-oneprints a report only if there is a problem with sending or receiving a fax. A confirmationmessage indicating whether a fax was successfully sent appears briefly on the colorgraphics display after each transaction. For more information on printing reports, seePrint reports.1 Press Setup.2 Press 2, and then press 1.
This displays the Print Report menu and then selects Fax Report Setup.3 Press 5, and then press OK.
This selects Send Only.Every time you send a fax, the HP all-in-one will print a confirmation reportinforming you whether the fax was sent successfully or not.
Note If you select Send Only, you will not receive printed reports if there areerrors while the HP all-in-one is receiving faxes. Print the Fax Log to viewany receive errors. For more information on printing the Fax Log, seeGenerate reports manually.
Send a fax manually from a phone You can make a phone call and talk with the recipient before you send your fax. Thismethod of sending a fax is called manually sending a fax. Sending a fax manually isuseful if you want to make sure the recipient is available to receive the fax before yousend it.
Note If you are going to send the fax directly to another fax machine, rather thanspeak with the recipient before sending it, we recommend that you send itdirectly from the control panel. When you send a fax manually from a phone, itcan take longer to send. The other fax machine might time out before receivingthe fax and the transmission might fail. In this case, send the fax from the controlpanel or by using monitor dialing. For information, see Send a basic fax or Send afax using monitor dialing.
You can send a black-and-white or color fax from a telephone; the following sectionprovides instructions for sending the fax in black and white.
To send a fax manually from a phone1 Load the first page face down on the right front corner of the glass.2 Dial the number by using the keypad on the phone that is connected to your
HP all-in-one.
Note You must use the keypad on the phone to dial the number. Do not use thekeypad on the control panel of the HP all-in-one.
Chapter 11
90 HP Photosmart 2600/2700 series all-in-one
Use
the
fax
feat
ures
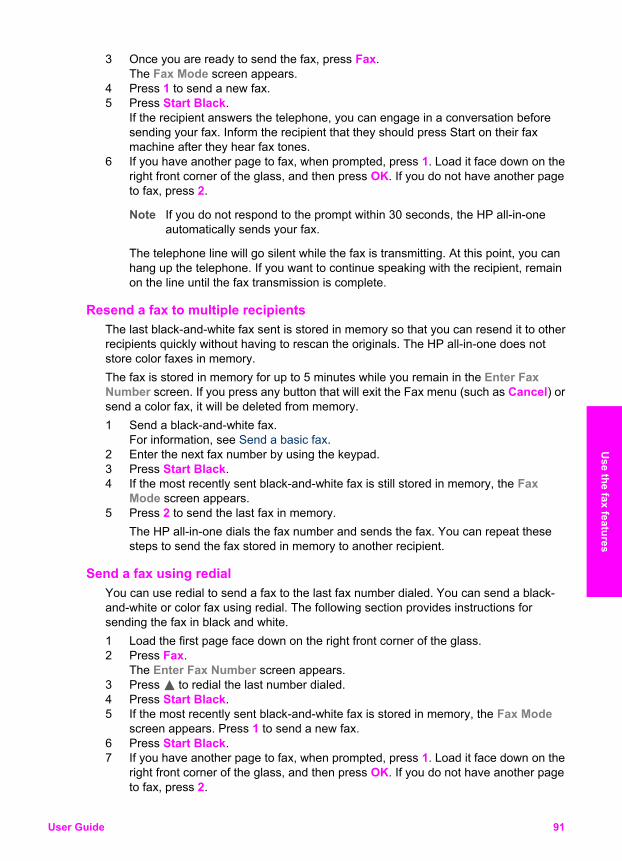
3 Once you are ready to send the fax, press Fax.The Fax Mode screen appears.
4 Press 1 to send a new fax.5 Press Start Black.
If the recipient answers the telephone, you can engage in a conversation beforesending your fax. Inform the recipient that they should press Start on their faxmachine after they hear fax tones.
6 If you have another page to fax, when prompted, press 1. Load it face down on theright front corner of the glass, and then press OK. If you do not have another pageto fax, press 2.
Note If you do not respond to the prompt within 30 seconds, the HP all-in-oneautomatically sends your fax.
The telephone line will go silent while the fax is transmitting. At this point, you canhang up the telephone. If you want to continue speaking with the recipient, remainon the line until the fax transmission is complete.
Resend a fax to multiple recipients The last black-and-white fax sent is stored in memory so that you can resend it to otherrecipients quickly without having to rescan the originals. The HP all-in-one does notstore color faxes in memory.The fax is stored in memory for up to 5 minutes while you remain in the Enter FaxNumber screen. If you press any button that will exit the Fax menu (such as Cancel) orsend a color fax, it will be deleted from memory.1 Send a black-and-white fax.
For information, see Send a basic fax.2 Enter the next fax number by using the keypad.3 Press Start Black.4 If the most recently sent black-and-white fax is still stored in memory, the Fax
Mode screen appears.5 Press 2 to send the last fax in memory.
The HP all-in-one dials the fax number and sends the fax. You can repeat thesesteps to send the fax stored in memory to another recipient.
Send a fax using redial You can use redial to send a fax to the last fax number dialed. You can send a black-and-white or color fax using redial. The following section provides instructions forsending the fax in black and white.1 Load the first page face down on the right front corner of the glass.2 Press Fax.
The Enter Fax Number screen appears.3 Press to redial the last number dialed.4 Press Start Black.5 If the most recently sent black-and-white fax is stored in memory, the Fax Mode
screen appears. Press 1 to send a new fax.6 Press Start Black.7 If you have another page to fax, when prompted, press 1. Load it face down on the
right front corner of the glass, and then press OK. If you do not have another pageto fax, press 2.
User Guide 91
Use the fax features
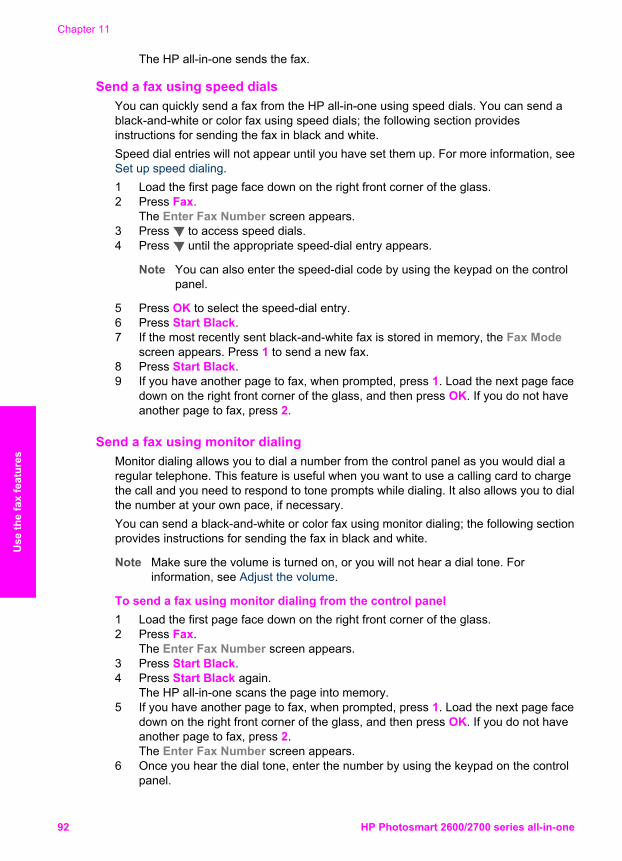
The HP all-in-one sends the fax.
Send a fax using speed dials You can quickly send a fax from the HP all-in-one using speed dials. You can send ablack-and-white or color fax using speed dials; the following section providesinstructions for sending the fax in black and white.Speed dial entries will not appear until you have set them up. For more information, seeSet up speed dialing.1 Load the first page face down on the right front corner of the glass.2 Press Fax.
The Enter Fax Number screen appears.3 Press to access speed dials.4 Press until the appropriate speed-dial entry appears.
Note You can also enter the speed-dial code by using the keypad on the controlpanel.
5 Press OK to select the speed-dial entry.6 Press Start Black.7 If the most recently sent black-and-white fax is stored in memory, the Fax Mode
screen appears. Press 1 to send a new fax.8 Press Start Black.9 If you have another page to fax, when prompted, press 1. Load the next page face
down on the right front corner of the glass, and then press OK. If you do not haveanother page to fax, press 2.
Send a fax using monitor dialing Monitor dialing allows you to dial a number from the control panel as you would dial aregular telephone. This feature is useful when you want to use a calling card to chargethe call and you need to respond to tone prompts while dialing. It also allows you to dialthe number at your own pace, if necessary.You can send a black-and-white or color fax using monitor dialing; the following sectionprovides instructions for sending the fax in black and white.
Note Make sure the volume is turned on, or you will not hear a dial tone. Forinformation, see Adjust the volume.
To send a fax using monitor dialing from the control panel1 Load the first page face down on the right front corner of the glass.2 Press Fax.
The Enter Fax Number screen appears.3 Press Start Black.4 Press Start Black again.
The HP all-in-one scans the page into memory.5 If you have another page to fax, when prompted, press 1. Load the next page face
down on the right front corner of the glass, and then press OK. If you do not haveanother page to fax, press 2.The Enter Fax Number screen appears.
6 Once you hear the dial tone, enter the number by using the keypad on the controlpanel.
Chapter 11
92 HP Photosmart 2600/2700 series all-in-one
Use
the
fax
feat
ures

7 Follow any prompts that might occur.Your fax is sent when the receiving fax machine answers.
Receive a fax Depending on the Auto Answer setting, your HP all-in-one can receive faxesautomatically or manually. If you have set the Auto Answer option to Off, you will needto receive faxes manually. If the Auto Answer option is set to On, your HP all-in-onewill automatically answer incoming calls and receive faxes. For more information onAuto Answer, see Set up the HP all-in-one to receive faxes.
Note If you installed a photo or gray photo print cartridge for printing photos, youmight want to replace it with the black print cartridge when receiving faxes. SeeWork with print cartridges.
Set the number of rings before answering You can specify how many rings should occur before your HP all-in-one automaticallyanswers the incoming call.
Note This setting only applies if Auto Answer is set to On.
The Rings to Answer setting is important if you have an answering machine on thesame phone line as your HP all-in-one. You want the answering machine to answer thephone before the HP all-in-one. The number of rings to answer for the HP all-in-oneshould be greater than the number of rings to answer for the answering machine.For example, set your answering machine to answer in 4 rings and your HP all-in-one toanswer in the maximum number of rings supported by your device. (The maximumnumber of rings varies by country/region.) In this setup, the answering machine willanswer the call and the HP all-in-one will monitor the line. If the HP all-in-one detectsfax tones, the HP all-in-one will receive the fax. If the call is a voice call, the answeringmachine will record the incoming message.
To set the number of rings before answering from the control panel1 Press Setup.2 Press 4, and then press 4 again.
This displays the Basic Fax Setup menu and then Rings to Answer.3 Enter the appropriate number of rings by using the keypad.4 Press OK to accept the setting.
Receive a fax manually If you set up your HP all-in-one to receive faxes manually (the Auto Answer option isset to Off) or you answer the phone and hear fax tones, use the instructions in thissection to receive faxes.You can receive faxes manually from a phone that is:● Directly connected to the HP all-in-one (on the "2-EXT" port)● On the same phone line, but is not connected to the HP all-in-one1 Make sure the HP all-in-one is turned on and you have paper loaded in the input
tray.2 Remove any originals from the glass.
User Guide 93
Use the fax features
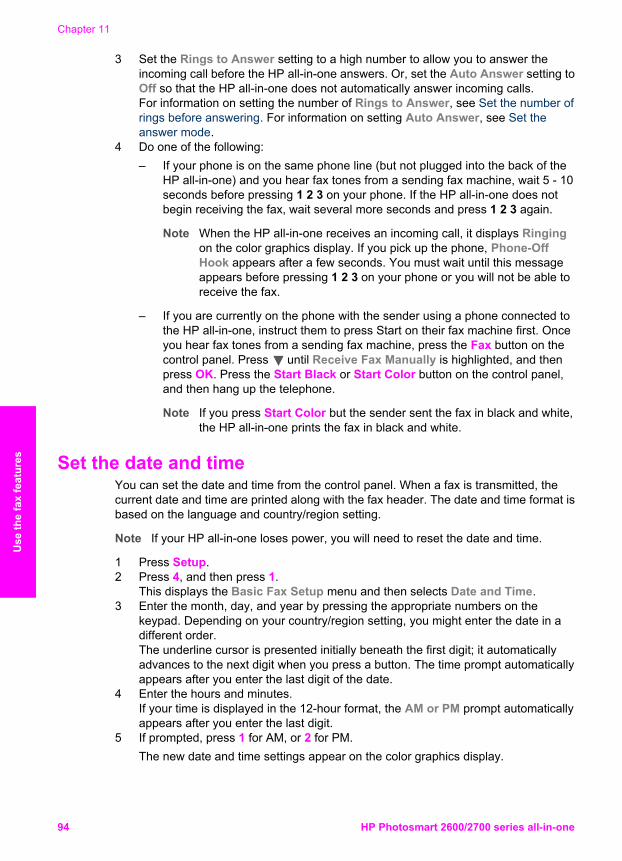
3 Set the Rings to Answer setting to a high number to allow you to answer theincoming call before the HP all-in-one answers. Or, set the Auto Answer setting toOff so that the HP all-in-one does not automatically answer incoming calls.For information on setting the number of Rings to Answer, see Set the number ofrings before answering. For information on setting Auto Answer, see Set theanswer mode.
4 Do one of the following:– If your phone is on the same phone line (but not plugged into the back of the
HP all-in-one) and you hear fax tones from a sending fax machine, wait 5 - 10seconds before pressing 1 2 3 on your phone. If the HP all-in-one does notbegin receiving the fax, wait several more seconds and press 1 2 3 again.
Note When the HP all-in-one receives an incoming call, it displays Ringingon the color graphics display. If you pick up the phone, Phone-OffHook appears after a few seconds. You must wait until this messageappears before pressing 1 2 3 on your phone or you will not be able toreceive the fax.
– If you are currently on the phone with the sender using a phone connected tothe HP all-in-one, instruct them to press Start on their fax machine first. Onceyou hear fax tones from a sending fax machine, press the Fax button on thecontrol panel. Press until Receive Fax Manually is highlighted, and thenpress OK. Press the Start Black or Start Color button on the control panel,and then hang up the telephone.
Note If you press Start Color but the sender sent the fax in black and white,the HP all-in-one prints the fax in black and white.
Set the date and time You can set the date and time from the control panel. When a fax is transmitted, thecurrent date and time are printed along with the fax header. The date and time format isbased on the language and country/region setting.
Note If your HP all-in-one loses power, you will need to reset the date and time.
1 Press Setup.2 Press 4, and then press 1.
This displays the Basic Fax Setup menu and then selects Date and Time.3 Enter the month, day, and year by pressing the appropriate numbers on the
keypad. Depending on your country/region setting, you might enter the date in adifferent order.The underline cursor is presented initially beneath the first digit; it automaticallyadvances to the next digit when you press a button. The time prompt automaticallyappears after you enter the last digit of the date.
4 Enter the hours and minutes.If your time is displayed in the 12-hour format, the AM or PM prompt automaticallyappears after you enter the last digit.
5 If prompted, press 1 for AM, or 2 for PM.The new date and time settings appear on the color graphics display.
Chapter 11
94 HP Photosmart 2600/2700 series all-in-one
Use
the
fax
feat
ures
Set the fax header The fax header prints your name and fax number on the top of every fax you send. Werecommend that you set up the fax header by using the Fax Setup Wizard (Windowsusers) or the Setup Assistant (Macintosh users) during the HP Image Zone softwareinstallation. You can also set up the fax header from the control panel.The fax header information is required by law in many countries/regions.1 Press Setup.2 Press 4, and then press 2.
This displays the Basic Fax Setup menu and then selects Fax Header.3 Enter your personal or company name.
For information on entering text from the control panel, see Enter text and symbols.4 When you are finished entering your personal or company name, select Done on
the visual keyboard, and then press OK.5 Enter your fax number by using the numeric keypad.6 Press OK.
You might find it easier to enter fax header information by using the HP Director thatcame with your HP Image Zone software. In addition to entering fax headerinformation, you can also enter cover page information that will be used when you send afax from your computer and attach a cover page. For more information, see theonscreen HP Image Zone Help that came with your HP Image Zone software.
Enter text and symbols You can enter text and symbols from the control panel by using the visual keyboardthat appears automatically on the color graphics display when setting up your faxheader information or speed-dial entries. You can also use the keypad on the controlpanel to enter text and symbols.You can also enter symbols from the keypad when you dial a fax or phone number.When the HP all-in-one dials the number, it will interpret the symbol and respondaccordingly. For example, if you enter a dash in the fax number, the HP all-in-one willpause before dialing the remainder of the number. A pause is useful if you need toaccess an outside line before dialing the fax number.
Note If you want to enter a symbol in your fax number, such as a dash, you will needto enter the symbol by using the keypad.
Enter text using the visual keyboardYou can enter text or symbols by using the visual keyboard that automatically appearson the color graphics display when you need to enter text. For example, the visualkeyboard automatically appears when you are setting up fax header information orspeed-dial entries.● To select a letter, number, or symbol in the visual keyboard, press , , , and
to highlight the appropriate selection.● Once you have highlighted the appropriate letter, number, or symbol, press OK on
the control panel to select it.The selection appears on the color graphics display.
● To enter lowercase letters, select the abc button on the visual keyboard, and thenpress OK.
User Guide 95
Use the fax features
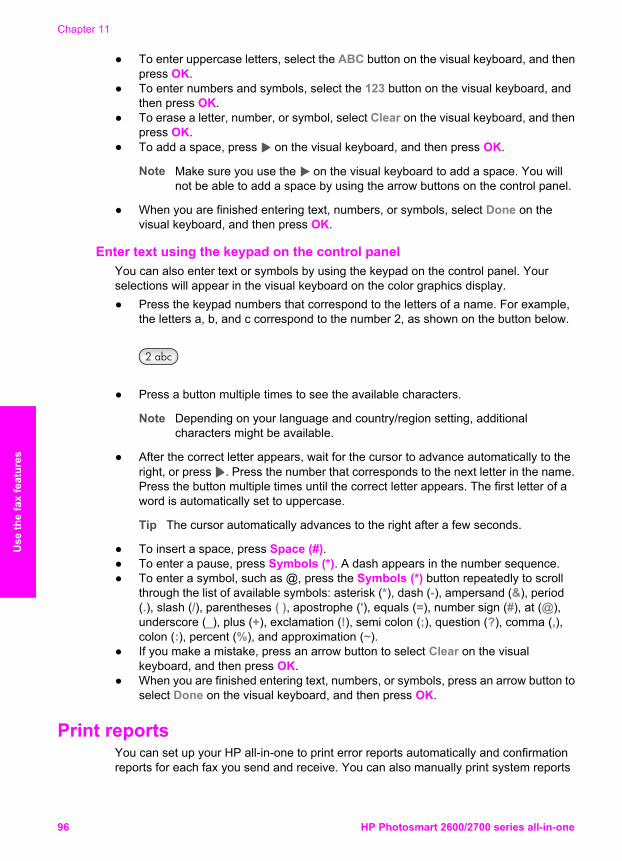
● To enter uppercase letters, select the ABC button on the visual keyboard, and thenpress OK.
● To enter numbers and symbols, select the 123 button on the visual keyboard, andthen press OK.
● To erase a letter, number, or symbol, select Clear on the visual keyboard, and thenpress OK.
● To add a space, press on the visual keyboard, and then press OK.
Note Make sure you use the on the visual keyboard to add a space. You willnot be able to add a space by using the arrow buttons on the control panel.
● When you are finished entering text, numbers, or symbols, select Done on thevisual keyboard, and then press OK.
Enter text using the keypad on the control panelYou can also enter text or symbols by using the keypad on the control panel. Yourselections will appear in the visual keyboard on the color graphics display.● Press the keypad numbers that correspond to the letters of a name. For example,
the letters a, b, and c correspond to the number 2, as shown on the button below.
● Press a button multiple times to see the available characters.
Note Depending on your language and country/region setting, additionalcharacters might be available.
● After the correct letter appears, wait for the cursor to advance automatically to theright, or press . Press the number that corresponds to the next letter in the name.Press the button multiple times until the correct letter appears. The first letter of aword is automatically set to uppercase.
Tip The cursor automatically advances to the right after a few seconds.
● To insert a space, press Space (#).● To enter a pause, press Symbols (*). A dash appears in the number sequence.● To enter a symbol, such as @, press the Symbols (*) button repeatedly to scroll
through the list of available symbols: asterisk (*), dash (-), ampersand (&), period(.), slash (/), parentheses ( ), apostrophe ('), equals (=), number sign (#), at (@),underscore (_), plus (+), exclamation (!), semi colon (;), question (?), comma (,),colon (:), percent (%), and approximation (~).
● If you make a mistake, press an arrow button to select Clear on the visualkeyboard, and then press OK.
● When you are finished entering text, numbers, or symbols, press an arrow button toselect Done on the visual keyboard, and then press OK.
Print reports You can set up your HP all-in-one to print error reports automatically and confirmationreports for each fax you send and receive. You can also manually print system reports
Chapter 11
96 HP Photosmart 2600/2700 series all-in-one
Use
the
fax
feat
ures
as you need them; these reports provide useful system information about your HP all-in-one.By default, your HP all-in-one is set to print a report only if there is a problem withsending or receiving a fax. A confirmation message that indicates whether a fax wassuccessfully sent appears briefly on the color graphics display after each transaction.
Generate reports automatically You can configure your HP all-in-one so that it automatically prints error andconfirmation reports.
Note If you need printed confirmation each time a fax is sent, follow these instructionsbefore sending any faxes and select Send Only.
1 Press Setup.2 Press 2, and then press 1.
This displays the Print Report menu and then selects Fax Report Setup.3 Press to scroll through the following report types:
– 1. Every Error: prints whenever there is any kind of fax error (default).– 2. Send Error: prints whenever there is a transmission error.– 3. Receive Error: prints whenever there is a receiving error.– 4. Every Fax: confirms every time a fax is sent or received.– 5. Send Only: prints every time a fax is sent indicating whether the fax was
successful or not.– 6. Off: does not print any error or confirmation reports.
4 After the report that you want is highlighted, press OK.
Generate reports manually You can manually generate reports about your HP all-in-one, such as the status of thelast fax you sent, a list of programmed speed-dial entries, or a self-test report fordiagnostic purposes.1 Press Setup, and then press 2.
This displays the Print Report menu.2 Press to scroll through the following report types:
– 1. Fax Report Setup: prints the automatic fax reports as described inGenerate reports automatically.
– 2. Last Transaction: prints details of the last fax transaction.– 3. Fax Log: prints a log of approximately the last 30 fax transactions.– 4. Speed Dial List: prints a list of programmed speed-dial entries.– 5. Self-Test Report: prints a report to assist you in diagnosing print and
alignment problems. For more information, see Print a self-test report.3 After the report that you want is highlighted, press OK.
Set up speed dialing You can assign speed-dial entries to fax numbers you use often. This lets you dial thosenumbers quickly by using the control panel.For information on sending a fax using speed dials, see Send a fax using speed dials.
User Guide 97
Use the fax features
You can quickly and easily set up speed-dial entries from your computer by using theHP Director that came with your HP Image Zone software. For more information, seethe onscreen HP Image Zone Help that came with your HP Image Zone software.
Create speed-dial entries You can create speed-dial entries for fax numbers that you use frequently.1 Press Setup.2 Press 3, and then press 1.
This displays the Speed Dial Setup menu and then selects Individual Speed Dial.The first unassigned speed-dial entry appears on the color graphics display.
3 Press OK to select the displayed speed-dial entry. You can also press or toselect a another empty entry, and then press OK.
4 Enter the fax number to assign to that entry, and then press OK.
Tip To enter a pause within a number sequence, press the Space (#) buttonrepeatedly, until a dash appears on the color graphics display.
The visual keyboard automatically appears on the color graphics display.5 Enter the name. After you have finished entering the name, select Done on the
visual keyboard, and then press OK.For more information on entering text using the visual keyboard, see Enter text andsymbols.
6 Press 1 if you want to set up another number, or press Cancel to exit the SpeedDial Setup menu.
Update speed-dial entries You can change the phone number or name of an individual speed-dial entry.1 Press Setup.2 Press 3, and then press 1.
This displays the Speed Dial Setup menu and then selects Individual Speed Dial.3 Press or to scroll through the speed-dial entries, and then press OK to select
the appropriate entry.4 When the current fax number appears, press to erase it.5 Enter the new fax number.6 Press OK to save the new number.
The visual keyboard automatically appears on the color graphics display.7 Use the visual keyboard to change the name.
For more information on using the visual keyboard, see Enter text and symbols.8 Press OK.9 Press 1 to update another speed-dial entry, or press Cancel to exit.
Delete speed-dial entries You can delete an individual or group speed-dial entry.1 Press Setup.2 Press 3, and then press 2.
This displays the Speed Dial Setup menu and then selects Delete Speed Dial.3 Press or until the speed-dial entry that you want to delete appears, and then
press OK to delete it. You can also enter the speed-dial code by using the keypadon the control panel.
Chapter 11
98 HP Photosmart 2600/2700 series all-in-one
Use
the
fax
feat
ures
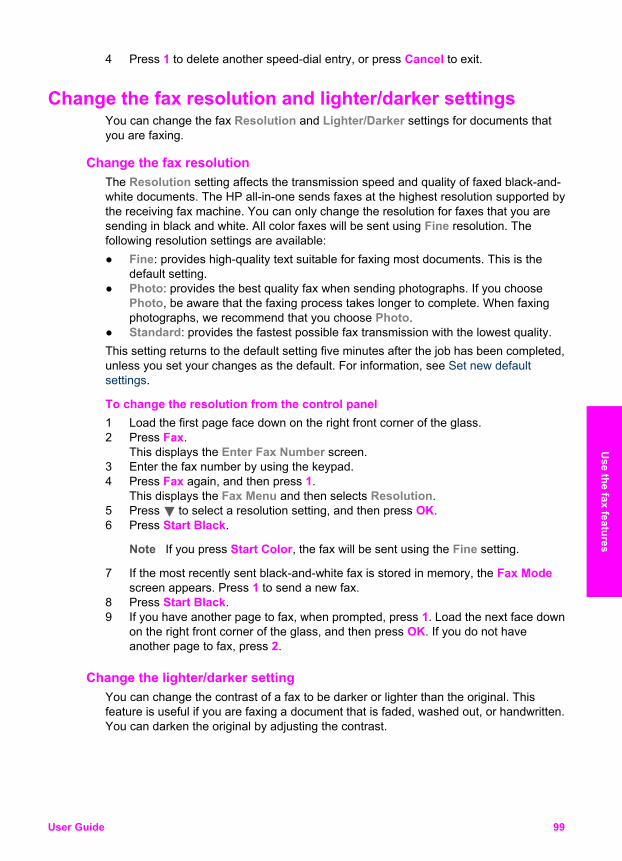
4 Press 1 to delete another speed-dial entry, or press Cancel to exit.
Change the fax resolution and lighter/darker settings You can change the fax Resolution and Lighter/Darker settings for documents thatyou are faxing.
Change the fax resolution The Resolution setting affects the transmission speed and quality of faxed black-and-white documents. The HP all-in-one sends faxes at the highest resolution supported bythe receiving fax machine. You can only change the resolution for faxes that you aresending in black and white. All color faxes will be sent using Fine resolution. Thefollowing resolution settings are available:● Fine: provides high-quality text suitable for faxing most documents. This is the
default setting.● Photo: provides the best quality fax when sending photographs. If you choose
Photo, be aware that the faxing process takes longer to complete. When faxingphotographs, we recommend that you choose Photo.
● Standard: provides the fastest possible fax transmission with the lowest quality.This setting returns to the default setting five minutes after the job has been completed,unless you set your changes as the default. For information, see Set new defaultsettings.
To change the resolution from the control panel1 Load the first page face down on the right front corner of the glass.2 Press Fax.
This displays the Enter Fax Number screen.3 Enter the fax number by using the keypad.4 Press Fax again, and then press 1.
This displays the Fax Menu and then selects Resolution.5 Press to select a resolution setting, and then press OK.6 Press Start Black.
Note If you press Start Color, the fax will be sent using the Fine setting.
7 If the most recently sent black-and-white fax is stored in memory, the Fax Modescreen appears. Press 1 to send a new fax.
8 Press Start Black.9 If you have another page to fax, when prompted, press 1. Load the next face down
on the right front corner of the glass, and then press OK. If you do not haveanother page to fax, press 2.
Change the lighter/darker setting You can change the contrast of a fax to be darker or lighter than the original. Thisfeature is useful if you are faxing a document that is faded, washed out, or handwritten.You can darken the original by adjusting the contrast.
User Guide 99
Use the fax features
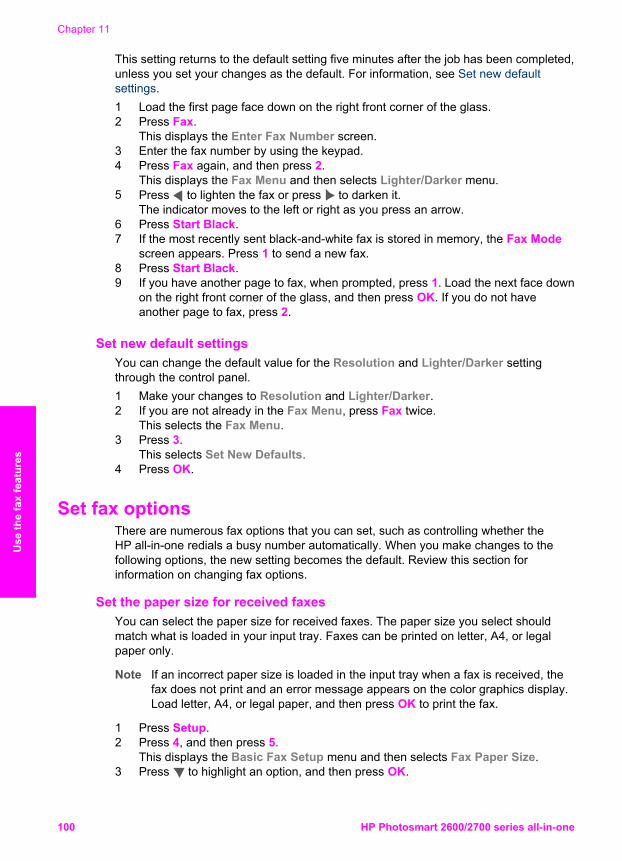
This setting returns to the default setting five minutes after the job has been completed,unless you set your changes as the default. For information, see Set new defaultsettings.1 Load the first page face down on the right front corner of the glass.2 Press Fax.
This displays the Enter Fax Number screen.3 Enter the fax number by using the keypad.4 Press Fax again, and then press 2.
This displays the Fax Menu and then selects Lighter/Darker menu.5 Press to lighten the fax or press to darken it.
The indicator moves to the left or right as you press an arrow.6 Press Start Black.7 If the most recently sent black-and-white fax is stored in memory, the Fax Mode
screen appears. Press 1 to send a new fax.8 Press Start Black.9 If you have another page to fax, when prompted, press 1. Load the next face down
on the right front corner of the glass, and then press OK. If you do not haveanother page to fax, press 2.
Set new default settings You can change the default value for the Resolution and Lighter/Darker settingthrough the control panel.1 Make your changes to Resolution and Lighter/Darker.2 If you are not already in the Fax Menu, press Fax twice.
This selects the Fax Menu.3 Press 3.
This selects Set New Defaults.4 Press OK.
Set fax options There are numerous fax options that you can set, such as controlling whether theHP all-in-one redials a busy number automatically. When you make changes to thefollowing options, the new setting becomes the default. Review this section forinformation on changing fax options.
Set the paper size for received faxes You can select the paper size for received faxes. The paper size you select shouldmatch what is loaded in your input tray. Faxes can be printed on letter, A4, or legalpaper only.
Note If an incorrect paper size is loaded in the input tray when a fax is received, thefax does not print and an error message appears on the color graphics display.Load letter, A4, or legal paper, and then press OK to print the fax.
1 Press Setup.2 Press 4, and then press 5.
This displays the Basic Fax Setup menu and then selects Fax Paper Size.3 Press to highlight an option, and then press OK.
Chapter 11
100 HP Photosmart 2600/2700 series all-in-one
Use
the
fax
feat
ures
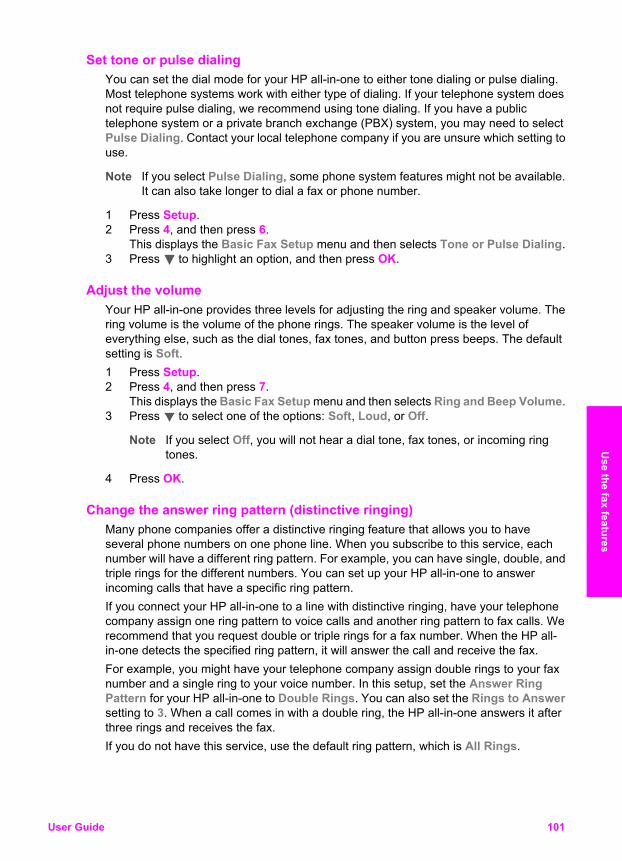
Set tone or pulse dialing You can set the dial mode for your HP all-in-one to either tone dialing or pulse dialing.Most telephone systems work with either type of dialing. If your telephone system doesnot require pulse dialing, we recommend using tone dialing. If you have a publictelephone system or a private branch exchange (PBX) system, you may need to selectPulse Dialing. Contact your local telephone company if you are unsure which setting touse.
Note If you select Pulse Dialing, some phone system features might not be available.It can also take longer to dial a fax or phone number.
1 Press Setup.2 Press 4, and then press 6.
This displays the Basic Fax Setup menu and then selects Tone or Pulse Dialing.3 Press to highlight an option, and then press OK.
Adjust the volume Your HP all-in-one provides three levels for adjusting the ring and speaker volume. Thering volume is the volume of the phone rings. The speaker volume is the level ofeverything else, such as the dial tones, fax tones, and button press beeps. The defaultsetting is Soft.1 Press Setup.2 Press 4, and then press 7.
This displays the Basic Fax Setup menu and then selects Ring and Beep Volume.3 Press to select one of the options: Soft, Loud, or Off.
Note If you select Off, you will not hear a dial tone, fax tones, or incoming ringtones.
4 Press OK.
Change the answer ring pattern (distinctive ringing) Many phone companies offer a distinctive ringing feature that allows you to haveseveral phone numbers on one phone line. When you subscribe to this service, eachnumber will have a different ring pattern. For example, you can have single, double, andtriple rings for the different numbers. You can set up your HP all-in-one to answerincoming calls that have a specific ring pattern.If you connect your HP all-in-one to a line with distinctive ringing, have your telephonecompany assign one ring pattern to voice calls and another ring pattern to fax calls. Werecommend that you request double or triple rings for a fax number. When the HP all-in-one detects the specified ring pattern, it will answer the call and receive the fax.For example, you might have your telephone company assign double rings to your faxnumber and a single ring to your voice number. In this setup, set the Answer RingPattern for your HP all-in-one to Double Rings. You can also set the Rings to Answersetting to 3. When a call comes in with a double ring, the HP all-in-one answers it afterthree rings and receives the fax.If you do not have this service, use the default ring pattern, which is All Rings.
User Guide 101
Use the fax features

To change the answer ring pattern from the control panel1 Verify that your HP all-in-one is set to answer fax calls automatically. For
information, see Set up the HP all-in-one to receive faxes.2 Press Setup.3 Press 5, and then press 1.
This displays the Advanced Fax Setup menu and then selects Answer RingPattern.
4 Press to highlight an option, and then press OK.When the phone rings with the ring pattern assigned to your fax line, the HP all-in-one answers the call and receives the fax.
Redial a busy or unanswered number automatically You can set your HP all-in-one to redial a busy or an unanswered numberautomatically. The default setting for Busy Redial is Redial. The default setting for NoAnswer Redial is No Redial.1 Press Setup.2 Do one of the following:
– To change the Busy Redial setting, press 5, and then press 2.This displays the Advanced Fax Setup menu and then selects Busy Redial.
– To change the No Answer Redial setting press 5, and then press 3.This displays the Advanced Fax Setup menu and then selects No AnswerRedial.
3 Press to select Redial or No Redial.4 Press OK.
Set automatic reduction for incoming faxes This setting determines what your HP all-in-one does if it receives a fax that is too largefor the default paper size. With this setting turned on (the default), the image of theincoming fax is reduced so that it fits on one page, if possible. With this feature turnedoff, information that does not fit on the first page is printed on a second page.Automatic Reduction is useful when you receive a legal-size fax and letter-size paperis loaded in the input tray.1 Press Setup.2 Press 5, and then press 4.
This displays the Advanced Fax Setup menu and then selects AutomaticReduction.
3 Press to select Off or On.4 Press OK.
Set backup fax reception The HP all-in-one stores all received faxes in memory. If there is an error condition thatprevents the HP all-in-one from printing the faxes, Backup Fax Reception allows youto continue receiving faxes. During the error condition, with Backup Fax Receptionenabled, the faxes are stored in memory.For example, if the HP all-in-one is out of paper and Backup Fax Reception isenabled, all received faxes are stored in memory. After you load more paper, you can
Chapter 11
102 HP Photosmart 2600/2700 series all-in-one
Use
the
fax
feat
ures
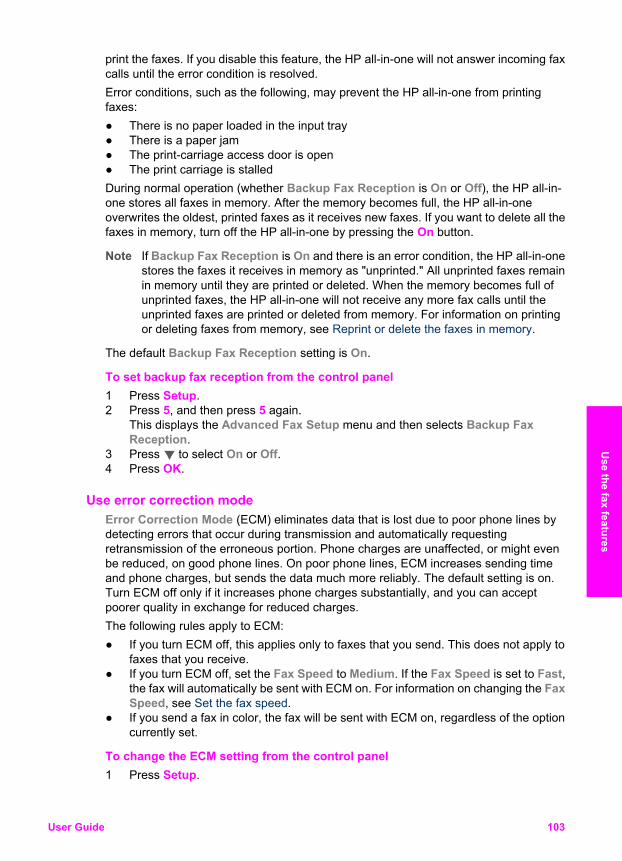
print the faxes. If you disable this feature, the HP all-in-one will not answer incoming faxcalls until the error condition is resolved.Error conditions, such as the following, may prevent the HP all-in-one from printingfaxes:● There is no paper loaded in the input tray● There is a paper jam● The print-carriage access door is open● The print carriage is stalledDuring normal operation (whether Backup Fax Reception is On or Off), the HP all-in-one stores all faxes in memory. After the memory becomes full, the HP all-in-oneoverwrites the oldest, printed faxes as it receives new faxes. If you want to delete all thefaxes in memory, turn off the HP all-in-one by pressing the On button.
Note If Backup Fax Reception is On and there is an error condition, the HP all-in-onestores the faxes it receives in memory as "unprinted." All unprinted faxes remainin memory until they are printed or deleted. When the memory becomes full ofunprinted faxes, the HP all-in-one will not receive any more fax calls until theunprinted faxes are printed or deleted from memory. For information on printingor deleting faxes from memory, see Reprint or delete the faxes in memory.
The default Backup Fax Reception setting is On.
To set backup fax reception from the control panel1 Press Setup.2 Press 5, and then press 5 again.
This displays the Advanced Fax Setup menu and then selects Backup FaxReception.
3 Press to select On or Off.4 Press OK.
Use error correction mode Error Correction Mode (ECM) eliminates data that is lost due to poor phone lines bydetecting errors that occur during transmission and automatically requestingretransmission of the erroneous portion. Phone charges are unaffected, or might evenbe reduced, on good phone lines. On poor phone lines, ECM increases sending timeand phone charges, but sends the data much more reliably. The default setting is on.Turn ECM off only if it increases phone charges substantially, and you can acceptpoorer quality in exchange for reduced charges.The following rules apply to ECM:● If you turn ECM off, this applies only to faxes that you send. This does not apply to
faxes that you receive.● If you turn ECM off, set the Fax Speed to Medium. If the Fax Speed is set to Fast,
the fax will automatically be sent with ECM on. For information on changing the FaxSpeed, see Set the fax speed.
● If you send a fax in color, the fax will be sent with ECM on, regardless of the optioncurrently set.
To change the ECM setting from the control panel1 Press Setup.
User Guide 103
Use the fax features
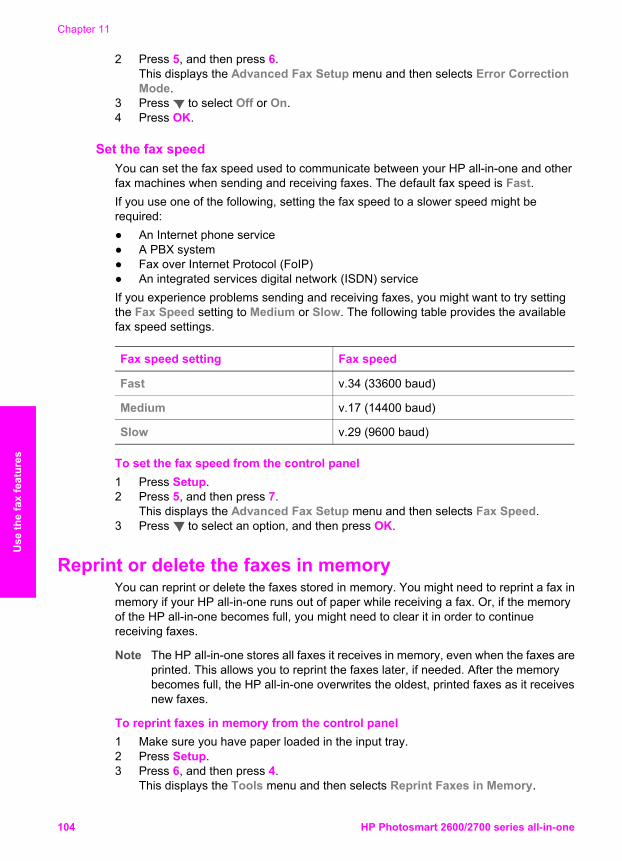
2 Press 5, and then press 6.This displays the Advanced Fax Setup menu and then selects Error CorrectionMode.
3 Press to select Off or On.4 Press OK.
Set the fax speed You can set the fax speed used to communicate between your HP all-in-one and otherfax machines when sending and receiving faxes. The default fax speed is Fast.If you use one of the following, setting the fax speed to a slower speed might berequired:● An Internet phone service● A PBX system● Fax over Internet Protocol (FoIP)● An integrated services digital network (ISDN) serviceIf you experience problems sending and receiving faxes, you might want to try settingthe Fax Speed setting to Medium or Slow. The following table provides the availablefax speed settings.
Fax speed setting Fax speed
Fast v.34 (33600 baud)
Medium v.17 (14400 baud)
Slow v.29 (9600 baud)
To set the fax speed from the control panel1 Press Setup.2 Press 5, and then press 7.
This displays the Advanced Fax Setup menu and then selects Fax Speed.3 Press to select an option, and then press OK.
Reprint or delete the faxes in memory You can reprint or delete the faxes stored in memory. You might need to reprint a fax inmemory if your HP all-in-one runs out of paper while receiving a fax. Or, if the memoryof the HP all-in-one becomes full, you might need to clear it in order to continuereceiving faxes.
Note The HP all-in-one stores all faxes it receives in memory, even when the faxes areprinted. This allows you to reprint the faxes later, if needed. After the memorybecomes full, the HP all-in-one overwrites the oldest, printed faxes as it receivesnew faxes.
To reprint faxes in memory from the control panel1 Make sure you have paper loaded in the input tray.2 Press Setup.3 Press 6, and then press 4.
This displays the Tools menu and then selects Reprint Faxes in Memory.
Chapter 11
104 HP Photosmart 2600/2700 series all-in-one
Use
the
fax
feat
ures
The faxes are printed in the reverse order they were received with the mostrecently received fax printed first, and so on.
4 If you do not need a fax that is printing, press Cancel.The HP all-in-one begins printing the next fax in memory.
Note You will need to press Cancel for each stored fax in order to stop it fromprinting.
To delete all the faxes in memory from the control panel➔ To delete all the faxes from memory, turn off the HP all-in-one by pressing the On
button.
All faxes stored in memory will be deleted from memory after you turn off the power toyour HP all-in-one.
Fax over the Internet You may subscribe to a low cost phone service that allows you to send and receivefaxes with your HP all-in-one by using the Internet. This method is called Fax overInternet Protocol (FoIP). You probably use a FoIP service (provided by your telephonecompany) if you:● Dial a special access code along with the fax number, or● Have an IP converter box that connects to the Internet and provides analog phone
ports for the fax connection.
Note You can only send and receive faxes by connecting a phone cord to the portlabeled "1-LINE" on the HP all-in-one and not from the Ethernet port. This meansthat your connection to the Internet must be done either through a converter box(which supplies regular analog phone jacks for fax connections) or yourtelephone company.
The FoIP service might not work properly when the HP all-in-one is sending andreceiving faxes at high speed (33600bps). If you experience problems sending andreceiving faxes, use a slower fax speed. You can do this by changing the Fax Speedsetting from High (the default) to Medium. For information on changing this setting, seeSet the fax speed.You should also check with your telephone company to make sure their Internet phoneservice supports faxing. If they do not support faxing, you will not be able to send andreceive faxes through the Internet.
Stop faxing You can cancel a fax you are sending or receiving at any time.
To stop faxing from the control panel➔ Press Cancel on the control panel to stop a fax you are sending or receiving. Look
for the Fax Cancelled message on the color graphics display. If it does notappear, press Cancel again.The HP all-in-one prints any pages it has already started printing and then cancelsthe remainder of the fax. This can take a few moments.
User Guide 105
Use the fax features

To cancel a number you are dialing➔ Press Cancel to cancel a number you are currently dialing.
Chapter 11
106 HP Photosmart 2600/2700 series all-in-one
Use
the
fax
feat
ures
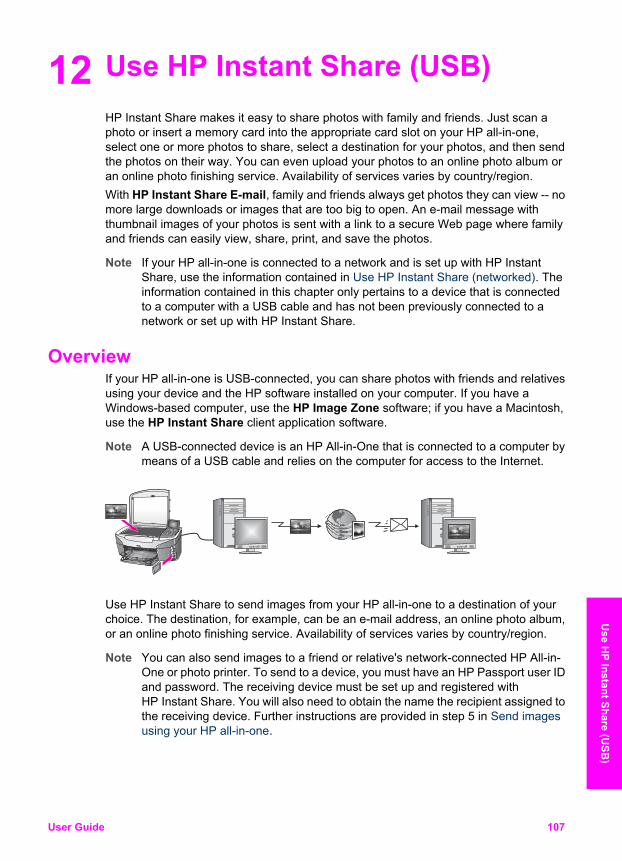
12 Use HP Instant Share (USB)HP Instant Share makes it easy to share photos with family and friends. Just scan aphoto or insert a memory card into the appropriate card slot on your HP all-in-one,select one or more photos to share, select a destination for your photos, and then sendthe photos on their way. You can even upload your photos to an online photo album oran online photo finishing service. Availability of services varies by country/region.With HP Instant Share E-mail, family and friends always get photos they can view -- nomore large downloads or images that are too big to open. An e-mail message withthumbnail images of your photos is sent with a link to a secure Web page where familyand friends can easily view, share, print, and save the photos.
Note If your HP all-in-one is connected to a network and is set up with HP InstantShare, use the information contained in Use HP Instant Share (networked). Theinformation contained in this chapter only pertains to a device that is connectedto a computer with a USB cable and has not been previously connected to anetwork or set up with HP Instant Share.
Overview If your HP all-in-one is USB-connected, you can share photos with friends and relativesusing your device and the HP software installed on your computer. If you have aWindows-based computer, use the HP Image Zone software; if you have a Macintosh,use the HP Instant Share client application software.
Note A USB-connected device is an HP All-in-One that is connected to a computer bymeans of a USB cable and relies on the computer for access to the Internet.
Use HP Instant Share to send images from your HP all-in-one to a destination of yourchoice. The destination, for example, can be an e-mail address, an online photo album,or an online photo finishing service. Availability of services varies by country/region.
Note You can also send images to a friend or relative's network-connected HP All-in-One or photo printer. To send to a device, you must have an HP Passport user IDand password. The receiving device must be set up and registered withHP Instant Share. You will also need to obtain the name the recipient assigned tothe receiving device. Further instructions are provided in step 5 in Send imagesusing your HP all-in-one.
User Guide 107
Use H
P Instant Share (USB
)
Get started You must have the following to use HP Instant Share with your HP all-in-one:● An HP all-in-one connected to a computer with a USB cable● Internet access through the computer to which the HP all-in-one is connected● Based on your operating system:
– Windows: HP Image Zone software installed on your computer– Macintosh: HP Image Zone software installed on your computer, including the
HP Instant Share client application softwareFor more information, see the Setup Guide that came with your device.
Once you have set up your HP all-in-one and installed the HP Image Zone software,you are ready to start sharing photos using HP Instant Share.
Send images using your HP all-in-one Images can be photos or scanned documents. Either can be shared with friends andrelatives using your HP all-in-one and HP Instant Share. Select photos from a memorycard or scan an image, press HP Instant Share on the control panel of your HP all-in-one, and send your images to the destination of your choice. See the topics below fordetailed instructions.
Send photos from a memory card Use your HP all-in-one to share photos immediately upon inserting a memory card, orinsert the memory card and share photos at a later time. To share photos immediately,insert the memory card into the appropriate card slot, select one or more photos, andthen press HP Instant Share on the control panel.If you insert the memory card, and then decide to send the photos at a later time, youwill find that when you come back to your HP all-in-one it has gone into idle mode.Simply press HP Instant Share and follow the prompts to select and share photos.
Note For more information on using a memory card, see Use a memory card orPictBridge camera.
To send photos immediately upon inserting your memory card1 Make sure the memory card is inserted into the appropriate card slot on your
HP all-in-one.2 Select one or more photos.
For more information on selecting photos, see Use a memory card or PictBridgecamera.
Note Movie file types might not be supported by the HP Instant Share service.
3 Press HP Instant Share on the control panel of your HP all-in-one.For Windows users, the HP Image Zone software opens on your computer. The HPInstant Share tab appears. Thumbnails of your photos appear in the SelectionTray. For more information on the HP Image Zone, see Use the HP Image Zone inthe onscreen help.For Macintosh users, the HP Instant Share client application software opens onyour computer. Thumbnails of your photos appear in the HP Instant Sharewindow.
Chapter 12
108 HP Photosmart 2600/2700 series all-in-one
Use
HP
Inst
ant S
hare
(USB
)
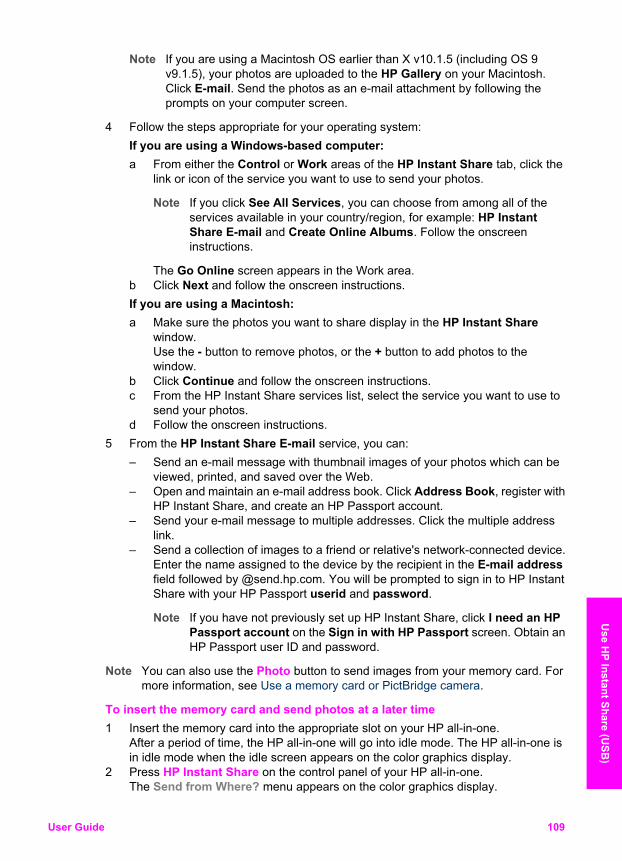
Note If you are using a Macintosh OS earlier than X v10.1.5 (including OS 9v9.1.5), your photos are uploaded to the HP Gallery on your Macintosh.Click E-mail. Send the photos as an e-mail attachment by following theprompts on your computer screen.
4 Follow the steps appropriate for your operating system:If you are using a Windows-based computer:a From either the Control or Work areas of the HP Instant Share tab, click the
link or icon of the service you want to use to send your photos.
Note If you click See All Services, you can choose from among all of theservices available in your country/region, for example: HP InstantShare E-mail and Create Online Albums. Follow the onscreeninstructions.
The Go Online screen appears in the Work area.b Click Next and follow the onscreen instructions.If you are using a Macintosh:a Make sure the photos you want to share display in the HP Instant Share
window.Use the - button to remove photos, or the + button to add photos to thewindow.
b Click Continue and follow the onscreen instructions.c From the HP Instant Share services list, select the service you want to use to
send your photos.d Follow the onscreen instructions.
5 From the HP Instant Share E-mail service, you can:– Send an e-mail message with thumbnail images of your photos which can be
viewed, printed, and saved over the Web.– Open and maintain an e-mail address book. Click Address Book, register with
HP Instant Share, and create an HP Passport account.– Send your e-mail message to multiple addresses. Click the multiple address
link.– Send a collection of images to a friend or relative's network-connected device.
Enter the name assigned to the device by the recipient in the E-mail addressfield followed by @send.hp.com. You will be prompted to sign in to HP InstantShare with your HP Passport userid and password.
Note If you have not previously set up HP Instant Share, click I need an HPPassport account on the Sign in with HP Passport screen. Obtain anHP Passport user ID and password.
Note You can also use the Photo button to send images from your memory card. Formore information, see Use a memory card or PictBridge camera.
To insert the memory card and send photos at a later time1 Insert the memory card into the appropriate slot on your HP all-in-one.
After a period of time, the HP all-in-one will go into idle mode. The HP all-in-one isin idle mode when the idle screen appears on the color graphics display.
2 Press HP Instant Share on the control panel of your HP all-in-one.The Send from Where? menu appears on the color graphics display.
User Guide 109
Use H
P Instant Share (USB
)
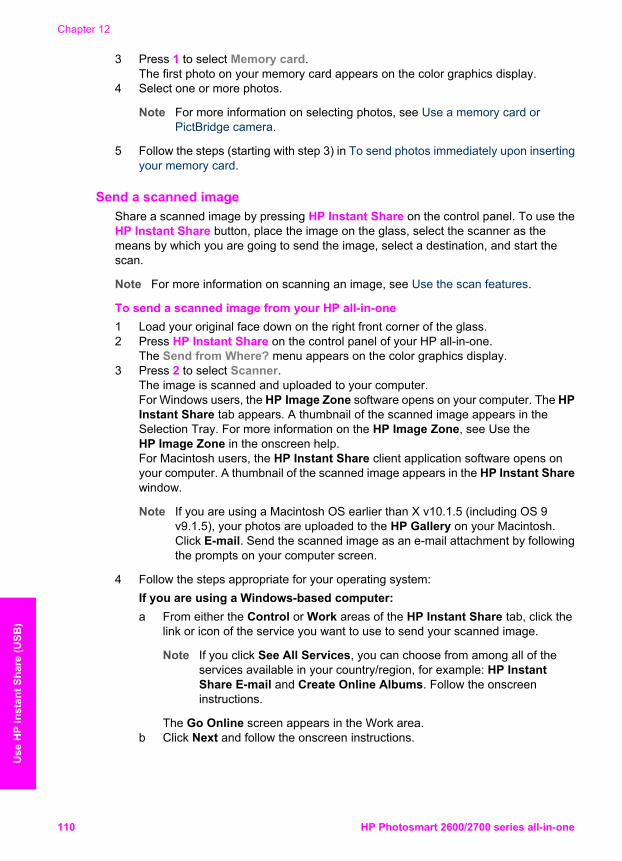
3 Press 1 to select Memory card.The first photo on your memory card appears on the color graphics display.
4 Select one or more photos.
Note For more information on selecting photos, see Use a memory card orPictBridge camera.
5 Follow the steps (starting with step 3) in To send photos immediately upon insertingyour memory card.
Send a scanned image Share a scanned image by pressing HP Instant Share on the control panel. To use theHP Instant Share button, place the image on the glass, select the scanner as themeans by which you are going to send the image, select a destination, and start thescan.
Note For more information on scanning an image, see Use the scan features.
To send a scanned image from your HP all-in-one1 Load your original face down on the right front corner of the glass.2 Press HP Instant Share on the control panel of your HP all-in-one.
The Send from Where? menu appears on the color graphics display.3 Press 2 to select Scanner.
The image is scanned and uploaded to your computer.For Windows users, the HP Image Zone software opens on your computer. The HPInstant Share tab appears. A thumbnail of the scanned image appears in theSelection Tray. For more information on the HP Image Zone, see Use theHP Image Zone in the onscreen help.For Macintosh users, the HP Instant Share client application software opens onyour computer. A thumbnail of the scanned image appears in the HP Instant Sharewindow.
Note If you are using a Macintosh OS earlier than X v10.1.5 (including OS 9v9.1.5), your photos are uploaded to the HP Gallery on your Macintosh.Click E-mail. Send the scanned image as an e-mail attachment by followingthe prompts on your computer screen.
4 Follow the steps appropriate for your operating system:If you are using a Windows-based computer:a From either the Control or Work areas of the HP Instant Share tab, click the
link or icon of the service you want to use to send your scanned image.
Note If you click See All Services, you can choose from among all of theservices available in your country/region, for example: HP InstantShare E-mail and Create Online Albums. Follow the onscreeninstructions.
The Go Online screen appears in the Work area.b Click Next and follow the onscreen instructions.
Chapter 12
110 HP Photosmart 2600/2700 series all-in-one
Use
HP
Inst
ant S
hare
(USB
)
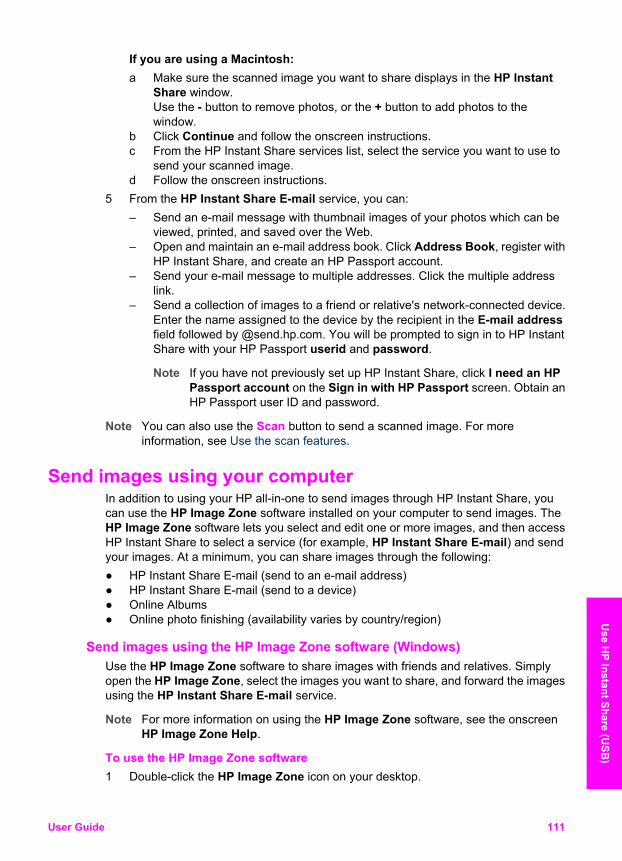
If you are using a Macintosh:a Make sure the scanned image you want to share displays in the HP Instant
Share window.Use the - button to remove photos, or the + button to add photos to thewindow.
b Click Continue and follow the onscreen instructions.c From the HP Instant Share services list, select the service you want to use to
send your scanned image.d Follow the onscreen instructions.
5 From the HP Instant Share E-mail service, you can:– Send an e-mail message with thumbnail images of your photos which can be
viewed, printed, and saved over the Web.– Open and maintain an e-mail address book. Click Address Book, register with
HP Instant Share, and create an HP Passport account.– Send your e-mail message to multiple addresses. Click the multiple address
link.– Send a collection of images to a friend or relative's network-connected device.
Enter the name assigned to the device by the recipient in the E-mail addressfield followed by @send.hp.com. You will be prompted to sign in to HP InstantShare with your HP Passport userid and password.
Note If you have not previously set up HP Instant Share, click I need an HPPassport account on the Sign in with HP Passport screen. Obtain anHP Passport user ID and password.
Note You can also use the Scan button to send a scanned image. For moreinformation, see Use the scan features.
Send images using your computer In addition to using your HP all-in-one to send images through HP Instant Share, youcan use the HP Image Zone software installed on your computer to send images. TheHP Image Zone software lets you select and edit one or more images, and then accessHP Instant Share to select a service (for example, HP Instant Share E-mail) and sendyour images. At a minimum, you can share images through the following:● HP Instant Share E-mail (send to an e-mail address)● HP Instant Share E-mail (send to a device)● Online Albums● Online photo finishing (availability varies by country/region)
Send images using the HP Image Zone software (Windows) Use the HP Image Zone software to share images with friends and relatives. Simplyopen the HP Image Zone, select the images you want to share, and forward the imagesusing the HP Instant Share E-mail service.
Note For more information on using the HP Image Zone software, see the onscreenHP Image Zone Help.
To use the HP Image Zone software1 Double-click the HP Image Zone icon on your desktop.
User Guide 111
Use H
P Instant Share (USB
)
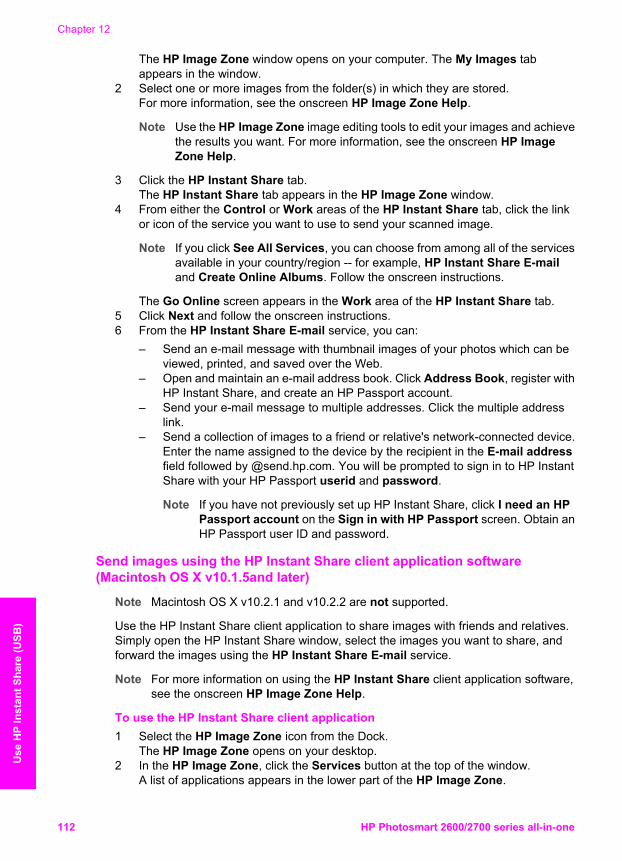
The HP Image Zone window opens on your computer. The My Images tabappears in the window.
2 Select one or more images from the folder(s) in which they are stored.For more information, see the onscreen HP Image Zone Help.
Note Use the HP Image Zone image editing tools to edit your images and achievethe results you want. For more information, see the onscreen HP ImageZone Help.
3 Click the HP Instant Share tab.The HP Instant Share tab appears in the HP Image Zone window.
4 From either the Control or Work areas of the HP Instant Share tab, click the linkor icon of the service you want to use to send your scanned image.
Note If you click See All Services, you can choose from among all of the servicesavailable in your country/region -- for example, HP Instant Share E-mailand Create Online Albums. Follow the onscreen instructions.
The Go Online screen appears in the Work area of the HP Instant Share tab.5 Click Next and follow the onscreen instructions.6 From the HP Instant Share E-mail service, you can:
– Send an e-mail message with thumbnail images of your photos which can beviewed, printed, and saved over the Web.
– Open and maintain an e-mail address book. Click Address Book, register withHP Instant Share, and create an HP Passport account.
– Send your e-mail message to multiple addresses. Click the multiple addresslink.
– Send a collection of images to a friend or relative's network-connected device.Enter the name assigned to the device by the recipient in the E-mail addressfield followed by @send.hp.com. You will be prompted to sign in to HP InstantShare with your HP Passport userid and password.
Note If you have not previously set up HP Instant Share, click I need an HPPassport account on the Sign in with HP Passport screen. Obtain anHP Passport user ID and password.
Send images using the HP Instant Share client application software(Macintosh OS X v10.1.5and later)
Note Macintosh OS X v10.2.1 and v10.2.2 are not supported.
Use the HP Instant Share client application to share images with friends and relatives.Simply open the HP Instant Share window, select the images you want to share, andforward the images using the HP Instant Share E-mail service.
Note For more information on using the HP Instant Share client application software,see the onscreen HP Image Zone Help.
To use the HP Instant Share client application1 Select the HP Image Zone icon from the Dock.
The HP Image Zone opens on your desktop.2 In the HP Image Zone, click the Services button at the top of the window.
A list of applications appears in the lower part of the HP Image Zone.
Chapter 12
112 HP Photosmart 2600/2700 series all-in-one
Use
HP
Inst
ant S
hare
(USB
)
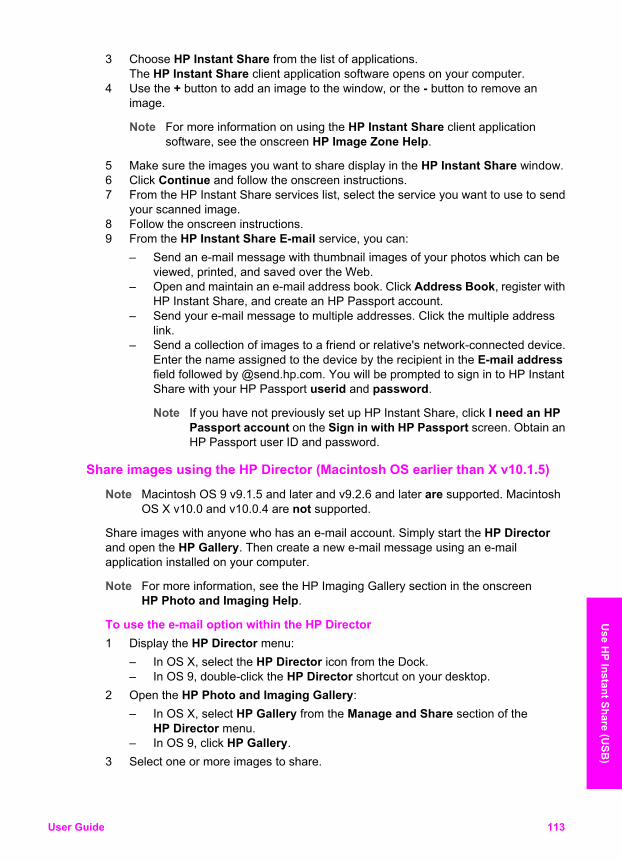
3 Choose HP Instant Share from the list of applications.The HP Instant Share client application software opens on your computer.
4 Use the + button to add an image to the window, or the - button to remove animage.
Note For more information on using the HP Instant Share client applicationsoftware, see the onscreen HP Image Zone Help.
5 Make sure the images you want to share display in the HP Instant Share window.6 Click Continue and follow the onscreen instructions.7 From the HP Instant Share services list, select the service you want to use to send
your scanned image.8 Follow the onscreen instructions.9 From the HP Instant Share E-mail service, you can:
– Send an e-mail message with thumbnail images of your photos which can beviewed, printed, and saved over the Web.
– Open and maintain an e-mail address book. Click Address Book, register withHP Instant Share, and create an HP Passport account.
– Send your e-mail message to multiple addresses. Click the multiple addresslink.
– Send a collection of images to a friend or relative's network-connected device.Enter the name assigned to the device by the recipient in the E-mail addressfield followed by @send.hp.com. You will be prompted to sign in to HP InstantShare with your HP Passport userid and password.
Note If you have not previously set up HP Instant Share, click I need an HPPassport account on the Sign in with HP Passport screen. Obtain anHP Passport user ID and password.
Share images using the HP Director (Macintosh OS earlier than X v10.1.5)
Note Macintosh OS 9 v9.1.5 and later and v9.2.6 and later are supported. MacintoshOS X v10.0 and v10.0.4 are not supported.
Share images with anyone who has an e-mail account. Simply start the HP Directorand open the HP Gallery. Then create a new e-mail message using an e-mailapplication installed on your computer.
Note For more information, see the HP Imaging Gallery section in the onscreenHP Photo and Imaging Help.
To use the e-mail option within the HP Director1 Display the HP Director menu:
– In OS X, select the HP Director icon from the Dock.– In OS 9, double-click the HP Director shortcut on your desktop.
2 Open the HP Photo and Imaging Gallery:– In OS X, select HP Gallery from the Manage and Share section of the
HP Director menu.– In OS 9, click HP Gallery.
3 Select one or more images to share.
User Guide 113
Use H
P Instant Share (USB
)
For more information, see the onscreen HP Photo and Imaging Help.4 Click E-mail.
The e-mail program on your Macintosh opens.Share the images as an e-mail attachment by following the prompts on yourcomputer screen.
Chapter 12
114 HP Photosmart 2600/2700 series all-in-one
Use
HP
Inst
ant S
hare
(USB
)
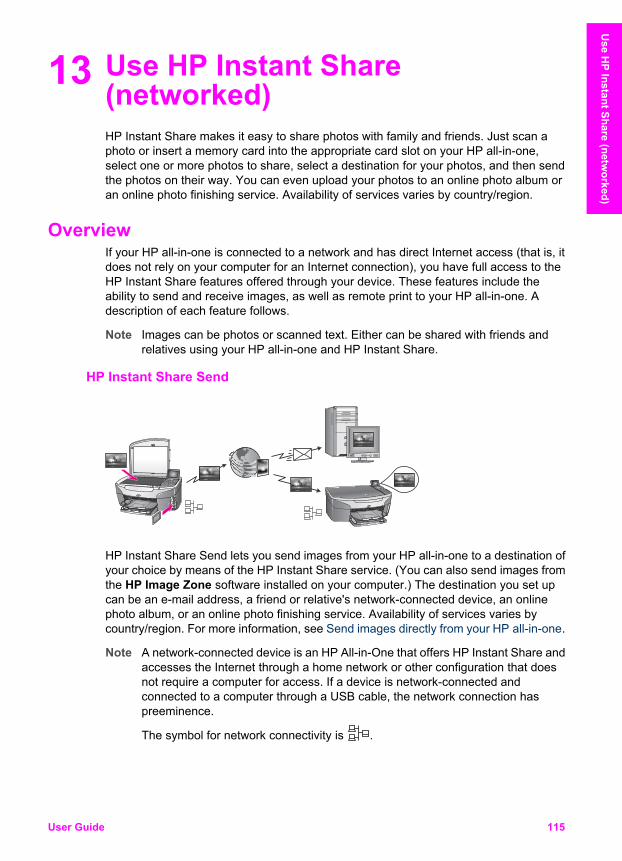
13 Use HP Instant Share(networked)HP Instant Share makes it easy to share photos with family and friends. Just scan aphoto or insert a memory card into the appropriate card slot on your HP all-in-one,select one or more photos to share, select a destination for your photos, and then sendthe photos on their way. You can even upload your photos to an online photo album oran online photo finishing service. Availability of services varies by country/region.
Overview If your HP all-in-one is connected to a network and has direct Internet access (that is, itdoes not rely on your computer for an Internet connection), you have full access to theHP Instant Share features offered through your device. These features include theability to send and receive images, as well as remote print to your HP all-in-one. Adescription of each feature follows.
Note Images can be photos or scanned text. Either can be shared with friends andrelatives using your HP all-in-one and HP Instant Share.
HP Instant Share Send
HP Instant Share Send lets you send images from your HP all-in-one to a destination ofyour choice by means of the HP Instant Share service. (You can also send images fromthe HP Image Zone software installed on your computer.) The destination you set upcan be an e-mail address, a friend or relative's network-connected device, an onlinephoto album, or an online photo finishing service. Availability of services varies bycountry/region. For more information, see Send images directly from your HP all-in-one.
Note A network-connected device is an HP All-in-One that offers HP Instant Share andaccesses the Internet through a home network or other configuration that doesnot require a computer for access. If a device is network-connected andconnected to a computer through a USB cable, the network connection haspreeminence.
The symbol for network connectivity is .
User Guide 115
Use H
P Instant Share (networked)
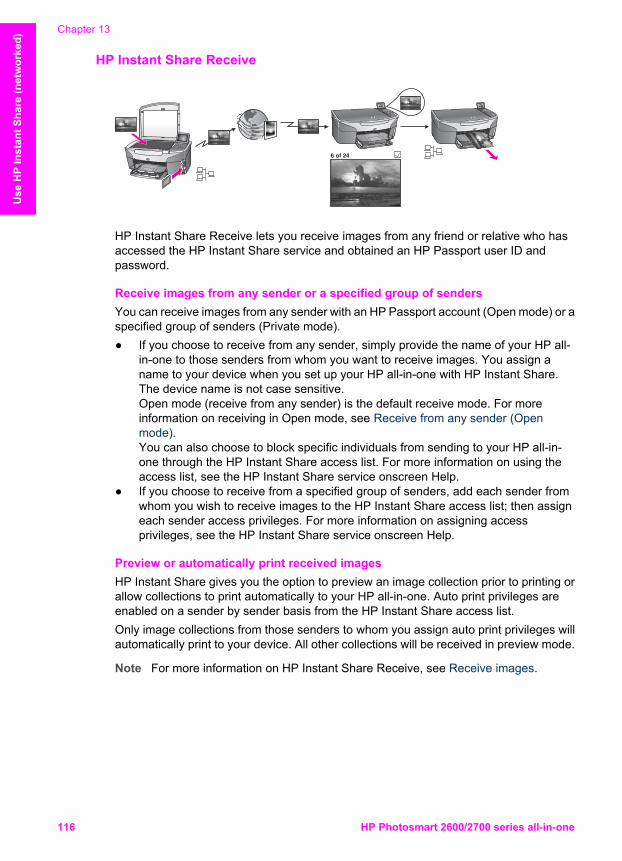
HP Instant Share Receive
HP Instant Share Receive lets you receive images from any friend or relative who hasaccessed the HP Instant Share service and obtained an HP Passport user ID andpassword.
Receive images from any sender or a specified group of sendersYou can receive images from any sender with an HP Passport account (Open mode) or aspecified group of senders (Private mode).● If you choose to receive from any sender, simply provide the name of your HP all-
in-one to those senders from whom you want to receive images. You assign aname to your device when you set up your HP all-in-one with HP Instant Share.The device name is not case sensitive.Open mode (receive from any sender) is the default receive mode. For moreinformation on receiving in Open mode, see Receive from any sender (Openmode).You can also choose to block specific individuals from sending to your HP all-in-one through the HP Instant Share access list. For more information on using theaccess list, see the HP Instant Share service onscreen Help.
● If you choose to receive from a specified group of senders, add each sender fromwhom you wish to receive images to the HP Instant Share access list; then assigneach sender access privileges. For more information on assigning accessprivileges, see the HP Instant Share service onscreen Help.
Preview or automatically print received imagesHP Instant Share gives you the option to preview an image collection prior to printing orallow collections to print automatically to your HP all-in-one. Auto print privileges areenabled on a sender by sender basis from the HP Instant Share access list.Only image collections from those senders to whom you assign auto print privileges willautomatically print to your device. All other collections will be received in preview mode.
Note For more information on HP Instant Share Receive, see Receive images.
Chapter 13
116 HP Photosmart 2600/2700 series all-in-one
Use
HP
Inst
ant S
hare
(net
wor
ked)
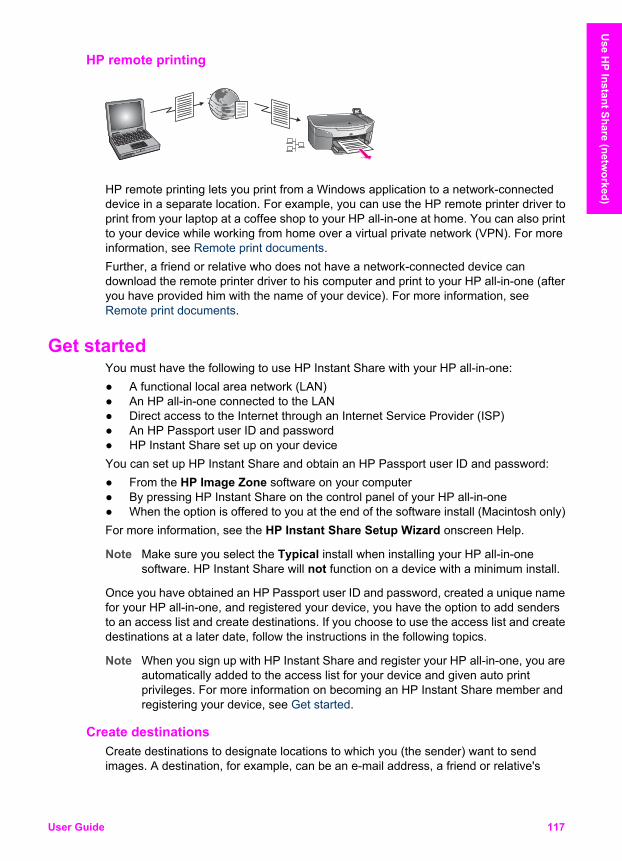
HP remote printing
HP remote printing lets you print from a Windows application to a network-connecteddevice in a separate location. For example, you can use the HP remote printer driver toprint from your laptop at a coffee shop to your HP all-in-one at home. You can also printto your device while working from home over a virtual private network (VPN). For moreinformation, see Remote print documents.Further, a friend or relative who does not have a network-connected device candownload the remote printer driver to his computer and print to your HP all-in-one (afteryou have provided him with the name of your device). For more information, seeRemote print documents.
Get started You must have the following to use HP Instant Share with your HP all-in-one:● A functional local area network (LAN)● An HP all-in-one connected to the LAN● Direct access to the Internet through an Internet Service Provider (ISP)● An HP Passport user ID and password● HP Instant Share set up on your deviceYou can set up HP Instant Share and obtain an HP Passport user ID and password:● From the HP Image Zone software on your computer● By pressing HP Instant Share on the control panel of your HP all-in-one● When the option is offered to you at the end of the software install (Macintosh only)For more information, see the HP Instant Share Setup Wizard onscreen Help.
Note Make sure you select the Typical install when installing your HP all-in-onesoftware. HP Instant Share will not function on a device with a minimum install.
Once you have obtained an HP Passport user ID and password, created a unique namefor your HP all-in-one, and registered your device, you have the option to add sendersto an access list and create destinations. If you choose to use the access list and createdestinations at a later date, follow the instructions in the following topics.
Note When you sign up with HP Instant Share and register your HP all-in-one, you areautomatically added to the access list for your device and given auto printprivileges. For more information on becoming an HP Instant Share member andregistering your device, see Get started.
Create destinations Create destinations to designate locations to which you (the sender) want to sendimages. A destination, for example, can be an e-mail address, a friend or relative's
User Guide 117
Use H
P Instant Share (networked)
network-connected device, an online photo album, or an online photo finishing service.Availability of services varies by country/region.
Note Although destinations are created on the HP Instant Share service, they areaccessed through the HP all-in-one.
To create destinations1 Press HP Instant Share on the control panel of your HP all-in-one.
The HP Instant Share menu appears on the color graphics display.2 Press 3to select Add New Destination.
The Select Computer menu appears, with a list of computers connected to yournetwork.
3 Select a computer from the list.
Note HP Image Zone software must be installed on the computer selected, andthe computer must be able to access the HP Instant Share service.
The HP Instant Share service screens appear in a window on your computer.4 Sign in to HP Instant Share with your HP Passport userid and password.
The HP Instant Share manager appears.
Note You will not be prompted for your HP Passport userid and password if youhave set the HP Instant Share service to remember them.
5 Select the Share tab and follow the onscreen instructions to create a newdestination.For more information, see the onscreen Help.If you want to send a collection of images to a friend or relative's network-connected device, select HP Instant Share E-mail. In the E-mail address fieldenter the name of the device followed by @send.hp.com. (This particular e-mailaddress can only be used with HP Instant Share.)
Note To send to a device: 1) both the sender and recipient must have an HPPassport user ID and password; 2) the device to which the image is sentmust be registered with HP Instant Share; and 3) the image must be sentusing HP Instant Share E-mail or HP remote printing.Prior to setting up a device destination in HP Instant Share E-mail oradding a printer for use with HP remote printing, ask the recipient for theunique name he assigned to his network-connected device. The devicename is created by a person when he signs up with HP Instant Share andregisters his device. For more information, see Get started.
Use the HP Instant Share access list The access list is used when your HP all-in-one is set to receive in either Open orPrivate mode.● In Open mode, you receive image collections from any sender who has an HP
Passport account, and who knows the name you assigned to your device. Bychoosing to receive in Open mode, you are allowing a sender to send images toyour device.
Chapter 13
118 HP Photosmart 2600/2700 series all-in-one
Use
HP
Inst
ant S
hare
(net
wor
ked)
Use the access list to assign auto print privileges. Also use it to block senders fromwhom you do not want to receive images.
● In Private mode, you only receive images from senders you specify on the accesslist. Individuals added to the list must have an HP Passport user ID and password.When you add a sender to the list, grant one of the following access privileges:– Allow: Allows images received from a sender to be previewed prior to printing.– Auto print: Allows images received from a sender to print automatically to your
device.– Block: Ensures you do not receive unwanted images from a sender.
To use the access list1 Press HP Instant Share on the control panel of your HP all-in-one.
The HP Instant Share menu appears on the color graphics display.2 Press 3, and then press 5.
This displays the Instant Share Options menu, and then selects ManageAccount.The Select Computer menu appears, with a list of computers connected to yournetwork.
3 Select a computer from the list.
Note HP Image Zone software must be installed on the computer selected, andthe computer must be able to access the HP Instant Share service.
The HP Instant Share service screens appear in a window on your computer.4 At the prompt, sign in to HP Instant Share with your HP Passport userid and
password.The HP Instant Share manager appears.
Note You will not be prompted for your HP Passport userid and password if youhave set the HP Instant Share service to remember them.
5 Follow the onscreen instructions to add or remove senders and change accessprivileges using the access list.For more information, see the onscreen Help.
Note You will need to obtain the HP Passport user ID of each sender you are addingto the access list. The user ID is required in order to add a sender to the list.After you have added a sender to the list and granted access privileges, theaccess list displays the sender's information as follows: access privilegesgranted, first name, last name, and HP Passport user ID.
Send images directly from your HP all-in-one Images can be photos or scanned documents. Either can be shared with friends andrelatives using your HP all-in-one and HP Instant Share. Select photos from a memorycard or scan an image, press HP Instant Share on the control panel of your HP all-in-one, and send your images to the destination of your choice. See the topics below fordetailed instructions.
Note If you are sending to a network-connected device, the receiving device must beregistered with HP Instant Share.
User Guide 119
Use H
P Instant Share (networked)
Send photos from a memory card Your HP all-in-one gives you the option to send photos immediately upon inserting amemory card, or insert the memory card and send photos at a later time. To sendphotos immediately, insert the memory card into the appropriate card slot, select one ormore photos, and press HP Instant Share on the control panel.If you insert the memory card, and then decide to send the photos at a later time, youwill find that when you come back to your HP all-in-one it has gone into idle mode.Simply press HP Instant Share and follow the prompts to select and share photos.
Note For more information on using a memory card, see Use a memory card orPictBridge camera.
To send a photo to your friend or relative's network-connected device1 Ask your friend or relative (recipient) for the name he assigned to his network-
connected device.
Note The device name is assigned when you set up your HP Instant Shareaccount and register your HP all-in-one. The device name is not casesensitive.
2 Verify that the recipient either is receiving in Open mode or has included your HPPassport user ID in the access list for the receiving device.For more information, see Receive from any sender (Open mode) and Use theHP Instant Share access list.
3 Create a destination using the device name you obtained from the recipient.For more information, see Create destinations.
4 Press HP Instant Share to send your photos.For more information, see the following procedure.
To send photos immediately upon inserting your memory card1 Make sure the memory card is inserted into the appropriate card slot on your
HP all-in-one.2 Select one or more photos.
For more information on selecting photos, see Use a memory card or PictBridgecamera.
Note Movie file types might not be supported by the HP Instant Share service.
3 From the control panel of your HP all-in-one, press HP Instant Share.The Share Menu appears on the color graphics display.The Share Menu displays the destinations you created on the HP Instant Shareservice. For more information, see Create destinations.
4 Use the and arrows to highlight a destination to which you want to send yourphotos.
5 Press OK to select the destination and send your photos.
Note You can also use the Photo button to send images from your memory card. Formore information, see Use a memory card or PictBridge camera.
To insert the memory card and send photos at a later time1 Insert the memory card into the appropriate slot on your HP all-in-one.
Chapter 13
120 HP Photosmart 2600/2700 series all-in-one
Use
HP
Inst
ant S
hare
(net
wor
ked)
After a period of time, the HP all-in-one will go into idle mode. The HP all-in-one isin idle mode when the idle screen appears on the color graphics display.
2 When you are ready to send the photos, press HP Instant Share on the controlpanel of your HP all-in-one.The HP Instant Share menu appears on the color graphics display.
3 Press 1 to select Send.The Send from Where? menu appears.
4 Press 1 to select Memory card.The first photo on your memory card appears on the color graphics display.
5 Select one or more photos.For more information on selecting photos, see Use a memory card or PictBridgecamera.
6 Press Photo on the control panel.The Share Menu appears.The Share Menu displays the destinations you created on the HP Instant Shareservice. For more information, see Create destinations.
7 Use the and arrows to highlight a destination to which you want to send yourphotos.
8 Press OK to select the destination and send your photos.
Send photos from a destination file If your HP digital camera supports HP Instant Share, it lets you assign photos todestinations on a memory card. The assigned photos are stored in a destination file.When you remove the memory card from the camera and place it in the appropriatecard slot on your HP all-in-one, the HP all-in-one reads the memory card and forwardsthe photos to their assigned destinations.
To send photos to destinations assigned by your HP digital camera1 Make sure the memory card is inserted into the appropriate card slot on your
HP all-in-one.For more information, see Use a memory card or PictBridge camera.The Destinations Found dialog appears on the color graphics display.
2 Press 1 to select Yes, send photos to HP Instant Share destinations.The photos are sent to their assigned destinations.
Note Sending photos to a large number of destinations might take a long time andmight exceed the maximum number of destinations to which the HP all-in-onecan send in a single transaction. Reinserting the memory card will cause theremaining photos to be sent to their destinations.
Send a scanned image You can share a scanned image by pressing HP Instant Share on the control panel. Touse the HP Instant Share button, place the image on the glass, select the scanner asthe method you are using to send the image, select a destination, and start the scan.
Note For more information on scanning an image, see Use the scan features.
To send a scanned image to your friend or relative's network-connected device1 Ask your friend or relative (recipient) for the name he assigned to his network-
connected device.
User Guide 121
Use H
P Instant Share (networked)
Note The device name is assigned when you set up your HP Instant Shareaccount and register your HP all-in-one. The device name is not casesensitive.
2 Verify that the recipient either is receiving in Open mode or has included your HPPassport user ID in the access list for the receiving device.For more information, see Receive from any sender (Open mode) and Use theHP Instant Share access list.
3 Create a destination using the device name you obtained from your friend orrelative.For more information, see Create destinations.
4 Press HP Instant Share to send your photos.For more information, see the following procedure.
To send a scanned image from your HP all-in-one1 Load your original face down on the right front corner of the glass.2 From the control panel, press HP Instant Share.
The HP Instant Share menu appears on the color graphics display.3 Press 1 to select Send.
The Send from Where? menu appears.4 Press 2 to select Scanner.
The Share Menu appears.The Share Menu displays the destinations you created on the HP Instant Shareservice. For more information, see Create destinations.
5 Use the and arrows to highlight a destination to which you want to send yourimage.
6 Press OK to select the destination and begin the scan.The image is scanned and sent to the destination selected.
Note You can also use the Scan button to send a scanned image. For moreinformation, see Use the scan features.
Cancel sending images Sending images to a destination, or set of destinations, can be canceled at any time bypressing Cancel on the control panel. The effect of the cancellation depends onwhether a collection of images has been uploaded to the HP Instant Share service.● If a collection is fully uploaded to the HP Instant Share service, it is sent to its
destination.● If a collection is in the process of being uploaded to the HP Instant Share service,
it is not sent to its destination.
Send images using your computer In addition to using your HP all-in-one to send images through HP Instant Share, youcan use the HP Image Zone software installed on your computer to send images. TheHP Image Zone software lets you select and edit one or more images, and then accessHP Instant Share to select a service (for example, HP Instant Share E-mail) and sendyour images. At a minimum, you can share images through the following:● HP Instant Share E-mail (send to an e-mail address)● HP Instant Share E-mail (send to a device)
Chapter 13
122 HP Photosmart 2600/2700 series all-in-one
Use
HP
Inst
ant S
hare
(net
wor
ked)
● Online Albums● Online photo finishing (availability varies by country/region)
Note You cannot receive image collections using the HP Image Zone software.
If you want to share images using HP Instant Share E-mail (send to a device), performthe tasks in the bullets below:● Ask the recipient for the name he assigned to his network-connected device.
Note The device name is assigned when you set up your HP Instant Shareaccount and register your HP all-in-one. For more information, see Getstarted.
● Verify that the recipient either is receiving in Open mode or has included your HPPassport user ID in the access list for the receiving device.For more information, see Receive from any sender (Open mode) and Use theHP Instant Share access list.
● Perform the operating system specific instructions following.
To send images from the HP Image Zone (Windows users)1 Double-click the HP Image Zone icon on your desktop.
The HP Image Zone window opens on your computer. The My Images tabappears in the window.
2 Select one or more images from the folder(s) in which they are stored.For more information, see the onscreen HP Image Zone Help.
Note Use the HP Image Zone image editing tools to edit your images and achievethe results you want. For more information, see the onscreen HP ImageZone Help.
3 Click the HP Instant Share tab.The HP Instant Share tab appears in the HP Image Zone window.
4 In the Control area, click See All Services.The Go Online screen appears in the Work area of the HP Instant Share tab.
5 Click Next.6 From the services list, select the service you want to use to send your images.7 Follow the onscreen instructions.
For more information, see the onscreen Help.If you want to send a collection of images to a friend or relative's network-connected device, select HP Instant Share E-mail. In the E-mail address fieldenter the name of the device followed by @send.hp.com. You will be prompted tosign in to HP Instant Share with your HP Passport userid and password.
Note If you have not previously set up HP Instant Share, click I need an HPPassport account on the Sign in with HP Passport screen. Obtain an HPPassport user ID and password. At the Region and Terms of Use screen,select your country/region, and accept the Terms of Use.
To send images from the HP Image Zone (Macintosh OS X v10.1.5 and laterusers)
Note Macintosh OS X v10.2.1 and v10.2.2 are not supported.
1 Select the HP Image Zone icon from the Dock.
User Guide 123
Use H
P Instant Share (networked)
The HP Image Zone opens on your desktop.2 In the HP Image Zone, click the Services button at the top of the window.
A list of applications appears in the lower part of the HP Image Zone.3 Choose HP Instant Share from the list of applications.
The HP Instant Share client application software opens on your computer.4 Add the images you want to share to the HP Instant Share window.
For more information, see the HP Instant Share section of the HP Image ZoneHelp.
5 When you have added all of the images, click Continue.6 Follow the onscreen instructions.7 From the services list, select the service you want to use to send your images.8 Follow the onscreen instructions.
For more information, see the onscreen Help.If you want to send a collection of images to a friend or relative's network-connected device, select HP Instant Share E-mail. In the E-mail address fieldenter the name of the device followed by @send.hp.com. You will be prompted tosign in to HP Instant Share with your HP Passport userid and password.
Note If you have not previously set up HP Instant Share, click I need an HPPassport account on the Sign in with HP Passport screen. Obtain an HPPassport user ID and password. At the Region and Terms of Use screen,select your country/region, and accept the Terms of Use.
Receive images Images can be sent from one network-connected device to another. You can receive acollection of images from any sender who has an HP Passport user ID and password(Open mode) or a specified group of senders (Private mode). The default receive modeis Open. For more information, see HP Instant Share Receive.
Note An image collection (or collection of images) is a group of images sent by anindividual to a specific destination which, in this case, is your device.
Receive from any sender (Open mode) By default, your HP all-in-one is set to receive in Open mode. Any friend or relative with avalid HP Passport account who knows your device name is allowed to send you animage collection. The collection will not automatically print unless you grant auto printprivileges to the sender through the HP Instant Share access list. For more information,see Use the HP Instant Share access list.
Note Even though your HP all-in-one is set to receive from any sender, you can stillblock the receipt of images from specific senders. Simply block them using theaccess list. For more information, see Use the HP Instant Share access list.You can also block images sent to your device by accessing the print jobs list onthe HP Instant Share service.
To receive images from any sender1 Press HP Instant Share on the control panel of your HP all-in-one.
The HP Instant Share menu appears on the color graphics display.2 Press 3 to select HP Instant Share Options.
The Instant Share Options menu appears.
Chapter 13
124 HP Photosmart 2600/2700 series all-in-one
Use
HP
Inst
ant S
hare
(net
wor
ked)
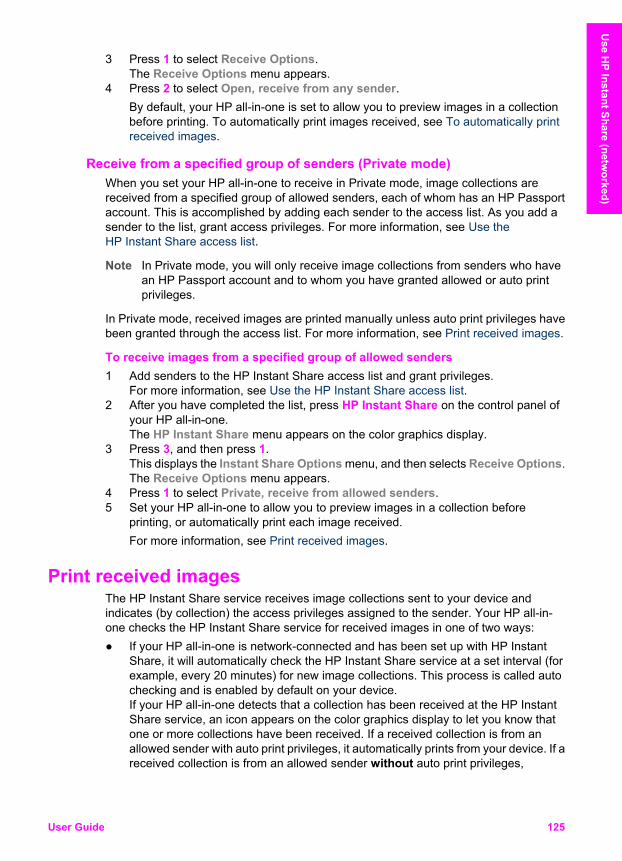
3 Press 1 to select Receive Options.The Receive Options menu appears.
4 Press 2 to select Open, receive from any sender.By default, your HP all-in-one is set to allow you to preview images in a collectionbefore printing. To automatically print images received, see To automatically printreceived images.
Receive from a specified group of senders (Private mode) When you set your HP all-in-one to receive in Private mode, image collections arereceived from a specified group of allowed senders, each of whom has an HP Passportaccount. This is accomplished by adding each sender to the access list. As you add asender to the list, grant access privileges. For more information, see Use theHP Instant Share access list.
Note In Private mode, you will only receive image collections from senders who havean HP Passport account and to whom you have granted allowed or auto printprivileges.
In Private mode, received images are printed manually unless auto print privileges havebeen granted through the access list. For more information, see Print received images.
To receive images from a specified group of allowed senders1 Add senders to the HP Instant Share access list and grant privileges.
For more information, see Use the HP Instant Share access list.2 After you have completed the list, press HP Instant Share on the control panel of
your HP all-in-one.The HP Instant Share menu appears on the color graphics display.
3 Press 3, and then press 1.This displays the Instant Share Options menu, and then selects Receive Options.The Receive Options menu appears.
4 Press 1 to select Private, receive from allowed senders.5 Set your HP all-in-one to allow you to preview images in a collection before
printing, or automatically print each image received.For more information, see Print received images.
Print received images The HP Instant Share service receives image collections sent to your device andindicates (by collection) the access privileges assigned to the sender. Your HP all-in-one checks the HP Instant Share service for received images in one of two ways:● If your HP all-in-one is network-connected and has been set up with HP Instant
Share, it will automatically check the HP Instant Share service at a set interval (forexample, every 20 minutes) for new image collections. This process is called autochecking and is enabled by default on your device.If your HP all-in-one detects that a collection has been received at the HP InstantShare service, an icon appears on the color graphics display to let you know thatone or more collections have been received. If a received collection is from anallowed sender with auto print privileges, it automatically prints from your device. If areceived collection is from an allowed sender without auto print privileges,
User Guide 125
Use H
P Instant Share (networked)
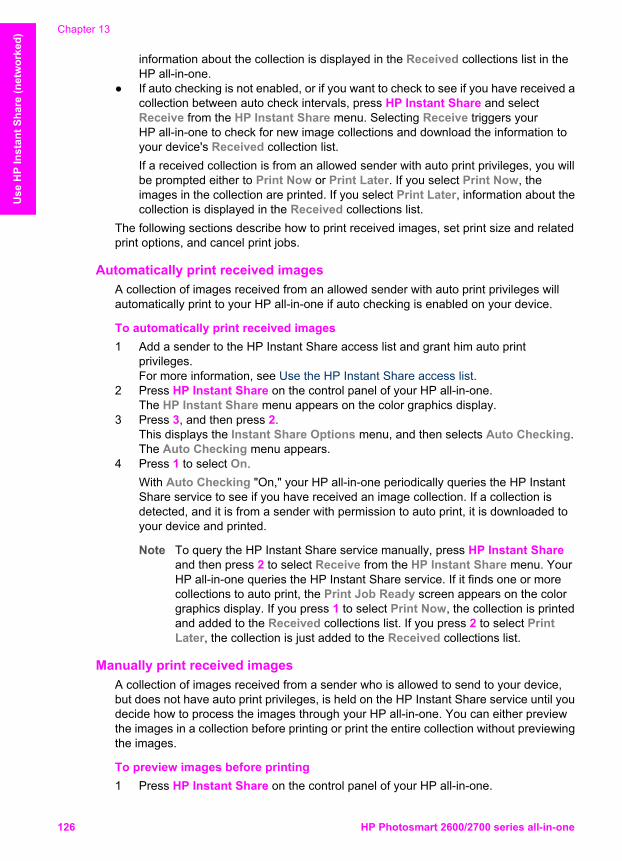
information about the collection is displayed in the Received collections list in theHP all-in-one.
● If auto checking is not enabled, or if you want to check to see if you have received acollection between auto check intervals, press HP Instant Share and selectReceive from the HP Instant Share menu. Selecting Receive triggers yourHP all-in-one to check for new image collections and download the information toyour device's Received collection list.If a received collection is from an allowed sender with auto print privileges, you willbe prompted either to Print Now or Print Later. If you select Print Now, theimages in the collection are printed. If you select Print Later, information about thecollection is displayed in the Received collections list.
The following sections describe how to print received images, set print size and relatedprint options, and cancel print jobs.
Automatically print received images A collection of images received from an allowed sender with auto print privileges willautomatically print to your HP all-in-one if auto checking is enabled on your device.
To automatically print received images1 Add a sender to the HP Instant Share access list and grant him auto print
privileges.For more information, see Use the HP Instant Share access list.
2 Press HP Instant Share on the control panel of your HP all-in-one.The HP Instant Share menu appears on the color graphics display.
3 Press 3, and then press 2.This displays the Instant Share Options menu, and then selects Auto Checking.The Auto Checking menu appears.
4 Press 1 to select On.With Auto Checking "On," your HP all-in-one periodically queries the HP InstantShare service to see if you have received an image collection. If a collection isdetected, and it is from a sender with permission to auto print, it is downloaded toyour device and printed.
Note To query the HP Instant Share service manually, press HP Instant Shareand then press 2 to select Receive from the HP Instant Share menu. YourHP all-in-one queries the HP Instant Share service. If it finds one or morecollections to auto print, the Print Job Ready screen appears on the colorgraphics display. If you press 1 to select Print Now, the collection is printedand added to the Received collections list. If you press 2 to select PrintLater, the collection is just added to the Received collections list.
Manually print received images A collection of images received from a sender who is allowed to send to your device,but does not have auto print privileges, is held on the HP Instant Share service until youdecide how to process the images through your HP all-in-one. You can either previewthe images in a collection before printing or print the entire collection without previewingthe images.
To preview images before printing1 Press HP Instant Share on the control panel of your HP all-in-one.
Chapter 13
126 HP Photosmart 2600/2700 series all-in-one
Use
HP
Inst
ant S
hare
(net
wor
ked)
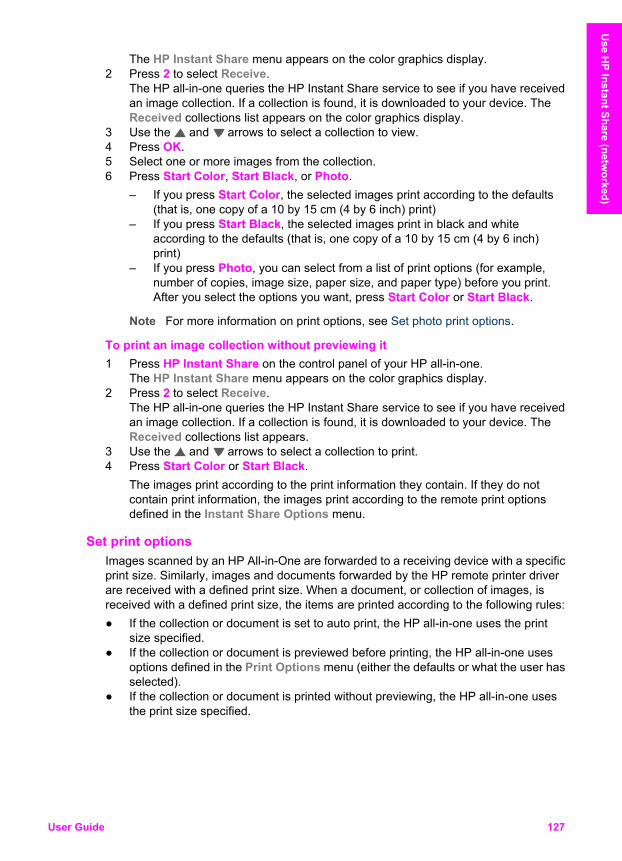
The HP Instant Share menu appears on the color graphics display.2 Press 2 to select Receive.
The HP all-in-one queries the HP Instant Share service to see if you have receivedan image collection. If a collection is found, it is downloaded to your device. TheReceived collections list appears on the color graphics display.
3 Use the and arrows to select a collection to view.4 Press OK.5 Select one or more images from the collection.6 Press Start Color, Start Black, or Photo.
– If you press Start Color, the selected images print according to the defaults(that is, one copy of a 10 by 15 cm (4 by 6 inch) print)
– If you press Start Black, the selected images print in black and whiteaccording to the defaults (that is, one copy of a 10 by 15 cm (4 by 6 inch)print)
– If you press Photo, you can select from a list of print options (for example,number of copies, image size, paper size, and paper type) before you print.After you select the options you want, press Start Color or Start Black.
Note For more information on print options, see Set photo print options.
To print an image collection without previewing it1 Press HP Instant Share on the control panel of your HP all-in-one.
The HP Instant Share menu appears on the color graphics display.2 Press 2 to select Receive.
The HP all-in-one queries the HP Instant Share service to see if you have receivedan image collection. If a collection is found, it is downloaded to your device. TheReceived collections list appears.
3 Use the and arrows to select a collection to print.4 Press Start Color or Start Black.
The images print according to the print information they contain. If they do notcontain print information, the images print according to the remote print optionsdefined in the Instant Share Options menu.
Set print options Images scanned by an HP All-in-One are forwarded to a receiving device with a specificprint size. Similarly, images and documents forwarded by the HP remote printer driverare received with a defined print size. When a document, or collection of images, isreceived with a defined print size, the items are printed according to the following rules:● If the collection or document is set to auto print, the HP all-in-one uses the print
size specified.● If the collection or document is previewed before printing, the HP all-in-one uses
options defined in the Print Options menu (either the defaults or what the user hasselected).
● If the collection or document is printed without previewing, the HP all-in-one usesthe print size specified.
User Guide 127
Use H
P Instant Share (networked)
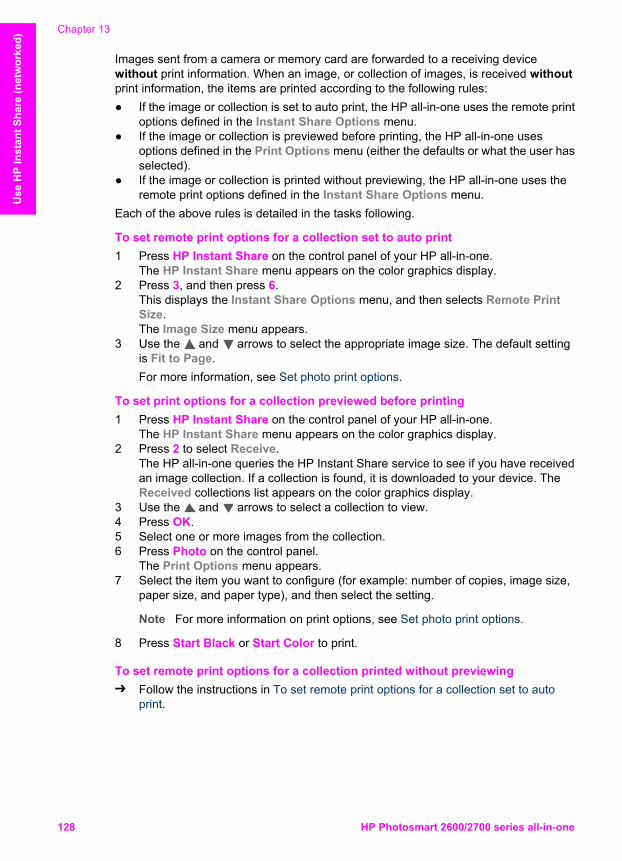
Images sent from a camera or memory card are forwarded to a receiving devicewithout print information. When an image, or collection of images, is received withoutprint information, the items are printed according to the following rules:● If the image or collection is set to auto print, the HP all-in-one uses the remote print
options defined in the Instant Share Options menu.● If the image or collection is previewed before printing, the HP all-in-one uses
options defined in the Print Options menu (either the defaults or what the user hasselected).
● If the image or collection is printed without previewing, the HP all-in-one uses theremote print options defined in the Instant Share Options menu.
Each of the above rules is detailed in the tasks following.
To set remote print options for a collection set to auto print1 Press HP Instant Share on the control panel of your HP all-in-one.
The HP Instant Share menu appears on the color graphics display.2 Press 3, and then press 6.
This displays the Instant Share Options menu, and then selects Remote PrintSize.The Image Size menu appears.
3 Use the and arrows to select the appropriate image size. The default settingis Fit to Page.For more information, see Set photo print options.
To set print options for a collection previewed before printing1 Press HP Instant Share on the control panel of your HP all-in-one.
The HP Instant Share menu appears on the color graphics display.2 Press 2 to select Receive.
The HP all-in-one queries the HP Instant Share service to see if you have receivedan image collection. If a collection is found, it is downloaded to your device. TheReceived collections list appears on the color graphics display.
3 Use the and arrows to select a collection to view.4 Press OK.5 Select one or more images from the collection.6 Press Photo on the control panel.
The Print Options menu appears.7 Select the item you want to configure (for example: number of copies, image size,
paper size, and paper type), and then select the setting.
Note For more information on print options, see Set photo print options.
8 Press Start Black or Start Color to print.
To set remote print options for a collection printed without previewing➔ Follow the instructions in To set remote print options for a collection set to auto
print.
Chapter 13
128 HP Photosmart 2600/2700 series all-in-one
Use
HP
Inst
ant S
hare
(net
wor
ked)
Cancel print jobs Your HP all-in-one lets you cancel any action at any time. Simply press Cancel to haltreceive, preview, and print jobs.● If you select Receive from the HP Instant Share menu and then press Cancel,
your device stops checking to see if new image collections have been received bythe HP Instant Share service. You are returned to the HP Instant Share menu.
● If you are previewing a collection of images and press Cancel, any images youselected for print are deselected. You are returned to the Received collections list.
● If you have started printing an image collection and press Cancel, the print jobquits. The image in the midst of printing and the remaining images are not printed.Your HP all-in-one goes into idle mode.
Note Cancelled print jobs will not reprint automatically.
Remove received images Within the Received collections list displayed on your HP all-in-one, image collectionsare presented so that the most recent collection appears first. Older collections expireafter 30 days. (The number of days specified is subject to change. See the Terms ofService on the HP Instant Share service for the most current information.)If you receive a large number of collections, you might want to reduce the number ofcollections displayed. Your HP all-in-one provides a way to remove image collectionsfrom the Received collections list.
To remove image collections1 Press HP Instant Share on the control panel of your HP all-in-one.
The HP Instant Share menu appears on the color graphics display.2 Press 3 to select HP Instant Share Options.
The Instant Share Options menu appears.3 Press 3 to select Remove Collections.
The Remove Collections list appears.4 Use the and arrows to highlight a collection to remove.5 Press OK to select a collection for removal.
You can deselect a collection by pressing OK a second time.6 Select all collections you want removed.7 When you are finished, highlight the Done Selecting label, and then press OK.
The selected items are removed from the Received collections list.
Remote print documents The HP remote printer driver lets you send print jobs from Windows applications toremote, network-connected printing devices. For example, you can remote print fromyour laptop (or other PC) to your HP all-in-one, access your computer at work through aVPN and print to your device, or send a print job from any other remote network-connected device to your HP All-in-One. Each unit sending a print job must have the HPremote printer driver installed on it.The HP remote printer driver is installed on the computer (or laptop) on which youinstalled the software for your device. If you want to install the HP remote printer driveron another laptop, install the device software or download the driver from the HPwebsite.
User Guide 129
Use H
P Instant Share (networked)
Note To download the HP remote printer driver from the HP website, make sure youuse a broadband connection. Do not use a dial-up connection. It will takeapproximately 3 to 5 minutes to download the driver using a broadbandconnection.
To use the HP remote printer driver1 From a Windows application, select File and then Print.
The Print window appears on your computer screen.2 Select the printer named HP remote printers.3 Click printer Properties and set your print options.4 Click OK to print.
The HP Instant Share Welcome screen appears in a window on your computer.The Welcome screen only appears if you have not previously selected Do notshow this screen again.
5 Follow the onscreen instructions.6 At the prompt, enter your HP Passport userid and password, and then click Next.
Tip You will only be prompted for your HP Passport userid and password if youhave not previously set the service to remember your userid and password.
Note If you have not previously set up HP Instant Share, click I need an HPPassport account on the Sign in with HP Passport screen. Obtain an HPPassport user ID and password. At the Region and Terms of Use screen,select your country/region, and accept the Terms of Use.
The Select a Remote Printer screen appears.7 If you are printing to your HP all-in-one, select your printer from the list of printers.
Note Printers are listed using the unique name assigned to the device when thedevice was set up and registered with HP Instant Share. Any printer to whichyou have been allowed access will appear on the list.
If you are printing to a network-connected device other than your own, select thename of the printer from the list of printers. If it is the first time you have printed tothe device, click Add Printer to add the device to the list. For more information onsending to a device, see steps 1 and 2 in the task To send a photo to your friend orrelative's network-connected device.
8 Follow the onscreen instructions.
Note For more information on receiving remote print jobs, see Receive images.
Set HP Instant Share options Your HP all-in-one lets you:● Choose whether you will receive image collections in Open or Private mode● Enable or disable auto checking● Remove printed or unwanted image collections from the Received collections list● Add or delete senders and assign access privileges from the access list● View the unique name you assigned to your device● Reset your HP Instant Share device settings to factory defaults
To set HP Instant Share options1 Press HP Instant Share on the control panel of your HP all-in-one.
Chapter 13
130 HP Photosmart 2600/2700 series all-in-one
Use
HP
Inst
ant S
hare
(net
wor
ked)
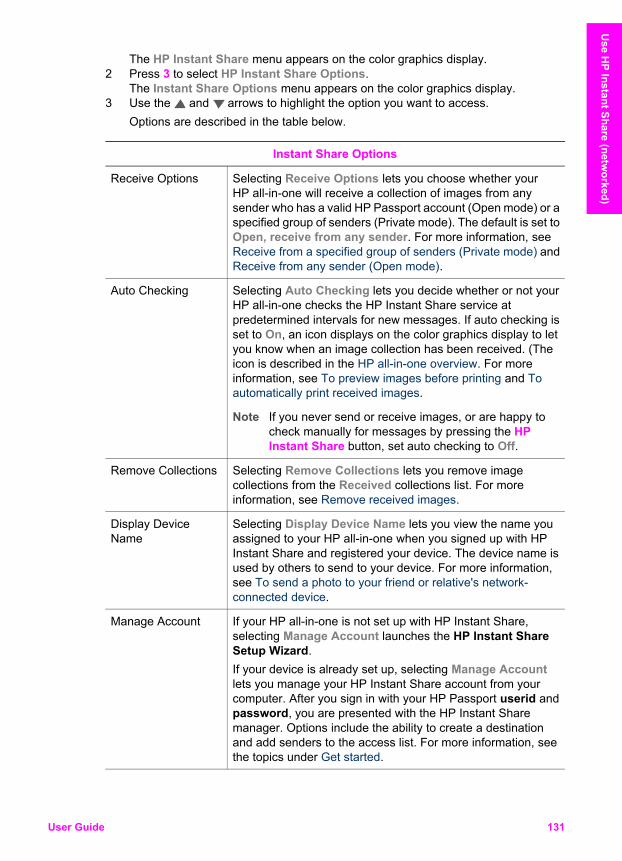
The HP Instant Share menu appears on the color graphics display.2 Press 3 to select HP Instant Share Options.
The Instant Share Options menu appears on the color graphics display.3 Use the and arrows to highlight the option you want to access.
Options are described in the table below.
Instant Share Options
Receive Options Selecting Receive Options lets you choose whether yourHP all-in-one will receive a collection of images from anysender who has a valid HP Passport account (Open mode) or aspecified group of senders (Private mode). The default is set toOpen, receive from any sender. For more information, seeReceive from a specified group of senders (Private mode) andReceive from any sender (Open mode).
Auto Checking Selecting Auto Checking lets you decide whether or not yourHP all-in-one checks the HP Instant Share service atpredetermined intervals for new messages. If auto checking isset to On, an icon displays on the color graphics display to letyou know when an image collection has been received. (Theicon is described in the HP all-in-one overview. For moreinformation, see To preview images before printing and Toautomatically print received images.
Note If you never send or receive images, or are happy tocheck manually for messages by pressing the HPInstant Share button, set auto checking to Off.
Remove Collections Selecting Remove Collections lets you remove imagecollections from the Received collections list. For moreinformation, see Remove received images.
Display DeviceName
Selecting Display Device Name lets you view the name youassigned to your HP all-in-one when you signed up with HPInstant Share and registered your device. The device name isused by others to send to your device. For more information,see To send a photo to your friend or relative's network-connected device.
Manage Account If your HP all-in-one is not set up with HP Instant Share,selecting Manage Account launches the HP Instant ShareSetup Wizard.If your device is already set up, selecting Manage Accountlets you manage your HP Instant Share account from yourcomputer. After you sign in with your HP Passport userid andpassword, you are presented with the HP Instant Sharemanager. Options include the ability to create a destinationand add senders to the access list. For more information, seethe topics under Get started.
User Guide 131
Use H
P Instant Share (networked)

Instant Share Options
Remote Print Size Selecting Remote Print Size lets you set the print size forreceived images. For more information, see Set print options.
Reset HP InstantShare
Selecting Reset HP Instant Share lets you reset your HPInstant Share device settings to factory defaults. This meansyour HP all-in-one is no longer registered with HP InstantShare.
Note If you reset your HP Instant Share device settings, yourHP all-in-one will no longer be able to send or receiveimages until it is again set up with HP Instant Share.
Select this option when you either want to give your device tosomeone else or want to switch your HP all-in-one from beingnetwork-connected to USB-connected.
Chapter 13(continued)
132 HP Photosmart 2600/2700 series all-in-one
Use
HP
Inst
ant S
hare
(net
wor
ked)
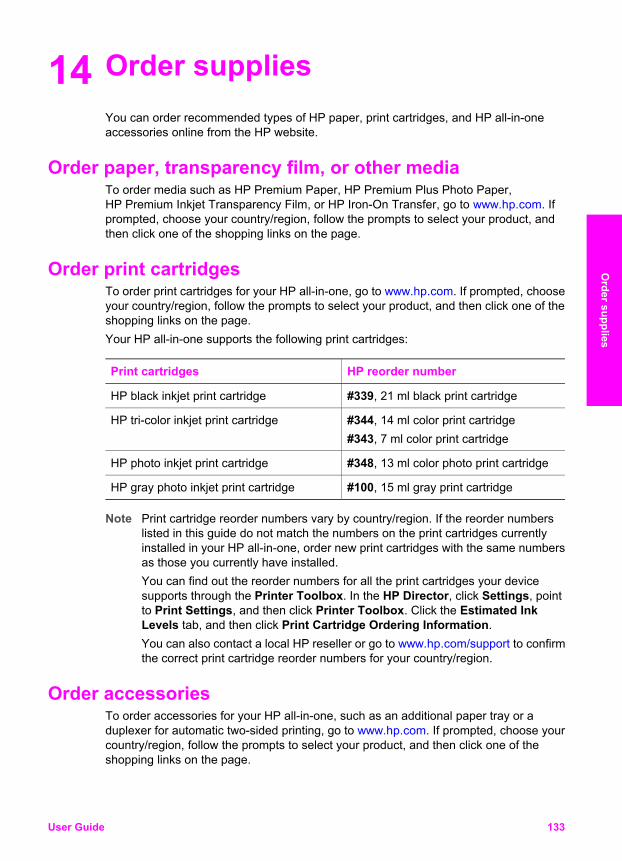
14 Order suppliesYou can order recommended types of HP paper, print cartridges, and HP all-in-oneaccessories online from the HP website.
Order paper, transparency film, or other media To order media such as HP Premium Paper, HP Premium Plus Photo Paper,HP Premium Inkjet Transparency Film, or HP Iron-On Transfer, go to www.hp.com. Ifprompted, choose your country/region, follow the prompts to select your product, andthen click one of the shopping links on the page.
Order print cartridges To order print cartridges for your HP all-in-one, go to www.hp.com. If prompted, chooseyour country/region, follow the prompts to select your product, and then click one of theshopping links on the page.Your HP all-in-one supports the following print cartridges:
Print cartridges HP reorder number
HP black inkjet print cartridge #339, 21 ml black print cartridge
HP tri-color inkjet print cartridge #344, 14 ml color print cartridge#343, 7 ml color print cartridge
HP photo inkjet print cartridge #348, 13 ml color photo print cartridge
HP gray photo inkjet print cartridge #100, 15 ml gray print cartridge
Note Print cartridge reorder numbers vary by country/region. If the reorder numberslisted in this guide do not match the numbers on the print cartridges currentlyinstalled in your HP all-in-one, order new print cartridges with the same numbersas those you currently have installed.You can find out the reorder numbers for all the print cartridges your devicesupports through the Printer Toolbox. In the HP Director, click Settings, pointto Print Settings, and then click Printer Toolbox. Click the Estimated InkLevels tab, and then click Print Cartridge Ordering Information.You can also contact a local HP reseller or go to www.hp.com/support to confirmthe correct print cartridge reorder numbers for your country/region.
Order accessories To order accessories for your HP all-in-one, such as an additional paper tray or aduplexer for automatic two-sided printing, go to www.hp.com. If prompted, choose yourcountry/region, follow the prompts to select your product, and then click one of theshopping links on the page.
User Guide 133
Order supplies

Depending on your country/region, your HP all-in-one might support the followingaccessories:
Accessory and HP modelnumber
Description
HP Automatic Two-sidedPrinting Accessoryph5712
Enables you to automatically print on both sides of a sheet ofpaper. With this accessory installed you can print on both sidesof the page without having to manually flip and reload the pagesin the middle of your print job.
HP Auto Two-sided PrintAccessory with Small PaperTray(also called the Hagaki Traywith Auto Two-sided PrintAccessory)ph3032
Adds a dedicated paper tray for small paper sizes and envelopesto the rear of your HP all-in-one and enables you to automaticallyprint on both sides of full- and small-size papers. With thisaccessory installed, you can load full-size paper in the maininput tray and small paper, such as Hagaki cards, in the rearinput tray. This saves you time when switching between printjobs on different size papers because you do not need to removeand reload paper each time.
HP 250 Sheet Plain PaperTraypt3447
Adds a dedicated paper tray for up to 250 sheets of full-size plainpaper to your HP all-in-one. With this accessory installed, youcan load plain paper in the lower input tray and special papertypes in the upper input tray. This saves you time when switchingbetween print jobs on different types of paper because you donot need to remove and reload paper each time.
HP bt300 Bluetooth®Wireless Printer Adapterbt300
Enables you to print from a Bluetooth device to your HP all-in-one. This accessory plugs into the camera port on the front of theHP all-in-one and accepts print jobs from supported Bluetoothdevices, such as a digital camera phone or a personal digitalassistant (PDA). It does not support printing from a Bluetooth-enabled PC or Macintosh computer.
Order other supplies To order other supplies, such as HP all-in-one software, a copy of the printed UserGuide, a Setup Guide, or other customer-replaceable parts, call the appropriate numberbelow:● In the U.S. or Canada, dial 1-800-474-6836 (1-800-HP invent).● In Europe, dial +49 180 5 290220 (Germany) or +44 870 606 9081 (U.K.).To order HP all-in-one software in other countries/regions, call the phone number foryour country/region. The numbers listed below are current as of the publication date ofthis guide. For a list of current ordering numbers, go to www.hp.com/support. Ifprompted, choose your country/region, and then click Contact HP for information oncalling for technical support.
Country/region Number for ordering
Asia Pacific (exceptfor Japan)
65 272 5300
Chapter 14
134 HP Photosmart 2600/2700 series all-in-one
Ord
er s
uppl
ies
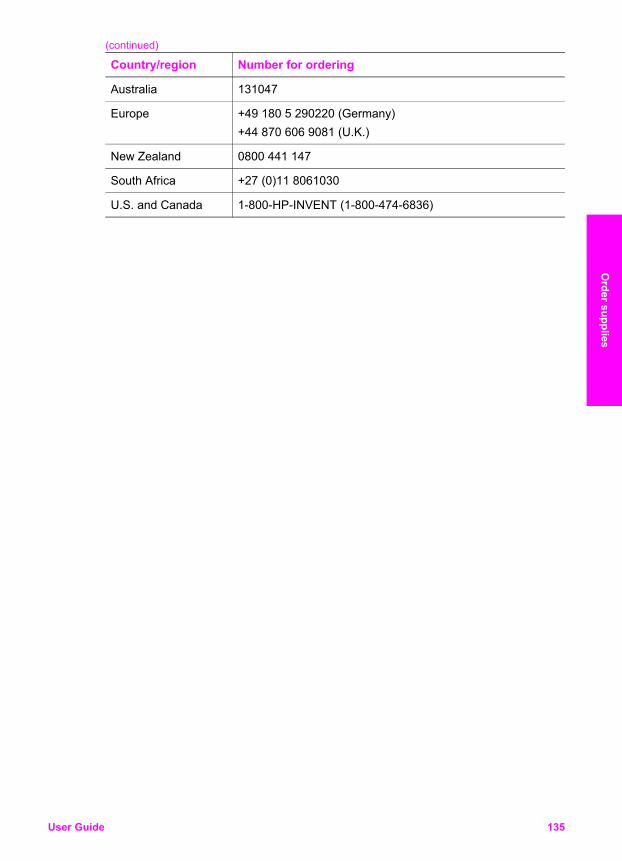
Country/region Number for ordering
Australia 131047
Europe +49 180 5 290220 (Germany)+44 870 606 9081 (U.K.)
New Zealand 0800 441 147
South Africa +27 (0)11 8061030
U.S. and Canada 1-800-HP-INVENT (1-800-474-6836)
(continued)
User Guide 135
Order supplies

Chapter 14
136 HP Photosmart 2600/2700 series all-in-one
Ord
er s
uppl
ies
15 Maintain your HP all-in-oneThe HP all-in-one requires little maintenance. Sometimes you might want to clean theglass and lid backing to remove surface dust and ensure that your copies and scansremain clear. You will also need to replace, align, or clean your print cartridgesoccasionally. This chapter provides instructions for keeping your HP all-in-one in topworking condition. Perform these simple maintenance procedures as necessary.
Clean the HP all-in-oneFingerprints, smudges, hair, and other debris on the glass or lid backing slow downperformance and affect the accuracy of special features such as Fit to Page. To ensurethat your copies and scans remain clear, you might need to clean the glass and lidbacking. You might also want to dust the exterior of the HP all-in-one.
Clean the glass Dirty glass from fingerprints, smudges, hair, and dust slows down performance andaffects the accuracy of features such as Fit to Page.1 Turn off the HP all-in-one, unplug the power cord, and raise the lid.
Note When you unplug the power cord, the date and time are erased. You willneed to reset the date and time later, when you plug the power cord backin. Any faxes stored in memory are also erased.
2 Clean the glass with a soft cloth or sponge slightly moistened with a nonabrasiveglass cleaner.
Warning Do not use abrasives, acetone, benzene, or carbon tetrachlorideon the glass; they can damage it. Do not place or spray liquid directly on theglass; the liquid might seep under the glass and damage the device.
3 Dry the glass with a chamois or cellulose sponge to prevent spotting.
Clean the lid backing Minor debris can accumulate on the white document backing located underneath the lidof the HP all-in-one.1 Turn off the HP all-in-one, unplug the power cord, and raise the lid.2 Clean the white document backing with a soft cloth or sponge slightly moistened
with a mild soap and warm water.3 Wash the backing gently to loosen debris. Do not scrub the backing.4 Dry the backing with a chamois or soft cloth.
Warning Do not use paper-based wipes, as these might scratch thebacking.
5 If further cleaning is needed, repeat the previous steps using isopropyl (rubbing)alcohol, and wipe the backing thoroughly with a damp cloth to remove any residualalcohol.
User Guide 137
Maintain your H
P all-in-one
Warning Be careful not to spill alcohol on the glass or painted parts of theHP all-in-one, as this might damage the device.
Clean the exterior Use a soft cloth or slightly moistened sponge to wipe dust, smudges, and stains off thecase. The interior of the HP all-in-one does not require cleaning. Keep fluids away fromthe control panel and the interior of the HP all-in-one.
Warning To avoid damage to painted parts of the HP all-in-one, do not usealcohol or alcohol-based cleaning products on the control panel, lid, or otherpainted parts of the device.
Check the estimated ink levels You can easily check the ink supply level to determine how soon you might need toreplace a print cartridge. The ink supply level shows an estimate of the amount of inkremaining in the print cartridges.
To check the ink levels from the control panel➔ Look for two icons at the bottom of the color graphics display that represent the
levels of ink remaining in the two installed print cartridges.– A green icon represents an estimate of the amount of ink remaining in the tri-
color print cartridge.– A black icon represents an estimate of the amount of ink remaining in the black
print cartridge.– An orange icon represents an estimate of the amount of ink remaining in the
photo print cartridge.– A blue-gray icon represents an estimate of the amount of ink remaining in the
gray photo print cartridge.If you are using non-HP print cartridges or cartridges that have been refilled, or ifthere is no print cartridge installed in one of the cartridge stalls, one or both iconsmight not appear in the icon bar. The HP all-in-one cannot detect the amount of inkremaining in non-HP print cartridges or cartridges that have been refilled.If an icon shows a hollow ink drop, the print cartridge represented by that color iconhas very little ink remaining and will need to be changed soon. Replace the printcartridge when the print quality starts to degrade.For more information on the ink level icons on the color graphics display, see Colorgraphics display icons.
You can also check the estimated amount of ink remaining in your print cartridges fromthe computer. If you have a USB connection between your computer and the HP all-in-one, see the onscreen HP Image Zone Help for information on checking the ink levelsfrom the Printer Toolbox. If you have a network connection, you can check the inklevels from the Embedded Web Server (EWS). See the Network Guide for informationon accessing the EWS.
Chapter 15
138 HP Photosmart 2600/2700 series all-in-one
Mai
ntai
n yo
ur H
P al
l-in-
one
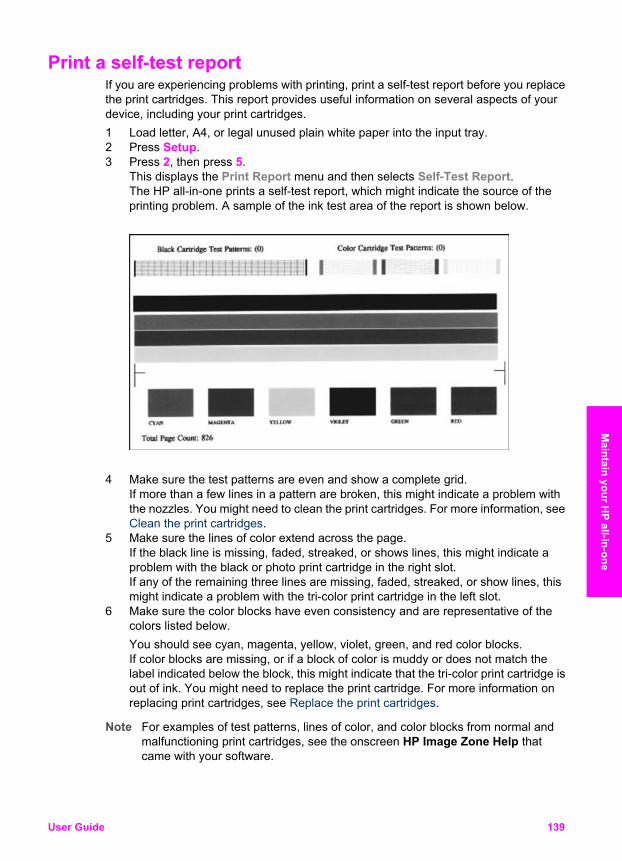
Print a self-test report If you are experiencing problems with printing, print a self-test report before you replacethe print cartridges. This report provides useful information on several aspects of yourdevice, including your print cartridges.1 Load letter, A4, or legal unused plain white paper into the input tray.2 Press Setup.3 Press 2, then press 5.
This displays the Print Report menu and then selects Self-Test Report.The HP all-in-one prints a self-test report, which might indicate the source of theprinting problem. A sample of the ink test area of the report is shown below.
4 Make sure the test patterns are even and show a complete grid.If more than a few lines in a pattern are broken, this might indicate a problem withthe nozzles. You might need to clean the print cartridges. For more information, seeClean the print cartridges.
5 Make sure the lines of color extend across the page.If the black line is missing, faded, streaked, or shows lines, this might indicate aproblem with the black or photo print cartridge in the right slot.If any of the remaining three lines are missing, faded, streaked, or show lines, thismight indicate a problem with the tri-color print cartridge in the left slot.
6 Make sure the color blocks have even consistency and are representative of thecolors listed below.You should see cyan, magenta, yellow, violet, green, and red color blocks.If color blocks are missing, or if a block of color is muddy or does not match thelabel indicated below the block, this might indicate that the tri-color print cartridge isout of ink. You might need to replace the print cartridge. For more information onreplacing print cartridges, see Replace the print cartridges.
Note For examples of test patterns, lines of color, and color blocks from normal andmalfunctioning print cartridges, see the onscreen HP Image Zone Help thatcame with your software.
User Guide 139
Maintain your H
P all-in-one
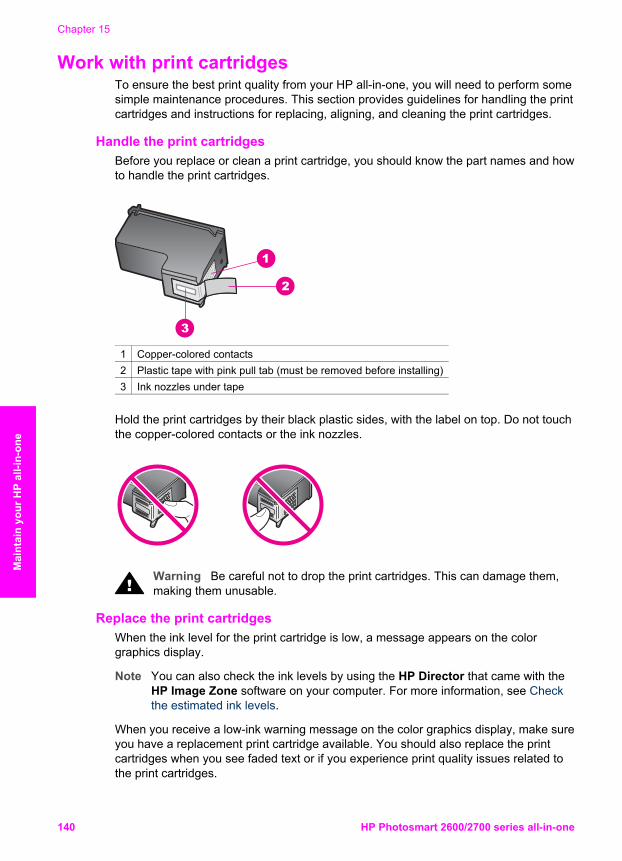
Work with print cartridges To ensure the best print quality from your HP all-in-one, you will need to perform somesimple maintenance procedures. This section provides guidelines for handling the printcartridges and instructions for replacing, aligning, and cleaning the print cartridges.
Handle the print cartridges Before you replace or clean a print cartridge, you should know the part names and howto handle the print cartridges.
1 Copper-colored contacts2 Plastic tape with pink pull tab (must be removed before installing)3 Ink nozzles under tape
Hold the print cartridges by their black plastic sides, with the label on top. Do not touchthe copper-colored contacts or the ink nozzles.
Warning Be careful not to drop the print cartridges. This can damage them,making them unusable.
Replace the print cartridges When the ink level for the print cartridge is low, a message appears on the colorgraphics display.
Note You can also check the ink levels by using the HP Director that came with theHP Image Zone software on your computer. For more information, see Checkthe estimated ink levels.
When you receive a low-ink warning message on the color graphics display, make sureyou have a replacement print cartridge available. You should also replace the printcartridges when you see faded text or if you experience print quality issues related tothe print cartridges.
Chapter 15
140 HP Photosmart 2600/2700 series all-in-one
Mai
ntai
n yo
ur H
P al
l-in-
one
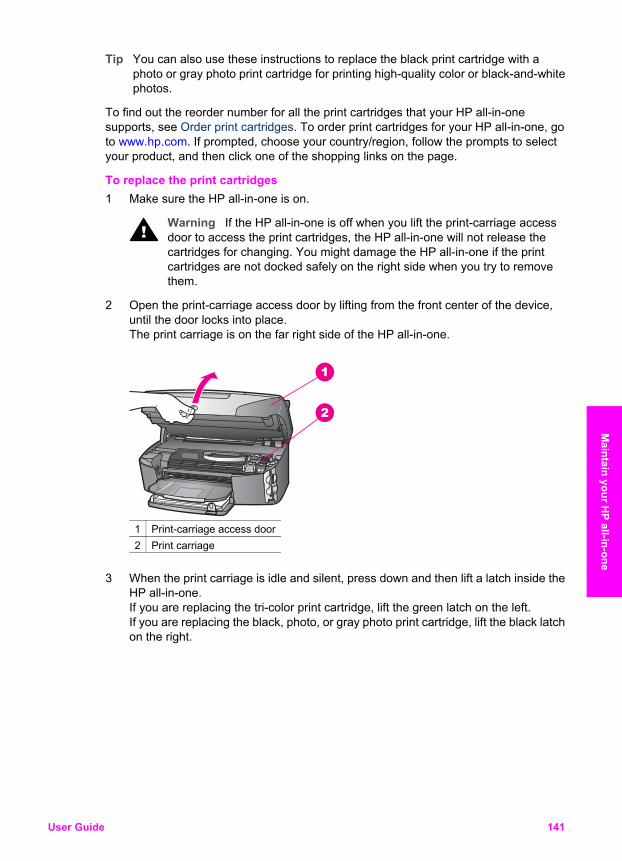
Tip You can also use these instructions to replace the black print cartridge with aphoto or gray photo print cartridge for printing high-quality color or black-and-whitephotos.
To find out the reorder number for all the print cartridges that your HP all-in-onesupports, see Order print cartridges. To order print cartridges for your HP all-in-one, goto www.hp.com. If prompted, choose your country/region, follow the prompts to selectyour product, and then click one of the shopping links on the page.
To replace the print cartridges1 Make sure the HP all-in-one is on.
Warning If the HP all-in-one is off when you lift the print-carriage accessdoor to access the print cartridges, the HP all-in-one will not release thecartridges for changing. You might damage the HP all-in-one if the printcartridges are not docked safely on the right side when you try to removethem.
2 Open the print-carriage access door by lifting from the front center of the device,until the door locks into place.The print carriage is on the far right side of the HP all-in-one.
1 Print-carriage access door2 Print carriage
3 When the print carriage is idle and silent, press down and then lift a latch inside theHP all-in-one.If you are replacing the tri-color print cartridge, lift the green latch on the left.If you are replacing the black, photo, or gray photo print cartridge, lift the black latchon the right.
User Guide 141
Maintain your H
P all-in-one
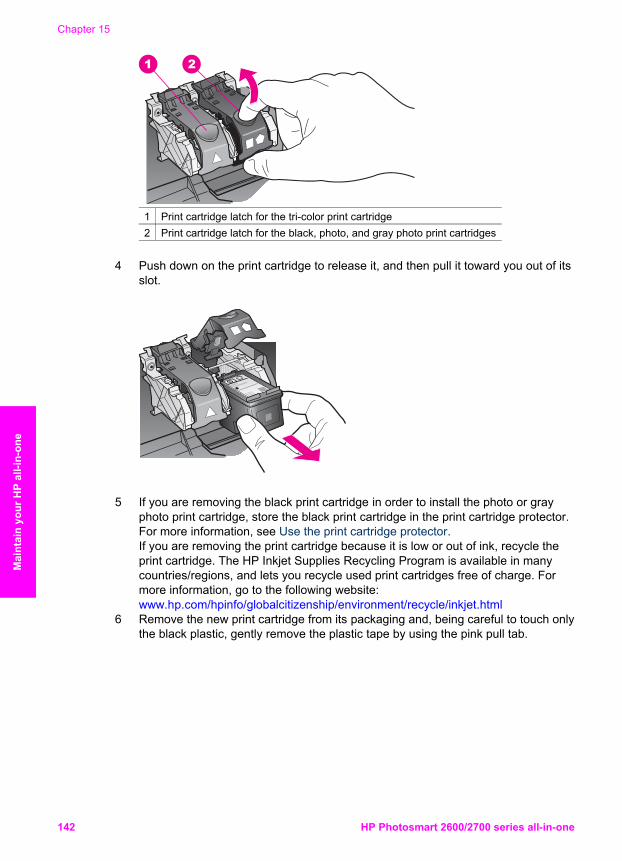
1 Print cartridge latch for the tri-color print cartridge2 Print cartridge latch for the black, photo, and gray photo print cartridges
4 Push down on the print cartridge to release it, and then pull it toward you out of itsslot.
5 If you are removing the black print cartridge in order to install the photo or grayphoto print cartridge, store the black print cartridge in the print cartridge protector.For more information, see Use the print cartridge protector.If you are removing the print cartridge because it is low or out of ink, recycle theprint cartridge. The HP Inkjet Supplies Recycling Program is available in manycountries/regions, and lets you recycle used print cartridges free of charge. Formore information, go to the following website:www.hp.com/hpinfo/globalcitizenship/environment/recycle/inkjet.html
6 Remove the new print cartridge from its packaging and, being careful to touch onlythe black plastic, gently remove the plastic tape by using the pink pull tab.
Chapter 15
142 HP Photosmart 2600/2700 series all-in-one
Mai
ntai
n yo
ur H
P al
l-in-
one
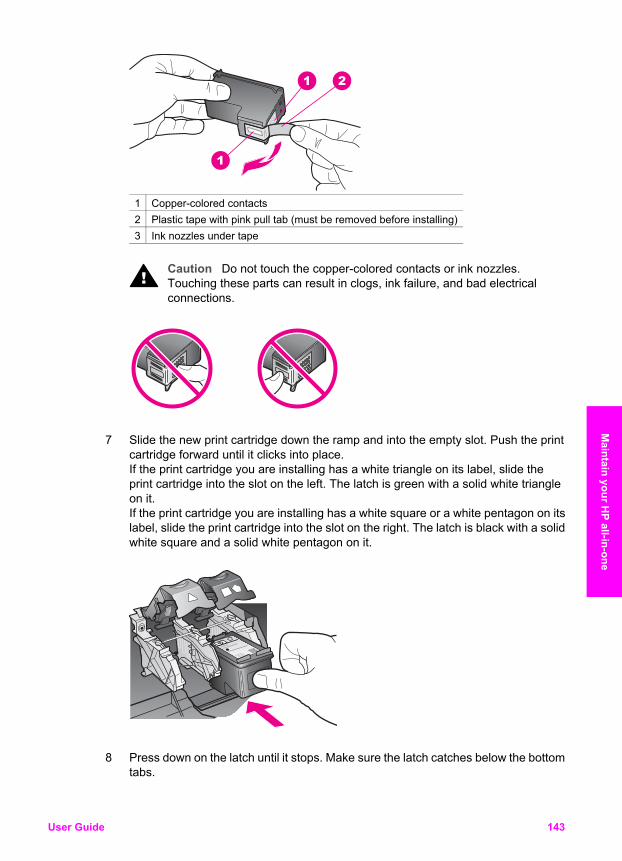
1 Copper-colored contacts2 Plastic tape with pink pull tab (must be removed before installing)3 Ink nozzles under tape
Caution Do not touch the copper-colored contacts or ink nozzles.Touching these parts can result in clogs, ink failure, and bad electricalconnections.
7 Slide the new print cartridge down the ramp and into the empty slot. Push the printcartridge forward until it clicks into place.If the print cartridge you are installing has a white triangle on its label, slide theprint cartridge into the slot on the left. The latch is green with a solid white triangleon it.If the print cartridge you are installing has a white square or a white pentagon on itslabel, slide the print cartridge into the slot on the right. The latch is black with a solidwhite square and a solid white pentagon on it.
8 Press down on the latch until it stops. Make sure the latch catches below the bottomtabs.
User Guide 143
Maintain your H
P all-in-one
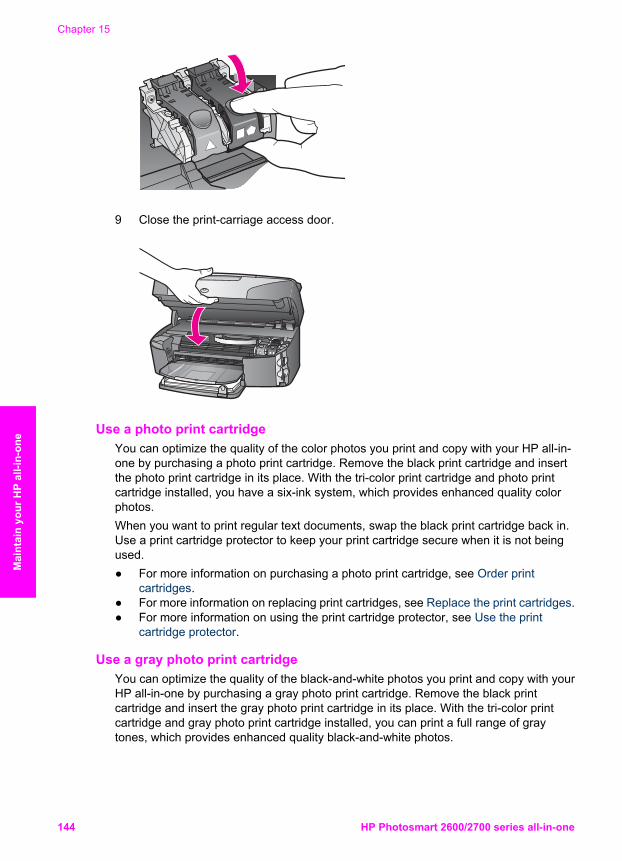
9 Close the print-carriage access door.
Use a photo print cartridge You can optimize the quality of the color photos you print and copy with your HP all-in-one by purchasing a photo print cartridge. Remove the black print cartridge and insertthe photo print cartridge in its place. With the tri-color print cartridge and photo printcartridge installed, you have a six-ink system, which provides enhanced quality colorphotos.When you want to print regular text documents, swap the black print cartridge back in.Use a print cartridge protector to keep your print cartridge secure when it is not beingused.● For more information on purchasing a photo print cartridge, see Order print
cartridges.● For more information on replacing print cartridges, see Replace the print cartridges.● For more information on using the print cartridge protector, see Use the print
cartridge protector.
Use a gray photo print cartridge You can optimize the quality of the black-and-white photos you print and copy with yourHP all-in-one by purchasing a gray photo print cartridge. Remove the black printcartridge and insert the gray photo print cartridge in its place. With the tri-color printcartridge and gray photo print cartridge installed, you can print a full range of graytones, which provides enhanced quality black-and-white photos.
Chapter 15
144 HP Photosmart 2600/2700 series all-in-one
Mai
ntai
n yo
ur H
P al
l-in-
one
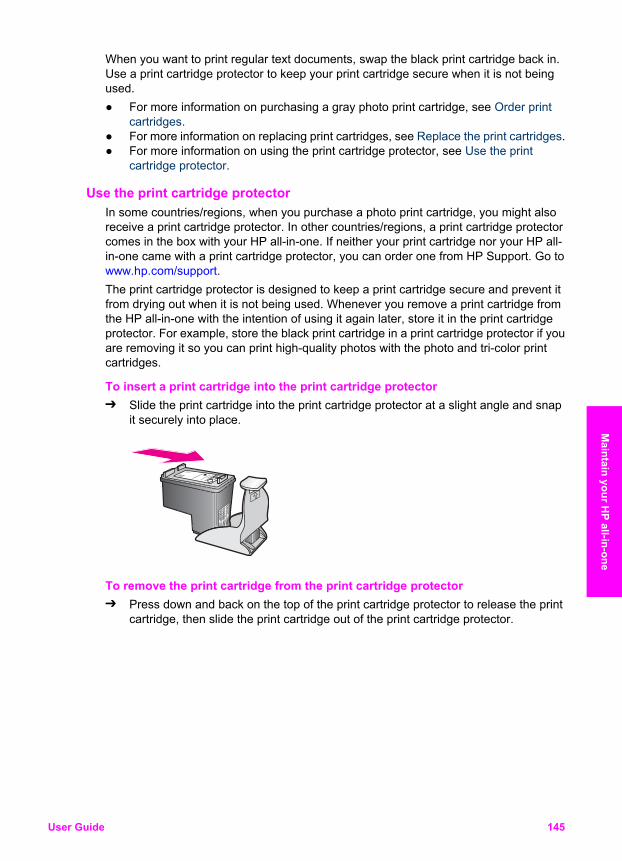
When you want to print regular text documents, swap the black print cartridge back in.Use a print cartridge protector to keep your print cartridge secure when it is not beingused.● For more information on purchasing a gray photo print cartridge, see Order print
cartridges.● For more information on replacing print cartridges, see Replace the print cartridges.● For more information on using the print cartridge protector, see Use the print
cartridge protector.
Use the print cartridge protector In some countries/regions, when you purchase a photo print cartridge, you might alsoreceive a print cartridge protector. In other countries/regions, a print cartridge protectorcomes in the box with your HP all-in-one. If neither your print cartridge nor your HP all-in-one came with a print cartridge protector, you can order one from HP Support. Go towww.hp.com/support.The print cartridge protector is designed to keep a print cartridge secure and prevent itfrom drying out when it is not being used. Whenever you remove a print cartridge fromthe HP all-in-one with the intention of using it again later, store it in the print cartridgeprotector. For example, store the black print cartridge in a print cartridge protector if youare removing it so you can print high-quality photos with the photo and tri-color printcartridges.
To insert a print cartridge into the print cartridge protector➔ Slide the print cartridge into the print cartridge protector at a slight angle and snap
it securely into place.
To remove the print cartridge from the print cartridge protector➔ Press down and back on the top of the print cartridge protector to release the print
cartridge, then slide the print cartridge out of the print cartridge protector.
User Guide 145
Maintain your H
P all-in-one
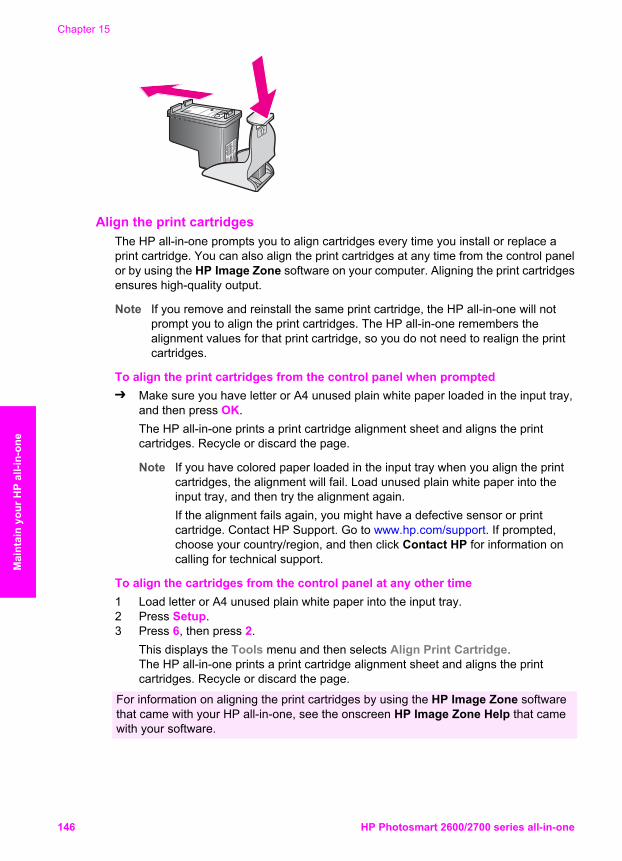
Align the print cartridges The HP all-in-one prompts you to align cartridges every time you install or replace aprint cartridge. You can also align the print cartridges at any time from the control panelor by using the HP Image Zone software on your computer. Aligning the print cartridgesensures high-quality output.
Note If you remove and reinstall the same print cartridge, the HP all-in-one will notprompt you to align the print cartridges. The HP all-in-one remembers thealignment values for that print cartridge, so you do not need to realign the printcartridges.
To align the print cartridges from the control panel when prompted➔ Make sure you have letter or A4 unused plain white paper loaded in the input tray,
and then press OK.The HP all-in-one prints a print cartridge alignment sheet and aligns the printcartridges. Recycle or discard the page.
Note If you have colored paper loaded in the input tray when you align the printcartridges, the alignment will fail. Load unused plain white paper into theinput tray, and then try the alignment again.If the alignment fails again, you might have a defective sensor or printcartridge. Contact HP Support. Go to www.hp.com/support. If prompted,choose your country/region, and then click Contact HP for information oncalling for technical support.
To align the cartridges from the control panel at any other time1 Load letter or A4 unused plain white paper into the input tray.2 Press Setup.3 Press 6, then press 2.
This displays the Tools menu and then selects Align Print Cartridge.The HP all-in-one prints a print cartridge alignment sheet and aligns the printcartridges. Recycle or discard the page.
For information on aligning the print cartridges by using the HP Image Zone softwarethat came with your HP all-in-one, see the onscreen HP Image Zone Help that camewith your software.
Chapter 15
146 HP Photosmart 2600/2700 series all-in-one
Mai
ntai
n yo
ur H
P al
l-in-
one
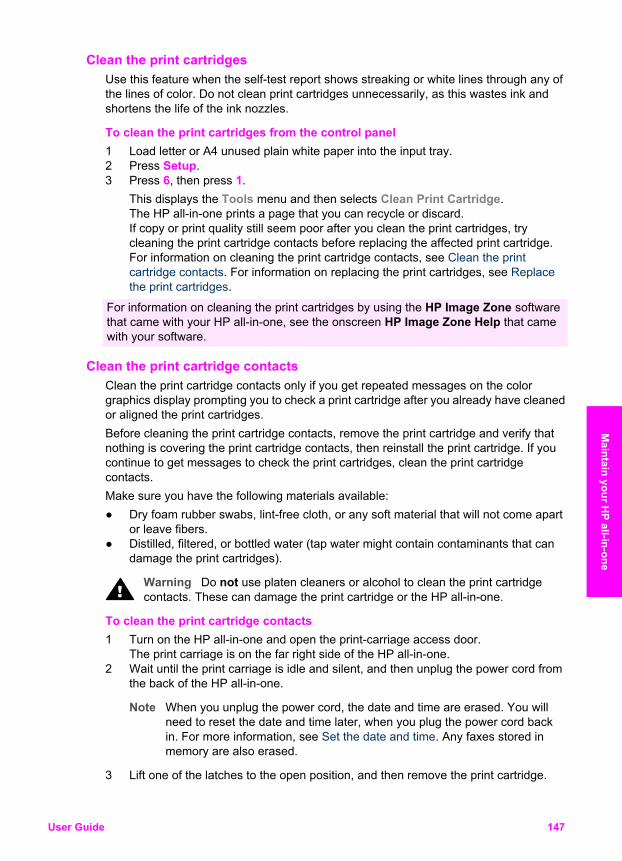
Clean the print cartridges Use this feature when the self-test report shows streaking or white lines through any ofthe lines of color. Do not clean print cartridges unnecessarily, as this wastes ink andshortens the life of the ink nozzles.
To clean the print cartridges from the control panel1 Load letter or A4 unused plain white paper into the input tray.2 Press Setup.3 Press 6, then press 1.
This displays the Tools menu and then selects Clean Print Cartridge.The HP all-in-one prints a page that you can recycle or discard.If copy or print quality still seem poor after you clean the print cartridges, trycleaning the print cartridge contacts before replacing the affected print cartridge.For information on cleaning the print cartridge contacts, see Clean the printcartridge contacts. For information on replacing the print cartridges, see Replacethe print cartridges.
For information on cleaning the print cartridges by using the HP Image Zone softwarethat came with your HP all-in-one, see the onscreen HP Image Zone Help that camewith your software.
Clean the print cartridge contacts Clean the print cartridge contacts only if you get repeated messages on the colorgraphics display prompting you to check a print cartridge after you already have cleanedor aligned the print cartridges.Before cleaning the print cartridge contacts, remove the print cartridge and verify thatnothing is covering the print cartridge contacts, then reinstall the print cartridge. If youcontinue to get messages to check the print cartridges, clean the print cartridgecontacts.Make sure you have the following materials available:● Dry foam rubber swabs, lint-free cloth, or any soft material that will not come apart
or leave fibers.● Distilled, filtered, or bottled water (tap water might contain contaminants that can
damage the print cartridges).
Warning Do not use platen cleaners or alcohol to clean the print cartridgecontacts. These can damage the print cartridge or the HP all-in-one.
To clean the print cartridge contacts1 Turn on the HP all-in-one and open the print-carriage access door.
The print carriage is on the far right side of the HP all-in-one.2 Wait until the print carriage is idle and silent, and then unplug the power cord from
the back of the HP all-in-one.
Note When you unplug the power cord, the date and time are erased. You willneed to reset the date and time later, when you plug the power cord backin. For more information, see Set the date and time. Any faxes stored inmemory are also erased.
3 Lift one of the latches to the open position, and then remove the print cartridge.
User Guide 147
Maintain your H
P all-in-one
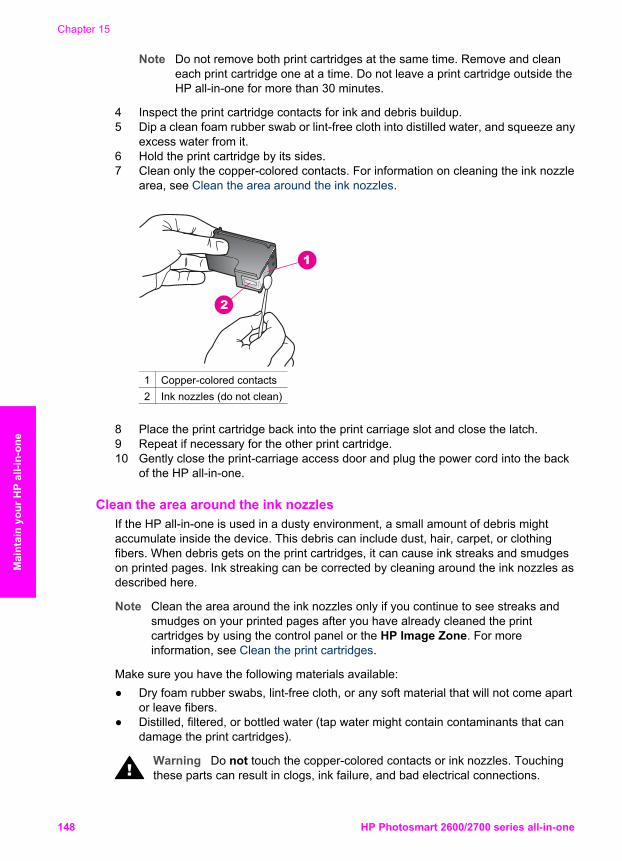
Note Do not remove both print cartridges at the same time. Remove and cleaneach print cartridge one at a time. Do not leave a print cartridge outside theHP all-in-one for more than 30 minutes.
4 Inspect the print cartridge contacts for ink and debris buildup.5 Dip a clean foam rubber swab or lint-free cloth into distilled water, and squeeze any
excess water from it.6 Hold the print cartridge by its sides.7 Clean only the copper-colored contacts. For information on cleaning the ink nozzle
area, see Clean the area around the ink nozzles.
1 Copper-colored contacts2 Ink nozzles (do not clean)
8 Place the print cartridge back into the print carriage slot and close the latch.9 Repeat if necessary for the other print cartridge.10 Gently close the print-carriage access door and plug the power cord into the back
of the HP all-in-one.
Clean the area around the ink nozzles If the HP all-in-one is used in a dusty environment, a small amount of debris mightaccumulate inside the device. This debris can include dust, hair, carpet, or clothingfibers. When debris gets on the print cartridges, it can cause ink streaks and smudgeson printed pages. Ink streaking can be corrected by cleaning around the ink nozzles asdescribed here.
Note Clean the area around the ink nozzles only if you continue to see streaks andsmudges on your printed pages after you have already cleaned the printcartridges by using the control panel or the HP Image Zone. For moreinformation, see Clean the print cartridges.
Make sure you have the following materials available:● Dry foam rubber swabs, lint-free cloth, or any soft material that will not come apart
or leave fibers.● Distilled, filtered, or bottled water (tap water might contain contaminants that can
damage the print cartridges).
Warning Do not touch the copper-colored contacts or ink nozzles. Touchingthese parts can result in clogs, ink failure, and bad electrical connections.
Chapter 15
148 HP Photosmart 2600/2700 series all-in-one
Mai
ntai
n yo
ur H
P al
l-in-
one
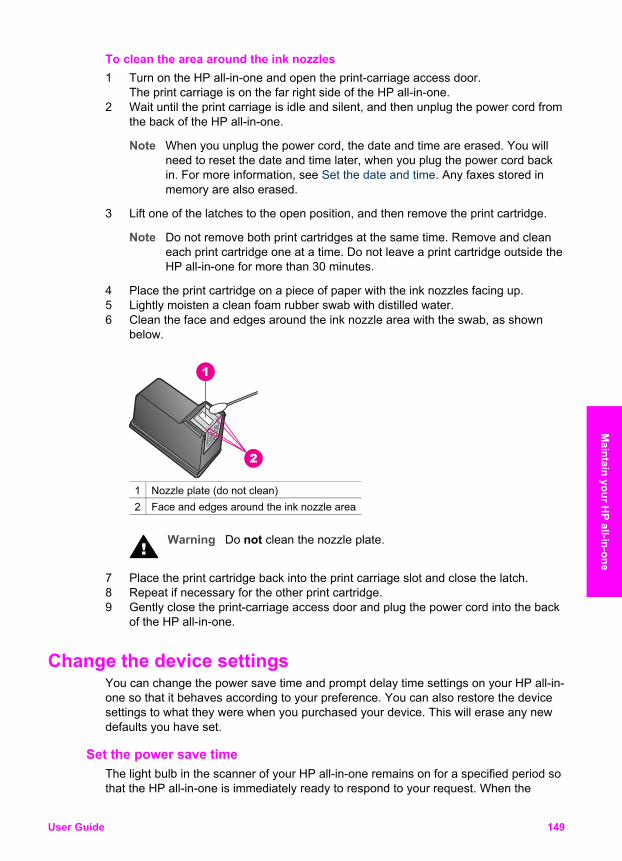
To clean the area around the ink nozzles1 Turn on the HP all-in-one and open the print-carriage access door.
The print carriage is on the far right side of the HP all-in-one.2 Wait until the print carriage is idle and silent, and then unplug the power cord from
the back of the HP all-in-one.
Note When you unplug the power cord, the date and time are erased. You willneed to reset the date and time later, when you plug the power cord backin. For more information, see Set the date and time. Any faxes stored inmemory are also erased.
3 Lift one of the latches to the open position, and then remove the print cartridge.
Note Do not remove both print cartridges at the same time. Remove and cleaneach print cartridge one at a time. Do not leave a print cartridge outside theHP all-in-one for more than 30 minutes.
4 Place the print cartridge on a piece of paper with the ink nozzles facing up.5 Lightly moisten a clean foam rubber swab with distilled water.6 Clean the face and edges around the ink nozzle area with the swab, as shown
below.
1 Nozzle plate (do not clean)2 Face and edges around the ink nozzle area
Warning Do not clean the nozzle plate.
7 Place the print cartridge back into the print carriage slot and close the latch.8 Repeat if necessary for the other print cartridge.9 Gently close the print-carriage access door and plug the power cord into the back
of the HP all-in-one.
Change the device settingsYou can change the power save time and prompt delay time settings on your HP all-in-one so that it behaves according to your preference. You can also restore the devicesettings to what they were when you purchased your device. This will erase any newdefaults you have set.
Set the power save time The light bulb in the scanner of your HP all-in-one remains on for a specified period sothat the HP all-in-one is immediately ready to respond to your request. When the
User Guide 149
Maintain your H
P all-in-one
HP all-in-one has not been used within that specified period, it turns the light bulb off topreserve power. You can exit this mode by pressing any button on the control panel.Your HP all-in-one is automatically set to enter power save mode after 12 hours. Followthese steps if you want the HP all-in-one to enter this mode earlier.1 Press Setup.2 Press 7, then press 2.
This displays the Preferences menu and then selects Set Power Save ModeTime.
3 Press to select the appropriate time, then press OK.You can choose 1, 4, 8, or 12 hours for the power save time.
Set the prompt delay time The Prompt Delay Time option allows you to control the amount of time that passesbefore a message prompts you to take further action. For example, if you press Copyand the prompt delay time passes without you pressing another button, the message"Press START to copy. Press Number or OK to select." appears in the colorgraphics display. You can choose Fast, Normal, Slow, or Off. If you select Off, hintswill not appear on the color graphics display but other messages, such as low inkwarnings and error messages, will still appear.1 Press Setup.2 Press 7, then press 3.
This displays the Preferences menu and then selects Set Prompt Delay Time.3 Press to select a delay time, then press OK.
Restore the factory defaults You can restore the original factory settings to what they were when you purchasedyour HP all-in-one.
Note Restoring the factory defaults will not change the date information you set, norwill it affect any changes you made to scan settings and the language andcountry/region settings.
You can perform this process from the control panel only.1 Press Setup.2 Press 6, then press 3.
This displays the Tools menu and then selects Restore Factory Defaults.The factory default settings are restored.
Self-maintenance soundsThe HP all-in-one might make noises after long periods (approximately 2 weeks) ofinactivity. This is normal operation and is necessary to ensure the HP all-in-oneproduces the best quality printouts.
Chapter 15
150 HP Photosmart 2600/2700 series all-in-one
Mai
ntai
n yo
ur H
P al
l-in-
one
16 Troubleshooting information This chapter contains troubleshooting information for the HP all-in-one. Specificinformation is provided for installation and configuration issues, and some operationaltopics. For more troubleshooting information, see the onscreen HP Image Zone Helpfile that came with your software.Many issues are caused when the HP all-in-one is connected to the computer using aUSB cable before the HP all-in-one software is installed on the computer. If youconnected the HP all-in-one to your computer before the software installation screenprompts you to do so, you must follow these steps:1 Disconnect the USB cable from the computer.2 Uninstall the software (if you have already installed it).3 Restart your computer.4 Turn off the HP all-in-one, wait one minute, then restart it.5 Reinstall the HP all-in-one software. Do not connect the USB cable to the
computer until prompted by the software installation screen.
For information about uninstalling and reinstalling the software, see Uninstall andreinstall the software.This section contains the following topics:● Setup troubleshooting: Contains information on hardware setup, software
installation, fax setup, and HP Instant Share setup troubleshooting information.● Operational troubleshooting: Contains information on issues that may occur
during normal tasks when using the HP all-in-one features.● Device update: Based on advice from HP customer support or a message on the
color graphics display, you might access the HP support website to retrieve anupgrade for your device. This section contains information about updating yourdevice.
Before you call HP Support If you have a problem, follow these steps:1 Check the documentation that came with the HP all-in-one.
– Setup Guide: The Setup Guide explains how to set up the HP all-in-one.– User Guide: The User Guide is the book you are reading. This book describes
the basic features of the HP all-in-one, explains how to use the HP all-in-onewithout connecting it to a computer, and contains setup and operationaltroubleshooting information.
– HP Image Zone Help: The onscreen HP Image Zone Help describes how touse the HP all-in-one with a computer and contains additional troubleshootinginformation not covered in the User Guide.
User Guide 151
Troubleshooting information
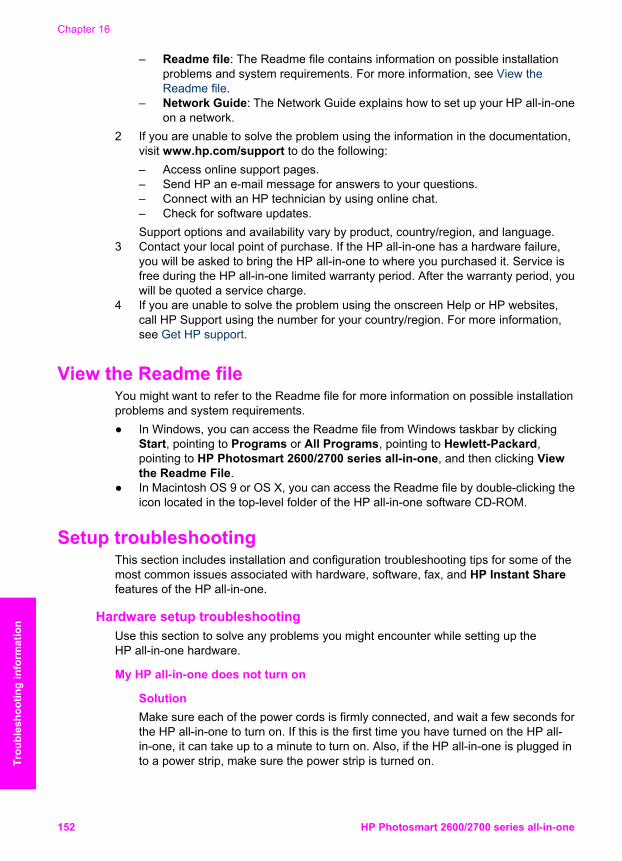
– Readme file: The Readme file contains information on possible installationproblems and system requirements. For more information, see View theReadme file.
– Network Guide: The Network Guide explains how to set up your HP all-in-oneon a network.
2 If you are unable to solve the problem using the information in the documentation,visit www.hp.com/support to do the following:– Access online support pages.– Send HP an e-mail message for answers to your questions.– Connect with an HP technician by using online chat.– Check for software updates.Support options and availability vary by product, country/region, and language.
3 Contact your local point of purchase. If the HP all-in-one has a hardware failure,you will be asked to bring the HP all-in-one to where you purchased it. Service isfree during the HP all-in-one limited warranty period. After the warranty period, youwill be quoted a service charge.
4 If you are unable to solve the problem using the onscreen Help or HP websites,call HP Support using the number for your country/region. For more information,see Get HP support.
View the Readme file You might want to refer to the Readme file for more information on possible installationproblems and system requirements.● In Windows, you can access the Readme file from Windows taskbar by clicking
Start, pointing to Programs or All Programs, pointing to Hewlett-Packard,pointing to HP Photosmart 2600/2700 series all-in-one, and then clicking Viewthe Readme File.
● In Macintosh OS 9 or OS X, you can access the Readme file by double-clicking theicon located in the top-level folder of the HP all-in-one software CD-ROM.
Setup troubleshooting This section includes installation and configuration troubleshooting tips for some of themost common issues associated with hardware, software, fax, and HP Instant Sharefeatures of the HP all-in-one.
Hardware setup troubleshooting Use this section to solve any problems you might encounter while setting up theHP all-in-one hardware.
My HP all-in-one does not turn on
SolutionMake sure each of the power cords is firmly connected, and wait a few seconds forthe HP all-in-one to turn on. If this is the first time you have turned on the HP all-in-one, it can take up to a minute to turn on. Also, if the HP all-in-one is plugged into a power strip, make sure the power strip is turned on.
Chapter 16
152 HP Photosmart 2600/2700 series all-in-one
Trou
bles
hoot
ing
info
rmat
ion
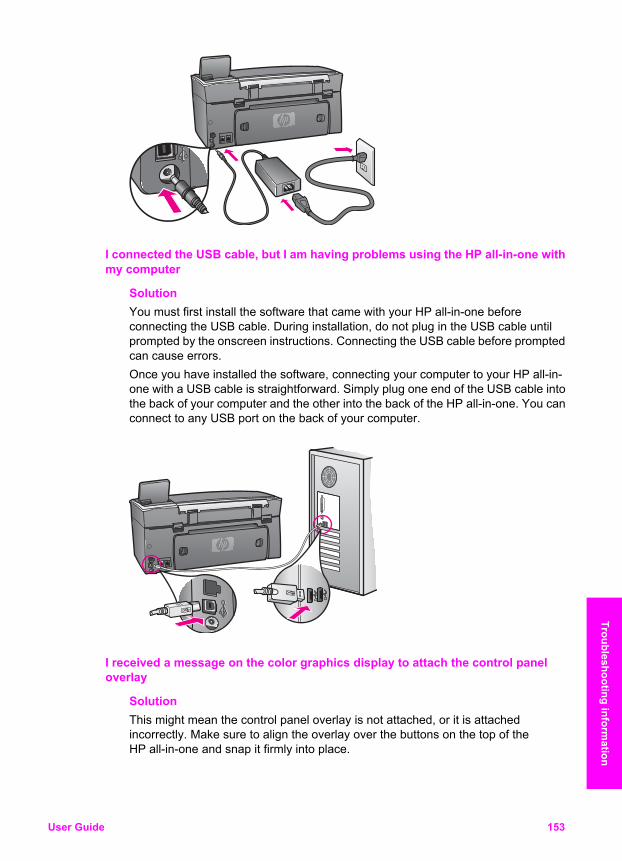
I connected the USB cable, but I am having problems using the HP all-in-one withmy computer
SolutionYou must first install the software that came with your HP all-in-one beforeconnecting the USB cable. During installation, do not plug in the USB cable untilprompted by the onscreen instructions. Connecting the USB cable before promptedcan cause errors.Once you have installed the software, connecting your computer to your HP all-in-one with a USB cable is straightforward. Simply plug one end of the USB cable intothe back of your computer and the other into the back of the HP all-in-one. You canconnect to any USB port on the back of your computer.
I received a message on the color graphics display to attach the control paneloverlay
SolutionThis might mean the control panel overlay is not attached, or it is attachedincorrectly. Make sure to align the overlay over the buttons on the top of theHP all-in-one and snap it firmly into place.
User Guide 153
Troubleshooting information
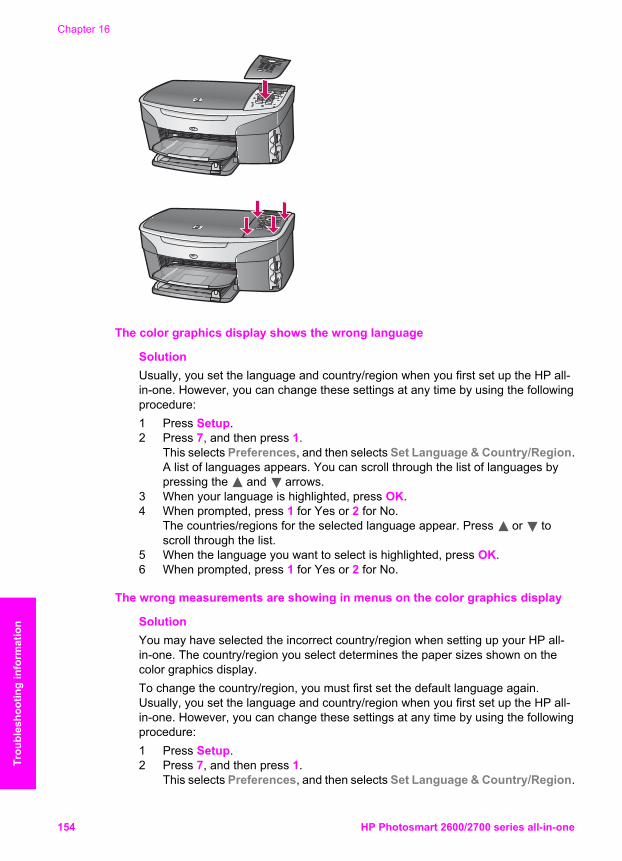
The color graphics display shows the wrong language
SolutionUsually, you set the language and country/region when you first set up the HP all-in-one. However, you can change these settings at any time by using the followingprocedure:1 Press Setup.2 Press 7, and then press 1.
This selects Preferences, and then selects Set Language & Country/Region.A list of languages appears. You can scroll through the list of languages bypressing the and arrows.
3 When your language is highlighted, press OK.4 When prompted, press 1 for Yes or 2 for No.
The countries/regions for the selected language appear. Press or toscroll through the list.
5 When the language you want to select is highlighted, press OK.6 When prompted, press 1 for Yes or 2 for No.
The wrong measurements are showing in menus on the color graphics display
SolutionYou may have selected the incorrect country/region when setting up your HP all-in-one. The country/region you select determines the paper sizes shown on thecolor graphics display.To change the country/region, you must first set the default language again.Usually, you set the language and country/region when you first set up the HP all-in-one. However, you can change these settings at any time by using the followingprocedure:1 Press Setup.2 Press 7, and then press 1.
This selects Preferences, and then selects Set Language & Country/Region.
Chapter 16
154 HP Photosmart 2600/2700 series all-in-one
Trou
bles
hoot
ing
info
rmat
ion
A list of languages appears. You can scroll through the list of languages bypressing the and arrows.
3 When your language is highlighted, press OK.4 When prompted, press 1 for Yes or 2 for No.
The countries/regions for the selected language appear. Press or toscroll through the list.
5 When the language you want to select is highlighted, press OK.6 When prompted, press 1 for Yes or 2 for No.
I received a message on the color graphics display to align the print cartridges
SolutionThe HP all-in-one prompts you to align cartridges every time you install a new printcartridge. For more information, see Align the print cartridges.
Note If you remove and reinstall the same print cartridge, the HP all-in-one willnot prompt you to align the print cartridges. The HP all-in-one remembersthe alignment values for that print cartridge, so you do not need to realignthe print cartridges.
I received a message on the color graphics display that the print cartridgealignment failed
CauseThe incorrect type of paper is loaded in the input tray.
SolutionIf you have colored paper loaded in the input tray when you align the printcartridges, the alignment fails. Load unused plain white letter or A4 paper into theinput tray, and then try the alignment again.If the alignment fails again, you might have a defective sensor or print cartridge.Contact HP Support. Go to www.hp.com/support. If prompted, choose yourcountry/region, and then click Contact HP for information on calling for technicalsupport.
CauseProtective tape is covering the print cartridges.
SolutionCheck each print cartridge. If the plastic tape is still covering the ink nozzles, gentlyremove the plastic tape by using the pink pull tab. Do not touch the ink nozzles orthe copper-colored contacts.
User Guide 155
Troubleshooting information
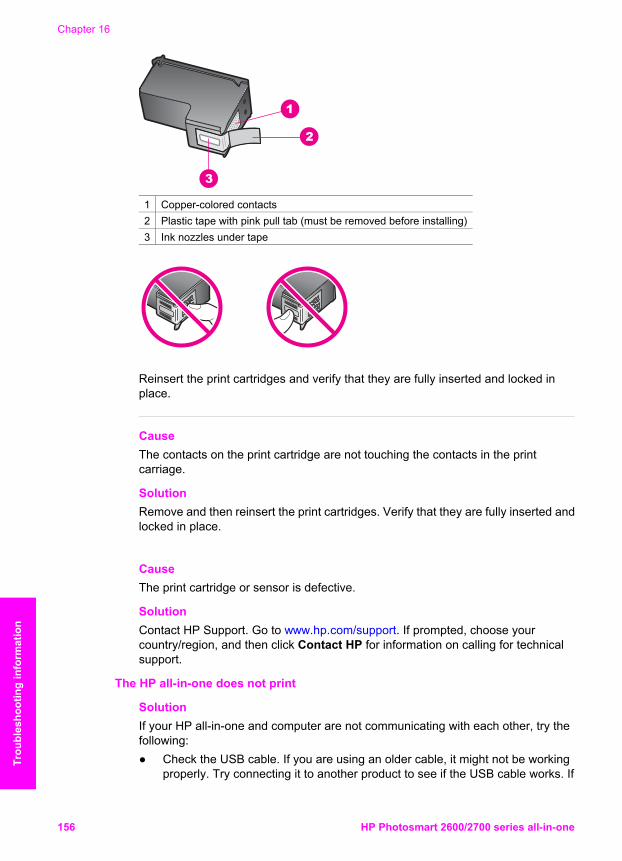
1 Copper-colored contacts2 Plastic tape with pink pull tab (must be removed before installing)3 Ink nozzles under tape
Reinsert the print cartridges and verify that they are fully inserted and locked inplace.
CauseThe contacts on the print cartridge are not touching the contacts in the printcarriage.
SolutionRemove and then reinsert the print cartridges. Verify that they are fully inserted andlocked in place.
CauseThe print cartridge or sensor is defective.
SolutionContact HP Support. Go to www.hp.com/support. If prompted, choose yourcountry/region, and then click Contact HP for information on calling for technicalsupport.
The HP all-in-one does not print
SolutionIf your HP all-in-one and computer are not communicating with each other, try thefollowing:● Check the USB cable. If you are using an older cable, it might not be working
properly. Try connecting it to another product to see if the USB cable works. If
Chapter 16
156 HP Photosmart 2600/2700 series all-in-one
Trou
bles
hoot
ing
info
rmat
ion
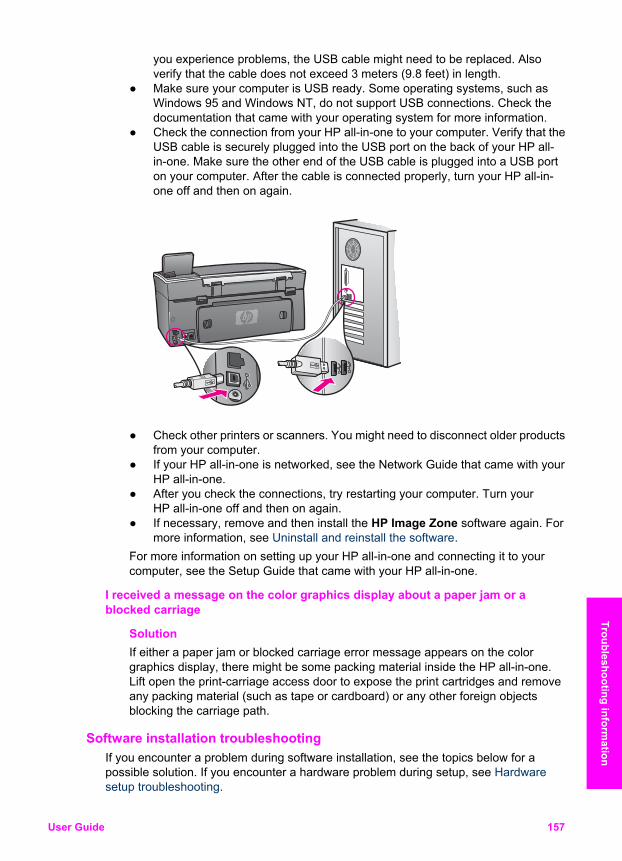
you experience problems, the USB cable might need to be replaced. Alsoverify that the cable does not exceed 3 meters (9.8 feet) in length.
● Make sure your computer is USB ready. Some operating systems, such asWindows 95 and Windows NT, do not support USB connections. Check thedocumentation that came with your operating system for more information.
● Check the connection from your HP all-in-one to your computer. Verify that theUSB cable is securely plugged into the USB port on the back of your HP all-in-one. Make sure the other end of the USB cable is plugged into a USB porton your computer. After the cable is connected properly, turn your HP all-in-one off and then on again.
● Check other printers or scanners. You might need to disconnect older productsfrom your computer.
● If your HP all-in-one is networked, see the Network Guide that came with yourHP all-in-one.
● After you check the connections, try restarting your computer. Turn yourHP all-in-one off and then on again.
● If necessary, remove and then install the HP Image Zone software again. Formore information, see Uninstall and reinstall the software.
For more information on setting up your HP all-in-one and connecting it to yourcomputer, see the Setup Guide that came with your HP all-in-one.
I received a message on the color graphics display about a paper jam or ablocked carriage
SolutionIf either a paper jam or blocked carriage error message appears on the colorgraphics display, there might be some packing material inside the HP all-in-one.Lift open the print-carriage access door to expose the print cartridges and removeany packing material (such as tape or cardboard) or any other foreign objectsblocking the carriage path.
Software installation troubleshooting If you encounter a problem during software installation, see the topics below for apossible solution. If you encounter a hardware problem during setup, see Hardwaresetup troubleshooting.
User Guide 157
Troubleshooting information
During a normal installation of the HP all-in-one software, the following events occur:1 The HP all-in-one CD-ROM runs automatically.2 The software installs.3 Files are copied to your hard drive.4 You are requested to connect the HP all-in-one to your computer.5 A green OK and check mark appear on an installation wizard screen.6 You are requested to restart your computer.7 The Fax Setup wizard runs.8 The registration process runs.
If any of these things did not occur, there might be a problem with the installation. Tocheck the installation on a PC, verify the following:● Start the HP Director and check to make sure the following icons appear: Scan
Picture, Scan Document, Send Fax and HP Gallery. For information on startingHP Director, see the onscreen HP Image Zone Help that came with yoursoftware. If the icons do not appear immediately, you might need to wait a fewminutes for the HP all-in-one to connect to your computer. Otherwise, see Some ofthe icons are missing in the HP Director.
Note If you performed a minimum installation of the software (as apposed to atypical installation), the HP Image Zone and Copy are not installed and willnot be available from the HP Director.
● Open the Printers dialog box and check to see that the HP all-in-one is listed.● Look in the system tray at the far right of the Windows taskbar for an HP all-in-one
icon. This indicates that the HP all-in-one is ready.
When I insert the CD-ROM into my computer’s CD-ROM drive, nothing happens
SolutionDo the following:1 From the Windows Start menu, click Run.2 In the Run dialog box, enter d:\setup.exe (if your CD-ROM drive is not
assigned to drive letter D, enter the appropriate drive letter), and then click OK.
The minimum system checks screen appears
SolutionYour system does not meet the minimum requirements to install the software. ClickDetails to see what the specific problem is, and then correct the problem beforeattempting to install the software.
A red X appears on the USB connect prompt
SolutionNormally, a green check appears indicating that the plug and play is successful. Ared X indicates that the plug and play failed.Do the following:1 Verify that the control panel overlay is firmly attached, unplug the HP all-in-one
power cord, and then plug it in again.2 Verify that the USB and power cables are plugged in.
Chapter 16
158 HP Photosmart 2600/2700 series all-in-one
Trou
bles
hoot
ing
info
rmat
ion
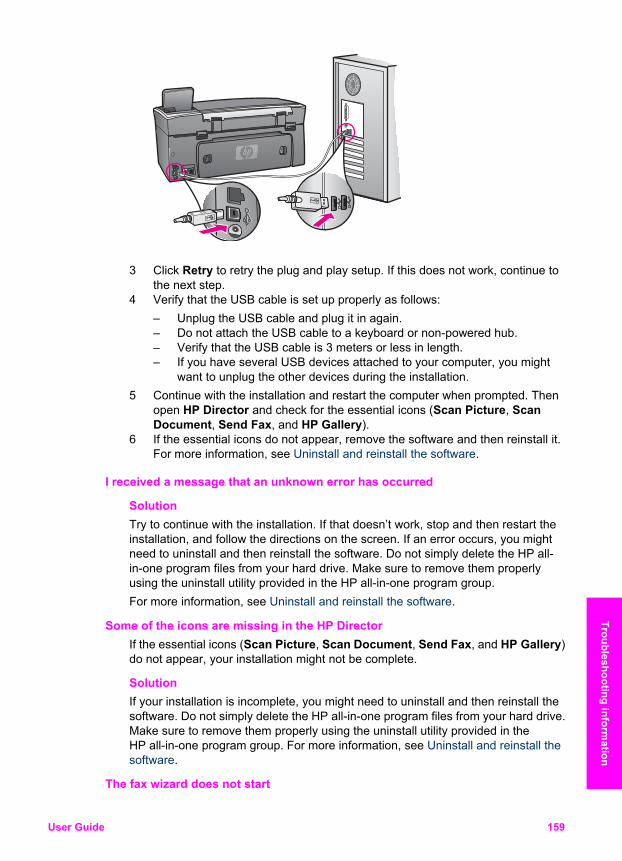
3 Click Retry to retry the plug and play setup. If this does not work, continue tothe next step.
4 Verify that the USB cable is set up properly as follows:– Unplug the USB cable and plug it in again.– Do not attach the USB cable to a keyboard or non-powered hub.– Verify that the USB cable is 3 meters or less in length.– If you have several USB devices attached to your computer, you might
want to unplug the other devices during the installation.5 Continue with the installation and restart the computer when prompted. Then
open HP Director and check for the essential icons (Scan Picture, ScanDocument, Send Fax, and HP Gallery).
6 If the essential icons do not appear, remove the software and then reinstall it.For more information, see Uninstall and reinstall the software.
I received a message that an unknown error has occurred
SolutionTry to continue with the installation. If that doesn’t work, stop and then restart theinstallation, and follow the directions on the screen. If an error occurs, you mightneed to uninstall and then reinstall the software. Do not simply delete the HP all-in-one program files from your hard drive. Make sure to remove them properlyusing the uninstall utility provided in the HP all-in-one program group.For more information, see Uninstall and reinstall the software.
Some of the icons are missing in the HP Director If the essential icons (Scan Picture, Scan Document, Send Fax, and HP Gallery)do not appear, your installation might not be complete.
SolutionIf your installation is incomplete, you might need to uninstall and then reinstall thesoftware. Do not simply delete the HP all-in-one program files from your hard drive.Make sure to remove them properly using the uninstall utility provided in theHP all-in-one program group. For more information, see Uninstall and reinstall thesoftware.
The fax wizard does not start
User Guide 159
Troubleshooting information
SolutionLaunch the fax wizard as follows:1 Start the HP Director. For more information, see the onscreen HP Image
Zone Help that came with your software.2 Click the Settings menu, select Fax Settings and Setup, then select Fax
Setup Wizard.
The registration screen does not appear
Solution➔ In Windows, you can access the registration screen from the Windows taskbar
by clicking Start, pointing to Programs or All Programs (XP), Hewlett-Packard, HP Photosmart 2600/2700 series all-in-one, and then clickingSign up now.
The Digital Imaging Monitor does not appear in the system tray
SolutionIf the Digital Imaging Monitor does not appear in the system tray, start theHP Director to check whether or not essential icons are there. For moreinformation about starting the HP Director, see the onscreen HP Image Zone Helpthat came with your software.For more information about missing essential icons in the HP Director, see Someof the icons are missing in the HP Director.The system tray normally appears in the lower-right corner of the desktop.
Uninstall and reinstall the software If your installation is incomplete, or if you connected the USB cable to the computerbefore prompted by the software installation screen, you might need to uninstall andthen reinstall the software. Do not simply delete the HP all-in-one program files fromyour hard drive. Make sure to remove them properly using the uninstall utility providedin the HP all-in-one program group.A reinstall can take from 20 to 40 minutes for both Windows and Macintosh computers.There are three methods to uninstall the software on a Windows computer.
To uninstall from a Windows computer, method 11 Disconnect your HP all-in-one from your computer. Do not connect the HP all-in-
one to your computer until after you have reinstalled the software.2 Press the On button to turn off the HP all-in-one.3 On the Windows taskbar, click Start, Start Programs or All Programs (XP),
Hewlett-Packard, HP Photosmart 2600/2700 series all-in-one, uninstallsoftware.
4 Follow the onscreen instructions.5 If you are asked whether you would like to remove shared files, click No.
Other programs that use these files might not work properly if the files are deleted.
Chapter 16
160 HP Photosmart 2600/2700 series all-in-one
Trou
bles
hoot
ing
info
rmat
ion
6 Restart your computer.
Note It is important that you disconnect your HP all-in-one before restarting yourcomputer. Do not connect the HP all-in-one to your computer until after youhave reinstalled the software.
7 To reinstall the software, insert the HP all-in-one CD-ROM into your computer’sCD-ROM drive, and follow the onscreen instructions and the instructions providedin the Setup Guide that came with your HP all-in-one.
8 After the software is installed, connect the HP all-in-one to your computer.9 Press the On button to turn the HP all-in-one on.
After connecting and turning on your HP all-in-one, you might have to wait severalminutes for all of the Plug and Play events to complete.
10 Follow the onscreen instructions.
When the software installation is complete, the Status Monitor icon appears in theWindows system tray.To verify that the software is properly installed, double-click the HP Director icon on thedesktop. If the HP Director shows the key icons (Scan Picture, Scan Document,Send Fax, and HP Gallery), the software has been properly installed.
To uninstall from a Windows computer, method 2
Note Use this method if Uninstall Software is not available in the Windows Startmenu.
1 On the Windows taskbar, click Start, Settings, Control Panel.2 Double-click Add/Remove Programs.3 Select HP all-in-one & Officejet 4.0, and then click Change/Remove.
Follow the onscreen instructions.4 Disconnect your HP all-in-one from your computer.5 Restart your computer.
Note It is important that you disconnect your HP all-in-one before restarting yourcomputer. Do not connect the HP all-in-one to your computer until after youhave reinstalled the software.
6 Launch setup.7 Follow the onscreen instructions and the instructions provided in the Setup Guide
that came with your HP all-in-one.
To uninstall from a Windows computer, method 3
Note This is an alternate method if Uninstall Software is not available in the WindowsStart menu.
1 Run the HP Photosmart 2600/2700 series all-in-one software Setup program.2 Select Uninstall and follow the onscreen directions.3 Disconnect your HP all-in-one from your computer.4 Restart your computer.
Note It is important that you disconnect your HP all-in-one before restarting yourcomputer. Do not connect the HP all-in-one to your computer until after youhave reinstalled the software.
User Guide 161
Troubleshooting information
5 Run the HP Photosmart 2600/2700 series all-in-one software Setup programagain.
6 Launch Reinstall.7 Follow the onscreen instructions and the instructions provided in the Setup Guide
that came with your HP all-in-one.
To uninstall from a Macintosh computer1 Disconnect the HP all-in-one from your Macintosh.2 Double-click the Applications: HP All-in-One Software folder.3 Double-click HP Uninstaller.
Follow the onscreen instructions.4 After the software is uninstalled, disconnect your HP all-in-one, and then restart
your computer.
Note It is important that you disconnect your HP all-in-one before restarting yourcomputer. Do not connect the HP all-in-one to your computer until after youhave reinstalled the software.
5 To reinstall the software, insert the HP all-in-one CD-ROM into your computer’sCD-ROM drive.
6 On the desktop, open the CD-ROM and then double-click HP all-in-one installer.7 Follow the onscreen instructions and the instructions provided in the Setup Guide
that came with your HP all-in-one.
Fax setup troubleshooting This section contains fax setup troubleshooting information for the HP all-in-one. If yourHP all-in-one is not set up properly for faxing, you might experience problems whensending faxes, receiving faxes, or both.
Tip This section contains only setup-related troubleshooting. For additional faxtroubleshooting topics, such as problems with your printouts or slow fax reception,see the onscreen Troubleshooting Help that came with your HP Image Zonesoftware.
If you are having faxing problems, you can print a fax test report to check the status ofyour HP all-in-one. The test will fail if your HP all-in-one is not set up properly for faxing.Perform this test after you have completed setting up your HP all-in-one for faxing.
To test your fax setup 1 Press Setup.2 Press 6, and then press 5.
This displays the Tools menu and then selects Run Fax Test.The HP all-in-one displays the status of the test on the color graphics display andprints a report.
Chapter 16
162 HP Photosmart 2600/2700 series all-in-one
Trou
bles
hoot
ing
info
rmat
ion
3 Review the report.– If the test passes and you are still having problems faxing, check the fax
settings listed in the report to verify the settings are correct. A blank orincorrect fax setting can cause faxing problems.
– If the test fails, review the report for information on how to fix any problemsfound. For more information, you can also see the next section, The fax testfailed.
4 Press OK to return to the Setup Menu.
If you are still experiencing faxing problems, continue with the following sections formore troubleshooting help.
The fax test failed If you ran a fax test and the test failed, review the report for basic information about theerror. For more detailed information, check the report to see which part of the testfailed, and then navigate to the appropriate topic in this section for information:● The fax hardware test failed● The fax connected to active telephone wall jack test failed● The phone cord connected to correct port on fax test failed● The fax line condition test failed● The dial tone detection test failed
The fax hardware test failed
Solution● Turn off the HP all-in-one by using the On button located on the control panel
and then unplug the power cord from the back of the HP all-in-one. After a fewseconds, plug the power cord back in and turn the power on. Run the testagain. If the test fails again, continue reviewing the troubleshooting informationin this section.
● Try to send or receive a test fax. If you can send or receive a fax successfully,there might not be a problem.
● If you have a Windows computer and are running the test from the Fax SetupWizard, make sure the HP all-in-one is not busy completing another task, suchas receiving a fax or making a copy. Check the color graphics display for amessage indicating that the HP all-in-one is busy. If it is busy, wait until it isfinished and in the idle state, before running the test.
After you resolve any problems found, run the fax test again to make sure it passesand your HP all-in-one is ready for faxing. If the Fax Hardware Test continues tofail and you experience problems faxing, contact HP for support. For information oncontacting HP for support, see Get HP support.
The fax connected to active telephone wall jack test failed
Solution● Check the connection between the telephone wall jack and the HP all-in-one to
make sure the phone cord is secure.● Make sure you use the phone cord that came with your HP all-in-one. If you do
not use the supplied phone cord to connect from the telephone wall jack toyour HP all-in-one, you may not be able to send or receive faxes. After you
User Guide 163
Troubleshooting information
plug in the phone cord that came with your HP all-in-one, run the fax testagain.
● Make sure you have correctly connected the HP all-in-one to the telephonewall jack. Using the phone cord supplied in the box with your HP all-in-one,connect one end to your telephone wall jack, then connect the other end to theport labeled "1-LINE" on the back of your HP all-in-one. For more informationon setting up your HP all-in-one for faxing, see Fax setup.
● If you are using a phone splitter, this can cause faxing problems. (A splitter is atwo-cord connector that plugs into a telephone wall jack.) Try removing thesplitter and connecting the HP all-in-one directly to the telephone wall jack.
● Try connecting a working phone and phone cord to the telephone wall jackthat you are using for the HP all-in-one and check for a dial tone. If you do nothear a dial tone, contact your telephone company and have them check theline.
● Try to send or receive a test fax. If you can send or receive a fax successfully,there might not be a problem.
After you resolve any problems found, run the fax test again to make sure it passesand your HP all-in-one is ready for faxing.
The phone cord connected to correct port on fax test failed
SolutionThe phone cord is plugged into the wrong port on the back of the HP all-in-one.1 Using the phone cord supplied in the box with your HP all-in-one, connect one
end to your telephone wall jack, then connect the other end to the port labeled"1-LINE" on the back of your HP all-in-one.
Note If you use the "2-EXT" port to connect to the telephone wall jack, youwill not be able to send or receive faxes. The "2-EXT" port should onlybe used to connect other equipment, such as an answering machine or atelephone.
2 After you have connected the phone cord to the port labeled "1-LINE", run thefax test again to make sure it passes and your HP all-in-one is ready forfaxing.
3 Try to send or receive a test fax.
The fax line condition test failed
Solution● Make sure you connect your HP all-in-one to an analog phone line or you will
not be able to send or receive faxes. To check if your phone line is digital,connect a regular analog phone to the line and listen for a dial tone. If you donot hear a normal sounding dial tone, it might be a phone line set up for digitalphones. Connect your HP all-in-one to an analog phone line and try sendingor receiving a fax.
● Check the connection between the telephone wall jack and the HP all-in-one tomake sure the phone cord is secure.
● Make sure you have correctly connected the HP all-in-one to the telephonewall jack. Using the phone cord supplied in the box with your HP all-in-one,connect one end to your telephone wall jack, then connect the other end to the
Chapter 16
164 HP Photosmart 2600/2700 series all-in-one
Trou
bles
hoot
ing
info
rmat
ion
port labeled "1-LINE" on the back of your HP all-in-one. For more informationon setting up your HP all-in-one for faxing, see Fax setup.
● Other equipment, which uses the same phone line as the HP all-in-one, mightbe causing the test to fail. To find out if other equipment is causing a problem,disconnect everything from the phone line, and then run the test again.– If the Fax Line Condition Test passes without the other equipment, then
one or more pieces of the equipment is causing problems; try adding themback one at a time and rerunning the test each time, until you identifywhich piece of equipment is causing the problem.
– If the Fax Line Condition Test fails without the other equipment, connectthe HP all-in-one to a working phone line and continue reviewing thetroubleshooting information in this section.
● If you are using a phone splitter, this can cause faxing problems. (A splitter is atwo-cord connector that plugs into a telephone wall jack.) Try removing thesplitter and connecting the HP all-in-one directly to the telephone wall jack.
After you resolve any problems found, run the fax test again to make sure it passesand your HP all-in-one is ready for faxing. If the Fax Line Condition test continuesto fail and you experience problems faxing, contact your telephone company andhave them check the phone line.
The dial tone detection test failed
Solution● Other equipment, which uses the same phone line as the HP all-in-one, might
be causing the test to fail. To find out if other equipment is causing a problem,disconnect everything from the phone line, and then run the test again. If theDial Tone Detection Test passes without the other equipment, then one ormore pieces of the equipment is causing problems; try adding them back oneat a time and rerunning the test each time, until you identify which piece ofequipment is causing the problem.
● Try connecting a working phone and phone cord to the telephone wall jackthat you are using for the HP all-in-one and check for a dial tone. If you do nothear a dial tone, contact your telephone company and have them check theline.
● Make sure you have correctly connected the HP all-in-one to the telephonewall jack. Using the phone cord supplied in the box with your HP all-in-one,connect one end to your telephone wall jack, then connect the other end to theport labeled "1-LINE" on the back of your HP all-in-one. For more informationon setting up your HP all-in-one for faxing, see Fax setup.
● If you are using a phone splitter, this can cause faxing problems. (A splitter is atwo-cord connector that plugs into a telephone wall jack.) Try removing thesplitter and connecting the HP all-in-one directly to the telephone wall jack.
● If your telephone system is not using a standard dial tone, such as some PBXsystems, this may cause the test to fail. This will not cause a problem sendingor receiving faxes. Try sending or receiving a test fax.
● Check to make sure the country/region setting is set appropriately for yourcountry/region. If the country/region setting is not set or is not set correctly, thetest may fail and you might have problems sending and receiving faxes. Tocheck the setting, press Setup and then press 7. The language and country/region settings appear on the color graphics display. If the country/region
User Guide 165
Troubleshooting information
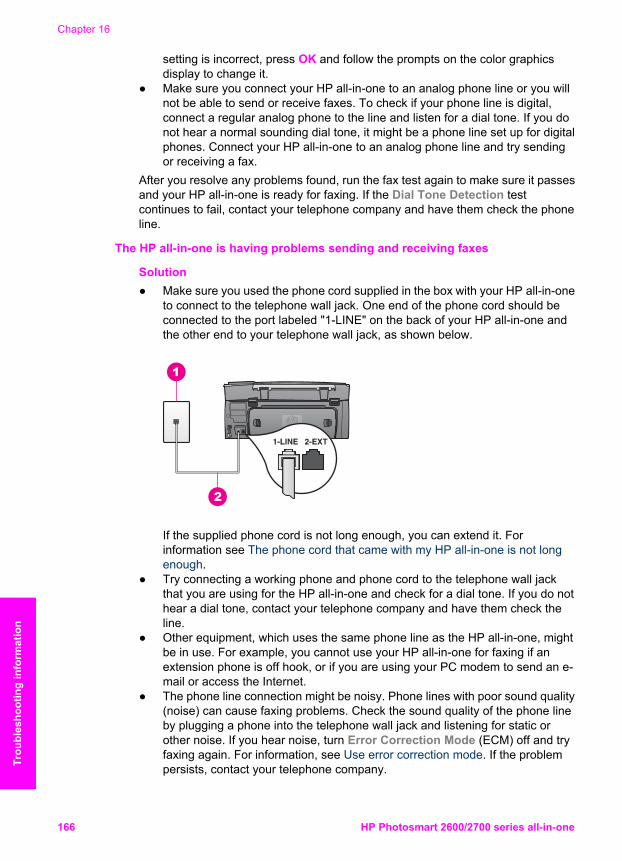
setting is incorrect, press OK and follow the prompts on the color graphicsdisplay to change it.
● Make sure you connect your HP all-in-one to an analog phone line or you willnot be able to send or receive faxes. To check if your phone line is digital,connect a regular analog phone to the line and listen for a dial tone. If you donot hear a normal sounding dial tone, it might be a phone line set up for digitalphones. Connect your HP all-in-one to an analog phone line and try sendingor receiving a fax.
After you resolve any problems found, run the fax test again to make sure it passesand your HP all-in-one is ready for faxing. If the Dial Tone Detection testcontinues to fail, contact your telephone company and have them check the phoneline.
The HP all-in-one is having problems sending and receiving faxes
Solution● Make sure you used the phone cord supplied in the box with your HP all-in-one
to connect to the telephone wall jack. One end of the phone cord should beconnected to the port labeled "1-LINE" on the back of your HP all-in-one andthe other end to your telephone wall jack, as shown below.
If the supplied phone cord is not long enough, you can extend it. Forinformation see The phone cord that came with my HP all-in-one is not longenough.
● Try connecting a working phone and phone cord to the telephone wall jackthat you are using for the HP all-in-one and check for a dial tone. If you do nothear a dial tone, contact your telephone company and have them check theline.
● Other equipment, which uses the same phone line as the HP all-in-one, mightbe in use. For example, you cannot use your HP all-in-one for faxing if anextension phone is off hook, or if you are using your PC modem to send an e-mail or access the Internet.
● The phone line connection might be noisy. Phone lines with poor sound quality(noise) can cause faxing problems. Check the sound quality of the phone lineby plugging a phone into the telephone wall jack and listening for static orother noise. If you hear noise, turn Error Correction Mode (ECM) off and tryfaxing again. For information, see Use error correction mode. If the problempersists, contact your telephone company.
Chapter 16
166 HP Photosmart 2600/2700 series all-in-one
Trou
bles
hoot
ing
info
rmat
ion
● If you are using a digital subscriber line (DSL) service, make sure that youhave a DSL filter connected or you will not be able to fax successfully. TheDSL filter removes the digital signal and allows your HP all-in-one tocommunicate properly with the phone line. Obtain a DSL filter from your DSLprovider. If you already have a DSL filter, make sure it is connected correctly.For information, see Case B: Set up your HP all-in-one with DSL.
● Make sure your HP all-in-one is not connected to a telephone wall jack that isset up for digital phones. To check if your phone line is digital, connect aregular analog phone to the line and listen for a dial tone. If you do not hear anormal sounding dial tone, it might be a phone line set up for digital phones.
● If you are using either a private branch exchange (PBX) or an integratedservices digital network (ISDN) converter/terminal adapter, make sure theHP all-in-one is connected to the port that is designated for fax and phoneuse. Also, make sure that the terminal adapter is set to the correct switch typefor your country/region, if possible.Note that some ISDN systems allow you to configure the ports for specificphone equipment. For example, you might have assigned one port fortelephone and Group 3 fax and another port for multiple purposes. If youcontinue to have problems when connected to the fax/phone port, try using theport designated for multiple purposes; it might be labeled "multi-combi" orsomething similar. For information on setting up your HP all-in-one with a PBXphone system or ISDN line, see Fax setup.
● If your HP all-in-one shares the same phone line with a DSL service, the DSLmodem might not be properly grounded. If the DSL modem is not properlygrounded, it can create noise on the phone line. Phone lines with poor soundquality (noise) can cause faxing problems. You can check the sound quality ofthe phone line by plugging a phone into the telephone wall jack and listeningfor static or other noise. If you hear noise, turn off your DSL modem andcompletely remove power for at least 15 minutes. Turn the DSL modem backon and listen to the dial tone again.
Note You might notice static on the phone line again in the future. If yourHP all-in-one stops sending and receiving faxes, repeat this process.
If the phone line is still noisy or for more information on turning your DSLmodem off, contact your DSL provider for support. You can also contact yourtelephone company.
● If you are using a phone splitter, this can cause faxing problems. (A splitter is atwo-cord connector that plugs into a telephone wall jack.) Try removing thesplitter and connecting the HP all-in-one directly to the telephone wall jack.
The HP all-in-one cannot receive faxes, but can send faxes
Solution● If you are not using a distinctive ring service, check to make sure that the
Answer Ring Pattern feature on your HP all-in-one is set to All Rings. Forinformation, see Change the answer ring pattern (distinctive ringing).
● If Auto Answer is set to Off, you will need to manually receive faxes;otherwise, your HP all-in-one will not receive the fax. For information onreceiving faxes manually, see Receive a fax manually.
● If you have a voice mail service at the same phone number you use for faxcalls, you must receive faxes manually, not automatically. This means that you
User Guide 167
Troubleshooting information
must be available to respond in person to incoming fax calls. For informationon setting up your HP all-in-one when you have a voice mail service, see Faxsetup. For information on receiving faxes manually, see Receive a faxmanually.
● If you have a PC modem on the same phone line with your HP all-in-one,check to make sure that the PC modem software is not set to receive faxesautomatically. Modems with the auto fax receive feature turned on will receiveall incoming faxes, which prevents the HP all-in-one from receiving fax calls.
● If you have an answering machine on the same phone line with your HP all-in-one, you might have one of the following problems:– Your outgoing message might be too long or too loud to allow the HP all-
in-one to detect fax tones, and the calling fax machine might disconnect.– Your answering machine might hang up too quickly after the outgoing
message plays if it does not detect someone trying to record a message,as when a fax is calling. This prevents the HP all-in-one from detecting thefax tones. This problem is most common with digital answering machines.
The following actions might help solve these problems:– Make sure your HP all-in-one is set to receive faxes automatically. For
information on setting up your HP all-in-one to receive faxesautomatically, see Set up the HP all-in-one to receive faxes.
– Make sure the Rings to Answer setting is correct. Set your answeringmachine to answer in 4 rings and your HP all-in-one to answer in themaximum number of rings supported by your device. (The maximumnumber of rings varies by country/region.) In this setup, the answeringmachine will answer the call and the HP all-in-one will monitor the line. Ifthe HP all-in-one detects fax tones, the HP all-in-one will receive the fax.If the call is a voice call, the answering machine will record the incomingmessage. For information on setting the number of rings to answer, seeSet the number of rings before answering.
– Disconnect the answering machine and then try receiving a fax. If you canreceive a fax without the answering machine, the answering machinemight be causing the problem.
– Reconnect the answering machine and rerecord your outgoing message.Make sure the message is as short as possible (no more than 10 secondslong), and that you speak softly and slowly when recording it. At the endof your outgoing message, record an additional 4 - 5 seconds of silencewith no background noise. Try to receive a fax again.
Note Some digital answering machines might not retain the recordedsilence at the end of your outgoing message. Play back youroutgoing message to check.
● If your HP all-in-one shares the same phone line with other types of phoneequipment, such as an answering machine, a PC modem, or multi-port switchbox, the fax signal level might be reduced. This can cause problems during faxreception.To find out if other equipment is causing a problem, disconnect everythingexcept the HP all-in-one from the phone line, and then try to receive a fax. Ifyou can receive faxes successfully without the other equipment, one or morepieces of the other equipment is causing problems; try adding them back one
Chapter 16
168 HP Photosmart 2600/2700 series all-in-one
Trou
bles
hoot
ing
info
rmat
ion
at a time and receiving a fax each time, until you identify which equipment iscausing the problem.
● If you have a special ring pattern for your fax phone number (using a distinctivering service through your telephone company), make sure that the AnswerRing Pattern feature on your HP all-in-one is set to match. For example, if thetelephone company has assigned your fax number a double ring pattern, makesure Double Rings is selected as the Answer Ring Pattern setting. Forinformation on changing this setting, see Change the answer ring pattern(distinctive ringing).
Note The HP all-in-one cannot recognize some ring patterns, such as thosewith alternating short and long ringing patterns. If you are havingproblems with a ring pattern of this type, ask your telephone company toassign a non-alternating ring pattern.
Fax tones are recorded on my answering machine
Solution● Make sure your HP all-in-one is set to receive faxes automatically. If your
HP all-in-one is set up to receive faxes manually, the HP all-in-one will notanswer incoming calls. You must be available to respond in person to incomingfax calls, or the HP all-in-one will not receive the fax and your answeringmachine will record the fax tones. For information on setting up your HP all-in-one to receive faxes automatically, see Set up the HP all-in-one to receivefaxes.
● Make sure the Rings to Answer setting is correct. The number of rings toanswer for the HP all-in-one should be greater than the number of rings toanswer for the answering machine. If the answering machine and the HP all-in-one are set to the same number of rings to answer, both devices willanswer the call, and fax tones will be recorded on the answering machine.Set your answering machine to answer in 4 rings and your HP all-in-one toanswer in the maximum number of rings supported by your device. (Themaximum number of rings varies by country/region.) In this setup, theanswering machine will answer the call and the HP all-in-one will monitor theline. If the HP all-in-one detects fax tones, the HP all-in-one will receive thefax. If the call is a voice call, the answering machine will record the incomingmessage. For information on setting the number of rings to answer, see Setthe number of rings before answering.
I hear static on my phone line since connecting the HP all-in-one
Solution● If you are using a phone splitter, this can cause static on the phone line. (A
splitter is a two-cord connector that plugs into a telephone wall jack.) Tryremoving the splitter and connecting the HP all-in-one directly to the telephonewall jack.
● If you are not using a proper grounded power outlet for your HP all-in-one, youmight hear static on your phone line. Try connecting to another power outlet.
The phone cord that came with my HP all-in-one is not long enough
User Guide 169
Troubleshooting information
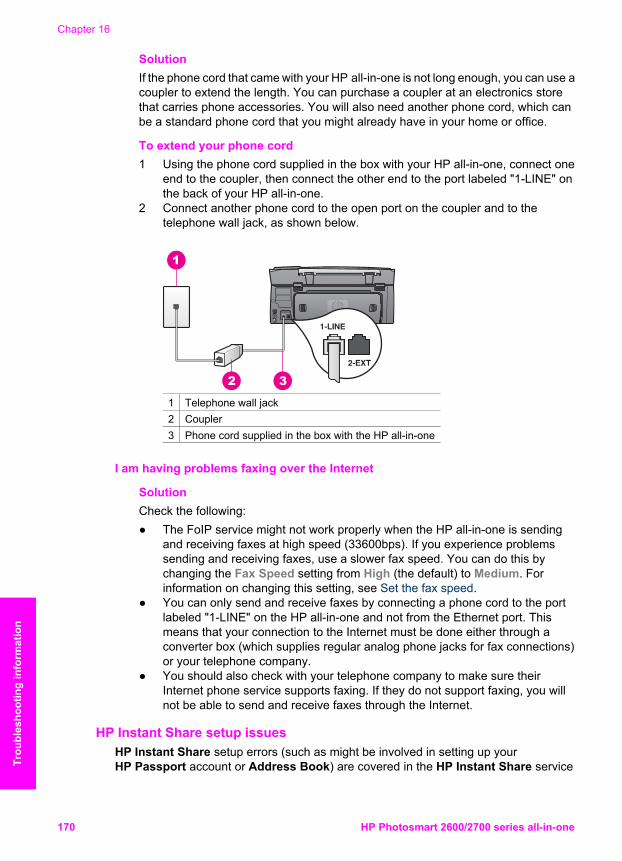
SolutionIf the phone cord that came with your HP all-in-one is not long enough, you can use acoupler to extend the length. You can purchase a coupler at an electronics storethat carries phone accessories. You will also need another phone cord, which canbe a standard phone cord that you might already have in your home or office.
To extend your phone cord1 Using the phone cord supplied in the box with your HP all-in-one, connect one
end to the coupler, then connect the other end to the port labeled "1-LINE" onthe back of your HP all-in-one.
2 Connect another phone cord to the open port on the coupler and to thetelephone wall jack, as shown below.
1 Telephone wall jack2 Coupler3 Phone cord supplied in the box with the HP all-in-one
I am having problems faxing over the Internet
SolutionCheck the following:● The FoIP service might not work properly when the HP all-in-one is sending
and receiving faxes at high speed (33600bps). If you experience problemssending and receiving faxes, use a slower fax speed. You can do this bychanging the Fax Speed setting from High (the default) to Medium. Forinformation on changing this setting, see Set the fax speed.
● You can only send and receive faxes by connecting a phone cord to the portlabeled "1-LINE" on the HP all-in-one and not from the Ethernet port. Thismeans that your connection to the Internet must be done either through aconverter box (which supplies regular analog phone jacks for fax connections)or your telephone company.
● You should also check with your telephone company to make sure theirInternet phone service supports faxing. If they do not support faxing, you willnot be able to send and receive faxes through the Internet.
HP Instant Share setup issues HP Instant Share setup errors (such as might be involved in setting up yourHP Passport account or Address Book) are covered in the HP Instant Share service
Chapter 16
170 HP Photosmart 2600/2700 series all-in-one
Trou
bles
hoot
ing
info
rmat
ion
screen-specific help. Specific operational troubleshooting information is provided in theHP Instant Share troubleshooting.Use this section to solve HP Instant Share errors generated as a result of the way thedevice was set up.
Minimum installation error
SolutionHP Instant Share cannot be set up on your HP all-in-one. The HP Instant Sharefeature is not installed.➔ To enable the HP Instant Share feature, insert the installation CD that came
with your product and select Typical (Recommended).– If you need an installation CD for an HP Photosmart 2600 series all-in-
one, you can order one from www.hp.com/support.– If you need an installation CD for an HP Photosmart 2700 series all-in-
one, you can order one from www.hp.com/support.
Note If your system does not meet the system requirements for a Typicalsoftware installation, you will not be able to install and use HP InstantShare.
You need to install device software
SolutionYou have not installed the HP all-in-one software.➔ To install the HP all-in-one software, insert the installation CD that came with
your product and select Typical (Recommended).– If you need an installation CD for an HP Photosmart 2600 series all-in-
one, you can order one from www.hp.com/support.– If you need an installation CD for an HP Photosmart 2700 series all-in-
one, you can order one from www.hp.com/support.
(HP Instant Share) Not Set Up
SolutionYou have pressed the HP Instant Share button and your HP all-in-one is notregistered with HP Instant Share.1 Press 1 to select Yes, set up HP Instant Share for easy photo sharing.
The HP Instant Share Setup Wizard opens in a browser on your computer.2 Follow the onscreen instructions to obtain an HP Passport account and set up
your HP all-in-one for HP Instant Share.
HP Instant Share is not set up or network is not available
SolutionYou have not set up HP Instant Share on your device.1 Press HP Instant Share on the control panel of your HP all-in-one.2 Press 1 to select Yes, set up HP Instant Share for easy photo sharing.
User Guide 171
Troubleshooting information
The HP Instant Share Setup Wizard opens in a browser on your computer.3 Follow the onscreen instructions to obtain an HP Passport account and set up
your HP all-in-one for HP Instant Share.
SolutionThe network is not available.➔ For detailed information, see the Network Guide that came with your HP all-
in-one.
Destinations not set up on device. Refer to manual for Help.
SolutionThe HP Instant Share service did not find any destinations. No destinations wereconfigured.➔ Create destinations to designate locations to which you want to send images.
A destination, for example, can be an e-mail address, a friend or relative'snetwork-connected device, an online photo album, or an online photo finishingservice. Availability of services varies by country/region.
To create destinations1 Press HP Instant Share on the control panel of your HP all-in-one.
The HP Instant Share menu appears on the color graphics display.2 Press 3 to select Add New Destination.
The Select Computer menu appears, with a list of computers connected toyour network.
3 Select a computer from the list.
Note HP Image Zone software must be installed on the computer selected,and the computer must be able to access the HP Instant Share service.
The HP Instant Share service screens appear in a window on your computer.4 Sign in to HP Instant Share with your HP Passport userid and password.
The HP Instant Share manager appears.
Note You will not be prompted for your HP Passport userid and password ifyou have set the HP Instant Share service to remember them.
5 Select the Share tab and follow the onscreen instructions to create a newdestination.For more information, see the onscreen Help.If you want to send a collection of images to a friend or relative's network-connected device, select HP Instant Share E-mail. In the E-mail addressfield enter the name of the device to which you want to send followed [email protected].
Note To send to a device: 1) both the sender and recipient must have anHP Passport user ID and password; 2) the device to which the image issent must be registered with HP Instant Share; and 3) the image mustbe sent using HP Instant Share E-mail or HP remote printing.Prior to setting up a device destination in HP Instant Share E-mail oradding a printer for use with HP remote printing, ask the recipient for the
Chapter 16
172 HP Photosmart 2600/2700 series all-in-one
Trou
bles
hoot
ing
info
rmat
ion
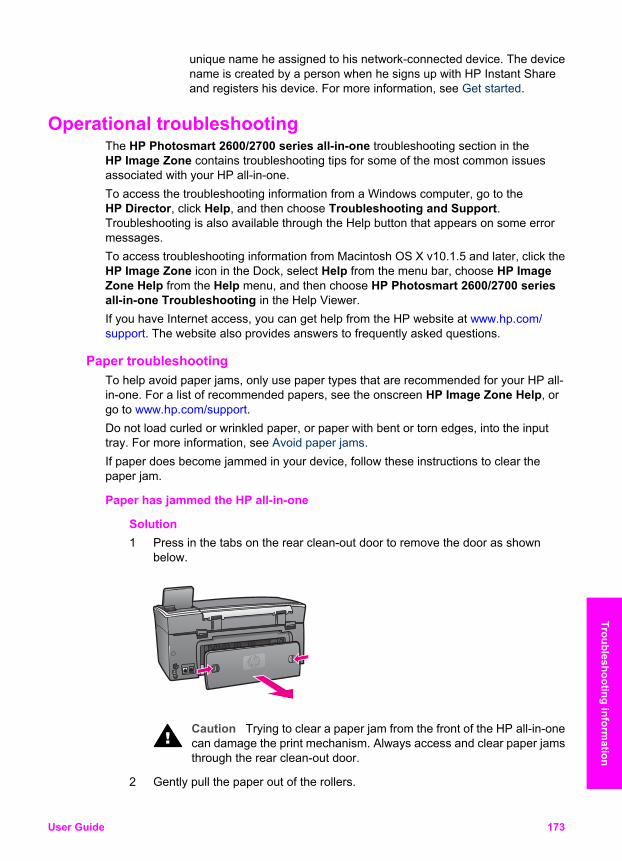
unique name he assigned to his network-connected device. The devicename is created by a person when he signs up with HP Instant Shareand registers his device. For more information, see Get started.
Operational troubleshooting The HP Photosmart 2600/2700 series all-in-one troubleshooting section in theHP Image Zone contains troubleshooting tips for some of the most common issuesassociated with your HP all-in-one.To access the troubleshooting information from a Windows computer, go to theHP Director, click Help, and then choose Troubleshooting and Support.Troubleshooting is also available through the Help button that appears on some errormessages.To access troubleshooting information from Macintosh OS X v10.1.5 and later, click theHP Image Zone icon in the Dock, select Help from the menu bar, choose HP ImageZone Help from the Help menu, and then choose HP Photosmart 2600/2700 seriesall-in-one Troubleshooting in the Help Viewer.If you have Internet access, you can get help from the HP website at www.hp.com/support. The website also provides answers to frequently asked questions.
Paper troubleshooting To help avoid paper jams, only use paper types that are recommended for your HP all-in-one. For a list of recommended papers, see the onscreen HP Image Zone Help, orgo to www.hp.com/support.Do not load curled or wrinkled paper, or paper with bent or torn edges, into the inputtray. For more information, see Avoid paper jams.If paper does become jammed in your device, follow these instructions to clear thepaper jam.
Paper has jammed the HP all-in-one
Solution1 Press in the tabs on the rear clean-out door to remove the door as shown
below.
Caution Trying to clear a paper jam from the front of the HP all-in-onecan damage the print mechanism. Always access and clear paper jamsthrough the rear clean-out door.
2 Gently pull the paper out of the rollers.
User Guide 173
Troubleshooting information
Warning If the paper tears when you are removing it from the rollers,check the rollers and wheels for torn pieces of paper that might remaininside the device. If you do not remove all the pieces of paper from theHP all-in-one, more paper jams are likely to occur.
3 Replace the rear clean-out door. Gently push the door forward until it snapsinto place.
4 Press OK to continue the current job.
Paper has jammed the optional two-sided printing accessory
SolutionYou might need to remove the two-sided printing accessory. For more information,see the printed guide that came with your two-sided printing accessory.
Note If you turned the HP all-in-one off before clearing the paper jam, turn it backon, and then restart your printing or copying job.
Print cartridge troubleshooting If you are experiencing problems with printing, you might have a problem with one of theprint cartridges. Try the following:1 Remove and reinsert the print cartridges and verify that they are fully inserted and
locked in place.2 If the problem persists, print a self-test report to determine if there is a problem with
the print cartridges.This report provides useful information about your print cartridges, including statusinformation.
3 If the self-test report shows a problem, clean the print cartridges.4 If the problem persists, clean the copper-colored contacts of the print cartridges.5 If you are still experiencing problems with printing, determine which print cartridge
is experiencing the problem and replace it.
For more information on these topics, see Maintain your HP all-in-one.
HP Instant Share troubleshooting Error messages discussed in this section appear on your HP all-in-one color graphicsdisplay. Basic HP Instant Share troubleshooting topics are covered below. Online helpis provided for any error messages encountered on the HP Instant Share service.
General errors Use this section to solve the following generic HP Instant Share errors.
HP Instant Share error. Refer to manual for Help.
SolutionThe HP all-in-one experienced an error.➔ Shut down and restart your HP all-in-one.
To shut down your HP all-in-one1 Turn off the HP all-in-one by using the On button located on the control panel.2 Unplug the power cord from the back of the HP all-in-one.
Chapter 16
174 HP Photosmart 2600/2700 series all-in-one
Trou
bles
hoot
ing
info
rmat
ion
HP Instant Share error. Try again later.
SolutionThe HP Instant Share service sent data that is not recognized by the HP all-in-one.➔ Try the task again later. If that doesn't work, shut down and restart your
HP all-in-one.
To shut down your HP all-in-one1 Turn off the HP all-in-one by using the On button located on the control panel.2 Unplug the power cord from the back of the HP all-in-one.
Connection errors Use this section to solve the following errors generated when your HP all-in-one fails toconnect to the HP Instant Share service.
No network connection. See documentation.
SolutionWired networkNetwork cables are loose or disconnected.Incomplete or incorrect network connections prevent devices from communicatingwith each other and generate problems in your network.● Check cable connections from the HP all-in-one to your gateway, router, or
hub to ensure connections are secure. If these connections are secure, checkyour remaining cables to ensure connections are secure. Make sure none ofthe cables are crushed or damaged.
● Check all of the following connections: power cords; cables between theHP all-in-one and the hub or router; cables between the hub or router and yourcomputer; and (if applicable) cables to and from your modem or Internetconnection.
● If the connections mentioned above are secure, connect the cable to theHP all-in-one to a working part of the network to verify the cable is bad, orswap out remaining cables (one at a time) until you replace the malfunctioningcable.
Note You can also launch the HP Director from the desktop on yourcomputer, and click Status. A dialog box appears on the computerstating whether or not the HP all-in-one is connected.
SolutionWireless NetworkThere is some sort of interference.The HP all-in-one is out of range of the access point.● Verify that physical barriers and other forms of interference are limited.
Signals transmitted between your HP all-in-one and access point are affectedby interference from other wireless devices - including cordless phones,microwave ovens, and neighboring wireless networks. Physical objectsbetween the computer and the HP all-in-one also affect transmitted signals. Ifthis is occurring, move your network components closer to the HP all-in-one.
User Guide 175
Troubleshooting information
To minimize interference from another wireless network, try changingchannels.
● Move the HP all-in-one and the access point closer together. If the distancebetween your access point and the HP all-in-one is significant, try reducing thedistance. (The range for 802.11b is approximately 100 feet, and less if there isany interference.) If possible, provide a clear path between the access pointand HP all-in-one, and minimize sources of radio interference.
SolutionYour HP all-in-one was connected to a network at one time. It is now directlyconnected to a computer using a USB cable. The HP Instant Share application isreading the previous network settings.➔ If you are trying to use HP Instant Share while using a USB cable, reset the
network settings on the HP all-in-one or access HP Instant Share from theHP Image Zone software on your computer.
Note For more information on resetting network settings, see the NetworkingGuide that came with your HP all-in-one.
Failed to connect to HP Instant Share
SolutionThe domain name server (DNS) did not have an entry for the URL.➔ Check the DNS settings, then try the task again later.
To check the DNS IP address1 Press Setup on the control panel of your HP all-in-one.
The Setup Menu appears on the color graphics display.2 Press 8, and then press 1.
This selects Network and then View Network Settings.The Network Settings menu appears.
3 Press 1 to select Print Detailed Report.The network configuration page prints on your HP all-in-one.
4 Find the DNS Server information and verify that the IP address of thenetwork's domain name server is accurate.Call your Internet Service Provider (ISP) to verify the DNS address.
5 If it is invalid, access the embedded Web server (EWS) and enter the correctIP address.
To enter information in the EWS1 Find the device IP Address on the network configuration page.2 Enter the device IP Address into the Address field on a browser on your
computer.The EWS Home page appears in your browser window.
3 Click the Networking tab.4 Using the sidebar navigation, find the information you are looking to change
and enter the correct information.For more information, see the HP Photosmart 2600/2700 series all-in-onesection in the HP Image Zone Help.
Chapter 16
176 HP Photosmart 2600/2700 series all-in-one
Trou
bles
hoot
ing
info
rmat
ion
SolutionThe HP Instant Share service is not responding. Either the service is down formaintenance, the proxy settings are inaccurate, or one or more of your networkcables are disconnected.➔ Try one of the following:
– Check your proxy settings (see the procedure below).– Check your network connections. For more information, see the Network
Guide that came with your HP all-in-one.– Try the task again later.
Note Your HP all-in-one does not support proxies that requireauthentication.
To check your proxy settings1 Press Setup on the control panel of your HP all-in-one.
The Setup Menu appears on the color graphics display.2 Press 8, and then press 1.
This selects Network and then View Network Settings.The Network Settings menu appears.
3 Press 1 to select Print Detailed Report.The network configuration page prints on your HP all-in-one.
4 Find the device IP Address on the network configuration page.5 Enter the device IP Address into the Address field on a browser on your
computer.The embedded Web server (EWS) Home page appears in your browserwindow.
6 Click the Networking tab.7 Under Applications, click Instant Share.8 Verify the proxy settings.9 If the settings are inaccurate, enter the correct information in the appropriate
field(s) in the EWS.For more information, see the Network Guide that came with your HP all-in-one.
Failed to connect to HP Instant Share. Check DNS address.
SolutionThe HP all-in-one cannot connect to the HP Instant Share service. Possible causesinclude: the DNS IP address is unknown; no DNS IP address is set; or the DNS IPaddress is all zeroes.➔ Verify the DNS IP address used by your HP all-in-one.
For more information, see To check the DNS IP address.
Failed to connect to HP Instant Share. DNS server not responding.
SolutionEither the DNS server is not responding, the network is down, or the DNS IPaddress is invalid.1 Verify the DNS IP address used by your HP all-in-one.
User Guide 177
Troubleshooting information
For more information, see To check the DNS IP address.2 If the DNS IP address is valid, try connecting again later.
Failed to connect to HP Instant Share. Check proxy address.
SolutionThe DNS server could not resolve the proxy URL to an IP address.1 Verify the proxy information used by your HP all-in-one.
For more information, see To check your proxy settings.2 If the proxy information is valid, try connecting again later.
Connection lost to HP Instant Share service.
SolutionThe HP all-in-one lost its connection to the HP Instant Share service.1 Check physical network connections and make sure the network is
operational.For more information, see the Network Guide that came with your HP all-in-one.
2 Once you verify network connectivity, retry the task.
Send image collections errors Use this section to solve errors generated when problems are encountered sendingimages from your HP all-in-one to a selected destination.
Corrupted Destination file found.
SolutionThere is something wrong with the format of the Destination (Intent) file on thememory card.➔ Consult the user documentation that came with your camera and reassign
intents on the memory card.
Destination not authorized on this device.
SolutionOne or more of the HP Instant Share destinations does not belong to the registereduser of the device.➔ Make sure the camera and HP all-in-one are registered under the same
HP Passport account.
Memory card error
SolutionThe memory card might be defective.1 Remove the memory card from the HP all-in-one, and then reinsert the card.2 If this does not work, shut down and restart your HP all-in-one.3 If this does not work, reformat the memory card.
As a last resort, replace the memory card.
Chapter 16
178 HP Photosmart 2600/2700 series all-in-one
Trou
bles
hoot
ing
info
rmat
ion
HP Instant Share storage limit exceeded. Refer to manual for Help.
SolutionThe job you were sending failed. Allotted disk space has been exceeded on theHP Instant Share service.
Note Older files are automatically deleted from your account. This error will goaway in a few days or weeks.
To remove files from the HP Instant Share service1 Press HP Instant Share on the control panel of your HP all-in-one.
The HP Instant Share menu appears on the color graphics display.2 Press 3, and then press 5.
This selects the Instant Share Options menu and then Manage Account.The HP Instant Share service screens appear in a window on your computer.
3 Sign in to HP Instant Share with your HP Passport userid and password.
Note You will not be prompted for your HP Passport userid and password ifyou have set the HP Instant Share service to remember them.
4 Follow the onscreen instructions.5 From the HP Instant Share setup menu, select Manage Account.6 Follow the onscreen instructions to remove files from your account.
Send and Receive image collections errorsUse this section to solve errors that are common to both HP Instant Share Send andReceive functions.
Login failed. Refer to the manual for Help.
SolutionThe HP all-in-one failed to log in to the HP Instant Share service.● Try again later.● Set up the device again through HP Instant Share.
HP Instant Share service discontinued.
SolutionThe HP Instant Share service has been discontinued.➔ The service has been discontinued. If you have any questions, contact HP
Customer Support.
HP Instant Share service temporarily unavailable. Try again later.
SolutionThe HP Instant Share service is currently down for maintenance.➔ Try connecting again later.
User Guide 179
Troubleshooting information
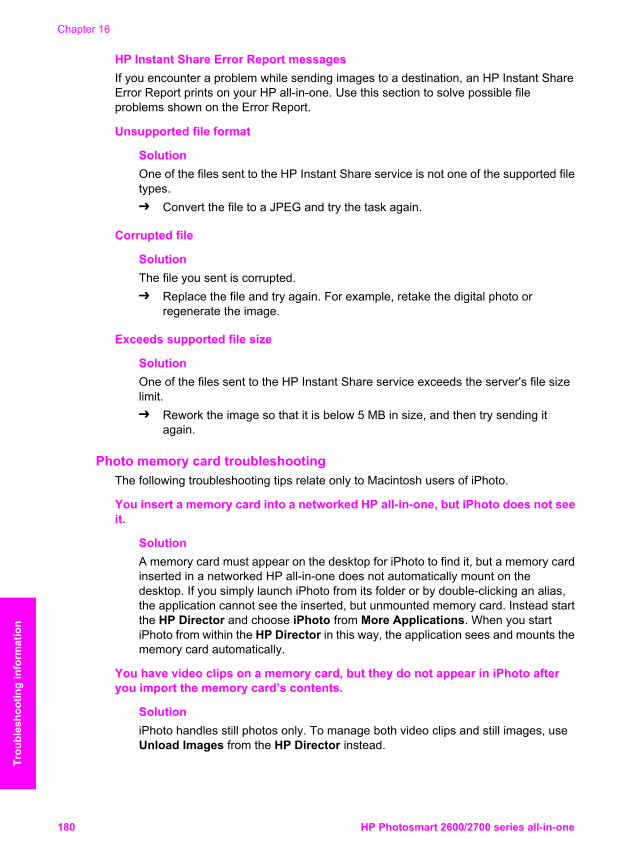
HP Instant Share Error Report messages If you encounter a problem while sending images to a destination, an HP Instant ShareError Report prints on your HP all-in-one. Use this section to solve possible fileproblems shown on the Error Report.
Unsupported file format
SolutionOne of the files sent to the HP Instant Share service is not one of the supported filetypes.➔ Convert the file to a JPEG and try the task again.
Corrupted file
SolutionThe file you sent is corrupted.➔ Replace the file and try again. For example, retake the digital photo or
regenerate the image.
Exceeds supported file size
SolutionOne of the files sent to the HP Instant Share service exceeds the server's file sizelimit.➔ Rework the image so that it is below 5 MB in size, and then try sending it
again.
Photo memory card troubleshooting The following troubleshooting tips relate only to Macintosh users of iPhoto.
You insert a memory card into a networked HP all-in-one, but iPhoto does not seeit.
SolutionA memory card must appear on the desktop for iPhoto to find it, but a memory cardinserted in a networked HP all-in-one does not automatically mount on thedesktop. If you simply launch iPhoto from its folder or by double-clicking an alias,the application cannot see the inserted, but unmounted memory card. Instead startthe HP Director and choose iPhoto from More Applications. When you startiPhoto from within the HP Director in this way, the application sees and mounts thememory card automatically.
You have video clips on a memory card, but they do not appear in iPhoto afteryou import the memory card’s contents.
SolutioniPhoto handles still photos only. To manage both video clips and still images, useUnload Images from the HP Director instead.
Chapter 16
180 HP Photosmart 2600/2700 series all-in-one
Trou
bles
hoot
ing
info
rmat
ion
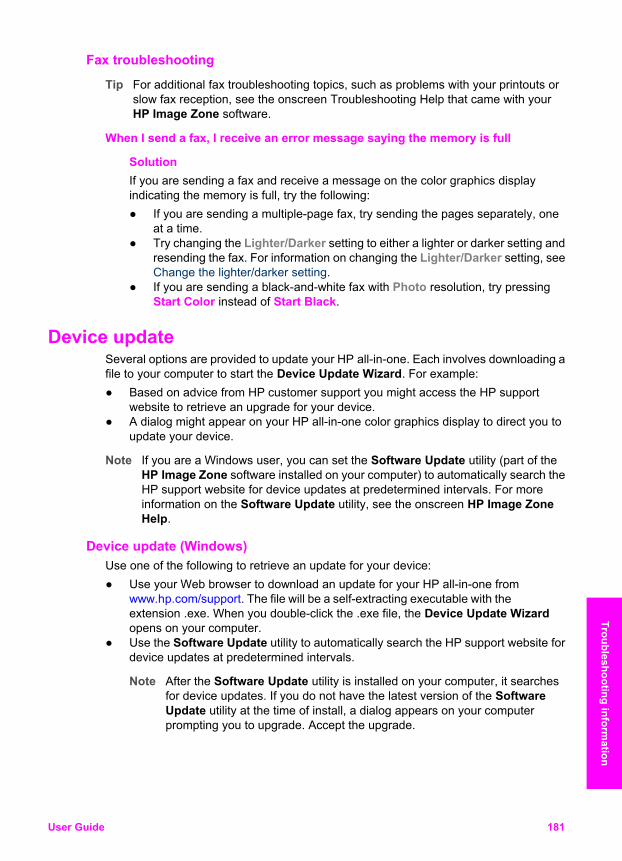
Fax troubleshooting
Tip For additional fax troubleshooting topics, such as problems with your printouts orslow fax reception, see the onscreen Troubleshooting Help that came with yourHP Image Zone software.
When I send a fax, I receive an error message saying the memory is full
SolutionIf you are sending a fax and receive a message on the color graphics displayindicating the memory is full, try the following:● If you are sending a multiple-page fax, try sending the pages separately, one
at a time.● Try changing the Lighter/Darker setting to either a lighter or darker setting and
resending the fax. For information on changing the Lighter/Darker setting, seeChange the lighter/darker setting.
● If you are sending a black-and-white fax with Photo resolution, try pressingStart Color instead of Start Black.
Device update Several options are provided to update your HP all-in-one. Each involves downloading afile to your computer to start the Device Update Wizard. For example:● Based on advice from HP customer support you might access the HP support
website to retrieve an upgrade for your device.● A dialog might appear on your HP all-in-one color graphics display to direct you to
update your device.
Note If you are a Windows user, you can set the Software Update utility (part of theHP Image Zone software installed on your computer) to automatically search theHP support website for device updates at predetermined intervals. For moreinformation on the Software Update utility, see the onscreen HP Image ZoneHelp.
Device update (Windows) Use one of the following to retrieve an update for your device:● Use your Web browser to download an update for your HP all-in-one from
www.hp.com/support. The file will be a self-extracting executable with theextension .exe. When you double-click the .exe file, the Device Update Wizardopens on your computer.
● Use the Software Update utility to automatically search the HP support website fordevice updates at predetermined intervals.
Note After the Software Update utility is installed on your computer, it searchesfor device updates. If you do not have the latest version of the SoftwareUpdate utility at the time of install, a dialog appears on your computerprompting you to upgrade. Accept the upgrade.
User Guide 181
Troubleshooting information
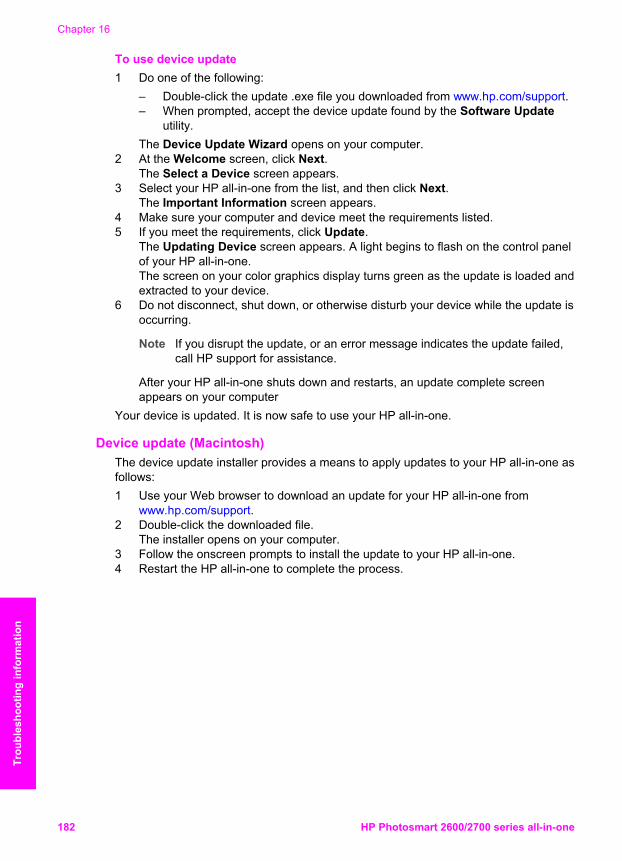
To use device update1 Do one of the following:
– Double-click the update .exe file you downloaded from www.hp.com/support.– When prompted, accept the device update found by the Software Update
utility.The Device Update Wizard opens on your computer.
2 At the Welcome screen, click Next.The Select a Device screen appears.
3 Select your HP all-in-one from the list, and then click Next.The Important Information screen appears.
4 Make sure your computer and device meet the requirements listed.5 If you meet the requirements, click Update.
The Updating Device screen appears. A light begins to flash on the control panelof your HP all-in-one.The screen on your color graphics display turns green as the update is loaded andextracted to your device.
6 Do not disconnect, shut down, or otherwise disturb your device while the update isoccurring.
Note If you disrupt the update, or an error message indicates the update failed,call HP support for assistance.
After your HP all-in-one shuts down and restarts, an update complete screenappears on your computer
Your device is updated. It is now safe to use your HP all-in-one.
Device update (Macintosh) The device update installer provides a means to apply updates to your HP all-in-one asfollows:1 Use your Web browser to download an update for your HP all-in-one from
www.hp.com/support.2 Double-click the downloaded file.
The installer opens on your computer.3 Follow the onscreen prompts to install the update to your HP all-in-one.4 Restart the HP all-in-one to complete the process.
Chapter 16
182 HP Photosmart 2600/2700 series all-in-one
Trou
bles
hoot
ing
info
rmat
ion
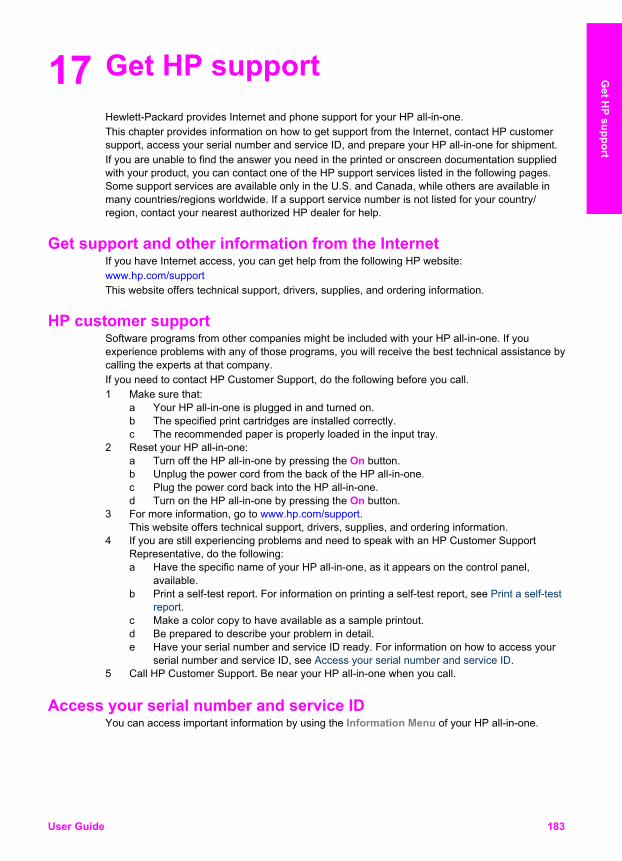
17 Get HP supportHewlett-Packard provides Internet and phone support for your HP all-in-one.This chapter provides information on how to get support from the Internet, contact HP customersupport, access your serial number and service ID, and prepare your HP all-in-one for shipment.If you are unable to find the answer you need in the printed or onscreen documentation suppliedwith your product, you can contact one of the HP support services listed in the following pages.Some support services are available only in the U.S. and Canada, while others are available inmany countries/regions worldwide. If a support service number is not listed for your country/region, contact your nearest authorized HP dealer for help.
Get support and other information from the Internet If you have Internet access, you can get help from the following HP website:www.hp.com/supportThis website offers technical support, drivers, supplies, and ordering information.
HP customer support Software programs from other companies might be included with your HP all-in-one. If youexperience problems with any of those programs, you will receive the best technical assistance bycalling the experts at that company.If you need to contact HP Customer Support, do the following before you call.1 Make sure that:
a Your HP all-in-one is plugged in and turned on.b The specified print cartridges are installed correctly.c The recommended paper is properly loaded in the input tray.
2 Reset your HP all-in-one:a Turn off the HP all-in-one by pressing the On button.b Unplug the power cord from the back of the HP all-in-one.c Plug the power cord back into the HP all-in-one.d Turn on the HP all-in-one by pressing the On button.
3 For more information, go to www.hp.com/support.This website offers technical support, drivers, supplies, and ordering information.
4 If you are still experiencing problems and need to speak with an HP Customer SupportRepresentative, do the following:a Have the specific name of your HP all-in-one, as it appears on the control panel,
available.b Print a self-test report. For information on printing a self-test report, see Print a self-test
report.c Make a color copy to have available as a sample printout.d Be prepared to describe your problem in detail.e Have your serial number and service ID ready. For information on how to access your
serial number and service ID, see Access your serial number and service ID.5 Call HP Customer Support. Be near your HP all-in-one when you call.
Access your serial number and service ID You can access important information by using the Information Menu of your HP all-in-one.
User Guide 183
Get H
P support

Note If your HP all-in-one is not turning on, you can view the serial number by looking at the topsticker above the rear USB port. The serial number is the 10-character code in the upperleft corner of the sticker.
1 Press and hold OK. While holding OK, press 4. This displays the Information Menu.2 Press until Model Number appears and then press OK. This displays the service ID.
Write down the complete service ID.3 Press Cancel and then until Serial Number appears.4 Press OK. This displays the serial number.
Write down the complete serial number.5 Press Cancel to exit the Information Menu.
Call in North America during warranty Call 1-800-474-6836 (1-800-HP invent). US phone support is available in both English andSpanish languages 24 hours a day, 7 days a week (days and hours of support may changewithout notice). This service is free during the warranty period. A fee may apply outside thewarranty period.
Call elsewhere in the world The numbers listed below are current as of the publication date of this guide. For a list of currentinternational HP Support Service numbers, go to www.hp.com/support and choose your owncountry/region or language.You can call the HP support center in the following countries/regions. If your country/region is notlisted, contact your local dealer or nearest HP Sales and Support Office to find out how to obtainservices.Support service is free during the warranty period; however, your standard long-distance phonecharges will apply. In some cases, a flat fee per single incident will also apply.For phone support in Europe, please check for the details and conditions of phone support in yourcountry/region by going to www.hp.com/support.Alternatively, you can ask your dealer or call HP at the phone number provided in this guide.As part of our constant efforts to improve our phone support service, we advise you to check ourwebsite on a regular basis for new information regarding service features and delivery.
Country/Region HP technical support Country/Region HP technical support
Algeria1 +213 61 56 45 43 Lebanon +971 4 883 8454
Argentina (54)11-4778-8380, 0-810-555-5520
Luxembourg (French) 900 40 006
Australia during warranty 131047 Luxembourg (German) 900 40 007
Australia post-warranty(per-call charge)
1902 910 910 Malaysia 1-800-805405
Austria +43 1 86332 1000 Mexico 01-800-472-6684
Bahrain 800 171 Mexico (Mexico City) (55) 5258-9922
Bangladesh fax to: +65-6275-6707 Middle East +971 4 366 2020
Belgium (Dutch) +32 070 300 005 Morocco1 +212 22 404747
Belgium (French) +32 070 300 004 Netherlands (0.10 Euro/min.)
0900 2020 165
Chapter 17
184 HP Photosmart 2600/2700 series all-in-one
Get
HP
supp
ort
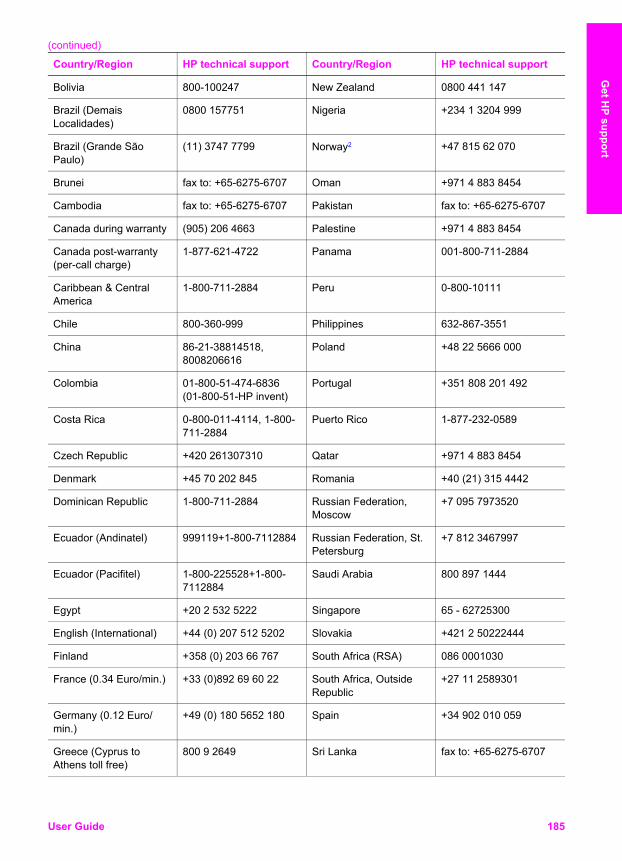
Country/Region HP technical support Country/Region HP technical support
Bolivia 800-100247 New Zealand 0800 441 147
Brazil (DemaisLocalidades)
0800 157751 Nigeria +234 1 3204 999
Brazil (Grande SãoPaulo)
(11) 3747 7799 Norway2 +47 815 62 070
Brunei fax to: +65-6275-6707 Oman +971 4 883 8454
Cambodia fax to: +65-6275-6707 Pakistan fax to: +65-6275-6707
Canada during warranty (905) 206 4663 Palestine +971 4 883 8454
Canada post-warranty(per-call charge)
1-877-621-4722 Panama 001-800-711-2884
Caribbean & CentralAmerica
1-800-711-2884 Peru 0-800-10111
Chile 800-360-999 Philippines 632-867-3551
China 86-21-38814518,8008206616
Poland +48 22 5666 000
Colombia 01-800-51-474-6836(01-800-51-HP invent)
Portugal +351 808 201 492
Costa Rica 0-800-011-4114, 1-800-711-2884
Puerto Rico 1-877-232-0589
Czech Republic +420 261307310 Qatar +971 4 883 8454
Denmark +45 70 202 845 Romania +40 (21) 315 4442
Dominican Republic 1-800-711-2884 Russian Federation,Moscow
+7 095 7973520
Ecuador (Andinatel) 999119+1-800-7112884 Russian Federation, St.Petersburg
+7 812 3467997
Ecuador (Pacifitel) 1-800-225528+1-800-7112884
Saudi Arabia 800 897 1444
Egypt +20 2 532 5222 Singapore 65 - 62725300
English (International) +44 (0) 207 512 5202 Slovakia +421 2 50222444
Finland +358 (0) 203 66 767 South Africa (RSA) 086 0001030
France (0.34 Euro/min.) +33 (0)892 69 60 22 South Africa, OutsideRepublic
+27 11 2589301
Germany (0.12 Euro/min.)
+49 (0) 180 5652 180 Spain +34 902 010 059
Greece (Cyprus toAthens toll free)
800 9 2649 Sri Lanka fax to: +65-6275-6707
(continued)
User Guide 185
Get H
P support
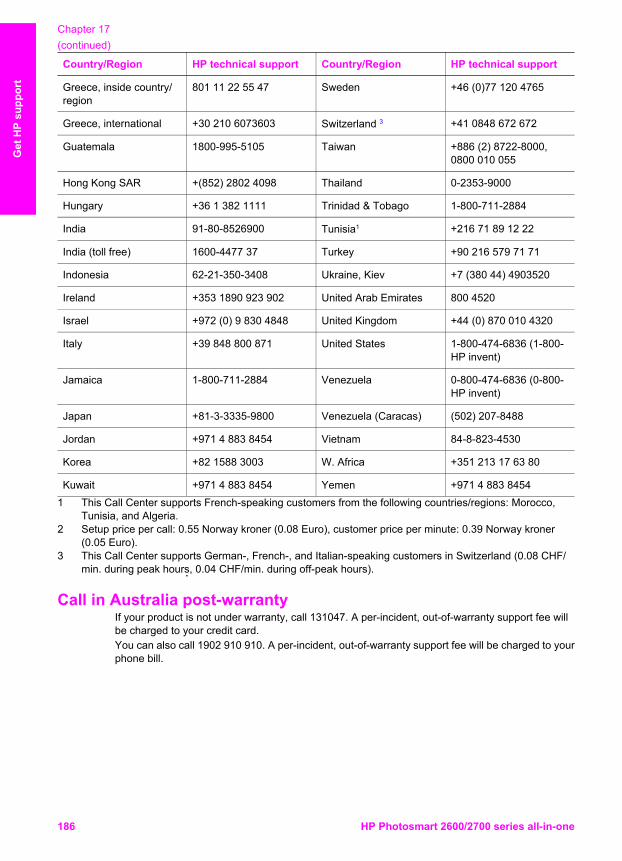
Country/Region HP technical support Country/Region HP technical support
Greece, inside country/region
801 11 22 55 47 Sweden +46 (0)77 120 4765
Greece, international +30 210 6073603 Switzerland 3 +41 0848 672 672
Guatemala 1800-995-5105 Taiwan +886 (2) 8722-8000,0800 010 055
Hong Kong SAR +(852) 2802 4098 Thailand 0-2353-9000
Hungary +36 1 382 1111 Trinidad & Tobago 1-800-711-2884
India 91-80-8526900 Tunisia1 +216 71 89 12 22
India (toll free) 1600-4477 37 Turkey +90 216 579 71 71
Indonesia 62-21-350-3408 Ukraine, Kiev +7 (380 44) 4903520
Ireland +353 1890 923 902 United Arab Emirates 800 4520
Israel +972 (0) 9 830 4848 United Kingdom +44 (0) 870 010 4320
Italy +39 848 800 871 United States 1-800-474-6836 (1-800-HP invent)
Jamaica 1-800-711-2884 Venezuela 0-800-474-6836 (0-800-HP invent)
Japan +81-3-3335-9800 Venezuela (Caracas) (502) 207-8488
Jordan +971 4 883 8454 Vietnam 84-8-823-4530
Korea +82 1588 3003 W. Africa +351 213 17 63 80
Kuwait +971 4 883 8454 Yemen +971 4 883 84541 This Call Center supports French-speaking customers from the following countries/regions: Morocco,
Tunisia, and Algeria.2 Setup price per call: 0.55 Norway kroner (0.08 Euro), customer price per minute: 0.39 Norway kroner
(0.05 Euro).3 This Call Center supports German-, French-, and Italian-speaking customers in Switzerland (0.08 CHF/
min. during peak hours, 0.04 CHF/min. during off-peak hours).
Call in Australia post-warranty If your product is not under warranty, call 131047. A per-incident, out-of-warranty support fee willbe charged to your credit card.You can also call 1902 910 910. A per-incident, out-of-warranty support fee will be charged to yourphone bill.
Chapter 17(continued)
186 HP Photosmart 2600/2700 series all-in-one
Get
HP
supp
ort
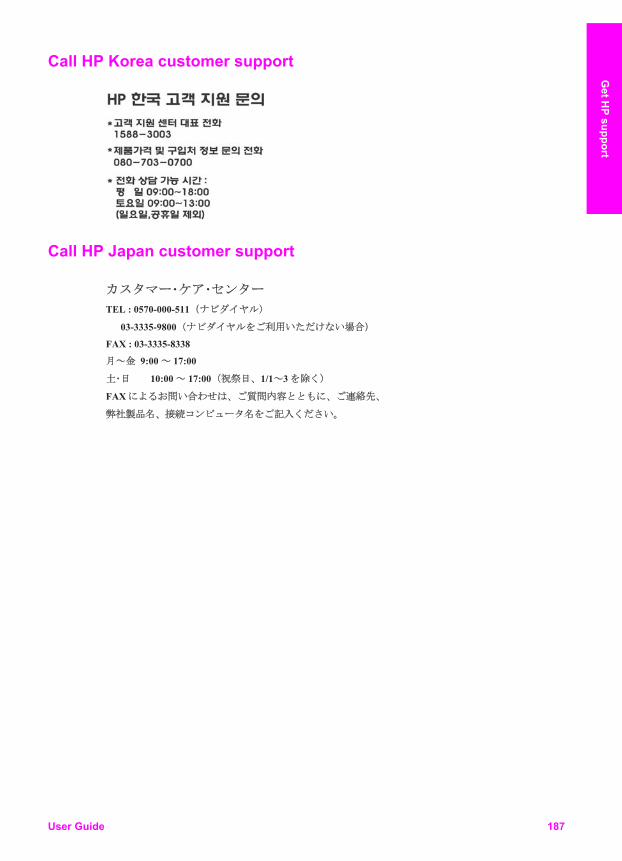
Call HP Korea customer support
Call HP Japan customer support
TEL : 0570-000-511
03-3335-9800
FAX : 03-3335-8338
9:00 17:00
10:00 17:00 1/1 3
FAX
User Guide 187
Get H
P support
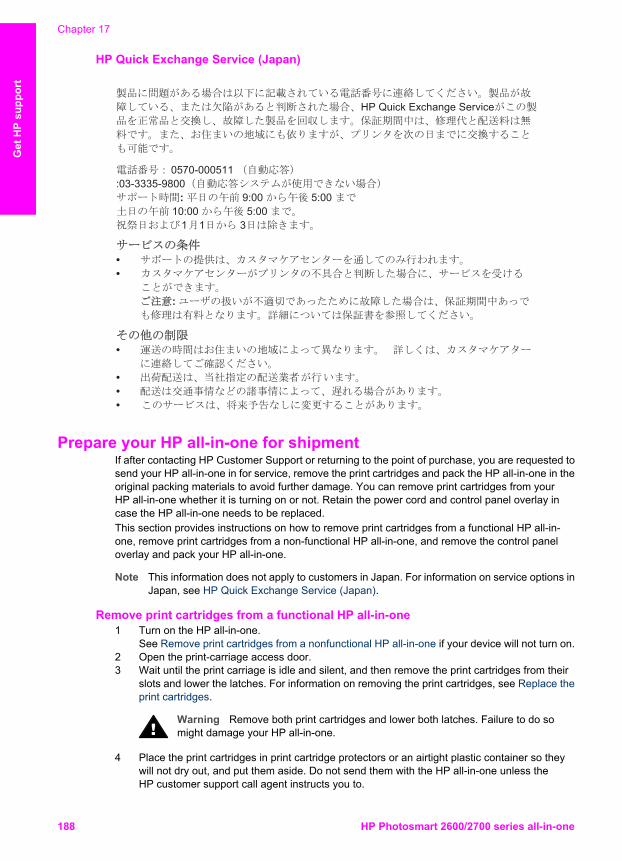
HP Quick Exchange Service (Japan)
HP Quick Exchange Service
0570-000511 :03-3335 -9800
: 9:00 5:00 10:00 5:00
1 1 3
:
Prepare your HP all-in-one for shipment If after contacting HP Customer Support or returning to the point of purchase, you are requested tosend your HP all-in-one in for service, remove the print cartridges and pack the HP all-in-one in theoriginal packing materials to avoid further damage. You can remove print cartridges from yourHP all-in-one whether it is turning on or not. Retain the power cord and control panel overlay incase the HP all-in-one needs to be replaced.This section provides instructions on how to remove print cartridges from a functional HP all-in-one, remove print cartridges from a non-functional HP all-in-one, and remove the control paneloverlay and pack your HP all-in-one.
Note This information does not apply to customers in Japan. For information on service options inJapan, see HP Quick Exchange Service (Japan).
Remove print cartridges from a functional HP all-in-one1 Turn on the HP all-in-one.
See Remove print cartridges from a nonfunctional HP all-in-one if your device will not turn on.2 Open the print-carriage access door.3 Wait until the print carriage is idle and silent, and then remove the print cartridges from their
slots and lower the latches. For information on removing the print cartridges, see Replace theprint cartridges.
Warning Remove both print cartridges and lower both latches. Failure to do somight damage your HP all-in-one.
4 Place the print cartridges in print cartridge protectors or an airtight plastic container so theywill not dry out, and put them aside. Do not send them with the HP all-in-one unless theHP customer support call agent instructs you to.
Chapter 17
188 HP Photosmart 2600/2700 series all-in-one
Get
HP
supp
ort
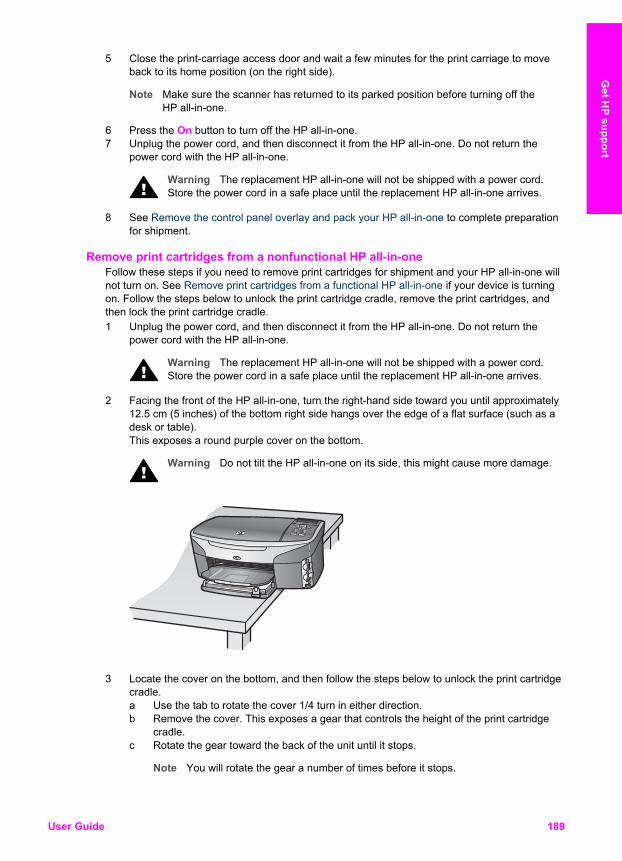
5 Close the print-carriage access door and wait a few minutes for the print carriage to moveback to its home position (on the right side).
Note Make sure the scanner has returned to its parked position before turning off theHP all-in-one.
6 Press the On button to turn off the HP all-in-one.7 Unplug the power cord, and then disconnect it from the HP all-in-one. Do not return the
power cord with the HP all-in-one.
Warning The replacement HP all-in-one will not be shipped with a power cord.Store the power cord in a safe place until the replacement HP all-in-one arrives.
8 See Remove the control panel overlay and pack your HP all-in-one to complete preparationfor shipment.
Remove print cartridges from a nonfunctional HP all-in-oneFollow these steps if you need to remove print cartridges for shipment and your HP all-in-one willnot turn on. See Remove print cartridges from a functional HP all-in-one if your device is turningon. Follow the steps below to unlock the print cartridge cradle, remove the print cartridges, andthen lock the print cartridge cradle.1 Unplug the power cord, and then disconnect it from the HP all-in-one. Do not return the
power cord with the HP all-in-one.
Warning The replacement HP all-in-one will not be shipped with a power cord.Store the power cord in a safe place until the replacement HP all-in-one arrives.
2 Facing the front of the HP all-in-one, turn the right-hand side toward you until approximately12.5 cm (5 inches) of the bottom right side hangs over the edge of a flat surface (such as adesk or table).This exposes a round purple cover on the bottom.
Warning Do not tilt the HP all-in-one on its side, this might cause more damage.
3 Locate the cover on the bottom, and then follow the steps below to unlock the print cartridgecradle.a Use the tab to rotate the cover 1/4 turn in either direction.b Remove the cover. This exposes a gear that controls the height of the print cartridge
cradle.c Rotate the gear toward the back of the unit until it stops.
Note You will rotate the gear a number of times before it stops.
User Guide 189
Get H
P support
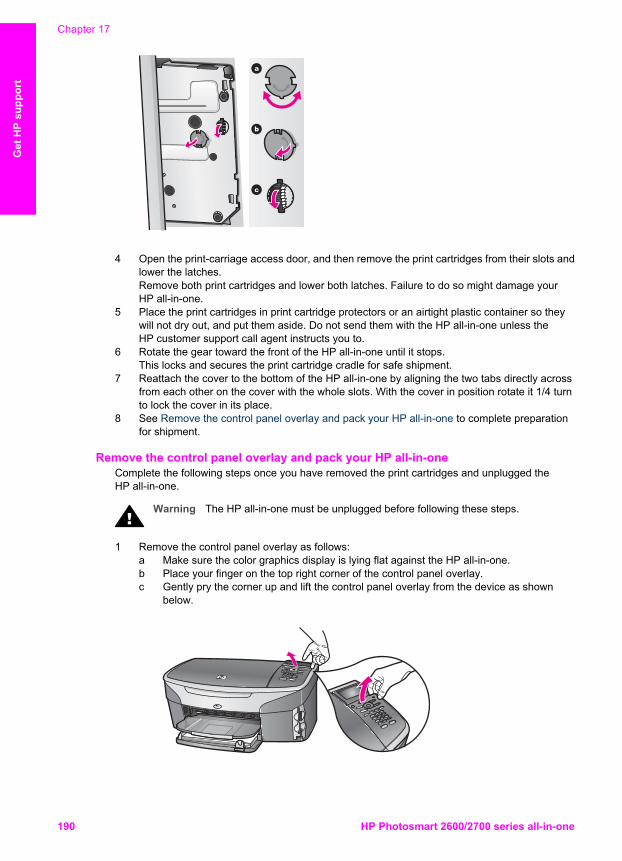
4 Open the print-carriage access door, and then remove the print cartridges from their slots andlower the latches.Remove both print cartridges and lower both latches. Failure to do so might damage yourHP all-in-one.
5 Place the print cartridges in print cartridge protectors or an airtight plastic container so theywill not dry out, and put them aside. Do not send them with the HP all-in-one unless theHP customer support call agent instructs you to.
6 Rotate the gear toward the front of the HP all-in-one until it stops.This locks and secures the print cartridge cradle for safe shipment.
7 Reattach the cover to the bottom of the HP all-in-one by aligning the two tabs directly acrossfrom each other on the cover with the whole slots. With the cover in position rotate it 1/4 turnto lock the cover in its place.
8 See Remove the control panel overlay and pack your HP all-in-one to complete preparationfor shipment.
Remove the control panel overlay and pack your HP all-in-oneComplete the following steps once you have removed the print cartridges and unplugged theHP all-in-one.
Warning The HP all-in-one must be unplugged before following these steps.
1 Remove the control panel overlay as follows:a Make sure the color graphics display is lying flat against the HP all-in-one.b Place your finger on the top right corner of the control panel overlay.c Gently pry the corner up and lift the control panel overlay from the device as shown
below.
Chapter 17
190 HP Photosmart 2600/2700 series all-in-one
Get
HP
supp
ort
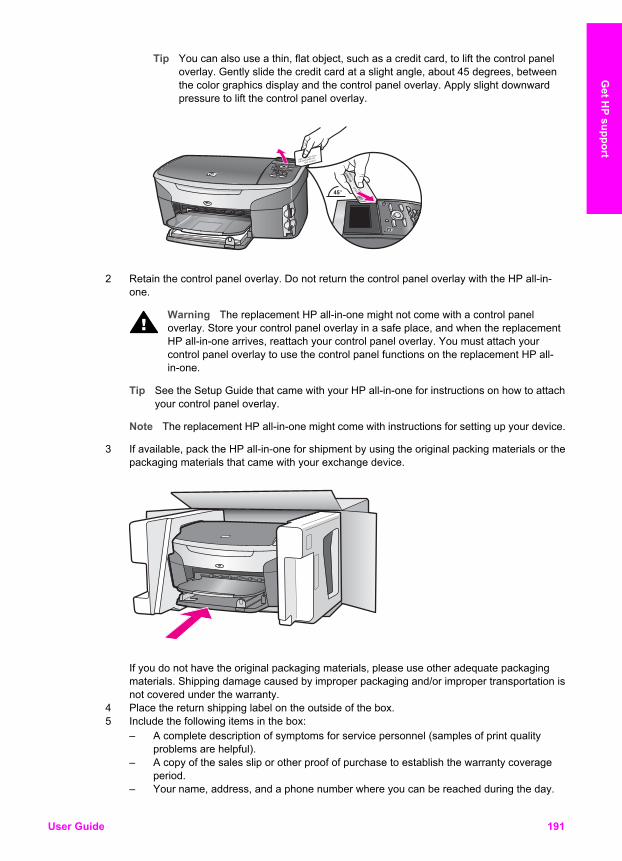
Tip You can also use a thin, flat object, such as a credit card, to lift the control paneloverlay. Gently slide the credit card at a slight angle, about 45 degrees, betweenthe color graphics display and the control panel overlay. Apply slight downwardpressure to lift the control panel overlay.
2 Retain the control panel overlay. Do not return the control panel overlay with the HP all-in-one.
Warning The replacement HP all-in-one might not come with a control paneloverlay. Store your control panel overlay in a safe place, and when the replacementHP all-in-one arrives, reattach your control panel overlay. You must attach yourcontrol panel overlay to use the control panel functions on the replacement HP all-in-one.
Tip See the Setup Guide that came with your HP all-in-one for instructions on how to attachyour control panel overlay.
Note The replacement HP all-in-one might come with instructions for setting up your device.
3 If available, pack the HP all-in-one for shipment by using the original packing materials or thepackaging materials that came with your exchange device.
If you do not have the original packaging materials, please use other adequate packagingmaterials. Shipping damage caused by improper packaging and/or improper transportation isnot covered under the warranty.
4 Place the return shipping label on the outside of the box.5 Include the following items in the box:
– A complete description of symptoms for service personnel (samples of print qualityproblems are helpful).
– A copy of the sales slip or other proof of purchase to establish the warranty coverageperiod.
– Your name, address, and a phone number where you can be reached during the day.
User Guide 191
Get H
P support

Chapter 17
192 HP Photosmart 2600/2700 series all-in-one
Get
HP
supp
ort
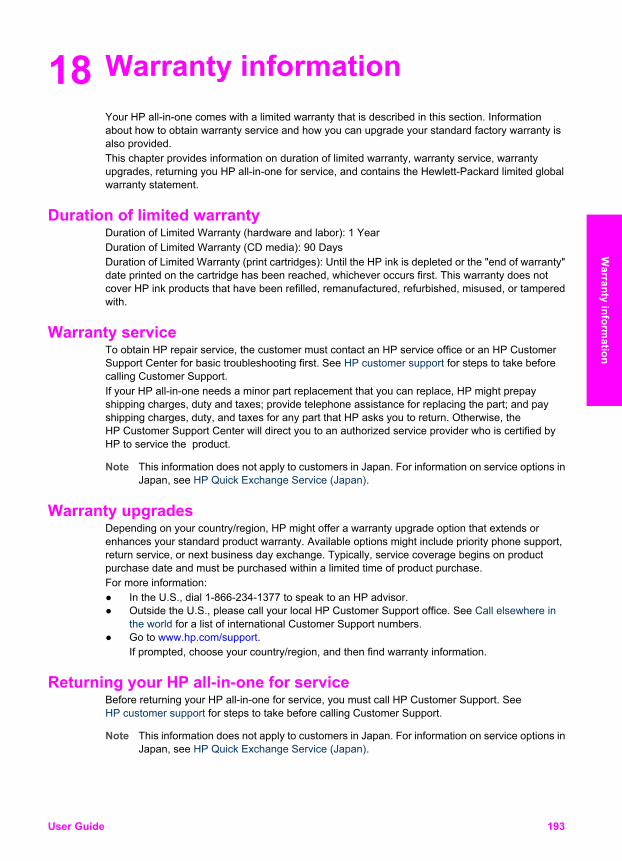
18 Warranty information Your HP all-in-one comes with a limited warranty that is described in this section. Informationabout how to obtain warranty service and how you can upgrade your standard factory warranty isalso provided.This chapter provides information on duration of limited warranty, warranty service, warrantyupgrades, returning you HP all-in-one for service, and contains the Hewlett-Packard limited globalwarranty statement.
Duration of limited warrantyDuration of Limited Warranty (hardware and labor): 1 YearDuration of Limited Warranty (CD media): 90 DaysDuration of Limited Warranty (print cartridges): Until the HP ink is depleted or the "end of warranty"date printed on the cartridge has been reached, whichever occurs first. This warranty does notcover HP ink products that have been refilled, remanufactured, refurbished, misused, or tamperedwith.
Warranty serviceTo obtain HP repair service, the customer must contact an HP service office or an HP CustomerSupport Center for basic troubleshooting first. See HP customer support for steps to take beforecalling Customer Support.If your HP all-in-one needs a minor part replacement that you can replace, HP might prepayshipping charges, duty and taxes; provide telephone assistance for replacing the part; and payshipping charges, duty, and taxes for any part that HP asks you to return. Otherwise, theHP Customer Support Center will direct you to an authorized service provider who is certified byHP to service the product.
Note This information does not apply to customers in Japan. For information on service options inJapan, see HP Quick Exchange Service (Japan).
Warranty upgrades Depending on your country/region, HP might offer a warranty upgrade option that extends orenhances your standard product warranty. Available options might include priority phone support,return service, or next business day exchange. Typically, service coverage begins on productpurchase date and must be purchased within a limited time of product purchase.For more information:● In the U.S., dial 1-866-234-1377 to speak to an HP advisor.● Outside the U.S., please call your local HP Customer Support office. See Call elsewhere in
the world for a list of international Customer Support numbers.● Go to www.hp.com/support.
If prompted, choose your country/region, and then find warranty information.
Returning your HP all-in-one for serviceBefore returning your HP all-in-one for service, you must call HP Customer Support. SeeHP customer support for steps to take before calling Customer Support.
Note This information does not apply to customers in Japan. For information on service options inJapan, see HP Quick Exchange Service (Japan).
User Guide 193
Warranty inform
ation
Hewlett-Packard limited global warranty statementThe following information specifies the HP limited global warranty.
Extent of limited warrantyHewlett-Packard ("HP") warrants to the end-user customer ("Customer") that each HP Photosmart2600/2700 series all-in-one product ("Product"), including related software, accessories, media,and supplies, shall be free from defects in material and workmanship for the duration, whichbegins on the date of purchase by the Customer.For each hardware Product, the duration of HP's limited warranty is one year for parts and oneyear for labor. For all other Products, the duration of HP's limited warranty for both parts and laboris ninety days.For each software Product, HP's limited warranty applies only to a failure to execute programminginstructions. HP does not warrant that the operation of any Product shall be uninterrupted or errorfree.HP's limited warranty covers only those defects which arise as a result of normal use of a Product,and does not cover any other problems, including those which arise as a result of (a) impropermaintenance or modification, (b) software, accessories, media, or supplies not provided orsupported by HP, or (c) operation outside the Product's specifications.For any hardware Product, the use of a non-HP ink cartridge or a refilled ink cartridge does notaffect either the warranty to the Customer or any HP support contract with the Customer.However, if Product failure or damage is attributable to the use of a non-HP or refilled inkcartridge, HP shall charge its standard labor and materials charges to service the Product for thefailure or damage.If HP receives, during the applicable warranty period, notice of a defect in any Product, HP shalleither repair or replace the defective Product, at HP's option. Where labor charges are not coveredby HP's limited warranty, repairs shall be at HP's standard charges for labor.If HP is unable to repair or replace, as applicable, a defective Product which is covered by HP'swarranty, HP shall, within a reasonable time after being notified of the defect, refund the purchaseprice for the Product.HP shall have no obligation to repair, replace, or refund until the Customer returns the defectiveProduct to HP.Any replacement product may be either new or like-new, provided that it has functionality at leastequal to that of the Product being replaced.HP products, including each Product, may contain remanufactured parts, components, or materialsequivalent to new in performance.HP's limited warranty for each Product is valid in any country/region or locality where the coveredHP product is distributed by HP. Contracts for additional warranty service, such as on-site service,are available from any authorized HP service facility in countries/regions where the product isdistributed by HP or by an authorized representative.
Limitations of warrantyTO THE EXTENT ALLOWED BY LOCAL LAW, NEITHER HP NOR ITS THIRD PARTYSUPPLIERS MAKE ANY OTHER WARRANTY OR CONDITION OF ANY KIND, WHETHEREXPRESS OR IMPLIED, WARRANTIES OR CONDITIONS OF MERCHANTABILITY,SATISFACTORY QUALITY, AND FITNESS FOR A PARTICULAR PURPOSE.
Limitations of liabilityTo the extent allowed by local law, the remedies provided in this Limited Warranty Statement arethe Customer's sole and exclusive remedies.TO THE EXTENT ALLOWED BY LOCAL LAW, EXCEPT FOR THE OBLIGATIONSSPECIFICALLY SET FORTH IN THIS LIMITED WARRANTY STATEMENT, IN NO EVENT SHALLHP OR ITS THIRD PARTY SUPPLIERS BE LIABLE FOR DIRECT, INDIRECT, SPECIAL,INCIDENTAL, OR CONSEQUENTIAL DAMAGES, WHETHER BASED ON CONTRACT, TORT,
Chapter 18
194 HP Photosmart 2600/2700 series all-in-one
War
rant
y in
form
atio
n
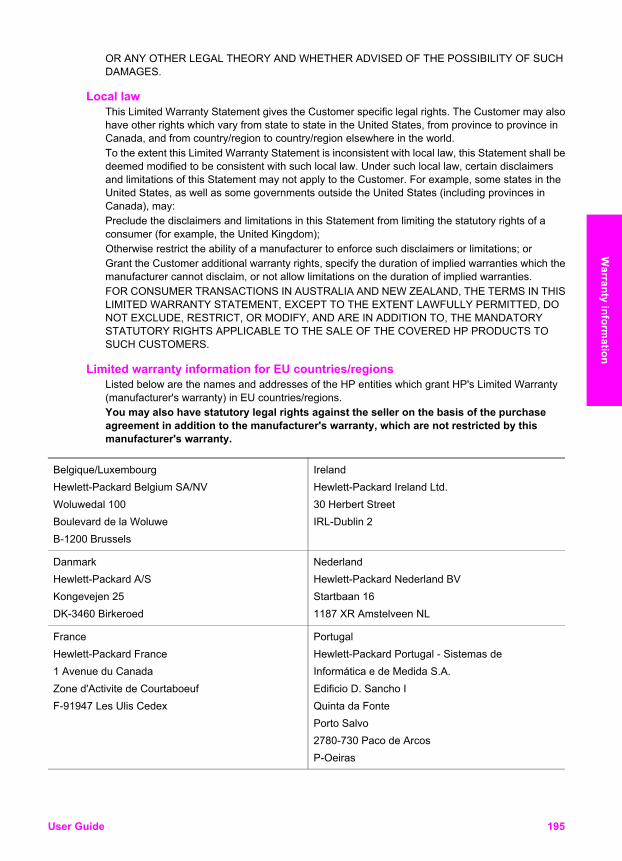
OR ANY OTHER LEGAL THEORY AND WHETHER ADVISED OF THE POSSIBILITY OF SUCHDAMAGES.
Local lawThis Limited Warranty Statement gives the Customer specific legal rights. The Customer may alsohave other rights which vary from state to state in the United States, from province to province inCanada, and from country/region to country/region elsewhere in the world.To the extent this Limited Warranty Statement is inconsistent with local law, this Statement shall bedeemed modified to be consistent with such local law. Under such local law, certain disclaimersand limitations of this Statement may not apply to the Customer. For example, some states in theUnited States, as well as some governments outside the United States (including provinces inCanada), may:Preclude the disclaimers and limitations in this Statement from limiting the statutory rights of aconsumer (for example, the United Kingdom);Otherwise restrict the ability of a manufacturer to enforce such disclaimers or limitations; orGrant the Customer additional warranty rights, specify the duration of implied warranties which themanufacturer cannot disclaim, or not allow limitations on the duration of implied warranties.FOR CONSUMER TRANSACTIONS IN AUSTRALIA AND NEW ZEALAND, THE TERMS IN THISLIMITED WARRANTY STATEMENT, EXCEPT TO THE EXTENT LAWFULLY PERMITTED, DONOT EXCLUDE, RESTRICT, OR MODIFY, AND ARE IN ADDITION TO, THE MANDATORYSTATUTORY RIGHTS APPLICABLE TO THE SALE OF THE COVERED HP PRODUCTS TOSUCH CUSTOMERS.
Limited warranty information for EU countries/regionsListed below are the names and addresses of the HP entities which grant HP's Limited Warranty(manufacturer's warranty) in EU countries/regions.You may also have statutory legal rights against the seller on the basis of the purchaseagreement in addition to the manufacturer's warranty, which are not restricted by thismanufacturer's warranty.
Belgique/LuxembourgHewlett-Packard Belgium SA/NVWoluwedal 100Boulevard de la WoluweB-1200 Brussels
IrelandHewlett-Packard Ireland Ltd.30 Herbert StreetIRL-Dublin 2
DanmarkHewlett-Packard A/SKongevejen 25DK-3460 Birkeroed
NederlandHewlett-Packard Nederland BVStartbaan 161187 XR Amstelveen NL
FranceHewlett-Packard France1 Avenue du CanadaZone d'Activite de CourtaboeufF-91947 Les Ulis Cedex
PortugalHewlett-Packard Portugal - Sistemas deInformática e de Medida S.A.Edificio D. Sancho IQuinta da FontePorto Salvo2780-730 Paco de ArcosP-Oeiras
User Guide 195
Warranty inform
ation
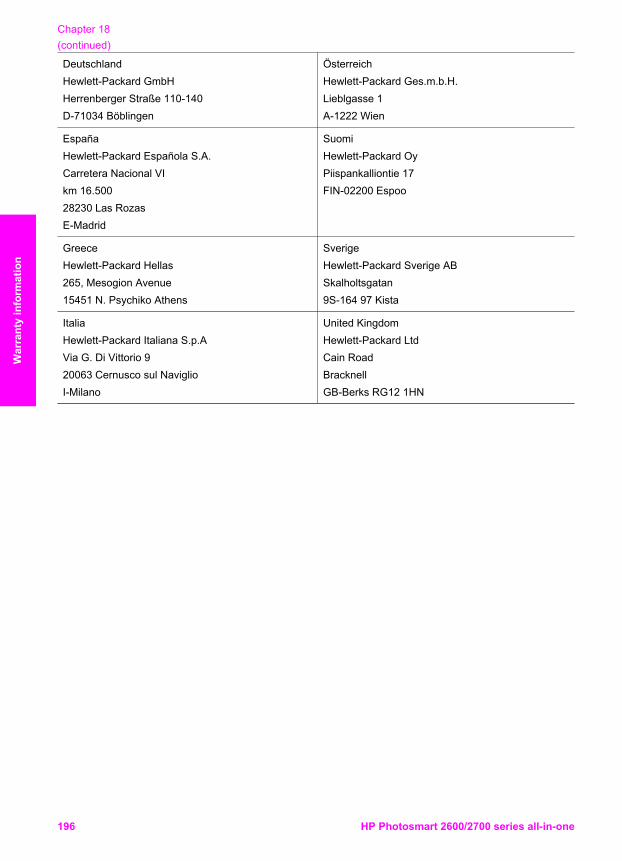
DeutschlandHewlett-Packard GmbHHerrenberger Straße 110-140D-71034 Böblingen
ÖsterreichHewlett-Packard Ges.m.b.H.Lieblgasse 1A-1222 Wien
EspañaHewlett-Packard Española S.A.Carretera Nacional VIkm 16.50028230 Las RozasE-Madrid
SuomiHewlett-Packard OyPiispankalliontie 17FIN-02200 Espoo
GreeceHewlett-Packard Hellas265, Mesogion Avenue15451 N. Psychiko Athens
SverigeHewlett-Packard Sverige ABSkalholtsgatan9S-164 97 Kista
ItaliaHewlett-Packard Italiana S.p.AVia G. Di Vittorio 920063 Cernusco sul NaviglioI-Milano
United KingdomHewlett-Packard LtdCain RoadBracknellGB-Berks RG12 1HN
Chapter 18(continued)
196 HP Photosmart 2600/2700 series all-in-one
War
rant
y in
form
atio
n
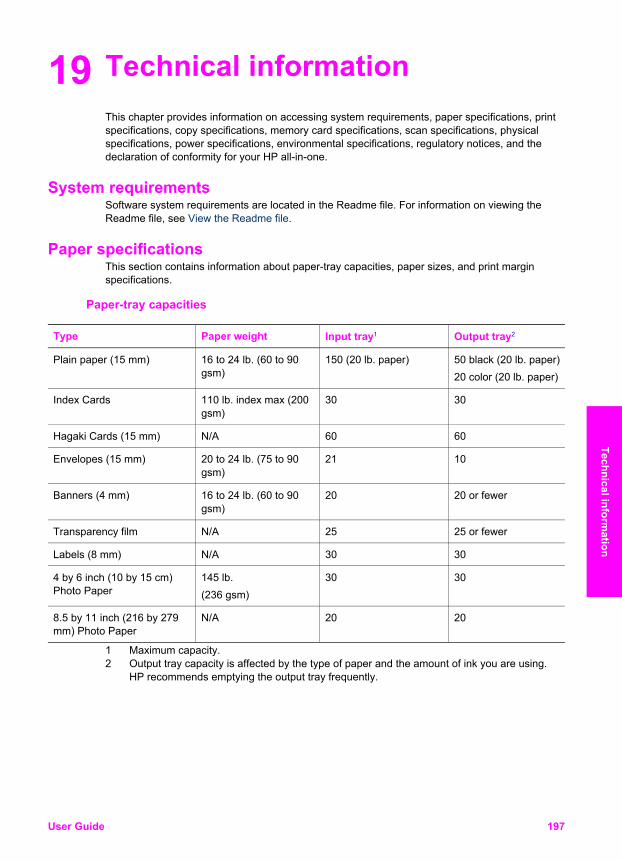
19 Technical informationThis chapter provides information on accessing system requirements, paper specifications, printspecifications, copy specifications, memory card specifications, scan specifications, physicalspecifications, power specifications, environmental specifications, regulatory notices, and thedeclaration of conformity for your HP all-in-one.
System requirements Software system requirements are located in the Readme file. For information on viewing theReadme file, see View the Readme file.
Paper specifications This section contains information about paper-tray capacities, paper sizes, and print marginspecifications.
Paper-tray capacities
Type Paper weight Input tray1 Output tray2
Plain paper (15 mm) 16 to 24 lb. (60 to 90gsm)
150 (20 lb. paper) 50 black (20 lb. paper)20 color (20 lb. paper)
Index Cards 110 lb. index max (200gsm)
30 30
Hagaki Cards (15 mm) N/A 60 60
Envelopes (15 mm) 20 to 24 lb. (75 to 90gsm)
21 10
Banners (4 mm) 16 to 24 lb. (60 to 90gsm)
20 20 or fewer
Transparency film N/A 25 25 or fewer
Labels (8 mm) N/A 30 30
4 by 6 inch (10 by 15 cm)Photo Paper
145 lb.(236 gsm)
30 30
8.5 by 11 inch (216 by 279mm) Photo Paper
N/A 20 20
1 Maximum capacity.2 Output tray capacity is affected by the type of paper and the amount of ink you are using.
HP recommends emptying the output tray frequently.
User Guide 197
Technical information

Paper sizes
Type Size
Paper Letter: 216 by 279 mm (8.5 by 11 inches)A4: 210 by 297 mm (8.27 by 11.7 inches)A5: 148 by 210 mm (5.8 by 8.3 inches)Executive: 184.2 by 266.7 mm (7.25 by 10.5 inches)Legal1: 216 by 356 mm (8.5 by 14 inches)
Banner HP Banner Paper, 90 g/m2 (24 lb. Bond), A (C1820A) and A4 SizeThird Party Z-Fold Computer Paper, 60-90 g/m2 (16-24 lb. Bond), A andA4 size, with tractor perforations removed
Envelopes U.S. #10: 104 by 241 mm (4.125 by 9.5 inches)A2: 111 by 146 mm (4.4 by 5.8 inches)DL: 110 by 220 mm (4.3 by 8.7 inches)C6: 114 by 162 mm (4.5 by 6.4 inches)
Transparency film Letter: 216 by 279 mm (8.5 by 11 inches)A4: 210 by 297 mm
Photo paper 102 by 152 mm (4 by 6 inches)127 by 178 mm (5 by 7 inches)Letter: 216 by 279 mm (8.5 by 11 inches)A4: 210 by 297 mm (8.27 by 11.7 inches)
Cards Index card: 76.2 by 127 mm (3 by 5 inches)Index card: 101 by 152 mm (4 by 6 inches)Index card: 127 by 203.2 mm (5 by 8 inches)127 by 178 mm (5 by 7 inches)A6: 105 by 148.5 mm (4.13 by 5.85 inches)Hagaki postcard: 100 by 148 mm (3.94 by 5.83 inches)
Labels Letter: 216 by 279 mm (8.5 by 11 inches)A4: 210 by 297 mm (8.27 by 11.7 inches)
Custom 76 by 127 mm up to 216 by 356 mm (3 by 5 inches up to 8.5 by 14inches)
1 20 lb. and up
Print margin specifications
Top (leadingedge)
Bottom (trailingedge)1
Left Right
U.S. (Letter, Legal) 1.8 mm (0.07inches)
3 mm (0.12 inches) 3.2 mm (0.13inches)
3.2 mm (0.13inches)
Executive 1.8 mm (0.07inches)
6 mm (0.24 inches) 3.2 mm (0.13inches)
3.2 mm (0.13inches)
Chapter 19
198 HP Photosmart 2600/2700 series all-in-one
Tech
nica
l inf
orm
atio
n
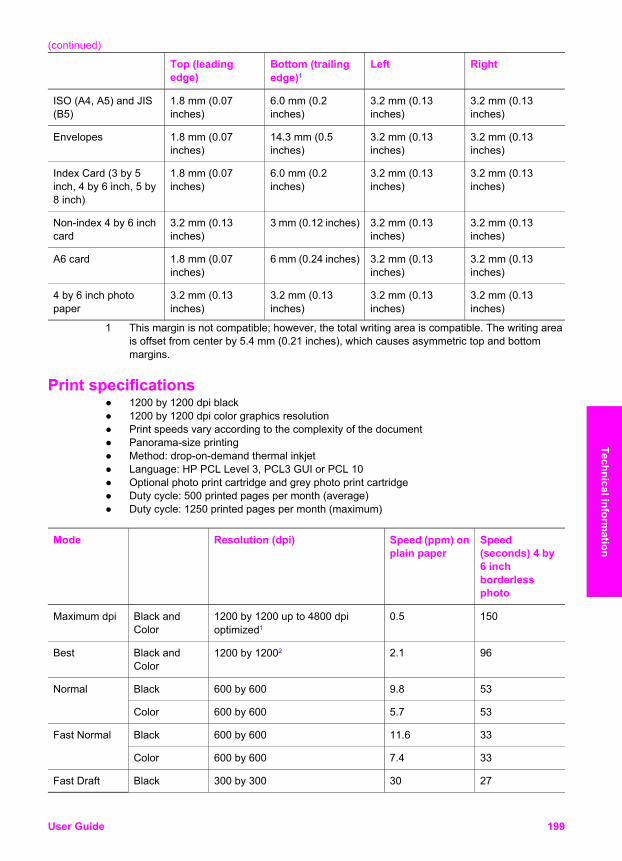
Top (leadingedge)
Bottom (trailingedge)1
Left Right
ISO (A4, A5) and JIS(B5)
1.8 mm (0.07inches)
6.0 mm (0.2inches)
3.2 mm (0.13inches)
3.2 mm (0.13inches)
Envelopes 1.8 mm (0.07inches)
14.3 mm (0.5inches)
3.2 mm (0.13inches)
3.2 mm (0.13inches)
Index Card (3 by 5inch, 4 by 6 inch, 5 by8 inch)
1.8 mm (0.07inches)
6.0 mm (0.2inches)
3.2 mm (0.13inches)
3.2 mm (0.13inches)
Non-index 4 by 6 inchcard
3.2 mm (0.13inches)
3 mm (0.12 inches) 3.2 mm (0.13inches)
3.2 mm (0.13inches)
A6 card 1.8 mm (0.07inches)
6 mm (0.24 inches) 3.2 mm (0.13inches)
3.2 mm (0.13inches)
4 by 6 inch photopaper
3.2 mm (0.13inches)
3.2 mm (0.13inches)
3.2 mm (0.13inches)
3.2 mm (0.13inches)
1 This margin is not compatible; however, the total writing area is compatible. The writing areais offset from center by 5.4 mm (0.21 inches), which causes asymmetric top and bottommargins.
Print specifications ● 1200 by 1200 dpi black● 1200 by 1200 dpi color graphics resolution● Print speeds vary according to the complexity of the document● Panorama-size printing● Method: drop-on-demand thermal inkjet● Language: HP PCL Level 3, PCL3 GUI or PCL 10● Optional photo print cartridge and grey photo print cartridge● Duty cycle: 500 printed pages per month (average)● Duty cycle: 1250 printed pages per month (maximum)
Mode Resolution (dpi) Speed (ppm) onplain paper
Speed(seconds) 4 by6 inchborderlessphoto
Maximum dpi Black andColor
1200 by 1200 up to 4800 dpioptimized1
0.5 150
Best Black andColor
1200 by 12002 2.1 96
Normal Black 600 by 600 9.8 53
Color 600 by 600 5.7 53
Fast Normal Black 600 by 600 11.6 33
Color 600 by 600 7.4 33
Fast Draft Black 300 by 300 30 27
(continued)
User Guide 199
Technical information

Mode Resolution (dpi) Speed (ppm) onplain paper
Speed(seconds) 4 by6 inchborderlessphoto
Color 300 by 300 20 27
1 Up to 4800 by 1200 optimized dpi color printing. Adding a photo print cartridge increasesprint quality
2 PhotoREt color printing with photo paper.
Copy specifications ● Digital image processing● Up to 99 copies from original (varies by model)● Digital zoom from 25 to 400% (varies by model)● Fit to page, Poster, Many on page● Up to 30 copies per minute black; 20 copies per minute color (varies by model)● Copy speeds vary according to the complexity of the document
Mode Speed (ppm) Print resolution (dpi) Scan resolution (dpi)
Best Black up to 0.8 1200 by 1200 1200 by 12001
Color up to 0.8 1200 by 1200 up to 4800dpi optimized1
1200 by 12001
Normal Black up to 9.8 600 by 600 300 by 300
Color up to 5.7 600 by 600 300 by 300
Fast Black up to 30 300 by 300 300 by 300
Color up to 20 300 by 300 300 by 300
1 On premium photo paper.
Fax specifications ● Walk-up black and white and color fax capability● Up to 75 speed dials (varies by model)● Up to 90-page memory (varies by model, based on ITU-T Test Image #1 at standard
resolution). More complicated pages or higher resolution will take longer and use morememory.
● Manual multiple-page fax● Automatic busy redial up to five times (varies by model)● Automatic no-answer redial one time (varies by model)● Confirmation and activity reports● CCITT/ITU Group 3 fax with Error Correction Mode● 33.6 Kbps transmission● 3 seconds per page speed at 33.6 Kbps (based on ITU-T Test Image #1 at standard
resolution). More complicated pages or higher resolution take longer and use more memory● Ring detect with automatic fax/answering machine switching
Photo (dpi) Fine (dpi) Standard (dpi)
Black 200 by 200 200 by 200 200 by 100
Chapter 19(continued)
200 HP Photosmart 2600/2700 series all-in-one
Tech
nica
l inf
orm
atio
n
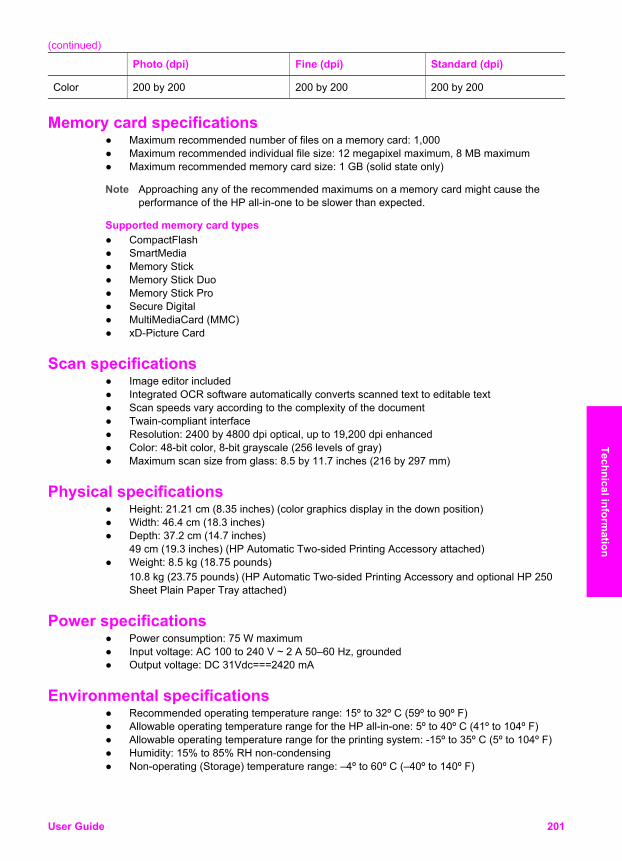
Photo (dpi) Fine (dpi) Standard (dpi)
Color 200 by 200 200 by 200 200 by 200
Memory card specifications ● Maximum recommended number of files on a memory card: 1,000● Maximum recommended individual file size: 12 megapixel maximum, 8 MB maximum● Maximum recommended memory card size: 1 GB (solid state only)
Note Approaching any of the recommended maximums on a memory card might cause theperformance of the HP all-in-one to be slower than expected.
Supported memory card types● CompactFlash● SmartMedia● Memory Stick● Memory Stick Duo● Memory Stick Pro● Secure Digital● MultiMediaCard (MMC)● xD-Picture Card
Scan specifications ● Image editor included● Integrated OCR software automatically converts scanned text to editable text● Scan speeds vary according to the complexity of the document● Twain-compliant interface● Resolution: 2400 by 4800 dpi optical, up to 19,200 dpi enhanced● Color: 48-bit color, 8-bit grayscale (256 levels of gray)● Maximum scan size from glass: 8.5 by 11.7 inches (216 by 297 mm)
Physical specifications ● Height: 21.21 cm (8.35 inches) (color graphics display in the down position)● Width: 46.4 cm (18.3 inches)● Depth: 37.2 cm (14.7 inches)
49 cm (19.3 inches) (HP Automatic Two-sided Printing Accessory attached)● Weight: 8.5 kg (18.75 pounds)
10.8 kg (23.75 pounds) (HP Automatic Two-sided Printing Accessory and optional HP 250Sheet Plain Paper Tray attached)
Power specifications ● Power consumption: 75 W maximum● Input voltage: AC 100 to 240 V ~ 2 A 50–60 Hz, grounded● Output voltage: DC 31Vdc===2420 mA
Environmental specifications ● Recommended operating temperature range: 15º to 32º C (59º to 90º F)● Allowable operating temperature range for the HP all-in-one: 5º to 40º C (41º to 104º F)● Allowable operating temperature range for the printing system: -15º to 35º C (5º to 104º F)● Humidity: 15% to 85% RH non-condensing● Non-operating (Storage) temperature range: –4º to 60º C (–40º to 140º F)
(continued)
User Guide 201
Technical information
● In the presence of high electromagnetic fields it is possible the output from the HP all-in-onemay be slightly distorted
● HP recommends using a USB cable less than or equal to 3 m (10 feet) in length to minimizeinjected noise due to potential high electromagnetic fields
Additional specificationsMemory: 16 MB ROM, 64 MB DRAMIf you have Internet access, you can get acoustic information from the HP website. Go to:www.hp.com/support.
Environmental product stewardship program This section provides information on protecting the environment; ozone production; energyconsumption; paper use; plastics; material safety data sheets; and recycling programs.This section contains information about environmental standards.
Protecting the environmentHewlett-Packard is committed to providing quality products in an environmentally sound manner.This product has been designed with several attributes to minimize impacts on our environment.For more information, visit HP’s Commitment to the Environment website at:www.hp.com/hpinfo/globalcitizenship/environment/index.html
Ozone productionThis product generates no appreciable ozone gas (O3).
Energy consumptionEnergy usage drops significantly while in ENERGY STAR® mode, which saves natural resources,and saves money without affecting the high performance of this product. This product qualifies forENERGY STAR, which is a voluntary program established to encourage the development ofenergy-efficient office products.
ENERGY STAR is a U.S. registered service mark of the U.S. EPA. As an ENERGY STAR partner,HP has determined that this product meets ENERGY STAR guidelines for energy efficiency.For more information on ENERGY STAR guidelines, go to the following website:www.energystar.gov
Paper useThis product is suited for the use of recycled paper according to DIN 19309.
PlasticsPlastic parts over 25 grams are marked according to international standards that enhance theability to identify plastics for recycling purposes at the end of the product’s life.
Material safety data sheetsMaterial safety data sheets (MSDS) can be obtained from the HP website at:www.hp.com/go/msdsCustomers without Internet access should contact their local HP Customer Care Center.
Chapter 19
202 HP Photosmart 2600/2700 series all-in-one
Tech
nica
l inf
orm
atio
n
Recycling programHP offers an increasing number of product return and recycling programs in many countries, aswell as partnering with some of the largest electronic recycling centers throughout the world. HPalso conserves resources by refurbishing and reselling some of its most popular products.This HP product contains the following materials that may require special handling at end-of-life:● Mercury in the fluorescent lamp in the scanner (< 2 mg)● Lead in the solder
HP inkjet supplies recycling programHP is committed to protecting the environment. The HP Inkjet Supplies Recycling Program isavailable in many countries/regions, and lets you recycle used print cartridges free of charge. Formore information, go to the following website:www.hp.com/hpinfo/globalcitizenship/environment/recycle/inkjet.html
Regulatory noticesThe HP all-in-one meets product requirements from regulatory agencies in your country/region.This section contains regulatory topics that do not pertain to wireless functions.
Regulatory model identification number For regulatory identification purposes, your product is assigned a Regulatory Model Number. TheRegulatory Model Number for your product is SDGOB-0304-01/SDGOB-0304-02. This regulatorynumber should not be confused with the marketing name (HP Photosmart 2600/2700 series all-in-one) or product number (Q3450A/Q3452A).
Notice to users of the U.S. telephone network: FCC requirements This equipment complies with FCC rules, Part 68. On this equipment is a label that contains,among other information, the FCC Registration Number and Ringer Equivalent Number (REN) forthis equipment. If requested, provide this information to your telephone company.An FCC compliant telephone cord and modular plug is provided with this equipment. Thisequipment is designed to be connected to the telephone network or premises wiring using acompatible modular jack which is Part 68 compliant. This equipment connects to the telephonenetwork through the following standard network interface jack: USOC RJ-11C.The REN is useful to determine the quantity of devices you may connect to your telephone line andstill have all of those devices ring when your number is called. Too many devices on one line mayresult in failure to ring in response to an incoming call. In most, but not all, areas the sum of theRENs of all devices should not exceed five (5). To be certain of the number of devices you mayconnect to your line, as determined by the REN, you should call your local telephone company todetermine the maximum REN for your calling area.If this equipment causes harm to the telephone network, your telephone company may discontinueyour service temporarily. If possible, they will notify you in advance. If advance notice is notpractical, you will be notified as soon as possible. You will also be advised of your right to file acomplaint with the FCC. Your telephone company may make changes in its facilities, equipment,operations, or procedures that could affect the proper operation of your equipment. If they do, youwill be given advance notice so you will have the opportunity to maintain uninterrupted service.If you experience trouble with this equipment, please contact the manufacturer, or look elsewherein this manual, for warranty or repair information. Your telephone company may ask you todisconnect this equipment from the network until the problem has been corrected or until you aresure that the equipment is not malfunctioning.This equipment may not be used on coin service provided by the telephone company. Connectionto party lines is subject to state tariffs. Contact your state public utility commission, public servicecommission, or corporation commission for more information.
User Guide 203
Technical information
This equipment includes automatic dialing capability. When programming and/or making test callsto emergency numbers:● Remain on the line and explain to the dispatcher the reason for the call.● Perform such activities in the off-peak hours, such as early morning or late evening.
Note The FCC hearing aid compatibility rules for telephones are not applicable to thisequipment.
The Telephone Consumer Protection Act of 1991 makes it unlawful for any person to use acomputer or other electronic device, including fax machines, to send any message unless suchmessage clearly contains in a margin at the top or bottom of each transmitted page or on the firstpage of transmission, the date and time it is sent and an identification of the business, other entity,or other individual sending the message and the telephone number of the sending machine orsuch business, other entity, or individual. (The telephone number provided may not be a 900number or any other number for which charges exceed local or long-distance transmissioncharges.) In order to program this information into your fax machine, you should complete thesteps described in the software.
FCC statement The United States Federal Communications Commission (in 47 CFR 15.105) has specified that thefollowing notice be brought to the attention of users of this product.Declaration of Conformity: This equipment has been tested and found to comply with the limits for aClass B digital device, pursuant to part 15 of the FCC Rules. Operation is subject to the followingtwo conditions: (1) this device may not cause harmful interference, and (2) this device must acceptany interference received, including interference that may cause undesired operation. Class Blimits are designed to provide reasonable protection against harmful interference in a residentialinstallation. This equipment generates, uses, and can radiate radio frequency energy, and, if notinstalled and used in accordance with the instructions, may cause harmful interference to radiocommunications. However, there is no guarantee that interference will not occur in a particularinstallation. If this equipment does cause harmful interference to radio or television reception,which can be determined by turning the equipment off and on, the user is encouraged to try tocorrect the interference by one or more of the following measures:● Reorient the receiving antenna.● Increase the separation between the equipment and the receiver.● Connect the equipment into an outlet on a circuit different from that to which the receiver is
connected.● Consult the dealer or an experienced radio/TV technician for help.For more information, contact the Product Regulations Manager, Hewlett-Packard Company, SanDiego, (858) 655-4100.The user may find the following booklet prepared by the Federal Communications Commissionhelpful: How to Identify and Resolve Radio-TV Interference Problems. This booklet is available fromthe U.S. Government Printing Office, Washington DC, 20402. Stock No. 004-000-00345-4.
Caution Pursuant to Part 15.21 of the FCC Rules, any changes or modifications to thisequipment not expressly approved by the Hewlett-Packard Company may cause harmfulinterference and void the FCC authorization to operate this equipment.
Exposure to radio frequency radiation
Caution The radiated output power of this device is far below the FCC radio frequencyexposure limits. Nevertheless, the device shall be used in such a manner that thepotential for human contact during normal operation is minimized. This product and anyattached external antenna, if supported, shall be placed in such a manner to minimize thepotential for human contact during normal operation. In order to avoid the possibility ofexceeding the FCC radio frequency exposure limits, human proximity to the antenna shallnot be less than 20 cm (8 inches) during normal operation.
Chapter 19
204 HP Photosmart 2600/2700 series all-in-one
Tech
nica
l inf
orm
atio
n

Note à l’attention des utilisateurs du réseau téléphonique Canadien/notice to usersof the Canadian telephone network
Cet appareil est conforme aux spécifications techniques des équipements terminaux d’IndustrieCanada. Le numéro d’enregistrement atteste de la conformité de l’appareil. L’abréviation IC quiprécède le numéro d’enregistrement indique que l’enregistrement a été effectué dans le cadred’une Déclaration de conformité stipulant que les spécifications techniques d’Industrie Canada ontété respectées. Néanmoins, cette abréviation ne signifie en aucun cas que l’appareil a été validépar Industrie Canada.Pour leur propre sécurité, les utilisateurs doivent s’assurer que les prises électriques reliées à laterre de la source d’alimentation, des lignes téléphoniques et du circuit métallique d’alimentationen eau sont, le cas échéant, branchées les unes aux autres. Cette précaution est particulièrementimportante dans les zones rurales.Le numéro REN (Ringer Equivalence Number) attribué à chaque appareil terminal fournit uneindication sur le nombre maximal de terminaux qui peuvent être connectés à une interfacetéléphonique. La terminaison d’une interface peut se composer de n’importe quelle combinaisond’appareils, à condition que le total des numéros REN ne dépasse pas 5.Basé sur les résultats de tests FCC Partie 68, le numéro REN de ce produit est 0.2B.This equipment meets the applicable Industry Canada Terminal Equipment TechnicalSpecifications. This is confirmed by the registration number. The abbreviation IC before theregistration number signifies that registration was performed based on a Declaration of Conformityindicating that Industry Canada technical specifications were met. It does not imply that IndustryCanada approved the equipment.Users should ensure for their own protection that the electrical ground connections of the powerutility, telephone lines and internal metallic water pipe system, if present, are connected together.This precaution may be particularly important in rural areas.
Note The Ringer Equivalence Number (REN) assigned to each terminal device provides anindication of the maximum number of terminals allowed to be connected to a telephoneinterface. The termination on an interface may consist of any combination of devicessubject only to the requirement that the sum of the Ringer Equivalence Numbers of all thedevices does not exceed 5.
The REN for this product is 0.2B, based on FCC Part 68 test results.
Notice to users in the European Economic Area
This product is designed to be connected to the analog Switched Telecommunication Networks(PSTN) of the European Economic Area (EEA) countries/regions.Network compatibility depends on customer selected settings, which must be reset to use theequipment on a telephone network in a country/region other than where the product waspurchased. Contact the vendor or Hewlett-Packard Company if additional product support isnecessary.This equipment has been certified by the manufacturer in accordance with Directive 1999/5/EC(annex II) for Pan-European single-terminal connection to the public switched telephone network(PSTN). However, due to differences between the individual PSTNs provided in differentcountries, the approval does not, of itself, give an unconditional assurance of successful operationon every PSTN network termination point.In the event of problems, you should contact your equipment supplier in the first instance.
User Guide 205
Technical information
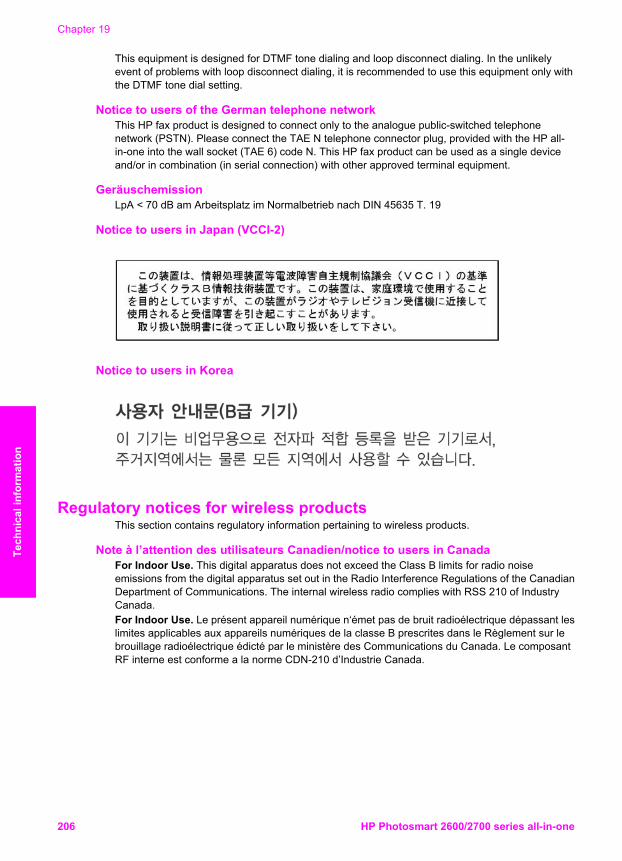
This equipment is designed for DTMF tone dialing and loop disconnect dialing. In the unlikelyevent of problems with loop disconnect dialing, it is recommended to use this equipment only withthe DTMF tone dial setting.
Notice to users of the German telephone network This HP fax product is designed to connect only to the analogue public-switched telephonenetwork (PSTN). Please connect the TAE N telephone connector plug, provided with the HP all-in-one into the wall socket (TAE 6) code N. This HP fax product can be used as a single deviceand/or in combination (in serial connection) with other approved terminal equipment.
GeräuschemissionLpA < 70 dB am Arbeitsplatz im Normalbetrieb nach DIN 45635 T. 19
Notice to users in Japan (VCCI-2)
Notice to users in Korea
Regulatory notices for wireless products This section contains regulatory information pertaining to wireless products.
Note à l’attention des utilisateurs Canadien/notice to users in Canada For Indoor Use. This digital apparatus does not exceed the Class B limits for radio noiseemissions from the digital apparatus set out in the Radio Interference Regulations of the CanadianDepartment of Communications. The internal wireless radio complies with RSS 210 of IndustryCanada.For Indoor Use. Le présent appareil numérique n‘émet pas de bruit radioélectrique dépassant leslimites applicables aux appareils numériques de la classe B prescrites dans le Règlement sur lebrouillage radioélectrique édicté par le ministère des Communications du Canada. Le composantRF interne est conforme a la norme CDN-210 d’Industrie Canada.
Chapter 19
206 HP Photosmart 2600/2700 series all-in-one
Tech
nica
l inf
orm
atio
n
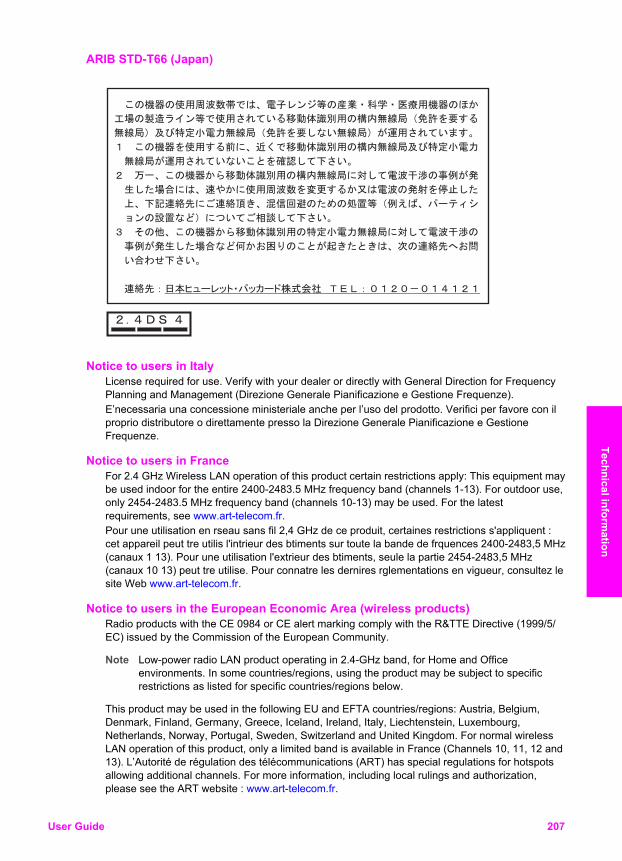
ARIB STD-T66 (Japan)
Notice to users in Italy License required for use. Verify with your dealer or directly with General Direction for FrequencyPlanning and Management (Direzione Generale Pianificazione e Gestione Frequenze).E’necessaria una concessione ministeriale anche per l’uso del prodotto. Verifici per favore con ilproprio distributore o direttamente presso la Direzione Generale Pianificazione e GestioneFrequenze.
Notice to users in France For 2.4 GHz Wireless LAN operation of this product certain restrictions apply: This equipment maybe used indoor for the entire 2400-2483.5 MHz frequency band (channels 1-13). For outdoor use,only 2454-2483.5 MHz frequency band (channels 10-13) may be used. For the latestrequirements, see www.art-telecom.fr.Pour une utilisation en rseau sans fil 2,4 GHz de ce produit, certaines restrictions s'appliquent :cet appareil peut tre utilis l'intrieur des btiments sur toute la bande de frquences 2400-2483,5 MHz(canaux 1 13). Pour une utilisation l'extrieur des btiments, seule la partie 2454-2483,5 MHz(canaux 10 13) peut tre utilise. Pour connatre les dernires rglementations en vigueur, consultez lesite Web www.art-telecom.fr.
Notice to users in the European Economic Area (wireless products) Radio products with the CE 0984 or CE alert marking comply with the R&TTE Directive (1999/5/EC) issued by the Commission of the European Community.
Note Low-power radio LAN product operating in 2.4-GHz band, for Home and Officeenvironments. In some countries/regions, using the product may be subject to specificrestrictions as listed for specific countries/regions below.
This product may be used in the following EU and EFTA countries/regions: Austria, Belgium,Denmark, Finland, Germany, Greece, Iceland, Ireland, Italy, Liechtenstein, Luxembourg,Netherlands, Norway, Portugal, Sweden, Switzerland and United Kingdom. For normal wirelessLAN operation of this product, only a limited band is available in France (Channels 10, 11, 12 and13). L’Autorité de régulation des télécommunications (ART) has special regulations for hotspotsallowing additional channels. For more information, including local rulings and authorization,please see the ART website : www.art-telecom.fr.
User Guide 207
Technical information
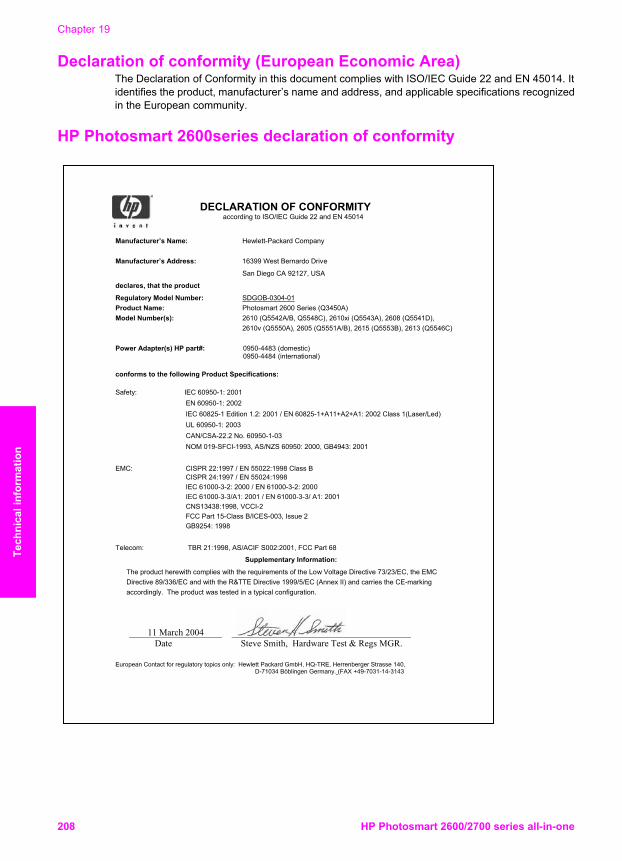
Declaration of conformity (European Economic Area) The Declaration of Conformity in this document complies with ISO/IEC Guide 22 and EN 45014. Itidentifies the product, manufacturer’s name and address, and applicable specifications recognizedin the European community.
HP Photosmart 2600series declaration of conformity
DECLARATION OF CONFORMITY according to ISO/IEC Guide 22 and EN 45014
Manufacturer’s Name: Hewlett-Packard Company
Manufacturer’s Address: 16399 West Bernardo Drive
San Diego CA 92127, USA
declares, that the product
Regulatory Model Number: SDGOB-0304-01Product Name: Photosmart 2600 Series (Q3450A)Model Number(s): 2610 (Q5542A/B, Q5548C), 2610xi (Q5543A), 2608 (Q5541D),
2610v (Q5550A), 2605 (Q5551A/B), 2615 (Q5553B), 2613 (Q5546C)
Power Adapter(s) HP part#: 0950-4483 (domestic) 0950-4484 (international)
conforms to the following Product Specifications:
Safety: IEC 60950-1: 2001EN 60950-1: 2002 IEC 60825-1 Edition 1.2: 2001 / EN 60825-1+A11+A2+A1: 2002 Class 1(Laser/Led)UL 60950-1: 2003CAN/CSA-22.2 No. 60950-1-03NOM 019-SFCI-1993, AS/NZS 60950: 2000, GB4943: 2001
EMC: CISPR 22:1997 / EN 55022:1998 Class B CISPR 24:1997 / EN 55024:1998IEC 61000-3-2: 2000 / EN 61000-3-2: 2000IEC 61000-3-3/A1: 2001 / EN 61000-3-3/ A1: 2001 CNS13438:1998, VCCI-2FCC Part 15-Class B/ICES-003, Issue 2 GB9254: 1998
Telecom: TBR 21:1998, AS/ACIF S002:2001, FCC Part 68
Supplementary Information:
The product herewith complies with the requirements of the Low Voltage Directive 73/23/EC, the EMC Directive 89/336/EC and with the R&TTE Directive 1999/5/EC (Annex II) and carries the CE-markingaccordingly. The product was tested in a typical configuration.
11 March 2004 Date Steve Smith, Hardware Test & Regs MGR.
European Contact for regulatory topics only: Hewlett Packard GmbH, HQ-TRE, Herrenberger Strasse 140, D-71034 (FAX +49-7031-14-3143
Chapter 19
208 HP Photosmart 2600/2700 series all-in-one
Tech
nica
l inf
orm
atio
n
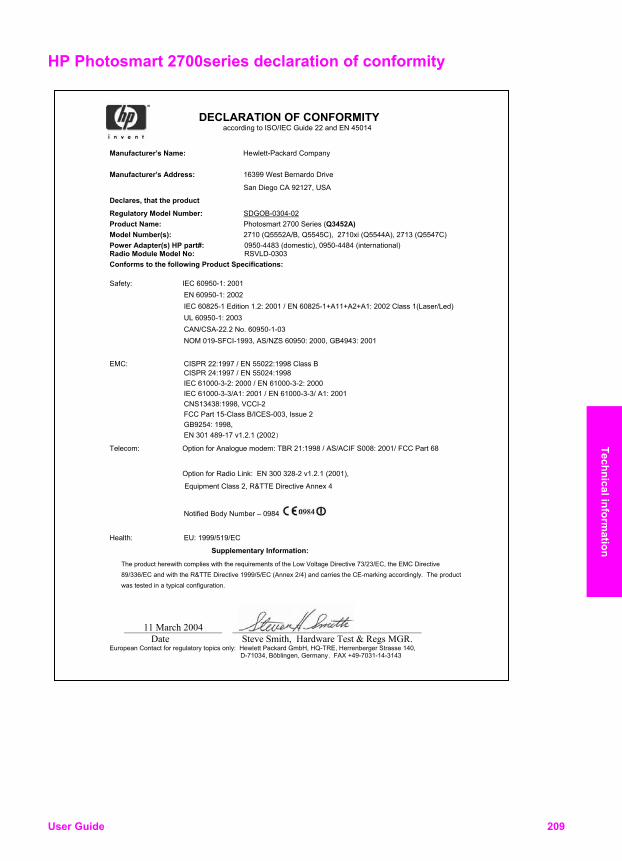
HP Photosmart 2700series declaration of conformity
DECLARATION OF CONFORMITY according to ISO/IEC Guide 22 and EN 45014
Manufacturer’s Name: Hewlett-Packard Company Manufacturer’s Address: 16399 West Bernardo Drive
San Diego CA 92127, USA
Declares, that the product
Regulatory Model Number: SDGOB-0304-02Product Name: Photosmart 2700 Series (Q3452A) Model Number(s): 2710 (Q5552A/B, Q5545C), 2710xi (Q5544A), 2713 (Q5547C) Power Adapter(s) HP part#: 0950-4483 (domestic), 0950-4484 (international) Radio Module Model No: RSVLD-0303 Conforms to the following Product Specifications: Safety: IEC 60950-1: 2001 EN 60950-1: 2002 IEC 60825-1 Edition 1.2: 2001 / EN 60825-1+A11+A2+A1: 2002 Class 1(Laser/Led) UL 60950-1: 2003 CAN/CSA-22.2 No. 60950-1-03 NOM 019-SFCI-1993, AS/NZS 60950: 2000, GB4943: 2001 EMC: CISPR 22:1997 / EN 55022:1998 Class B CISPR 24:1997 / EN 55024:1998 IEC 61000-3-2: 2000 / EN 61000-3-2: 2000 IEC 61000-3-3/A1: 2001 / EN 61000-3-3/ A1: 2001 CNS13438:1998, VCCI-2 FCC Part 15-Class B/ICES-003, Issue 2 GB9254: 1998, EN 301 489-17 v1.2.1 (2002)
Telecom: Option for Analogue modem: TBR 21:1998 / AS/ACIF S008: 2001/ FCC Part 68
Option for Radio Link: EN 300 328-2 v1.2.1 (2001),
Equipment Class 2, R&TTE Directive Annex 4
Notified Body Numb 4
Health: EU: 1999/519/EC
Supplementary Information:
The product herewith complies with the requirements of the Low Voltage Directive 73/23/EC, the EMC Directive 89/336/EC and with the R&TTE Directive 1999/5/EC (Annex 2/4) and carries the CE-marking accordingly. The product was tested in a typical configuration.
11 March 2004
Date Steve Smith, Hardware Test & Regs MGR.
European Contact for regulatory topics only: Hewlett Packard GmbH, HQ-TRE, Herrenberger Strasse 140, D-71034, B many. FAX +49-7031-14-3143
User Guide 209
Technical information

Chapter 19
210 HP Photosmart 2600/2700 series all-in-one
Tech
nica
l inf
orm
atio
n
Index
Symbols/Numerics10 by 15 cm photo paper
load 39specifications 197
2-wire phone cord 166, 1694 by 6 inch photo paper,load 394-wire phone cord 166, 169
AA4 paper, load 37access list, HP InstantShare 118, 130accessories, order 133ADSL line. see DSL linealign print cartridges 146answer mode 87answer ring pattern 82, 101answering machine
receive faxes 87troubleshoot 169
auto checking 125auto print 126automatic fax reports 97
Bbanner paper
load 42specifications 197
baud rate 104best copy quality 61blocked carriage 157Bluetooth
accessibility 23connect to your HP all-in-one 22passkey authentication 23security settings 23
borderless copiesfill entire page 63photo 63
borderless photosprint from memory card 54
Ccancel
button 7copy 68fax 105print job 77scan 73
carriage, blocked 157cartridges. see print cartridgesclean
exterior 138glass 137lid backing 137print cartridgecontacts 147print cartridge ink nozzlearea 148print cartridges 147
colorcopies 66intensity 65
color graphics displaychange language 154changemeasurements 154icons 8screen saver 9
CompactFlash memorycard 45confirmation reports, fax 97connect USB cable 153connection problems, fax 166connection types supported
Bluetooth adapter 22Ethernet 21USB 21wireless 22
contrast, fax 99control panel
enter text 95overview 6
copyblack-and-whitedocuments 62cancel 68color intensity 65default settings 62enhance light areas 66enlarge into poster 67
iron-on transfer 68menu 10menu button 8number of copies 62paper size 59paper types,recommended 60photos onto letter paper 63photos, enhance 66quality 61several on one page 64specifications 200speed 61text, enhance 66
correct port test, fax 164customer support
Australia 186before you call 151contact 183HP Quick Exchange Service(Japan) 188Japan 187Korea 187North America 184outside U.S. 184serial number 183service ID 183warranty 193website 183
Ddarken
copies 65faxes 99
date, set 94declaration of conformity
European EconomicArea 208HP Photosmart 2600series 208HP Photosmart 2700series 209
default settingsfax 100restore 150
destination filesend photos 121
User Guide 211
destinationscreate 117manage 130
device updateabout 181Macintosh 182Windows 181
dial tone test, failure 165digital camera
PictBridge 55distinctive ringing 82, 87, 101DNS. see domain name serverdomain name server
check IP address 176, 177down arrow 8DPOF file 55DSL line, set up with fax 80
Eembedded Web server 176enter text 95envelopes
load 41specifications 197
environmentEnvironmental productstewardship program 202environmentalspecifications 201
error correction mode(ECM) 103error reports, fax 97EWS. see embedded Webserver
Ffactory defaults, restore 150fast copy quality 61fax
answer call 93answer mode, set 87, 88answer ring pattern 101answeringmachine 167 169auto answer, set 87, 88backup fax reception 102cancel 105contrast 99date and time 94defaults 100delete 104distinctiveringing 82, 87, 101
DSL line, set up 80enter text and symbols 95error correction mode(ECM) 103full 181header 95Internet, over 105, 170ISDN line, set up 81lighten or darken 99manual receive 93manual send 90memory 181memory is full 181menu 11menu button 8monitor dialing 92paper size 100pause 95PBX system, set up 81phone cord 163, 166, 169receive 93redial 91, 102reduce automatically 102reports 85, 90, 96reprint 104resolution 99rings to answer 93send 89set up 79, 162settings 99, 100specifications 200speed 104speed dial 92, 97, 98static on the phoneline 169test 85, 162test failed 163tone or pulse dial 101troubleshoot 162voice mail, set up 84volume 101
FCC requirements 203FCC statement 204fill entire page 63fit to page 65FoIP 105, 170four-wire phone cord 166, 169
Gglass
clean 137load original 35
greeting cards, load 42
HHagaki cards, load 40hardware setup
troubleshoot 152hardware test, fax 163header, fax 95HP all-in-one
about 5return 188
HP DirectorHP Instant Share 113missing icons 159start 12
HP GalleryOS 9 HP Image Zone 17OS X HP Image Zone 15
HP help (OS 9 HP ImageZone) 18HP Image Print (OS X HP ImageZone) 15HP Image Zone
button (Windows) 13HP InstantShare 111, 112, 122Macintosh 14, 16, 112overview 12send images 122Windows 12, 111
HP Instant Shareaccess list 118auto checking 125auto print 118, 126cancel print jobs 129cancel sendingimages 122connection errors 175connection lost 178destination file 121destinations 117, 172destinations notauthorized 178e-mail 57, 71e-mail images fromHP Image Zone(network) 122e-mail photos from amemory card (USB) 108e-mail photos from memorycard (network) 120e-mail photos from theHP Image Zone(USB) 111Error Report 180
212 HP Photosmart 2600/2700 series all-in-one
file corrupted 180file size exceeded 180general errors 174HP Image Zone 111, 122HP remoteprinting 117, 129icons 9login failed 179manage account 130manually print images 126menu 11minimum install 171network-connected 58Not set up 171online albums 57Open mode 116, 118, 124Options menu 130overview 107, 115preview images 126print images 125print options 127Privatemode 116, 118, 125quality prints 57receive from allowedsenders 125receive from anysender 124receive images 116, 124remove images 129scan images 71sendimages 57, 71, 108, 115,119, 178send images from HP imageZone (USB) 111send photos from a memorycard (network) 120send photos from a memorycard (USB) 108send scannedimages 110, 121send to adevice 71, 108, 111, 117,119, 122service discontinued 179service unavailable 179setup (networked) 117setup (USB) 108storage limitexceeded 179troubleshoot errormessages 174
troubleshoot setup 170USB-connected 57
HP Instant ShareHP on the Web (OS 9 HP ImageZone) 18HP remote printing
how to remote print 129overview 117
Iindividual speed dialentries 98ink cartridges. see printcartridgesink level icons 9ink levels, check 138input tray
capacities 197select 61
install device software 171installation problems 152Instant Share. see HP InstantShareInternet, fax using 105, 170iron-on iron-on transfers
copy 68iron-on transfers
load 42ISDN line, set up 81
Jjams, paper 43, 157, 173
Kkeypad 8, 95
Llabels
load 42specifications 197
left arrow 8legal paper
load 37specifications 197
letter paperload 37specifications 197
lid backing, clean 137lighten
copies 65faxes 99
line condition test, fax 164
load10 by 15 cm photopaper 394 by 6 inch photo paper 39A4 paper 37banner paper 42envelopes 41full-size paper 37greeting cards 42Hagaki cards 40iron-on transfers 42labels 42legal paper 37letter paper 37original 35postcards 40transparencies 42
MMagic Gate Memory Stick 45maintenance
align print cartridges 146check ink levels 138clean exterior 138clean glass 137clean lid backing 137clean print cartridges 147power save mode 149prompt delay time 150replace printcartridges 140restore factorydefaults 150self-test report 139
make copiesHP Director (Windows) 13OS 9 HP Image Zone(Macintosh) 17OS X HP Image Zone(Macintosh) 15
manualfax reports 97receive, fax 93send, fax 90, 92
media. see papermemory
delete faxes 104reprint faxes 104save faxes 102
memory cardtroubleshoot 180
memory cardsCompactFlash 45
Index
User Guide 213
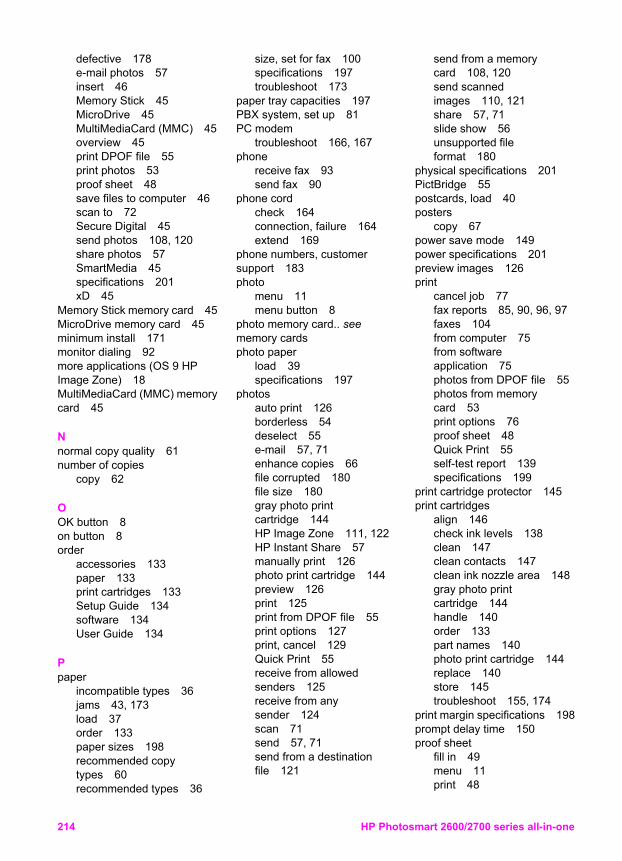
defective 178e-mail photos 57insert 46Memory Stick 45MicroDrive 45MultiMediaCard (MMC) 45overview 45print DPOF file 55print photos 53proof sheet 48save files to computer 46scan to 72Secure Digital 45send photos 108, 120share photos 57SmartMedia 45specifications 201xD 45
Memory Stick memory card 45MicroDrive memory card 45minimum install 171monitor dialing 92more applications (OS 9 HPImage Zone) 18MultiMediaCard (MMC) memorycard 45
Nnormal copy quality 61number of copies
copy 62
OOK button 8on button 8order
accessories 133paper 133print cartridges 133Setup Guide 134software 134User Guide 134
Ppaper
incompatible types 36jams 43, 173load 37order 133paper sizes 198recommended copytypes 60recommended types 36
size, set for fax 100specifications 197troubleshoot 173
paper tray capacities 197PBX system, set up 81PC modem
troubleshoot 166, 167phone
receive fax 93send fax 90
phone cordcheck 164connection, failure 164extend 169
phone numbers, customersupport 183photo
menu 11menu button 8
photo memory card.. seememory cardsphoto paper
load 39specifications 197
photosauto print 126borderless 54deselect 55e-mail 57, 71enhance copies 66file corrupted 180file size 180gray photo printcartridge 144HP Image Zone 111, 122HP Instant Share 57manually print 126photo print cartridge 144preview 126print 125print from DPOF file 55print options 127print, cancel 129Quick Print 55receive from allowedsenders 125receive from anysender 124scan 71send 57, 71send from a destinationfile 121
send from a memorycard 108, 120send scannedimages 110, 121share 57, 71slide show 56unsupported fileformat 180
physical specifications 201PictBridge 55postcards, load 40posters
copy 67power save mode 149power specifications 201preview images 126print
cancel job 77fax reports 85, 90, 96, 97faxes 104from computer 75from softwareapplication 75photos from DPOF file 55photos from memorycard 53print options 76proof sheet 48Quick Print 55self-test report 139specifications 199
print cartridge protector 145print cartridges
align 146check ink levels 138clean 147clean contacts 147clean ink nozzle area 148gray photo printcartridge 144handle 140order 133part names 140photo print cartridge 144replace 140store 145troubleshoot 155, 174
print margin specifications 198prompt delay time 150proof sheet
fill in 49menu 11print 48
214 HP Photosmart 2600/2700 series all-in-one
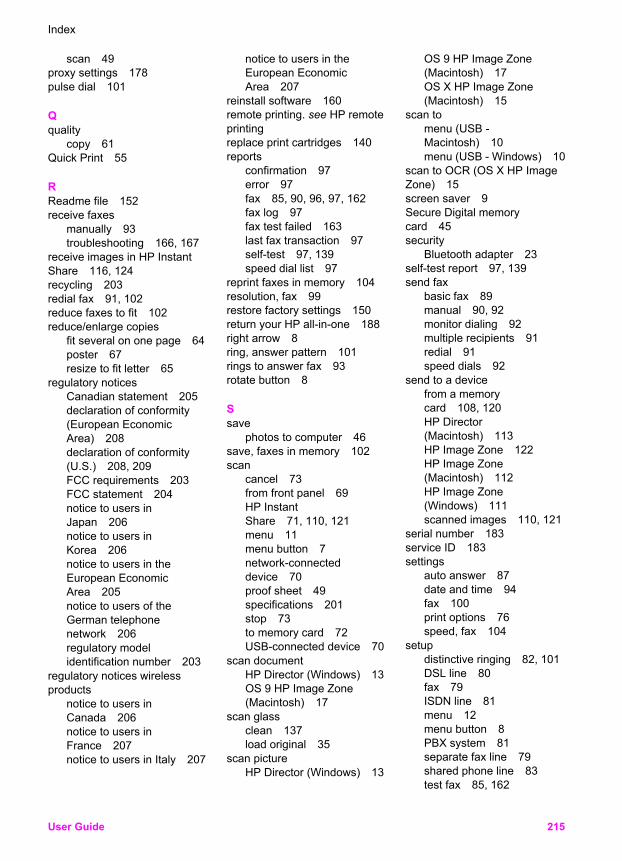
scan 49proxy settings 178pulse dial 101
Qquality
copy 61Quick Print 55
RReadme file 152receive faxes
manually 93troubleshooting 166, 167
receive images in HP InstantShare 116, 124recycling 203redial fax 91, 102reduce faxes to fit 102reduce/enlarge copies
fit several on one page 64poster 67resize to fit letter 65
regulatory noticesCanadian statement 205declaration of conformity(European EconomicArea) 208declaration of conformity(U.S.) 208, 209FCC requirements 203FCC statement 204notice to users inJapan 206notice to users inKorea 206notice to users in theEuropean EconomicArea 205notice to users of theGerman telephonenetwork 206regulatory modelidentification number 203
regulatory notices wirelessproducts
notice to users inCanada 206notice to users inFrance 207notice to users in Italy 207
notice to users in theEuropean EconomicArea 207
reinstall software 160remote printing. see HP remoteprintingreplace print cartridges 140reports
confirmation 97error 97fax 85, 90, 96, 97, 162fax log 97fax test failed 163last fax transaction 97self-test 97, 139speed dial list 97
reprint faxes in memory 104resolution, fax 99restore factory settings 150return your HP all-in-one 188right arrow 8ring, answer pattern 101rings to answer fax 93rotate button 8
Ssave
photos to computer 46save, faxes in memory 102scan
cancel 73from front panel 69HP InstantShare 71, 110, 121menu 11menu button 7network-connecteddevice 70proof sheet 49specifications 201stop 73to memory card 72USB-connected device 70
scan documentHP Director (Windows) 13OS 9 HP Image Zone(Macintosh) 17
scan glassclean 137load original 35
scan pictureHP Director (Windows) 13
OS 9 HP Image Zone(Macintosh) 17OS X HP Image Zone(Macintosh) 15
scan tomenu (USB -Macintosh) 10menu (USB - Windows) 10
scan to OCR (OS X HP ImageZone) 15screen saver 9Secure Digital memorycard 45security
Bluetooth adapter 23self-test report 97, 139send fax
basic fax 89manual 90, 92monitor dialing 92multiple recipients 91redial 91speed dials 92
send to a devicefrom a memorycard 108, 120HP Director(Macintosh) 113HP Image Zone 122HP Image Zone(Macintosh) 112HP Image Zone(Windows) 111scanned images 110, 121
serial number 183service ID 183settings
auto answer 87date and time 94fax 100print options 76speed, fax 104
setupdistinctive ringing 82, 101DSL line 80fax 79ISDN line 81menu 12menu button 8PBX system 81separate fax line 79shared phone line 83test fax 85, 162
Index
User Guide 215
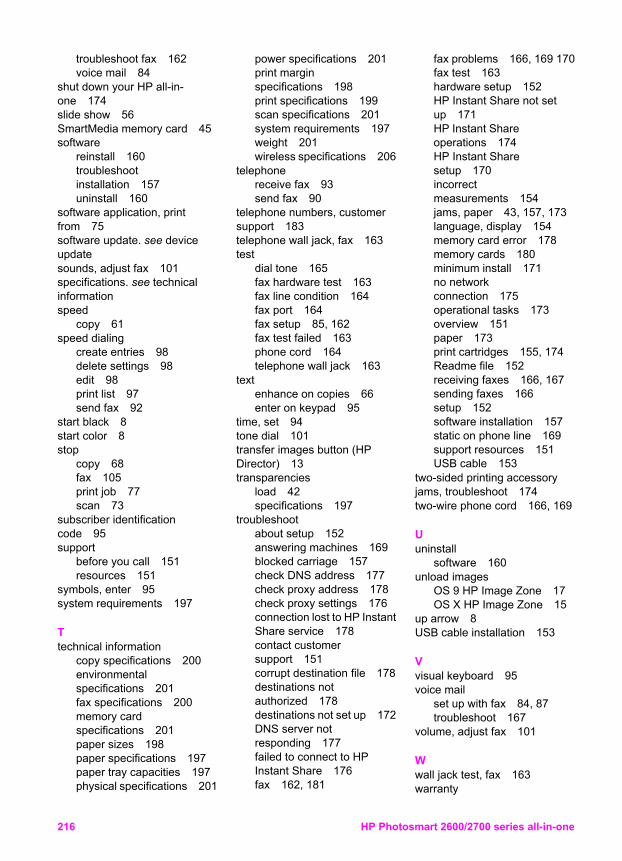
troubleshoot fax 162voice mail 84
shut down your HP all-in-one 174slide show 56SmartMedia memory card 45software
reinstall 160troubleshootinstallation 157uninstall 160
software application, printfrom 75software update. see deviceupdatesounds, adjust fax 101specifications. see technicalinformationspeed
copy 61speed dialing
create entries 98delete settings 98edit 98print list 97send fax 92
start black 8start color 8stop
copy 68fax 105print job 77scan 73
subscriber identificationcode 95support
before you call 151resources 151
symbols, enter 95system requirements 197
Ttechnical information
copy specifications 200environmentalspecifications 201fax specifications 200memory cardspecifications 201paper sizes 198paper specifications 197paper tray capacities 197physical specifications 201
power specifications 201print marginspecifications 198print specifications 199scan specifications 201system requirements 197weight 201wireless specifications 206
telephonereceive fax 93send fax 90
telephone numbers, customersupport 183telephone wall jack, fax 163test
dial tone 165fax hardware test 163fax line condition 164fax port 164fax setup 85, 162fax test failed 163phone cord 164telephone wall jack 163
textenhance on copies 66enter on keypad 95
time, set 94tone dial 101transfer images button (HPDirector) 13transparencies
load 42specifications 197
troubleshootabout setup 152answering machines 169blocked carriage 157check DNS address 177check proxy address 178check proxy settings 176connection lost to HP InstantShare service 178contact customersupport 151corrupt destination file 178destinations notauthorized 178destinations not set up 172DNS server notresponding 177failed to connect to HPInstant Share 176fax 162, 181
fax problems 166, 169 170fax test 163hardware setup 152HP Instant Share not setup 171HP Instant Shareoperations 174HP Instant Sharesetup 170incorrectmeasurements 154jams, paper 43, 157, 173language, display 154memory card error 178memory cards 180minimum install 171no networkconnection 175operational tasks 173overview 151paper 173print cartridges 155, 174Readme file 152receiving faxes 166, 167sending faxes 166setup 152software installation 157static on phone line 169support resources 151USB cable 153
two-sided printing accessoryjams, troubleshoot 174two-wire phone cord 166, 169
Uuninstall
software 160unload images
OS 9 HP Image Zone 17OS X HP Image Zone 15
up arrow 8USB cable installation 153
Vvisual keyboard 95voice mail
set up with fax 84, 87troubleshoot 167
volume, adjust fax 101
Wwall jack test, fax 163warranty
216 HP Photosmart 2600/2700 series all-in-one

upgrades 193Webscan 24wired connection icons 9wireless connection icons
ad hoc 9
XxD memory card 45
Zzoom button 8
Index
User Guide 217

www.hp.com
*Q3450-90196**Q3450-90196*
Q3450-90196
© 2004 Hewlett-Packard Development Company, L.P.
Printed on at least 50% total recycled fiber with at least 10% post-consumer paper
Electronic Edition