Embed Size (px)
Citation preview
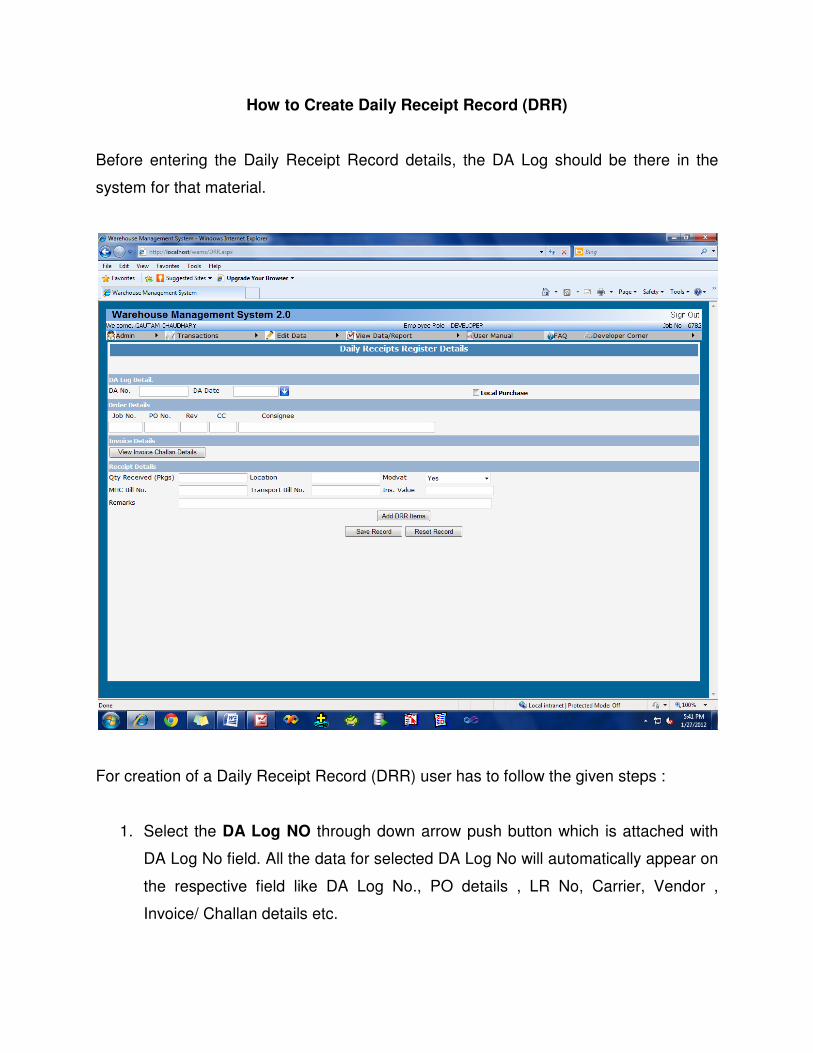
How to Create Daily Receipt Record (DRR)
Before entering the Daily Receipt Record details, the DA Log should be there in the
system for that material.
For creation of a Daily Receipt Record (DRR) user has to follow the given steps :
1. Select the DA Log NO through down arrow push button which is attached with
DA Log No field. All the data for selected DA Log No will automatically appear on
the respective field like DA Log No., PO details , LR No, Carrier, Vendor ,
Invoice/ Challan details etc.
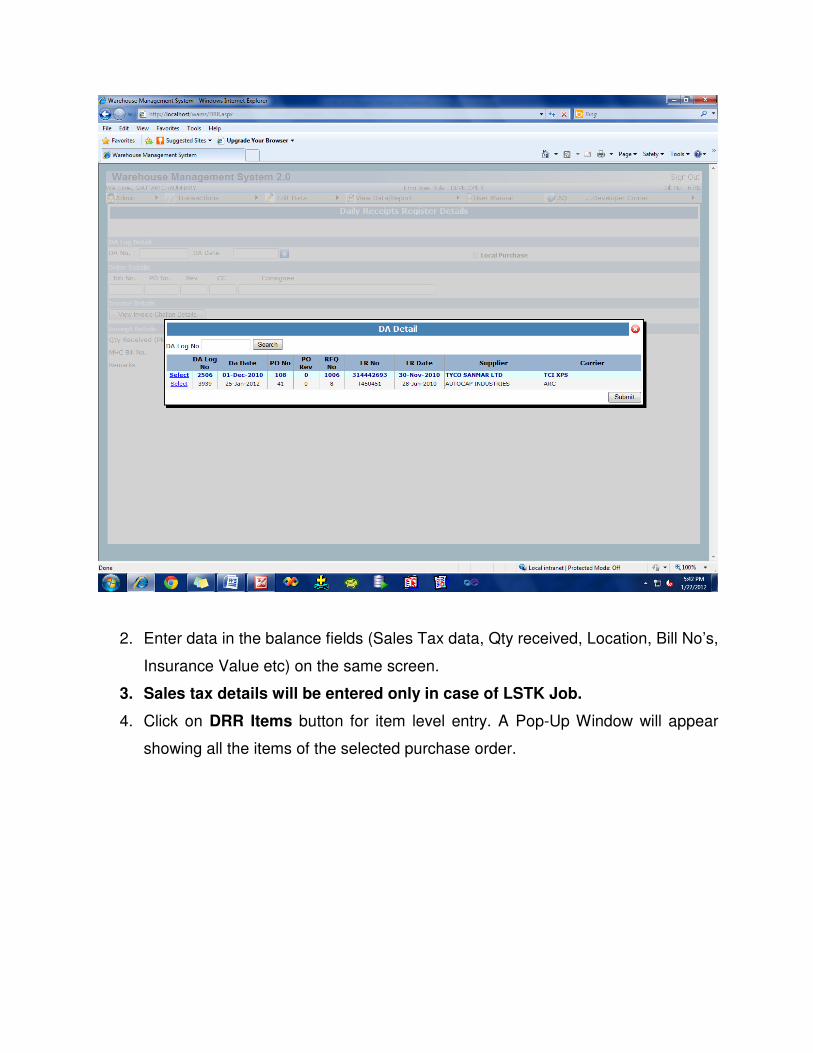
2. Enter data in the balance fields (Sales Tax data, Qty received, Location, Bill No’s,
Insurance Value etc) on the same screen.
3. Sales tax details will be entered only in case of LSTK Job.
4. Click on DRR Items button for item level entry. A Pop-Up Window will appear
showing all the items of the selected purchase order.
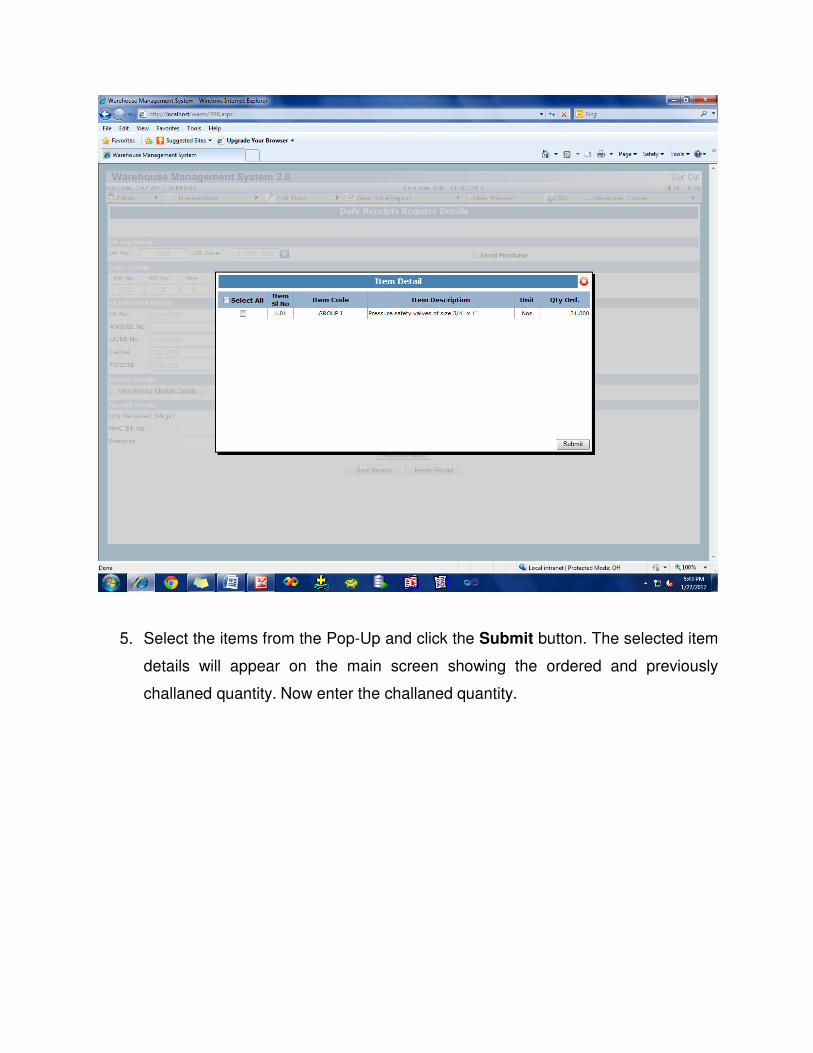
5. Select the items from the Pop-Up and click the Submit button. The selected item
details will appear on the main screen showing the ordered and previously
challaned quantity. Now enter the challaned quantity.

6. In this screen one can also enter DRR’s for Local Purchase after clicking on the
Local Purchase check box.
7. For entry of sub-item details, user has to click the Sub Item Details link button
appearing in front of all the items having any sub item. A Pop-Up window will
appear showing the sub item details. User has to fill the sub item quantity details
there and click the Submit push button.

8. Once Submit push button is clicked the entered sub
the main page. User can also delete the sub item details from the main page with
the use of delete link button.
Once Submit push button is clicked the entered sub-item details will appear on
the main page. User can also delete the sub item details from the main page with
link button.
item details will appear on
the main page. User can also delete the sub item details from the main page with
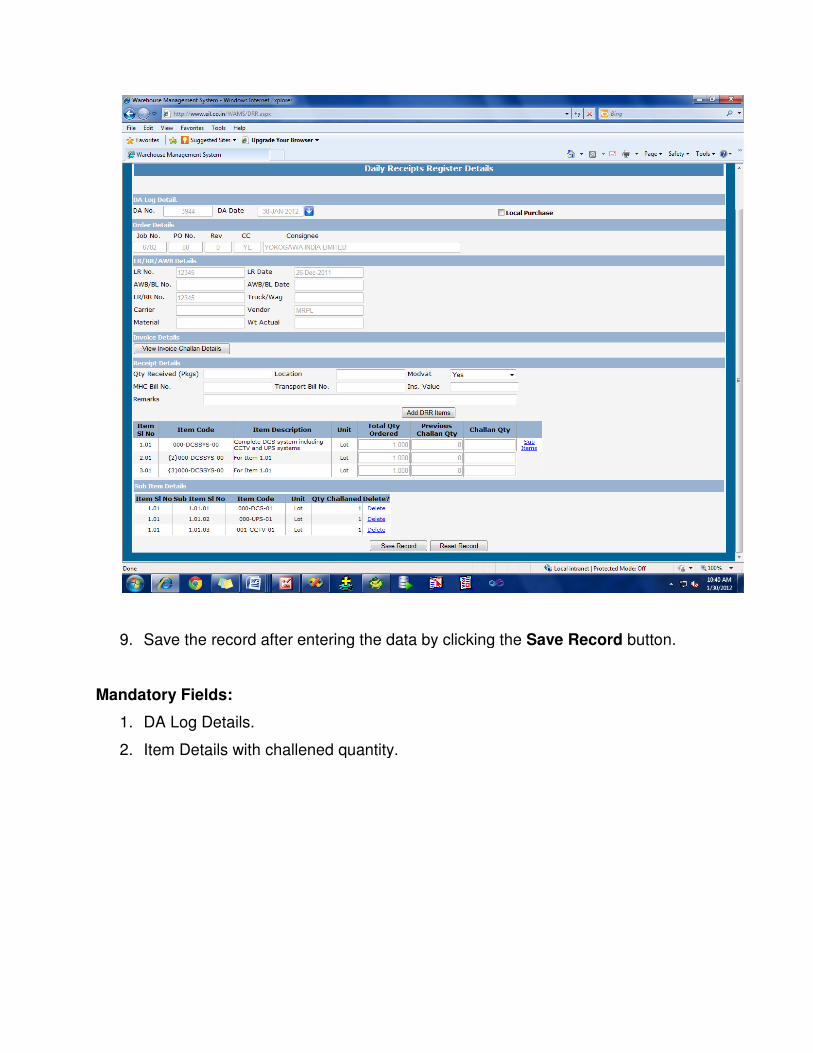
9. Save the record after entering the data by clicking the
Mandatory Fields:
1. DA Log Details.
2. Item Details with challened quantity.
Save the record after entering the data by clicking the Save Record
tem Details with challened quantity.
ecord button.