Embed Size (px)
Citation preview

HOB Enterprise Access: HOBLink J-Term User Manual
HOB, Inc. 245 Saw Mill River Road Suite #106 Hawthorne, NY 10532 USA
Phone: +1 (612) 333-7712 Fax: +1(914) 372-1974 E-mail: [email protected]: [email protected]: [email protected] Web: www.hobsoft.com 05.16.2006
User Manual


HOB Enterprise Access and HOBLink J-Term software and documentation 2004 by HOB
Telephone: +49- 9103/715-161 Fax: +49- 9103/715-299
Information in this document is subject to change without notice, and does not represent a commitment on the part of HOB.
All rights are reserved. Reproduction of editorial or pictorial contents without express permission is prohibited.
HOB software and documentation have been tested and reviewed. Nevertheless, HOB will not be liable for any loss or damage whatsoever arising from the use of any information or particulars in, or any error or omission in, this document.
IBM is a trademark of the IBM Corporation.
Sun Microsystems, HotJava, and Java are trademarks or registered trademarks of Sun Microsystems, Inc.
Netscape and Netscape Navigator are registered trademarks of Netscape Communications Corporation.
Microsoft and Microsoft Internet Explorer are registered trademarks of Microsoft Corporation.
All other product names are trademarks or registered trademarks of their respective corporations.
iii

Table Of Contents
1. HOB Enterprise Access Product Family............................................................... 1 1.1 Introduction .................................................................................................. 1 1.1.1 Overview ................................................................................................... 1 1.1.2 General Requirements ................................................................................. 1 1.1.3 Launching HOB EA Administration.................................................................. 2 1.1.4 Launching a HOB EA Application.................................................................... 2 1.1.5 JAVA Web Start .......................................................................................... 3 1.1.6 How to Run HOBLink J-Term......................................................................... 4 1.1.7 How to Install HOB EA Applications on Operating Systems with a GUI................. 5 1.1.8 How to Install HOB EA Applications on OS/400 Systems ................................... 5 1.1.9 How to Install HOB EA Applications on Operating Systems without a GUI ............ 7 1.1.10 How to Install HOB EA Applications on z/OS Systems ....................................... 8 2. HOB Enterprise Access Components .................................................................11 2.1 HOB EA Server..............................................................................................11 2.1.1 Definition ..................................................................................................11 2.1.2 EA Server Function.....................................................................................11 2.1.3 How to Configure the EA Server ...................................................................11 2.1.4 Logging on to the HOB EA Server .................................................................11 2.2 HOB Proxy Server..........................................................................................14 2.2.1 How to Run the Proxy Server Under Windows NT / 2000..................................15 2.2.2 How to Run the Proxy Server on OS/400 Systems...........................................16 2.2.3 How to Run the Proxy Server on z/OS Systems ..............................................16 2.2.4 How to Run the Proxy Server on z/OS Systems as a Started Task .....................16 2.2.5 How to Run the Proxy Server on Other Operating Systems...............................17 2.2.6 Proxy Server Settings .................................................................................17 2.3 Client Component..........................................................................................17 2.4 HOB Enterprise Access Administration ..............................................................18 2.4.1 Installing HOB EA Administration..................................................................20 2.4.2 Startup Options .........................................................................................21 2.4.3 Importing Users.........................................................................................21 3. HOBLink J-Term ............................................................................................23 3.1 Welcome to HOBLink J-Term...........................................................................23 3.2 HOBLink J-Term Session Manager....................................................................23 3.2.1 Options.....................................................................................................23
v
HOB Enterprise Access: HOBLink J-Term User Manual
3.2.2 Cloning Sessions ........................................................................................24 3.3 HOBLink J-Term Session Editor........................................................................25 3.3.1 Options.....................................................................................................25 3.3.2 Display Session..........................................................................................25 3.3.3 Printer Session ..........................................................................................26 3.3.4 User Defined Options..................................................................................26 3.3.5 Print Parameters for HOBLink J-Term ............................................................27 3.3.6 Map Displayable Attributes ..........................................................................28 3.3.7 Schemes...................................................................................................30 3.4 Connection Types ..........................................................................................30 3.4.1 Select Connection Type...............................................................................30 3.5 Host Printing.................................................................................................31 3.5.1 GDI Print (Graphical Display Interface)..........................................................31 3.5.2 Native GDI Windows Print (only for Windows) ................................................31 3.5.3 Escape Print ..............................................................................................31 3.6 Parameters for HOB EA Applications.................................................................33 3.6.1 Parameters for the Applet............................................................................33 3.6.2 Parameters for the Application .....................................................................34 3.6.3 Parameters for HTML Pages Using the Prefix "Auto".........................................35 3.6.4 Parameters for the Administration Tool "removeCC.html".................................36 3.6.5 URL Parameters for WebProfile.....................................................................36 3.7 HTML Pages..................................................................................................37 3.7.1 HTML Pages for Emulation / Administration Tools............................................37 3.7.2 HTML Pages for Secure SSL Connections .......................................................38 3.7.3 HTML Pages for the Cached Client / SSH Security ...........................................38 3.8 Additional Tools.............................................................................................38 3.9 COM Interface Support...................................................................................39 3.10 Information about EHLLAPI-Bridge...................................................................39 3.10.1 Requirements ............................................................................................39 3.10.2 How to Install the EHLLAPI Bridge ................................................................39 3.10.3 Supported Subsets .....................................................................................39 3.10.4 Sample Program ........................................................................................39 3.10.5 Tools for Diagnosing Errors..........................................................................39 3.11 Introduction to Open Host Interface Objects for Java..........................................40 3.12 Macro Import Utility.......................................................................................41 4. HOB Telnet Resource Manager ........................................................................43
vi
Table Of Contents
4.1 Configure Resource Names using TRM ..............................................................43 4.2 Configure TN3270 and TN5250 Session Resource Names ....................................43 4.2.1 There are three different ways to these resource names: .................................43 4.2.2 Importing and Exporting Configured Entries ...................................................44 4.2.3 Export TRM file ..........................................................................................44 4.2.4 Import TRM files ........................................................................................45 5. Error Messages .............................................................................................47 5.1 Common Error Messages ................................................................................47 5.2 SSL Error Messages .......................................................................................49 6. Glossary.......................................................................................................63 7. Index ..........................................................................................................67
vii

1. HOB Enterprise Access Product Family
1.1 Introduction
This introductory section of the document is intended to provide you with generally applicable, basic knowledge for HOB Enterprise Access (in the following, HOB EA) and the HOB EA applications. HOBLink J-Term is a member of the HOB EA product family. For more detailed information, please refer to the online help / installation guide found on the product CD and / or included with the product download.
1.1.1 Overview
HOB Enterprise Access is a product that grants maximum flexibility to achieve a single point of administration for all HOB EA applications. This type of administration requires the installation of HOB Enterprise Access as a server component for the HOB EA applications on a computer acting as a server PC. This server PC stores the user settings of all HOB EA applications in a database to which all users must log on. After users attach to this server PC, the user settings are downloaded via TCP/IP. The downloaded user settings make it possible for users to launch the HOB EA applications they have been authorized to use.
1.1.2 General Requirements
1.1.2.1 EA Server
The EA Server can be run on any computer supporting the Java Virtual Machine 1.3 or later. The EA Server is an application without a GUI that runs invisibly in the background.
1.1.2.2 Client System
From the Client side every common browser with full Java 1.1.4 support can be used:
• Microsoft Internet Explorer 4.0 and higher
• Netscape Communicator 4.5, 6 or 7
• Sun HotJava Browser
Alternatively, you can use Java Web Start, which requires no browser support and works browser independently.
1.1.2.3 Web Server
HOB EA applications can be installed on the following web servers (This list is not exhaustive):
• Microsoft Internet Information Server 3.x or 4.x
• Peer Web Services
• Personal Web Server
1

HOB Enterprise Access: HOBLink J-Term User Manual
• Apache HTTP Server
• Lotus Go, Domino and Domino Go
• IBM HTTP Server
• Netscape Enterprise Server 3.x
1.1.2.4 Memory Requirements
The following data refer to a typical installation and only supply approximate values. The actual values depend on the operating system in use.
• The installation requires approx. 90 MB of hard disk space. For a large number of files exceeding 1 KB this value may increase.
• Every user created uses approx. 0.5 KB of hard disk space.
• EA Server and Proxy Server each require approx. 5 MB free RAM, depending on the installed Java Virtual Machine (at least version 1.3).
1.1.3 Launching HOB EA Administration
When you launch HOB EA Administration for the first time use the following entries:
User Name: administrator (this field is not case-sensitive)
Password: adminpw (this field is case-sensitive!)
For security reasons, change the password before you log on the next time. The new password is not stored in the specified startup.hxml file, but is stored locally on the computer where HOB Enterprise Access is installed.
1.1.4 Launching a HOB EA Application
You can launch a HOB EA application in two ways, each of which requires a different procedure:
1.1.4.1 As an Applet
When running an HOB EA application as an applet, you can specify certain parameters for the respective HTML page; this automates the logon to a great extent. Simply specify the required parameters directly on the corresponding HTML page.
1.1.4.2 As an Application
When an HOB EA application is running as an application, it always uses the startup options defined in the startup.hxml file in the following subdirectory of its installation path:
<installation directory>/www/lib/hob/props/
You can complete the program arguments of the EXE file of HOB EA applications with the following parameter, in order to use a different HXML file:
/JTerm.exe -suserdefined.hxml
2
HOB Enterprise Access Product Family
The file name is appended to the parameter -s without any blank in-between. If the file name uses blanks you must put the entire parameter in quotation marks, e.g. "-suserdefined settings.hxml".
1.1.5 JAVA Web Start
Compared to conventional applets, Java Web Start applets can be launched without using a web browser. Java Web Start also provides an update mechanism which automatically updates applets installed on clients once a newer applet version is detected on the web servers.
When Java Web Start is run the second time, users get a chance to create a desktop icon on the client automatically. This makes it easier to run Java Web Start.
1.1.5.1 Requirements
1. Client
• Java Web Start, version 1.0.1, or later
• Supported operating systems: Windows 98 / NT / 2000 / ME / XP, LINUX, Solaris and Macintosh OS X
The Java Virtual Machines, version 1.2.x and 1.3 require Java Web Start to be installed additionally. Version 1.4 or later Java Virtual Machines, however, already include Java Web Start as an installation component.
For further information, please see: http://java.sun.com/products/javawebstart/
2. Server
Run the server installation of HOBLink J-Term on the server (download via HTTP/HTTPS).
If necessary, configure the JNLP MIME Type (application/x-java-jnlp-file) of the JNLP file manually.
Tips...
Sun Microsystems suggests the following procedure:
Configure the Web server to use the Java Web Start MIME type by setting all files with the .jnlp file extension to the application/x-java-jnlp-file MIME type:
application/x-java-jnlp-file MIME type
Most Web browsers use the MIME type returned with the contents from the Web server to determine how to handle the particular content. The server must return application/x-java-jnlp-file MIME type for JNLP files in order for Java Web Start to be invoked.
Each Web server has a specific way in which to add MIME types. For example, for the Apache Web server you must add the following line to the .mime.types configuration file:
application/x-java-jnlp-file JNLP
Check the documentation for the specifics of your Web server.
3

HOB Enterprise Access: HOBLink J-Term User Manual
1.1.5.2 How to Create and Configure a JNLP File
Configure the file JLaunch.jnlp (HOBLink J-Term) or JWT.jnlp (HOBLink JWT) in the following directory:
<EADIR>\www\lib
Replace the following strings by the actual custom data:
codebase="http://myserver.mydomain.com/HOB_EA/lib"
Replace HOB_EA by the share name of the Web Server.
1.1.5.3 Supported Parameters
The following parameters determine the applet window size, e.g.:
width="600" height="320"
If necessary; you can enable the following commented parameters. For further information, please see the online help .
<param name="xxstartup" value="startup.hxml"> <param name="xxwebprofile" value="Y"> <param name="xxuserhome" value="C:\Program Files\myHomeDir"> <param name="xxmultihome" value="Y">
1.1.5.4 HOBLink J-Term Parameters
If you have changed the file name JLaunch.jnlp you must also customize the following reference parameters to reflect the actual name:
href="JLaunch.jnlp"
1.1.6 How to Run HOBLink J-Term
Run the respective .jnlp file to run HOBLink J-Term with Java Web Start.
This can be done in two ways:
• Distribution Via Web Server
1. Copy the respective .jnlp file to the web server.
2. Create an HTML page including a link to this file (such as the link "Java Web Start" on the initial page of HOBLink J-Term).
3. Load the HTML page in the browser and select the link.
• Distribution Via Network or Local Drives
1. Copy the respective .jnlp file to the network or local drive.
2. Double-click on the name of the .jnlp file or create a desktop link.
4
HOB Enterprise Access Product Family
1.1.7 How to Install HOB EA Applications on Operating Systems with a GUI
1. Install the desired HOB EA application from the HOB Enterprise Access CD.
2. In the course of the installation, select the product name that indicates "Enterprise Model," to include HOB Enterprise Access in the installation procedure.
3. Apply web sharing to the directory ..\www, e.g. with the virtual directory name HOB_EA.
For information on how to run HOB EA applications with WebProfile, please refer to the relevant online help.
1.1.8 How to Install HOB EA Applications on OS/400 Systems
1. JAVA for an OS/400 system, version 1.2 must be installed on the OS/400 system. Use the command JAVA *VERSION, to verify the version number.
2. Create a new directory, e.g. /QOpenSys/HOB_EA In the following description, the installation directory (/QOpenSys/HOB_EA) is
indicated as <HOBEADIR>.
3. Copy the installation file HOB_EA.hobea.zip to <HOBEADIR>, e.g. by means of FTP.
4. On the OS/400 system run the QShell by entering the command STRQSH
5. In the QShell command line switch to <HOBEADIR>.
6. In the QShell unzip the ZIP file, .e.g. by entering the following command: jar -xvf hobea.zip
1.1.8.1 Configuring the HTTP Server
1. Apply web sharing to <HOBEADIR>/www and <HOBEADIR>/portal.db. For instance use the virtual directory names "HOB_EA" and "portal.db". In the QShell enter the following command: chmod -R 775 www chmod -R 775 portal.db
2. In the command line of the OS/400 system make <HOBEADIR> available to the HTTP system profile by entering the following commands: CHGAUT OBJ('/<HOBEADIR>') USER(QTMHHTTP) DTAAUT(*RX) CHGAUT OBJ('/<HOBEADIR>/*') USER(QTMHHTTP) DTAAUT(*RX)
This procedure can also be executed via a browser:
1. Launch AdminServer by means of STRTCPSVR SERVER(*HTTP) HTTPSVR(*ADMIN)
2. Specify the browser URL http://<IPOS400>:2001 in the configuration menu. Replace the variable <IPOS400> with a valid URL, which specifies the IP address of the OS/400 system, e.g. os400.hob.de
If the HOB EA application is to be run as a separate instance, you must first create a new configuration and then a new instance. Otherwise, you can also use an existing configuration.
1. In the configuration specify the port for the Server instance and specify the default page, e.g. default.html.
5
HOB Enterprise Access: HOBLink J-Term User Manual
2. Assign the Web Server directories to the users.
3. In the Configuration menu>Request Processing>Request Routing enter the following commands: Pass /portal.db/* /<HOBEADIR>/portal.db/* Pass /HOB_EA/* /<HOBEADIR>/www/* Sample for the command line with the WRKHTTPCFG command: Welcome default.html HostName <IPOS400> Port 80 Enable GET Enable HEAD AddType .class application/octet-stream binary 1.0 DirAccess On AlwaysWelcome On Pass /portal.db/* /<HOBEADIR>/portal.db/* Pass /jterm/* /<HOBEADIR>/www/* Replace the variable <IPOS400> with a valid URL, which specifies the IP address of the OS/400 system, e.g. os400.hob.de
The configuration shown is only a sample. Pass and Mapping directives must be customized according to your demands. In the aforementioned sample you launch the default page of HOBLink J-Term by entering the URL http://os400.hob.de/HOB_EA/.
1.1.8.2 Registering HOB EA Applications on an OS/400
In the following instructions the HOB Enterprise Access installation directory is indicated as <HOBEADIR>.
1. Register the HOB EA application in a Java command line of the QShell. Switch to the following directory: <HOBEADIR>/www/lib
2. Run the JAVA-Tool jpkeyc by entering the following commands: java -classpath /<HOBEADIR>/www/lib/jpkeyc.jar:. hob.tools.jpkey.jpkeyc -a/<HOBEADIR>/www/lib -s<SERIALNO> -k<PRODKEY> -crel57.gif Replace the following variables: <HOBEADIR> with the installation directory /QOpenSys/HOB_EA <SERIALNO> with the first part of the product key <PRODKEY> with the second part of the product key
3. If your product key for instance is 1234-5678 and your installation directory is /QOpenSys/HOB_EA, the command is as follows: java -classpath /QOpenSys/HOB_EA/www/lib/jpkeyc.jar:. hob.tools.jpkey.jpkeyc -a/usr/HOB_EA/www/lib -s1234 -k5678 -crel57.gif
4. The HOB EA application has been successfully registered once the Java Tool displays a corresponding message.
6
HOB Enterprise Access Product Family
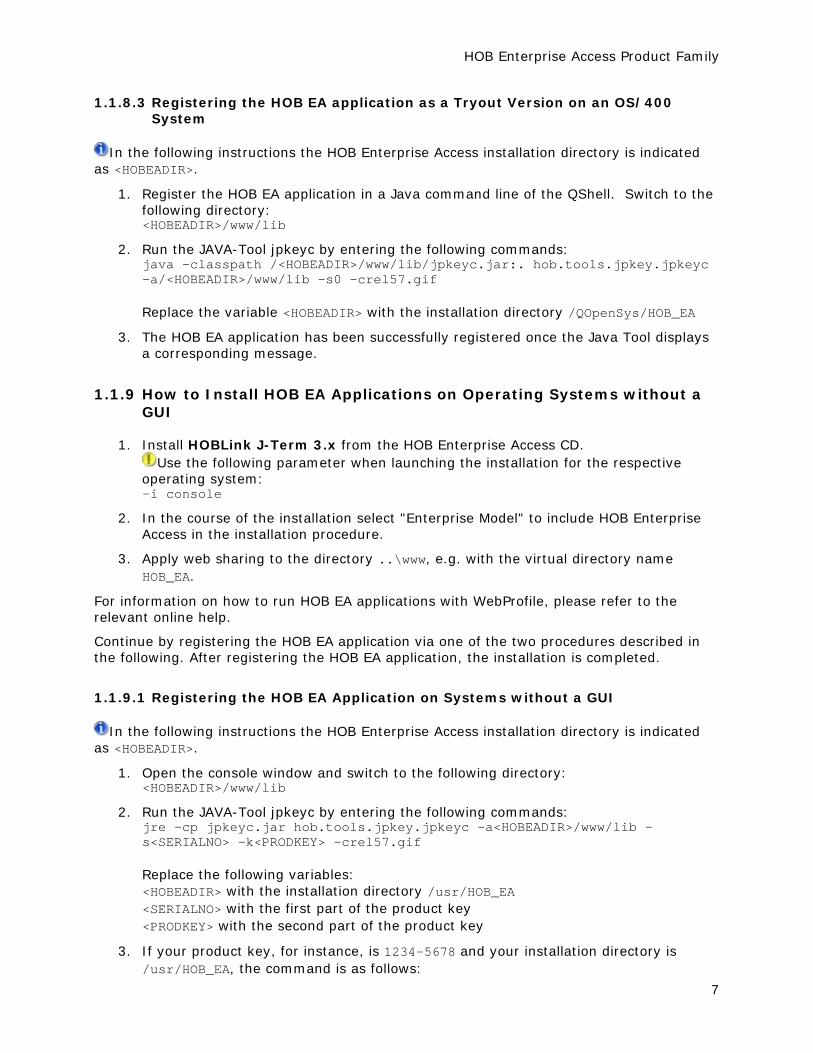
1.1.8.3 Registering the HOB EA application as a Tryout Version on an OS/400 System
In the following instructions the HOB Enterprise Access installation directory is indicated as <HOBEADIR>.
1. Register the HOB EA application in a Java command line of the QShell. Switch to the following directory: <HOBEADIR>/www/lib
2. Run the JAVA-Tool jpkeyc by entering the following commands: java -classpath /<HOBEADIR>/www/lib/jpkeyc.jar:. hob.tools.jpkey.jpkeyc -a/<HOBEADIR>/www/lib -s0 -crel57.gif Replace the variable <HOBEADIR> with the installation directory /QOpenSys/HOB_EA
3. The HOB EA application has been successfully registered once the Java Tool displays a corresponding message.
1.1.9 How to Install HOB EA Applications on Operating Systems without a GUI
1. Install HOBLink J-Term 3.x from the HOB Enterprise Access CD. Use the following parameter when launching the installation for the respective
operating system: -i console
2. In the course of the installation select "Enterprise Model" to include HOB Enterprise Access in the installation procedure.
3. Apply web sharing to the directory ..\www, e.g. with the virtual directory name HOB_EA.
For information on how to run HOB EA applications with WebProfile, please refer to the relevant online help.
Continue by registering the HOB EA application via one of the two procedures described in the following. After registering the HOB EA application, the installation is completed.
1.1.9.1 Registering the HOB EA Application on Systems without a GUI
In the following instructions the HOB Enterprise Access installation directory is indicated as <HOBEADIR>.
1. Open the console window and switch to the following directory: <HOBEADIR>/www/lib
2. Run the JAVA-Tool jpkeyc by entering the following commands: jre -cp jpkeyc.jar hob.tools.jpkey.jpkeyc -a<HOBEADIR>/www/lib -s<SERIALNO> -k<PRODKEY> -crel57.gif Replace the following variables: <HOBEADIR> with the installation directory /usr/HOB_EA <SERIALNO> with the first part of the product key <PRODKEY> with the second part of the product key
3. If your product key, for instance, is 1234-5678 and your installation directory is /usr/HOB_EA, the command is as follows:
7
HOB Enterprise Access: HOBLink J-Term User Manual
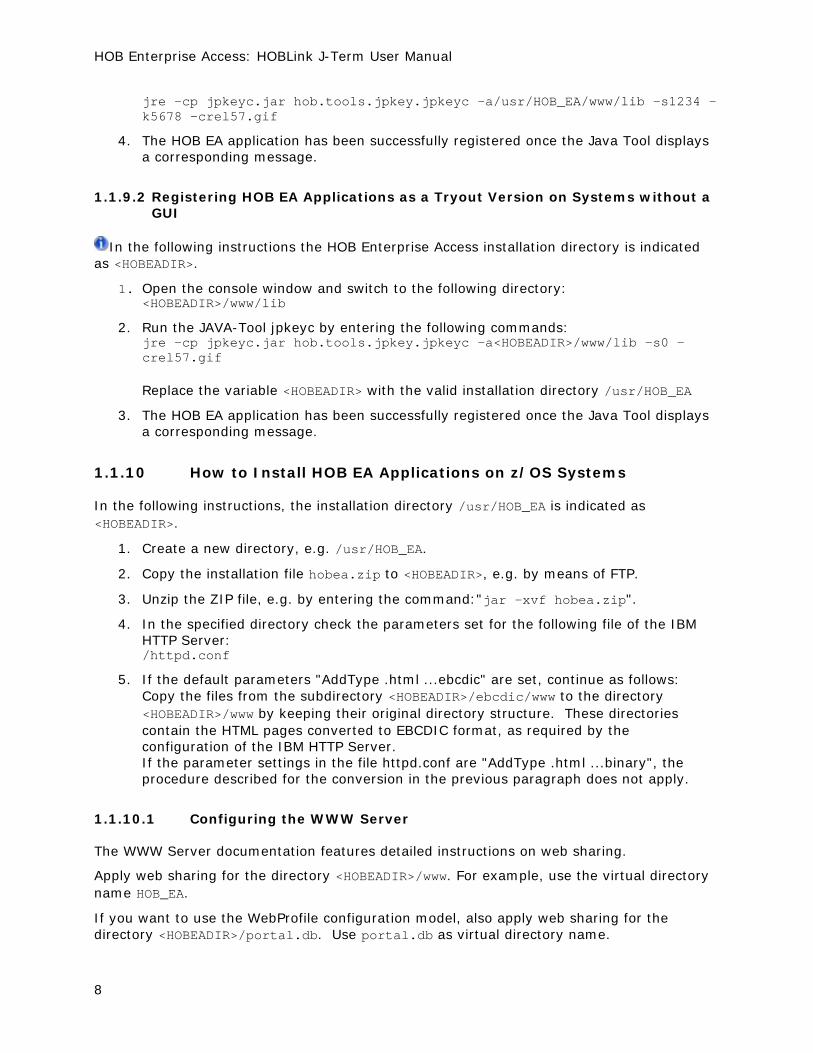
jre -cp jpkeyc.jar hob.tools.jpkey.jpkeyc -a/usr/HOB_EA/www/lib -s1234 -k5678 -crel57.gif
4. The HOB EA application has been successfully registered once the Java Tool displays a corresponding message.
1.1.9.2 Registering HOB EA Applications as a Tryout Version on Systems without a GUI
In the following instructions the HOB Enterprise Access installation directory is indicated as <HOBEADIR>.
1. Open the console window and switch to the following directory: <HOBEADIR>/www/lib
2. Run the JAVA-Tool jpkeyc by entering the following commands: jre -cp jpkeyc.jar hob.tools.jpkey.jpkeyc -a<HOBEADIR>/www/lib -s0 -crel57.gif Replace the variable <HOBEADIR> with the valid installation directory /usr/HOB_EA
3. The HOB EA application has been successfully registered once the Java Tool displays a corresponding message.
1.1.10 How to Install HOB EA Applications on z/OS Systems
In the following instructions, the installation directory /usr/HOB_EA is indicated as <HOBEADIR>.
1. Create a new directory, e.g. /usr/HOB_EA.
2. Copy the installation file hobea.zip to <HOBEADIR>, e.g. by means of FTP.
3. Unzip the ZIP file, e.g. by entering the command:"jar -xvf hobea.zip".
4. In the specified directory check the parameters set for the following file of the IBM HTTP Server: /httpd.conf
5. If the default parameters "AddType .html ...ebcdic" are set, continue as follows: Copy the files from the subdirectory <HOBEADIR>/ebcdic/www to the directory <HOBEADIR>/www by keeping their original directory structure. These directories contain the HTML pages converted to EBCDIC format, as required by the configuration of the IBM HTTP Server. If the parameter settings in the file httpd.conf are "AddType .html ...binary", the procedure described for the conversion in the previous paragraph does not apply.
1.1.10.1 Configuring the WWW Server
The WWW Server documentation features detailed instructions on web sharing.
Apply web sharing for the directory <HOBEADIR>/www. For example, use the virtual directory name HOB_EA.
If you want to use the WebProfile configuration model, also apply web sharing for the directory <HOBEADIR>/portal.db. Use portal.db as virtual directory name.
8
HOB Enterprise Access Product Family
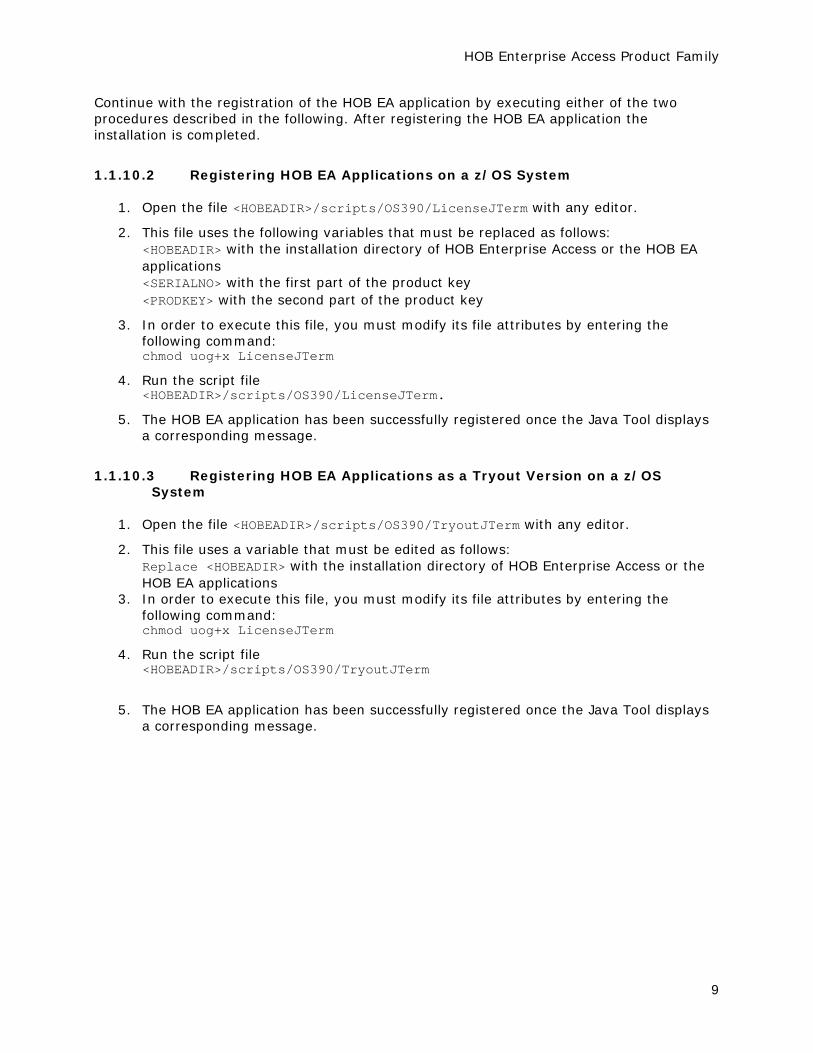
Continue with the registration of the HOB EA application by executing either of the two procedures described in the following. After registering the HOB EA application the installation is completed.
1.1.10.2 Registering HOB EA Applications on a z/OS System
1. Open the file <HOBEADIR>/scripts/OS390/LicenseJTerm with any editor.
2. This file uses the following variables that must be replaced as follows: <HOBEADIR> with the installation directory of HOB Enterprise Access or the HOB EA applications <SERIALNO> with the first part of the product key <PRODKEY> with the second part of the product key
3. In order to execute this file, you must modify its file attributes by entering the following command: chmod uog+x LicenseJTerm
4. Run the script file <HOBEADIR>/scripts/OS390/LicenseJTerm.
5. The HOB EA application has been successfully registered once the Java Tool displays a corresponding message.
1.1.10.3 Registering HOB EA Applications as a Tryout Version on a z/OS System
1. Open the file <HOBEADIR>/scripts/OS390/TryoutJTerm with any editor.
2. This file uses a variable that must be edited as follows: Replace <HOBEADIR> with the installation directory of HOB Enterprise Access or the HOB EA applications
3. In order to execute this file, you must modify its file attributes by entering the following command: chmod uog+x LicenseJTerm
4. Run the script file <HOBEADIR>/scripts/OS390/TryoutJTerm
5. The HOB EA application has been successfully registered once the Java Tool displays a corresponding message.
9

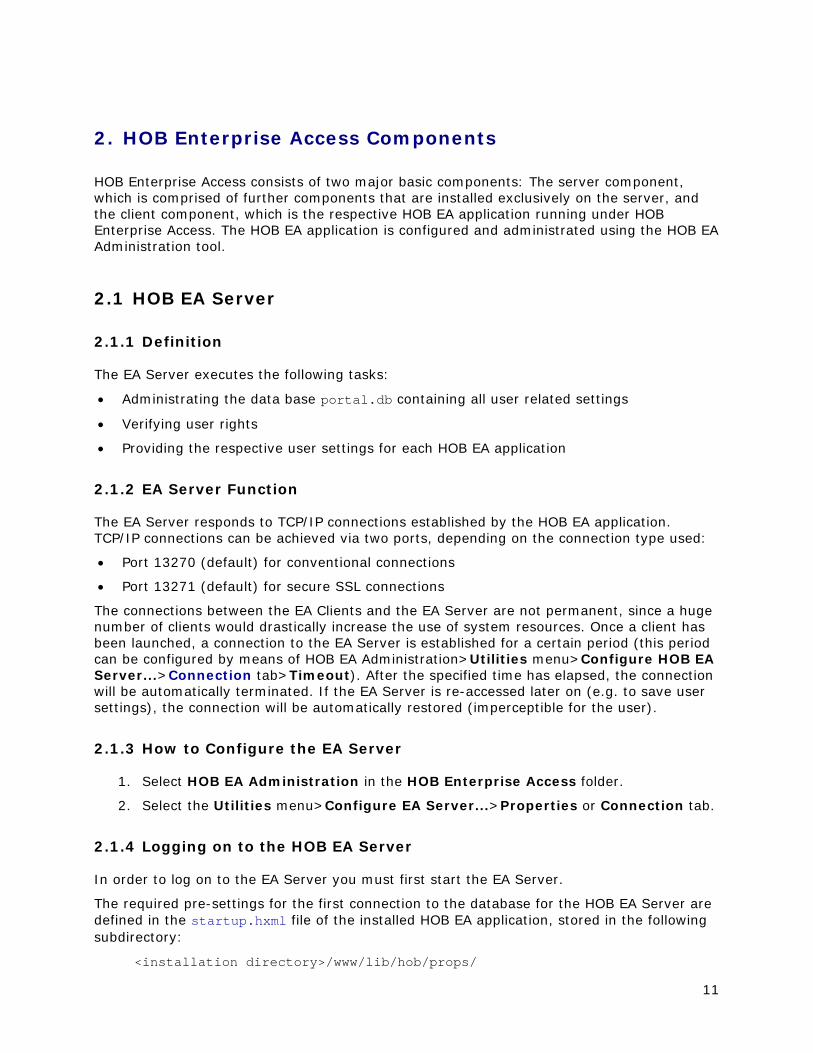
2. HOB Enterprise Access Components
HOB Enterprise Access consists of two major basic components: The server component, which is comprised of further components that are installed exclusively on the server, and the client component, which is the respective HOB EA application running under HOB Enterprise Access. The HOB EA application is configured and administrated using the HOB EA Administration tool.
2.1 HOB EA Server
2.1.1 Definition
The EA Server executes the following tasks:
• Administrating the data base portal.db containing all user related settings
• Verifying user rights
• Providing the respective user settings for each HOB EA application
2.1.2 EA Server Function
The EA Server responds to TCP/IP connections established by the HOB EA application. TCP/IP connections can be achieved via two ports, depending on the connection type used:
• Port 13270 (default) for conventional connections
• Port 13271 (default) for secure SSL connections
The connections between the EA Clients and the EA Server are not permanent, since a huge number of clients would drastically increase the use of system resources. Once a client has been launched, a connection to the EA Server is established for a certain period (this period can be configured by means of HOB EA Administration>Utilities menu>Configure HOB EA Server...>Connection tab>Timeout). After the specified time has elapsed, the connection will be automatically terminated. If the EA Server is re-accessed later on (e.g. to save user settings), the connection will be automatically restored (imperceptible for the user).
2.1.3 How to Configure the EA Server
1. Select HOB EA Administration in the HOB Enterprise Access folder.
2. Select the Utilities menu>Configure EA Server...>Properties or Connection tab.
2.1.4 Logging on to the HOB EA Server
In order to log on to the EA Server you must first start the EA Server.
The required pre-settings for the first connection to the database for the HOB EA Server are defined in the startup.hxml file of the installed HOB EA application, stored in the following subdirectory:
<installation directory>/www/lib/hob/props/
11
HOB Enterprise Access: HOBLink J-Term User Manual
Use the HOB EA Administration tool to edit this file.
2.1.4.1 How to Launch the EA Server Under Windows NT / 2000
For this operating system EA Server is installed as system service.
• The items "Start HOB EA Server" and "Stop HOB EA Server" are available in the folder HOB Enterprise Access to execute the corresponding action.
In order to launch the service automatically when booting the system, you can change the start-up mode from "Manually" to "Automatically."
• Use the Control Panel to enable the startup mode "Automatically" for the service "HOB EA Server."
2.1.4.2 How to Launch the EA Server on OS/400 Systems
In order to launch the EA Server use the following Java command in the QShell. To make the launching procedure easier we recommend writing a CL application.
Sample:
PGM MONMSG MSGID(JVA0122) MONMSG MSGID(JVAB53B) RUNJVA CLASS(hob.hlc.srv.EntprServer) PARM('-p/<HOBEADIR>') + /<HOBEADIR>/www/lib/HOBssl.jar:+ /<HOBEADIR>/www/lib/activation.jar:+ /<HOBEADIR>/www/lib/mail.jar:+ /<HOBEADIR>/www/lib/jndi/ldapbp.jar') ENDPGM
Replace the variable <HOBEADIR> with the installation path of HOB Enterprise Access or the HOB EA application (whatever applies).
This step completes the installation. You can now continue with configuring a user database using the HOB EA Administration tool.
2.1.4.3 How to Launch the EA Server on z/OS Systems
1. Open the file <HOBEADIR>/scripts/OS390/RunEAServer by means of any editor.
2. This file uses the variable <HOBEADIR> that must be replaced by the installation directory of HOB Enterprise Access or the HOB EA application (whatever applies).
3. In order to execute this file, you must modify its file attributes by entering the following command. hmod uog+x RunEAServer
4. Launch EA Server either by means of... a. the following script file <HOBEADIR>/scripts/OS390/RunEAServer or b. a Started Task, as described several lines down under the link "How to launch the EA Server on an z/OS system as Started Task."
12
HOB Enterprise Access Product Family
This step completes the installation. You can now continue with configuring a user database using the HOB EA Administration tool.
2.1.4.4 How to Launch the EA Server on z/OS Systems as a Started Task
If a Started Task has been set up, it can automatically be launched once the system has been booted.
The name of a Started Task must be defined in RACF as a user of the OMVS Segment (data set name). The following examples uses HENTPR as the name of the Started Task.
Use the following command to launch HOB Enterprise Access under z/OS from the console.
//HENTPR PROC //ENTPR EXEC PGM=BPXBATCH //STDIN DD PATH='/<HOBEADIR>/scripts/ // OS390/RunEAServer',PATHOPTS=(ORDONLY) //STDOUT DD PATH='/tmp/hentpr.out',PATHOPTS=(OWRONLY,OCREAT), // PATHMODE=SIRWXU //STDERR DD PATH='/tmp/hentpr.err',PATHOPTS=(OWRONLY,OCREAT), // PATHMODE=SIRWXU
Replace the variable <HOBEADIR> with the installation path of HOB Enterprise Access or the HOB EA application (whichever applies).
The output created by HENTPR as well as error messages can be redirected to the OMVS sets. If error messages occur, they can be viewed directly in the data set for error diagnosing purposes.
This step completes the installation. You can now continue with configuring a user database using the HOB EA Administration tool.
2.1.4.5 How to Launch the EA Server on Other Operating Systems
• Run the executable file EAServer in the installation directory.
This step completes the installation. You can now continue with configuring a user database using the HOB EA Administration tool.
2.1.4.6 Log File Entries
All actions performed by the EA Server are recorded and saved to a log file. These entries are written to the following subdirectory: / file /portal.db/logPortal.txt of the installation directory.
2.1.4.7 How to Determine the Log File Settings
1. Run HOB EA Administration from the HOB Enterprise Access folder.
2. Select EA Server menu>Log file...>OK button>Options menu>Configure log file....
2.1.4.8 How to View the Log File
1. Run HOB EA Administration from the HOB Enterprise Access folder.
13

HOB Enterprise Access: HOBLink J-Term User Manual
2. Select EA Server menu>Log file....
2.2 HOB Proxy Server
You can use the Proxy Server for TCP/IP redirection to increase the data security of your organization. Setting up a Proxy Server is urgently recommended if you communicate with a host that does not support SSL.
You can use the Proxy Server, for example, with our HOBLink Secure software (subject to additional costs) to achieve strong encryption for applications that do not support SSL at all or only offer weak encryption. The Proxy Server is the mediator between the application and the insecure data channel you want to use to communicate with your partners.
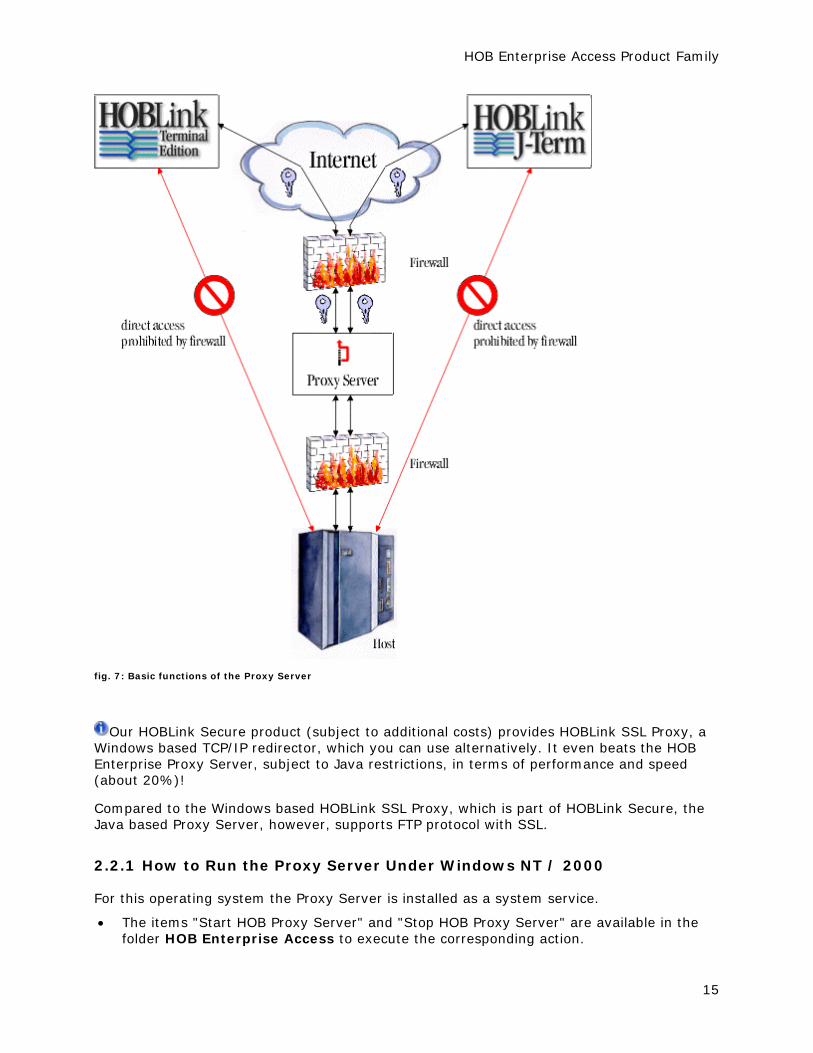
The Proxy Server acts as a transparent TCP/IP Server, which connects to other servers via the ports that are assigned to it. Each defined server has ports that can be configured individually. Instead of direct connections to the destination server, the connections are re-routed to the Proxy Server and the local ports. The Proxy Server assigns the number of the local port to the destination host port and thus establishes the connection. In any case, for security reasons you should avoid direct access to the host via the virtual host port (e.g. port 23). This goal can be easily achieved by coupling the Proxy Server with a firewall. If a DMZ (Demilitarized Zone) is set up, this is the ideal place to deploy the Proxy Server with maximum efficiency.
In this case, the installed HOB EA application (client) can attach to the host via the Proxy Server. This scenario is represented by the following graphic:
14
HOB Enterprise Access Product Family
fig. 7: Basic functions of the Proxy Server
Our HOBLink Secure product (subject to additional costs) provides HOBLink SSL Proxy, a Windows based TCP/IP redirector, which you can use alternatively. It even beats the HOB Enterprise Proxy Server, subject to Java restrictions, in terms of performance and speed (about 20%)!
Compared to the Windows based HOBLink SSL Proxy, which is part of HOBLink Secure, the Java based Proxy Server, however, supports FTP protocol with SSL.
2.2.1 How to Run the Proxy Server Under Windows NT / 2000
For this operating system the Proxy Server is installed as a system service.
• The items "Start HOB Proxy Server" and "Stop HOB Proxy Server" are available in the folder HOB Enterprise Access to execute the corresponding action.
15

HOB Enterprise Access: HOBLink J-Term User Manual
In order to launch the service automatically when booting the system, you can change the startup mode from "Manually" to "Automatically."
• Use the Control Panel to enable the startup mode "Automatically" for the service "HOB Proxy Server."
2.2.2 How to Run the Proxy Server on OS/400 Systems
Example:
PGM MONMSG MSGID(JVA0122) MONMSG MSGID(JVAB53B) RUNJVA CLASS(hob.proxy.ProxyServer) PARM('-p/<HOBEADIR>' + '-sproxysu.hxml' '-a<IPOS400>') + CLASSPATH('/<HOBEADIR>/www/lib:+ /<HOBEADIR>/www/lib/activation.jar:+ /<HOBEADIR>/www/lib/mail.jar:+ /<HOBEADIR>/www/lib/HOBssl.jar') ENDPGM
Replace the variable <HOBEADIR> with the installation path of HOB Enterprise Access or the HOB EA application (whatever applies).
2.2.3 How to Run the Proxy Server on z/OS Systems
1. Open the file <HOBEADIR>/scripts/OS390/runProxyServer by means of any editor.
2. This file uses variables that must be replaced by following: <HOBEADIR> with the installations path of HOB Enterprise Access or the HOB EA application (whatever applies). <SERVINET> by the Internet address of your Server, e.g. myserver.mydomain.com.
3. In order to execute this file, you must modify its file attributes by entering the following command. chmod uog+x runProxyServer
4. Launch EA Server either by means of... a. the following script file <HOBEADIR>/scripts/OS390/runProxyServer or b. a Started Task, as described several lines down under the link "How to launch the EA Server on an z/OS system as Started Task."
2.2.4 How to Run the Proxy Server on z/OS Systems as a Started Task
If a Started Task has been set up, it can be launched automatically once the system has been booted.
The name of a Started Task must be defined in RACF as a user of the OMVS Segment (data set name). The following example uses HPROXY as the name of the Started Task.
Use the following command to launch the Proxy Server under z/OS from the console.
16
//HPROXY PROC //PROXY EXEC PGM=BPXBATCH,REGION=6M //STDIN DDPATH='/<HOBEADIR>/scripts/
HOB Enterprise Access Product Family
// OS390/runProxyServer',PATHOPTS=(ORDONLY) //STDOUT DDPATH='/tmp/proxy.out',PATHOPTS=(OWRONLY,OCREAT), // PATHMODE=SIRWXU //STDERR DDPATH='/tmp/proxy.err',PATHOPTS=(OWRONLY,OCREAT), // PATHMODE=SIRWXU
Replace the variable <HOBEADIR> with the installation path of HOB Enterprise Access or the HOB Enterprise Access application (whatever applies).
The output created by HPROXY as well as error messages can be redirected to the OMVS sets. If error messages occur, they can be viewed directly in the data set for error diagnostic purposes.
2.2.5 How to Run the Proxy Server on Other Operating Systems
• Run the executable file ProxyServer in the installation directory.
2.2.6 Proxy Server Settings
When the Proxy Server is launched, it always uses the startup options defined in the file proxysu.hxml in the following subdirectory of the installation path:
<installation directory>/www/lib/hob/props/
The following parameter is specified as default for the Proxy Server, so the aforementioned file is used on launching the Proxy Server, e.g.
\lib\hob.proxy.ProxyServer -sproxysu.hxml
You can also use customized HXML files with alternative options. Simply specify the desired file name instead of the specified file proxysu.hxml. If blanks are used within the file name you must put the entire parameter in quotation marks, e.g. "-suserdefined settings.hxml".
2.3 Client Component
The client component is the respective HOB EA application being used in conjunction with HOB Enterprise Access. It is recommended to use the HOB EA Administration tool to configure and administrate the HOB EA applications. The HOB EA applications are:
• HOBLink J-Term
This product supplies emulations which can be optionally run as guified versions.
Users are identified by user name and password or by the IP address.
The emulations are accessible via the user settings. These may or may not be editable by the user depending on the user rights configured for that respective user.
• HOBLink JWT EA / UWT EA
Java client that connects any platform (Windows, UNIX, Macintosh, NC, OS/2 and Handheld PCs) with Microsoft Windows Terminal Servers.
17
HOB Enterprise Access: HOBLink J-Term User Manual
HOBLink UWT is a Native Client that connects Linux systems with Microsoft Windows Terminal Servers.
Users are identified by user name and password or by the IP address.
Both clients are accessible via the user settings. These may or may not be editable by the user depending on the user rights configured for that respective user.
• HOBLink VPN
A Virtual Private Network security solution providing IPSec and SSL security, with a universal gateway and client design, firewall functions, strong authentication and more.
2.4 HOB Enterprise Access Administration
HOB EA Administration is a Java-based application. This tool is used for:
• Configuring the HOB EA Server, which administrates the user settings in a database
• Creating and administrating users, groups, containers and their properties
• Configuring the HOB EA applications
• Determining the startup options, which provide basic settings for logging on to the data base and the connection to the EA Server
• Issuing user rights
• Setting up filters, which, for instance, prevent the user from executing a specific action, e.g. menu commands
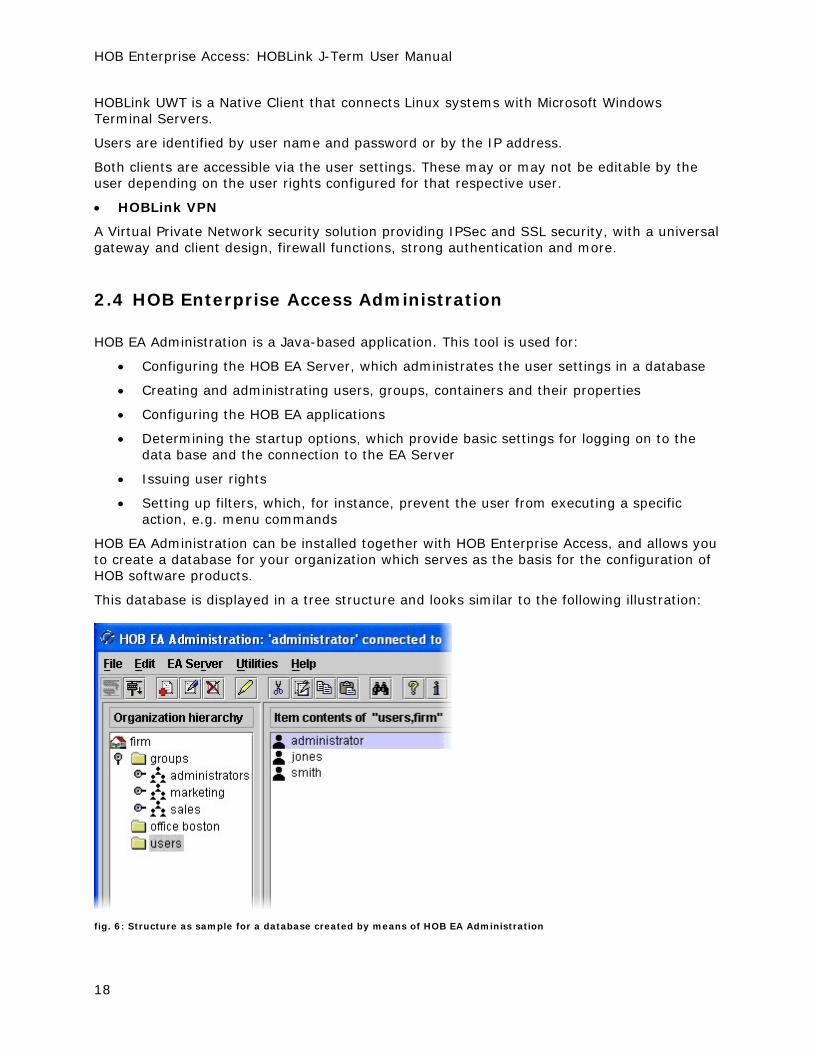
HOB EA Administration can be installed together with HOB Enterprise Access, and allows you to create a database for your organization which serves as the basis for the configuration of HOB software products.
This database is displayed in a tree structure and looks similar to the following illustration:
fig. 6: Structure as sample for a database created by means of HOB EA Administration
18
HOB Enterprise Access Product Family
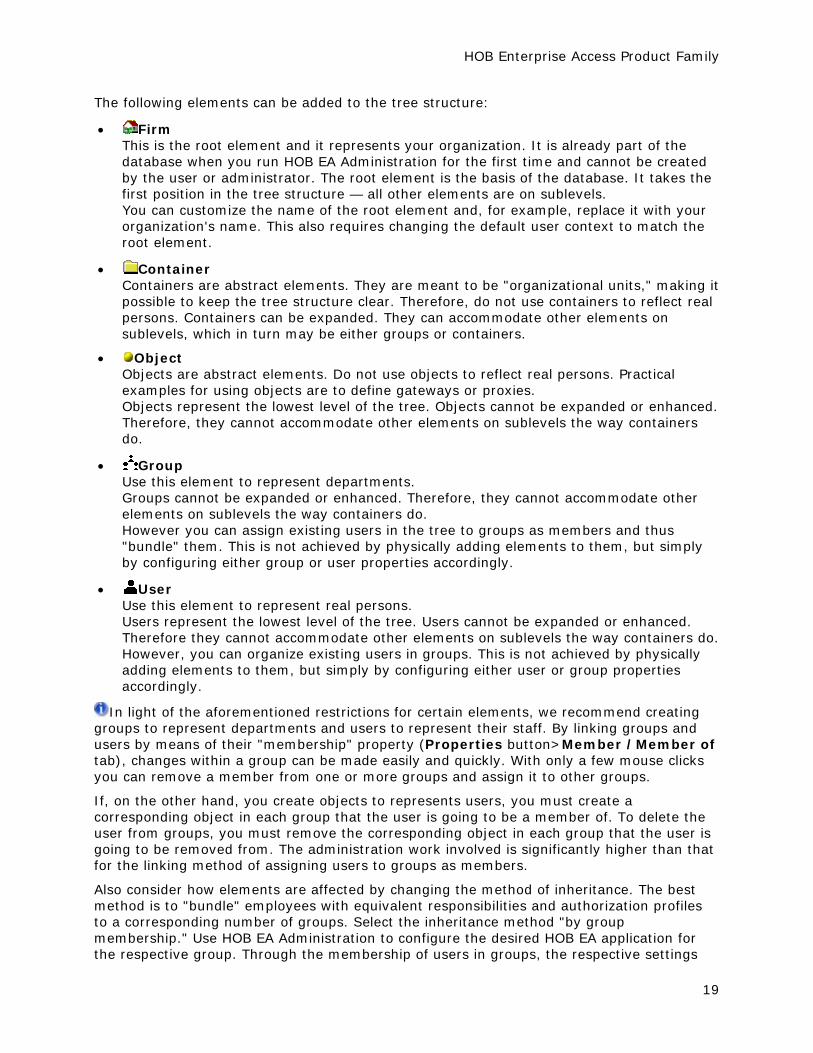
The following elements can be added to the tree structure:
• Firm This is the root element and it represents your organization. It is already part of the database when you run HOB EA Administration for the first time and cannot be created by the user or administrator. The root element is the basis of the database. It takes the first position in the tree structure — all other elements are on sublevels. You can customize the name of the root element and, for example, replace it with your organization's name. This also requires changing the default user context to match the root element.
• Container Containers are abstract elements. They are meant to be "organizational units," making it possible to keep the tree structure clear. Therefore, do not use containers to reflect real persons. Containers can be expanded. They can accommodate other elements on sublevels, which in turn may be either groups or containers.
• Object Objects are abstract elements. Do not use objects to reflect real persons. Practical examples for using objects are to define gateways or proxies. Objects represent the lowest level of the tree. Objects cannot be expanded or enhanced. Therefore, they cannot accommodate other elements on sublevels the way containers do.
• Group Use this element to represent departments. Groups cannot be expanded or enhanced. Therefore, they cannot accommodate other elements on sublevels the way containers do. However you can assign existing users in the tree to groups as members and thus "bundle" them. This is not achieved by physically adding elements to them, but simply by configuring either group or user properties accordingly.
• User Use this element to represent real persons. Users represent the lowest level of the tree. Users cannot be expanded or enhanced. Therefore they cannot accommodate other elements on sublevels the way containers do. However, you can organize existing users in groups. This is not achieved by physically adding elements to them, but simply by configuring either user or group properties accordingly.
In light of the aforementioned restrictions for certain elements, we recommend creating groups to represent departments and users to represent their staff. By linking groups and users by means of their "membership" property (Properties button>Member /Member of tab), changes within a group can be made easily and quickly. With only a few mouse clicks you can remove a member from one or more groups and assign it to other groups.
If, on the other hand, you create objects to represents users, you must create a corresponding object in each group that the user is going to be a member of. To delete the user from groups, you must remove the corresponding object in each group that the user is going to be removed from. The administration work involved is significantly higher than that for the linking method of assigning users to groups as members.
Also consider how elements are affected by changing the method of inheritance. The best method is to "bundle" employees with equivalent responsibilities and authorization profiles to a corresponding number of groups. Select the inheritance method "by group membership." Use HOB EA Administration to configure the desired HOB EA application for the respective group. Through the membership of users in groups, the respective settings
19
HOB Enterprise Access: HOBLink J-Term User Manual
and rights are inherited by users within the group. This way you can quickly react to internal staff changes and assign users to other groups. The other way around, you also control rights that are issued to the user.
2.4.1 Installing HOB EA Administration
After installing HOB Enterprise Access, the HOB EA Administration tool is only available on the computer on which you have run the installation. To be able to access this tool from any workstation in your network, we offer the following options:
2.4.1.1 How to Install HOB EA Administration on Client PC’s
This alternative allows you to install HOB EA Administration on selected computers.
1. Insert HOB Enterprise Access CD in appropriate drive.
2. Install HOB EA Administration on the Client PC from which you want to run the tool.
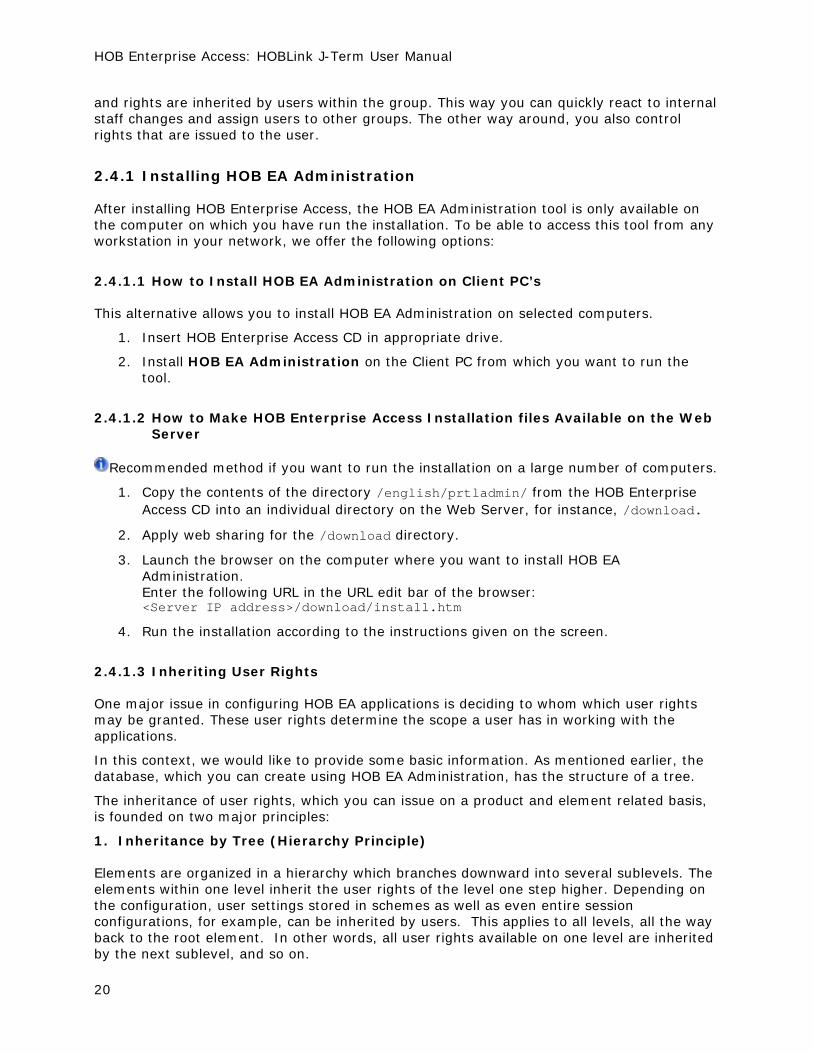
2.4.1.2 How to Make HOB Enterprise Access Installation files Available on the Web Server
Recommended method if you want to run the installation on a large number of computers.
1. Copy the contents of the directory /english/prtladmin/ from the HOB Enterprise Access CD into an individual directory on the Web Server, for instance, /download.
2. Apply web sharing for the /download directory.
3. Launch the browser on the computer where you want to install HOB EA Administration. Enter the following URL in the URL edit bar of the browser: <Server IP address>/download/install.htm
4. Run the installation according to the instructions given on the screen.
2.4.1.3 Inheriting User Rights
One major issue in configuring HOB EA applications is deciding to whom which user rights may be granted. These user rights determine the scope a user has in working with the applications.
In this context, we would like to provide some basic information. As mentioned earlier, the database, which you can create using HOB EA Administration, has the structure of a tree.
The inheritance of user rights, which you can issue on a product and element related basis, is founded on two major principles:
1. Inheritance by Tree (Hierarchy Principle)
Elements are organized in a hierarchy which branches downward into several sublevels. The elements within one level inherit the user rights of the level one step higher. Depending on the configuration, user settings stored in schemes as well as even entire session configurations, for example, can be inherited by users. This applies to all levels, all the way back to the root element. In other words, all user rights available on one level are inherited by the next sublevel, and so on.
20
HOB Enterprise Access Product Family
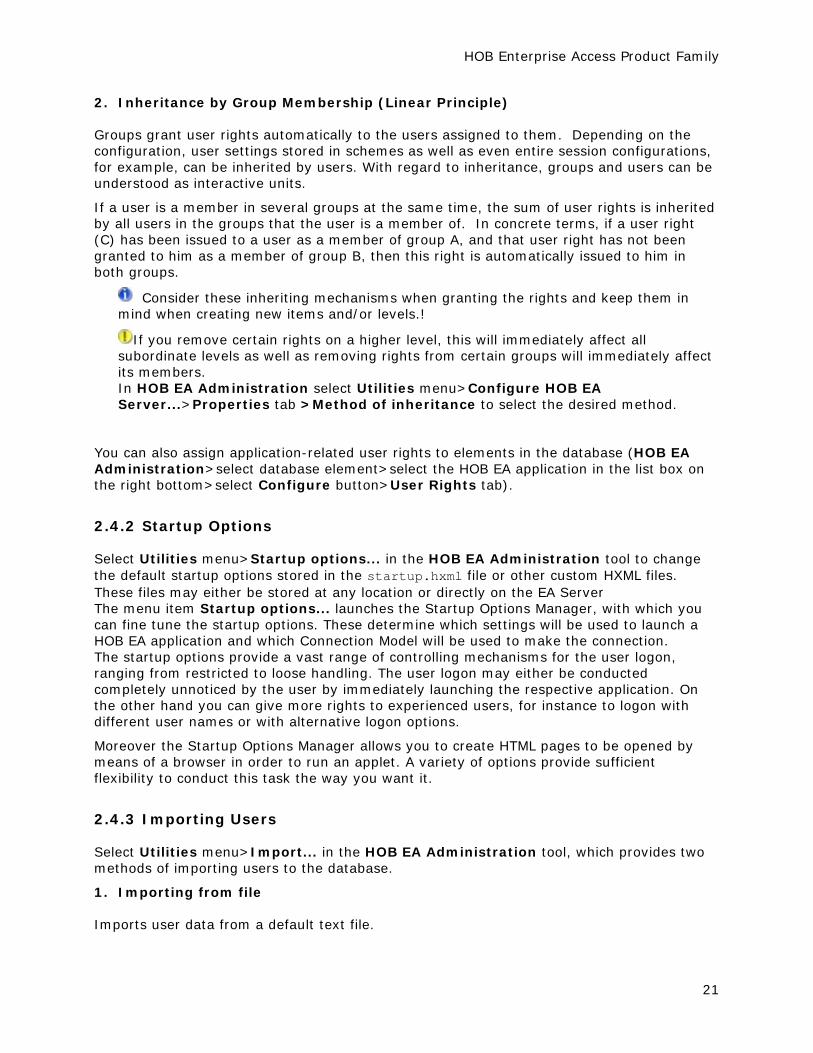
2. Inheritance by Group Membership (Linear Principle)
Groups grant user rights automatically to the users assigned to them. Depending on the configuration, user settings stored in schemes as well as even entire session configurations, for example, can be inherited by users. With regard to inheritance, groups and users can be understood as interactive units.
If a user is a member in several groups at the same time, the sum of user rights is inherited by all users in the groups that the user is a member of. In concrete terms, if a user right (C) has been issued to a user as a member of group A, and that user right has not been granted to him as a member of group B, then this right is automatically issued to him in both groups.
Consider these inheriting mechanisms when granting the rights and keep them in mind when creating new items and/or levels.!
If you remove certain rights on a higher level, this will immediately affect all subordinate levels as well as removing rights from certain groups will immediately affect its members. In HOB EA Administration select Utilities menu>Configure HOB EA Server...>Properties tab >Method of inheritance to select the desired method.
You can also assign application-related user rights to elements in the database (HOB EA Administration>select database element>select the HOB EA application in the list box on the right bottom>select Configure button>User Rights tab).
2.4.2 Startup Options
Select Utilities menu>Startup options... in the HOB EA Administration tool to change the default startup options stored in the startup.hxml file or other custom HXML files. These files may either be stored at any location or directly on the EA Server The menu item Startup options... launches the Startup Options Manager, with which you can fine tune the startup options. These determine which settings will be used to launch a HOB EA application and which Connection Model will be used to make the connection. The startup options provide a vast range of controlling mechanisms for the user logon, ranging from restricted to loose handling. The user logon may either be conducted completely unnoticed by the user by immediately launching the respective application. On the other hand you can give more rights to experienced users, for instance to logon with different user names or with alternative logon options.
Moreover the Startup Options Manager allows you to create HTML pages to be opened by means of a browser in order to run an applet. A variety of options provide sufficient flexibility to conduct this task the way you want it.
2.4.3 Importing Users
Select Utilities menu>Import... in the HOB EA Administration tool, which provides two methods of importing users to the database.
1. Importing from file
Imports user data from a default text file.
21

HOB Enterprise Access: HOBLink J-Term User Manual
Each line must provide user name, group and password (optional). The data can either be tab stop separated or semicolon separated. In the following dialogs select the import file and the destination elements in the tree, where the data is to be inserted.
The installation directory contains the sample file ImportUsers.txt, which provides further details.
2. Importing with LDAP
Imports user data from an LDAP Server database.
22
3. HOBLink J-Term
3.1 Welcome to HOBLink J-Term
HOBLink J-Term is the solution for EA Connectivity via the Internet, providing you with terminal emulations for 3270, 5250, VT, HP700, Siemens 9750 (BS2000) and SINIX 97801 (Siemens) in Java, in one single application. HOBLink J-Term can be run on any computer on which a Java Virtual Machine is installed that supports JDK 1.1.7, e.g., on a PC with a web browser or on a network client. HOBLink J-Term is a certified Java solution.
3.2 HOBLink J-Term Session Manager
The Session Manager is the control center for all sessions. The Session Manager provides a clear overview of all available sessions.
Provided that your system administrator has granted you the required user rights (only applicable when installed with HOB Enterprise Access), you can carry out the following procedures relevant to HOBLink sessions:
3.2.1 Options
Folder
Shows the name of the currently selected folder or \, if you are in the root of the Session Manager.
BY pressing you can move up one level, if you are currently within a folder. This button has no effect if you are in the root (the folder field displays \).
The Session Manager provides several ways of displaying folders to arrange and identify
them. Press to select one of the following display formats:
• Large Icons
Shows Session / Folder names using large icons, arranged in rows from left to right.
• Small Icons
Shows Session / Folder names using small icons, arranged in rows from left to right.
• List
Shows Session / Folder names in list format, displaying small icons in front. The entries are arranged in columns from top to bottom.
• Details
Shows Session / Folder names in list format, displaying large icons in front. The entries are arranged in columns from top to bottom. They also provide enhanced information such as Name, Type, State and Owner.
Run
23
HOB Enterprise Access: HOBLink J-Term User Manual
Runs the currently selected session(s).
Close
Closes the currently selected session(s).
New...
Creates a new session in the Session Manager.
Clone
Adds copies of one or more currently selected sessions.
(See SectionXXX, below, for more detailed information on cloning sessions.)
Edit...
Edit and modify schemes in the Session Editor, in which the session-specific settings are saved
Schemes are used to store session specific settings.
Edit All...
Modifies schemes for all session in Session Editor. This button is available only when at least two sessions in the window are selected (multiple selection by pressing [Ctrl] in addition).
You can also use this button to group folders logically.
Delete
Removes currently selected session(s) from the list.
3.2.2 Cloning Sessions
1. Start the Session Manager.
Select name of the desired session. To select multiple sessions simultaneously click and hold down [Ctrl] and then click the
desired sessions.
This function is only available, provided that your system administrator has granted you the required user rights (only applicable for the installation of HOB Enterprise Access).
2. Click Clone button.
A cloned session can be only distinguished from its original by the name, which consists of the prefix Copy of and the original session name, i.e. Copy of Session 1, if Session 1 is the original session name.
For more detailed information, please see the corresponding J-Term online help item.
24
HOBLink J-Term
3.3 HOBLink J-Term Session Editor
Provided that your system administrator has granted you the required user rights (only applicable for the installation of HOB Enterprise Access), you can edit the settings of a scheme in the tabs shown on the right.
All modifications in a scheme are incorporated and saved when the Session Editor is closed.
The affiliated schemes of either a display session or a printer session are displayed in the left pane in a tree structure on multiple levels. It is necessary to open a particular level to view its contents.
3.3.1 Options
New
Creates a new scheme for the selected scheme type. You can modify the settings for this scheme in the tab card in the right pane.
The button is disabled if your system administrator has not granted you rights to this process (only applicable for the installation of HOB Enterprise Access).
Delete
Deletes the scheme that is highlighted in the sublevel of a scheme type.
The button is disabled if your system administrator has not granted you rights to this process (only applicable for the installation of HOB Enterprise Access).
Set
When more than one scheme of this scheme type is displayed in the left pane of the tree view, this activates the scheme to be used for the connection setup. The scheme to be used appears bold.
You may choose only one scheme for each scheme type as the active scheme.
Undo
Cancels all current modifications that have been made in the tab card for the displayed scheme. This action is no longer possible as soon as you select another scheme, since this action saves the changes in the first scheme.
Default
Restores the default settings for the selected scheme.
Close
Closes the Session Editor and applies all modifications of the schemes.
3.3.2 Display Session
If a session is defined as a display session, you can use it on a PC to start host applications and take advantage of all the functions of a terminal.
The OIA (Operator Information Area) appears and shows the current connection status. To obtain detailed information about the connection, please refer to the online help.
25
HOB Enterprise Access: HOBLink J-Term User Manual
3.3.3 Printer Session
If a session is defined as a printer session, you can use a PC printer as a host printer.
The OIA also appears here (as in the display session) and shows the current connection status. To get detailed information about the connection, please refer to the online help.
3.3.4 User Defined Options
You can enter any of the listed functions in the User Defined Options tab found in the Others scheme.
Here you have the option of making other settings for the HOB EA application that were not covered in the dialogs provided.
26
HOBLink J-Term
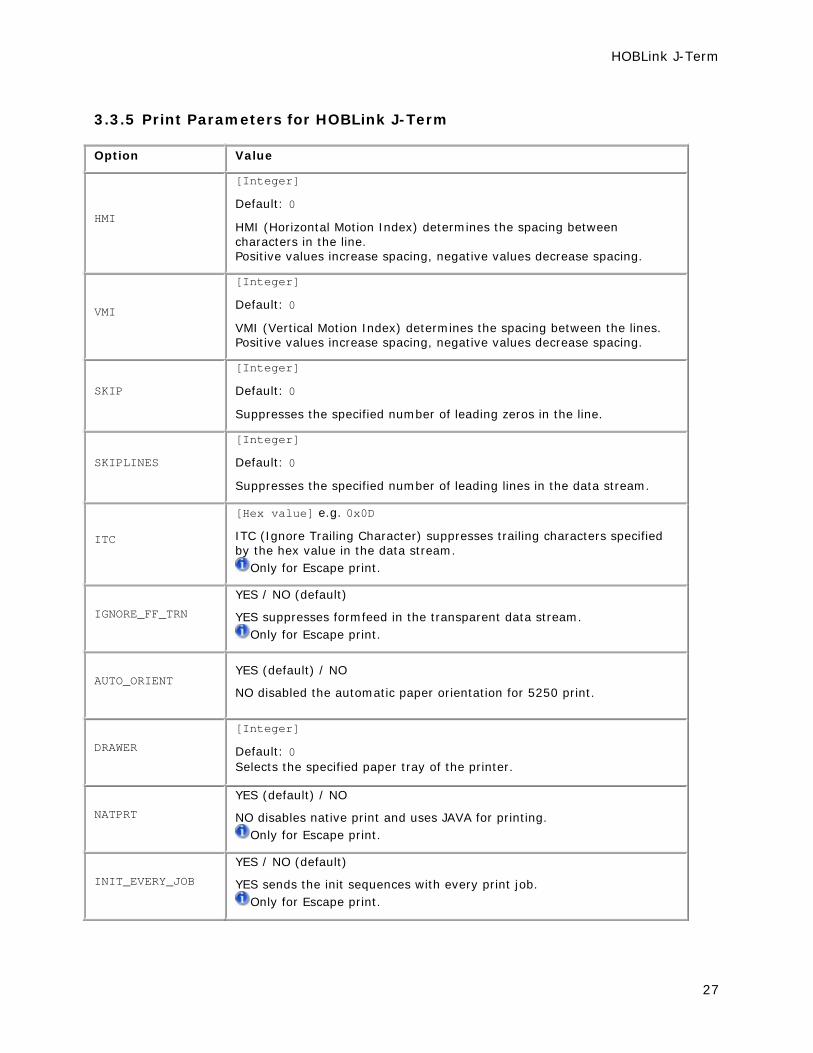
3.3.5 Print Parameters for HOBLink J-Term
Option Value
HMI
[Integer]
Default: 0
HMI (Horizontal Motion Index) determines the spacing between characters in the line. Positive values increase spacing, negative values decrease spacing.
VMI
[Integer]
Default: 0
VMI (Vertical Motion Index) determines the spacing between the lines. Positive values increase spacing, negative values decrease spacing.
SKIP
[Integer]
Default: 0
Suppresses the specified number of leading zeros in the line.
SKIPLINES
[Integer]
Default: 0
Suppresses the specified number of leading lines in the data stream.
ITC
[Hex value] e.g. 0x0D
ITC (Ignore Trailing Character) suppresses trailing characters specified by the hex value in the data stream.
Only for Escape print.
IGNORE_FF_TRN
YES / NO (default)
YES suppresses formfeed in the transparent data stream. Only for Escape print.
AUTO_ORIENT YES (default) / NO
NO disabled the automatic paper orientation for 5250 print.
DRAWER
[Integer]
Default: 0 Selects the specified paper tray of the printer.
NATPRT
YES (default) / NO
NO disables native print and uses JAVA for printing. Only for Escape print.
INIT_EVERY_JOB
YES / NO (default)
YES sends the init sequences with every print job. Only for Escape print.
27
HOB Enterprise Access: HOBLink J-Term User Manual
PRT_SHF_CPI
YES / NO (Standard)
YES customizes the CPI when retaining the SHF command (Set Horizontal Format), depending on which page width is requested by the SHF command. If e.g. the SHF command sets 132 characters per line, CPI is modified to 17 CPI so that 132 characters will fit the line.
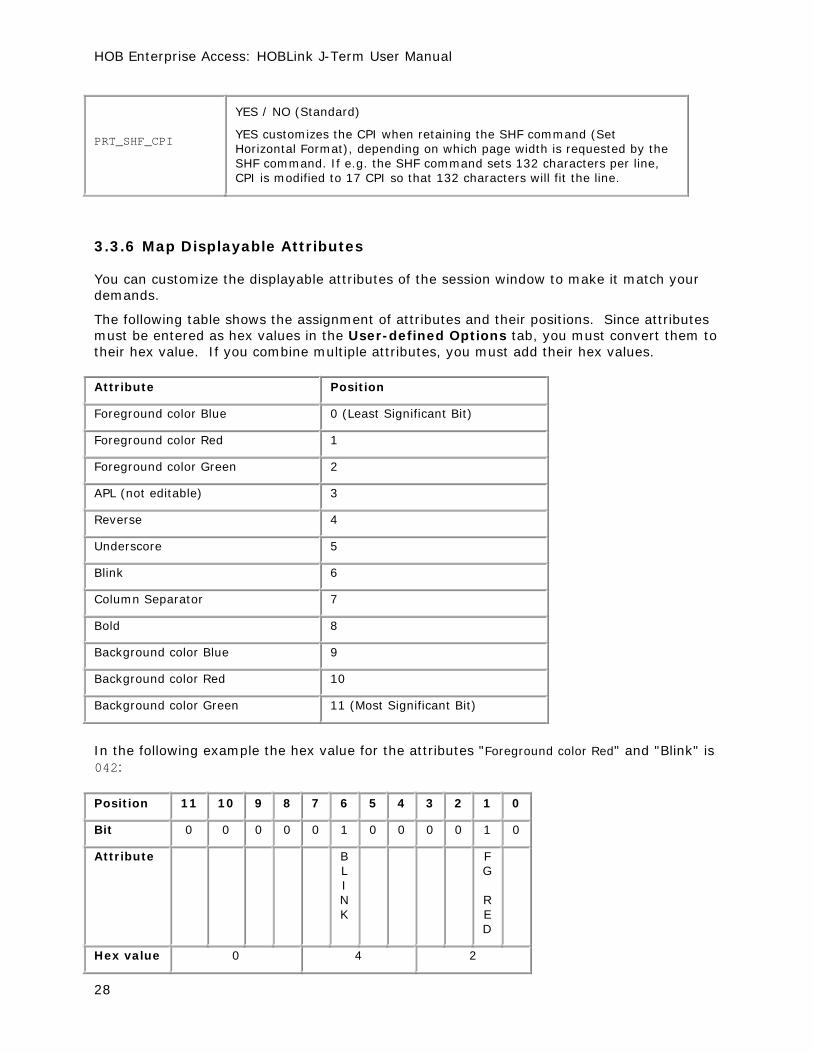
3.3.6 Map Displayable Attributes
You can customize the displayable attributes of the session window to make it match your demands.
The following table shows the assignment of attributes and their positions. Since attributes must be entered as hex values in the User-defined Options tab, you must convert them to their hex value. If you combine multiple attributes, you must add their hex values.
Attribute Position
Foreground color Blue 0 (Least Significant Bit)
Foreground color Red 1
Foreground color Green 2
APL (not editable) 3
Reverse 4
Underscore 5
Blink 6
Column Separator 7
Bold 8
Background color Blue 9
Background color Red 10
Background color Green 11 (Most Significant Bit)
In the following example the hex value for the attributes "Foreground color Red" and "Blink" is 042:
Position 11 10 9 8 7 6 5 4 3 2 1 0
Bit 0 0 0 0 0 1 0 0 0 0 1 0
Attribute B L I N K
F G R E D
Hex value 0 4 2
28
HOBLink J-Term
The mapping of attributes requires the following information:
1. The current value, specifying one or more attributes.
2. A filter that determines the attributes to be compared.
3. The target value, specifying the result of the attribute mapping.
3.3.6.1 Mapping Attributes
1. Enter the following in the Option field to map the desired attribute (Option column in the following table). Start off with the parameter MAP_ATTR0.
The attributes must be numbered in ascending order. You can enter a maximum of 16 attribute mappings (MAP_ATTR0 ... MAP_ATTR15.
2. Enter the following information as hex values in the Value field (Value column in the following table), which must be separated from each other by semicolons. The respective hex value must be converted according to the above tables: - the current value of the attribute(s). - the filter, determining, which attribute(s) is (are) to be changed. - the target attribute value, specifying the result of the mapping. - the filter, determining which attribute(s) will be overwritten. All others remain unchanged.
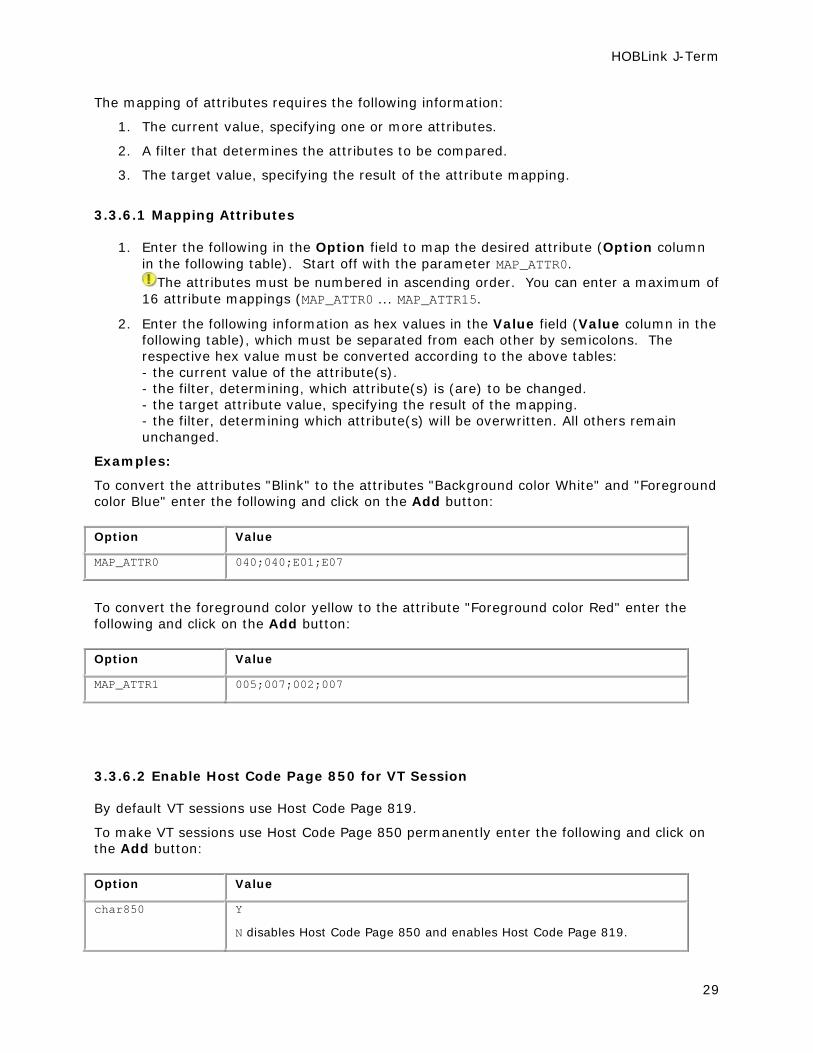
Examples:
To convert the attributes "Blink" to the attributes "Background color White" and "Foreground color Blue" enter the following and click on the Add button:
Option Value
MAP_ATTR0 040;040;E01;E07
To convert the foreground color yellow to the attribute "Foreground color Red" enter the following and click on the Add button:
Option Value
MAP_ATTR1 005;007;002;007
3.3.6.2 Enable Host Code Page 850 for VT Session
By default VT sessions use Host Code Page 819.
To make VT sessions use Host Code Page 850 permanently enter the following and click on the Add button:
Option Value
char850 Y
N disables Host Code Page 850 and enables Host Code Page 819.
29
HOB Enterprise Access: HOBLink J-Term User Manual
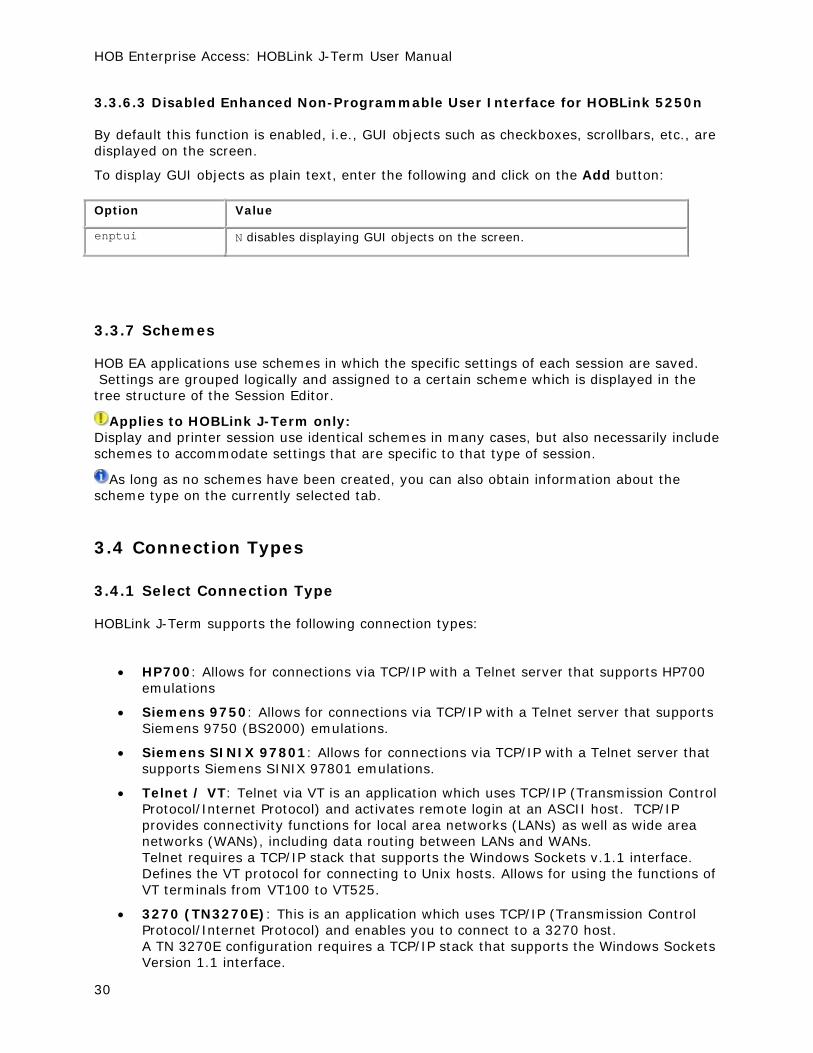
3.3.6.3 Disabled Enhanced Non-Programmable User Interface for HOBLink 5250n
By default this function is enabled, i.e., GUI objects such as checkboxes, scrollbars, etc., are displayed on the screen.
To display GUI objects as plain text, enter the following and click on the Add button:
Option Value
enptui N disables displaying GUI objects on the screen.
3.3.7 Schemes
HOB EA applications use schemes in which the specific settings of each session are saved. Settings are grouped logically and assigned to a certain scheme which is displayed in the tree structure of the Session Editor.
Applies to HOBLink J-Term only: Display and printer session use identical schemes in many cases, but also necessarily include schemes to accommodate settings that are specific to that type of session.
As long as no schemes have been created, you can also obtain information about the scheme type on the currently selected tab.
3.4 Connection Types
3.4.1 Select Connection Type
HOBLink J-Term supports the following connection types:
• HP700: Allows for connections via TCP/IP with a Telnet server that supports HP700 emulations
• Siemens 9750: Allows for connections via TCP/IP with a Telnet server that supports Siemens 9750 (BS2000) emulations.
• Siemens SINIX 97801: Allows for connections via TCP/IP with a Telnet server that supports Siemens SINIX 97801 emulations.
• Telnet / VT: Telnet via VT is an application which uses TCP/IP (Transmission Control Protocol/Internet Protocol) and activates remote login at an ASCII host. TCP/IP provides connectivity functions for local area networks (LANs) as well as wide area networks (WANs), including data routing between LANs and WANs. Telnet requires a TCP/IP stack that supports the Windows Sockets v.1.1 interface. Defines the VT protocol for connecting to Unix hosts. Allows for using the functions of VT terminals from VT100 to VT525.
• 3270 (TN3270E): This is an application which uses TCP/IP (Transmission Control Protocol/Internet Protocol) and enables you to connect to a 3270 host. A TN 3270E configuration requires a TCP/IP stack that supports the Windows Sockets Version 1.1 interface.
30
HOBLink J-Term
• 5250 (TN5250): TN5250 allows for connections via TCP/IP with a Telnet server that supports 5250 emulations, e.g. an IBM AS/400 or a Communications Server for Windows NT.
For detailed information on these connection types, e.g., general options, security options, etc., please see the online help item for the desired connection type.
3.5 Host Printing
The following section describes the different ways of host printing provided by HOBLink J-Term.
3.5.1 GDI Print (Graphical Display Interface)
This mode is recommended. It meets most demands required by state of the art printing. Print data will be graphically processed on the PC and will then be forwarded to the printer.
This mode is the default print mode set by HOBLink J-Term.
3.5.2 Native GDI Windows Print (only for Windows)
The GDI Printer mode uses only Windows print functions for printing. This operation downloads DLLs from the Web Server and installs them locally.
Benefits
Supports the printer selection dialog, which usually displays with every print job.
Determines a specific printer or the default Windows printer defined on the system.
Supports the highest resolution the printer is capable of. JAVA print, however, reaches its limitations by printing a maximum of 72 dpi.
3.5.3 Escape Print
This mode forwards the print data to the printer as text including the printer commands. They will be graphically processed at the printer. Escape Print increases performance by reducing the data volume forwarded to the printer (as compared with GDI print).
Escape print is required if the host print data stream contains printer escape sequences. Escape print uses Printer Definition Files. These contain the formatting information of the print data and can be configured individually.
For Escape print various print targets can be configured. For more information on this subject, please see the online help.
3.5.3.1 Escape Print with Windows
Escape print with Windows uses only Windows printing functions. This operation downloads DLLs from the Web Server and installs them locally.
Escape print with Windows is only available for the print targets Port and Easy Print!
Benefits
31
HOB Enterprise Access: HOBLink J-Term User Manual
Avoids problems certain (network) printers have with JAVA functions
Allows the use of a locally attached USB printer.
Supports the Windows default printer and allows its configuration.
3.5.3.2 Escape Print with JAVA
Escape print with JAVA uses only JAVA printing functions.
• JAVA Print Basics
When you send a host file to print, you are actually printing to a PC file. However, if the Printer Name specified in the session configuration is that of a target that the operating system recognizes, such as LPTn, the output is redirected to the target. If not, a file is created (with the name specified in the Printer Name field), and output is sent to that file. For example, if you enter "9.9.9.9" as the Printer Name, a file with that name is created (in the browser's working directory by default).
• JAVA Print on Windows
On Windows, print output goes to a printer if you enter any valid LPT number or a UNC (Universal Naming Convention, a default PC format for identification of Servers, printers and other devices in a network) name, such as \\server_name\printer_name.
• JAVA Print on AIX / UNIX / LINUX
Print output goes directly to a printer if you enter a device name such as /dev/lp0. However, printing to a network printer is a two-stage process:
1. Configure the session with the print target File. Enter a valid file name under File Path and Name (for example, hprint.*).
2. When the print job has finished, go to a command prompt and issue the appropriate command to send the file to a remote printer. For example, lp-dprtq1 hprint.000 or lpr-Pprtq1 -b hprint.000 (the name of the remote printer in this example is prtq1).
3.5.3.3 Configuring and Using Printer Definition Files
For every printer it is possible to define the properties (escape sequences) in the printer definition file. HOBLink J-Term reads these character strings for the specified printer and forwards them to the printer.
For printers that are not listed, you can create your own Printer Definition Files with an ASCII editor. Printer definition files must be named using the *.gif extension and be saved in the path \<JTERMDIR>\www\lib\hob\comm\prt.
3.5.3.4 Additional Print Options
Besides the configurable Windows functions you can specify additional options in the Others scheme>User Defined Options (Overview button in the online help). For more information on this subject, please see the online help.
32
HOBLink J-Term
3.6 Parameters for HOB EA Applications
The following parameters can be used when launching HOB EA applications.
They must be specified in the respective HTML pages.
The syntax of the entries varies, depending on whether you are running J-Term as an applet or as a Java application:
3.6.1 Parameters for the Applet
Parameter Name
Value Description
startup alphanumeric characters
Specifies the name of the HXML file defining the start up options that are used by the application.
The startup.hxml file is specified as default, however marked as a comment only and therefore disabled. To use this file, delete the characters xx preceding the file name and save the changes. Customized HXML files with alternative options, must be placed in the following subdirectory of the installation path:
<installation directory>/www/lib/hob/props/
This directory can contain several alternative files with different startup options. They can be enabled anytime by specifying the respective file name in the HTML page.
If the startup parameter is not specified, the HOB EA application is run with its default startup options and typical default settings.
In this case you can also specify the parameter webprofile, to use a WebProfile defining the user settings
webprofile= y or n Default: n
HOB EA application will be launched without using a WebProfile
value: y
HOB EA application will be launched by means of a WebProfile
This entry is meaningless if the parameter startup is being used.
userhome alphanumeric characters
This parameter specifies the valid User Home directory including its path. All startup options are stored in the subdirectory \hob_jportal of the respective path, e.g.:
C:\Program Files\Settings\
multihome y or n Default: n
By default this parameter is set as a comment and therefore not enabled. To enable this parameter delete the xx characters ahead of the parameter and save the changes.
This option only affects MS Internet Explorer!
Due to restrictions for HOB EA applications on Windows Terminal Servers user specific settings may not be stored in the default User Home directory. Enable the parameter to store the settings in the
33
HOB Enterprise Access: HOBLink J-Term User Manual
following directory:
/profile/<Username>/hob_jportal
username
password
alphanumeric characters
Specifies the user name or password for the logon to HOB Enterprise Access.
HOBLink J-Term saves the user name and password locally on the PC! If the option "Use AutoLogon" (HOB EA Administration>Utilities menu>Startup options...>Logon tab) is disabled, user name (and password if applicable) used for the last logon will automatically display in the logon dialog.
The logon data is stored in the User Home directory depending on the used Java Virtual Machine.
3.6.2 Parameters for the Application
Parameter Name
Value Description
-s alphanumeric characters
Specifies the name of the HXML file defining the start up options that are used by the application, e.g. JTerm.exe -smystartup.hxml
We recommend to store customized HXML files in the following subdirectory of the installation path:
<installation directory>/www/lib/hob/props/
This directory can contain several alternative files with different startupoptions. They can be enabled anytime by specifying the respective file name in the HTML page.
If the startup parameter is not specified, the HOB EA application is run with the settings stored in the file startup.hxml. If the file has not been edited and its settings have not been modified, the HOB EA application is run with its default startup options and typical default settings.
-h alphanumeric characters
Specifies the path where to save user specific settings. The user must have write access to this path. e.g. -hC:\Documents and Settings
If this parameter is not set the user specific settings are stored in the valid User Home directory\hob_jportal depending on the used Java Virtual Machine .
-p alphanumeric characters
This parameter specifies the valid application installation directory.
By default this parameter is specified in the affiliated *.lax file resident in the installation directory, for JTerm.exe consequently JTerm.lax. If this parameter is passed on running *.exe this will haveno effect, since the entry in the *.lax is relevant.
-u -g
alphanumeric characters
Specifies the user name (-u) or password (-g) for the logon to HOB Enterprise Access.
If you use the parameter to pass on the password you must enter it as plain text, which is a significant security risk. Therefore we do not recommend to use this parameter!
HOBLink J-Term saves the data passed on using these parameters locally on the PC! The password will only be saved if the check box
34

HOBLink J-Term
Save password is enabled in the logon dialog. If the option "Use AutoLogon" (HOB EA Administration>Utilities menu>Startup options...>Logon tab) is disabled the data passed on via the respective parameter will automatically display in the logon dialog.
The data passed on via these parameters have higher priority than all other, locally stored data and will replace them.
The logon data is stored in the User Home directory depending on the used Java Virtual Machine.
-b alphanumeric characters
Specifies the context where the user will be searched.
HOBLink J-Term saves the data passed on using this parameter locally on the PC, if in the Startup options the checkbox Show button"Expand>>" is enabled (HOB EA Administration>Utilities menu>Startup options...>Logon tab).
In conjunction with the option "Use AutoLogon" (HOB EA Administration>Utilities menu>Startup options...>Logon tab) the data passed on via the respective parameter will automatically display in the logon dialog once you click the Expand button.
The data passed on via these parameters have higher priority than all other, locally stored data and will replace them.
The logon data is stored in the User Home directory depending on the used Java Virtual Machine.
3.6.3 Parameters for HTML Pages Using the Prefix "Auto"
Parameter Name
Value Description
sun_url alphanumeric characters
Specifies the name of a HTML page, that you are re-routed to, if a browser using Java2 is identified.
ms_url alphanumeric characters
Specifies the name of a HTML page, that you are re-routed to, if MS Internet Explorer is identified as browser.
netscape_url alphanumeric characters
Specifies the name of a HTML page, that you are re-routed to, if Netscape 4.x is identified as browser.
mac9_url alphanumeric characters
Specifies the name of a HTML page, that you are re-routed to, if Mac OS 9 is identified as operating system.
msg Y or N Default: N
Use the parameter Y, to display messages on the Java console, which will help you in analyzing errors once they occur.
target _self _parent _top _blank <name>
Default: _self This parameter is relevant only, if the HTML page is displayed in a frame. To assign the page to a target frame, set the respective value. The values are interpreted as follows:
_self opens the page in the same frame. For hyperlinks to targets that are displayed in the same frame it is not required to specify the target. It is only of importance if the page containing the hyperlink specifies a different target frame.
_parent displays the target of the hyperlink in that window state, which was active prior to starting the frame set.
35
HOB Enterprise Access: HOBLink J-Term User Manual
_top uses the entire window frame to display the target of the hyperlink.
_blank runs a new instance of the browser and displays the page, which is target of the hyperlink, in this new instance..
<name> specifies the name of a frame. If a the specified frame name does not exist, the browser opens a new window to display the hyperlink target.
3.6.4 Parameters for the Administration Tool "removeCC.html"
Parameter Name
Value Description
ok_url alphanumeric characters
Default: default.html By default this parameter is set as a comment and therefore not enabled. To enable this parameter delete the xx characters ahead of the parameter and save the changes.
Specifies the name of a HTML page, that you are re-routed to after you have deleted local user settings.
removeall alphanumeric characters
Default: N
By default this parameter is set as a comment and therefore not enabled. To enable this parameter delete the xx characters ahead of the parameter and save the changes.
Before deleting local user settings users will be prompted to confirm the operation. Use the parameter Y to suppress that dialog and delete the settings unnoticed by the users.
3.6.5 URL Parameters for WebProfile
If you run HOB EA applications selecting the connection model WebProfile the use of the startup.hxml (the file including the startup options) is not compulsory. You may alternatively append User Name (the name of the configuration object) and its context to the URL, specified in the browser, by using the following parameters.
Parameter Name
Value Description
eaconfig= alphanumeric characters
Specifies the name of the configuration object in HOB EA Administration, i.e. the User Name
eacontext= alphanumeric characters
(optional)
Specifies the context of the configuration object in HOB EA Administration an.
This parameter is required only if the context you want to log on to is different from the defined default user context.
The parameters are appended to the HTML URL by typing a question mark (?). If the parameter eacontext is also required, you must append it by typing an ampersand (&), such as
36
HOBLink J-Term
http://www.hobsoft.com/EA/start.html?eaconfig=johnpublic&eacontext=business1,firm
3.7 HTML Pages
All HTML pages referenced below are located in the following subdirectory:
<installation directory>\www
Components HTML pages
Summary of all HTML pages (Initial pages)
default.html
The file name extensions _de, _en and _fr indicate the language-dependent pages.
Enable JavaScript in the browser!
Initial page executing an automatic version checkof the JVM available with the browser
defaultMS.html
Installing the HOB LDAP Extension hldap_de.html / hldap_en.html
3.7.1 HTML Pages for Emulation / Administration Tools
Components HTML pages
Display / Printer session JTerm.html
Running HOBLink J-Term & JWT JLaunch.html
Running JWT JWT.html
Change password ChangePwd.html
Create new user CreateUser.html
Running the Local Variables Editor LocalVar.html
Running the Startup Options Manager StartOpt.html
Administration tool to configure HTTP Proxy HttpProxyEdit.html
Administration tool to remove local user settings removeCC.html
All HTML page listed in the above table are also available in combination with certain prefixes and suffixes. Their meaning is described in the table below:
Description HTML prefix / suffix
HTML pages with this prefix perform an version verification of the JVM provided by the browser.
Parameters defined in the HTML page re-route you to an initial page matching the JVM.
Auto*.html (e.g. AutoJTerm.html)
HTML pages with this suffix work only with browsers using Java2 (Netscape 6/7, MS Internet Explorer with PlugIns and Mac OS X).
*J2.html (e.g. JTermJ2.html)
37
HOB Enterprise Access: HOBLink J-Term User Manual
HTML pages with this suffix run only on Macintosh computers with operating system OS 9or lower.
*Mac.html (e.g. JTermMac.html)
3.7.2 HTML Pages for Secure SSL Connections
Components HTML pages
Display / Printer session using a secure connection
JTermSecure.html
Running HOBLink J-Term & JWT using a secure connection
JLaunchSecure.html
Running JWT using a secure connection JWTSecure.html
3.7.3 HTML Pages for the Cached Client / SSH Security
For cached clients and/or SSH security, no default HTML pages are provided. However, you can create these pages conveniently using the Startup Options Manager's HTML wizard, which is part of the tool HOB EA Administration (menu Utilities>Startup options...>menu HTML Pages>Create...). Select Cached Client as Client Type and enable the checkbox Use SSH Security, if you want to use SSH.
3.8 Additional Tools
The following tools are not required to run HOBLink J-Term. However they are practical tools, which make it easier to work with HOBLink J-Term:
• Demohost (<JTERMDIR>\tools\demohost) Trace tool to simulate 3270-, 5250- and VT data. For further information refer to the file ReadMe.txt in the specified path.
• Export (<JTERMDIR>\tools\Export) Tool used to export users and groups from Windows NT and Novell networks to a file for later import in HOB Enterprise Access.
• HLL Bridge (<JTERMDIR>\tools\HllBridge) Contains all files required for the EHLLAPI interface of HOBLink J-Term including a sample program and supplementary tools.
• hostname (<JTERMDIR>\tools\hostname) Tool used to verify the IP configuration of the WebServer. For further information refer to the file ReadMe.txt in the specified path.
• HXML Editor (<JTERMDIR>\tools\HXMLEdit) Tool used to edit HOB Enterprise Access HXML files.
• TCP Trace (<JTERMDIR>\tools\TCPTrace) Windows Trace tool to record TCP/IP data.
• VTprint (<JTERMDIR>\tools\VTprint) Tool used to forward UNIX files to a printer via the VT emulation For further information refer to the file ReadMe.txt in the specified path.
38
HOBLink J-Term
3.9 COM Interface Support
HOBLink J-Term supports the COM Interface.
You can enable this Interface by installing the HLLAPI-COM-Extension from the HOB Enterprise Access CD.
A detailed description for the COM Interface is provided in the help file COMInterface.hlp, which you can find in the installation directory of the extension.
3.10 Information about EHLLAPI-Bridge
3.10.1 Requirements
Using the EHLLAPI Bridge requires that the following software be installed:
• Windows 95 / 98 NT / 2000 / XP
• Internet Explorer version 4.01, Service Pack 2 and the updated Java Virtual Machine, or later, or Netscape Navigator 4.7x or later
3.10.2 How to Install the EHLLAPI Bridge
1. Install the HLLAPI-COM-Extension from the HOB Enterprise Access CD. This copies all required HLLAPI or COM files to the PC and additionally the system path is extended by the installation path.
Since other emulations use DLLs with identical names, the order of the path entry is relevant to get EHLLAPI working. If other emulations already use HLLAPI, ensure the HOBLink J-Term installation path to be specified prior to all other emulations in the system path. If you do not comply with this policy other DLLs of the same name might be used instead, which do not allow communication with EHLLAPI application under HOBLink J-Term.
2. Then run HOBLink J-Term and the HLLAPI applications that you like to work with.
3.10.3 Supported Subsets
Currently HOBLink J-Term supports the most familiar subsets.
3.10.4 Sample Program
The directory <HLLAPI installationpath>/samples contains a sample program which uses the EHLLAPI Bridge.
3.10.5 Tools for Diagnosing Errors
For error cases HOBLink J-Term also provides a tracer for the EHLLAPI communication an testing tool. These tools are located in the following path:
<HLLAPI installationpath>/HLLAPI Tools/HLLBridgeTrc.exe
This tracer registers all actions of the EHLLAPI communication and provides important information about errors that have occurred during the communication.
39
HOB Enterprise Access: HOBLink J-Term User Manual
<HLLAPI installationpath>/HLLAPI Tools/ApiTester.exe
1. Run the testing tool, to test if the EHLLAPI Bridge works fine.
2. Select API menu>Load Library.
3. Select the file <HLLAPI installationpath>/PCSHLL32.DLL in the list box.
4. Click OK. The functions API/Function Group 1... to Group 3 will be enabled.
5. Call those functions in the API menu and test them consecutively.
6. Exit the testing tool by selecting File menu>Exit.
3.11 Introduction to Open Host Interface Objects for Java
The Open Host Interface Objects (OHIO) implemented in this product is a programming interface for host access that is still subject to development. The current version complies with the OHIO API definition in the second draft of the Open Host Interface Objects Internet Draft. OHIO API originates from IBM and Attachmate and HOB has also fully implemented the OHIO API and favors the use of OHIO API supported programming.
The Open Host Interface Objects (OHIO) provides the basic classes and methods that allow the development of platform independent applications that can access host information at the data stream level. OHIO implements the host access function in a complete class model, which is independent of any graphical display and only requires a Java-enabled browser or similar Java environment to operate. The class library represents an object-oriented abstraction of a host connection that includes reading and writing the host presentation space, enumerating the fields in the presentation space, reading the operator information area (OIA) for status information, and performing asynchronous notification of significant events.
Using OHIO, programmers can generate Java applets that manipulate data from the host presentation space without requiring the users to have the applets residing on their machines. The presentation space represents a virtual screen that contains both data and associated attributes presented by host applications. OHIO Java applets enable the following functions:
• Opening a host session • Waiting for incoming host data • Getting previously selected strings from the screen • Getting associated attributes of the strings • Setting new string values • Returning function keys to the host • Waiting for the next host response
After executing an interaction the applet can optionally switch to other tasks or simply close the session. The entire operation can be done without ever showing host screens.
OHIO implementation provides the following additional benefits:
• Its source code is 100% Java and thus is platform independent. • OHIO can be downloaded and executed on client workstations via standard Web and
Java technology. This guarantees major maintenance and resource savings.
For more detailed information, please refer to the online help.
40
HOBLink J-Term
3.12 Macro Import Utility
This utility imports macro files (*.mac) created by means of IBM Personal Communications into the applications HOBLink TE / HOBLink J-Term. During the import procedure the macro syntax of the files is converted to the HOBLink specific format. Afterwards you can execute the macros or edit them using the Macro Editor as desired.
Options
Folder
Displays the folder, which is searched for macros. Usually, when running the utility the specific IBM Personal Communications path is displayed, where the macros are stored by default. If no entry is shown in the edit field, use the ... button to search for an appropriate path.
...
Determines folder / path for the macro search. All macros found in the search path will be shown in the list box.
Select All
Selects all macros shown in the window.
Unselect All
Unselects all macros shown in the window.
Import
Imports the currently selected macros to the local user settings of the currently connected user, whereby one scheme is created respectively for each macro.
Close
Exits the utility and closes the window.
41

4. HOB Telnet Resource Manager
The Telnet Resource Manager, in the following abbreviated as TRM, allows you to centrally administrate and configure all TN3270 and TN5250 Resource Names of HOBLink J-Term / HOBLink TE, instead of entering them one by one for each session.
The only elements that can be configured are containers (in HOB EA Administration represented by ) and "Organization Units" (only LDAP) (in HOB EA Administration represented by ).
The dialog shows the existing sessions in one column and next to them on the right the column for the configurable resources.
4.1 Configure Resource Names using TRM
1. Run HOB EA Administration.
2. Select desired database item in the tree structure, to which you want to assign a configuration.
The only elements that can be configured are containers and "Organization Units" (only LDAP).
3. In the dropdown list at the right bottom of the application window select "Telnet Resource Manager."
4. Select Configure button or .
5. To configure or change Resource / Device Names, double-click the desired cell in the respective column labeled as Resource.
6. Enter desired name.
7. Click outside the cell to apply the name.
8. Select File menu>Save to save the entry and close TRM.
To use the Resource Names configured through TRM you must configure the TN3270 or TN5250 sessions accordingly.
4.2 Configure TN3270 and TN5250 Session Resource Names
4.2.1 There are three different ways to these resource names:
1. In the Current Session
Select the User Settings button in the toolbar. The tree structure of the Session Editor opens.
This function is only available if your system administrator has granted you the required user rights (only applicable if installed with HOB Enterprise Access).
2. Via the Session Manager
43
HOB Enterprise Access: HOBLink J-Term User Manual
1. Activate or run the Session Manager.
2. Select name of the desired session.
3. Click on the Edit... button. The tree structure of the Session-Editor opens.
This function is only available if your system administrator has granted you the required user rights (only applicable if installed with HOB Enterprise Access).
3. Centrally via HOB EA Administration
1. Run HOB EA Administration on the server, administrating the data base of all HOB EA users.
2. If required, open a particular level and select a data base item, the settings of which you want to modify. (data base items Containers , Groups are shown on the left, Users and Objects are shown on the right pane).
3. In the list box at the right bottom right select "HOBLink J-Term 3.x" and click Configure. The tree structure of the Administration displays.
4.2.1.1 After you have selected one of the above-mentioned methods, proceed as follows:
1. (Open Schemes level. Only applicable for Session Manager / HOB EA Administration.)
2. Select desired Connection scheme type (only available for Connection Types 3270 and 5250) or, if not available, create a new scheme with New....
3. Under Resource / Device Name insert wild card "Telnet Resource Manager" using the arrow button next to the edit field. If desired, you can combine the Resource Name with any other wild card.
4. Repeat steps 1-3 for all sessions that are to use Resource Name previously configured by Telnet Resource Manager.
5. Click Close to save changes and close the Session Editor.
For more information on this subject, please refer to the online help.
4.2.2 Importing and Exporting Configured Entries
The benefits of TRM is the import and export function of created configurations, which, for instance, can be edited and enhanced to meet your demands using MS Excel. After completing all edit operations, you can re-import the file through TRM.
To verify, if the edited file is in accordance with the syntax, required by TRM, before importing the file you can test it by running File menu>Verify. If this verification is successful a confirming message is displayed.
4.2.3 Export TRM file
1. Run HOB EA Administration.
44
HOB Telnet Resource Manager
2. Select desired database item in the tree structure, whose configuration you want to write in a file.
The only elements that can be selected are containers and "Organization Units" (LDAP only).
3. In the dropdown list at the right bottom of the application window select "Telnet Resource Manager."
4. Select Configure button or .
5. Select File>Export to export the file to text file format.
6. Enter a poignant file name and select Save. By default the file name export is suggested in the edit field.
7. Run MS Excel.
8. Open the file using the file type option Text files (*.prn; *.txt; *.csv).
9. Select Separated as file type.
10. Select Next >.
11. Select Colon to display the entries in table format.
12. Select Next > to show the preview.
13. Select Finish to open the file. The entries are arranged in columns.
14. Edit the file as desired and save the changes.
4.2.4 Import TRM files
1. Run HOB EA Administration.
2. Select desired database item in the tree structure, to which you want to assign a configuration.
The only elements that can be configured are containers and "Organization Units" (only LDAP).
3. In the dropdown list at the right bottom of the application window select "Telnet Resource Manager."
4. Select Configure button or .
5. Select File>Import.
6. Enter file name and select Open. The current configuration will be definitely overwritten by the new import data.
45

5. Error Messages
5.1 Common Error Messages
• 4001
TN3270 connection was rejected by server. Resource / Device Name may not be available or already in use.
• 4002
Connection was rejected by server. The client used the CONNECT command to request a specific Printer Session, the requested Resource / Device Name, however, adheres to a Display Session.
• 4003
Connection was rejected by server. The requested Resource / Device Name is already associated with another Telnet session.
• 4004
Connection was rejected by server. The client used the ASSOCIATE command and either the Session Type is not a Printer Session or the Resource / Device Name is not a Display Session.
• 4005
Connection was rejected by server. The Resource / Device Name specified in the CONNECT or ASSOCIATE command is not known to the server.
• 4006
Connection was rejected by server. Server does not support the requested Session Type.
• 4007
Connection was rejected by server. Requested Resource / Device Name is incompatible with requested Session Type (such as Display or Printer Session).
• 4008
Connection was rejected by server. Server is unable to satisfy the Session Type of request sent by the client; e.g., a specific Display or Printer Session was requested but the server does not have such a pool of Resource / Device Names defined to it, or the ASSOCIATE command was used but no partner Printers are defined to the server.
47
HOB Enterprise Access: HOBLink J-Term User Manual
• 4009
Connection was rejected by server. Any other error in Session Type or Resource / Device Name processing has occurred.
• 4010
Error in host data. Printer Session has received data bound for a Display Session. Verify Session configuration or host log mode.
• 4011
Error in host data. Display Session has received data bound for a Printer Session. Verify Session configuration or host log mode.
• 4012
Error in host data. TN3270 Session has received HOBCOM data. Verify Session configuration or host log mode.
• 4020 to 4059
Error in host data.
• 4060
Error in Telnet communication data.
• 4061
Error sending communication data.
• 4062
Error sending communication data (ASCII mode).
• 4070 to 4079
Error executing a file transfer.
• 4100 to 4200
Internal application errors.
• 5101
No HOBCOM Session (Terminal type is not 0x11).
48
Glossary
• 5103
Connection aborted by user.
• 5105
UserID is missing.
• 5106
Host error message (unknown user).
• 5107
Host error message (invalid password).
5.2 SSL Error Messages
The following is a listing and short description of all SSL-related error messages.
• 2
The SSL component is not part of the software and is subject to further charge. Contact any HOB branch office for information on purchase.
• 3
Could not read the Certificate data base file "hclient.cdb" or the SSL configuration file "hclient.cfg". In case the applet is running the files should be in the User Home Directory (see parameters userhome and multihome), in case the application is running the files should be in ...\www\lib\sslpublic directory.
• 4
File hob.ssl.hssldpro class could not be found. Probably HOBssl.jar (Netscape) or HOBssl.cab (MS IE) is either not included in the Applet archive (when running the Applet) or it is not included in the Classpath of the corresponding LAX file (when running the application).
The SSL component is not included in installations that are downloaded from HOB's web site www.hob.de. This component is not part of the purchased software and is subject to further charge. Contact any HOB branch office for information on purchase.
• 5
Logon to HTTPS Proxy failed.
For detailed information about this error refer to the messages of the JAVA console.
• 6
Logon to HTTP Proxy failed after three attempts using invalid User Name and/or Password. 49
HOB Enterprise Access: HOBLink J-Term User Manual
• 94
Connect timeout occurred (TCP transmit timed out)
• 95
Connect timeout occurred (TCP receive timed out).
• 96
Connection closed from the remote site during handshake.
• 97
Connection closed, probably remote site does not support SSL/TLS protocol or a fatal handshake error occurred.
• 140
Server requested a client certificate but no certificate of the requested type is available (only with SSL and Client authentication simultaneously).
• 141
Renegotiate request not accepted.
• 142
Fatal protocol alert received from remote site causing a disconnect (maybe attack from outside).
• 160
Compression method after connection interruption is different.
• 162
Compression method sent by client is unknown to server.
• 181
Protocol version used by server is not supported by client.
• 186
Server selected Cipher Suite is not included in client list or requested Cipher Suite is different after connection interruption.
50

Glossary
• 188
Server selected compression method is not included in client list or requested compression is different after connection interruption.
• 210
Invalid data length of received certificate.
• 211
Despite enabled client authentication the requested certificate was not received by server in the data stream.
• 212
No certificate received from server.
• 213
Corrupted certificate list/chain received.
• 215
Received certificate cannot be used for the selected key exchange mode.
• 216
The certificate's public parameters cannot be extracted.
• 217
DH parameters in the certificate do not match the local used parameters.
• 219
Certificate chain verification encountered an unspecific error within the chain.
• 220
Client authentication enabled: there is no (Subject) Common Name in the certificate received by client.
• 221
The Server's Subject Common Name of the certificate is not contained in the known server names list.
51
HOB Enterprise Access: HOBLink J-Term User Manual
• 222
The Client's Subject Common Name of the certificate is not contained in the known client names list.
• 223
The Client's Subject Common Name of the certificate is contained in the excluded client names list.
• 224
No root certificate found in the data base for the received certificate list (chain).
• 225
Certificate or parts/all of the chain were revoked (at least one certificate).
• 226
Certificate or parts/all of the chain have expired.
• 227
Certificate/chain was rejected due to a non explicitly specified error.
• 230
Invalid data length detected in Certificate Request Message data.
• 231
Server requested a client certificate but has not sent a certificate of its own.
• 232
Requested certificate types list contains an invalid size field.
• 233
Requested certificate type is not supported by client.
• 234
Invalid size filed in the received certificate list
• 235
Certificate search failed while internally processing Diffie Hellman parameters.
52
Glossary
• 236
Error searching a certificate matching the request of the connection partner.
• 237
When the client authentication is enabled, the verification of the client certificate chain on the basis of the issuer-name list of certificates requested by the server is unsuccessful. You may have to enable the option Exact certificate Issuer/Subject items match in the Server configuration (*.cfg) of the entry "Protocol Control" displayed in the HLSecurity file tree.
• 240
Server key exchange message/data length is invalid.
• 242
Conversion of internal RSA parameters of a certificate on the client side failed.
• 244
Conversion of internal Diffie Hellman parameters of a certificate on the client side failed.
• 245
Server specified an unknown key exchange mode.
• 247
Signature of server key exchange message invalid (RSA).
• 248
Signature of received temporary key exchange data is not valid.
• 250
Certificate verify message / data length is invalid.
• 252
RSA-Decryption of signature invalid.
• 253
Received signature is not valid.
53
HOB Enterprise Access: HOBLink J-Term User Manual
• 254
Unknown signature algorithm was specified (internal error).
• 260
Invalid data length detected in Certificate Request Message data on server side.
• 262
The Diffie Hellman public value received on the client side does not match the Diffie Hellman parameters.
• 264
Conversion of the key's Diffie Hellman public value failed on the server side.
• 265
Generation of the Premaster secret from Diffie Hellman parameters and values failed.
• 266
Unknown key exchange mode on the server side was detected while processing internally.
• 270
Invalid data length detected in Certificate Request Message.
• 271
Received handshake messages MAC does not match own calculated MAC.
• 280
An unknown key exchange mode was detected while processing internally.
• 281
Generation of internal certificate chain generation failed.
• 282
Converting certificate's private key parameter failed internally.
• 283
Internal TLS/SSL certificate list generation failed
54
Glossary
• 284
The requested certificate was not found on the client side.
• 286
Internal generation of a certificate list from selected end-certificate failed.
• 290
Unknown key exchange mode was detected while internally processing the Certificate Request Message.
• 291
The internal generation of relative distinguished names list failed while processing the Certificate Request Message.
• 300-305
Internal processing of RSA / Diffie Hellman key parameters failed while negotiating the key exchange.
• 306
Unknown key exchange mode was detected while internally processing the key exchange data on the client side.
• 307-308
Internal processing of RSA / DSA signature parameters failed on the client side while negotiating the key exchange.
• 320
Unknown asymmetric key algorithm was detected while verifying the certificate.
• 321
Internal private parameter extraction from certificate to be verified failed.
• 323-324
Generation of RSA / DSA signature of handshake messages failed while verifying the certificate.
• 325
An invalid signature algorithm was detected while verifying the certificate.
55
HOB Enterprise Access: HOBLink J-Term User Manual
• 330-334
Internal processing of RSA / Diffie Hellman key parameters failed on the server side while negotiating the key exchange.
• 335
Unknown key exchange mode was detected while internally processing the key exchange data on the server side.
• 410
Configuration password decoding from password file failed.
• 411
Password for configuration file does not match.
• 412
Certificate data base password decoding from password file failed.
• 413
Password for certificate data base file does not match.
• 414
Processing of configuration file data failed or file not found.
• 415
Processing of certificate data base file data failed or file not found.
• 416
Generating certificates tree from certificate data base failed, usually due to corrupted certificate data base or malformed certificates in data base.
• 417
There is no certificate with a private key in the data base but the server needs at least one certificate of that type.
• 418
Generating root certificates failed, usually due to corrupted certificate data base or malformed certificates in data base.
56
Glossary
• 421
For the cipher suites selected in the configuration no matching certificate(s) could be found. Check server configuration / certificate data base.
• 583
Maximum number of configured connection is exceeded. No more sockets available from Java socket interface.
• 775
RSA signature generate failed
• 776
RSA signature verify decryption error
• 777
Given RSA Signature different from own generated
• 6100
The current version of your installation does not support the interface for external certificate stores.
• 6101/6104
The interface for external certificate stores cannot be loaded.
• 6110-6112
The interface for external certificate stores has forwarded incorrect or incomplete certificate data to the application for the Client authentication. Verify the certificates in the external certificate store (e.g. to ensure the certificate chain is complete).
• 6113
The interface for external certificate stores has forwarded no data, incomplete or incorrect certificate data to the application. Verify the certificates in the external certificate store (e.g. to ensure the certificate chain is complete).
• 6115-6118
The interface for external certificate stores has forwarded incorrect or incomplete certificate data to the application to verify the Server authentication. Verify the certificates in the external certificate store (e.g. to ensure the certificate chain is complete).
57

HOB Enterprise Access: HOBLink J-Term User Manual
• 6120/6121
Invalid or incomplete data forwarded to the application by the interface for external certificate stores. Verify your personal end user certificates.
• 6125-6127
The data signature using the key parameters of the selected end certificate from the external certificate store could not be executed or has produced an error.
• 6202
The file specified in the configuration (cfg), which explicitly selects the external certificate store, was not found.
• 6203 / 6204 / 6210 - 6214
Error accessing internal interface functions. Possibly parts of the installation were modified or removed.
• 6221 / 6222 / 6229-6231 / 6235 / 6237-6238 / 6240
Internal error accessing the external certificate store.
• 6241-6243
Certificate verifying the Server certificate was not found.
• 6250-6251 / 6255-6256 / 6260
Internal error accessing certificates in the external certificate store.
• 6261-6266
Error accessing certificate chains in the external certificate store.
• 6267-6268 / 6271-6275
Error accessing the external certificate store.
• 6291-6297
Internal error attempting to find a user certificate in the external certificate store.
• 6299-6300 / 6308 / 6314
Error accessing the external certificate store.
58
Glossary
• 6315
No matching certificate was found in the external certificate store.
• 6316-6319
Error accessing internal interface functions. Possibly parts of the installation were modified or removed.
• 6322
The dialog to select certificates was aborted by the user.
• 6323
Internal error accessing certificates in the external certificate store.
• 6324
The dialog of a Crypto Service Provider was aborted by the user.
• 6325-6326
Certain parameters of the detected certificate are not available or are invalid. Verify the user certificates installed in the external certificate store.
• 6330-6336
Error accessing certificate chains of the user certificate in the external certificate store.
• 6337-6338 / 6341-6345
Error accessing the external certificate store.
• 6361-6362 / 6368-6369 /6378 / 6390-6391
Error accessing the external certificate store.
• 6395-6396
Error accessing certificate chains of the user certificate in the external certificate store.
• 6397
Search for a certificate providing the appropriate properties required for user authentication failed. Verify the user certificates installed in the external certificate store.
• 6401-6406
Error accessing certificate chains of the user certificate in the external certificate store.
59
HOB Enterprise Access: HOBLink J-Term User Manual
• 6407-6408 / 6411-6415
Error accessing the external certificate store.
• 6420
No certificate found for user authentication. Verify the user certificates installed in the external certificate store.
• 6422-6429
Executing the signature function in the external certificate store failed. Verify the installation of all components permitting access to external certificate stores.
• 6431-6432 / 6439 / 6448
Error accessing the external certificate store.
• 6449 / 6465-6466 / 6487
Certain parameters of the detected certificate are not available or are invalid. Verify the user certificates installed in the external certificate store.
• 8000-8065
SSH error in the provided parameters, in the configuration or the initialization.
• 8070
The SSH component is not part of the software and is subject to further charge. Contact any HOB branch office for information on purchase.
• 8071
HOBssh.jar (Netscape) or HOBssh.cab (MS IE) and HOBssl.jar (Netscape) or HOBssl.cab (MS IE) are not installed or were not found.
The corresponding entries in the HTML/Java Web Start pages could be missing. To add them, use the HTML/Java Web Start pages Wizard in the Startup Options Manager of the tool HOB EA Administration (menu Utilities>Startup options...>menu HTML Pages>Create...). Enable the option Use SSH Security.
The SSL component is not included in installations that are downloaded from HOB's web site www.hob.de. This component is not part of the purchased software and is subject to further charge. Contact any HOB branch office for information on purchase.
• 8100-8140
Error in the SSH configuration parameters.
60
Glossary
• 8200-8266
Error in the SSH packet connection processor. send/receive error, packet length error, socket error, send/receive thread error.
• 8300-8345
Error attempting an SSH connection.
• 8350
Authentication failed. This could have the following causes: - invalid password - invalid or missing private key on the Client - invalid or missing public key of the Client on the Server
• 8351-8358
Error attempting an SSH connection.
• 8360
IP address for SSH Server Host is not available.
• 8361-8367
Error processing the so-called SSH Hostkeys.
• 8370
Authentication of SSH Server Host failed.
• 8383
Server not found. Invalid TCP/IP Address or Port.
• 8400-8412
Error in SSH Key Exchange Processor.
• 8420
The host specified for the SSH connection could not be verified.
• 8421
Host not found in the SSH Known Hosts file. Add the host name to this file or allow all hosts for connection. For further information refer to "Known Hosts" in the index of HOB EA Administration online help.
61
HOB Enterprise Access: HOBLink J-Term User Manual
• 8422-8451
Error in SSH Key Exchange Processor.
• 8460-8661
Error in SSH Channel Handler (Channel RX/TX data error, Channel Thread error or Socket error).
• 8680-8961
Error accessing various libraries (invalid parameters or error in library functions).
• 8970-8994
Java Clients error (Socket Class error, Input Stream error or Output Stream error).
• 9000-9050
Error in SFTP Interface Library.
62
6. Glossary
1. Display Session
If a session is defined as a display session, you can use it on a PC to start host applications and take advantage of all the functions of a terminal.
The OIA (Operator Information Area) appears and shows the current connection status. To obtain detailed information about the connection, please refer to the online help.
2. EHLLAPI Interface
EHLLAPI is a programming interface for Windows operating systems that is supported by HOBLink.
HOBLink is fully IBM compatible and additionally supports the functions 120 - 127. These functions support a connection to structured fields, e.g. read and write structured fields.
The appropriate DLL name depends on whether a 16-bit or a 32-bit EHLLAPI application is linked.
3. Express Logon (Definition)
When starting a session using Express Logon, the HOBLink J-Term client establishes an SSL connection with TN3270 server. During the logon process, a macro with the Express Logon information is played. Once the session is established, the client sends the application ID for the host application that the user is accessing to the TN3270 server. This information is contained in the logon macro. The TN3270 server uses the client's certificate information from the SSL connection and the application ID received from the client, and requests the user ID and password from the host access control program (such as IBM RACF).
The HOBLink J-Term client uses the macro function to put predefined variables strings in the user ID and password fields. The TN3270 server substitutes the user ID and password in the appropriate place in the 3270 datastream. The logon is completed.
4. HOB Beans
JavaBeans represent a component software architecture from Sun that runs in the Java environment. JavaBeans are independent Java program modules that are called for and executed. They have been used primarily for developing user interfaces at the client side.
JavaBeans enable software developers to design and create reusable pieces of software that easily integrate with each other, with applets or applications, and even with development tools.
5. Macro
A macro is a sequence of key and host commands which can be executed in a single step.
You can execute recorded macros (HOBLink session>Macro menu>Record) in a number of different ways:
• Assign a key (Session Editor>Keyboard scheme)
• Assign a Keypad key (Session Editor>Keypad scheme)
• Assign a mouse button (Session Editor>Mouse scheme)
• Assign a Hotspot (Session Editor>Hotspots scheme)
• Assign a menu command (Session Editor>Menu scheme)
• Assign a toolbar button (Session Editor>Toolbar scheme)
63
HOB Enterprise Access: HOBLink J-Term User Manual
A macro can contain the following elements:
1. Function Keys
2. Characters
3. Key Sequences
4. Other Macros
5. Wait conditions
6. Commands for executing Windows, DOS programs and JAVA applets
6. OIA
The OIA (Operator Information Area) is located at the bottom edge of the HOBLink Window. It contains information in the form of characters and symbols about the Host session status and the active application.
All error messages are displayed in the OIA. When an error message appears, you can double-click on the OIA to get further information on the cause, problem and possible response for error correction.
You can change the color of the OIA in the Session Editor under the Color scheme>Category "Others."
7. Printer Definition File
A Printer Definition File (PDF) is an ASCII file that contains variables (symbolic names for assigned control codes) formatting controls, and character definitions. You can edit a PDF with an ASCII text editor to customize it for your printer. In general most printers support similar commands for basic functions, but they differ widely in their support for more advanced functions.
8. Printer Session
If a session is defined as a printer session, you can use a PC printer as a host printer.
The OIA also appears here (as in the display session) and shows the current connection status. To get detailed information about the connection, please refer to the online help.
9. PRNTrace.txt
This is a printer trace file that is automatically generated when you enable Printer Trace in the Host Printer scheme>Printer tab (Printer Session only).
10. Schemes
HOB EA applications use schemes in which the specific settings of each session are saved. Settings are grouped logically and assigned to a certain scheme which is displayed in the tree structure of the Session Editor.
Applies to HOBLink J-Term only: Display and printer session use identical schemes in many cases, but also necessarily include schemes to accommodate settings that are specific to that type of session.
As long as no schemes have been created, you can also obtain information about the scheme type on the currently selected tab.
11. Requirements for SSL/TLS Security
Enable the option "Use SSL/TLS Security" in the Connection scheme only if HOBLink Secure (subject to further charge) has been registered.
Not all Connection Types support SSL/TLS!
64
Glossary
You can obtain further information about this software from our HOB Offices.
First configure the corresponding settings with the HOBLink Security Manager. You'll find additional details in the Online Help for the HOBLink Security Manager.
Then copy the files (aka HLSecurity Unit) created by the HOBLink Security Manager according to the following description:
• Paste Server files (for EA Server / Proxy Server)
Copy the files hserver.* to the installation directory of the respective Server:
<install>\sslsettings
• Paste Client files (HOBLink J-Term/JWT)
Copy the files hclient.* to the User Home directory of the respective Client.
If the password file hclient.pwd has not been copied to the specified folder, you will be prompted automatically to enter your password for the certificate while logging on.
• Alternative paste operation (if Client authentication is not used)
Copy the files hclient.* to the following directory of the Web Server:
<install>\www\lib\sslpublic
SSL certificates are downloaded from the web. For security reasons we recommend to download them only using HTTPS.
12. Templates for File Transfer
You can use templates to specify the criteria that are used for automatically generating local final names (PC file names) from remote file names (host file names) and vice versa.
Templates are the same for all sessions and can be used for both sending and receiving data.
In addition, templates control the following:
• The format in which the data is transferred. As a default, there are two types of templates available, for binary format and for text format.
• The conversion into another character format (e.g. ASCII into EBCDIC).
• Send and receive options (e.g. data record format, block length)
• Information about naming modalities to be used for generating files / file formats and the use of wildcards (*) (e.g. all local file names with the extension *.text are renamed with the remote file name *.txt.
When file names are created, the existing templates are searched starting with the one ranked in the first position. The first template which contains the entries being searched for will be used.
65

7. Index
8. additional options for HOBLink J-Term 23
A
Administration Tools
Macro Import Utility ...................... 36
D
dialogs........................................... 26
Display Session..........................22, 41
E
EHLLAPI interface
EHLLAPI-Bridge............................ 34
File Transfer in a DOS window ........ 41
EHLLAPI interface............................ 41
Express Logon configuration
~ definition ................................. 41
F
File Transfer
templates.................................... 43
File Transfer ................................... 43
G
Glossary ...................22, 26, 41, 42, 43
H
HLSecurity Unit............................... 43
HOB Beans..................................... 41
HOB Telnet Resource Manager .......... 37
HOBLink J-Term Session Editor ......... 21
HOBLink J-Term Session Manager...... 19
HOBLink Secure.............................. 43
HOBLink Session............................. 42
Host Printing .................................. 27
I
Introduction ................................... 19
M
Macros
Definition .................................... 41
Macros .......................................... 41
O
OIA............................................... 42
Operator Information Area ............... 42
P
Printer Session .......................... 22, 42
Printing ......................................... 27
PRNTrace.txt .................................. 42
S
schemes ................................... 26, 42
Secret HOBLink J-Term .................... 23
SSL/TLS Security ............................ 43
T
Telnet Resource Manager ................. 37
templates ...................................... 43
U
User Defined Options....................... 23
67