Embed Size (px)
Citation preview
Hiding faces on videos:Masks
This is a mini How-To to make videos during demostrations while preservingpeople's anonymousness.
This kind of documentation comes from the experience of indymedia's videosabused by police and repressive institutions in several countries around the
world...
First of all, you should be aware of what or who you're filming in your video..Just a few things to keep in mind:
*Your video will be probably published, so be careful on who's faces you show in it; usually it'senough to aim the camera to people's chest instead of revealing their identity during the actions.*If you have a camera that is "your weapon" in the "media war", please be careful, or enemy willuse your weapon against you or people from the demostration, once the video is published.
*If you've not been careful during demostration filming, let us remind you to cover picture framesthat may disclose people identities, for their own security.
SOFTWAREWe'll try to teach you about covering faces on 4 different video editing software; unfortunatelyonly one of these is an Open Source Software, namely the first one we're going to present:
Cinelerra.At the end of this document you'll find a table with features of covering on every software we'll
speak; that's a way for you to understand easily which one is right for your needs.
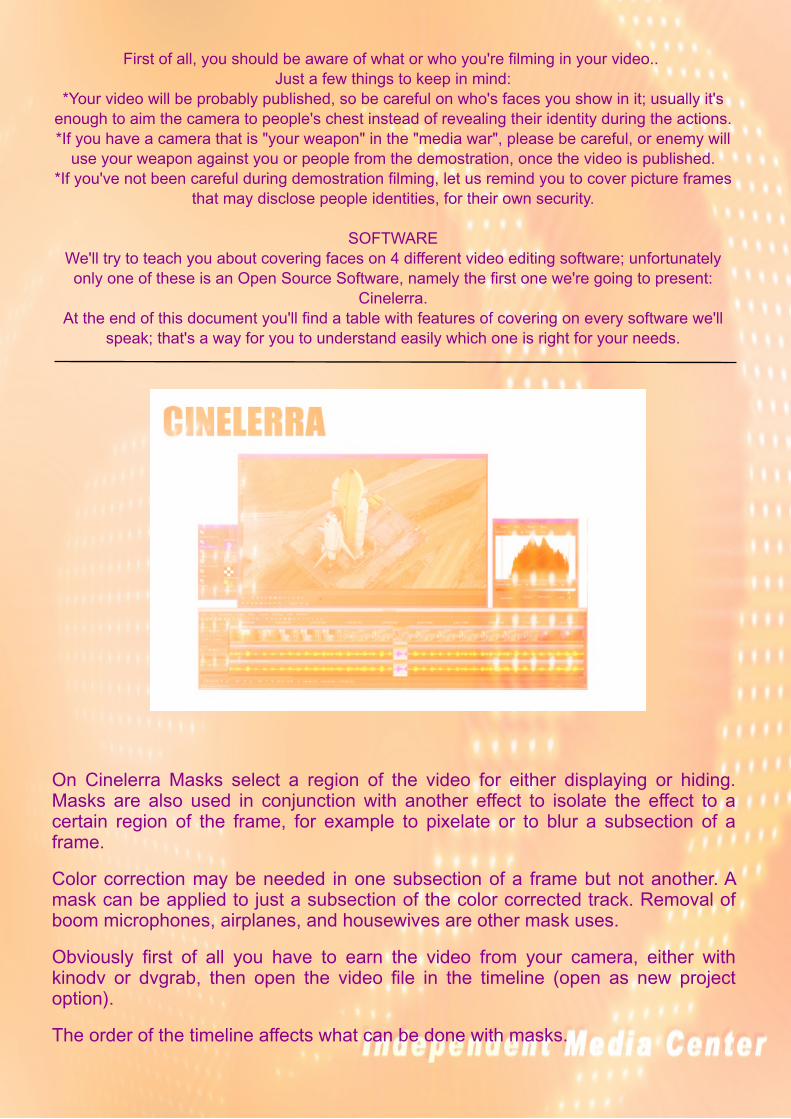
On Cinelerra Masks select a region of the video for either displaying or hiding.Masks are also used in conjunction with another effect to isolate the effect to acertain region of the frame, for example to pixelate or to blur a subsection of aframe.
Color correction may be needed in one subsection of a frame but not another. Amask can be applied to just a subsection of the color corrected track. Removal ofboom microphones, airplanes, and housewives are other mask uses.
Obviously first of all you have to earn the video from your camera, either withkinodv or dvgrab, then open the video file in the timeline (open as new projectoption).
The order of the timeline affects what can be done with masks.
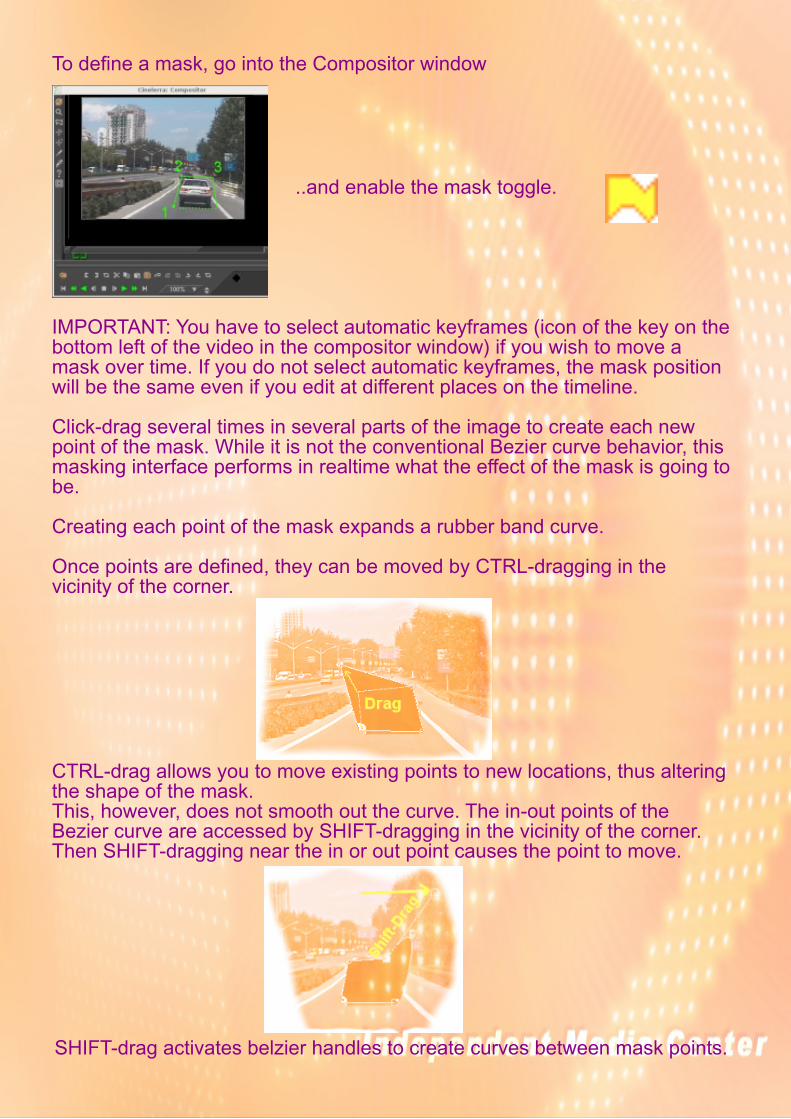
To define a mask, go into the Compositor window
..and enable the mask toggle.
IMPORTANT: You have to select automatic keyframes (icon of the key on thebottom left of the video in the compositor window) if you wish to move amask over time. If you do not select automatic keyframes, the mask positionwill be the same even if you edit at different places on the timeline.
Click-drag several times in several parts of the image to create each newpoint of the mask. While it is not the conventional Bezier curve behavior, thismasking interface performs in realtime what the effect of the mask is going tobe.
Creating each point of the mask expands a rubber band curve.
Once points are defined, they can be moved by CTRL-dragging in thevicinity of the corner.
CTRL-drag allows you to move existing points to new locations, thus alteringthe shape of the mask.This, however, does not smooth out the curve. The in-out points of theBezier curve are accessed by SHIFT-dragging in the vicinity of the corner.Then SHIFT-dragging near the in or out point causes the point to move.
SHIFT-drag activates belzier handles to create curves between mask points.
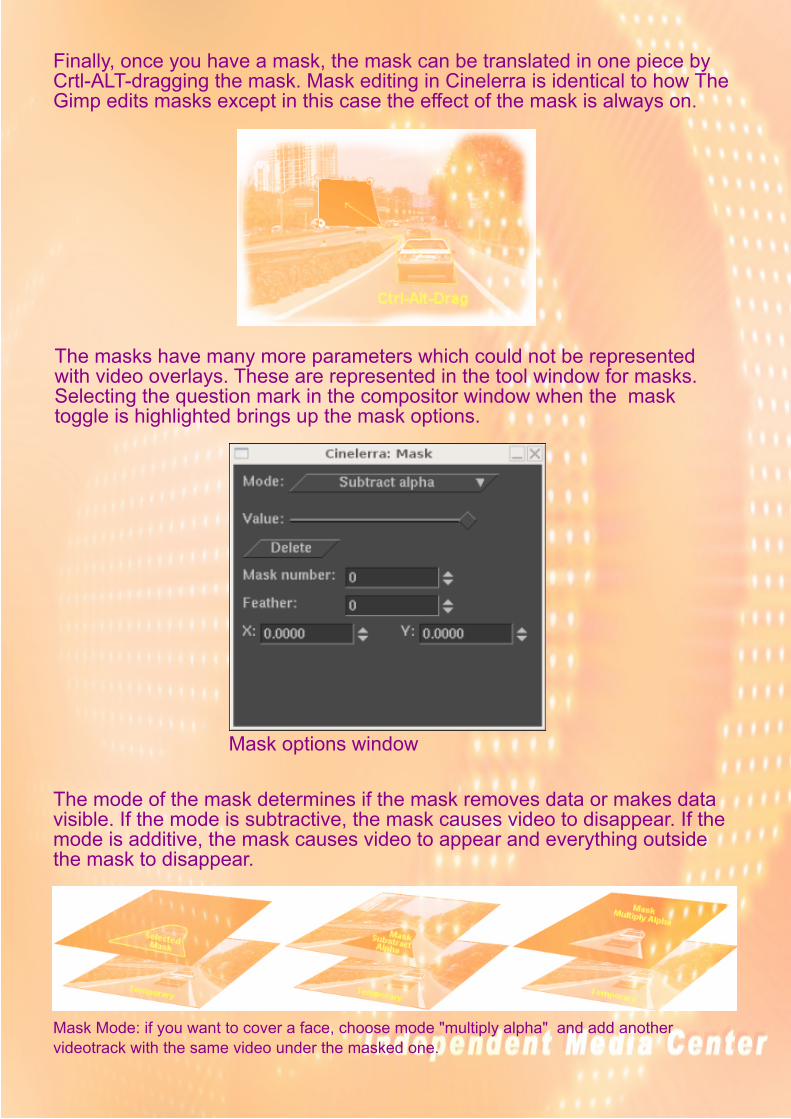
Finally, once you have a mask, the mask can be translated in one piece byCrtl-ALT-dragging the mask. Mask editing in Cinelerra is identical to how TheGimp edits masks except in this case the effect of the mask is always on.
The masks have many more parameters which could not be representedwith video overlays. These are represented in the tool window for masks.Selecting the question mark in the compositor window when the masktoggle is highlighted brings up the mask options.
Mask options window
The mode of the mask determines if the mask removes data or makes datavisible. If the mode is subtractive, the mask causes video to disappear. If themode is additive, the mask causes video to appear and everything outsidethe mask to disappear.
Mask Mode: if you want to cover a face, choose mode "multiply alpha" and add anothervideotrack with the same video under the masked one.
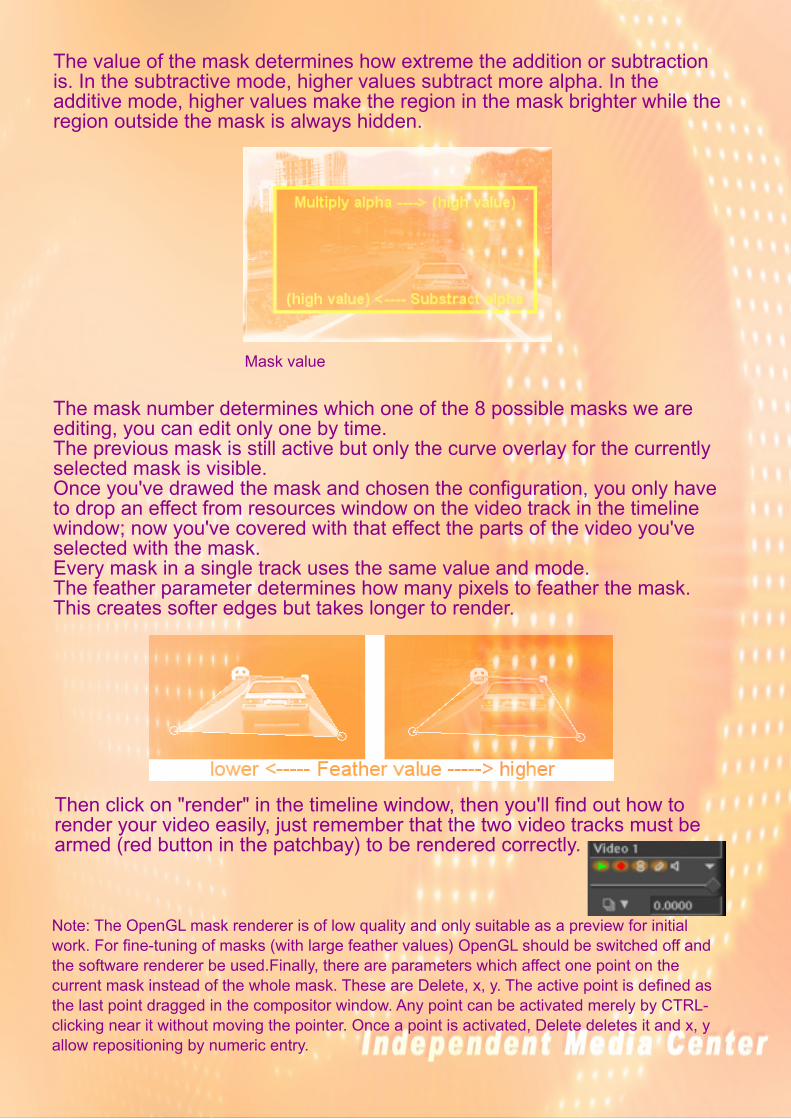
The value of the mask determines how extreme the addition or subtractionis. In the subtractive mode, higher values subtract more alpha. In theadditive mode, higher values make the region in the mask brighter while theregion outside the mask is always hidden.
Mask value
The mask number determines which one of the 8 possible masks we areediting, you can edit only one by time.The previous mask is still active but only the curve overlay for the currentlyselected mask is visible.Once you've drawed the mask and chosen the configuration, you only haveto drop an effect from resources window on the video track in the timelinewindow; now you've covered with that effect the parts of the video you'veselected with the mask.Every mask in a single track uses the same value and mode.The feather parameter determines how many pixels to feather the mask.This creates softer edges but takes longer to render.
Then click on "render" in the timeline window, then you'll find out how torender your video easily, just remember that the two video tracks must bearmed (red button in the patchbay) to be rendered correctly.
Note: The OpenGL mask renderer is of low quality and only suitable as a preview for initialwork. For fine-tuning of masks (with large feather values) OpenGL should be switched off andthe software renderer be used.Finally, there are parameters which affect one point on thecurrent mask instead of the whole mask. These are Delete, x, y. The active point is defined asthe last point dragged in the compositor window. Any point can be activated merely by CTRL-clicking near it without moving the pointer. Once a point is activated, Delete deletes it and x, yallow repositioning by numeric entry.
The next software we'll propose will be known for osx users, imovie.This is a non free licensed software so you'll need ffpmeg2theora libraries to
encode your video in a free format.
Imovie has a basilar interface but it's able to andle also some compositingeffect just as masks.
In this case we can define a mask as a black and white image (or clip)whose value at each pixel determines it's opacity (or alpha) value.
So a white pixel would indicate an opaque pixel, black a transparent one,and grey values varying degrees of transparency.You may recognize that a mask acts like a stencil.
In compositing, two images (or clips) are combined in one of several waysusing a mask. The most common way is to place one image (the
foreground) over another (the background). Where the mask is darker,indicating transparency, the background image will show through the
foreground. Where the mask is brighter, indicating opacity, the foregroundimage will block the background.
With Imove you are not able to move the mask in anycase.
IMOVIE
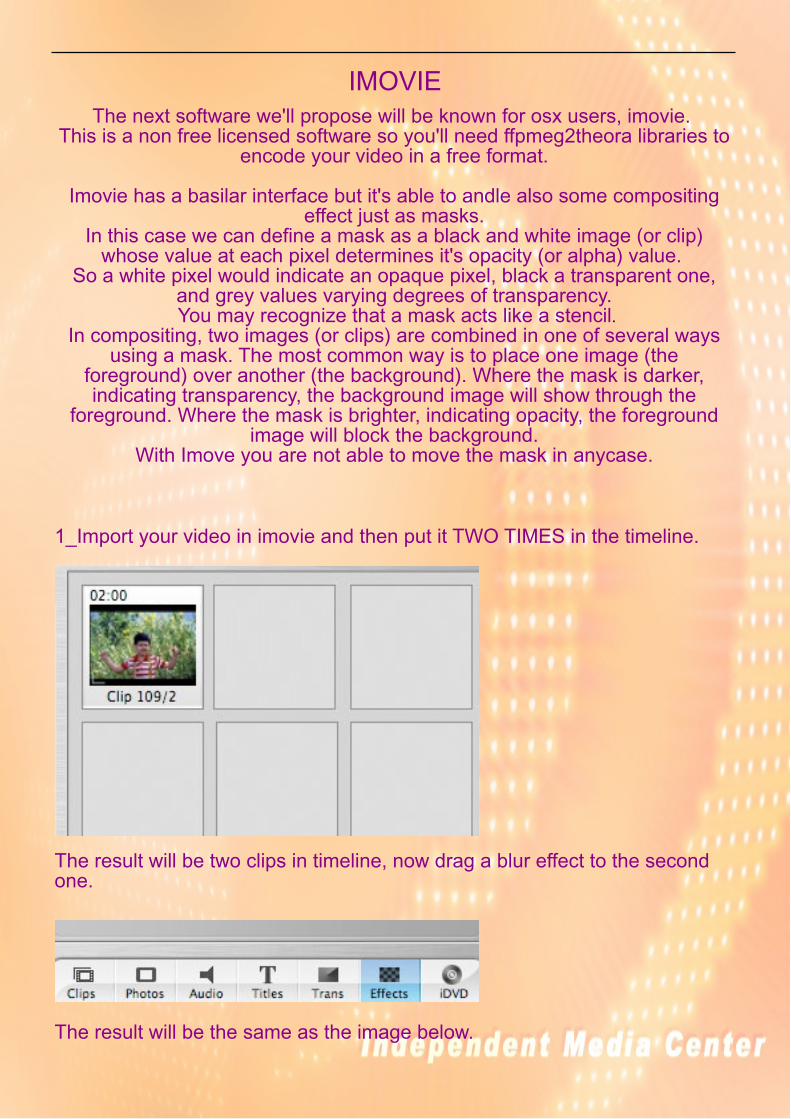
1_Import your video in imovie and then put it TWO TIMES in the timeline.
The result will be two clips in timeline, now drag a blur effect to the secondone.
The result will be the same as the image below.
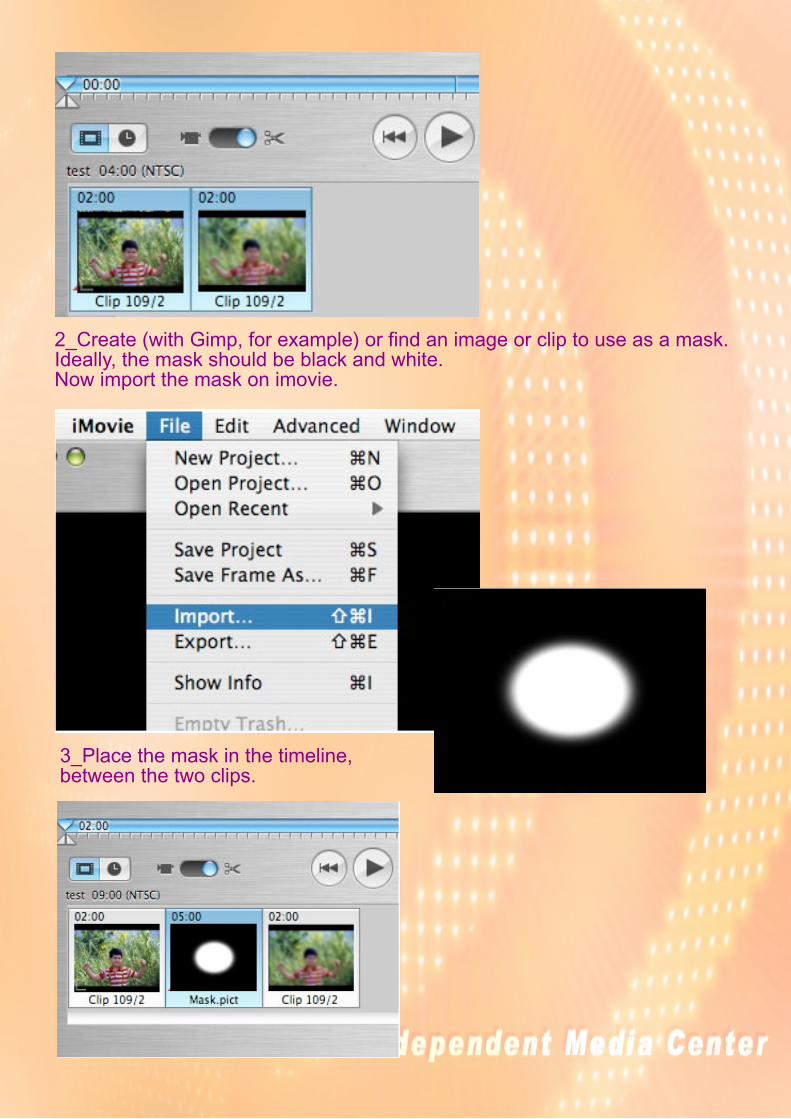
2_Create (with Gimp, for example) or find an image or clip to use as a mask.Ideally, the mask should be black and white.Now import the mask on imovie.
3_Place the mask in the timeline,between the two clips.
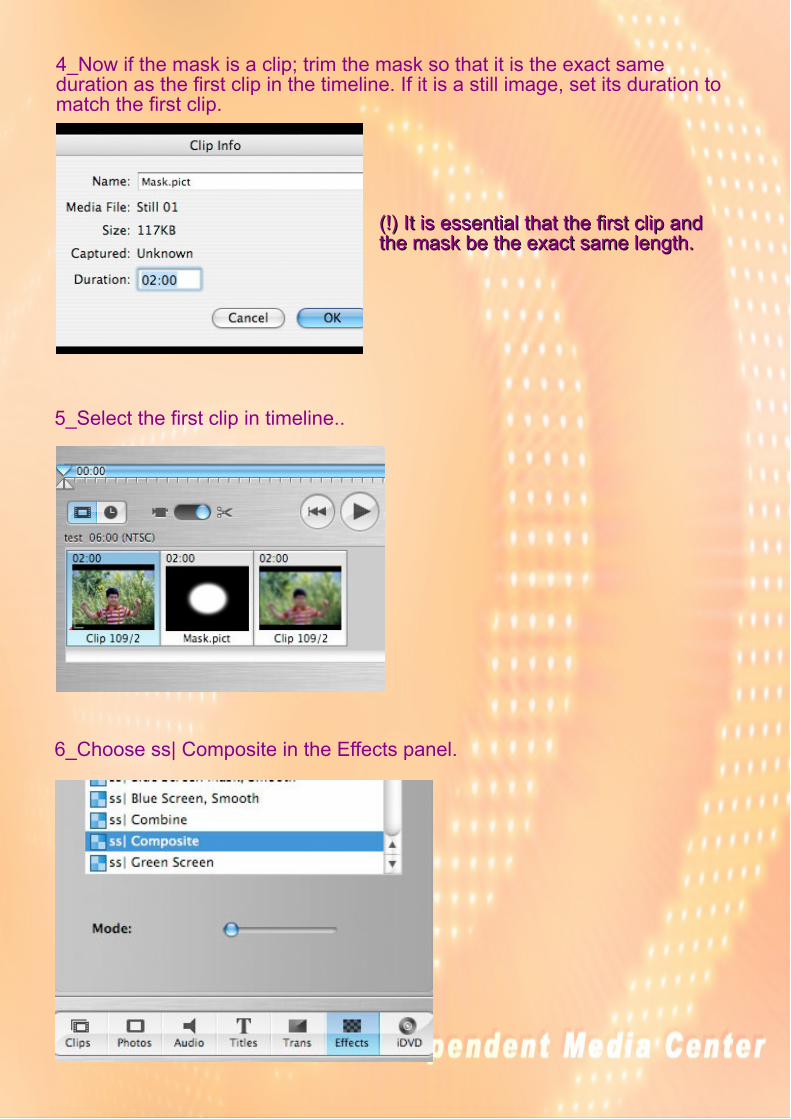
4_Now if the mask is a clip; trim the mask so that it is the exact sameduration as the first clip in the timeline. If it is a still image, set its duration tomatch the first clip.
((!!)) IItt iiss eesssseennttiiaall tthhaatt tthhee ffiirrsstt cclliipp aannddtthhee mmaasskk bbee tthhee eexxaacctt ssaammee lleennggtthh..
5_Select the first clip in timeline..
6_Choose ss| Composite in the Effects panel.
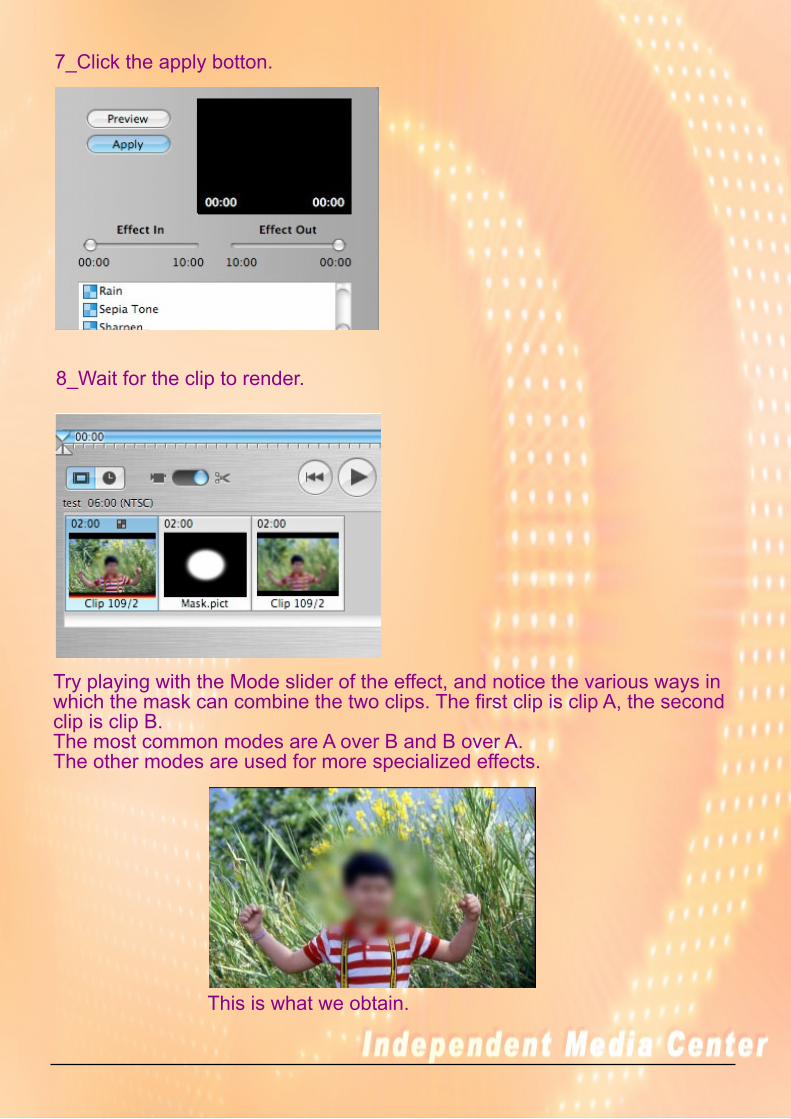
7_Click the apply botton.
8_Wait for the clip to render.
Try playing with the Mode slider of the effect, and notice the various ways inwhich the mask can combine the two clips. The first clip is clip A, the secondclip is clip B.The most common modes are A over B and B over A.The other modes are used for more specialized effects.
This is what we obtain.
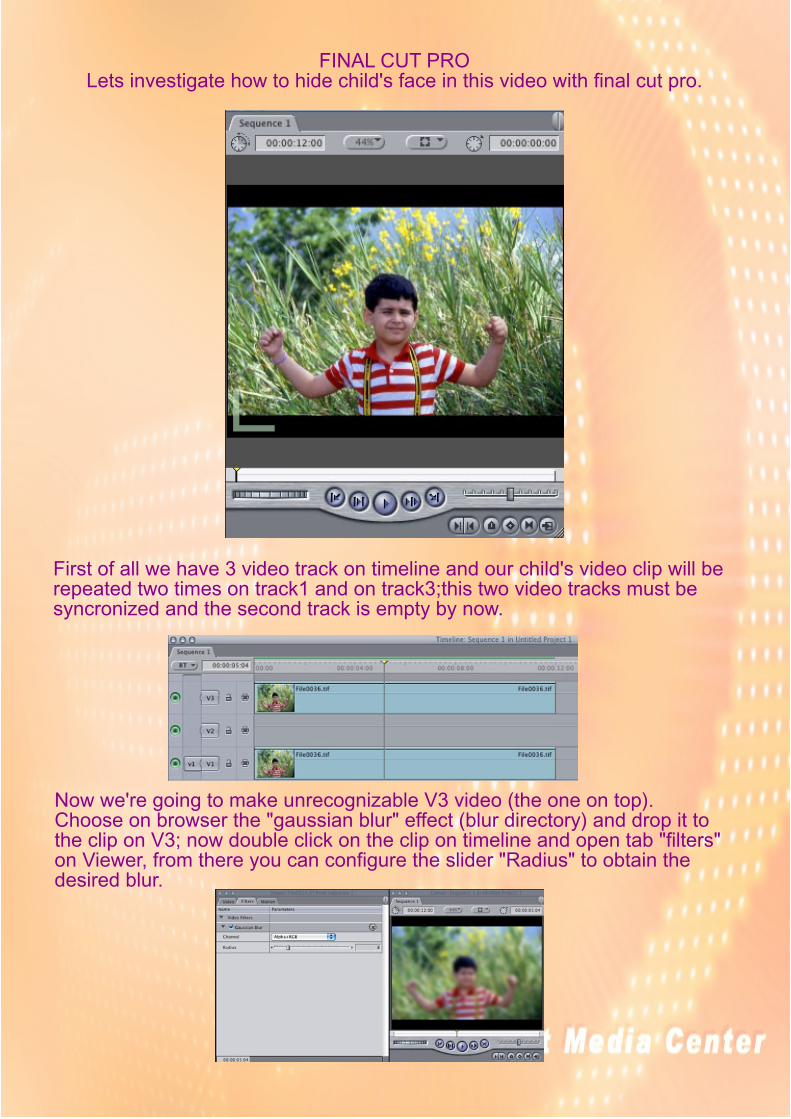
FINAL CUT PROLets investigate how to hide child's face in this video with final cut pro.
First of all we have 3 video track on timeline and our child's video clip will berepeated two times on track1 and on track3;this two video tracks must besyncronized and the second track is empty by now.
Now we're going to make unrecognizable V3 video (the one on top).Choose on browser the "gaussian blur" effect (blur directory) and drop it tothe clip on V3; now double click on the clip on timeline and open tab "filters"on Viewer, from there you can configure the slider "Radius" to obtain thedesired blur.
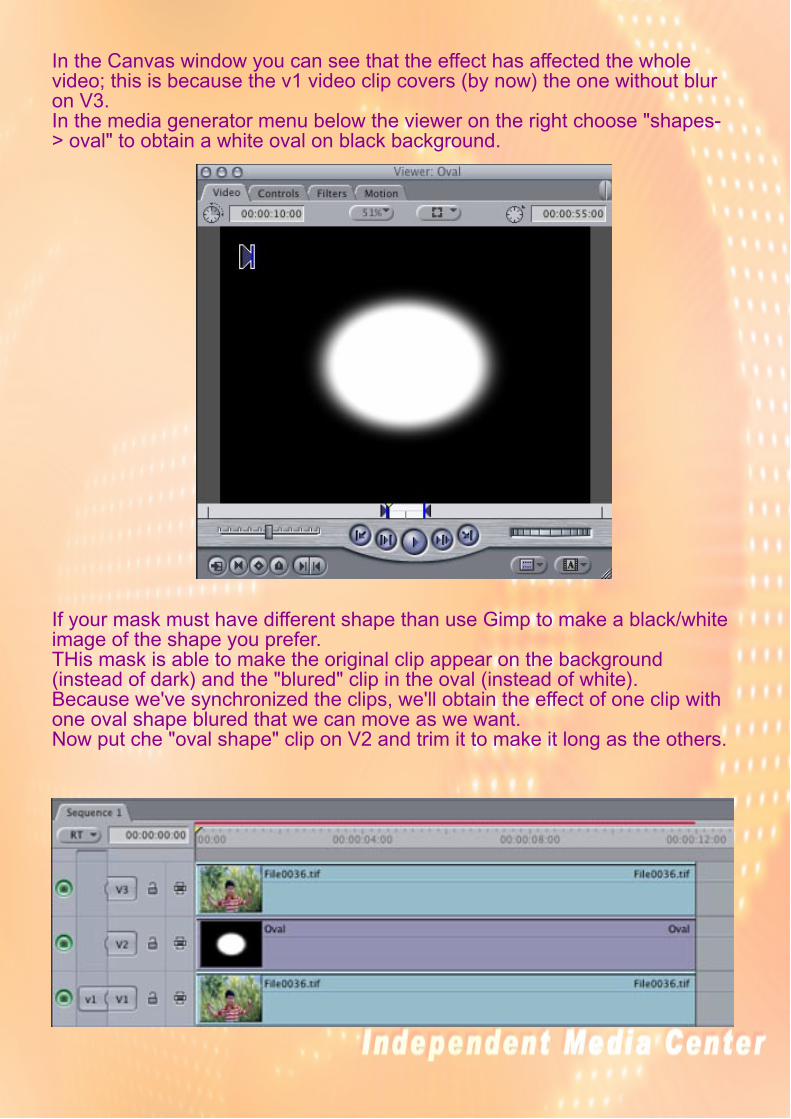
In the Canvas window you can see that the effect has affected the wholevideo; this is because the v1 video clip covers (by now) the one without bluron V3.In the media generator menu below the viewer on the right choose "shapes-> oval" to obtain a white oval on black background.
If your mask must have different shape than use Gimp to make a black/whiteimage of the shape you prefer.THis mask is able to make the original clip appear on the background(instead of dark) and the "blured" clip in the oval (instead of white).Because we've synchronized the clips, we'll obtain the effect of one clip withone oval shape blured that we can move as we want.Now put che "oval shape" clip on V2 and trim it to make it long as the others.

Now double click on V3 and choose "composite mode -> travelmatte - luma"
This is the final effect.
But is not the only effect that we can obtain with this software.Going to the Canvans windows and choosing from the top menu "View->Image+Wireframe" we can see a X on the center of the window; now doubleclicking to the V2 clip and moving corners of the clip on Canvas we canresize and move the oval to the position we prefer.
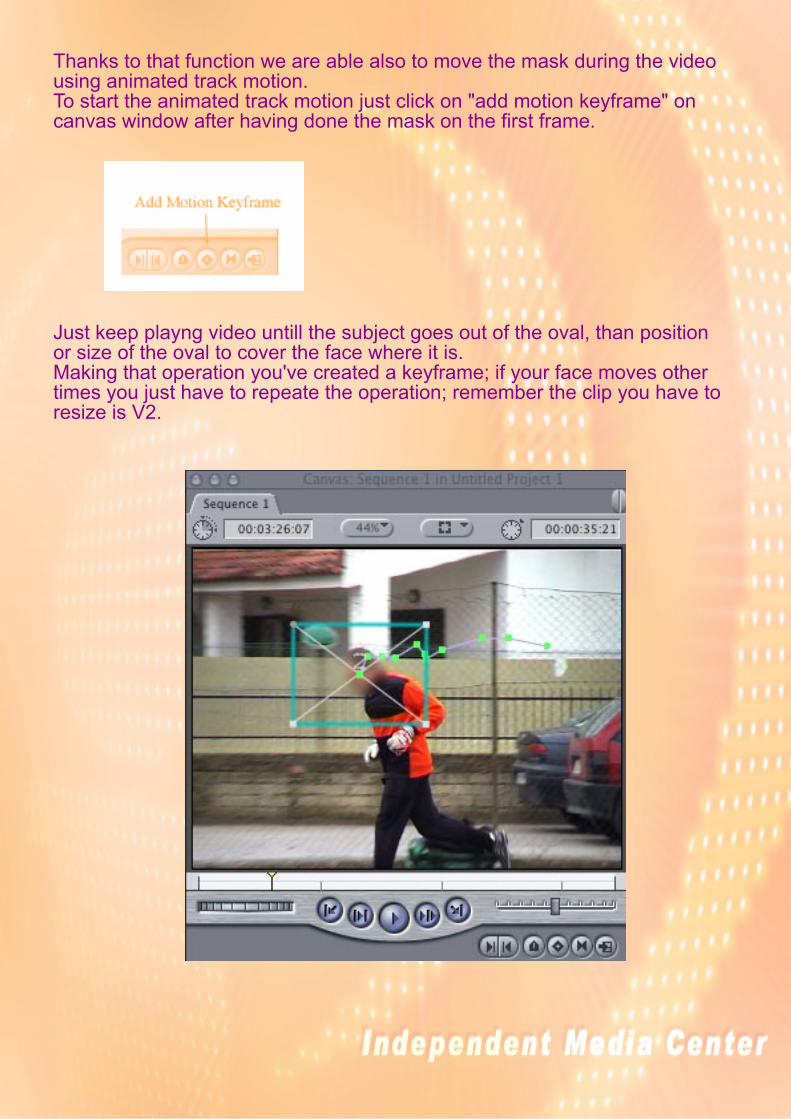
Thanks to that function we are able also to move the mask during the videousing animated track motion.To start the animated track motion just click on "add motion keyframe" oncanvas window after having done the mask on the first frame.
Just keep playng video untill the subject goes out of the oval, than positionor size of the oval to cover the face where it is.Making that operation you've created a keyframe; if your face moves othertimes you just have to repeate the operation; remember the clip you have toresize is V2.
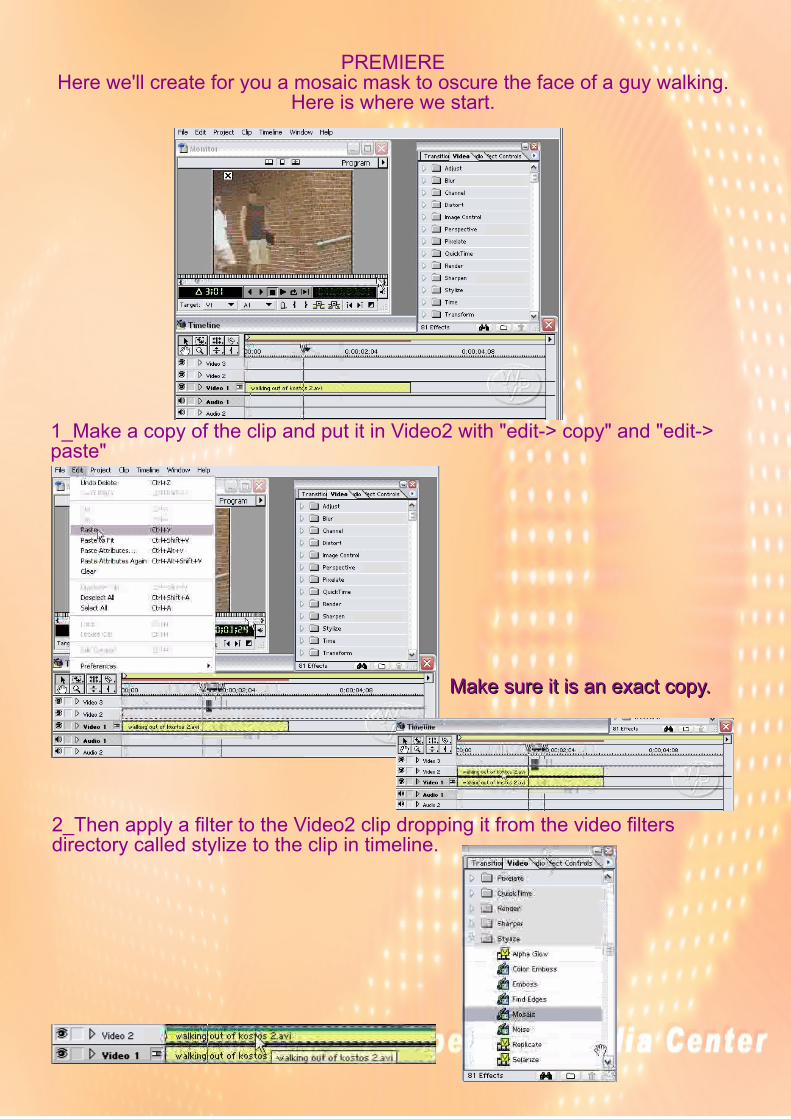
PREMIEREHere we'll create for you a mosaic mask to oscure the face of a guy walking.
Here is where we start.
1_Make a copy of the clip and put it in Video2 with "edit-> copy" and "edit->paste"
MMaakkee ssuurree iitt iiss aann eexxaacctt ccooppyy..
2_Then apply a filter to the Video2 clip dropping it from the video filtersdirectory called stylize to the clip in timeline.
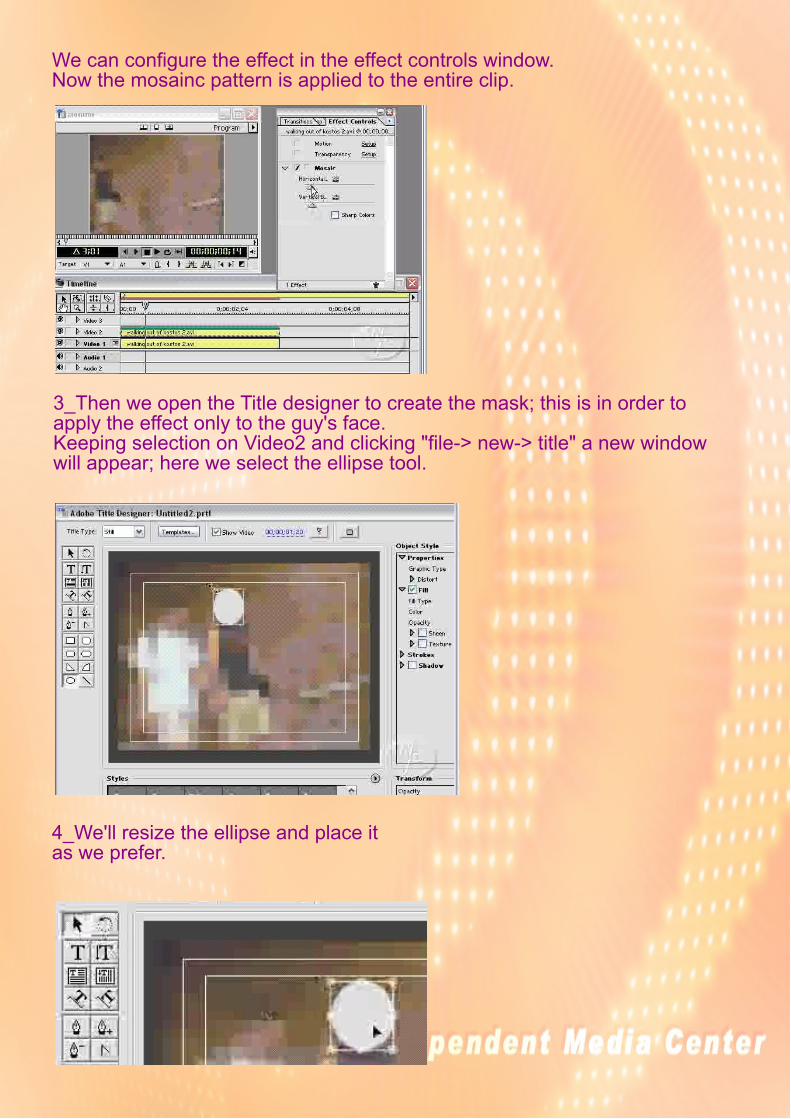
We can configure the effect in the effect controls window.Now the mosainc pattern is applied to the entire clip.
3_Then we open the Title designer to create the mask; this is in order toapply the effect only to the guy's face.Keeping selection on Video2 and clicking "file-> new-> title" a new windowwill appear; here we select the ellipse tool.
4_We'll resize the ellipse and place itas we prefer.
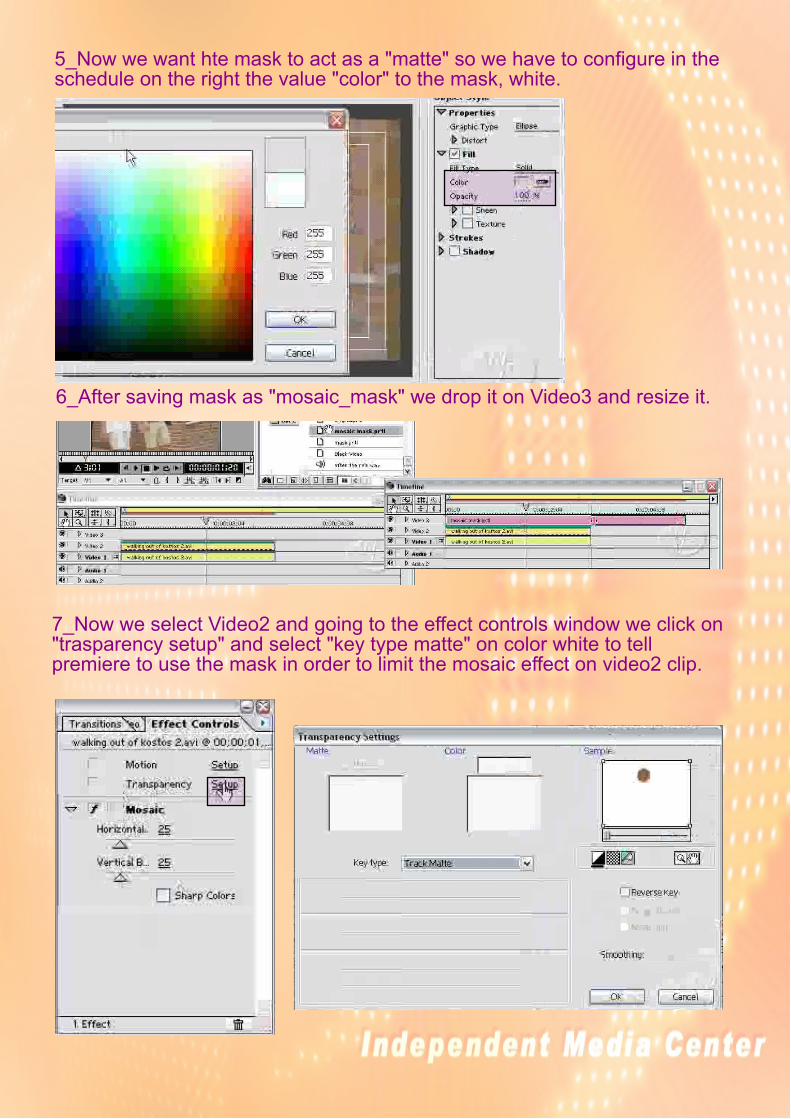
5_Now we want hte mask to act as a "matte" so we have to configure in theschedule on the right the value "color" to the mask, white.
6_After saving mask as "mosaic_mask" we drop it on Video3 and resize it.
7_Now we select Video2 and going to the effect controls window we click on"trasparency setup" and select "key type matte" on color white to tellpremiere to use the mask in order to limit the mosaic effect on video2 clip.
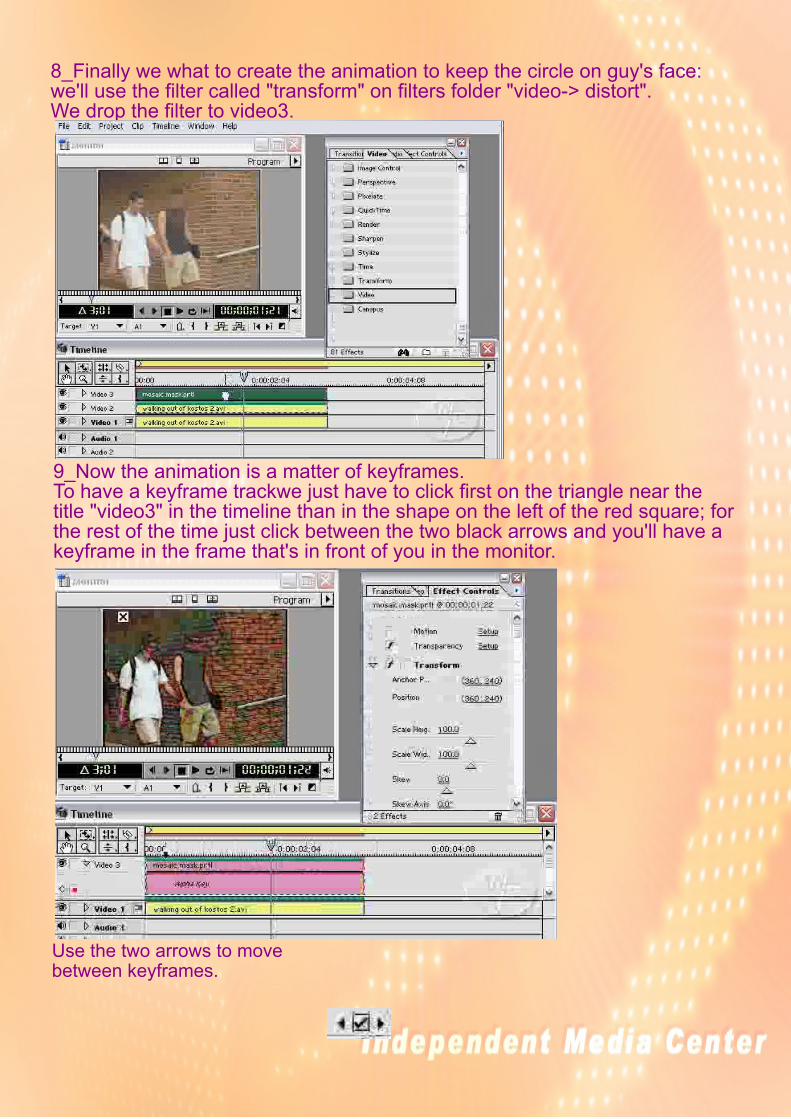
8_Finally we what to create the animation to keep the circle on guy's face:we'll use the filter called "transform" on filters folder "video-> distort".We drop the filter to video3.
9_Now the animation is a matter of keyframes.To have a keyframe trackwe just have to click first on the triangle near thetitle "video3" in the timeline than in the shape on the left of the red square; forthe rest of the time just click between the two black arrows and you'll have akeyframe in the frame that's in front of you in the monitor.
Use the two arrows to movebetween keyframes.
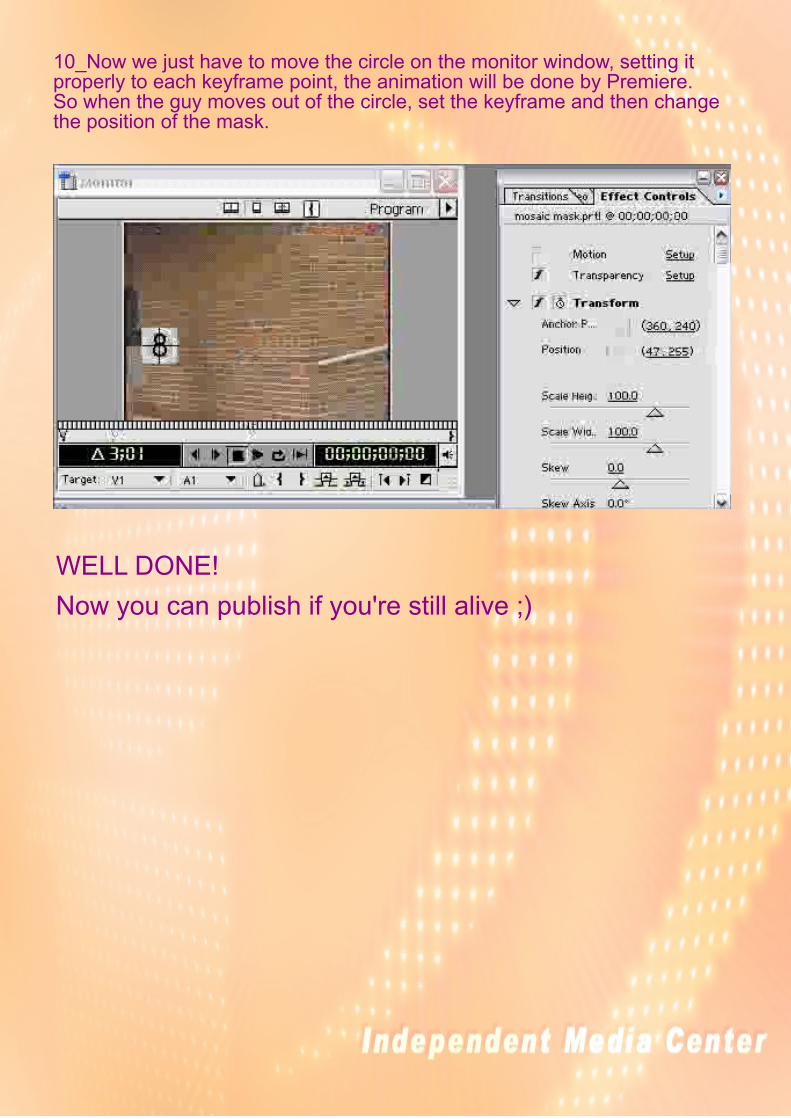
10_Now we just have to move the circle on the monitor window, setting itproperly to each keyframe point, the animation will be done by Premiere.So when the guy moves out of the circle, set the keyframe and then changethe position of the mask.
WELL DONE!
Now you can publish if you're still alive ;)

![Original file was jvis finalitiis.org/journals/tiis/digital-library/manuscript/file...In [17], data hiding and extraction is suggested for Audio Video Interleave videos, that embeds](https://img.pdfslide.us/doc/110x75/5e740416a2da081283236f81/original-file-was-jvis-in-17-data-hiding-and-extraction-is-suggested-for.jpg)