Embed Size (px)
Citation preview
BYU – ChE 376 – Hands On Demonstrations of Basic Heat & Mass Transfer Principles
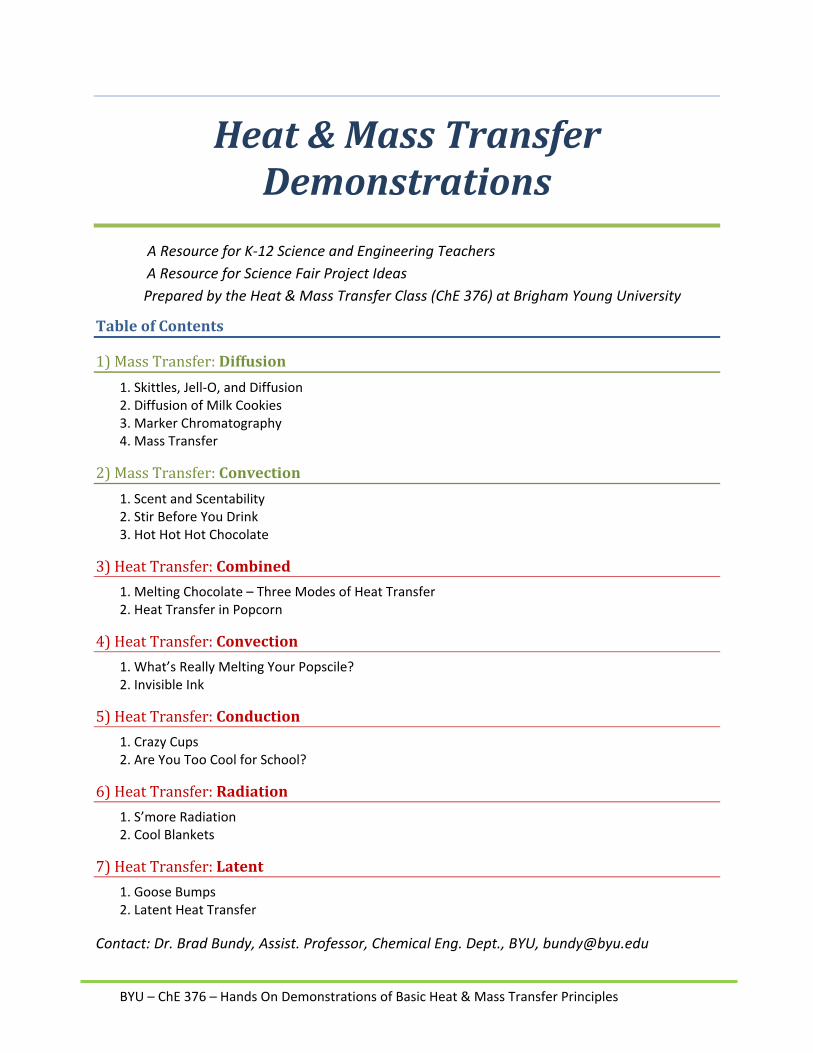
Heat&MassTransferDemonstrations
A Resource for K‐12 Science and Engineering Teachers
A Resource for Science Fair Project Ideas
Prepared by the Heat & Mass Transfer Class (ChE 376) at Brigham Young University
TableofContents
1)MassTransfer:Diffusion
1. Skittles, Jell‐O, and Diffusion 2. Diffusion of Milk Cookies 3. Marker Chromatography 4. Mass Transfer
2)MassTransfer:Convection
1. Scent and Scentability 2. Stir Before You Drink 3. Hot Hot Hot Chocolate
3)HeatTransfer:Combined
1. Melting Chocolate – Three Modes of Heat Transfer 2. Heat Transfer in Popcorn
4)HeatTransfer:Convection
1. What’s Really Melting Your Popscile? 2. Invisible Ink
5)HeatTransfer:Conduction
1. Crazy Cups 2. Are You Too Cool for School?
6)HeatTransfer:Radiation
1. S’more Radiation 2. Cool Blankets
7)HeatTransfer:Latent
1. Goose Bumps 2. Latent Heat Transfer
Contact: Dr. Brad Bundy, Assist. Professor, Chemical Eng. Dept., BYU, [email protected]
BYU – ChE 376 – Hands On Demonstrations of Basic Heat & Mass Transfer Principles
Warning: These demonstrations involve substances and materials when in use have the potential to cause injury and burns. For example electricity should be used appropriately . Equipment and Hot materials such as light bulbs, hot water, hand warmers, electric fans should be used with appropriate protective equipment and according to manufacturer’s specifications.
BYU – ChE 376 – Hand’s On Demonstrations of Basic Heat & Mass Transfer Principles Page 1 of 2
Skittles, Jell-O, and Diffusion A 5 Minute Demonstration that illustrates why diffusion occurs and the differences among
diffusion in solids, liquids, and gases.
Resources Required 1. Estimated Time: Prepare gelatin 7 days in advance. Skittles can be prepared in less than 5
minutes. 2. List of Materials and Estimated Cost:
• Colorless gelatin • Skittles • Food dye • Three lidded containers • Clear plastic cups (about six) • Syringe or dropper Total cost: $12-$17
3. Total Project Time: Demonstration takes 5-10 minutes. Project set up takes approximately 2 hours spread over a 5 day period.
Safety Precautions 1. Keep gelatin covered to prevent molding. 2. Food dye may stain; handle with care to prevent damage to clothing.
Preparation Instructions
1) Obtain the Necessary Materials You can find all materials at the grocery store.
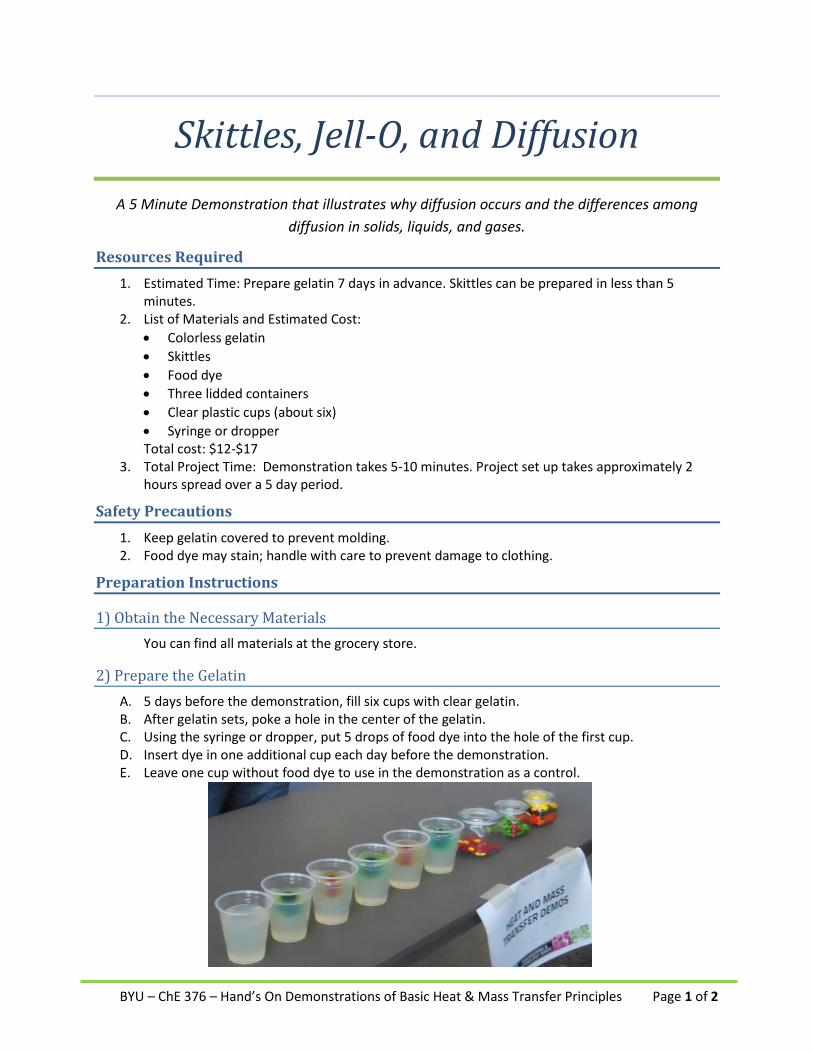
2) Prepare the Gelatin A. 5 days before the demonstration, fill six cups with clear gelatin. B. After gelatin sets, poke a hole in the center of the gelatin. C. Using the syringe or dropper, put 5 drops of food dye into the hole of the first cup. D. Insert dye in one additional cup each day before the demonstration. E. Leave one cup without food dye to use in the demonstration as a control.
BYU – ChE 376 – Hand’s On Demonstrations of Basic Heat & Mass Transfer Principles Page 2 of 2
3) Prepare the Skittles A. Separate the Skittles by color. B. Pack one plastic container completely full, dividing the Skittles into three layers by color.
(Representative of a solid.) C. Fill another container halfway full, with half of the Skittles in one color and the other half
another color. (Representative of a liquid.) D. Fill the last container with a handful of one color and about 5-10 Skittles of another color. (Gas)
Demonstration Instructions 1. To introduce diffusion and interest students, ask the children if they know why matter does not
seem to stay in one place. (Bring up some examples, such as when you spray air freshener the smell does not just stay in one spot in a room.)
2. Explain that diffusion, or the spreading of molecules, happens because there is a difference in concentration. In other words, when there is a lot of matter in one area and less mater in another area, the matter will spread out.
3. Show how diffusion works by lining up the cups of gelatin in chronological order according to when the food dye was added. This will help the children to see that over time, the molecules of food dye spread out to areas of lower concentration in the gelatin.
4. Ask the children if they think diffusion happens faster in a solid, liquid, or gas. 5. Have the children shake the three containers of Skittles. Help them to recognize that when the
Skittles are packed in the container, it is much harder to mix them. 6. Explain that just like the Skittles in the container, solids take much longer to diffuse than gases,
which have far more room between molecules. (Show other containers representing liquids and gases. Note how easy it is to shake the Skittles up.)
7. Illustrate that diffusion is happening all around us; ask the children to think of other examples of diffusion.
Potential Discussion Questions
1. Why does matter spread out? Matter moves according to concentration gradients; when there is more matter in one area than another, the matter will move to areas of lower concentration.
2. Why is it harder for diffusion to occur in solids than for liquids and gases? The molecules in solids are more tightly packed together; there is less movement. In liquids and gases, there is much more space between molecules so matter can spread more easily.
Fun Facts and Resources • Diffusion can be affected by various factors, including temperature, size of molecules, and the
degree of the difference in concentration. • When molecules are evenly distributed throughout a space, it is called equilibrium. You can see
equilibrium take place when food dye is dropped in water. Eventually all the food dye molecules evenly disperse, making the water a uniform shade.
• Diffusion is used by scientists and engineers to create medicines that diffuse through a membrane into the body over time, catalysts that diffuse through a reactor and speed up reactions, and air fresheners that help permeate odors! It’s used all around us!
• http://highered.mcgraw-hill.com/sites/0072495855/student_view0/chapter2/animation__how_diffusion_works.html
• http://www.biologycorner.com/bio1/diffusion.html
BYU – ChE 376 – Hand’s On Demonstrations of Basic Heat & Mass Transfer Principles Page 1 of 2
Diffusion of Milk in Cookies 5 minute demonstration that illustrates the principle of mass diffusion. Knowledge of mass
diffusion is important in understanding how fast chemical reactions occur.
Resources Required 1. Estimated Time: Approximately 30 minutes to purchase supplies 2. List of Materials and Estimated Cost.
• Oreos ($3-4 per pack) • Milk ($2-3 per gallon) • Cups ($3-4 per pack of 100) • A balance/kitchen scale
3. Total project time: 1 hour (30 minutes to do the demonstration)
Safety Precautions 1. Sanitation concerns. Make sure that kids don’t dip their fingers/cookies into each other’s cups of
milk. 2. Check with the students beforehand to make sure that allergies won’t put anyone in a harmful
health situation.
Preparation Instructions
1) Obtain the Necessary Materials
If using a kitchen scale it should be fairly accurate (to at least .1 grams) to be able register a weight difference between a dry and wet cookie. If a balance is used instead (similar to the one pictured below) it should be fine for simplified demonstration. The edible materials can be purchased at any local grocery store.
2) Prepare Handout and Practice the Demonstration
http://commons.wikimedia.org/wiki/File:US_Department of Justice Scales Of Justice.sv
BYU – ChE 376 – Hand’s On Demonstrations of Basic Heat & Mass Transfer Principles Page 2 of 2
The scale/balance should be tested prior to demonstration in front of an audience.
Demonstration Instructions 1. Get out the scale/balance. 2. If using the scale, first place a dry cookie on the scale and record the weight. 3. If using a balance, place one dry cookie on each side. They should be level on the balance. 4. Pour a cup of milk. 5. Dip a cookie in the milk for a predetermined amount of time, e.g. 1, 3, 5, 10 seconds. Having the
children dip the cookies increases participation and hands on learning. Explain that in the beginning, there is no milk in the cookie so the milk will want to go into the cookie. This is called diffusion.
6. Place the cookie with milk in it on the scale, and explain that now that the milk has diffused into the cookie, it weighs more than it used to. If using a balance, the side with the wet cookie should be lower than the dry cookie.
7. You can do multiple examples by varying the amount of time the cookie is held in the milk, which will show that the longer the cookie is kept in the milk, the heavier it will be.
Potential Discussion Questions 1. Why does the milk go in the cookie? (Because there is more milk outside the cookie than inside) 2. If we leave a cookie in the milk for a really long time, will it suck up all of the milk in the cup?
(No, once the milk has filled all the space inside the cookie no more milk will go inside it) 3. What are some other examples of diffusion? (Food coloring in water, liquid moving up a paper
towel)
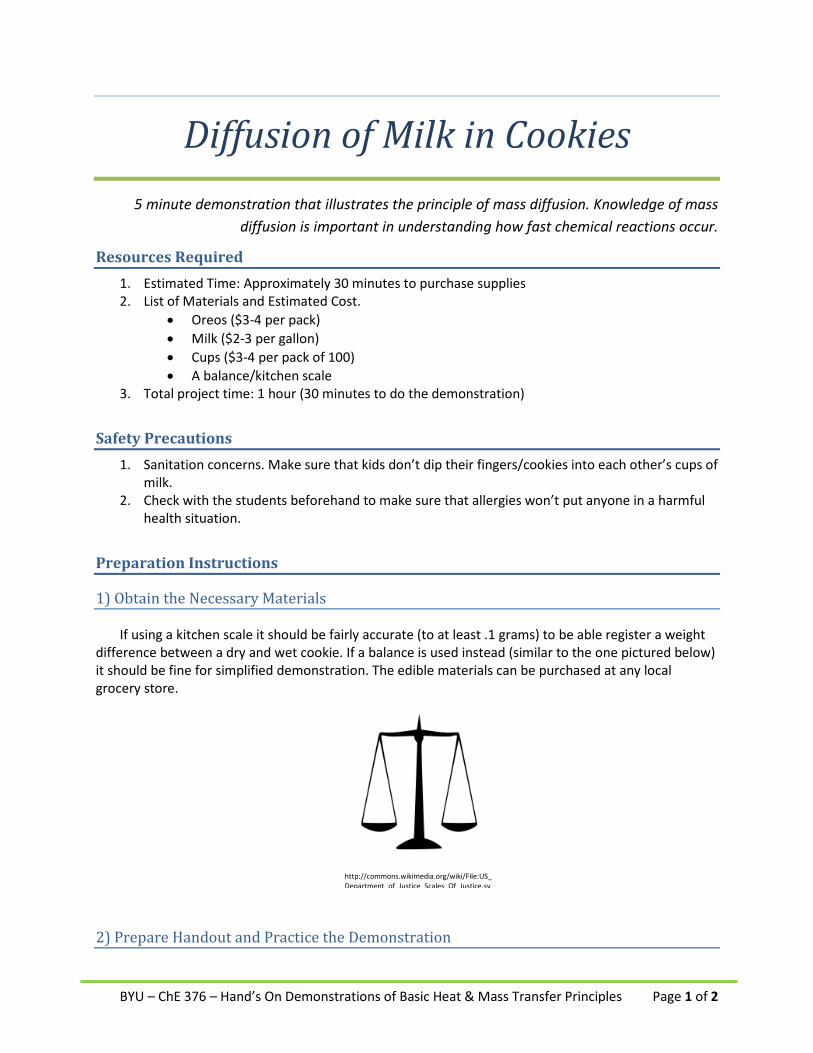
Fun Facts and Resources 1. The milk transfers fastest into the cookie for the first few seconds after being dipped in the milk
because that is when there is the biggest difference between the amount of milk in the cup and inside the cookie.
2. Almost half a trillion Oreo cookies have been sold since being created 100 years ago. 3. There have been dozens of Oreo flavors, some of the least known being banana split crème,
blueberry ice cream, lemon ice, green tea, strawberry, and birthday cake.
http://commons.wikimedia.org/wiki/File:Oreos-%26-Milk.jpg
BYU – ChE 376 – Hand’s On Demonstrations of Basic Heat & Mass Transfer Principles Page 1 of 2
Marker Chromatography This demonstration illustrates the principles of mass transfer. In the demo mass transfer is observed through both solid and liquid mediums. This concept is taught by observing how dots of marker ink streak and separate into the individual colors, dyes, or inks that are combined to make a specific marker color. The varying diffusion rates of different colors allow this to be observed. Because every color has a different diffusivity, each color will move at a different rate through the paper resulting in the visible separation of the different colors in each marker. Chromatography is used in industries to test for contaminants in liquids, such as pollution in ground water, and to identify unknown compounds. The pharmaceutical industry uses chromatography to determine the purity of compounds. The food industry uses chromatography to analyze contaminants in food products.
Resources Required 1. Estimated Time: 20 min 2. List of Materials and Estimated Cost.
• Markers (not-whiteboard or permanent) • Coffee filters • Water • Container to hold water • Tape • $10.00
3. Total Project Time: The preparation of the demonstration will take 10 min, and the demonstration itself will take 10 min.
Safety Precautions 1. Scissors will be used to cut the coffee filters into rectangular shape so care is needed.
Preparation Instructions
1) Obtain the Necessary Materials You can find the coffee filters at any grocery store. Other materials can be found in standard
school supplies.
2) Prepare Handout and Practice the Demonstration The main component of this demonstration is water wicking up the coffee filter past the marker dots. The dots should not be submerged in water. Cut coffee filters into rectangular shapes, having a flat bottom on the filter is important. Tape the coffee filter at a position so that the bottom is barely in the water. The marker dots should be placed about a half an inch above the bottom of the coffee filter. Experiment before hand with the markers you have available to select which markers produce the best color patterns. Dark colors such as blacks and browns work well.

BYU – ChE 376 – Hand’s On Demonstrations of Basic Heat & Mass Transfer Principles Page 2 of 2
Demonstration Instructions 1. Demonstrate how the markers produce colored dots on the dry coffee filter. 2. Tape the coffee filter up so that the bottom is barely immersed in water. 3. Describe what is happening as the coffee filter becomes wet. 4. Describe how the marker dot bleeds upwards as the water travels past the dot. 5. Over the next few minutes the individual colors in the marker will separate. 6. Explain why certain colors travel higher up the wet coffee filter. (size of dye molecules)
Source http://img528.imageshack.us/img528/520/colour6vm8.jpg
Potential Discussion Questions 1. Why does water travel up the coffee filter, even though gravity is applying a downward
force? 2. Why does making the coffee filter wet cause the marker colors to separate? 3. What colors are actually used to make dark colored markers such as black and brown? 4. Do small color molecules or large color molecules travel faster up the coffee filter?
Fun Facts and Resources Drawing lines and different dot patterns produce interesting results, experiment with different markers and designs. Additional Resources: http://www.crayola.com/crafts/detail/marker-chromatography-craft/ http://en.wikipedia.org/wiki/Paper_chromatography
BYU – ChE 376 – Hand’s On Demonstrations of Basic Heat & Mass Transfer Principles Page 1 of 3
Mass Transfer 5 Minute Demonstration of forced convection versus diffusion and effect of concentration on
diffusion.
Resources Required 1. Estimated Time: 1 hour. This includes acquiring materials and setting up. 2. List of Materials and Estimated Cost.
• 2 or 3 items with distinctive, non-toxic odors (we used vinegar, “stinky tofu,” and blueberries (frozen versus hot pie as a theoretical example)
• Liquid N2 or Dry ice (N2 is more fun, and faster, but harder to contain) • Litmus paper • A blow dryer or well directed fan • Cost:$10 assuming the blow dryer can be borrowed.
3. Demonstration Time: 5 minutes.
Safety Precautions 1. Both liquid N2 and dry ice can pose storage, frost burn, and asphyxiation hazards. Do not use
large quantities in small or air tight rooms, and store only in containers designed for low temperature storage.
2. Vinegar can cause irritation of the nasal membranes during the “smell test.” Make sure not to run the same test multiple times on the same participant.
Preparation Instructions
1) Obtain the Necessary Materials Litmus paper: Any pool or aquarium store, Dry Ice: most grocery stores, Liquid N2: Any chemical
supply store, Blow Dryer: common household item, Vinegar, tofu, etc: grocery stores or Asian food stores
2) Prepare Handout and Practice the Demonstration If you have young kids or there are kids in the neighborhood they make for great audiences.
3) Ask for feedback Feedback about what was unclear rapidly improves each subsequent presentation.
Demonstration Instructions 1. Explain the concept (free convection, forced convection, or diffusion) 2. Let the audience choose the appropriate test (Sniff test (freeze the vinegar and compare
detection by scent ranges for frozen and unfrozen vinegar), litmus test (freeze the vinegar, wet the litmus paper, and capture the vapors escaping from the surface of frozen and unfrozen
BYU – ChE 376 – Hand’s On Demonstrations of Basic Heat & Mass Transfer Principles Page 2 of 3
vinegar; compare rate of color change.) Advection test: lay out the stinky tofu, note strength of scent with diffusion, and then add in a moving air stream for comparison.)
3. Let two or three volunteers note the various test results. 4. Lead a discussion referring back to the principles involved and the reasons behind observed
results.
Potential Discussion Questions 1. What do you think a concentration gradient is? (a
good example is unmixed orange juice concentrate in water)
2. Can you smell vinegar better when it’s frozen or at room temperature? Why?
3. Will more vapor come off frozen vinegar or liquid vinegar?
4. When does diffusion occur more quickly: in food that is frozen or at room temperature?
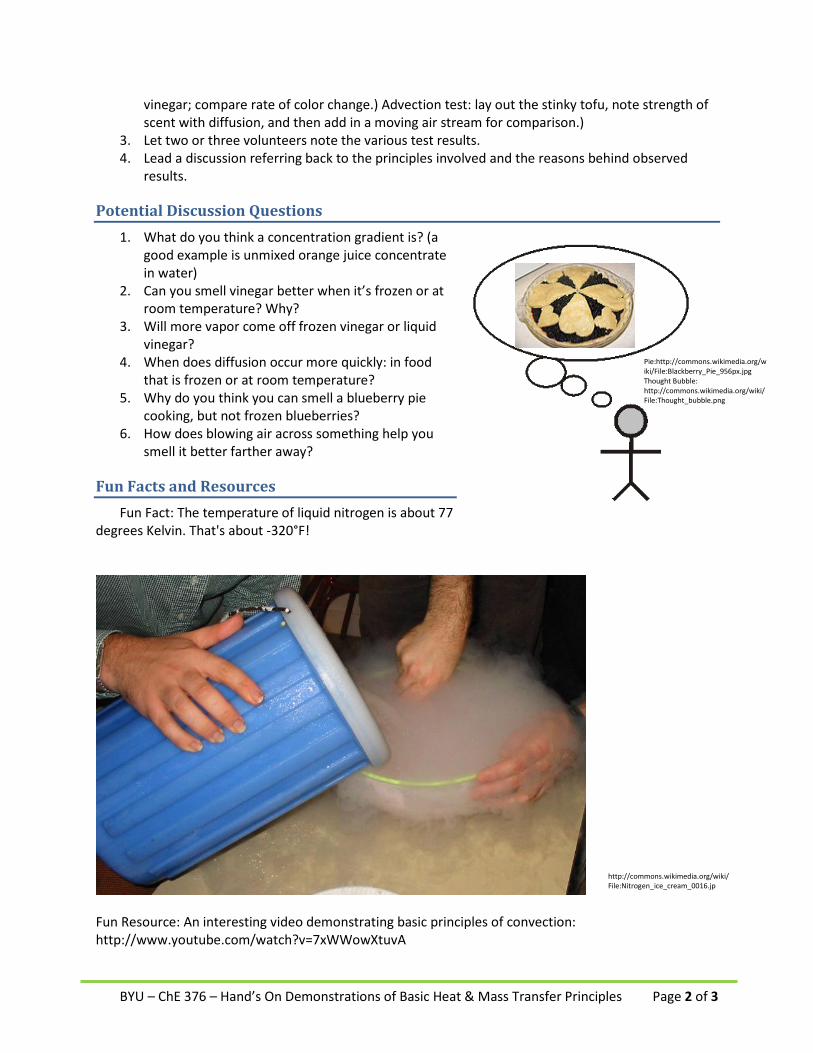
5. Why do you think you can smell a blueberry pie cooking, but not frozen blueberries?
6. How does blowing air across something help you smell it better farther away?
Fun Facts and Resources Fun Fact: The temperature of liquid nitrogen is about 77
degrees Kelvin. That's about -320°F!
Fun Resource: An interesting video demonstrating basic principles of convection: http://www.youtube.com/watch?v=7xWWowXtuvA
Pie:http://commons.wikimedia.org/wiki/File:Blackberry_Pie_956px.jpg Thought Bubble: http://commons.wikimedia.org/wiki/File:Thought_bubble.png
http://commons.wikimedia.org/wiki/File:Nitrogen_ice_cream_0016.jp

BYU – ChE 376 – Hand’s On Demonstrations of Basic Heat & Mass Transfer Principles Page 3 of 3
BYU – ChE 376 – Hand’s On Demonstrations of Basic Heat & Mass Transfer Principles Page 1 of 2
Scent and Scentability 5 Minute Demonstration that demonstrates the difference between diffusion and convection. Diffusion
and convection are fundamental ways in which heat and mass are transferred around us. Some examples include oxygen transport through the body, heat transfer from warm to cold air causing rain, etc.
Resources Required 1. Estimated Set-up Time: 15 minutes 2. List of Materials Price
• Body sprays (can be found at the dollar store) $2 • Measuring Tape or yard stick $1 • Stop watch $1 • Masking tape or duct tape $1 • Access to Excel and a screen to display the spreadsheet (optional) $0
Total Cost $5 3. Demonstration Time: 5 Minutes
Safety Precautions 1. Keep electrical cords away from children. Tape them down as needed. 2. Use a fan with secure casing 3. Keep participants a sufficient distance away to prevent inhalation or eye irritation. 4. Keep fan below eye level of participants.
Preparation Instructions
1) Obtain the Necessary Materials Use a small home or classroom fan for this demonstration. You can find one at Home Depot if
needed. Body sprays can be found at the dollar store. You can use an air freshener spray or perfume as substitutes as long as there is good ventilation and you are not repeating the experiment many times. Otherwise, we recommend using a body spray because the scent is not as strong. Masking tape or duct tape may be used as the distance-markers.
2) Set up for the Demonstration Place the fan on a table, or stand it up, making sure the fan is within reach of an electrical outlet.
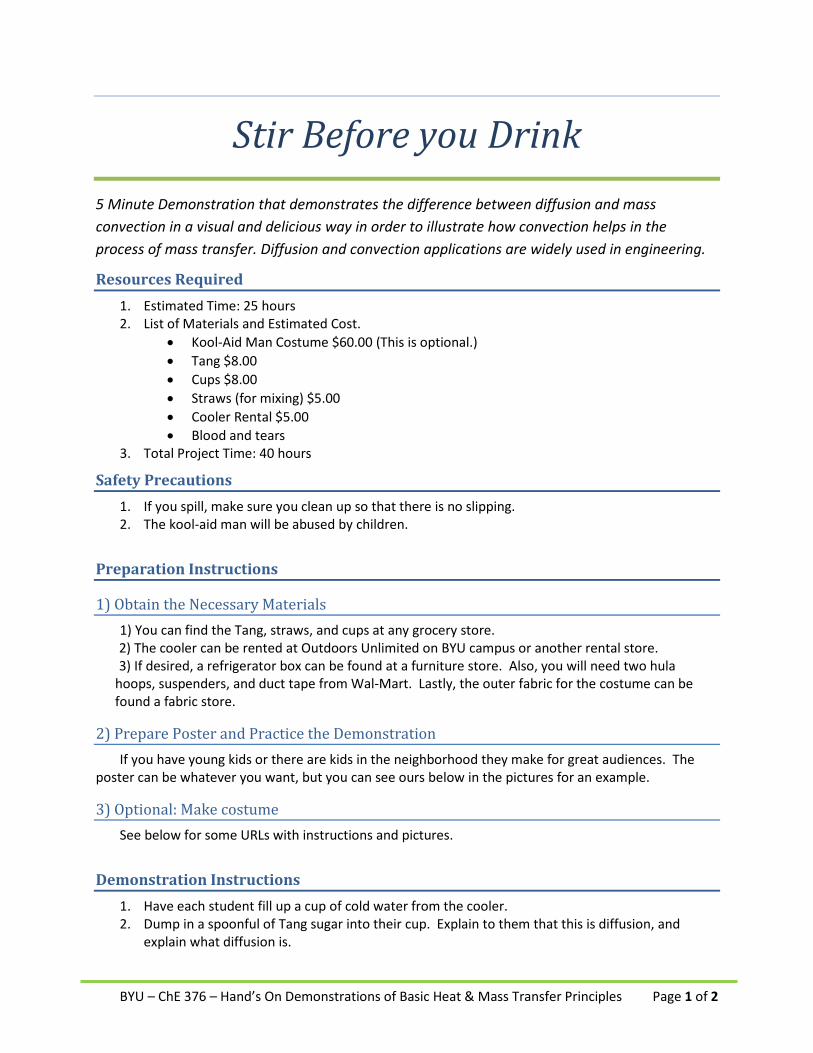
Using the yard stick or measuring tape, mark off from the front of the fan as many distances as desired between 4 feet and 15 feet away, putting pieces of tape on the ground at each distance. For instance, put a piece of tape at 4 feet, 5 feet, 7 feet, 9 feet, and 11 feet. It works best if the markers are a little offset from each other so some are to the right and some are to the left of the stream of the fan, so the demonstration participants are not stacked up. (See Picture Below)
3) Set up for the Graphical Representation If desired, it is a helpful to create a spreadsheet to record the data that you get for the
demonstration, and have a visual representation of the experiment. Before doing the demonstration,
BYU – ChE 376 – Hand’s On Demonstrations of Basic Heat & Mass Transfer Principles Page 2 of 2
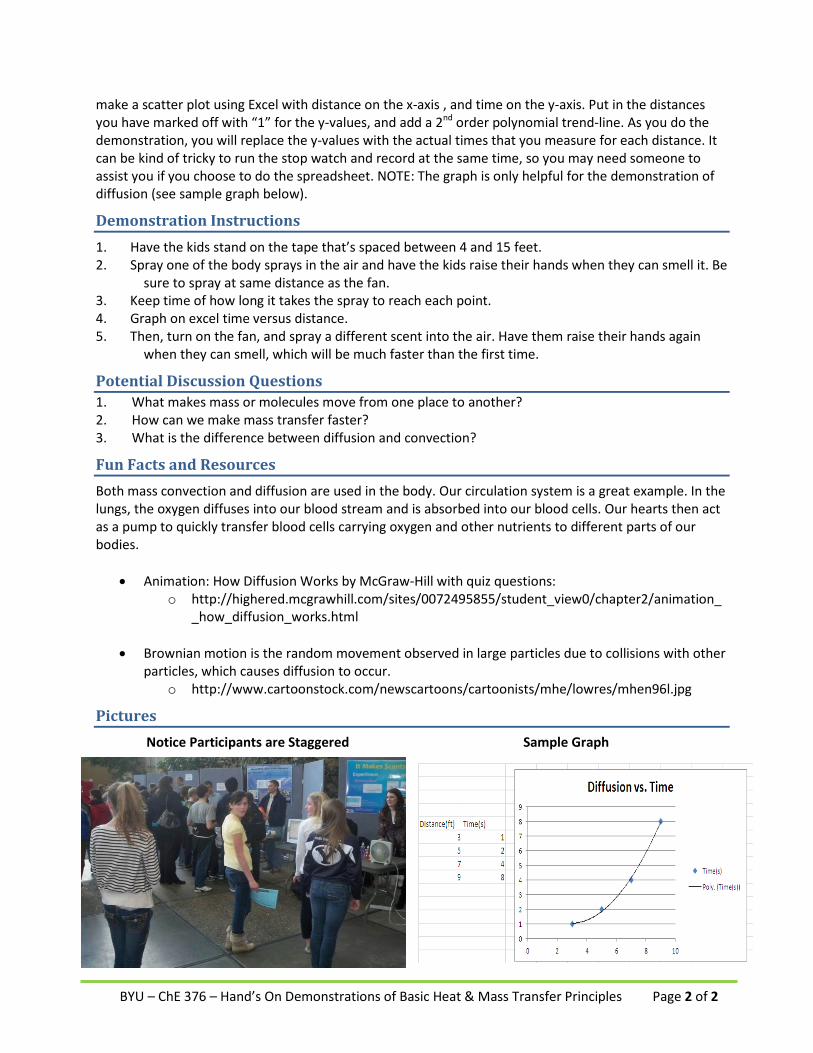
make a scatter plot using Excel with distance on the x-axis , and time on the y-axis. Put in the distances you have marked off with “1” for the y-values, and add a 2nd order polynomial trend-line. As you do the demonstration, you will replace the y-values with the actual times that you measure for each distance. It can be kind of tricky to run the stop watch and record at the same time, so you may need someone to assist you if you choose to do the spreadsheet. NOTE: The graph is only helpful for the demonstration of diffusion (see sample graph below).
Demonstration Instructions 1. Have the kids stand on the tape that’s spaced between 4 and 15 feet. 2. Spray one of the body sprays in the air and have the kids raise their hands when they can smell it. Be
sure to spray at same distance as the fan. 3. Keep time of how long it takes the spray to reach each point. 4. Graph on excel time versus distance. 5. Then, turn on the fan, and spray a different scent into the air. Have them raise their hands again
when they can smell, which will be much faster than the first time.
Potential Discussion Questions 1. What makes mass or molecules move from one place to another? 2. How can we make mass transfer faster? 3. What is the difference between diffusion and convection?
Fun Facts and Resources Both mass convection and diffusion are used in the body. Our circulation system is a great example. In the lungs, the oxygen diffuses into our blood stream and is absorbed into our blood cells. Our hearts then act as a pump to quickly transfer blood cells carrying oxygen and other nutrients to different parts of our bodies.
• Animation: How Diffusion Works by McGraw-Hill with quiz questions: o http://highered.mcgrawhill.com/sites/0072495855/student_view0/chapter2/animation_
_how_diffusion_works.html
• Brownian motion is the random movement observed in large particles due to collisions with other particles, which causes diffusion to occur.
o http://www.cartoonstock.com/newscartoons/cartoonists/mhe/lowres/mhen96l.jpg
Pictures Notice Participants are Staggered Sample Graph
BYU – ChE 376 – Hand’s On Demonstrations of Basic Heat & Mass Transfer Principles Page 1 of 2
Stir Before you Drink 5 Minute Demonstration that demonstrates the difference between diffusion and mass convection in a visual and delicious way in order to illustrate how convection helps in the process of mass transfer. Diffusion and convection applications are widely used in engineering.
Resources Required 1. Estimated Time: 25 hours 2. List of Materials and Estimated Cost.
• Kool-Aid Man Costume $60.00 (This is optional.) • Tang $8.00 • Cups $8.00 • Straws (for mixing) $5.00 • Cooler Rental $5.00 • Blood and tears
3. Total Project Time: 40 hours
Safety Precautions 1. If you spill, make sure you clean up so that there is no slipping. 2. The kool-aid man will be abused by children.
Preparation Instructions
1) Obtain the Necessary Materials 1) You can find the Tang, straws, and cups at any grocery store.
2) The cooler can be rented at Outdoors Unlimited on BYU campus or another rental store. 3) If desired, a refrigerator box can be found at a furniture store. Also, you will need two hula ____ ___hoops, suspenders, and duct tape from Wal-Mart. Lastly, the outer fabric for the costume can be ___found a fabric store.
2) Prepare Poster and Practice the Demonstration If you have young kids or there are kids in the neighborhood they make for great audiences. The
poster can be whatever you want, but you can see ours below in the pictures for an example.
3) Optional: Make costume See below for some URLs with instructions and pictures.
Demonstration Instructions 1. Have each student fill up a cup of cold water from the cooler. 2. Dump in a spoonful of Tang sugar into their cup. Explain to them that this is diffusion, and
explain what diffusion is.

BYU – ChE 376 – Hand’s On Demonstrations of Basic Heat & Mass Transfer Principles Page 2 of 2
3. Give them a straw to stir their Tang. Explain that this is convection. Highlight the differences between diffusion and convection and answer the why questions.
4. Explain other biological/engineering processes that use diffusion/convection. At the end, if the students are up for it, you can possibly explain why diffusion/convection happen (entropy, concentration gradients).
Potential Discussion Questions 1. What is diffusion? 2. What is convection? How is it different from diffusion? 3. What are some other examples of diffusion/convection besides mixing drinks? 4. Why would diffusion/convection be important to engineers?
Fun Facts and Resources http://www.ehow.com/how_7864101_make-koolaid-man-costume.html http://www.youtube.com/watch?v=bhgBF08cwTY These are some websites that explain how to make a kool-aid man costume.
BYU – ChE 376 – Hand’s On Demonstrations of Basic Heat & Mass Transfer Principles Page 1 of 2
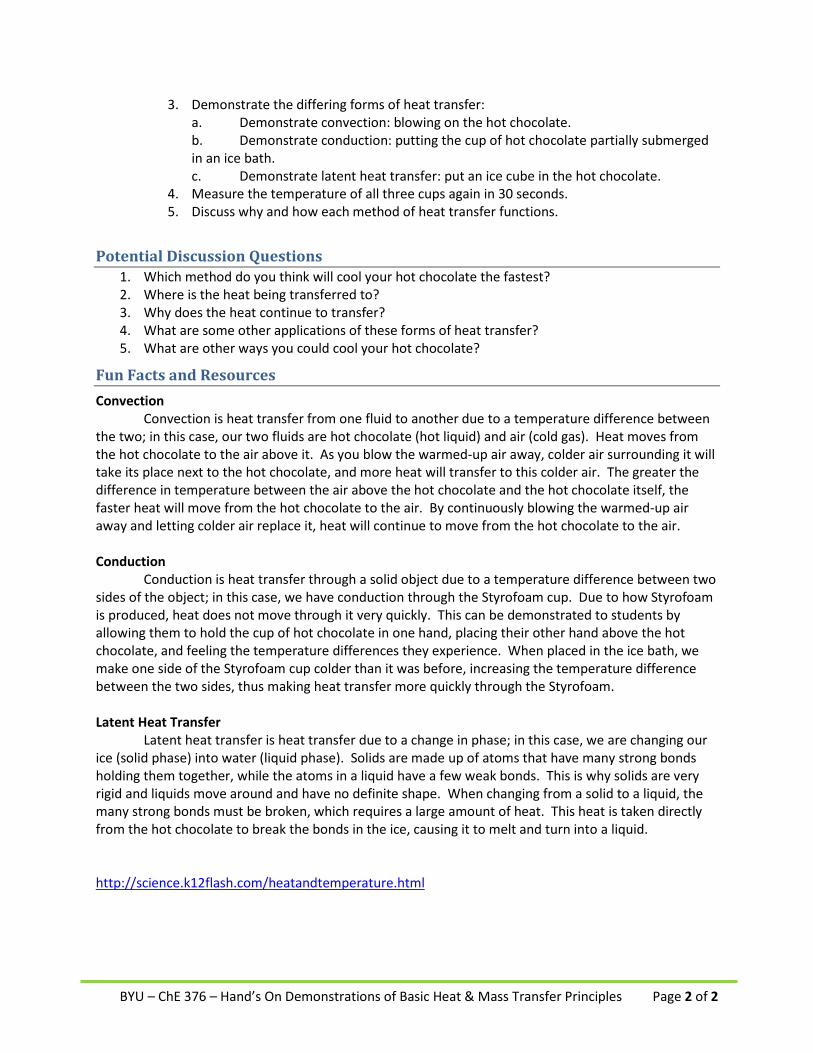
Hot Hot Hot Chocolate! 5 Minute Demonstration that explains three different methods of heat transfer. The methods to be demonstrated include convection, conduction, and latent heat transfer. Students will be able to understand through connecting with the common example of how to cool hot chocolate. Examples which pertain to this demonstration, and are within the engineering discipline, are cooling Nuclear Power Plants and transferring heat from pipes.
Resources Required 1. Estimated Time: 10 min 2. List of Materials and Estimated Cost.
• Hot Chocolate: $7.99 for a container with 40 servings • Styrofoam cups:$ 2.50 for 100 Styrofoam cups • Thermometer: $7.50 for one thermometer online • Ice: Free – make in your freezer
3. Total Project Time: 20 min
Safety Precautions 1. Burns from hot chocolate – (1) Warn students that hot chocolate is extremely hot. (2) Handle
hot chocolate with care. (3) Have ice available to cool any burns.
Preparation Instructions
1) Obtain the Necessary Materials You can find the Hot Chocolate and Styrofoam cups from any local grocery store, and you can
find a thermometer online from Google Shopping. 2) Prepare Handout and Practice the Demonstration
If you have young kids or there are kids in the neighborhood, they make for great audiences. 3) Prepare Materials for the Demonstration
Before class you will need to warm up the hot chocolate to about 120°Fahrenheit. Set out the cups and thermometer.
Demonstration Instructions 1. Pour equal amounts of hot chocolate into three separate Styrofoam cups. 2. Measure the temperature of each and show the students.
http://commons.wikimedia.org/wiki/File:Nuclear_Power_Plant_Cattenom.jpg
http://commons.wikimedia.org/wiki/File:Hot_chocolate_p1150797.jpg
BYU – ChE 376 – Hand’s On Demonstrations of Basic Heat & Mass Transfer Principles Page 2 of 2
3. Demonstrate the differing forms of heat transfer: a. Demonstrate convection: blowing on the hot chocolate. b. Demonstrate conduction: putting the cup of hot chocolate partially submerged in an ice bath. c. Demonstrate latent heat transfer: put an ice cube in the hot chocolate.
4. Measure the temperature of all three cups again in 30 seconds. 5. Discuss why and how each method of heat transfer functions.
Potential Discussion Questions 1. Which method do you think will cool your hot chocolate the fastest? 2. Where is the heat being transferred to? 3. Why does the heat continue to transfer? 4. What are some other applications of these forms of heat transfer? 5. What are other ways you could cool your hot chocolate?
Fun Facts and Resources Convection Convection is heat transfer from one fluid to another due to a temperature difference between the two; in this case, our two fluids are hot chocolate (hot liquid) and air (cold gas). Heat moves from the hot chocolate to the air above it. As you blow the warmed-up air away, colder air surrounding it will take its place next to the hot chocolate, and more heat will transfer to this colder air. The greater the difference in temperature between the air above the hot chocolate and the hot chocolate itself, the faster heat will move from the hot chocolate to the air. By continuously blowing the warmed-up air away and letting colder air replace it, heat will continue to move from the hot chocolate to the air. Conduction Conduction is heat transfer through a solid object due to a temperature difference between two sides of the object; in this case, we have conduction through the Styrofoam cup. Due to how Styrofoam is produced, heat does not move through it very quickly. This can be demonstrated to students by allowing them to hold the cup of hot chocolate in one hand, placing their other hand above the hot chocolate, and feeling the temperature differences they experience. When placed in the ice bath, we make one side of the Styrofoam cup colder than it was before, increasing the temperature difference between the two sides, thus making heat transfer more quickly through the Styrofoam. Latent Heat Transfer Latent heat transfer is heat transfer due to a change in phase; in this case, we are changing our ice (solid phase) into water (liquid phase). Solids are made up of atoms that have many strong bonds holding them together, while the atoms in a liquid have a few weak bonds. This is why solids are very rigid and liquids move around and have no definite shape. When changing from a solid to a liquid, the many strong bonds must be broken, which requires a large amount of heat. This heat is taken directly from the hot chocolate to break the bonds in the ice, causing it to melt and turn into a liquid. http://science.k12flash.com/heatandtemperature.html
BYU – ChE 376 – Hand’s On Demonstrations of Basic Heat & Mass Transfer Principles Page 1 of 2
Melting Chocolate-The Modes of Heat Transfer
5 Minute Demonstration of the three methods of heat transfer: convection, conduction, and radiation. A knowledge of the modes of heat transfer is important in engineering and science. One application is a computer fan that sits on a heat sink to pull away heat from the processor
so it is not damaged.
Resources Required 1. Estimated Time: 1 hour to build the different apparatuses 2. List of Materials and Estimated Cost.
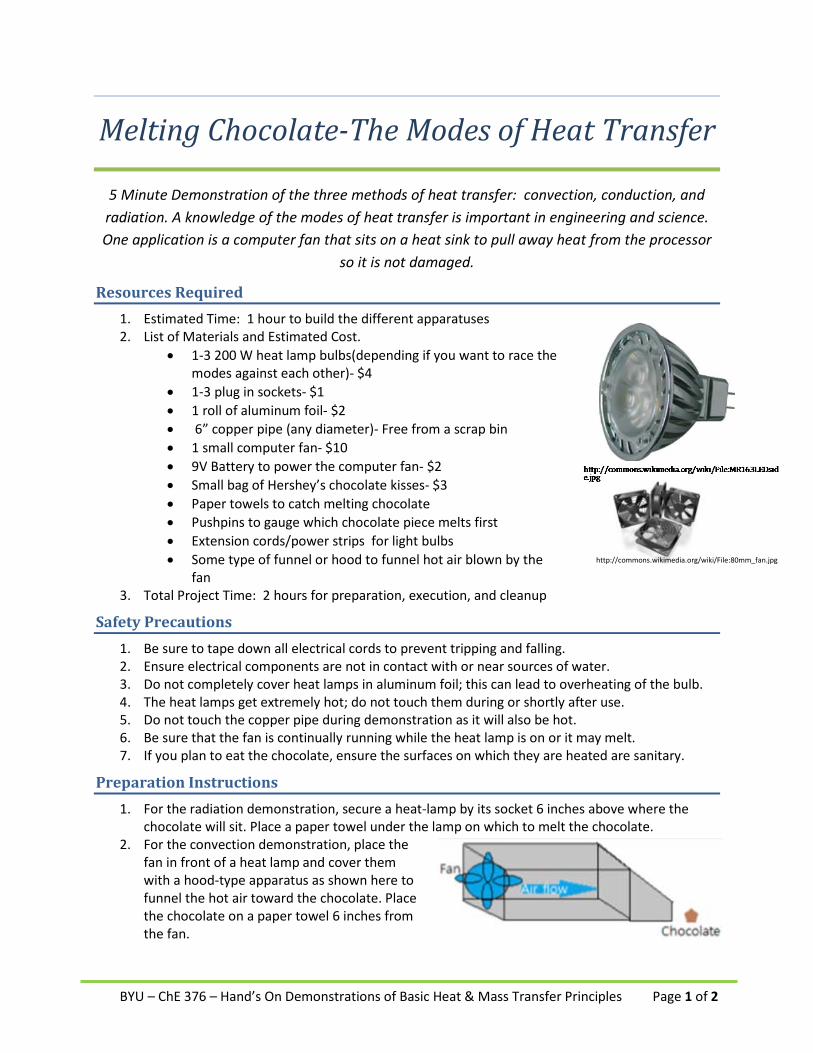
• 1-3 200 W heat lamp bulbs(depending if you want to race the modes against each other)- $4
• 1-3 plug in sockets- $1 • 1 roll of aluminum foil- $2 • 6” copper pipe (any diameter)- Free from a scrap bin • 1 small computer fan- $10 • 9V Battery to power the computer fan- $2 • Small bag of Hershey’s chocolate kisses- $3 • Paper towels to catch melting chocolate • Pushpins to gauge which chocolate piece melts first • Extension cords/power strips for light bulbs • Some type of funnel or hood to funnel hot air blown by the
fan 3. Total Project Time: 2 hours for preparation, execution, and cleanup
Safety Precautions 1. Be sure to tape down all electrical cords to prevent tripping and falling. 2. Ensure electrical components are not in contact with or near sources of water. 3. Do not completely cover heat lamps in aluminum foil; this can lead to overheating of the bulb. 4. The heat lamps get extremely hot; do not touch them during or shortly after use. 5. Do not touch the copper pipe during demonstration as it will also be hot. 6. Be sure that the fan is continually running while the heat lamp is on or it may melt. 7. If you plan to eat the chocolate, ensure the surfaces on which they are heated are sanitary.
Preparation Instructions 1. For the radiation demonstration, secure a heat-lamp by its socket 6 inches above where the
chocolate will sit. Place a paper towel under the lamp on which to melt the chocolate. 2. For the convection demonstration, place the
fan in front of a heat lamp and cover them with a hood-type apparatus as shown here to funnel the hot air toward the chocolate. Place the chocolate on a paper towel 6 inches from the fan.
http://commons.wikimedia.org/wiki/File:80mm_fan.jpg
BYU – ChE 376 – Hand’s On Demonstrations of Basic Heat & Mass Transfer Principles Page 2 of 2
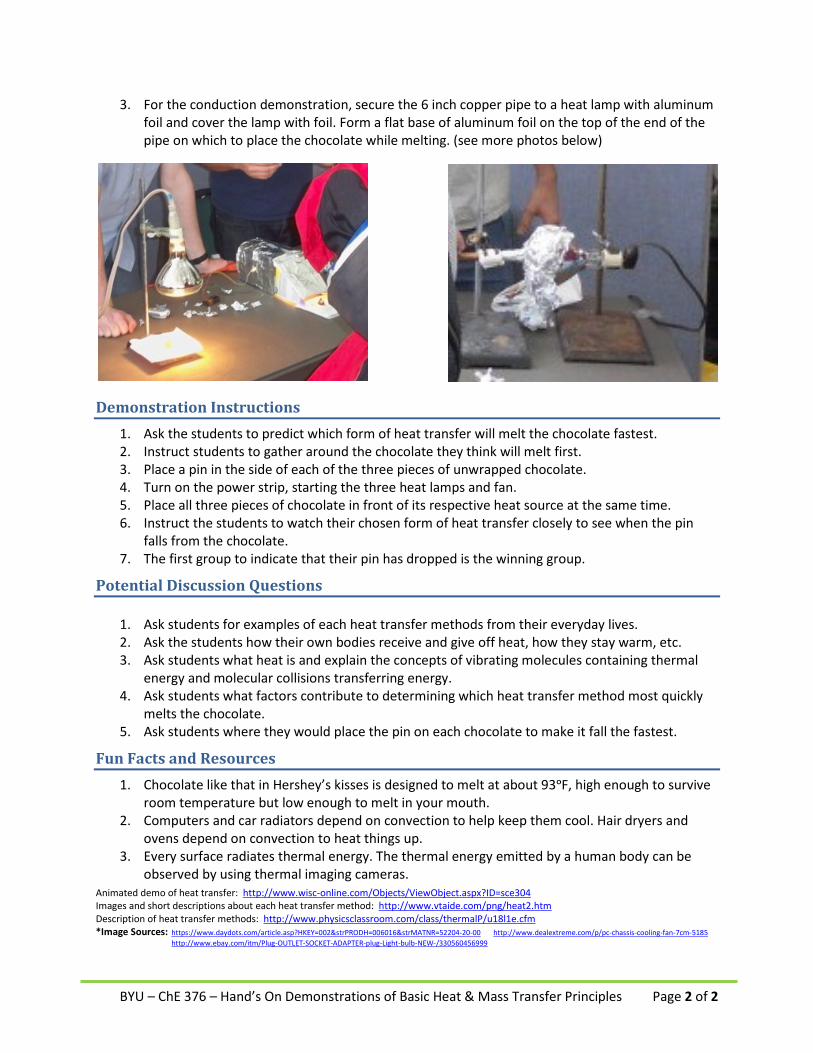
3. For the conduction demonstration, secure the 6 inch copper pipe to a heat lamp with aluminum foil and cover the lamp with foil. Form a flat base of aluminum foil on the top of the end of the pipe on which to place the chocolate while melting. (see more photos below)
Demonstration Instructions 1. Ask the students to predict which form of heat transfer will melt the chocolate fastest. 2. Instruct students to gather around the chocolate they think will melt first. 3. Place a pin in the side of each of the three pieces of unwrapped chocolate. 4. Turn on the power strip, starting the three heat lamps and fan. 5. Place all three pieces of chocolate in front of its respective heat source at the same time. 6. Instruct the students to watch their chosen form of heat transfer closely to see when the pin
falls from the chocolate. 7. The first group to indicate that their pin has dropped is the winning group.
Potential Discussion Questions 1. Ask students for examples of each heat transfer methods from their everyday lives. 2. Ask the students how their own bodies receive and give off heat, how they stay warm, etc. 3. Ask students what heat is and explain the concepts of vibrating molecules containing thermal
energy and molecular collisions transferring energy. 4. Ask students what factors contribute to determining which heat transfer method most quickly
melts the chocolate. 5. Ask students where they would place the pin on each chocolate to make it fall the fastest.
Fun Facts and Resources 1. Chocolate like that in Hershey’s kisses is designed to melt at about 93ᵒF, high enough to survive
room temperature but low enough to melt in your mouth. 2. Computers and car radiators depend on convection to help keep them cool. Hair dryers and
ovens depend on convection to heat things up. 3. Every surface radiates thermal energy. The thermal energy emitted by a human body can be
observed by using thermal imaging cameras.
Animated demo of heat transfer: http://www.wisc-online.com/Objects/ViewObject.aspx?ID=sce304 Images and short descriptions about each heat transfer method: http://www.vtaide.com/png/heat2.htm Description of heat transfer methods: http://www.physicsclassroom.com/class/thermalP/u18l1e.cfm *Image Sources: https://www.daydots.com/article.asp?HKEY=002&strPRODH=006016&strMATNR=52204-20-00 http://www.dealextreme.com/p/pc-chassis-cooling-fan-7cm-5185 http://www.ebay.com/itm/Plug-OUTLET-SOCKET-ADAPTER-plug-Light-bulb-NEW-/330560456999

BYU – ChE 376 – Hand’s On Demonstrations of Basic Heat & Mass Transfer Principles Page 1 of 2
Heat Transfer in Popcorn 5 Minute Demonstration that the three methods of heat transfer (conduction, convection and
radiation) that engineers use frequently can also be employed to cook popcorn.
Resources Required 1. Estimated Time: 2-3 hours, including preparation time 2. List of Materials
• Air Popper • Microwave • Popcorn kernels and Microwave popcorn • Bowl • Single-Serve cups • Desired flavoring: butter salt, etc. (optional)
3. Estimated Cost: $40 (for about 200 people) 4. Total Project Time: 3 hours
Safety Precautions 1. Tape down electric cords 2. Exercise caution in operating the hot air popper 3. Take proper measures to ensure sanitation (wash hands, wear gloves, etc.) 4. Do not touch hot objects
Preparation Instructions
1) Obtain the Necessary Materials You can get the popcorn in bulk if this demonstration is to be large-scale. Hot air popper and
microwave can usually be borrowed. Other materials can be found at most stores.
2) Prepare Handout and Practice the Demonstration If desired, prepare a handout describing how popcorn pops and the principles discussed in this
demonstration. Questions for students to answer could be included on this handout. Practice the demonstration to ensure everything goes smoothly.
3) Setup Set up microwave oven and air popper on a clear space, observing proper safety precautions.
Display poster and have fun!
BYU – ChE 376 – Hand’s On Demonstrations of Basic Heat & Mass Transfer Principles Page 2 of 2
Demonstration Instructions 1. Make popcorn in the hot air popper and in the microwave. If stove is available, conduction can
also be demonstrated with a Jiffy-Pop®, but we recommend just explaining it due to safety concerns.
2. While the corn is popping, explain how popcorn pops (Heat transfers into the kernels, increasing the temperature and pressure until the shell explodes).
3. Explain the three methods of heat transfer (conduction, convection, radiation), citing examples of each; i.e. touching a hot stove (conduction), blowing on hot chocolate (convection) heat from the sun (radiation).
4. Relate the heat transfer methods to popcorn cooking methods. Explain that the air popper uses convection, the microwave uses radiation, and stovetop cooking uses conduction.
Potential Discussion Questions 1. What are some examples of conduction/convection/radiation heat transfer? 2. When you put your hand close to a light bulb, why does your hand feel hot? (radiation) 3. How can heat transfer from one object to another? 4. Why do you cool off when the wind is blowing on you? (convection) 5. Why shouldn’t you touch a hot stove? (conduction)
Fun Facts and Resources To pop, the popcorn needs to reach a temperature of about 350°F. This is over 100°F higher
than the boiling point of water! When the kernel explodes, it is at 135 psi, over nine times atmospheric pressure. If you’ve dived
to the bottom of a 10 ft. pool, you can feel a lot of pressure in your ears – the pressure inside the kernel is closer to what you would feel at the bottom of a 300 ft. lake!
Some Native Americans believed that a spirit lived inside each kernel of popcorn. When heated, the spirit grew angry and would eventually burst out of its home and into the air as a disgruntled puff of steam.
There’s evidence that popcorn was first made at least 6700 years ago.
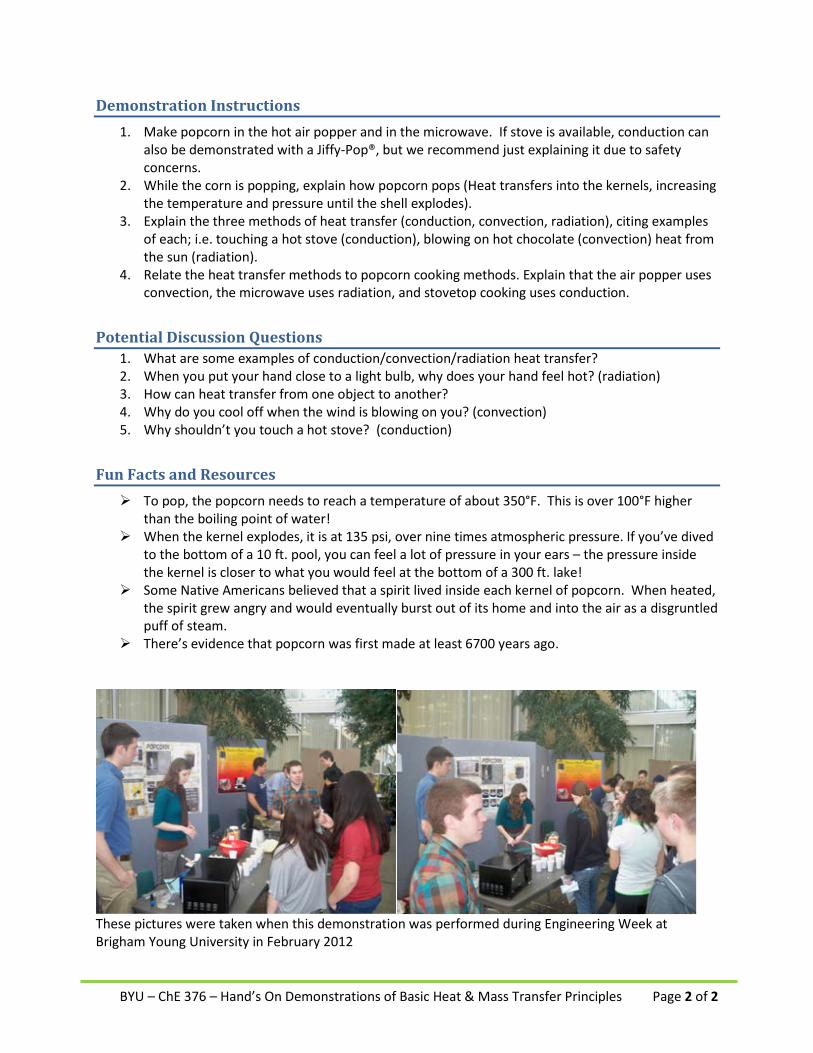
These pictures were taken when this demonstration was performed during Engineering Week at Brigham Young University in February 2012
BYU – ChE 376 – Hand’s On Demonstrations of Basic Heat & Mass Transfer Principles Page 1 of 2
What’s Really Melting Your Popsicle? 5 Minute Demonstration that shows the effect of forced convection and temperature gradients on heat transfer (used in industry to increase heating and cooling above free convection alone).
Resources Required 1. Estimated Time: 5 – 10 minutes 2. List of Materials and Estimated Cost:
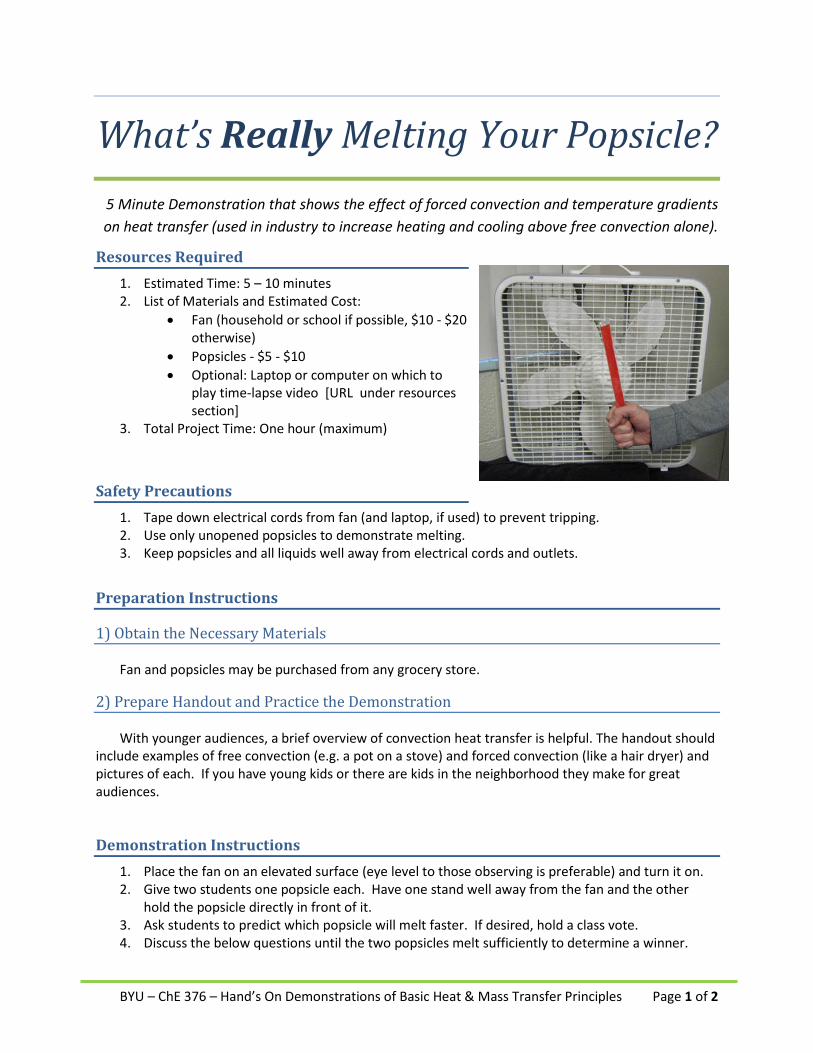
• Fan (household or school if possible, $10 - $20 otherwise)
• Popsicles - $5 - $10 • Optional: Laptop or computer on which to
play time-lapse video [URL under resources section]
3. Total Project Time: One hour (maximum)
Safety Precautions 1. Tape down electrical cords from fan (and laptop, if used) to prevent tripping. 2. Use only unopened popsicles to demonstrate melting. 3. Keep popsicles and all liquids well away from electrical cords and outlets.
Preparation Instructions
1) Obtain the Necessary Materials
Fan and popsicles may be purchased from any grocery store.
2) Prepare Handout and Practice the Demonstration
With younger audiences, a brief overview of convection heat transfer is helpful. The handout should include examples of free convection (e.g. a pot on a stove) and forced convection (like a hair dryer) and pictures of each. If you have young kids or there are kids in the neighborhood they make for great audiences.
Demonstration Instructions 1. Place the fan on an elevated surface (eye level to those observing is preferable) and turn it on. 2. Give two students one popsicle each. Have one stand well away from the fan and the other
hold the popsicle directly in front of it. 3. Ask students to predict which popsicle will melt faster. If desired, hold a class vote. 4. Discuss the below questions until the two popsicles melt sufficiently to determine a winner.
BYU – ChE 376 – Hand’s On Demonstrations of Basic Heat & Mass Transfer Principles Page 2 of 2
5. If desired, following the demonstration, play the time-lapse video from Youtube for students to see this process quickly.
Potential Discussion Questions 1. Why do students believe the fan popsicle/the air popsicle will melt faster? Ask them to be
specific. 2. Why do we feel cold in front of a fan? (If necessary, ask further guiding questions, such as
“What is colder, the air, or you? What is colder, the air, or the popsicle?” a. Answer: We feel cold because we are hotter than the air flowing through the fan, and
because heat always transfers from hot objects to cold objects, we feel colder standing in front of a fan.
b. Answer: The air is colder than you, but the popsicle is colder than the air. 3. Why would air flowing over the popsicle make it melt faster?
a. Answer: the air flowing over the popsicle increases heat transfer because the air can be thought of as adding heat constantly to the popsicle – because the air does not stagnate above the popsicle, it is always new air flowing over it. The air above the popsicle does not lose temperature over time, and therefore is more capable of adding heat to the popsicle.
Fun Facts and Resources http://www.youtube.com/watch?v=u6rag7foEls&feature=youtu.be (URL for youtube video made specifically for this project) http://www.engineeringtoolbox.com/convective-heat-transfer-d_430.html (website with the graphs of different convection rates as a function of volumetric flow rate) http://www.engineersedge.com/heat_transfer/convection.htm (Convection overview from Engineer’s Edge) http://culinaryarts.about.com/od/cookingmethods/a/heattransfer.htm (Convection when examined from a food standpoint – free convection) http://www.physicsclassroom.com/class/thermalP/u18l1e.cfm (Basic heat transfer methods overview) For more information, we suggest the Wikipedia article and associated links on Newton’s Law of Cooling.
BYU – ChE 376 – Hand’s On Demonstrations of Basic Heat & Mass Transfer Principles Page 1 of 2
Invisible Ink 5 Minute Demonstration that explains the difference between radiation and convection and
teaches children how heat can be transferred faster and in greater amounts.
Resources Required 1. Estimated Time: 10 minutes 2. List of Materials and Estimated Cost. (common household items):
• Q-tips • Newspaper • Lemon Juice • Space Heater • Lamp
3. Total Project Cost: Less than a dollar
Safety Precautions 1. The space heater and lamp are going to come to a very hot temperature. Be careful when
handling the newspaper around either of those two items to prevent people and other objects from burning.
2. Be careful around the electrical cords. Do not trip over the cords or allow large amounts of the lemon juice to come in contact with the inside of either the lamp or heater.
Preparation Instructions
1) Obtain the Necessary Materials You can find all of the necessary materials around your own home. If you do not have a space
heater, you can use a hair dryer as well. If you do not have lemon juice, you can use some other citrus juice or vinegar. You can grab a newspaper from your home or from a local newspaper stand.
2) Prepare Handout and Practice the Demonstration A handout can be prepared for the children containing information about the difference between
radiation and convection heat transfer. On the handout, define radiation and convection in terms of temperature, area, and heat transfer constants. (qconvection=h*As*(Tsurface-Tsurroundings) and qradiation=ε*σ*As*(T4
surface-T4surroundings)) Also give a qualitative definition of the two describing radiation as
energy transferred through electromagnetic waves and convection as energy transferred due to bulk motion of the fluid. If you have young kids or there are kids in the neighborhood they make for great audiences. In preparation for the demonstration, secret messages can be written on the newspaper in advance so the children can see the message appear as the paper heats up.
BYU – ChE 376 – Hand’s On Demonstrations of Basic Heat & Mass Transfer Principles Page 2 of 2
Demonstration Instructions (Complete steps 1-4 before the actual presentation takes place) 1. Rip newspaper into long strips. 2. Dip the Q-tips into the lemon juice allowing the Q-tip to become completely soaked with the
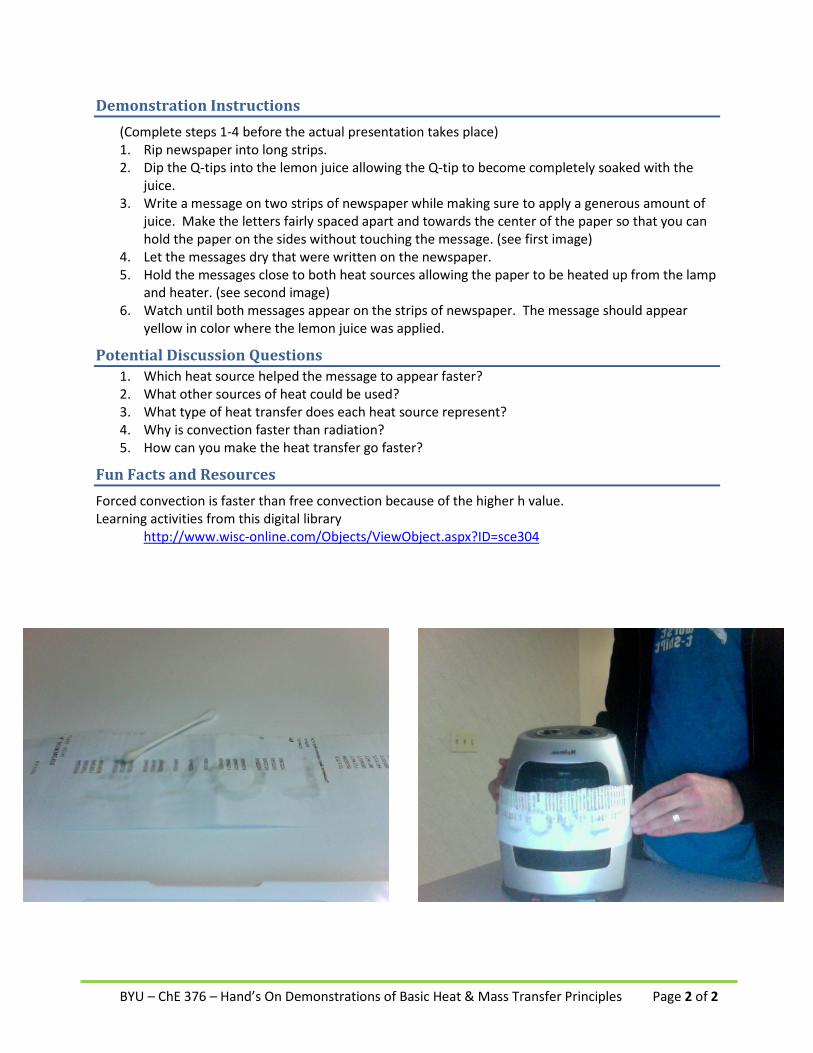
juice. 3. Write a message on two strips of newspaper while making sure to apply a generous amount of
juice. Make the letters fairly spaced apart and towards the center of the paper so that you can hold the paper on the sides without touching the message. (see first image)
4. Let the messages dry that were written on the newspaper. 5. Hold the messages close to both heat sources allowing the paper to be heated up from the lamp
and heater. (see second image) 6. Watch until both messages appear on the strips of newspaper. The message should appear
yellow in color where the lemon juice was applied.
Potential Discussion Questions 1. Which heat source helped the message to appear faster? 2. What other sources of heat could be used? 3. What type of heat transfer does each heat source represent? 4. Why is convection faster than radiation? 5. How can you make the heat transfer go faster?
Fun Facts and Resources Forced convection is faster than free convection because of the higher h value. Learning activities from this digital library http://www.wisc-online.com/Objects/ViewObject.aspx?ID=sce304
BYU – ChE 376 – Hand’s On Demonstrations of Basic Heat & Mass Transfer Principles Page 1 of 2
Crazy Cups Demonstrate thermal conductivity in a fun and colorful way! Heat sensitive, color-changing paper is taped onto various types of cups to show which material transfers heat the fastest.
Pour hot water into the cups and see which paper on the cup changes color the fastest.
Resources Required 1. Estimated Time: 20 minutes 2. List of Materials and Estimated Cost.
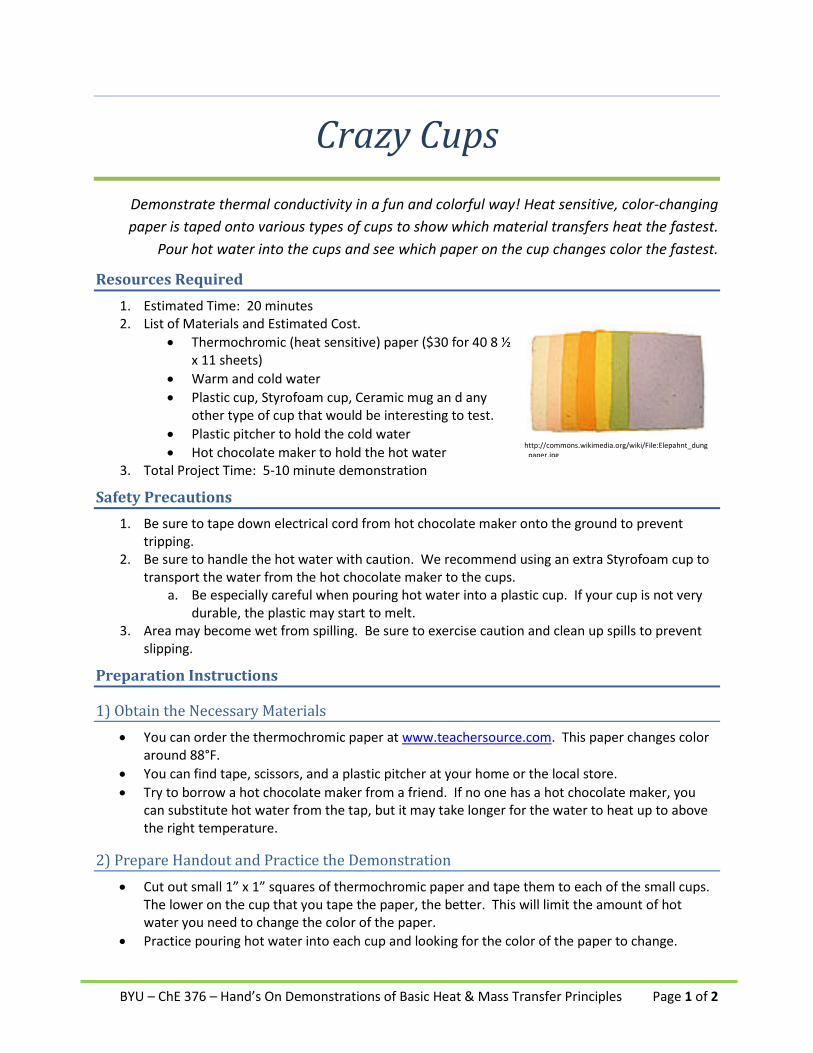
• Thermochromic (heat sensitive) paper ($30 for 40 8 ½ x 11 sheets)
• Warm and cold water • Plastic cup, Styrofoam cup, Ceramic mug an d any
other type of cup that would be interesting to test. • Plastic pitcher to hold the cold water • Hot chocolate maker to hold the hot water
3. Total Project Time: 5-10 minute demonstration
Safety Precautions 1. Be sure to tape down electrical cord from hot chocolate maker onto the ground to prevent
tripping. 2. Be sure to handle the hot water with caution. We recommend using an extra Styrofoam cup to
transport the water from the hot chocolate maker to the cups. a. Be especially careful when pouring hot water into a plastic cup. If your cup is not very
durable, the plastic may start to melt. 3. Area may become wet from spilling. Be sure to exercise caution and clean up spills to prevent
slipping.
Preparation Instructions
1) Obtain the Necessary Materials • You can order the thermochromic paper at www.teachersource.com. This paper changes color
around 88°F. • You can find tape, scissors, and a plastic pitcher at your home or the local store. • Try to borrow a hot chocolate maker from a friend. If no one has a hot chocolate maker, you
can substitute hot water from the tap, but it may take longer for the water to heat up to above the right temperature.
2) Prepare Handout and Practice the Demonstration • Cut out small 1” x 1” squares of thermochromic paper and tape them to each of the small cups.
The lower on the cup that you tape the paper, the better. This will limit the amount of hot water you need to change the color of the paper.
• Practice pouring hot water into each cup and looking for the color of the paper to change.
http://commons.wikimedia.org/wiki/File:Elepahnt_dungpaper.jpg
BYU – ChE 376 – Hand’s On Demonstrations of Basic Heat & Mass Transfer Principles Page 2 of 2
• As you are practicing the demonstration, be sure to time how long it takes each cup to change the color of the paper with hot water, and how long it takes for each cup to change back when you add cold water.
• Sometimes, you will need to wait for a period of time between demonstrations before the color on some of the cups will change back. This is why we recommend having multiple cups of each material available.
• If you have young kids or there are kids in the neighborhood they make for great audiences.
Demonstration Instructions 1. Explain thermochromic paper (make sure the kids know that it changes color when heated) 2. Quickly discuss heat flow through materials (concept of conduction)
a. Quick discussion of Fick’s Law (understanding that different materials have different thermal conductivity)
3. Pour hot water into the mug. Wait for the paper to change color. 4. Pour hot water into the Styrofoam cup. Wait for the paper to change color. 5. Pour hot water into the plastic cup. Wait for the paper to change color.
Potential Discussion Questions 1. What is thermal conductivity and which cup has a higher thermal conductivity coefficient? 2. What do you think affects the thermal conductivity of various materials? 3. Why do we put insulation into our homes? Does insulation decrease or increase the heat
transfer into the home? 4. Which cup would be best to put hot chocolate in?
Fun Facts and Resources • Thermochromic paper is a fun way to show heat transfer. Some bottle labels contain
thermochromic paper that changes color when the drink is cold. Also, the thickness of the cup changes the rate at which the paper will change color. It may be fun to make a really thick Styrofoam cup, by stacking them together, and compare how long it takes the paper to change color on the outside.
• There is also thermochromic paint which works in a similar fashion to the paper.
BYU – ChE 376 – Hand’s On Demonstrations of Basic Heat & Mass Transfer Principles Page 1 of 2
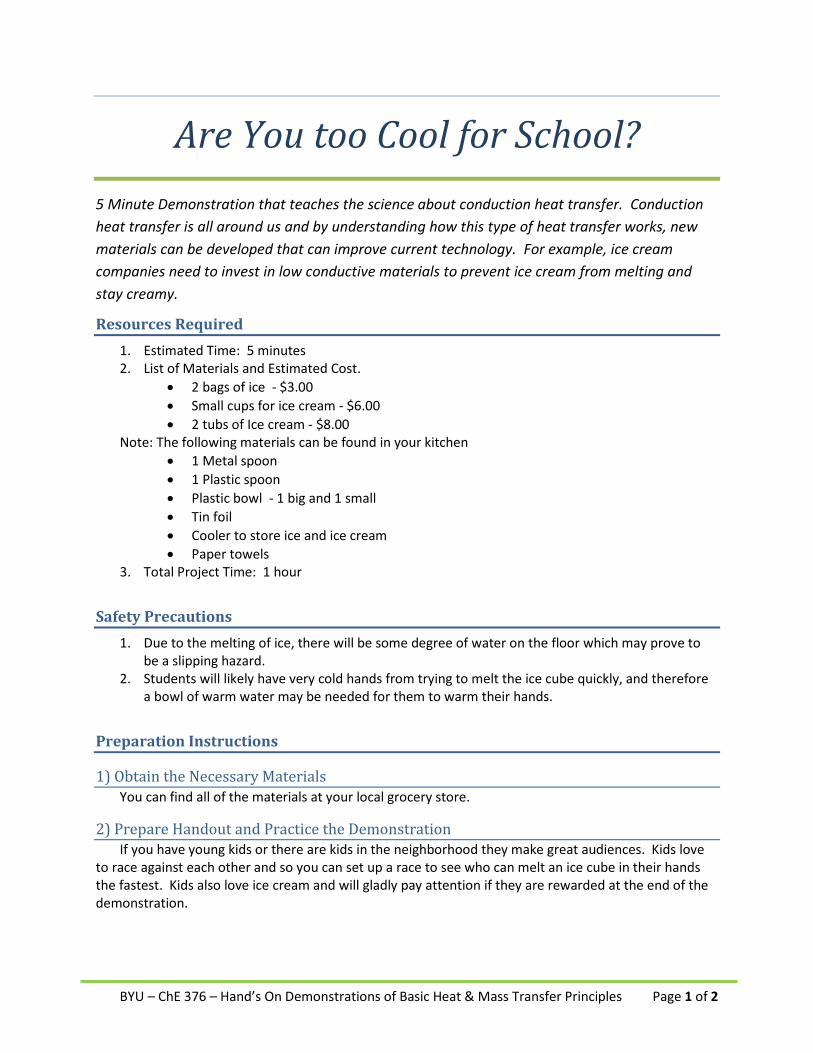
Are You too Cool for School? 5 Minute Demonstration that teaches the science about conduction heat transfer. Conduction heat transfer is all around us and by understanding how this type of heat transfer works, new materials can be developed that can improve current technology. For example, ice cream companies need to invest in low conductive materials to prevent ice cream from melting and stay creamy.
Resources Required 1. Estimated Time: 5 minutes 2. List of Materials and Estimated Cost.
• 2 bags of ice - $3.00 • Small cups for ice cream - $6.00 • 2 tubs of Ice cream - $8.00
Note: The following materials can be found in your kitchen • 1 Metal spoon • 1 Plastic spoon • Plastic bowl - 1 big and 1 small • Tin foil • Cooler to store ice and ice cream • Paper towels
3. Total Project Time: 1 hour
Safety Precautions 1. Due to the melting of ice, there will be some degree of water on the floor which may prove to
be a slipping hazard. 2. Students will likely have very cold hands from trying to melt the ice cube quickly, and therefore
a bowl of warm water may be needed for them to warm their hands.
Preparation Instructions
1) Obtain the Necessary Materials You can find all of the materials at your local grocery store.
2) Prepare Handout and Practice the Demonstration If you have young kids or there are kids in the neighborhood they make great audiences. Kids love
to race against each other and so you can set up a race to see who can melt an ice cube in their hands the fastest. Kids also love ice cream and will gladly pay attention if they are rewarded at the end of the demonstration.
BYU – ChE 376 – Hand’s On Demonstrations of Basic Heat & Mass Transfer Principles Page 2 of 2
3) Examples Used in Teaching about Conduction Heat Transfer 1. Melting an ice cube in the student’s hand 2. A metal spoon conducting heat from your hand to the ice cream which causes the ice cream to melt.
Demonstration Instructions 1. Scoop ice cream into small cups before demonstration and store in the cooler along with the ice.
Use a sheet of tin foil to stack the ice cream cups in the cooler. 2. Pour cold water into the large bowl and place metal and plastic spoon in it. 3. After you have the students’ undivided attention, begin by asking, “Why does ice melt in your
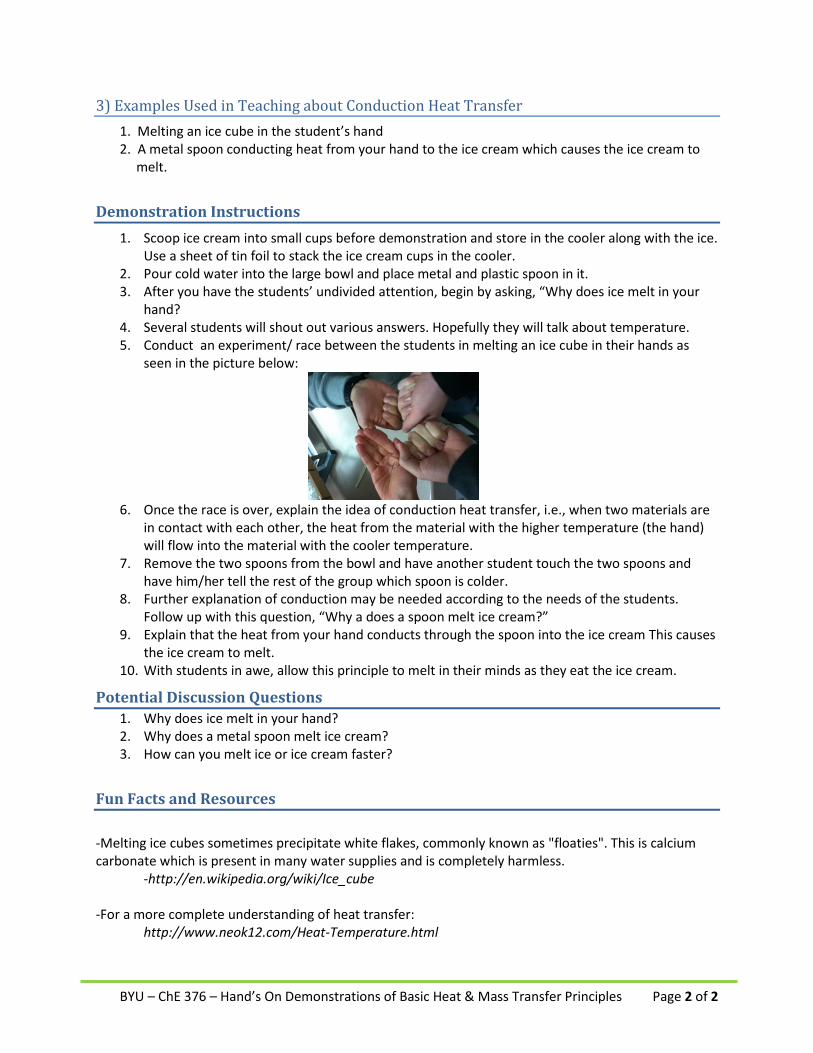
hand? 4. Several students will shout out various answers. Hopefully they will talk about temperature. 5. Conduct an experiment/ race between the students in melting an ice cube in their hands as
seen in the picture below:
6. Once the race is over, explain the idea of conduction heat transfer, i.e., when two materials are
in contact with each other, the heat from the material with the higher temperature (the hand) will flow into the material with the cooler temperature.
7. Remove the two spoons from the bowl and have another student touch the two spoons and have him/her tell the rest of the group which spoon is colder.
8. Further explanation of conduction may be needed according to the needs of the students. Follow up with this question, “Why a does a spoon melt ice cream?”
9. Explain that the heat from your hand conducts through the spoon into the ice cream This causes the ice cream to melt.
10. With students in awe, allow this principle to melt in their minds as they eat the ice cream.
Potential Discussion Questions 1. Why does ice melt in your hand? 2. Why does a metal spoon melt ice cream? 3. How can you melt ice or ice cream faster?
Fun Facts and Resources -Melting ice cubes sometimes precipitate white flakes, commonly known as "floaties". This is calcium carbonate which is present in many water supplies and is completely harmless. -http://en.wikipedia.org/wiki/Ice_cube -For a more complete understanding of heat transfer: http://www.neok12.com/Heat-Temperature.html
BYU – ChE 376 – Hand’s On Demonstrations of Basic Heat & Mass Transfer Principles Page 1 of 2
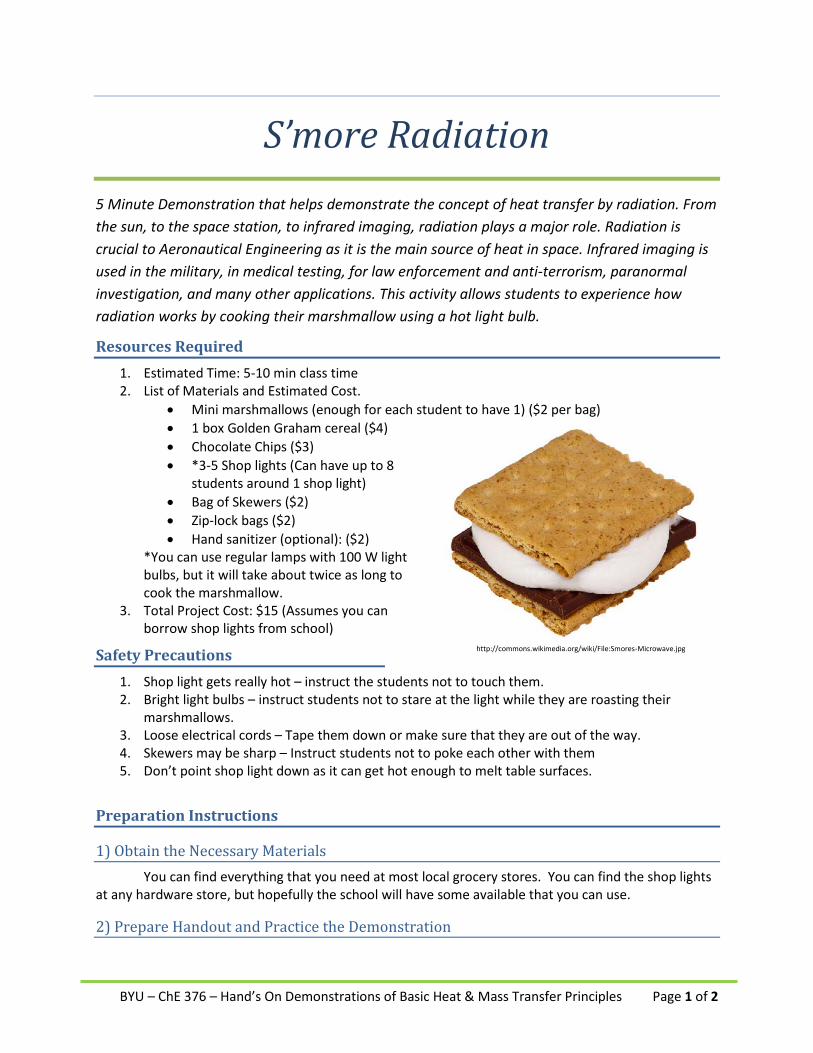
S’more Radiation 5 Minute Demonstration that helps demonstrate the concept of heat transfer by radiation. From the sun, to the space station, to infrared imaging, radiation plays a major role. Radiation is crucial to Aeronautical Engineering as it is the main source of heat in space. Infrared imaging is used in the military, in medical testing, for law enforcement and anti-terrorism, paranormal investigation, and many other applications. This activity allows students to experience how radiation works by cooking their marshmallow using a hot light bulb.
Resources Required 1. Estimated Time: 5-10 min class time 2. List of Materials and Estimated Cost.
• Mini marshmallows (enough for each student to have 1) ($2 per bag) • 1 box Golden Graham cereal ($4) • Chocolate Chips ($3) • *3-5 Shop lights (Can have up to 8
students around 1 shop light) • Bag of Skewers ($2) • Zip-lock bags ($2) • Hand sanitizer (optional): ($2)
*You can use regular lamps with 100 W light bulbs, but it will take about twice as long to cook the marshmallow.
3. Total Project Cost: $15 (Assumes you can borrow shop lights from school)
Safety Precautions 1. Shop light gets really hot – instruct the students not to touch them. 2. Bright light bulbs – instruct students not to stare at the light while they are roasting their
marshmallows. 3. Loose electrical cords – Tape them down or make sure that they are out of the way. 4. Skewers may be sharp – Instruct students not to poke each other with them 5. Don’t point shop light down as it can get hot enough to melt table surfaces.
Preparation Instructions
1) Obtain the Necessary Materials You can find everything that you need at most local grocery stores. You can find the shop lights
at any hardware store, but hopefully the school will have some available that you can use.
2) Prepare Handout and Practice the Demonstration
http://commons.wikimedia.org/wiki/File:Smores-Microwave.jpg
BYU – ChE 376 – Hand’s On Demonstrations of Basic Heat & Mass Transfer Principles Page 2 of 2
If you have young kids or there are kids in the neighborhood they make for great audiences.
3) Prepare Materials for the Demonstration Place 1 marshmallow, 2 golden grahams, 1 chocolate chip, and 1 skewer into a Zip-lock bag for each
student.
Demonstration Instructions 1. Explain the concept of radiation, and how a light bulb gets hot when it is turned on and gives off
heat. 2. Have students wash their hands. 3. Separate students into groups of 4-5 and have one group stand around each light bulb. 4. Give each student a bag of materials and have them place the mini marshmallow on the skewer. 5. Instruct students not to touch the shop light or to look directly into it while they roast their
marshmallow. 6. Turn on lights and have students roast marshmallows for 2-3 minutes. 7. While the marshmallows are roasting, explain what is happening: The hot light bulb is radiating
heat which is absorbed by the marshmallow. As the marshmallow absorbs heat, it softens, making it perfect for a tasty snack. This is also a good time to ask for any student questions.
8. Place roasted marshmallow and chocolate chip between golden grahams. 9. Eat and enjoy! 10. Follow up with discussion questions and any remaining questions the students may have.
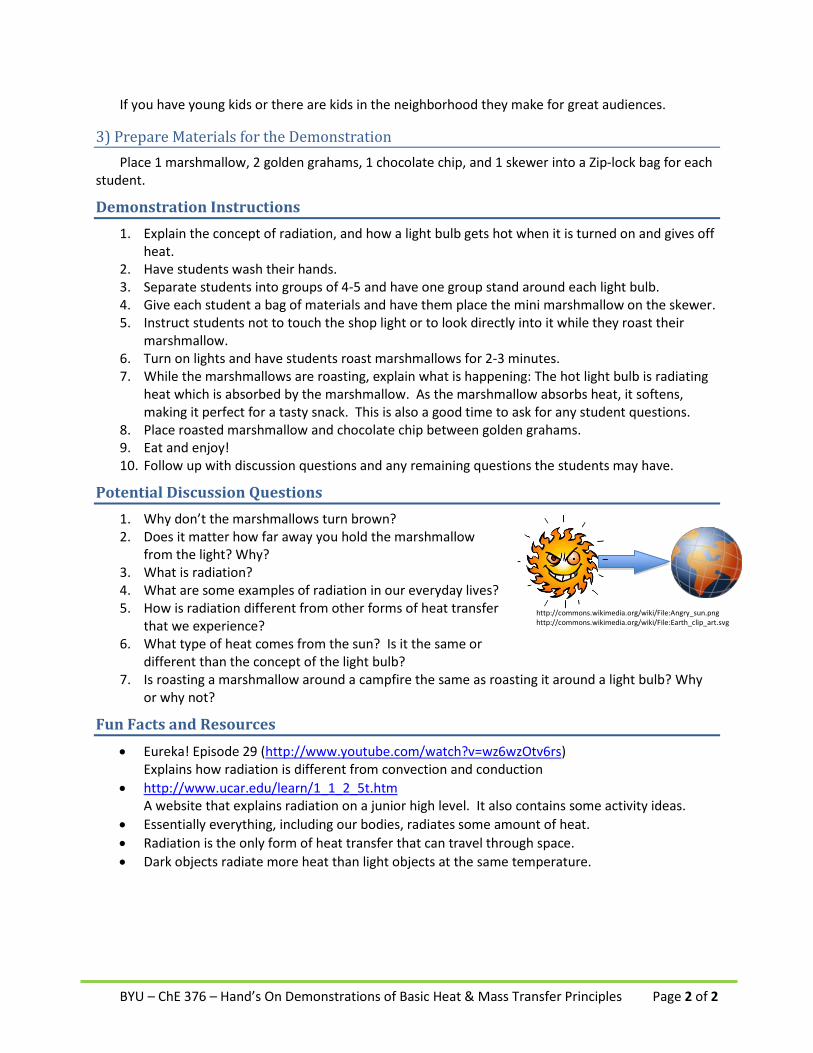
Potential Discussion Questions 1. Why don’t the marshmallows turn brown? 2. Does it matter how far away you hold the marshmallow
from the light? Why? 3. What is radiation? 4. What are some examples of radiation in our everyday lives? 5. How is radiation different from other forms of heat transfer
that we experience? 6. What type of heat comes from the sun? Is it the same or
different than the concept of the light bulb? 7. Is roasting a marshmallow around a campfire the same as roasting it around a light bulb? Why
or why not?
Fun Facts and Resources • Eureka! Episode 29 (http://www.youtube.com/watch?v=wz6wzOtv6rs)
Explains how radiation is different from convection and conduction • http://www.ucar.edu/learn/1_1_2_5t.htm
A website that explains radiation on a junior high level. It also contains some activity ideas. • Essentially everything, including our bodies, radiates some amount of heat. • Radiation is the only form of heat transfer that can travel through space. • Dark objects radiate more heat than light objects at the same temperature.
http://commons.wikimedia.org/wiki/File:Angry_sun.png http://commons.wikimedia.org/wiki/File:Earth_clip_art.svg
BYU – ChE 376 – Hand’s On Demonstrations of Basic Heat & Mass Transfer Principles Page 1 of 2
Cool Blankets 5 Minute Demonstration that explains the principle of radiation heat transfer as well as how
emergency blankets work to keep you warm in an emergency.
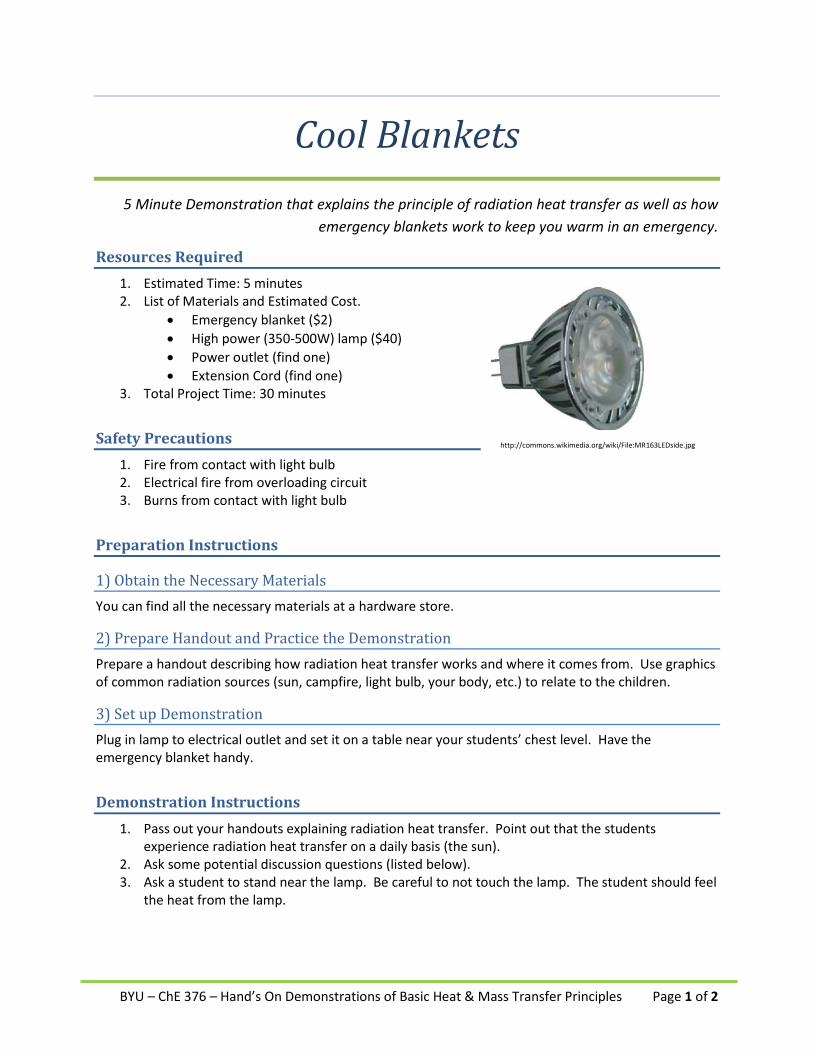
Resources Required 1. Estimated Time: 5 minutes 2. List of Materials and Estimated Cost.
• Emergency blanket ($2) • High power (350-500W) lamp ($40) • Power outlet (find one) • Extension Cord (find one)
3. Total Project Time: 30 minutes
Safety Precautions 1. Fire from contact with light bulb 2. Electrical fire from overloading circuit 3. Burns from contact with light bulb
Preparation Instructions
1) Obtain the Necessary Materials You can find all the necessary materials at a hardware store.
2) Prepare Handout and Practice the Demonstration Prepare a handout describing how radiation heat transfer works and where it comes from. Use graphics of common radiation sources (sun, campfire, light bulb, your body, etc.) to relate to the children.
3) Set up Demonstration Plug in lamp to electrical outlet and set it on a table near your students’ chest level. Have the emergency blanket handy.
Demonstration Instructions 1. Pass out your handouts explaining radiation heat transfer. Point out that the students
experience radiation heat transfer on a daily basis (the sun). 2. Ask some potential discussion questions (listed below). 3. Ask a student to stand near the lamp. Be careful to not touch the lamp. The student should feel
the heat from the lamp.
http://commons.wikimedia.org/wiki/File:MR163LEDside.jpg

BYU – ChE 376 – Hand’s On Demonstrations of Basic Heat & Mass Transfer Principles Page 2 of 2
4. Have the student step away and repeat step 3, but wrapped in the emergency blanket. Ask if he/she can feel a difference. The student should be shielded from the radiation heat, feeling colder.
5. Repeat with other students as desired.
Potential Discussion Questions 1. Why do you feel hot in the sun? 2. What are common sources of radiation heat
transfer? 3. What differences are there between a normal
blanket and an emergency blanket? 4. Why does an emergency blanket keep you warm
when it’s cold outside, but keep you cool from the radiation of the lamp?
Fun Facts and Resources http://heat-radiation.waterheatingsystem.co.uk/ Good graphics for your presentation http://www.physics4kids.com/files/thermo_transfer.html Basic description of radiation heat transfer http://www.powersleuth.org/docs/EHM%20Lesson%205%20FT.pdf Sample lesson plan for the 3 kinds of heat transfer
Sample Handout Ideas Possible Graphics
Source: Microsoft Clipart
Radiation is heat transfer emitted in the form of invisible waves. It is emitted from everything around you. Your body, the walls, and all the lights in the room right now are all giving off heat through radiation.
So how do we feel radiation? Well, a light bulb feels hot when you put your hand close to it. That’s because it is giving off a lot of heat through radiation, and that heat is being absorbed into your skin.
Some special materials reflect radiant heat better than others. For example, our skin absorbs radiation fairly well. That’s why we feel hot when we are exposed to a radiation source, like a fire or light bulb. An emergency blanket reflects radiation. So if we put an emergency blanket between the radiation source and our skin, the blanket will reflect almost all of the radiation back to the source!
BYU – ChE 376 – Hands On Demonstrations of Basic Heat & Mass Transfer Principles Page 1 of 2
Goose Bumps A 5 minute demonstration that explains the science behind goose bumps through the principles of convection and conduction in heat transfer. Applies to the industrial and consumer use of insulation.
Resources Required 1. Estimated Time: 2 hours (including collecting supplies and assembly) 2. List of Materials and Estimated Cost- Total Cost: $15
• Socks – 5$ • Bubble wrap (2 sq. ft. per arm)– 5$ • Bag of ice-2$ • Cooler(reusable) • Duct tape or any waterproof tape-3$
Safety Precautions 1. The demonstration involves water and ice, and care is needed to make sure extra water and ice
is cleaned up to avoid slipping. 2. The cold water can quickly lower body temperature and towels should also be available to the
students to dry off excess water. 3. The cooler should be placed at a level where students can reach down into the water easily to
avoid spills which could be caused if the cooler isn’t easily accessible.
Preparation Instructions
1) Obtain the Necessary Materials • Purchase some cotton, bubble wrap (available at post office), and duct tape. • Obtain a cooler, ice, and water.
2) Prepare Handout and Practice the Demonstration Each insulated sock requires two square feet of bubble wrap to be long enough. Wrap the bubble wrap around your arm to see where it will fit and tape it to form a long cylinder. Use tape to cover any perforation or exposed areas. Seal the end and sides with duct tape so that the sleeve is watertight. Cover the sleeve with a cotton sock. Practice the demonstration on your spouse, children, and neighbors. Wow them with science.
Demonstration Instructions 1. Start by choosing one or two students to come up to the cooler (full of ice and water). 2. Ask each student to put the insulated sock on one arm and to keep the other arm bare. 3. Have the students put both arms in at the same time. After a few seconds of their arms being
submerged ask which arm feels colder? 4. Students can remove their arms from the cooler and remove the sock. 5. Proceed to ask the students what they felt and why.
BYU – ChE 376 – Hands On Demonstrations of Basic Heat & Mass Transfer Principles Page 2 of 2
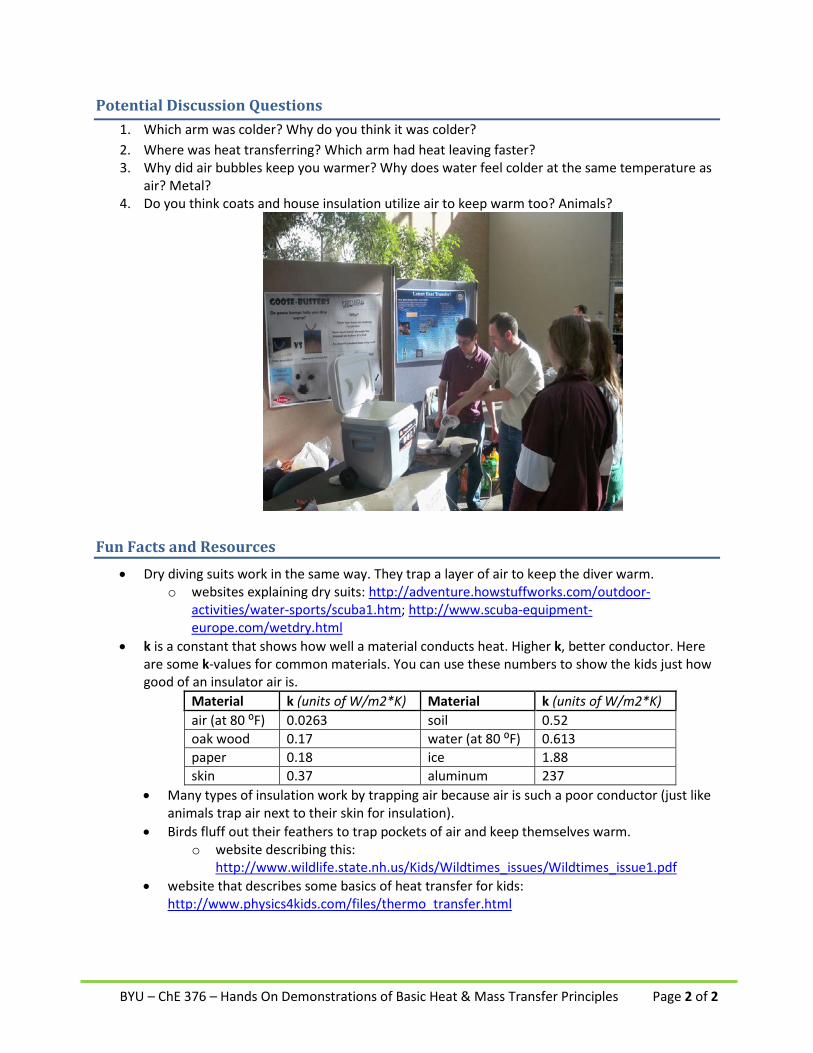
Potential Discussion Questions 1. Which arm was colder? Why do you think it was colder? 2. Where was heat transferring? Which arm had heat leaving faster? 3. Why did air bubbles keep you warmer? Why does water feel colder at the same temperature as
air? Metal? 4. Do you think coats and house insulation utilize air to keep warm too? Animals?
Fun Facts and Resources • Dry diving suits work in the same way. They trap a layer of air to keep the diver warm.
o websites explaining dry suits: http://adventure.howstuffworks.com/outdoor-activities/water-sports/scuba1.htm; http://www.scuba-equipment-europe.com/wetdry.html
• k is a constant that shows how well a material conducts heat. Higher k, better conductor. Here are some k-values for common materials. You can use these numbers to show the kids just how good of an insulator air is.
Material k (units of W/m2*K) Material k (units of W/m2*K) air (at 80 ⁰F) 0.0263 soil 0.52 oak wood 0.17 water (at 80 ⁰F) 0.613 paper 0.18 ice 1.88 skin 0.37 aluminum 237
• Many types of insulation work by trapping air because air is such a poor conductor (just like animals trap air next to their skin for insulation).
• Birds fluff out their feathers to trap pockets of air and keep themselves warm. o website describing this:
http://www.wildlife.state.nh.us/Kids/Wildtimes_issues/Wildtimes_issue1.pdf • website that describes some basics of heat transfer for kids:
http://www.physics4kids.com/files/thermo_transfer.html
BYU – ChE 376 – Hand’s On Demonstrations of Basic Heat & Mass Transfer Principles Page 1 of 2
Latent Heat Transfer 5 Minute Demonstration that will explain the principle of latent heat transfer (evaporation).
Engineering, Chemistry, and Biology industries use this concept.
Resources Required 1. Estimated Time: 30 min (preparation) 2. List of Materials and Estimated Cost.
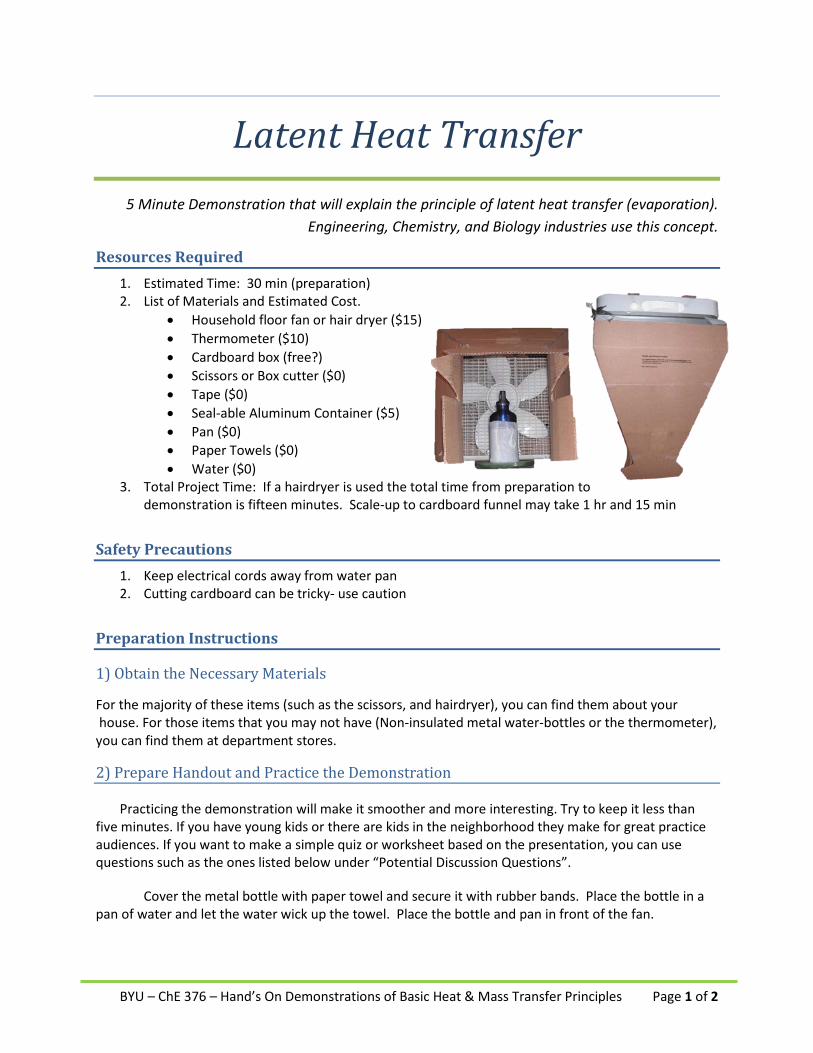
• Household floor fan or hair dryer ($15) • Thermometer ($10) • Cardboard box (free?) • Scissors or Box cutter ($0) • Tape ($0) • Seal-able Aluminum Container ($5) • Pan ($0) • Paper Towels ($0) • Water ($0)
3. Total Project Time: If a hairdryer is used the total time from preparation to demonstration is fifteen minutes. Scale-up to cardboard funnel may take 1 hr and 15 min
Safety Precautions 1. Keep electrical cords away from water pan 2. Cutting cardboard can be tricky- use caution
Preparation Instructions
1) Obtain the Necessary Materials
For the majority of these items (such as the scissors, and hairdryer), you can find them about your house. For those items that you may not have (Non-insulated metal water-bottles or the thermometer), you can find them at department stores.
2) Prepare Handout and Practice the Demonstration
Practicing the demonstration will make it smoother and more interesting. Try to keep it less than five minutes. If you have young kids or there are kids in the neighborhood they make for great practice audiences. If you want to make a simple quiz or worksheet based on the presentation, you can use questions such as the ones listed below under “Potential Discussion Questions”.
Cover the metal bottle with paper towel and secure it with rubber bands. Place the bottle in a pan of water and let the water wick up the towel. Place the bottle and pan in front of the fan.
BYU – ChE 376 – Hand’s On Demonstrations of Basic Heat & Mass Transfer Principles Page 2 of 2
Demonstration Instructions
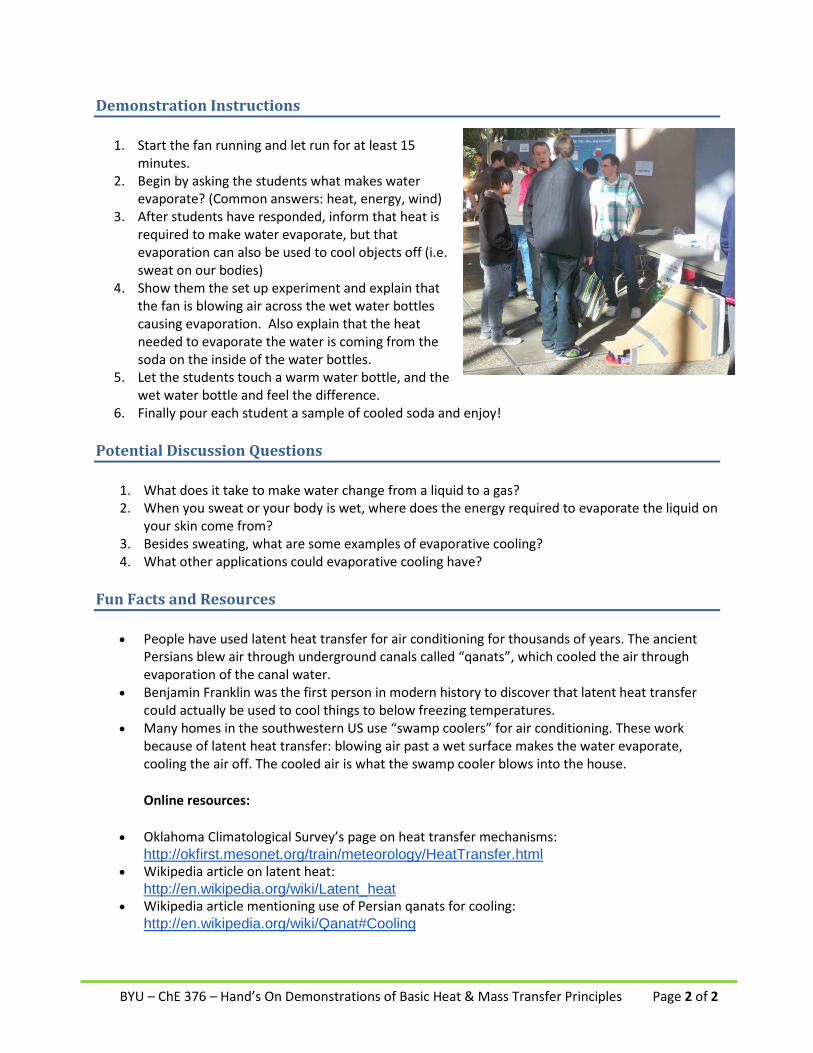
1. Start the fan running and let run for at least 15 minutes.
2. Begin by asking the students what makes water evaporate? (Common answers: heat, energy, wind)
3. After students have responded, inform that heat is required to make water evaporate, but that evaporation can also be used to cool objects off (i.e. sweat on our bodies)
4. Show them the set up experiment and explain that the fan is blowing air across the wet water bottles causing evaporation. Also explain that the heat needed to evaporate the water is coming from the soda on the inside of the water bottles.
5. Let the students touch a warm water bottle, and the wet water bottle and feel the difference.
6. Finally pour each student a sample of cooled soda and enjoy!
Potential Discussion Questions
1. What does it take to make water change from a liquid to a gas? 2. When you sweat or your body is wet, where does the energy required to evaporate the liquid on
your skin come from? 3. Besides sweating, what are some examples of evaporative cooling? 4. What other applications could evaporative cooling have?
Fun Facts and Resources
• People have used latent heat transfer for air conditioning for thousands of years. The ancient Persians blew air through underground canals called “qanats”, which cooled the air through evaporation of the canal water.
• Benjamin Franklin was the first person in modern history to discover that latent heat transfer could actually be used to cool things to below freezing temperatures.
• Many homes in the southwestern US use “swamp coolers” for air conditioning. These work because of latent heat transfer: blowing air past a wet surface makes the water evaporate, cooling the air off. The cooled air is what the swamp cooler blows into the house.
Online resources:
• Oklahoma Climatological Survey’s page on heat transfer mechanisms: http://okfirst.mesonet.org/train/meteorology/HeatTransfer.html
• Wikipedia article on latent heat: http://en.wikipedia.org/wiki/Latent_heat
• Wikipedia article mentioning use of Persian qanats for cooling: http://en.wikipedia.org/wiki/Qanat#Cooling