Embed Size (px)
Citation preview
BYU – ChE 376 – Hands On Demonstrations of Basic Heat & Mass Transfer Principles
HeatandMassTransfer5MinuteDemonstrations
A Resource for K‐12 Science and Engineering Teachers
A Resource for Science Fair Project Ideas
Prepared by the 2011 Heat & Mass Transfer Class (ChE 376) at Brigham Young University
TableofContents
1)MassTransfer
1. How Well Do You Smell? 2. Bloating Gummy Bears 3. Why Does Matter Spread Out? 4. What Affects Diffusion? 5. Melting Diffusion 6. Cool‐Aid Diffusion
2)ConvectionHeatTransfer
1. Exploring Convection and Latent Heat 2. A Convection Carousel
3)ConductionHeatTransfer
1. Can’t Touch This! But You Can Touch This… 2. Heat Transfer Rates 3. Cooling Hot Chocolate 4. Chocolate Meltdown
4)RadiationHeatTransfer
1. Heating through Radiation 2. Space Blankets 3. “Seeing” Radiation
3)LatentHeatTransfer
1. The Science Behind Reusable Hand Warmers
Contact: Dr. Brad Bundy, Assist. Professor, Chemical Eng. Dept., Brigham Young University

BYU – ChE 376 – Hands On Demonstrations of Basic Heat & Mass Transfer Principles
Warning: These demonstrations involve substances and materials when in use have the potential to cause injury and burns. For example electricity should be used appropriately . Equipment and Hot materials such as light bulbs, hot water, hand warmers, electric fans should be used with appropriate protective equipment and according to manufacturer’s specifications.

Mass Transfer
BYU – ChE 376 – Hands On Demonstrations of Basic Heat & Mass Transfer Principles Page 1 of 2
How well do you smell? 5 Minute Demonstration that teaches students about diffusion, forced convection and mass
transfer in general.
Resources Required 1. Estimated Time: 5 minutes per presentation 2. List of Materials and Estimated Cost.
• Fan (size depending on how big of a group per presentation and size of bag of chips. Make sure it is one you can adjust.)
• Bag of strong smelling chips. (We recommend Cheetos, Doritos, Lays: Barbecue or cheesy flavors.) We purchased 4 boxes of 50 small bags of chips for around $10 per box. We used roughly one small bag for every two-three people in each presentation.
• Poster that gives outline and definition of what diffusion and forced convection is with pictures.
3. Total Project Time: 3 hours, 1 hour for preparation of presentation, 1 hour to purchase the chip, 1 hour for the actual presentation
Safety Precautions 1. Electric chord for the fan (taped down). 2. Chips. (Choking hazard for very small children)
Preparation Instructions
1) Obtain the Necessary Materials
You can find the boxes of chips at Cosco, Wal-mart, or any major retail store. If a fan is not available, Home depot carries them.
2) Prepare Handout and Practice the Demonstration No handouts necessary for this demonstration. If you would like to practice just get a group of
volunteer students or other co-workers and follow the demonstration instructions.

Mass Transfer
BYU – ChE 376 – Hands On Demonstrations of Basic Heat & Mass Transfer Principles Page 2 of 2
Demonstration Instructions 1. Present an unopened bag to the students and ask them if they can smell the chips inside. (The
majority will say no, if they say yes, compliment them on their sense of smell.) 2. Ask them why they cannot or barely can smell the chips. (Most will answer because of the
plastic.) 3. Take the bag back; ask the students if you open the bag approx 5 feet from them, will they then
be able to smell the chips. Proceed to open the bag, shake lightly, and wait for the students to be able to smell the chips. (Takes about 15-30 seconds)
4. Ask why does the smell come out? Why does it not just stay in the bag? Use this moment to teach about diffusion and Fick’s law. Mention how air is still a barrier, just not as strong as the plastic, explain the time elapsed before the students smell the chips. Use a metaphor if you like. One we used was with people in a crowded elevator and when the door opens they all want to disperse.
5. Retrieve fan. Ask the students if they think it will be easier or harder to smell the chips with a fan blowing behind it. Have the students step back 3 or 4 steps (about 8-10 feet). Turn the fan on low, blowing in the direction of the students. They should be able to smell the chips within 5-10 seconds)
6. Teach about forced convection. Diffusion is random and in all directions, decreasing it’s concentration rapidly. With forced convection, vast majority of concentration travels in one direction, making it much more powerful and easier to smell. If you wish, continue the elevator example with when the doors open, all of the people have to walk down a hallway before they can disperse.
7. Present the bag of chips to the students to eat.
Potential Discussion Questions 1. Why does smell travel through air? 2. Why is it easier to smell with a fan? 3. Why can some people smell the chips through the bag?
Fun Facts and Resources Enjoy!
Mass Transfer
BYU – ChE 376 – Hands On Demonstrations of Basic Heat & Mass Transfer Principles Page 1 of 2
Bloating Gummy Bears 5 minute demonstration of bloating gummy bears that shows the principle of diffusion and mass
transfer which is net movement of mass from one location to another.
Resources Required 1. Estimated Time: 2 hours 2. List of Materials and Estimated Cost.
• Gummy bears- 5 $ • Water (cold) • 4 Beakers-1$ each • Rubber Gloves-0.5$ • Ruler
Safety Precautions
1. Threat of choking on a gummy bear
Preparation Instructions
1) Obtain the Necessary Materials
You can find gummy bears, beakers, and rubber gloves at specific local grocery stores.
2) Prepare Handout and Practice the Demonstration
Young kids to middle school age are great audiences.
Demonstration Instructions
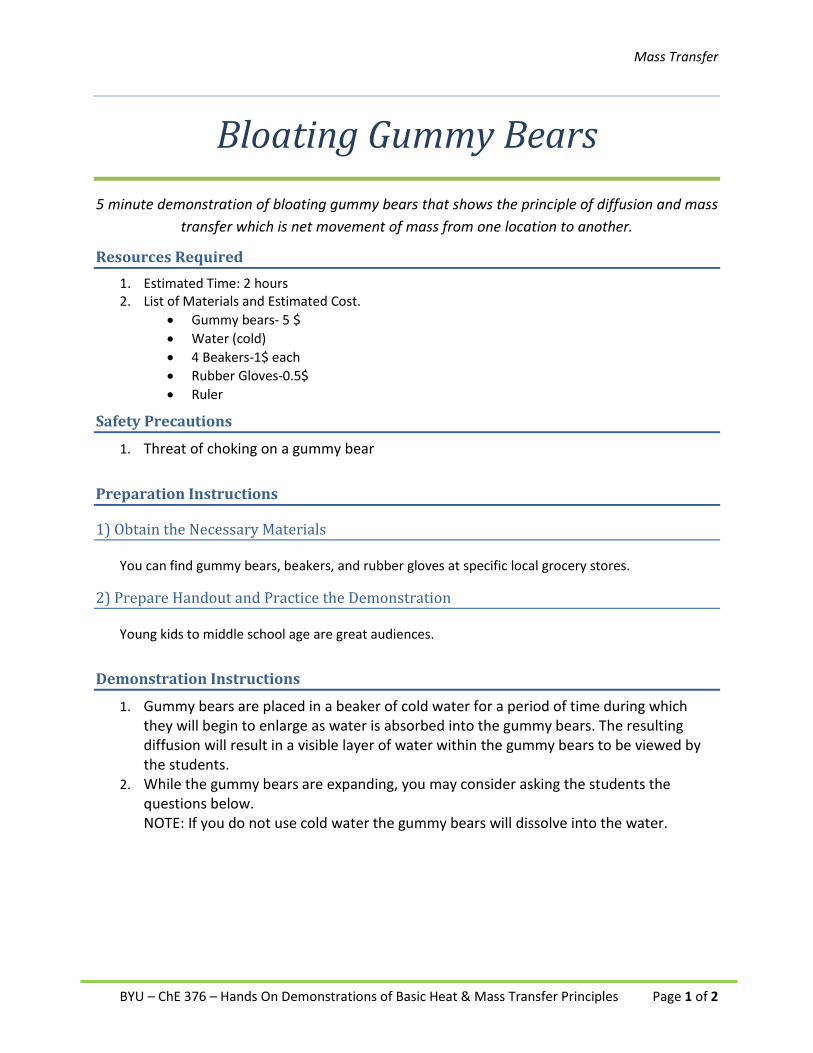
1. Gummy bears are placed in a beaker of cold water for a period of time during which they will begin to enlarge as water is absorbed into the gummy bears. The resulting diffusion will result in a visible layer of water within the gummy bears to be viewed by the students.
2. While the gummy bears are expanding, you may consider asking the students the questions below. NOTE: If you do not use cold water the gummy bears will dissolve into the water.

Mass Transfer
BYU – ChE 376 – Hands On Demonstrations of Basic Heat & Mass Transfer Principles Page 2 of 2
Potential Discussion Questions 1. Where is mass transfer happening in the room right now? This is a good question to ask at the
start of the demonstration. 2. Why does mass transfer happen? This will get the students thinking about the importance of
mass transfer when they may have not thought about it before. 3. What can be a useful application of mass transfer in daily life? Prompt with such question as:
How do we breathe, smell or taste? 4. Guess the time which gummy bears spent in a beaker. 5. What happens to the bears when placed in water overnight? This is to prompt some critical
thinking about limits and equilibrium possibilities. 6. What variables does diffusion depend on? This can lead into a further discussion of osmosis.
Example: why does our skin get wrinkled when we are in the pool for a long time?
Fun Facts and Resources
Mass transfer is the net movement of mass from one location to another. Often, chemicals transfer between two phases (liquid to vapor, solid to vapor for example) through an interface or diffusion through a phase.
The whole concept of mass transfer is very important because is through this process that our lungs absorb oxygen, how we taste and smell as well as why our skin becomes wrinkled when we are pool.
For resources on mass transfer and other interactive learning methods please consider visiting the following:
http://scienceprojectideasforkids.com/2010/absorption-bloated-gummi-bea/
http://en.wikipedia.org/wiki/Mass_transfer
http://www.loc.gov/rr/scitech/mysteries/wrinkles.html

Mass Transfer
BYU – ChE 376 – Hands On Demonstrations of Basic Heat & Mass Transfer Principles Page 1 of 2
Why does matter spread out? A 5 Minute Demonstration that illustrates the difference in the diffusion rates in solids and
liquids, with applications from drug delivery to why soda, left unopened, eventually goes flat.
Resources Required 1. Estimated Time: 7 days to prepare the solid; <5 minutes to prepare the liquid 2. List of Materials and Estimated Cost
• Clear plastic cups (about 6) • Colorless gelatin • Food coloring • Small syringe or dropper • Water • 3 small lidded containers • 1 large bag of Skittles® (or M&M’S® or other similar candy) Total cost: $5-$10
3. Total Project Time: Can be run in 5-10 minutes, depending on discussion
Safety Precautions 1. Store the gelatin samples in a refrigerator, or they will mold in 1-2 days 2. Food coloring can stain – consider using a tarp/plastic under the demo
Preparation Instructions
1) Obtain the Necessary Materials a. You can find all the needed materials at any grocery store.
The final setup should look something like this
2) Prepare the gelatin & water a. 7 days before the presentation, fill 5 cups with gelatin b. After it sets, poke a hole in the center of the cup about halfway down the depth of the gelatin c. Use the syringe to put 5 drops of food coloring into the hole of the first cup d. 5, 3, and 1 days before the presentation, inject the same amount of dye into 1 additional cup e. Leave the remaining cup to use during the demonstration f. Immediately before the demonstration, fill one cup with water

Mass Transfer
BYU – ChE 376 – Hands On Demonstrations of Basic Heat & Mass Transfer Principles Page 2 of 2
3) Prepare the Skittles® a. Separate the Skittles® by color b. Fill 1 lidded container completely full, half with one color, half with another color (solid) c. Fill 1 lidded container halfway full, ¼ with one color, ¼ with another color (liquid) d. Fill 1 lidded container with about 5 of one color and about 5 of another color (gas)
Demonstration Instructions 1. To introduce the concept of
diffusion, ask the kids if they know why a helium balloon deflates after a little while (Because the helium can escape through the plastic wall of the balloon, but it does so really slowly)
2. Explain that molecules can collide and move past each other in solids, liquids and gases, but how fast they do so depends on the phase (You can use the diagram at the right to illustrate this point)
3. Line up the gelatin cups in chronological order to show diffusion over time and inject food coloring into the final cup so the kids can see that diffusion does not occur immediately Drop about 5 drops of food coloring in the water cup and watch it diffuse
Note: At this point, if you want to show the difference between stirred and non-stirred diffusion in liquids, you can repeat step 3, stirring the water with a spoon
4. Ask them why they think it takes so much longer in the gelatin than it does in the water (Molecules in the solid are closer together than they are in the liquid)
5. Ask kids to take turns shaking the three closed containers, observing the difference in mixing (diffusion) between the three ‘phases’ (solid, liquid, gas)
6. Explain that the containers represent, respectively, solid, liquid and gas phases and equate mixing in the containers to diffusion in the cups
Potential Discussion Questions 1. Why does it take longer for gelatin than it does for water? There is much more space between
molecules in the gas phase than in the liquid phase than in the solid phase. 2. What’s going on at the molecular level (Think about the Skittles®)? The molecules in solids have
less freedom of movement than molecules in liquids or gases. 3. Why does the food coloring mix faster if it is stirred? An outside source is helping the molecules
mix (bulk flow), instead of the molecules colliding and moving past each other on their own.
Fun Facts and Resources
• http://www.biologycorner.com/bio1/diffusion.html • http://highered.mcgraw-
hill.com/sites/0072495855/student_view0/chapter2/animation__how_diffusion_works.html • http://people.chem.byu.edu/rbshirts/research/boltzmann_3d

Mass Transfer
BYU – ChE 376 – Hands On Demonstrations of Basic Heat & Mass Transfer Principles Page 1 of 2
What Affects Diffusion? This demonstration takes a look at the factors that affect mass transfer, specifically diffusion. The equation that governs diffusion is NA=-DAB*As*ΔCA. NA is the rate of mass transfer and DAB takes into account substance, temperature (increases with increasing temperature), pressure; As is the surface area; ΔCA is the difference in concentration. The demonstration specifically looks at the role temperature plays in diffusion.
Resources Required 1. Estimated Preparation Time: 10 minutes 2. Estimated Experiment Time: 20 minutes 3. List of Materials
• 4 equally sized bottles (clear) • 2 container (hot water & ice) • Food coloring (yellow & blue) • Hot plate
• Index card or old credit card • Tray • Ice • Insulated gloves
4. Total Project Time: 30 minutes
Safety Precautions 1. A hot plate is used to heat the water—avoid direct contact and keep out of reach of children to
avoid burns. 2. Tape down electrical cords so children do not trip, moving the hot plate and causing burns. 3. Warm water can become hot water, which can burn. Use insulated gloves to help reduce risk. 4. Perform demo in a tray of sorts so accidental bumping will not result in dyed water being spilled.
Preparation Instructions 1. Obtain the necessary materials at the chemistry department of your school or at Wal-Mart. 2. Practice the demonstration.
Demonstration Instructions 1. Heat enough water to fill two of the bottles to about 60-70 C (140-160 F). 2. Once the water is around that temperature range fill two of the bottles, completely to the top. 3. Dye one of the bottles yellow and the other blue with the food coloring. 4. At the same time fill the remaining two bottles and surround the bottles with ice to cool them
down to somewhere about 5-15 C (40-60 F). 5. Also dye one of the cold water bottles blue and the other yellow. 6. Take an index card or an old credit card and place it over the mouth of one of the hot water
bottles. Flip it over being careful not to let any of the water escape. Place the bottle on top of the other bottle and pull the card out to allow the dyed water to mix. (It works best if yellow is on the top and blue is on the bottom.
7. Repeat the last step with the cold water bottles.

Mass Transfer
BYU – ChE 376 – Hands On Demonstrations of Basic Heat & Mass Transfer Principles Page 2 of 2
8. Allow the dyes to mix with each other. You should be able to see a difference by how fast and how well the dyed water mixes depending on the temperature of the water.
9. An example of an introduction questions that could be used to teach would be, first explain to the students that one of the systems is filled with cold water and the other is filled with hot, and then ask them if they can guess which one is the hot system and which one is the cold system.
a. After having them identify the hot and cold systems you can go into a discussion of why the hot system mixes faster and better then the cold system.
b. Adding heat to a system causes the energy of the molecules of the system to go up. c. Both systems naturally diffuse (yellow water diffuses into the blue and blue water
in to the yellow) but because the hot system has more energy it diffuses faster. d. The hot system also mixes better because of the extra energy. Once the colors
have diffused into each other, they bounce around a lot and mix while the cold molecules stay almost stationary and don’t mix as well.
Fun Facts, Discussion Questions, and Resources Some real life examples of this principle include:
• Why do you spray perfume on your wrists? We spray perfume on our wrists because the skin is warmest there due to the proximity of veins. This heat allows the perfume molecules to move quicker through the air so others can smell the perfume.
• Why do tropical fish need more cholesterol than arctic fish? The cells in fish that swim in tropical water have different membranes than those of fish swimming in arctic water. The warm, tropical water would make the materials move in and out of cells too quickly so tropical fish have cholesterol in their cell membranes to slow that transfer.
• Why are your small intestines so long? Surface area (As) is also part of the equation. The human small intestine is, on average, 20 feet long. This is to maximize surface area so we can get as much diffusion from our food as possible to get the most nutrients.
Wikipedia has a great article on this principle, which is called Fick’s law. http://en.wikipedia.org/wiki/Fick%27s_law
An animation of diffusion can also be found at: http://highered.mcgraw-
hill.com/sites/0072495855/student_view0/chapter2/animation__how_diffusion_works.html
The bottles with hot water are on the right. They have already mixed by the time of this picture whereas the cold, on the left, are still mixing. The hot water should start mixing right away at the mouth of the bottle where the cold will take time to mix.
Mass Transfer
BYU – ChE 376 – Hand’s On Demonstrations of Basic Heat & Mass Transfer Principles Page 1 of 2
Melting Diffusion 5 Minute Demonstration that shows how temperature affects diffusion and heat transfer. This show how ice melts faster in hot water, convection currents and how dye spreads out faster in hot water. Chemical producing industries rely heavily on these principles.
Resources Required 1. Estimated Time: 5 minutes 2. List of Materials and Estimated Cost.
• Food coloring • Water • Ice cube trays • 3 clear plastic containers (Graduated cylinder, plastic cups, etc.)
3. Total Project Time: 15 minutes
Safety Precautions 1. Careful when handling food coloring so that it does not stain. 2. Careful when handling hot water.
Preparation Instructions
1) Obtain the Necessary Materials
You can find the food coloring and the ice cube trays at any grocery store.
2) Prepare Handout and Practice the Demonstration
If you have young kids or there are kids in the neighborhood they make for great audiences.
3) Prepare Ice Cubes Put 2-3 drops of food coloring for each compartment in the ice cube tray. Prepare the ice cubes at
least one day in advance.
4) Prepare the Containers of Water Fill one with hot water from the tap. Fill one with cold water from the tap. The other one should be filled with lukewarm water.

Mass Transfer
BYU – ChE 376 – Hand’s On Demonstrations of Basic Heat & Mass Transfer Principles Page 2 of 2
Demonstration Instructions 1. Inform the students that each container has a different temperature of water. One hot, one cold
and one lukewarm. 2. Drop an ice cube in each container at the same time. 3. Allow the students to observe 4. Have the students predict which container has the hot, cold and lukewarm water. 5. Ask why they predicted that.
Note: The ice cube in the hot water will melt and diffuse fastest. 6. Ask the Potential Discussion Questions as desired
Potential Discussion Questions
1. Why does the dye sink to the bottom of the container?
Answer: Cold water is heavier (dense) than the warmer water. 2. At which temperature will the dye diffuse fastest?
Answer: In the hot water. 3. Why does the dye diffuse faster in this container?
Answer: The ice melts the fastest. 4. If the water was at 32 oF would the dye still sink?
Answer: No, since the water and the melting ice would be at the same temperature. 5. Would diffusion happen faster in a gas or a solid compared to a liquid?
Answer: In a gas since there is more room for the molecules to move around.
Fun Facts and Resources http://www.youtube.com/watch?v=gXJMBgyT_hk&feature=related http://www.youtube.com/watch?v=o6nqYcrItiQ&NR=1 Cold water is heavier than hot water and that is why it sinks. Instead of food coloring, Kool-aid could be used and the left over ice cubes could be a given to the kids.

Mass Transfer
BYU – ChE 376 – Hands On Demonstrations of Basic Heat & Mass Transfer Principles Page 1 of 2
Diffusion 5 minute in-class demonstration that shows students how diffusion depends on temperature.
This phenomena is used in the automotive industry and observed in tea bags and juice making.
Resources Required 1. Preparation time: 5-10 minutes 2. List of Materials and Estimated Costs:
• Transparent plastic container such as cups or a pitcher (cups are about $1) • Some juice mix (Kool-Aid, Crystal Light, etc.) ($8 for 75 Crystal Light packets) • Spoon (Free) • Container of Hot water (Free) • Container of Ice water($1 for ice)
3. Total Project Time: 10-15 min
Definition of Diffusion Diffusion is defined as the movement of atoms or molecules from an area of higher concentration to an area of lower concentration. Simply defined, it is what causes molecules to spread apart or scatter.
Safety Precautions 1. Be careful around hot water, it can burn skin or mouths. 2. Be careful with colored dyes, they may stain carpets.
Preparation Instructions
1) Obtain the Necessary Materials You can find all of the materials at any grocery store. Have hot water and ice water prepared
before the demonstration. Hot water can be prepared by boiling water or getting it straight from the tap if the tap water is hot to the touch. Cold water can be prepared by adding ice to cold tap water.
2) Prepare Handout and Practice the Demonstration Prepare questions and comments to make during the presentation. Attempt the demonstration
various times. Of the three Crystal Light mixes we used (strawberry, regular lemonade, and pink lemonade), the pink lemonade variety was found to work the best. The other flavors were harder to see in the water and caused the students to incorrectly understand the mechanism of diffusion. Also, use various transparent containers to decide which will be the most effective. If the demonstration will only be done once, large pitchers may be better. If many trials will be done, smaller cups will be more appropriate but they still must be sufficiently large to see the effect.

Mass Transfer
BYU – ChE 376 – Hands On Demonstrations of Basic Heat & Mass Transfer Principles Page 2 of 2
Demonstration Instructions 1. Define diffusion to introduce the topic. 2. Have students make hypotheses about the effect of temperature on diffusion. Ask them: “In
which container will the mix diffuse more quickly? Why?” 3. Fill one transparent container with ice water and another with hot water. 4. Ask two student volunteers to come up. Have them pour the juice mix into both containers at
the same time. 5. Observe the diffusion in both containers. Ask the class: “In which container did it mix more
quickly?” “Was our hypothesis correct?” “What can accelerate the diffusion in the colder cup?” “How does that (stirring, smaller juice mix particles, shaking, etc.) give the molecules more energy?”
6. Have a student stir the cold cup with plastic spoon to accelerate diffusion. 7. Ask the students, “When do you see diffusion in your every-day life other than with Kool-Aid?” 8. Drink to your enjoyment.
Potential Discussion Questions 1. “Why does the mix diffuse faster in the hot water than in the cold water?”
(The molecules in the hot water have more energy and move faster than the molecules in the cold water. The molecules of the mix naturally want to spread out and get away from each other, so the faster moving, hot water molecules help the mix spread out faster.)
2. “What is happening to cause diffusion?”
(Diffusion is caused by a concentration gradient. This means that there are a lot of one type of molecule in one place (ie. lots of kool-aid at the top), and not as many in another, so the molecules move to where they have more space.)
3. “What can we do to accelerate diffusion?”
(Stir it to cause the juice powder molecules to move faster, or heat up the water.)
4. “What are other applications of diffusion?”
(Possible examples are air fresheners, diffusers such as aromatic diffusers, perfume/cologne, making silicon chips, and mixing things for chemical processes.)
Fun Facts and Resources An extension of this experiment may be to develop ideas on other dependencies of diffusion
such as particle size of juice mix powder, velocity of stirring, and mapping out the change in diffusion rate due to a greater temperature difference. We used nearly boiling water at the beginning of the day (about 150 °F) and ice water (about 32 °F). The greater the temperature difference, the easier it is to compare the diffusion and see the effect of temperature on diffusion. Particle size may be changed using different juice mixes or freezing the mix so it comes out in clumps. Enjoy the magic of diffusion!
Helpful Educational Videos • http://www.sciencefix.com/home/2010/3/31/video-demo-food-coloring-diffusion.html • http://www.youtube.com/watch?v=M30PrtZDB8I&feature=related

Convection Heat Transfer
BYU – ChE 376 – Hands On Demonstrations of Basic Heat & Mass Transfer Principles Page 1 of 2
Exploring Convection and Latent Heat A 5-minute demonstration that shows the effect that convection has on latent cooling.
Convection is the process of heat transfer (cooling or heating) that occurs when a fluid, like air or water, flows over an object at a different temperature. The latent heat of vaporization of water is the amount of energy or heat that is needed to convert water from a liquid to a gas at a constant temperature. The term that is most often used is latent/evaporative cooling. In this demonstration, the main cause of heat transfer is evaporation and the water evaporating off of the hand takes heat from your hand in order to evaporate, thus causing the hand to feel cooler.
This relates to engineering in many ways one way is its use in heat exchangers. These heat exchangers are placed in any vessel or reactor where a process is taking place. They use the principle of latent heat to keep a constant temperature and leaving the vessel able to be reused. The fluid flowing past will take the heat away from our experiment.
In industry that uses this principle is the refrigeration and also HVAC (Heating, ventilating and air-conditioning. These are always used for exchanging heat for the purpose we want whether to cool down or heat up.
Resources Required 1. Estimated Time: 20 minutes 2. List of Materials and Estimated Cost.
• Paper Towels $2, Hand Sanitizer $4, Fan $15, Bowl $3, water 3. Total Project Time: 30 minutes
Safety Precautions 1. Tape the cord from the fan to the ground to keep people from tripping over it. 2. Make sure the fan has a protective cover to prevent people from hurting their fingers 3. Keep the paper towels close by so that any spills from the water can be cleaned up quickly.
Preparation Instructions
1) Obtain the Necessary Materials
You can find a fan at any store like Walmart, Target, etc. A bucket or bowl to hold the water can be found at similar stores. We found the paper towels and hand sanitizer at Walmart for low cost.
2) Set up the demonstration
Plug the fan in and place in on a table next to the bucket of water, the roll of paper towels, and the bottle of hand sanitizer.

Convection Heat Transfer
BYU – ChE 376 – Hands On Demonstrations of Basic Heat & Mass Transfer Principles Page 2 of 2
Demonstration Instructions 1. Begin with a thought question. I.E. Why do we sweat? This can get them thinking and hopefully
catch their attention. 2. Ask them to think about a question, like “How does sweating make us cooler?”, as they participate. 3. Continue with participation form some or all of the students. 4. Have them dip their hands in the water. 5. Hold one hand in front of the fan and the other in open air without the fan blowing on it. 6. They should note that the hand in front of the fan feels colder than the other hand in the open air. 7. Continue by asking the final thought question, “How does it work?” Hopefully they have been
thinking about it while they participated. 8. Explain the way it works. Supplementary demonstration: Try hand sanitizer on one hand and water on the other hand and then have them put both hands in front of the fan. The hand sanitizer should get colder than the water. This is due to less energy being needed to evaporate the alcohol than the water.
Potential Discussion Questions
1. Why do we sweat? 2. How does sweating make us cooler? 3. Why do you feel cold right when you get out of the swimming pool even on a hot summer day? 4. Why do you feel cold right when you get out of the shower? 5. Why do elephants spray water on themselves? 6. Why do dogs pant? 7. Why do pigs roll in the mud?
Fun Facts and Resources Most animals do not sweat but have other ways to cool themselves down. Most that do not sweat do not even have sweat glands. i.e Elephants have large ears, dogs pant.
Set up of the demonstration is shown below.

Convection Heat Transfer
BYU – ChE 376 – Hands On Demonstrations of Basic Heat & Mass Transfer Principles Page 1 of 3
The Convection Carousel
5 minute demonstration that showcases natural convection Definitions: Heat Convection: Heat transfer that takes place as a result of fluid
flow. This concept can be taught quantitatively by Newton’s Law of Cooling.
Natural convection: The density of a gas changes with
temperature. These temperature differences allow buoyant forces to move warmer, less dense air upwards.
Applications: Convection in engineering: cooling towers, hot air balloons Convection in nature: earthquakes and plate tectonics, tornadoes, hurricanes, and fire whirls
Resources Required 1. Preparation Time: 2 hours – (not necessary that the children each create a carousel)
Demonstration Time: 5 – 10 minutes plus discussion
2. List of Materials and Estimated Cost
Box: http://commons.wikimedia.org/wiki/File:Open_cardboard_box_husky.png Candle: http://commons.wikimedia.org/wiki/File:Candle_icon.png Scissors:
http://commons.wikimedia.org/wiki/File:Scissor.JPG Glue: http://commons.wikimedia.org/wiki/File:School_glue.JPG Hook: http://commons.wikimedia.org/wiki/File:Hook_(PSF).png Skewers: http://commons.wikimedia.org/wiki/File:Bamboo_Skewers.jpg
3. Total Project Time: Approximately 2 hours
Safety Precautions 1. Tea lights should be out of reach of children and care should be taken to prevent burning or fire. 2. If open flames are not permitted, another heat source (heat lamp, heating coil) can be used. It
will get hot, so keep out of reach of children
Cardboard Use moving or mailing boxes and cereal boxes
Wooden Skewer $ 2 / pack of 100
Small Metal Hook $ 2 / picture hanging hook kit (~15 hooks)
Tea Lights $ 5 / pack of 50
Glue Use available glue
Scissors Use available scissors
Estimated Cost $ 9
Convection Heat Transfer
BYU – ChE 376 – Hands On Demonstrations of Basic Heat & Mass Transfer Principles Page 2 of 3
Preparation Instructions
1) Obtain the Necessary Materials
Items that are not found within your household are available from the local supermarket and/or Wal-mart
2) Create the Carousel Apparatus
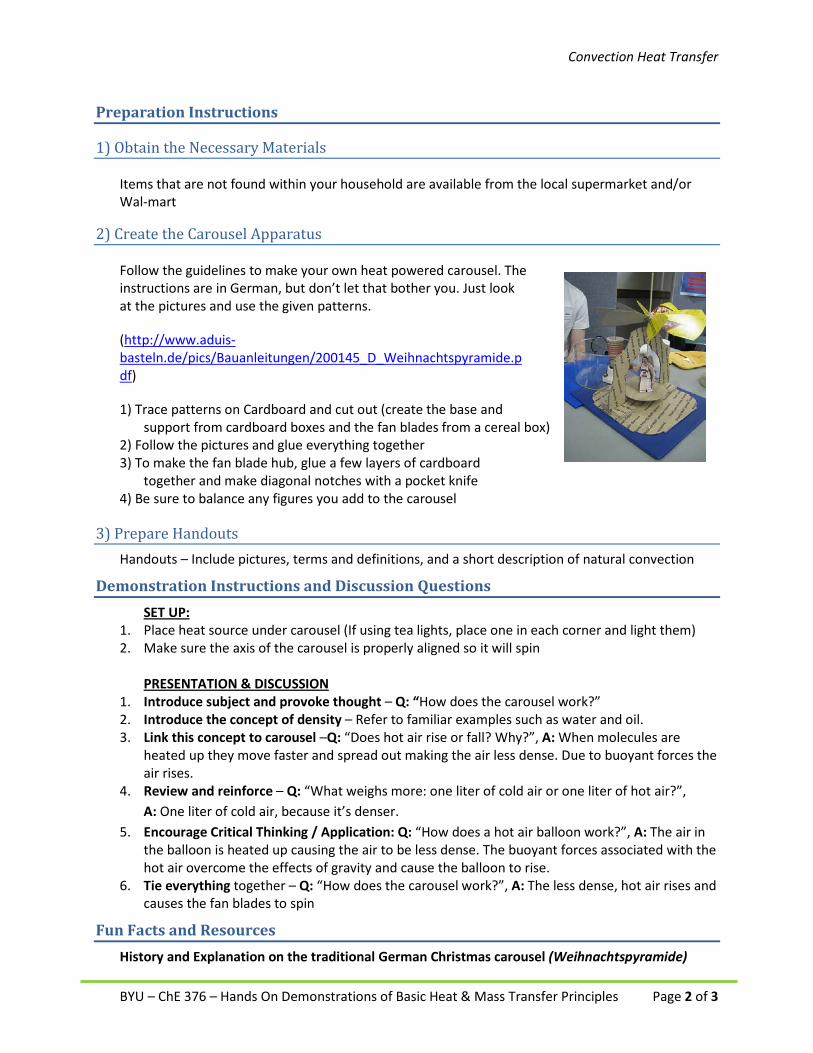
Follow the guidelines to make your own heat powered carousel. The instructions are in German, but don’t let that bother you. Just look at the pictures and use the given patterns.
(http://www.aduis-basteln.de/pics/Bauanleitungen/200145_D_Weihnachtspyramide.pdf)
1) Trace patterns on Cardboard and cut out (create the base and support from cardboard boxes and the fan blades from a cereal box)
2) Follow the pictures and glue everything together 3) To make the fan blade hub, glue a few layers of cardboard
together and make diagonal notches with a pocket knife 4) Be sure to balance any figures you add to the carousel
3) Prepare Handouts Handouts – Include pictures, terms and definitions, and a short description of natural convection
Demonstration Instructions and Discussion Questions SET UP:
1. Place heat source under carousel (If using tea lights, place one in each corner and light them) 2. Make sure the axis of the carousel is properly aligned so it will spin
PRESENTATION & DISCUSSION 1. Introduce subject and provoke thought – Q: “How does the carousel work?” 2. Introduce the concept of density – Refer to familiar examples such as water and oil. 3. Link this concept to carousel –Q: “Does hot air rise or fall? Why?”, A: When molecules are
heated up they move faster and spread out making the air less dense. Due to buoyant forces the air rises.
4. Review and reinforce – Q: “What weighs more: one liter of cold air or one liter of hot air?”, A: One liter of cold air, because it’s denser.
5. Encourage Critical Thinking / Application: Q: “How does a hot air balloon work?”, A: The air in the balloon is heated up causing the air to be less dense. The buoyant forces associated with the hot air overcome the effects of gravity and cause the balloon to rise.
6. Tie everything together – Q: “How does the carousel work?”, A: The less dense, hot air rises and causes the fan blades to spin
Fun Facts and Resources History and Explanation on the traditional German Christmas carousel (Weihnachtspyramide)

Convection Heat Transfer
BYU – ChE 376 – Hands On Demonstrations of Basic Heat & Mass Transfer Principles Page 3 of 3
http://en.wikipedia.org/wiki/Christmas_pyramid http://www.allthingsgerman.net/blog/podcasts/weihnachtspyramide

Conduction Heat Transfer
BYU – ChE 376 – Hands On Demonstrations of Basic Heat & Mass Transfer Principles Page 1 of 2
Can’t Touch This! But you can touch this…
5 Minute Demo that shows how different materials affect the amount of heat transferred.
Resources Required 1. Estimated Time: 1hr 2. List of Materials and Estimated Cost:
• Gorilla Epoxy - $6 • Small Styrofoam square (1cm thick) - $1 • Aluminum metal square (1cm thick) - $10 • Wood square (1cm thick) - $2 • Polypropylene square (1cm thick) - $4 • Heating plate (optional) could just use hot water
from the tap or another source • Ice cold water
3. Total Project Time: 1hr (most of the project preparation time is in assembling the box)
Safety Precautions 1. Hot water hazard. Have demonstration a good distance away from the students while pouring
the water to and from the box. Have students approach one by one to see the display in an orderly manner to avoid spilling the water.
2. If using a heating plate, tape down any electrical cords running to it. Also keep the hot plate away from the students
3. Make sure the wood and metal edges of the box have no shards or shape edges
Preparation Instructions
1) Obtain the Necessary Materials
All of our materials were found on campus; however, these materials should be readily available at Home Depot. We used wood, aluminum, Styrofoam, and polypropylene plastic. We used calking to glue these materials together into a box.
2) Prepare Handout and Practice the Demonstration
We did not use any handouts but the poster that we used displayed formulas that we used for the presentation as well as visual aids of a couple everyday materials that they would recognize and relate to.
Conduction Heat Transfer
BYU – ChE 376 – Hands On Demonstrations of Basic Heat & Mass Transfer Principles Page 2 of 2
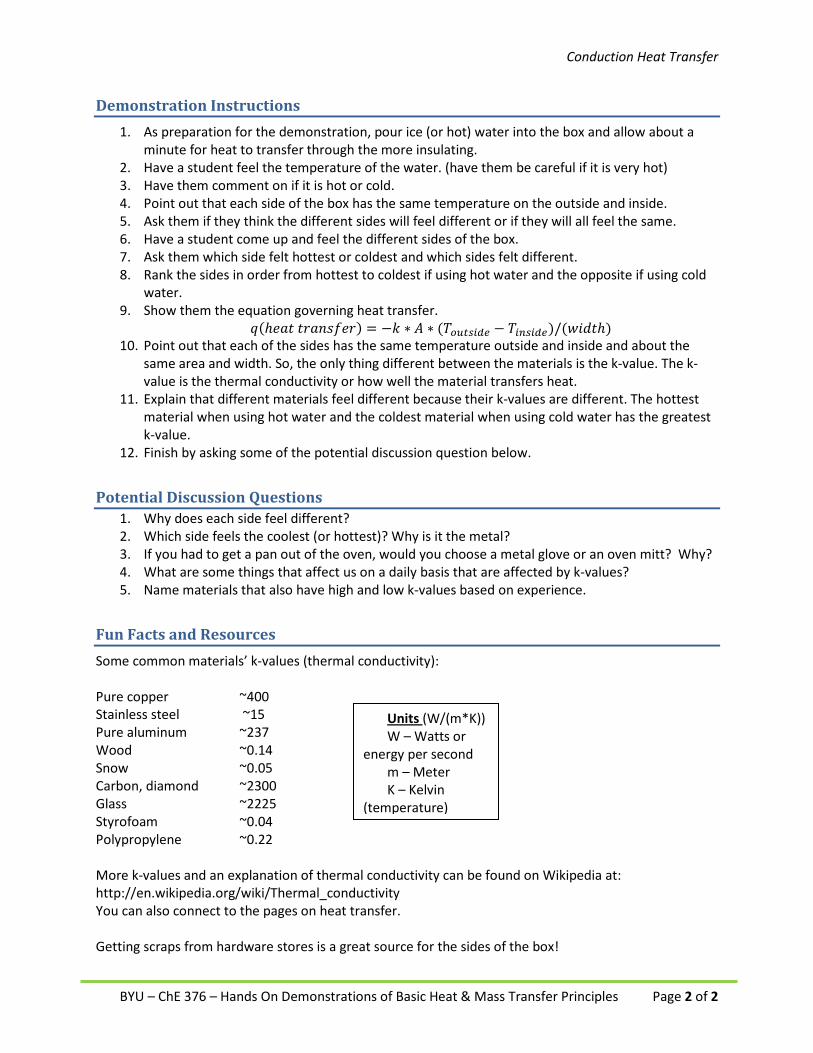
Demonstration Instructions 1. As preparation for the demonstration, pour ice (or hot) water into the box and allow about a
minute for heat to transfer through the more insulating. 2. Have a student feel the temperature of the water. (have them be careful if it is very hot) 3. Have them comment on if it is hot or cold. 4. Point out that each side of the box has the same temperature on the outside and inside. 5. Ask them if they think the different sides will feel different or if they will all feel the same. 6. Have a student come up and feel the different sides of the box. 7. Ask them which side felt hottest or coldest and which sides felt different. 8. Rank the sides in order from hottest to coldest if using hot water and the opposite if using cold
water. 9. Show them the equation governing heat transfer.
𝑞(ℎ𝑒𝑎𝑡 𝑡𝑟𝑎𝑛𝑠𝑓𝑒𝑟) = −𝑘 ∗ 𝐴 ∗ (𝑇𝑜𝑢𝑡𝑠𝑖𝑑𝑒 − 𝑇𝑖𝑛𝑠𝑖𝑑𝑒)/(𝑤𝑖𝑑𝑡ℎ) 10. Point out that each of the sides has the same temperature outside and inside and about the
same area and width. So, the only thing different between the materials is the k-value. The k-value is the thermal conductivity or how well the material transfers heat.
11. Explain that different materials feel different because their k-values are different. The hottest material when using hot water and the coldest material when using cold water has the greatest k-value.
12. Finish by asking some of the potential discussion question below.
Potential Discussion Questions 1. Why does each side feel different? 2. Which side feels the coolest (or hottest)? Why is it the metal? 3. If you had to get a pan out of the oven, would you choose a metal glove or an oven mitt? Why? 4. What are some things that affect us on a daily basis that are affected by k-values? 5. Name materials that also have high and low k-values based on experience.
Fun Facts and Resources Some common materials’ k-values (thermal conductivity): Pure copper ~400 Stainless steel ~15 Pure aluminum ~237 Wood ~0.14 Snow ~0.05 Carbon, diamond ~2300 Glass ~2225 Styrofoam ~0.04 Polypropylene ~0.22 More k-values and an explanation of thermal conductivity can be found on Wikipedia at: http://en.wikipedia.org/wiki/Thermal_conductivity You can also connect to the pages on heat transfer. Getting scraps from hardware stores is a great source for the sides of the box!
Units (W/(m*K)) W – Watts or
energy per second m – Meter K – Kelvin
(temperature)

Conduction Heat
BYU – ChE 376 – Hands On Demonstrations of Basic Heat & Mass Transfer Principles Page 1 of 2
Heat Transfer Rates 5-15 Minute demonstrations to illustrate heat transfer and the influence of material on heat transfer rate. Heat
transfer is a critical consideration in the design of many common items. Controlling the location of energy is key in the creation of efficient refrigerators, engines, houses and many other household items. To be useful each of these devices must either prevent heat from being transferred, or allow it to do so quickly. A freezer needs insulation to prevent heat transfer in, while an engine must be able to rapidly transfer heat out of the interior of the engine to
prevent the components from melting. Tightly packed structures are able to transfer heat easily, while unstructured or scattered materials (such as gases, like air) are less effective in this regard.
Resources Required 1. Estimated Time of Preparation: 2 hr (buying materials, cutting rods) 2. List of Materials and Estimated Cost.
• Rods made of various materials (ex. Wood, Plastic, Steel, Zinc, Aluminum) • Cups filled with ice and water • Total Cost came out to be ~$12.50 for all the rods
3. Estimated Demonstration Time: 10-30 minutes depending on depth of discussion. Wood and plastic will remain at room temperature for all reasonable time scales and can be left in the water long before the demonstration. The metal should be added when you are ready, aluminum should become cold in one or two minutes, and you may point out that, though in the water for an extended period, the wood and plastic remain warm.
Safety Precautions 1. Edges on cut rods need to be filed down to prevent injury from sharp ends 2. Water used to demonstrate heat transfer should not be ingested
Preparation Instructions
1) Obtain the Necessary Materials
You can find steel, zinc (galvanized steel is zinc coated), copper wire, aluminum, wooden and plastic rods at Home Depot (we bought a plastic reflector that had a rod attached to it). Ice and cups can be bought at any local grocery store. Surface area influences transfer rate, try to find rods of similar thickness. The governing equation and representative “k” values (which determine how well a material can transfer heat) can be found on our poster.
2) Prepare Handout and Practice the Demonstration
For handouts, it is important to include which metals conduct heat fastest. You will want to list the “k” values for the various metals along with a description of why materials with higher “k” values conduct heat faster. Other possibilities for the handout include different examples or images of heat transfer like those listed below.
To practice the demonstration just follow the demonstration instructions listed below, and try using some of the potential discussion questions, which are also listed below. If you have young kids or there are kids in the neighborhood they make for great audiences.
Conduction Heat
BYU – ChE 376 – Hands On Demonstrations of Basic Heat & Mass Transfer Principles Page 2 of 2
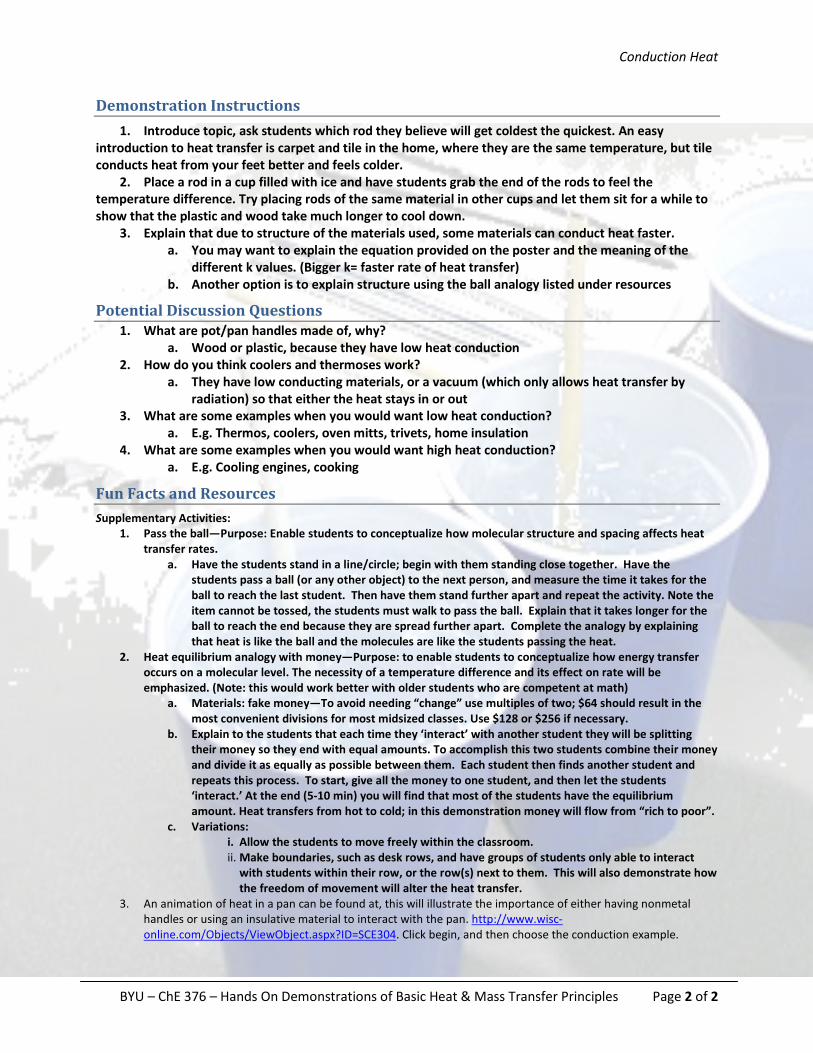
Demonstration Instructions 1. Introduce topic, ask students which rod they believe will get coldest the quickest. An easy
introduction to heat transfer is carpet and tile in the home, where they are the same temperature, but tile conducts heat from your feet better and feels colder.
2. Place a rod in a cup filled with ice and have students grab the end of the rods to feel the temperature difference. Try placing rods of the same material in other cups and let them sit for a while to show that the plastic and wood take much longer to cool down.
3. Explain that due to structure of the materials used, some materials can conduct heat faster. a. You may want to explain the equation provided on the poster and the meaning of the
different k values. (Bigger k= faster rate of heat transfer) b. Another option is to explain structure using the ball analogy listed under resources
Potential Discussion Questions 1. What are pot/pan handles made of, why?
a. Wood or plastic, because they have low heat conduction 2. How do you think coolers and thermoses work?
a. They have low conducting materials, or a vacuum (which only allows heat transfer by radiation) so that either the heat stays in or out
3. What are some examples when you would want low heat conduction? a. E.g. Thermos, coolers, oven mitts, trivets, home insulation
4. What are some examples when you would want high heat conduction? a. E.g. Cooling engines, cooking
Fun Facts and Resources Supplementary Activities:
1. Pass the ball—Purpose: Enable students to conceptualize how molecular structure and spacing affects heat transfer rates.
a. Have the students stand in a line/circle; begin with them standing close together. Have the students pass a ball (or any other object) to the next person, and measure the time it takes for the ball to reach the last student. Then have them stand further apart and repeat the activity. Note the item cannot be tossed, the students must walk to pass the ball. Explain that it takes longer for the ball to reach the end because they are spread further apart. Complete the analogy by explaining that heat is like the ball and the molecules are like the students passing the heat.
2. Heat equilibrium analogy with money—Purpose: to enable students to conceptualize how energy transfer occurs on a molecular level. The necessity of a temperature difference and its effect on rate will be emphasized. (Note: this would work better with older students who are competent at math)
a. Materials: fake money—To avoid needing “change” use multiples of two; $64 should result in the most convenient divisions for most midsized classes. Use $128 or $256 if necessary.
b. Explain to the students that each time they ‘interact’ with another student they will be splitting their money so they end with equal amounts. To accomplish this two students combine their money and divide it as equally as possible between them. Each student then finds another student and repeats this process. To start, give all the money to one student, and then let the students ‘interact.’ At the end (5-10 min) you will find that most of the students have the equilibrium amount. Heat transfers from hot to cold; in this demonstration money will flow from “rich to poor”.
c. Variations: i. Allow the students to move freely within the classroom. ii. Make boundaries, such as desk rows, and have groups of students only able to interact
with students within their row, or the row(s) next to them. This will also demonstrate how the freedom of movement will alter the heat transfer.
3. An animation of heat in a pan can be found at, this will illustrate the importance of either having nonmetal handles or using an insulative material to interact with the pan. http://www.wisc-online.com/Objects/ViewObject.aspx?ID=SCE304. Click begin, and then choose the conduction example.
Conduction & Convection Heat Transfer
BYU – ChE 376 – Hands On Demonstrations of Basic Heat & Mass Transfer Principles Page 1 of 2
Cooling Hot Chocolate 5 Minute Demonstration that teaches methods of heat transfer to cool down hot chocolate
similar to how industries cool down liquids through conduction, convection, fins, etc
Resources Required 1. Estimated Time: 10 min 2. List of Materials and Estimated Cost.
• Hot chocolate (made or premixed), Styrofoam cups, thermometer (or thermocouple), metal spoons, and plastic spoons.
3. Total Project Time: 3 hours (including poster/experiment write-up)
Safety Precautions 1. Hot chocolate may be hot enough to scald and burn. Use safe handling. If making it, do not heat
to boiling. 2. Use clean procedures for handling, including sanitary gloves for preparation and distribution.
Preparation Instructions
1) Obtain the Necessary Materials
You can find the hot chocolate at any grocery store and all other supplies should be common.
2) Prepare Handout and Practice the Demonstration Convection is the transfer of heat by the actual movement of the warmed matter. Convection above
a hot surface occurs because hot air expands, becomes less dense, and rises. Hot water is likewise less dense than cold water and rises, causing convection currents which transport energy, this is free convection. Forced convection is what occurs when we attempt to cool our hot chocolate by convection e.g. blowing air over it, stirring it, etc. Heat leaves the chocolate cup as the currents of steam and air rise. The heat moves with the fluid.
Conduction is the transfer of heat through one particular matter, for practical purposes, a solid
Demonstration Instructions 1. Young kids love hot chocolate on a cold day (best taught in winter) 2. Pour them a cup of hot chocolate 3. While they are waiting for it to cool down, ask them what tricks they know to hurry up the
cooling down process (kids will name off some very unique ways) 4. Explain how each of their suggestions works scientifically (need to be familiar with
convection and conduction-see above) 5. Once they have given their ideas, explain how the experiment works, namely, how stirring
and/or simply placing spoons in it cools it down (stirring-forced convection, placing spoons-free convection from liquid into spoons, conduction through spoons and free convection into air). Also, explain how the liquid has convection into the cup where conduction occurs and then convection transfers it into the air.
Conduction & Convection Heat Transfer
BYU – ChE 376 – Hands On Demonstrations of Basic Heat & Mass Transfer Principles Page 2 of 2
6. Explain how multiple spoons increase the surface area which increases the amount of convection, however, there is an optimal amount of spoons because if you place too many you are counterproductive because you are eliminating too much surface area of the liquid
7. Have a contest to see who can cool down their hot chocolate the fastest using any method
Potential Discussion Questions 1. What is the first thing you do when you are given a cup of hot chocolate? 2. Why would you blow on it? 3. What are some other ways to cool the hot chocolate? 4. How do you think stirring cools it and would you rather use a plastic or metal spoon to stir? 5. How can just placing metal spoons in the cup cool it down?
Fun Facts and Resources There are many ways to cool hot chocolate, here are some other tips:
A plastic spoon instead of a metal one when stirring so it doesn’t transfer heat from your hand Ice
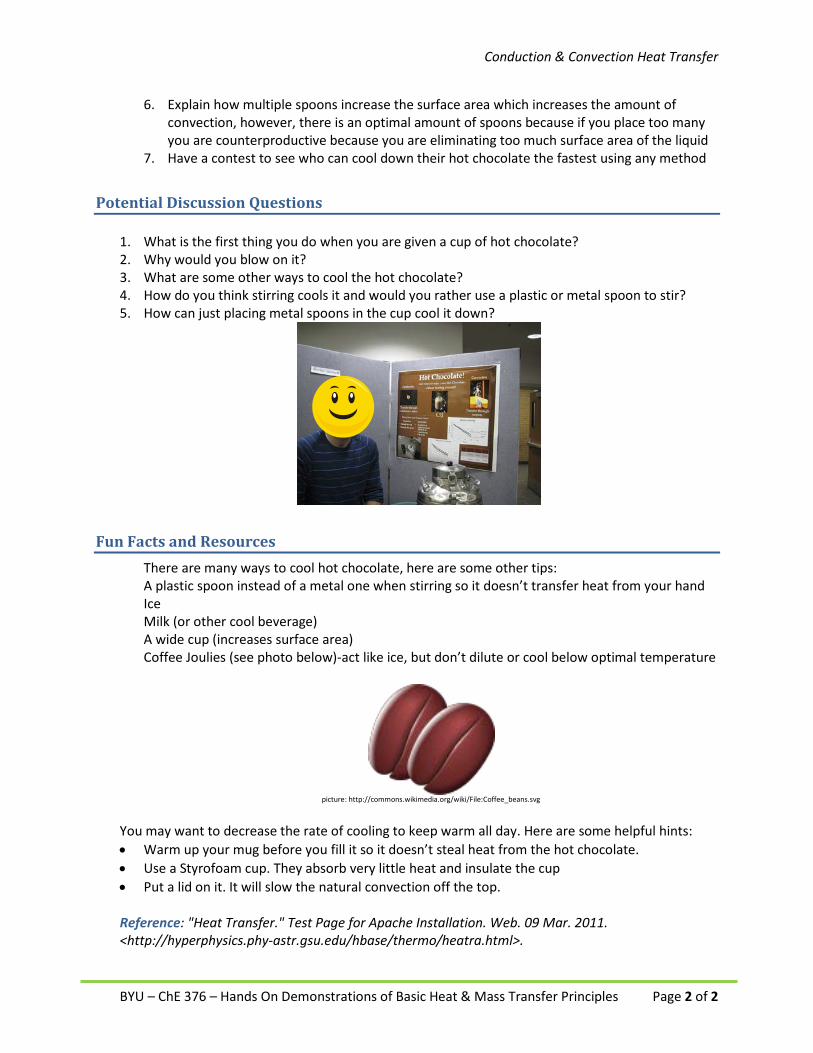
Milk (or other cool beverage) A wide cup (increases surface area) Coffee Joulies (see photo below)-act like ice, but don’t dilute or cool below optimal temperature
picture: http://commons.wikimedia.org/wiki/File:Coffee_beans.svg
You may want to decrease the rate of cooling to keep warm all day. Here are some helpful hints: • Warm up your mug before you fill it so it doesn’t steal heat from the hot chocolate. • Use a Styrofoam cup. They absorb very little heat and insulate the cup • Put a lid on it. It will slow the natural convection off the top. Reference: "Heat Transfer." Test Page for Apache Installation. Web. 09 Mar. 2011. <http://hyperphysics.phy-astr.gsu.edu/hbase/thermo/heatra.html>.

Conduction Heat Transfer
BYU – ChE 376 – Hands On Demonstrations of Basic Heat & Mass Transfer Principles Page 1 of 2
Chocolate Meltdown Five to fifteen minute demonstration of factors which increase conduction heat transfer into
chocolate, making it melt. Conduction heat transfer is used in engineering to heat up chemicals so that a chemical reaction can take place.
Resources Required 1. Time
• Preparation: 5 min • Demonstration: 5-15 min
2. List of Materials and Estimated Cost. • Chocolate Chips, preferably milk chocolate, because they will melt faster, $3 • Plastic gloves or bags, to cover the hand that melts the chocolate, $2 • Napkins, to demonstrate the effect of an insulator), $2 • Hot Plate, or other surface (if available), to show chocolate can melt faster on a better
conductor than our skin • Stop Watch, (or any clock with a second hand) to measure the time required to melt the
chocolate • Total Cost: about $7
Safety Precautions 1. Be aware of any potential chocolate allergies.
Preparation Instructions
1) Obtain the Necessary Materials You can obtain chocolate chips, napkins, plastic gloves or bags at any local grocery store. You can obtain a stop watch from any local sporting goods store or retail store.
2) Prepare Handout and Practice the Demonstration You may want to prepare a handout that describes all of the principles you wish to discuss. If you have young kids or there are kids in the neighborhood they make for great audiences.
Demonstration Instructions 1. Ask the students to brainstorm ideas for how they can melt chocolate quickest. Some ideas are
mentioned below: a. Hold the chocolate on a napkin in your hand. b. Hold the chocolate in your hand with a glove on. c. Breathe on the chocolate. d. Rub the chocolate in between your fingers. e. Mash the chocolate in small pieces and then try to melt it. f. Place the chocolate on a warm surface or in mouth. g. Use several of these ideas simultaneously

Conduction Heat Transfer
BYU – ChE 376 – Hands On Demonstrations of Basic Heat & Mass Transfer Principles Page 2 of 2
2. Have each student (or group) pick the method they want to use 3. Distribute the plastic bags, napkins, and other necessary items to each student (or group) 4. Give the students the same number of chips (1-4) for every method you plan to demonstrate. 5. Time how long it takes for each student (or group) to melt the chocolate for the method chosen. 6. Discuss why some methods melted the chocolate more quickly than others.
Potential Discussion Questions Q: Why did the chocolate melt faster on your hand with the glove than with both glove and napkin?
A: The napkin is an insulator and thus reduces the rate of heat transfer. Q: Why did the chocolate melt faster in your mouth or on a warm plate than in your hand?
A: The saliva in your mouth and the warm plate may be a hotter temperature than your hand, and they also have higher coefficients of thermal conductivity, k.
Q: Why did the chocolate melt faster when you rubbed it? A: Friction creates heat (which increases the temperature of your hand).
Q: Why did the chocolate melt faster when it was smashed into smaller pieces? A: Smashing the chocolate increases the surface area and decreases the thickness.
Q: Why did the chocolate melt faster in your mouth or hand than by only blowing on it? A: Air is a poor conductor, which means it will have a smaller coefficient of thermal conductivity.
Fun Facts and Resources
• k is the “Coefficient of Thermal Conductivity,” a measurement of how well heat passes through a material (chocolate). Every material has its own unique value.
• A is the surface area.
• thickness is the length the heat must travel
toget through the material.
• T.hot and T.cold are the temperatures of the hand (or source of heat) and the chocolate (or object being heated), respectively
• For a larger image, copy the one on the right
paste it into PowerPoint or Paint, and resize as necessary.
Online Resources This demonstration only deals with conduction heat transfer. These websites differentiate between and describe the three types of heat transfer (conduction, convection, and radiation). They may be useful for the instructor and/or students to better understand heat transfer.
http://www.wisc-online.com/objects/ViewObject.aspx?ID=SCE304 http://www.spaceflight.esa.int/impress/text/education/Heat%20Transfer/index.html

Radiation Heat Transfer
BYU – ChE 376 – Hands On Demonstrations of Basic Heat & Mass Transfer Principles Page 1 of 2
Heating Through Radiation 5 minute demonstration that teaches about radiation heat transfer. All objects transfer heat
through radiation, but most of the time this heat transfer is small. Microwave and nuclear power are among industries that use this type of heat transfer.
Resources Required 1. Estimated Time: 5 minutes. 2. List of Materials and Estimated Cost.
• 150 watt light bulb: $2.00 • Clamp light: $6.50 • Small, clear plastic cups: $1.50 • Colored markers: $4.00 • Aluminum foil: $1.00
3. Total Project Time: 50 minutes including time to heat water. 90 minutes including time to get materials.
Safety Precautions 1. Cord from clamp light must be taped down and out of the way to prevent tripping or dislodging
clamp light. 2. Be cautious with the clamp light. The light produces heat that can cause burns. The high
intensity of the light bulb can be harmful to the eyes as well. Make sure to place the projected light away from the vision of the audience.
3. If you have to replace the bulb anytime during the experiment, make sure to turn off the light and disconnect it from the power source to avoid electric shock. Use a hot pad while handling the bulb to avoid burns.
picture:http://commons.wikimedia.org/wiki/File:Henderson_Family_Day_Arm_2007.jpg
Preparation Instructions
1) Obtain the Necessary Materials You can find the clamp light and light bulb at Home Depot for the indicated price above. The plastic cups, colored markers, and aluminum foil can be obtained from a grocery store.
2) Setup the Demonstration Insert the light bulb inside the clamp light and place the clamp light so that the light is not directed towards the audience. Make sure that the clamp light is secured firmly and cords are taped down for safety.

Radiation Heat Transfer
BYU – ChE 376 – Hands On Demonstrations of Basic Heat & Mass Transfer Principles Page 2 of 2
With 2 clear plastic cups, color the outer surface of one cup black and one cup orange. Cover a 3rd plastic cup with aluminum foil on the outside and leave a 4th cup clear. Unlike the picture, make sure the aluminum foil covers the bottom of cup it is on so that radiation will be reflected by it and not heat the water inside that cup.
3) Prepare Handout and Practice the Demonstration
If you have young kids or there are kids in the neighborhood they make for great audiences.
Demonstration Instructions 1. Fill each one of the 4 cups with about 1/8th cup water.
2. Turn the light on, place cups within a foot of the light source, and wait for the water to heat up (about 30–45 min).
3. While waiting (I suggest starting the lamp earlier) introduce the subject of radiation to the audience.
4. Depending on the audience you can talk about energy being carried by light, how the energy is transferred by vibrating electrons or whatever suits your needs.
5. Consider introducing some of the discussion questions below to prep the audience on answering after the demonstration.
6. Using a thermometer, or a finger, determine the temperature of the water in each cup. Someone from the audience may assist in doing this.
7. Arrange the cups in order of ascending or descending temperature of water. 8. Discuss why the temperatures differ, such as foil reflecting the light, the orange absorbing less
radiation to heat the water than the black, and the clear letting all the radiation through to heat the water.
9. Reask the discussion questions from earlier.
Potential Discussion Questions 1. Why do you feel warmer when wearing black clothes on a sunny day? 2. Why do we use foil shields in car windows? 3. How do microwaves work? 4. How do we get sunburned? 5. Is that wall giving off radiation? How about that table? Everything gives off radiation.
Fun Facts and Resources How sunscreen works: http://www.loc.gov/rr/scitech/mysteries/sunscreen.html How radiation works: http://science.howstuffworks.com/radiation.htm How microwave cooking works: http://science.howstuffworks.com/radiation.htm
Radiation Heat Transfer
BYU – ChE 376 – Hands On Demonstrations of Basic Heat & Mass Transfer Principles Page 1 of 2
Space Blankets A 5 minute demonstration explaining how radiation heat transfer occurs and how space
blankets were developed to both provide warmth and to shield from radiation.
Estimated Time: 1 hour 1. List of Materials and Estimated Cost.
• Space Blankets: $2.50 per blanket • 250 Watt heat lamp bulb: $7.69 per bulb according to amazon.com. Note that any light
bulb can be used, but the demonstration will work better with a higher wattage. • Brooder light case: $15.13 according to amazon.com
2. Total Project Time: Including time to purchase supplies, total project setup time is 1 – 2 hours.
Safety Precautions 1. Avoid skin contact with the lamp because it can become very hot and cause burns. 2. Make sure to tape down any electrical extension cords.
Preparation Instructions
1) Obtain the Necessary Materials You can obtain the space blanket from any sporting goods store. We purchased our space blankets
at Walmart. The heat lamp supplies can be bought from any hardware store such as Ace or Lowes. However it is much cheaper to purchase them online at amazon.com.
2) Prepare Handout and Practice the Demonstration
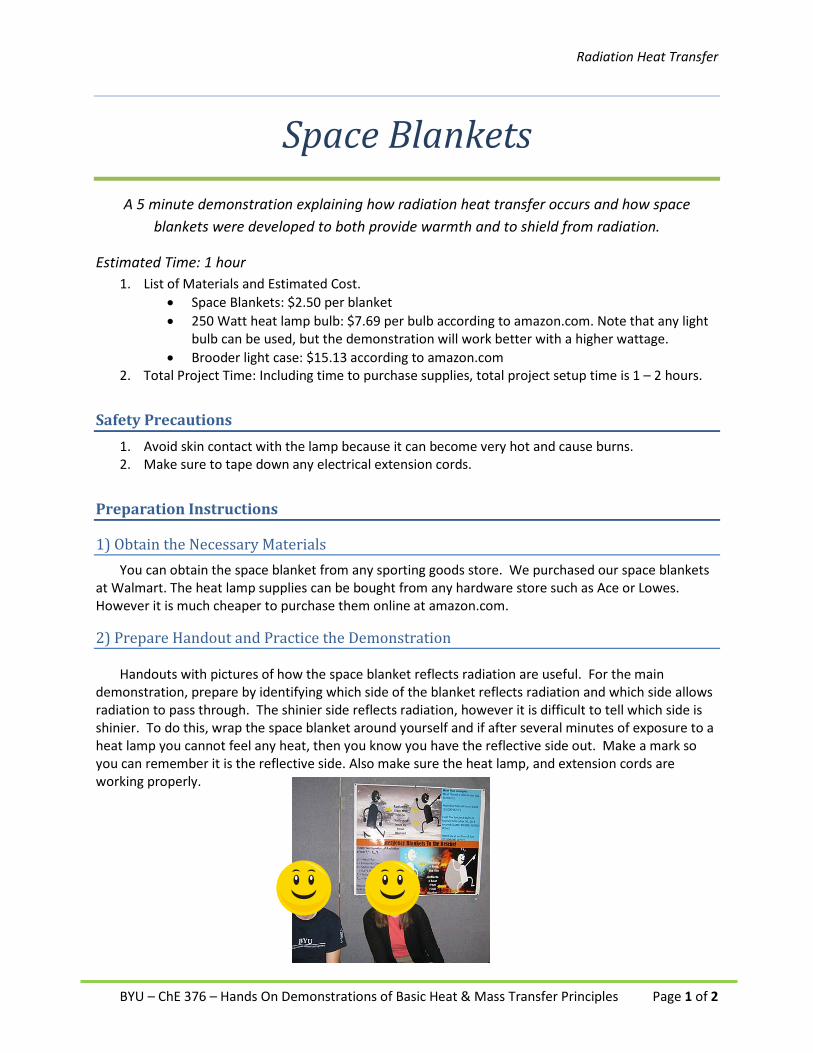
Handouts with pictures of how the space blanket reflects radiation are useful. For the main demonstration, prepare by identifying which side of the blanket reflects radiation and which side allows radiation to pass through. The shinier side reflects radiation, however it is difficult to tell which side is shinier. To do this, wrap the space blanket around yourself and if after several minutes of exposure to a heat lamp you cannot feel any heat, then you know you have the reflective side out. Make a mark so you can remember it is the reflective side. Also make sure the heat lamp, and extension cords are working properly.

Radiation Heat Transfer
BYU – ChE 376 – Hands On Demonstrations of Basic Heat & Mass Transfer Principles Page 2 of 2
Demonstration Instructions 1. Prepare the heat lamp by making sure there is a power source nearby. Also secure the
extension cord so it does not become a hazard. 2. Explain to the students that one form of heat transfer is through radiation, which is in the form
of electromagnetic waves. Everything that has a temperature gives off radiation, but hotter objects give off more radiation. This is why the sun gives off much more radiation than most common household objects. Tell the students that space blankets are made of a material that reflects radiation on one side, and allows radiation to come through on the other.
3. Have a student feel the heat from the heat lamp before putting on the blanket so they can feel how hot it is.
4. Have the student put on the blanket, reflective side out, and then shine the heat lamp on them. Ask them if they can feel any heat. Remind them of how hot it was before they put on the space blanket. They should say that they cannot feel any heat.
5. Instruct the student to flip the blanket to the other side and shine the heat lamp on them. Ask them the same question. This time the answer should be that they can feel the inside of the blanket heating up.
6. Ask any follow up questions you feel are necessary.
Potential Discussion Questions 1. Why can’t you feel any heat when the reflective side of the blanket it out? 2. Why do you feel yourself heating up when the reflective side is in? 3. How do space blankets work? 4. What is radiation?
Fun Facts and Resources
• Firefighters use a similar type of material to shield themselves from the intense radiation of a fire.
• The type of material in space blankets is called Mylar.
• Mylar was developed by NASA as a material to shield space shuttles from the intense radiation of the sun.
• Since its use by NASA, Mylar was developed commercially as a survival blanket and has been used in many countries to provide disaster survivors or refugees with warmth while they are displaced from housing.

Radiation
BYU – ChE 376 – Hands On Demonstrations of Basic Heat & Mass Transfer Principles Page 1 of 2
“Seeing” Radiation A demonstration that illustrates heat transfers by radiation or ‘light’ that is not seen with the eyes. The electromagnetic spectrum (or radiation spectrum ranging from radio waves to microwaves to infrared to visible light to ultraviolet to X-rays) transfers energy from one place to another without the aid of matter. Infrared thermometers such as ear thermometers work by measuring the amount of energy that is transmitted. The hotter the object is, the shorter the wavelength radiation it emits, eventually getting so hot that we can see its radiant heat energy as light (i.e. hot metal).
Resources Required 1. Estimated Preparation Time: 1 hr 2. List of Materials and Estimated Cost:
• IR thermometer $30 • Television set, Security Camera (IR) $35 (optional)
3. Total Presentation Time: 30-60min
Safety Precautions 1. Electrical cords to prevent tripping. 2. Heavy television sets should be on a sturdy table, bench or cart that will prevent tipping. 3. Some IR thermometer contain laser light to guide direction. Extreme care should be made to
avoid pointing at the eyes as it may cause blindness.
Preparation Instructions
1) Obtain the Necessary Materials
The security camera and infrared thermometers can be found at Home Depot or other home improvement store in the home security isle. Television sets can usually be borrowed from school libraries or local branch libraries. Connecting cords should be included with the purchase of the security camera.
2) Prepare Handout and Practice the Demonstration
Often less expensive IR cameras only operate in dimly lit conditions and only receive one wavelength of radiation. IR cameras emit their own radiation and see the reflection of those rays back. However, more expensive radiation cameras can record more wavelengths and give a temperature scale of objects observed.
Handouts could include thermal images in color or in black and white scales to show temperatures. Depending on the level of material covered, the electromagnetic spectrum could be included as an introduction or explanation of radiation, or radio waves. A worksheet with fill-in-the-blanks with answers easily accessible and remembered in the demonstration may increase attention.

Radiation
BYU – ChE 376 – Hands On Demonstrations of Basic Heat & Mass Transfer Principles Page 2 of 2
Demonstration Instructions 1. Begin by asking a thought question to the students to help them begin thinking: “What is light?” 2. Depending on level of detail, introduce or briefly explain the electromagnetic spectrum. 3. Explain that there is much more than just visible light as a form of radiation. 4. If using a camera, turn it on and demonstrate with it:
a. With the camera, observe the objects in full color. b. Turn off the lights, or close the box so that the camera switches to “IR.” c. Observe the grayscale of the objects (whiter objects reflect back the emitted
radiation given from the security camera) 5. Explain the principle of radiation and how all objects emit radiation if it is above absolute zero. 6. Ask students how this emitted radiation can be used. 7. Infrared thermometers use this principle to turn radiation into a temperature reading. 8. Use the infrared thermometer to take temperatures and show the principle that radiation can
be energy that we do not see with our eyes. 9. If safe enough, allow students to use the infrared thermometer to obtain temperatures.
Potential Discussion Questions 1. How can you tell that glowing metal is hot? 2. How can the thermometer tell the temperature if it doesn’t touch anything?
Fun Facts and Resources The warmer the object, the shorter the wavelength the radiation emits. Visual light has a shorter wavelength than infrared. That is why very hot metal emits radiation that we can see (“red-hot”). Since the sun is extremely hot it emits wavelengths shorter than visual light, such as ultraviolet. To protect skin from burning from this short wavelength, sunscreen needs to be applied which blocks the ultraviolet radiation. Images below may be helpful in preparing handouts or for discussion in this demonstration.
Infrared Thermometer The Electromagnetic Spectrum Thermal Image of a small dog Hot metal can radiate in the visible spectrum
_____________________________________________________________________________________ References: Thermal Image from http://commons.wikimedia.org/wiki/File:Infrared_dog.jpg Infrared Thermometer picture found at: http://commons.wikimedia.org/wiki/File:Infrared_thermometer.JPG Electromagnetic radiation found at: http://commons.wikimedia.org/wiki/File:Spectre.svg
Thermal Radiation http://commons.wikimedia.org/wiki/File:Blacksmith_working.jpg How to Build an IR Camera http://www.ehow.com/how_6700228_build-deep-ir-camera.html http://www.ehow.com/how_6081591_build-infrared-camera-lenses.html

Latent Heat Transfer
BYU – ChE 376 – Hands On Demonstrations of Basic Heat & Mass Transfer Principles Page 1 of 2
The Science Behind Reusable Hand Warmers
A 5 minute demonstration that explains phase changes and the reason why hand warmers work: the principles of latent heat and phase changes will be discussed.
Resources Required 1. Estimated Preparation Time: 1-3 hours (depending on if a handout must be prepared) 2. List of Materials and Estimated Cost
Safety Precautions 1. If the hand warmers have already been solidified they must be changed back to liquid form
through boiling the hand warmers in a pot of water. The principle safety concern being possible burns. Potholders and tongs should be used to avoid direct contact with the water or the hot plate. Also, boil the water out of the way of the students on a stable surface.
2. The hot plate will have an electrical cord that presents a tripping hazard. The cord should be taped to the floor or moved out of traffic.
3. After being taken out of the hot water the hand warmers will be hot and care must be taken to avoid burns. A bowl of cool water can be used to cool the hand warmers down.
Preparation Instructions
1) Obtain the Necessary Materials You can obtain the hand warmers at Emergency Essentials or online. A hot plate and tongs can be
obtained from almost all science laboratories. The pot can be a kitchen pot that water can be boiled in. 2) Prepare Handout and Practice the Demonstration
A handout can be prepared in Microsoft Power Point or Word to explain the concepts that will be discussed. Pictures illustrating how the molecules are spaced in gases, liquids, and solids would be good to include. Pictures of phase changes in real life are also useful. Practicing the demonstration on kids is helpful to understand the knowledge level of the students.
3) Preparing hand warmers that have already been solidified 1. Increase the temperature of the hot plate to induce boiling in the water and place the washcloth
on the bottom of the pot in the water. 2. Once the water is boiling, place the used hand warmers in the water. Avoid letting the hand
warmers touch the side of the metal pan by using the washcloth as a barrier between the two. 3. Wait approximately 7 – 10 minutes, stirring occasionally. 4. When it appears that the hand warmers are completely liquid, remove from the boiling water with
tongs. Be careful not to take the hand warmers out too soon. If crystals are still present in the solution the hand warmer will recrystallize as it cools.
• Sodium Acetate Hand Warmer(s) - $2.50 each • Hot Plate • Pot of Water • Dishcloth/towel • Tongs • Potholder

Latent Heat Transfer
BYU – ChE 376 – Hands On Demonstrations of Basic Heat & Mass Transfer Principles Page 2 of 2
Demonstration Instructions 1. Before the demonstration, have a pot of water warm at near boiling to receive used hand
warmers. 2. Four hand warmers are typically used for a demonstration (one solid at room temperature,
one beginning to solidify, one nearly solidified, and one in the liquid state). Place the four hand warmers on the table prior to each demonstration. This will allow the kids to see the progression of the phase change.
3. Begin by asking the students some of the discussion questions listed below. (1-3) Get them to start thinking about what might happen when the liquid turns to solid.
4. Ask one of the students to bend the metal disc back and forth inside the liquid hand warmer. They might need assistance.
5. As the hand warmer begins to change phases pass it around for multiple students to see. 6. Follow up with more discussion questions.(4-5) Make sure they understand why heat comes
off when changing from a liquid to a solid.
Potential Discussion Questions And Answers 1. What is a phase change? A phase change is a change between states: liquid, gas, or solid. 2. What examples do we see every day of phase changes?
Melting, boiling and freezing are all examples of phase changes. We see evaporation of water into the air (liquid to gas) and the snow melting on a warm day (solid to liquid). There are phase changes all around us.
3. How does the spacing and movement of the molecules change between a liquid and a solid, or a liquid and a gas? The molecules are closer together as a substance moves from a gas to a liquid to a solid. The molecules move slower and the substance has less energy as it moves from a gas to a liquid to a solid.
4. When ice melts on your hand and changes from a solid to a liquid how does your hand feel? Why is this? Your hand feels colder. The ice is changing from a more ordered, lower energy phase to a less ordered, higher energy phase. Therefore, energy is needed to go into the ice to change it from a solid to a liquid and is taken from our hands.
5. If your hand feels colder when the ice goes from a solid to a liquid what do you think will happen if something changes from a liquid to a solid? Heat will be released because less energy is present in the solid than the original phase, the liquid.
Fun Facts and Resources • The hand warmer goes from liquid phase to solid phase. The latent heat from this phase change
goes into your hand and makes you warm. When the sweat on your skin evaporates, it goes from liquid phase to gas phase. The latent heat of that phase change goes from your body into your sweat, which makes you cool. You could think of sweating as the opposite of the hand warmer.
• This video explains how the hand warmer works: http://beprepared.com/article.asp?ai=725 • This YouTube video is a good explanation of the different phases of matter: • http://www.youtube.com/watch?v=s-KvoVzukHo&feature=related