Embed Size (px)
Citation preview
Hacom's pfSense Quick-Start GuideBao Ha
Copyright © 2008 Hacom
Permission is granted to copy, distribute and/or modify this document under the terms of the GNU Free Documentation License, Version 1.2 or any later version published by the Free Software Foundation; with no Invariant Sections, with no Front-Cover Texts, and with no Back-Cover Texts.
12 November 2008
Table of ContentsHacom's pfSense Quick-Start Guide..........................................................................................................1
Introduction...........................................................................................................................................2Setup and Configuration........................................................................................................................4Web Administration............................................................................................................................10Backup and Restore of configuration..................................................................................................18Firmware Update.................................................................................................................................19Maximum Firewall States...................................................................................................................25
1
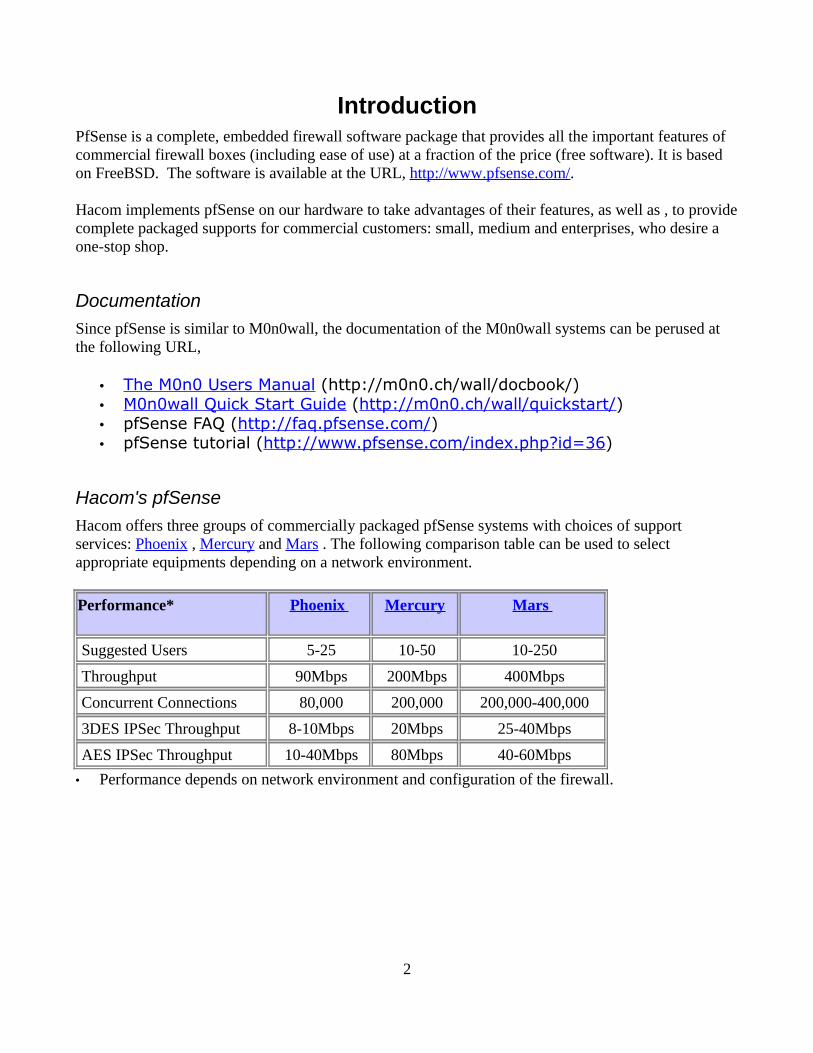
IntroductionPfSense is a complete, embedded firewall software package that provides all the important features of commercial firewall boxes (including ease of use) at a fraction of the price (free software). It is based on FreeBSD. The software is available at the URL, http://www.pfsense.com/.
Hacom implements pfSense on our hardware to take advantages of their features, as well as , to provide complete packaged supports for commercial customers: small, medium and enterprises, who desire a one-stop shop.
Documentation
Since pfSense is similar to M0n0wall, the documentation of the M0n0wall systems can be perused at the following URL,
• The M0n0 Users Manual (http://m0n0.ch/wall/docbook/)• M0n0wall Quick Start Guide (http://m0n0.ch/wall/quickstart/)• pfSense FAQ (http://faq.pfsense.com/)• pfSense tutorial (http://www.pfsense.com/index.php?id=36)
Hacom's pfSense
Hacom offers three groups of commercially packaged pfSense systems with choices of support services: Phoenix , Mercury and Mars . The following comparison table can be used to select appropriate equipments depending on a network environment.
Performance* Phoenix Mercury Mars
Suggested Users 5-25 10-50 10-250
Throughput 90Mbps 200Mbps 400Mbps
Concurrent Connections 80,000 200,000 200,000-400,000
3DES IPSec Throughput 8-10Mbps 20Mbps 25-40Mbps
AES IPSec Throughput 10-40Mbps 80Mbps 40-60Mbps
• Performance depends on network environment and configuration of the firewall.
2
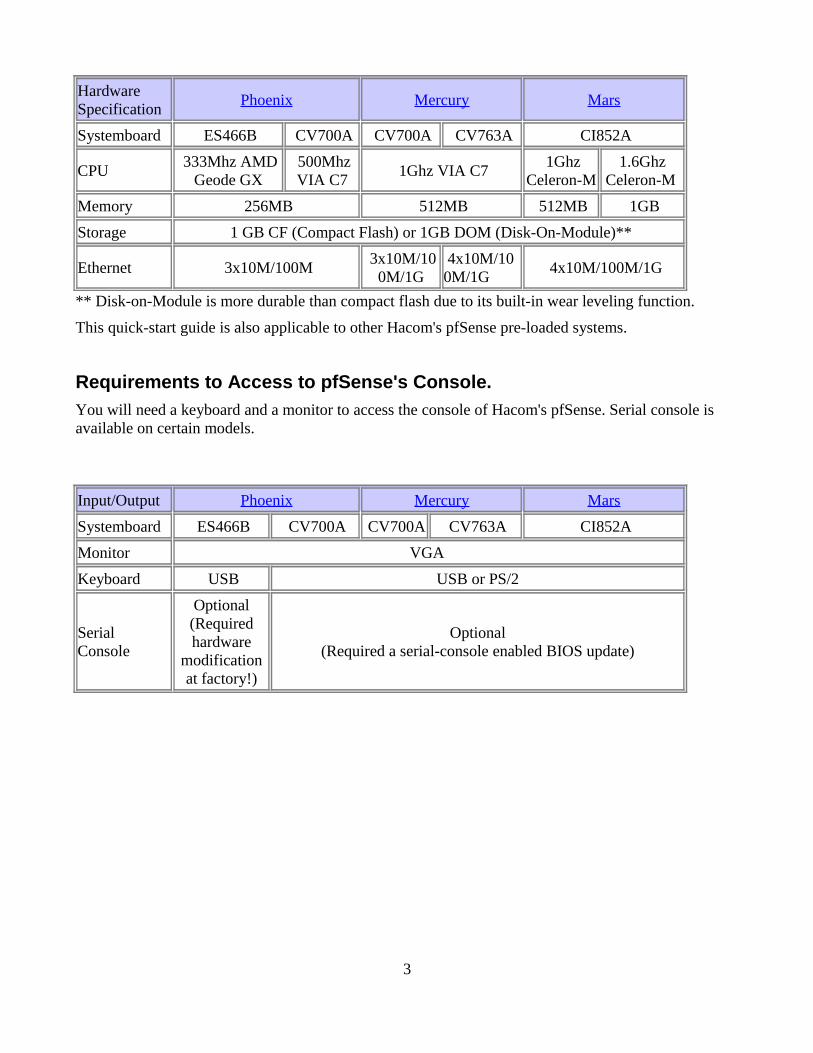
Hardware Specification
Phoenix Mercury Mars
Systemboard ES466B CV700A CV700A CV763A CI852A
CPU 333Mhz AMD
Geode GX 500Mhz VIA C7
1Ghz VIA C7 1Ghz
Celeron-M1.6Ghz
Celeron-M
Memory 256MB 512MB 512MB 1GB
Storage 1 GB CF (Compact Flash) or 1GB DOM (Disk-On-Module)**
Ethernet 3x10M/100M 3x10M/10
0M/1G 4x10M/100M/1G
4x10M/100M/1G
** Disk-on-Module is more durable than compact flash due to its built-in wear leveling function.
This quick-start guide is also applicable to other Hacom's pfSense pre-loaded systems.
Requirements to Access to pfSense's Console.
You will need a keyboard and a monitor to access the console of Hacom's pfSense. Serial console is available on certain models.
Input/Output Phoenix Mercury Mars
Systemboard ES466B CV700A CV700A CV763A CI852A
Monitor VGA
Keyboard USB USB or PS/2
Serial Console
Optional(Required hardware
modification at factory!)
Optional(Required a serial-console enabled BIOS update)
3
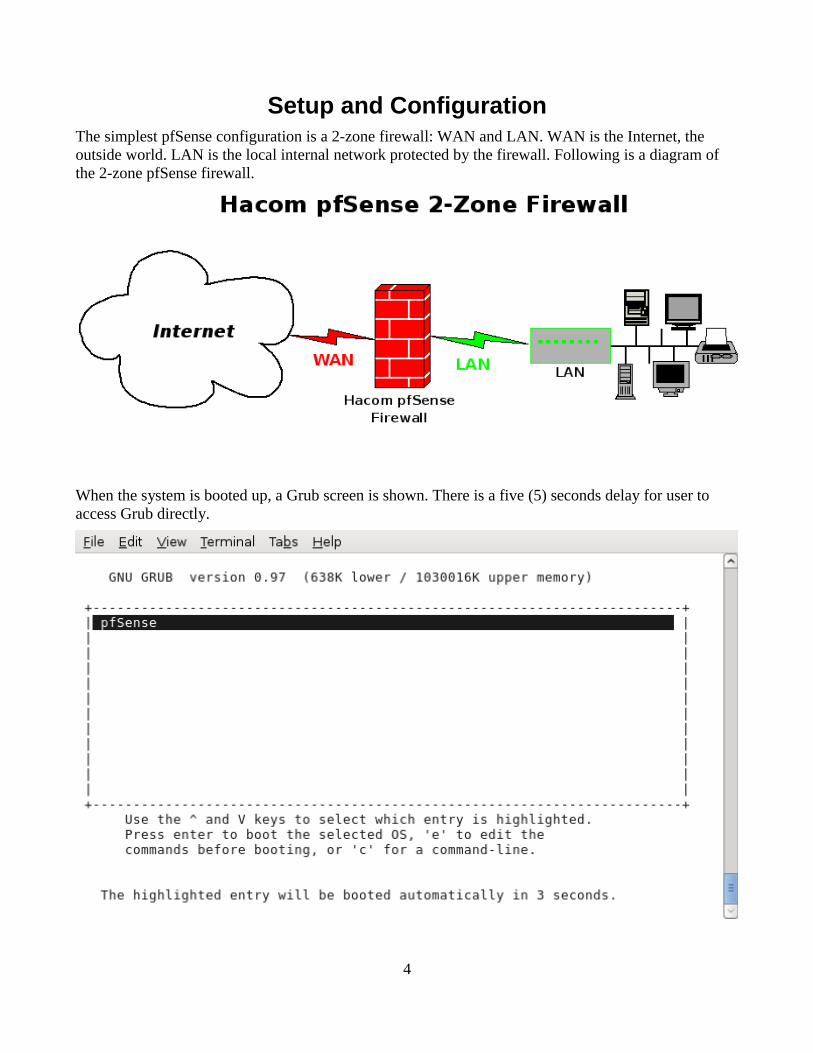
Setup and ConfigurationThe simplest pfSense configuration is a 2-zone firewall: WAN and LAN. WAN is the Internet, the outside world. LAN is the local internal network protected by the firewall. Following is a diagram of the 2-zone pfSense firewall.
When the system is booted up, a Grub screen is shown. There is a five (5) seconds delay for user to access Grub directly.
4
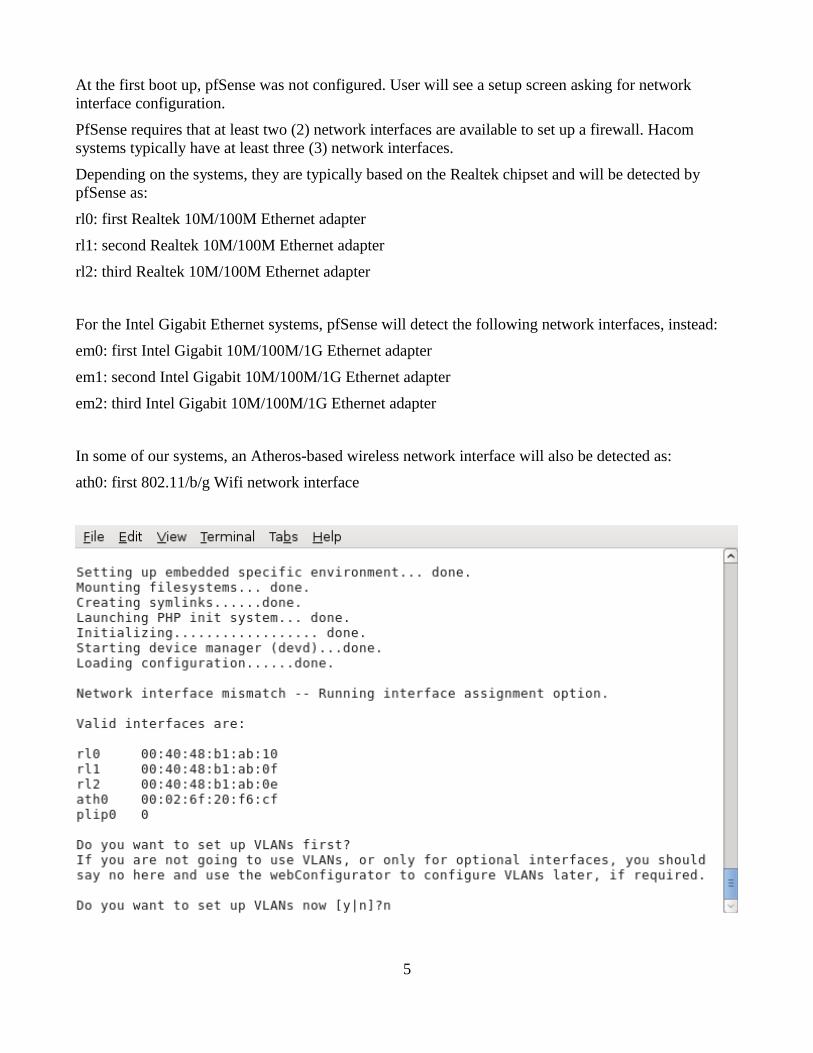
At the first boot up, pfSense was not configured. User will see a setup screen asking for network interface configuration.
PfSense requires that at least two (2) network interfaces are available to set up a firewall. Hacom systems typically have at least three (3) network interfaces.
Depending on the systems, they are typically based on the Realtek chipset and will be detected by pfSense as:
rl0: first Realtek 10M/100M Ethernet adapter
rl1: second Realtek 10M/100M Ethernet adapter
rl2: third Realtek 10M/100M Ethernet adapter
For the Intel Gigabit Ethernet systems, pfSense will detect the following network interfaces, instead:
em0: first Intel Gigabit 10M/100M/1G Ethernet adapter
em1: second Intel Gigabit 10M/100M/1G Ethernet adapter
em2: third Intel Gigabit 10M/100M/1G Ethernet adapter
In some of our systems, an Atheros-based wireless network interface will also be detected as:
ath0: first 802.11/b/g Wifi network interface
5
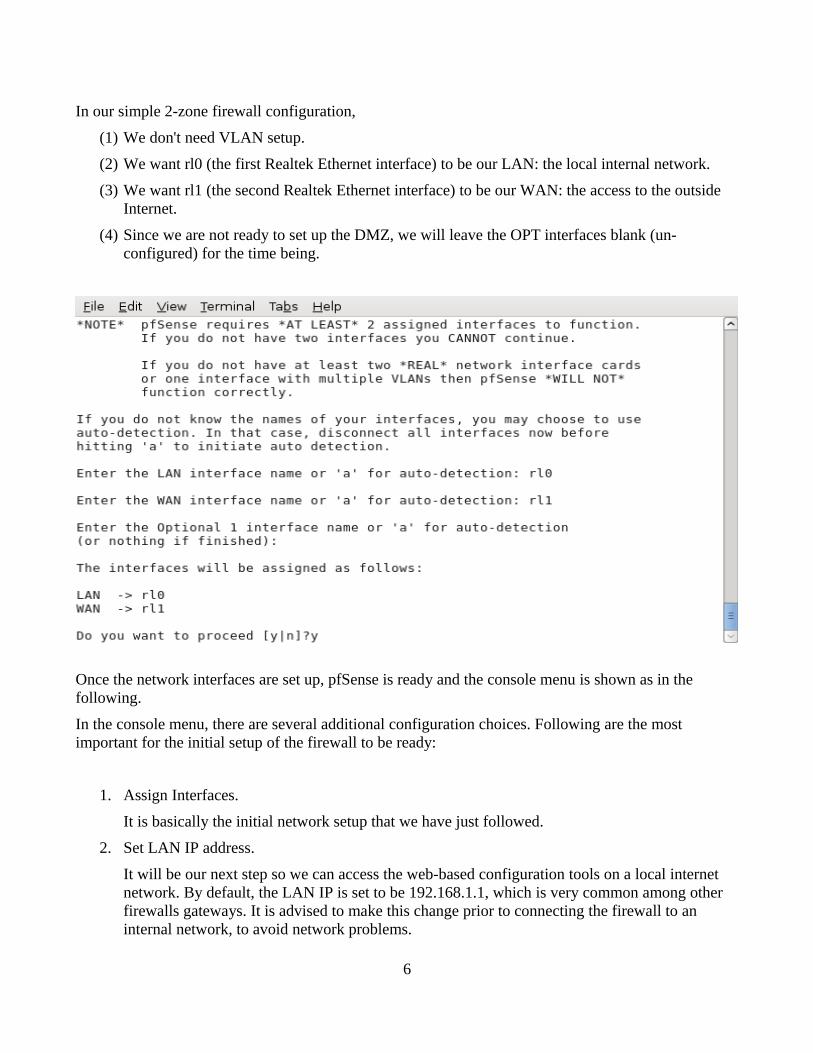
In our simple 2-zone firewall configuration,
(1) We don't need VLAN setup.
(2) We want rl0 (the first Realtek Ethernet interface) to be our LAN: the local internal network.
(3) We want rl1 (the second Realtek Ethernet interface) to be our WAN: the access to the outside Internet.
(4) Since we are not ready to set up the DMZ, we will leave the OPT interfaces blank (un-configured) for the time being.
Once the network interfaces are set up, pfSense is ready and the console menu is shown as in the following.
In the console menu, there are several additional configuration choices. Following are the most important for the initial setup of the firewall to be ready:
1. Assign Interfaces.
It is basically the initial network setup that we have just followed.
2. Set LAN IP address.
It will be our next step so we can access the web-based configuration tools on a local internet network. By default, the LAN IP is set to be 192.168.1.1, which is very common among other firewalls gateways. It is advised to make this change prior to connecting the firewall to an internal network, to avoid network problems.
6
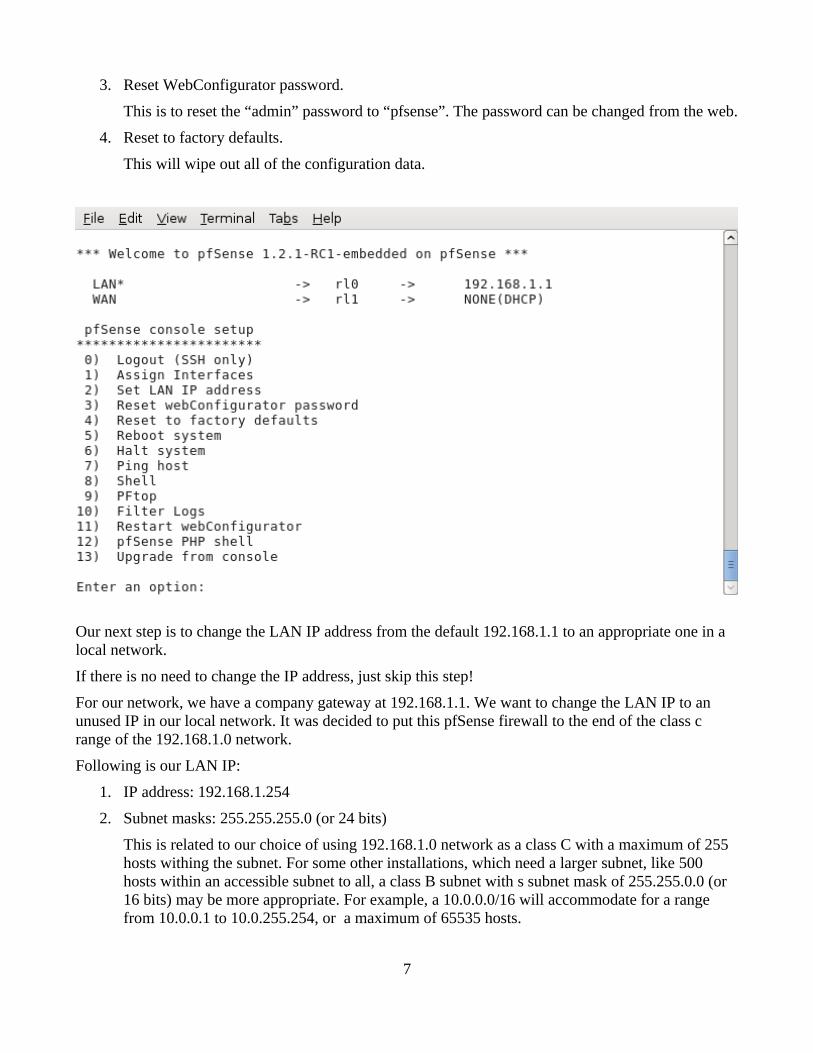
3. Reset WebConfigurator password.
This is to reset the “admin” password to “pfsense”. The password can be changed from the web.
4. Reset to factory defaults.
This will wipe out all of the configuration data.
Our next step is to change the LAN IP address from the default 192.168.1.1 to an appropriate one in a local network.
If there is no need to change the IP address, just skip this step!
For our network, we have a company gateway at 192.168.1.1. We want to change the LAN IP to an unused IP in our local network. It was decided to put this pfSense firewall to the end of the class c range of the 192.168.1.0 network.
Following is our LAN IP:
1. IP address: 192.168.1.254
2. Subnet masks: 255.255.255.0 (or 24 bits)
This is related to our choice of using 192.168.1.0 network as a class C with a maximum of 255 hosts withing the subnet. For some other installations, which need a larger subnet, like 500 hosts within an accessible subnet to all, a class B subnet with s subnet mask of 255.255.0.0 (or 16 bits) may be more appropriate. For example, a 10.0.0.0/16 will accommodate for a range from 10.0.0.1 to 10.0.255.254, or a maximum of 65535 hosts.
7
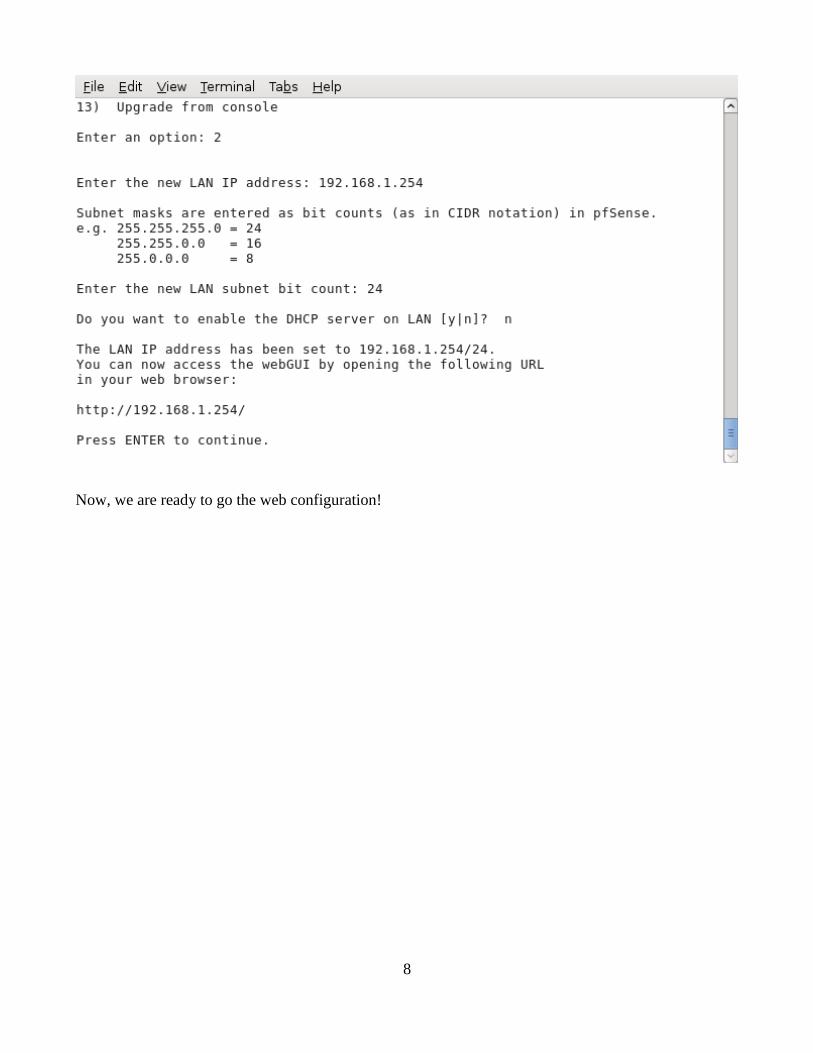
Now, we are ready to go the web configuration!
8
Web Administration
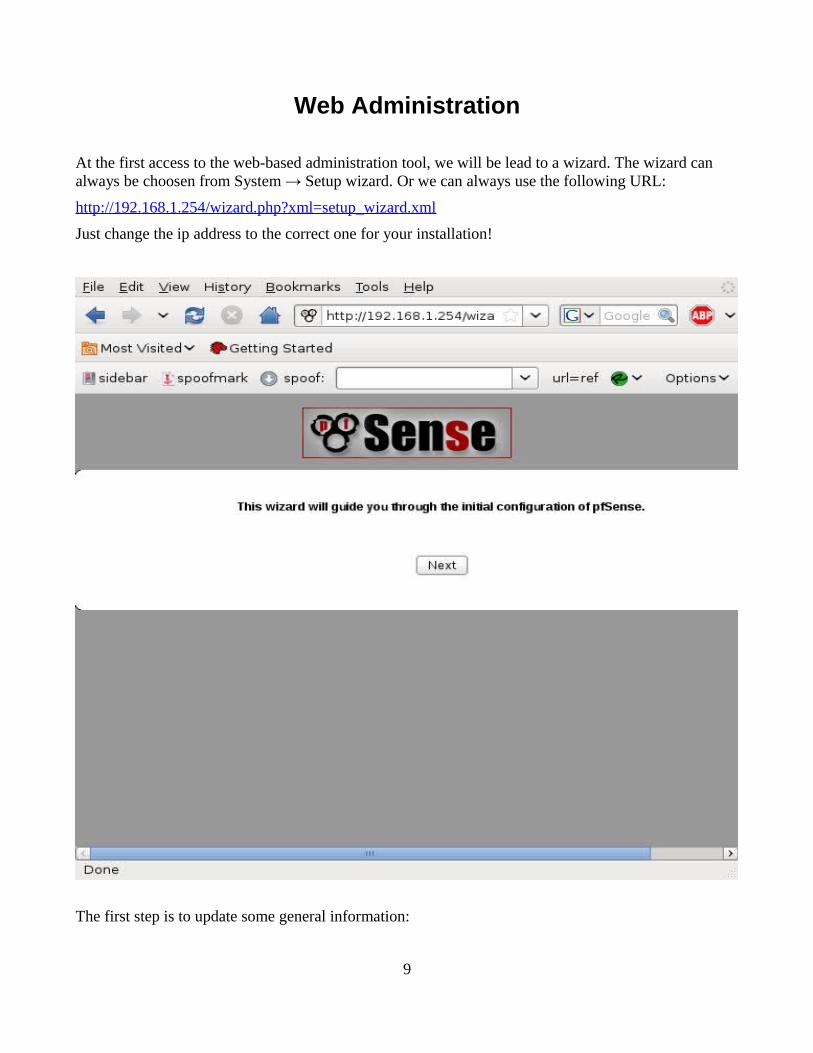
At the first access to the web-based administration tool, we will be lead to a wizard. The wizard can always be choosen from System → Setup wizard. Or we can always use the following URL:
http://192.168.1.254/wizard.php?xml=setup_wizard.xml
Just change the ip address to the correct one for your installation!
The first step is to update some general information:
9
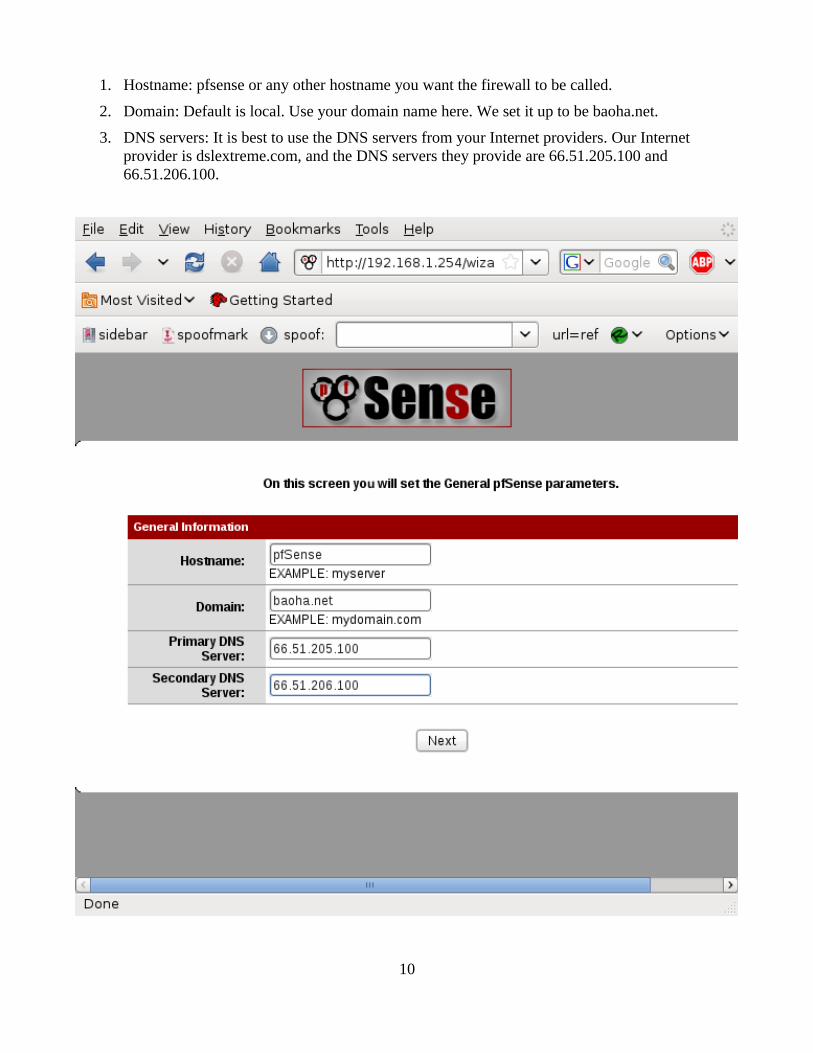
1. Hostname: pfsense or any other hostname you want the firewall to be called.
2. Domain: Default is local. Use your domain name here. We set it up to be baoha.net.
3. DNS servers: It is best to use the DNS servers from your Internet providers. Our Internet provider is dslextreme.com, and the DNS servers they provide are 66.51.205.100 and 66.51.206.100.
10
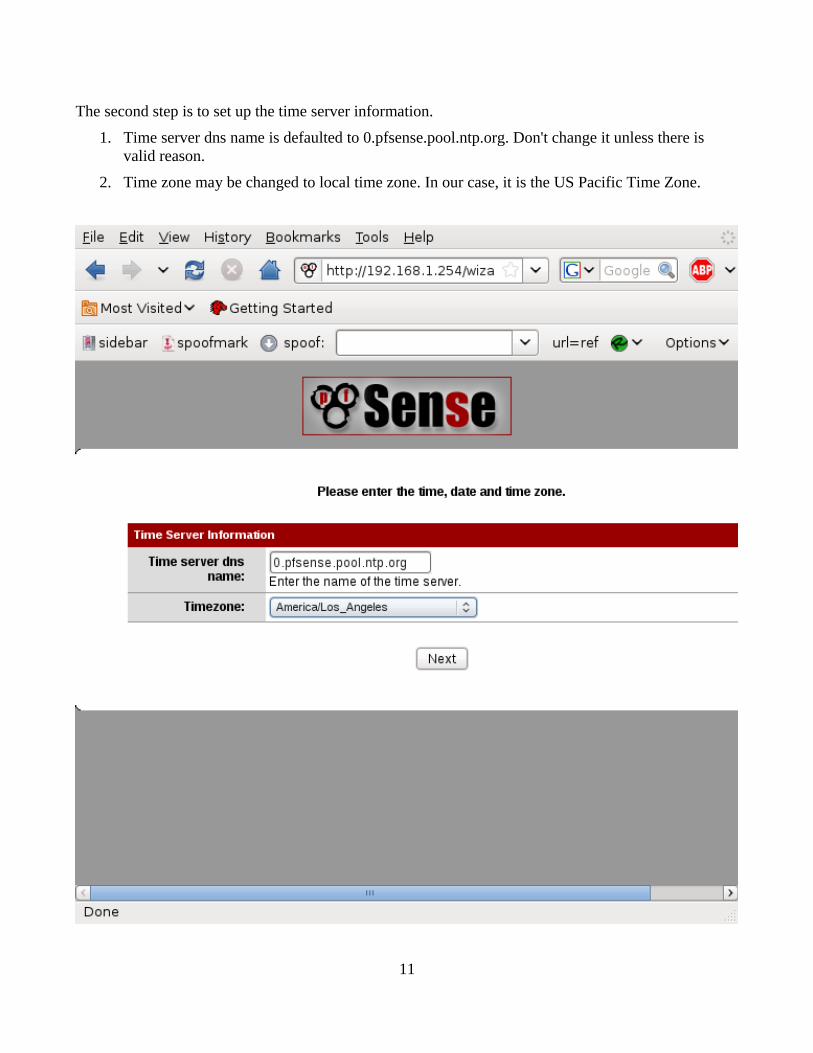
The second step is to set up the time server information.
1. Time server dns name is defaulted to 0.pfsense.pool.ntp.org. Don't change it unless there is valid reason.
2. Time zone may be changed to local time zone. In our case, it is the US Pacific Time Zone.
11
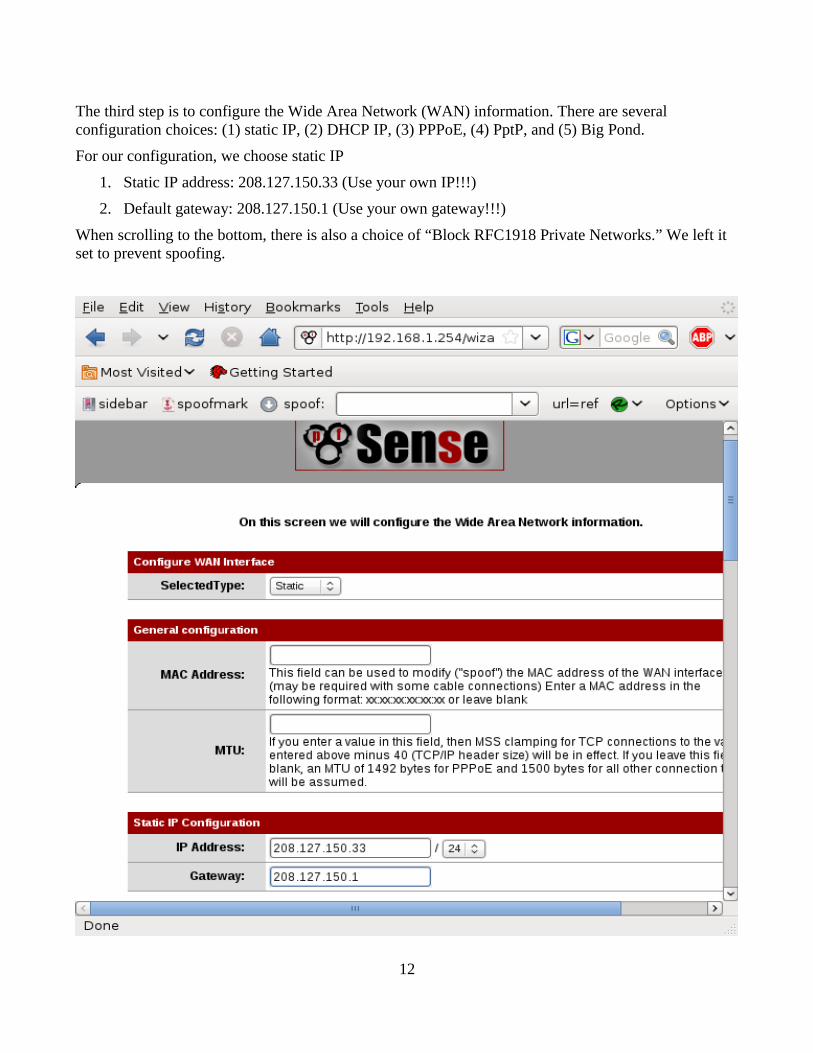
The third step is to configure the Wide Area Network (WAN) information. There are several configuration choices: (1) static IP, (2) DHCP IP, (3) PPPoE, (4) PptP, and (5) Big Pond.
For our configuration, we choose static IP
1. Static IP address: 208.127.150.33 (Use your own IP!!!)
2. Default gateway: 208.127.150.1 (Use your own gateway!!!)
When scrolling to the bottom, there is also a choice of “Block RFC1918 Private Networks.” We left it set to prevent spoofing.
12
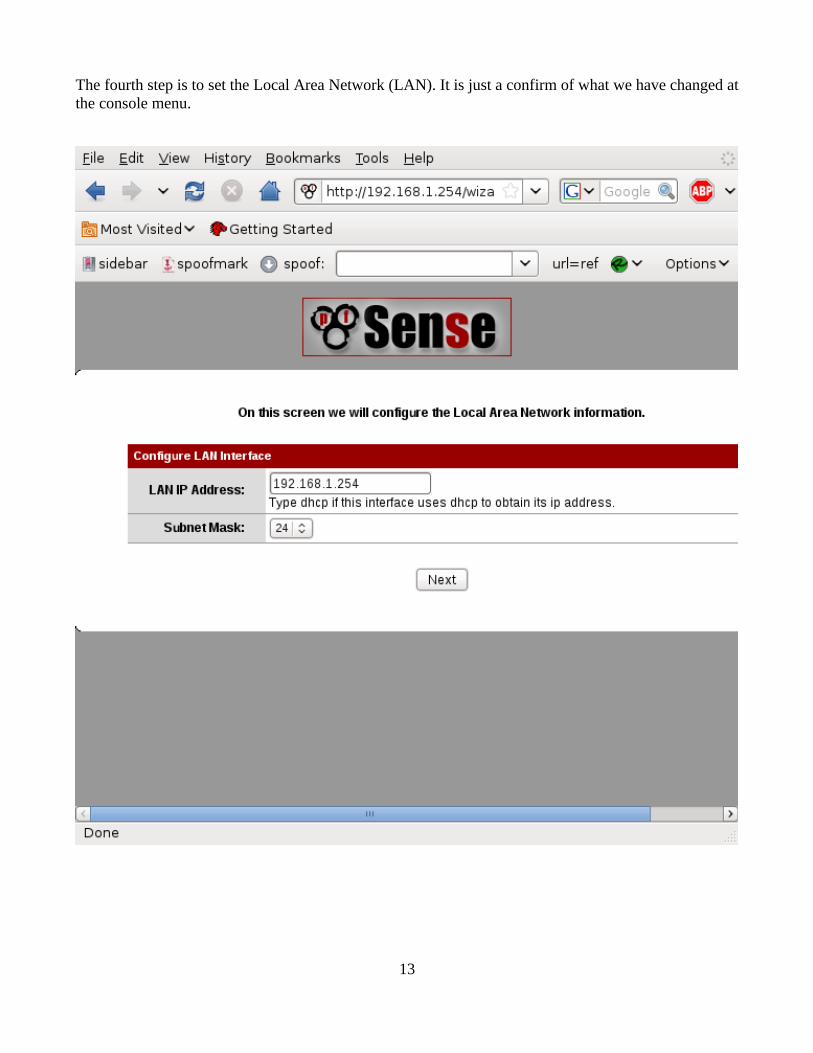
The fourth step is to set the Local Area Network (LAN). It is just a confirm of what we have changed at the console menu.
13
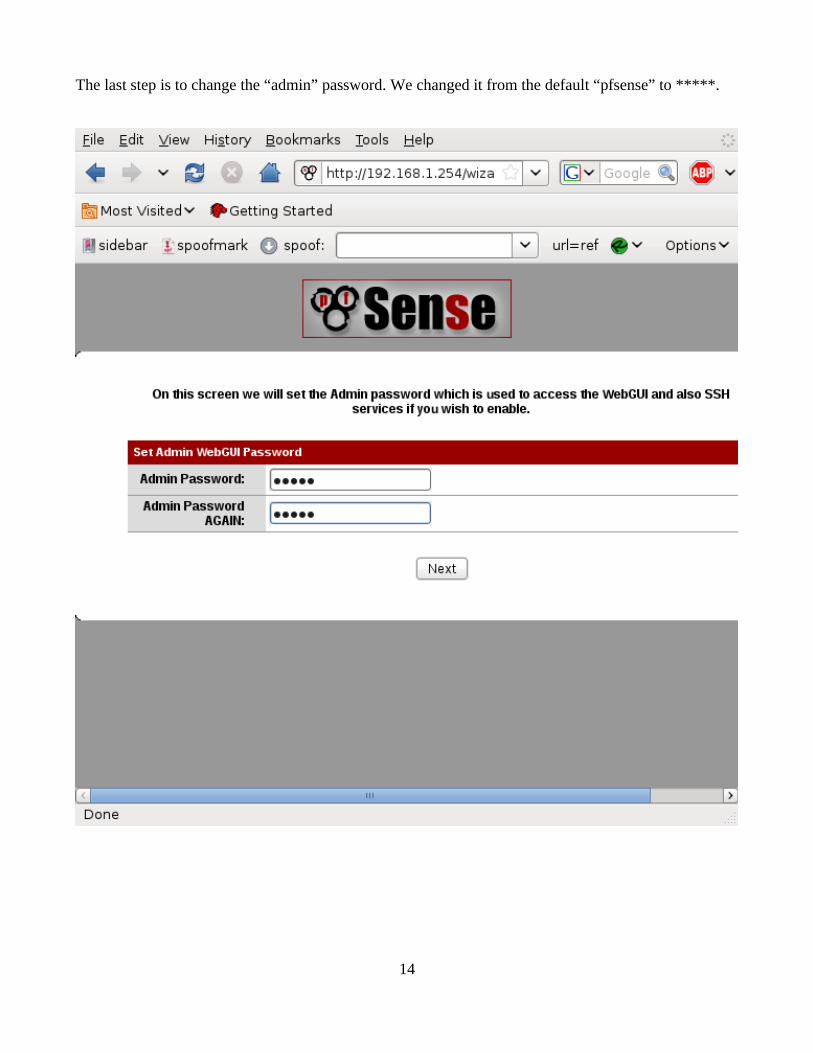
The last step is to change the “admin” password. We changed it from the default “pfsense” to *****.
14
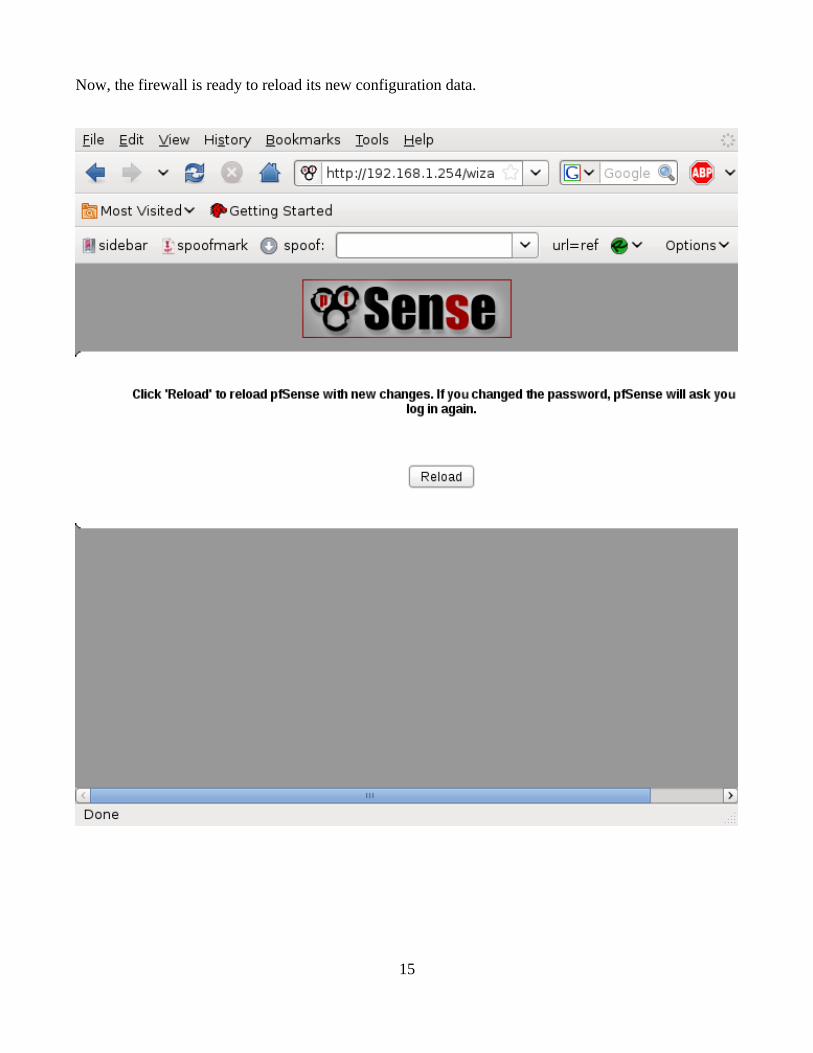
Now, the firewall is ready to reload its new configuration data.
15
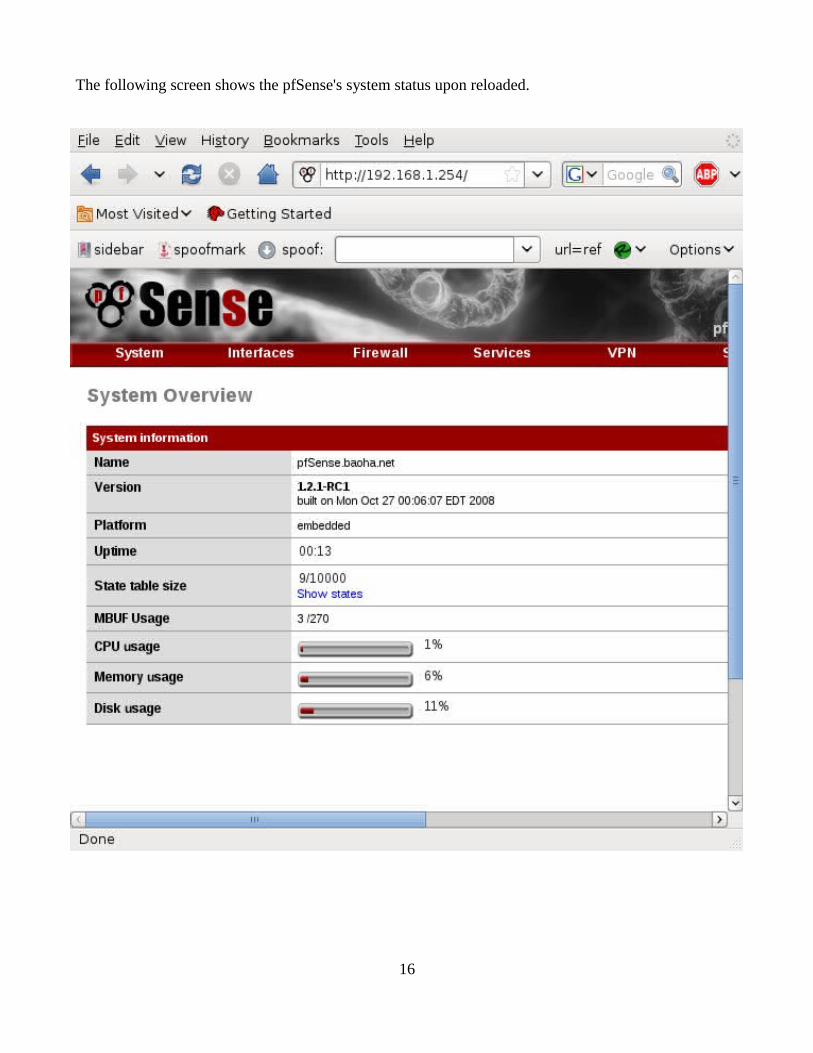
The following screen shows the pfSense's system status upon reloaded.
16
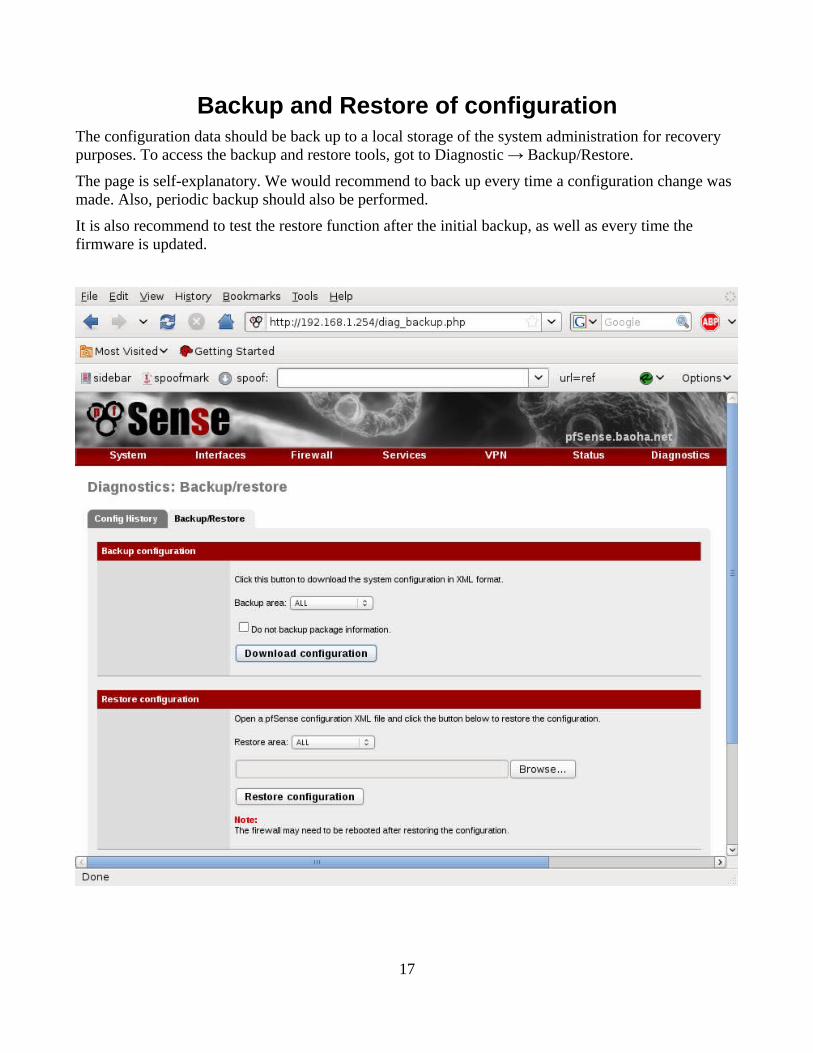
Backup and Restore of configurationThe configuration data should be back up to a local storage of the system administration for recovery purposes. To access the backup and restore tools, got to Diagnostic → Backup/Restore.
The page is self-explanatory. We would recommend to back up every time a configuration change was made. Also, periodic backup should also be performed.
It is also recommend to test the restore function after the initial backup, as well as every time the firmware is updated.
17
Firmware Update
There are several ways to update the firmware.
1. For Hacom systems prior to pfSense version 1.2.1, it is recommended
a. to back up the configuration
b. to flash the new firmware
c. to restore the configuration.
2. Starting from version 1.2.1, firmware can be updated reliably on-line.
Important notes: Hacom pfSense systems are based on the full firmware, including headless systems.
● When updating the firmware, use the full-update version.
● The compact flash (CF) based systems require the platform information to be changed from “embedded” to “pfSense” before the updating process. It should be changed back to “embedded” after the update. The CF-based system can be used as “pfSense” platform if the mount command shows the following:
...
pfSense:~# mount
/dev/ad2s4a on / (ufs, local, noatime)
devfs on /dev (devfs, local)
/dev/md0 on /var/run (ufs, local)
/dev/ad2s4d on /cf (ufs, local, noatime)
devfs on /var/dhcpd/dev (devfs, local)
pfSense:~#
...
The “noatime” option on the root / and /cf allows the CF to last several years under normal use. It is recommended to use industrial-grade CF or Disk-on-Module (DOM) with their built-in static wear leveling function.
● The DOM based platforms are “pfSense” and ready to use just like a solid state drive.
18
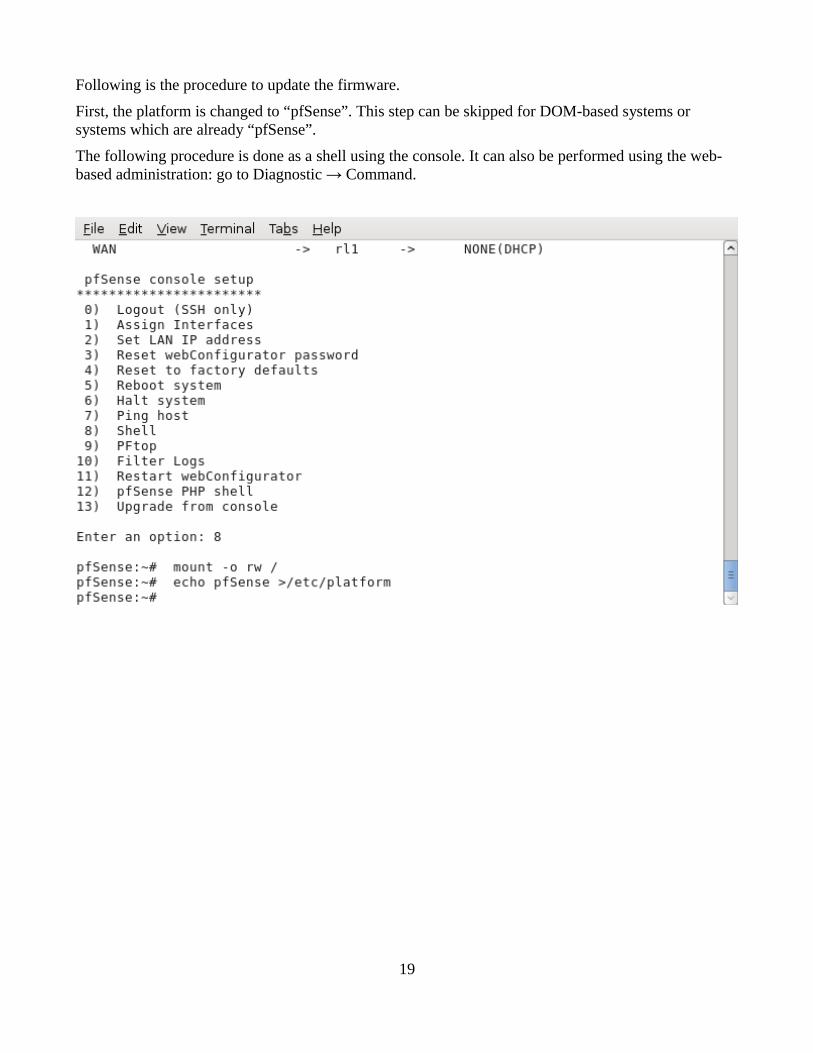
Following is the procedure to update the firmware.
First, the platform is changed to “pfSense”. This step can be skipped for DOM-based systems or systems which are already “pfSense”.
The following procedure is done as a shell using the console. It can also be performed using the web-based administration: go to Diagnostic → Command.
19
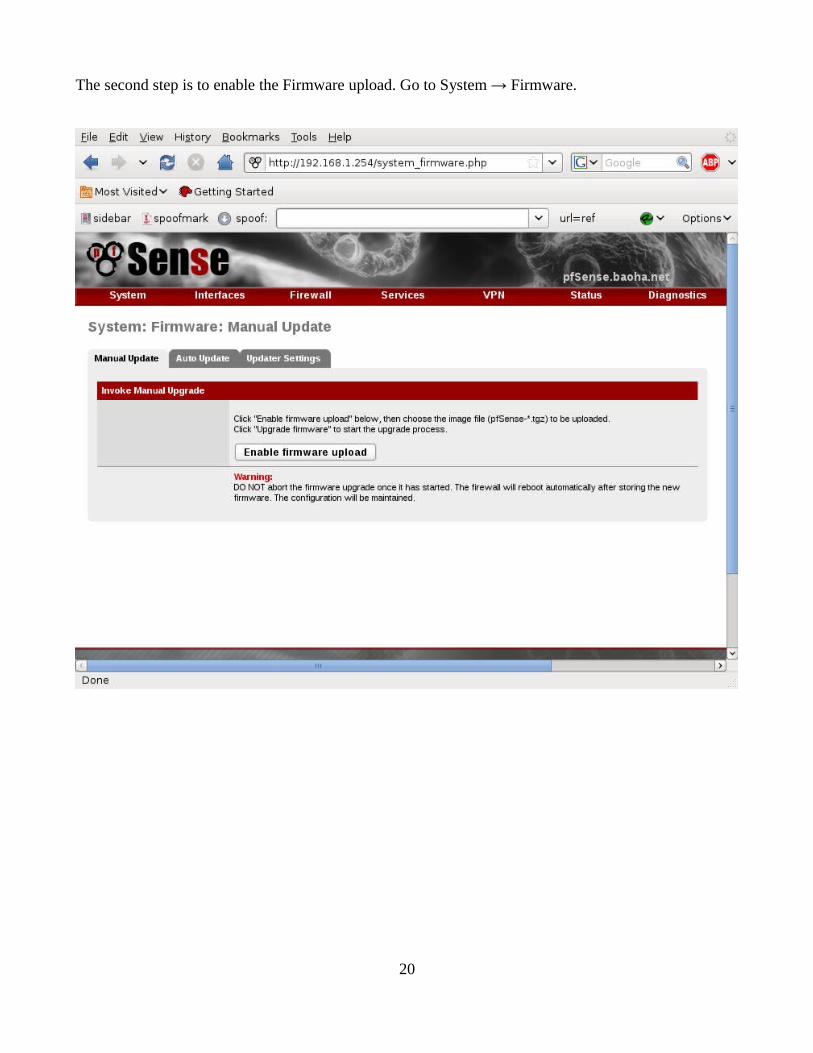
The second step is to enable the Firmware upload. Go to System → Firmware.
20
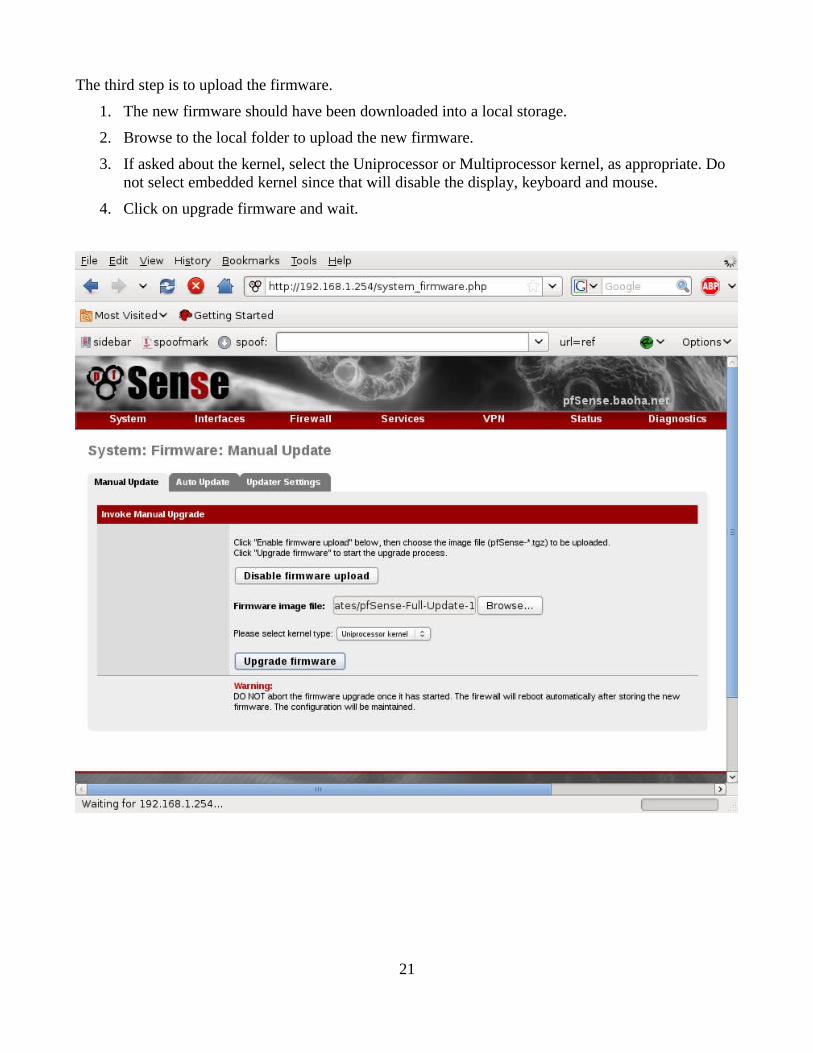
The third step is to upload the firmware.
1. The new firmware should have been downloaded into a local storage.
2. Browse to the local folder to upload the new firmware.
3. If asked about the kernel, select the Uniprocessor or Multiprocessor kernel, as appropriate. Do not select embedded kernel since that will disable the display, keyboard and mouse.
4. Click on upgrade firmware and wait.
21
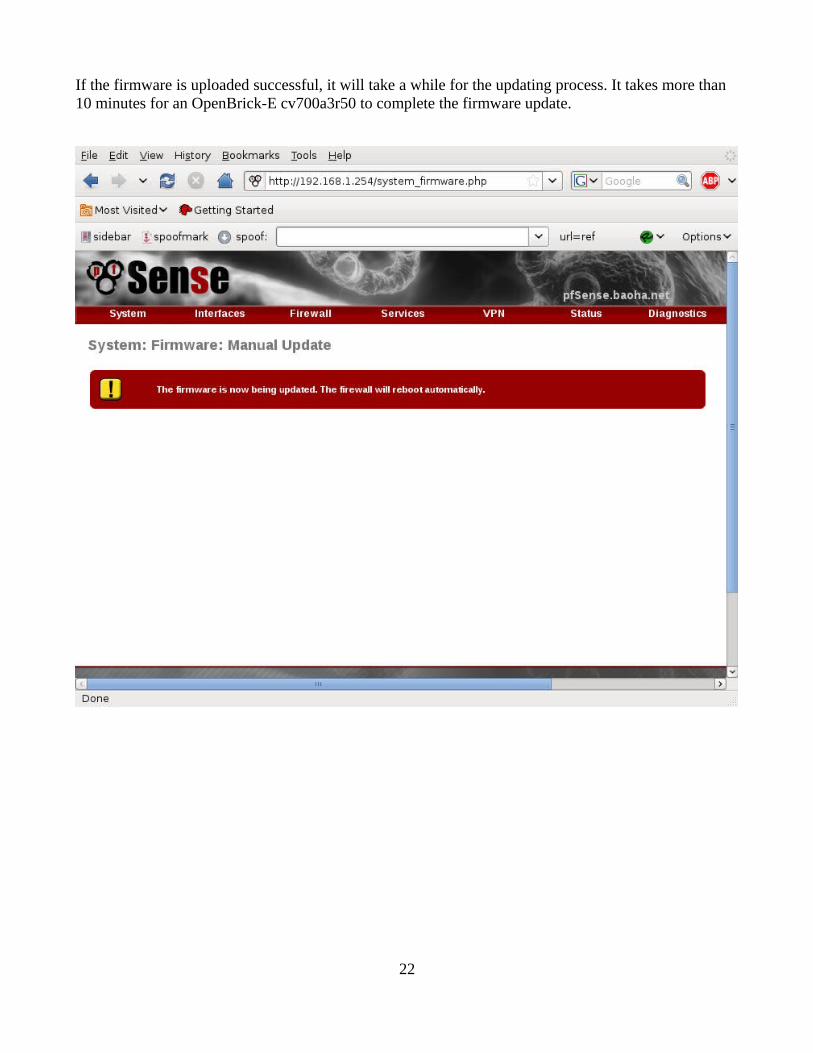
If the firmware is uploaded successful, it will take a while for the updating process. It takes more than 10 minutes for an OpenBrick-E cv700a3r50 to complete the firmware update.
22
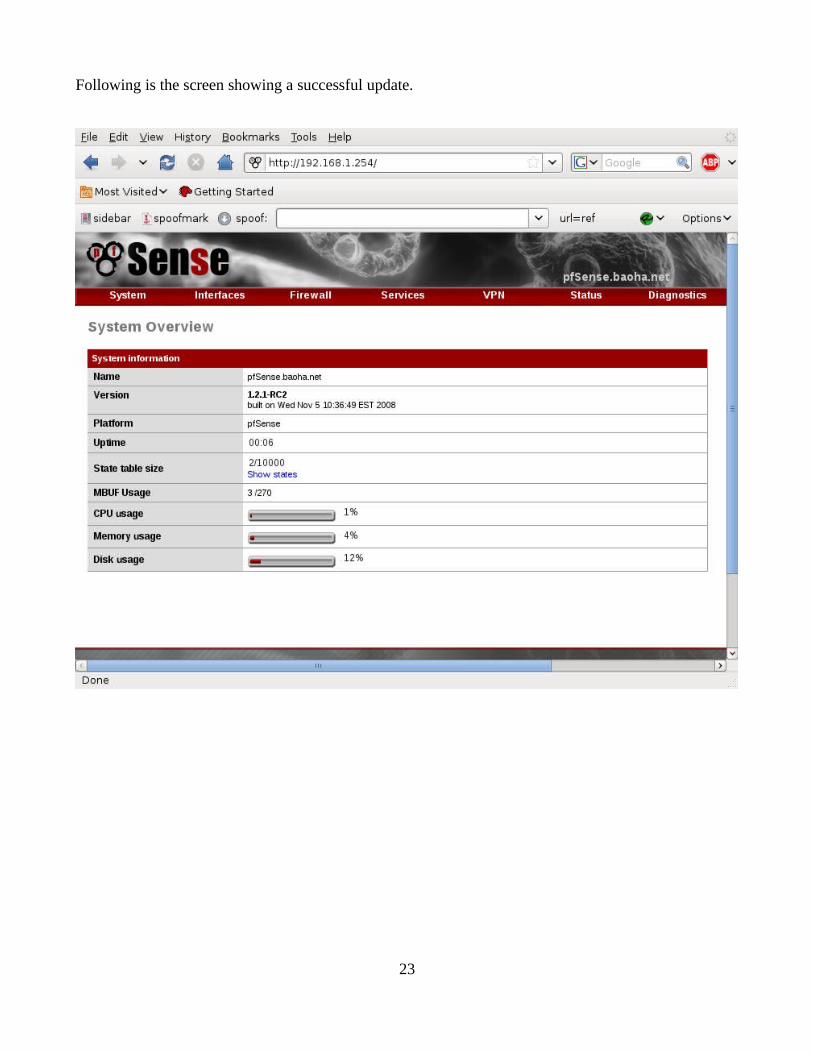
Following is the screen showing a successful update.
23
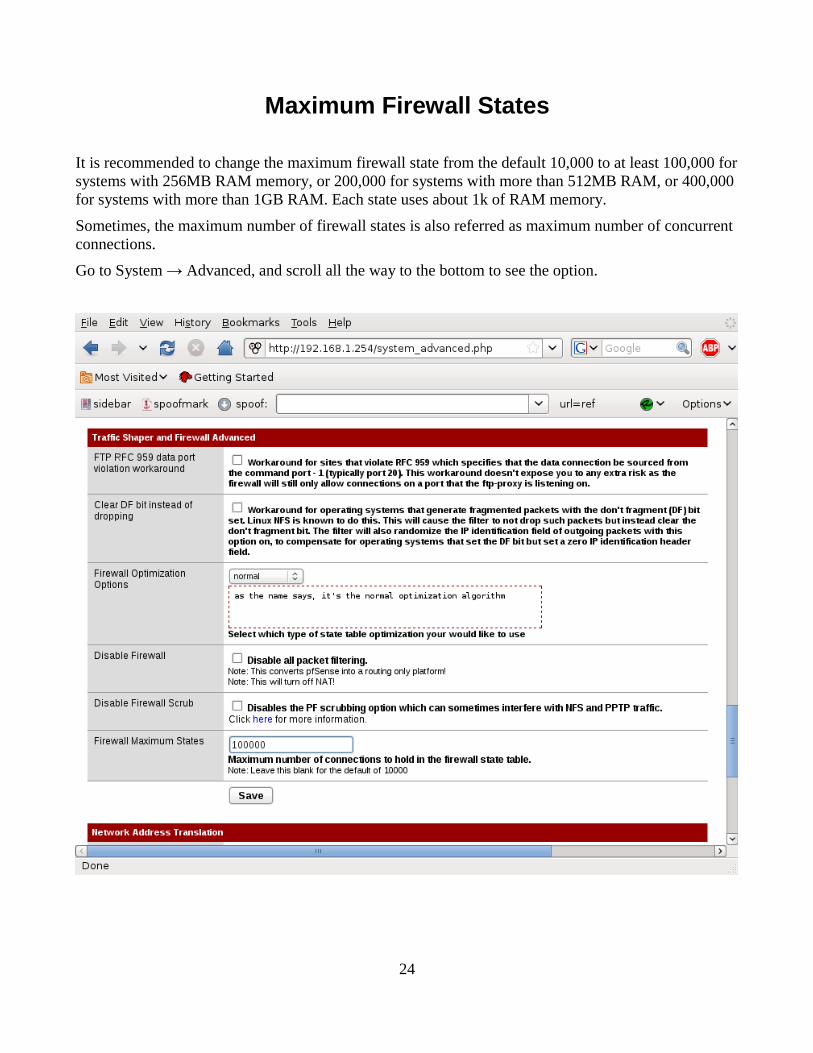
Maximum Firewall States
It is recommended to change the maximum firewall state from the default 10,000 to at least 100,000 for systems with 256MB RAM memory, or 200,000 for systems with more than 512MB RAM, or 400,000 for systems with more than 1GB RAM. Each state uses about 1k of RAM memory.
Sometimes, the maximum number of firewall states is also referred as maximum number of concurrent connections.
Go to System → Advanced, and scroll all the way to the bottom to see the option.
24